

Page 1
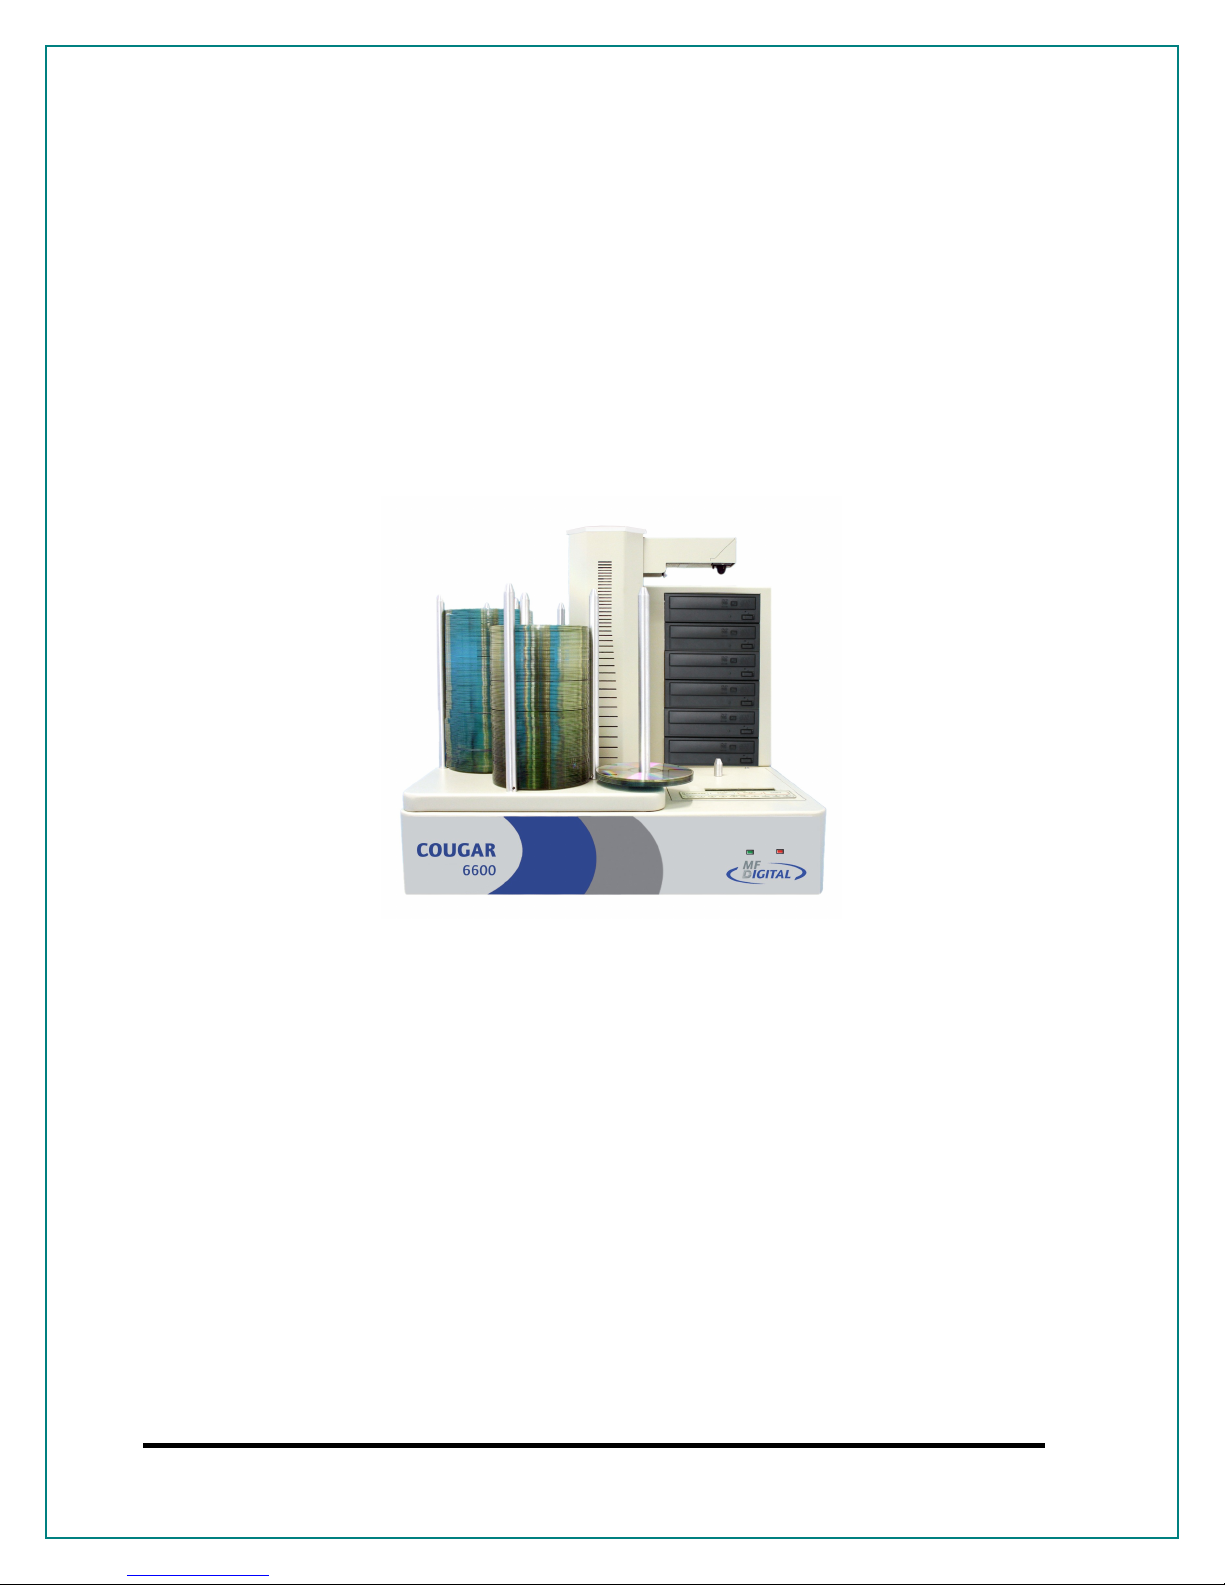
Setup Guide for the
Cougar 6600 Client
Page 1
Page 2
How to Configure the Cougar 6600 Client
Configure the Cougar 6600 client feature to enable remote users.
• Connect the Cougar 6600 to your network using the RJ-45
connector.
• Turn on the Cougar 6600
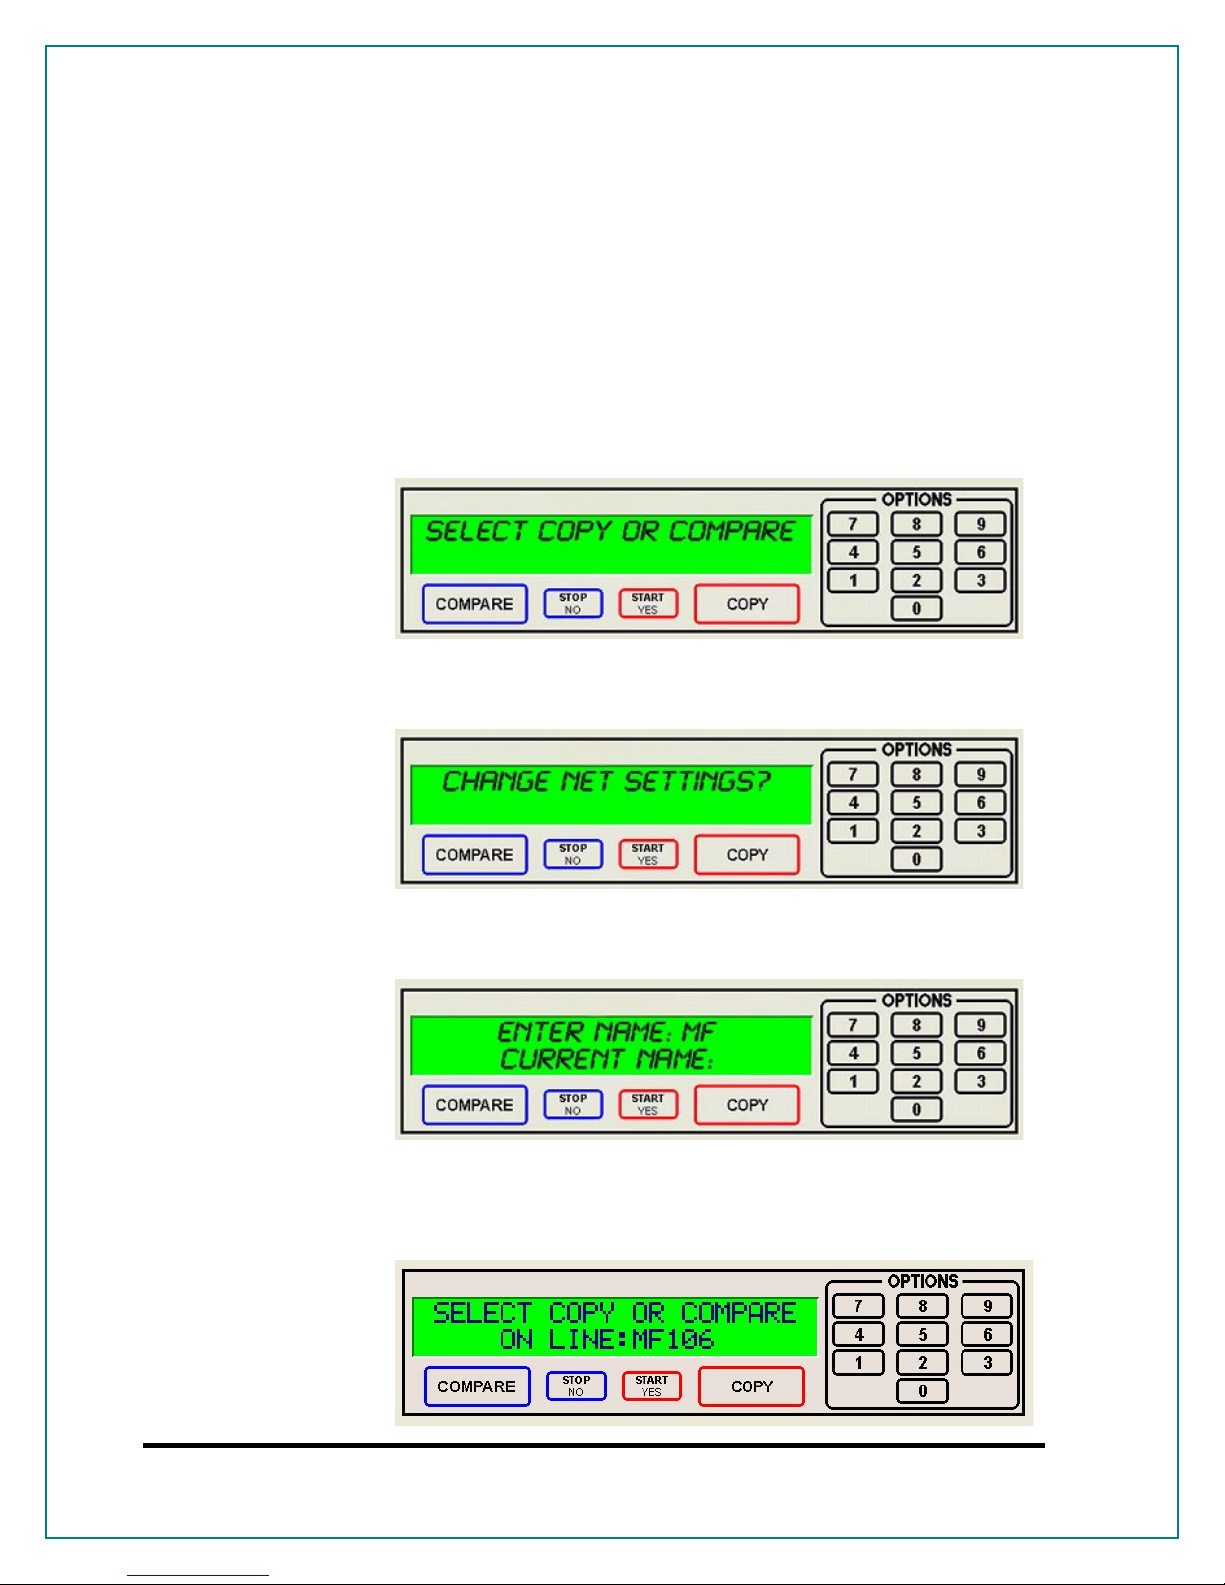
• Wait for the Cougar 6600 Standalone Series to boot up, you will
see:
• Press the “7” key, you will see:
• Press the “START/YES” key, you will see:
• You must leave “MF” at the front of the name. You should name
it “MF106” for example.
Page 2
Page 3
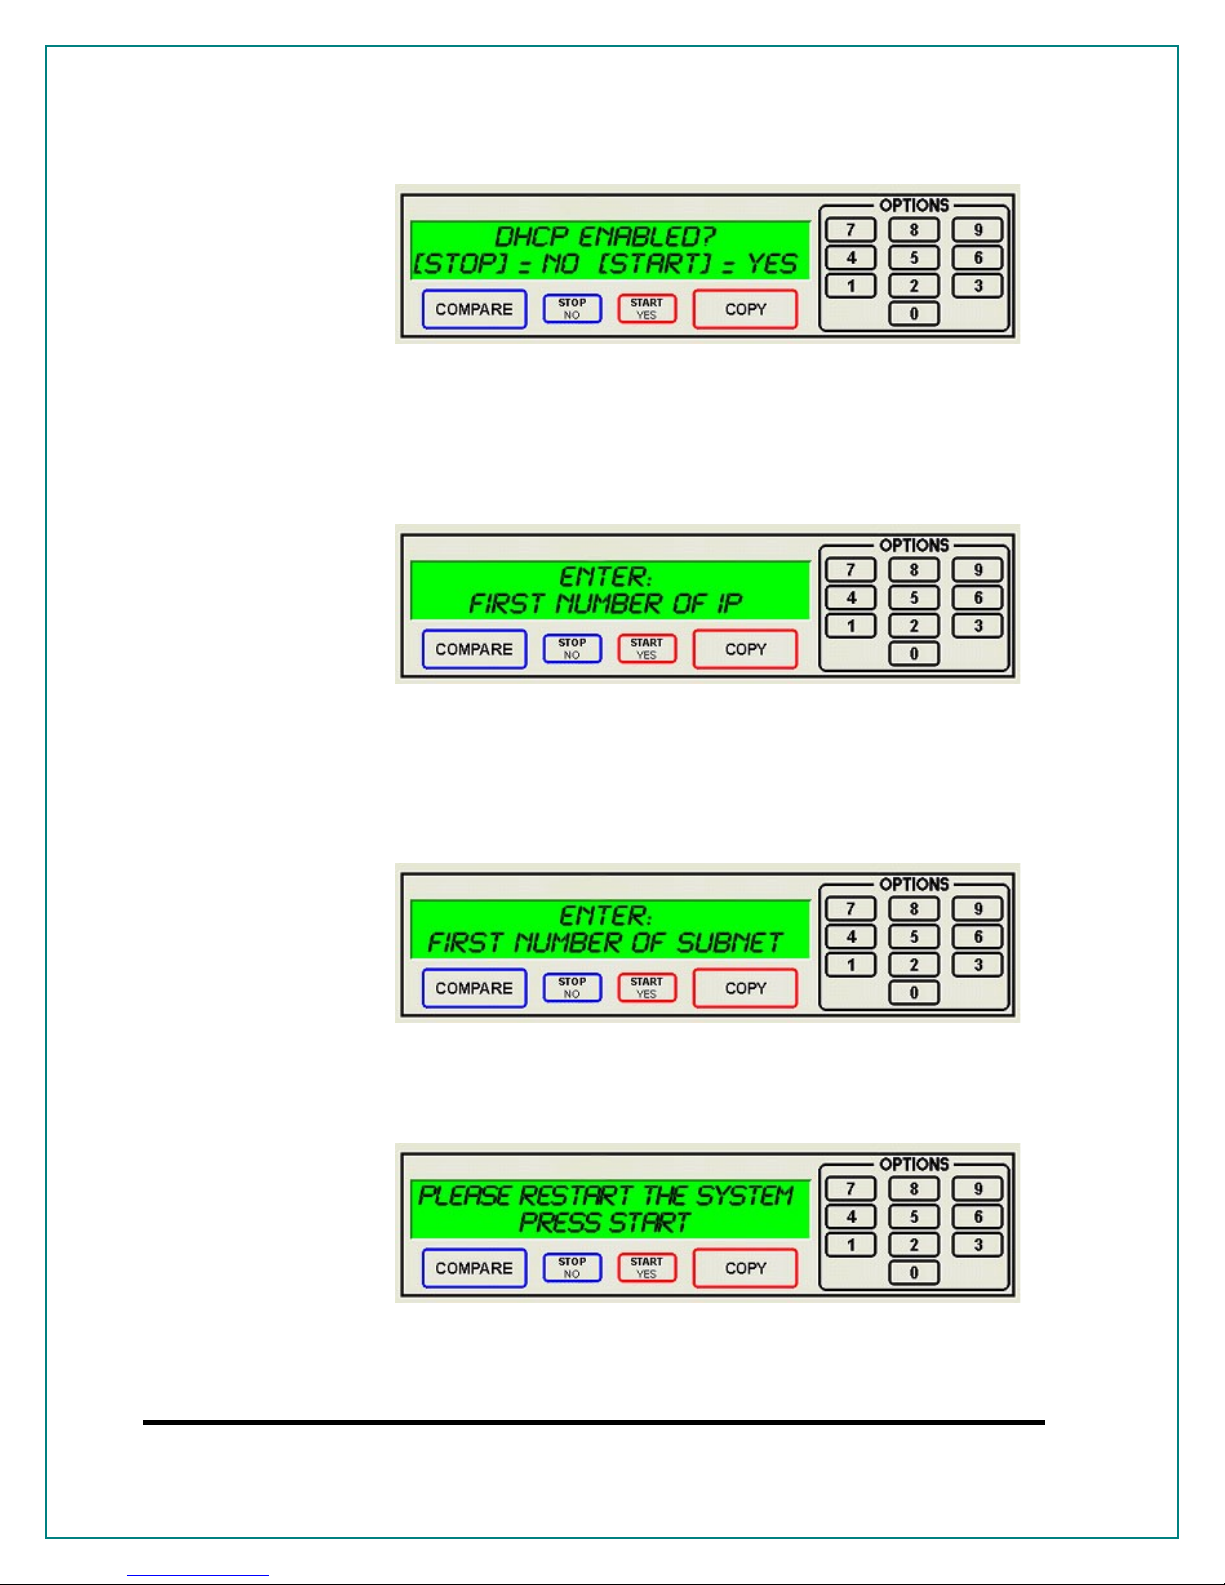
• Press the “START/YES” key, you will see:
• Press the “Stop No” key if the network does not use DHCP or
press the “START/YES” key if the network does use DHCP. If
you press the ““START/YES” “ key you will be prompted to
Restart the system, if you press the “Stop No” key you will see:
• Enter the 4 sets of numbers of the IP address, one set at a time.
After each octet press the “START/YES” key. Do not enter an IP
address of a machine that is already on the network. When you
have entered in the entire IP address, you will see:
• Enter the 4 sets of numbers of the subnet. Pressing
“START/YES” after each set. You will then see:
• Press the “START/YES” key and then restart the system by
turning it Off and On again.
Page 3
Page 4
Installing the CougarNET Client Application on A PC
• To Obtain optional CougarNet Client software visit
www.mfdigital.com/techsupport.html
• Scroll to the “Downloads - Manuals, Guides, Drivers” download
box
• Select Cougar 6600 Optional Client from the latest software
versions dropdown menu
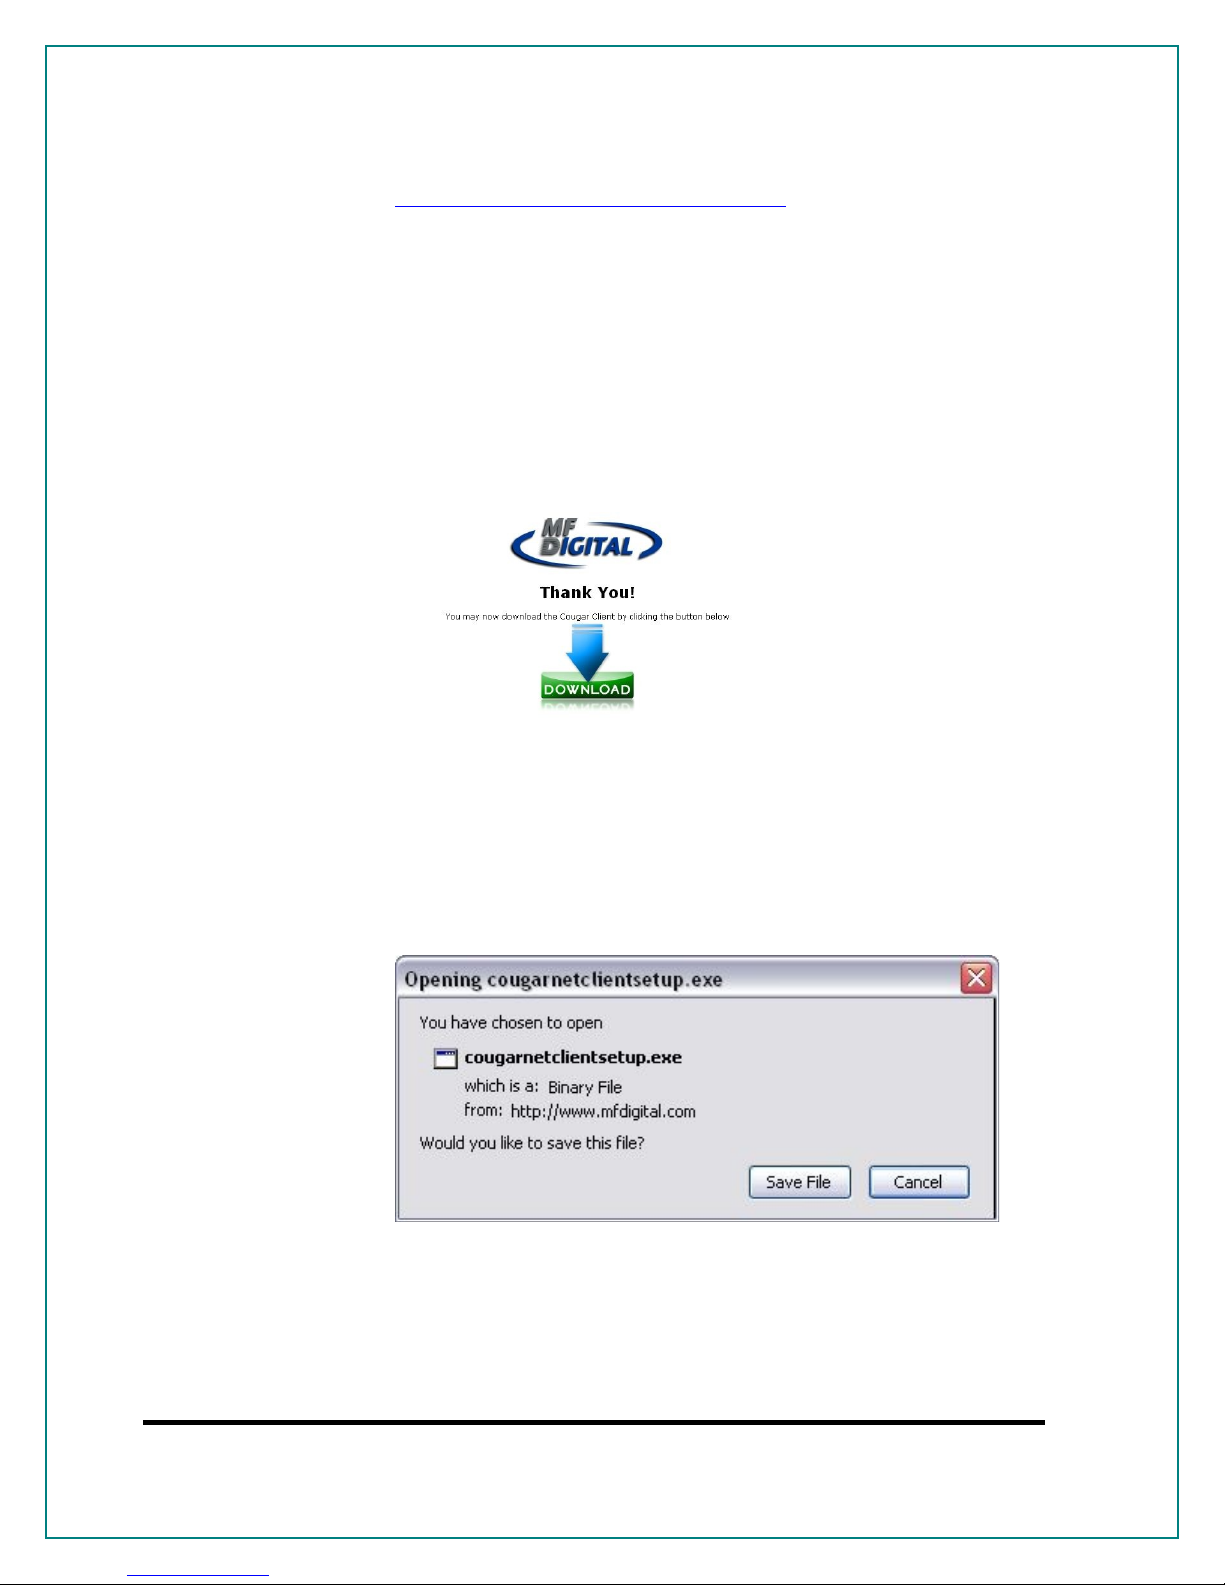
• Then fill in the registration details and the following screen will
appear:
• Click on “Download” and once this has been done the download
will begin
• Once the set up file has been downloaded double click the file to
run the setup installer and the following screen will appear:
Page 4
Page 5
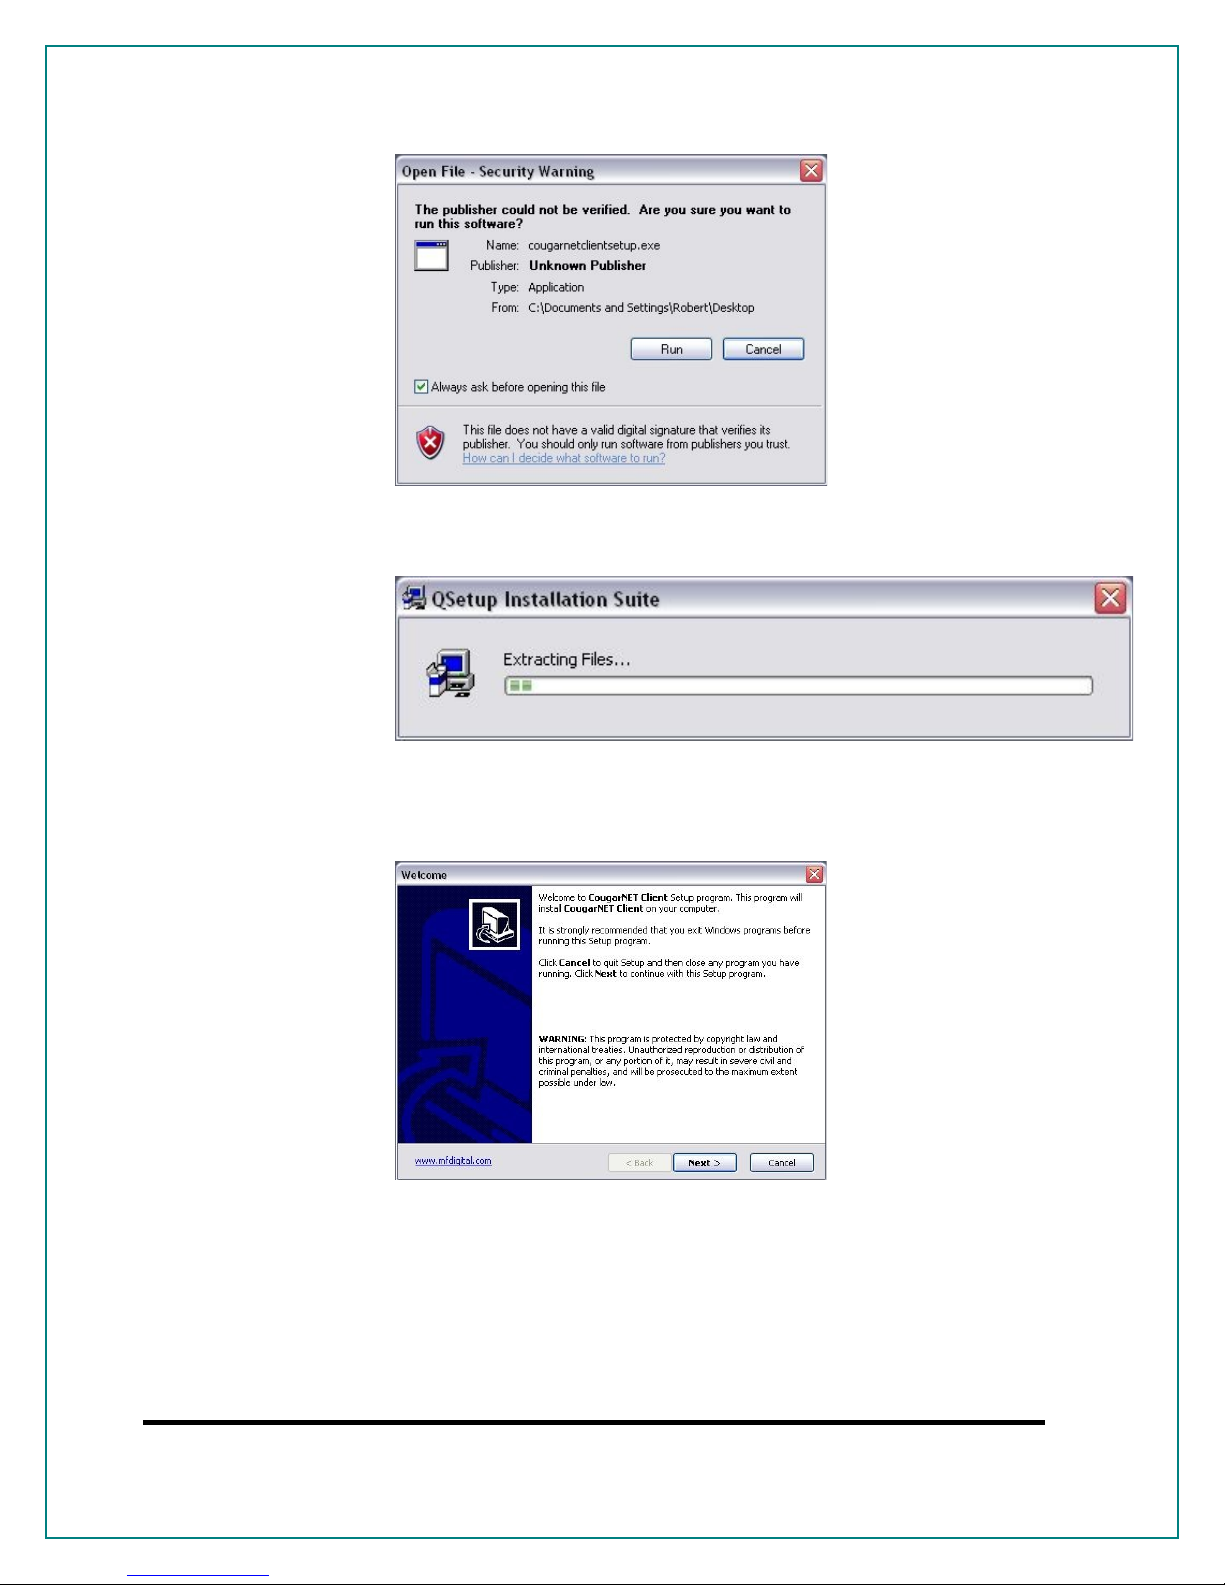
• Then click “Run” on the following screen:
• Then the following screen will appear:
• Then once all the files have extracted click “Next” on the
following screen.
Page 5
Page 6
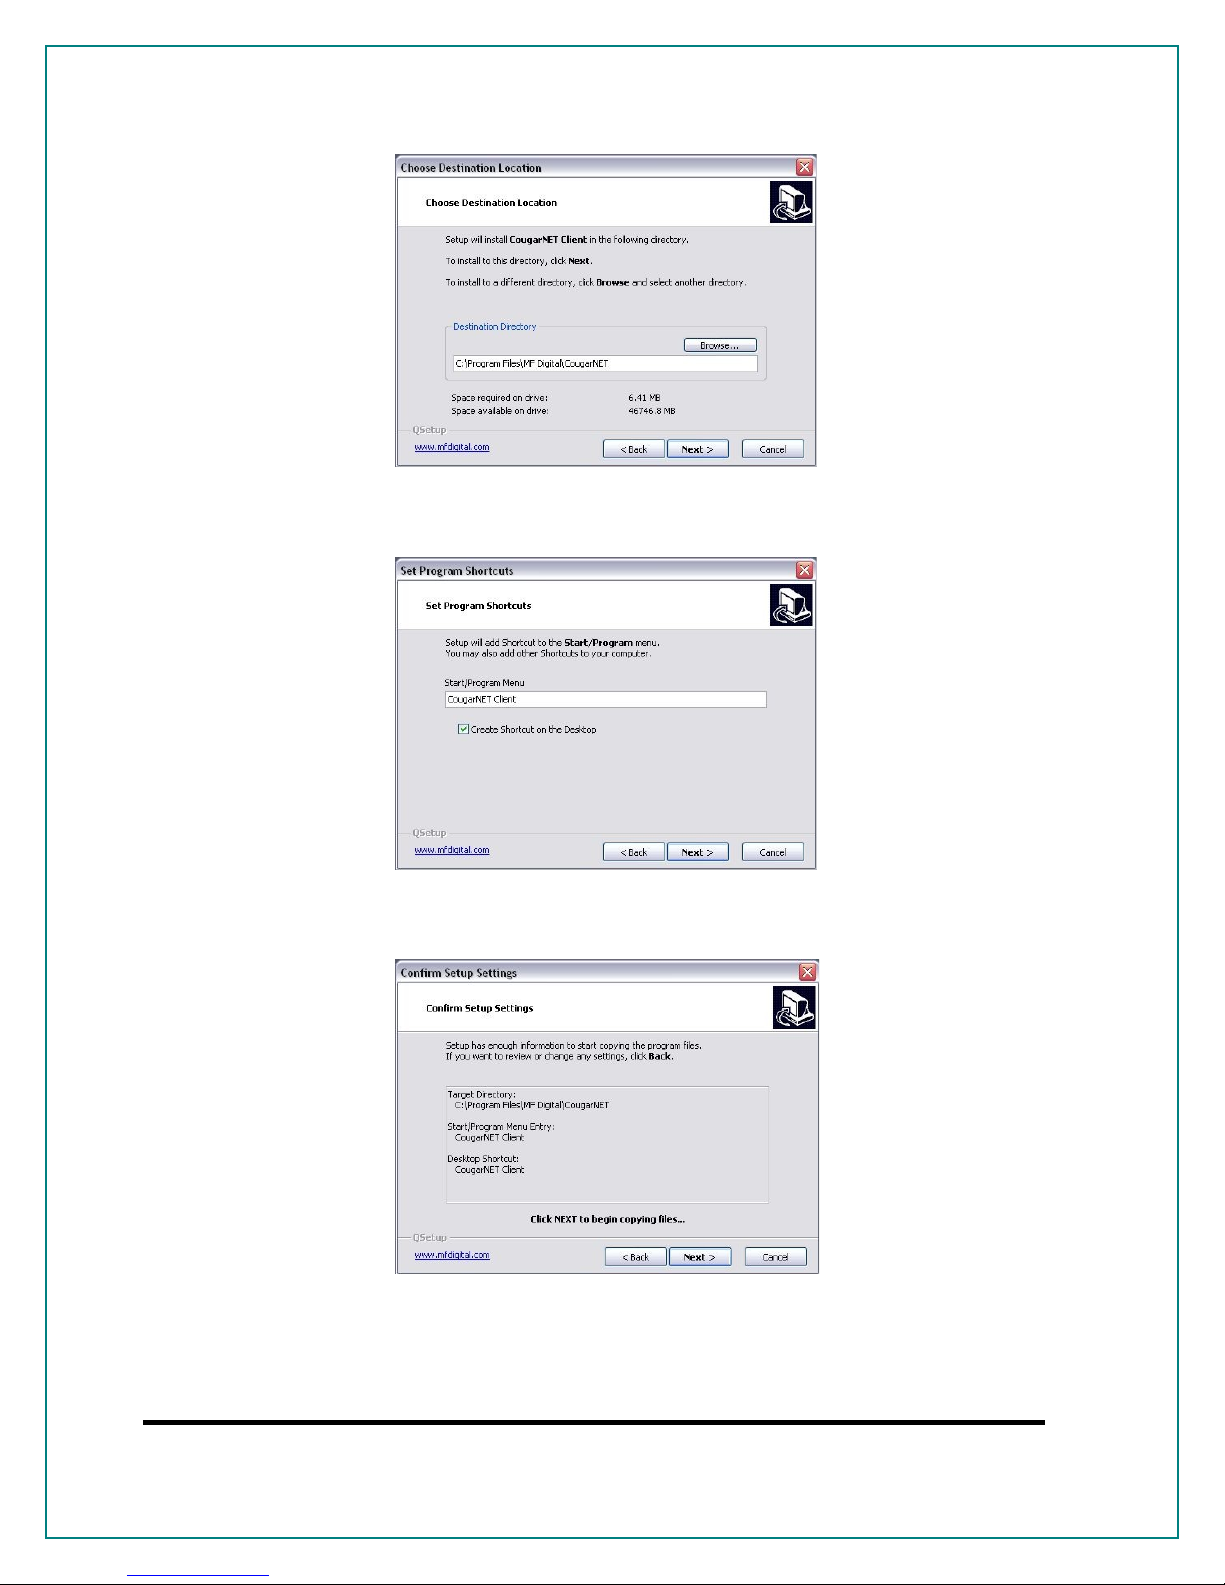
• Then click “Next” on the following screen:
• Then click “Next” on the following screen:
• Then click “Next” on the following screen:
Page 6
Page 7
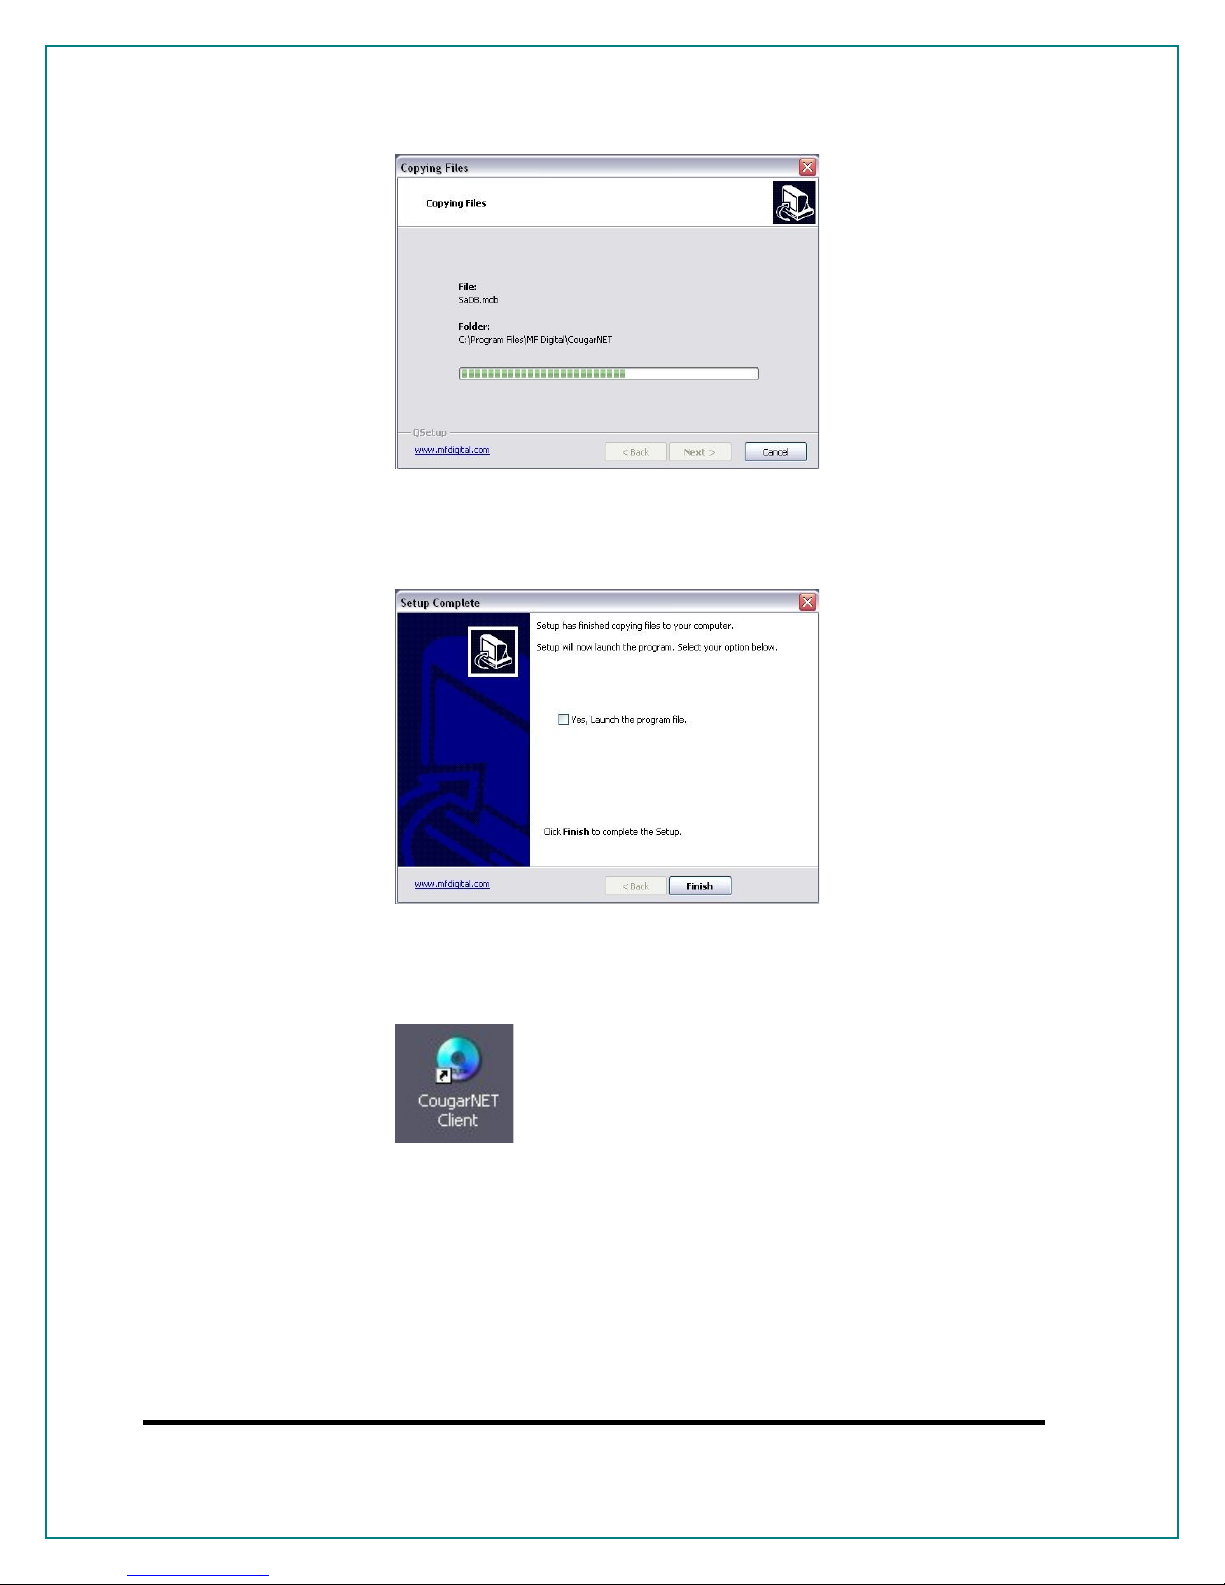
• Then the following screen will appear:
• Then click “Finish” on the following screen and this will
complete the installation:
• Once installed double click on the desktop shortcut to open the
application:
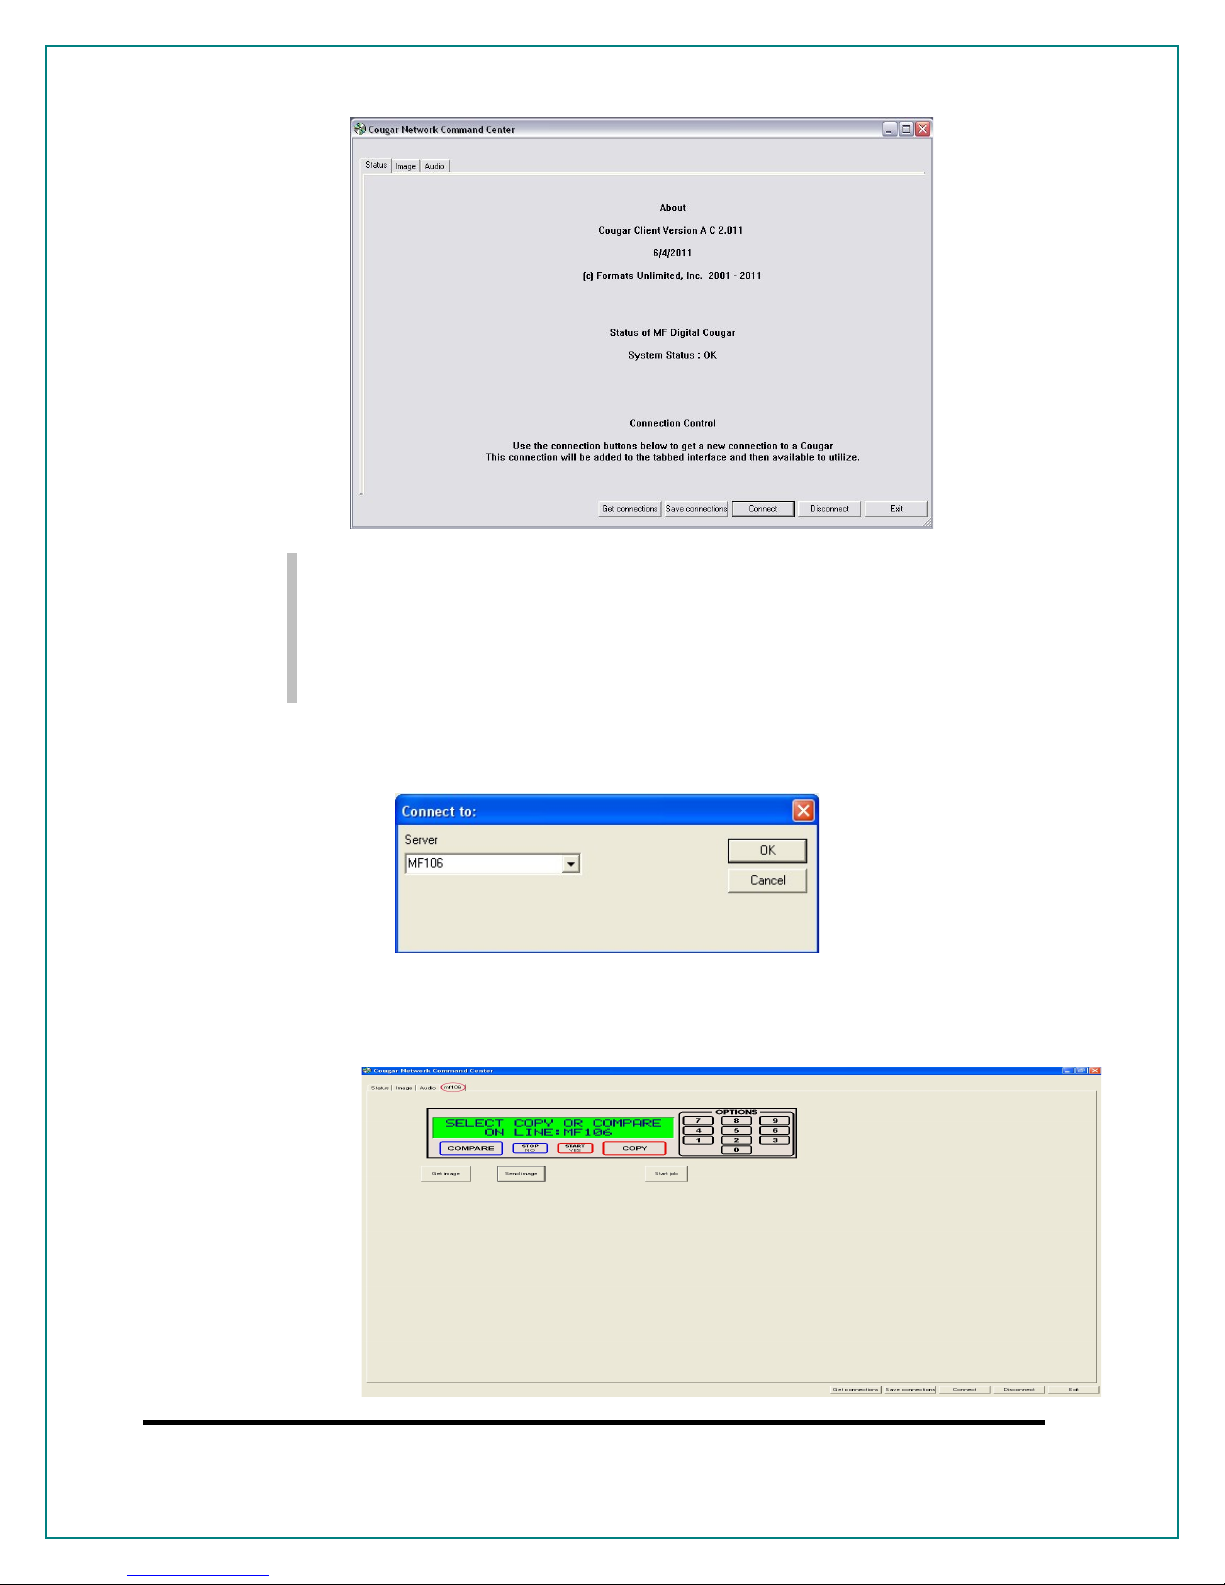
• When the application opens the following screen will appear:
Page 7
Page 8
Note: Keep in mind the SAVE and LOAD connections are saved
per remote PC. If you want to save/load connections on
multiple PC’s you will need to connect and save to each
PC.
• Press “Connect” to include a Cougar to the client
• Enter the name of the Cougar 6600 (MF106 ) press “OK”
• A new tab will appear at the top of the screen called “MF106”
• Click the “MF106” tab and you will see :
Page 8
Page 9
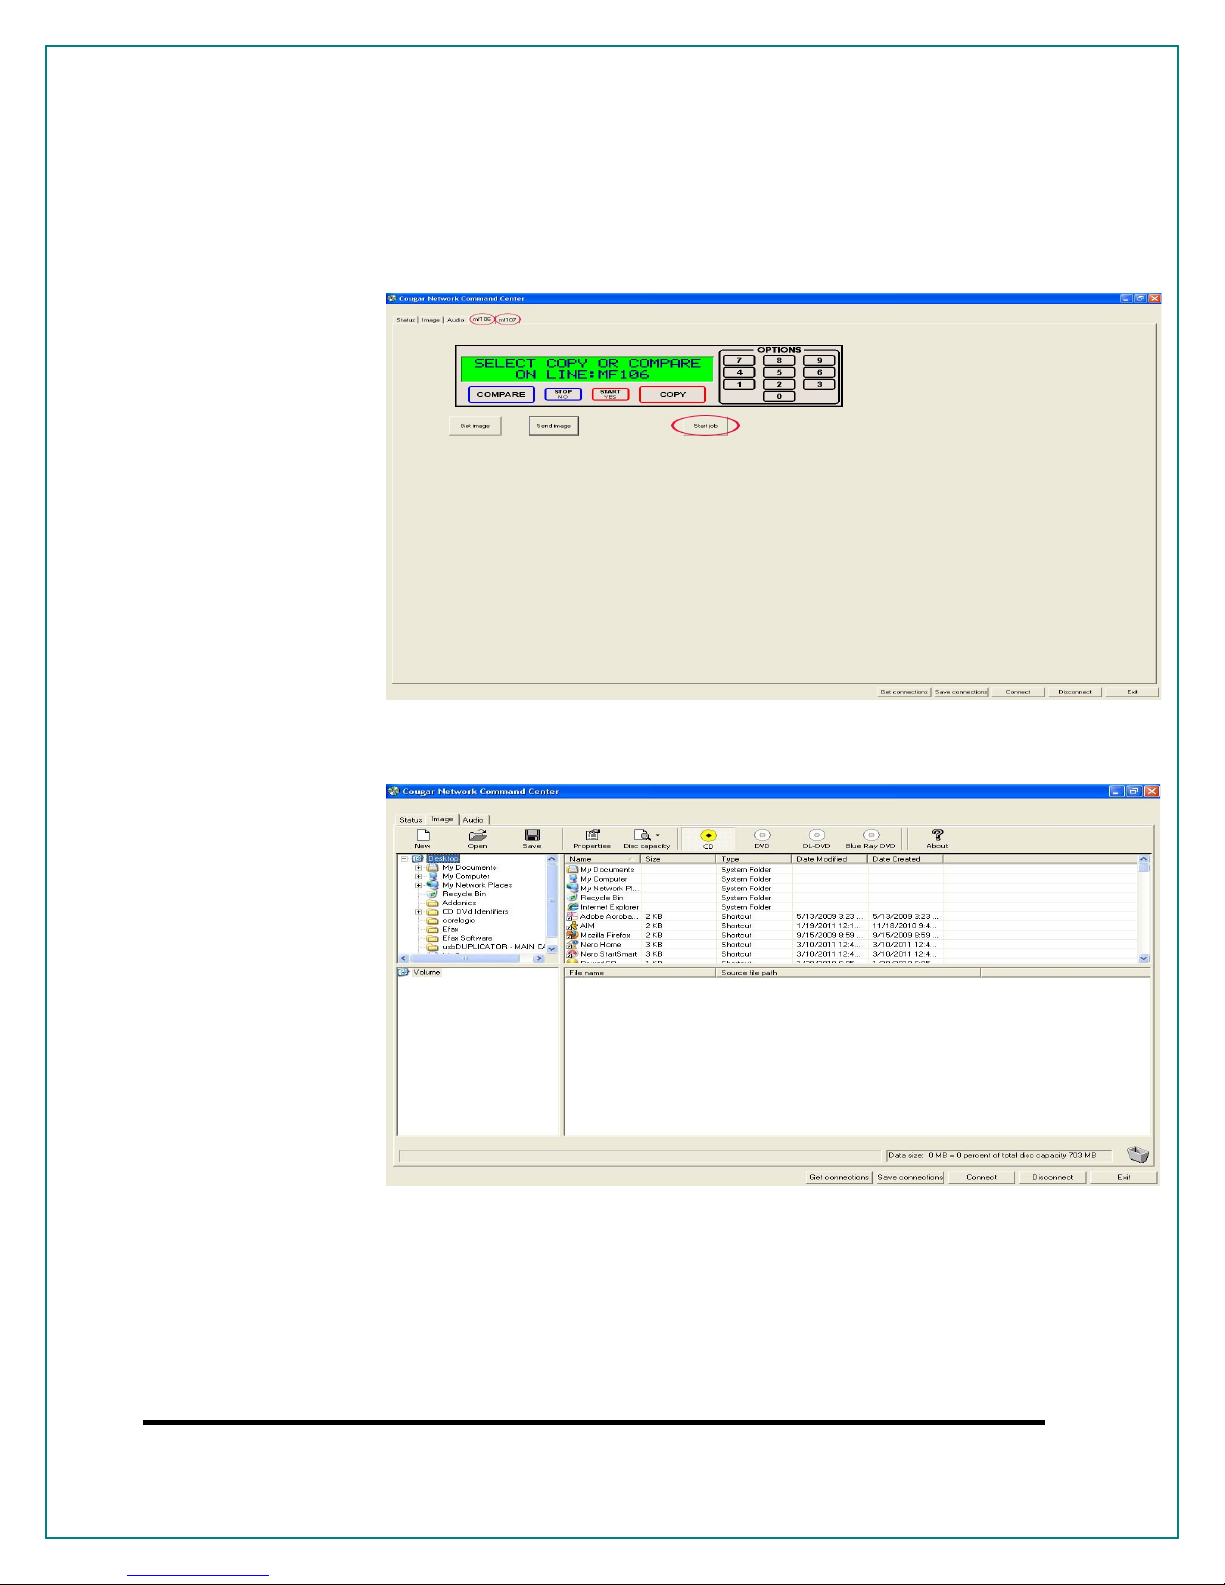
Using the CougarNET Client Application
• After you have connected all your Cougars, you will see the new
tabs on top. One mouse click lets you select a Cougar. You can
start a job, receive or send an image over the network to the
selected Cougar.
• CougarNET even provides for creating audio & data disc images
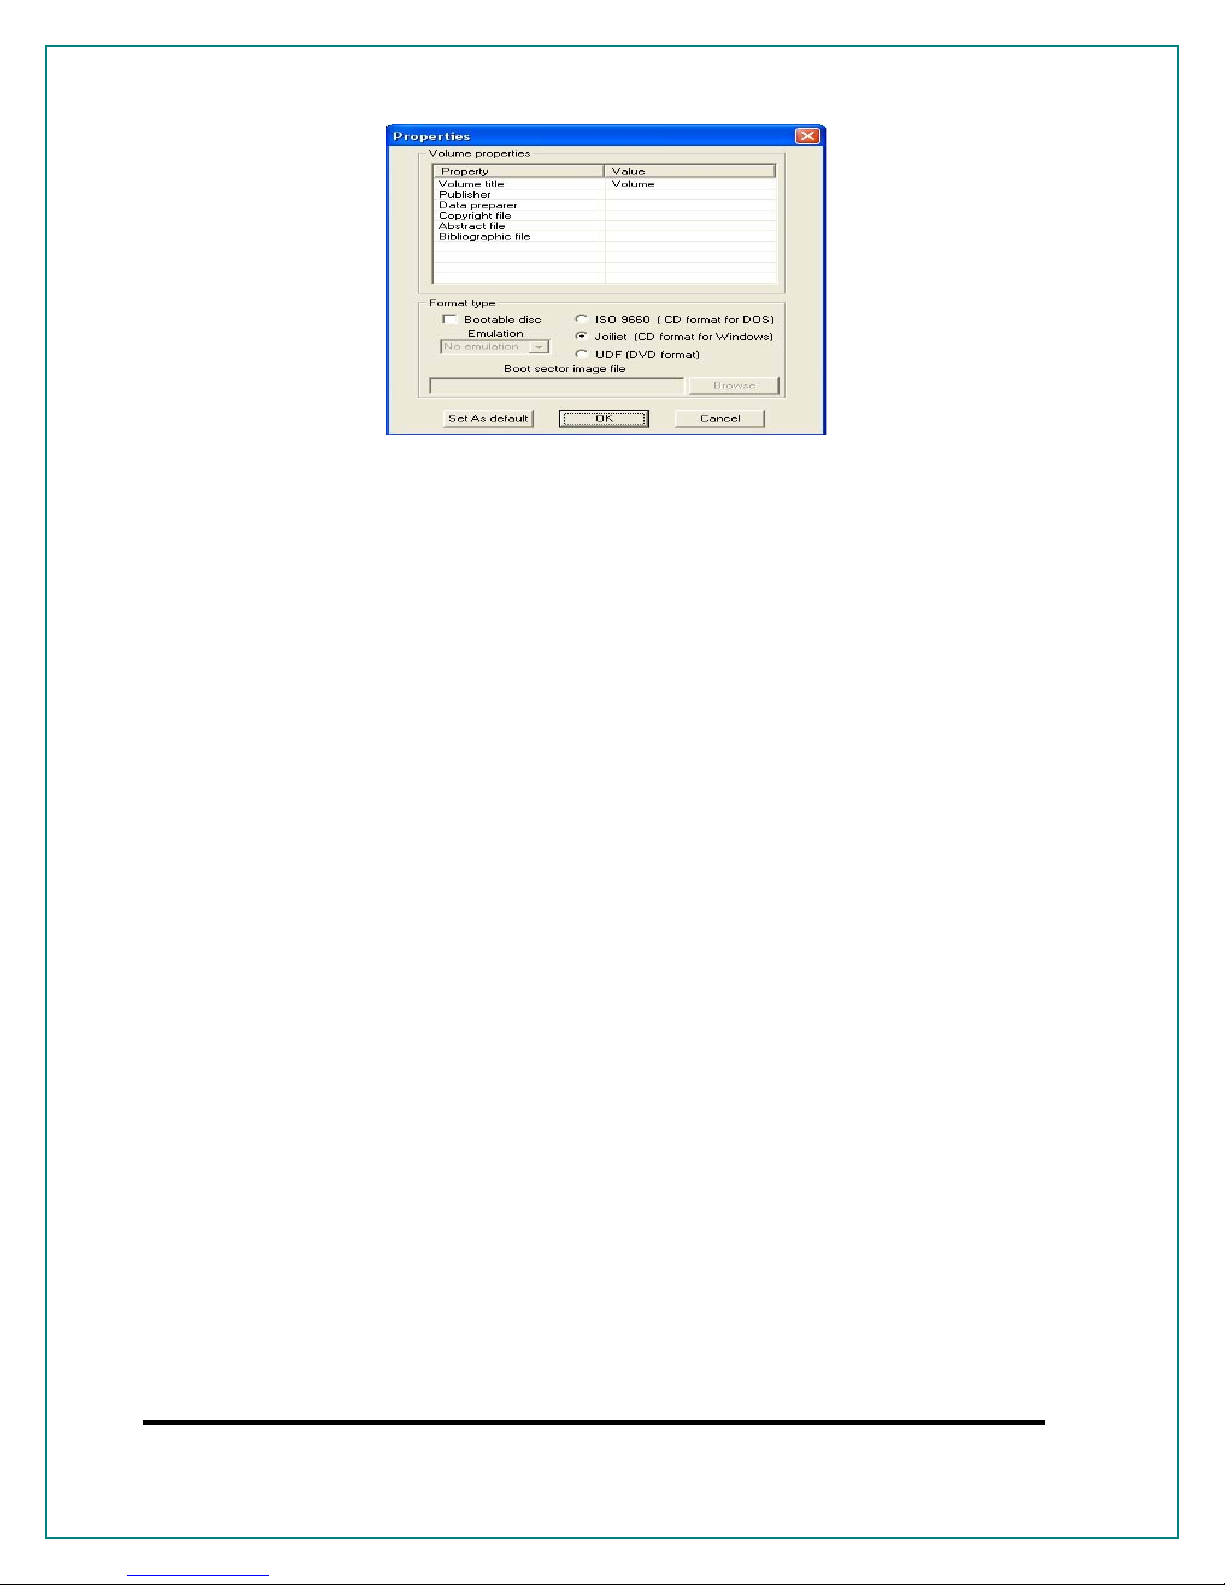
• Use the Image Tab to define disc properties (Volume title,
bootable disc, ISO 9660, Joliet or UDF
Page 9
Page 10
Page 10
 Loading...