

Page 1
Operating Instructions
HM-1S
Self-Powered
Studio Monitor
Patents Pending
Copyright © 1998
Meyer Sound Laboratories, Inc.
All rights reserved
Part # 05.059.004.01 Rev A2
Page 2
Contents
Introduction .......................................................... 3
Power Requirements ............................................ 3
Power Cable Requirements.................................. 5
Audio Input ........................................................... 5
The HM-1S Subwoofer ......................................... 5
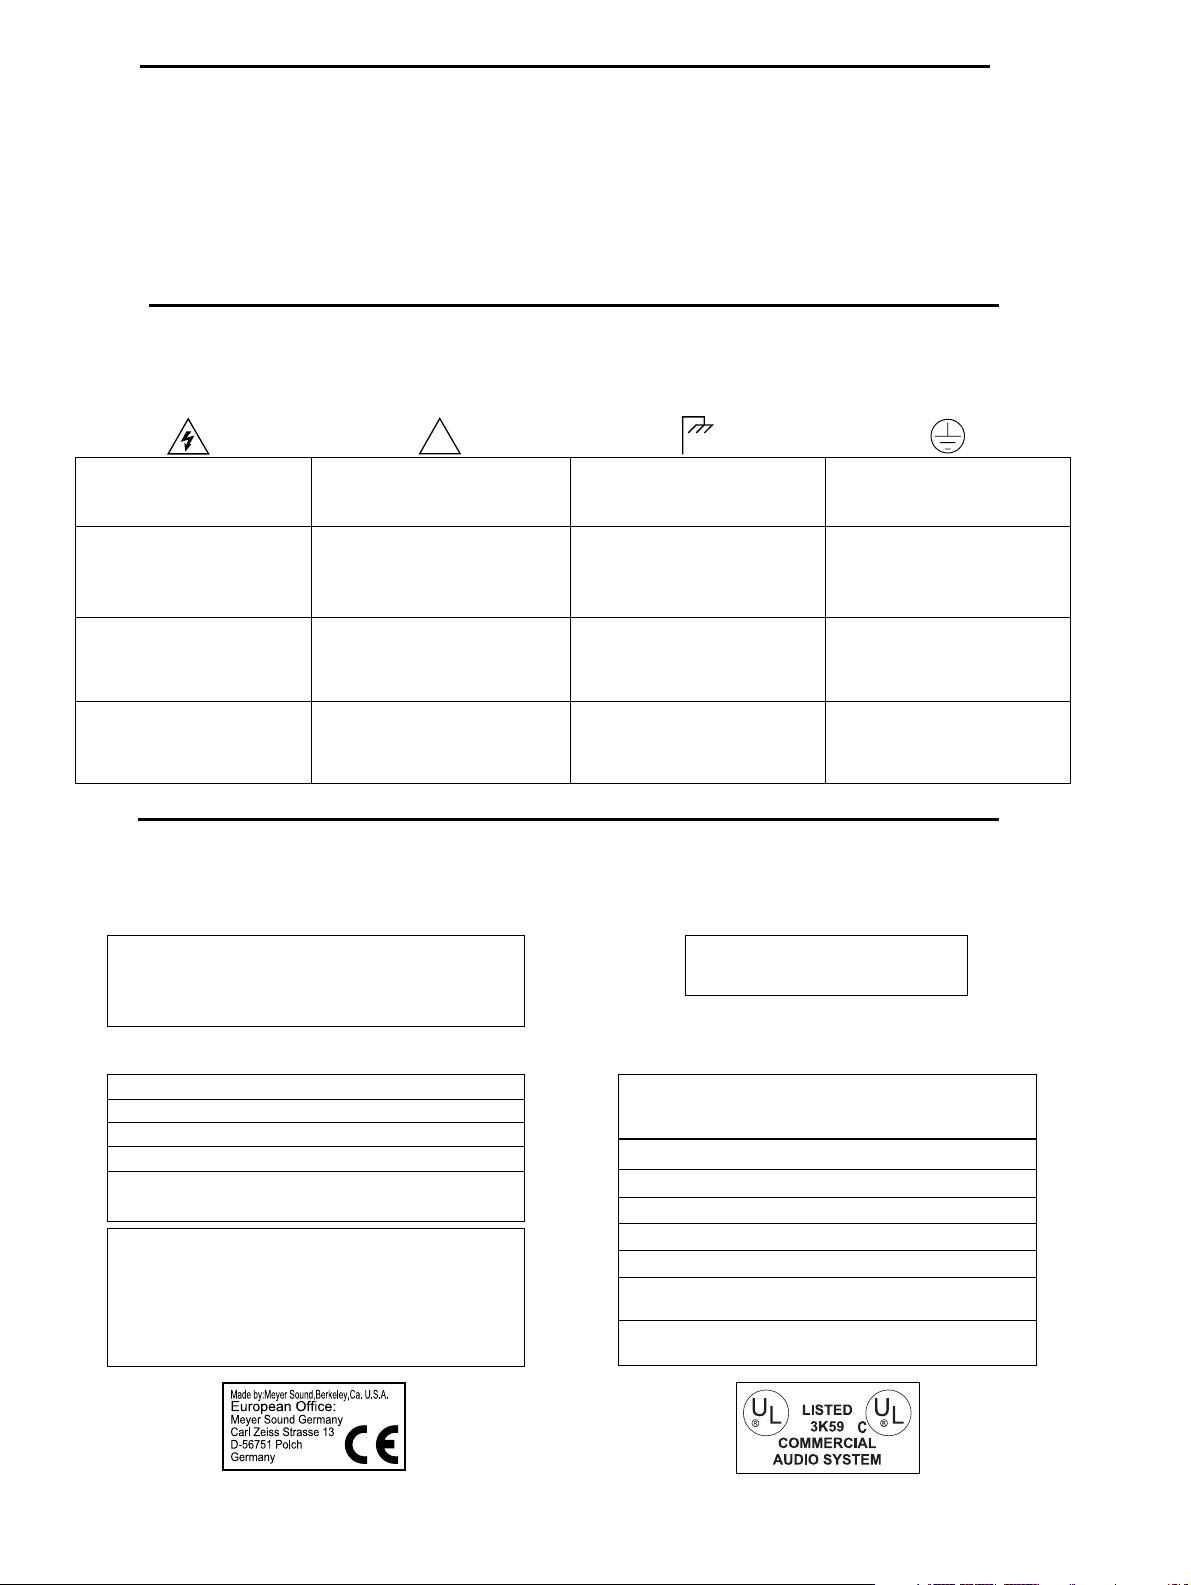
Symbols Used
These symbols indicate important safety or operating features in this booklet and on the chassis.
!
Dangerous voltages:
risk of electric shock
Pour indiquer les risques
résultant de tensions
dangereuses
Zu die gefahren von
gefährliche spanning zeigen
Para indicar azares
provengo de peligroso
voltajes
Important operating
instructions
Pour indequer important
instructions
Zu wichtige betriebsanweisung und unter-
haltsanweisung zeigen
Para indicar importante funcionar
y mantenimiento instrucciones Armadura o chassis Tierra proteccionista
Cooling and Fan Installation ................................ 16
Protection and Limiting ....................................... 16
Safety Summary ................................................. 17
Rear Panel Connectors ....................................... 18
Dimensions ......................................................... 18
Frame or chassis
Masse, châssis
Rahmen oder chassis
Protective earth ground
Terre de protection
Die schutzerde
Declaration of Conformity
According to ISO/IEC Guide and EN 45014
Name: Meyer Sound Laboratories
Address: 2832 San Pablo Avenue
Berkeley, California 94702-2204, USA
conforms to the following Product Specifications:
Safety: EN 60065: 1994
EMC: EN 55022: 1987 - Class A
IEC 801-2: 1984 - 8 kV
IEC 801-3: 1984 - 3 V/m
IEC 801-4: 1984 - 0.5 kV Signal Lines,
1.0 kV Power Lines
The product herewith complies with the requirements of t he
Low Voltage Directive 73/23/EEC and the EMC Directive 89/336/EEC.
Office of Quality Manager
Berkeley, California USA
April 1, 1997
declares that the product:The Manufacturer:
Product Name: HM-1S
Product Options: All
Environmental Specifications for Meyer
Sound Electronics Products
Operating temperature: 0° C to +45° C
Nonoperating temp: < 40° C or > +75° C
Humidity: to 95% at 35°C
Operating altitude: to 4600 m (15,000 ft)
Nonoperating altitude: to 6300 m (25,000 ft)
Shock: 30 g 11 msec half-sine
on each of 6 sides
Vibration: 10 55 Hz (0.010 m
peak-to-peak excursion)
2
Page 3
Introduction
Power Requirements
The Meyer HM-1S Studio Monitor is a compact, full-
range, self-powered reference monitor that employs a
concentric tweeter mounting structure to achieve true
point-source performance. Sophisticated phase-correction circuitry provides superb imaging without the off-axis
cancellation effects, back-wave interference, and IM distortion commonly exhibited by dual-concentric speakers.
The HM-1S Studio Monitor is a two-way system comprising a
7-inch graphite cone low-frequency driver, and a concentrically-mounted, 1-inch soft-dome high-frequency driver.
A constant-directivity, high-frequency horn affords a symmetric 100° beam width. The HM-1S employs optimized
electronics, drivers, and cabinet venting (tuned to 40 Hz)
to achieve low frequency response far exceeding that of
most small speakers. The drivers are magnetically shielded
and the magnets employ field-cancelling techniques
to minimize magnetic leakage, allowing speaker placement within one foot of color video monitors.
The HM-1S can be used with the Meyer HM-1S Studio
Subwoofer, extending the free-field LF (low frequency)
response down to 42 Hz. The passive subwoofer is
powered from the Sub output on the rear panel of the HM1S. Although each HM-1S Studio Monitor can power a
subwoofer, ample LF energy may be obtained by driving
one subwoofer from two HM-1S Studio Monitors, resulting in a correctly-summed mono signal. Subwoofer usage
depends on the loading conditions, the LF gain desired,
and whether a stereo LF signal is required. Placing the
HM-1S next to a wall or ceiling (half-space loading) also
extends the LF response down to 42 Hz.
The HM-1S Studio Monitor and Subwoofer cabinets are
constructed from medium density fiberboard and finished with an attractive, durable oak veneer (natural
wood or black). Although external heatsinks on the rear
of the cabinet provide adequate convection cooling, a
variable-speed cooling fan assembly (part# 40.039.016.01,
driven from a rear-panel output and mounted on the rear
of the speaker) is available if the HM-1S will be operated
in hot temperatures or in an unventilated, enclosed area.
The HM-1S requires a 48 VDC external power supply,
which provides these benefits:
Low voltage wiring simplifies installation.
Utilizes telecom 48 V supply and bus standard.
Eliminates 50/60 Hz AC noise coupling in wiring.
The power supply input uses a male 2-pin EN3 connector.
The HM-1S can be powered by the Meyer PS-1 AC
adapter or a supply that conforms to the 48 VDC specifications detailed in this section.
Meyer PS-1 AC Adapter
Using the Meyer PS-1 AC adapter is the simplest way to
power a pair of HM-1Ss, or a single HM-1S with a subwoofer. The AC adapter can be purchased through Meyer
Sound and comes with two 10 ft power cables. The AC
adapter has two output connectors that are wired together
inside the supply, allowing either one connector to
drive two speakers at the end of a single cable, or one
connector and cable per speaker.
Do not connect the outputs of multiple PS-1 AC
adapters together!
For installations up to 10 HM-1Ss, using multiple PS-1
AC adapters is often the simplest and most cost-effective
solution. Since the limited output power for each supply
acts as circuit protection for light gauge cables, it is not
necessary to install circuit breaker distribution panels.
Using the PS-1 does, however, limit each 48 V line to two
speakers. The dimensions of the AC adapter are 10 x 5 x 3.
Contact Meyer Sound for further information on the PS1 AC Adapter.
The enclosure contains a 400 W stereo amplifier, an active
crossover, frequency and phase alignment circuitry, and
driver protection voltage limiters. Front-panel LEDs indicate
power, signal limit, and thermal overload, and a rearpanel circuit breaker provides overall DC power protection.
The HM-1S accepts a unipolar 48 VDC power source,
which may be supplied by the Meyer PS-1 AC Adapter.
Using a DC supply enables long power cable runs with
minimal induced noise or hum, which is particularly important for recording studios and other noise sensitive
environments.
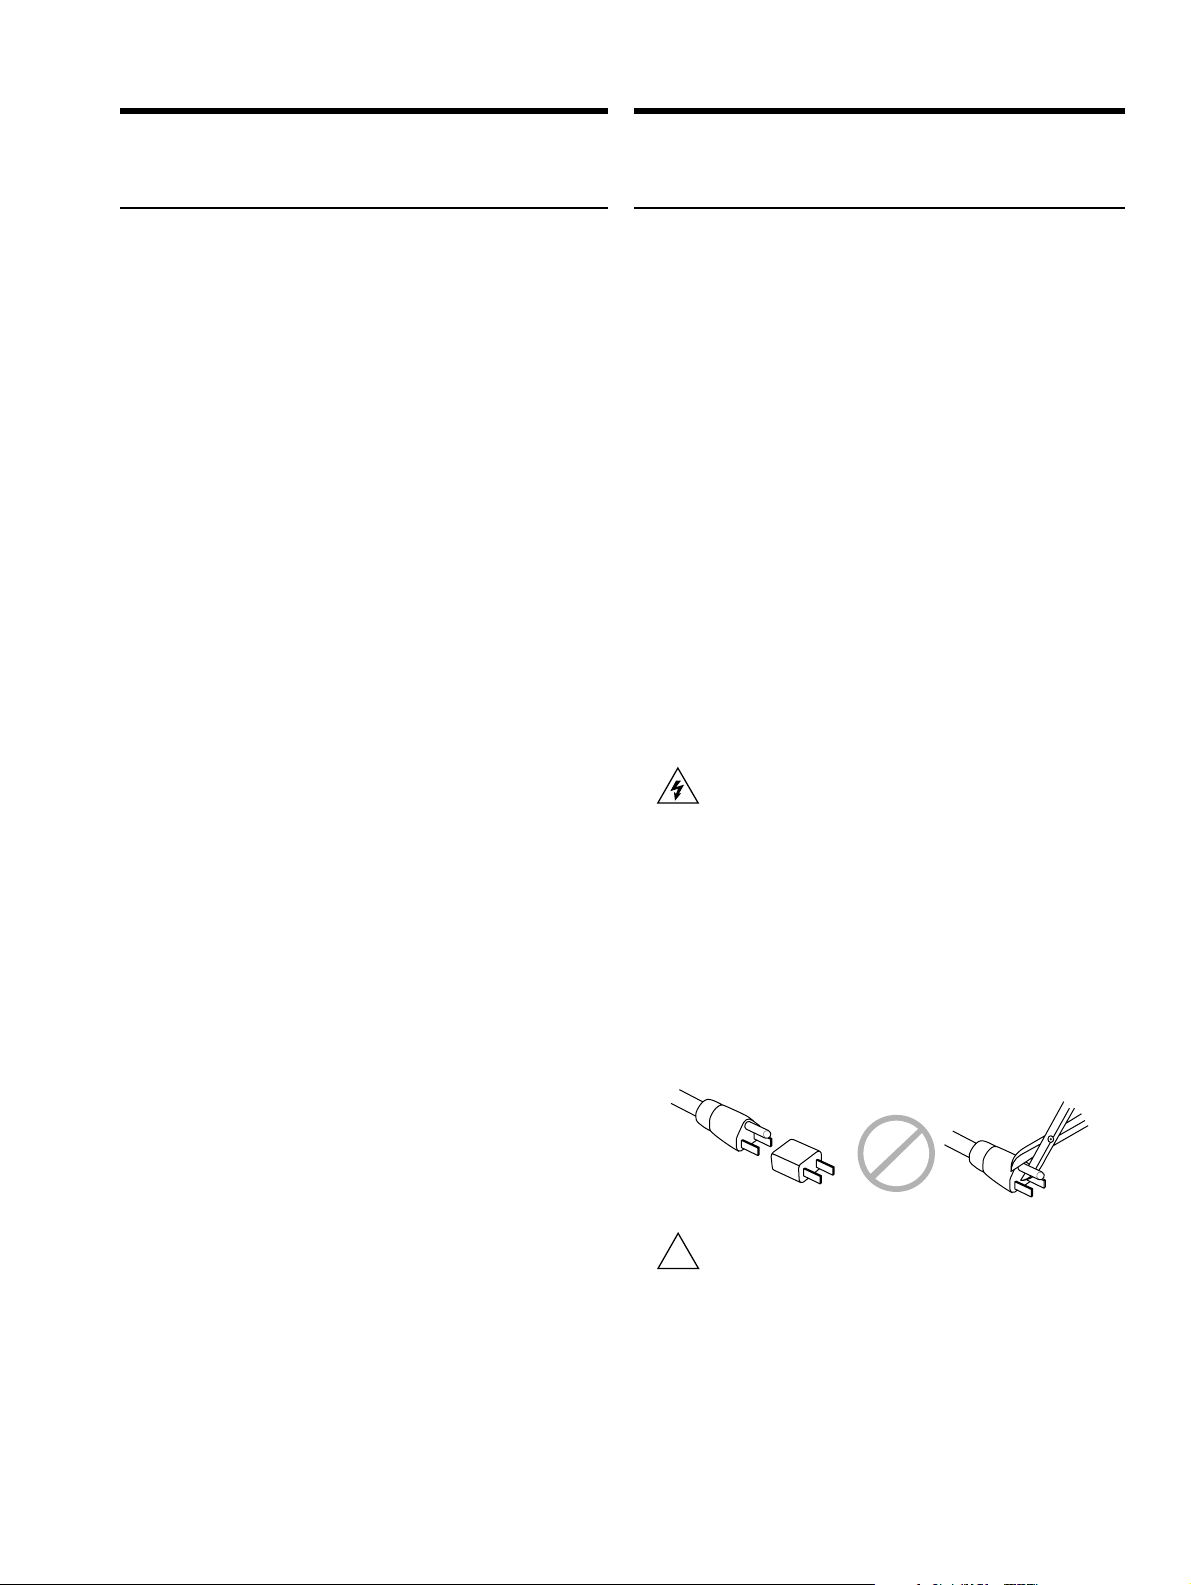
!
Do not use a ground-lifting adapter or cut the AC
cable ground pin.
3
Page 4
Power Supplies for Larger Systems
If an installation includes more than 10 speakers, or
requires several speakers to operate from a single 48 V
line, a single, high-output power supply should be
considered. The following sections provide current and
voltage specifications for the HM-1Ss power requirements.
Current Ratings
The wide dynamic range of audio signals normally causes
a high peak-to-RMS ratio in an amplifiers DC supply
currents. The HM-1S has internal storage circuits to
minimize the peak-to-average ratio, which
reduces the peak power rating required by the
supply;
allows efficient use of switched-mode power sup-
plies which have similar peak and continuous ratings.
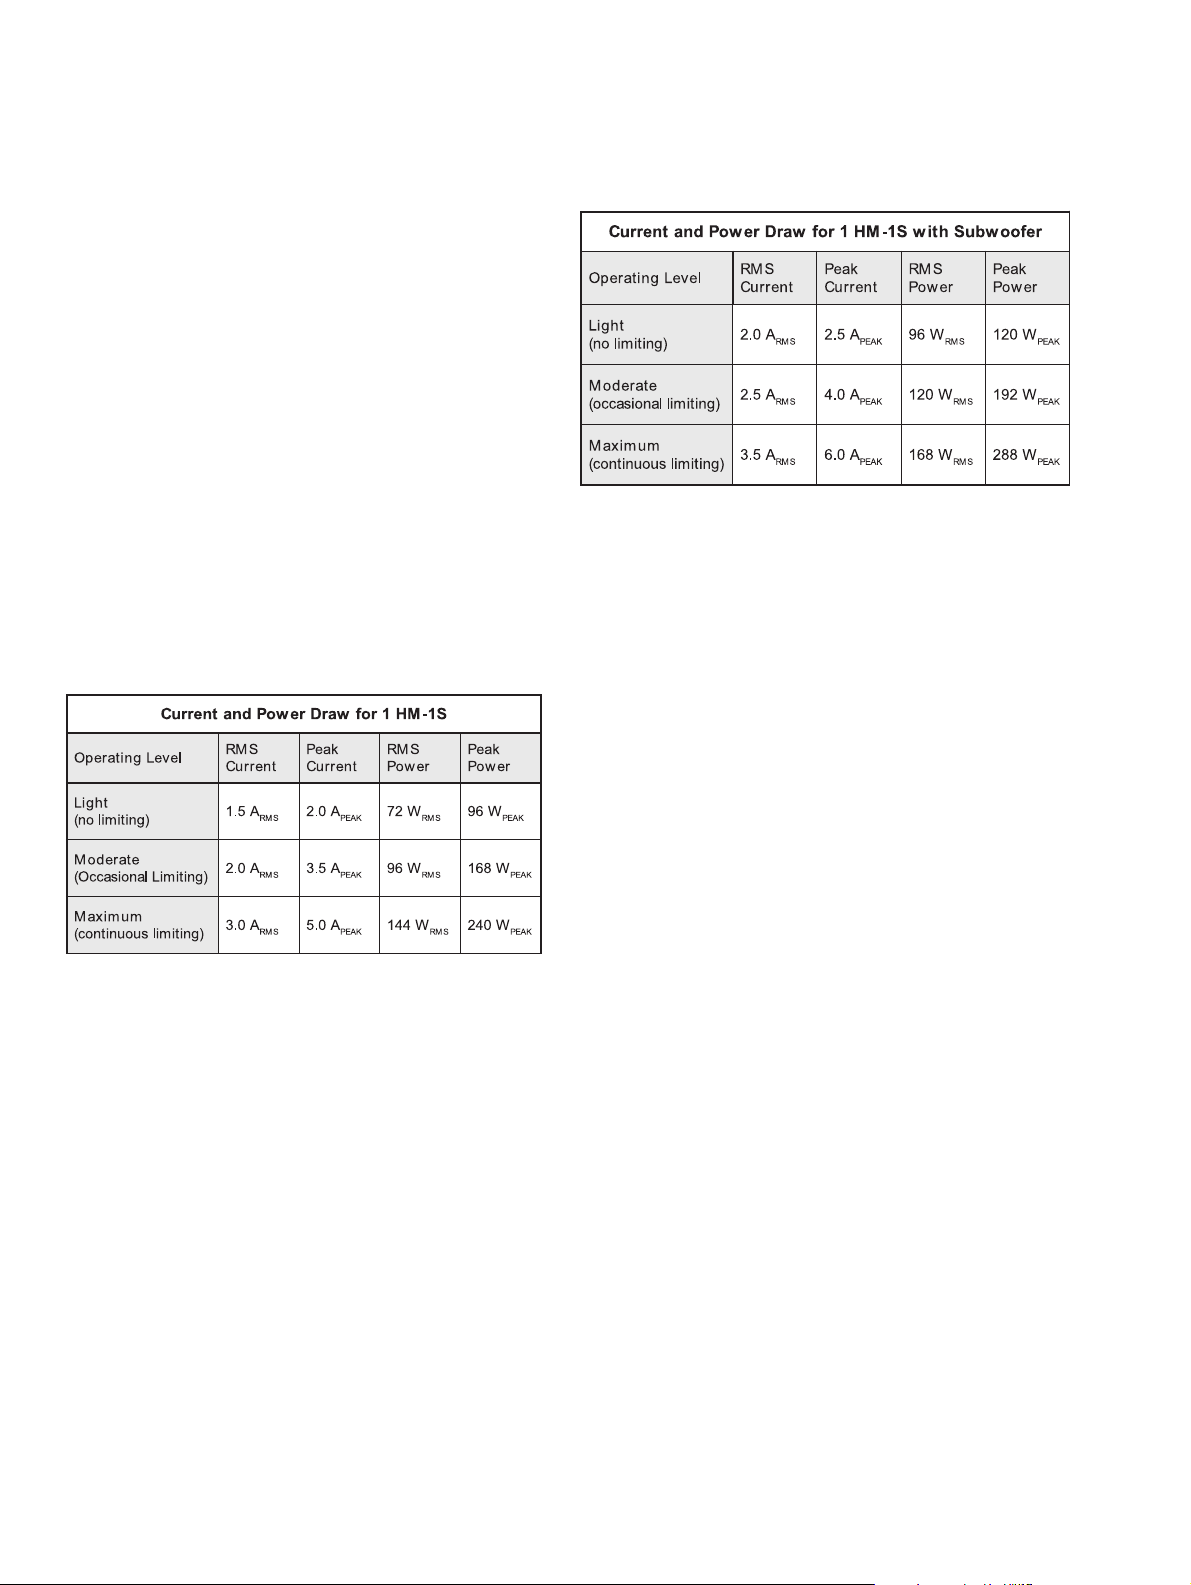
The following table lists the current and power draw for a
single HM-1S at light, moderate, and maximum operating
levels.
An HM-1S with subwoofer draws 0.4 ADC, 20 W in a
quiescent state.
Voltage Ratings
The voltage operating range for the HM-1S is 48 VDC
nominal, 52 VDC absolute maximum, and 35 VDC
minimum without shutoff.
Each HM-1S draws 0.4 ADC, 20 W in a quiescent state.
The RMS current is measured over a 500 ms integration
time. The peak current is measured over a 10 ms integration
time.
Each HM-1S can drive a slaved Meyer subwoofer from a
connection on the amplifier panel. Adding the subwoofer
increases the amplifiers output current, which increases
the power supply current. The current and power ratings
for an HM-1S and a subwoofer are listed in the following
table at light, moderate, and maximum operating levels.
Allowing operation down to 35 VDC provides two benefits. First, a moderate voltage drop (up to 8 V) for long
DC power cables has a minimal impact on audio performance, enabling the use of light-gauge cables for most
installations.
Second, since some switched-mode power supplies
slowly foldback the voltage if they experience current-
limit, power supplies with lower power (current) ratings
can be used efficiently. Since supplies with lower power
ratings typically experience current-limit when the HM1S is at continuous limiting, some voltage drop and loss
of headroom is acceptable provided the voltage does
not drop below 35 VDC. At 35 V, the maximum current
draw is 25% lower than the values stated in the preceding
tables.
NOTE: If the HM-1S will not be driven at continuous limiting,
a power supply that satisfies the moderate specifications
for voltage and current can be used safely without risk of
sonic degradation or interruption.
It is important to understand how the selected power
supply responds to current-limit, particularly for switchedmode supplies. Some supplies trip off and must be reset
manually, while others remain off for a period of time and
reset automatically. In both cases, the HM-1S suffers
4
Page 5
audio interruption. In the third, and preferable case,
supplies that feature voltage foldback allow brief periods
of current-limit without audio interruption; for this reason,
we recommend using such supplies.
The HM-1S does not require tight voltage regulation and
operates down to 35 V although peak SPL values are
reduced. This operating voltage flexibility allows for wiring loss and voltage foldback without interruption or
degradation of the audio signal.
A single HM-1S attached to a 100 ft 18 AWG cable (1.27
Ω total) produces a 6.4 VDC loss at the speaker (41.6 V)
during maximum audio bursts (5 A, 0.5 s). This results in
a small loss in peak SPL.
Audio Input
Many high power industrial supplies (15 kWatt) are
available for 19 EIA racks that are suitable for large
installations with equipment rooms. Distribution panels
with branch circuits can be used economically with up to
8 HM-1Ss on a branch. Contact Meyer Sound for information on tested and approved supplies.
Power Cable Requirements
Each HM-1S draws a maximum of 3 Arms and 5 Apk
from a 48 V power supply at peak SPL. The cabling
between the 48 V supply and the speaker adds resistance to the circuit and produces a voltage drop at the
speaker. Decreasing the voltage at the speaker compromises the peak SPL so cable resistance should be
minimized.
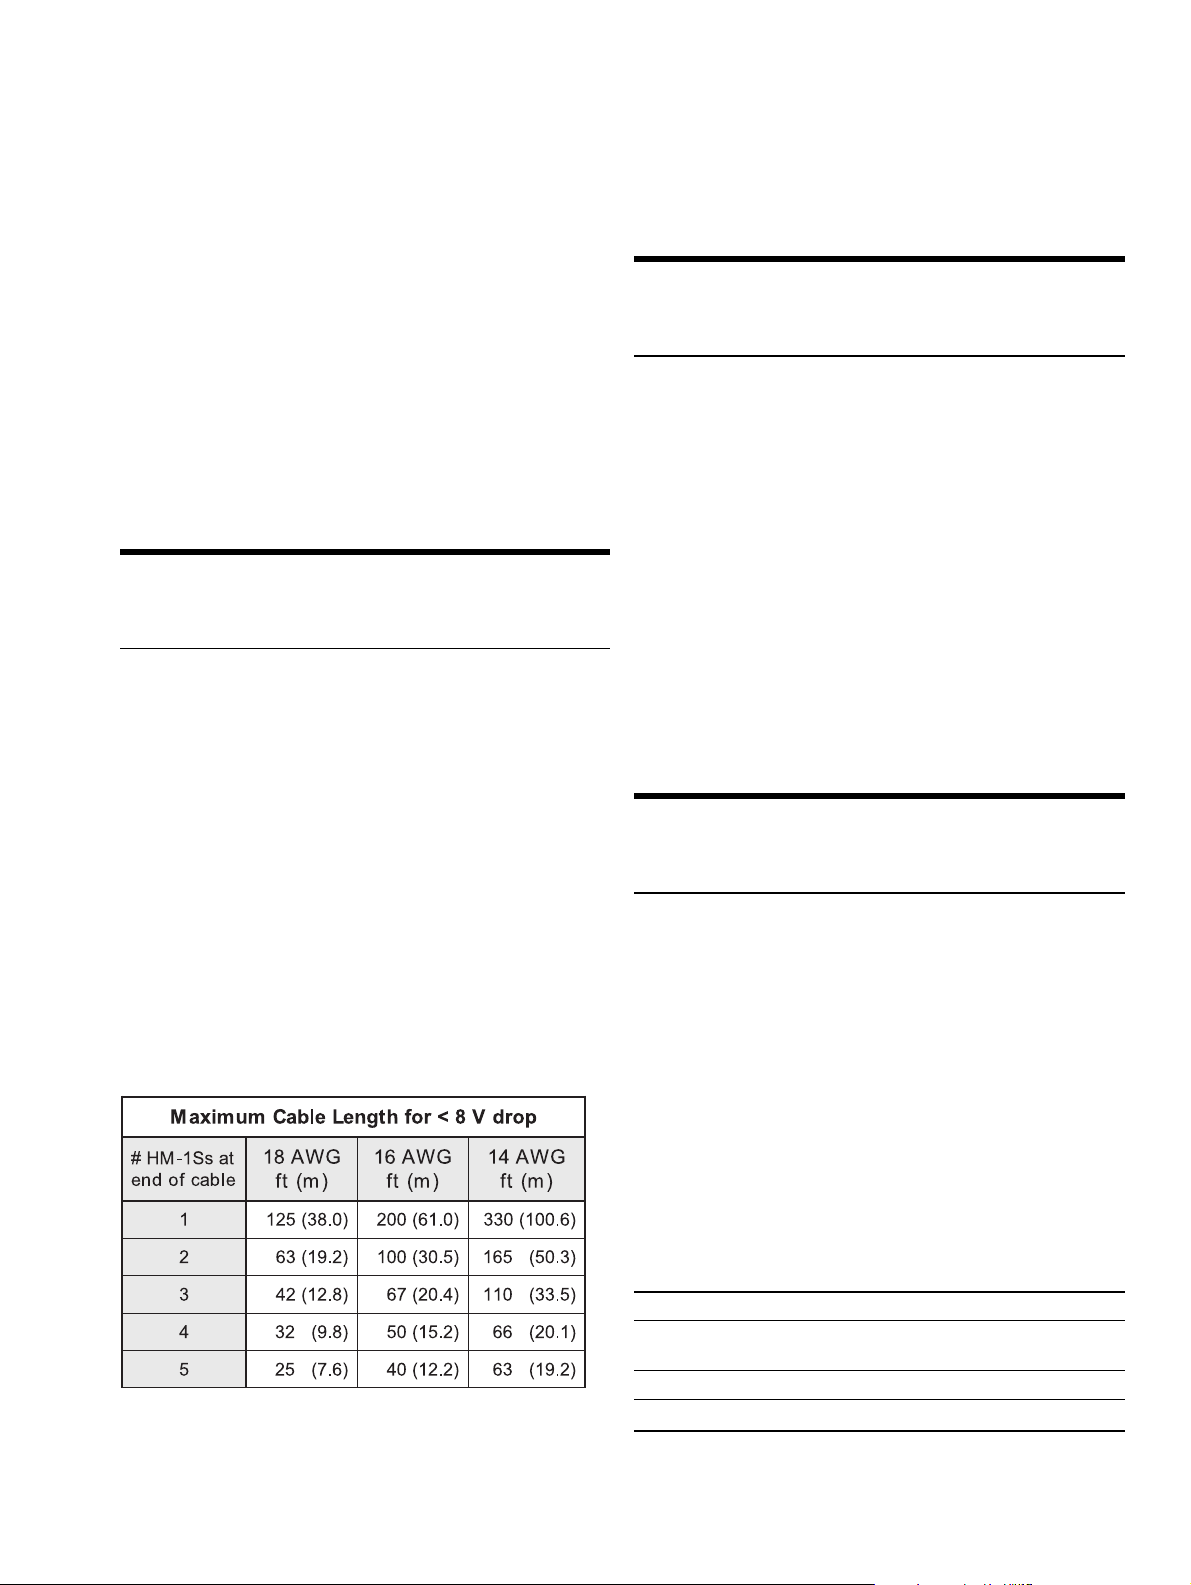
For best sonic performance, avoid voltage drops greater
than 8 V at the speaker. Voltage drops greater than 15
V may cause the speaker to mute or distort. The maximum round-trip resistance for a cable attached to a
single HM-1S should be no higher than 1.6 Ω, which
keeps the voltage drop below 8 V during the maximum
current draw of 5 Apk.
The following table helps select cable gauges for various
cable lengths.
The HM-1S has an input impedance of 10 kΩ and receives
its audio input signal at a female XLR connector. Pins 2
and 3 carry the input as a differential signal; pin 1 and the
case are connected to the chassis. The power and audio
cables can be jacketed in the same sheath without inducing noise to the input signal.
For best EMI immunity, it is desirable to use a twisted pair
shielded cable with the twisted pair connected to pins 2
and 3, and the shield to pin 1. However, an unshielded
twisted pair cable can be used effectively, even if it is
jacketed with the power cable.
The input is RF and ESD protected, capacitive coupled,
±50 V common mode to ground, +4 dBu nominal, +21 dBu
max. Clipping occurs at the input at 12 Vpk. The Common
Mode Rejection Ratio (CMRR) is greater than 80 dB.
The HM-1S Subwoofer
The low frequency response of an HM-1S can be extended
down to 42 Hz if used with the HM-1S Subwoofer or placed
next to a wall or ceiling (half-space loading). Each HM-1S
can power a subwoofer from the male 3-pin EN3 Sub
output connector on the rear panel. However, depending on
the loading conditions, ample low frequency energy may
be obtained by driving a single subwoofer from two HM1Ss, resulting in a correctly-summed mono signal. Cables
for connecting one HM-1S to a subwoofer and two HM-1s
to a single subwoofer are shipped with each HM-1S
Subwoofer.
The addition of one subwoofer increases the maximum
SPL of a single HM-1S by 4 dB (without sub: 116 dB SPL;
with sub: 120 dB SPL). The HM-1S Subwoofer has the
following specifications:
Transducer 10 low frequency cone driver
Enclosure/Finish Medium Density Fiberboard (MDF) /
Oak Veneer (natural or black)
Weight 33 lb (11.0 kg)
Dimensions Height: 17.5; Width: 12.3; Depth: 9.3
5
Page 6
HM-1S Speaker Cable
The following drawings and procedures are provided as
an aid in the event that the speaker cable used to connect
the HM-1S to the HM-1S Subwoofer needs to be repaired
or extended. In cases where the original speaker cable
has been modified, be sure to complete the Subwoofer
Performance Verification section on page 10 of this
manual. Misalignment of the polarity between the HM-1S
and the HM-1S Subwoofer will result in a serious degradation of performance.
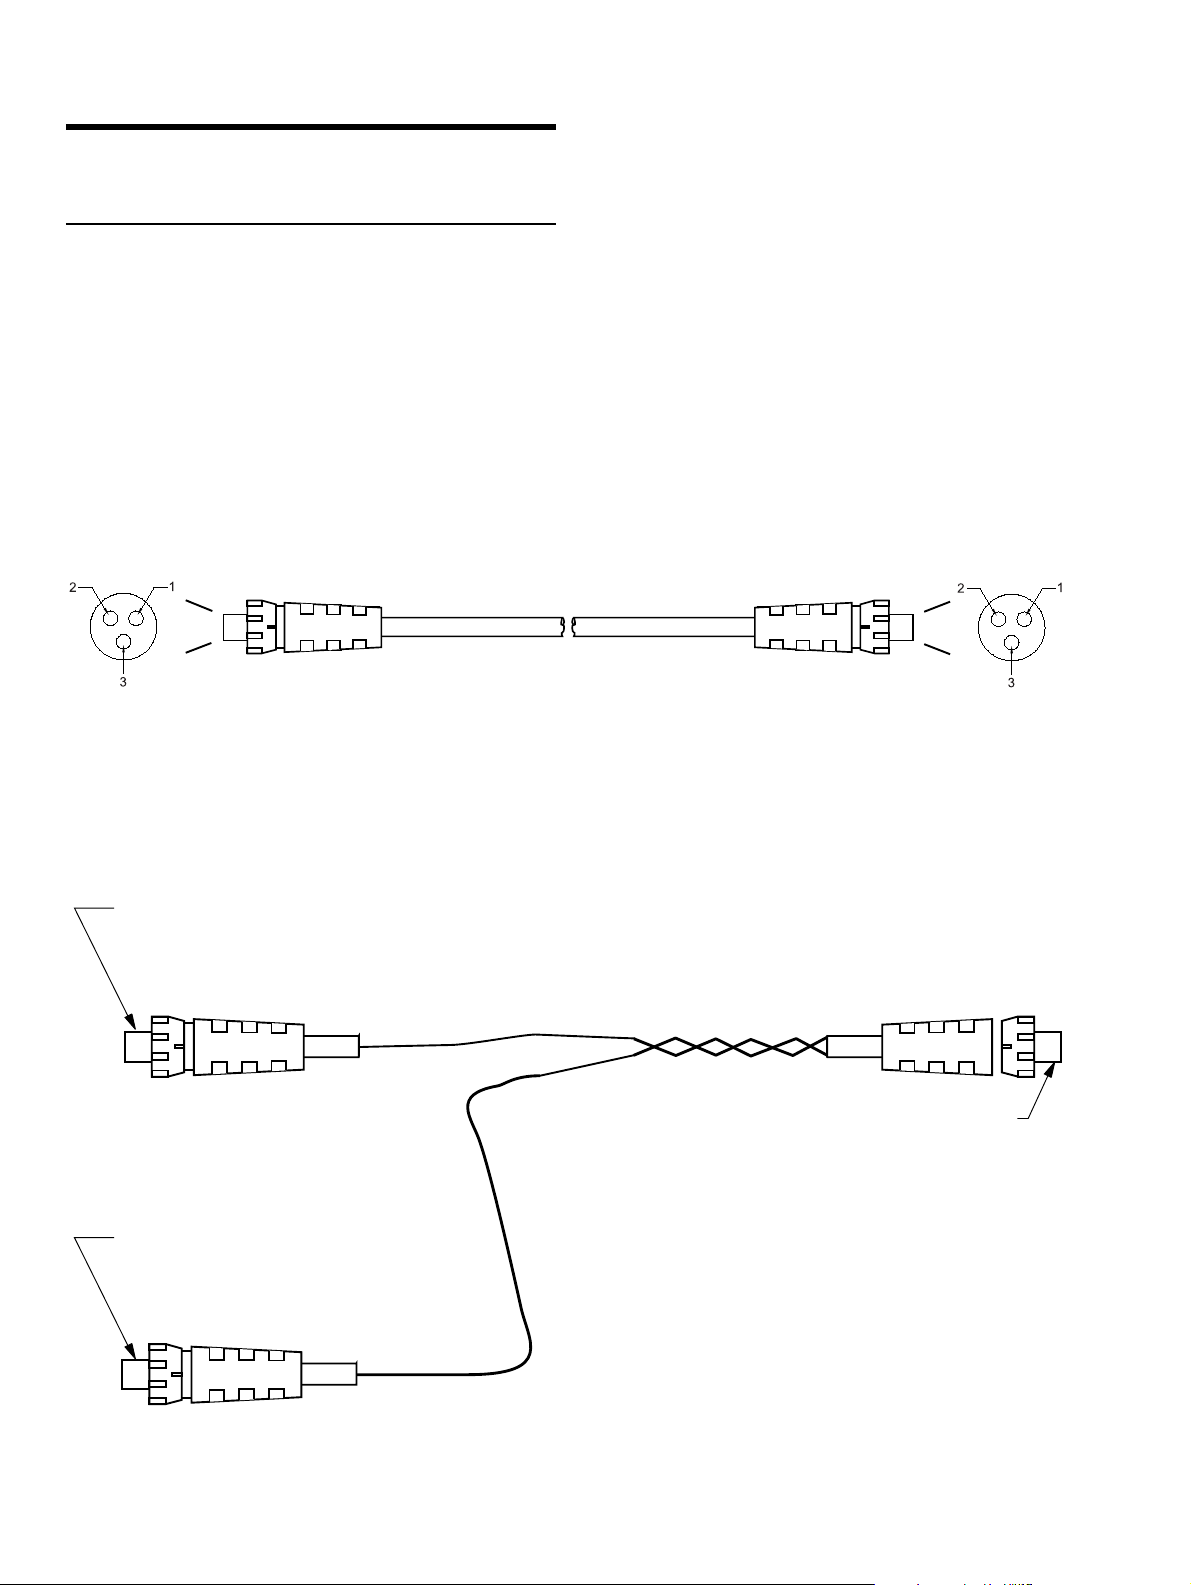
(Single HM-1S to HM-1S) Stereo Subwoofer Cable
M.S.P.N. 28.062.007.01
(2 HM-1S to 1 HM-1S) Mono Subwoofer Cable
Connections:
Gray wire to pin 1,
pin 2 no connection,
pin 3 no connection.
-
Connections:
pin 1 no connection,
pin 2 no connection.
White wire to pin 3.
+
M.S.P.N. 28.062.009.01
GRAY
Connections:
Gray wire to pin 1,
pin 2 no connection,
White wire to pin 3.
WHITE
6
Page 7

HM-1S to HM-1S Subwoofer Cable
Connector Assembly Procedure
Boot
Cable
Cable Clamp Housing
Coupling Ring
Cord Connector
Contact Pins
Step 1:
Feed the end of the cable through the boot, cable clamp housing,
and coupling ring in the order and position shown.
Cable
Cord Connector
3/8" Max.
7/32"
2
Contact Pins
Dot pin 1
indicator
1
3
Solder
3
1
9/32"
Step 2:
FOR STEREO CABLES: Strip cable as shown and begin soldering conductors to pins starting
with the Gray wire to pin 1, pin 2 no connection, and the White wire to pin 3.
FOR MONO CABLES: See wiring instructions on page 6.
Cord Connector
Tab
Cord Connector
Coupling Ring
Tab
Side notch
Step 3:
Align coupling ring's tabs with cord connector's side notches and push
the coupling ring onto cord connector.
Clamp
Step 4:
Push the cable clamp housing foward until it locks into the connector body
and snap the two clamps into their compartments.
Clamp
Lock
Step 5:
Push the boot all the way foward to seat tightly onto the cable clamp housing.
7
Page 8

Subwoofer Performance Verification
There are two methods of verifying that the phase relationship between the HM-1S and its subwoofer. One method is
free field, the other is a ground plane measurement in half space.
Free Field:
Place the HM-1S directly above and coplanar to the subwoofer as pictured below:
Place a calibrated measurement microphone 1 meter, on axis to the tweeter of the HM-1S as pictured below:
Using the noise or other broadband test signal, perform a transfer function of the HM-1S. Start with the subwoofer
disconnected.
8
Page 9

HM-1S on axis at 1 meter, free field.
This represents a typical response of the HM-1S in free-field environment, on axis at 1 meter. This measurement
was performed in the large anechoic chamber at MSLI.
Connect the subwoofer and measure the combined response of the system.
9
Page 10

HM-1S with in-phase subwoofer on axis at 1 meter, free field.
This represents a typical response of the HM-1S and subwoofer, in phase, in a free field environment on axis at 1
meter. This measurement was performed in the large anechoic chamber at MSLI. This response indicates a
complementary phase relationship between the HM-1S and subwoofer.
10
Page 11

If the subwoofer is out of phase, the combined response will have a significant loss of energy compared to the
overall response at around 82 Hz as illustrated below:
HM-1S with out-of-phase subwoofer on axis at 1 meter, free field.
11
Page 12

This represents a typical response of the HM-1S and subwoofer out-of-phase phase, in a free field environment onaxis at 1 meter. This measurement was performed in the large anechoic chamber at MSLI.
If your system response indicates a phase reversal please contact Meyer Sound Technical Support for assistance.
Half Space:
To verify the system performance in half space you must perform a ground-plane measurement. This type of
measurement is not desirable for system calibration and should only be used to verify the performance of the
subwoofer. Place the HM-1S next to the subwoofer on the flat ground and position the calibrated measurement
microphone one meter on axis from the tweeter of the HM-1S as pictured below:
Using noise or other broadband test signal, perform a transfer function of the HM-1S. Start with the subwoofer
disconnected.
12
Page 13

HM-1S on axis at 1 meter, ground plane.
This represents a typical ground-plane response of the HM-1S, on-axis at 1 meter. Keep in mind that any surface
close to the test space can create reflections which will change the response of the speaker.
Connect the subwoofer to the HM-1S and measure the combined response of the system.
13
Page 14

HM-1S with in-phase Subwoofer on axis at 1 meter, ground plane.
This represents a typical ground-plane response of the HM-1S and subwoofer, in phase, at 1 meter. This response
indicates a complementary phase relationship between the HM-1S and subwoofer.
14
Page 15

If the subwoofer is out of phase the combined response will have a significant loss of energy compared to the
overall response at around 82 Hz as illustrated below:
HM-1S with out-of-phase Subwoofer on axis at 1 meter, ground plane.
This represents a typical ground plane response of the HM-1S and subwoofer out-of-phase, in a ground plane
environment on axis at 1 meter. If your system response indicates a phase reversal please contact Meyer Sound
Technical Support for assistance.
15
Page 16

Cooling and Fan Installation
The HM-1S depends on natural convection to cool the
heatsinks that absorb heat from the amplifiers and radiate
the heat into the surrounding air space. Natural convection
requires free air in back of, and underneath the HM-1S to
allow air to flow up over the heatsinks. The HM-1S reaches
an equilibrium temperature in approximately 15 minutes
at a steady operating level.
In free air, at a typical room temperature of 25°C, the HM1S reaches an equilibrium temperature of
40°C in a quiescent state (no audio signal);
60°C at a moderate operating level (occasional
limiting);
75°C at the maximum operating level (continuous
limiting), or at a moderate level with a subwoofer.
If the temperature reaches 85°C, the thermal limiters
activate (see Protection and Limiting) to prevent high
source levels from further increasing the temperature
and damaging the drivers and electronics. The thermal
limiters provide 30 dB of muting until the temperature
decreases to 75°C.
The fans attach easily to the two bottom rear corners of
the HM-1S. Use a 5/32 Allen wrench to remove the bottom
screws and install the left and right fans according to the
diagram below. The fans are shipped with a terminal plug
keyed for insertion into the 2-pin fan output connector in
the proper orientation only.
The fan speed is temperature controlled. At a heatsink
temperature of 25°C, the fans turn on at half speed and
increase speed linearly until reaching full speed at
75°C.
Protection and Limiting
The front of the HM-1S has two LEDs that indicate power and
limiter activity. The right LED is green when power is applied. This LED turns red if thermal limiting occurs (described in the section Cooling and Fan Installation) until the
temperature decreases to 75°C.
The left LED indicates driver limiter activity with a variable intensity red color; full illumination occurs at thermal
limiting.
The HM-1S can be cooled by two fans, available as an
accessory kit. The fans should be used if:
the HM-1S is enclosed in a soffit or ceiling mount
without adequate space for natural convection;
the HM-1S is used in hot ambient temperatures or
direct sunlight;
the user wishes to avoid accidental contact with the
heatsinks if the rear of the HM-1S is exposed.
Rigging
!
Do not drill into the HM-1S Cabinet.
The HM-1S is not designed for use with rigging systems.
For rigging needs, Use the Standard Contractors version
HM-1 cabinets which can be easily fitted for omni- mounts,
and other rigging options.
Installed fans blow air over the heatsink
16
Page 17

Safety Summary
English Français
To reduce the risk of electric shock, disconnect the loud-
speaker from the AC adapter before installing audio cable.
Reconnect the adapter only after making all signal connections.
Connect the AC adapter to a two-pole, three wire grounding
mains receptacle. The receptacle must be connected to a
fuse or circuit breaker. Connection to any other type of
receptacle poses a shock hazard and may violate local
electrical codes.
Do not install the loudspeaker in wet or humid locations.
Do not allow water or any foreign object to get inside the
loudspeaker. Do not put objects containing liquid on, or
near, the unit.
To reduce the risk of overheating the loudspeaker, avoid
exposing it to direct sunlight. Do not install the unit near
heat emitting appliances, such as a room heater or stove.
This loudspeaker contains potentially hazardous voltages.
Do not attempt to disassemble the unit. The unit contains
no user serviceable parts. Repairs should be performed
only by factory trained service personnel.
!
Pour réduire le risque délectrocution, débranchez la prise
principale de lhaut-parleur, avant dinstaller le câble
dinterface allant à laudio. Ne rebranchez le bloc
dalimentation quaprès avoir effectué toutes les connections.
Branchez lhaut-parleur dans une prise de courant à 3
dérivations (deux pôles et la terre). Cette prise doit être
munie dune protection adéquate (fusible ou coupe-circuit).
Le branchement dans tout autre genre de prise pourrait
entraîner un risque délectrocution et peut constituer une
infraction à la réglementation locale concernant les installations électriques.
Ne pas installer lhaut-parleur dans un endroit où il y a de
leau ou une humidité excessive.
Ne pas laisser de leau ou tout objet pénétrer dans lhaut-
parleur. Ne pas placer de r´cipients contenant un liquide
sur cet appareil, ni à proximité de celui-ci.
Pour éviter une surchauffe de lhaut-parleur, conservez-la
à labri du soleil. Ne pas installer à proximité dappareils
dégageant de la chaleur tels que radiateurs ou appareils
de chauffage.
Ce haut-parleur contient des circuits haute tension
présentant un danger. Ne jamais essayer de le démonter.
Il ny a aucun composant qui puisse être réparé par
lutilisateur. Toutes les réparations doivent être effectuées
par du personnel qualifié et agréé par le constructeur.
Deutsch Español
Um die Gefahr eines elektrischen Schlages auf ein Minimum
zu reduzieren, den Lautsprecher vom Stromnetz trennen,
bevor ggf. ein Audio-Schnittstellensignalkabel
angeschlossen wird. Das Netzkabel erst nach Herstellung
aller Signalverbindungen wieder einstecken.
Der Lautsprecher an eine geerdete zweipolige Dreiphasen-
Netzsteckdose anschließen. Die Steckdose muß mit einem
geeigneten Abzweigschutz (Sicherung oder
Leistungsschalter) verbunden sein. Der Anschluß der
unterbrechungsfreien Stromversorgung an einen anderen
Steckdosentyp kann zu Stromschlägen führen und gegen
die örtlichen Vorschriften verstoßen.
Der Lautsprecher nicht an einem Ort aufstellen, an dem
sie mit Wasser oder übermäßig hoher Luftfeuchtigkeit in
Berührung kommen könnte.
Darauf achten, daß weder Wasser noch Fremdkörper in
das Innere den Lautsprecher eindringen. Keine Objekte,
die Flüssigkeit enthalten, auf oder neben die
unterbrechungsfreie Stromversorgung stellen.
Um ein Überhitzen dem Lautsprecher zu verhindern, das
Gerät vor direkter Sonneneinstrahlung fernhalten und nicht
in der Nähe von wärmeabstrahlenden Haushaltsgeräten
(z.B. Heizgerät oder Herd) aufstellen.
Im Inneren diesem Lautsprecher herrschen potentiell
gefährliche Spannungen. Nicht versuchen, das Gerät zu
öffnen. Es enthält keine vom Benutzer reparierbaren Teile.
Reparaturen dürfen nur von ausgebildetem
Kundenienstpersonal durchgeführt werden.
Para reducir el riesgo de descarga eléctrica, desconecte
de la red el altoparlante antes de instalar el cable de
señalización de interfaz de la segnale. Vuelva a conectar
el conductor flexible de alimentación solamente una vez
efectuadas todas las interconexiones de señalizatción.
Conecte el altoparlante a un tomacorriente bipolar y trifilar
con neutro de puesta a tierra. El tomacorriente debe estar
conectado a la protección de derivación apropiada (ya
sea un fusible o un disyuntor). La conexión a cualquier
otro tipo de tomacorriente puede constituir peligro de
descarga eléctrica y violar los códigos eléctricos locales.
No instale el altoparlante en lugares donde haya agua o
humedad excesiva.
No deje que en el altoparlante entre agua ni ningún objeto
extraño. No ponga objetos con líquidos encima de la
unidad ni cerca de ella.
Para reducir el riesgo de sobrecalentamiento, no exponga
la unidad a los rayos directos del sol ni la instale cerca de
artefactos que emiten calor, como estufas o cocinas.
Este altoparlante contiene niveles de voltaje peligrosos
en potencia. No intente desarmar la unidad, pues no
contiene piezas que puedan ser repardas por el usuario.
Las reparaciones deben efectuarse únicamente por parte
del personal de mantenimiento capacitado en la fábrica.
17
Page 18

Rear Panel Connectors
Audio Input Signal
(female XLR)
Fan Output
(2-pin terminal plug)
6 A
Circuit Breaker
Dimensions
All units in inches
HM-1S Front HM-1S Side HM-1S Top HM-1S Sub Front HM-1S Sub Side
HM-1S weighs 11.0 lb (5.0 kg);
HM-1S Subwoofer weighs 33 lb (15 kg)
Meyer Sound Laboratories, Inc.
2832 San Pablo Avenue
Berkeley, California 94702
Telephone: 510 - 486 - 1166
FAX: 510 - 486 - 8356
E-mail: techsupport@meyersound.com
http://www.meyersound.com
18
Meyer Sound Germany GmbH
Carl Zeiss Strasse 13
D-56751 Polch
Germany
Telephone: 26 54 96 00 58
FAX: 26 54 96 00 59
E-Mail: meyersound@t-online.de
 Loading...