

Page 1
Bristol-72 MF 72TL68
Bristol-82 MF 82T
Operating instructions
04/39/23
L95
604 47 2017.A1
Page 2

Foreword
Contents
Dear customer,
thank you for selecting a Metz
TV set with perfect 100 Hz technology.
We have equipped this TV set
with a menu system which uses
"file cards" and believe that this
will provide you with a user
interface that is easy to understand.
If you have any problems, you
can press the "INFO" key to
display a help function that will
assist you in setting up your TV
set.
However, you should read at
least sections 1 to 8 of the
Operating Instructions before
putting your new TV set into service.
Your METZ-WERKE
1. Installation . . . . . . . . . . . . . . . . . . . . . . . . . . . 3
2. Safety notes . . . . . . . . . . . . . . . . . . . . . . . . . . 4
3. Remote control unit . . . . . . . . . . . . . . . . . . . . . 6
4. Daily operating . . . . . . . . . . . . . . . . . . . . . . . 8
5. Setting the operating mode . . . . . . . . . . . . . . . 8
6. Selecting stations . . . . . . . . . . . . . . . . . . . . . . 9
7. Help function (Information) . . . . . . . . . . . . . . 10
8. Using the menü . . . . . . . . . . . . . . . . . . . . . . 11
Basic functionsExtended functionsConfiguration
9. Teletext . . . . . . . . . . . . . . . . . . . . . . . . . . . . 12
10. AV playback . . . . . . . . . . . . . . . . . . . . . . . 15
10.1 Copying between AV devices. . . . . . . . . . . 17
11. Picture settings, general. . . . . . . . . . . . . . . . 18
11.1
Picture settings for a specific programme posi
12 Sound settings, general . . . . . . . . . . . . . . . . 21
12.1
Sound settings for a specific programme position
13. Colour standard . . . . . . . . . . . . . . . . . . . . . 23
14. Automatic zoom. . . . . . . . . . . . . . . . . . . . . 24
15. Childlock . . . . . . . . . . . . . . . . . . . . . . . . . . 25
16. Reminder . . . . . . . . . . . . . . . . . . . . . . . . . . 27
17. Timer control . . . . . . . . . . . . . . . . . . . . . . . 28
18. Special function, picture format . . . . . . . . . . 30
18. Special function, Zoom . . . . . . . . . . . . . . . . 31
Special function, picture position . . . . . . . . . 31
19. EPG - NexTView. . . . . . . . . . . . . . . . . . . . . 32
19.1
Activating the EPG NexTView
19.2 Collecting NexTView data. . . . . . . . . . . . . 34
19.3 Using
20.
Setting the language and country
21. Programming stations . . . . . . . . . . . . . . . . . 39
22. Stationlogo . . . . . . . . . . . . . . . . . . . . . . . . 42
23. Sorting stations. . . . . . . . . . . . . . . . . . . . . . 43
24. AV devices . . . . . . . . . . . . . . . . . . . . . . . . . 44
25. Inital programme position . . . . . . . . . . . . . . 47
26. Setting the operating scope . . . . . . . . . . . . . 48
27. Operation without the remote control unit. . . 50
28. Technical data . . . . . . . . . . . . . . . . . . . . . . 51
29. Options . . . . . . . . . . . . . . . . . . . . . . . . . . . 52
30. Connecting headphones . . . . . . . . . . . . . . . 53
31. Cleaning the TV set. . . . . . . . . . . . . . . . . . . 53
32. Glossary . . . . . . . . . . . . . . . . . . . . . . . . . . 54
NexTView
. . . . . . . . . . . . . . . . . . . . 35
. . . . . . . . . . . . 33
. . . . . . . . . . . . . 38
tion20
Troubleshooting. . . . . . . . . . . . . . . . . . . . . 57
Index. . . . . . . . . . . . . . . . . . . . . . . . . . . . . 60
22
2
Page 3
1. Installation
• Take care that no bright artificial light or sunshine falls directly on the screen. This could cause
reflections which have a negative effect on the
brilliance of the picture.
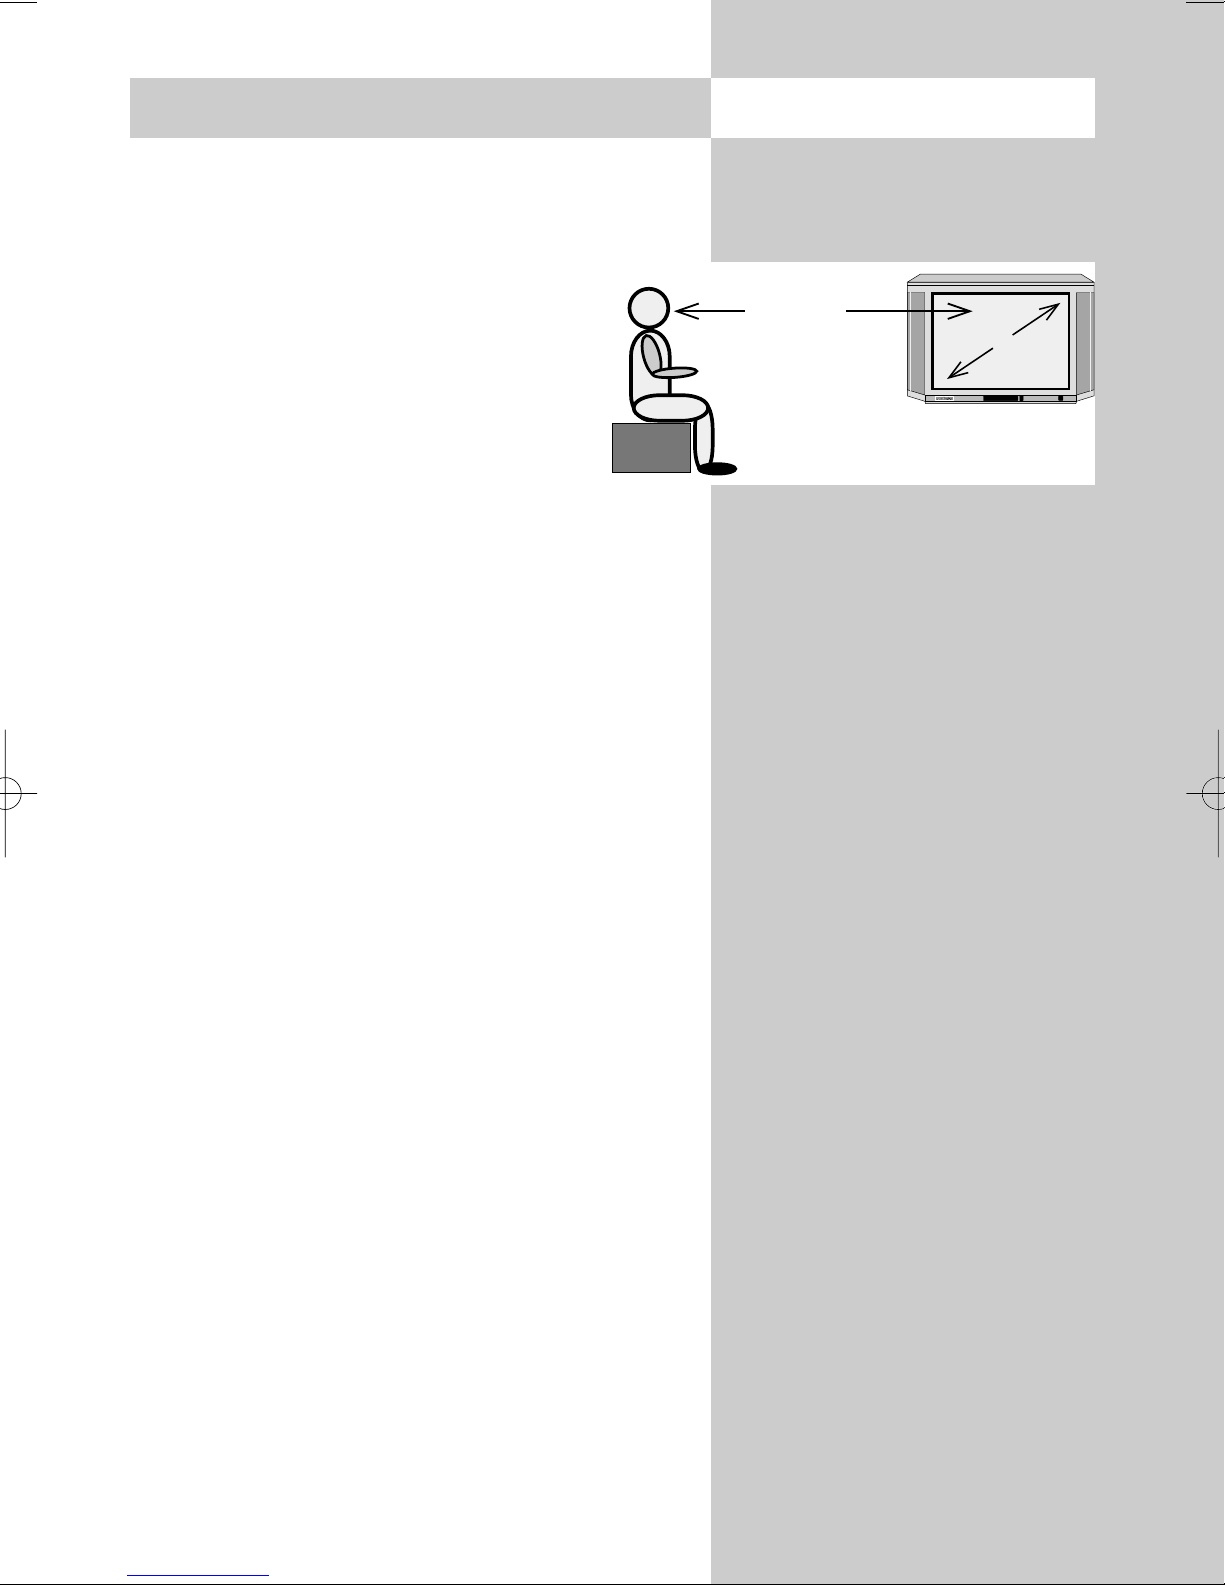
• The optimum viewing distance is about
five times the screen diagonal dimension. For TV sets with a 70 cm screen, it
is thus about 3.5 metres.
• The antenna cable and any other components
(such as a video recorder) connected between
the antenna socket in the wall and the TV set
must comply with the European standard
EN 60966-2-4.
5 x cm
cm
y
• There may be no magnetic fields in the immediate vicinity of the TV set. Keep loudspeaker
boxes well away from the set.
• The antenna cable used for connecting the TV
set must have a screening attenuation of at least
75 dB.
• The use of non-approved cables will invalidate
the operating permission for the TV set.
• For details of how to connect peripheral devices
such as video recorders, DVD players, etc. press
the „INFO“ key to call the help function, select
„Connecting AV devices“ with the cursor and
press „OK“ to display the information.
3
Page 4
2. Safety notes
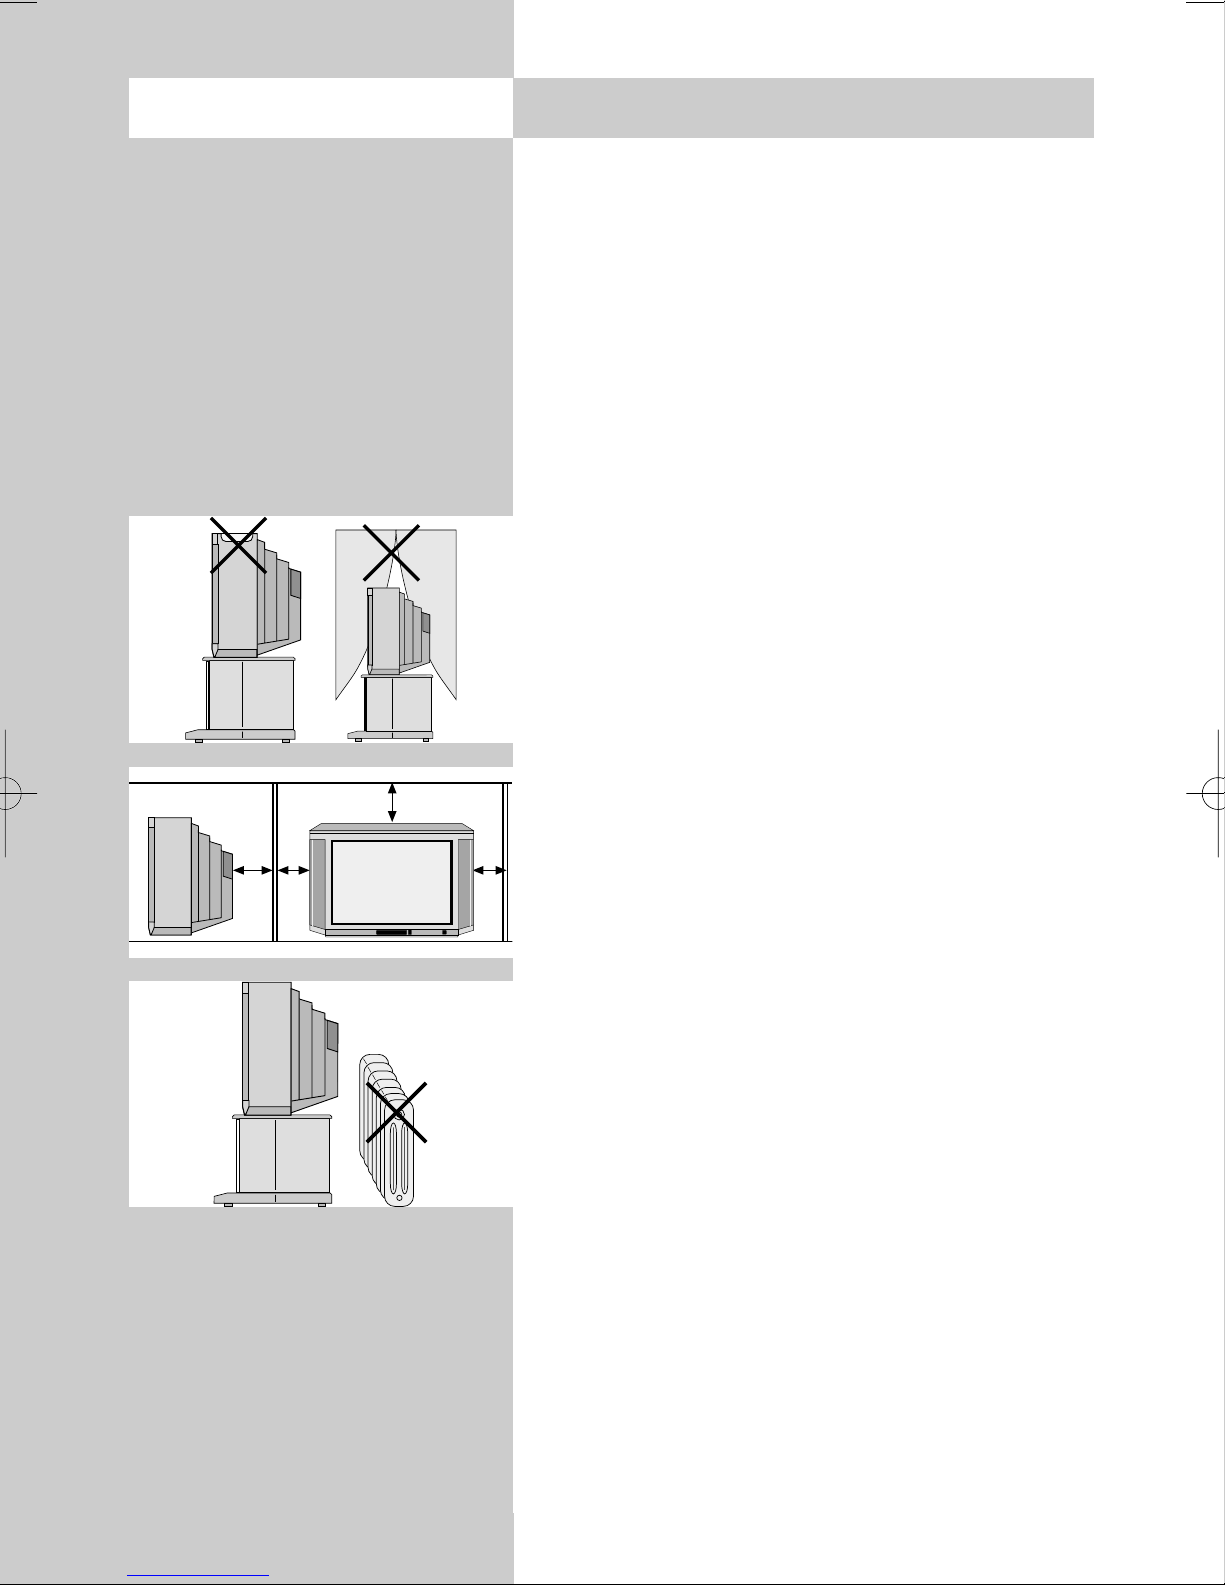
• Always place the monitor on a solid, stable surface.
• If a cold TV set is moved to a warm room,
always allow any condensation on the screen to
evaporate before switching it on.
• The TV set is intended for use in a dry room. If,
in exceptional circumstances, you use it outdoors, take care that is protected against moisture (rain, splashed water, dew).
• TV sets need adequate ventilation. Never cover
the openings on the rear of the set with curtains,
doilies, newspapers, etc. Also take care that the
slits in the bottom of the case are freely accessible so that the intake of the cooling air is not
hindered.
• If you place the TV set in a wall unit, leave suffi-
y
cient space on all sides for the circulation of
cooling air.
• Do not place the TV set close to a radiator, since
this would effect adequate cooling.
• Do not place
burning candles or
vessels containing liquids (vases, etc.)
on top of the TV set, since any hot wax or water
dripping into the set could cause serious damage
to the electronic components and could also jeopardize the electrical safety of the set.
4
Page 5
2. Safety notes
• Lightning can damage electrical equipment. A
lightning flash entering the power cable or the
aerial cable can damage the TV set even if it is
switched off. You should therefore disconnect
the power cable and aerial cable from their outlets or from the TV set in the case of a thunderstorm.
• The monitor may be opened and repaired only
by a qualified person.
CAUTION! HIGH VOLTAGES CAN KILL!
If repairs should be necessary, consult your
local dealer.
• Always switch off the TV set before cleaning it.
• Do not hold the remote control directly in front
of your eyes and press a button. The remote
control emits infrared radiation!
• Do not place rechargeable batteries in the battery compartment of the remote control.
Use only two 1.5 V dry batteries of the type
LR03/AM4/AAA (Micro).
• The TV set is intended only for the reception and
reproduction of picture and sound signals.
• The TV set may be operated only from a mains
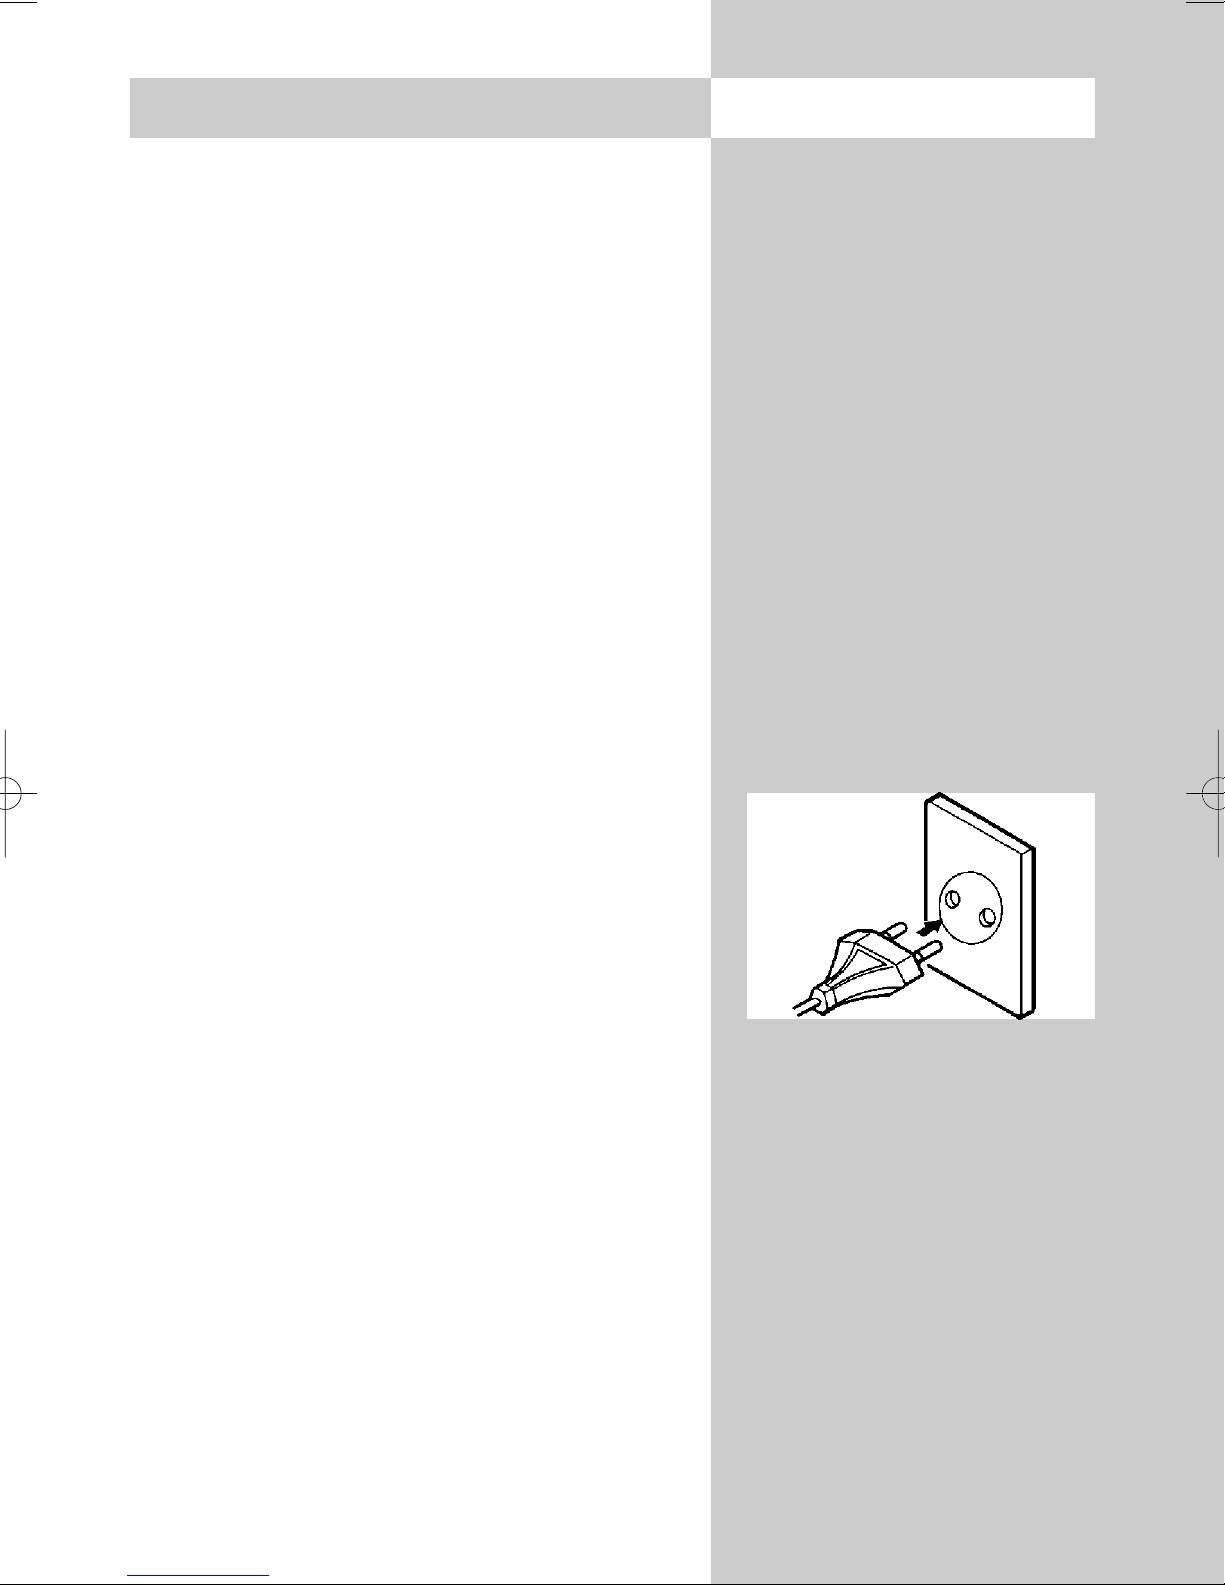
voltage of 230 VAC, 50/60 Hz.
Australia: 240 VAC.
• Lay the power cable so that nothing stands on it
and no-one can trip over it.
5
Page 6

3. Remote control unit
The remote control unit transmits commands to the TV set with the aid of infra-
red light. You should always point the
remote control unit directly at the TV set.
The remote control unit may possibly
interfere with other infrared devices (such
as infrared headphones) within its range.
Sunlight falling directly on the TV set may
interfere with the operation of the remote
control unit, because the TV set cannot
detect the infrared signals from it. The TV
set must first be switched on with the
main switch before the remote control unit
can be used.
The most important keys in normal
use
ON:
with programme position 1 or the programmed initial programme position
selected.
OFF (standby)
Numeric keys (direct station selection)
P+ / P-: next/previous programme
position
Volume control
Also used to change settings in the
menu
6
Return to previously selected program-
me position
Display the station table
Never load rechargeable batteries
into the battery compartment of the
remote control unit!
Only use two 1.5V LR03/AM4 batteries, size AAA.
Page 7

3. Remote control unit
Overview of key functions
Switch to satellite radio mode
Switch on from standby mode to satellite radio mode
1)
(
only if a SAT upgrade module is fitted)
Function keys F1 ... F3
Press F1 or F3 briefly to return all settings to the factory defaults
Press F1 or F3 longer to display the available special functions
Press F2 to change the sound settings
Cursor control key in the „Information“ and the TV menu
OK - confirmation key
Change settings in the TV menu
Sound mute
Call the TV menu
In the menu: return to the previous main menu item
1)
Call Teletext
Call the „Information“
In the „Information“: return to the contents
Frame freeze
In the „AV devices“ menu: delete
Return to previously selected programme position
In the TV menu: call „Configuration“
Display date and time
In the TV menu: call „Timer“
In the TV menu: call the „Station table“ or display station attributes
Call the sound settings
In the TV menu: call „AV devices“
Call the picture settings
In the TV menu: call „Picture and sound“
Return to the TV picture
Switch from satellite radio mode
standby mode to TV mode (
1)
to TV mode Switch on from
1)
only if a SAT upgrade module is fitted)
AV playback/record menu
Switch on from standby mode to AV mode
7
Page 8

4. Daily operation
Switching on
Switch on the TV set with the main
switch. The red standby indicator lights.
Then enter the desired programme position on the numeric keys of the remote
control unit.
If you have defined an initial programme position (see page 46), pressing the
key with the TV set in standby mode
will select this programme position.
Switching off
Press the key to switch the TV set to
standby mode or press the main switch
on the TV set to switch it off completely.
Adjusting the volume
You can adjust the volume with the
key.
+
-
Adjusting picture and sound settings
Call the picture settings with the blue key
or the sound settings with the yellow
key .
At the bottom left of the screen, you will
then see the setting box with the various
functions. Select the desired function
with the rocker key „P+/P-“ and adjust
the setting with the
+
key.
-
TV AV R
8
5. Setting the operating mode
The TV set can be switched on at the desired operating level with the keys "TV", "AV" and "R".
These keys can also be used to switch between the
operating levels.
When the TV set is switched on with one of these
keys, the station which was last selected at this
operating level is again set.
TV = television mode
AV = audio-visual mode for use with AV devices
R = radio mode
(1)available only if a SAT receiver is installed)
1)
Page 9
6. Selecting stations
Station selection and programme position management
Your TV set can manage up to 999 programme
positions in the station table. You can select these
programme positions with the numeric keys, with
the oval „P+/P-“ rocker key or via the station
table.
When you enter a position number on the numeric keys, the first digit you enter is the „hundreds“
digit. If there are less than 100 programme positions defined, this digit automatically moves to the
„tens“ position. If less than 10 programme positions exist, it automatically moves to the „ones“
position.
Call the menu
After pressing any numeric key, you have three
seconds to enter further digits.
Selecting programmes from the station
table
In normal TV mode, you can open the
station table with the white key . In
the table which is then displayed, you
can select a station with the oval „P+/P-“
rocker key. Then press the „OK“ key to
switch to this station.
If more than 20 stations are stored in the
station table, you can display the next
10 stations by pressing the oval cursor
control key.
14 MDR
13 Nord 3
12 RTL
11 SAT 1
10 Nord 3
9 SuperRTL
8 Kabel 1
7 PRO 7
6 West 3
5 Hessen 3
4 SW-BW
3 Bayern 3
2 ZDF
1 ARD
Return to previous station
With the red key , you can switch back and
forth between the last two stations you selected.
OK
9
Page 10
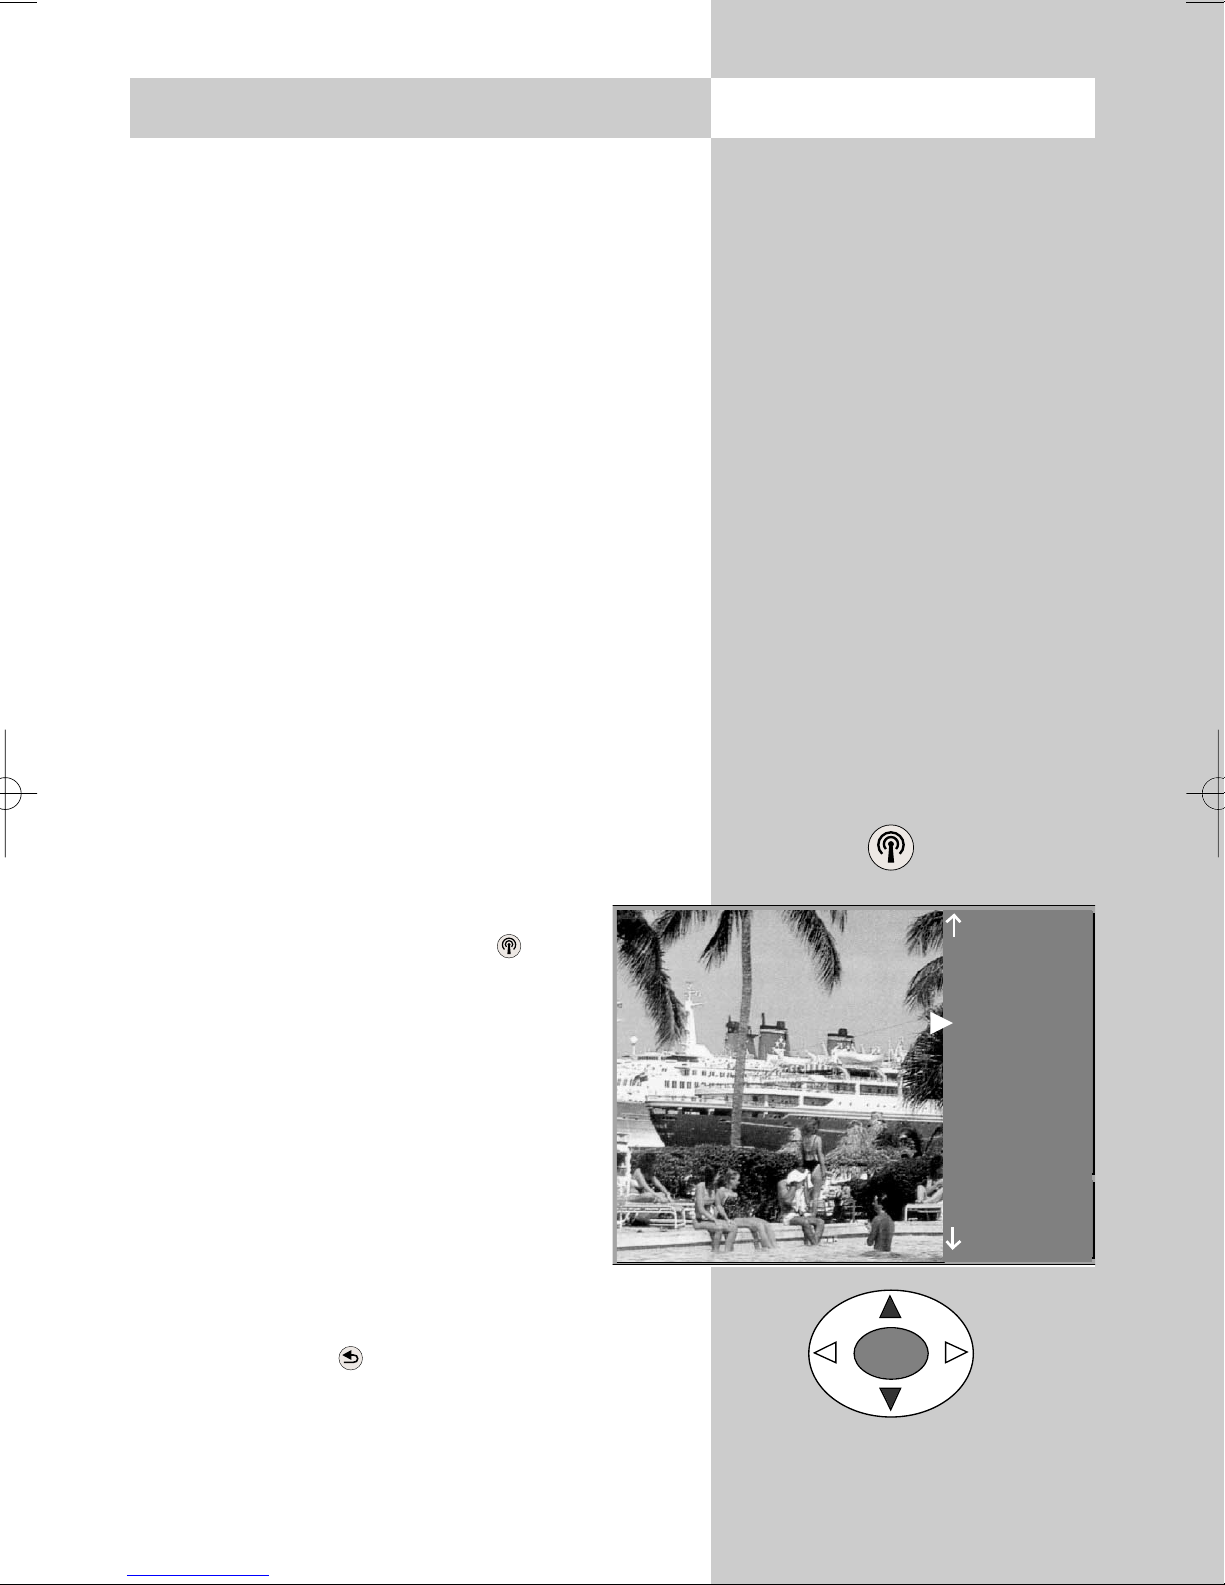
Call the info
7. Help function (Information)
When designing this TV set, we have tried to
make its operation as easy as possible so that
you will enjoy learning how to use it.
The TV set itself can provide the answers, with the
menu „Information“, to any questions you may
have during installation and switching on.
To use this function, simply press the „INFO“ key
INFO
to display the table of contents of the
„Information“ on the screen.
The menu „Information“ (help function)
In the table of contents, or in the index, you can
then select the information you need with the cur-
Information
Contents (1/2)
Index
Programme selection
Pictures settings
Sound settings
AV playback / recording / satellite recording
Teletext
Function keys
Satellite radio mode
Use the cursor to select an underlined text.
OK: further information INFO: help index
Previously visited pages: backwards forwards
>
--
sor control key.
„Cursor right“ : move to next page of the
index.
„Cursor left“ : scroll backwards through
the index.
„Cursor up“ : select the previous underlined text or the arrow -->.
„Cursor down“ : select a line in the list.
Then press the „OK“ key to display this
information.
You can select any underlined words in the
OK
10
table of contents, the index or the explanatory text with the cursor and press „OK“ in order
to display further information about them.
You can scroll back and forth through previously
selected help pages with the aid of the red and
green keys.
Page 11
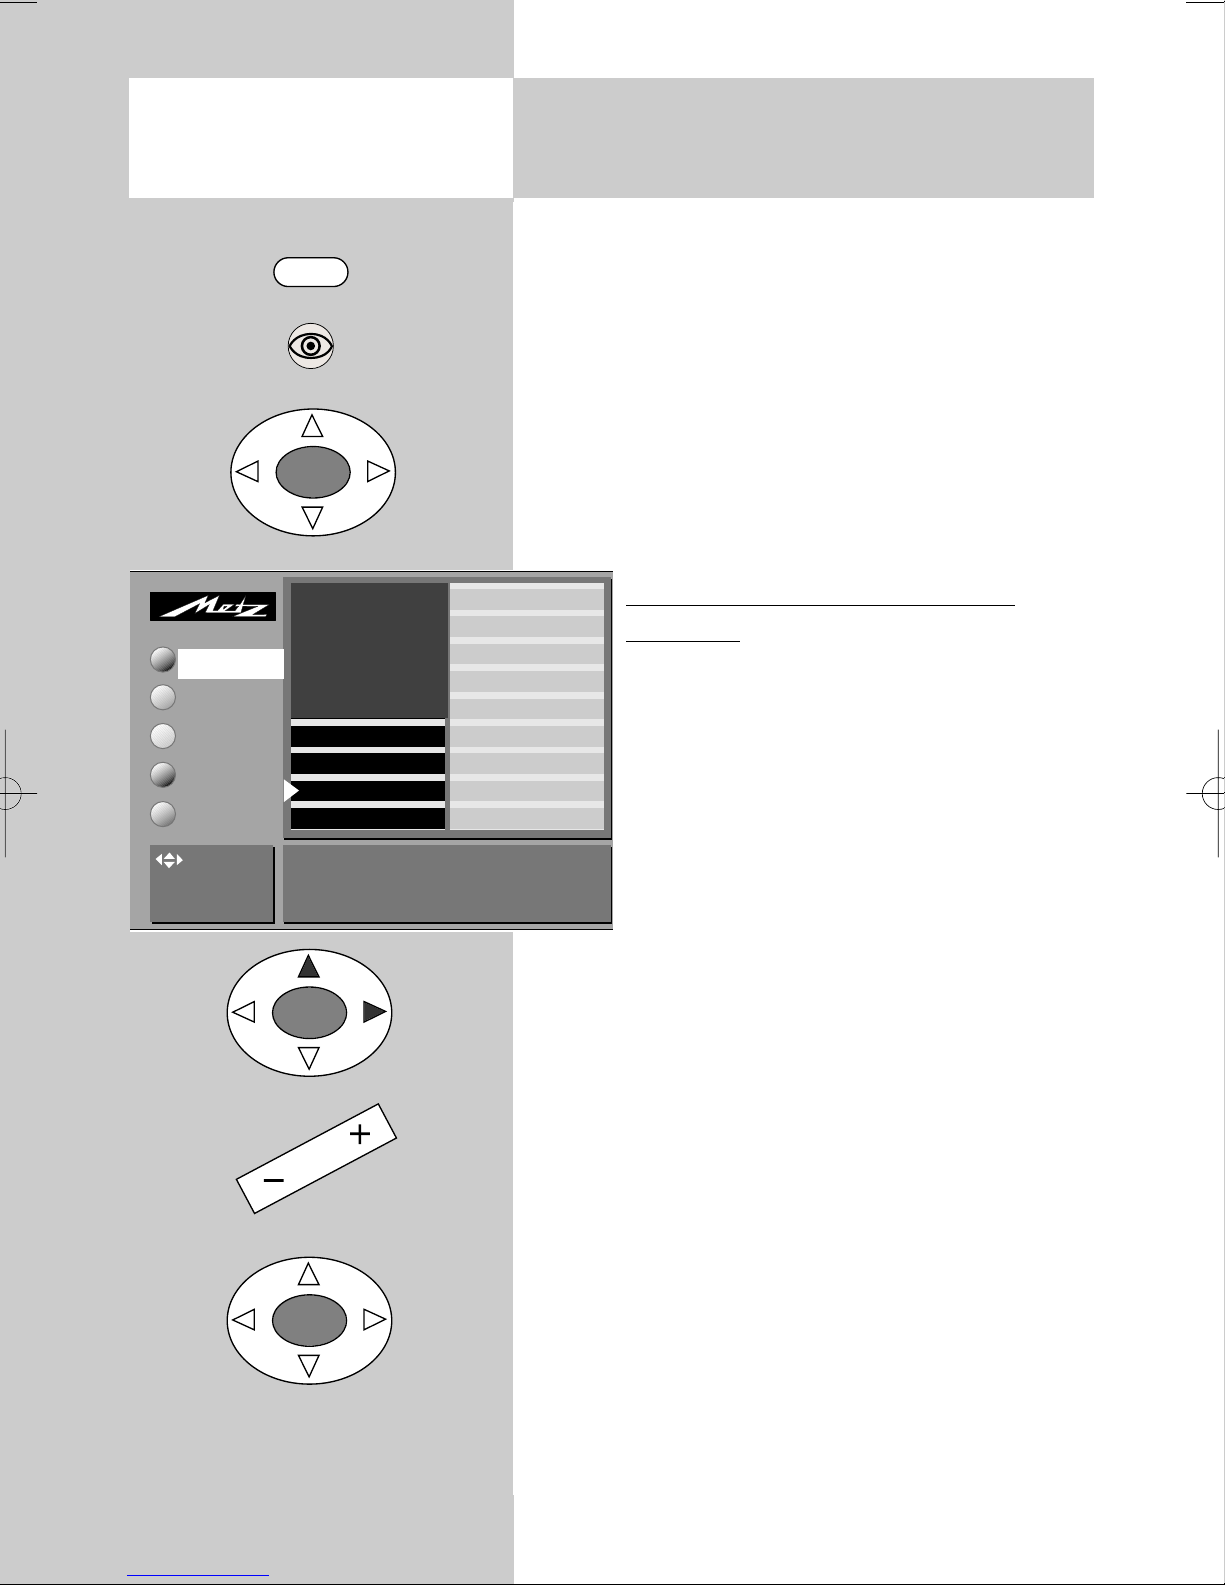
8. Using the menus Call the menu
With the „TV menu“, we help you to find your
way through the many operating functions of
your TV set.
Do not hesitate to try out the options in the
various menus. Any changes you make become
permanently effective only if you save
them by pressing the „OK“ key. If you
are not sure that you want to retain a
new setting, you can simply exit from
the menu by pressing the „TV“ key. The
new setting is then discarded.
While you are in the TV menu, you can
return to the main menu item
at any
time by pressing the „MENU“ key. If you
do not understand a menu item, press
the „INFO“ key for more information.
Picture-Volume
AV devices
Station table
Timer
Configuration
Coloured keys:
call menü
TV: return to TV
picture
TV-Menü
To return to the menu, press the „INFO“
key twice.
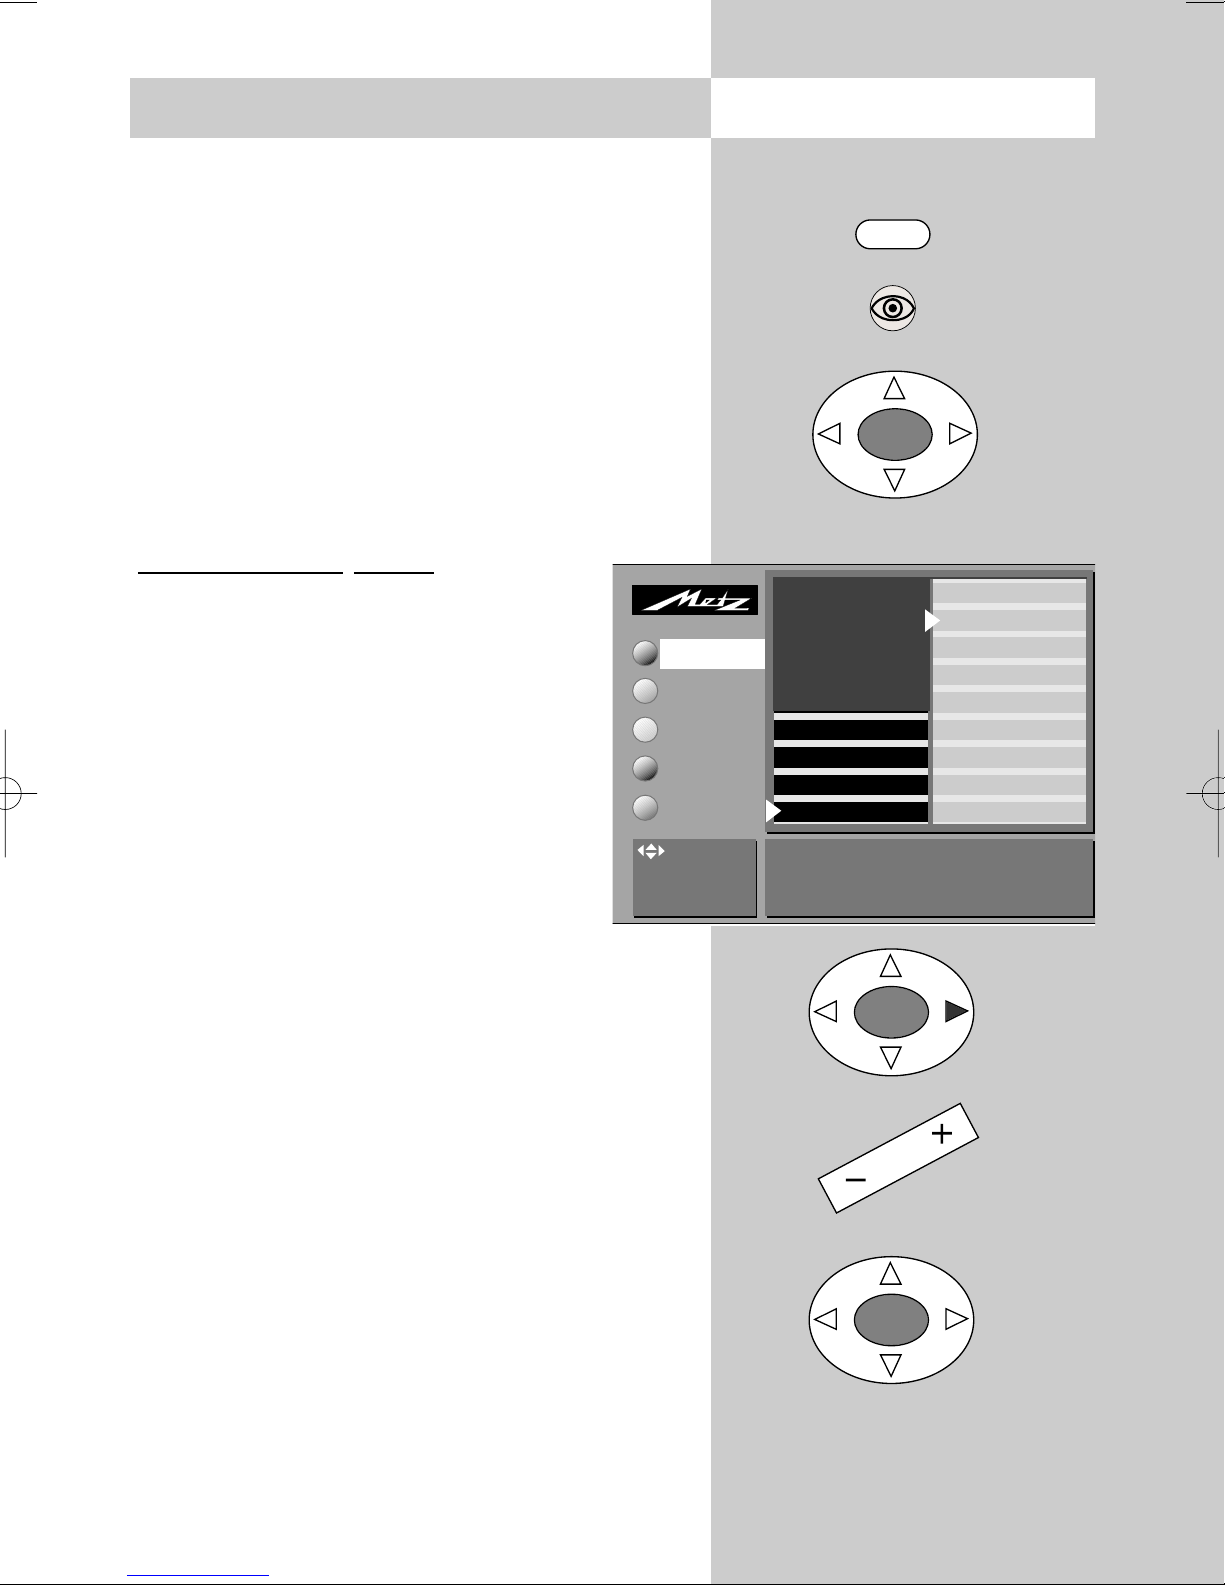
The five main sections of the menu can be opened
MENU
Main menu items
OK
with the coloured keys. The help information is
shown in the form of two card files containing the
subjects
(blue) and the sections of the selected
subject (yellow). You can select the subjects and sections with the aid of the red
triangular cursor, which is moved with
the oval key.
Pressing the „OK“ key then moves you to
the setting window
below the file boxes.
The current setting is displayed here and
+
you can change it with the
key.
-
To save the new setting, press the „OK“
key. This also returns you to the file of
yellow section cards. If you do not want
Picture-Volume
AV devices
Station table
Timer
Configuration
: select
menu item
TV-Menü
to save the new setting, press the „MENU“ key to
return to the related main menu item or press the
„TV“ key to exit from the menu.
Subjects*
Sound set.prog.po
Sound settings, gen.
Pict. set.,prog. posn.*
Pict. settings, gen.
These settings apply to all programme positions.
Sections*
Picture pos., vertica
Panorama
CTI
Comb filter
Noise reduction
Picture sharpness
Colour intensity
Contrast
Luminance
Cursor Setting window
You can delete your input by pressing the ll key.
* The number of subjects and sections
displayed here depends on the operating scope setting in the menu.
11
Page 12
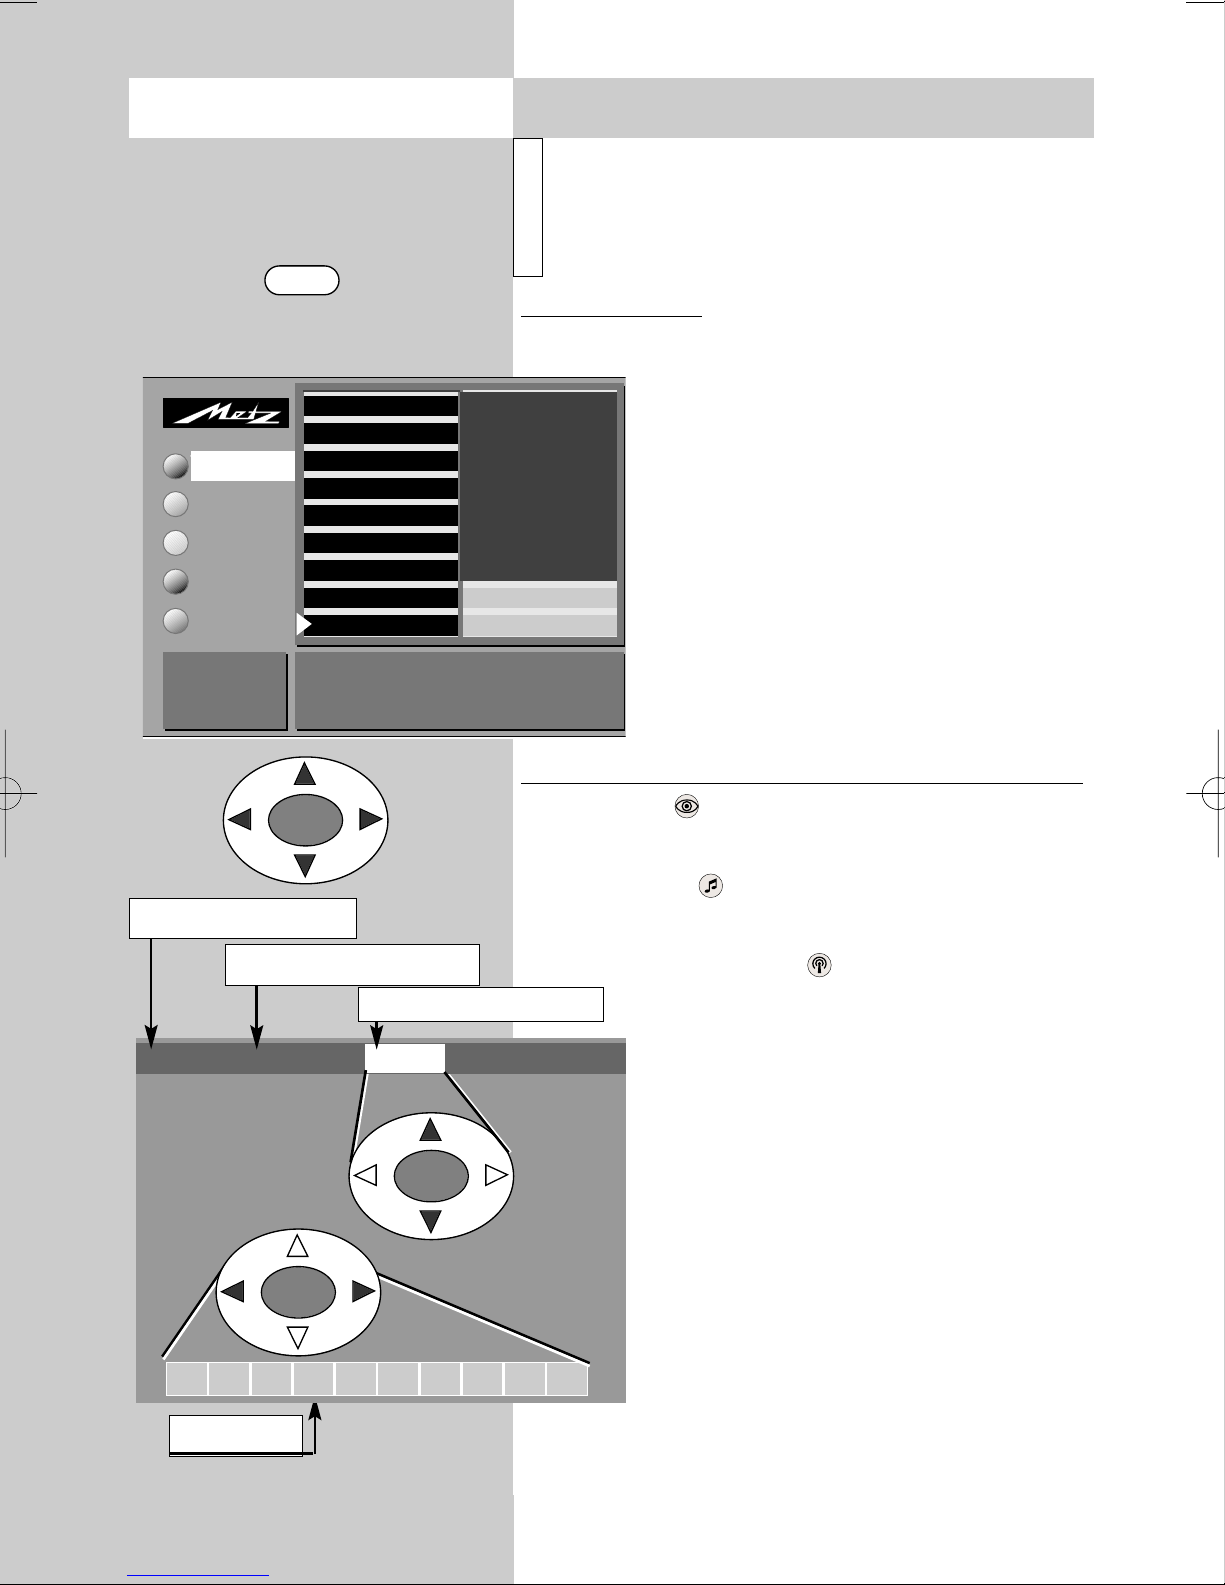
TEXT
9. TeletextCall the menu
Teletext is a free information service provided
by many TV stations. Within this „electronic
i
newspaper“, you can scroll through the pages
in various ways.
Themen
Subjects
Chapter
Pages
Next BookMark
Set
BookMark
Cursor: select
Subjects / Section.
OK: display page
TV-Menü
TV Guide 2
FS-Sendungen
ARD morgen
ARD heute
TV Guide
Sport 1
Wetter
tagesschau
Übersicht
OK
Calling T
eletext:
• Press the „TEXT“ key.
If the station you are watching transmits „TOP“ teletext, two file-card boxes
are displayed (see the picture on the
left). Otherwise, page 100 appears
(see the lower picture).
• In the case of „TOP“ stations, you
Impressum
Inhalt
can select a file card with the cursor
control key.
• After selecting a card, press „OK“ to
open it.
Controlling Teletext when the pages are displayed directly:
The blue key is used to preselect the subject
selection function.
The yellow key is used to preselect the section
Blue preselection key
Yellow preselection key
White preselection key
Topics
100 100 SAT.1 21.05.02 15:30:23
Sections
Pages
Pages
selection function.
next mark
The white key is used to preselect
the page selection function.
After pressing one of these preselection
keys, you can step through the subjects, sections or pages with the rocker
switch „P+/P-“.
OK
You can also move directly to a page
by entering its number with the numeric keys. If multiple sub-pages exist for
OK
the selected page, their numbers are
displayed in black. In the example on
00 01 02 03 04 05 06 07 08 09
the left, there are five sub-pages.
You can scroll through the sub-pages
Sub-pages
with the cursor control key.
12
Page 13
9. Teletext
Double font size
When viewing Teletext pages, you can
switch to a larger font with the F1 key.
The first time you press this key, the
upper third of the page is displayed with
the large font. Pressing it again displays
the centre third of the page and pressing it a third time displays the bottom
third of the page. Pressing the key a
fourth time returns to the full-page
display with the normal font size.
Riddle solution key
Function key F2 is programmed to
display hidden text on a Teletext page,
such as the solutions to riddles.
n to last contents page
Retur
You can return directly to the last contents page at any time by pressing the
key.
eletext: setting marks
T
3)
You will probably have your favourite
Teletext pages, such as stock exchange
reports, news, weather forecasts, which
you visit frequently.
To permit rapid access to such pages,
you can set so-called „marks“ on these
Up to 10 marks can be set on each
☞
programme position. The total
number of marks (on all programme positions) is restricted to 128.
T
eletext: scrolling by marks
3)
With Teletext active, you can scroll
sequentially through all marked pages by
repeatedly pressing the green key
You can even view your favourite pages
directly from the TV mode with the
„TEXT“ key. Pressing the „TEXT“ key
opens Teletext and selects the first marked
page. You can then scroll through the
marked pages with the „TEXT“ key.
Pressing the „TEXT“ key with the last marked page displayed switches back to the
TV programme.
eletext: displaying active marks
T
3)
If marks are set for a programme position,
pressing the F3 key displays a list of all
marks, showing where they are set.
Pressing F3 again hides the list.
With the list displayed, you can select
any desired mark with the numeric keys.
eletext: deleting marks
T
3)
Call the teletext page whose mark you
pages.
To do this, first go to the page on which
you want to set the mark.
• Then press the red key for „Set
mark“ to set a mark on this page. A
„paper-clip“ symbol appears at the top
left corner of the page. If the page has
sub-pages, the mark is always set and
displayed on the currently displayed
sub-page.
want to delete and press the red key
„Clear mark“ to delete the mark.
3) Not possible with an external
satellite receiver!
13
Page 14

9. Teletext
Teletext: subtitles
Your TV set can display subtitles transmitted on
Teletext together with the programme. If such subtitles are available, the station normally displays a
message at the beginning of the programme, telling you where to find the subtitles.
• Press the „TEXT“ key to open Teletext.
• In the case of „TOP“ stations, press the „OK“
key to open any page.
• Use the numeric keys to enter the number of the
page containing the subtitles.
14
Page 15
10. AV playback
AV playback
(Devices with switching voltage)
AV playback is the term for playing back videocassettes, DVDs, etc. from an AV device for viewing them on a TV set.
In order to view the pictures, you must programme your TV set so that it automatically switches to
Call the menu
MENU
the AV programme position when a signal is
received at the EURO socket to which the AV
device is connected.
Programming automatic switching
In a menu with two asterisks (**),
☞
the settings for this menu item cannot be changed.
Programme switching is set to
☞
"On" in the factory for both EURO
sockets.
• Press the „MENU“ key to open the TV
menu.
• Press the red key to open the menu
„Configuration“.
• Use the cursor control key to select „EURO
Picture-Volume
AV devices
Station table
Timer
Configuration
Configuration
: select,
OK: go to
settings.
TV-Menü
Operation
EURO sockets*
Station search
Country*
Language*
OK
EURO 2
EURO 1
Change stations on
socket“.
• Use the cursor control key to select „EURO 1 or
„Euro 2“.
• Press the „OK“ key and then, in the setting window, set „Programme switching“ to „ON“ with
+
the
key.
-
• Press the „OK“ key to save the new setting.
• Press the „TV“ key to close the TV menu.
When you subsequently start a playback operation on the connected AV device, the TV set switches to playback mode, regardless of the currently selected programme position.
OK
* The number of subjects and sections
displayed here depends on the operating scope setting in the menu.
15
Page 16
10. AV playbackCall the menu
AV playback
(Devices without switching voltage)
In order to view the pictures, you must manually
AV
AV menu Playback
EURO1
EURO2
Front of TV set
switch your TV set to playback mode.
• Select any programme position.
• Press the „AV“ key.
Press the numeric key for the desired AV device.
•
• The TV set now switches from the current programme to playback mode.
DVD/Videorec. 1
• Start the playback operation on the
AV device. Playback mode remains
DVD/CD Player
active until you switch to another programme position.
Camcorder/Foto
Picture quality when playing
back from tape machines
The VCR function provides the best possi-
ble picture quality when playing back
recordings from a tape machine, such as a camcorder or video recorder.
In a menu with two aste-
☞
risks (**), the settings for
the menu item "VCR" cannot be changed.
Setting the VCR function
• Select the appropriate programme position.
• Press the „MENU“ key to open the TV menu.
• Press the „OK“ key to open the menu „Picture
and sound“.
• Use the cursor control key to select „Picture set-
tings for Pr xy“.
• Press the „OK“ key and then use the cursor
control key to select „VCR“.
• Press the „OK“ key for confirmation and use the
-/+ key to select „Opt. 1“. If this setting does
not produce a satisfactory picture quality,
switch to „Opt. 2“.
• Press the „OK“ key to save the new setting.
16
Page 17

10.1 Copying between
AV devices
• Select any programme position.
• Press the „AV“ key to display the „AV menu
Playback“.
• Select the AV playback device with the numeric
keys.
•
The TV set switches from the current programme
to the selected playback device.
• Press the „AV“ key again.
• Then press the red key to select the recording device.
• Press the green key to lock the selected signal
connection. If a Data Logic video recorder is
connected, it will immediately start to record,
providing there is a cassette with a protection
tag inserted.
• Start recording with the recording AV device.
• Play back with the playback AV device.
17
Page 18
Call the menu
MENU
OK
Picture-Volume
AV devices
Station table
Timer
Configuration
: select,
OK: go to
settings.
TV-Menü
Sound set.prog.po
Sound settings, gen.
Pict. set.,prog. posn.*
Pict. settings, gen.
Contrast 61
Standard value 50
Accept 61 as the standard value:
11. Picture settings, general
In a menu with two asterisks (**), the set-
☞
tings for certain menu items cannot be
changed.
You can adjust the picture settings (brightness,
contrast, chrominance, etc.) for all programme
positions and save these settings as the standard
values. These standard values can be recalled at
any time by pressing the „OK“ key.
Defining the picture settings:
• Press the „MENU“ key to open the TV menu.
Picture pos., vertica
2)
Panorama
CTI*
Comb filter*
Noise reduction*
Picture sharpness*
Colour intensity
Contrast
Brightness
*
• Press the „OK“ key to open the menu
„Picture and sound“.
• Use the cursor control key to select the
individual picture settings.
• Press the „OK“ key and then use the
+
key to change the setting in the
-
setting window.
• Use the cursor control key to select the
3rd line in the setting window "...
accept as a standard value: OK".
• Save the new setting as the standard
OK
OK
* The number of subjects and sections
displayed here depends on the operating scope setting in the menu.
18
value by pressing the „OK“ key.
• Press the „TV“ key to close the menu
☞
If these standard settings are unsatisfactory
for some programme positions, you can
define special individual settings for these
positions as described on the next page.
Rotation
2)
This function can be used to compensate for the
effects of the Earth’s magnetic field. Normally, this
adjustment should be necessary only when you
first install the TV set, or if you move it to a different location, and the picture is not aligned horizontally on the screen.
2) Available only on TV sets which are equipped
with this option.
Page 19
11. Picture settings, general
In a menu with two asterisks (**), the set-
☞
tings for certain menu items cannot be
changed.
Call the menu
MENU
Panorama
☞
2)
function
This setting can be made only on 16:9 TV
sets.
The panorama function can be used to expand
"normal" programmes in 4:3 format to the 16:9
format. This is done by increasing the width of the
picture to fill the complete width of the screen.
2)
Setting Panorama
• Press the "MENU" key to open the TV
menu.
• Press the "OK" key to open the menu
"Picture and sound".
• Use the cursor control key to select
"Panorama".
mode:
Picture-Volume
AV devices
Station table
Timer
Configuration
• Press the "OK" key and then, in the
: select,
OK: go to
settings.
TV-Menü
setting window, use the
-
+
key to
change the setting for "Panorama".
OK
Picture pos., vertica
2)
Panorama
CTI*
Comb filter*
Noise reduction*
Sound set.prog.po
Sound settings, gen.
Pict. set.,prog. posn.*
Pict. settings, gen.
Panorama On, zoom 1 Mode Non-linear
Picture sharpness*
Colour intensity
Contrast
Brightness
*
• Use the cursor control key to select the
menu item "Mode" and use the
+
key to select
-
either "linear" or "non-linear".
• Press the "OK" key to save your changes.
The picture shows the factory setting.
• Press the "TV" key to close the TV menu.
2)
The functions "Panorama
☞
" and "Zoom"
can also be used together.
2) Available only on TV sets which are equipped
with this option.
OK
OK
* The number of subjects and sections
displayed here depends on the operating scope setting in the menu.
19
Page 20
Call the menu
MENU
OK
11.1
☞
Picture settings for a specific
programme posi
In a menu with two asterisks (**), the pictu-
tion ...
re settings for a specific programme position cannot be changed.
If the standard settings are not satisfactory for certain programme positions, you can define different settings for these positions with the menu item
„Picture settings for Pr ...“. These settings apply
only to the selected programme position and cannot be overwritten by the standard settings.
Picture-Volume
AV devices
Station table
Timer
Configuration
: select,
OK: go to
settings.
TV-Menü
VCR
Colour standard
Colour offset
CTI
Comb filter
Sound set.prog.po
Sound settings, gen.
Pict. set.,prog. posn.*
Pict. settings, gen.
These settings apply to the currently selected
programme position.
Noice reduction
Picture sharpness
Colour intensity
Contrast
• Press the „OK“ key and then select the setting
OK
you want to change.
• Press the „OK“ key to confirm your selection
and then, in the setting window, use the
to change the setting.
Defining different picture settings
for Pr. xy:
• Select the programme position for
which you want to define different picture settings.
• Press the „MENU“ key to open the TV
menu.
• Press the „OK“ key to open the menu
„Picture and sound“.
• Use the cursor control key to select the
item „Picture settings for Pr. xy“.
+
key
-
OK
* The number of subjects and sections
displayed here depends on the operating scope setting in the menu.
20
• Press the „OK“ key to save the new setting.
• Press the „TV“ key to close the menu.
You can also define and recall the individu-
☞
al picture settings in the station table.
2) Available only on TV sets which are equipped
with this option.
Page 21

In a menu with two asterisks (**), the set-
☞
tings for certain menu items cannot be
changed.
You can adjust the sound settings (volume, treble,
bass, etc.) for all programme positions and save
these settings as the standard values. These standard values can be recalled at any time by pressing the „OK“ key.
Defining the sound settings:
• Press the „MENU“ key to open the TV menu.
• Use the blue key to select the menu „Picture
and sound“ and press the „OK“ key to
open it.
• Use the cursor control key to select the
Picture-Volume
item „Sound settings, general“.
• Press the „OK“ key and then select the
AV devices
Station table
setting you want to change.
Timer
• Press the „OK“ key to confirm your
Configuration
selection and then, in the setting win-
: select,
OK: go to
settings.
TV-Menü
dow, use the
ting.
+
key to change the set-
-
Call the menu12. Sound settings, general
MENU
OK
Stereo wide*
Spatial sound*
Balance*
Tone settings
Sound set.prog.po
Sound settings, gen.
Pict. set.,prog. posn.*
Pict. settings, gen.
Volume 55
Satandard value 46
Accept 55 as the standard value: OK
Volume headphones
Bass
Treble
Volume
• Use the cursor control key to select the third line
"Use ... as new standard value: OK".
• Press the „OK“ key to save the new setting as
the standard value.
• Press the „TV“ key to close the menu.
If these standard settings are unsatisfactory
☞
for some programme positions, you can
define special individual settings for these
positions as described on the next page.
OK
* The number of subjects and sections
displayed here depends on the operating scope setting in the menu.
21
Page 22

Call the menu
MENU
OK
12.1 Sound settings for a specific
programme position ..
In a menu with two asterisks (**), the set-
☞
tings for certain menu items cannot be
changed.
If the standard settings are not satisfactory for
certain programme positions, you can define different settings for these positions with the menu
item „Sound settings for Pr...“. These settings
apply only to the selected programme position
and cannot be overwritten by the standard settings.
Picture-Volume
AV devices
Station table
Timer
Configuration
: select
menu item
TV-Menü
Defining dif
xy:
• Select the programme position for
Sound set.prog.po
Sound settings, gen.
Pict. set.,prog. posn.*
Pict. settings, gen.
These settings apply to the currently selected programme
position.
Forced mono*
Tone settings*
Volume correction
• Press the „MENU“ key to open the TV
• Use the blue key to select the menu
• Use the cursor control key to select the item
„Sound settings for Pr. xy“.
OK
• Press the „OK“ key and then select the setting
you want to change.
• Press the „OK“ key to confirm your selection
and then, in the setting window, use the
to change the setting.
ferent sound settings for Pr.
which you want to define different
sound settings.
menu.
„Picture and sound“ and press the
„OK“ key to open it.
+
-
key
OK
* The number of subjects and sections
displayed here depends on the operating scope setting in the menu.
22
• Press the „OK“ key to save the new setting.
• Press the „TV“ key to close the menu.
You can also define and recall the individu-
☞
al sound settings in the station table.
Page 23

In a menu with two asterisks (**), the set-
☞
tings for the menu item "Colour standard"
cannot be changed.
Your TV set normally detects the colour standard
(PAL, SECAM, NTSC, NTSC44, PAL60, PAL M)
automatically. If this automatic function does not
work, you can select the colour standard manually.
The colour standard function is set in the factory
to „Automatic“.
Call the menu13. Colour standard
MENU
OK
Setting the colour standard
:
• Select the programme position for
which you want to set the colour standard.
• Press the „MENU“ key to open the TV
menu.
• Press the white key to open the
„station table“.
• Move the cursor to „Colour standard“.
• Press the „OK“ key to confirm your
selection and then, in the setting window, use the
+
key to select the
-
TV-Menü
appropriate colour standard.
• Press the „OK“ key to save the new setting.
• Press the „TV“ key to close the menu.
Picture-Volume
AV devices
Station table
Station table
Timer
Configuration
: select,
OK: go to
settings.
009 MDR
008 SW 3
007 N24
006 PRO 7
005 RTL
004 SAT 1
003 Bayern 3
002 ZDF
001 ARD
Colour standard Automatic mode
Decoder
Sound correction
Colour standard*
Picture corrections*
Picture quality*
Enter Logo
Frequency/channel
TV Standard*
2) Available only on TV sets which are equipped
with this option.
OK
* The number of subjects and sections
displayed here depends on the operating scope setting in the menu.
23
Page 24

Call the menu 14. Automatic zoom
Picture-Volume
AV devices
Station table
Timer
Configuration
Configuration
: select,
OK: go to
settings.
TV-Menü
MENU
OK
Operation
EURO sockets*
Station search
Country*
Language*
Scope of operation
EPG settings
Automatic zoom
Sound setting
Init. prog. position*
Automatic zoom on
The menu item "automatic zoom" cannot
☞
be selected in a menu with two asterisks
(**).
The menu item "automatic zoom" is availa-
☞
ble only on TV sets with the aspect ratio
16:9.
If the automatic zoom function is active, programmes in "widescreen" format (such as the aspect
ratio 16:9) are adjusted automatically to fill as
much of the screen as possible.
If this function is not active, no automatic
adjustment of such programmes is carried out.
2)
Activating automatic zoom
2)
*
• Press the „MENU“ key to open the TV
:
menu.
• Press the red key to open the menu
„Configuration“.
• Use the cursor control key to select
OK
TV
* The number of subjects and sections
displayed here depends on the operating scope setting in the menu.
„Operation“ and then „Automatic
zoom“.
• Press the „OK“ key.
• Use the
+
key to switch the automatic zoom
-
function on or off
• Press the „OK“ key to save the new setting.
• Press the „TV“ key to close the menu.
2) Available only on TV sets which are equipped
with this option.
24
Page 25

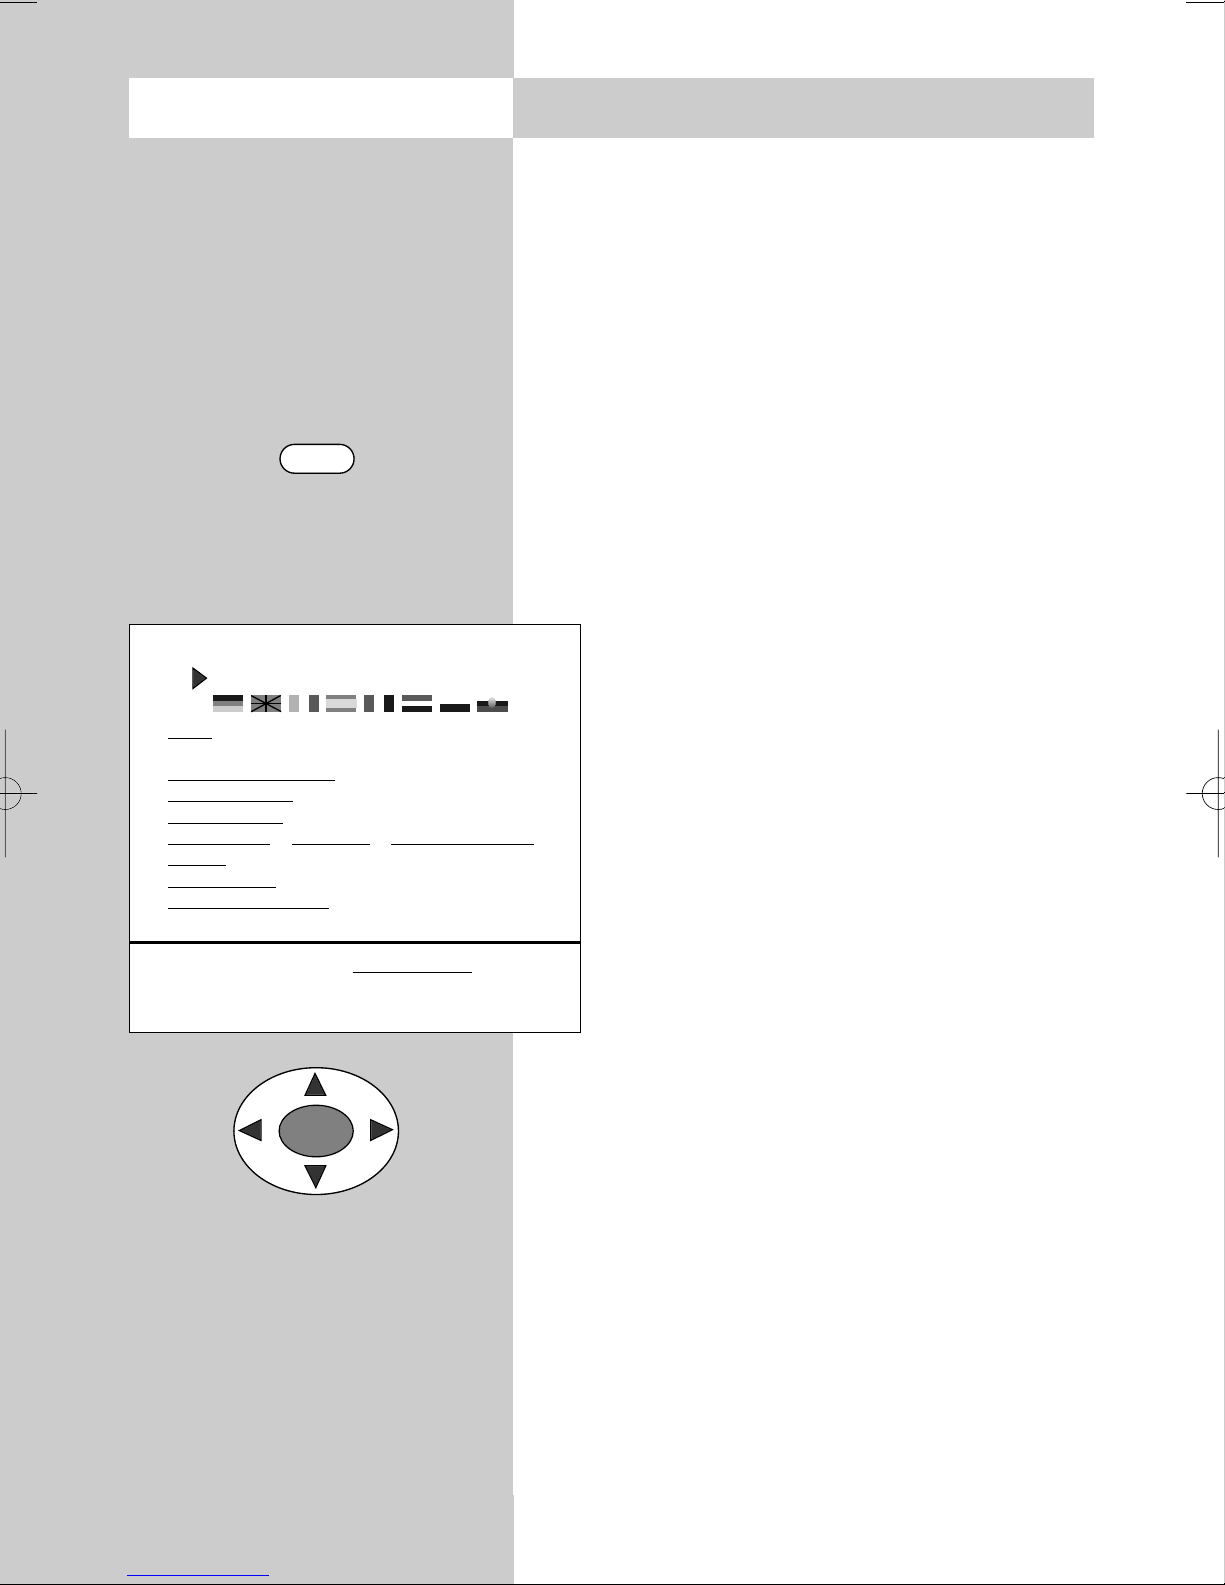
15. Childlock
With this function, you can determine when the
TV set can be switched on and which programmes may be viewed at specific times. The childlock may be set:
Call the menu
a) for all programmes,
b) so that one to six programmes (Prog A ... Prog
F), called permitted programmes can still be
viewed,
c) so that all or all permitted programmes may be
viewed during a preset period (between the
specified start and end times).
After setting, the childlock must be saved with a
4-digit „Code“
Setting the childlock:
• Press the „MENU“ key to open the TV
menu.
• Press the green key to open the
menu „Timer“.
Setting the childlock for all programmes:
a)
Use the cursor control key to select
„Childlock“ and press the „OK“ key.
In the setting window, use the
+
key
-
Picture-Volume
AV devices
Station table
Timer
Timer
Configuration
: select,
OK: go to
settings.
TV-Menü
to set the childlock to „Active“.
MENU
Time settings
Timer control
Reminder*
Childlock
OK
End viewing time*
Start viewing time*
Code input
Permitted programmes*
Childlock
Activation off
• Press the „OK“ key to save the new setting.
b) Permitted programmes*
Activate the childlock as described in step a),
above.
Use the cursor control key to open the file card
„Permitted programmes“ and press the „OK“
key. In the setting window, use the numeric
keys to enter the numbers of the permitted programme positions or press the „AV“ key to permit use of the AV programme position.
• Press the „OK“ key to save the new setting.
OK
* The number of subjects and sections
displayed here depends on the operating scope setting in the menu.
25
Page 26

Call the menu 15. Childlock
c) Start* and end times*
Use the cursor control key to open the file card
„Start viewing time/End viewing time“„ and
Picture-Volume
AV devices
Station table
Timer
Timer
Configuration
: select,
OK: go to
settings.
TV-Menü
OK
Time settings
Timer control
Reminder*
Childlock
Protecting the childlock settings with a code
• Use the cursor control key to open the file card
End viewing time*
Start viewing time*
Code input
Permitted programmes*
Childlock
Code * * * *
Deactivating the childlock
press the „OK“ key. In the setting window, enter
the start and end times with the numeric keys.
„Code input“ and press the „OK“ key. In
the setting window, enter your personal
code with the numeric keys.
Make a note of the code, since the
☞
childlock can be switched off only
by entering it again!
• Press the „OK“ key to save the code.
• Press the „TV“ key to close the menu.
• Switch off the TV set with the key.
The childlock is activated only
☞
when the TV set is switched off.
✂
É
Factory setting
Code: 0000
OK
If the childlock is active, this is indicated by the
display of a message when you switch the TV set
on. If you then enter the correct code, the childlock is temporarily deactivated and the TV set can
be operated „normally“ as long as it remains
switched on. If you wish to permanently deactivate the childlock, proceed as follows:
• Press the „MENU“ key to open the TV menu.
• Press the green key to open the menu
„Timer“.
• Use the cursor control key to select „Childlock“
and press the „OK“ key.
• In the setting window, use the
+
key to set the
-
childlock to „Inactive“.
• Press the „OK“ key to save the new setting.
26
Page 27

16. Reminder
In a menu with two asterisks (**), the set-
☞
tings for the menu item "Reminder" cannot
be changed.
If you want to be reminded of something while
watching television, you can set a reminder time.
At this time, a box with the reminder appears on
the screen of the TV set.
Call the menu
MENU
Setting the reminder time
• Press the „MENU“ key to open the TV menu.
• Press the green key to open the menu
„Timer“.
• Use the cursor control key to select
„Reminder“.
• Press the „OK“ key twice and then, in
the setting window, enter the desired
time (four digits) with the numeric
keys.
• Press the „OK“ key to save the new
setting.
• Press the „TV“ key to close the menu.
OK: go to
settings.
TV-Menü
At the specified time, a box with the reminder
Picture-Volume
AV devices
Station table
Timer
Timer
Configuration
: select,
Time settings
Timer control
Reminder*
Childlock
OK
Reminder time*
Time - - : - -
appears on the screen of the TV set. You can
clear this display by pressing any key.
If you do not want the reminder to appear
☞
each day, you must clear it in the menu by
pressing the ll key.
OK
* The number of subjects and sections
displayed here depends on the operating scope setting in the menu.
27
Page 28

Call the menu
MENU
OK
Picture-Volume
AV devices
Station table
Timer
Timer
Configuration
: select
menu item
TV-Menü
Time settings
Timer control
Reminder*
Childlock
Power-on time, power-off time and sleep timer can
be set here.
☞
In the menu item „Timer control“, you can programme a switch-on time, a switch-off time and a
sleep timer (switch off after ...).
Switch-on time*: the TV set is switched on at the
specified time.
Switch-off time*: the TV set is switched off at the
specified time.
Switch off after ...: (Sleep Timer): the TV set is
switched off after the period you specify (in increments of 15 minutes).
Switch off after...
Switch-off time*
Switch-on time*
17. Timer control
In a menu with two asterisks (**), the settings for the menu items "Switch-on time"
and "Switch-off time" cannot be changed
Setting the times
• Press the „MENU“ key to open the TV
menu.
• Press the green key to open the
menu „Timer“.
• Use the cursor control key to select
„Switch-on time“ or „Switch off time“.
• Press the „OK“ key twice and then, in
the setting window, enter the desired
time (four digits) with the numeric
keys.
* The number of subjects and sections
displayed here depends on the operating scope setting in the menu.
28
• Press the „OK“ key to save the new setting.
• Press the „TV“ key to close the menu.
At the specified switch-on time, the TV set switches from standby mode (red LED on) to normal
TV mode. If you do not press any key on the
remote control unit within 10 minutes, the TV set
switches back to standby mode. This ensures that
the TV set does not remain switched on if you are
not at home.
If you do not want the TV set to switch
☞
itself on or off each day, you must clear
the times in the menu by pressing the ll
key.
Page 29

17. Timer control Call the menu
Normally, the TV set gets the date and time from
the data transmitted with the programme (if this
station transmits Teletext) and sets the internal
clock accordingly.
If the data are not received correctly, or if the station you are watching does not send such data,
you can set the date and time manually.
Normally, this function is not needed: even the
changeover between summer and winter time is
executed automatically.
Setting the time and date
• Press the „MENU“ key to open the TV menu.
• Press the green key to open the
menu „Timer“.
• Use the cursor control key to select the
file card „Set time“.
• Press the „OK“ key twice.
• In the setting window, enter the current
Picture-Volume
AV devices
Station table
Timer
Timer
time with the numeric keys.
• The clock starts running from this time
Configuration
when you press the „OK“ key.
• Use the cursor control key to select the
: select,
OK: go to
settings.
TV-Menü
file card „Current date“.
MENU
OK
Time settings
Timer control
Reminder
Childlock
You can set the date and time manually if they have not
been set automatically.
Local time offset
Current date
Current local time
• Press the „OK“ key.
• In the setting window, enter the current date
with the numeric keys.
• Press the „OK“ key to save the new setting.
• Press the „TV“ key to close the menu.
The local time offset is the difference between
the local time and Greenwich Mean Time
(GMT). This time difference and any necessary
switching between summer time and winter
i
time are normally detected automatically by the
TV set.
They need to be set manually only if the TV set
does not detect them automatically.
OK
29
Page 30

Call the menu
F1
18. Special functions
Picture format
The function "Picture format" is available
☞
only on TV sets with the aspect ratio 16:9.
16:9 full picture +
Zoom
Standard 4:3 —
Standard 4:3 +
Panorama
16:9 Vollbild —
Panorama
+
16:9 full picture
Calling the picture for
•
Briefly press the F1 key to display the pop-up
mat3) function:
menu for special picture functions.
• You can use the "P+/P-" rocker key to
select the various functions. You can
also set the zoom factor for the selected picture format within the next five
seconds.
• The settings made here (except for the
automatic zoom in the TV menu)
remain stored until you switch to another programme position or switch off
the TV set.
Zoom
After selecting the "Zoom" function, you
can adjust the zoom factor with the
+
-
key.
In addition to adjusting the zoom factor, you can move
the picture up or down on the screen so that, for example, the station logo or subtitles remain visible. To do
this, press the F1 key and then the key and move the
picture with the "P+/P-" rocker key.
Standard 4:3
3)
3) This menu item is available
only on TV sets with a 16:9
screen.
30
This is the standard setting for all programmes
with the aspect ratio 4:3.
Panorama
3)
With the Panorama function, you can adjust the
picture of a programme in 4:3 aspect ratio to fill
the 16:9 format of the screen (only on sets with
16:9 screen). The picture is expanded uniformly in
the horizontal direction. You can also zoom the
picture. The Panorama function can be switched
on and off in the menu "Picture and Sound" under
the heading "Picture settings, general".
16:9 full screen
3)
This function is used to display the picture format
of external devices (such as 16:9 video recorders)
with the correct aspect ratio.
Page 31

18. Special functions
Zoom
The following description applies only to TV sets
with a 4:3 screen.
Calling the zoom function:
• Briefly press function key „F1“
The small window "Zoom" is displayed
at the bottom left corner of the screen.
• The zoom factor can now be adjusted
with the
The new zoom factor is stored until it is
changed again and can be recalled at
any time with the „F1“ key.
+
key.
-
Call the menu
F1
- Zoom +
18. Special functions
Picture position
☞
The function "Picture position" is available
only on TV sets with a 16:9 screen.
3)
Calling the picture-position function
• Press and hold the function key "F1" for
at least one second. The window
"Special functions" appears on the
screen.
• Press numeric key to open the
function "Picture position".
• Use the
or up to the desired position (e.g. so that
the station logo or subtitles are visible).
☞
This setting is not stored. However,
you can save the picture position
globally by following the instructions in
Section 11.1.
+
key to move the picture down
-
.
:
Call the menu
F1
Specialfunctions 1
Picture format
Picture pos., vertical
3) This menu item is available
only on TV sets with a 16:9
screen.
31
Page 32

19. EPG - NexTView
NexTView is an Electronic Program Guide (EPG)
for all important programme providers. This EPG
is transmitted by various stations and also contains the programme data for the other stations.
The TV set needs about 30 minutes to collect the
large amount of data for the first time.
• On TV sets with two tuners (standard configuration) the data are collected by the second tuner
(see the next page) during normal operation of
the TV set. When the data have been collected,
the TV set stores the EPG in a special memory.
The EPG is updated regularly in this memory as
long as the TV set is not switched off with the
main switch.
• On TV sets with only one tuner (e.g. if your set
has been converted and has only one satellite
tuner):
- the set must be left tuned to the NeexTView pro-
gramme position for at least 30 minutes, or
- the data are collected during the night (between
02:30 - 03:00) while the set is in standby mode.
Not possible with an external satellite receiver!
32
Page 33

19.1 Activating the EPG NexTView
The EPG function can be switched on by pressing
the keys "F3" if an EPG programme position is
defined in the menu (see below).
On all programme positions where NexTView is
received, the TV set displays the following message after a short delay:
This station is sending NexTView (EPG). Save it as
the EPG programme position?
• Yes • No
Call the menu
F3
MENU
The TV set is asking you whether you want to use
this programme position for collecting the data for
the EPG NexTView.
Press the red key for "No" - this programme position is not used for receiving the NexTView data. The message is
still displayed for all other programme
Picture-Volume
AV devices
positions where NexTView data are
received.
Press the green key for "Yes" - this programme position will be used for receiving the NexTView data. The message is
then not displayed for other programme
positions where NexTView data are
Station table
Timer
Configuration
: select,
OK: go to
settings.
TV-Menü
received.
If you know the programme position for a
NexTView station, you can also enter its number
directly on the numeric keys.
OK
Operation
EURO sockets*
Station search
Country*
Language*
EPG on EPG prog. position 6
Now showing on Kabel 1
Scope of operation
EPG settings
2)
Automatic zoom
Sound setting
Init. prog. position*
*
OK
You can overwrite any existing programme position number or delete the number by pressing the
II key.
Not possible with an external satellite receiver!
* The number of subjects and sections
displayed here depends on the operating scope setting in the menu.
33
Page 34

19.2 Collecting NexTView data
The EPG NexTView is transmitted by
various stations and the information provided by each station may differ. You
thus have a choice between several different NexTView programme guides.
• On TV sets with only one tuner (e.g. if
your set has been converted and has
only one satellite tuner):
Switch to the NexTView programme
position.
Leave it on this programme position
for at least 30 minutes.
• TV sets with two tuners:
The TV set collects the NexTView data
with the aid of its second tuner.
Special notes:
Stations which are listed in the TV station
list of the TV set with an automatic logo
(set automatically by the TV set) are also
shown in the EPG. Stations which carry
two different programmes (such as a
children’s programme in the daytime
and another programme in the evening)
must be stored in two different programme positions.
- the Teletext function "Subtitles" is active.
If the TV set is switched to standby mode
while the data are being collected, the
green LED remains on to remind you that
this function is still running.
The collection operation is interrupted or
cancelled if:
- you switch the programme position
from terrestrial to SAT or vice versa;
- you call the "Picture in Picture" function;
- you open the Teletext function;
- a recording is programmed in the
menu "AV recording";
- a "timer recording" is running or will
begin within the next hour;
Not possible with an external satellite receiver!
34
Page 35

19.3 Using NexTView
Once all of the data have been collected, pressing the "F3" key displays the NexTView programme guide, showing the programme currently running on this programme position.
The left column of the EPG shows the keys with
special functions in this mode:
P+/P- Select a programme
OK Watch the selected programme or set a
reminder for it
Call the menu
F3
Cursor control key Scroll forward
or back through the programme times
0-9 Enter a time for which program-
mes are to be displayed
TV Return to the TV picture
blue Display all programme types
yellow Display only programme types
which match the current user
and their preferences
white Set user preferences
All programmes
Selection
Interest
Users
Record
0..9: enter time
:select
OK: view
NexTView
green Select a user (father, mother,
teenager, child)
red Selected programme is ready for recor-
ding (see Page 37)
Selecting and viewing a programme, setting a
reminder
Heute 20:07
- Mo Di Mi Do Fr Sa So + 13.08
20:00 RTL 2 -20:15
RTL II News
20:00 ARD -20:15
Tagesschau
20:00 Nord 3 -20:15
Tagesschau
20:00 West 3 -20:15
Tagesschau
20:00 3 SAT -20:15
Tagesschau
News
In the EPG, you can select a programme with the
"P+/P-" rocker key.
• By pressing the "OK" key, you can
- watch the programme if it is already running or
- set a reminder for it if it starts later. In this case,
a green check mark appears after the start
time.
• Press the "TEXT" key to display or hide the des-
cription of the programme. This description
cannot be displayed for all programmes.
Not possible with an external satellite receiver!
35
Page 36

Call the menu
19.3 Using NexTView
Setting the user
By repeatedly pressing the green key, you can set
the current user (father, mother, teenager, child)
for the NexTView programme guide.
Setting preferences
All programmes
Selection
Interest
Interest
Users
Record
Up to eight stations
can be selected
NexTView
All programmes
Selection
Interest
Interest
Users
Record
Music
Education
Children/School
Sport
Leisure
Shows
Current affairs
Feature film
Station selection
Music
Education
Children/School
Sport
Leisure
Shows
Current affairs
Feature film
Station selection
MDR
✓
PRO 7
✓
RTL 2
✓
RTL
✓
SAT 1
✓
Bayern 3
✓
ZDF
✓
✓
ARD
✓
Display all stations
☞
• You can remove the red check marks again by
pressing the "OK" key.
✓
water sports
✓
motor sports
✓
athletics
✓
team sports
✓
tennis/squash
✓
football/soccer
✓
sport magazine
✓
special events
✓
sport (general)
Each user can set the NexTView programme guide to reflect the personal
preferences.
• Press the white key .
• Use the "P+/P-" rocker key to select
one of the blue cards.
• Use the cursor control key to switch
to the yellow page.
• Use the "P+/P-" rocker key to select
the appropriate yellow cards and
mark each one by pressing the "OK"
key.
Up to eight preferences can be selected for
each user.
• Save the selected preferences by pressing the red key .
Up to eight stations
can be selected
NexTView
✓
motor sports
✓
team sports
✓
tennis/squash✓winter sports
✓
football/soccer✓local sports
Not possible with an external satellite receiver!
36
✓
sport magazine
✓
special events
Page 37

19.3 Using NexTView
Recording a programme
If you have a Metz video recorder with dialogue
system, the NexTView programme guide permits
you to start a recording by pressing a single key.
• Open the NexTView programme guide.
• Use the "P+/P-" rocker key to select the programme you want to record.
If a video recorder with dialogue system is connected:
- Switch on the video recorder.
- Insert a cassette.
- Press the red key on the remote
control of the TV set.
If a normal video recorder is connected:
- Switch on the video recorder.
- Insert a cassette.
- Press the red key on the remote
control of the TV set - the TV timer is
programmed.
- On the video recorder programme a
timer with the date and time on the
AV programme position so that the
programme provided by the TV timer
will be recorded.
All programmes
Selection
Interest
Users
Record
0..9: Zeit wählen
:auswählen
OK: ansehen
NexTView
Call the menu
F3
OK
Heute 20:07
- Mo Di Mi Do Fr Sa So + 13.08
20:00 RTL 2 -20:15
RTL II News
20:00 ARD -20:15
Tagesschau
20:00 Nord 3 -20:15
Tagesschau
20:00 West 3 -20:15
Tagesschau
20:00 3 SAT -20:15
Tagesschau
Nachrichten - News
If you want to record a programme from a
☞
terrestrial station (received via antenna or
cable), you must programme the video
recorder itself.
Not possible with an external satellite receiver!
37
Page 38

Call the menu
MENU
OK
Picture-Volume
AV devices
Station table
Timer
Configuration
: select
menu item
TV-Menü
Operation
EURO sockets*
Station search
Country*
Language*
20. Setting the language and country
☞
Setting the language for the TV menu
You can select one of the available languages for
the display of the TV menu. All texts in the menu
and in the help function (Information) are then
displayed in the selected language.
Setting the country
Nederlands
Français
Español
Italiano
English
Deutsch
Selected language English
In a menu with two asterisks (**), the settings for the menu items "Language" and
"Country" cannot be changed.
After installing the TV set, you must select
the country where it is installed (such as
Great Britain). This information is used
by the TV set to make certain basic settings (such as the channel spacing, the
sorting sequence for the stations, etc.).
Setting the language and countr
•
Press the "MENU" key to open the TV
y:
menu.
• Press the red key to open the menu
"Configuration".
Picture-Volume
AV devices
Station table
Timer
Configuration
: select
menu item
TV-Menü
* The number of subjects and sections
displayed here depends on the operating scope setting in the menu.
Operation
EURO sockets*
Station search
Country*
Language*
Selected country Australia
• Use the cursor control key to select the desired
Italy
Great Britain
France
Finland
Germany
Denmark
Belgium
Baltic states
Australia
language and your country.
• Use the cursor control key to select the
desired language and your country.
• Press the "OK" key to save the settings.
• Press the "TV" key to close the menu.
38
Page 39

21. Programming stations
You can programme the TV stations in three diffe-
Call the menu
rent ways.
a) Automatic station search
The automatic station search function searches the
entire range of reception frequencies for TV stations.
All stations which are found are placed in a station
table, which is displayed at the end of the search
operation. If you are not satisfied with the order in
which the stations are stored, you can shift or delete
stations (see Section 9, "Sorting stations").
Executing an automatic station search
• Press the „MENU“ key to call the TV menu
• Press the red key to open the
„Configuration“ menu.
• Use the cursor control key to select
"Automatic station search" and press
the "OK" key.
Picture-Volume
AV devices
• If your TV set has the appropriate
option2), you can select the desired
TV standard with the
+
key in the
-
setting window (in this example, the
Station table
Timer
Configuration
MENU
Operation
EURO sockets*
Station search
Country*
Language*
OK
DataLogic
Terr. station search
standard B/G is selected).
• Use the cursor control key > to select
the menu item "Station search
: select,
OK: go to
settings.
TV-Menü
(START)" and press the "OK" key to confirm
your selection.
• A station table containing all stations which are
found is displayed on the left side of the screen.
• At the end of the search, all stations which were
found are sorted and displayed.
• To delete any unwanted stations, select them
with the cursor and press the II key.
• To save the stations, press the "OK" key and
enter, with the numeric keys, the number of the
programme position where the first station is to
be saved. The remaining stations are saved in
the following programme positions.
TV standard B/G Station search (START)
2) Available only on TV sets
which are equipped with this
option.
* The number of subjects and sections
displayed here depends on the operating scope setting in the menu.
39
Page 40

Call the menu 21. Programming stations
b) Station search
Picture-Volume
AV devices
Station table
Station table
Timer
Configuration
: select,
OK: go to
settings.
TV-Menü
MENU
The station search function permits you to search
for specific stations if you do not know their channel number or frequency.
Executing a station search
• Press the „MENU“ key to display the TV menu.
• Press the white key to display the station
table.
• Move the cursor to en empty programme posi-
OK
tion (or to a position containing a station you
wish to replace with the new station).
• Move the cursor to „Frequency/Channel“.
009 MDR
008 SW 3
007 N24
006 PRO 7
005 RTL
004 SAT 1
003 Bayern 3
002 ZDF
001 ARD
Channel 6 Cable channel --
Frequency 182.31 MHz
Scan operation ARD
Decoder
Sound correction
Colour standard*
Picture corrections*
Picture quality*
Enter Logo
Frequency/channel
TV Standard
• Press the „OK“ key.
• In the setting window which is then
displayed, move the cursor to
„Search“.
• Press the
+
key to start the search.
-
• The search stops when the first station
is found.
2)
• If you want to save this station, press
the „OK“ key.
• If you do not want to save this station,
press the
+
key again to continue the
-
search.
OK
2) Available only on TV sets
which are equipped with this
option.
* The number of subjects and sections
displayed here depends on the operating scope setting in the menu.
40
c) Direct channel input
You can programme a station directly by entering
its channel number with the numeric keys (you
must, of course, know the channel number of the
desired station).
Executing direct channel input
• Press the „MENU“ key to display the TV menu.
• Press the white key to display the station
table.
• Move the cursor to en empty programme position (or to a position containing a station you
Page 41

21. Programming stations Call the menu
wish to replace with the new station).
• Move the cursor to „Frequency/Channel“.
• Press the „OK“ key.
• In the setting window which is then displayed,
move the cursor to „Channel“ or „Special channel“.
• Enter the number of the channel or special
channel with the numeric keys.
• Press the „OK“ key to save the station.
• Press the „TV“ key to close the menu.
Fine tuning
When you programme stations, each channel is
automatically tuned to the centre frequency. This
is normally sufficient. If this automatic
function does not produce satisfactory
results, you can carry out fine tuning.
Executing fine tuning
• Select the desired programme position.
Picture-Volume
AV devices
Station table
Station table
Timer
MENU
OK
• Press the „MENU“ key.
• Press the white key to open the station table.
• Move the cursor to the subject card
Configuration
Change value
with + and –
Confirm with OK
TV-Menü
„Frequency/Channel“.
• Press the „OK“ key to confirm your selection.
• In the setting window, select „Frequency“ and
use the
+
key to change the frequency value
-
until the picture is as clear as possible.
• Save the new setting by pressing the „OK“ key.
• Press the „TV“ key to close the menu.
Channel 6 Cable channel --
Frequency 182.31 MHz
Scan operation ARD
OK
41
Page 42

Call the menu
MENU
OK
009 MDR
Picture-Volume
AV devices
Station table
Station table
Timer
Configuration
: select,
OK: go to
settings.
TV-Menü
008 SW 3
007 N24
006 PRO 7
005 RTL
004 SAT 1
003 Bayern 3
002 ZDF
001 ARD
. , ABC DEF
GHI JKL MNO
PQRS TUV WXYZ
Each station which transmits VPS signals also
sends a station logo with up to eight characters,
which is automatically assigned to this station in
the station list. If this automatic function does not
work correctly, or if you want a different station
logo, you can overwrite the logo manually.
Setting the station logo
• Select the desired programme position.
• Press the „MENU“ key.
• Press the white key to open the station table.
• Move the cursor to the subject card „Logo“.
• Press the „OK“ key to confirm your selection. In
Decoder
Sound correction
Colour standard*
Picture corrections*
Picture quality*
Enter Logo
Frequency/channel
TV Standard*
ARD
22. Station logo
the setting window, you can now enter
the desired logo with the aid of the
numeric keys.
As long as the red cursor is selected, you
can enter the desired letters and digits
by pressing the numeric keys (e.g. key
: J-K-L-5). If you make a mistake, you
can delete the characters before the red
cursor, one at a time, with the red key. To
delete the entire logo, press the ll key.
• When you are finished, press the
OK
2) Available only on TV sets
which are equipped with this
option.
* The number of subjects and sections
displayed here depends on the operating scope setting in the menu.
42
„OK“ key to save the new logo.
• Press the „TV“ key to close the menu.
Page 43

23. Sorting stations
In the station table, you can shift or copy one or
more stations to other programme positions. You
can also delete any unwanted stations.
Copying, shifting and deleting stations
• Press the „MENU“ key to call the TV menu.
• Press the white key to call the station table.
Call the menu
MENU
• Press the „F1“ key to enable editing of the station table.
• Use the cursor control key to select the programme position you want to copy, shift or
delete.
• Press the „OK“ key to mark this programme
position: the text colour changes to
orange and an asterisk is displayed
after the last digit of the programme
position number (in the example on
the left: position 007).
• To shift or copy this station, move the
cursor to the programme position
before or after which the selected station(s) is/are to be inserted. If these
stations originally had a lower posi-
Picture-Volume
AV devices
Station table
Station table
Timer
Configuration
F1: End
White: Clear all
marks
TV-Menü
F1
OK
009 MDR
008 SW 3
007* N24
006 PRO 7
005 RTL
004 SAT 1
003 Bayern 3
002 ZDF
001 ARD
Move, copy, delete: Select one or more stationswith OK.
Move cursor to new position
+ = copy, - = move, II = delete
Decoder
Sound correction
Colour standard*
Picture corrections*
Picture quality*
Enter Logo
Frequency/channel
TV Standard*
tion number than this position, it/they
will be inserted before this programme position.
Stations which originally had a higher number
will be inserted after this programme position.
• Press the
+
key to copy (+) or shift (-) the
-
selected station(s).
• To delete a station, press the ll key.
• Press the „F1“ key to save the new settings
F1
43
Page 44

Call the menu
MENU
OK
Connect as follows:
Picture-Volume
AV devices
AV devices
Station table
Timer
Configuration
Select device with
cursor and call
device attributes
with OK
TV-Menü
Back of TV set
EURO1
EURO2
Front of TV set
Select a new device:
Videorecorder 1 Decoder A
DVD/Videorec. 2 Decoder B Other device
DVD / CD Satellite / SetTop
I I I I I I I I I I
I I I I I I I I I I
I I I I I I I I I I
I I I I I I I I I I
24. AV devices
AV (Audio/Video) devices are devices which
provide picture and/or sound signals for play-
i
back on your TV set (for example, video cassette recorders, DVD players, etc.).
In the menu „AV devices“, the setting window
displays a list of all common AV units.
Always connect AV devices exactly as
☞
shown in the connection diagram in the TV
menu of your TV set!
SVHS/Hi8 and Data Logic video recorders must
always be connected as „Video recorder 1“. A
„normal“ VHS video recorder may be
connected as „Video recorder 1“ or
DVD/Videorec. 1
FBAS
DVD / CD
2)
FBAS
Camcorder/Photo
„Video recorder 2“.
Connecting A
V devices
• Press the „MENU“ key to open the TV
menu.
• Press the yellow key to open the
menu „AV devices“. In the factory, a
video recorder is programmed for the
EURO 1 socket and a DVD player for
the EURO 2 socket. If you want to
change these settings, you can select
one of the AV devices with the cursor
control key and delete it by pressing
the ll key.
OK
44
• Use the cursor control key to select the device
you wish to connect to the TV set.
• Press the „OK“ key to confirm your selection
and, in the setting window, set the parameters
„Signal OUT“ and „Signal IN“ to match the AV
device (see the operating instructions for the AV
device for details).
• Press the „OK“ key. The newly connected device
appears in the connection diagram.
Caution: connecting a new device may
☞
cause an existing connection to be modified. If this happens, you will have to move
the cables for the affected AV device to the
correct positions.
Page 45

24. AV devices
Call the menu
Data Logic video recorder
„Data Logic“ is a system which permits a dialogue
between the TV set and a video recorder. This
i
„intelligent“ system provides such functions as:
- Automatic transfer of the settings for terrestrial
and cable stations to the video recorder.
- One-touch recording: the video recorder records
the programme you are currently watching.
- Automatic switching to the AV programme position.
- Direct control of recording from the timer menu
of the TV set.
- Automatically switching off the video recorder
when the TV set is switched to standby mode.
In the menu „AV devices“, activate the option
„Data Logic“ under „Video recorder 1“
and connect the video recorder to the
EURO 1 socket.
Data Logic will function correctly
☞
Picture-Volume
AV devices
only if the video recorder is connected to the EURO 1 socket.
Station table
Timer
Other comparable dialogue systems: Qlink
Configuration
(Panasonic), EasyLink (Philips), Megalogic
(Grundig, SMARTLINK (Sony).
Data Logic: transferring the station table
Configuration
: select,
OK: go to
settings.
TV-Menü
• Press the „MENU“ key to open the TV
In a menu with two aste-
☞
risks (**), the settings for
this menu item cannot be
changed.
MENU
OK
Operation
EURO sockets*
Station search
Country*
Language*
Data transfer start Yes
DataLogic
Terr. station search
menu.
• Press the red key to open the menu
„Configuration“.
• Use the cursor control key to select „Automatic
station search“.
• Press the „OK“ key and then use the cursor control key to select „Data Logic“.
• Press the „OK“ key and then, in the setting window, select „Start data transfer: yes“ with the
+
key.
-
• Press the „OK“ key to transfer the stations table
from the TV set to the video recorder
• Press the „TV“ key to close the TV menu.
OK
* The number of subjects and sections
displayed here depends on the operating scope setting in the menu.
45
Page 46

24. AV devicesCall the menu
Picture-Volume
AV devices
AV devices
Station table
Timer
Configuration
Change value
with + and Confirm with OK
TV-Menü
MENU
Some AV devices may use the composite colour
signal for recording and playing back, while
using the RGB signal to display the menus.
We cannot state specifically whether this is the
case for your AV device. The operating instructions for the device may provide information
about this.
If you connect and configure such an AV device
OK
with the signal type "composite colour" and the
picture of the recording you are playing back
appears on the screen but there are no menus
Connect as follows:
Back of TV set
I I I I I I I I I I
EURO1
I I I I I I I I I I
I I I I I I I I I I
EURO2
I I I I I I I I I I
Front of TV set
DVD/Videorec. 1:
Signal OUT RGB Signal IN CVBS
Data Logic off
2)
DVD/Videorec. 1
CVBS
DVD / CD
RGB
Camcorder(Photo
visible, you must change the signal type
to "RGB" in the menu "AV devices". This
is done as follows:
Setting the signal type
• Press the MENU key to open the TV
menu.
• Press the yellow key (..) to open the
menu "AV devices.
• Use the cursor key to select the affected AV device in the connection diagram.
OK
TV
• Press the "OK" key. The cursor is now located
before "Signal-OUT" in the settings window.
+
• Press the
key to set "Signal-OUT" to "RGB".
-
• Press the "OK" key. In the connection diagram,
the signal type for the AV device is changed.
☞
Caution! It may happen that an existing
connection diagram is modified. In this
case, you must connect the AV devices to
different input sockets, as shown in the diagram..
• Press the "TV" key to close the TV menu.
46
Page 47

25. Initial programme position Call the menu
You can define a so-called initial programme
position in this TV set. This is intended primarily to
enable you to switch to the AV programme position when you are using an external SAT receiver.
Setting the initial programme position
☞
In a menu with two asterisks (**), the settings for this menu item cannot be changed.
In the menu „AV devices“ (see also section
24, „AV devices“), select and connect a SAT receiver (SAT/SetTop).
MENU
OK
• Press the „AV“ key.
• In the „AV playback menu“, use the
numeric keys to select the position
„SAT/SetTop“.
• Press the „MENU“ key to open the TV
menu.
• Press the red key to open the menu
„Configuration“.
Picture-Volume
AV devices
Station table
Timer
Configuration
: select,
OK: go to
settings.
TV-Menü
• Use the cursor control key to select
„Operation“ and then „Initial programme position“.
• Press the „OK“ key and then, in the setting window, use the
+
key to select „Yes“.
-
• Press the „OK“ key to save the new setting.
Operation
EURO sockets*
Station search
Country*
Language*
Switch on with this station? Yes
Scope of operation
EPG settings
Automatic zoom
Sound setting
Init. prog. position*
OK
2)
*
☞
After this, the AV programme position will
be selected automatically if you switch your
TV set on with the main switch and then
press the key on the remote control unit.
2) Available only on TV sets
which are equipped with this
option.
* The number of subjects and sections
displayed here depends on the operating scope setting in the menu.
47
Page 48

26. Setting the operating scope
The operating scope of the TV set can be set to
three different levels in order to make it easier to
find the functions you need in the many possible
menus.
The operating scope of the TV set is indicated by
one, two or three asterisks (*).
1 The motto here is "just watching TV". It is not
possible to open the TV menu. Only the functions provided on the remote control can be
used, namely:
- Zapping
- Programme selection with the numeric keys, with
the P+/P- rocker switch or with the white key .
- Opening Teletext.
- Displaying information with the INFO key.
- Playing back films from a VCR or DVD player by
pressing the AV key.
- Pressing the F1 key and selecting functions from
the "Special functions 1".
- Pressing the F3 key and selecting functions from
the "Special functions 3".
- Pressing the blue key and selecting the standard picture functions.
- Pressing the yellow key .and selecting the
standard sound functions
- Pressing the F3 key to open the EPG function
If your TV set is currently set to operating scope 1
(*) and you want to use one of the extended
menus, you can change the scope as follows:
48
• Press and hold the MENU key for at least five
seconds to open the TV menu.
• The menu item "Operation" is pre-selected auto-
matically.
• Use the
pe and press the OK key to save the new setting.
+
key to select the desired operating sco-
-
Page 49

26. Setting the operating scope
2 In the operating scope with two asterisks,
you can control your TV set to suit your
personal tastes. There is a simple TV
menu. All functions available with one
asterisk can be used, and the following
additional functions are available:
- Childlock
- Timer control (sleep timer)
Call the menu
MENU
- Automatic station search
- Transfer of data from the TV station table to a
DataLogic video recorder.
- Setting functions in the station table
menu.
3 The operating scope with
three asterisks is for people
who like to try out all of the
available functions. The entire
TV menu can be used.
Programming the operating scope
•
Press the MENU key to open the TV menu.
.
OK: go to
settings.
TV-Menü
• Press the red key to open the configuration
menu.
•
Use the cursor key to select „Scope of operating“.
Picture-Volume
AV devices
Station table
Timer
Configuration
: select,
OK
Operation
EURO sockets*
Station search
Country*
Language*
Scope of operation full
Scope of operation
EPG settings
2)
Automatic zoom
Sound setting
Init. prog. position*
*
•
Press the OK key and use the cursor key to select
"
Scope of operating
".
• Press the OK key and use the
desired operating scope.
• Press the OK key to save the new setting.
+
key to select the
-
OK
49
Page 50

P
–+F
+
-
P
27.
Operation without the
remote control unit
The following procedures are intended only for
cases where the batteries of the remote control
unit are exhausted or the remote control unit is not
available.
The TV controls are located at the front of the set
underneath a cover which can be opend with the
fingernails.
Switching on
Press the main switch on the TV set to switch to
standby mode. To switch the set on with programme position 1 selected, press and hold the key F
until the green LED lights up.
You can also execute the following functions with
the controls on the front of the TV set. The preselected function remains active for 10 seconds.
Changing programme positions:
Press the -/+ keys.
olume:
V
Press the preselection key F until the bar display
for volume appears on the screen. Then press the
- or + key to adjust the volume.
Contrast:
Press the preselection key F until the bar display
for contrast appears on the screen. Then press the
- or + key to adjust the contrast.
50
Page 51

28. Technical data
Mains voltage:
230 V ˜50 / 60 Hz
240 V ˜(Australia only)
Antenna input::
75 Ohms unbalanced
DIN 45325
Reception bands:
Standard channels 2 - 12,
21 - 69
Special channels S1 - S20,
S21 - S41,
S42 .. S46 (Belgium OIR channels)
Power
consumption:
59 X)
(to CENELEC/TC
Power consumption
Bristol-72
Bristol-82
ca. 105 W
ca. 108 W
Power consumption per hour:
See power consumption in Wh.
Standby mode: approx. 1.5 W
to DIN 45324
into 4Ω( at 1 kHz
Music output power
(sinusoidal power)
2 x 12 W
(2 x 8 W)
2 x 12 W
(2 x 8 W)
51
Page 52

29. Options
• Satellite upgrade kit 085 NL 1018
similar to the above, but also capable of receiving ADR (Astra Digital Radio) stations.
• DVB-S digital upgrade kit 027 NL 1119 (CI)
for the reception of digital TV and radio stations
from a satellite. The upgrade kit is installed in the
TV set and no additional remote control is needed.
• DVB-T upgrade kit 056 NH 1114 (CI)
for the reception of digital TV and radio stations
transmitted by terrestrial transmitters, which can
be received with a rod antenna or a roof-mounted
terrestrial antenna. The upgrade kit is installed in
the TV set and no additional remote control is needed.
For other upgrade kits, please consult your local
dealer.
Important note for users of the TV set:
Unauthorised modification of this TV set, in particular changing the high voltage or using a CRT of
a different type, can result in the emission of high
levels of X-ray radiation. TV sets modified in this
manner no longer conform to the official approval for operation and may not be used.
52
Page 53

30. Connecting headphones
The headphone socket is located on the front of
the TV set. On many models, you must first open a
cover by pressing at the marked location in order
to expose the socket.
We recommend using headphones with an impedance of at least 32 Ω. The use of headphones
with a lower impedance (about 8 Ω) will reduce
the dynamic range.
The headphone volume can be saved as one of
the standard settings. In the case of dual-language
programmes, you can listen to either sound channel 1 or 2 on the headphones, regardless of the
channel selected for the loudspeakers.
31. Cleaning the TV set
Always switch off the TV set with the main
☞
switch before cleaning it!
Clean the case of the TV set only with a soft, dry
(or slightly moistened) cloth. Do not use aggressive
detergents or scouring powders, since these could
damage the paintwork and/or remove the inscriptions. Clean the screen with a moist window leather.
53
Page 54

32. Glossary
AV programme position
AV devices have one or more sockets, depending
on the model. These sockets are labelled on the
device, for example with AV1.
These sockets can be selected on the AV device
and the selected socket is shown on the display of
the AV device, for example A1 for socket AV1.
Code
The settings for the childlock are protected by a 4digit numerical code which you can set a desired.
Write down or remember the code you define. If
you forget the code, ask your local dealer for assistance
CTI
The CTI (Colour Transient Improvement) circuit is
an electronic circuit which ensures precise transitions between differently coloured parts of the picture, preventing the colour smearing which could
otherwise occur. The CTI function is active for programmes received via the antenna input and for
picture signals from AV devices.
Comb filter
2)
2) Available only on TV sets
which are equipped with this
option.
54
In conventional TV sets, the luminance signal and
the chrominance information are separated from
each other with a frequency separating filter.
However, this means that a certain amount of the
luminance signal is still included in the colour signal and can cause interference (cross-luminance)
and that a certain amount of the colour signal
causes interference in the luminance signal (crosscolour). The comb filter prevents these problems.
Just like a comb, this filter extracts the colour signal, which is located in the gaps of the luminance
signal, without affecting the bandwidth of the
luminance signal. The result is a TV picture with
the maximum possible resolution and without
cross-colour or cross-luminance interference.
Page 55

32. Glossary
Tone settings
You can switch the tone settings between
„Normal“ and „Speech“.
Noise reduction
This setting can be used to improve the quality of
pictures with „snow“ or other noise resulting from
poor reception conditions. Depending on the
amount of interference, various correction facilities
are available and the noise reduction can be set
individually for each programme position.
Standard settings
Standard settings are all values (such as brightness, volume, chrominance, etc.) which are the
same for all programme positions.
Panorama
2)
The panorama function permits "normal" programmes in 4:3 format to be adapted to the 16:9
format of the CRT. This is done by expanding the
width of the picture to fill the entire width of the
screen.
Noise reduction
This setting can be used to improve the quality of
pictures with „snow“ or other noise resulting from
poor reception conditions. Depending on the
amount of interference, various correction facilities
are available and the noise reduction can be set
individually for each programme position.
Rotation
2)
This function can be used to compensate for the
Earth’s magnetic field. It may be needed when the
TV set is first installed, or if the TV set is moved to
a different location, and the picture is not aligned
horizontally on the screen.
VCR
The VCR function ensures optimum picture quality
when playing back recordings from tape devices
2) Available only on TV sets
which are equipped with this
option.
55
Page 56

32. Glossary
such as camcorders and video recorders.
Forced mono
In some cases, your TV set may switch from mono
to stereo during a programme, although the station
is not transmitting a stereo signal. This is normally
due to the local reception conditions. If you activate
„forced mono“ for the selected programme positions, all programmes will be reproduced in mono,
regardless of the received signal.
2) Available only on TV sets
which are equipped with this
option.
56
Page 57

Problem Possible cause Remedy
The TV set does not
react to commands
from the remote control unit.
Unnatural colours,
coloured spots on
the screen
• There is no visual contact between the remote control unit
and the TV set.
• Sunlight is falling directly on
the infrared of the TV set.
• The batteries in the remote
control unit are exhausted.
• The TV set has been switched
off with the mains switch.
• The microprocessor is faulty.
• Strong magnetic fields in the
vicinity of the TV set (from
loudspeakers or other devices)
• Ensure that there are no
obstacles.
• Avoid direct exposure
to sunlight.
• Replace the batteries.
• Switch on the TV set
with the mains switch.
• Switch the TV set off
with the mains switch
and then switch it on
again.
• Move the loudspeakers
away from the TV set.
• If the coloured spots per-
sist, switch the TV set off
After the TV set has
been switched on,
the message „Please
enter code“ is
displayed.
The TV set does not
switch to the selected
programme position.
Instead, a list of stations is displayed with
a teddy-bear symbol.
You have switched
off the TV set with
the key, but the
green LED is still on.
• The childlock function has
been programmed to prevent
selection of any station.
• The childlock function has
been programmed to permit
selection of only the stations
shown in the list.
• The TV set is currently collecting EPG (electronic programme guide) data from the selected NextView station.
with the mains switch, wait
a few seconds and then
switch it on again.
• Enter the code number
with which the childlock
function was programmed.
• Enter the code number
with which the childlock
function was programmed.
• Leave the TV set as it is.
It will switch itself off
automatically once all
available data have
been collected.
57
Page 58

Problem
Possible cause Remedy
Immediate recording
of a terrestrial station (received via
your house antenna
or cable) with Data
Logic does not work.
General problems
with an external AV
device connected to
the TV set.
• The Data Logic video recorder
is not connected to the house
antenna or cable outlet.
• The AV device has not been
set up correctly in the TV set.
• Connect the Data Logic
video recorder to the
house antenna or cable
outlet with the aid of an
antenna cable.
• In the menu „AV devices“, select the appropriate device with the
cursor, set the „Signal
OUT/IN“ accordingly
and press the „OK“ key.
Connect the AV device
only as shown in the
connection diagram.
Data Logic does not
work.
• The Data Logic video recorder
with data interchange has not
been set up correctly in the TV
set.
• The Data Logic video recorder
is not connected to the EURO1
socket.
• The Euro-AV (Scart) cable
being used does not have all
21 pins connected.
• In the menu „AV devices“, define the Data
Logic video recorder as
video recorder 1 with
„Datalogic ON“.
• Connect the Data Logic
video recorder to the
EURO1 socket with a
Scart cable.
• Use a Euro-AV (Scart)
cable with all 21 pins
connected.
58
Page 59

Problem
Possible cause Remedy
You are playing
back a film in 16:9
format from an AV
device, but it appears on the screen in
4:3 format.
The menu of a connected AV device
(such as a DVD player) is not displayed
on the screen of the
TV set.
• You have not set the aspect
ratio for the AV programme
position correctly
• The AV device was entered in
the TV menu with the signal
type "Composite video blanking and sync" (CVBS).
• Select the AV programme position and set the
aspect ratio to 16:9 or
"Automatic" (see
Section 14 or 18)
• In the connection menu,
set the signal type for
the AV device to "RGB"
(see page 46).
59
Page 60

Index
Additional devices (see AV devices) . . . . . . . . 44
Aspect ratio . . . . . . . . . . . . . . . . . . . . . . . . . 30
Automatic station search . . . . . . . . . . . . . . . . 39
Automatic zoom . . . . . . . . . . . . . . . . . . . . . . 24
AV devices, connecting . . . . . . . . . . . . . . . . . 44
AV programme position. . . . . . . 25,37,45,47,54
AV playback, devices without switching voltage 16
AV playback, devices with switching voltage . . 15
Batteries for remote control . . . . . . . . . . . . . . 57
Brightness (luminance) . . . . . . . . . . . . . . . . . . 18
Camcorder, connecting. . . . . . . . . . . . . . . 16,44
Channel frequency settings . . . . . . . . . . . . 40,41
Childlock . . . . . . . . . . . . . . . . . . . . . . . . . . . 25
Childlock, activating . . . . . . . . . . . . . . . . . . . 25
Childlock, deactivating. . . . . . . . . . . . . . . . . . 26
Cleaning. . . . . . . . . . . . . . . . . . . . . . . . . . . . 56
Code for childlock . . . . . . . . . . . . . . . . 25,26,54
Colour intensity (chrominance) . . . . . . . . . . . . 18
Colour standard . . . . . . . . . . . . . . . . . . . . . . 23
Comb filter (see "Picture settings"). . . . . . . . . . 54
Country . . . . . . . . . . . . . . . . . . . . . . . . . . . . 38
CTI (see picture settings). . . . . . . . . . . . 18,19,54
DataLogic video recorder . . . . . . . . 17,44,45,58
Decoder (D-Box), connecting . . . . . . . . . . . . . 44
Display answer . . . . . . . . . . . . . . . . . . . . . . . 13
Double font size . . . . . . . . . . . . . . . . . . . . . . 13
DVD player, connecting . . . . . . . . . . . . . . . . . 44
Electronic Programme Guide (EPG) . . . . . . 32,33
EPG . . . . . . . . . . . . . . . . . . . . . . . . . . . . 32,33
EURO sockets . . . . . . . . . . . . . . . . . . . . . . . . 15
External devices, connecting. . . . . . . . . . . . . . 44
External devices, playback . . . . . . . . . . . . 15,16
Fine tuning . . . . . . . . . . . . . . . . . . . . . . . . . . 41
Font size, double. . . . . . . . . . . . . . . . . . . . . . 13
Forced mono. . . . . . . . . . . . . . . . . . . . . . . . . 55
Frame freeze. . . . . . . . . . . . . . . . . . . . . . . . . . 7
Glossary . . . . . . . . . . . . . . . . . . . . . . . . . . . 54
Headphones. . . . . . . . . . . . . . . . . . . . . . . . . 53
Help. . . . . . . . . . . . . . . . . . . . . . . . . . . . . . . 10
60
Page 61

Index
Info (Information) (see "Help") . . . . . . . . . . . . 10
Initial programme position . . . . . . . . . . . . . . . 46
Interests (see NexTView) . . . . . . . . . . . . . . 35,36
Language in TV menu . . . . . . . . . . . . . . . . . . 38
Mark-by-mark scrolling. . . . . . . . . . . . . . . . . 13
Marks, deleting . . . . . . . . . . . . . . . . . . . . . . . 14
Marks, overview . . . . . . . . . . . . . . . . . . . . . . 14
Marks, setting in Teletext . . . . . . . . . . . . . . . . 13
Menu language. . . . . . . . . . . . . . . . . . . . . . . 38
Menu, menu control. . . . . . . . . . . . . . . . . . . . 11
Multiple pages, sub-pages . . . . . . . . . . . . . . . 13
NexTView (see "EPG") . . . . . . . . . . . . . . . 32,33
Noise reduction. . . . . . . . . . . . . . . . . . . . . . . 55
Panorama
Picture format . . . . . . . . . . . . . . . . . . . . . . . . 30
Picture position. . . . . . . . . . . . . . . . . . . . . 30,31
Picture quality with video recorder (see VCR)
Picture settings . . . . . . . . . . . . . . . . . 8,18,19,20
Picture sharpness . . . . . . . . . . . . . . . . . . . 18,20
Premiere decoder - see "AV devices"
Programme guide (see "NexTView")
Programme switching for AV devices . . . . . . . 15
Puzzle key . . . . . . . . . . . . . . . . . . . . . . . . . . . I3
2)
. . . . . . . . . . . . . . . . . . . . . . . . . . 19
. . 16,56
Recording with NexTView (EPG) . . . . . . . . . . 58
Reminder . . . . . . . . . . . . . . . . . . . . . . . . . . . 27
Rotation. . . . . . . . . . . . . . . . . . . . . . . . . . 18,56
Signal type (EURO sockets). . . . . . . . . . . . 44,46
Sleep timer (see "Switch-off time") . . . . . . . . . 28
Sound 1, sound 2 . . . . . . . . . . . . . . . . . . . . . 53
Sound effects – see "Stereo wide" or "Spatial sound"
Sound settings. . . . . . . . . . . . . . . . . . . . . . . . 21
Spatial sound (see "Sound settings") . . . . . 21,55
Spatial sound. . . . . . . . . . . . . . . . . . . . . . 54,58
Standard picture settings (see standard settings)18
Standard sound values . . . . . . . . . . . . . . . 21,22
Standard time . . . . . . . . . . . . . . . . . . . . . . . . 28
Standard values . . . . . . . . . . . . . . . . . 18,21,55
Station logo . . . . . . . . . . . . . . . . . . . . . . . . . 42
Station search . . . . . . . . . . . . . . . . . . . . . 39,40
Station search, automatic. . . . . . . . . . . . . . . . 39
2) Available only on TV sets
which are equipped with this
option.
61
Page 62

Index
Station selection . . . . . . . . . . . . . . . . . . . 6,9,50
Station table . . . . . . . . . . . . . . . . . . . . . . . . . . 9
Stations, deleting. . . . . . . . . . . . . . . . . . . . . . 43
Stations, moving . . . . . . . . . . . . . . . . . . . . . . 43
Stations, moving, copying, deleting . . . . . . . . 43
Subtitles . . . . . . . . . . . . . . . . . . . . . . . . . . . . 14
Summer time (see "Time settings"). . . . . . . . . . 29
Switching voltage, devices without . . . . . . . . . 16
Switching voltage, devices with . . . . . . . . . . . 15
Switch-off time . . . . . . . . . . . . . . . . . . . . . . . 28
Switch-on time . . . . . . . . . . . . . . . . . . . . . . . 28
Teletext. . . . . . . . . . . . . . . . . . . . . . . . . . . . . 12
Teletext, deleting marks . . . . . . . . . . . . . . . . . 14
Teletext, font size . . . . . . . . . . . . . . . . . . . . . . 13
Teletext, overview of marks. . . . . . . . . . . . . . . 14
Teletext, scrolling by marks. . . . . . . . . . . . . . . 13
Teletext, setting marks . . . . . . . . . . . . . . . . . . 13
Thunderstorms. . . . . . . . . . . . . . . . . . . . . . . . . 4
Timer control. . . . . . . . . . . . . . . . . . . . . . . . . 28
Tone settings (see "Sound settings") . . . . . . 21,55
Transferring recordings . . . . . . . . . . . . . . . . . 17
TV menu. . . . . . . . . . . . . . . . . . . . . . . . . . . . 11
VCR function . . . . . . . . . . . . . . . . . . . . . . 16,56
Video cassette, playing back . . . . . . . . . . . . . 15
Video recorder, connecting . . . . . . . . . . . . . . 44
Video recorder, picture quality (see "VCR function")
Video-recorder programme change . . . . . . . . 15
Volume correction (see Section 12.1) . . . . . 22,55
Winter time . . . . . . . . . . . . . . . . . . . . . . . . . 29
Zoom. . . . . . . . . . . . . . . . . . . . . . . . . 17,30,31
Errors excepted. Subject to changes.
62
Page 63

✍ ✍
63
Page 64

Service Centre
Training Centre
Administration and development
Storage/Dispatch
Mecablitz production
TV production
Plastics technology
Metz - Werke GmbH & Co. KG - Zirndorf near Nürnberg
Core competence in the areas of electronics and plastics
technology to form the basis of the excellent reputation of the
Metz Werke that has been built up throughout the world over
a period of many decades.
Metz offers quality made in Germany:
Consumer electronics, mecablitz flash units,
plastics technology and industrial electronics.
Metz-Werke GmbH & Co. KG
Postfach 1267, D-90506 Zirndorf
Fon: +49 911 - 97060
Fax: +49 911 - 9706340
www.metz.de
info@metz.de
Errors excepted. Subject to changes.
ķ Printed in Germany
Metz - allways first class.
 Loading...