

Page 1

Network Scales
UC Evo CT
User's Guide
Page 2
Revision
Date
Revisions
02
02/2016
Updated name of Dead Deck model
to Printer-Weight Indicator and
Fusion 5.0 Updates
01
09/2014
Updates and new format
00
08/2014
UC Evo CT new User's Guide
© METTLER TOLEDO 2014
No part of this manual may be reproduced or transmitted in any form or by any means, electronic or
mechanical, including photocopying and recording, for any purpose without the express written
permission of METTLER TOLEDO.
U.S. Government Restricted Rights: This documentation is furnished with Restricted Rights.
Copyright 2014 METTLER TOLEDO. This documentation contains proprietary information of METTLER
TOLEDO. It may not be copied in whole or in part without the express written consent of METTLER
TOLEDO.
METTLER TOLEDO reserves the right to make refinements or changes to the product or manual
without notice.
COPYRIGHT
METTLER TOLEDO® is a registered trademark of Mettler-Toledo, LLC. All other brand or product
names are trademarks or registered trademarks of their respective companies.
METTLER TOLEDO RESERVES THE RIGHT TO MAKE REFINEMENTS OR CHANGES
WITHOUT NOTICE.
FCC Notice
This device complies with Part 15 of the FCC Rules and the Radio Interference Requirements of the
Canadian Department of Communications. Operation is subject to the following conditions: (1) this
device may not cause harmful interference, and (2) this device must accept any interference
received, including interference that may cause undesired operation.
This equipment has been tested and found to comply with the limits for a Class A digital device,
pursuant to Part 15 of FCC Rules. These limits are designed to provide reasonable protection against
harmful interference when the equipment is operated in a commercial environment. This equipment
generates, uses, and can radiate radio frequency energy and, if not installed and used in
accordance with the instruction manual, may cause harmful interference to radio communications.
Operation of this equipment in a residential area is likely to cause harmful interference in which case
the user will be required to correct the interference at his or her expense.
Revision History
NOTE: Not all of the features and functions listed in this User's Guide may be available
on your scale, depending on your scale settings and software version.
Page 3
RoHS Compliance Statement.
The majority of our products fall within categories 8 and 9. Those categories currently do not fall
within the scope of the Directive 2002/95/EG (RoHS) of January 27, 2003. If our products are
intended for use in other products which themselves fall within the scope of the RoHS Directive,
compliance requirements have to be separately negotiated contractually.
Those products which fall within categories 1-7 and 10 will be in compliance with the EU RoHS
Directive from no later than July 1, 2006.
If it is not possible for technical reasons to replace any non-RoHS-compliant substances in any of
the above products as required, we plan to inform our customers in a timely manner
Statement regarding harmful substances
We do not make direct use of harmful materials such as asbestos, radioactive substances or
arsenic compounds. However, we purchase components from third party suppliers, which may
contain some of these substances in very small quantities.
Page 4

Page 5

Warnings and Cautions
In conformance with the European Directive 2002/96/EC on Waste Electrical and Electronic
Disposal of Electrical and Electronic Equipment
Equipment (WEEE) this device may not be disposed of in domestic waste. This also applies
to countries outside the EU, per their specific requirements.
Please dispose of this product in accordance with local regulations at the collecting point
specified for electrical and electronic equipment.
If you have any questions, please contact the responsible authority or the distributor from
which you purchased this device.
Should this device be passed on to other parties (for private or professional use), the
content of this regulation must also be related.
Thank you for your contribution to environmental protection.
Page 6

64092826 | 02 | 02/2016
METTLER TOLEDO UC Evo CT User's Guide
1
Contents
1 Introduction ................................................................................. 1-1
1.1. Overview ...................................................................................... 1-1
1.2. Operator Touchscreen .................................................................... 1-3
1.3. Power Cord and Switch.................................................................. 1-4
1.4. Network Connections ..................................................................... 1-5
2 Loading Labels ............................................................................ 2-1
2.1. UCWx Evo CT ............................................................................... 2-1
2.2. UC-GT Evo CT ............................................................................... 2-3
3 Operating Instructions .................................................................. 3-1
3.1. Main Screen ................................................................................. 3-1
3.1.1. Main Screen Additional Functions .......................................................................... 3-2
3.1.2. PLU Screen ......................................................................................................... 3-3
3.1.3. Presets ............................................................................................................... 3-5
3.1.3.1. Preset Quick Editor ........................................................................................................... 3-5
3.2. Customer Display ......................................................................... 3-6
3.3. Basic Operation ............................................................................ 3-7
3.3.1. PLU Call-Up ........................................................................................................ 3-7
3.3.1.1. Presets ........................................................................................................................... 3-7
3.3.1.2. Scanning ........................................................................................................................ 3-8
3.3.1.3. Keypad ........................................................................................................................... 3-9
3.3.1.4. Search by PLU Description ................................................................................................ 3-9
3.3.1.5. Tare ................................................................................................................................ 3-9
3.3.1.6. PLU Screen .................................................................................................................... 3-10
3.3.2. Printing Labels .................................................................................................. 3-10
3.3.2.1. Printing Labels – Service mode/By-weight ......................................................................... 3-10
3.3.2.2. Printing Labels – Service mode/By-count ........................................................................... 3-10
3.3.2.3. Printing Labels – Prepack Mode ....................................................................................... 3-11
3.3.2.4. Stripped and Un-Stripped Modes ...................................................................................... 3-11
3.4. PLU Pricing Modes ...................................................................... 3-12
3.4.1. By-Weight PLU .................................................................................................. 3-12
3.4.2. By-Count PLU ................................................................................................... 3-13
3.4.3. Standard Pack PLU ............................................................................................ 3-13
3.5. Temporary Overrides ................................................................... 3-13
3.6. Operator ID and Password ........................................................... 3-15
3.7. Product Info Button ..................................................................... 3-15
3.8. Memory Mode ............................................................................ 3-15
3.9. Country of Origin Labeling (COOL) ................................................ 3-17
3.9.1. COOL Record Types ........................................................................................... 3-17
3.9.1.1. COOL Text ..................................................................................................................... 3-17
Page 7

2
METTLER TOLEDO UC Evo CT User's Guide
64092826 | 02 | 02/2016
Contents
3.9.1.2. Production Text .............................................................................................................. 3-17
3.9.1.3. Country Text .................................................................................................................. 3-17
3.9.1.4. Pre Text ........................................................................................................................ 3-17
3.9.2. Create/Edit COOL Text ........................................................................................ 3-18
3.9.3. Pre-Configured COOL Statements ........................................................................ 3-18
3.9.4. Tracking or Lot Numbers .................................................................................... 3-18
3.9.5. COOL Changes from PLU Screen ......................................................................... 3-19
3.9.6. Custom COOL Statements ................................................................................... 3-19
3.9.7. Forced COOL..................................................................................................... 3-20
3.9.8. COOL Pretext..................................................................................................... 3-20
3.9.9. Scale Setup for COOL ......................................................................................... 3-21
3.9.9.1. Allow Incomplete Custom COOL Step ................................................................................ 3-21
3.9.9.2. COOL Entry Mode ........................................................................................................... 3-21
3.9.9.3. COOL Processing Mode .................................................................................................. 3-23
3.9.9.4. Standard COOL, no Tracking ............................................................................................ 3-23
3.9.9.5. Restricted COOL, no Tracking ........................................................................................... 3-23
3.9.9.6. Standard COOL, with Tracking ......................................................................................... 3-23
3.9.9.7. Restricted COOL, with Tracking ........................................................................................ 3-23
3.10. Operations Menu ........................................................................ 3-24
3.10.1. Void Transactions .............................................................................................. 3-24
3.10.2. Verify Labels ..................................................................................................... 3-25
3.10.3. Measure Label .................................................................................................. 3-25
3.10.4. Reset Printer ..................................................................................................... 3-25
3.10.5. Launch User Application ..................................................................................... 3-26
3.11. UC Production Reports Tool .......................................................... 3-26
3.11.1.1. Daily Production Trend Report .......................................................................................... 3-27
3.11.1.2. Price Override Report ...................................................................................................... 3-27
3.11.1.3. Detailed PLU Report ........................................................................................................ 3-27
3.11.1.4. Department Summary Report ........................................................................................... 3-27
3.11.1.5. Setup ............................................................................................................................ 3-27
3.11.2. Custom Production Report .................................................................................. 3-28
3.11.3. Daily Production Report ..................................................................................... 3-30
3.11.4. Price Override Report ......................................................................................... 3-31
3.11.5. Detailed PLU Report ........................................................................................... 3-32
3.11.6. Department Summary ........................................................................................ 3-33
3.11.7. Setup: Configuring Reports ................................................................................. 3-34
3.12. Self-Service Mode ....................................................................... 3-38
3.12.1. Zeroing the Scale in Self-Service Mode ................................................................. 3-41
3.12.2. Slide Show in Self-Service Mode .......................................................................... 3-41
3.13. Search Function .......................................................................... 3-41
3.13.1. Search in Self-Service Mode ................................................................................ 3-41
3.13.2. Search in Service Counter Mode .......................................................................... 3-42
3.14. Auto HTML ................................................................................. 3-43
3.15. App Manager .............................................................................. 3-44
Page 8

64092826 | 02 | 02/2016
METTLER TOLEDO UC Evo CT User's Guide
3
4 Setup .......................................................................................... 4-1
4.1. Introduction .................................................................................. 4-1
4.1.1. Printer and Label Setup ........................................................................................ 4-2
4.1.2. Chose Store Logo ................................................................................................ 4-2
4.2. Label Printer Setup ........................................................................ 4-3
4.2.1. Refresh, Save, Cancel .......................................................................................... 4-3
4.2.2. Current Label Stock .............................................................................................. 4-4
4.2.3. Run Total Label Format ........................................................................................ 4-4
4.2.4. Stripped Delivery ................................................................................................. 4-4
4.2.5. Inverted Delivery .................................................................................................. 4-4
4.2.6. Eject Length ........................................................................................................ 4-4
4.2.7. Image Offset ....................................................................................................... 4-4
4.2.8. NF Label Format .................................................................................................. 4-5
4.2.9. Label Formats ..................................................................................................... 4-5
4.2.10. Barcode Setup..................................................................................................... 4-6
4.2.10.1. Barcode Type .................................................................................................................. 4-6
4.2.11. Printer Adjustment ............................................................................................. 4-10
4.2.11.1. Calibrate Gap Sensor ...................................................................................................... 4-10
4.2.11.2. Measure Label ............................................................................................................... 4-11
4.2.11.3. Print Test ....................................................................................................................... 4-11
4.2.11.4. Stage Label ................................................................................................................... 4-11
4.2.11.5. Calibrate Both Sensors .................................................................................................... 4-11
4.3. Presets ...................................................................................... 4-12
4.3.1. Preset Quick Key Editor ...................................................................................... 4-13
4.3.2. Preset Page Setup ............................................................................................. 4-14
4.3.3. Add Page ......................................................................................................... 4-15
4.3.4. Graphical Tare Presets ....................................................................................... 4-17
4.3.5. Edit Page .......................................................................................................... 4-20
4.3.6. Add Preset Pages “By Department” ...................................................................... 4-20
4.3.7. Add Preset Page Using “Custom” ........................................................................ 4-21
4.3.8. Show/Hide Menu ............................................................................................... 4-22
4.3.9. Edit Preset ........................................................................................................ 4-23
4.3.9.1. Choose PLU (list) ........................................................................................................... 4-24
4.3.9.2. Chose PLU (search) ....................................................................................................... 4-25
4.3.9.3. Configure Preset Wizard .................................................................................................. 4-26
4.3.10. Graphical Presets .............................................................................................. 4-28
4.3.11. Display Options................................................................................................. 4-29
4.3.11.1. Top Page ...................................................................................................................... 4-29
4.3.11.2. Display Page ................................................................................................................. 4-30
4.3.11.3. Auto-Configure Settings ................................................................................................... 4-30
4.3.11.4. Top Tare Page ............................................................................................................... 4-30
4.3.12. Save the Page ................................................................................................... 4-30
4.4. Quick Edits ................................................................................. 4-30
4.5. Launch External Applications ........................................................ 4-33
4.5.1. UC Editor .......................................................................................................... 4-34
4.5.2. UC SmartLabel .................................................................................................. 4-35
Page 9

4
METTLER TOLEDO UC Evo CT User's Guide
64092826 | 02 | 02/2016
Contents
5 Maintenance ............................................................................... 5-1
5.1. External Cleaning .......................................................................... 5-1
5.2. Printer Cleaning ............................................................................ 5-2
5.2.1. Materials Required ............................................................................................... 5-2
5.2.2. Recommended Frequency: ................................................................................... 5-2
5.2.3. UC-CWx/UC-GT ................................................................................................... 5-2
Page 10

64092826 | 02 | 02/2016
METTLER TOLEDO UC Evo CT User's Guide
1-1
This chapter covers
• Network Connections
1 Introduction
Customer Display
stainless steel platter
Operator Display
High resolution thermal printer
Integrated wireless solution
1.1. Overview
Thank you for purchasing a UC Evo CT product. You have chosen the most capable scale
• Overview
• Operator Touchscreen
• Power Cord and Switch
instrument available. METTLER TOLEDO designed the UC Evo CT for your current and
future requirements. The UC Evo CT can easily adapt to changing process and data
requirements. This flexibility protects your investment and helps you keep pace with
rapidly changing production and customer demands. The METTLER TOLEDO
products offer a user friendly graphical touchscreen interface and the Microsoft Windows
operating system or Linux.
®
UC Evo CT
®
UC Evo CT features:
•
CWT Evo CT; 5.7": UC-CWQ Evo CT)
• Easy to clean
•
adjustable viewing angle.
•
•
standard, 2x2 MIMO optional.
Figure 1-1: UC-CWx Evo CT
– Color LCD with LED backlight and adjustable viewing angle. (12.1": UC-
- 12.1" (308mm) color LCD touchscreen with LED backlighting and
for wireless data transmission according to IEEE 802.11 a/b/g/n
15.75" x 9.75" (400 x 248 mm)
with extra-large label capacity.
Page 11

1-2
METTLER TOLEDO UC Evo CT User's Guide
64092826 | 02 | 02/2016
Introduction
All compact counter scale versions feature a pull-out thermal label printer designed for quick and
easy roll changes with an extra-large label capacity. The customer display and operator display is
angle adjustable.
Figure 1-2: UC-GT Evo CT Self-Service Scale (shown with optional scanner)
UC-GT Evo CT Features:
• 12.1" (308mm) color LCD touchscreen with CCFL backlighting.
• Easy to clean stainless steel platter 15.75" x 9.75" (400 x 248 mm)
• 2" (54 mm) wide up to 5"/sec thermal label printer
• Integrated wireless solution for wireless data transmission according to IEEE 802.11 a/b/g/n
standard, 2x2 MIMO capable.
The UC-CWQ Evo CT scale is a low profile counter scale. The operator display on this model is a
12.1” LED backlit color LCD with a Touchscreen keyboard. The customer display on the UC-CWQ
Evo CT is a color 5.7” VGA LED backlit display.
The UC-CWT Evo CT scale is a low profile counter scale with a large merchandising customer
display. The operator display on this model is a 12.1” LED backlit color LCD with a Touchscreen
keyboard. The UC-CWT Evo CT customer display is a 12.1” LED backlit LCD color display.
A Printer-Weight Indicator deck version of the UC-CW Evo CT is also available. The Printer-Weight
Indicator can be connected to an external scale base for weight input.
Page 12

64092826 | 02 | 02/2016
METTLER TOLEDO UC Evo CT User's Guide
1-3
The UC-GT Evo CT scales are tower versions designed for self-service applications and include a
large 12.1” LED backlit color LCD display. This model has no rear display.
Figure 1-3: UC-CWQ Evo CT Counter Scale, UC-CWT Evo CT Counter Scale, UC-GT Evo CT Self-Service
Figure 1-4: UC-CW Evo CT Printer-Weight Indicator, UC-CWQ Evo CT with Scanner
1.2. Operator Touchscreen
The Operator display is an easy-to-use Graphical Touchscreen combining an LCD display and
touch sensitive screen into one unit. It can display text-based preset keys or graphical image-based
preset keys.
Figure 1-5: Main Screen Shown with Graphical Presets
The touchscreen angle is adjustable using the lock levers located on the rear top of the display.
Page 13
1-4
METTLER TOLEDO UC Evo CT User's Guide
64092826 | 02 | 02/2016
Introduction
Pull both levers outward at the same time to raise or lower the display.
1.3. Power Cord and Switch
On the UC-CWx/UC-GT Evo CT, the power switch and power cord jack are located on the scale base
near the left front of the unit. Press the (-) on the rocker power switch briefly to turn the scale power
to ON. To turn the scale power off, always exit any editing screens, and then press the (o) on the
switch to turn power OFF.
Always turn the scale power to off before cleaning the scale.
Figure 1-6: Power Switch and Power Cord Connection, UC-CWx/UC-GT Evo CT
The UC requires 100-240 VAC, 50/60 Hz, 2.2A power. Wiring must include a proper ground. The
integrity of the power ground for equipment is important for both safety and dependable operation of
Page 14
64092826 | 02 | 02/2016
METTLER TOLEDO UC Evo CT User's Guide
1-5
the electronic device. A poor ground can result in an unsafe condition should an electrical short
develop in the equipment.
A good ground connection minimizes extraneous electrical noise pulses. The electronic device
should not share power lines with noise-generating equipment. Examples include electrical motors,
compressors, heating elements, lights, and relays that may generate noise spikes and power
surges. To confirm ground integrity, use a commercial branch circuit analyzer or grounded outlet
tester. If adverse power conditions exist, a dedicated power circuit or power line conditioner might
be required.
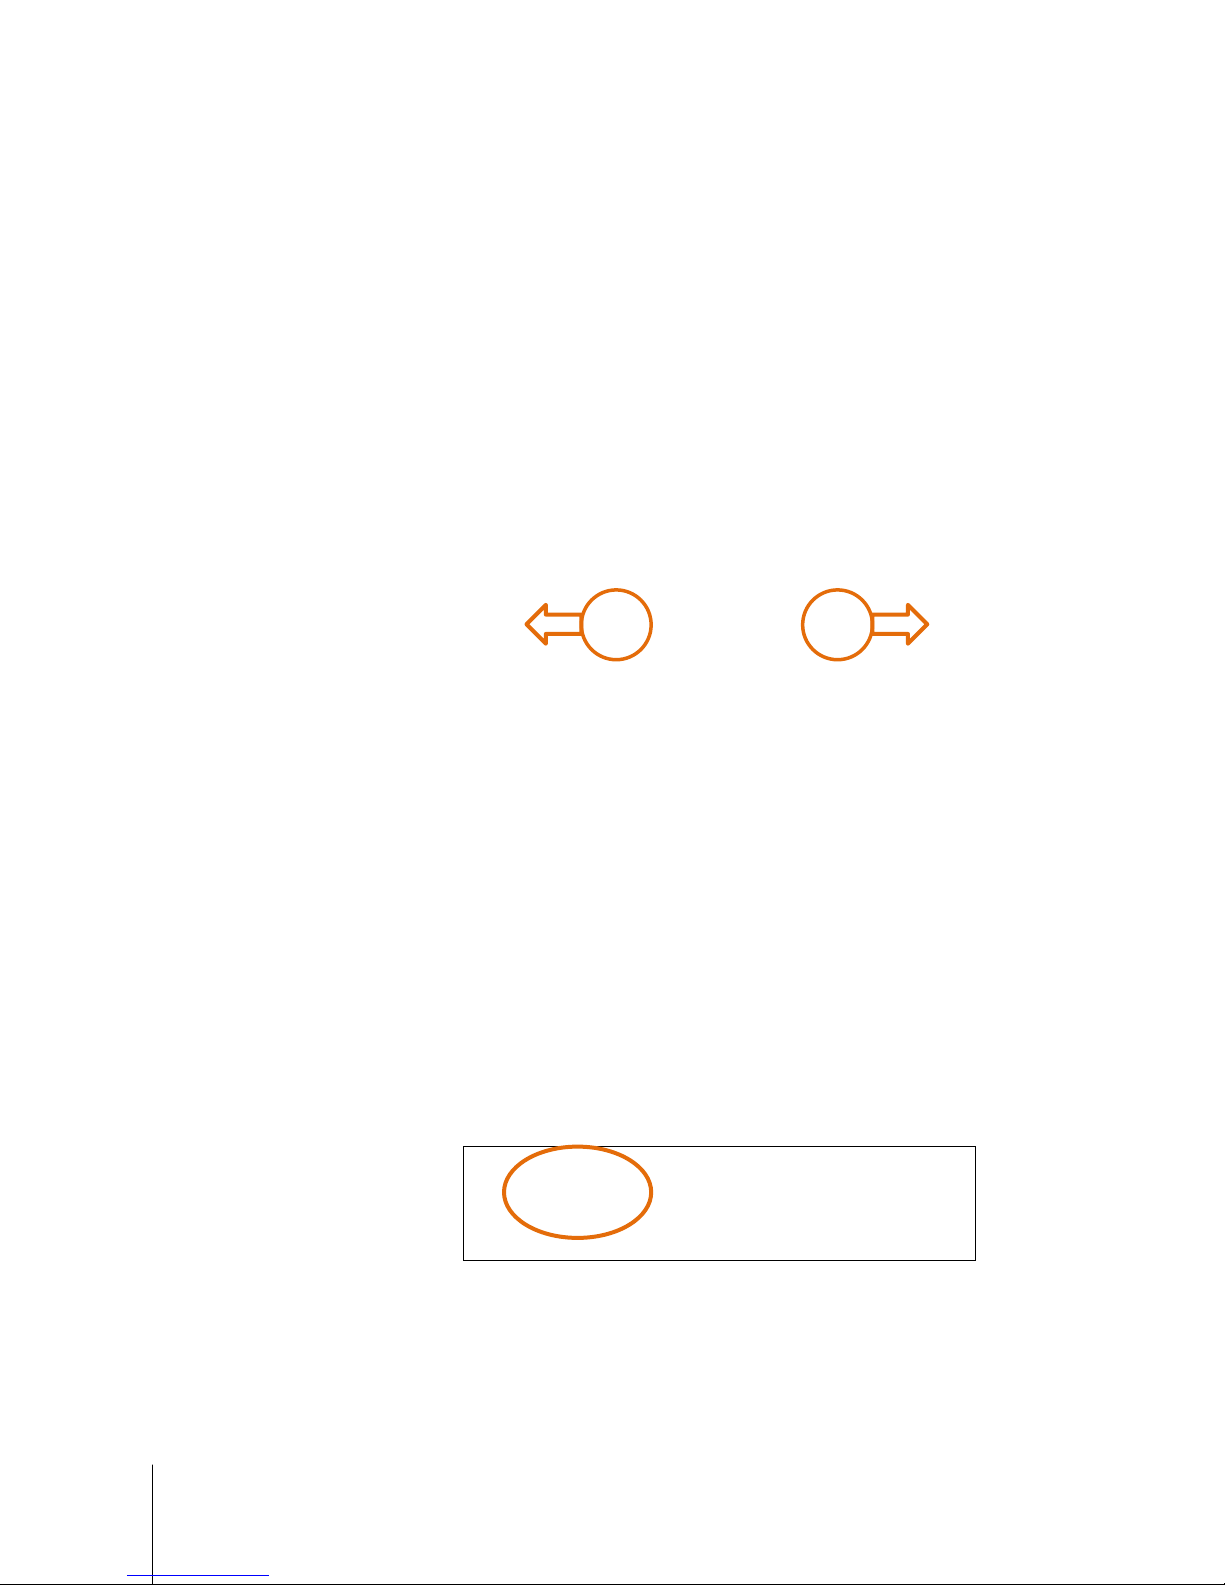
1.4. Network Connections
UC Evo CT scales can connect to an Ethernet network using a cable or using a wireless radio. The
wired connection jack locations are shown below. If you are connected using a wireless radio, you
will see a cover protruding from the left side of the counter scale, the right side of the UC-GT Evo CT
(see below).
Figure 1-7: UC-CWx Evo CT Cover for Wireless Antenna (right)
Figure 1-8: RJ45 Ethernet Jack for Wired Connections: UC-CWx/UC-GT Evo CT
Page 15

64092826 | 02 | 02/2016
METTLER TOLEDO UC Evo CT User's Guide
2-1
This chapter covers
• UC-GT Evo Ct
2 Loading Labels
2.1. UCWx Evo CT
• CWx Evo CT
Figure 2-1: Label Access, UC-CWX (UC-CWQ Evo CT and UC-CWT Evo CT)
Figure 2-2: Label Access, UC-GT Evo CT
Page 16

2-2
METTLER TOLEDO UC Evo CT User's Guide
64092826 | 02 | 02/2016
Loading Labels
Press down on the release tab to open the door. Pull
Unlock and raise the printhead by pulling up on the
Pull the liner back and route it under the bottom guide
Press down on the printhead latch until it locks down.
the printer out using the green pull-tab on the printer.
latch. Install the label roll on the supply spool, remove
6 inches of labels from the liner, and then slide under
the guides.
as shown on the label threading diagram on the printer
back-plate. Push the green knob to lock the liner and
turn it clockwise to take up slack.
If the label width is different than the current width, turn
the slotted screw with a small flat blade screwdriver
CW or CCW to the width of the new label stock.
Page 17

64092826 | 02 | 02/2016
METTLER TOLEDO UC Evo CT User's Guide
2-3
Press down on the printhead latch until it locks down.
Push the printer in and close the door for normal
Open the printer door and look to the label threading
Unlock and raise the printhead by pressing the green
operation.
2.2. UC-GT Evo CT
diagram on the printer back-plate for reference in
loading labels.
release latch.
Page 18

2-4
METTLER TOLEDO UC Evo CT User's Guide
64092826 | 02 | 02/2016
Loading Labels
For stripped label operation, install the label roll on the
Press down on the printhead latch until it locks. Close
supply spool and remove about six inches of labels
from the liner. Slide the labels into the guides as shown
in the photo at right.
the printer door. The printer is now ready to start
printing labels.
Page 19

64092826 | 02 | 02/2016
METTLER TOLEDO UC Evo CT User's Guide
3-1
This chapter covers
3 Operating Instructions
1
Weight Display. Displays the current weight of the item on the scale. Touch to zero the scale if the
2
Current Department, date, time, and network ID.
3
Price Look Up (PLU) number display.
4
CLEAR button clears values from the PLU number box.
5
BACKSPACE erases the last entry. When touched again it erases digits to the left.
6
ENTER accepts the displayed value.
7
Search – used to search the Database for a PLU.
8
The Operations Button is used to access Verify Labels, Void Transactions, Measure Label and other
9
The Setup – enter the scale's Setup Mode.
10
Tab Bar – allows you to toggle between preset page tabs. When there are more page tabs than can be
11
Presets – can be either pages or keys. When a preset page is selected, it will display the associated
preset keys. When a preset key is selected, it takes you to the PLU transaction screen. Touch twice to
1
10
4
6
7
3.1. Main Screen
This chapter covers basic operating instructions, functions of the Main and PLU
• Main Screen
• Customer Display
• Basic Operation
• PLU Pricing Modes
• Temporary Overrides
• Operator ID and Password
• Product Info Button
• Memory Mode
• Country of Origin Labeling (COOL)
• Operations Menu
• UC Production Reports Tool
• Self-Service Mode
• Search Function
• Auto HTML
• App Manager
screens, pricing modes and overrides.
12
11
Figure 3-1: Main Screen Functions
2
3
5
8
9
weight is not 0.00 with nothing on the platter.
enabled Operator accessible functions. Not shown in Self-Serve Mode.
displayed, left and right arrow buttons will display. The current tab will be highlighted. The buttons are
configured in Setup mode under Presets Setup.
Page 20

3-2
METTLER TOLEDO UC Evo CT User's Guide
64092826 | 02 | 02/2016
Operating Instructions
print a label. If enabled in Setup, touch and hold to start the Preset Quick Editor.
12
Gross/Net indicator. When Net displays, this indicates a tare weight.
1
Task Bar – Displays when Application Manager is active. Used to switch between the scale application
2
Enter/Print – When enabled in Scale Settings, the Enter/Print button will accept the displayed PLU
3
Memory – When in Memory Mode, stored transactions can be viewed by selecting the memory key
4
Help – Launches the UC Help System. Refer to the UC Software Technical Manual for more information
5
Batch Mode - Batch print allows printing of batches of the same label. When the scale is in batch
6
When “Enable Double Click for Presets” is
7
Alert Area – Displays any alerts or messages to the operator.
8
Printer Online and Database Online indicators. Green indicates online.
6
2
5
3.1.1. Main Screen Additional Functions
1
7
8
3
4
Figure 3-2: Main Screen Additional Functions
and other external applications. Refer to the UC Software Technical Manual for details on configuring
this feature.
number and print a label.
from the main screen until a totals label is printed. . When items are in memory, the 'x' disappers.
on enabling the UC Help System.
mode, the 'x' disappears.
selected in Scale Settings, touching twice quickly on the preset button functions as an Enter/Print
button. A label will be printed if the weight is greater than the minimum print increment setting from the
Load Cell Setup screen in by-weight weighing mode.
Page 21

64092826 | 02 | 02/2016
METTLER TOLEDO UC Evo CT User's Guide
3-3
3.1.2. PLU Screen
1
Weight of the item - Displays the Weight of the item (Gross Weight – tare value (if applicable)). If a tare
2
Tare - touch this box to override the tare, if allowed in setup.
3
Unit Price - Touch to override (if allowed in setup). Used to calculate the Total Price.
4
Total Price - When sold by weight, this is the unit price multiplied by the net weight of the item. In by-
5
Pack Date uses the current date set in the scale. This will print on the label if it is included in the label
6
Shelf Life – Defaults to the pack date + the number of days in the shelf life field in the PLU record. When
7
Use By Date – Defaults to the pack date + the number of days in the product life field in the PLU record.
8
Clear ends the transaction and returns the display to the Main Screen.
9
Help – launches the UC Help System. Refer to the UC Software Technical Manual for more information
10
Memory – Touch Memory instead of Print to enter the transaction into memory for use on a totals
11
Print - prints the item label.
12
Label Format allows selection of available label sizes and styles.
13
Touching Accumulator selects the accumulator group for totals reporting. Refer to the UC Software
1
5 6 7
17
16
15
14 13
12
Shown below is the PLU Screen in a by-weight mode. If the value displays in a different color, it can
be changed for that transaction (#2 for example). If the value in the area is all the same color, it
cannot be changed (#4 for example).
2 3
4
8
9
10
11
Figure 3-3: PLU By Weight
is programmed, and nothing is on the platter, this weight will show a negative amount. If a tare is not
programmed, and the weight is not 0.00 with nothing on the platter, touch to zero scale.
count or standard pack, this is the total price of the item.
format.
the box is a different color, this date can be changed.
When the box is a different color, this date can be changed.
on enabling the UC Help System.
receipt label.
Technical Manual for more information on Accumulator Setup.
Page 22

3-4
METTLER TOLEDO UC Evo CT User's Guide
64092826 | 02 | 02/2016
Operating Instructions
14
Enable Prepack – when checked, enables Prepack Mode allowing the PLU to stay on the screen until
15
Product Info key (if HTML by PLU is enabled and configured) will display additional product
16
Extra Text – Text record associated with the PLU. When the box is a different color, this can be
17
Gross/Net indicator: when Net displays, this indicates that a tare weight has been deducted from the
1
Contents/Qty shows the item quantity.
1
Contents/Qty shows the item quantity.
2
Net Weight shows the predetermined weight of the item, excluding packaging materials.
1
1
Clear is touched (for batch label printing). Whenever weight is placed on the platter, a label will print.
information. Refer to the UC Software Technical Manual for more information on enabling and
configuring the Product Info key.
changed.
gross weight.
Figure 3-4: PLU By Count
2
Figure 3-5: PLU Standard Pack
Page 23

64092826 | 02 | 02/2016
METTLER TOLEDO UC Evo CT User's Guide
3-5
3.1.3. Presets
Touch and hold on any Preset to open the Quick
To change the Color Combination, touch any Preset.
Presets are used for single button call up of PLU numbers. Touch Once – Calls PLU and opens the
PLU screen. Place the item on the platter and touch the Preset and then the Print button to print a
label.
Touch Twice (if Enabled) – When touched twice quickly, a label will automatically print. To use,
place the item on the platter and then touch the Preset button twice quickly. The label will print after
briefly displaying a PLU information screen.
Touch and Hold (if Enabled) – Opens a Preset button Quick Editor. Touch and hold a Preset to
open a Quick editor. The hold time required and the time to return to the Main screen with no
activity can be configured in setup. A supervisor password is required to use this feature.
3.1.3.1. Preset Quick Editor
If enabled in setup, touching and holding a Preset button will open the Preset Quick Editor. (The
amount of time required to hold is configured in setup mode from 2-10 seconds.) When edits are
completed, touch the Save button to save and exit.
Editor. Select the user (Supervisor, Operator,
Technician) and enter the password.
Then touch the Color button to change the Color
Combination for that button.
Page 24

3-6
METTLER TOLEDO UC Evo CT User's Guide
64092826 | 02 | 02/2016
Operating Instructions
Then touch the Color button to change the Color
To add a Preset, touch any blank button, then key in
To change a Preset, touch the Preset and enter a new
Combination for that button.
the PLU number and touch the Enter button.
Touch Save to save the changes and exit the editor.
PLU number. To swap, touch the first Preset, touch the
Swap button, and then touch the second Preset to
swap positions.
Touch Save to save the changes and exit the editor.
3.2. Customer Display
After a PLU is called up by the Operator, the screen below shows an example of the PLU data that is
displayed on the Customer screen.
Figure 3-6: Customer Display on UC-CWQ Evo and UC-CWQ Evo CT
Page 25

64092826 | 02 | 02/2016
METTLER TOLEDO UC Evo CT User's Guide
3-7
Figure 3-7: Customer Display on UC-CWT Evo and UC-CWT Evo CT
Preset Buttons, Barcode Scanning, Search by
Description
Keypad
The scale can be set up to display the operator in one language and the customer display in
another. For example, English operator, and Spanish customer displays. This is configured in the
Scale Settings screens.
The customer display can also show merchandising messages, photos, and videos. Information to
set up the unit for merchandising can be found in the UC Software Technical Manual.
3.3. Basic Operation
3.3.1. PLU Call-Up
There are four ways to call up PLU records:
3.3.1.1. Presets
or Numeric Entry using the
The scale application can be set up for either text or graphical Presets. Below left shows a Main
Screen example of text Preset Buttons and below right a graphical preset screen. Touch a Preset
button to call the PLU. To quickly print a label, touch the Preset Button twice (when enabled in
setup). The buttons along the bottom select preset pages. Pages are PLUs grouped into categories,
departments, or multiple departments.
.
Page 26
3-8
METTLER TOLEDO UC Evo CT User's Guide
64092826 | 02 | 02/2016
Operating Instructions
Figure 3-8: Text Presets
Figure 3-9: Graphical Presets
3.3.1.2. Scanning
If the unit is equipped with a bar code scanner and the scanner is enabled and configured in the
Scale Settings, scan the bar code label on the product and the PLU will automatically load. Place
the items on the platter to weigh and complete the transaction. Refer to the UC Software Technical
Manual for more information on Barcode Scanner Configuration.
Figure 3-10: UC-CW (left) and UC-GT (right) Equipped with a Barcode Scanner
Page 27

64092826 | 02 | 02/2016
METTLER TOLEDO UC Evo CT User's Guide
3-9
3.3.1.3. Keypad
The numeric keypad is used to enter a PLU number. In Scale Settings, the Enter/Print button may be
enabled. If no over-rides are needed (and if enabled), the Enter/Print button can be touched instead
of Enter to quickly print a label.
Figure 3-11: Enter/Print Enabled (left) and Disabled (right)
3.3.1.4. Search by PLU Description
See the 'Search Function' section for a detailed description of how to use this PLU Call-Up method.
3.3.1.5. Tare
If forced tare is turned on in the PLU record or Scale Settings, the Force Data Wizard screen will
open. Place the tray or wrapper on the platter and click “Platter Tare”, click “Clear Tare” for none, or
“Enter Tare” using the keypad. Based on the Tare Override Limit Scale Settings, the user may have a
maximum allowable tare value limit. Click “Done” when you are finished.
When enabled, the graphical tare wizard screen may display. Touch the preset tare image of the
desired tare, select Platter Tare, or enter the value into the keypad and touch Enter.
Figure 3-12: Force Data Wizard Screen – Ver 4.3 and Earlier (left) and Ver. 4.4 and Later (right)
Page 28

3-10
METTLER TOLEDO UC Evo CT User's Guide
64092826 | 02 | 02/2016
Operating Instructions
Figure 3-13: Graphical Tare Wizard Screen
3.3.1.6. PLU Screen
The PLU Screen will display next. On this screen, items like the Shelf-Life or Use-By Date can be
changed if the value displays in a different color background (based on Transaction Override
Settings in Setup/Service Scale Setup). If the field is all the same color, the value cannot be
changed. Changes are only temporary over-rides and the values will revert to the original values
when touching the Clear button or when returning to the Main Screen.
3.3.2. Printing Labels
3.3.2.1. Printing Labels – Service mode/By-weight
3.3.2.2. Printing Labels – Service mode/By-count
Enter a PLU number for a by-weight item, place the item on the scale, and touch the Print button to
print a label. After you take the label and remove the item from the platter, the scale will return to the
home screen.
Enter the PLU number for a by-count item and touch the Print button to print a label. Touch Clear to
return to the home screen. If "Enable By-Count Auto Clear" is enabled, after you take the label and
Figure 3-14: PLU Screen
Page 29

64092826 | 02 | 02/2016
METTLER TOLEDO UC Evo CT User's Guide
3-11
remove the item from the platter, the scale will return to the home screen automatically without the
need to touch the Clear button.
3.3.2.3. Printing Labels – Prepack Mode
Prepack Mode allows you to weigh multiple items of the same PLU. If you are in Prepack Mode, the
label will automatically print after placing the item on the platter. After the first label prints, remove
the first item from the platter and place the next item to weigh on the platter. After you remove the
label from the printer, the next label will print. Repeat this procedure until you are finished. To exit
this PLU, touch the Clear button to return to the home screen.
Figure 3-15: Print Button
In prepack mode, touching the Print button or placing the item on the platter prints the label.
3.3.2.4. Stripped and Un-Stripped Modes
The printer can be loaded to automatically strip the labels from the liner (stripped mode) or to print
and deliver the label with the liner attached (un-stripped mode). Un-stripped mode is useful when
printing batches of the same type of label. To use the unit in un-stripped mode, do not thread the
liner back to the take-up roller and un-check "Stripped Delivery" in Setup/Label Printer Setup.
Figure 3-16: Labels Loaded in Stripped Mode – UC-CWx (left), UC-LP (right)
Page 30

3-12
METTLER TOLEDO UC Evo CT User's Guide
64092826 | 02 | 02/2016
Operating Instructions
Figure 3-17: Stripped Delivery Selection in Label Printer Setup Screen
3.4. PLU Pricing Modes
PLU is an abbreviation for Price Look Up. The PLU is a reference number assigned to access a
product's record that includes fields such as the description, price, tare, etc. Different PLU's will
have different pricing modes. Meat is normally sold "By Weight" by the pound or kilogram. Many
bakery products are sold "By Count". Other products may be sold in a standard package that all
weighs the same (or assumes all weight is the same or a minimum value). The different pricing
modes are described in the following sections.
3.4.1. By-Weight PLU
Figure 3-18: By-Weight PLU
Examples of products sold by weight are meats, cheese, poultry and produce. By-Weight items can
be priced in three ways:
Priced "Per Pound" - Typically weighed items are priced per the pound. The weight multiplied by
the unit price equals the total price of the product to the customer.
Priced "Per Fraction of a Pound" (fractional) - The item may also be priced by a fraction of a
pound (where legal and desired). Pricing per 1/4 pound and per
1/2 pound is available where it is legal for trade.
"Pounds for" price - The PLU may be sold as a an item containing a certain amount of weight
(pounds-for) for a fixed price (rather than price per pound). (Ex: 2 pounds-for $1.00).
Page 31

64092826 | 02 | 02/2016
METTLER TOLEDO UC Evo CT User's Guide
3-13
3.4.2. By-Count PLU
Examples of items sold by the count are fruits and vegetables, cookies, donuts, rolls, bread, etc.
Example: 4 Apples for $0.69. The By-Count PLU allows the operator to use the scale for a labeling
operation. Pricing is entered as a certain quantity of items for a set price.
3.4.3. Standard Pack PLU
Figure 3-19: By-Count PLU
Figure 3-20: Standard Pack PLU
Examples of items sold by Standard Pack include whole chickens, sheet cakes, bread, etc. The
Standard Pack PLU is similar to By-Count and also allows the operator to use the scale for a
labeling operation. The labels indicate the net weight of the item and total price of the item.
3.5. Temporary Overrides
Note: Depending on the configuration of the scale, a Supervisor or Operator password may be
required for the Tare and Unit Price over-rides for By Weight PLUs, or Total Price on By Count or
Standard Pack PLUs.
If the value is displayed in a different color background, you can perform a temporary override. In
the PLU screen below, the Tare, Unit Price, Shelf Life, Use by Date, Extra Text, Label Format,
and Accumulator box background color is different than the field background, indicating they can
be changed. Fields for the Pack Date and Total Price in the screen below cannot be changed. The
override is only temporary and values will revert to the original the next time the PLU is called.
Page 32

3-14
METTLER TOLEDO UC Evo CT User's Guide
64092826 | 02 | 02/2016
Operating Instructions
Figure 3-21: PLU Screen
Touch the field to enter a new value. Depending on setup, an Operator ID and password may be
required in order to access certain over-rides. This is configured in the Setup/Service Scale
Setup/Transaction Screen Overrides screen. For more information on transaction screen override
settings, refer to the UC Software Technical Manual.
Figure 3-22: Change Date Calendar (left), Extra Text Window (center) and Unit Price Keypad (right)
Page 33

64092826 | 02 | 02/2016
METTLER TOLEDO UC Evo CT User's Guide
3-15
3.6. Operator ID and Password
Depending on scale configuration, an Operator ID and a Password may be required in order to
complete a transaction. Having this required adds additional security, as well as reporting and
tracking features. Refer to the Setup Passwords/Levels section of the UC Software Technical Manual
for more information on security settings.
Figure 3-23: Operator ID Entry
3.7. Product Info Button
If enabled in setup, a Product Info button will display at the lower left of the screen. When the button
is touched an information screen will display that may contain instructions or additional product
information. An example of a product information screen is shown below. Refer to the HTML by PLU
section of the UC Software Technical Manual for more information on enabling and configuring the
product information button.
Figure 3-24: Product Information Screens
3.8. Memory Mode
With the UC memory mode, you can store multiple transactions and print one label with the totals
for all of the items. To use memory mode, call up the PLU and from the PLU Screen (below), place
the item on the platter, and then touch the “Memory” button. The screen will return automatically to
the home screen for the next transaction.
Page 34

3-16
METTLER TOLEDO UC Evo CT User's Guide
64092826 | 02 | 02/2016
Operating Instructions
Figure 3-25: Memory Button
After completing all of the transactions, touch the “Memory” button on the home screen. Home
Screen Memory Button calls all of the transactions. When in Memory Mode, this button will display
in bold “Memory”.
Figure 3-26: Memory Mode
When the Memory button is touched at the home screen, the contents of all the transactions will be
listed.
• Touch "Return" to continue with another transaction
• Delete the entire order by touching “Clear Order”
• To delete one item, touch the PLU number box for the item and touch the “Delete Item” button
• To print the label with all items listed on it, touch the “Print” button. The label format used will
be the Run Total Label Format as defined in the Label Printer Setup.
Page 35

64092826 | 02 | 02/2016
METTLER TOLEDO UC Evo CT User's Guide
3-17
3.9. Country of Origin Labeling (COOL)
Figure 3-27: COOL Labeling
Country of Origin Labeling (COOL) designates where a product came from and where it was
processed. COOL records (Country of Origin Labeling) are very similar to ingredients records. COOL
records must be assigned to a PLU in order to print. COOL implementation involves a combination
of COOL Text Records, COOL Production Text Records, COOL Countries and COOL Pretext.
COOL is supported through specialized Extra Text Records and lists of extra text records that are
associated with the PLU record. The operator can choose a preconfigured COOL statement or, in
create custom COOL statements, and if enabled, enter tracking and Lot numbers.
3.9.1. COOL Record Types
3.9.1.1. COOL Text
COOL Text records contain the complete statement of how the product was harvested and where it
was harvested. Common examples of a COOL Text record are “Wild Caught” or “Product of USA”.
Multiple COOL Texts can be chained together to give an operator more selections. This is useful for
a retailer that purchases an identical product from multiple countries.
3.9.1.2. Production Text
Production text is a phrase in the list such as “Produced in”, “Processed in”. Production text is
created the same way as COOL Text.
3.9.1.3. Country Text
Country text is a list of countries and the individual country names (literals). Country text and text
lists are created the same as COOL Text as described above.
3.9.1.4. Pre Text
Pre Text is a word or phrase that prints before the COOL Text on a label. Pre Text is programmed
into the PLU record and cannot be overridden by the operator. Pre text and text lists are created the
same as COOL Text as described above.
Page 36

3-18
METTLER TOLEDO UC Evo CT User's Guide
64092826 | 02 | 02/2016
Operating Instructions
If allowed, “No
Cool” bypasses
COOL
Touch Enter after
selecting COOL
text
3.9.2. Create/Edit COOL Text
COOL records can be created or edited in the UC Editor. Additionally, COOL records can be created
and downloaded from a host. Refer to the UC Editor Chapter in the UC Line Software Technical
Manual for additional details.
3.9.3. Pre-Configured COOL Statements
Preconfigured COOL statements can be one of four types:
• Default COOL preconfigured text.
• Current Preconfigured COOL text.
• Most recently used preconfigured text.
• List of possible preconfigured text for that PLU.
Each is identified on the Preconfigured COOL Statement screen. The current text is the one that is
currently selected and would be used if proceeding with the transaction. The most recently used text
is the text statement that was last used to complete a transaction and was printed on a label for that
PLU. If COOL is not forced on a PLU, meaning you are able to complete a transaction without
selecting a COOL statement to be printed on the label, a No COOL button is available. After selecting
the appropriate COOL statement, the user touches the Enter button to proceed. The Cancel button
will stop processing of the current transaction and return the user to the main screen.
If the PLU selected has data that will allow the user to construct a custom COOL statement, the
Custom button is available.
Figure 3-28: COOL Declaration Screen
3.9.4. Tracking or Lot Numbers
When Tracking is enabled, two tracking values can be entered. If previous tracking numbers have
been used, they will display in the Tracking One and Tracking Two fields. Touch the Apply button to
use the displayed values or cancel to bypass the tracking number screen. To enter a number, the
Tracking One field can either be populated by scanning a GS1 Databar that contains AI 10
(batch/lot#) or by keying it in manually. The Tracking Two field must be keyed in manually. Touch
the Apply button to accept the displayed values.
Page 37

64092826 | 02 | 02/2016
METTLER TOLEDO UC Evo CT User's Guide
3-19
Apply button
accepts the
displayed values
Tra
cking One field
COOL text box
Figure 3-29: Tracking Information Screen
3.9.5. COOL Changes from PLU Screen
To change the COOL or the tracking number from the PLU screen, touch the Lot # button or touch
the COOL Text box. Select the new COOL or No COOL, re-enter the tracking and touch Apply.
Lot # button
Figure 3-30: Changing COOL from PLU Screen
3.9.6. Custom COOL Statements
Custom COOL statements are constructed from keywords or production steps and country names. If
a PLU record has custom COOL production steps and country names associated with it, a Custom
button will appear at the bottom of the Preconfigured COOL Declaration screen. If there is no
preconfigured COOL text associated with the PLU, screen will display Custom COOL dialogs.
Multiple production steps followed by a country can be selected to form phrases. Touch Done when
completed selecting the text. The Undo button will undo the last entry and will continue to undo until
all countries and production steps are removed. The Clear button will completely clear the custom
declaration allowing a new declaration to be built.
Page 38

3-20
METTLER TOLEDO UC Evo CT User's Guide
64092826 | 02 | 02/2016
Operating Instructions
First, select a
production step
Select a country
from this list
after selecting a
production step
Clear all steps
and countries,
allowing the
Undo removes the
last country or
production step;
repeat touches to
undo all additions
from this list
user to start over
Figure 3-31: Custom COOL Declarations
3.9.7. Forced COOL
A PLU can contain a value in the data record that indicates that COOL is to be forced for that PLU.
There is also a scale setting within Service Scale Setup that enables forced COOL for all PLU records
called up on that scale. When both of these are set, the scale will not allow a transaction to
complete without a COOL statement selected for printing on the label.
3.9.8. COOL Pretext
COOL Pre-Text is a single text record associated with the PLU in the PLU record. It is not changeable
and is always printed on the label. The most common use of it is to identify if seafood is farm
raised or caught in the wild.
Figure 3-32: Enabling Forced Cool
Page 39

64092826 | 02 | 02/2016
METTLER TOLEDO UC Evo CT User's Guide
3-21
Figure 3-33: COOL Declaration Screen without “No Cool” Button
When checked,
allows partial COOL
statements
Entry Mode selects
operator requirements
Processing Mode
selects turns tracking
3.9.9. Scale Setup for COOL
Certain features must be enabled in setup in order for COOL to function on the UC. To access these
features, touch the Setup button and select Unit Setup. Next touch the Scale Settings button and Next
Page.
on or off
3.9.9.1. Allow Incomplete Custom COOL Step
When checked, allows partial COOL statements.
3.9.9.2. COOL Entry Mode
COOL Entry mode selects requirements that will be presented to an operator when a PLU with COOL
assigned is called up. Touch the field for the drop down menu to select.
Figure 3-34: Scale Settings Screen
Page 40

3-22
METTLER TOLEDO UC Evo CT User's Guide
64092826 | 02 | 02/2016
Operating Instructions
Harvested in Mexico; Processed in-USA
Figure 3-35: Forced COOl Entry Mode on Scale Settings Screen
Entry Required When Forced – When selected and the PLU record has Forced COOL assigned, the
operator must select COOL text before a label will print.
Use Default As Current – When selected, the Default preprogrammed COOL text will be presented
in the Current COOL Text field allowing the operator to touch Enter to accept it and print the label.
Use Last Used As Current – When selected, the last used COOL will show up in the Current COOL
text field. The operator will only need to touch the Enter button to continue if no changes are
required.
Figure 3-36: Selecting Last Used as Current COOL Declaration
Page 41

64092826 | 02 | 02/2016
METTLER TOLEDO UC Evo CT User's Guide
3-23
3.9.9.3. COOL Processing Mode
This function selects COOL restrictions and turns tracking on or off. Touch the field for the drop
down menu to select.
3.9.9.4. Standard COOL, no Tracking
Figure 3-37: Setting COOL Processing Mode
In this mode, COOL operates normally and no tracking number is used. When Standard Mode is
selected and COOL is forced in the PLU record and Enable Forced COOL is checked on the Service
Scale Setup screen, the operator is required to manually select a COOL text and touch the ENTER
key to accept. If Enable Forced COOL is not checked on the Service Scale Setup screen, a different
COOL text or Custom COOL can be selected or the No COOL button can be used for no text.
3.9.9.5. Restricted COOL, no Tracking
In Restricted Mode, the last used COOL text is automatically highlighted and if no change is
required, the operator touches the ENTER key to accept the displayed COOL text. If COOL is forced in
the PLU record and Enable Forced COOL is checked on the Service Scale Setup screen, the default
COOL cannot be changed. Tracking is not enabled in this mode.
3.9.9.6. Standard COOL, with Tracking
In this mode, COOL operates normally and a tracking number is required. When Standard Mode is
selected and COOL is forced in the PLU record and Enable Forced COOL is checked on the Service
Scale Setup screen, the operator is required to manually select a COOL text and touch the ENTER
key to accept. If Enable Forced COOL is not checked on the Service Scale Setup screen, a different
COOL text or Custom COOL can be selected or the No COOL button can be used for no text.
3.9.9.7. Restricted COOL, with Tracking
In Restricted Mode, the last used COOL text is automatically highlighted and if no change is
required, the operator touches the ENTER key to accept the displayed COOL text. If COOL is forced in
the PLU record and Enable Forced COOL is checked on the Service Scale Setup screen, the default
COOL cannot be changed. A tracking number is required in this mode.
Page 42

3-24
METTLER TOLEDO UC Evo CT User's Guide
64092826 | 02 | 02/2016
Operating Instructions
3.10. Operations Menu
When the Operations button is touched, the Operations screen will display. In this screen the
following functions can be performed:
Figure 3-38: Operations Menu Functions
3.10.1. Void Transactions
Use this feature to void previous transactions so your totals collection will remain accurate.
Highlight the transaction, then click the Void button.
Figure 3-39: Void Transactions Screen
A dialog screen will appear to verify voiding the transaction. Click OK to confirm.
Page 43

64092826 | 02 | 02/2016
METTLER TOLEDO UC Evo CT User's Guide
3-25
3.10.2. Verify Labels
This function is used if you wish to print labels of all or selected PLUs. The information printed on
the label is determined by the Verify Label Format selected.
3.10.3. Measure Label
Figure 3-40: Verify Labels Dialog
Measure Label is used to verify and reset the label size that is currently in the printer. Be prepared to
catch the labels as the printer feeds them while it is determining the size. When complete, the UC
will reset the label size to match what was measured in this test when the Done button is touched.
3.10.4. Reset Printer
Use this function to reset the label printer to clear possible error conditions or communication errors
between the scale and internal printer.
Figure 3-41: Label Measurement Pop-Up
Page 44

3-26
METTLER TOLEDO UC Evo CT User's Guide
64092826 | 02 | 02/2016
Operating Instructions
3.10.5. Launch User Application
This function is used to start custom programs that have been configured in your scale. These will
vary or may not be used at all in your location. Consult your system administrator for further
information.
Figure 3-42: Launch User Application Screen
3.11. UC Production Reports Tool
From the Setup screen, select Minimize Application. From the desktop, click on your start menu
and select the Programs tab. Follow the path outlined in the picture below, selecting Mettler
Toledo, the Production Reports folder and the Production Reports program to launch the
Production Reports Tool.
Figure 3-43: Accessing Production Reports from the Desktop
Upon execution of the Production Reports application, the following screen is displayed. The user
can view a report by touching the corresponding buttons.
Page 45

64092826 | 02 | 02/2016
METTLER TOLEDO UC Evo CT User's Guide
3-27
3.11.1.1. Daily Production Trend Report
When selected, this report summarizes all the items produced for the selected 4 weeks. This report
is useful to view the production trend by using weight or by using value of each item.
3.11.1.2. Price Override Report
When selected, this report lists all the items for which Price have been overridden in a particular
date range.
3.11.1.3. Detailed PLU Report
When selected, this report summarizes the production details of a selected item. The summary is
done for the selected 4 weeks. The summary consists of Production based on Units, Weight and
value. This report also lists the number of Price overrides done during the period.
3.11.1.4. Department Summary Report
When selected, this report summarizes the production details of all the items in a selected
department. The summary is done for the selected 4 weeks. The summary consists of Production
based on Units, Weight and value. This report also lists the number of Price overrides done during
the period.
Figure 3-44: Production Reports Screen
3.11.1.5. Setup
When selected, the user can modify some of the settings like Header, Footer, Selected Columns
etc., for all the reports. The user can also modify the Database connection settings. The Production
reports can use both the local and remote database for producing reports.
Page 46

3-28
METTLER TOLEDO UC Evo CT User's Guide
64092826 | 02 | 02/2016
Operating Instructions
3.11.2. Custom Production Report
Figure 3-45: Custom Production Report Screen
When this report is selected, the screen above with the headers are shown.
3.11.2.1.1. Start Date
When selected, a popup calendar is to be shown from which the user can select the starting date.
Default = Yesterday Date.
3.11.2.1.2. End Date
When selected, a popup calendar is to be shown from which the user can select the ending date.
Default = Yesterday Date.
3.11.2.1.3. Department Number
When the Dept # header is tapped (Touched), the filter options screen is shown:
The
Variable Name
Number, Operator, PLU etc).
Figure 3-46: Filter Options Screen
is the name of the field for which the filter is to be done (example: Deptart
Page 47

64092826 | 02 | 02/2016
METTLER TOLEDO UC Evo CT User's Guide
3-29
The
Condition
contains the filter conditions which is to be applied to the variable (example: ‘=’, ‘>’,
‘<’, ‘>=’, ‘<=’). For Alpha variables, the condition is always ‘=’. Other conditions apply only to the
numeric fields.
Value
The
is a list of values from which the user can select. (example: Department Numbers). The
value also contains
The report can be sorted by Ascending or Descending Department Number.
3.11.2.1.4. Group Number
When the user taps the Grp# header, the window is shown to filter the required Group numbers.
3.11.2.1.5. Operator Number
When the user taps the Op.# header, the window is shown to filter the required Operators.
3.11.2.1.6. PLU Number
When the user taps the PLU# header, the window is shown to filter the required PLUs.
3.11.2.1.7. Description
When the user taps the Description header, the window is shown to select the required description.
All
, for selecting all the department number (default)
The List window contains all the Item Description, pertaining to the PLU# selected or all the Item
description if PLU# is “All”. A Search option is provided to search an Item Description. By typing the
text in the Search window and touching the Browse button (…), the List window will show the
filtered Item description.
Figure 3-47: Item Description Selection Screen
Page 48

3-30
METTLER TOLEDO UC Evo CT User's Guide
64092826 | 02 | 02/2016
Operating Instructions
3.11.2.1.8. RUN REPORT
Once all the filter and selection criteria is completed, the user has to touch “RUN REPORT” button.
Now the report will be generated and displayed in the list window.
3.11.2.1.9. PRINT
Once the report is generated and displayed, by touching this button, the report is printed on to a
connected printer.
3.11.2.1.10. SAVE
When this button is touched, the generated report is saved to a Excel or a HTML file.
3.11.3. Daily Production Report
Figure 3-48: Daily Production Report
3.11.3.1.1. Start Date
When selected, a popup calendar is to be shown from which the user can select the starting date.
Default = Yesterday Date.
3.11.3.1.2. End Date
When selected, a popup calendar is to be shown from which the user can select the ending date.
Default = Yesterday Date.
3.11.3.1.3. Report For
By selecting a particular day, the report is generated for the day for the past 4 weeks.
3.11.3.1.4. Report By
By selecting “Weight”, the report displays production trend based on Weight and if “Units” is
selected, the proeduction trend is based on the number of units produced for the particular period.
Page 49

64092826 | 02 | 02/2016
METTLER TOLEDO UC Evo CT User's Guide
3-31
3.11.3.1.5. Department Number
When the Dept # header is tapped (Touched), the option screen is shown.
3.11.3.1.6. PLU Number
When the user taps the PLU# header, the window is shown to filter the required PLUs..
3.11.3.1.7. Description
When the user taps the Description header, the window is shown to select the required description.
3.11.3.1.8. RUN REPORT
Once all the filter and selection criteria is completed, the user has to touch “RUN REPORT” button.
Now the report will be generated and displayed in the list window.
3.11.3.1.9. PRINT
Once the report is generated and displayed, by touching this button, the report is printed on to a
connected printer.
3.11.3.1.10. SAVE
When this button is touched, the generated report i saved to a Excel or a HTML file.
3.11.4. Price Override Report
3.11.4.1.1. Start Date
When selected, a popup calendar is to be shown from which the user can select the starting date.
Default = Yesterday Date.
3.11.4.1.2. End Date
When selected, a popup calendar is to be shown from which the user can select the ending date.
Default = Yesterday Date.
Figure 3-49: Price Override Report
Page 50

3-32
METTLER TOLEDO UC Evo CT User's Guide
64092826 | 02 | 02/2016
Operating Instructions
3.11.4.1.3. Department Number
When the Dept # header is tapped (Touched), the option screen is shown.
3.11.4.1.4. Operator Number
When the user taps the Op.# header, the window is shown to filter the required Operators.
3.11.4.1.5. PLU Number
When the user taps the PLU# header, the window is shown to filter the required PLUs..
3.11.4.1.6. Description
When the user taps the Description header, the window is shown to select the required description.
3.11.4.1.7. RUN REPORT
Once all the filter and selection criteria is completed, the user has to touch “RUN REPORT” button.
Now the report will be generated and displayed in the list window.
3.11.4.1.8. PRINT
Once the report is generated and displayed, by touching this button, the report is printed on to a
connected printer.
3.11.4.1.9. SAVE
When this button is touched, the generated report is saved to a Excel or a HTML file.
3.11.5. Detailed PLU Report
Figure 3-50: Detailed PLU Report
3.11.5.1.1. Start Date
When selected, a popup calendar is to be shown from which the user can select the starting date.
Default = Yesterday Date.
Page 51

64092826 | 02 | 02/2016
METTLER TOLEDO UC Evo CT User's Guide
3-33
3.11.5.1.2. End Date
NOTE
When selected, a popup calendar is to be shown from which the user can select the ending date.
Default = Yesterday Date.
3.11.5.1.3. Department Number
When the Dept # header is tapped (Touched), the option screen is shown.
3.11.5.1.4. PLU Number
When the user taps the PLU# header, the window is shown to filter the required PLUs..
3.11.5.1.5. PLU SEARCH
When this button is, the search window is shown to select the required description. The user can
select a particular PLU from the list box.
3.11.5.1.6. RUN REPORT
Once all the filter and selection criteria is completed, the user has to touch “RUN REPORT” button.
Now the report will be generated and displayed in the list window.
3.11.5.1.7. PRINT
Once the report is generated and displayed, by touching this button, the report is printed on to a
connected printer.
3.11.5.1.8. SAVE
By touching this button, The generated report can be saved to a Excel or a HTML file.
: The Value range can be modified from “Setup” menu for the “Items Produced by value
range” as per user requirement.
3.11.6. Department Summary
Figure 3-51: Department Summary Reports
Page 52

3-34
METTLER TOLEDO UC Evo CT User's Guide
64092826 | 02 | 02/2016
Operating Instructions
NOTE
3.11.6.1.1. Start Date
When selected, a popup calendar is to be shown from which the user can select the starting date.
Default = Yesterday Date.
3.11.6.1.2. End Date
When selected, a popup calendar is to be shown from which the user can select the ending date.
Default = Yesterday Date.
3.11.6.1.3. Department Number
When the Dept # header is tapped (Touched), the option screen is shown.
3.11.6.1.4. RUN REPORT
Once all the filter and selection criteria is completed, the user has to touch “RUN REPORT” button.
Now the report will be generated and displayed in the list window.
3.11.6.1.5. PRINT
Once the report is generated and displayed, by touching this button, the report is printed on to a
connected printer.
3.11.6.1.6. SAVE
By touching this button, The generated report can be saved to a Excel or a HTML file.
: The Value range can be modified from “Setup” menu for the “Items Produced by value
range” as per user requirement.
3.11.7. Setup: Configuring Reports
The displayed fields in the report can be modified from the “Setup” menu. The configuration screen
is shown in Figure 3-48.
Figure 3-52: Custom Production Report Screen
Page 53

64092826 | 02 | 02/2016
METTLER TOLEDO UC Evo CT User's Guide
3-35
3.11.7.1.1. Available Fields
This window lists the fields that are available in corresponding Report.
3.11.7.1.2. Selected Fields
This window lists the fields that are selected by the user to be displayed in the corresponding
Report.
3.11.7.1.3. Display Name
With this field, the user can modify the title of the selected field.
3.11.7.1.4. ADD
When this button is touched, the current field is selected to be displayed in the report.
3.11.7.1.5. REMOVE
With this button, the selected field is removed from the report.
3.11.7.1.6. UP DOWN
With this button, the selected field can be moved up or down.
3.11.7.1.7. OK
Touch this button to save the changes.
3.11.7.1.8. CANCEL
Touch this button to discard the changes.
Some reports, such as Department Summary and Detailed PLU report, have more than one screen
for configuration. The following figures shows a typical Department Summary configuration.
Figure 3-53: Custom Production Report Screen: Produced Units by Day
Page 54

3-36
METTLER TOLEDO UC Evo CT User's Guide
64092826 | 02 | 02/2016
Operating Instructions
3.11.7.1.9. NEXT
By touching this button, the next configuration screen is shown.
3.11.7.1.10. PREV
Not available (disabled) for this configuration Screen.
Figure 3-54: Custom Production Report Screen: Produced Retail Value by Day
3.11.7.1.11. NEXT
By touching this button, the next configuration screen is shown.
3.11.7.1.12. PREV
By touching this button, the previous configuration screen is shown.
Figure 3-55: Custom Production Report Screen: Price Overrides
Page 55

64092826 | 02 | 02/2016
METTLER TOLEDO UC Evo CT User's Guide
3-37
3.11.7.1.13. NEXT
By touching this button, the next configuration screen is shown.
3.11.7.1.14. PREV
By touching this button, the previous configuration screen is shown.
Figure 3-56: Custom Production Report Screen: Items Produced by Value range
3.11.7.1.15. NEXT
Not available (disabled) for this configuration Screen.
3.11.7.1.16. PREV
By touching this button, the previous configuration screen is shown.
If the user wishes to change the default database to another database, the database selection
dialog box displays.
Page 56

3-38
METTLER TOLEDO UC Evo CT User's Guide
64092826 | 02 | 02/2016
Operating Instructions
Figure 3-57: Database Selection Dialog
3.11.7.1.17. Select database file
With this option, the user can browse and select a database (either remote and local) for the use of
production reports.
3.11.7.1.18. User ID & Password
The user has to enter the Connection parameters in these fields.
3.11.7.1.19. OK
By touching this button, the details are saved and used for the running production reports.
3.11.7.1.20. CANCEL
By touching this button, the details if modified, are discarded and not saved.
3.11.7.1.21. DEFAULT
By touching this button, the user changes are discarded and the default database and connection
settings are loaded.
3.12. Self-Service Mode
When the scale is in Self-Service Mode, no overrides are possible by the user. This is ideal for
placement on the floor within a department for customers to use.
In addition, the Operations button is disabled and removed and the Setup button can be replaced
with a different graphic.
Self-Service Mode screens are shown below. The self-service screen may be configured with or
without the numeric keypad. If the Main Screen is configured without the keypad (Unit Setup/Scale
Settings/Hide Keypad), it can easily be accessed by touching the Keypad button on the top right.
The Keypad can be centered or displayed to the side of the PLUs. To change this, navigate to Unit
Page 57

64092826 | 02 | 02/2016
METTLER TOLEDO UC Evo CT User's Guide
3-39
Settings/Scale Settings/Self-Service with Centered Keypad. Touch the SAVE button to save the setting
and exit.
Figure 3-58: Self-Service Centered Keypad (left) and Self-Service Mode with Keypad (right)
If the primary database for the scale is off-line, there is an indicator to alert store personnel to take
corrective action. When the primary database is on-line, the background of the PLU number field is
white. When the primary database is off-line, the background changes to yellow. When yellow and
off-line, the scale can use the secondary database stored in the scale. If this happens, turn the
power switch to off and allow the unit to shut down correctly. Turn the power switch back to on and
allow the unit to restart the application. If the problem persists, contact your help desk.
Presets can be set up to call PLUs or pages. To call up a PLU and print a label, touch the image of
the item and touch Print. If the item is not listed, touch the search button.
Note: If enabled, an Alternative Language button can be accessed for multi-lingual locations.
Figure 3-59: Self-Service Mode Off Line Indicator
Page 58

3-40
METTLER TOLEDO UC Evo CT User's Guide
64092826 | 02 | 02/2016
Operating Instructions
Figure 3-60: Alternative Language Button
If the unit is equipped with a bar code scanner, scan the bar code on the product and the PLU will
automatically load. Refer to the UC Software Technical Manual for more information on configuring
the barcode scanner.
Figure 3-61: UC-CW (left) and UC-GT (right) Equipped with a Barcode Scanner
The PLU screen will look different based on pricing mode (by count, by weight or a pre-packed
item). Additional information on the PLU may also be display (if configured).
Figure 3-62: By-Count PLU (left) and By-Weight PLU – with HTML by PL (right)
Place the item on the platter, and then touch the PRINT button to print the label. After the label
prints, the screen will return to the Main screen.
Page 59

64092826 | 02 | 02/2016
METTLER TOLEDO UC Evo CT User's Guide
3-41
3.12.1. Zeroing the Scale in Self-Service Mode
to zero the
scale
1.
the zero function
3. Touch any other
button to lock the
While in self-service mode, the zero function is normally disabled. In order to zero the scale in selfservice mode, a hidden button is available in the position next to where the setup button is located.
2. Touch
zero function again
Figure 3-63: Zeroing the Scale in Service Mode
3.12.2. Slide Show in Self-Service Mode
A slide show can be set up to run while the scale is idle. If the center keypad is enabled in setup
mode, the slide show will run to the left of the keypad and on the top of the display when presets
are showing.
Touch here to enable
3.13. Search Function
Search can be used in service or self-serve modes.
3.13.1. Search in Self-Service Mode
If an item isn’t found on the presets, touch the “Search” button on the Main Screen. This will call up
the Search Screen.
Figure 3-64: Slide Show Locations
Page 60

3-42
METTLER TOLEDO UC Evo CT User's Guide
64092826 | 02 | 02/2016
Operating Instructions
Figure 3-65: Search in Self-Service Mode
In Self-Service mode, the Department is not editable. By typing in the first few letters of the item, the
search screen will return a list of items that contain the search string.
Highlight the item by touching it with your finger to call that PLU and return to the PLU Edit Screen
or prompt for by-count.
3.13.2. Search in Service Counter Mode
The Search Function is available in both Self-Service and Service Counter (normal) modes. The
process of Searching by name or partial name is the same as in Self-Service mode. However, in
Service Counter mode you can change Departments via a dropdown menu.
Figure 3-66: Department Selection Drop-Down List
Page 61

64092826 | 02 | 02/2016
METTLER TOLEDO UC Evo CT User's Guide
3-43
Also in Service Counter mode the “Next” and “Previous” buttons are not available; instead the
returned search list is browsed via a scroll bar
3.14. Auto HTML
Figure 3-67: Search List Scroll Bar
When HTML/PLU Auto Display is enabled (Version 4.2 or later), and a PLU is called up, the
Product Info Page will open automatically. After closing the page, the scale will return to the PLU
Screen. Product Info pages must be created and linked to the PLU record. Refer to the UC Software
Technical Manual for more information on creating and linking HTML pages to PLUs.
Figure 3-68: Product Information Page
Page 62

3-44
METTLER TOLEDO UC Evo CT User's Guide
64092826 | 02 | 02/2016
Operating Instructions
3.15. App Manager
The App Manager (Version 4.2 or later) is a feature that allows switching to another configured
application. Only one application can be run at a time. The Scale Application is considered one of
the switched applications.
Figure 3-69: Application Manager Buttons
To ensure that the operator can always return to the scale application, a task bar is always
displayed. This bar can be configured differently for each application. If it is not configured for an
application, a default bar is configured with the “Scale” button. This bar is always on top but if you
navigate away, the task bar will be active again in 30 seconds or as configured. Refer to the UC
Software Technical Manual for details on configuring the Task Bar.
Page 63

64092826 | 02 | 02/2016
METTLER TOLEDO UC Evo CT User's Guide
4-1
This chapter covers
4 Setup
UC Software Technical Manual
4.1. Introduction
This Chapter covers the Setup screens commonly accessed by an Operator. These
• Introduction
• Label Printer Setup
• Presets
• Quick Edits
• Launch External Applications
include: Printer & Label Setup, Preset Setup, Quick Edits, and Launch External
Application. Additional Setup functions are available to the administrator of the scale.
These are discussed in the
Setup is accessed by touching the Setup button on the Main screen. When the unit is
in Self Service Mode, the Setup button may be hidden or displayed with an image.
Setup can be accessed by touching the image.
.
Figure 4-1: Main Screen, Setup Button Location
The Setup screen is shown below. Touch the specific button to enter into the desired setup topics.
To return to the Main screen, touch the Return button.
Page 64

4-2
METTLER TOLEDO UC Evo CT User's Guide
64092826 | 02 | 02/2016
Setup
Functions outlined by boxes, below, are discussed in this chapter.
Figure 4-2: Setup Screen
4.1.1. Printer and Label Setup
This screen is used to choose store logo, configure the printer, measure labels, set up the bar codes
printed by the printer, and delete custom label formats.
Figure 4-3: Printer and Label Setup Screen
4.1.2. Chose Store Logo
Touch the box to open the Choose a Graphic menu. Select an image to be used for the store logo
by touching the graphic name on the left side. The image will display on the right.
Use the scroll bars to display the list of images. Touch Top to go to the beginning of the list and
End to go to the end of the list. For no store logo, touch the None selection.
To save your change, touch the Done button. The image will be used on all labels printed.
Page 65

64092826 | 02 | 02/2016
METTLER TOLEDO UC Evo CT User's Guide
4-3
Figure 4-4: Graphic Selection Screen
UC Software Technical Manual
Refer to the
graphics library.
4.2. Label Printer Setup
From the Label Printer Setup screen you can do a variety of functions to help configure the label.
Figure 4-5: Label Printer Setup Screen, Initial View
for more information on how to save graphics to the
Use the scroll bar at the bottom of this setup screen to view additional formatting options.
4.2.1. Refresh, Save, Cancel
When the application starts, it loads the available label formats into an internal cache for quick and
easy retrieval. Touching the Refresh button causes the application to update its internal cache of
the label formats that are available to the scale. So if new label formats or changes to existing label
formats have been loaded to the scale, they will only be available after touching the Refresh button.
Touch the SAVE button to save the configuration and return to the Printer & Label Setup Main
screen. To exit without saving, touch the CANCEL button.
Page 66

4-4
METTLER TOLEDO UC Evo CT User's Guide
64092826 | 02 | 02/2016
Setup
4.2.2. Current Label Stock
The length of the labels listed in Current Label Stock must match the length of the labels that are
loaded into the printer. Standard sizes available include: 1.9”, 2.1”, 2.4”, 3.3”, 3.7”, 4.2”, 4.7”,
5.1”, and Continuous (roll stock).
4.2.3. Run Total Label Format
Select the style of the label to use when printing totals labels (in Memory Mode or when using Sales
Online).
4.2.4. Stripped Delivery
This function enables or disables the take-up motor and label taken sensor. This box should be
checked when labels are taken stripped from the liner. The take-up motor will wind up the used liner
on the take-up spool and the label taken sensor will prevent another label from printing when one
remains in the printer. When this box is not checked, the take-up motor is disabled and the label
taken sensor is ignored. Continuous stock should always be run with this unchecked (disabled).
4.2.5. Inverted Delivery
When enabled (box checked) the label will be delivered with the opposite end first.
Figure 4-6: Normal and Inverted Delivery
4.2.6. Eject Length
This is the position the label will stop at after printing. If the Eject Length is increased, the label is
ejected further outward from the printer. If the Eject Length is decreased, the label moves inward
towards the printer. (Default value: 10.0 mm) For example, if the labels are falling off the liner,
decrease the value; if labels stick too much to the liner, increase the value.
Note: For the UC-GT, set the Eject Length to 6 for a starting position. Adjust from that point as
needed.
4.2.7. Image Offset
The Image offset is used to adjust the vertical position of the image printed on the label (in
millimeters). It is measured in mm from the rear gap sensor to the printer's print head. Increasing
the image offset value moves the printed image lower on the label and increasing the value moves
the image down on the label. (Default value: 0.0mm)
Page 67

64092826 | 02 | 02/2016
METTLER TOLEDO UC Evo CT User's Guide
4-5
Printing is too high.
Increase the Image Offset value.
4.2.8. NF Label Format
Select the label format that will be used for a NutriFact label (if the PLU is configured to print
nutrifacts on a second label).
4.2.9. Label Formats
Select the default (0) format and alternate formats (1-15) to use for the Printer. This corresponds to
the label format field in the PLU record. Setup screen is shown below.
Figure 4-7: Image Offset Settings
Printing is too low.
Decrease the Image Offset value.
Printing is properly centered.
Touch the format on the right to highlight, and then touch an arrow button to copy the format to the
Assigned Formats list.
Figure 4-8: Label Format Setup Screen
Page 68

4-6
METTLER TOLEDO UC Evo CT User's Guide
64092826 | 02 | 02/2016
Setup
UC Software Technical Manual
UC Service Manual
4.2.10. Barcode Setup
Barcodes are configured according to your scanner requirements. See your store IT department and
the
4.2.10.1. Barcode Type
and
Figure 4-9: Barcode Setup Screen
for additional information.
Select a Barcode Type of UPC, EAN-13, EAN-128,CODE-128, or GS1 bar code symbols. Only valid
settings will display per each bar code type.
4.2.10.1.1. UPC Barcode
By-Weight Prefix
By-Count Prefix
Std. Pack Prefix
Run Total Prefix
Select the bar code prefix. This is the bar code type and is the first character of the bar
code. The default is 2.
0 General Merchandise. (No price is encoded)
1 Not identified.
2 Random-Weight. Item number with total price encoded.
3 National Drug and Health items. Similar to Type-0.
4 In-Store Marking.
5 Coupons.
Page 69

64092826 | 02 | 02/2016
METTLER TOLEDO UC Evo CT User's Guide
4-7
6 General Merchandise. (No price is encoded)
By-Weight Format
Format Codes:
Format Codes:
By-Count Format
Std. Pack Format
Run Total Format
Price Check Override
Manufacturer Number
4.2.10.1.2. EAN-13 Barcode
7 General Merchandise. (No price is encoded)
Refer to the code explanations.
NNNNN ##### X (5-D Item/5-D Wgt)
NNNNN N#### X (6-D Item/4-D Wgt)
NNNNN 0#### X (5-D Item/0/4-D Wgt)
NNNNN C#### X (5-D Item/C/4-D Wgt)
NNNNN $$$$$ X (5-D Item/5-D Price)
NNNNN N$$$$ X (6-D Item/4-D Price)
NNNNN 0$$$$ X (5-D Item/0/4-D Price)
NNNNN C$$$$ X (5-D Item/C/4-D Price)
When a PLU contains a command to turn off the price check digit, (Ex: Action Code 49),
this selection determines what will print in the price check digit space. A hard zero or a
six-digit item number can be selected.
This selection allows for a default five-digit manufacturer number, when used with type 0,
1, 3, 5, 6, or 7 bar codes, replacing the first five MSD digits of the item number.
N Item number Digits.
C Check Digit.
0 The number zero.
$ Total Price Digits.
# Weight Digits.
X Symbol Check Digit.
D Digit.
By-Weight Prefix
By-Count Prefix
Std. Pack Prefix
Run Total Prefix
By-Weight Format
By-Count Format
Std. Pack Format
Run Total Format
Enter the bar code prefix. The default is 21.
Refer to the code explanations.
NNNNC ##### X (4-D Item/C/5-D Wgt)
NNNNN ##### X (5-D Item/5-D Wgt)
NNNNC $$$$$ X (4-D Item/C /5-D Price)
NNNNN C$$$$ X (5-D Item/C/4-D Price)
NNNN$ $$$$$ X (4-D Item/6-D Price)
NNNNN $$$$$ X (5-D Item/5-D Price)
NNNNN N$$$$ X (6-D Item/4-D Price)
N Item number Digits.
C Check Digit.
0 The number zero.
$ Total Price Digits.
# Weight Digits.
X Symbol Check Digit.
D Digit.
Page 70

4-8
METTLER TOLEDO UC Evo CT User's Guide
64092826 | 02 | 02/2016
Setup
4.2.10.1.3. EAN-128 Barcodes
EAN-128 is an application standard of the GS1 implementation using the Code 128 barcode
specification. It is commonly called GS1-128. It uses a series of Application Identifiers to include
additional data such as use-by dates, batch numbers, quantities, weights and more. The bar code
can be configured by touching one of the format boxes to open the Barcode Format Pattern editor.
Figure 4-10: Barcode Format Pattern Editor
Page 71

64092826 | 02 | 02/2016
METTLER TOLEDO UC Evo CT User's Guide
4-9
4.2.10.1.4. GS1 Databar Barcodes
GS1 Databar is a stacked barcode that can have up to 3 rows of barcode data. It can contain up to
9 different pieces of information (Application IDs). The data always contains the Application ID 01
or GTIN number (the 14 digit item number of the PLU), and can contain the following optional
Application IDs (in order generated in the barcode):
ID Data Item Notes
01 GTIN Always selected, 14 digit Item Number
392x Total Price up to 15 digits, “x” is decimal position
8005 Unit Price 6 digits (no precision indicated)
3103* Net Wt (KG) 6 digits, lower 3 are right of decimal point
3202* Net Wt (Lb) 6 digits, lower 2 are right of decimal point
30* Count up to 8 digits
13 Pack Date 6 digits (YYMMDD)
15 Sell By Date 6 digits (YYMMDD)
17 Use By Date 6 digits (YYMMDD)
10 Batch / Lot # Variable, up to 20 digits
* = can contain one of these fields based on loadcell setting and package type (BW/BC/SP).
The desired fields can be configured in the PLU record or in Setup / Barcode Settings if the PLU
record is set to “Use Scale Settings”. The Barcode Settings screen has an additional checkbox to put
a human readable text line under the barcode. Only one line of text will print and the number of
characters depends on the width of the barcode field. Since this symbology is “variable width”
based on the number of fields selected, the barcode will be rendered from the starting position (top,
left) of the barcode field defined in the label format, and continue to the right edge of the label. It will
be rendered for the specified field height. If the data will not fit in one row of bars, two or three rows
will be generated, each row being one half or one third of the height.
Page 72

4-10
METTLER TOLEDO UC Evo CT User's Guide
64092826 | 02 | 02/2016
Setup
GTIN only
All Fields
GTIN, Total Price, and Count
4.2.11. Printer Adjustment
The Printer Adjustment menu (found in Unit Setup/Printer & Label Setup/Printer Adjustment) is used
to set the print density, select the print speed, measure labels, calibrate the printer sensors, and to
print a test label.
Figure 4-11: Printer Adjustment Setup Screen
4.2.11.1. Calibrate Gap Sensor
Calibrate Gap Sensor is used to calibrate the gap sensor with the label stock in use in the printer.
Page 73

64092826 | 02 | 02/2016
METTLER TOLEDO UC Evo CT User's Guide
4-11
4.2.11.2. Measure Label
Measure Label can be used to determine the length of the label stock in the printer.
Once the measurement test determines the length of the stock in the printer, touch the Done button.
The size will be saved when you touch the SAVE button. If you touch the CANCEL button the current
setting will remain.
4.2.11.3. Print Test
Figure 4-12: Label Measurement Pop-Up
Print Test can be used to test print density and coverage of the label stock that is installed in the
printer.
4.2.11.4. Stage Label
When pushed, the Stage Label button will eject one blank label and set the next label into position
for printing. This is required when changing label rolls or when putting in a new roll when the scale
is out of labels.
When the scale is in Self-Service mode, this is the only way to stage a label without changing back
into service counter mode.
4.2.11.5. Calibrate Both Sensors
Calibrate Both Sensors is used to calibrate the label taken and gap sensor with the label stock in
use in the printer.
Before running this test, make sure labels are loaded properly with nothing blocking the label taken
sensor. If the label taken sensor is blocked, you will see an error message.
Page 74

4-12
METTLER TOLEDO UC Evo CT User's Guide
64092826 | 02 | 02/2016
Setup
UC Software Technical Manual
Figure 4-13: Sensor Calibration Failure Dialog
Remove the item blocking the sensor and retry the calibration.
4.3. Presets
Presets are used for one-touch call up of PLU records. Instead of entering the PLU number, the
preset keys can be assigned to a specific PLU number and department. Then, when the preset key
is touched, the PLU is automatically called up. There can be many pages of presets and the PLUs
can be called from any department. The pages are selected using the Page Buttons at the bottom of
the screen. First configure the page, and then the preset keys for that page can be configured.
Presets can be easily arranged in a hierarchy method so the PLU can be located easily. For
example to locate a “Tangerine", you could select the FRUIT category and within “Fruit”, the
Tangerine preset can be touched.
There are two ways to display Presets: Graphical and Text. Graphical Presets show images of the
item and Text Presets show a text description only. Refer to the
more information on using Graphical Presets.
for
Figure 4-14: Example Screen with Graphical Preset Keys
Page 75

64092826 | 02 | 02/2016
METTLER TOLEDO UC Evo CT User's Guide
4-13
Figure 4-15: Example Screen with Text Preset Keys
Setup > Unit Setup > Scale Settings
4.3.1. Preset Quick Key Editor
Note: This feature is valid for scale application versions 4.3 or later.
The Preset Quick Key Editor is used to add or modify preset keys from the Main screen. This feature
must be enabled in Setup Mode.
Figure 4-16: Access to Scale Settings
To enable this feature, navigate to
the "Preset Quick Edit Touch and Hold Time" to the amount of seconds you would like to hold down
the Preset to configure it. To disable this feature, set it to 0.
The "Preset Quick Edit Timeout" setting selects the time before the Preset Quick Edit Screen will
change back to the Main Screen without any activity. Any changes made without saving will be lost
if the timeout returns back to the Main screen.
There will be always a Security Login Screen before you get to the Edit Screen, even if Security is not
configured in the scale. Only Supervisor or Technicians can log in. There is NO Operator login for
this feature. When you successfully logged in, you can add, remove and swap presets, only for the
Preset Page you logged in. No functions are available to delete or swap a Navigation Preset. After
saving, the system reverts back to normal mode, where you can switch pages and re-enter the
editor.
. From the last page, change
Page 76

4-14
METTLER TOLEDO UC Evo CT User's Guide
64092826 | 02 | 02/2016
Setup
Figure 4-17: Preset Quick Editor
4.3.2. Preset Page Setup
Touch the “Setup” key on the main screen and then the “Presets Setup” key. Shown below is the
Preset Setup screen. Here you can set up the Keys (PLUs), Pages, and select Display Options.
These are covered in the following sections.
Figure 4-18: Preset Setup Screen
Page 77

64092826 | 02 | 02/2016
METTLER TOLEDO UC Evo CT User's Guide
4-15
4.3.3. Add Page
To add new pages, touch the Pages button (1) then touch the Add Page (2) button.
Select the overall look of the page, including the Page Format (4) and Page Layout (6). To access
the page using a category button on the bottom of the screen, select the check box Show on Tab
Bar? (5). If the page will be used as a link accessed by touching one of the preset keys, leave the
box unchecked.
Figure 4-19: Adding Pages
Page Format: select “Text-based page", “Graphical page”, or "Graphical Tare page". For more
information on assigning graphics, refer to the UC Software Technical Manual.
Page layout: select the grid type of the preset keys on the page from 2x2 through 6x6.
Page 78

4-16
METTLER TOLEDO UC Evo CT User's Guide
64092826 | 02 | 02/2016
Setup
Example Text Based 4x4 Preset Page
Example Graphical 4x4 Preset Page
Example Graphical 3x3 Tare Page
4
5 6
Figure 4-20: Page Format Selection
Figure 4-21: Graphical Page Grid Type Selection Screen
You can add pages automatically by selecting "By Department" for the "Page Type", or manually
using "Custom". When selecting "By Department", pages of preset keys for all of the PLUs in that
department will be created. To program the preset keys manually, select "Custom" from the drop
down menu. Select either "By Department" or "Custom" from the drop down list and touch Next> to
continue.
Page 79

64092826 | 02 | 02/2016
METTLER TOLEDO UC Evo CT User's Guide
4-17
4.3.4. Graphical Tare Presets
UC Software Technical Manual
The Graphical Tare presets must have the tare value as Line 2 of the description. It is automatically
inserted when the tare is entered and should not be manually edited.
The Tare override (by touching the Tare box on a By Weight PLU) will bring up a copy of the
Graphical Tare screen. The Graphical Tare feature is enabled in Unit Setup / Scale Settings. If the
feature is enabled but no tare pages are configured, then the standard Forced Tare wizard will be
used.
Figure 4-22: Add Preset Page Screen
Figure 4-23: Graphical Tare Preset Options
For more information on assigning tare graphics, refer to the
Tare can be entered by either selecting the preset key, entering the value, or by placing the container
on the platter then touching the “Platter Tare” key. Based on the Tare Override Limit Scale Settings,
the user may have a maximum allowable tare value limit.
1. To add a new Graphical Tare page, select Page and Add Page. Select Graphical Tare page for
the Page Format and select the grid type from the Page Layout dropdown menu.
.
Page 80

4-18
METTLER TOLEDO UC Evo CT User's Guide
64092826 | 02 | 02/2016
Setup
Figure 4-24: Adding a Graphical Tare Preset Page
2. Next, rename the page using the Rename Page button and the keyboard. Touch "Apply" to save
and exit.
Figure 4-25: Naming the Page
3. Enter the tare using the "Enter Tare" button and the popup keypad.
Figure 4-26: Tare Entry Popup Keypad
4. Touch the "Choose a Graphic" button to select an image for the tare. The UC contains many
stock images of trays and containers to select from. Touch an image file name to display a
preview, and then touch Done to select the image.
Page 81

64092826 | 02 | 02/2016
METTLER TOLEDO UC Evo CT User's Guide
4-19
Figure 4-27: Graphic Selection Screen
5. Touch the Done button when finished editing the preset.
Figure 4-28: Selected Graphic Displayed in Preset Wizard
6. The new preset will display on the page. Touch another preset to edit or Save to save changes
and exit.
Figure 4-29: Graphic Displayed on Page
Page 82

4-20
METTLER TOLEDO UC Evo CT User's Guide
64092826 | 02 | 02/2016
Setup
4.3.5. Edit Page
To modify an existing page, first select the page using the Page, "Go to Page" selection.
Figure 4-30: Selecting a Page to Edit
From this screen, the page can be edited or removed or the presets can be edited or removed.
4.3.6. Add Preset Pages “By Department”
To add pages by department, first select the department from the drop down list and touch Next>
to continue. Then select the department pages you wish to create from the drop down menu.
Figure 4-31: Adding a Preset Page by Department
The number of pages that will be automatically created by using the PLUs from the selected
department will be shown.
Page 83

64092826 | 02 | 02/2016
METTLER TOLEDO UC Evo CT User's Guide
4-21
Figure 4-32: Dialog Box Displaying Number of Added Preset Pages
To go back, touch the <Back button, finish by touching the Done button, or cancel all by touching
Cancel.
NOTE: When programming presets is complete, remember to touch the Save button before
exiting Program Presets to save your settings.
4.3.7. Add Preset Page Using “Custom”
1. First select “Custom” from the dropdown menu, then touch Next>.
Figure 4-33: Adding Preset Page Using “Custom”
Page 84

4-22
METTLER TOLEDO UC Evo CT User's Guide
64092826 | 02 | 02/2016
Setup
2. To edit the page name, touch the Rename Page button.
Figure 4-34: Naming a Custom Page
3. Type the new page name using the keyboard. The Enter key will move the cursor to the next
line when two or more lines of description are needed.
4. Touch Apply to continue or Cancel to quit without saving changes.
5. You may also add an Alternate name for the page. This name will be used when the Alternate
Language button is touched. The same process as just outlined is used to set or edit the
alternate page name.
Figure 4-35: Adding an Alternate Name for the Page
6. The new page will be displayed and now can be editable.
4.3.8. Show/Hide Menu
To preview a page, touch the Hide Menus button on the Main Preset page. This will preview the
complete page layout, without the programming function keys such as “Keys” and “Pages” being
displayed.
This will show the page as it will display on the normal operation screen.
Page 85

64092826 | 02 | 02/2016
METTLER TOLEDO UC Evo CT User's Guide
4-23
NOTE: while viewing the screen in Setup Mode without Menus, the phrase “This unit is in
1
2
3
setup mode” will display along the bottom of the screen. This phrase does not appear on the
normal operation screen.
Touch the Show Menus button to return to editing mode.
4.3.9. Edit Preset
Use Keys/Edit Preset to add or modify a preset key or to select a Page that will display as a preset
key for categorical presets including pages that do not show up on the tab bar. To modify a button,
(1) touch the preset key you wish to edit, touch the Keys button (2) to display the drop down
menu, and then touch the “Edit Preset” button (3).
Figure 4-36: Setup Mode Displayed Without Menus
Figure 4-37: Adding or Modifying a Preset Key
Page 86

4-24
METTLER TOLEDO UC Evo CT User's Guide
64092826 | 02 | 02/2016
Setup
List
Search
Touch Choose PLU or Choose Page to select a PLU or to link to another page.
Figure 4-38: Configure Preset Wizard, Selection Options
If Choose PLU is touched, there are two methods to find PLU –
4.3.9.1. Choose PLU (list)
and
.
Select the department where the PLU is located by touching the + button next to the department.
You can scroll through the list of PLU numbers. Select the PLU you wish to use by touching it so it
is highlighted, then touch the Select key.
Figure 4-39: Choosing PLU from a List
Page 87

64092826 | 02 | 02/2016
METTLER TOLEDO UC Evo CT User's Guide
4-25
4.3.9.2. Chose PLU (search)
When the Search key is touched, a PLU can be found by its number or Item description.
For example, a search of the description “Lean” returned the following results:
Figure 4-40: Choosing PLU by Search
Highlight the PLU you wish to use, then touch the Select key.
Figure 4-41: Example Search Results
Page 88

4-26
METTLER TOLEDO UC Evo CT User's Guide
64092826 | 02 | 02/2016
Setup
4.3.9.3. Configure Preset Wizard
Modify the Preset Button color, description, and alternate description.
Figure 4-42: Choose Text/Key Colors Button
To change the preset button color, touch the "Choose Text/Key Colors" button.
Figure 4-43: Configure Preset Wizard, Button Displayed
Page 89

64092826 | 02 | 02/2016
METTLER TOLEDO UC Evo CT User's Guide
4-27
Select the new color combination to use for the preset button.
Figure 4-44: Color Combination Selector
The new button with the color selected will be shown in the preset grid.
Figure 4-45: Colored Button Displayed in Preset Grid
To create a custom color combination, touch the Colors button. Touch the combination to change.
Figure 4-46: Color Combination Selector
Page 90

4-28
METTLER TOLEDO UC Evo CT User's Guide
64092826 | 02 | 02/2016
Setup
Select the new colors for background and text. Touch OK when done.
Figure 4-47: Color Picker for New Background and Text Colors
4.3.10. Graphical Presets
If you are editing a graphic based page, the second screen allows you to select the graphic and edit
the descriptions as shown below.
Figure 4-48: Editing a Graphical Preset
The Service Application Software contains an extensive collection of images for produce, bulk foods,
and candy. To select an image to display on the preset key, touch the “Choose a Graphic” button.
Scroll through the graphic list using the scroll bars on the right, then touch the file to select the
graphic. A picture of the image will display whenever a file is highlighted, as shown below.
Touching “Top” will scroll to the top of the image list and touching “End” will scroll to the bottom of
the image list.
Page 91

64092826 | 02 | 02/2016
METTLER TOLEDO UC Evo CT User's Guide
4-29
Click Done to confirm the selected image.
At this point, you can touch “Edit the Description” to change the default description, Done to quit or
program another preset, Cancel to exit, or Back to select a different PLU.
You may also edit or add an alternate description by touching “Edit Alternate Description”. The
alternate description is used when the alternate language button is touched.
4.3.11. Display Options
Figure 4-49: Graphic Selection List
The Display Options button allows the following items to be configured.
4.3.11.1. Top Page
Top Page allows you to configure the page that displays first, every time you return to the main
screen. The selection includes the entire configured page and a feature called “Top Sellers”.
Figure 4-50: Display Options Dialog Box
Page 92

4-30
METTLER TOLEDO UC Evo CT User's Guide
64092826 | 02 | 02/2016
Setup
4.3.11.2. Display Page
This feature selects whether to display either the Top Page each time the scale returns to the home
screen, or to display the “Last Used” page. If you select Top Page, configure the page you wish
displayed under the “Top Page” settings.
4.3.11.3. Auto-Configure Settings
If you select Top Sellers, the UC will automatically configure the page for the PLUs that are used the
most. To set the frequency of the auto refresh of the page, refer to the Software Technical Manual.
To immediately create or refresh the Top Sellers page, touch the “Create/Refresh Page” key.
Figure 4-51: Auto Configure Settings
4.3.11.4. Top Tare Page
Top Tare Page allows you to configure the page that displays first when the Graphical Tare Wizard
opens.
4.3.12. Save the Page
When programming presets is complete, remember to touch the Save button to save changes
before exiting. To exit without saving any of the changes, touch the Cancel button.
4.4. Quick Edits
The Quick Edits selection is used to change some of the more common numeric data in a PLU
record. The Quick Edit function changes the record in the scale database immediately. Items that
can be changed include the price, tare, shelf-life, and use-by date. An external keyboard is not
required to use Quick Edits. Quick Edits is not for adding new records or deleting PLU’s. When
selecting the Quick Edits function, you will first be asked to select the department for the PLU data
you wish to change.
Page 93

64092826 | 02 | 02/2016
METTLER TOLEDO UC Evo CT User's Guide
4-31
Figure 4-52: Quick Edits Button on Setup Screen
Quick Edits is accessed by touching the Setup button on the Main screen. The Setup screen is
shown below. To return to the Main screen, touch the Return button. Touch the Quick Edits button
to enter the Quick Edits mode. This will give you the Quick Edits Wizard.
Figure 4-53: Quick Edits Wizard
Select the department, and then click Next to display the Quick Edit main screen.
Figure 4-54: Department Selected.
Page 94

4-32
METTLER TOLEDO UC Evo CT User's Guide
64092826 | 02 | 02/2016
Setup
The main screen shows the current department. Enter a PLU number on the touchpad and touch the
Enter key.
Figure 4-55: Quick Edit Fields
The current PLU data will be retrieved from the scale database. To change any of the displayed
fields, touch the box that displays the data. For example, to change the Unit Price, touch the box
displaying the Unit Price. Key in the new price (including the decimal point) and touch the Enter
key.
Figure 4-56: Quick Edits – Entering a New Price
Page 95

64092826 | 02 | 02/2016
METTLER TOLEDO UC Evo CT User's Guide
4-33
The PLU can also be converted to a Frequent Shopper price by touching the Frequent Shopper Type
UC Software Technical Manual
UC Service Manual
and Price boxes.
Figure 4-57: Selecting Frequent Shopper Type
To change the Shelf Life or Use By dates, touch the date boxes and select a new date from the
calendar. Touch the arrow keys at the top to change the month. Touch the new date, and then
touch the OK key.
Enter the date numerically by touching the “Use Numerical Keypad” key.
4.5. Launch External Applications
Use this function to access the UC Editor, UC Remote Setup, UC SmartLabel, the Report Generator,
and Touchscreen Calibrator; as well as any user loaded programs.
You may want to consult your system administrator or consult the
Figure 4-58: Quite Edits – Date and Numerical Value Entry Keypads
prior to accessing some external applications.
or
Page 96

4-34
METTLER TOLEDO UC Evo CT User's Guide
64092826 | 02 | 02/2016
Setup
Figure 4-59: Accessing Launch External Application from the Setup Menu
4.5.1. UC Editor
UC Editor is a separate application that is used to manage the scale item database. With UC Editor,
you can add, edit, or delete PLU records, Extra Text, Graphics, Nutritional Information, Action
Messages, and Grades. Use this editor to create and edit departments in the scale database and
manage department information, such as name, UPC, and store address lines.
To edit PLU information, an optional USB programming keyboard is required.
Refer to the UC Software Technical Manual for details on UC Editor.
Figure 4-60: UC Editor Interface
Page 97

64092826 | 02 | 02/2016
METTLER TOLEDO UC Evo CT User's Guide
4-35
4.5.2. UC SmartLabel
SmartLabel is used to format custom label formats.
Refer to the Smart Label User's Guide for details on SmartLabel.
Figure 4-61: UC Smart Label Interface
Page 98

64092826 | 02 | 02/2016
METTLER TOLEDO UC Evo CT User's Guide
5-1
This chapter covers
•
5 Maintenance
5.1. External Cleaning
Before cleaning the unit, turn the power off.
• External Cleaning
Printer Cleaning
• DO NOT use solvents or commercial cleaners on the unit. They may harm the surfaces or
damage the touchscreen.
• DO NOT spray directly at or on the unit.
• Touchscreen and customer display – only use a soft, clean cloth dampened with mild detergent
and water to clean the touchscreen and customer display screen. DO NOT scrape with sharp
objects.
• Cover and platter – clean using a soft, clean cloth dampened with a mild cleaner or detergent
and water.
Yes No
Page 99

5-2
METTLER TOLEDO UC Evo CT User's Guide
64092826 | 02 | 02/2016
Maintenance
UC-GT: Press down on the green latch to unlock
UC-CWx: Lift the green latch to release and
5.2. Printer Cleaning
Clean the printhead and platen roller any time you notice the print quality has degraded or when the
labels are changed. On the UC-CWx, slide the printer out for access to the printhead. On the UC-GT,
open the printer door.
5.2.1. Materials Required
• Small soft brush
• Mettler Toledo Cleaning Pen, p/n 68005732
- or -
• Cotton Swabs
• Alcohol
5.2.2. Recommended Frequency:
• Weekly
• More frequent than weekly if performance is degraded due to glue or debris buildup.
5.2.3. UC-CWx/UC-GT
and release the printhead.
Use the Mettler Toledo Cleaning Pen, p/n 68005732 available from Mettler Toledo to clean any
glue or debris from the black stripe area of the printhead. A cotton swab and alcohol may also be
used in place of the cleaning pen. Also, clean any build-up of dust and glue from the platen roller
using alcohol and a clean cloth. Rotate the roller by pushing the Operations Menu "Measure Label"
button.
raise the printhead.
Page 100

64092826 | 02 | 02/2016
METTLER TOLEDO UC Evo CT User's Guide
5-3
Do not use any metal or sharp objects to scrape the printhead or platen roller. This may cause
Printhead
Platen roller
Printhead
Platen roller
serious damage. For safety, do not touch the roller with your fingers while it is in motion.
 Loading...