

Page 1
User Manual
Quantos Automated Dosing
Powder Module
Page 2

Page 3
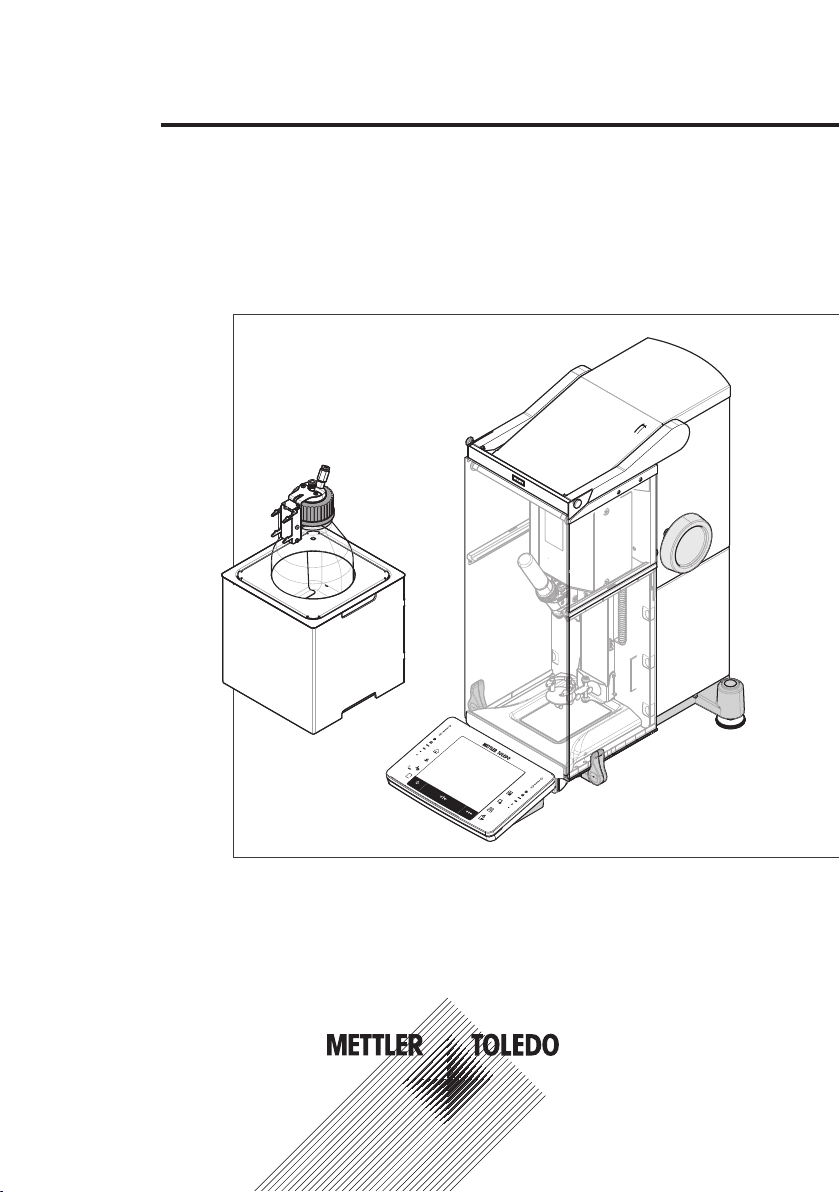
Overview dosing unit
5
2
8 10 11
9
7
6
3
4
1
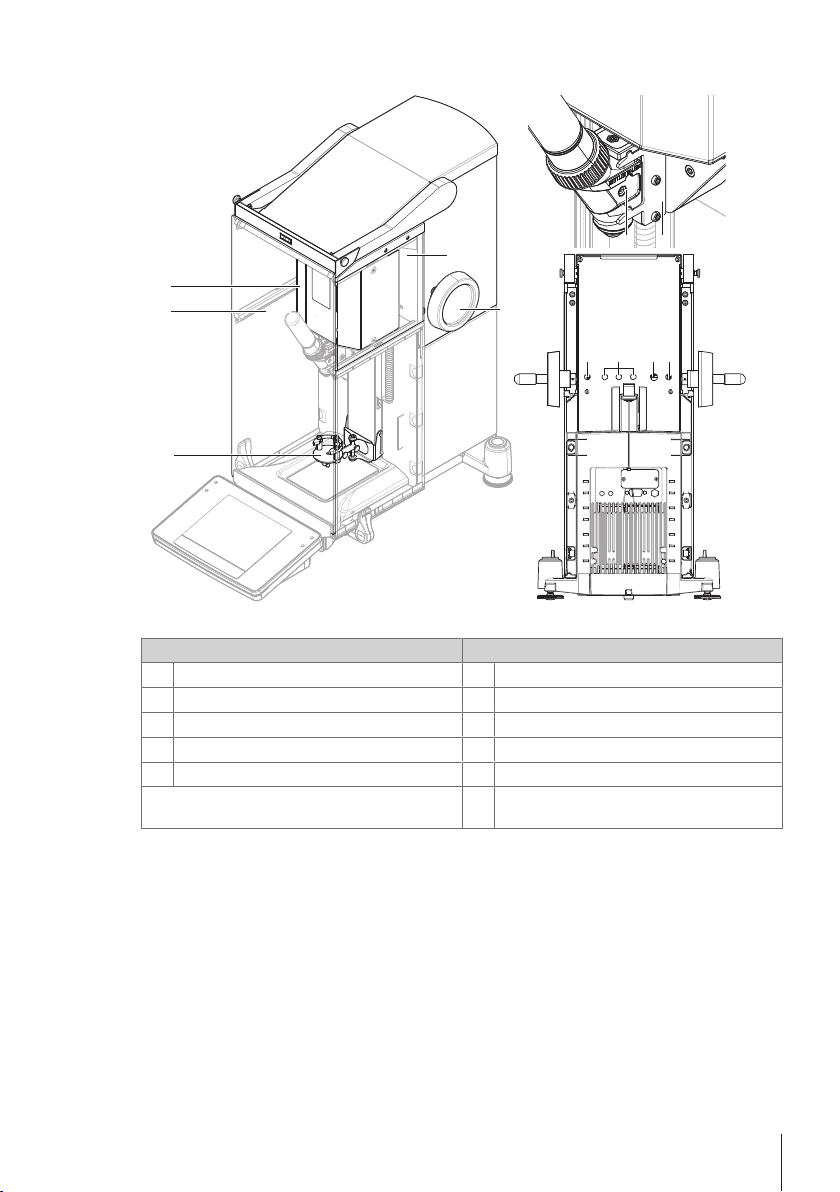
Legend Powder Module
Powder module Dosing head and backside
Drive unit
1
Front door
2
ErgoClip Quantos
3
Upper side glass
4
Head height adjustment handle
5
Dosing head
6
Dosing head support
7
Power supply cable (from AC adapter)
8
Connector for autosampler and CAN devices
9
RS232C interface - cable to balance
10
Power supply cable from powder module to
11
balance
3Quantos Automated Dosing
Page 4
1 Safety Information
• Read and understand the instructions in this manual before you use the device.
• Keep this manual for future reference.
• Include this manual if you pass on the device to other parties.
If the device is not used according to the instructions in this manual or if it is modified, the safety of
the user may be impaired and Mettler-Toledo GmbH assumes no liability.
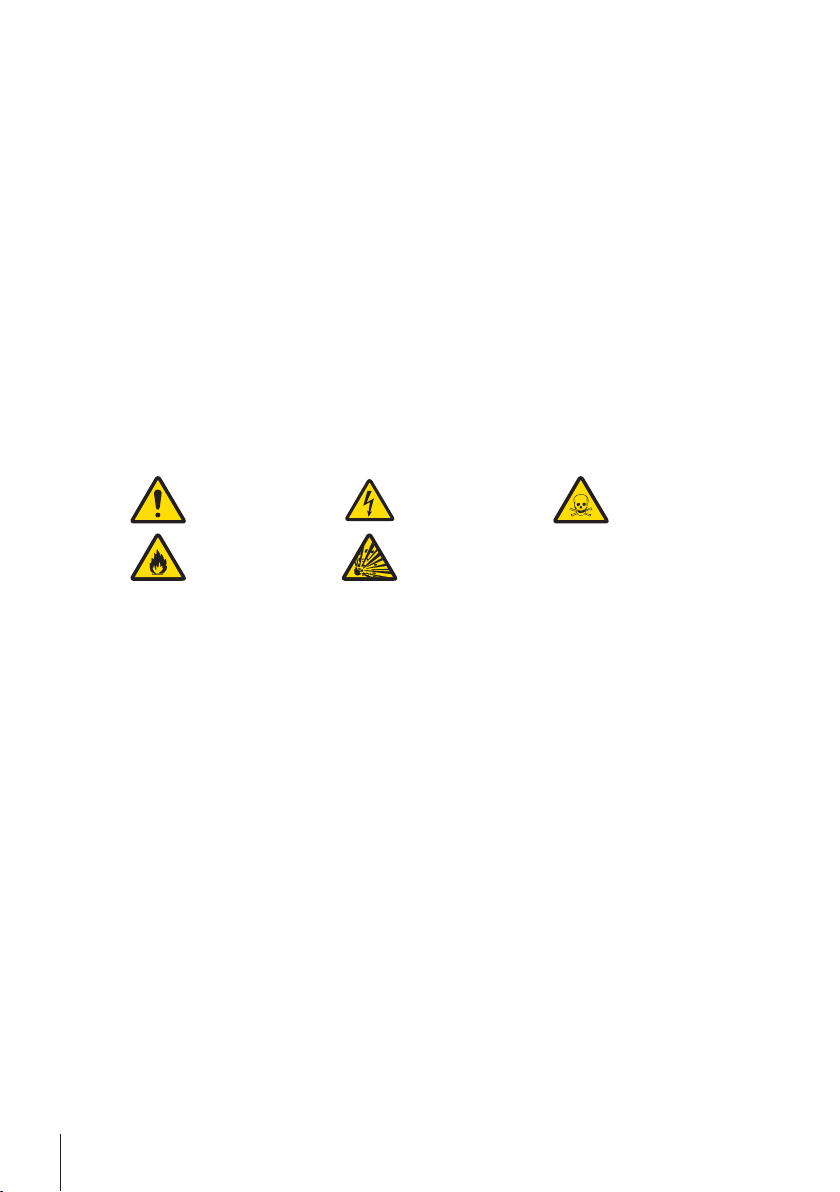
1.1 Definition of signal words and warning symbols
Signal Words
WARNING
CAUTION
NOTICE
Note
Symbols
General hazard Electrical shock Toxic substance
for a hazardous situation with medium risk, possibly resulting in death or severe
injury if not avoided.
for a hazardous situation with low risk, resulting in minor or moderate injury if not
avoided.
for a hazardous situation with low risk, resulting in damage to the instrument, other
material damage, malfunctions and erroneous results, or loss of data.
(no symbol)
for useful information about the product.
Inflammable or
explosive substance
Explosion
1.2 Product specific safety notes
Your dosing system represents state-of-the-art technology and complies with all recognized safety
rules, however, certain hazards may arise in extraneous circumstances. Do not open the device; it
does not contain any parts that can be maintained, repaired or replaced by the user. If you experience
problems with your dosing system, contact your authorized METTLER TOLEDO dealer or service representative.
The dosing system has been tested for the experiments and intended purposes documented in the
appropriate manual. However, this does not absolve you from the responsibility of performing your
own tests of the products supplied by us regarding their suitability for the methods and purposes you
intend to use them for.
Intended use
This dosing system is designed to be used in analytical laboratories by qualified staff. Your dosing
system is used for weighing and dosing powder or liquid samples. Use the dosing system exclusively
for this purpose.
Any other type of use and operation beyond the limits of technical specifications without written
consent from Mettler-Toledo GmbH, is considered as not intended.
Site requirements
The balance has been developed for indoor operation in a well-ventilated area. Avoid the following
environmental influences:
• Conditions outside of the ambient conditions specified in the technical data
• Powerful vibrations
• Direct sunlight
• Corrosive gas atmosphere
4 Quantos Automated Dosing
Page 5
• Explosive atmosphere of gases, steam, fog, dust and flammable dust
• Powerful electric or magnetic fields
Staff qualification
Incorrect use of the dosing system or the chemicals used in the analysis can lead to death or injury.
The following experience is needed for operating the dosing system.
• Knowledge and experience in working with toxic and caustic substances.
• Knowledge and experience in working with standard laboratory equipment.
• Knowledge and experience in working in accordance with general lab safety rules.
Responsibilities of the dosing system owner
The dosing system owner is the person that uses the dosing system for commercial use or places the
dosing system at the disposal of his staff. The dosing system owner is responsible for product safety
and the safety of staff, user(s) and third party.
The operator has the following responsibilities:
• Know the rules for safety at the workplace that are in effect and enforce them.
• Ensure that only qualified staff uses the dosing system.
• Define the responsibilities for installation, operation, cleaning, troubleshooting and maintenance
and ensure that the tasks are done.
• Train the staff in regular intervals and inform them about dangers.
• Provide the necessary protective gear for the staff.
Shut down of the instrument in emergency situations
− Pull the plug from the electrical outlet.
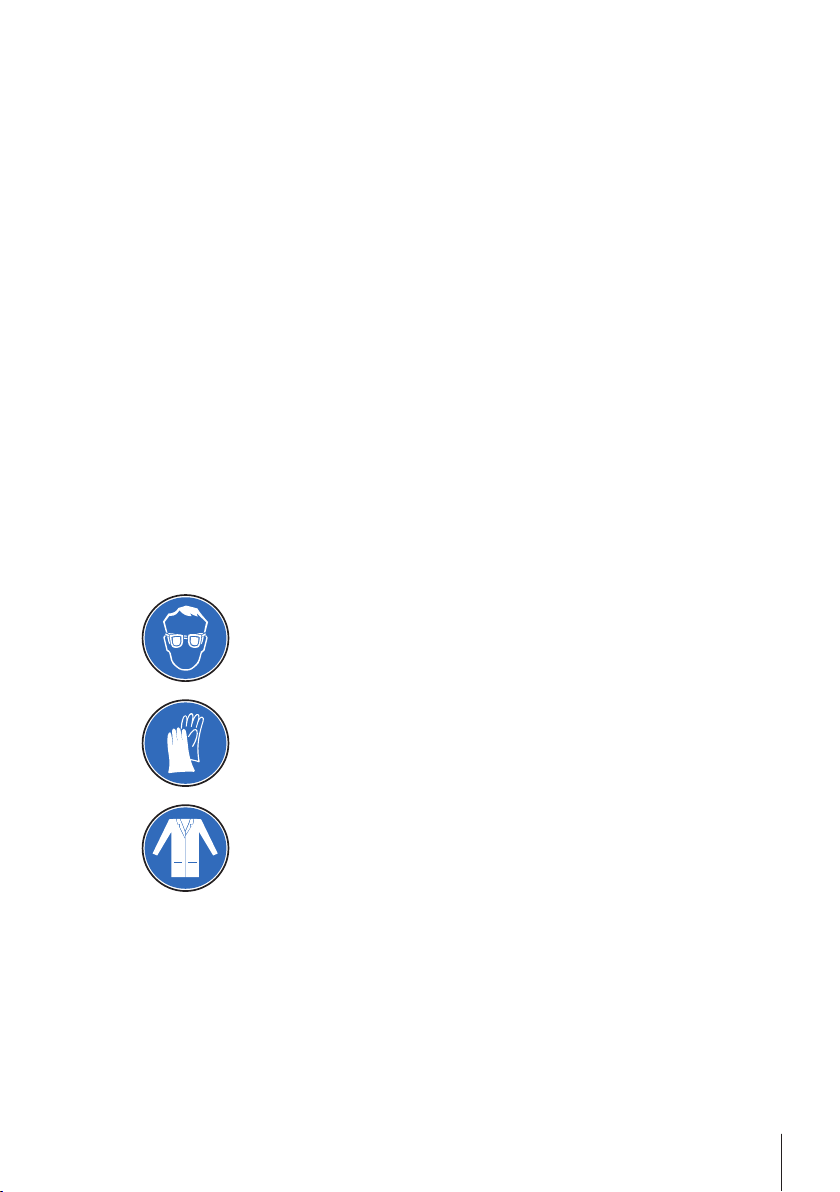
Protective clothing
Wear protective clothing in the laboratory when working with hazardous or toxic substances.
Wear suitable eye protection such as goggles.
Use appropriate gloves when handling chemicals or hazardous substances and check
their integrity before use.
Wear a lab coat.
5Quantos Automated Dosing
Page 6

Safety notes
WARNING
Danger of death or serious injury due to electric shock!
Contact with parts that contain a live current can lead to injury and death. If the device
cannot be shut down in an emergency situations, people can be injured or the device
can be damaged.
1 Only use the supplied three-core power cable with equipment grounding conductor
to connect your device.
2 Check that the voltage printed on it is the same as your local power supply voltage.
ð If this is not the case, under no circumstances connect the AC adapter to the
power supply, but contact a METTLER TOLEDO representative.
3 Only connect the instrument to a three-pin power socket with earthing contact.
4 Only standardized extension cable with equipment grounding conductor must be
used for operation of the device.
5 Do not disconnection the equipment grounding conductor.
6 Check the cables and the plug for damage and replace damaged cables and plugs.
7 Make sure that the cables are arranged so that they cannot be damaged or interfere
with the operation.
8 Keep all electrical cables and connections away from liquids.
9 Make sure that the power plug is accessible at all times.
WARNING
Danger of injuries and death due to toxic substances or caustic components!
Chemicals can cause injuries if they come in contact with bare skin, eyes or are
inhaled.
1 When using chemicals and solvents, comply with the instructions of the producer
and the general lab safety rules.
2 Set up the instrument in a well-ventilated location.
3 Clean any spills immediately.
4 If you dry substances which form toxic gases, place the instrument in a fume hood.
WARNING
Damage of bottle or pump because of high pressure!
If the bottle or the pump with a protective gas exposed to high pressure, the bottle or the
pump module might get damaged.
1 Avoid pressure higher than 1.5 bar (21 psi) in the bottle.
2 Ensure the protective gas does not exceed the pressure range of 0.2 bar (2.9 psi).
3 Wear protective glasses when working with the bottle.
WARNING
Danger of death and serious injuries due to flammable solvents!
Flammable solvents can ignite and lead to fire and explosions.
1 Keep flammable solvents away from naked flames.
2 When using chemicals and solvents, comply with the instructions of the producer
and the general lab safety rules.
6 Quantos Automated Dosing
Page 7
CAUTION
Danger of injuries due to splashing liquids!
Splashing liquids because of remaining pressure in dosing head. If you don't release
the pressure of the dosing head, liquid might splash when opening dosing head or
removing liquid tube.
1 Always release pressure of dosing head by switching off the instrument before
removing liquid tube.
2 Wear protective glasses.
NOTICE
Environment
Only use indoors in dry locations.
NOTICE
Danger of damage to the device!
Never open the device. The device contains no user-serviceable parts.
− In the event of problems, please contact a METTLER TOLEDO representative.
NOTICE
Danger of damage to the device due to incorrect parts!
Using incorrect parts with the device can damage the device or cause the device to
malfunction.
− Only use parts supplied with the device, listed accessories and spare parts from
Mettler-Toledo GmbH.
Finding more information
Refers to an external document.
FCC Rules
This device complies with Industry Canada licence-exempt RSS standard(s) and part 15 of the FCC
Rules. Operation is subject to the following two conditions: (1) this device may not cause interference, and (2) this device must accept any interference, including interference that may cause
undesired operation of the device.
Changes or modifications not expressly approved by the party responsible for compliance could void
the user's authority to operate the equipment.
This equipment has been tested and found to comply with the limits for a Class A digital device,
pursuant to part 15 of the FCC Rules. These limits are designed to provide reasonable protection
against harmful interference when the equipment is operated in a commercial environment. This
equipment generates, uses, and can radiate radio frequency energy and, if not installed and used in
accordance with the instruction manual, may cause harmful interference to radio communications.
Operation of this equipment in a residential area is likely to cause harmful interference in which case
the user will be required to correct the interference at his own expense.
7Quantos Automated Dosing
Page 8
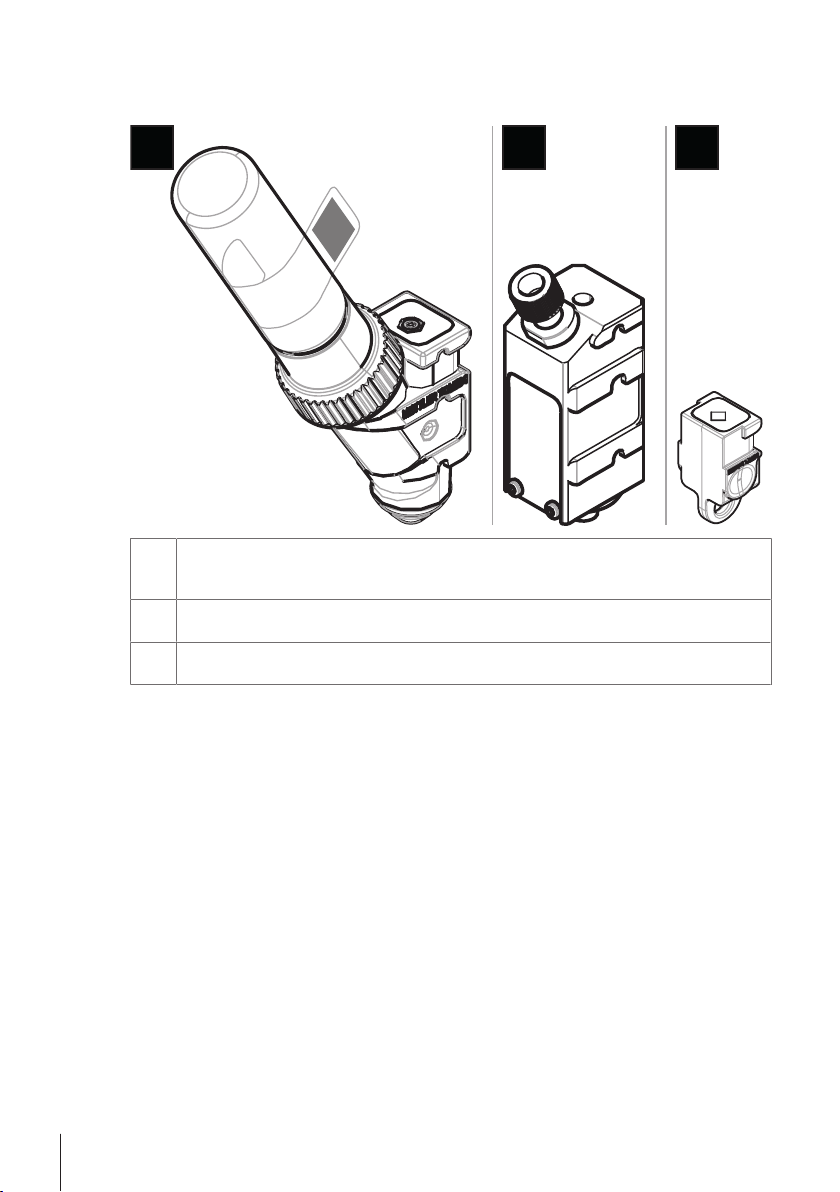
2 Design and Function
1 2 3
2.1 Dosing heads and equipment
1 Powder dosing head (e.g. QH008-BNMW)
This head can be equipped with a powder storage container. This is the standard head for powder
dosing.
2 Liquid dosing head (e.g. QL001)
This is the standard head for liquid dosing. It is used together with the pump module and bottle.
3 Manual dosing head (QA000-M)
This head has no powder container and the user has to dispense the powder manually.
Powder dosing head
The spare cap included in the delivery may be used to use the dosing head without a storage vial.
Storage vials and transport boxes need to be purchased separately.
You can print a label containing the powder data stored in the dosing head, affix this label to the
powder container.
Manual dosing head
This head is reduced to a tag that allows to enter substance data and to print respective data.
Powder test head
This head is equipped with a powder storage container filled with calcium carbonate (CaCO3) and a
test function. It dispenses automatically 10 times a defined mass and reports the results. Check the
results of the typical values > repeatability (sd), fine range automated operation and dosing time. If
your instrument didn't pass the tests, inform a METTLER TOLEDO service engineer.
MinWeigh dosing head
The MinWeigh dosing head performs a minimum weight test automatically by placing a test weight
on given tare weights. The procedure will be repeated 10 times to define the automated MinWeigh.
8 Quantos Automated Dosing
Page 9
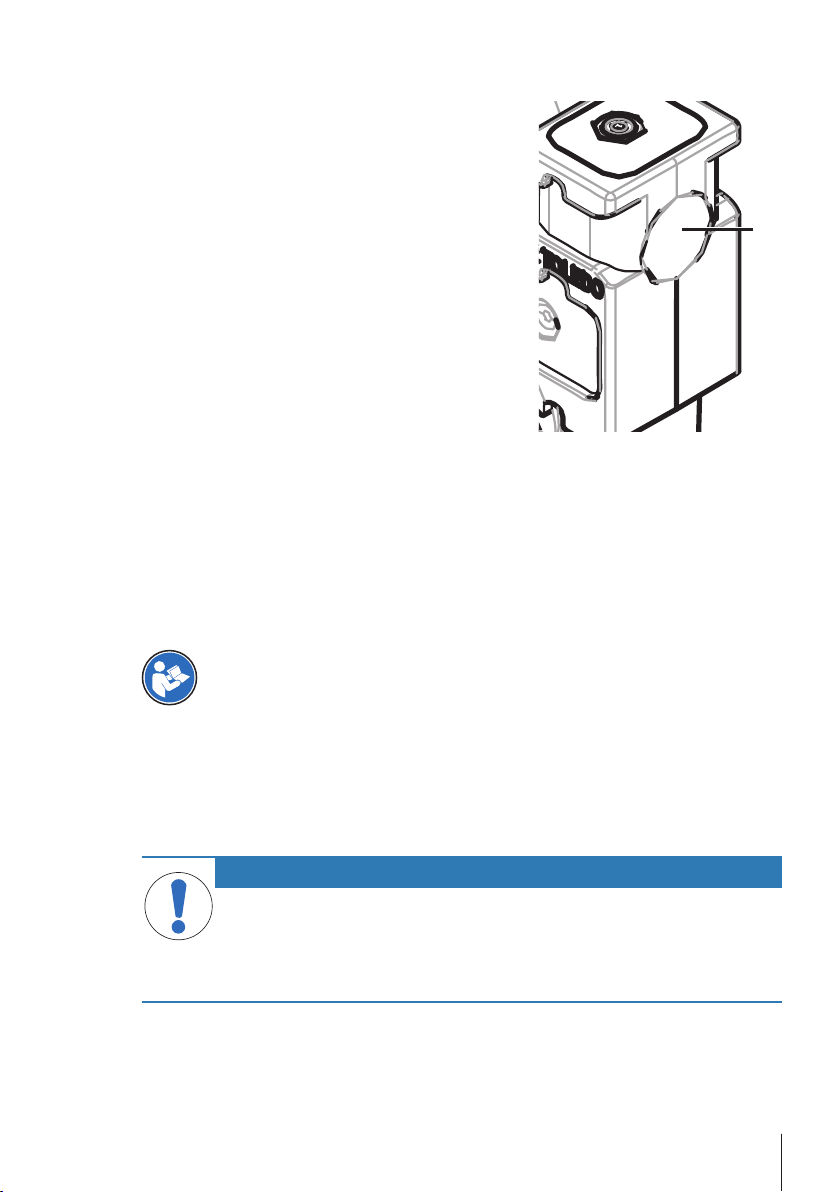
2.2 Data stored in the dosing head’s RFID tag
1
Every dosing head is equipped with a integrated RFID tag (1)
which stores and exchanges data with the instrument.
The following data is stored in the RFID tag of the head:
• User data
• This block holds information about the substance such as
the name of the substance, the filling and expiry dates, the
quantity, etc. This data can be edited by the user at any time
and should be entered before using a new head for the first
time to have the data available for reports and labels.
Note for powder dosing heads
The counter for the remaining powder dosing cycles is based on the lifetime limit of the dosing head
(max. 999). With every dosing cycle started, the counter is decreased by 1. If the counter drops to
zero, the head must be replaced. If the powder container of the old head still contains a considerable
amount of powder, you may remove the powder container from the old head and screw it onto the
new one. Just copy the user data and the powder content value from the old head to the new one.
If the remaining quantity of powder is insufficient for the next dosing cycle, a warning message will
appear.
3 Installation and Putting into Operation
Additional information about this instrument can be found in the Operating Instructions on the
CD-ROM or online.
Finding more information
u www.mt.com/quantos
The instrument is installed by METTLER TOLEDO service engineers. This includes the wiring as well
as the configuration of the interfaces and peripherals.
3.1 Scope of delivery
NOTICE
Danger of damage to the instrument due to incorrect parts!
Using incorrect parts with the instrument can damage the instrument or cause the
instrument to malfunction.
− Only use parts supplied with the instrument, listed accessories and spare parts
from METTLER TOLEDO.
9Quantos Automated Dosing
Page 10

Powder module
• Powder module
• Conductive front door
• Set of upper side glasses for powder module
• Set of bolts for upper side glasses
• ErgoClip Quantos
• Front cover
• Type label (standard or approved balance), to be
affixed to the powder module
• Dosing head starter kit
• User Manual
Recommended options
• Ethernet Option
• Ethernet / RS232 (Netcom kit)
• AntiStatic kit
• Cable box
3.2 Selecting the location
An optimal location will ensure accurate and reliable operation of the instrument. The surface must be
able to safely take the weight of the instrument when fully loaded. The following local conditions must
be observed:
If the instrument is not horizontal at the outset, it must be leveled during commissioning.
• The instrument must only be used indoors and up to a maximum
altitude of 4000 m above sea level.
• Before switching on the balance, wait until all parts are at room
temperature (+5 to 40°C).
The humidity must be between 10% and 80% non-condensing.
• The power plug must be accessible at all times.
• Firm, horizontal and vibration-free location.
• Avoid direct sunlight.
• No excessive temperature fluctuations.
• No strong drafts.
3.3 Assembling powder module
The instrument is mounted and installed by a METTLER TOLEDO service engineer.
3.4 Installing and removing dosing head
Installing dosing head
Refer to your XPE Operating Instructions for further information on the function of the keys.
10 Quantos Automated Dosing
Page 11

1 To open the front door, press key .
1
2 To open the side doors, press key
Note
If you have an autosampler installed, these keys may have
a different function.
3 Slide dosing head onto the dosing head support until it
comes to a stop.
4 Press it down slightly until it is properly seated in the
holding pins (1).
Note
The dosing head will be locked automatically, as soon as
first dosing starts.
ð The dosing head is ready to dose.
.
Removing dosing head
Once the dosing head has been locked, you have to unlock the head before removing it.
§ Function key Un/Lock must be active.
1 Tap Un/Lock.
ð The dosing head is being unlocked.
2 Remove dosing head by pulling it outwards carefully.
3.5 Assembling pump module and bottle
WARNING
Damage of bottle because of high pressure!
If the bottle has to resist higher pressure than 1.5 bar (21 psi) it might get damaged.
1 Avoid pressure higher than 1.5 bar (21 psi) in the bottle.
2 Wear protective glasses when working with the bottle.
− Mount pump module and bottle according to figure.
11Quantos Automated Dosing
Page 12

Inserting and removing liquid dosing head in and from the liquid dosing head support
1
2
To Bottle
Pump
E
xhaustInlet
CAN CANRS232CPower Supply
CAUTION
Danger of injuries due to splashing liquids or substances!
The bottle stands during use under 0.5 bar (7 psi) pressure. Liquid splashing out might
harm the user and can damage the device.
1 Do not remove tubes under pressure.
2 Relieve pressure by switching off the insrument, pull out the tube.
1 Insert liquid dosing head in the liquid dosing head support.
2 To remove liquid dosing head from the liquid dosing head
support, pull the catch (1) to the front and remove liquid
dosing head (2).
3.5.1 Connecting the tubes
Connectors of pump module
The thinner tube is used for transporting liquid from the bottle to the liquid dosing head. The slightly
bigger tube is used for pumping air into the bottle. By adding air, pressure rises in the bottle. When
pressure reaches min. 0.3 to max 0.5 bar (4.4 to 7.2 psi) the micro dispensing valve in the dosing
head opens and liquid can ascend the liquid tube. The two tubes are further referred to as liquid tube
and air tube.
12 Quantos Automated Dosing
Page 13

§ The liquid dosing head is inserted in the liquid dosing head
1 2
3
5
4
67
support.
− Connect liquid tube (1) at bottle (2) and at liquid dosing
head (3).
Connect air tube
NOTICE
Damage on tube connectors because of mishandling!
If the tubes are not removed correctly, the connectors and therefore the pump module
can be damaged.
Wrongly cut tubing can cause leaking connections.
1 To remove tubes, press down ring on connector and pull out tube carefully.
2 Cut tubes with a tube cutter.
A tube in the air inlet to bottle (5) opens the valve of the air outlet. Never leave a tube which is
connected to the air outlet unconnected at the other end because pressure can not be built up.
You can connect up to 3 bottles to the pump module (7).
− Connect the air tube (4) at the air inlet of the bottle (5) and
the air outlet of the pump module (6).
13Quantos Automated Dosing
Page 14

Remove air tube
8
5
4
697
10 11
1 Remove air tube to the bottle (4) by firmly press lay down
the ring (8) at the air inlet (5).
2 Remove the air tubing of the bottle (8) and only if necessary
of the pump module by pushing the ring (9).
Use the pump with protective gas
WARNING
Damage of pump because of high pressure!
If you need to feed the pump with protective gas, e.g. nitrogen, make sure it does not
exceed the pressure range of 0.2 bar (2.9 psi). The pump module might get damaged.
1 Ensure the protective gas does not exceed the pressure range of 0.2 bar (2.9 psi).
2 Wear protective glasses when working with the pump.
1 Insert muffler (10) into air inlet (11) to absorb noise.
2 If you need to feed the pump with protective gas, e.g.
nitrogen, make sure it does not exceed the pressure range of
0.2 bar (2.9 psi).
Wear protective glasses.
Do not insert the muffler (11) but instead connect a tube to
the air inlet (11).
Note
Outer tube diameter: 6mm
Pressure range: 0.1 to 0.2bar (1.5 to 2.9psi)
Contaminated air by using toxic, explosive or flammable liquids!
WARNING
14 Quantos Automated Dosing
Danger of injuries and death due to toxic substances!
If you use toxic, explosive or flammable liquids, the exhaust air will be contaminated.
− Use a tube for the exhaust air outlet.
Page 15

1 If you use toxic, explosive or flammable liquids, the exhaust
12
To Bottle
Pump
E
xhaustInlet
CAN CANRS232CPower Supply
1 2
3
air will be contaminated and the device can get damaged.
2 Connect a tube to exhaust air (12) outlet to absorb the air
into a safe container.
Note
Outer tube diameter: 6mm
3.6 Connecting the tubes
Connectors of pump module
The thinner tube is used for transporting liquid from the bottle to the liquid dosing head. The slightly
bigger tube is used for pumping air into the bottle. By adding air, pressure rises in the bottle. When
pressure reaches min. 0.3 to max 0.5 bar (4.4 to 7.2 psi) the micro dispensing valve in the dosing
head opens and liquid can ascend the liquid tube. The two tubes are further referred to as liquid tube
and air tube.
§ The liquid dosing head is inserted in the liquid dosing head
support.
− Connect liquid tube (1) at bottle (2) and at liquid dosing
head (3).
15Quantos Automated Dosing
Page 16

Connect air tube
5
4
67
8
5
4
697
NOTICE
Damage on tube connectors because of mishandling!
If the tubes are not removed correctly, the connectors and therefore the pump module
can be damaged.
Wrongly cut tubing can cause leaking connections.
1 To remove tubes, press down ring on connector and pull out tube carefully.
2 Cut tubes with a tube cutter.
A tube in the air inlet to bottle (5) opens the valve of the air outlet. Never leave a tube which is
connected to the air outlet unconnected at the other end because pressure can not be built up.
You can connect up to 3 bottles to the pump module (7).
− Connect the air tube (4) at the air inlet of the bottle (5) and
the air outlet of the pump module (6).
Remove air tube
1 Remove air tube to the bottle (4) by firmly press lay down
the ring (8) at the air inlet (5).
2 Remove the air tubing of the bottle (8) and only if necessary
of the pump module by pushing the ring (9).
16 Quantos Automated Dosing
Page 17

Use the pump with protective gas
10 11
12
WARNING
Damage of pump because of high pressure!
If you need to feed the pump with protective gas, e.g. nitrogen, make sure it does not
exceed the pressure range of 0.2 bar (2.9 psi). The pump module might get damaged.
1 Ensure the protective gas does not exceed the pressure range of 0.2 bar (2.9 psi).
2 Wear protective glasses when working with the pump.
1 Insert muffler (10) into air inlet (11) to absorb noise.
2 If you need to feed the pump with protective gas, e.g.
nitrogen, make sure it does not exceed the pressure range of
0.2 bar (2.9 psi).
Wear protective glasses.
Do not insert the muffler (11) but instead connect a tube to
the air inlet (11).
Note
Outer tube diameter: 6mm
Pressure range: 0.1 to 0.2bar (1.5 to 2.9psi)
Contaminated air by using toxic, explosive or flammable liquids!
WARNING
Danger of injuries and death due to toxic substances!
If you use toxic, explosive or flammable liquids, the exhaust air will be contaminated.
− Use a tube for the exhaust air outlet.
1 If you use toxic, explosive or flammable liquids, the exhaust
air will be contaminated and the device can get damaged.
2 Connect a tube to exhaust air (12) outlet to absorb the air
into a safe container.
Note
Outer tube diameter: 6mm
17Quantos Automated Dosing
Page 18

4 Operation
4.1 Powder dosing
4.1.1 Basic operation settings
Refer to your XPE Operating Instructions for further information on settings and parameters.
Navigation: [
] > Powder module... [Define] > Mounted... [Define]
If you dose powder for the first time, or after a master reset, check following settings:
Configure your settings in the following menu:
• Dosing must be chosen as application: [
• Powder module must be defined as mounted: [
• RS232 device must be activated: [
] > [Dosing]
] > Powder module... [Define] > [Mounted]
] > [System] > [Peripherals] > RFID / Quantos...[RS232
built-in] > [RS232 built-in]
• If front door is used, front door must be defined as mounted: [
] > Powder module… [Define]
> Mounted… [Define] > Front door… [Define] > Front door… [Mounted]
• If liquid module is mounted, liquid module must be defined as mounted: [
] > Liquid module…
[Define] > [Mounted]
4.1.2 Working with powder module
If you touch [Start] with the liquid module, you get these options:
[Solution]
[Solid dosing]
[Liquid dosing]
[Cancel]
To prepare a solution with defined
concentration solid/liquid in mg/g.
To dose a powder.
To dose a liquid.
To return.
See [Prepare a
solution}Page20]
See [Dosing
powder}Page18]
See [Dosing
liquid}Page19]
4.1.3 Dosing powder
Navigation: [
] > Dosing steps… [Define] > Dosing steps (solid)… [Define]
The following procedure is described according to the standard factory settings. You can customize or
disable the settings in the following menu:
To recreate the standard factory settings, choose [STD].
To abort dosing procedure at any time, tap the cancel key [C].
The instrument then returns to the home screen.
Note
The Dosing steps of instruments equipped with accessories may slightly differ from the example
below.
§ Powder dosing head is installed.
§ Weighing pan is empty.
§ ErgoClip is installed.
1 Tap [Start] > [Solid dosing].
2 Enter User ID and confirm with [OK].
3 Note
The Sample ID is not mandatory and the instrument does not check whether or not it is unique.
Enter Sample ID and confirm with [OK].
18 Quantos Automated Dosing
Page 19

4 Enter the amount Target quantity [mg] required and confirm with [OK].
5 Note
To define appropriate tolerance for your Target quantity, see Target Quantities and Tolerances.
Entering 1% results in a tolerance range of +1%/–1%. For other possibilities see XPE Operating
Instructions.
Enter the Tolerance in percent and confirm with [OK].
6 Place sample vessel on weighing pan or ErgoClip and confirm with [OK].
ð The value at the bottom of the display shows the weight of the sample vessel.
7 Note
If SafePos is selected, there is no request to lower the dosing head. It will be lowered automatically as soon as dosing starts.
Lower the position with the head height adjustment handle until dosing head is about 0.5 mm to
1 mm above the sample vessel and confirm with [OK].
8 Note
To abort dosing during process, tap [C].
Check, if all necessary adjustments are completed:
To abort procedure, tap [No].
To start dosing, tap [Yes].
ð Instrument doses powder.
ð The results are being displayed.
9 To finish dosing process, confirm with [OK].
Congratulations, you have just successfully finished your first dosing!
4.2 Liquid dosing
4.2.1 Basic operation settings
Refer to your XPE Operating Instructions for further information on settings and parameters.
Navigation: [
] > Liquid module… [Define] > Mounted… [Define]
If you dose liquid for the first time, or after a master reset, check following settings:
Configure your settings in the following menu:
• Dosing must be chosen as application: [
• Liquid module must be defined as mounted: [
• RS232 device must be activated: [
] > [Dosing]
] > Liquid module… [Define] > [Mounted]
] > [System] > [Peripherals] > RFID / Quantos… [RS232
built-in] > [RS232 built-in]
4.2.2 Dosing liquid
Navigation: [
] > Dosing steps… [Define] > Dosing steps (liquid)… [Define]
The following procedure is described according to the standard factory settings. You can customize or
disable the settings in the following menu:
To recreate the standard factory settings, choose [STD].
Note
To abort dosing procedure at any time, tap the cancel key [C].
The instrument then returns to the home screen.
19Quantos Automated Dosing
Page 20

§ Liquid dosing head is installed.
§ Weighing pan is empty.
§ If required, ErgoClip is installed.
1 Tap [Start] > [Liquid dosing].
2 Enter User ID and confirm with [OK].
3 Note
The Sample ID is not mandatory and the instrument does not check whether or not it is unique.
Enter Sample ID and confirm with [OK].
4 Enter the amount Target liquid [g] required and confirm with [OK].
5 Place sample vessel on weighing pan or ErgoClip and confirm with [OK].
6 Lower position of dosing head until it is about 1cm to 2cm above the sample vessel and
confirm with [OK].
7 Note
To abort dosing during process, tap [C].
Check, if all necessary adjustments are completed:
To abort procedure, tap [No].
To start dosing, tap [Yes].
ð Pressure builds up.
ð Instrument doses liquid.
ð The results are being displayed.
8 To finish dosing process, confirm with [OK].
Congratulations, you have just successfully finished your first dosing!
Note
• Bubbles in the tube do not impair the result, because the target result is weighed.
• If you dose liquids that might crystalize, clean the dosing head from time to time.
4.2.3 Prepare a solution
Solution dosings work with a concentration not measured by volume [ml], but by weight [mg].
Concentration To calculate the concentration (C):
C = mass of solid / (mass of solid + mass of liquid)
4.2.3.1 Dosing powder manually
Navigation: [
] > Dosing steps… [Define] > Dosing steps (solution)…[Define] > [STD]
If you have few solid samples you can leave the liquid dosing head installed.
The following procedure is described according to the standard factory settings:
§ Liquid dosing head is installed.
§ Weighing pan is empty.
1 Tap [Start] > [Solution] > [Start manual dosing].
2 Enter Substance and confirm with [OK].
3 Enter Lot ID of substance and confirm with [OK].
4 Enter User ID and confirm with [OK].
5 Enter Sample ID and confirm with [OK].
6 Enter Concentration [mg/g] and confirm with [OK].
7 Enter Target solution [g] and confirm with [OK].
8 Place sample vessel on weighing pan and confirm with [OK].
20 Quantos Automated Dosing
Page 21

9 Dose manually the needed powder and confirm with [OK].
ð Dosing results are displayed.
10 Confirm results with [OK].
11 To start liquid dosing tap [OK].
ð Instrument doses liquid.
12 Cap vessel and confirm with [OK].
ð Dosing results are displayed.
13 Confirm results with [OK].
4.2.3.2 Dosing solution with pre-prepared solid
Navigation: [
] > Dosing steps… [Define] > Dosing steps (solution)…[Define] > [STD]
If you have sample vessels with already prepared solid e.g. a tablet you can leave the liquid dosing
head installed.
The following procedure is described according to the standard factory settings:
§ Liquid dosing head is installed.
§ Mass of solid is known.
§ Weighing pan is empty.
1 Tap [Start] > [Solution] > [Enter predosed quantity].
2 Enter the weight of the pre-dosed solid in Enter predosed quantity and confirm with [OK].
3 Enter Concentration [mg/g] and confirm with [OK].
4 Enter Substance and confirm with [OK].
5 Enter Lot ID of substance and confirm with [OK].
6 Enter User ID and confirm with [OK].
7 Enter Sample ID and confirm with [OK].
8 Place sample vessel on weighing pan and confirm with [OK].
9 Note
To abort dosing during process, tap [C]
Check, if all necessary adjustments are completed:
To abort procedure, tap [No].
To start dosing, tap [Yes].
ð Pressure builds up.
ð Instrument doses liquid.
10 Cap sample vessel and confirm with [OK].
ð The results are being displayed.
11 To finish dosing process, confirm with [OK].
4.2.3.3 Automated powder dosing
Navigation: [
] > Dosing steps… [Define] > Dosing steps (solution)…[Define] > [STD]
The following procedure is described according to the standard factory settings:
§ Powder dosing head is installed.
§ Weighing pan is empty.
1 Tap [Start] > [Solution].
2 Enter User ID and confirm with [OK].
3 Enter Sample ID and confirm with [OK].
4 Enter Concentration [mg/g] and confirm with [OK].
21Quantos Automated Dosing
Page 22

5 Enter Target solution [g] and confirm with [OK].
1
2
6 Place sample vessel on weighing pan and confirm with [OK].
ð Instrument doses powder.
7 Insert liquid dosing head.
ð Instrument reads head.
ð Instrument doses liquid.
8 Cap vessel and confirm with [OK].
ð Dosing results are displayed.
9 Confirm results with [OK].
4.2.4 Releasing pressure
If you need to release the pressure in e.g. the bottle, switch off the instrument.
Switching Off
− Press [
] until Off appears in the display.
Note
Do not disconnect the instrument from the power supply except if you will not be using the instrument
for an extended period.
4.2.5 Handling of bottle
CAUTION
Danger of injuries due to splashing liquids or substances!
The bottle stands during use under 0.5 bar (7 psi) pressure. Liquid splashing out might
harm the user and can damage the device.
1 Do not remove tubes under pressure.
2 Relieve pressure by switching off the insrument, pull out the tube.
Changing a bottle
If you have more than one bottle equipped with cap and dosing head:
§ Pressure is released.
1 Install dosing head on dosing head support at the bottle.
2 Unplug air tube by pressing ring (1) down and pulling tube
(2) out carefully at the same time.
3 To seal the bottle, insert pin into air tube fitting.
4 Take the new bottle.
5 Connect air tube to new bottle.
6 To continue dosing with the new bottle, install dosing head.
22 Quantos Automated Dosing
Page 23

Filling the bottle
1
The Inline frit filter has to be covered with liquid at all times.
Before the inline frit filter gets dry, refill the bottle.
§ Pressure is released.
1 Unscrew regular cap.
2 Fill in the liquid. (max. is shown on bottle e.g. 1000ml)
Note
Do not exceed the maximum. The air above the liquid is
necessary for dosing.
3 Screw on cap.
4 Check that the cap is tight.
Changing the liquid of the bottle
You have just one cap with dosing head and want to change the liquid:
§ Pressure is released.
1 Unplug air tube.
2 Unscrew regular cap.
3 Unscrew inner PEEK nut.
4 Change the inner tube and the inline frit filter.
5 Screw the regular cap on new bottle.
6 Check that the cap is tight.
7 Connect air tube to new bottle.
8 Purge the contaminated external tube.
23Quantos Automated Dosing
Page 24

5 Technical Data
5.1 General data
WARNING
Danger of death or serious injury due to electric shock!
Contact with parts that contain a live current can lead to injury and death.
1 Only use an approved AC adapter with a current-limited SELV output.
2 Ensure correct polarity
Power supply
AC adapter: Primary: 100 – 240VAC, -15%/+10%, 50/60 Hz
Cable for AC adapter: 3-core, with country-specific plug
Balance power supply: 12 VDC ±3%, 2.5 A, maximum ripple: 80 mVpp
Protection and standards
Overvoltage category: II
Degree of pollution: 2
Protection: Protected against dust and water
Standards for safety and EMC: See Declaration of Conformity
Range of application: For use only in closed interior rooms
Environmental conditions
Height above mean sea level: Up to 4000m
Ambient temperature: 5–40°C
Relative air humidity: Max. 80% up to 31°C, linearly decreasing to 50% at 40°C,
Secondary: 12VDC ±3%, 2.5A (with electronic overload
protection)
noncondensing
24 Quantos Automated Dosing
Page 25

Page 26

Page 27

Page 28

Mettler-Toledo GmbH
30260314
Im Langacher 44
8606 Greifensee, Switzerland
www.mt.com/contact
Subject to technical changes.
© Mettler-Toledo GmbH 11/2016
30260314C en
www.mt.com/quantos
For more information
 Loading...