

Mettler Toledo PS60 Installation Instructions Manual
Scale Documentation
Mettler Toledo
PS Scale Installation Instructions
0

Table of Contents
Unpack the Scale..........................................................................................................................1
Place the scale on a level surface.................................................................................................1
Level the scale..............................................................................................................................2
Place platter on scale....................................................................................................................2
Plug the Scale in...........................................................................................................................2
Scale to Communications Port connections.................................................................................3
Verify power-up sequence when G
Instructions for UPS Worldship Customers.................................................................................6
Instructions for FedEx QuickShip Customers.............................................................................8
Troubleshooting .........................................................................................................................10
Technical Support ......................................................................................................................12
Warranty Returns.......................................................................................................................12
Replacement Components..........................................................................................................12
EOCAL™ is enabled .............................................................3
pply
Installation Instructions
MT Shipping Scale
Welcome and thank you for purchasing your Mettler-Toledo Shipping Scale. Please read and follow these simple instructions to get
the maximum benefit and satisfaction from your new scale.
Please follow the easy setup procedures in this manual to setup your new Mettler-Toledo Shipping Scale.
Unpack the Scale
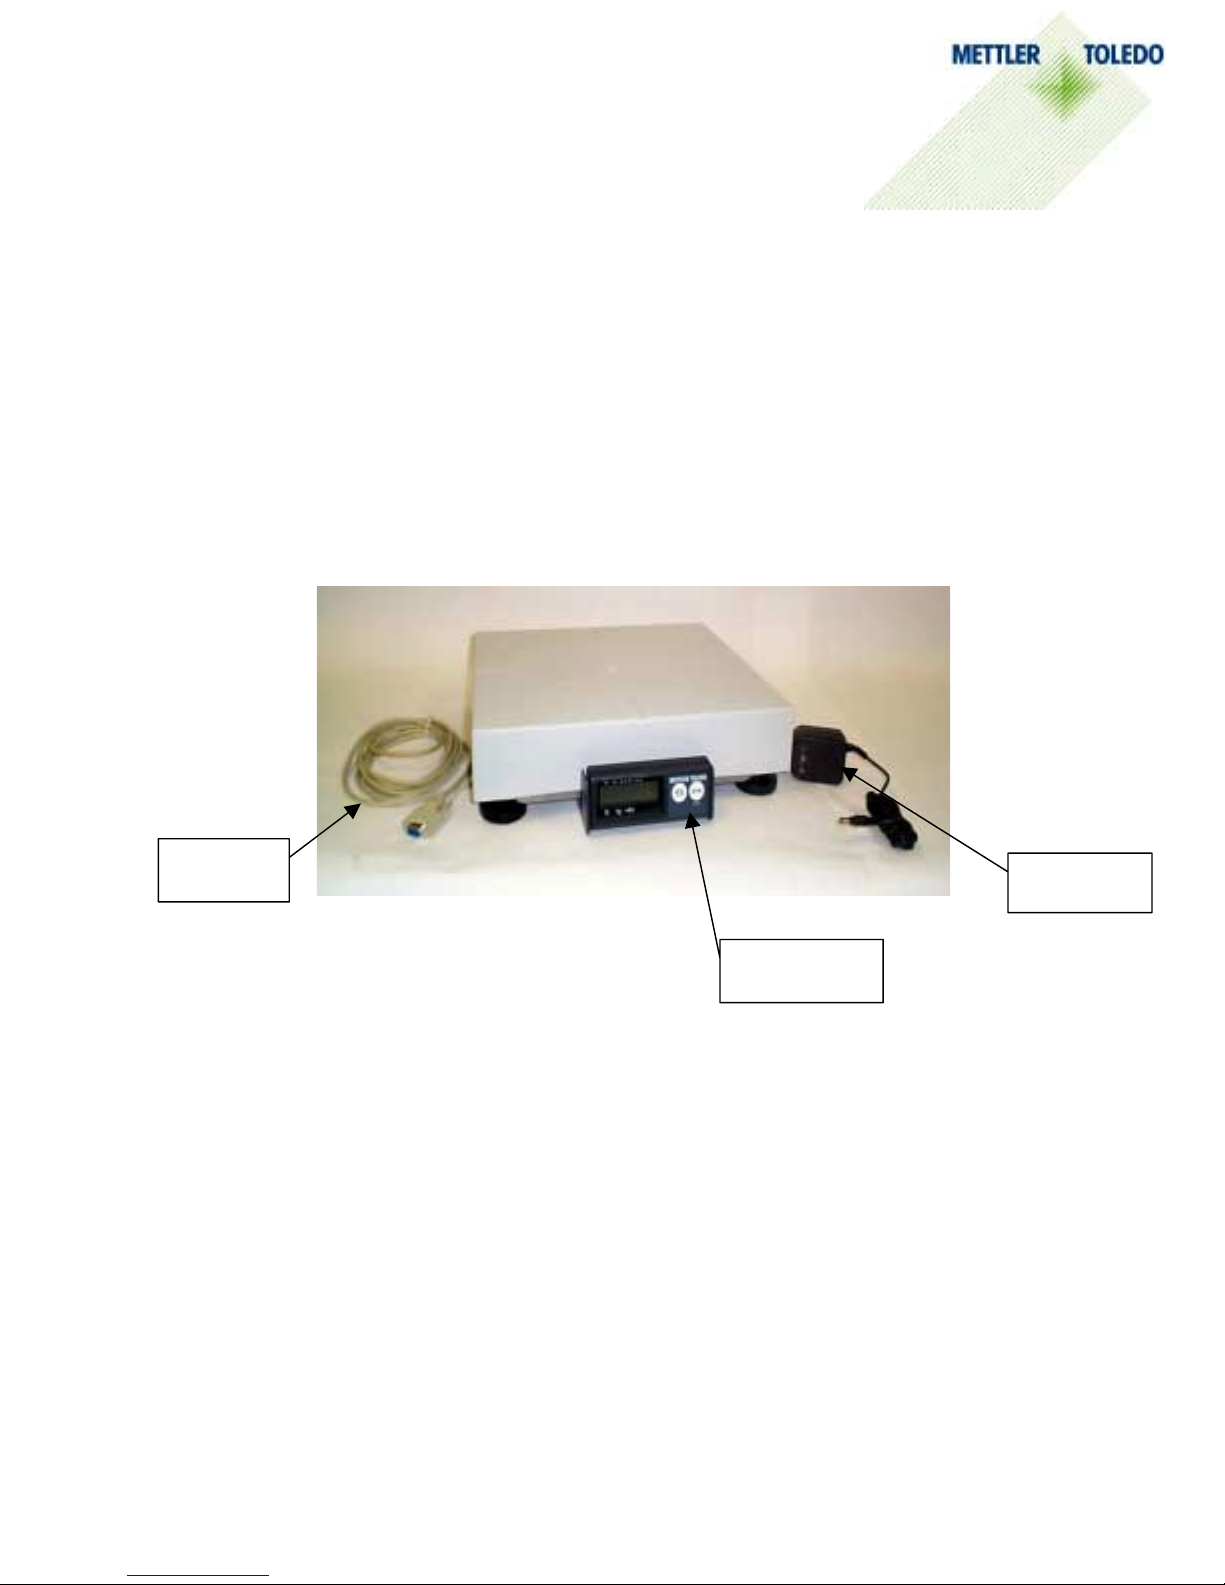
Remove the scale from the box. Set aside all packing materials. Inspect the contents. Each box contains the following.
• Shipping Scale with Display
• Wall Mount Power Supply
• RS232 Serial Cable
• Installation Instructions
RS232
Serial Cable
Wall Mount
Power Su
Shipping Scale
with Display
Place the scale on a le vel surface.
Place the scale near a power outlet. Ensure the scale is not touching objects that may affect the weight reading.
PG 1

b
n
Level the scale.
Level the scale by turning the scale feet until the leveling bubble is centered and the scale does not wobble. The leveling
bubble is located underneath the platter. See photo.
Incorrec t
Bubble is not
With in c ircl e
Correct
Bub b le i s
Within circle
Leveling
Feet 4 per
Place platter on scale.
Gently place the platter on the scale. If your scale comes with a stainless steel (metal) platter, you may wish to remove the
plastic protective skin.
Plug the Scale in.
Tilt the scale on its side and plug the power connector into the bottom of the scale. Plug the power supply or power cord into
a power outlet.
Power cord plug
locatio
Leveling
ubble
Power cord
Plastic Platter
shown
Bottom view of scale
PG 2
Scale to Communications Port connections
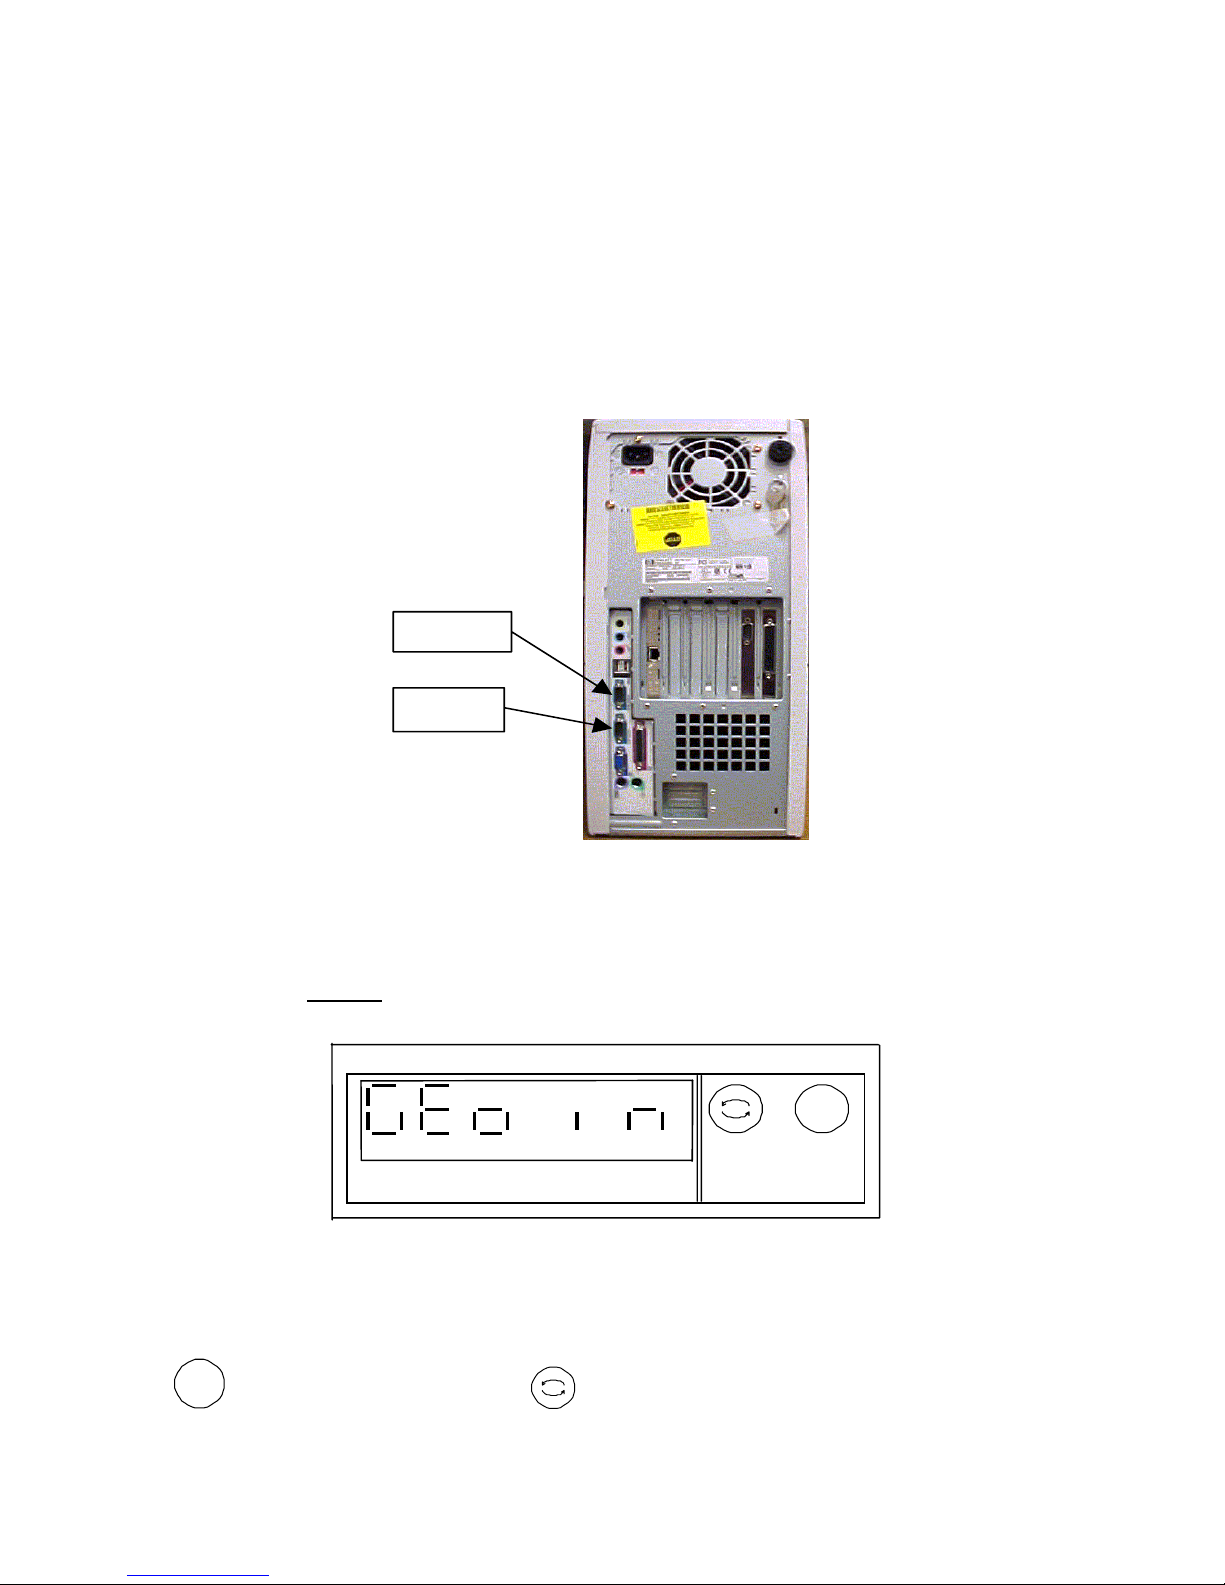
If you are using a PC-Based manifest shipping systems, plug the scale into an open communications port on your computer.
The ports should be labeled COM1 or COM2. Use the supplied RS232 cable to make the connection. Both ends on the cable
are identical. This picture depicts the COM ports on a typical PC.
NOTE: Make sure the power to your computer is switch off before you change ports. If you have plugged your scale into
the incorrect port, you must reboot your computer after changing ports.
NOTE: DO NOT substitute your RS232 serial cable with an ordinary RS232 cable. If you require a longer cable for your
application, call our MT Express technical support at 1-800-786-0812 to purchase an additional cable.
COM1
COM2
Verify power-up sequence when G
When you first plug in the scale, the display shows a brief power-up sequence. This sequence only appears ONCE, so please
make sure you do it carefully
. Once it is done, it displays a prompt for the GEOCAL™ location code.
EOCAL™ is enabled.
lb kg >0<
The G
EOCAL ™ feature allows the scale calibration to be adjusted for gravitational variations in your area.
Refer to the table and chart to determine the geographical two-digit code for your location. Scroll through the list by pressing
>0<
the
restart itself.
key. Stop at your code and press the key twice. The word done will be displayed briefly and the scale will
>0<
PG 3
 Loading...