

Mettler Toledo PM1200, PM5003 Comparator, PM480 DeltaRange, PM300, PM2500 DeltaRange Operating Instructions Manual
...
Operating instructions
METTLER TOLEDO
AM/PM Balances
_;
0.0000
9
_;
0.000
9
_;
0.0
9

2
Thank you very much for the confidence you have shown in our products by choosing a METTLER TOLEDO precision or analytical balance. To
obtain complete satisfaction from your balance, it is essential that you read through these operating instructions carefully.
These operating instructions apply to balances of the AM and PM series with a weighing range up to 6 kg. Although the operating procedures
for these balances are identical, differences exist regarding the weighing range, the readability accuracy and the weighing pan or platform.
Enclosed with these operating instructions is the booklet «Technical data and accessories», which also contains possibilities of the METTLER
TOLEDO AM/PM balances.

3
Page
Preparation Choosing the location 4
Mounting the weighing pan / levelling the balance 5
Installing the draft shield 6
Operation Control elements / connections / display 8
METTLER DeltaTrac / METTLER DeltaRange 9
Switching display on and off 10
Simple weighing / taring 11
Single-key (control bar) operation 12
Menu Overview 14
Calibrating 15
Adapting to the type of weighing (weighing process adapter) 16
Adapting to the ambient conditions (vibration adapter) 17
Configuring Overview 18
Configuration example 20
Standard settings and record printout 22
Balance operating settings 24
Unit selection, applications, print / transfer command, status display 26
Adapting to external equipment 28
Protecting the configuration 30
Applications Overview 32
Switching the weight unit 33
Piece counting 34
Plus / minus and percent weighing 36
Animal weighing 38
Print / transfer command 39
What if... Fault rectification 40
Miscellaneous Changing the operating voltage / replacing the fuse 42
Changing the protective cover / maintenance 43
Technicals terms 44
Technical data Overview 45
4
Preparation
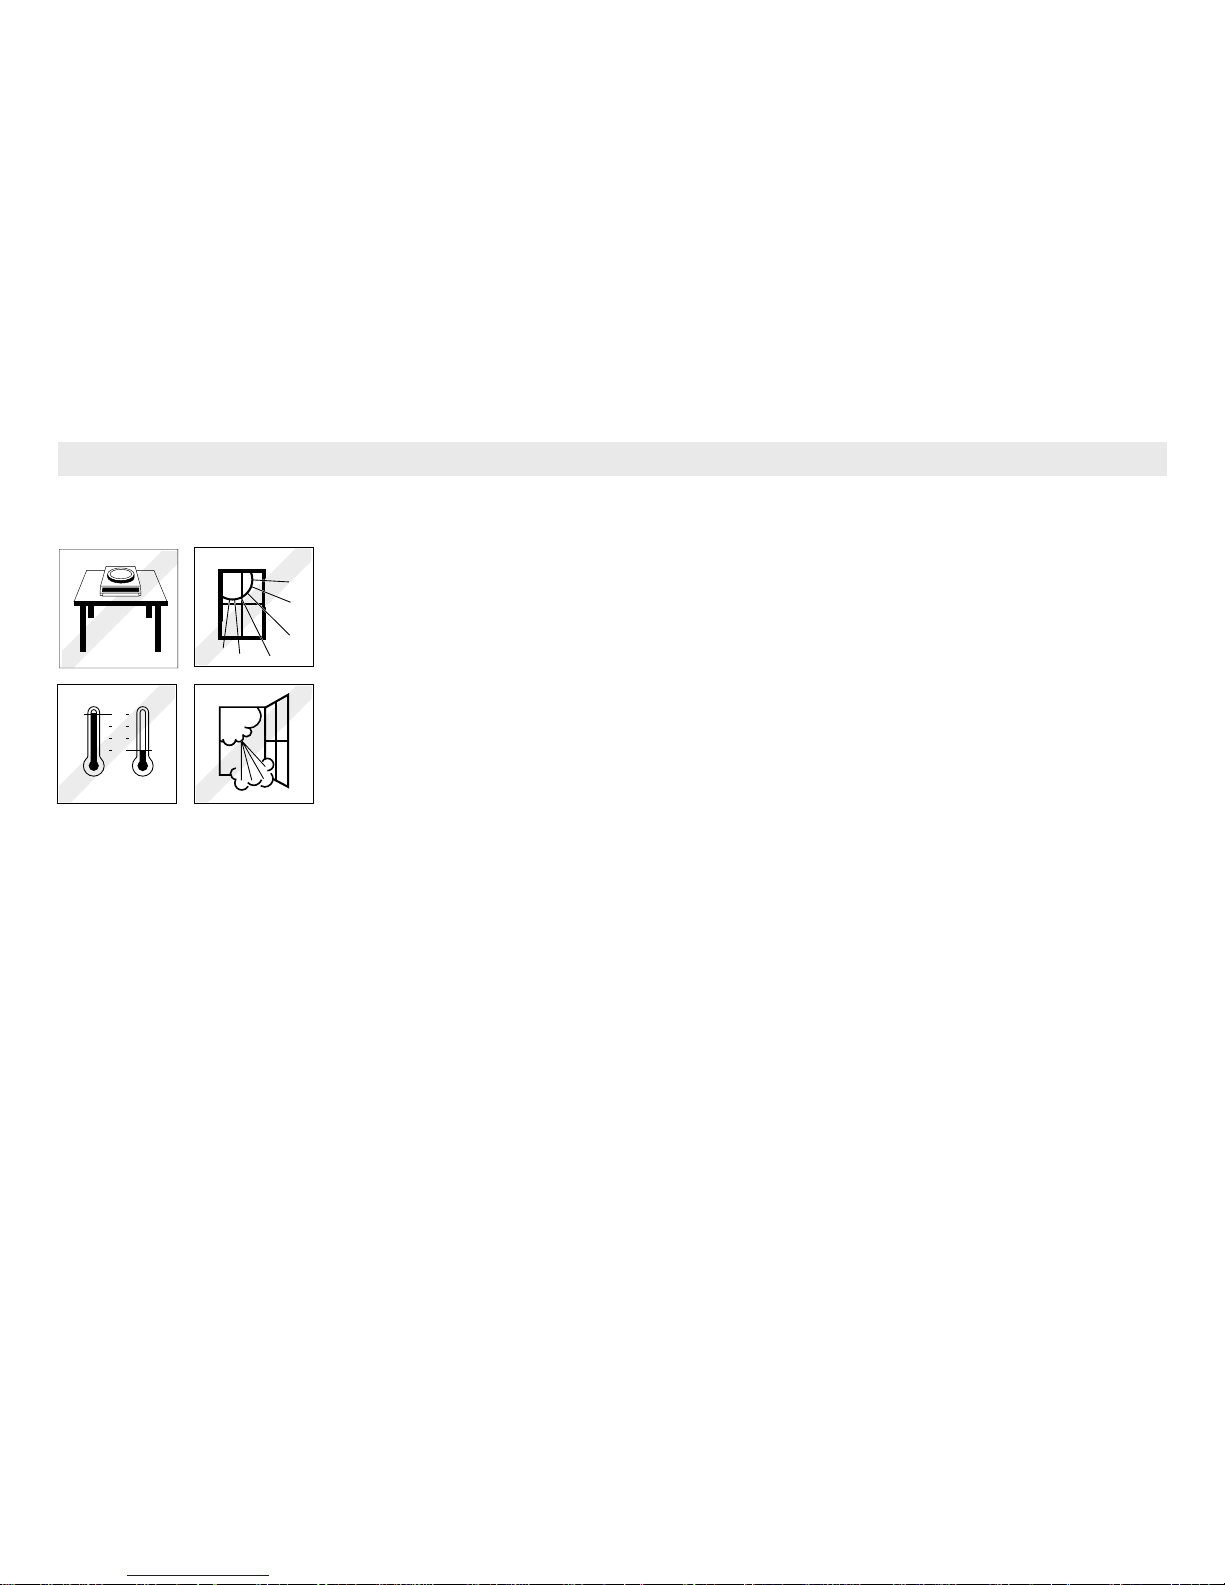
Select the proper location
For best results choose a suitable location for your balance.
A firm, vibration-free location as horizontal as possible
Avoid exposure to direct sunlight
No extreme temperature changes
No draft
Despite a possible unfavorable location, your balance can still produce accurate weighing results:
In this case you should adjust the vibration adapter accordingly. For procedures refer to section «Menu».
30°
20°
10°
0°
5
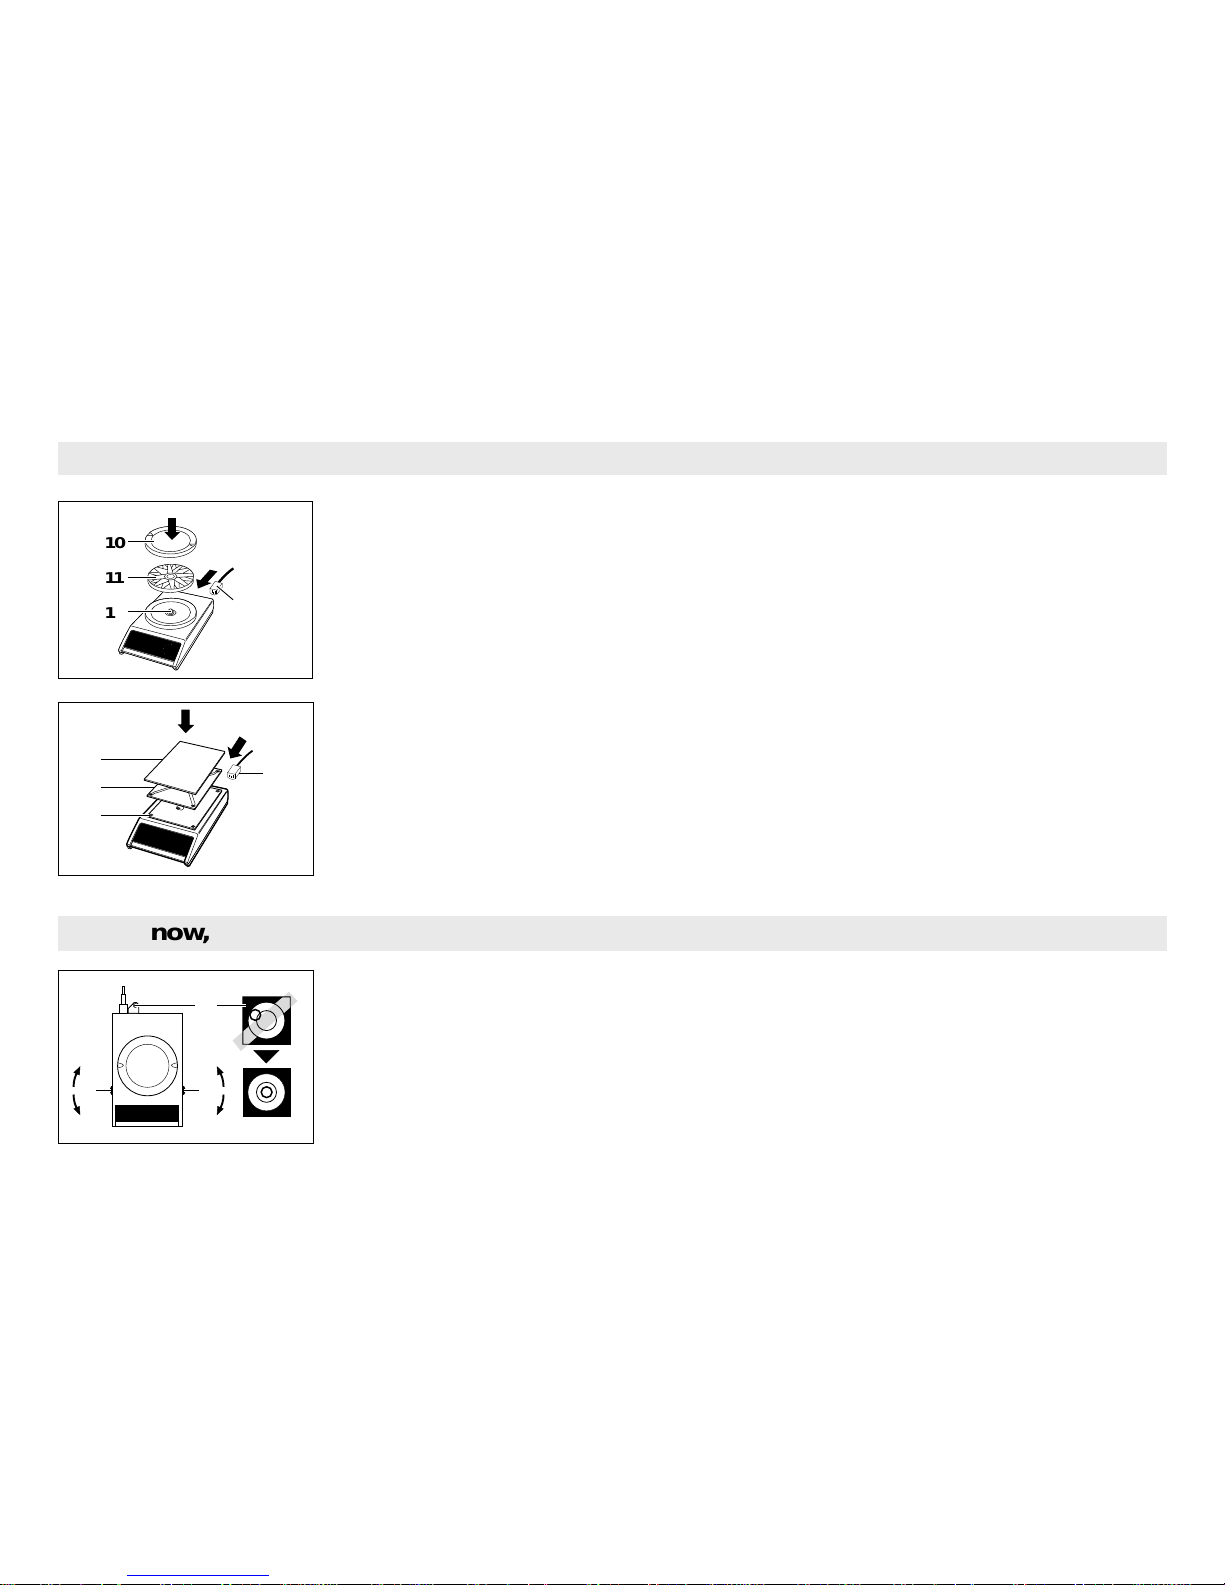
PM balances with weighing pan
Place pan support 11 and weighing
pan 10 on tapered pin 17; connect
power cable 20.
PM balances with weighing platform
Install platform support 11 with the four
pins resting on the four rubber grommets 40; then position weighing platform 10 on platform support 11; connect power cable 20.
AM balances: see page 7.
After each relocation of the balance,
repeat levelling procedures. For this
purpose adjust bubble in level indicator 9
with the two levelling screws 8.
Mount the weighing pan / platform
Preparation
9
88
0.00
9
10
11
17
20
11
10
40
20
0.00
9
…and now, level the balance
6
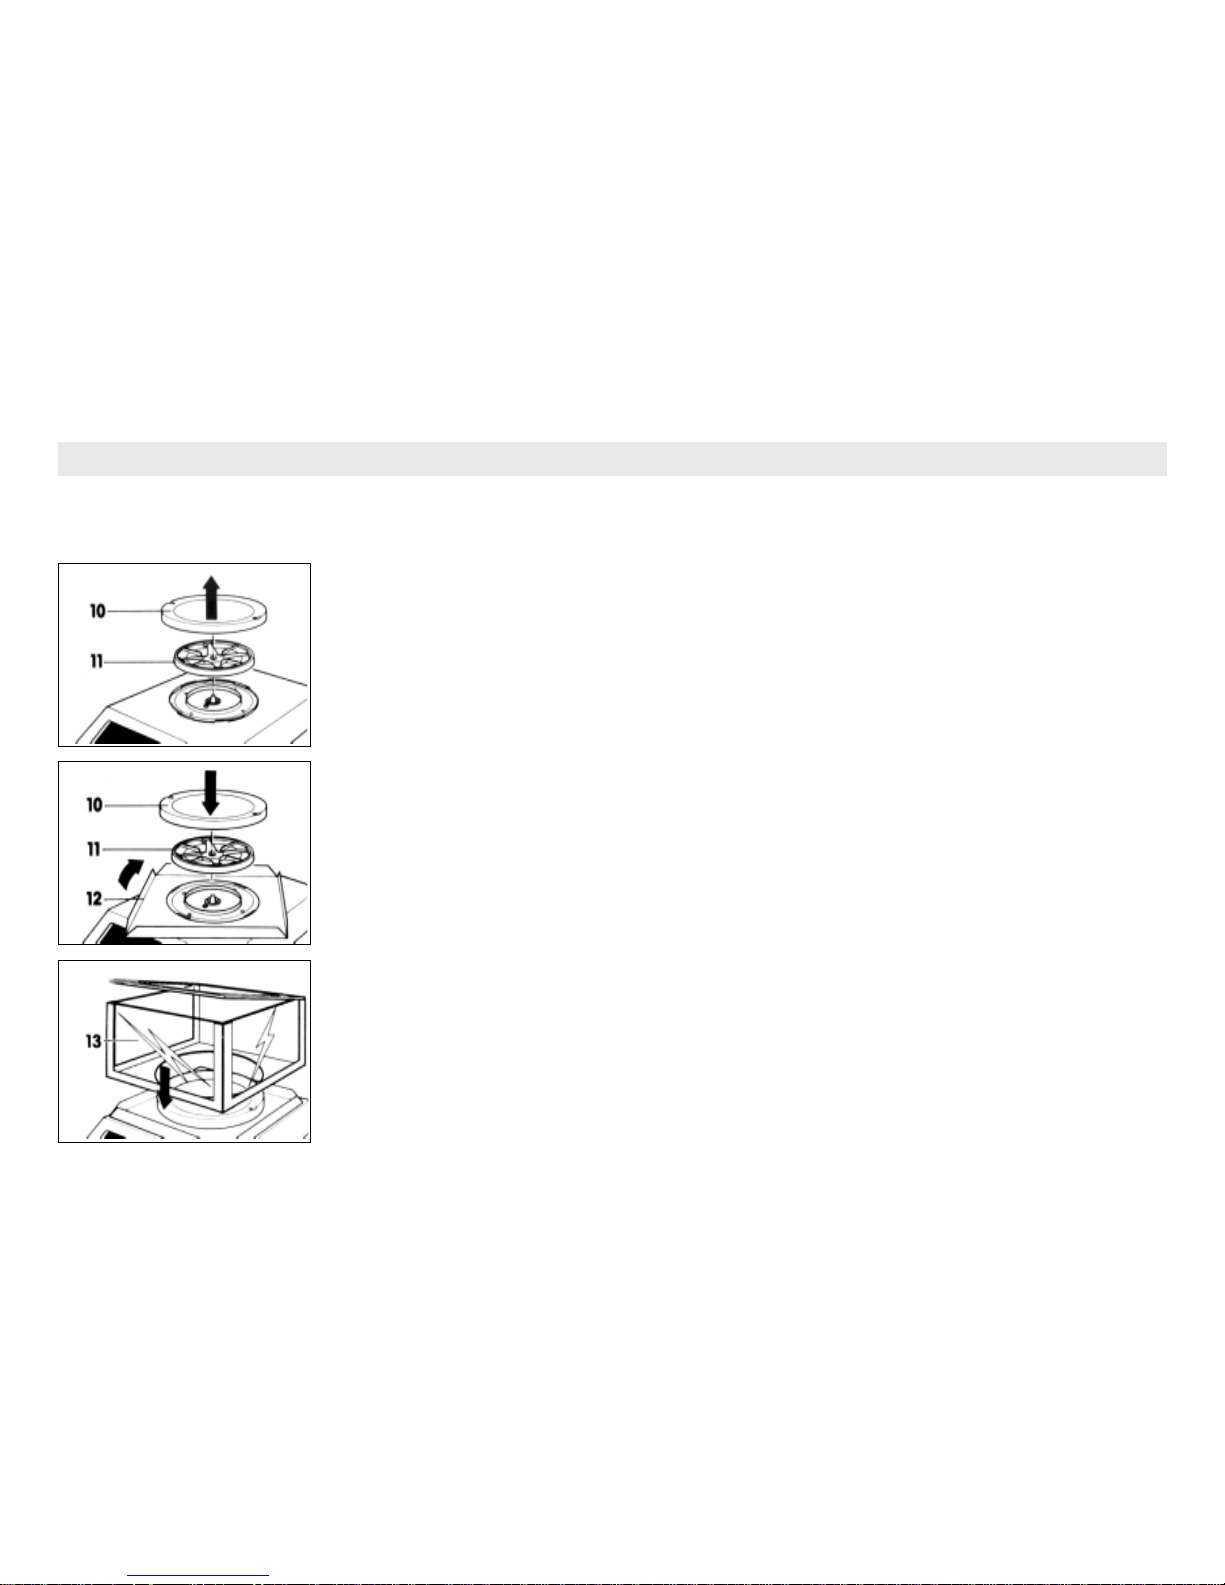
To ensure that the weighing results are not influenced by the drafts (particularly for sensitive measuring ranges) we recommend the installation
of a draft shield.
PM balances with 1 mg readability
Mounting procedures 1 and 2 are
needed only if the bottom element 12
has not been installed at the factory.
Remove weighing pan 10 and pan
support 11.
Place bottom element 12 on balance,
and rotate to stop. Replace pan support 11 and weighing pan 10.
Mount draft shield 13 and engage.
Preparation
Don't forget to install the draft shield
1
2
3
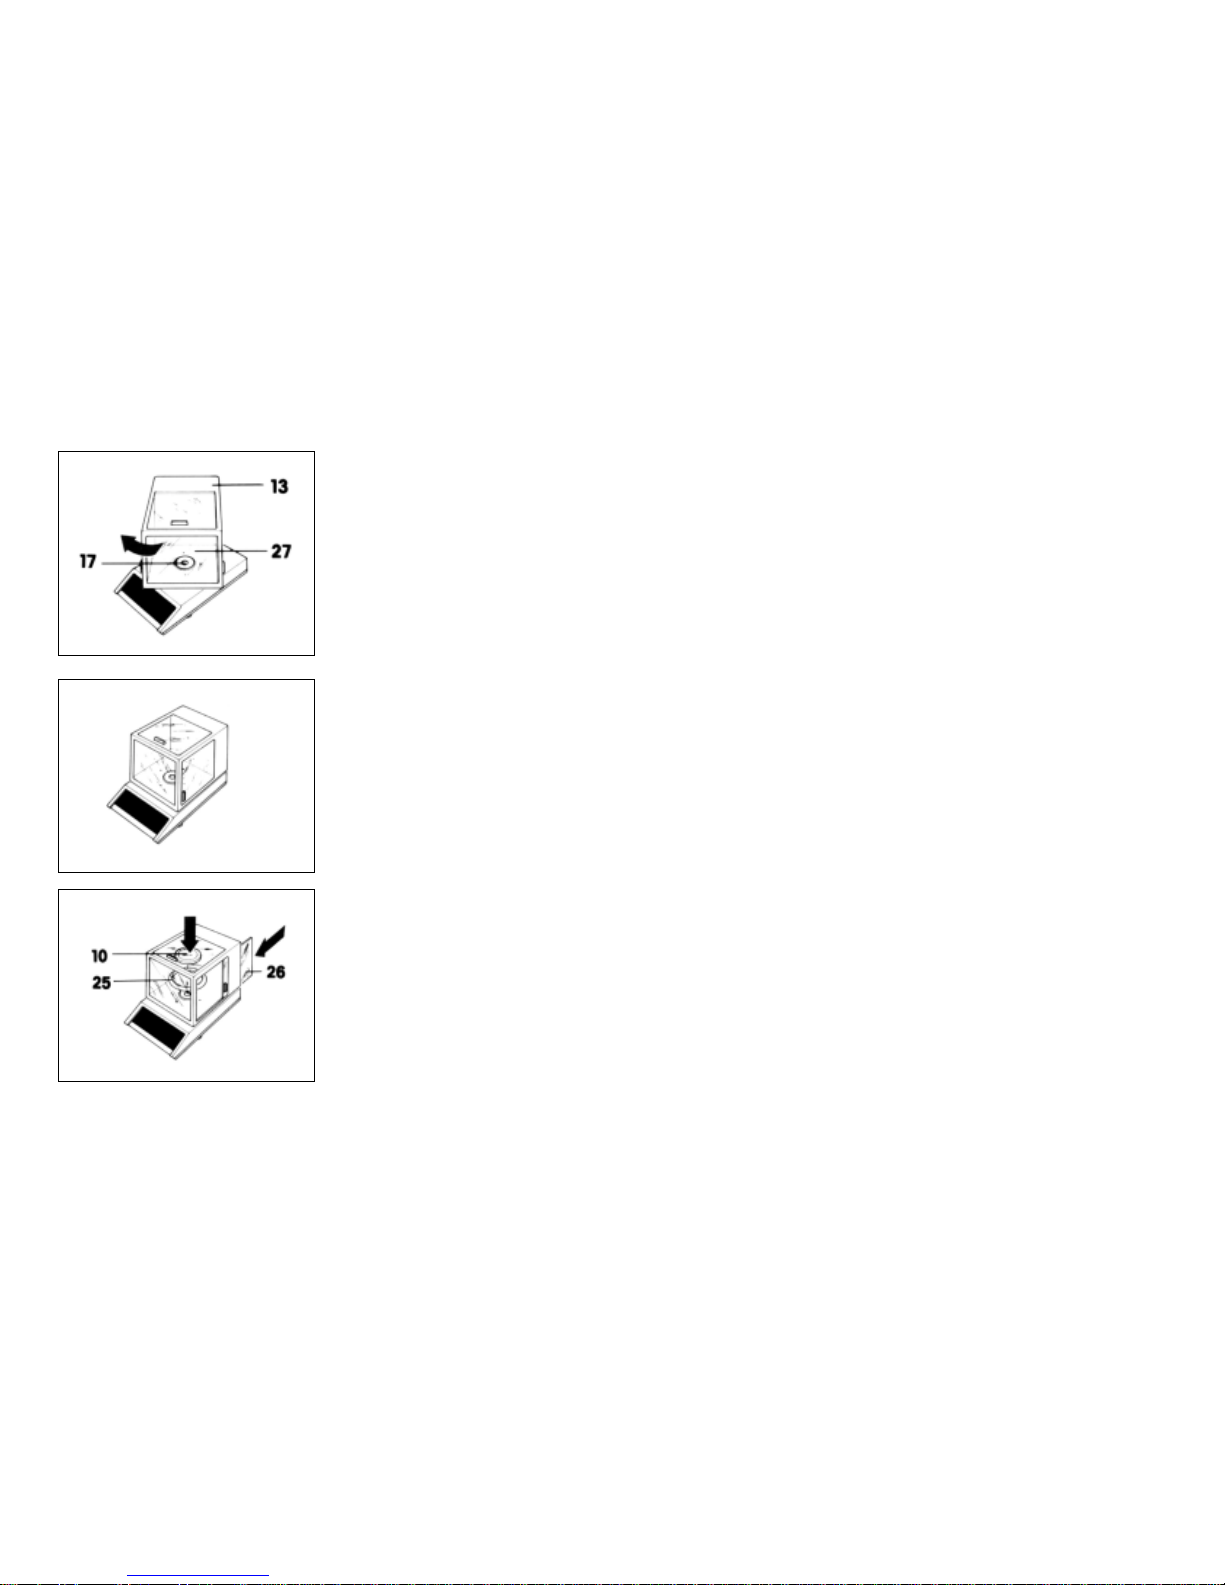
7
AM balances
Mount glass draft shield 13 on scale
rotated by 45°. Note that tapered pin
17 must be visible through bottom
hole 27. Now rotate glass draft shield
clockwise to stop.
Verify that the draft shield is aligned
parallel to the balance and is properly
engaged in bayonet base.
Install ring 25 and weighing pan 10,
close sliding door 26.
Note: Ring 25 protects the weighing
pan from lateral impacts.
Preparation
1
2
3
8
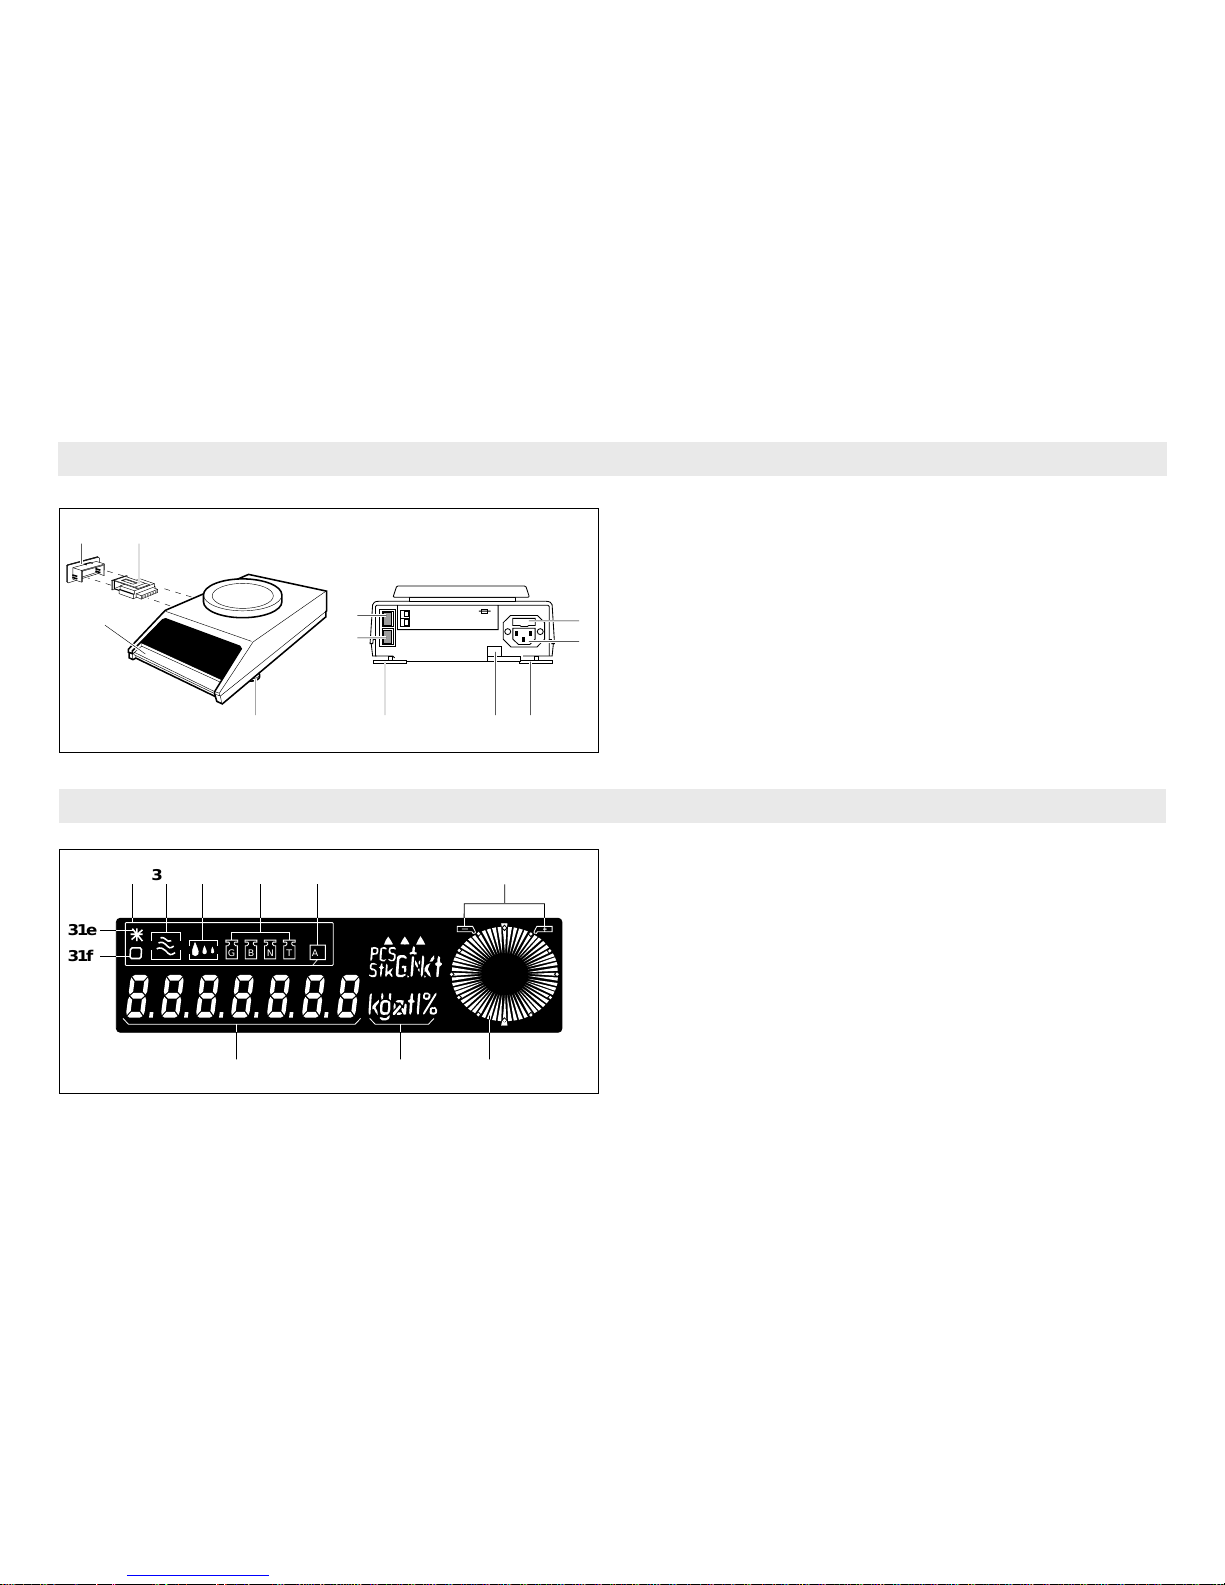
Operation
1 Control bar
2 Program cassette
3 Cover
4 Connector for data interface
5 Connector for METTLER TOLEDO GM instruments
6 Fuse holder (with spare fuse)
7 Power socket
8 Screw feet (level adjustment)
9 Level indicator
Control elements and connections
Display
31 Status indicator
31a Vibration adapter
31b Weighing process adapter
31c Weight status
31d Automatic zero correction (Autozero)
31e Special status of digital display
1)
31f Stability control
32 Digital display
33 Units
34 METTLER DeltaTrac (dynamic graphic indicator and dispensing
aid with 60 radial segments)
35 Tolerance limits
8.8.8.8.8.8.8
G B N TA
Z
31e
31f
31a
31 31b 31c 31d 35
343332
3
1
2
8 8 9 8
7
6
4
5
1)
indicates calculated quantities
such as mean values or values
multiplied by constants, as well as
data entered via the interface
9
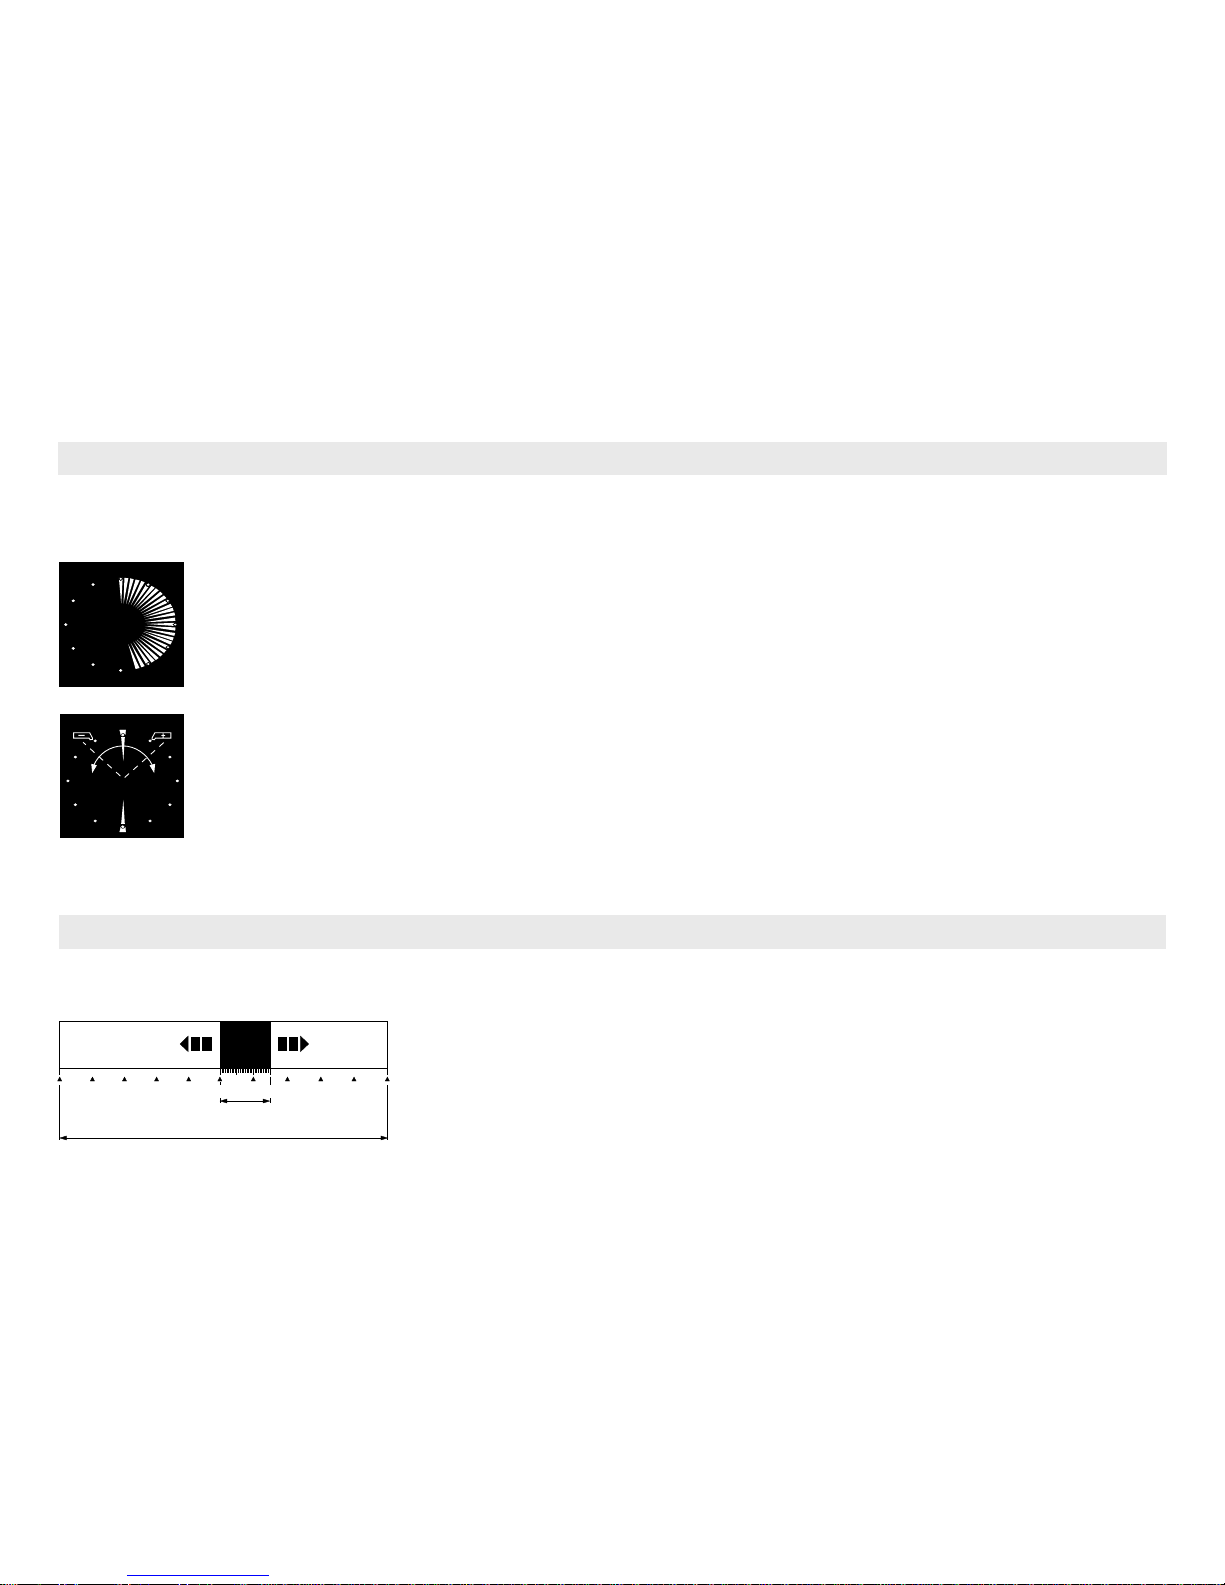
This dynamic graphic indicator with 60 radial segments is incorporated in all balance models. METTLER DeltaTrac shows you a graphic
representation of the numerical values shown in the digital display.
When used together with METTLER TOLEDO Pacs, the METTLER DeltaTrac can also perform additional functions (see booklet «Technical
data and accessories»).
Operation
…include a fin range with 10 times the normal accuracy. Briefly pressing the control bar (taring) will activate DeltaRange anywhere throughout
the entire weighing range.
With absolute weighing, subtractive weighing, weighing-in and
formula weighing, the dynamic display indicates the weighing
range used up and that still remaining.
With the aid of METTLER DeltaTrac you can check fill quantities and determine deviations from a definable target weight in
percent.
You can always see the tolerance limits with correct signs, as
well as positive or negative deviations (see «Applications»).
Note: You also have the 10 times more accurate fin range available in
subtractive weighing.
Coarse range
Fine range
Weighing range
Coarse range
10 times
more
accurate
fine range
The METTLER DeltaTrac
METTLER DeltaRange
®
balances…

10
Switch on display (▼ Display changes automatically)
Display switched off (standby)
Briefly press controll bar; all display segments light up briefly
(automatic system and display check).
Software No. (e.g. 10.40.00, for information only).
Weighing mode
Lifting the control bar from below causes the display to blank out; the electronics are live
as long as the power cable is connected (Standby). The balance is thus always ready for
operation; no warm-up time required.
-.-.-.-.0.0.0
9
0.00
9
Note: If a power outage occurs during operation, the display will indicate OFF immediately the power is restored. You should then briefly press
the control bar (also consult «What if…».
Display subsequently indicates zero (weighing mode). The number of decimal places
depends on the readability of your balance model as well as the selected weight unit.
Operation
.
8.8.8.8.8.8.8
PCS
Stk
G
Nkt
k
g
o
t
/
%
G B N TA
Z
010400
-.-.-.-.-.-.-
9
..
-.-.-.-.0.0.0
0.00
9
Switch off display
11
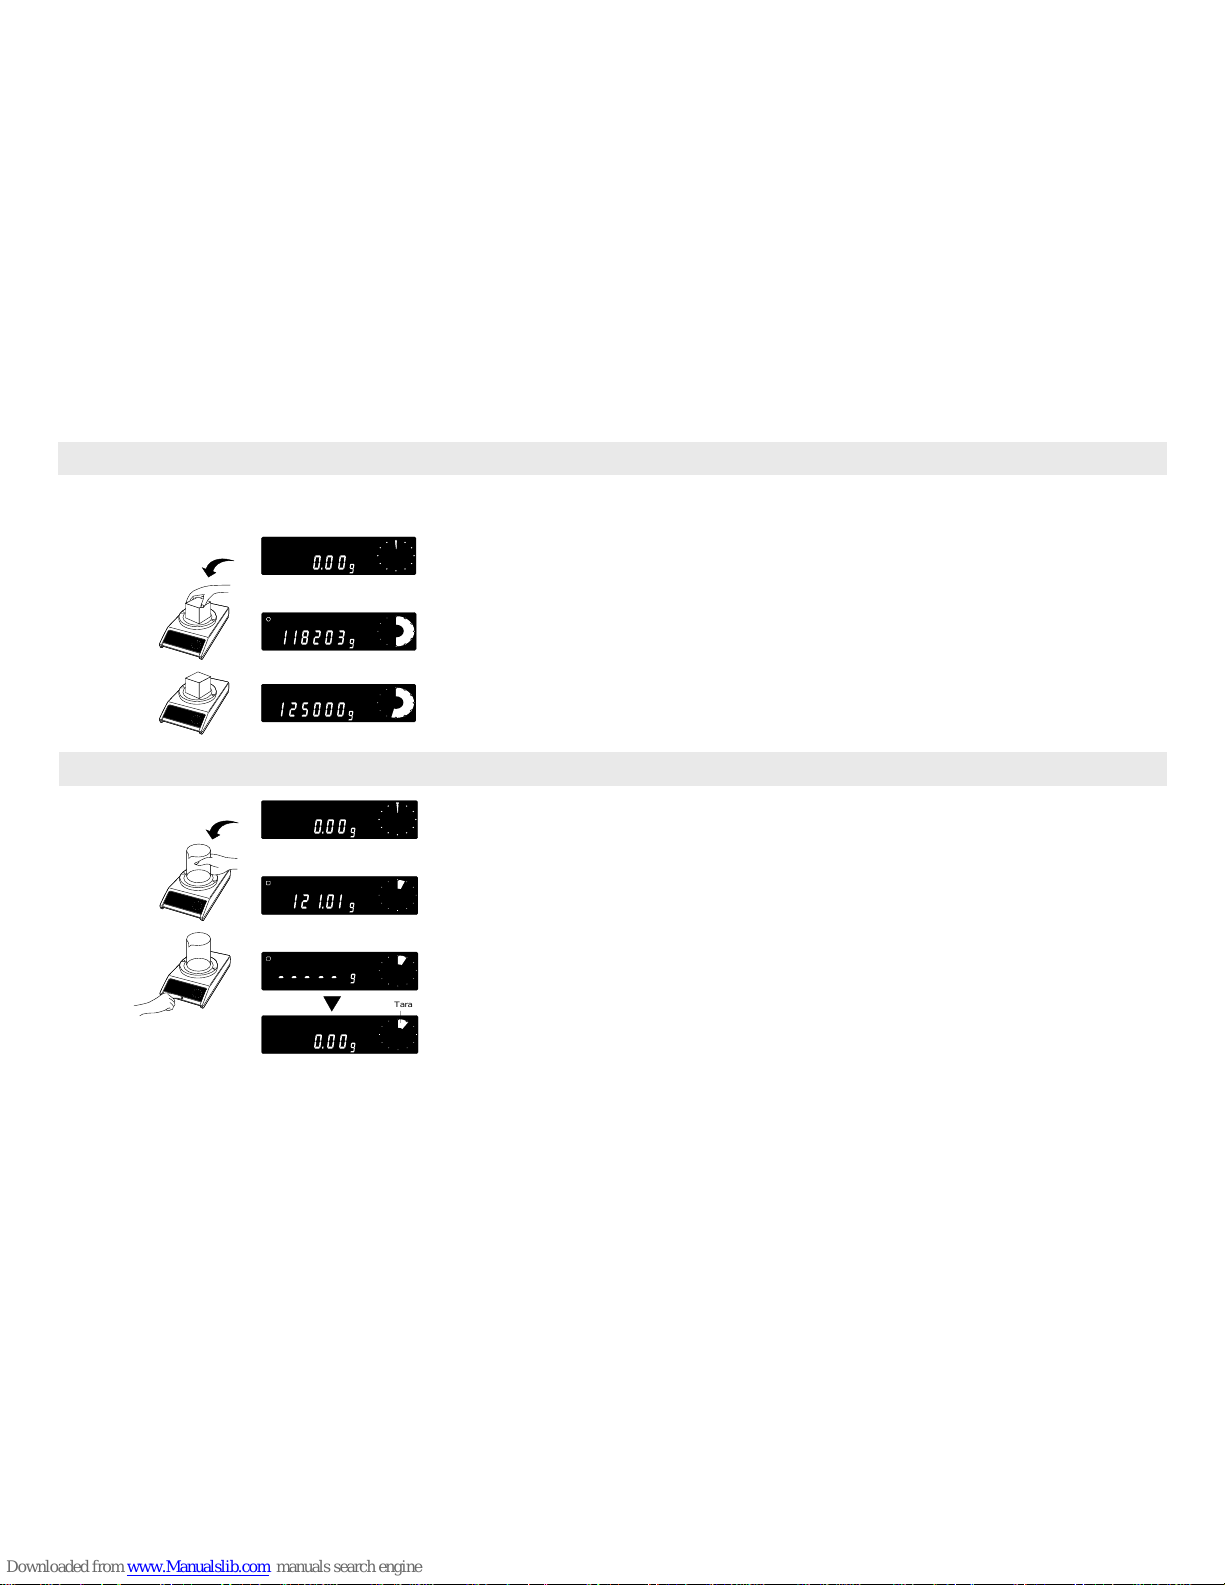
Simple weighing
Caution: Before the balance is used for the first time, it must be calibrated (see «Calibration» in section «Menu»).
Taring (▼ display changes automatically)
Weighing mode
Weighing mode
Brief pressing of control bar initiates taring cycle.
The container or packing has now been tared.
The weighing range minus tare weight is now available for weighing-in.
Load weighing sample
Wait for stability and read result
(Stability is reached as soon as stability detector fades).
Load an empty container or packing.
Note: The stability detector can be switched off during taring by pressing the control bar twice. It is then possible that the display does not show
exactly 0.00 g. The foot or hand switch from the accessories offers the possibility of external taring (connection at rear of balance).
Operation
1
.
000
9
..
31820
9
.
-.-.-.-.0.0.0
9
1
5.2
1
0.00
9
0.00
9
1
- - - - -
-.-.-.-.0.0.0
9
1
..
1 2 1.01
9
-.-.-.-.0.0.0
9
9
0.00
9
0.00
9
Tara
12
Simple operation with a control bar
Switching on/off, calibrating, configuring: All of these operations can be initiated with the control bar. You can even use this single control bar
to activate the applications incorporated as standard.
For more convenient operation of the applications, the GM303 Terminal (direct function, switch and print key) from the accessories can be
used.
…You will find them throughout the operating instructions and short-form instructions.
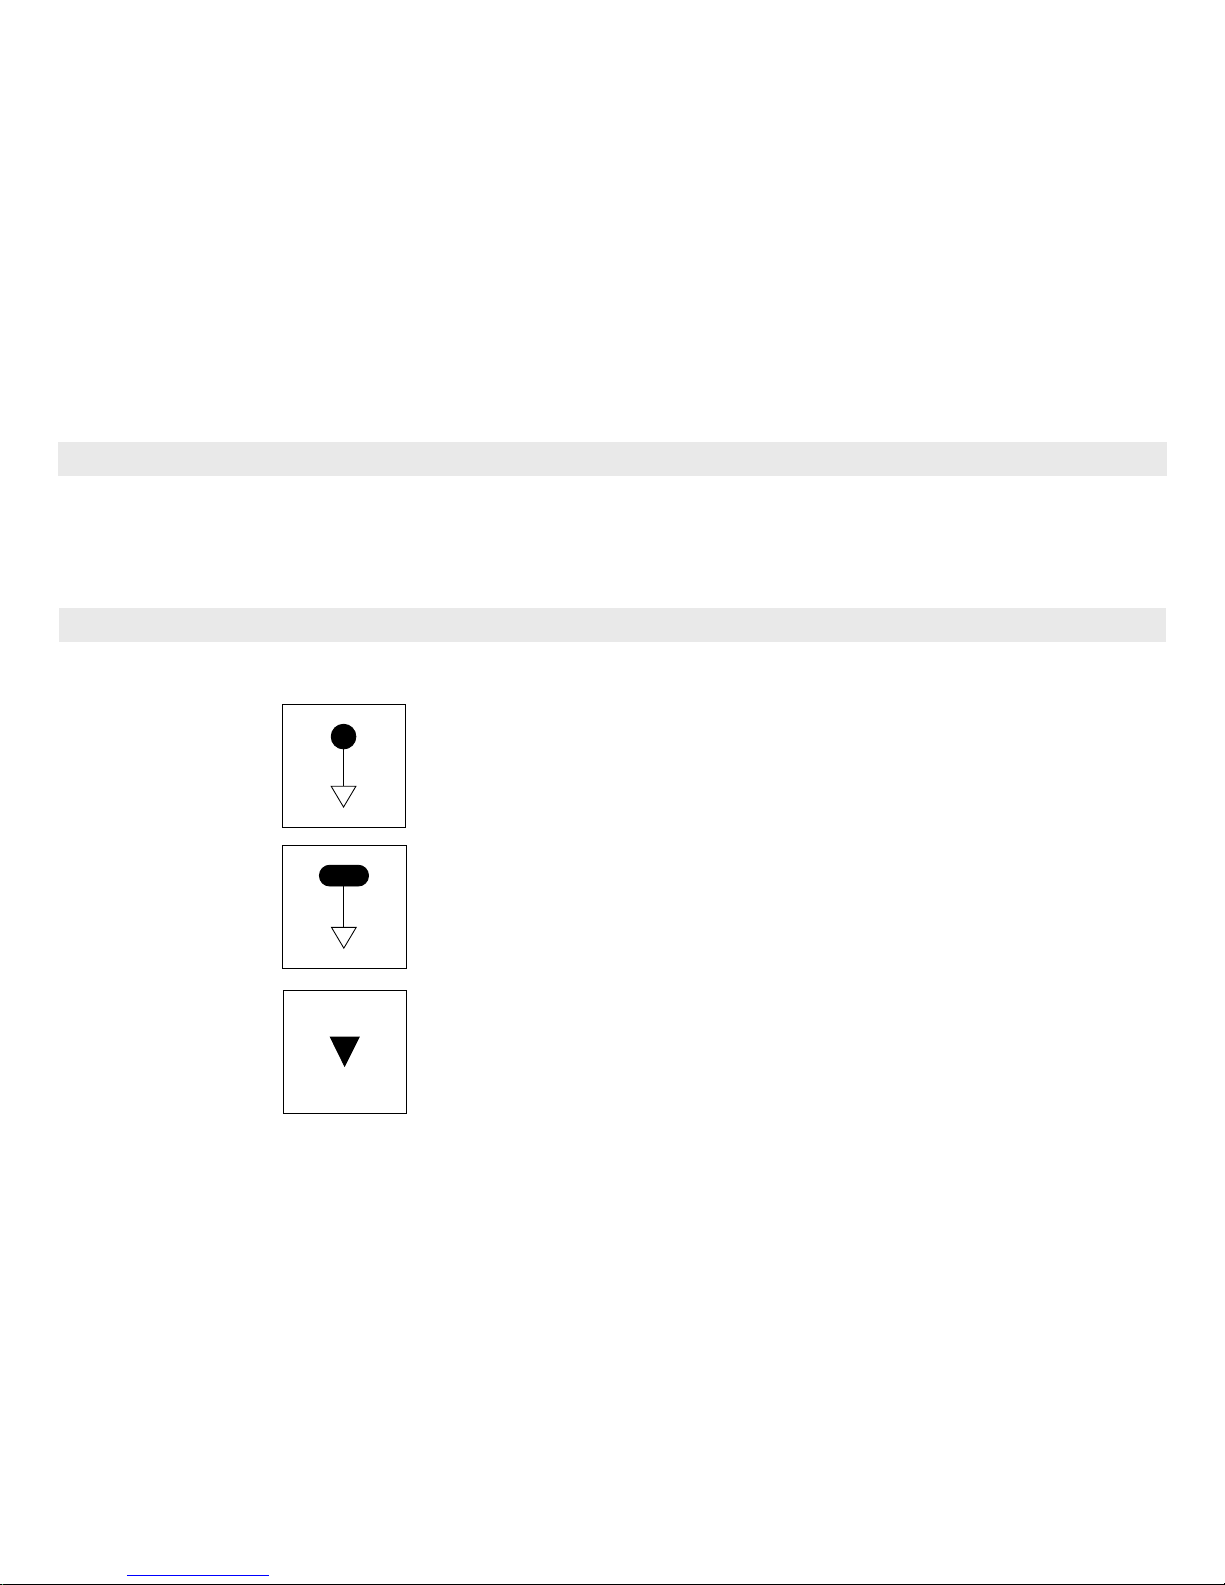
Press
control bar
briefly
Press and hold
control bar
until required display appears
Operation
Display changes
automatically
Note these symbols…
13
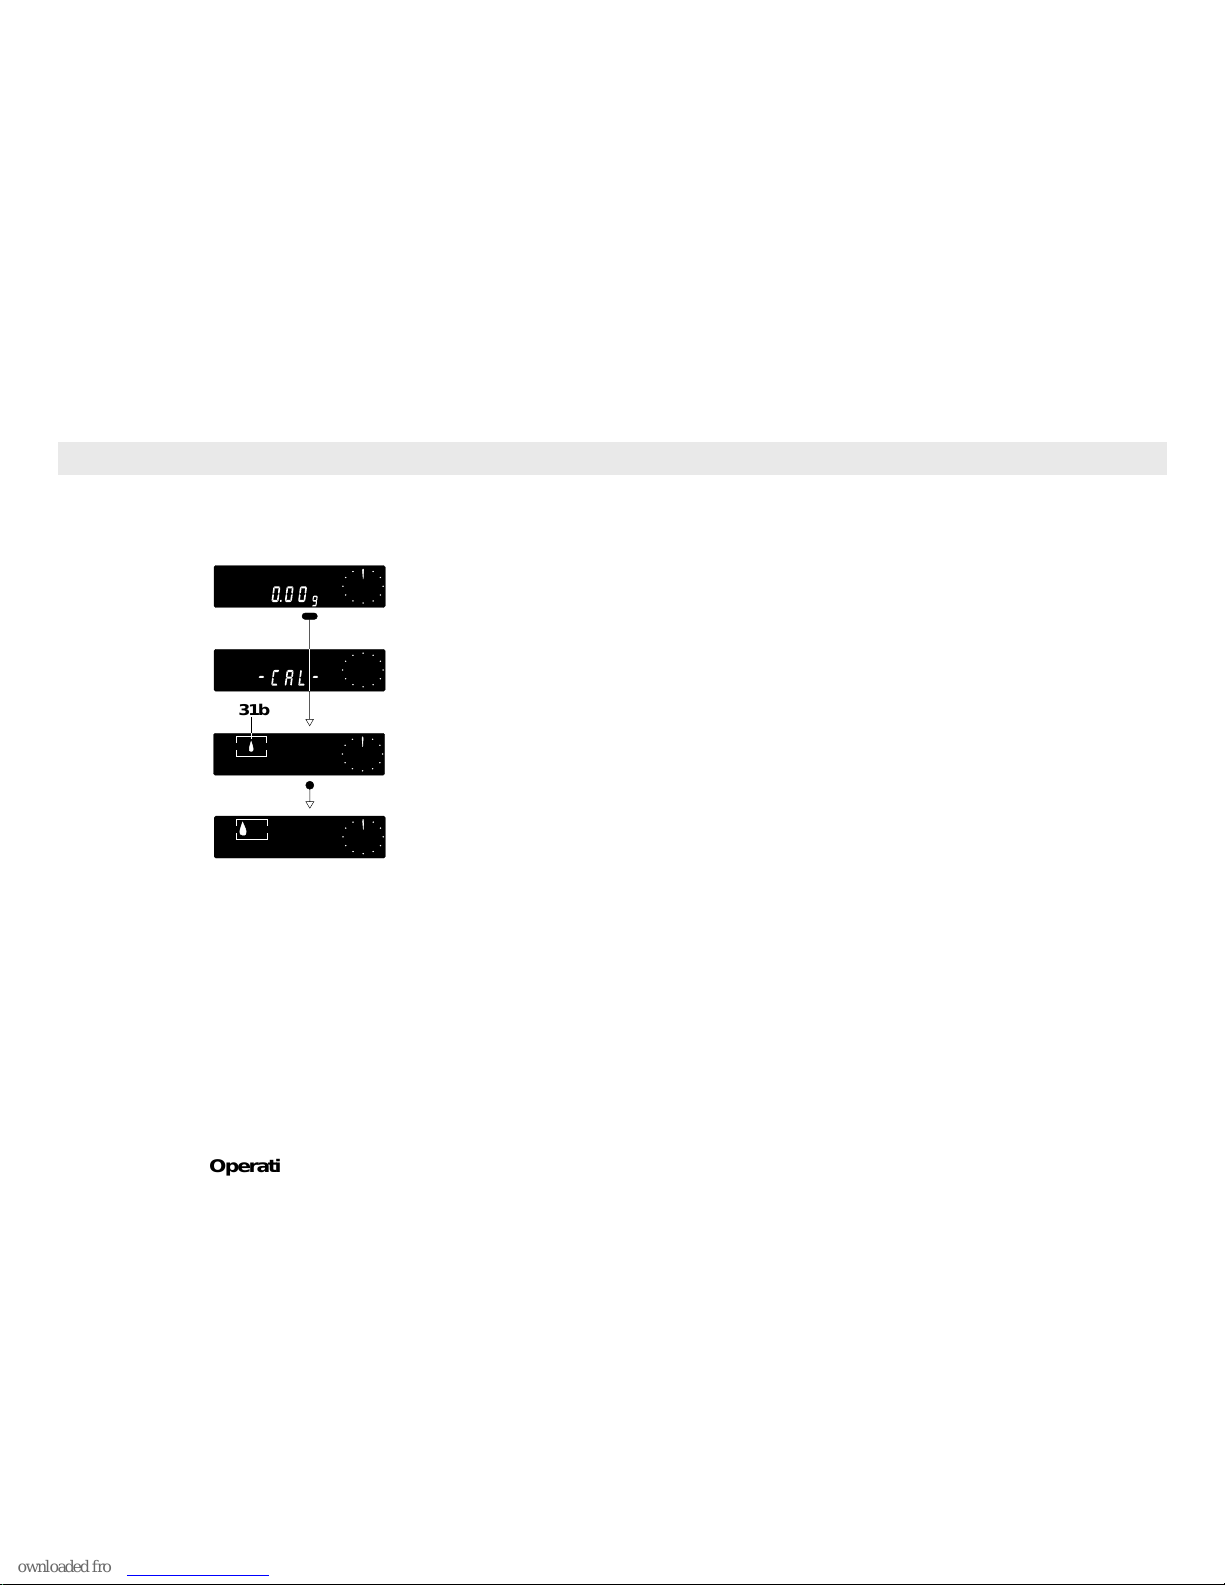
Introducing the symbols
Try to familiarize yourself with the key symbols with the aid of the following example. Switch on the display and remove weight from weighing
pan. Now try to select and change the weighing process adapter 31b.
Press control bar…
…keep depressed…
…release!
briefly press control bar!
Note: If the display automatically returns to zero (weighing mode) 3 seconds after the control bar was last pressed, simply
begin the procedure again.
Have you adjusted the status display so that the «drop symbol» is shown on the left of the display? If your first attempt was
unsuccessful, try again. You will find further information regarding the weighing process adapter and much more in the
following sections.
.
15
9
.
l-ca -
31b
-.-.-.-.0.0.0
Operation
14
Menu
We distinguish between two levels of software. The first, simpler level, we call the Menu. It can be activated by pressing and holding the control
bar. The second software level is called the Configuration file. Details can be found in section «Configuring».
…calibrate your balance,
…use the weighing process adapter to set the weighing modes or the weighing sample, and
…use the vibration adapter to adapt the balance to the ambient conditions.
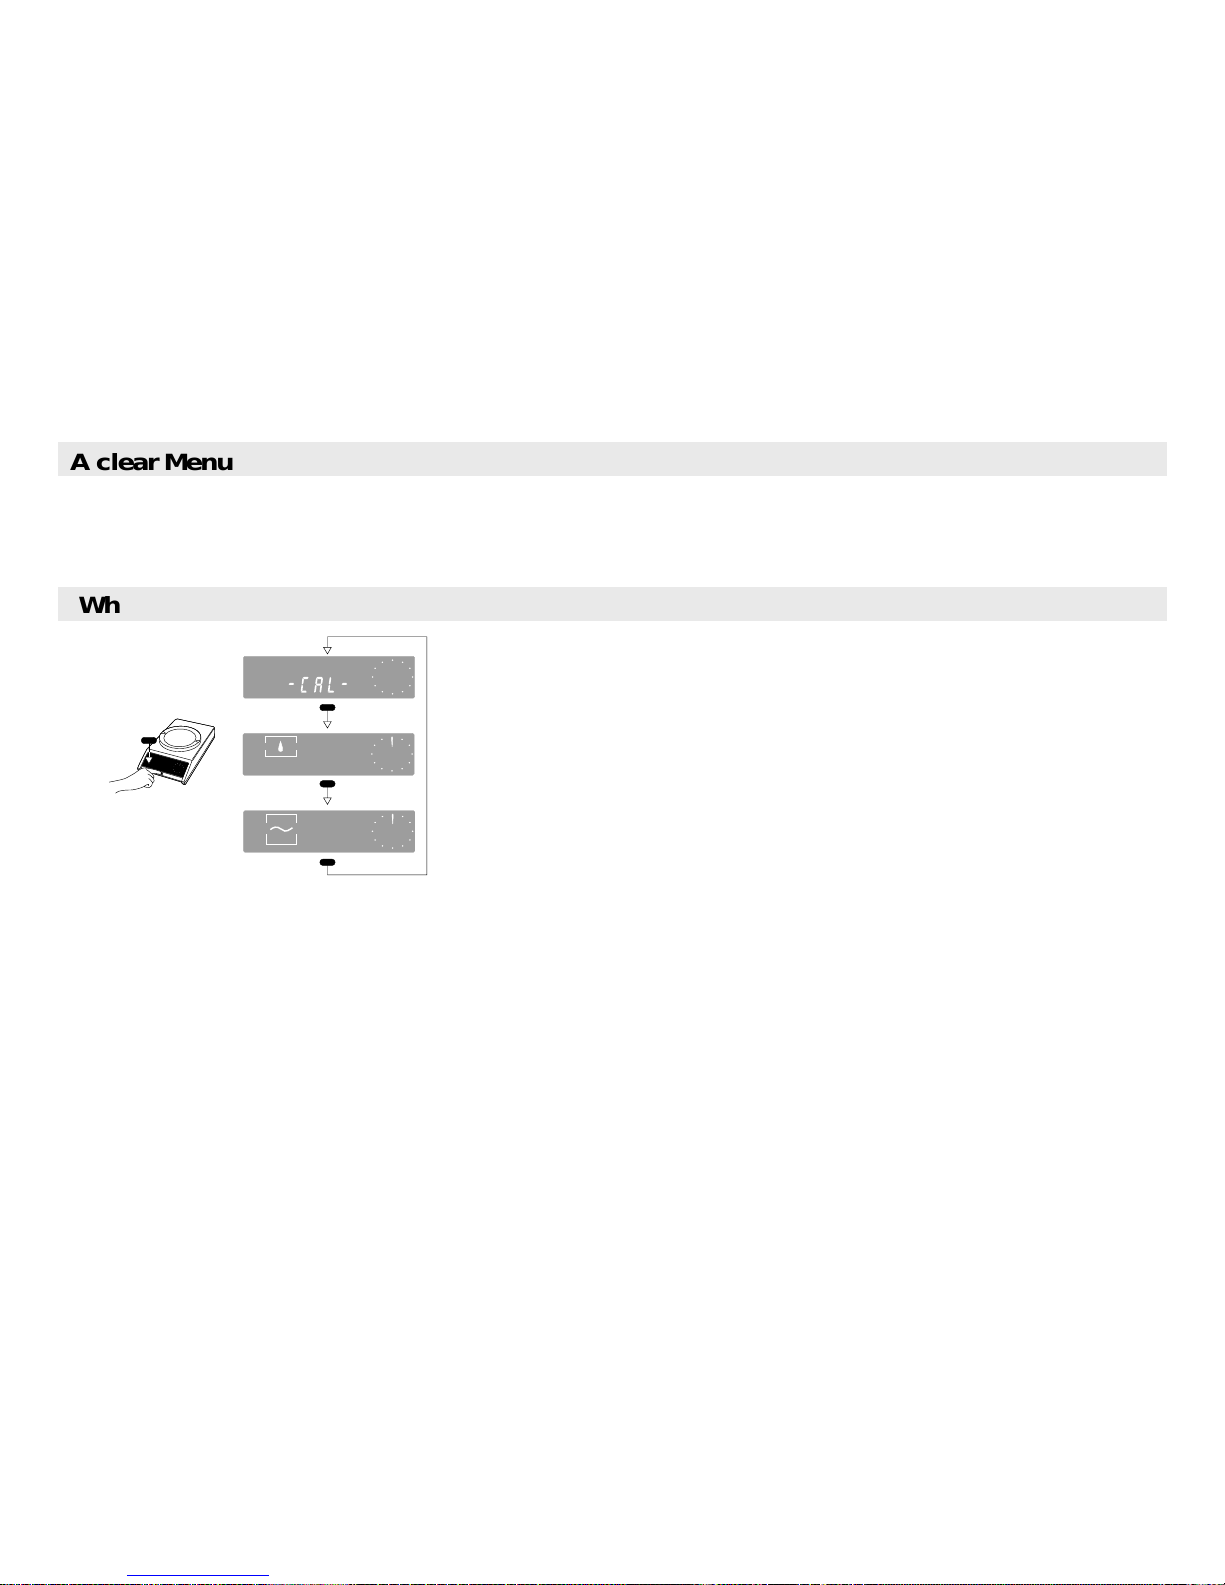
You can select the menu from the weighing mode. Switch on display and remove load from weighing pan. Then press
control bar (and keep depressed): The menu sequence starts. After the third menu step the balance returns to the
weighing mode. Now release the control bar.
Note: If you have selected the menu step «Weighing process adapter» or «Vibration adapter» and do not press the
control bar for 3 seconds, your balance will return automatically to the weighing mode. However, the actual settings are
stored (the same applies if you return to the weighing mode by pressing and holding the control bar).
.15.
l-ca -
0.00
9
A clear Menu
When the Menu is activated, you can…
15
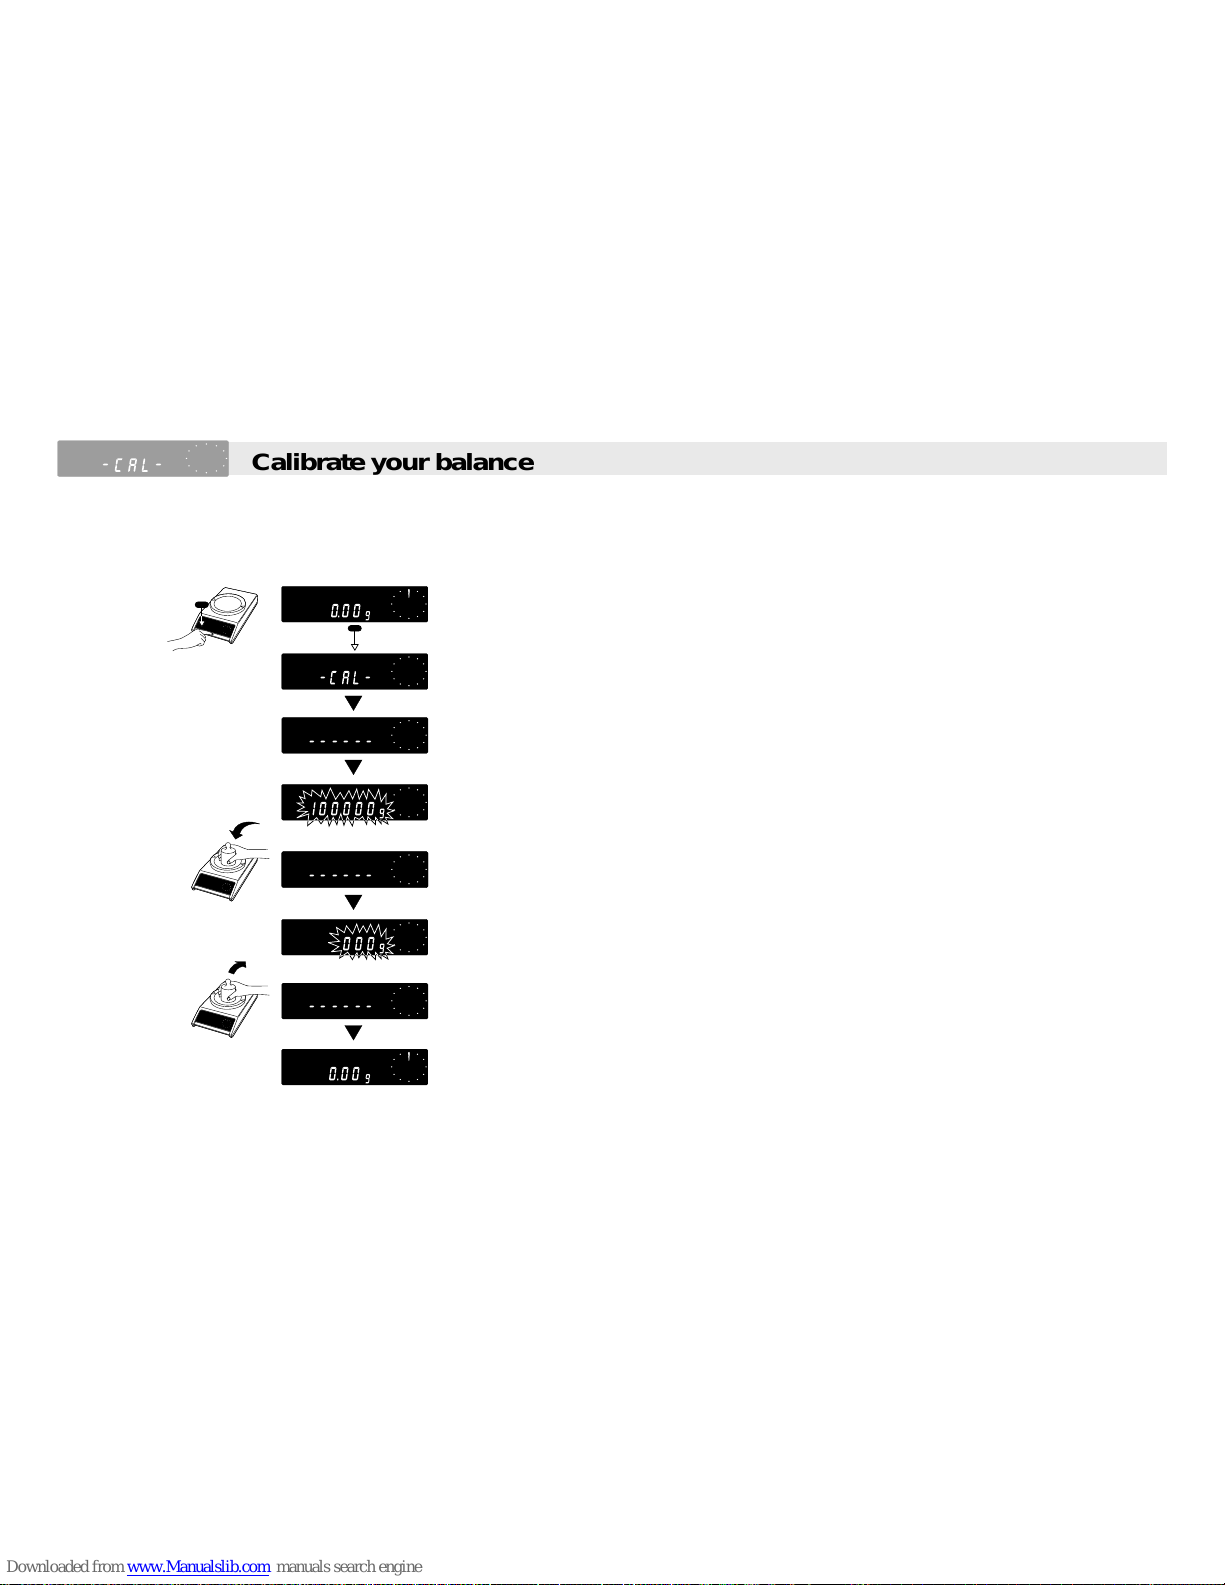
Before the balance is used for the first time, it must be calibrated (to take the acceleration due to gravity into account).
Caution: To obtain accurate results we recomment that you connect the balance to the line 30 min before calibrating (60 min for AM balances).
Menu
Start calibration with display switched on by pressing and holding the control bar
(weighing mode, display zero with empty weighing pan).
Release control bar as soon as –CAL– appears in display.
Required calibration weight, e.g. 1000.00 g, flashes.
Prompt to remove weight.
Place required calibration weight on balance.
Remove weight from balance.
The balance is recalibrated, (it is now back in weighing mode).
15 l-ca -
9
.15.
l-ca -
-.-.-.-.-.-.-.-
... .
00
..
0000.0
9
-.-.-.-.-.-.-.-
.. .
00..40000
9
-.-.-.-.-.-.-.-
-.-.-.-.0.0.0
9
-.-.-.-.0.0.0
.
1
0.00
9
0.00
9
0.00
9
Calibrate your balance
 Loading...