

Mettler Toledo PG-S Operating Instructions Manual
Operating instructions
METTLER TOLEDO
PG-S balances (0.1 g, 1 g)
PG5001-S
Max 5100g
Min 0.5g
FACT
METTLER TOLEDO
Overview of your PG-S balance
Front view PG-S
PG5001-S
5
Max 5100g
Min 0.5g
FACT
1
METTLER TOLEDO
2
3
4
Bottom view PG-S
Display PG-S
17
16
11
18 19 20 21
10
Rear view PG-S
89 7 6
12
15 14 13
Display, controls and connections of your PG-S balance
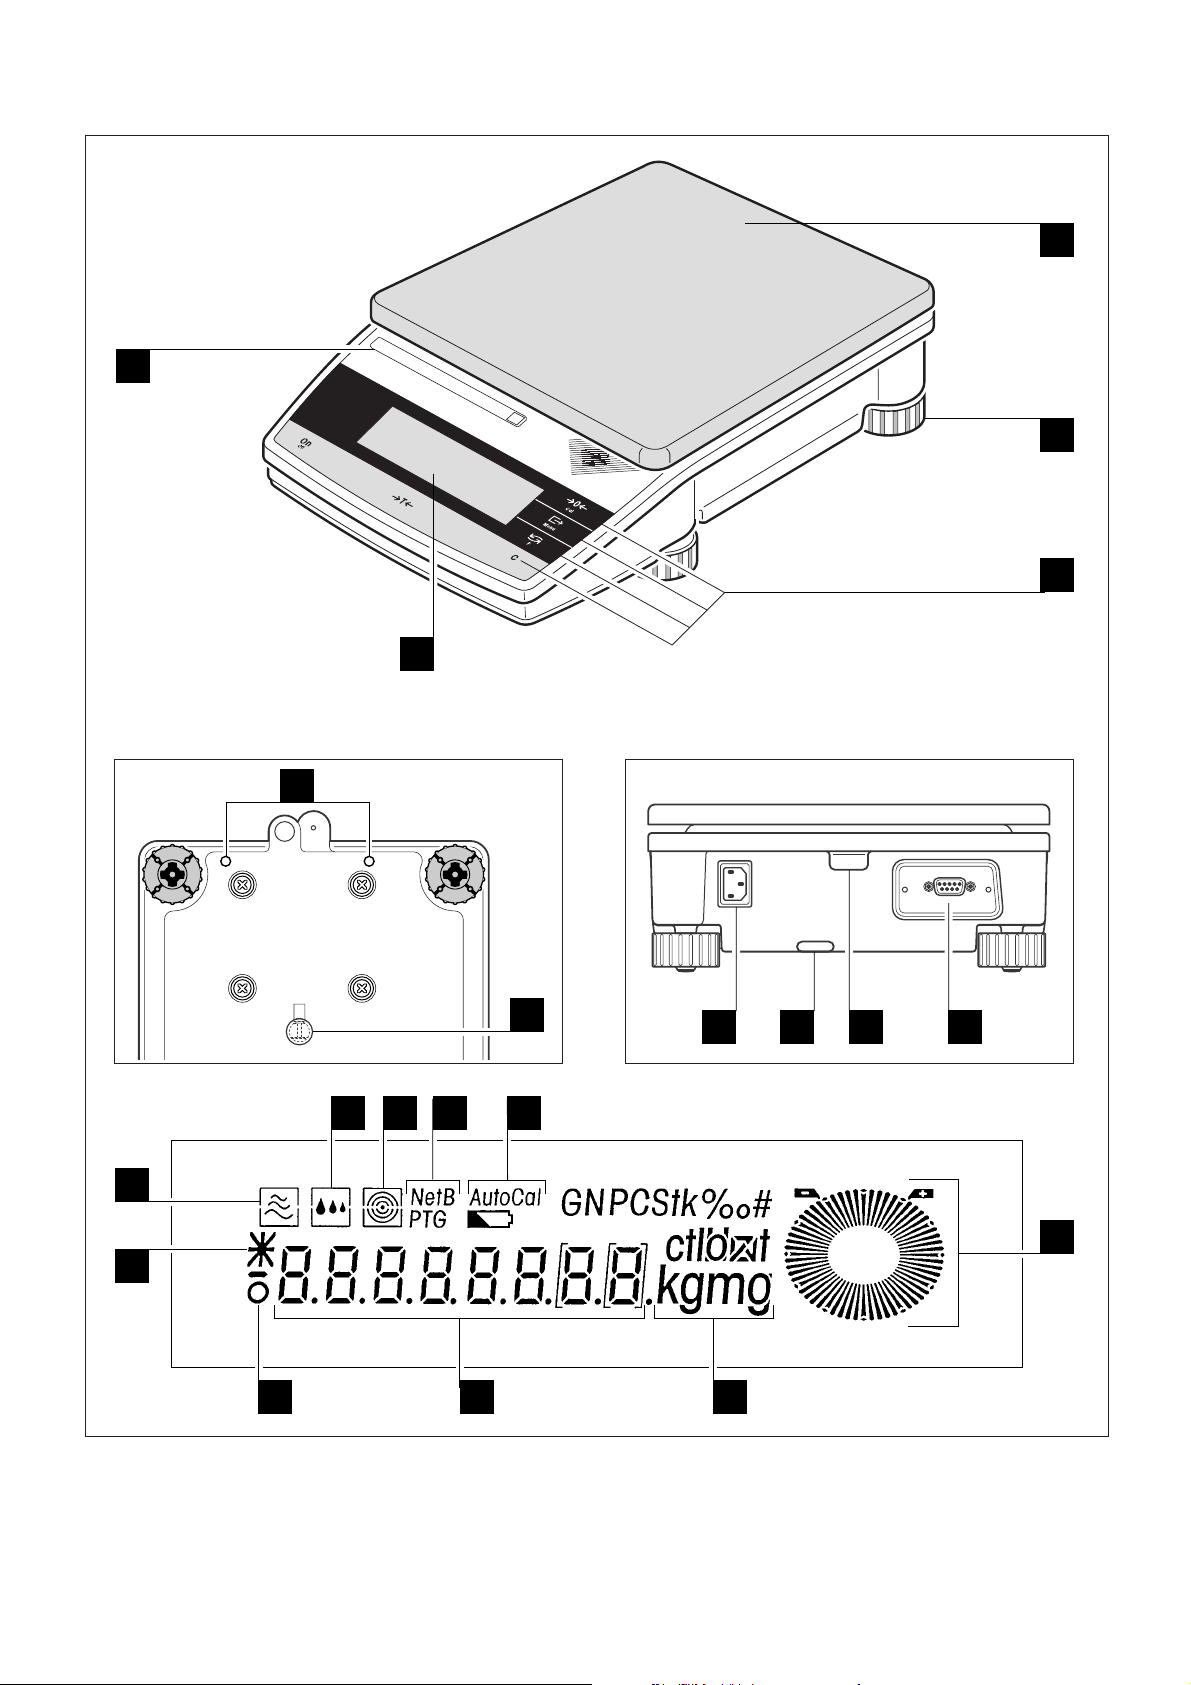
Front view
No. Designation
1 Display
2 Weighing pan
03 Leveling foot
04 Control keys
05 Model-specific data and type designation
Rear/bottom view
No. Designation
06 RS232C interface connection
Display
No. Designation
12 DeltaTrac
13 Weighing units
14 Alphanumeric display
15 Symbol of the stability detector
16 Symbol for calculated result
17 Status indicator of the vibration adapter
18 Status indicator of the weighing process adapter
19 Status indicator of the repeatability
20 Special symbols (e.g. for net weight)
07 Leveling control
08 Eye for antitheft device
09 Connection for AC adapter
10 Hanger for below-the-scale weighings
11 Fastening for auxiliary display
21 Display of adjustment mode

Contents
4
Contents
1. Getting to know your PG-S balance␣ .......................................................................................... 6
1.1 Introduction .............................................................................................................................. 6
1.2 Overview of the PG-S balances ................................................................................................... 6
1.3 What you should know about these instructions ........................................................................... 7
1.4 Safety has priority ..................................................................................................................... 8
2. Putting the balance into operation␣ ........................................................................................... 9
2.1 Unpacking and checking the standard equipment ......................................................................... 9
2.2 Location selection or location change.......................................................................................... 10
2.3 Leveling the balance ................................................................................................................. 11
2.4 Power supply ........................................................................................................................... 11
2.5 Adjusting (calibrating) the balance ............................................................................................. 12
3. Weighing made simple␣ ........................................................................................................... 13
3.1 Switching the balance on and off ................................................................................................ 13
3.2 Zeroing the scale ...................................................................................................................... 14
3.3 Taring the balance .................................................................................................................... 14
3.4 Performing a simple weighing .................................................................................................... 15
3.5 Weighing with the analog display – DeltaTrac .............................................................................. 15
3.6 DeltaRange
3.7 Switching weighing units ........................................................................................................... 16
3.8 Printing out the weighing result and transferring data .................................................................... 17
4. The menu␣ ............................................................................................................................... 18
4.1 What is the menu? .................................................................................................................... 18
4.2 Menu operation ........................................................................................................................ 19
4.3 Reset ....................................................................................................................................... 21
4.4 Selection of the adjustment (calibration) and test function ............................................................. 21
4.5 Switching automatic adjustment call-up on or off.......................................................................... 22
4.6 Preselecting a function .............................................................................................................. 23
4.7 Setting the vibration adapter ....................................................................................................... 24
4.8 Setting the weighing process adapter .......................................................................................... 24
4.9 Selecting repeatability ................................................................................................................ 25
4.10 Selecting weighing unit 1........................................................................................................... 26
4.11 Selecting weighing unit 2........................................................................................................... 27
4.12 Switching automatic zero correction (Autozero) on or off ............................................................... 28
®
balances with movable fine range............................................................................ 16

Contents
5
4.13 Preselecting automatic shutdown ............................................................................................... 28
4.14 Selecting the power-up mode ..................................................................................................... 29
4.15 Setting display of the icons ........................................................................................................ 30
4.16 Selecting peripheral device......................................................................................................... 30
4.17 Selecting data transfer mode ...................................................................................................... 30
4.18 Selecting data transfer format ..................................................................................................... 31
4.19 Setting baud rate (data transfer rate) ........................................................................................... 32
4.20 Setting parity/bit........................................................................................................................ 32
4.21 Setting handshake .................................................................................................................... 33
4.22 Printing out or saving menu settings ........................................................................................... 33
4.23 Canceling secure function .......................................................................................................... 34
5. Special applications and functions␣ .......................................................................................... 35
5.1 Piece counting ......................................................................................................................... 35
5.2 Percent weighing ...................................................................................................................... 37
5.3 Formula weighing ..................................................................................................................... 38
5.4 Dynamic weighing of unstable weighing samples......................................................................... 42
5.5 Below-the-balance weighings .................................................................................................... 44
5.6 Adjustment (calibration) with internal weight ................................................................................45
5.7 Adjustment (calibration) with external weights (VariCal) ................................................................ 47
5.8 Test of the balance with internal weight or external weights ............................................................ 49
6 Further important information␣ .................................................................................................. 52
6.1 Error messages ........................................................................................................................ 52
6.2 Preventive maintenance and care ............................................................................................... 53
6.3 Changing the protective cover .................................................................................................... 54
6.4 RS232C interface ...................................................................................................................... 54
6.5 LocalCAN universal interface ...................................................................................................... 55
7. Technical data and optional equipment␣ .................................................................................... 56
7.1 Technical data of the PG-S balances ........................................................................................... 56
7.2 Dimensions ............................................................................................................................. 58
7.3 Optional equipment ................................................................................................................... 59
8. Appendix␣ ............................................................................................................................... 61
8.1 Overview of menu ..................................................................................................................... 61
8.2 Conversion table for weight units ................................................................................................ 62
8.3 SOP (Standard Operating Procedure) .......................................................................................... 63
8.4 Index ....................................................................................................................................... 65

Getting to know your PG-S balance
6
1. Getting to know your PG-S balance
This section provides you with detailed information on your PG-S balance. Please read through the section carefully even
if you already have experience with METTLER TOLEDO balances and scales and be sure to familiarize yourself with the
safety notes!
1.1 Introduction
Thank you for deciding to purchase a balance from METTLER TOLEDO.
The precision balances of the PG-S line combine a wide range of weighing functions and setting possibilities with excep-
tional ease of operation.
Please read through these operating instructions thoroughly so that you can exploit all the possibilities offered by your
balance to the full.
These operating instructions apply to all balances of the PG-S line with a readability in the range 0.1 g/1 g. However, the
various models have different equipment and performance features. Where this is important for the operation, special
mention is made in the text.
1.2 Overview of the PG-S balances
The PG-S balance family comprises various precision balances which differ according to their weighing range, resolution
and equipment features.
The models of the PG-S line have the following features:
– Extremely rugged and chemically resistant construction.
– Convenient keypad for one-hand operation and large size, easily readable display.
– FACT (Fully Automatic Calibration Technology), fully automatic, motorized adjustment (calibration) with internal weight.
– Built-in functions for piece counting, percent weighing, formula weighing and dynamic weight determination.
– Built-in RS232C interface.
– Optional LocalCAN universal interface allows the attachment of up to 5 peripheral devices.
– Integrated short-form operating instructions to facilitate your daily work.
– Dynamic graphic indicator (DeltaTrac) for analog display of the weighing range still remaining.
A brief word regarding standards, directives and procedures for quality assurance: Your PG-S balance conforms with all
common standards and directives. It supports standard procedures, handicaps, work techniques and records as required
by GLP (Good Laboratory Practice) and SOP (Standard Operating Procedure). Recording of the sequences of operations
and adjustment work is highly important in this connection: we recommend use of the METTLER TOLEDO LC-P45 Printer
here. Your PG-S balance has a CE declaration of conformity and METTLER TOLEDO as the manufacturer has been awarded ISO 9001 certification.
Certified versions of PG-S balances are also available, please ask your nearest METTLER TOLEDO dealer.
Getting to know your PG-S balance
1.3 What you should know about these instructions
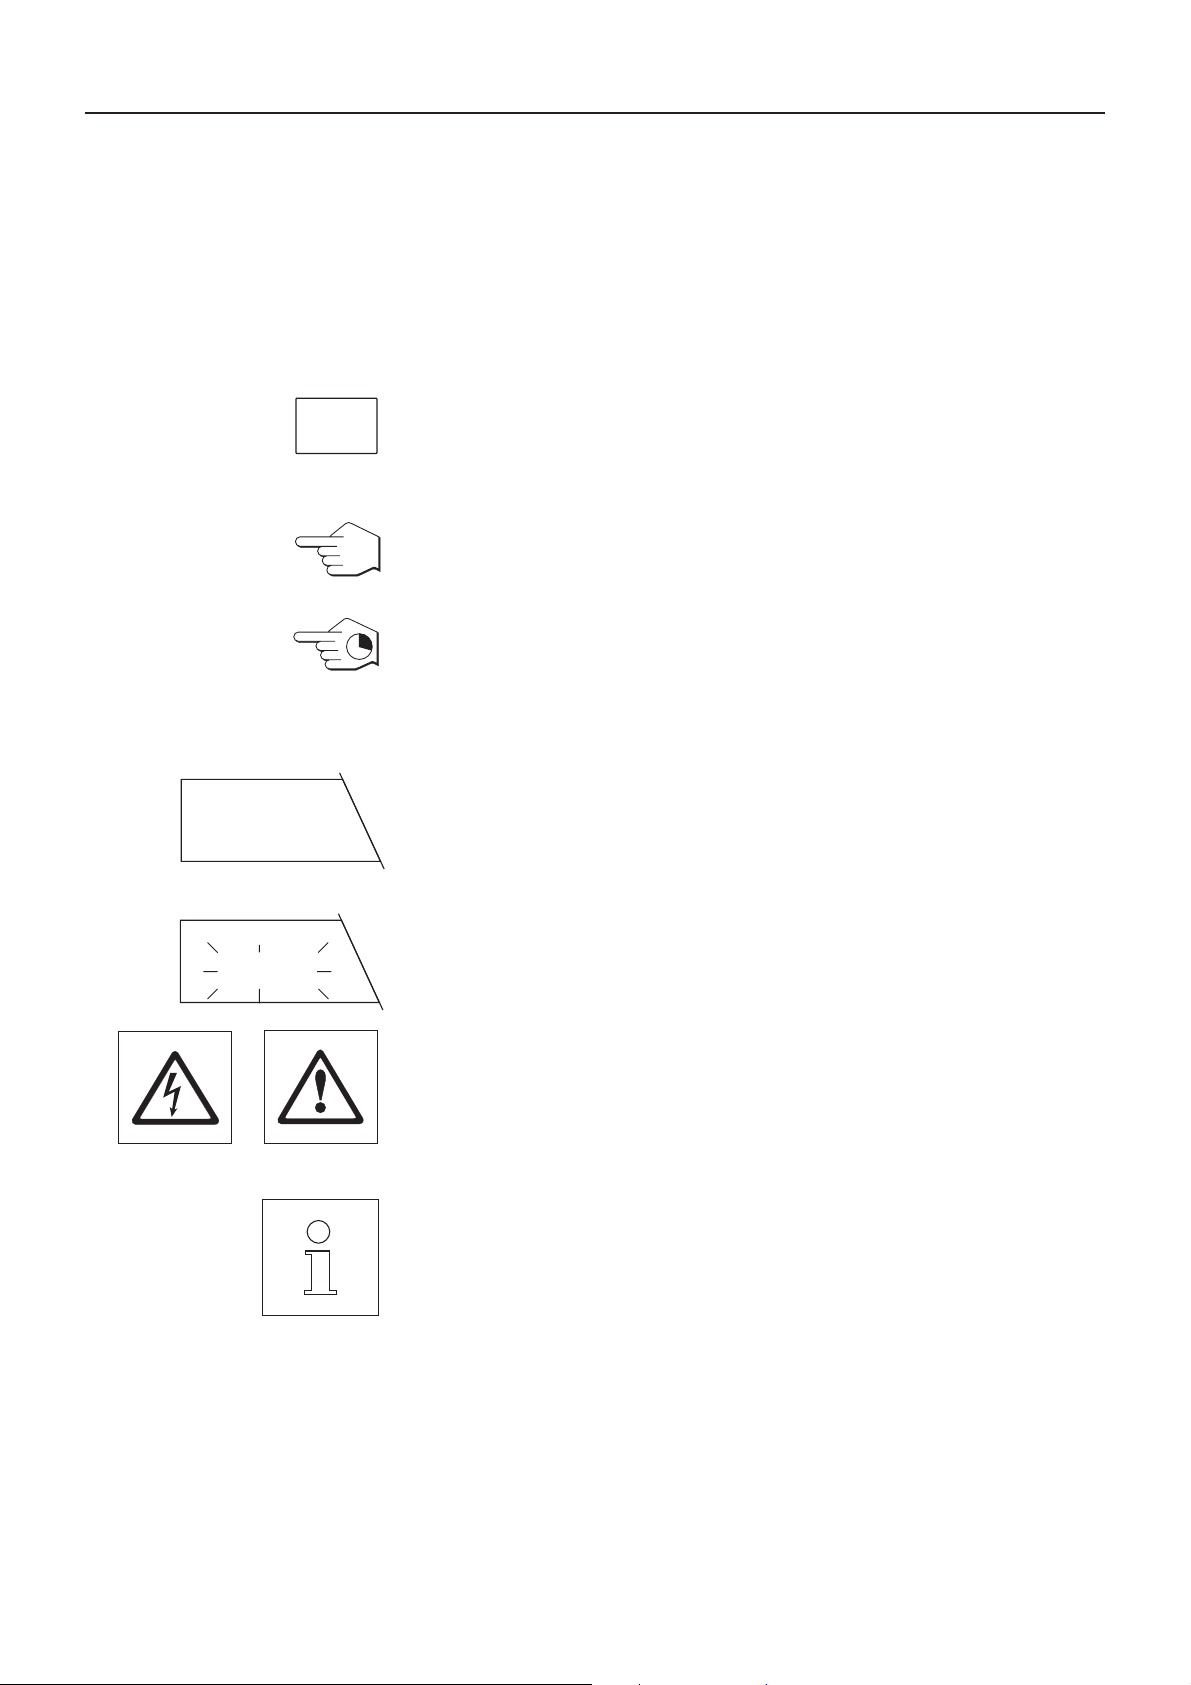
These instructions contain orientation aids which facilitate your search for the desired information:
Key designations are enclosed in double angle brackets
(e.g. «On/Off» or «±»).
7
50=1
Ç
Cal
g
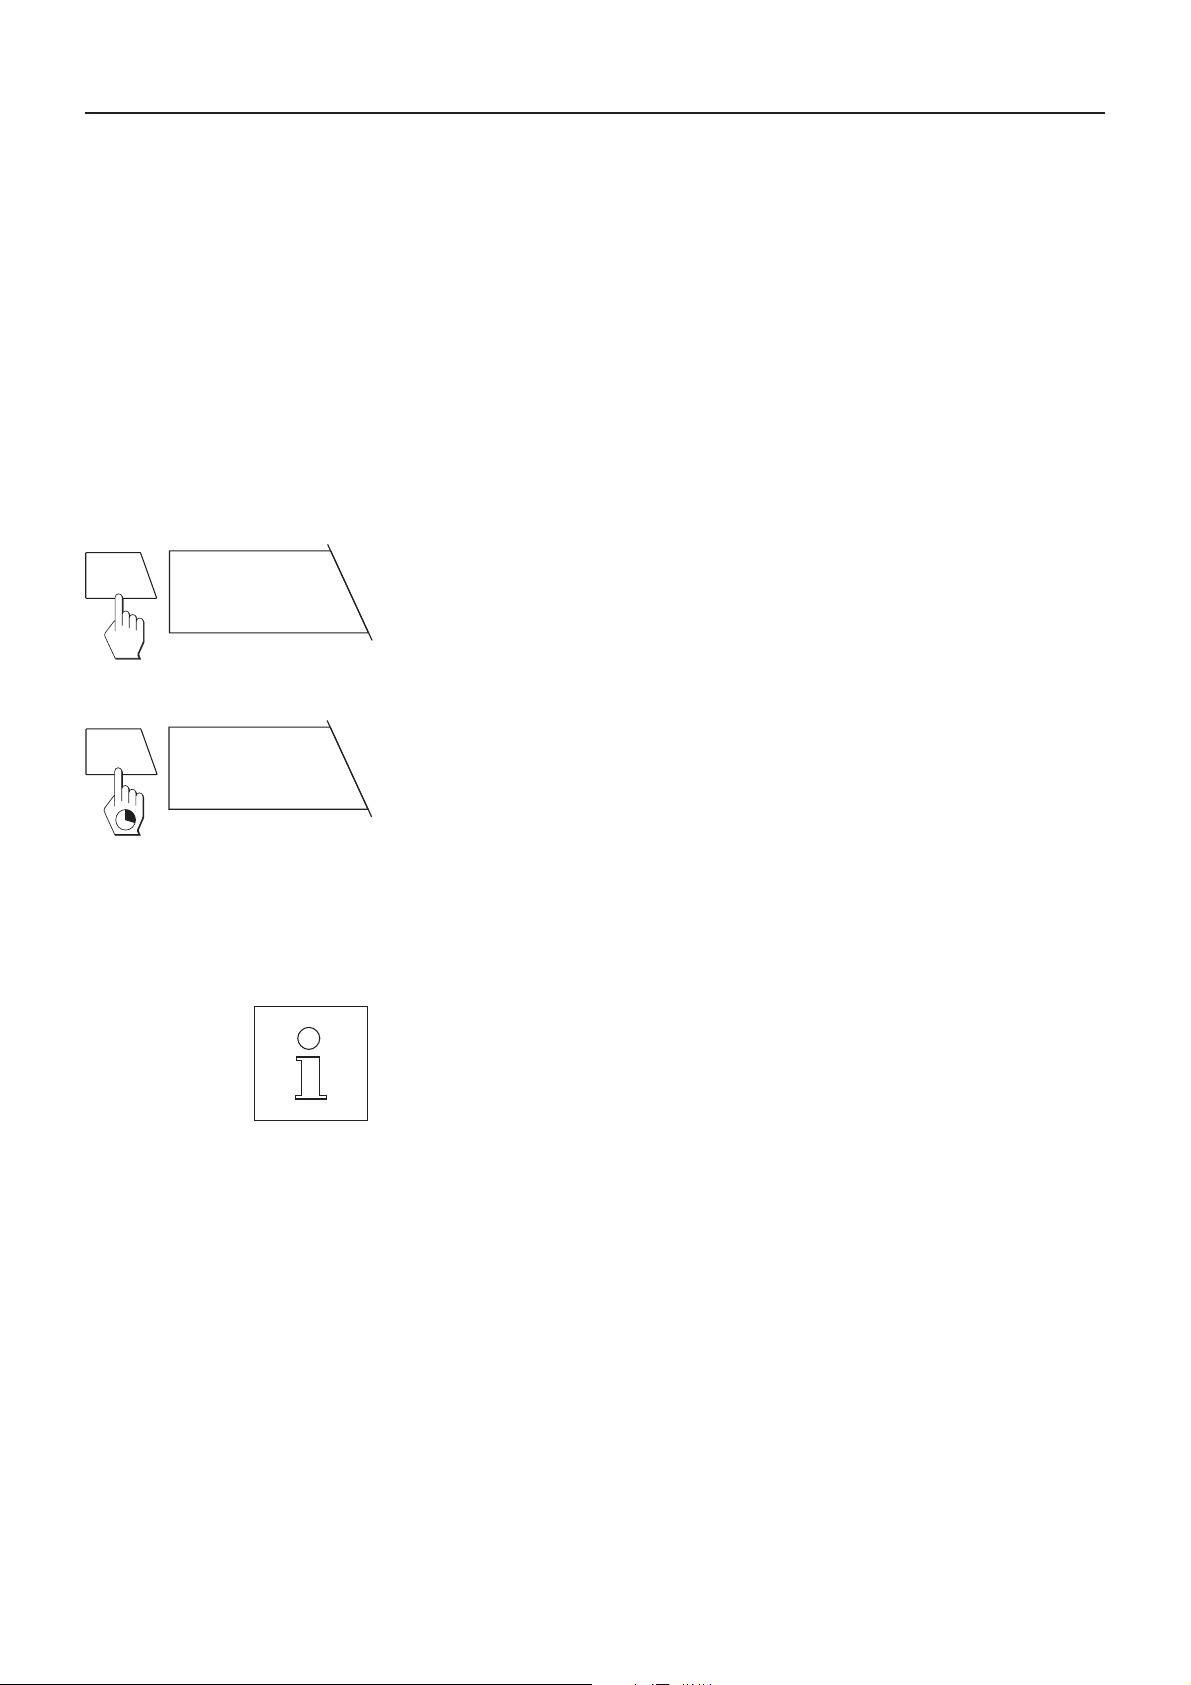
The keys of your PG-S balance have two assignments. The first function of a key
(e.g. «Ç») is always available by pressing the key briefly, whereas the second
function (e.g. «Cal.») is called up by pressing and holding the key:
This symbol indicates a brief keystroke.
This symbol indicates a long, sustained keystroke (approx. 2␣ seconds).
long
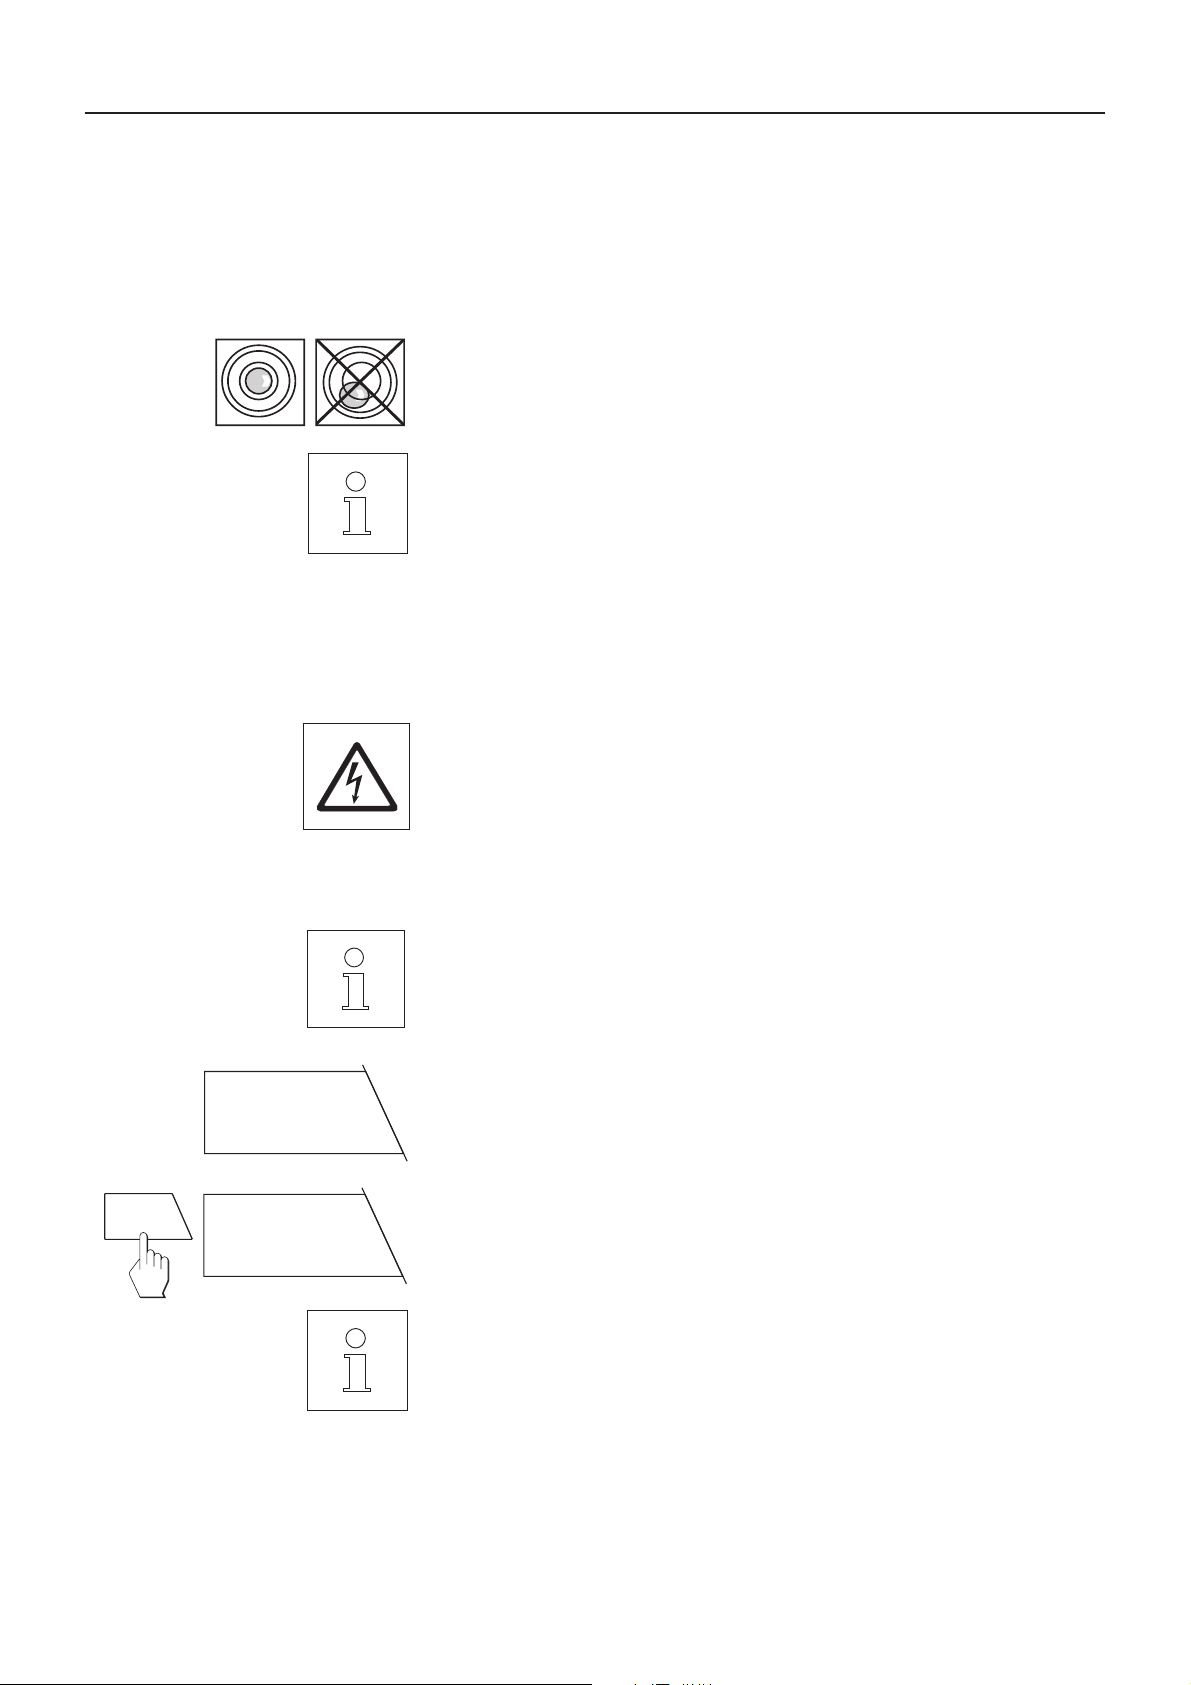
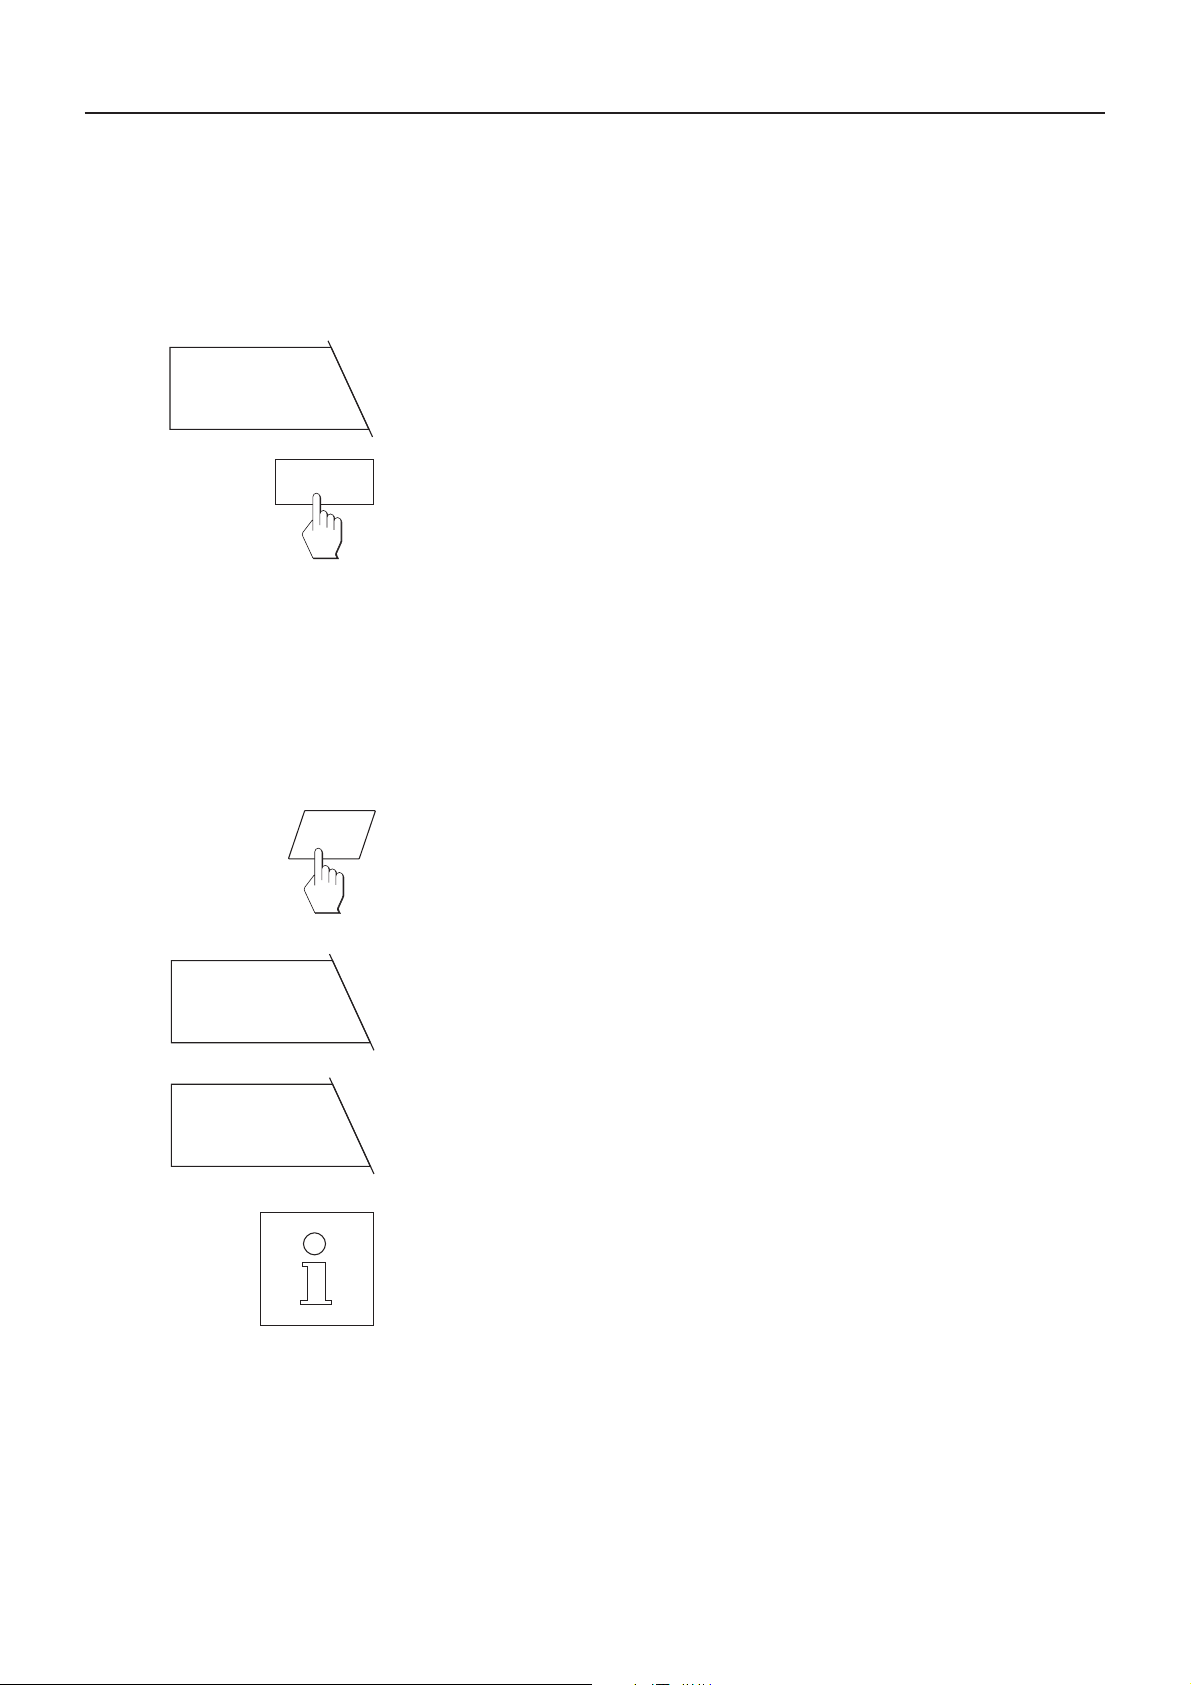
This representation symbolizes the current display of your balance.
This representation symbolizes a flashing element in the display of your balance.
These symbols indicate safety and hazard instructions which must be complied
with. Nonconformance with such instructions can lead to personal injuries to the
user, damage to the balance or other tangible assets or to malfunctions.
This symbol indicates additional information and instructions which facilitate your
handling of the balance and contribute to proper and economical use.
Getting to know your PG-S balance
8
1.4 Safety has priority
Please note the following instructions for safe and problem-free operation of your PG-S balance.
Read through these operating instructions carefully even if you already have experience with METTLER
TOLEDO balances and scales.
It is essential to note the instructions in section 2 when putting your new balance into operation.
PG-S balances may be used only indoors in closed rooms.
The PG-S balances may not be operated in a hazardous environment and only when attached to receptacle outlets with a ground connection.
Use only the included PG-S power cable.
Operate and use your PG-S balance only in accordance with the instructions in these operating instructions and short-form operating instructions.
Use only optional equipment and peripherals supplied by METTLER TOLEDO with your PG-S balance;
these have been optimally matched to your balance.
Your PG-S balance has a very rugged construction, but it is still a precision instrument. Treat it with the
appropriate care and it will thank you with years of trouble-free operation.
Never operate the keypad of your PG-S balance with sharp objects!
Never open the balance, it contains no parts which can be maintained, repaired or replaced by the user.
In the unlikely event you experience problems with your balance, please contact your responsible
METTLER TOLEDO dealer.
Putting the balance into operation
2. Putting the balance into operation
In this section you will learn how you unpack and set up your new balance and prepare it for operation. On completion of
the steps described in this section, your balance is ready for operation.
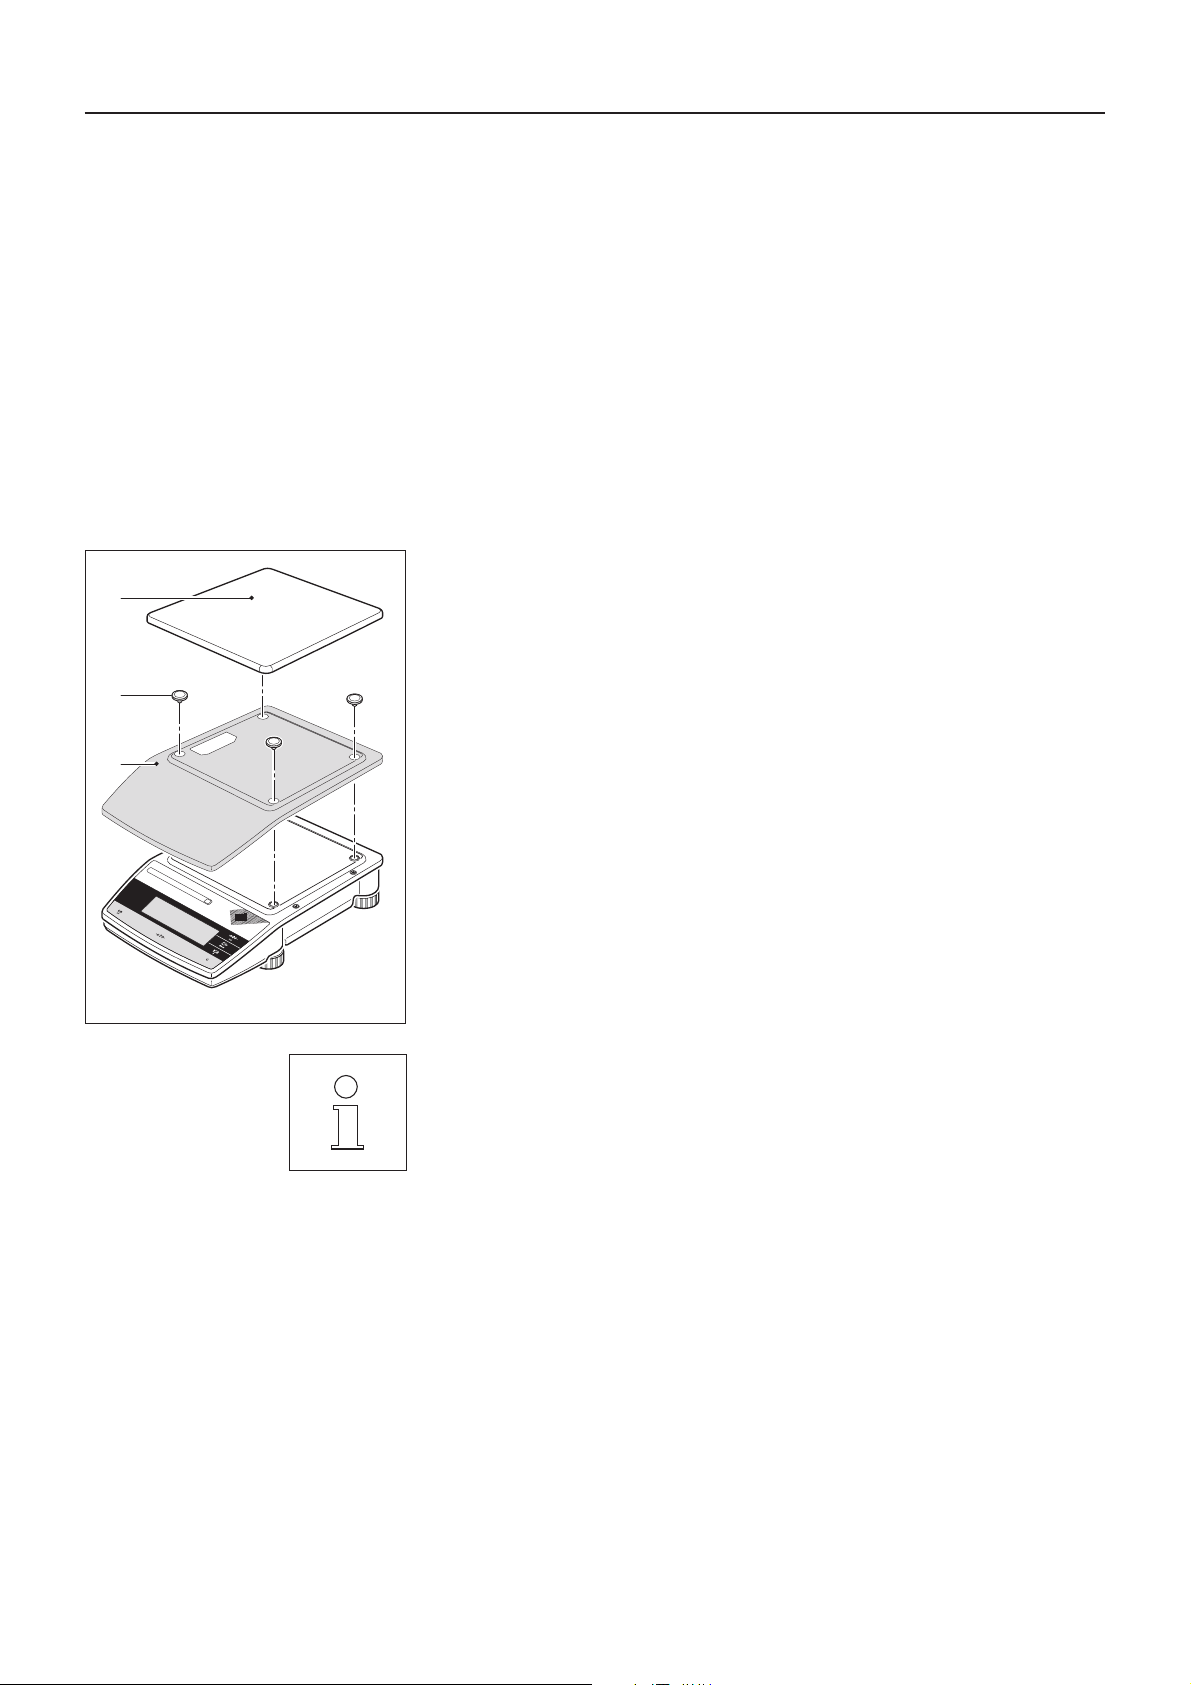
2.1 Unpacking and checking the standard equipment
PG-S balances are supplied in an environmentally harmless package.
Please check the standard equipment of your balance for completeness:
– Operating instructions
1
2
– Weighing pan (1)
– Pan mount (2)
– Protective cover (3)
– Power cable
– Description of interface commands
(Reference manual MT-SICS, available in English only)
9
3
PG5001-S
Max5100g
Min 0.5g
FACT
METTLER TOLEDO
XKD 02
Store all parts of the packaging in a safe place. This packaging guarantees the
best possible protection for the transport of your balance.
Putting the balance into operation
10
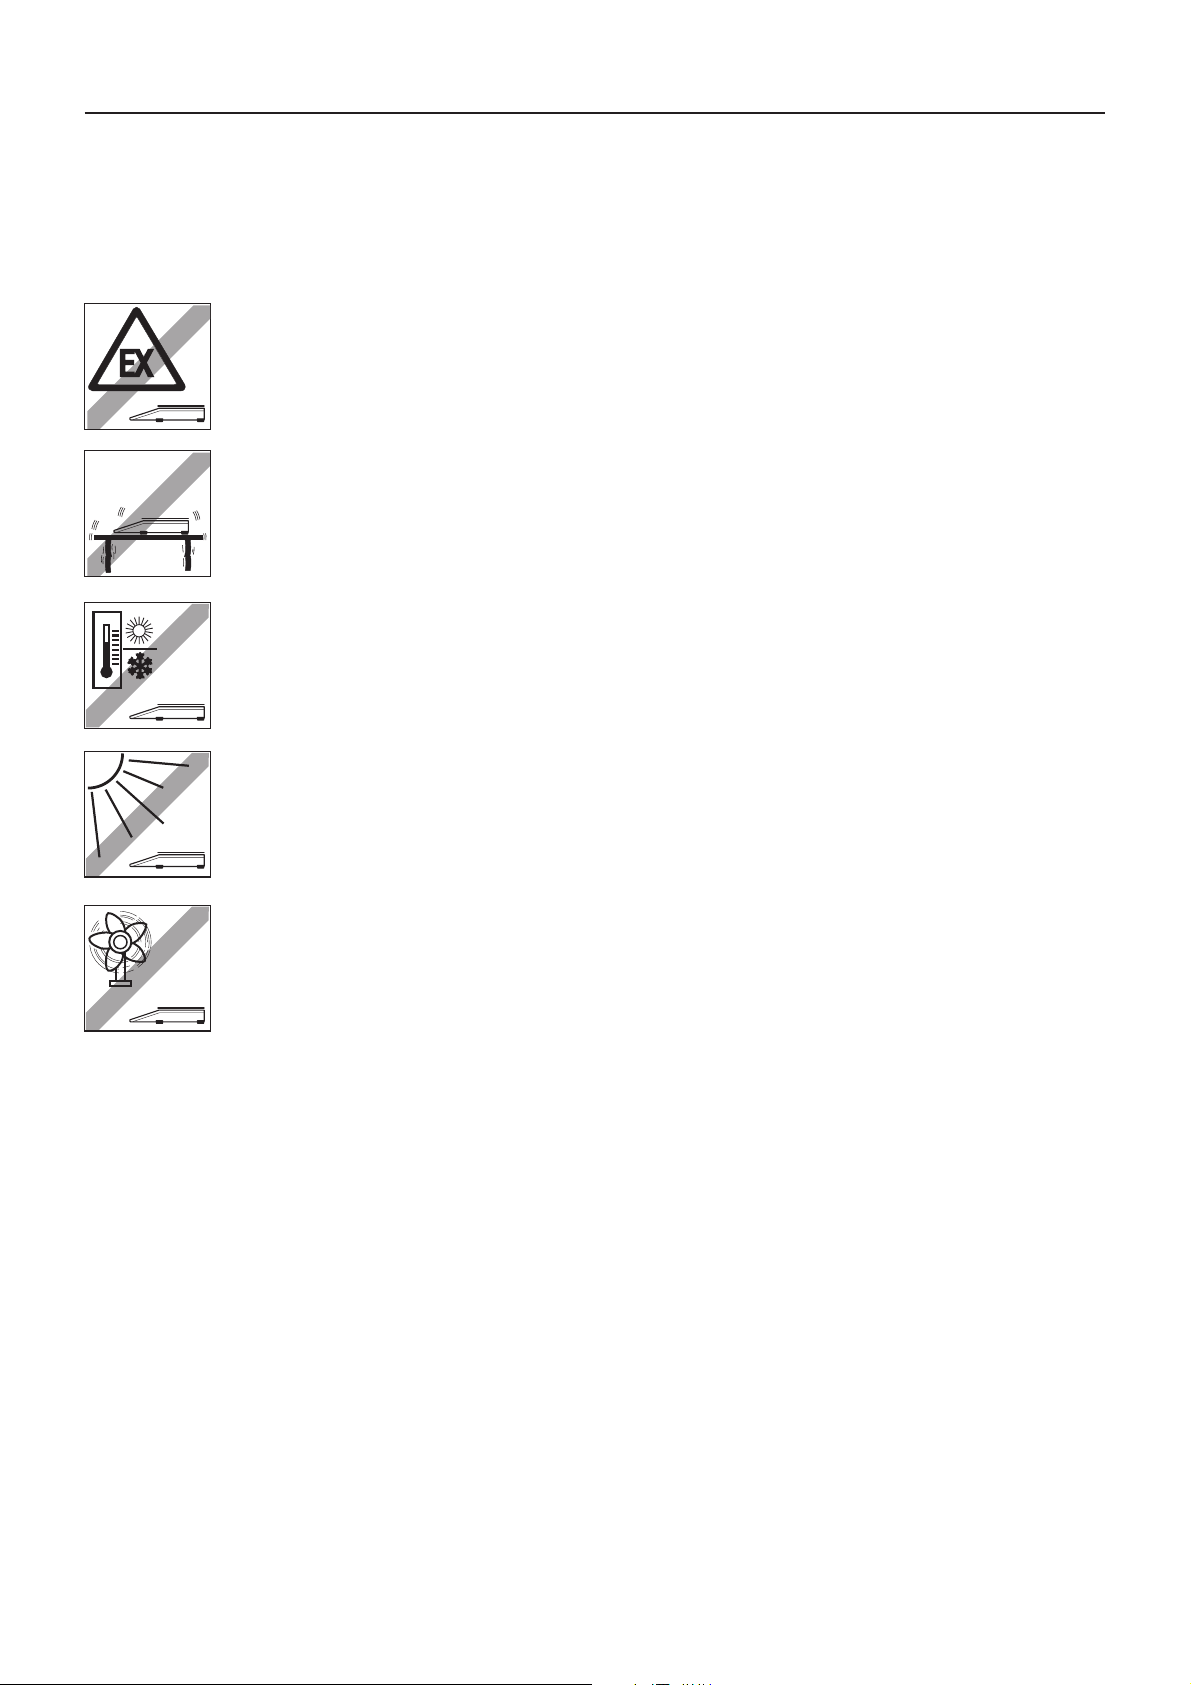
2.2 Location selection or location change
Your balance is a precision instrument and will thank you for an optimum location with high accuracy and dependability:
Never operate scale in a hazardous environment.
Firm, vibration-free position as horizontal as possible. The foundation must be capable of safely
supporting the weight of the fully loaded scale.
No excessive fluctuations in temperature.
No direct sunlight.
No powerful drafts (e.g. from fans).
Putting the balance into operation
11
2.3 Leveling the balance
To assure repeatable weighing results at all times, the balance must be exactly horizontal. To compensate minor unevenness at its location, the balance can be leveled:
Turn the leveling feet of the balance housing until the air bubble is in the center of
the level control.
The balance must be releveled each time its location is changed.
2.4 Power supply
On delivery the PG-S balances are set to the line voltage of their country of destination.
First check whether the voltage printed on the model plate of the balance matches your local line voltage. If this is not the case, on no account connect the
balance to the power supply, but contact your METTLER TOLEDO dealer.
Connect the balance to the power supply. Connect the balance only to power
receptacles with a ground contact and never use an extension cable without
an equipment grounding conductor!
Note:
Route the connection cable so that it does not touch the weighing pan and such
that it can not be damaged or hinder your daily operations!
The balance now performs a self-test in which all display segments light up
briefly. “OFF” then appears in the display (“OFF” indicates that the balance has
been disconnected from the power supply).
Press the «On/Off» key. The display briefly provides information on the installed
software version and the normal weight display then appears.
On
OFF
Off
+75 +30
Allow your balance to warm up for 30 minutes to enable it to adapt itself to the
ambient conditions.

Putting the balance into operation
12
2.5 Adjusting (calibrating) the balance
An adjustment (i.e. an adjustment to the acceleration due to gravity) is needed
when putting into operation for the first time and after every location change. In
colloquial language, this operation is frequently also referred to as “calibration”
(to avoid misunderstandings, this term is enclosed in brackets when necessary). You should also adjust (calibrate) your balance at regular intervals in
weighing operations to obtain precise results. If you work according to GLP ( Good
Laboratory Practice) and SOP (Standard Operating␣ Procedure), please note the
stipulated intervals for the adjustment (calibration).
With PG-S balances you have various possibilities for adjusting (calibrating) or
checking the balance. You have a choice between
– Adjustment (calibration) or checking the balance,
– internal or external weights,
– automatic or manual initiation of the adjustment operation
-- BALANCE CALIBRATION -
03.10.97 11:23:34
METTLER TOLEDO
Type: PG5001-S
SNR: 1105238536
SW: 1.75 1.30
Internal Cal. done
Signature:
.........................
--------- END -----------
The factory setting is fully automatic adjustment (calibration) FACT (Fully Automatic Calibration Technology) with the internal weight. In this setting, you have
no need worry about adjusting (calibrating) your balance.
The balance adjusts itself automatically
– after the warm-up phase on connection to the power supply,
– in the case of certified balances, during the warm-up phase (after power
failure),
– when a change in the ambient conditions, e.g. the temperature could lead to
a noticeable deviation in the measurement.
If your balance is attached to a printer, the adjustment (calibration) is automatically printed out in conformance with GLP. The record opposite is a specimen printed out with the METTLER TOLEDO LC-P45 Printer.
Weighing made simple
13
3. Weighing made simple
This section shows you how to perform simple weighings, how you can accelerate the weighing process and print out the
weighing result and transfer data.
3.1 Switching the balance on and off
Your balance is set in the factory so that it automatically switches to the weighing mode when you load a weight in the
standby mode.
On
Off
On
Off
long
=0
OFF
To switch the balance on, press the «On/Off» key briefly. As soon as the nor-
g
mal weight display appears, your balance is ready to weigh.
Note
In section 4.14 you will learn how to perform a display test in which all segments of the display light up briefly when you switch on the balance.
To switch the balance off, press the «On/Off» key and keep it pressed until the
message “OFF” appears in the display.
After it has been switched off, your balance is in the standby mode. If you wish to
perform a weighing, you need now only place the sample on the weighing pan
and the balance immediately displays the result. There is no need to switch it on
with the «On/Off» key (see also section 4.14).
As your balance needs no warm-up time when in the standby mode and is immediately ready for weighing, we advise you to switch the instrument off only by
use of the «On/Off» key and not to disconnect it from the power supply. This also
ensures that the balance is always in thermal equilibrium.
Weighing made simple
14
3.2 Zeroing the scale
As a result of environmental influences, your balance may not show exactly «0.0» even though the weighing pan is
unloaded. However, you can reset the display of your balance to zero at any time to ensure that the weighing really starts
at zero.
The balance does not show exactly zero even though the weighing pan is un-
=2
g
loaded.
Ç
Press the «
ÇÇ
Ç» key and the balance resets the display to zero.
ÇÇ
3.3 Taring the balance
The weight of any weighing container can be “tared” at a keystroke to set the display to zero. The taring range covers the
entire weighing range of your balance.
If you wish to tare a container, place it on the weighing pan.
#
------
Press the «#» key briefly to start the taring operation.
Taring runs automatically. If you tare the balance when it is unstable, the taring
procedure will be shown in the display by horizontal segments.
Net
=0
On completion of taring, the zero display and the symbol “Net” for net weight
appear. Your balance is again ready for weighing.
g
When the balance is unloaded, the stored tare value is shown with a negative
sign.
The current tare value remains stored until the next taring or zeroing or until the
balance is switched off.

Weighing made simple
15
3.4 Performing a simple weighing
Performing a simple weighing is described only for the sake of completeness as this operation comprises only two work
steps.
XKD 04
PG5001-S
METTLER TOLEDO
After you have tared the balance, place the weighing sample on the pan.
Wait until the circular symbol of the stability detector fades. Fading of the symbol indicates that the weighing result is stable.
40=6
g
Now read off the weight in the display.
50=5
g
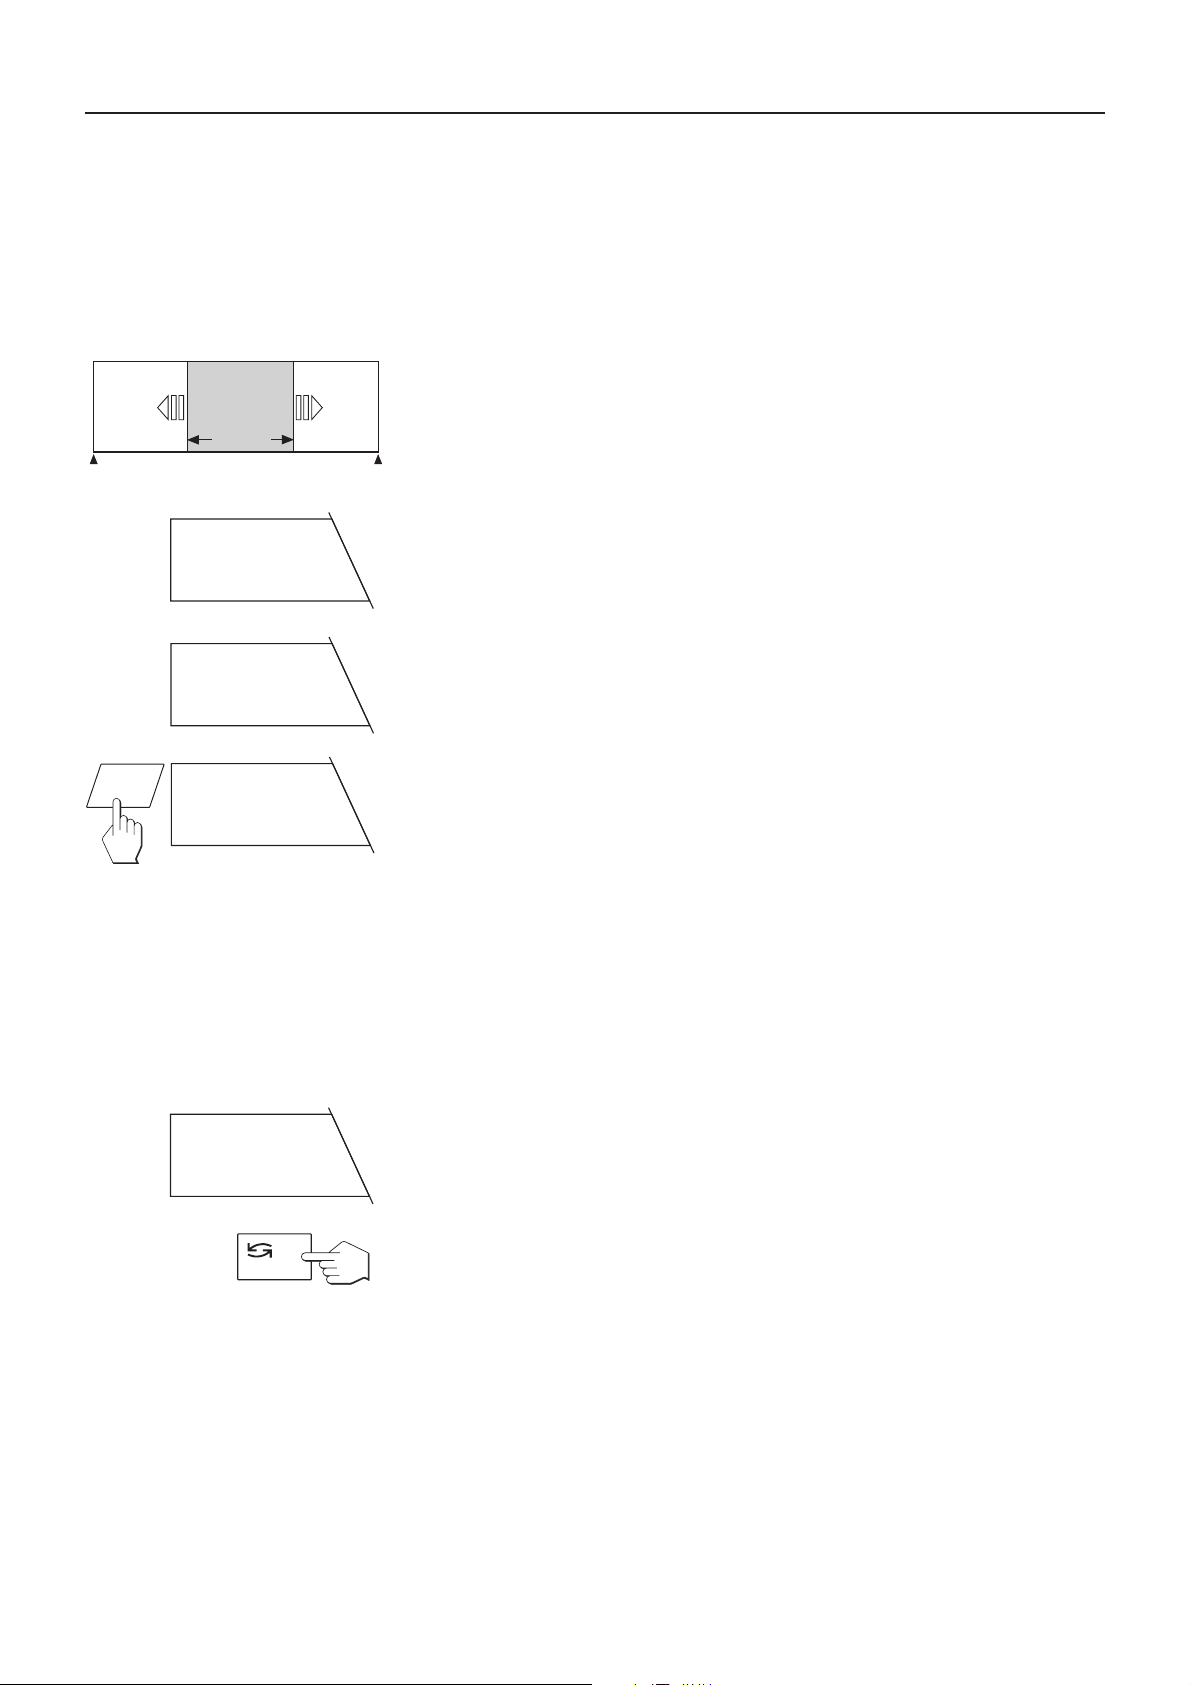
3.5 Weighing with the analog display – DeltaTrac
DeltaTrac is a dynamic graphic indicator which shows the weighing range in
use and that still available. You can thus recognize at a glance when the load on
the balance approaches the maximum capacity.
0 % in use 15 % in use
55
% in use 95 % in use
Weight within tolerance
Note
You can use the «“» key to switch from the dynamic graphic indicator to a
display with two pointers and two tolerance marks (for percent weighing). This
enables you to determine the position of the weighing result in regard to the
␣
target weight quicker (see section 5.2). The tolerance range is ±2.5
% of the
target weight. The setting of this tolerance range is fixed and can be changed
only via the interface.
Weighing made simple
16
3.6 DeltaRange® balances with movable fine range
METTLER TOLEDO DeltaRange® balances have a movable fine range with 10 times higher readability. An additional
decimal place always appears in the display of this fine range. Thanks to the DeltaRange function, you have the possibility to weigh small amounts of samples into heavy weighing containers.
The illustration opposite shows the principle of the movable fine range in which
1 g 1 g
0 g 12100 g
0.1 g
0.1 mg
2400 g
=0
4600
g
g
one extra decimal place is shown (in this example, the movable fine range
encompasses 2400 grams).
®
After the balance has been switched on, METTLER TOLEDO DeltaRange
ances operate in the fine range as standard.
If the fine range in the display is exceeded, the balance display automatically
switches to the lower readability.
bal-
#
=0
g
However, the fine range can always be recalled by taring the balance again.
3.7 Switching weighing units
Your balance can display the weighing result in two different weighing units. How you preselect the two weighing units is
described in sections 4.10 and 4.11.
You can switch between the two weighing units at a keystroke:
The balance shows the result in weighing unit 1.
5200
g
Press the «“» key briefly.
F
Weighing made simple
17
The balance shows the result in weighing unit 2. By pressing the «“» key
%200
kg
again, you can return to weighing unit 1.
Notes
If an additional unit (e.g. “%” or “PCS”) is displayed when switching between
the two weighing units, you have preselected a function in the menu. You will
find further information on the functions in sections 4.6 and 5.1 through 5.4.
You will find a table of the conversion factors between the various weighing units
in section 8.2.
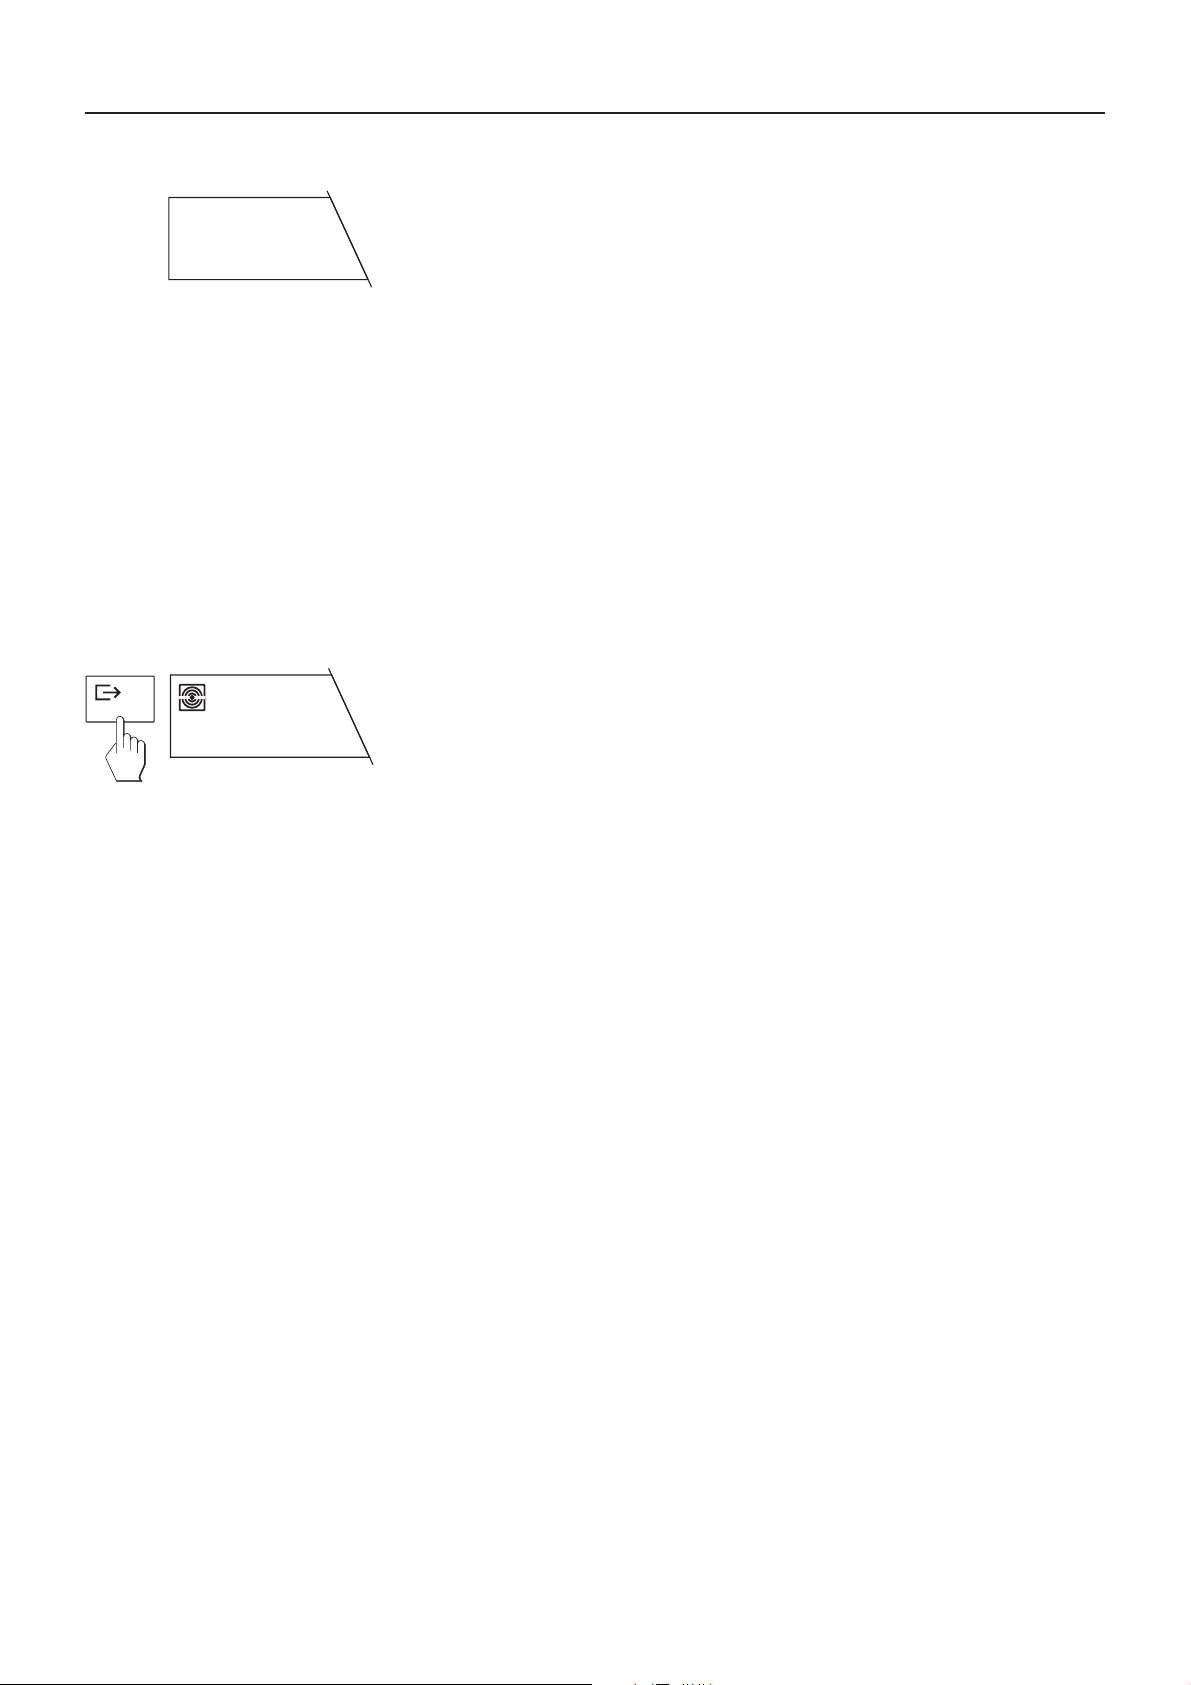
3.8 Printing out the weighing result and transferring data
If your balance is connected to a printer via the RS232C interface or via the LocalCAN universal interface, you can transfer
current weighing results, identifications and other data to the attached device with a single keystroke.
Menu
56"6
Press the «±» key briefly. As soon as the weighing result is stable, the status
g
indicator of the readability fades and the result is transferred to the attached device.
You will find additional information on the attachment of a printer in sections
6.4 and 6.5 and in the documentation accompanying your printer.
The menu
18
4. The menu
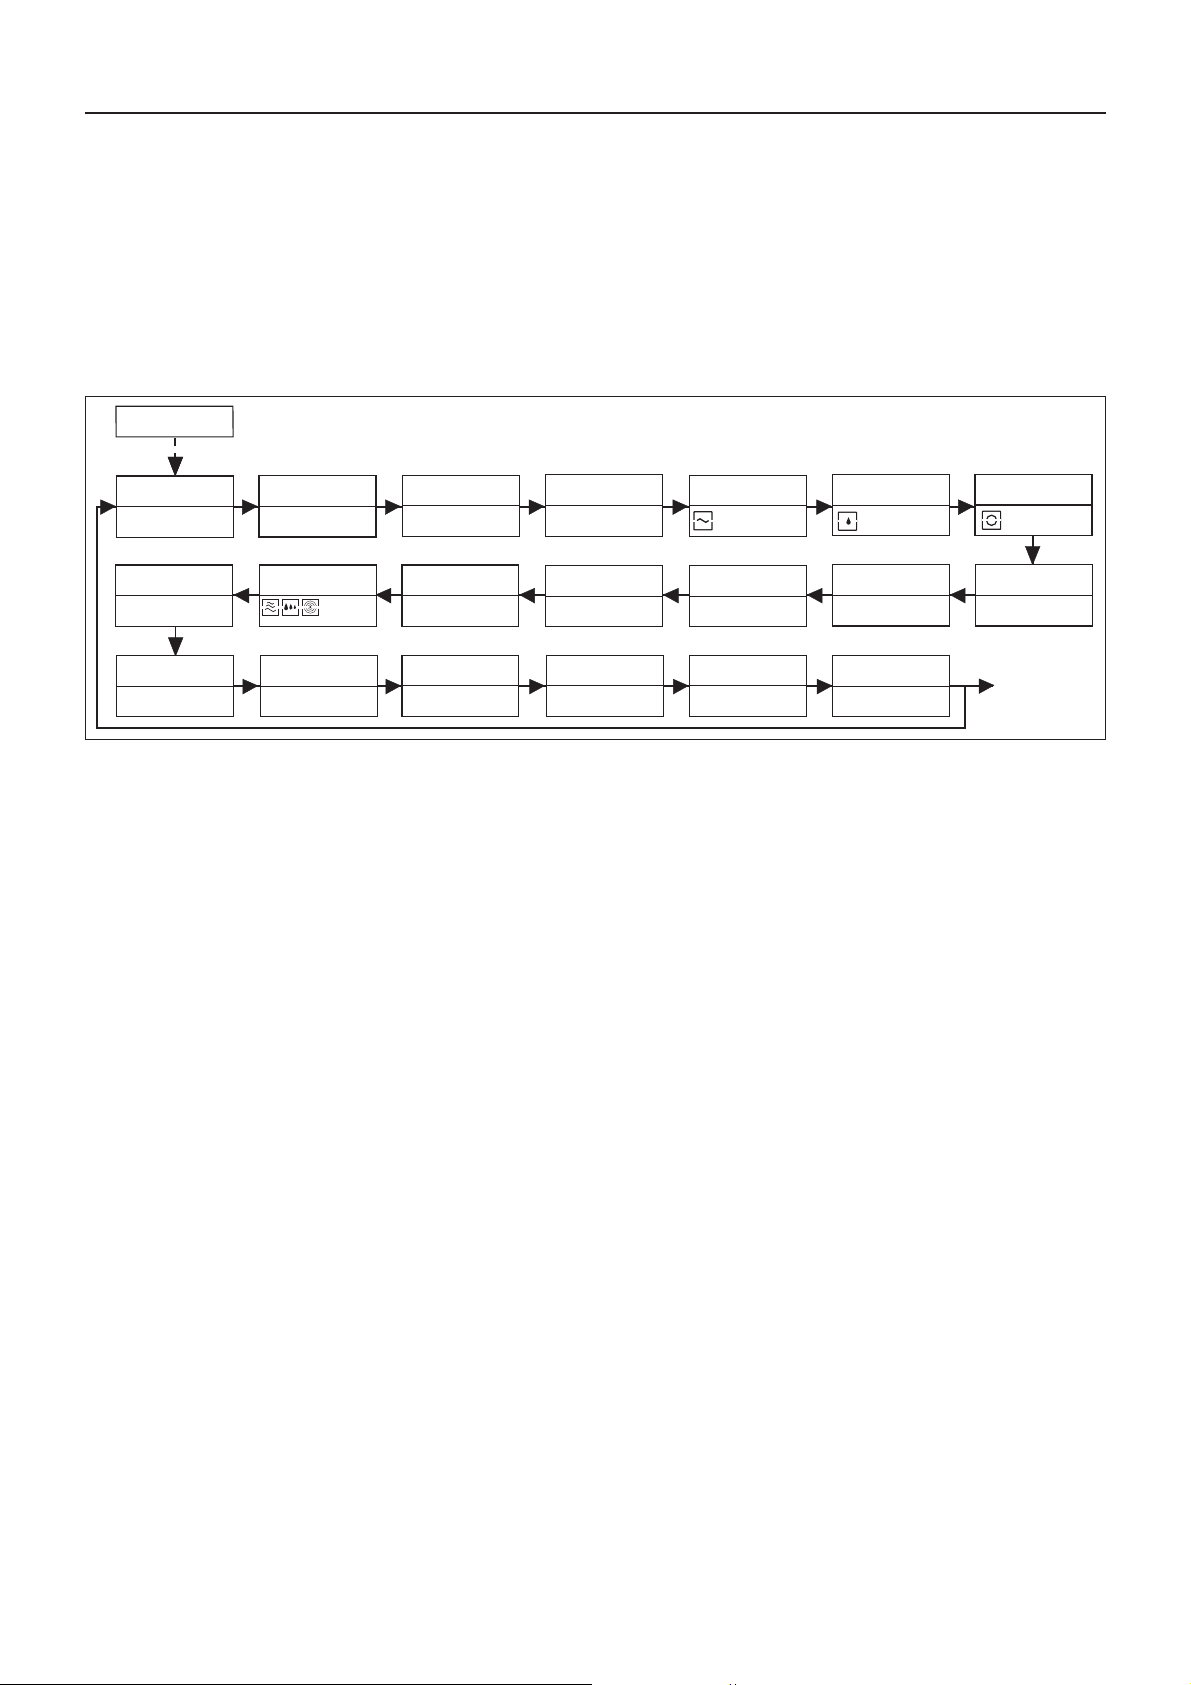
4.1 What is the menu?
The menu allows you to match your balance to your specific weighing needs. In the menu you can change the settings of
your balance and activate functions.
SECUrEd
1. Reset
rESEt
14. Peripheral unit
PrinTEr
15. Data transfer mode
S. off S. SICS
The menu contains 20 different options, each of which allows you various selection possibilities.
6. Weighing process
adapter
2
9. Weighing unit 2
Unit 2
20. Settings
2)
kg
3)
4)
2. Adjustment
FACT
13. Icons
on
16. Data transfer
4) 5)
format
3. Automatic adjustm.
1) 6)
call-up
Cal
InFo oFF
12. Power-up mode
Qu. STArT
3)
17. Bau rate
BD 2400
1)
2)
4. Function
F nonE
11. Autom. shutdown
ÅoFF -
3)
18. Parity/bit
7B-E LiST
5. Vibration adapter
2
10. Autozero
Å" on
19. Handshake
3)
HS oFF
7. Repeatability
6ood
8. Weighing unit 1
Unit 1
1)
g
1. Reset: Call-up of the factory setting.
2. Adjustment (calibration): Default settings for the type and testing of the adjustment (calibration).
3. Automatic adj. call-up 1) 6): Switch adjustment call-up to the display on or off.
4. Function 2): Preselec. of the func. you wish to have available in weighing operation at a keystroke.
5. Vibration adapter: Matching the balance to the ambient conditions.
6. Weighing process adapter: Matching the balance to different types of weighing.
7. Repeatability: Selection of the repeatability of the weighing results.
8. Weighing unit 1
1)
: Specification of the 1st weighing unit in which the balance should show the result.
9. Weighing unit 2 2): Specification of the 2nd weighing unit in which the balance should show the result.
10. Autozero: Switching the automatic zero correction (Autozero) on or off.
11. Automatic shutdown: Preselection of the time after which the balance should be switched off automatically.
12. Power-up mode 1): Start without or with display test.
13. Icons: On or off switching of the icons.
14. Peripheral unit 3): Attachment to a printer or host.
4)
15. Send commands
16. Send format
17. Baud rate
3)
: Matching the transfer speed.
: Selection of data transfer mode.
4) 5)
: Selection of data transfer format.
18. Parity/bit 3): Matching the character format.
19. Handshake 3): Transfer protocol
20. Settings: Saving or printing out all menu settings.
1)
With certified balances, these menu options have a fixed setting and can not be changed.
2)
With certified balances, only those weighing units/functions allowed by national weights and measures legislation can be selected.
3)
These menu options are shown only if your balance is equipped with an RS232C interface.
4)
These menu options are shown only if “HoSt” has been selected in menu option 14.
5)
These menu options are shown only if “S.oFF” has not been selected in menu option 15.
6)
This menu option is shown only if “FACT” or “CAL oFF” has not been selected in menu option 2.
Note: You will find a graphical overview of the entire menu with all setting possibi-lities in section 8.1.
The menu
19
4.2 Menu operation
In this section you will learn how to work with the menu. Information regarding the individual menu options and the
available settings can be found in the following sections.
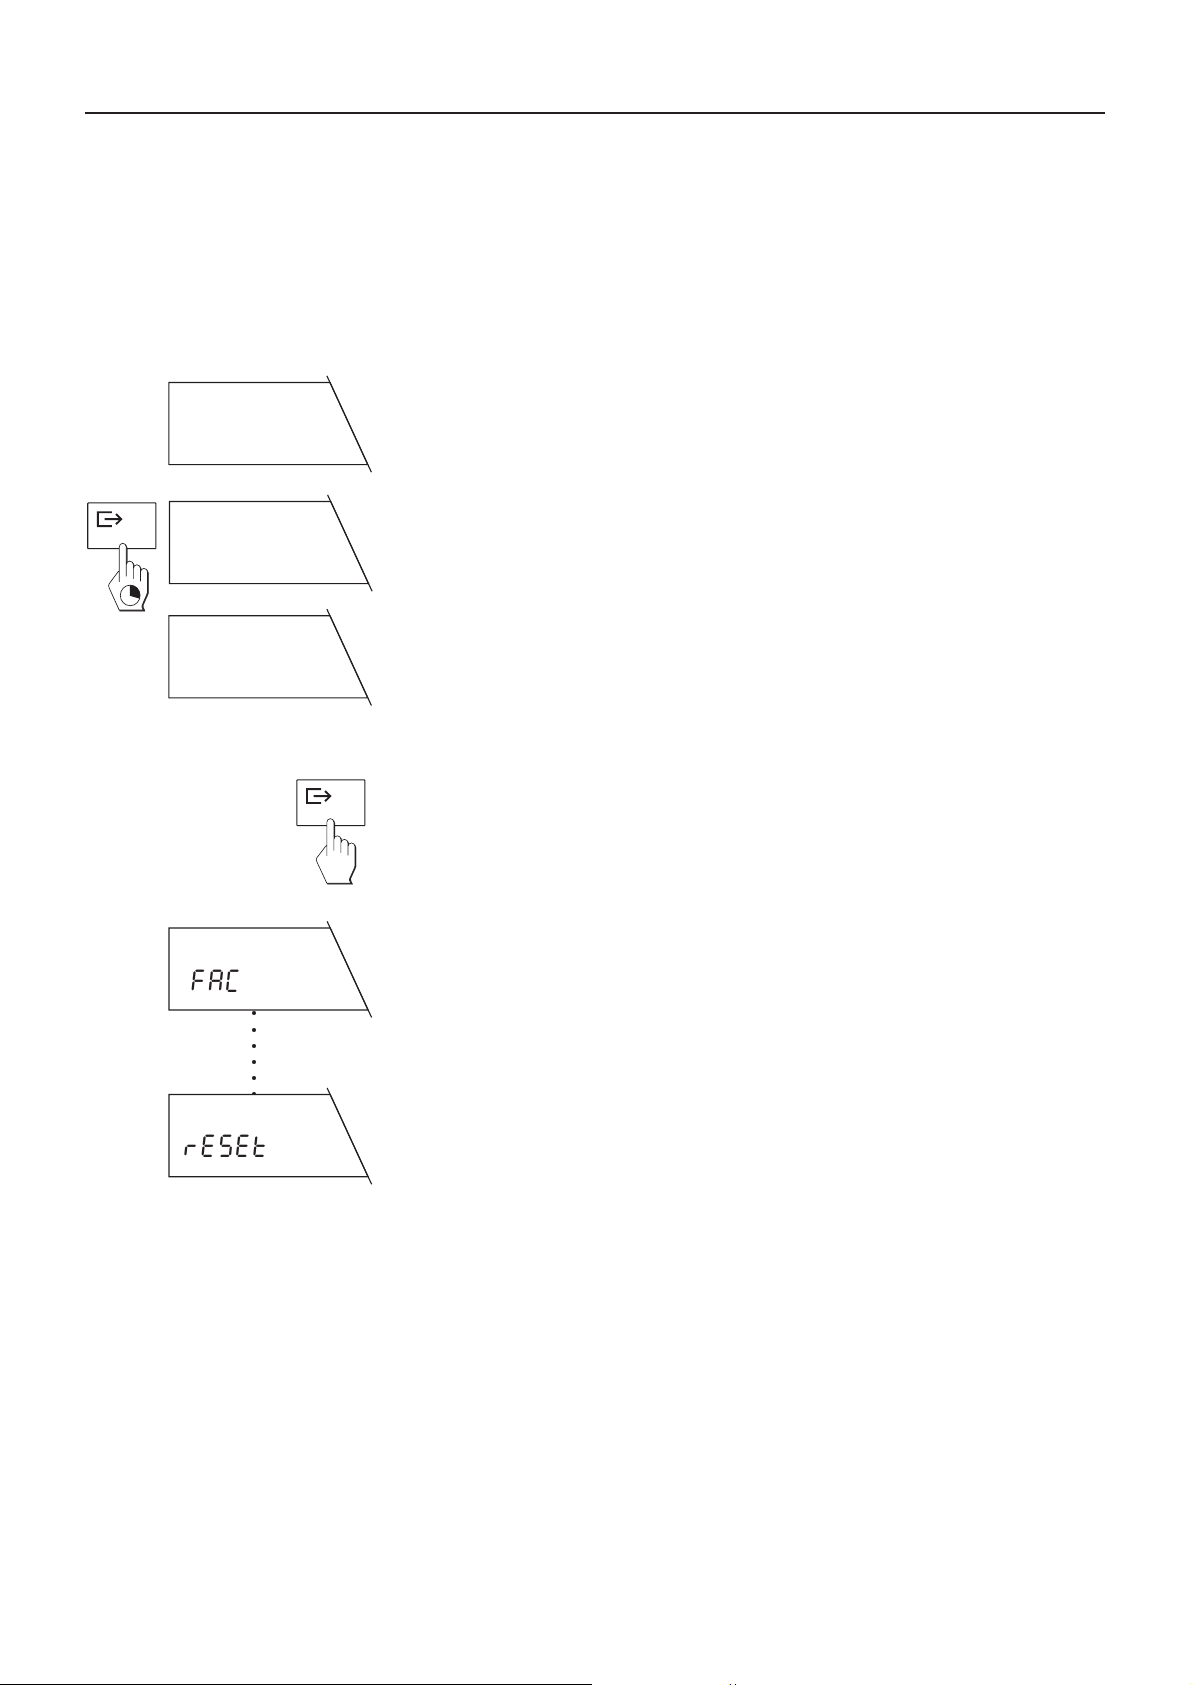
How to change from the weighing mode to the menu
The balance is operating in the normal weighing mode.
Menu
long
50"6
Ÿ≈ENU
rESEt
fACT
○○○○○○○○
g
Press the «Menu» key and keep it pressed until the balance switches to the menu.
After release of the «Menu» key, the balance shows the first option directly (“Reset”) with the current setting.
How to select the menu options
Press the «±» key briefly.
Menu
The next menu option appears in the display. Each time the «±» key is pressed, the balance switches to the following menu option.
rESEt
After the last menu option (“Settings”), the first menu option (“Reset”) is again
shown.

The menu
20
F
x times
Menu
Unit 1
Unit 1
Unit 1
StorEd
g
kg
kg
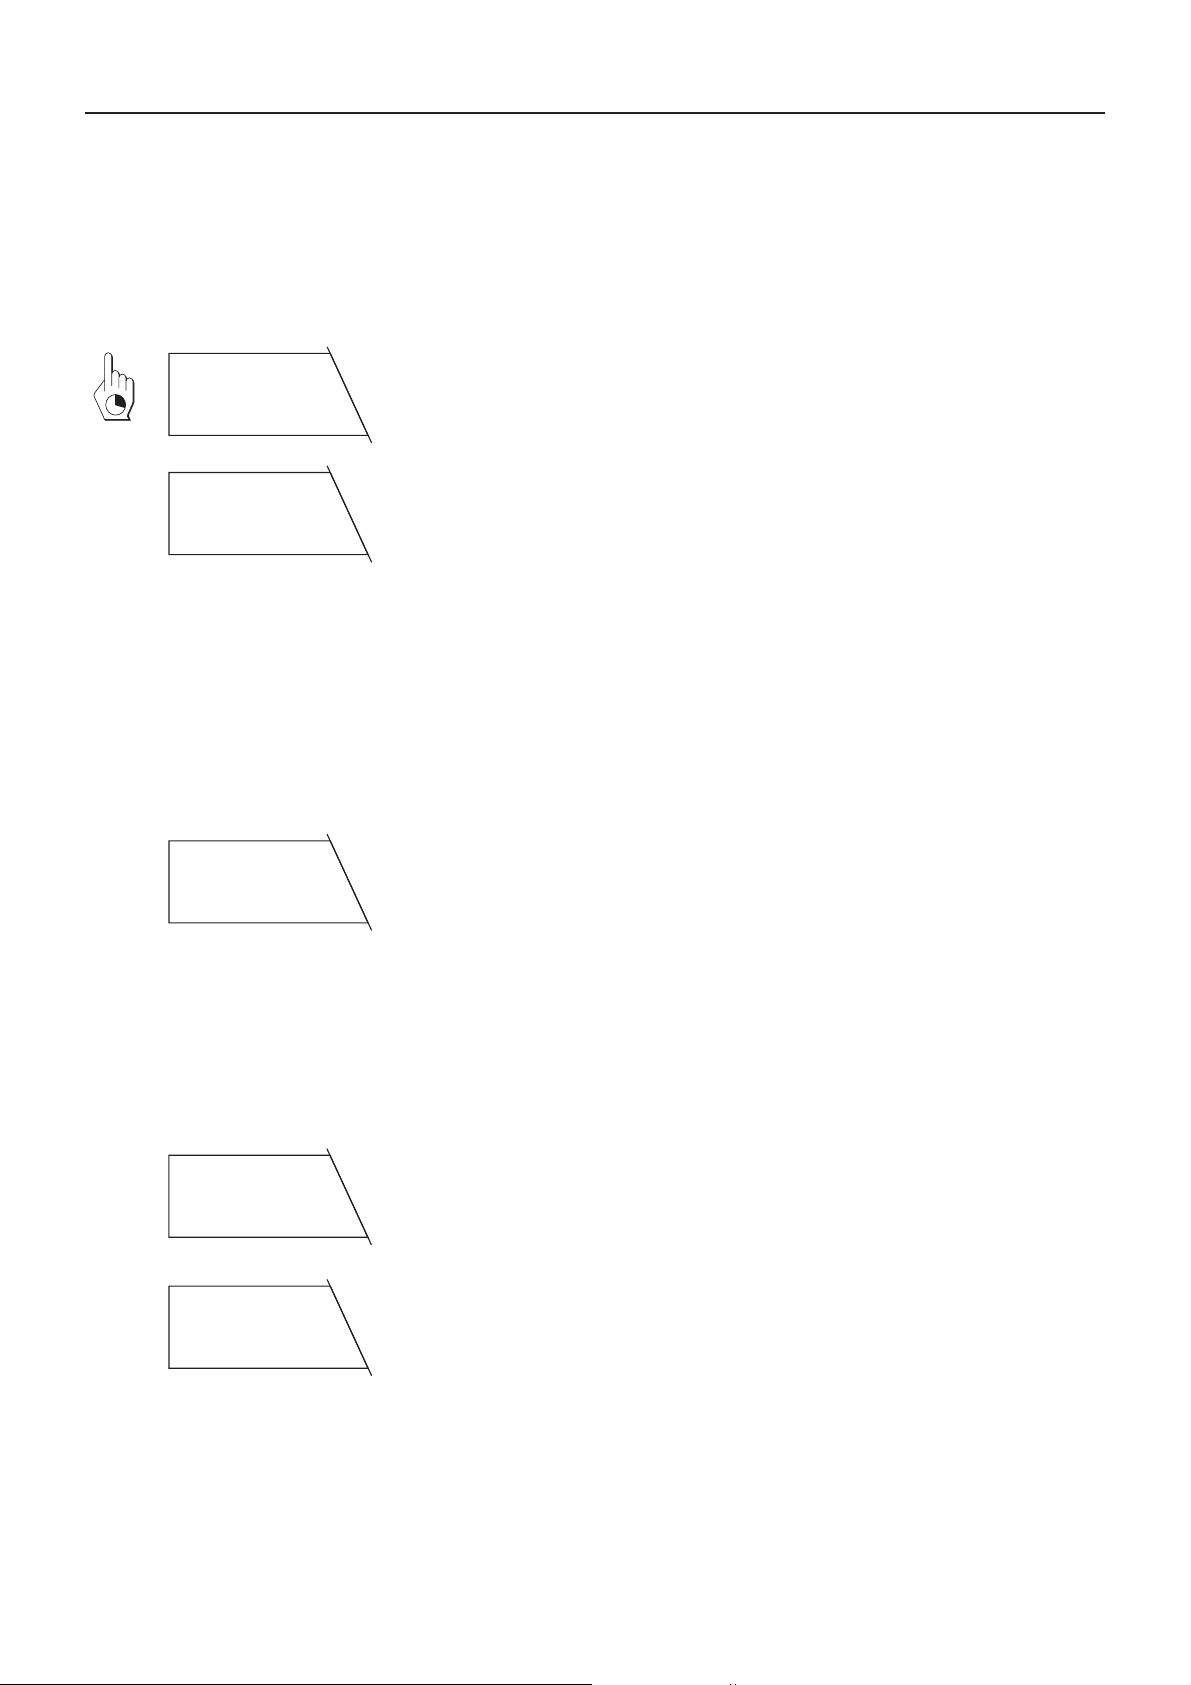
How to select the desired setting in a menu option
Press the «“» key briefly. The display shows the next setting available in the
selected menu option. Each time the «“» key is pressed, the balance switches
to the next setting. After the last setting, the first is again shown.
How to save your settings and quit the menu
After you have made all settings in the individual menu options, press the «Menu»
key and keep it pressed until the balance returns to the weighing mode.
Before the normal weighing result display reappears, the balance briefly confirms saving of the settings.
long
%026
kg
How to quit the menu without saving your settings
C
=0
g
By pressing the «C» key briefly (your attention is drawn to the termination by a
double beep), you can return to the weighing mode at any time without chan-
ging the stored settings.
If you do not press a key for 45 seconds, the balance automatically returns to
the weighing mode. Changes you have made in the menu are not saved!
4.3 Reset
In this menu option you have the possibility to reset all menu settings to the factory setting.
Resetting settings to factory setting
If you select this option and then save and quit the menu, all menu settings are
reset to the values set in the factory.
rESEt
long
Before the return to the weighing mode, the resetting is briefly confirmed in the
display.
r donE
4.4 Selection of the adjustment (calibration) and test function
The menu
21
Your balance can be adjusted (calibrated) with internal or external weights. The balance can also be checked by a test
with internal or external weights. If you have attached a printer to your balance, the data of the adjustment (calibration)
and the results of the test are printed out following GLP recommendations.
The following settings are available:
Fully automatic internal adjustment (calibration) FACT (Fully
fACT
Automatic Calibration Technology)
This is the factory setting. The balance adjusts (calibrates) itself fully automatically
– after the warm-up phase following connection to the power supply,
– when a change in the ambient conditions, e.g. the temperature could lead to
a noticeable measurement deviation,
– with certified balances, always independent of the settings in menu option
Adjustment.
Internal adjustment (calibration)
CAL int
Adjustment (calibration) is performed at a keystroke with the built-in weight.
UAr∫CAL
Adjustment (calibration) with external weights (VariCal)
Adjustment (calibration) is performed with a selectable* external weight.
* This function is blocked for certified balances.
 Loading...