

Page 1
English
Deutsch
Español
Français
Italiano
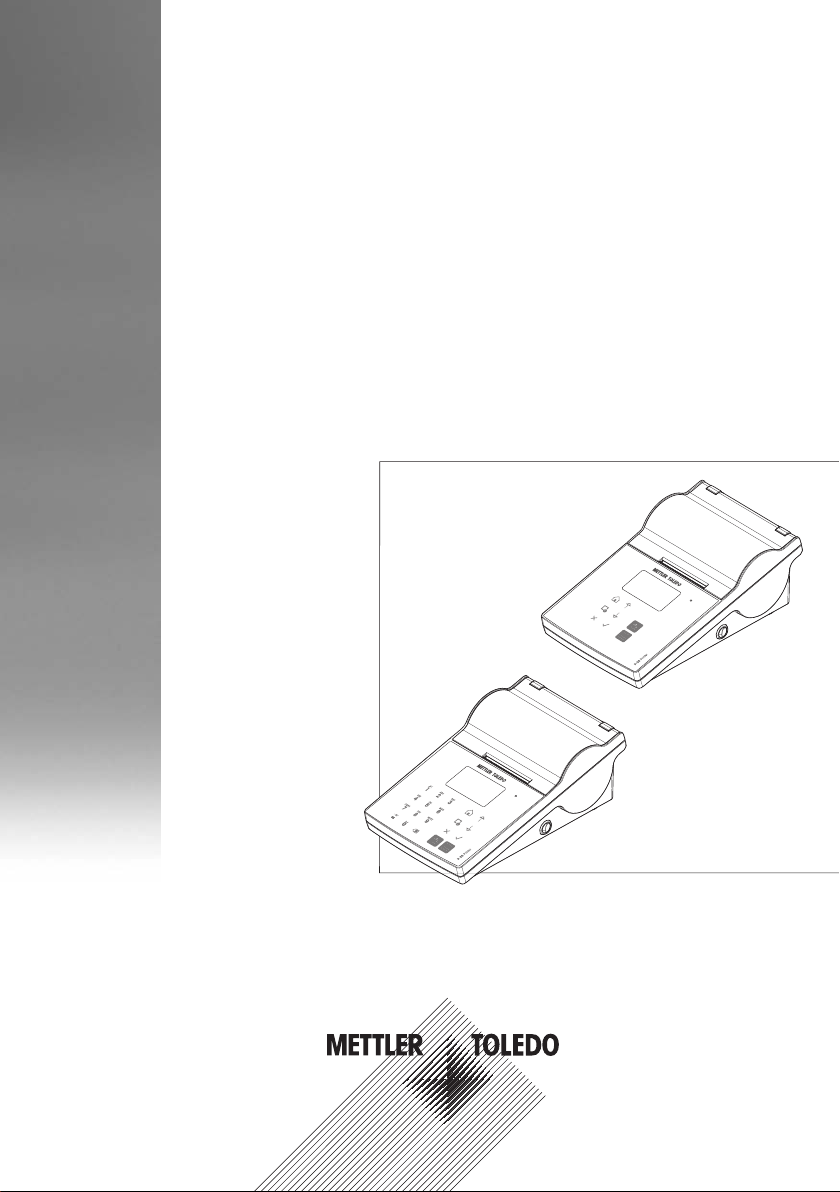
User Manual Printer P-56RUE, P-58RUE
Benutzerhandbuch Drucker P-56RUE, P-58RUE
Manual de usuario Impresora P-56RUE, P-58RUE
Guide de l'utilisateur Imprimante P-56RUE, P-58RUE
Manuale per l'utente Stampante P-56RUE, P-58RUE
中文
日本語
한국어
简明用户手册 打印机 P-56RUE, P-58RUE
ユーザマニュアル プリンタ P-56RUE, P-58RUE
사용자 매뉴얼 프린터 P-56RUE, P-58RUE
Page 2

Page 3
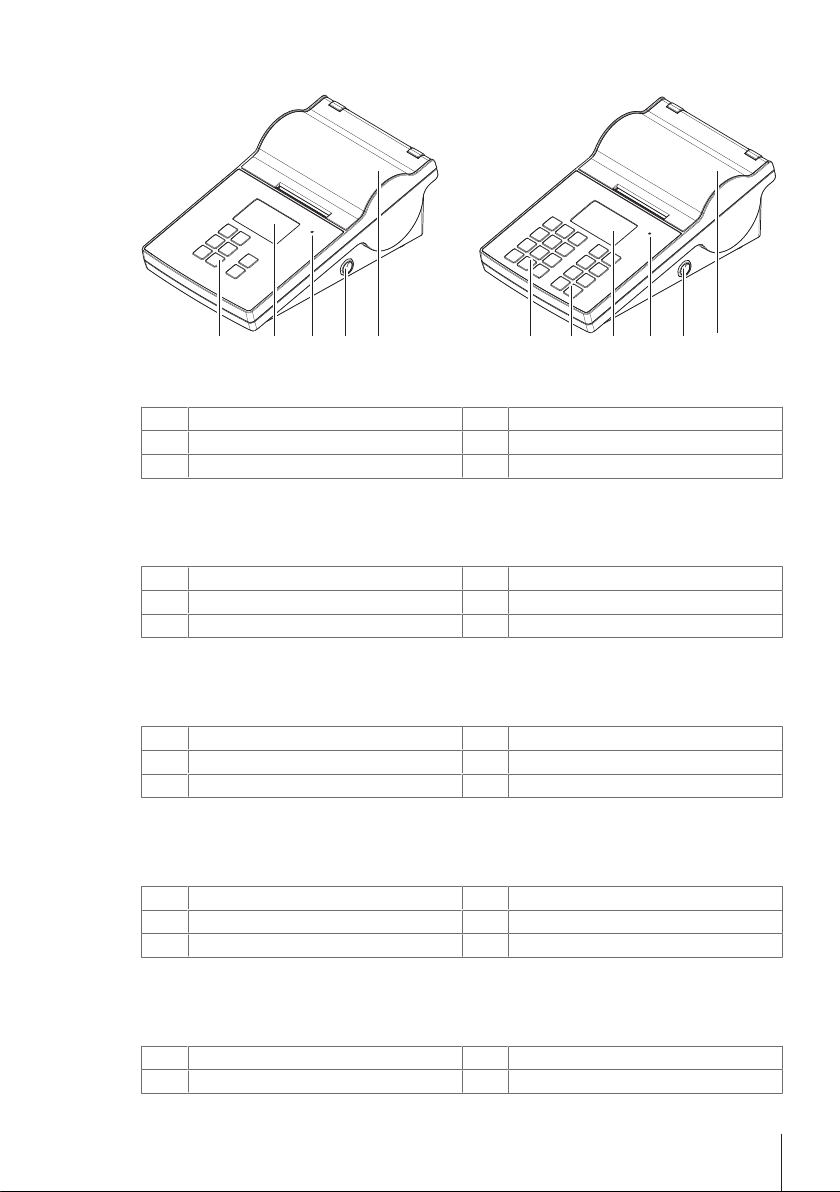
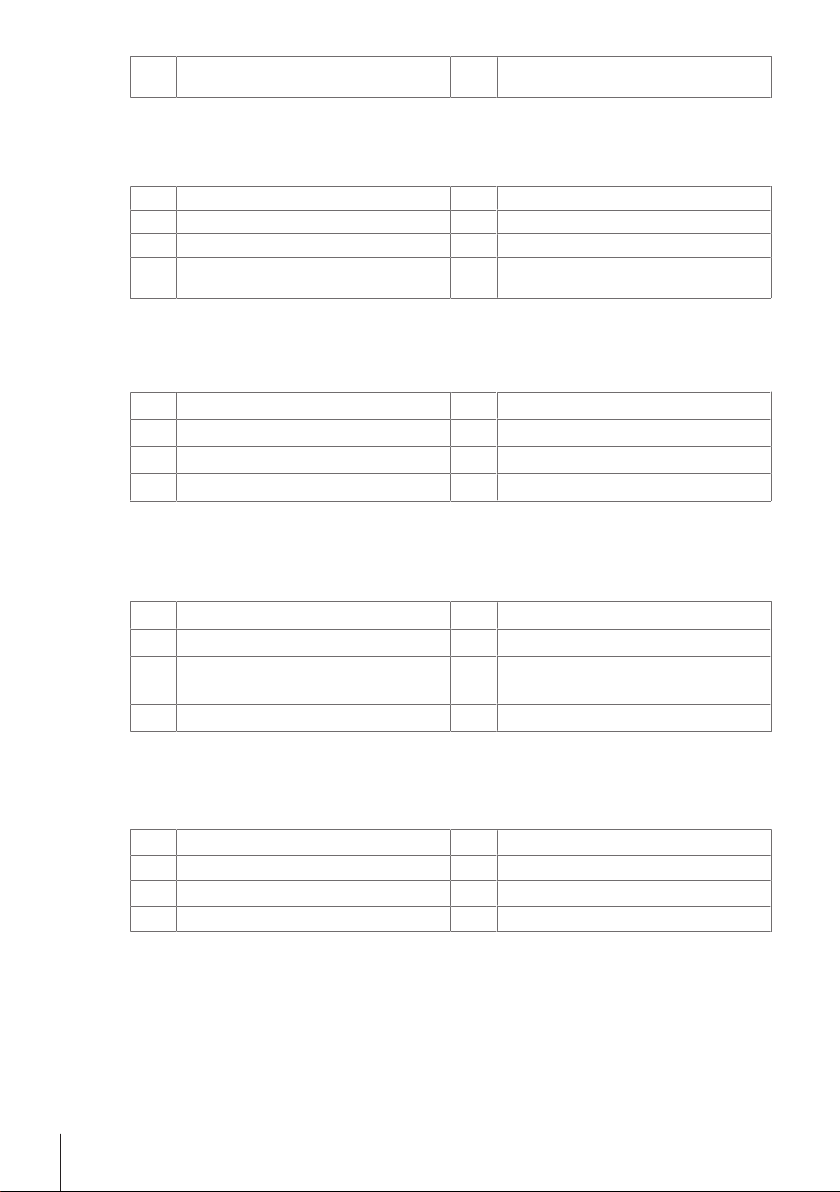
Overview
P-56RUE P-58RUE
2
3 4 5 6
1
3 4 5 6
2
Overview Table
Alphanumerical keys
1
General control keys
2
Display
3
Übersichtstabelle
Alphanumerische Tasten
1
AllgemeineSteuerungstasten
2
Anzeige
3
Triple status indicator
4
Power switch
5
Printer cover
6
Dreifach-Statusanzeige
4
Ein-/Ausschalter
5
Druckerabdeckung
6
Descripción general - Tabla
Teclas alfanuméricas
1
Teclas de control general
2
Pantalla
3
Tableau de présentation des éléments
Touches alphanumériques
1
Touches de commande générales
2
3
Affichage
Panoramica della tabella
Tasti alfanumerici
1
Tasti di controllo generale
2
4
5
6
4
5
6
4
5
Indicador de estado triple
Interruptor de alimentación
Cubierta de la impresora
Triple indicateur d'état
Interrupteur
Couvercle de l'imprimante
Triplo indicatore di stato
Interruttore di accensione
1
Page 4
3
概览表
1
2
3
要約表
1
2
3
개요 표
1
2
3
Display
字母数字键
常规控制键
显示屏
英数字キー
通常制御キー
ディスプレイ
영숫자 키
일반 제어 키
디스플레이
Coperchio della stampante
6
三色状态指示器
4
电源开关
5
打印机盖子
6
トリプルステータスインジケータ
4
電源スイッチ
5
プリンターカバー
6
3중 상태 표시기
4
전원 스위치
5
프린터 커버
6
2
Page 5
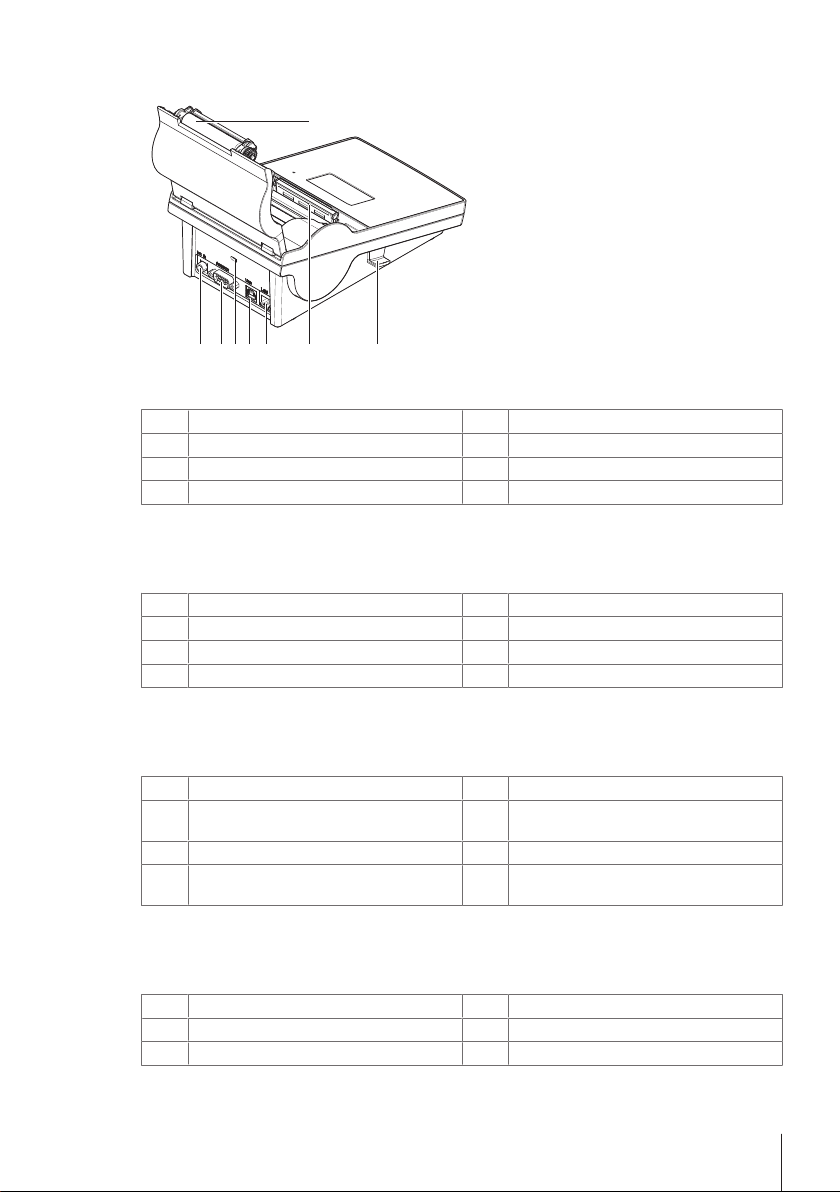
Overview
2 3 4 5 6 7 8
1
Overview Table
Platen roller
1
Socket for AC adapter
2
RS232 serial interface (9-pin)
3
Anti-theft slot
4
Übersichtstabelle
Druckrolle
1
Anschluss für Netzadapter
2
RS232 serielle Schnittstelle (9-polig)
3
Diebstahlsicherung
4
USB device connection
5
Ethernet RJ45 connection
6
Thermal printhead
7
Handler to open the printer cover
8
USB-Geräteanschluss
5
Ethernet RJ45-Anschluss
6
Thermodruckkopf
7
Hebel zum Öffnen der Druckerabdeckung
8
Descripción general - Tabla
Rodillo de la platina
1
Toma para el adaptador de corriente alterna
2
(AC)
Interfaz en serie RS232 (9 pines)
3
Ranura antirrobo
4
Tableau de présentation des éléments
Rouleau plat
1
Prise pour adaptateur secteur
2
Interface série RS232 (9broches)
3
Conexión para dispositivo USB
5
Conexión Ethernet RJ45
6
Cabezal de impresión térmico
7
Manipulador para abrir la cubierta de la im-
8
presora
Raccordement du périphérique USB
5
Connexion Ethernet RJ45
6
Tête d'impression thermique
7
3
Page 6
Fente antivol
4
Panoramica della tabella
Rullo del piatto
1
Manicotto per adattatore CA
2
Interfaccia seriale RS232 (9 poli)
3
Foro antifurto
4
概览表
压纸滚轴
1
交流适配器插槽
2
RS232串行接口(9针脚)
3
防盗槽
4
要約表
プラテンローラー
1
AC アダプタ接続端子
2
RS232シリアルインターフェイス(9ピ
3
ン)
盗難防止スロット
4
Bouton de déblocage pour ouvrir le cou-
8
vercle de l'imprimante
Connessione dispositivo USB
5
Connessione Ethernet RJ45
6
Testina di stampa termica
7
Manipolatore per aprire il coperchio della
8
stampante
USB设备连接
5
以太网RJ45连接
6
热敏打印头
7
用于打开打印机盖子的手柄
8
USB デバイス接続
5
イーサネットRJ45接続
6
サーマルプリントヘッド
7
プリンタカバーを開けます
8
개요 표
압반 롤러
1
AC 어댑터용 소켓
2
RS232 시리얼 인터페이스(9핀)
3
도난 방지 슬롯
4
4
USB 장치 연결부
5
Ethernet RJ45 연결
6
감열 프린트헤드
7
프린터 커버를 열기 위한 핸들러
8
Page 7
Overview
P-56 Printer
P-58 Printer
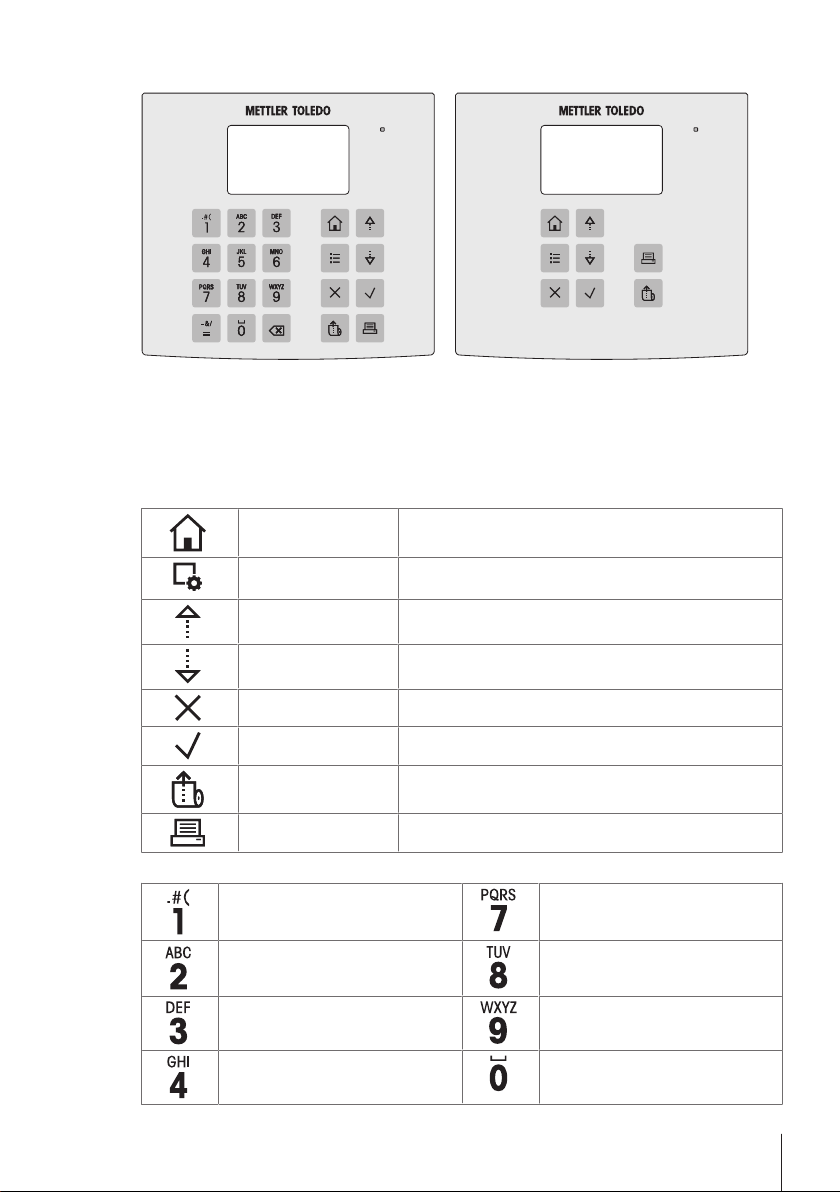
Overview Table
General Control keys
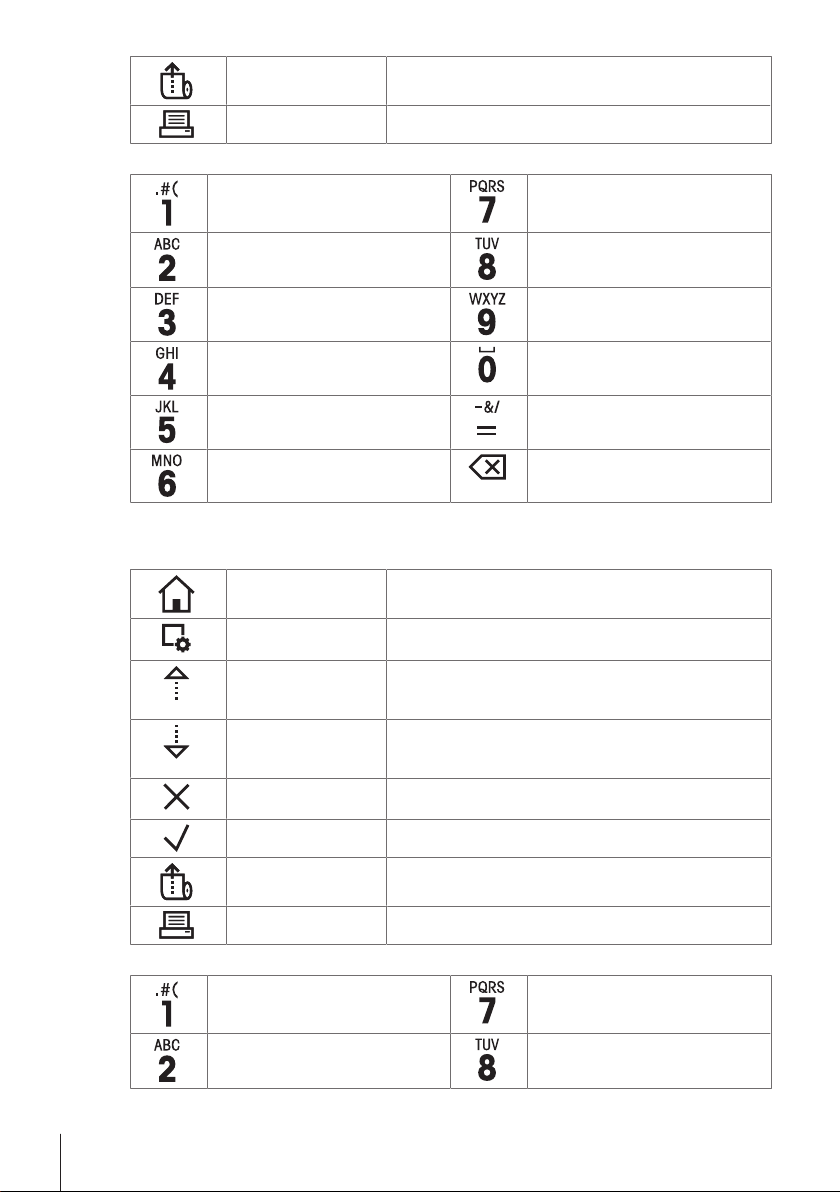
Home key To return to the printer home screen.
Menu key
Scroll up key To scroll up through a list or to move the curser to the left in a
Scroll down key To scroll down through a list or to move the curser to the right
Cancel key To cancel a running process/application or the last step.
Confirmation key To confirm the current selection.
Paper feed key To feed the paper.
Print key To print parameters or weighing results.
Alphanumerical keys (P-58RUE)
1 . # ( ) , : 7 P Q R S p q r s
2 A B C a b c 8 T U V t u v
3 D E F d e f 9 W X Y Z w x y z
4 G H I g h i 0 ˽
To open the section Settings (P-56RUE).
To open the section Main menu (P-58RUE).
string or number entry screen.
in a string or number entry screen.
5
Page 8
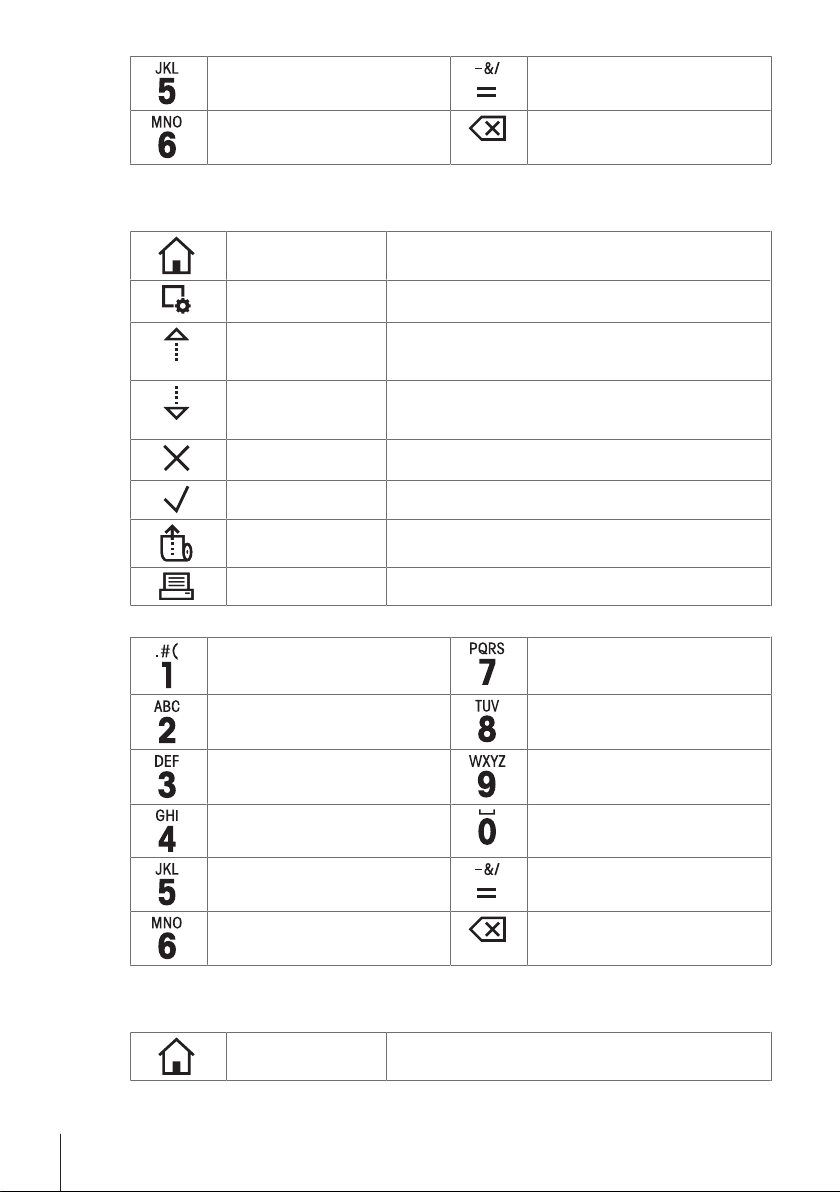
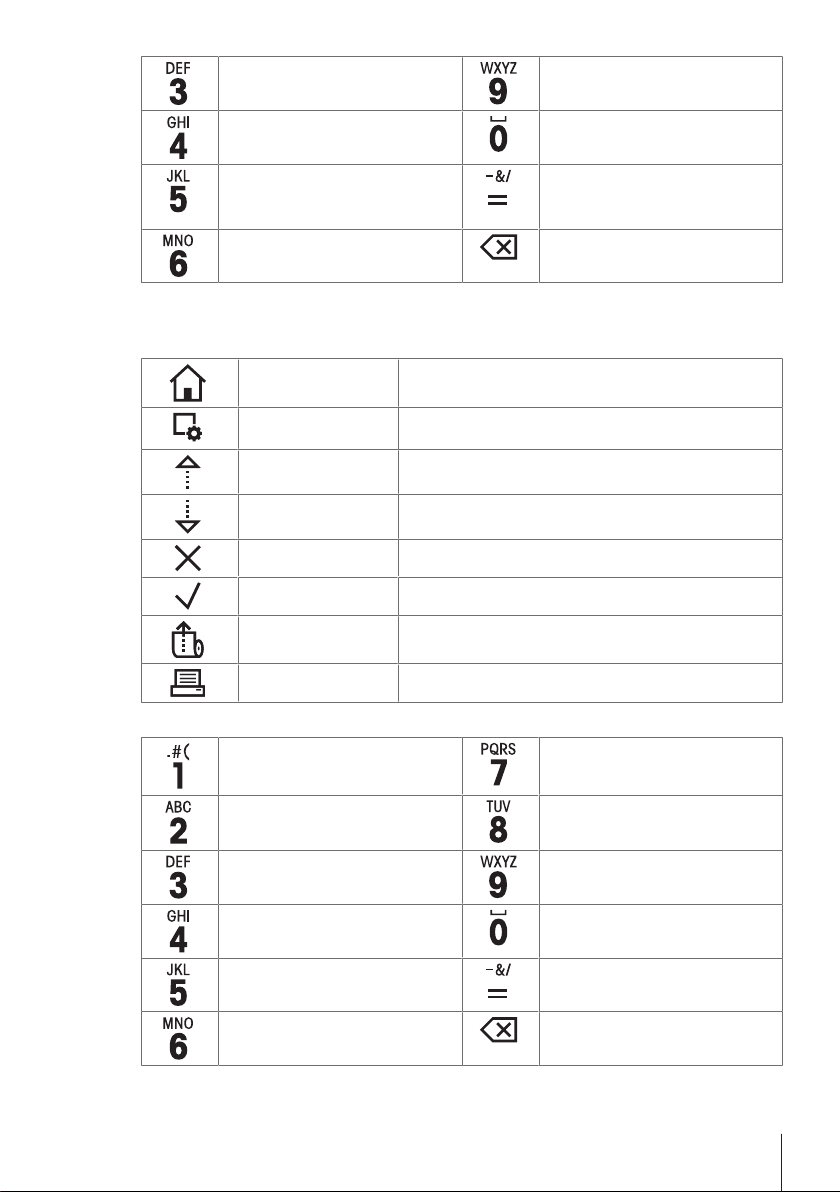
5 J K L j k l = - & / + * @ %
6 M N O m n o Delete key
Übersichtstabelle
Allgemeine Steuerungstasten
Home-Taste Zurück zum Homescreen des Druckers
Last entry recall of ID
To delete the last character.
Menütaste
Scroll up-Taste Aufwärtsscrollen durch eine Liste oder Positionierung des
Scroll down-Taste Abwärtsscrollen durch eine Liste oder Positionierung des
Abbrechen-Taste Abbrechen eines laufenden Prozesses/einer Anwendung oder
Bestätigungstaste Bestätigen der aktuellen Auswahl.
Papierzufuhr-Taste Zufuhr des Papiers
Drucken-Taste Ausdrucken von Parametern oder Wägeergebnissen.
Alphanumerische Tasten (P-58RUE)
1 . # ( ) , : 7 P Q R S p q r s
2 A B C a b c 8 T U V t u v
3 D E F d e f 9 W X Y Z w x y z
4 G H I g h i 0 ˽
5 J K L j k l = - & / + * @ %
6 M N O m n o Löschen-Taste
Öffnen des Menübereichs Einstellungen (P-56RUE)
Öffnen des Menübereichs Hauptmenü (P-58RUE)
Cursors nach links in einer Zeichenfolge oder einem
Zahleneingabebildschirm.
Cursors nach rechts in einer Zeichenfolge oder einem
Zahleneingabebildschirm.
des letzten Schrittes
Abruf der ID bei letzter Eingabe.
Löschen des letzten Zeichens.
Descripción general - Tabla
Teclas de control general
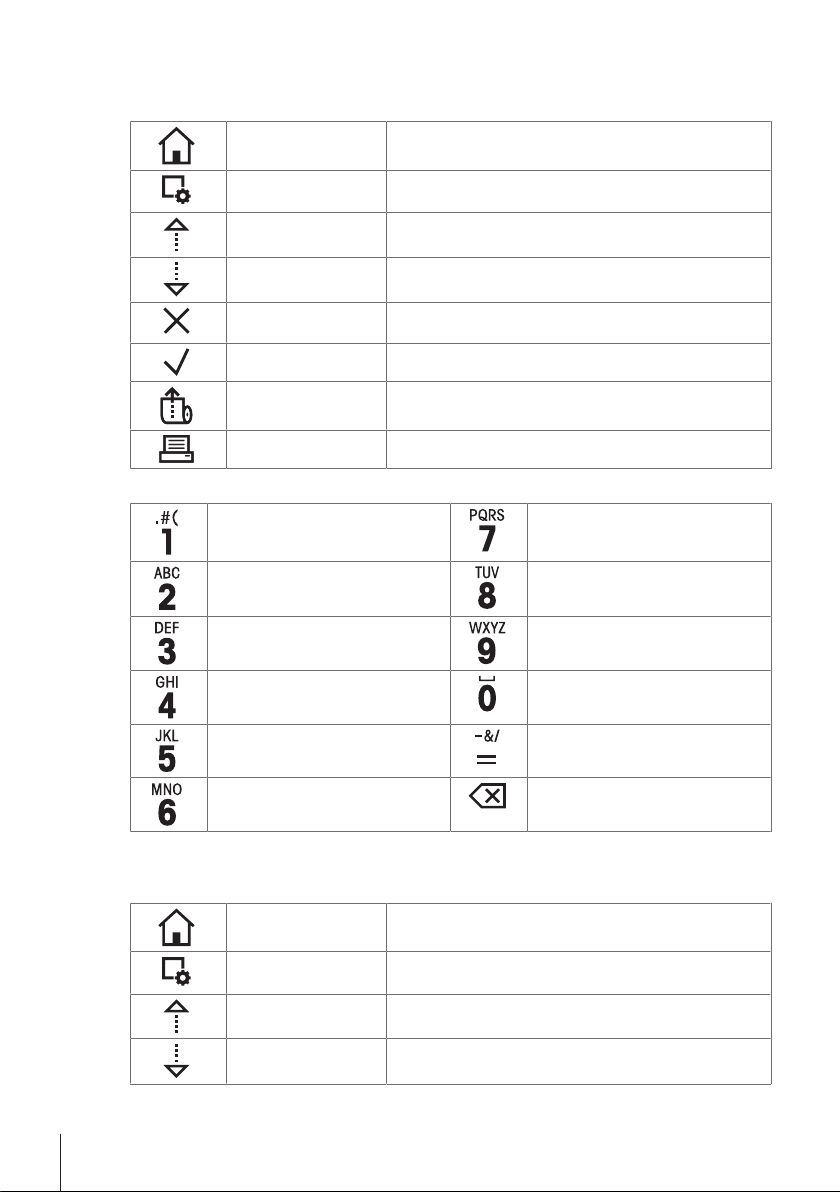
Tecla de inicio Para volver a la pantalla de inicio de la impresora.
6
Page 9
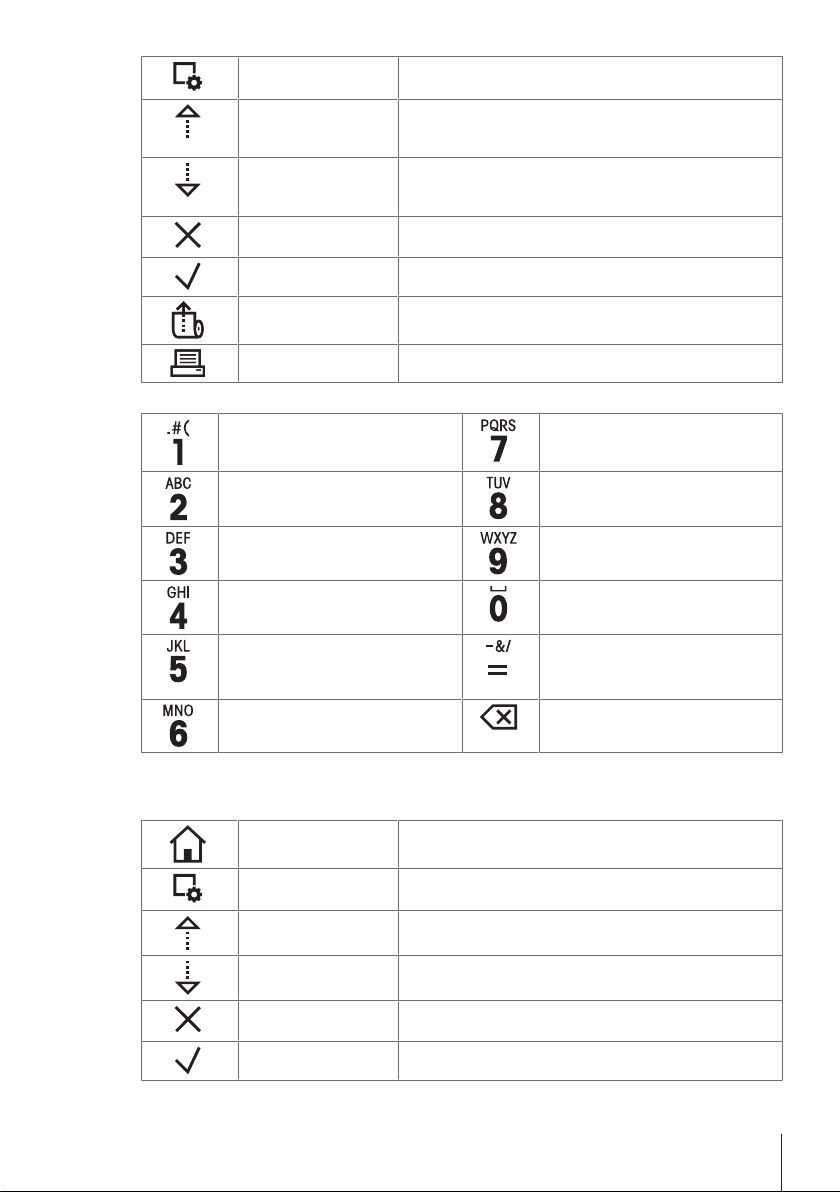
Tecla Menú
Tecla de desplazamiento
hacia arriba
Tecla de desplazamiento
hacia abajo
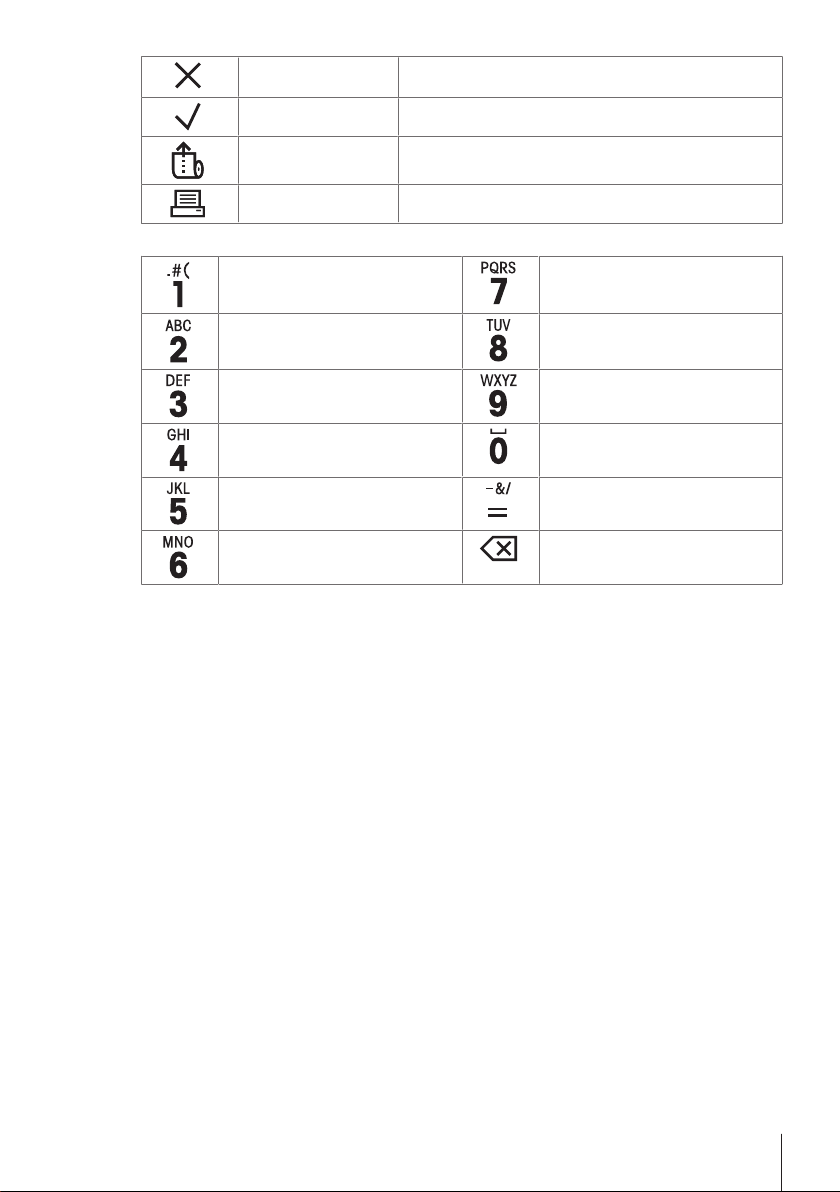
Tecla Cancelar Para cancelar un proceso/aplicación en ejecución o el último
Tecla de confirmación Para confirmar la selección actual.
Para abrir el apartado Configuraciones (P-56RUE).
Para abrir el apartado Menú principal (P-58RUE).
Para desplazarse hacia arriba en una lista o para mover el
cursor hacia la izquierda en una pantalla de introducción de
cadenas de datos o números.
Para desplazarse hacia abajo en una lista o para mover el
cursor hacia la derecha en una pantalla de introducción de
cadenas de datos o números.
paso.
Tecla de alimentación de
papel
Tecla Imprimir Para imprimir parámetros o resultados de pesajes.
Para suministrar papel.
Teclas alfanuméricas (P-58RUE)
1 . # ( ) , : 7 P Q R S p q r s
2 A B C a b c 8 T U V t u v
3 D E F d e f 9 W X Y Z w x y z
4 G H I g h i 0 ˽
5 J K L j k l = - & / + * @ %
6 M N O m n o Tecla Eliminar
Tableau de présentation des éléments
Touches de commande générales
Touche Accueil Revenir à l'écran d'accueil de l'imprimante.
Touche Menu
Touche de défilement
vers le haut
Touche de défilement
vers le bas
Touche Annuler Annuler un procédé/une application en cours ou la dernière
Toucher de confirmation Confirmer la sélection en cours.
Ouvrir la section Paramètres (P-56RUE).
Ouvrir la section Menu principal (P-58RUE).
Faire défiler une liste vers le haut ou déplacer le curseur vers la
gauche dans une chaîne ou sur l'écran de saisie de nombre.
Faire défiler une liste vers le bas ou déplacer le curseur vers la
droite dans une chaîne ou sur l'écran de saisie de nombre.
étape.
Recuperación de la última identificación introducida
Para eliminar el último carácter.
7
Page 10
Touche d'alimentation
papier
Touche Imprimer Imprimer les paramètres ou les résultats de pesée.
Touches alphanumériques (P-58RUE)
1 . # ( ) , : 7 P Q R S p q r s
2 A B C a b c 8 T U V t u v
3 D E F d e f 9 W X Y Z w x y z
4 G H I g h i 0 ˽
5 J K L j k l = - & / + * @ %
6 M N O m n o Toucher Effacer
Panoramica della tabella
Tasti di controllo generale
Tasto Pagina iniziale Per tornare alla schermata principale della stampante.
Alimenter l'imprimante en papier.
Rappel de l'ID de la dernière saisie
Effacer le dernier caractère.
Tasto Menu
Tasto di scorrimento
verso l'alto
Tasto di scorrimento
verso il basso
Tasto Annulla Per annullare un processo/un'applicazione in corso o l'ultima
Tasto di conferma Per confermare la selezione attuale.
Tasto alimentazione
carta
Tasto Stampa Per stampare i parametri o i risultati di pesata.
Per aprire la sezione Impostazioni (P-56RUE).
Per aprire la sezione Menù principale (P-58RUE).
Per scorrere verso l'alto in un elenco o per spostare il cursore
a sinistra in una stringa o in una schermata di inserimento
numerico.
Per scorrere verso il basso in un elenco o per spostare il
cursore a destra in una stringa o in una schermata di inserimento numerico.
operazione effettuata.
Per alimentare la carta.
Tasti alfanumerici (P-58RUE)
1 . # ( ) , : 7 P Q R S p q r s
2 A B C a b c 8 T U V t u v
8
Page 11
概览表
常规控制键
3 D E F d e f 9 W X Y Z w x y z
4 G H I g h i 0 ˽
5 J K L j k l = - & / + * @ %
Per richiamare l'ultimo valore di ID
inserito
6 M N O m n o Tasto Elimina
Per eliminare l'ultimo carattere inserito.
主页键 返回打印机主屏幕。
菜单键
向上滚动按键 在列表中向上滚动,或者将光标移至字符串或数字输入
向下滚动按键 在列表中向下滚动,或者将光标移至字符串或数字输入
取消键 取消正在进行的过程/应用程序或者最后一步。
确认键 确认当前选择。
进纸按键 进纸。
打印键 打印参数或称量结果。
字母数字键(P-58RUE)
1 . # ( ) , : 7 P Q R S p q r s
2 A B C a b c 8 T U V t u v
3 D E F d e f 9 W X Y Z w x y z
4 G H I g h i 0 ˽
5 J K L j k l = - & / + * @ %
6 M N O m n o 删除键
打开设置章节(P-56RUE)。
打开主菜单章节(P-58RUE)。
屏幕左侧。
屏幕右侧。
回显上次输入的ID
删除末尾字符。
9
Page 12
要約表
通常制御キー
ホームキー ホーム画面に戻ります
メニューキー
スクロープアップキー文字列または数字の入力画面でリストをスクロールア
スクロープダウンキー文字列または数字の入力画面でリストをスクロールダ
キャンセルキー 実行中のプロセス/アプリケーションまたは最後のステ
確認キー 現在の選択を確定する。
給紙キー 紙を補給する。
印刷キー パラメーターまたは計量結果を印字する。
英数字キー (P-58RUE)
1 . # ( ) , : 7 P Q R S p q r s
2 A B C a b c 8 T U V t u v
3 D E F d e f 9 W X Y Z w x y z
4 G H I g h i 0 ˽
5 J K L j k l = - & / + * @ %
6 M N O m n o 削除キー
設 定セクションを開く(P-56RUE)
Main menuセクションを開く(P-58RUE)
ップするかカーソルを左に移動します。
ウンするかカーソルを右に移動します。
ップをキャンセルします。
直前に入力されたIDの呼び出し
最後の文字を削除します。
10
개요 표
일반 제어 키
홈 키 프린터 홈 화면으로 돌아가기.
메뉴 키
스크롤 업 키 목록을 스크롤 업하거나 문자열 또는 숫자 입력 화면에
스크롤 다운 키 목록을 스크롤 다운하거나 문자열 또는 숫자 입력 화면
섹션 설정 열기(P-56RUE).
섹션 주메뉴 열기(P-58RUE).
서 커서를 왼쪽으로 이동하기.
에서 커서를 오른쪽으로 이동하기.
Page 13
취소 키 실행 중인 프로세스/어플리케이션 또는 마지막 단계 취
확인 키 현재 선택 항목을 확인하기.
용지 급지 키 용지 급지하기.
프린트 키 파라미터 또는 계량 결과 인쇄하기.
영숫자 키(P-58RUE)
1 . # ( ) , : 7 P Q R S p q r s
2 A B C a b c 8 T U V t u v
3 D E F d e f 9 W X Y Z w x y z
4 G H I g h i 0 ˽
5 J K L j k l = - & / + * @ %
6 M N O m n o 삭제 키
소하기.
마지막 입력 ID 호출
마지막 문자 삭제하기.
11
Page 14
1 Safety Information
• Read and understand the information in this User Manual before you use the instrument.
• Keep this User Manual for future reference.
• Include this User Manual if you pass on the instrument to other parties.
If the instrument is not used according to the information in the Operating Instructions or if it is modified, the
safety of the instrument may be impaired and Mettler-Toledo GmbH assumes no liability.
Finding more information
Additional information about this printer can be found in the Operating Instructions on the CDROM or online.
1.1 Definition of signal warnings and symbols
Safety notes are marked with signal words and warning symbols. Ignoring the safety notes may lead to
personal injury, damage to the instrument and malfunctions.
WARNING
CAUTION
NOTICE
Note
General hazard Electrical shock Hot surface
1.2 Product specific safety notes
General Safety Information
Your instrument corresponds to the state of the art technology and complies with all recognized safety rules,
however, certain hazards may arise in extraneous circumstances. Do not open the housing of the
instrument: It does not contain any parts which can be maintained, repaired or replaced by the user. If you
ever have problems with your instrument, contact your authorized METTLER TOLEDO dealer or service representative.
This printed document must be read and understood before using the instrument. This printed document
must be retained for future reference.
Always operate and use your instrument only in accordance with the instructions contained in this
document. The instructions for setting up your new instrument must be strictly observed.
If the instrument is not used according to the Operating Instructions, protection of the instrument may
be impaired and METTLER TOLEDO assumes no liability.
The instrument must not be altered or modified in any way. Only use METTLER TOLEDO original spare parts
and accessories.
Safety Notes
for a hazardous situation with medium risk, possibly resulting in death or severe
injury if not avoided.
for a hazardous situation with low risk, resulting in minor or moderate injury if not
avoided.
for a hazardous situation with low risk, resulting in damage to the instrument, other
material damage, malfunctions and erroneous results, or loss of data.
(no symbol)
for useful information about the product.
WARNING
Risk of electric shock
1 Do not open the AC adapter housing. Make sure that the AC adapter does not come in
contact with liquids.
2 Use only the 3-pin power cable with equipment grounding conductor which was supplied
with your instrument and only a 3-pin grounded outlet must be used.
Safety Information12 Printer
Page 15

NOTICE
Data Loss
Continuous printing can lead to a overheating of the print head. The printing process stops
until the print head has cooled down. During this cooling down phase the printer must not be
switched off, otherwise the buffer data will be lost.
Operating conditions
• The printer must be used in dry interior rooms only.
For the ambient conditions see General technical Data.
• The printer should be acclimated to room temperature.
• The printer should not be used in the presence of humidity and liquids.
en
Safety Information 13Printer
Page 16
2 Installation and Putting into Operation
Finding more information
Additional information about this printer can be found in the Operating Instructions on the CDROM or online.
2.1 Scope of delivery
The following accessories are part of the equipment:
• P-56RUE or P-58RUE thermal printer
• Set of paper rolls
• Universal AC adapter
• Country-specific power cable
• USB cable
• RS232 cable
• User Manual
• Declaration of conformity
• CD-ROM (containing documents in different languages, software and drivers)
2.2 Connecting the printer to the power supply
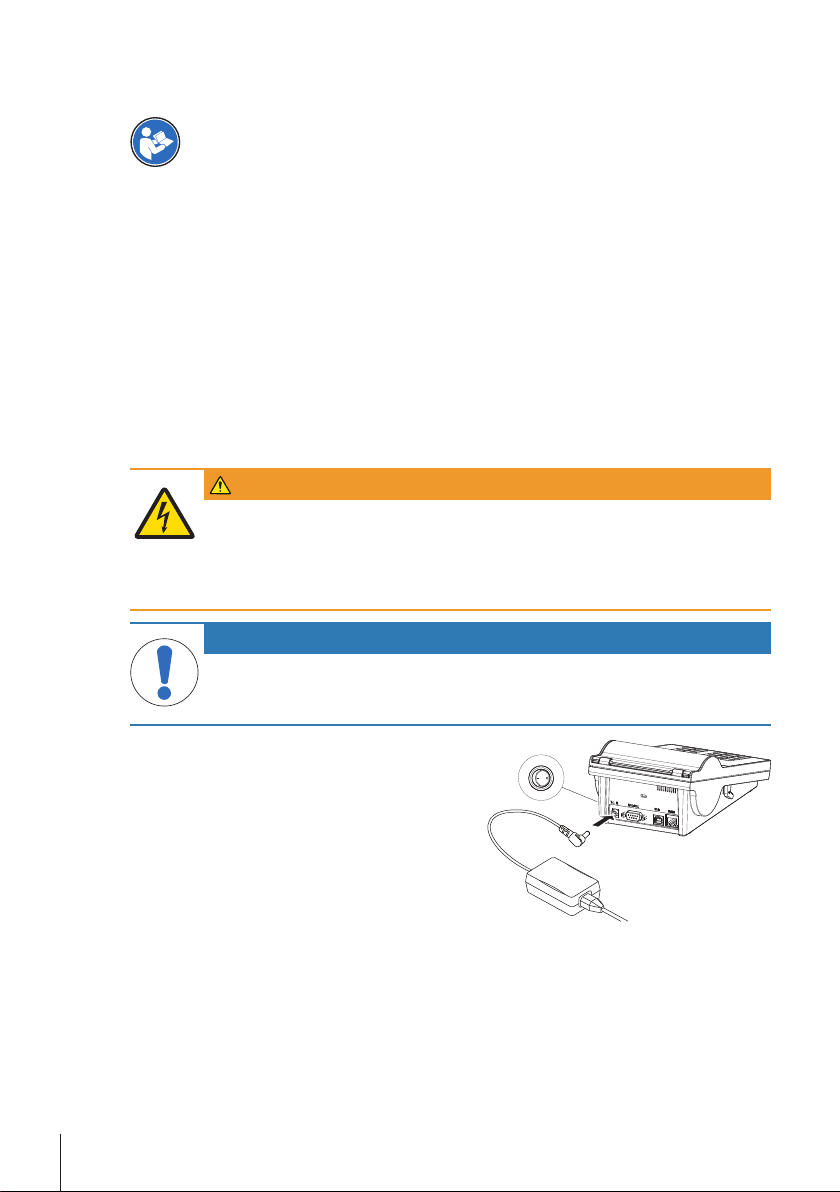
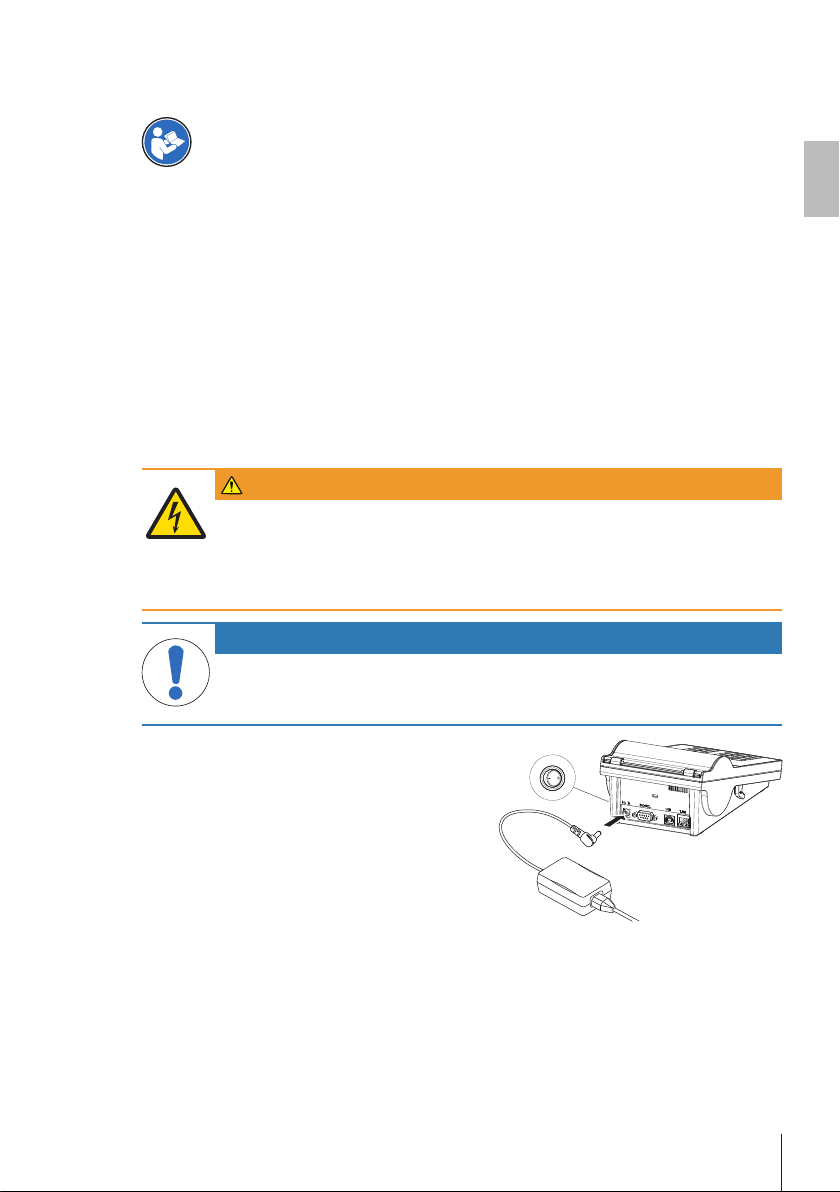
WARNING
Risk of electric shock
1 Do not open the AC adapter housing. Make sure that the AC adapter does not come in
contact with liquids.
2 Use only the 3-pin power cable with equipment grounding conductor which was supplied
with your instrument and only a 3-pin grounded outlet must be used.
NOTICE
Use only the original AC adapter delivered with your printer.
− Do not try to use this AC adapter for other METTLER TOLEDO instruments, otherwise they
could be damaged.
1 Connect the AC adapter to the connection socket on
the back of the printer.
2 Lock the connector with the screw nut.
3 Connect the 3-pin grounded power cable to the socket
for the AC adapter.
4 Connect the power cable to the mains.
5 Switch the printer on.
Installation and Putting into Operation14 Printer
Page 17
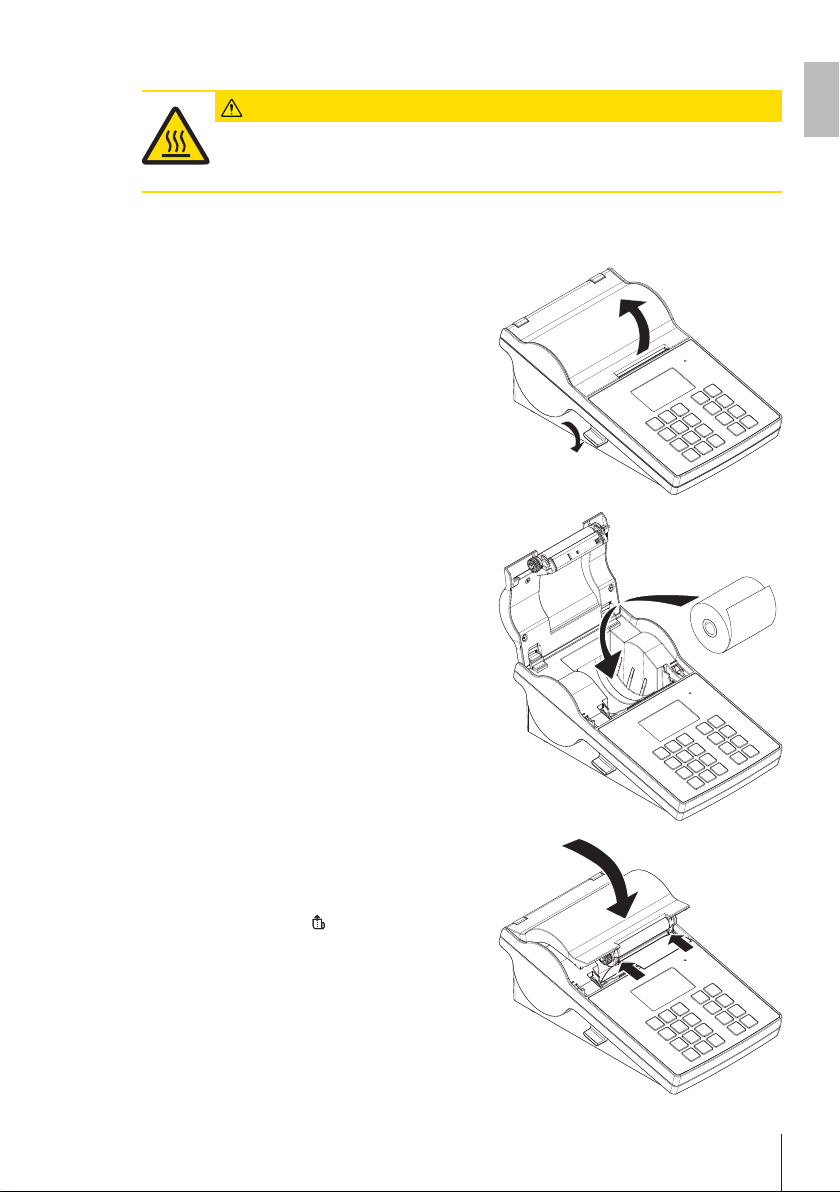
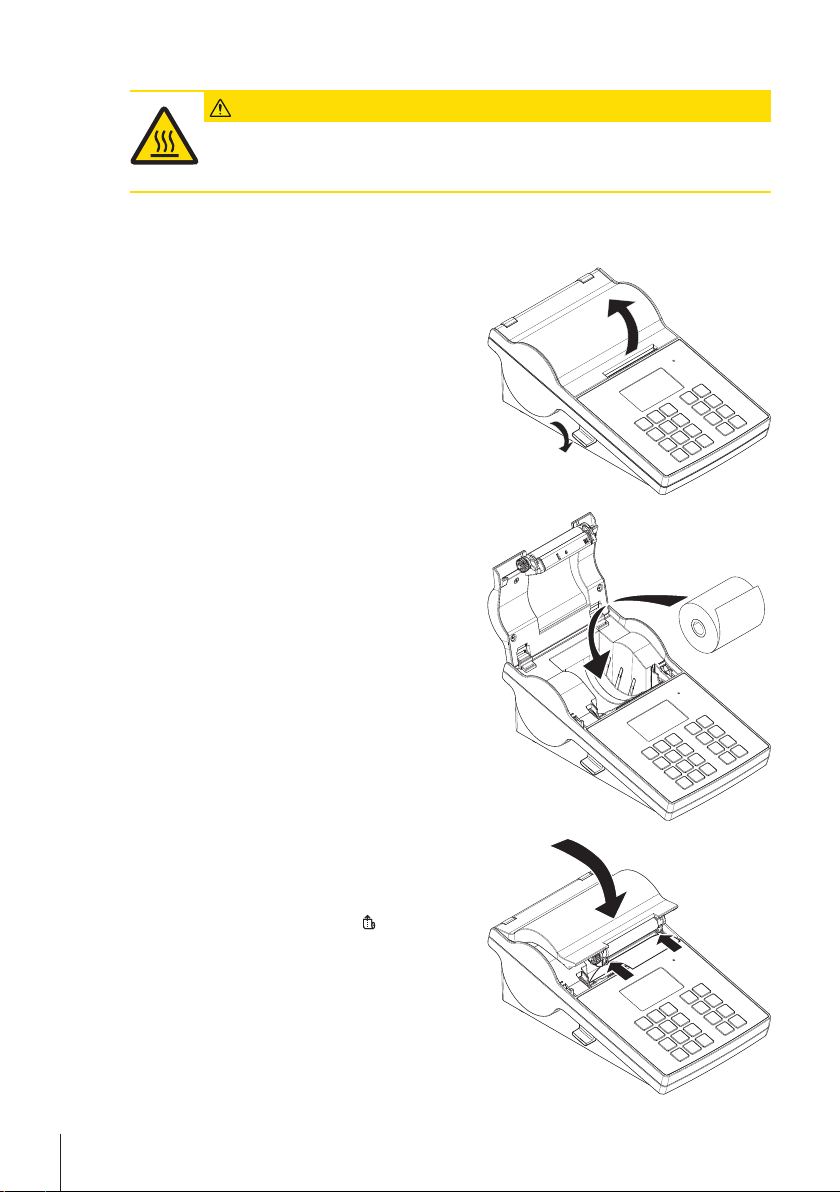
2.3 Inserting the paper roll
CAUTION
Danger of burns
The thermal printhead is getting hot during the printing process. Wait until the printhead has
cooled down before opening the printer cover.
Note
We recommend to use only specified paper from METTLER TOLEDO, see Accessories and spare parts in the
Operating Instructions.
1 Switch on the printer.
2 Press down the release key.
ð The printer cover opens.
3 Insert the paper roll into the printer frame.
Note
The paper roll must unroll in the correct direction (see
picture).
en
4 Make sure that the paper is in the middle of the paper
guides.
5 Close the printer cover. Firmly press down until it
snaps.
6 Press the paper feed key
to check the paper feed.
Installation and Putting into Operation 15Printer
Page 18

2.4 Connecting the printer to a METTLER TOLEDO instrument
NOTICE
We recommend connecting the printer to only one instrument at a time. If several instruments
are connected to the printer at the same time METTLER TOLEDO cannot assume the correct
functionality of the printer.
Note
The printer automatically detects the settings of the connected instrument if the instrument supports this
function.
2.4.1 Connecting the printer via the RS232 connection
1 Connect the printer to the power supply.
2 Use the RS232 cable to connect the printer to the METTLER TOLEDO instrument.
Note
The RS232 connection settings of the printer and of the instrument must be identical.
3 Switch on the printer.
Note
The function Auto connection is switched off by default. It can be switched on if the printer is connected with
the RS232 connection and if the connection settings (Baudrate, Bits / Parity, Handshake) of the printer
differ from the settings of the balance. For more information about activating the function Auto connection
see RS232.
Printer default settings
Baudrate: 9600 Stop bits: 1 Bit
Bits / Parity: 8 / None Handshake: XOn/XOff
2.4.2 Connecting the printer via the USB connection
1 Connect the printer to the power supply.
2 Use the USB cable to connect the printer to a METTLER TOLEDO instrument.
3 Switch on the printer.
2.4.3 Connecting the printer via the Ethernet connection
1 Connect the printer to the power supply.
2 Use an Ethernet cable to connect the printer directly to a METTLER TOLEDO instrument or indirectly over
the company's Ethernet.
Note
For installation and configuration of the Ethernet interface you need to have basic knowledge of TCP/IPbased networks, and of network technology in general. If necessary, contact the network administrator of
your IT department or your IT support.
2.5 Defining language, date and time
When using the printer for the first time, we recommend to define the printer language, the current time and
date.
1 Switch on the printer.
ð The message Set language & date / time first! is indicated.
2 Use the scroll keys (
ð Press the confirmation key
3 Chose a date format.
4 Define the date.
5 Chose a time format.
6 Define the time.
ð The language, time and date have been defined.
, ) to chose a language from the list.
.
Installation and Putting into Operation16 Printer
Page 19

Note
• These settings are retained even if you disconnect your printer from the power supply.
• Date and time will be changed from a connected instrument if the connected instrument supports date
and time.
• If the connected instrument supports date and time, the menu items are not available.
en
Installation and Putting into Operation 17Printer
Page 20
3 Maintenance
WARNING
Risk of electric shock
1 Before cleaning or performing maintenance work, disconnect the printer and the AC
adapter from the power supply.
2 Take care that no liquid penetrates into the printer or the AC adapter.
NOTICE
Never open the housing of the printer or the AC adapter – they contain no components, which
can be cleaned, repaired or replaced by the user.
Use only the power cable from METTLER TOLEDO.
3.1 Cleaning the housing
The printer housing is made of top grade, resistant materials. Therefore, all commercially available mild
cleaning agents can be used.
3.2 Disposal
In conformance with the European Directive 2012/19/EU on Waste Electrical and
Electronic Equipment (WEEE) this device may not be disposed of in domestic waste. This
also applies to countries outside the EU, per their specific requirements.
Please dispose of this product in accordance with local regulations at the collecting point
specified for electrical and electronic equipment. If you have any questions, please
contact the responsible authority or the distributor from which you purchased this device.
Should this device be passed on to other parties (for private or professional use), the
content of this regulation must also be related.
Thank you for your contribution to environmental protection.
Maintenance18 Printer
Page 21

4 Technical Data
Power Supply
AC/DC Adapter: Primary: 100 V - 240 V, ±10%, 50/60 Hz
Secondary: 24 V DC, 2.5 A (with electronic overload protection)
Power supply to the
printer:
Protection and Standards
Overvoltage category II
Degree of pollution 2
Standards for safety and
EMC
Range of application Indoor use only
Environmental Conditions
Height above mean sea
level
Ambient temperature
range
Relative air humidity 20% ~ 80% up to 31°C decreasing linearly to 50% at 40°C, non-condensing
Printer Features
Print technology Direct Thermal
Resolution 8 dots/mm (203 dpi)
Print speed Max. 101.6 mm/s (4 IPS)
Printable width 54 mm (2.12")
Real time clock Date and time
Resident fonts 7 Windows bit map fonts: 6 pt, 7 pt, 10 pt, 12 pt, 24 pt, 16x26, OCR A & B
Barcodes • 1-D Bar codes: Code 39, Code 138
Graphics • Support BMP and PCX
Interfaces • RS232 port (Male DB 9)
Control Panel • Triple color LED: green, orange or red for status indicating
Display LCD, backlight, 128 x 64 dots
Display languages English, German, French, Italian, Spanish, Russian, Chinese (simplified),
Materials
Top housing Die-cast zinc, chromed and plastics (PBT)
Bottom housing Plastics (PBT)
Platen-roller
Media
Width Max. 58 mm (2.28")
24 V DC, 2.5 A
Declaration of Conformity (part of standard equipment)
up to 4000 m
Operation: 5°C ~ 40°C
Storage: -25°C ~ 60°C
• 2-D Bar codes: PDF417 (layout as 1-D), Datamatrix code, QR code, Aztec
code
• Support ICO, WMF, JPG, EMF file through software
• Support image resize, rotating, mapping and inverse through DirectLabel
software
• USB 2.0 device port (B-type)
• Ethernet 10/100base-TX port (Rj-45)
• 8 tactile keys (P-56RUE), 20 tactile keys (P-58RUE)
Japanese, Korean
en
Technical Data 19Printer
Page 22

Thickness Min. 0.06 mm (0.003") ~ Max. 0.2 mm (0.008")
Roll diameter Max. 60 mm (2.36")
Core diameter 12.7 mm (0.5")
Paper roll wound
direction
Outwards
USB driver
Link http://www.ftdichip.com/Drivers/VCP.htm
Dimension / Weight
Length 220 mm
Height 88 mm
Width 130 mm
Net Weight 1.4 kg, without AC/DC adapter
Technical Data20 Printer
Page 23
1 Sicherheitshinweise
Weiterführende Informationen
Zusätzliche Informationen über diesen Drucker sind in der Bedienungsanleitung auf der CDROM enthalten oder online zu finden.
1.1 Erklärung der Warnhinweise und Symbole
Sicherheitshinweise sind mit Signalwörtern und Warnbildsymbolen gekennzeichnet. Die Missachtung der
Sicherheitshinweise kann zu Verletzungen und zu Beschädigung oder Störungen des Geräts führen.
WARNUNG
VORSICHT
HINWEIS
Hinweis
Allgemeine Gefahr Stromschlag Heisse Oberfläche
Eine Gefährdung mit mittlerem Risiko, die möglicherweise zum Tod oder zu schweren Körperverletzungen führen kann, wenn sie nicht vermieden wird.
Eine gefährliche Situation mit niedrigem Risiko, die leichte oder mittelschwere Verletzungen zur Folge haben kann, wenn sie nicht vermieden wird.
Eine gefährliche Situation mit niedrigem Risiko, die eine Beschädigung des Gerätes,
Materialschäden, Fehlfunktionen und falsche Resultate oder Datenverlust zur Folge
haben kann.
(kein Symbol)
zur Kennzeichnung allgemeiner Informationen zum Produkt.
1.2 Produktspezifische Sicherheitshinweise
Allgemeine Sicherheitshinweise
Ihr Gerät verfügt über modernste Technik und erfüllt alle anerkannten Sicherheitsstandards. Dennoch können
unter bestimmten Umständen Gefahren entstehen. Öffnen Sie das Gehäuse des Geräts nicht: Es enthält keine
Teile, die durch den Anwender gewartet, repariert oder ausgetauscht werden können. Sollten Sie einmal Probleme mit Ihrem Gerät haben, so wenden Sie sich bitte an den zuständigen METTLER TOLEDO-Vertriebsoder Kundendienstmitarbeiter.
Vor der Verwendung des Geräts muss diese gedruckte Anleitung sorgfältig durchgelesen und vollständig verstanden worden sein. Diese gedruckte Bedienungsanleitung ist zum späteren Nachschlagen aufzubewahren.
Bedienen und verwenden Sie Ihre Waage ausschließlich in Übereinstimmung mit den Anweisungen in diesem Dokument. Beachten Sie unbedingt die Hinweise zur Inbetriebnahme Ihrer neuen Waage.
Wenn das Gerät nicht entsprechend der Bedienungsanleitung benutzt wird, kann die Sicherheit des
Geräts beeinträchtigt werden; METTLER TOLEDO übernimmt in einem solchen Fall keinerlei Haftung.
Das Gerät darf in keiner Weise verändert werden. Verwenden Sie ausschließlich Originalersatzteile und
Zubehör von METTLER TOLEDO.
Sicherheitshinweise
de
WARNUNG
Gefahr eines elektrischen Schlags
1 Öffnen Sie das Gehäuse des Netzadapters nicht. Achten Sie darauf, dass der Netzadapter
nicht mit Flüssigkeiten in Berührung kommt.
2 Verwenden Sieausschliesslich das mitgelieferte dreipolige Netzkabel mit Schutzleiter
sowie diedreipolige Netzsteckdose mit Schutzkontakt.
Sicherheitshinweise 21Drucker
Page 24

HINWEIS
Datenverlust
Ununterbrochenes Drucken kann zur Überhitzung des Druckkopfes führen. Der Druckprozess
stoppt, bis sich der Druckkopf abgekühlt hat. Schalten Sie den Drucker während dieser
Abkühlphase nicht aus, da dies zum Verlust der Daten im Pufferspeicher führt.
Betriebsbedingungen
• Der Drucker darf nur in trockenen Innenräumen benutzt werden.
Betreffend den Umgebungsbedingungen siehe Allgemeine technische Daten.
• Der Drucker muss an die Raumtemperatur akklimatisiert werden.
• Der Drucker darf nicht bei Feuchtigkeit und Nässeverwendet werden.
Sicherheitshinweise22 Drucker
Page 25
2 Installation und Inbetriebnahme
Weiterführende Informationen
Zusätzliche Informationen über diesen Drucker sind in der Bedienungsanleitung auf der CDROM enthalten oder online zu finden.
2.1 Lieferumfang
Folgendes Zubehör gehört zur Ausstattung:
• P-56RUE- oder P-58RUE-Thermodrucker
• Ein Satz Papierrollen
• Universal-Netzadapter
• Länderspezifisches Netzkabel
• USB -Kabel
• RS232-Kabel
• Benutzerhandbuch
• Konformitätsbescheinigung
• CD-ROM (mit Dokumenten in verschiedenen Sprachen, Software und Treibern)
2.2 Drucker an Stromversorgung anschliessen
WARNUNG
Gefahr eines elektrischen Schlags
1 Öffnen Sie das Gehäuse des Netzadapters nicht. Achten Sie darauf, dass der Netzadapter
nicht mit Flüssigkeiten in Berührung kommt.
2 Verwenden Sieausschliesslich das mitgelieferte dreipolige Netzkabel mit Schutzleiter
sowie diedreipolige Netzsteckdose mit Schutzkontakt.
HINWEIS
Verwenden Sie ausschliesslich den mit Ihrem Drucker gelieferten Originalnetzadapter.
− Verwenden Sie den Netzadapter nicht mit anderen Geräten von METTLER TOLEDO. Sie
könnten beschädigt werden.
1 Verbinden Sie den Netzadapter mit der Anschluss-
buchse auf der Rückseite des Druckers.
2 Verriegeln Sie den Anschluss mit der Sicherungsmut-
ter.
3 Verbinden Sie das dreipolige geerdete Netzkabel mit
dem Netzadapter.
4 Verbinden Sie das Netzkabel mit dem Stromnetz.
5 Schalten Sie den Drucker ein.
de
Installation und Inbetriebnahme 23Drucker
Page 26
2.3 Die Papierrolle einsetzen
VORSICHT
Verbrennungsgefahr
Der Thermodruckkopf wird während des Druckvorgangs heiss. Warten Sie, bis sich der Druckkopf abgekühlt hat, bevor Sie die Druckerabdeckung öffnen.
Hinweis
Wir empfehlen, ausschliesslich das von METTLER TOLEDO angegebene Papier zu verwenden, siehe
Zubehör und Ersatzteile in der Bedienungsanleitung.
1 Schalten Sie den Drucker ein.
2 Drücken Sie den Freigabehebel nach unten.
ð Die Druckerabdeckung öffnet sich.
3 Setzen Sie die Papierrolle in den Drucker ein.
Hinweis
Die Papierrolle muss in der richtigen Richtung abgerollt werden (siehe Abbildung).
4 Vergewissern Sie sich, dass sich das Papier innerhalb
der Papierführungen befindet.
5 Schliessen Sie die Druckerabdeckung. Drücken Sie sie
fest nach unten, bis sie einrastet.
6 Drücken Sie die Papierzufuhr-Taste
zufuhr zu testen.
Installation und Inbetriebnahme24 Drucker
, um die Papier-
Page 27
2.4 Anschliessen des Druckers an ein METTLER TOLEDO-Gerät
HINWEIS
Wir empfehlen, den Drucker immer nur an ein Gerät gleichzeitig anzuschliessen. Wird der
Drucker an mehreren Geräten gleichzeitig betrieben, kann METTLER TOLEDO einen korrekten
Betrieb des Druckers nicht gewährleisten.
Hinweis
Der Drucker erkennt die Einstellungen des angeschlossenen Geräts, wenn das Gerät diese Funktion unterstützt.
2.4.1 Druckeranschluss über die RS232-Schnittstelle
1 Schliessen Sie den Drucker an die Stromversorgung an.
2 Schliessen Sie den Drucker mit dem RS232-Kabel an ein Gerät von METTLER TOLEDO an.
Hinweis
Die Anschlusseinstellungen für RS232 müssen am Drucker und am Gerät übereinstimmen.
3 Schalten Sie den Drucker ein.
Hinweis
Die Funktion Autom. Verbind. ist standardmässig ausgeschaltet. Sie lässt sich einschalten, wenn der Drucker mit der RS232-Schnittstelle verbunden ist und die Verbindungseinstellungen (Baudrate, Bits / Parity,
Handshake) am Drucker nicht mit denen der Waage übereinstimmen. Weitere Informationen zum Aktivieren
der Funktion Autom. Verbind. siehe RS232.
Standardeinstellungen des Druckers
Baudrate : 9600 Stop bits : 1 Bit
Bits / Parity : 8 / None Handshake : XOn/XOff
2.4.2 Druckeranschluss über USB
1 Schliessen Sie den Drucker an die Stromversorgung an.
2 Schliessen Sie den Drucker mit dem USB-Kabel an ein Gerät von METTLER TOLEDO an.
3 Schalten Sie den Drucker ein.
2.4.3 Den Drucker an einen Ethernet-Anschluss anschliessen
1 Schliessen Sie den Drucker an die Stromversorgung an.
2 Schliessen Sie den Drucker mit einem Ethernet-Kabel direkt an ein Gerät von METTLER TOLEDO an oder
indirekt über das Ethernet des Unternehmens.
Hinweis
Zur Installation und Konfiguration der Ethernet-Schnittstelle sind Grundkenntnisse im Bereich der TCP/IPbasierten Netzwerke und im Bereich der Netzwerktechnik im Allgemeinen erforderlich. Setzen Sie sich ggf.
mit dem Netzwerkadministrator Ihrer IT-Abteilung oder Ihres IT-Kundendiensts in Verbindung.
2.5 Festlegen von Sprache, Datum und Uhrzeit
Wenn Sie den Drucker zum ersten Mal verwenden, empfehlen wir Ihnen, für den Drucker die Sprache, die
aktuelle Uhrzeit und das Datum einzustellen.
1 Schalten Sie den Drucker ein.
ð Die Meldung Zuerst Sprache und Datum / Zeit einstellen! wird angezeigt.
2 Wählen Sie mit den Scroll-Tasten (
ð Drücken Sie die Bestätigungstaste
3 Wählen Sie ein Datumsformat.
4 Legen Sie das Datum fest.
5 Wählen Sie ein Uhrzeitformat.
6 Legen Sie die Uhrzeit fest.
ð Sprache, Uhrzeit und Datum wurden eingestellt.
, ) eine Sprache aus der Liste.
.
de
Installation und Inbetriebnahme 25Drucker
Page 28

Hinweis
• Diese Einstellungen bleiben auch dann erhalten, wenn Sie Ihren Drucker vom Stromnetz trennen.
• Datum und Uhrzeit werden von einem angeschlossenen Gerät geändert, wenn das angeschlossene
Gerät Datum und Uhrzeit unterstützt.
• Falls das angeschlossene Gerät Datum und Uhrzeit unterstützt, sind diese Menüpunkte nicht verfügbar.
Installation und Inbetriebnahme26 Drucker
Page 29

3 Wartung
WARNUNG
Gefahr eines elektrischen Schlags
1 Bevor Reinigungs- oder Wartungsarbeiten am Drucker vorgenommen werden, trennen Sie
den Drucker und den Netzadapter von der Stromversorgung.
2 Achten Sie darauf, dass keine Flüssigkeit in den Drucker oder den Netzadapter eindringt.
HINWEIS
Öffnen Sie niemals das Gehäuse des Druckers oder des Netzadapters. Diese enthalten keine
Komponenten, die vom Anwender gereinigt, repariert oder ausgetauscht werden können.
Für die Stromversorgung ausschliesslich das Kabel von METTLER TOLEDO verwenden.
3.1 Gehäuse reinigen
Das Druckergehäuse besteht aus hochwertigen, widerstandsfähigen Werkstoffen. Alle handelsüblichen milden Reinigungsmittel können verwendet werden.
3.2 Entsorgung
In Übereinstimmung mit den Anforderungen der Europäischen Richtlinie 2012/19/EU über
Elektro- und Elektronik-Altgeräte (WEEE) darf dieses Gerät nicht mit dem Hausmüll entsorgt werden. Sinngemäss gilt dies auch für Länder ausserhalb der EU entsprechend den
geltenden nationalen Regelungen.
Bitte entsorgen Sie dieses Produkt gemäss den örtlichen Bestimmungen in einer getrennten Sammlung für Elektro- und Elektronikgeräte. Bei allfälligen Fragen wenden Sie sich
bitte an die zuständige Behörde oder den Händler, bei dem Sie dieses Gerät erworben
haben. Bei Weitergabe dieses Gerätes (z. B. für private oder gewerbliche/industrielle Weiternutzung) ist diese Bestimmung sinngemäss weiterzugeben.
Vielen Dank für Ihren Beitrag zum Schutz der Umwelt.
de
Wartung 27Drucker
Page 30

4 Technische Daten
Stromversorgung
Netzadapter: Primär: 100 V – 240 V, ±10%, 50/60 Hz
Sekundär: 24 V DC, 2,5 A (elektronisch gegen Überlastung geschützt)
Stromversorgung für den
Drucker:
Schutz und Normen
Überspannungskategorie II
Verschmutzungsgrad 2
Normen für Sicherheit
und EMV
Verwendungsbereich Nur Innenraumnutzung
Umgebungsbedingungen
Höhe über NN bis 4000 m
Zulässiger Umgebung-
stemperaturbereich
Relative Luftfeuchtigkeit 20% ~ 80% bis 31°C, linear abnehmend bis 50% bei 40°C, nicht kon-
Druckermerkmale
Drucktechnik Thermodirekt
Auflösung 8 Punkte/mm (203 dpi)
Druckgeschwindigkeit Max. 101,6 mm/s (4 IPS)
Bedruckbare Breite 54 mm (2,12")
Echtzeituhr Datum und Uhrzeit
Standardschriftarten 7 Windows Bitmap-Schriften: 6 pt, 7 pt, 10 pt, 12 pt, 24 pt, 16x26, OCR A &
Barcodes • 1D-Barcodes: Code 39, Code 138
Grafiken • Unterstützt BMP und PCX
Schnittstellen • RS232-Anschluss (männlich DB 9)
Steuerelement • Dreifarbige LED: grün, orange oder rot zur Statusanzeige
Anzeige LCD, Hintergrundbeleuchtung, 128 x 64 Punkte
Anzeigesprachen Englisch, Deutsch, Französisch, Italienisch, Spanisch, Russisch, Chinesisch
Werkstoffe
Gehäuseoberteil Zinkdruckguss, verchromt und Kunststoff (PBT)
Gehäuseunterteil Kunststoff (PBT)
Druckrolle
24VDC, 2,5A
Konformitätsbescheinigung (Teil der Standardausstattung)
Betrieb: 5°C ~ 40°C
Lagerung: -25°C ~ 60°C
densierend
B
• 2D-Barcodes: PDF417 (Layout wie 1-D), Datamatrix-Code, QR-Code,
Aztec-Code
• Unterstützt ICO, WMF, JPG, EMF-Dateien mit Software
• Unterstützt Veränderung der Bildgrösse, Drehung, Mapping und Inversion
mit DirectLabel-Software.
• USB 2.0-Gerätanschluss (Typ B)
• Ethernet 10/100BASE-TX-Anschluss (RJ45)
• 8 Tasten (P-56RUE), 20 Tasten (P-58RUE)
(vereinfacht), Japanisch, Koreanisch
Technische Daten28 Drucker
Page 31

Medien
Breite Max. 58 mm (2,28")
Stärke Min. 0,06 mm (0,003") ~ Max. 0,2 mm (0,008")
Rollendurchmesser Max. 60 mm (2,36")
Faserkern-Durchmesser 12,7 mm (0,5")
Papierrolle Abrollrich-
tung
Nach aussen
USB-Treiber
Link http://www.ftdichip.com/Drivers/VCP.htm
Abmessungen/Gewicht
Länge 220 mm
Höhe 88 mm
Breite 130 mm
Nettogewicht 1,4 kg ohne Netzadapter
de
Technische Daten 29Drucker
Page 32

1 Información sobre seguridad
Más información
Se puede obtener más información acerca de esta impresora en las instrucciones de manejo
incluidas en el CD-ROM o a través de Internet.
1.1 Definición de los símbolos y señales de advertencia
Las indicaciones de seguridad se marcan con texto y símbolos de advertencia. Si se hace caso omiso de
las indicaciones de seguridad pueden producirse daños personales o materiales o funcionamientos anómalos.
ADVERTENCIA
ATENCIÓN
AVISO
Aviso
Peligro general Descarga eléctrica Superficie caliente
1.2 Indicaciones de seguridad específicas del producto
Información general sobre seguridad
Su equipo dispone de tecnología de vanguardia y cumple con todas las normativas de seguridad reconocidas. Sin embargo, podrían surgir situaciones de peligro en circunstancias no previstas. No abra la carcasa
del equipo: puesto que no contiene ninguna pieza que el usuario deba mantener, reparar o sustituir. Si experimenta problemas con su equipo, póngase en contacto con su distribuidor autorizado o representante de
mantenimiento de METTLER TOLEDO.
Antes de usar el instrumento, debe leer y comprender este documento impreso. Este documento impreso se
debe guardar para futuras consultas.
Utilice y maneje el instrumento siempre conforme a las instrucciones incluidas en este documento. Siga en
todo momento las indicaciones para la puesta en marcha de su nuevo equipo.
Si el instrumento no se utiliza conforme a las instrucciones de manejo, la protección que este ofrece
puede verse afectada y METTLER TOLEDO no asume ninguna responsabilidad.
El equipo no debe someterse a alteraciones o modificaciones de ningún tipo. Utilice solo piezas de repuesto
y accesorios originales de METTLER TOLEDO.
Notas de seguridad
situación de peligro con un nivel de riesgo medio que puede provocar lesiones graves o incluso la muerte en caso de que no se impida.
situación de peligro de bajo riesgo que puede provocar lesiones de carácter leve o
medio, en caso de que no se impida.
situación de peligro de bajo riesgo que puede provocar daños en el equipo, otros
daños materiales, errores de funcionamiento y resultados erróneos o pérdidas de
datos.
(sin símbolo)
Información útil sobre el producto.
ADVERTENCIA
Riesgo de electrocución
1 No abra la carcasa del adaptador de corriente alterna (AC). Asegúrese de que el adapta-
dor de corriente alterna (AC) no entre en contacto con líquidos.
2 Utilice únicamente el cable de alimentación de tres clavijas con la toma de tierra suminis-
trada junto con el equipo. Solo debe utilizarse en una toma de corriente de tres clavijas.
Información sobre seguridad30 Impresora
Page 33

AVISO
Pérdida de datos
La impresión continuada puede provocar un sobrecalentamiento del cabezal de impresión. El
proceso de impresión se detiene hasta que el cabezal de impresión se haya enfriado. Durante
esta fase de enfriamiento, la impresora no se debe desconectar; de lo contrario, los datos
presentes en la memoria intermedia se perderán.
Condiciones de funcionamiento
• La impresora debe utilizarse únicamente en espacios interiores secos.
Consulte el apartado Características técnicas generales para obtener más información acerca de las
condiciones ambientales.
• La impresora debe aclimatarse a la temperatura ambiente.
• No se debe utilizar la impresora si se detectan líquidos o humedad.
es
Información sobre seguridad 31Impresora
Page 34

2 Instalación y puesta en marcha
Más información
Se puede obtener más información acerca de esta impresora en las instrucciones de manejo
incluidas en el CD-ROM o a través de Internet.
2.1 Suministro estándar
Los siguientes accesorios forman parte del equipo:
• Impresora térmica P-56RUE o P-58RUE
• Juego de rollos de papel
• Adaptador de corriente alterna (AC) universal
• Cable de alimentación propio del país
• Cable USB
• Cable RS232
• Manual de usuario
• Declaración de conformidad
• CD-ROM (contiene la documentación en diferentes idiomas, el software y los controladores)
2.2 Conexión de la impresora a la fuente de alimentación
ADVERTENCIA
Riesgo de electrocución
1 No abra la carcasa del adaptador de corriente alterna (AC). Asegúrese de que el adapta-
dor de corriente alterna (AC) no entre en contacto con líquidos.
2 Utilice únicamente el cable de alimentación de tres clavijas con la toma de tierra suminis-
trada junto con el equipo. Solo debe utilizarse en una toma de corriente de tres clavijas.
AVISO
Utilice exclusivamente el adaptador de corriente alterna (AC) original suministrado con
la impresora.
− No intente utilizar el adaptador de corriente alterna (AC) con otros instrumentos de
METTLER TOLEDO, de lo contrario podrían resultar dañados.
1 Conecte el adaptador de corriente alterna (AC) a la to-
ma de la parte posterior de la impresora.
2 Fije el conector con la tuerca roscada.
3 Conecte el cable de alimentación de tres clavijas a la
toma para el adaptador de corriente alterna (AC).
4 Conecte el cable de alimentación a la red eléctrica.
5 Encienda la impresora.
Instalación y puesta en marcha32 Impresora
Page 35

2.3 Inserción del rollo de papel
ATENCIÓN
Peligro de quemaduras
El cabezal de impresión térmico se calienta durante el proceso de impresión. Espere a que el
cabezal de impresión se haya enfriado antes de abrir la cubierta de la impresora.
Aviso
Recomendamos utilizar únicamente el papel especificado de METTLER TOLEDO, consulte el apartado Accesorios y piezas de repuesto de las Instrucciones de manejo.
1 Encienda la impresora.
2 Pulse la tecla de liberación.
ð La cubierta de la impresora se abrirá.
3 Introduzca el rollo de papel en el bastidor de la impre-
sora.
Aviso
El rollo de papel se debe desenrollar en la dirección
correcta (consulte la imagen).
es
4 Asegúrese de que el papel está centrado en las guías
del papel.
5 Cierre la cubierta de la impresora. Presione con firme-
za hasta que se cierre.
6 Pulse la tecla de alimentación de papel
probar la alimentación de papel.
para com-
Instalación y puesta en marcha 33Impresora
Page 36

2.4 Conexión de la impresora a un instrumento METTLER TOLEDO
AVISO
Recomendamos conectar la impresora únicamente a un instrumento cada vez. Si se conectan varios instrumentos a la impresora al mismo tiempo, METTLER TO no podrá garantizar el
correcto funcionamiento de la impresora.
Aviso
La impresora detecta automáticamente la configuración del instrumento conectado si el instrumento es
compatible con esta función.
2.4.1 Conexión de la impresora a través de la conexión RS232
1 Conecte la impresora a la fuente de alimentación.
2 Utilice el cable RS232 para conectar la impresora al instrumento de METTLER TOLEDO.
Aviso
Los ajustes de la conexión RS232 de la impresora y del instrumento deben ser idénticos.
3 Encienda la impresora.
Aviso
La función Conexión de datos está desactivada de forma predeterminada. Se puede activar si la impresora
está conectada con la conexión RS232 y si los ajustes de conexión (Baudrate, Bits / Parity, Handshake)
de la impresora difieren de los ajustes de la balanza. Para obtener más información acerca de la activación
de la función Conexión de datos, consulte el apartado RS232.
Configuración predeterminada de la impresora
Baudrate : 9600 Stop bits : 1 Bit
Bits / Parity : 8 / None Handshake : XOn/XOff
2.4.2 Conexión de la impresora a través de la conexión USB
1 Conecte la impresora a la fuente de alimentación.
2 Utilice el cable USB para conectar la impresora a un instrumento de METTLER TOLEDO.
3 Encienda la impresora.
2.4.3 Conexión de la impresora a través de la conexión Ethernet
1 Conecte la impresora a la fuente de alimentación.
2 Utilice un cable Ethernet para conectar la impresora directamente a un instrumento de METTLER TOLEDO
o de forma indirecta a través de la red Ethernet de la empresa.
Aviso
Para la instalación y la configuración de la interfaz Ethernet es necesario tener conocimientos básicos de
redes basadas en TCP/IP y tecnología de redes en general. En caso necesario, póngase en contacto con su
administrador de red o con su departamento de TIC o su servicio de asistencia técnica informática.
2.5 Definición del idioma, la fecha y la hora
Al utilizar la impresora por primera vez, recomendamos definir el idioma de la impresora y la hora y fecha
actuales.
1 Encienda la impresora.
ð Se muestra el mensaje ¡Ajuste primero el idioma y la fecha/hora!.
2 Utilice las teclas de desplazamiento (
ð Pulse la tecla de confirmación
3 Seleccione un formato de fecha.
4 Defina la fecha.
5 Seleccione un formato de hora.
6 Defina la hora.
ð El idioma, la hora y la fecha se han definido.
, ) para seleccionar un idioma de la lista.
.
Instalación y puesta en marcha34 Impresora
Page 37

Aviso
• Esta configuración se guarda incluso si desconecta la impresora de la fuente de alimentación.
• La hora y la fecha se modificarán desde un instrumento conectado si el instrumento conectado admite
fecha y hora.
• Si el instrumento conectado admite fecha y hora, los elementos del menú no estarán disponibles.
es
Instalación y puesta en marcha 35Impresora
Page 38

3 Mantenimiento
ADVERTENCIA
Riesgo de electrocución
1 Antes de limpiar o realizar un trabajo de mantenimiento, desconecte la impresora y el
adaptador de corriente alterna (AC) de la fuente de alimentación.
2 Asegúrese de que no entren líquidos en la impresora o en el adaptador de corriente alter-
na (AC).
AVISO
No abra nunca la carcasa de la impresora ni del adaptador de corriente alterna (AC): no contienen piezas que el usuario pueda limpiar, reparar o sustituir.
Utilice únicamente el cable de alimentación de METTLER TOLEDO.
3.1 Limpieza de la carcasa
La carcasa de la impresora está fabricada con materiales resistentes de máxima calidad. Por lo tanto, se
pueden utilizar todos los productos de limpieza suaves de uso corriente.
3.2 Eliminación de residuos
Conforme a las exigencias de la Directiva 2012/19/EU europea, sobre residuos de aparatos eléctricos y electrónicos (RAEE), este aparato no debe eliminarse con la basura doméstica. Esta prohibición es asimismo válida para los países que no pertenecen a la UE,
cuyas normativas nacionales en vigor así lo reflejan.
Por favor, elimine este producto de acuerdo a las normativas locales en un lugar de recogida específico para aparatos eléctricos y electrónicos. Si tiene alguna pregunta al respecto, diríjase a las autoridades responsables o al distribuidor que le proporcionó el
equipo. Si se transfiere este equipo (por ejemplo, para seguir usándolo con carácter privado o industrial), se deberá transferir también esta determinación.
Le agradecemos que contribuya a proteger el medio ambiente.
Mantenimiento36 Impresora
Page 39

4 Características técnicas
Fuente de alimentación
Adaptador de CA/CC: Primario: 100V - 240V, ±10%, 50/60Hz
Secundario: 24VCC, 2,5A (con protección electrónica contra sobrecargas)
Alimentación de la impresora:
Protección y estándares
Categoría de sobrevolta-jeII
Grado de contaminación 2
Estándares para la se-
guridad y CEM
Ámbito de aplicación Uso exclusivo en interiores
Condiciones ambientales
Altura sobre el nivel del
mar
Zona de temperatura
ambiente
Humedad relativa en el
aire
Características de la impresora
Tecnología de impresión Térmica directa
Resolución 8puntos/mm (203dpi)
Velocidad de impresión Máx. 101,6mm/s (4 IPS)
Anchura de impresión 54mm (2,12")
Reloj en tiempo real Fecha y hora
Fuentes residentes Siete fuentes de mapas de bits de Windows: 6pt, 7pt, 10pt, 12pt, 24pt,
Códigos de barras • Códigos de barras 1-D: Código 39, Código 138
Gráficos • Compatible con BMP y PCX
Interfaces • Puerto RS232 (Macho DB 9)
Panel de control • LED de tres colores: verde, naranja o rojo para indicar el estado
Pantalla LCD, retroiluminada, 128 x 64 puntos
Idiomas de la pantalla Inglés, alemán, francés, italiano, español, ruso, chino (simplificado), japonés
Materiales
Carcasa superior Cinc fundido, cromado y plásticos (PBT)
Carcasa inferior Plásticos (PBT)
Rodillo de la platina
24VCC, 2,5A
Declaración de conformidad (componente del equipo estándar)
Hasta 4000m
Funcionamiento: 5°C ~ 40°C
Almacenamiento: -25°C ~ 60°C
Entre el 20% y el 80% hasta 31°C, reduciéndose gradualmente hasta el
50% a 40°C, sin condensación
16x26, OCR A & B
• Códigos de barras 2-D: PDF417 (diseño como 1-D), código Datamatrix,
código QR, código Aztec
• Compatible con archivos ICO, WMF, JPG, EMF mediante software
• Compatible con el redimensionamiento, la rotación, el mapeado y la inver-
sión de imágenes mediante el software DirectLabel
• Puerto para dispositivos USB 2.0 (tipo B)
• Puerto Ethernet 10/100base-TX (Rj-45)
• 8 teclas táctiles (P-56RUE), 20 teclas táctiles (P-58RUE)
y coreano
es
Características técnicas 37Impresora
Page 40

Medios
Anchura Máx. 58mm (2,28")
Grosor Mín. 0,06mm (0,003") ~ Máx. 0,2mm (0,008")
Diámetro del rollo Máx. 60mm (2,36")
Diámetro interior 12,7mm (0,5")
Dirección de desenrolla-
do del rollo de papel
Hacia fuera
Controlador USB
Enlace http://www.ftdichip.com/Drivers/VCP.htm
Dimensiones/Peso
Longitud 220mm
Altura 88mm
Anchura 130mm
Peso neto 1,4kg, sin adaptador de CA/CC
Características técnicas38 Impresora
Page 41

1 Informations liées à la sécurité
Pour plus d'informations
Vous trouverez des informations complémentaires sur cette imprimante dans le mode d'emploi
repris sur le CD-ROM ou en ligne.
1.1 Définition des avertissements et symboles
Les consignes de sécurité peuvent être identifiées grâce aux termes de notification et aux symboles d'avertissement. Si vous n'en tenez pas compte, vous risquez de vous blesser, d'endommager l'instrument et d'occasionner des dysfonctionnements.
AVERTISSEMENT
ATTENTION
AVIS
Remarque
Danger d’ordre général
1.2 Notes de sécurité propres au produit
Informations générales liées à la sécurité
Votre instrument repose sur une technologie de pointe et répond à toutes les règles de sécurité admises ; cependant, vous n'êtes pas à l'abri de certains dangers extérieurs. N'ouvrez pas le boîtier de l'instrument : il
ne contient aucune pièce dont la maintenance, la réparation ou le remplacement peut être effectué(e) par
l’utilisateur. Si vous rencontrez des problèmes avec l'instrument, contactez votre revendeur ou représentant
de service METTLER TOLEDO agréé.
Il convient de lire et de comprendre ce document imprimé avant d'utiliser l'instrument. Conservez-le pour
pouvoir vous y reporter ultérieurement.
Lorsque vous utilisez votre instrument, veillez à bien suivre les instructions figurant dans ce document. Pour
configurer un nouvel instrument, vous devez respecter rigoureusement les instructions.
En cas d'utilisation contraire aux instructions du mode d'emploi, la protection de l'instrument peut en
être affectée. METTLER TOLEDO ne saurait en aucun cas être tenu responsable.
L'instrument ne doit pas être transformé ni modifié d'une manière quelconque. Utilisez uniquement les
pièces détachées et accessoires originaux de METTLER TOLEDO.
Consignes de sécurité
Signale, si la mise en garde n'est pas respectée, une situation dangereuse présentant un risque moyen et pouvant entraîner des blessures graves, voire mortelles.
Signale une situation dangereuse impliquant un risque faible, susceptible d'entraîner
des blessures de gravité mineure ou moyenne si elle n'est pas évitée.
Signale une situation dangereuse impliquant un risque faible, susceptible de causer
des dommages matériels, notamment à l'instrument, des dysfonctionnements, des
résultats erronés ou des pertes de données.
(pas de symbole)
Signale des informations utiles sur le produit.
Décharge électrique Surface brûlante
fr
AVERTISSEMENT
Risque d’électrocution
1 N'ouvrez pas le boîtier de l'adaptateur secteur. Assurez-vous que l'adaptateur secteur
n'entre pas en contact avec des liquides.
2 Utilisez exclusivement le câble d'alimentation à 3broches doté d'un conducteur de mise à
la terre fourni avec votre instrument, qui doit être connecté à une prise de terre à
3broches.
Informations liées à la sécurité 39Imprimante
Page 42

AVIS
Perte de données
L'impression en continu peut entraîner une surchauffe de la tête d'impression. Le processus
d'impression s'arrête jusqu'à ce que la tête d'impression ait refroidi. L'imprimante ne doit pas
être éteinte pendant la phase de refroidissement, car cela entraînerait la perte des données sur
le tampon.
Conditions de fonctionnement
• L'imprimante doit être utilisée uniquement en intérieur, dans un endroit sec.
Reportez-vous au chapitre Caractéristiques techniques générales pour obtenir des informations sur les
conditions ambiantes.
• Il convient d'acclimater l'imprimante à la température ambiante.
• L'imprimante ne doit pas être utilisée en présence d'humidité et de liquides.
Informations liées à la sécurité40 Imprimante
Page 43

2 Installation et mise en fonctionnement
Pour plus d'informations
Vous trouverez des informations complémentaires sur cette imprimante dans le mode d'emploi
repris sur le CD-ROM ou en ligne.
2.1 Équipement livré
Les accessoires suivants font partie de l'équipement:
• Imprimante thermique P-56RUE ou P-58RUE
• Kit de rouleaux de papier
• Adaptateur secteur universel
• Câble secteur spécifique au pays
• Câble USB
• Câble RS232
• Guide de l'utilisateur
• Déclaration de conformité
• CD-ROM (contenant la documentation en plusieurs langues, le logiciel et les pilotes)
2.2 Raccordement de l'imprimante à l'alimentation électrique
AVERTISSEMENT
Risque d’électrocution
1 N'ouvrez pas le boîtier de l'adaptateur secteur. Assurez-vous que l'adaptateur secteur
n'entre pas en contact avec des liquides.
2 Utilisez exclusivement le câble d'alimentation à 3broches doté d'un conducteur de mise à
la terre fourni avec votre instrument, qui doit être connecté à une prise de terre à
3broches.
fr
AVIS
Utilisez uniquement l'adaptateur d'origine fourni avec votre imprimante.
− N'essayez pas d'utiliser cet adaptateur pour d'autres instruments METTLER TOLEDO, car
cela risquerait de les abîmer.
1 Branchez l’adaptateur secteur à la prise de raccorde-
ment située à l’arrière de l'imprimante.
2 Verrouillez le connecteur avec l'écrou de vis.
3 Branchez le câble d'alimentation à 3broches sur la
prise pour l'adaptateur secteur.
4 Raccordez le câble d'alimentation au réseau.
5 Allumez l'imprimante.
Installation et mise en fonctionnement 41Imprimante
Page 44

2.3 Mise en place du rouleau de papier
ATTENTION
Risque de brûlures
La tête d'impression thermique chauffe pendant le processus d'impression. Attendez que la
tête d'impression ait refroidi avant d'ouvrir le couvercle de l'imprimante.
Remarque
Il est recommandé d'utiliser exclusivement du papier spécial proposé par METTLER TOLEDO (reportez-vous
au chapitre Accessoires et pièces détachées dans le mode d'emploi).
1 Allumez l'imprimante.
2 Appuyez sur le bouton de déblocage.
ð Le couvercle de l'imprimante s'ouvre.
3 Insérez le rouleau de papier dans le châssis de l'im-
primante.
Remarque
Le rouleau de papier doit se dérouler dans le bon sens
(voir image).
4 Veillez à ce que le papier soit bien au centre des
guides prévus.
5 Refermez le couvercle de l'imprimante. Appuyez fer-
mement dessus jusqu'à ce qu'il s'enclenche.
6 Appuyez sur la touche d'alimentation papier
vérifier l'alimentation papier.
Installation et mise en fonctionnement42 Imprimante
pour
Page 45

2.4 Raccordement de l'imprimante à un instrument METTLER TOLEDO
AVIS
Nous vous recommandons de raccorder l'imprimante à un seul instrument à la fois. Si plusieurs instruments sont connectés à l'imprimante en même temps, METTLER TOLEDO ne peut
pas garantir le bon fonctionnement de l'imprimante.
Remarque
L'imprimante détecte automatiquement les réglages de l'instrument connecté si ce dernier prend en charge
cette fonction.
2.4.1 Raccordement de l'imprimante via le port RS232
1 Raccordez l'imprimante à l'alimentation.
2 Utilisez le câble RS232 pour connecter l'imprimante à l'instrument METTLER TOLEDO.
Remarque
Les paramètres de connexion RS232 de l'imprimante et de l'instrument doivent être identiques.
3 Allumez l'imprimante.
Remarque
La fonction Connex. données est désactivée par défaut. Elle peut être activée si l'imprimante est connectée
avec le câble RS232 et si les paramètres de connexion (Baudrate, Bits / Parity, Handshake) de l'imprimante diffèrent des paramètres de la balance. Pour en savoir plus sur l'activation de la fonction Connex.
données, consultez le chapitre RS232.
Réglages par défaut de l'imprimante
Baudrate : 9600 Stop bits : 1 Bit
Bits / Parity : 8 / None Handshake : XOn/XOff
2.4.2 Raccordement de l'imprimante via le port USB
1 Raccordez l'imprimante à l'alimentation.
2 Utilisez le câble USB pour connecter l'imprimante à l'instrument METTLER TOLEDO.
3 Allumez l'imprimante.
2.4.3 Raccordement de l'imprimante via le port Ethernet
1 Raccordez l'imprimante à l'alimentation.
2 Utilisez un câble Ethernet pour connecter l'imprimante directement à l'instrument METTLER TOLEDO ou
indirectement via le réseau Ethernet de l'entreprise.
Remarque
Pour installer et configurer l'interface Ethernet, vous devez posséder un minimum de connaissances sur les
réseaux basés sur TCP/IP, ainsi que sur la technologie réseau en général. Si nécessaire, contactez l'administrateur réseau de votre département ou votre service technique informatique.
2.5 Réglage de la langue, la date et l'heure.
Lors de la première utilisation de votre imprimante, il est recommandé de définir la langue de l'imprimante,
la date du jour et l'heure actuelle.
1 Allumez l'imprimante.
ð Le message Régler d'abord la langue et la date / heure! s'affiche.
2 Utilisez les touches de défilement
ð Appuyez sur la touche de confirmation
3 Choisissez le format de la date.
4 Définissez la date.
5 Choisissez le format de l'heure.
6 Définissez l'heure.
ð Vous avez défini la langue, la date et l'heure.
et pour sélectionner une langue dans la liste.
.
fr
Installation et mise en fonctionnement 43Imprimante
Page 46

Remarque
• Ces réglages sont conservés même si vous déconnectez votre imprimante de l’alimentation.
• La date et l'heure seront modifiées à partir d'un instrument branché si celui-ci prend en charge la fonc-
tion correspondante.
• Si l'instrument branché prend en charge la date et l'heure, les éléments de menu ne sont pas dispo-
nibles.
Installation et mise en fonctionnement44 Imprimante
Page 47

3 Maintenance
AVERTISSEMENT
Risque d’électrocution
1 Avant de procéder au nettoyage ou à tout autre travail de maintenance, débranchez l'im-
primante et l'adaptateur secteur de l'alimentation électrique.
2 Veillez à ce qu'aucun liquide n'entre dans l'imprimante ou l'adaptateur secteur.
AVIS
N'ouvrez jamais le boîtier de l'imprimante ou de l'adaptateur secteur, car ils ne contiennent
aucun composant pouvant être nettoyé, réparé ou remplacé par l'utilisateur.
Utilisez exclusivement un câble d'alimentation METTLER TOLEDO.
3.1 Nettoyage du boîtier
Le boîtier de l'imprimante est fabriqué à partir de matériaux résistants de qualité supérieure. Par conséquent,
tous les produits de nettoyage doux disponibles dans le commerce peuvent être utilisés.
3.2 Mise au rebut
Conformément à la directive européenne 2012/19/EU relative à la mise au rebut des
équipements électriques et électroniques (DEEE), cet appareil ne doit pas être jeté avec
les déchets ménagers. Ceci est aussi valable pour les pays hors UE conformément aux
réglementations nationales en vigueur.
Veuillez mettre au rebut cet appareil conformément à la législation nationale dans un
conteneur séparé pour appareils électriques et électroniques. Pour toute question, adressez-vous aux autorités compétentes ou au revendeur auprès duquel vous avez acheté cet
appareil. Si l'appareil a été cédé à des tiers (à des fins d'utilisation privée ou professionnelle), le contenu de cette réglementation doit avoir été communiqué également.
Merci pour votre contribution à la protection de l'environnement.
fr
Maintenance 45Imprimante
Page 48

4 Caractéristiques techniques
Alimentation électrique
Adaptateur CA/CC: Primaire: 100V - 240V, ±10%, 50/60Hz
Secondaire: 24VCC, 2,5A (avec protection contre les surcharges)
Alimentation vers l'imprimante:
Protection et normes
Catégorie de surtension II
Degré de pollution 2
Normes de sécurité et
CEM
Gamme d'applications Utilisation exclusivement en intérieur
Conditions environnementales
Altitude au-dessus du
niveau moyen de la mer
Plage de température
ambiante
Humidité relative de l’air 20 à 80% jusqu'à 31°C en diminution linéaire jusqu'à 50% à 40°C, hors
Caractéristiques de l'imprimante
Technologie d'impression
Résolution 8points par mm (203ppp)
Vitesse d'impression Max. 101,6mm/s (4IPS)
Largeur imprimable 54mm (2,12")
Horloge en temps réel Date et heure
Polices internes 7polices matricielles Windows: 6pt, 7pt, 10pt, 12pt, 24pt, 16x26, OCR A
Codes-barres • Codes-barres 1-D: code 39, code 138
Graphiques • Prend en charge BMP et PCX
Interfaces • Port RS232 (DB 9 mâle)
Panneau de commande • DEL tricolore: vert, orange ou rouge pour indication d'état
Affichage LCD, rétroéclairage, 128 x 64points
Langues d'affichage Anglais, allemand, français, italien, espagnol, russe, chinois (simplifié), japo-
Matériaux
Boîtier supérieur Zinc moulé sous pression, chromé et matière plastique (PBT)
Boîtier inférieur Plastique (PBT)
Rouleau plat
24VCC, 2,5A
Déclaration de conformité (fait partie de l'équipement standard)
jusqu'à 4000m
Fonctionnement: 5°C ~ 40°C
Stockage: -25°C ~ 60°C
condensation
Thermique directe
& B
• Codes-barres 2-D: PDF417 (composition équiv. à 1-D), code Datamatrix,
code QR, code Aztec
• Prend en charge les fichiers ICO, WMF, JPG, EMF via le logiciel
• Prend en charge le redimensionnement, la rotation, le mappage et l'inverse-
ment des images via le logiciel DirectLabel.
• Port périphérique USB 2.0 (type B)
• Port Ethernet 10/100 base-TX (Rj-45)
• 8touches tactiles (P-56RUE), 20touches tactiles (P-58RUE)
nais et coréen
Caractéristiques techniques46 Imprimante
Page 49

Support
Largeur Max. 58mm (2,28")
Épaisseur Min. 0,06mm (0,003") ~ Max. 0,2mm (0,008")
Diamètre du rouleau Max. 60mm (2,36")
Diamètre intérieur 12,7mm (0,5")
Sens d'enroulement du
rouleau de papier
Vers l'extérieur
Pilote USB
Lien http://www.ftdichip.com/Drivers/VCP.htm
Dimensions/poids
Longueur 220mm
Hauteur 88mm
Largeur 130mm
Poids net 1,4kg, sans adaptateur CA/CC
fr
Caractéristiques techniques 47Imprimante
Page 50

1 Informazioni sulla sicurezza
Per ulteriori informazioni
Ulteriori informazioni su questa stampante sono disponibili nelle istruzioni d'uso online o su
CD-ROM.
1.1 Definizione dei segnali di attenzione e dei simboli
Le disposizioni di sicurezza sono indicate con termini o simboli di avvertimento. Ignorare le disposizioni di
sicurezza può portare a lesioni personali, danni allo strumento e malfunzionamenti.
AVVERTENZA
ATTENZIONE
AVVISO
Nota
Pericolo generico Folgorazione Superficie calda
1.2 Note sulla sicurezza specifiche del prodotto
Informazioni generali sulla sicurezza
Il vostro strumento corrisponde allo stato dell'arte della tecnologia e rispetta tutte le norme di sicurezza riconosciute; tuttavia, alcuni rischi possono sorgere in circostanze estranee. Non aprire l'alloggiamento dello
strumento: non contiene parti che possano essere sottoposte a manutenzione, riparate o sostituite dall'utente. In caso di problemi con lo strumento, contattare il rivenditore autorizzato METTLER TOLEDO o un distributore autorizzato.
Prima di utilizzare lo strumento, è necessario aver letto e compreso questa pubblicazione. Conservarla per
future consultazioni.
Utilizzare lo strumento sempre e solo in conformità delle istruzioni contenute nel presente documento. Le
istruzioni per la configurazione del nuovo strumento devono essere rigorosamente rispettate.
Se lo strumento non viene utilizzato secondo le istruzioni d'uso, la sicurezza dello stesso può essere
compromessa. In tali casi, METTLER TOLEDO non si assumerà alcuna responsabilità.
È vietato alterare o modificare lo strumento in qualsiasi modo. Utilizzare esclusivamente pezzi di ricambio e
accessori METTLER TOLEDO.
Note di sicurezza
per situazioni pericolose a medio rischio che, se non evitate, potrebbero causare lesioni gravi o pericolo di morte.
per situazioni pericolose a basso rischio che, se non evitate, potrebbero causare lesioni di lieve o media entità.
per situazioni pericolose a basso rischio che, se non evitate, potrebbero arrecare
danni allo strumento, altri danni materiali, malfunzionamenti, risultati erronei o perdita di dati.
(senza simbolo)
per informazioni utili sul prodotto.
AVVERTENZA
Rischio di folgorazione
1 Non aprire l'alloggiamento dell'adattatore CA. Accertarsi che l’adattatore CA non venga a
contatto con liquidi.
2 Utilizzare esclusivamente il cavo di alimentazione tripolare con messa a terra fornito con
lo strumento e solo una presa tripolare con messa a terra.
Informazioni sulla sicurezza48 Stampante
Page 51

AVVISO
Perdita di dati
La stampa continua può comportare il surriscaldamento della testina di stampa. In tal caso, il
processo di stampa si ferma fino al raffreddamento della testina di stampa. Durante questa
fase di raffreddamento, la stampante non dev'essere spenta per non perdere i dati contenuti
nella memoria tampone.
Condizioni di funzionamento
• La stampante deve essere utilizzata solamente in ambienti chiusi e asciutti.
Per le condizioni ambientali vedere .
• La stampante deve essere portata alla temperatura ambiente.
• La stampante non deve essere utilizzata in presenza di umidità e liquidi.
it
Informazioni sulla sicurezza 49Stampante
Page 52

2 Installazione e messa in funzione
Per ulteriori informazioni
Ulteriori informazioni su questa stampante sono disponibili nelle istruzioni d'uso online o su
CD-ROM.
2.1 Contenuto della fornitura
I seguenti accessori sono parte della dotazione:
• Stampante termica P-56RUE o P-58RUE
• Set di rotoli di carta
• Adattatore CA universale
• Cavo di alimentazione secondo specifiche locali
• Cavo USB
• Cavo RS232
• Manuale per l'utente
• Certificazione di conformità
• CD-ROM (contenente documenti in diverse lingue, software e driver)
2.2 Collegare la stampante all'alimentazione
AVVERTENZA
Rischio di folgorazione
1 Non aprire l'alloggiamento dell'adattatore CA. Accertarsi che l’adattatore CA non venga a
contatto con liquidi.
2 Utilizzare esclusivamente il cavo di alimentazione tripolare con messa a terra fornito con
lo strumento e solo una presa tripolare con messa a terra.
AVVISO
Utilizzare esclusivamente l'adattatore CA originale fornito con la stampante.
− Non cercare di usare l'adattatore CA per altri strumenti METTLER TOLEDO, per evitare che
possano subire danni.
1 Collegare l'adattatore CA al manicotto di collegamento
sul retro della stampante.
2 Bloccare il connettore mediante il dado a vite.
3 Collegare il cavo di alimentazione tripolare al mani-
cotto per l'adattatore CA.
4 Collegare il cavo di alimentazione all'alimentazione di
rete.
5 Accendere la stampante.
Installazione e messa in funzione50 Stampante
Page 53

2.3 Inserire il rotolo della carta
ATTENZIONE
Pericolo di ustioni
La testina di stampa termica si riscalda durante il processo di stampa. Attendere che si raffreddi prima di aprire il coperchio della stampante.
Nota
Si consiglia di usare esclusivamente la carta indicata da METTLER TOLEDO, vedere nelle istruzioni d'uso.
1 Accendere la stampante.
2 Premere il tasto di sgancio.
ð Il coperchio della stampante si apre.
3 inserire il rotolo di carta nel telaio della stampante.
Nota
Il rotolo di carta deve srotolarsi nella giusta direzione
(vedere immagine).
it
4 Verificare che la carta si trovi al centro delle guide.
5 Chiudere il coperchio della stampante. Premere salda-
mente verso il basso fino ad avvertire uno scatto.
6 Premere il tasto di alimentazione carta
l'alimentazione della carta.
per verificare
Installazione e messa in funzione 51Stampante
Page 54

2.4 Collegare la stampante a uno strumento METTLER TOLEDO
AVVISO
Si consiglia di collegare la stampante a un solo strumento alla volta. Se più strumenti vengono collegati simultaneamente alla stampante, METTLER TOLEDO non garantisce il corretto
funzionamento della stampante.
Nota
La stampante rileva automaticamente le impostazioni dello strumento collegato se lo strumento supporta
questa funzione.
2.4.1 Collegamento della stampante mediante connessione RS232
1 Collegare la stampante all'alimentatore.
2 Utilizzare il cavo RS232 per collegare la stampante allo strumento METTLER TOLEDO.
Nota
Le impostazioni della connessione RS232 della stampante e dello strumento devono essere identiche.
3 Accendere la stampante.
Nota
La funzione Conness. autom. è disattivata come impostazione predefinita. È possibile accenderla se la
stampante è collegata a una connessione RS232 e se le impostazioni di connessione (Vel. Trasmissione,
Bits / Parity, Handshake) della stampante differiscono da quelle della bilancia. Per ulteriori informazioni in
merito all'attivazione della funzione Conness. autom. consultare .
Impostazioni predefinite della stampante
Vel. Trasmissione :
Bits / Parity : 8 / None Handshake : XOn/XOff
9600 Stop bits : 1 Bit
2.4.2 Collegamento della stampante mediante connessione USB
1 Collegare la stampante all'alimentatore.
2 Utilizzare il cavo USB per collegare la stampante allo strumento METTLER TOLEDO.
3 Accendere la stampante.
2.4.3 Collegamento della stampante mediante connessione Ethernet
1 Collegare la stampante all'alimentatore.
2 Utilizzare un cavo Ethernet per collegare la stampante direttamente allo strumento METTLER TOLEDO o
indirettamente tramite la rete Ethernet aziendale.
Nota
Per installare e configurare l'interfaccia Ethernet, è necessario avere conoscenze di base delle reti TCP/IP e
della tecnologia di rete in generale. Se necessario, contattare l'amministratore di rete dell'ufficio IT o il servizio di assistenza IT.
2.5 Impostazione di lingua, data e ora
Al primo utilizzo della stampante, si consiglia di impostare la lingua della stampante oltre all'ora e alla data
correnti.
1 Accendere la stampante.
ð Appare il messaggio Impostare prima lingua e data / ora!.
2 Utilizzare i tasti di scorrimento (
ð Premere il tasto di conferma
3 Scegliere il formato della data.
4 Definire la data.
5 Scegliere il formato dell'ora.
, ) per scegliere una lingua dall'elenco.
.
Installazione e messa in funzione52 Stampante
Page 55

6 Definire l'ora.
ð La lingua, la data e l'ora sono state definite.
Nota
• Queste impostazioni vengono mantenute anche nel caso in cui la stampante venga scollegata dall'ali-
mentazione.
• La data e l'ora vengono modificate da uno strumento collegato se lo strumento collegato prevede l'im-
postazione di data e ora.
• Se lo strumento collegato prevede l'impostazione di data e ora, le voci di menu non sono disponibili.
it
Installazione e messa in funzione 53Stampante
Page 56

3 Manutenzione
AVVERTENZA
Rischio di folgorazione
1 Prima di eseguire le operazioni di pulizia o di manutenzione, scollegare la stampante e
l'adattatore CA dall'alimentatore.
2 Evitare la penetrazione di liquidi nella stampante o nell'adattatore CA.
AVVISO
Non aprire mai l'alloggiamento della stampante o dell'adattatore CA in quanto non contengono componenti che possano essere puliti, riparati o sostituiti dall'utente.
Utilizzare esclusivamente il cavo di alimentazione METTLER TOLEDO.
3.1 Pulizia dello chassis
L'alloggiamento della stampante è costituito da materiali di eccellente qualità e resistenza. Pertanto, può essere pulito con uno degli agenti detergenti non aggressivi disponibili in commercio.
3.2 Smaltimento
In conformità con la direttiva europea 2012/19/EU WEEE (Waste Electrical and Electronic
Equipment), questo dispositivo non può essere smaltito tra i rifiuti domestici. Queste disposizioni sono valide anche nei paesi esterni all'UE, in base ai requisiti delle varie legislazioni.
Smaltire questo prodotto in accordo alle normative locali presso il punto di raccolta specificato per le apparecchiature elettriche ed elettroniche. In caso di dubbi, rivolgersi all'ente responsabile o al distributore da cui è stato acquistato questo dispositivo. Nel caso in
cui questo dispositivo venga affidato ad altri (per uso privato o professionale), accludere
anche il contenuto di queste normative.
Grazie per la cura dedicata alla protezione dell'ambiente.
Manutenzione54 Stampante
Page 57

4 Dati tecnici
Alimentatore
Adattatore CA/CC: Tensione di entrata: 100-240 V, ±10%, 50/60 Hz
Tensione di uscita: 24 V CC, 2,5 A (con protezione elettronica dal sovraccarico)
Alimentazione della
stampante:
Protezione e standard
Categoria di sovratensione
Grado di inquinamento 2
Standard per la sicurez-
za ed EMC
Campo di applicazione Solo per uso in ambienti chiusi
Condizioni ambientali
Altezza sopra il livello
medio del mare
Intervallo di temperatura
ambiente
Umidità relativa dell'aria 20-80% fino a 31 °C in lineare diminuzione fino al 50% a 40 °C, senza con-
Caratteristiche della stampante
Tecnologia di stampa Termica diretta
Risoluzione 8 punti/mm (203 dpi)
Velocità di stampa Max. 101,6 mm/s (4 IPS)
Larghezza stampabile 54 mm (2,12")
Orologio in tempo reale Data e ora
Font presenti 7 font bitmap Windows: 6 pt, 7 pt, 10 pt, 12 pt, 24 pt, 16x26, OCR A & B
Codici a barre • Codici a barre 1-D: Codice 39, Codice 138
Grafici • Supporto BMP e PCX
Interfacce • Porta RS232 (maschio DB 9)
Pannello di controllo • LED a tre colori: verde, arancione o rosso per indicazioni di stato
Display LCD, retroilluminazione, 128 x 64 punti
Lingue supportate inglese, tedesco, francese, italiano, spagnolo, russo, cinese (semplificato),
Materiali
Parte superiore dell'alloggiamento
Base dell'alloggiamento Plastica (PBT)
24 V CC, 2,5 A
II
Certificazione di conformità (parte della dotazione standard)
Fino a 4.000 m
Funzionamento: da 5 °C a 40 °C
Stoccaggio: da -25 °C a 60 °C
densa
• Codici a barre 2-D: PDF417 (vedi 1-D per il layout), codice Datamatrix, co-
dice QR, codice Aztec
• Supporto file ICO, WMF, JPG, EMF tramite software
• Supporto ridimensionamento, rotazione, mappatura e inversione immagini
tramite software DirectLabel
• Porta dispositivo USB 2.0 (tipo B)
• Porta Ethernet 10/100base-TX (Rj-45)
• 8 tasti tattili (P-56RUE), 20 tasti tattili (P-58RUE)
giapponese, coreano
Zinco pressofuso cromato e plastica (PBT)
it
Dati tecnici 55Stampante
Page 58

Rullo
Mezzo
Larghezza Max. 58 mm (2,28")
Spessore Min. 0,06 mm (0,003") ~ Max. 0,2 mm (0,008")
Diametro rotolo Max. 60 mm (2,36")
Diametro anima 12,7 mm (0,5")
Direzione di avvolgi-
mento rotolo carta
Verso l'esterno
Driver USB
Link http://www.ftdichip.com/Drivers/VCP.htm
Dimensione/Peso
Lunghezza 220 mm
Altezza 88 mm
Larghezza 130 mm
Peso netto 1,4 kg, senza adattatore CA/CC
Dati tecnici56 Stampante
Page 59

1
安全信息
查找更多信息
可在光盘或网上的使用说明书中查找到本打印机的更详细信息。
1.1
提示警告与符号定义
安全说明使用提示语与警告符号标注。忽视安全说明有可能造成人员受伤、仪器损坏与故障。
警告
小心
注意
信息
一般风险 触电 热表面
用于提示中等风险性危险情况,如不加以避免,可能会造成严重伤亡。
用于提示风险性较低的危险情况,如不规避会造成轻微或中度受伤。
用于提示低风险危险环境,会损坏仪器并导致其他实质性损害、故障、错误
结果或数据丢失。
(无符号)
用于产品的有用信息。
1.2
产品安全说明
一般安全信息
您的仪器采用最先进的技术,符合安全法规,但是在外部环境中有可能产生某些危害。请勿打开
仪器的外壳。其中没有任何可以由用户来维护,修理或者更换的部件。如果您的仪器出现任何问
题,请与您的梅特勒-托利多授权经销商或服务代表联系。
使用仪器前,必须阅读并理解本印刷文档。请务必保留本印刷文档,以供今后参考。
操作和使用仪器时,务必遵照本文档所包含的说明。必须严格遵守新仪器的设置说明。
梅特勒-托利多公司对由于未按照说明书操作而导致仪器保修期内保修资格失效的后果,概不负
责。
禁止以任何方式更改或修改仪器。只能使用梅特勒-托利多原装的配件和附件。
安全说明
警告
电击危险
1 请勿打开交流适配器外壳。确保交流适配器不会接触到液体。
2 只能使用仪器配备的带有设备接地导线的3针电源线,并且只能使用3针接地插
座。
注意
数据丢失
连续打印可导致打印头过热。打印过程停止,直到打印头冷却为止。在冷却阶段期
间,打印机不得关闭,否则缓冲数据将丢失。
zh
安全信息 57打印机
Page 60

操作条件
• 必须在干燥的室内使用打印机。
有关环境条件,请参阅 一般技术参数。
• 打印机必须适合在室温下运行。
• 不能在潮湿、仅可的环境中使用打印机。
安全信息58 打印机
Page 61

2
安装与操作
查找更多信息
可在光盘或网上的使用说明书中查找到本打印机的更详细信息。
2.1
标准配置
以下配件是设备的一部分:
• P-56RUE或P-58RUE热敏打印机
• 纸卷/套
• 通用交流适配器
• 所在国专用电缆
• USB电缆
• RS232电缆
• 简明用户手册
• 符合性声明
• 光盘(包含不同语言版本的文档、软件和驱动程序)
2.2
将打印机接通电源
警告
电击危险
1 请勿打开交流适配器外壳。确保交流适配器不会接触到液体。
2 只能使用仪器配备的带有设备接地导线的3针电源线,并且只能使用3针接地插
座。
zh
注意
使用与您的打印机配套的原装交流适配器。
− 请勿将此交流适配器用于其他梅特勒-托利多仪器,否则会导致仪器损坏。
1 将交流适配器连接到打印机后部的接口。
2 使用螺母锁定连接器。
3 将三针接地电源线连接到交流适配器的插座上。
4 将电源线连接到电源。
5 打开打印机。
安装与操作 59打印机
Page 62

2.3
插入纸卷
小心
灼伤危险
打印时,热敏打印头会变热。等待打印头冷却后再打开打印机盖子。
信息
我们建议只使用梅特勒-托利多提供的指定纸张(请参阅《操作说明书》中的 选件和备件一节)。
1 打开打印机。
2 按下释放键。
ð 打印机盖子打开。
3 将纸卷插入打印机机架。
信息
纸卷必须按正确方向展开(如图所示)。
4 确保纸张位于纸张导轨中央。
5 关闭打印机盖子。牢牢按下直到发出咯嗒声时为
止。
6 按下进纸键
安装与操作60 打印机
检查进纸情况。
Page 63

2.4
打印机与梅特勒-托利多仪器连接
注意
建议只将打印机一次连接到一台仪器。一次将打印机连接到多台仪器,则梅特勒-托
利多无法保证打印机能够正确操作。
信息
打印机可自动检测所连接仪器的设置(如果仪器支持此功能)。
2.4.1
通过RS232接口连接打印机
1 将打印机连接至电源。
2 使用RS232电缆将打印机连接到梅特勒-托利多仪器。
信息
打印机和仪器的 RS232 连接设置必须相同。
3 打开打印机。
信息
默认情况下,功能自动连接是关闭的。如果通过RS232接口连接打印机且打印机的连接设置
(Baudrate、Bits / Parity、Handshake)与天平设置不同,则可打开该功能。关于激活此功能的更
多信息,自动连接请参阅 RS232。
打印机的默认设置
Baudrate : 9600 Stop bits : 1 Bit
Bits / Parity : 8 / None Handshake : XOn/XOff
2.4.2
通过USB接口连接打印机
1 将打印机连接至电源。
2 使用USB电缆将打印机连接到梅特勒-托利多仪器。
3 打开打印机。
2.4.3
通过以太网接口连接打印机
1 将打印机连接至电源。
2 使用以太网电缆将打印机直接连接到梅特勒-托利多仪器,或者通过公司以太网间接连接。
信息
关于以太网接口安装与配置,您需要掌握基于 TCP/IP 网络的基本知识和一般网络技术。如需要,
请联系您的 IT 部门网络管理员或 IT 支持人员。
zh
2.5
定义语言、日期与时间。
首次使用打印机时,我们建议定义打印机语言、当前时间和日期。
1 打开打印机。
ð 显示请先设置语言和日期 / 时间!消息。
2 使用滚动键(
ð 按下确认键
3 选择一种日期格式。
4 定义日期。
5 选择一种时间格式。
、 )从列表中选择语言。
。
安装与操作 61打印机
Page 64

6 定义时间。
ð 已经定义语言、时间和日期。
信息
• 即使您的打印机在断电的情况下,这些设置仍然会被保留下来。
• 如果所连接的仪器支持日期和时间,则会从该仪器更改日期和时间。
• 如果所连接的仪器支持日期和时间,则菜单项不可用。
安装与操作62 打印机
Page 65

3
维护
警告
电击危险
1 进行清洁或执行维护工作前,先将打印机和交流适配器从电源断开。
2 确保打印机和交流适配器内不会进入液体。
注意
切勿拆开打印机或交流适配器外壳,显示操作终端或交流适配器 - 其中没有任何可以
由用户清洁,修理或者更换的部件!
只能使用梅特勒-托利多提供的电源线。
3.1
清洁外壳
打印机外壳采用顶级的耐腐蚀材料制成。因此,可以使用市面上销售的任意温和清洁剂。
3.2
处置
依照电气和电子设备废弃物_(WEEE) 的欧盟指令 2012/19/EU,该设备不得作为生
活废物进行处置。这也适用于欧盟以外的国家,请按照其具体要求进行处置。
请遵照当地法规,在规定的电气和电子设备收集点处理本产品。如果您有任何疑
问,请与主管部门或者您购买本设备的经销商联系。如果将本设备交给其他方
(供私用或专业人员使用),也必须遵守该规程的内容。
感谢您对环境保护所作的贡献。
zh
维护 63打印机
Page 66

4
技术参数
电源
交流/直流 适配器: 主要: 100 V - 240 V, ±10%, 50/60 Hz
辅助: 24 V DC, 2.5 A(带有电子过载保护装置)
电源至打印机: 24 V DC, 2.5 A
保护与标准
过压类别 II
污染等级 2
安全性和 EMC 标准 符合性声明(标准配置的一部分)
应用范围 仅供室内使用
环境条件
海拔高度 最高可达 4,000 米
环境温度范围 运行 5°C ~ 40°C
存储: -25°C ~ 60°C
相对空气湿度 气温在未达到 31 °C 时,空气湿度在 20% 到 80 % 之间,当气温达到
40 °C 时,空气湿度线性下降至 50 %,无凝结现象
打印机特点
打印技术 热敏式
分辨率 8点/毫米(203 dpi)
打印速度 最大101.6 mm/s(4 IPS)
可打印宽度 54 mm(2.12")
实时时钟 日期和时间
常驻字型 7种Windows位图字体: 6 pt, 7 pt, 10 pt, 12 pt, 24 pt, 16x26, OCR A & B
条码 • 1-D条形码: 代码39,代码138
• 2-D条形码: PDF417(布局为1-D),Datamatrix代码,二维码,Aztec
码
图形 • 支持BMP和PCX
• 通过软件支持ICO、WMF、JPG和EMF文件
• 通过DirectLabel软件支持图形调整大小、旋转、映射和倒转
接口 • RS232端口(DB 9,公端)
• USB 2.0设备端口(B型)
• 以太网10/100base-TX端口(Rj-45)
控制面板 • 三色LED: 绿色、橙色和红色,用于显示状态
• 8个触摸式按键(P-56RUE),20个触摸式按键(P-58RUE)
显示屏 LCD,背光,128 x 64点
显示语言 英语、德语、法语、意大利语、西班牙语、俄语、中文(简体)、日语
和韩语
材料
外壳上部件 压铸锌,铬合金和塑料(PBT)
技术参数64 打印机
Page 67

底部外壳 塑料(PBT)
压纸滚轴
介质
宽度 最大58 mm(2.28")
厚度 最 0.06 mm(0.003")~最大0.2 mm(0.008")
纸卷直径 最大60 mm(2.36")
核心直径 12.7 mm(0.5")
纸卷弯曲方向 向外
USB驱动程序
连接 http://www.ftdichip.com/Drivers/VCP.htm
尺寸/重量
长度 220 mm
高度 88 mm
宽度 130 mm
净重 1.4 kg,无交流/直流适配器
zh
技术参数 65打印机
Page 68

1
安全性について
詳細内容については以下のサイトを参照。
プリンターに関する詳細情報は、 CD-ROMまたはインターネット上の取扱説明書を
参照してください。
1.1
注意喚起およびアイコンの定義
安全注意事項には注意喚起(注意を促す語)およびアイコンを付けてあります。安全上の注意
を疎かにすると、怪我、機器の損傷、および故障の要因となります。
警告
注意
注記
備 考
一般的な危険性 電気ショック 高温注意
1.2
製品固有の安全注意事項
回避しないと、死亡事故または重度の事故や重傷を招く恐れがある場合
や、中程度の危険性を伴う状況に対して発せられます。
軽中度の負傷を招く恐れがある、軽度の危険状態に対する注意喚起。
天びんもしくは他の器物の損傷、エラーや故障、データ喪失を招く恐れが
ある、軽度の危険状態に対する注意喚起。
(記号なし)
製品に関する有益な情報。
安全性に関する一般的情報
お買い上げ頂いた製品は先端技術を結集したもので、最新の機器に求められる安全性を満たし
ていますが、誤った操作をすると故障の原因となるばかりか人に危険を及ぼす可能性もありま
す。機器の筐体は開けないでください。お客様で実施可能なパーツ交換、修理可能な部品はあ
りません。万が一機器にトラブルが発生した場合は、メトラー・トレドの正規販売代理店また
はサービス代理店にご連絡下さい。
装置を使用する前に、本説明書をよく読んで、その内容を理解してください。本説明書は必要
なときに参照できるように、保管してください。
機器を使用する際は必ずこのユーザーガイドの指示に従ってください。新しい機器を設定する
際の指示には、厳密に従う必要があります。
機器を取扱説明書に従わないで使用すると、機器の安全性が損なわれる恐れがありますが、こ
れに関してメトラー・トレドは一切責任を負いません。
装置の改造、変更は絶対におやめください。当社のスペアパーツやアクセサリだけを使用して
ください。
安全性について66 プリンタ
Page 69

安全注記
警告
電気ショックの危険性
1 AC アダプタのハウジングを分解しないでください。AC アダプタに液体などが
かからぬ様、ご注意ください。
2 機器に付属している接地線付き3ピン電源ケーブルのみを使用し、プラグは接
地線付き3ピンコンセントに差し込む必要があります。
注記
データ喪失
連続印字すると、プリントヘッドが過熱する恐れがあります。プリントjプロセス
は、プリントヘッドが冷却するまで中止します。冷却期間中は、プリンターの電源
をオフにしないでください。電源をオフするとバッファ内のデータが失われます。
操作条件
• プリンタは乾燥した室内でのみ使用してください。
周囲環境条件については、一般技術データをご参照ください。
• プリンタは室温に順応させる必要があります。
• 湿気および水滴が存在するような環境でプリンタを使用しないでください。。
ja
安全性について 67プリンタ
Page 70

2
設置と操作
詳細内容については以下のサイトを参照。
プリンターに関する詳細情報は、 CD-ROMまたはインターネット上の取扱説明書を
参照してください。
2.1
標準付属品
下記の付属品は設備の一部です。
• P-56RUEまたはP-58RUEサーマルプリンター
• ペーパーロールセット
• ユニバーサルAC アダプタ
• 該当国仕様の電源ケーブル
• USB ケーブル
• RS232 ケーブル
• ユーザマニュアル
• 適合宣言
• CD-ROM (ソフトウェア、ドライバーおよび複数言語による取扱説明書を収録)
2.2
プリンタを電源に接続する
警告
電気ショックの危険性
1 AC アダプタのハウジングを分解しないでください。AC アダプタに液体などが
かからぬ様、ご注意ください。
2 機器に付属している接地線付き3ピン電源ケーブルのみを使用し、プラグは接
地線付き3ピンコンセントに差し込む必要があります。
注記
プリンタに付属のAC アダプタのみ使用するようにしてください。
− このAC アダプタをMETTLER TOLEDOのその他の製品に使用しないでください。製
品が損傷する恐れがあります。
1 AC アダプタをプリンター後部の電源ソケットに
差し込みます。
2 ネジでコネクタを固定します。
3 接地線付き3ピン電源ケーブルをAC アダプタの
ソケットに差し込みます。
4 電源ケーブルをコンセントに差し込みます。
5 プリンタのスイッチを"オン"にします。
設置と操作68 プリンタ
Page 71

2.3
ペーパーロールの取り付け
注意
火傷の危険性
印字中、サーマルプリンターのプリントヘッドは熱くなります。プリントヘッドが
完全に冷えてからプリンターカバーを開けてください。
備 考
METTLER TOLEDOが指定する紙を使用することをお勧めします。アクセサリおよびスペアパート
を参照してください。
1 プリンタをオンにします。
2 リリースキーを押します。
ð プリンタカバーが開きます。
3 ペーパーロールをプリンタフレームに取り付け
ます。
備 考
ペーパーロールは正しい方向に固定される必要
があります(図を参照)。
ja
設置と操作 69プリンタ
Page 72

4 ペーパーがペーパーガイドの中央にあることを
確認してください。
5 プリンタカバーを閉じます。所定の位置にカチ
ッはまるまでしっかりとカバーを押し込んでく
ださい。
6 給紙キーを押して
2.4
プリンタをメトラー・トレド測定機器に接続する
紙を確認します。
注記
プリンターは一回に一つの機器に接続することをお勧めします。複数の機器が同時
にプリンターに接続している場合、METTLER TOLEDOはプリンターの正常な作動を
保証することができません。
備 考
接続する機器が自動検出機能を使用できる場合、プリンタは接続されている機器の設定を自動
的に検出します。
2.4.1
RS232接続でプリンターを接続します
1 プリンタを電源に接続します。
2 RS232ケーブルを使って、プリンターとMETTLER TOLEDO設備を接続します。
備 考
プリンターと設備のRS232接続設定は同じでなければなりません。
3 プリンタをオンにします。
備 考
デフォルトでは、この機能自動接続はオフになっています。しかし、プリンターがRS232接続
で繋がっているときや、プリンターと天びんの接続設定(Baudrate, Bits / Parity, Handshake) が異
なるときにスイッチオンにすることができます。機能 のアクティベーションに関する詳細情報
は、自動接続 RS232 を参照してください。
プリンタのデフォルト設定
Baudrate : 9600 Stop bits : 1 Bit
Bits / Parity : 8 / None Handshake : XOn/XOff
2.4.2
USBでプリンターを接続します
1 プリンタを電源に接続します。
2 USBケーブルを使って、プリンタとMETTLER TOLEDOの設備を接続します。
3 プリンタをオンにします。
2.4.3
プリンタをイーサネットで接続する
1 プリンタを電源に接続します。
設置と操作70 プリンタ
Page 73

2 イーサネットケーブルを使って、プリンタとMETTLER TOLEDOの設備を直接接続するか、社内
のイーサネットを利用して間接的に接続します。
備 考
イーサネットインターフェイスのインストールと設定を実施するには、TCP/IPベースのネットワ
ークや一般的なネットワーク技術に関する基本的な知識が必要です。必要に応じて、IT部門やIT
サポートのネットワーク管理者に問い合わせてください。
2.5
言語、日付と時刻を設定します。
プリンターを初めて使用するときは、プリンターの言語、現在の時間と日付を設定することを
お勧めします。
1 プリンタをオンにします。
ð まず言語と日付 / 時刻を設定します! メッセージが表示されます。
2 スクロールキー(
ð 確認キー
3 日付の書式を設定します。
4 日付を設定します。
5 時間の書式を設定します。
6 時間を設定します。
ð 言語、時間と日付の設定が完了しました。
備 考
• この設定は、プリンタを電源から切り離しても保持されます。
• 接続された設備が日付と時間を利用できる場合、日付と時刻は接続されている設備に応じて
変更されます。
• 接続されている設備が日付と時刻をサポートしている場合、このメニュー項目は利用できま
せん。
, )を使って、リストから言語を選びます。
を押します。
ja
設置と操作 71プリンタ
Page 74

3
メンテナンス
警告
電気ショックの危険性
1 クリーニングやメンテナンス作業を始める前に、プリンターとAC アダプタを電
源から切り離してください
2 プリンターあるいはAC アダプタに液体が侵入しないよう様、ご注意下さい。
注記
プリンタのハウジングや AC アダプタは決して開けないでください。これらの部分
にはユーザーによるクリーニングや修理、交換が可能なパーツは含まれていませ
ん。
METTLER TOLEDOの電源ケーブルを使用してください。
3.1
筐体のクリーニング
プリンターハウジングは耐久性に優れた最高級の材料で作られています。そのため、市販のす
べての中性洗浄剤が使用できます。
3.2
廃棄
欧州の電気・電子機器廃棄物リサイクル指令 (WEEE)2012/19/EU の要求に従
い、本装置を一般廃棄物として廃棄することはできません。これはEU以外の
国々に対しても適用されますので、各国の該当する法律に従ってください。
本製品は、各地域の条例に定められた電気・電子機器のリサイクル回収所に廃
棄してください。ご不明な点がある場合は、行政の担当部署または購入店へお
問い合わせください。本製品を他人へ譲渡する場合は(私的使用/業務使用を問
わず)、この廃棄規定の内容についても正しくお伝えください。
環境保護へのご協力を何卒よろしくお願いいたします。
メンテナンス72 プリンタ
Page 75

4
技術データ
電源
AC/DC アダプタ: 一次側: 100 V - 240 V, ±10%, 50/60 Hz
二次側 : 24 V DC、2.5 A (過負荷防止機構付き)
プリンタの供給電源: 24 V DC、2.5 A
保護度および規準
過電圧カテゴリー II
汚染等級 2
安全規格およびEMC規格適合宣言書(標準付属品)
使用範囲 屋内用途専用
周囲環境条件
海抜 最大 4000 m
周囲温度範囲 作動時: 5°C ~ 40°C
保管時: -25°C ~ 60°C
相対湿度 31 ℃で20% ~ 80%、40 ℃ で50 % まで直線的に減少、結露しないこ
と
プリンタの特長
印刷技術 感熱紙方式
解像度 8 ドット/mm (203 dpi)
印字速度 最大101.6 mm/s (4 IPS)
印字可能幅 54 mm (2.12")
リアルタイムクロック日付と時刻
ja
搭載フォント 7種類のWindows ビットマップフォント: 6 pt、7 pt、10 pt、12 pt、24
pt、16x26、OCR A & B
バーコード • 1-D バーコード: コード 39、コード 138
• 2-D バーコード: PDF417 (1-Dと同じレイアウト)、Datamatrixコー
ド、QRコード、Aztecコード
グラフィック • BMP および PCXをサポート
• ソフトウェアによりICO、WMF、JPG、EMFファイルをサポート
• DirectLabelソフトウェアにより画像のリサイズ、回転、マッピング
および反転をサポート
インターフェイス • RS232ポート(DB 9ピン、オス)
• USB 2.0デバイスポート (Bタイプ)
• イーサネット 10/100base-TXポート (Rj-45)
コントロールパネル • 3色LED: 緑、オレンジまたは赤、ステータスインジケータとして使
用
• 8個のタッチキー(P-56RUE)、20個のタッチキー(P-58RUE)
ディスプレイ LCD、バックライト、128 x 64ドット
技術データ 73プリンタ
Page 76

表示言語 英語、ドイツ語、フランス語、イタリア語、スペイン語、ロシア語、
中国語 (簡体字)、日本語、韓国語
材料
ハウジング頂部 錫ダイカスト、クロームメッキおよびプラスチック(PBT)
ハウジング底部 プラスチック (PBT)
プラテンローラー
メディア
Width 最大58 mm (2.28")
厚さ 最大0.06 mm (0.003") ~ 最大0.2 mm (0.008")
ロール直径 最大60 mm (2.36")
芯直径 12.7 mm (0.5")
ペーパーロール巻き方向外側
USBドライバー
リンク http://www.ftdichip.com/Drivers/VCP.htm
寸法 / 重量
長さ 220 mm
高さ 88 mm
Width 130 mm
正味重量 1.4 kg、AC/DCアダプターなし
技術データ74 プリンタ
Page 77

1
안전 정보
자세한 정보 알아보기
이 프린터에 대한 추가 정보는 CD-ROM이나 온라인 상의 사용자 설명서에서 찾을 수
있습니다.
1.1
경고 신호 및 기호의 정의
안전성 참고는 신호 단어와 경고 기호로 표시됩니다. 안전성 참고를 무시하면 부상을 입거나 측정
기가 손상되고 고장을 일으킬 수 있습니다.
경고
주의
주의 사항
참고
일반 위험 전기 충격 고온 표면
1.2
제품별 안전성 참고
피하지 않을 경우 사망이나 중상에 이를 수 있는 중급 위험 수준의 위험한
상황의 경우.
위험 가능성이 낮은 상황의 경우, 피하지 않으면 경미하거나 중간 수준의 부
상이 발생합니다.
위험 가능성이 낮은 상황인 경우, 기기, 기타 재료 손상, 오작동 및 부정확한
결과 또는 데이터 손실이 발생합니다.
(기호 없음)
제품에 대하여 유용한 정보인 경우 나타남.
일반 안전 정보
기기가 첨단 기술에 부합하며 인지된 모든 안전 규정을 준수하고 있지만 예외적인 경우 특정한
위험이 발생할 수 있습니다. 측정기의 하우징을 열지 마십시오. 사용자가 정비, 수리 또는 교환할
수 있는 부품이 없습니다. 측정기에 문제가 있으면, 인가된 METTLER TOLEDO 판매자 또는 서비스
담당자에게 문의하십시오.
기기를 사용하기 전에 인쇄된 본 문서를 읽고 이해해야 합니다. 향후 참조를 위해 인쇄된 본 문서
를 보관해야 합니다.
항상, 본 문서의 지시사항에 따라 기기를 조작하고 사용하십시오. 새 측정기의 설정 방법은 엄격
히 따라야 합니다.
사용자 설명서를 따르지 않고 기기를 사용하면, 기기 보호 기능이 제 기능을 못할 수 있으며
METTLER TOLEDO는 책임지지 않습니다.
어떤 방법으로든 기기를 변경하거나 수정해서는 안됩니다. METTLER TOLEDO의 순정 예비 부품 및
부속품을 사용하십시오.
안전 노트
ko
경고
전기 충격 위험
1 AC 어댑터 하우징을 열지 마십시오. AC 어댑터가 액체와 접촉하지 않게 해야 합니
다.
2 기기와 함께 제공된 장비 접지 전도체가 포함된 3핀 전원 케이블만 사용하십시
오. 또한 3핀 접지 콘센트만 사용해야 합니다.
안전 정보 75프린터
Page 78

주의 사항
데이터 손실
장시간 인쇄하면 프린트헤드가 과열될 수 있습니다. 프린트헤드가 식을 때까지 인쇄
프로세스가 중지됩니다. 식는 동안에는 프린터 전원을 끄지 마십시오. 그렇지 않으
면 버퍼 데이터가 손실됩니다.
작동 환경
• 프린터는 건조한 실내 환경에서만 사용해야 합니다.
주변 조건은 를 참조하십시오.
• 프린터는 실온에서 사용해야 합니다.
• 프린터를 습기 및 액체가 있는 곳에서 사용해서는 안됩니다.
안전 정보76 프린터
Page 79

2
설치 및 운영
자세한 정보 알아보기
이 프린터에 대한 추가 정보는 CD-ROM이나 온라인 상의 사용자 설명서에서 찾을 수
있습니다.
2.1
배송 범위
다음 액세서리는 장비의 일부입니다.
• P-56RUE 또는 P-58RUE 열전사 프린터
• 용지 롤 세트
• 유니버설 AC 어댑터
• 국가별 전원 케이블
• USB 케이블
• RS232 케이블
• 사용자 매뉴얼
• 적합성 선언
• CD-ROM(각기 다른 언어로 된 사용 설명서, 소프트웨어 및 드라이버 포함)
2.2
전원 공급 장치에 프린터 연결
경고
전기 충격 위험
1 AC 어댑터 하우징을 열지 마십시오. AC 어댑터가 액체와 접촉하지 않게 해야 합니
다.
2 기기와 함께 제공된 장비 접지 전도체가 포함된 3핀 전원 케이블만 사용하십시
오. 또한 3핀 접지 콘센트만 사용해야 합니다.
주의 사항
프린터와 함께 제공된 정품 AC 어댑터만 사용하십시오.
− 다른 METTLER TOLEDO 기기에 이 AC 어댑터를 사용하지 마십시오. 기기가 손상될
수 있습니다.
ko
1 AC 어댑터를 프린터 뒷면에 있는 연결 소켓에 연
결하십시오.
2 나사 너트를 사용해 커넥터를 고정시키십시오.
3 3핀 접지 전원 케이블을 AC 어댑터용 소켓에 연
결하십시오.
4 전원 케이블을 주 전원으로 연결하십시오.
5 프린터 전원을 켭니다.
설치 및 운영 77프린터
Page 80

2.3
용지 롤 삽입
주의
화상 위험
열전사 프린트헤드는 인쇄하는 동안 뜨거워집니다. 프린터 커버를 열기 전 프린트헤
드가 식을 때까지 기다리십시오.
참고
메틀러 토레도에서 지정한 용지만 사용할 것을 권장합니다(사용자 설명서의 참조).
1 프린터 전원을 켭니다.
2 릴리스 키를 누릅니다.
ð 프린터 커버를 엽니다.
3 용지 롤을 프린터 프레임에 넣습니다.
참고
용지 롤은 올바른 방향으로 풀어야 합니다(그림
참조).
4 용지가 용지 가이드 중앙에 오게 해야 합니다.
5 프린터 커버를 닫습니다. 딸깍 소리가 날 때까지
강하게 누릅니다.
6 급지 키
설치 및 운영78 프린터
를 눌러 용지 급지를 확인합니다.
Page 81

2.4
METTLER TOLEDO 기기에 프린터 연결
주의 사항
한 번에 프린터를 한 대의 기기에만 연결하는 것이 좋습니다. 여러 대의 기기를 한 개
의 프린터에 동시에 연결할 경우 METTLER TOLEDO는 프린터의 올바른 기능에 대해 보
장할 수 없습니다.
참고
기기가 이 기능을 지원하는 경우 프린터는 연결된 기기의 설정을 자동으로 감지합니다.
2.4.1
RS232 연결부를 통해 프린터 연결
1 전원 공급 장치에 프린터를 연결합니다.
2 RS232 케이블을 사용해 프린터를 METTLER TOLEDO 기기에 연결합니다.
참고
프린터 및 기기 설정에 대한 RS232 연결은 동일해야 합니다.
3 프린터 전원을 켭니다.
참고
기능 자동 연결은 기본적으로 꺼져 있습니다. RS232 연결부로 프린터가 연결되어 있는 경우, 프린
터의 연결 설정(Baudrate, Bits / Parity, Handshake)이 저울 설정과 다를 경우 전원을 켤 수 있습니
다. 기능 자동 연결 활성화에 대한 자세한 정보는 를 참조하십시오.
프린터 기본 설정
Baudrate : 9600 Stop bits : 1 Bit
Bits / Parity : 8 / None Handshake : XOn/XOff
2.4.2
USB 연결을 통해 프린터 연결
1 전원 공급 장치에 프린터를 연결합니다.
2 USB 케이블을 사용해 프린터를 메틀러 토레도 기기에 연결합니다.
3 프린터 전원을 켭니다.
2.4.3
Ethernet 연결을 통해 프린터 연결
1 전원 공급 장치에 프린터를 연결합니다.
2 이더넷 케이블을 사용해 프린터를 메틀러 토레도 기기에 직접 연결하거나 회사 이더넷을 통해
간적접으로 연결합니다.
참고
Ethernet 인터페이스를 설치 및 구성하려면 TCP/IP 기반 네트워크 및 네트워크 기술에 대한 기본 지
식을 갖추고 있어야 합니다. 필요한 경우, 귀하의 IT 부서 또는 IT 지원 부서의 네트워크 관리자에
게 문의하십시오.
2.5
언어, 날짜 및 시간 입력
프린터를 처음으로 사용하는 경우 언어, 현재 시간과 날짜를 입력할 것을 권장합니다.
1 프린터 전원을 켭니다.
ð 메시지 먼저 언어 및 날짜/시간을 설정하십시오!가 표시됩니다.
2 스크롤 키(
ð 확인 키
3 날짜 형식을 선택하십시오.
4 날짜를 입력하십시오.
5 시간 형식을 선택하십시오.
, )를 사용하여 목록에서 언어를 선택하십시오.
를 누르십시오.
ko
설치 및 운영 79프린터
Page 82

6 시간을 입력하십시오.
ð 언어, 시간 및 날짜가 입력되었습니다.
참고
• 전원에서 프린터를 분리하더라도 이 설정은 유지됩니다.
• 해당 기기가 날짜와 시간을 지원하는 경우 연결된 기기의 날짜와 시간이 변경됩니다.
• 연결된 기기가 날짜와 시간을 지원하는 경우 메뉴 항목은 사용할 수 없습니다.
설치 및 운영80 프린터
Page 83

3
유지보수
경고
전기 충격 위험
1 세척 또는 유지보수 작업을 수행하기 전에 프린터와 AC 어댑터를 전원 공급 장치
에서 분리합니다.
2 어떤 액체도 프린터나 AC어댑터 내부에 유입되지 않게 주의합니다.
주의 사항
프린터나 AC 어댑터의 하우징을 절대로 열지 마십시오. 여기에는 사용자가 직접 청
소, 수리 또는 교체할 수 있는 구성품이 없습니다.
METTLER TOLEDO에서 공급한 전원 케이블만 사용하십시오.
3.1
하우징 청소
프린터 하우징은 최고 등급으로 내구성이 좋은 재료로 제작되었습니다. 따라서 시판되는 모든 중
성 세제를 사용할 수 있습니다.
3.2
폐기
WEEE(Waste Electrical and Electronic Equipment: 전기 및 전자 장치 폐기물)에 대한
유럽 지침 2012/19/EU 를 준수하여, 본 장치는 국내 폐기물로 처리하지 못할 수도
있습니다. 이점은 EU 외부 국가의 특정 요건에 따라 이들 국가에도 적용됩니다.
현지 규정에 따라 본 제품을 전기 및 전자 장치 전용 수집 장소에 폐기하십시오.
질문이 있으면 담당 기관이나 본 장치를 구매하신 판매자에게 문의하십시오. 개
인 또는 전문 용도로 본 장치를 타인에게 양도하는 경우, 본 규정의 내용도 적용
됩니다.
귀하의 환경 보호에 대한 기여에 감사 드립니다.
ko
유지보수 81프린터
Page 84

4
기술 데이터
전원 공급 장치
AC/DC 어댑터: 기본: 100 V - 240 V, ±10%, 50/60 Hz
보조: 24 V DC, 2.5 A (전자 과부하 보호 포함)
프린터 전원 공급: 24 V DC, 2.5 A
보호 및 기준
과전압 카테고리 II
오염 등급 2
안전 및 EMC 기준 적합성 선언(기본 장비에 포함)
활용 범위 실내 전용
환경조건
해수면 위 고도 최대 4000 m
주변 온도 범위 작동: 5°C ~ 40°C
보관: -25°C ~ 60°C
상대 습도 20% ~ 80%(최대 31°C 기준), 50%까지 선형 감소(40°C 기준) , 비응축
프린터 기능
인쇄 기술 감열 방식
분해능 8도트/mm (203 dpi)
인쇄 속도 최대 101.6 mm/s (4 IPS)
인쇄 가능 너비 54 mm (2.12")
실시간 시각 날짜 및 시간
기본 글꼴 7종의 Windows 비트맵 글꼴: 6 pt, 7 pt, 10 pt, 12 pt, 24 pt, 16x26, OCR A
& B
바코드 • 1-D 바코드: Code 39, Code 138
• 2-D 바코드: PDF417(1-D 레이아웃), Datamatrix code, QR code, Aztec
code
그래픽 • BMP 및 PCX 지원
• 소프트웨어를 통해 ICO, WMF, JPG, EMF 파일 지원
• DirectLabel 소프트웨어를 통해 이미지 크기 조정, 회전, 매핑 및 반전
지원
인터페이스 • RS232 포트(수 DB 9)
• USB 2.0 장치 포트(B형)
• Ethernet 10/100base-TX 포트(Rj-45)
제어 패널 • 3중 색상 LED: 녹색, 주황색 또는 적색(상태 표시)
• 8개 터치 키(P-56RUE), 20개 터치 키(P-58RUE)
디스플레이 LCD, 백라이트, 128 x 64도트
디스플레이 언어 영어, 독일어, 프랑스어, 이태리어, 스페인어, 러시아어, 중국어(간체),
일본어, 한국어
재질
상단 하우징 주조 아연, 크롬 및 플라스틱(PBT)
하단 하우징 플라스틱(PBT)
압반 롤러
기술 데이터82 프린터
Page 85

미디어
너비 최대 58 mm (2.28")
두께 최소 0.06 mm (0.003") ~ 최대 0.2 mm (0.008")
롤 지름 최대 60 mm (2.36")
코어 지름 12.7 mm (0.5")
용지 롤 감긴 방향 바깥쪽
USB 드라이버
링크 http://www.ftdichip.com/Drivers/VCP.htm
치수 / 중량
길이 220 mm
높이 88 mm
너비 130 mm
순 중량 1.4 kg(AC/DC 어댑터 제외)
ko
기술 데이터 83프린터
Page 86

기술 데이터84 프린터
Page 87

Page 88

Mettler-Toledo GmbH
30084158
Im Langacher 44
8606 Greifensee, Switzerland
www.mt.com/contact
Subject to technical changes.
© Mettler-Toledo GmbH 03/2017
30084158C en, de, es, fr, it, zh, ja, ko
www.mt.com/lab-printers
For more information
 Loading...