

Page 1
User Manual
Printer
P-52RUE
Page 2

Page 3
Overview
1
2
4
5
6
3
7
8
9
11
10
13
12
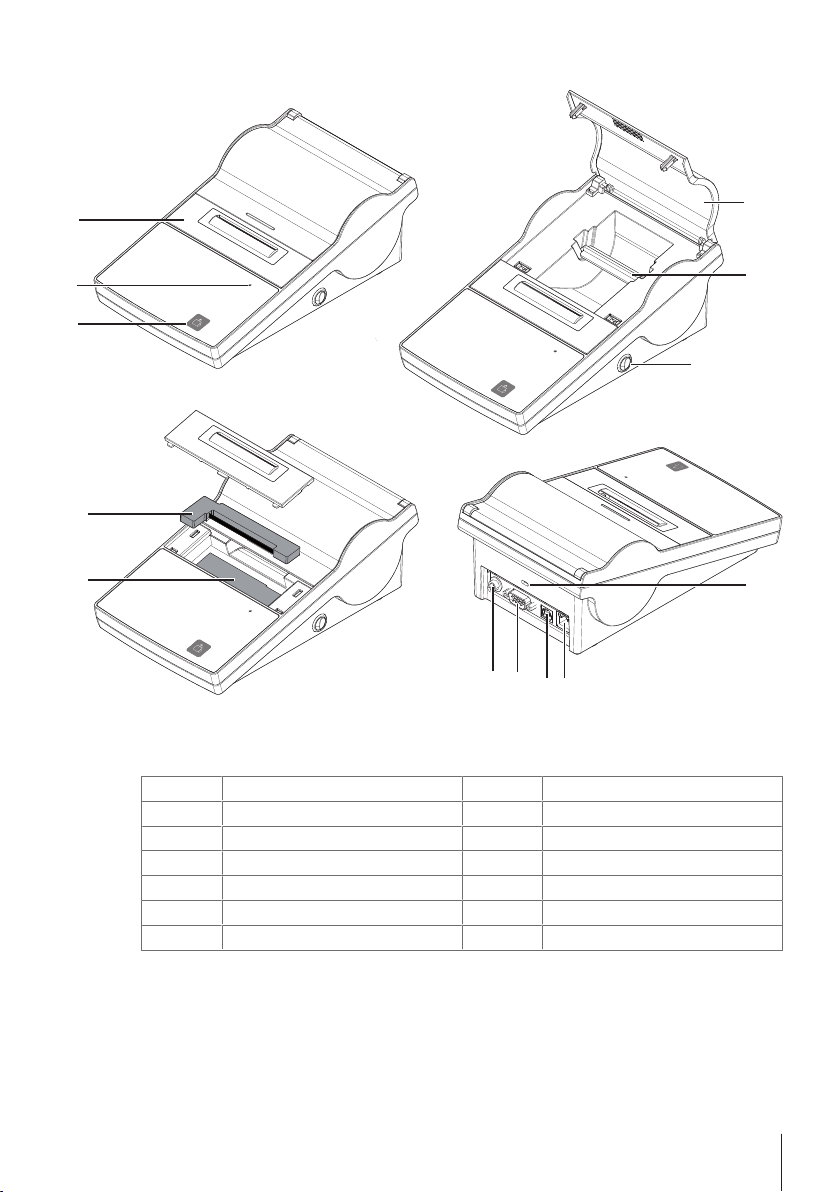
Overview Table
Paper feed button
1
Status indicator
2
Paper cutter
3
Printer cover
4
Paper rotary axis
5
Power switch
6
Anti-theft slot
7
Ethernet RJ45 connection
8
USB device connection
9
RS232 connection
10
Socket for AC adapter
11
Print head
12
Ribbon cartridge
13
Overview 3Printer
Page 4
1 Safety Information
• Read and understand the instructions in this manual before you use the instrument.
• Keep this manual for future reference.
• Include this manual if you pass on the instrument to other parties.
If the instrument is not used according to the instructions in this manual or if it is modified, the safety
of the instrument may be impaired and Mettler-Toledo GmbH assumes no liability.
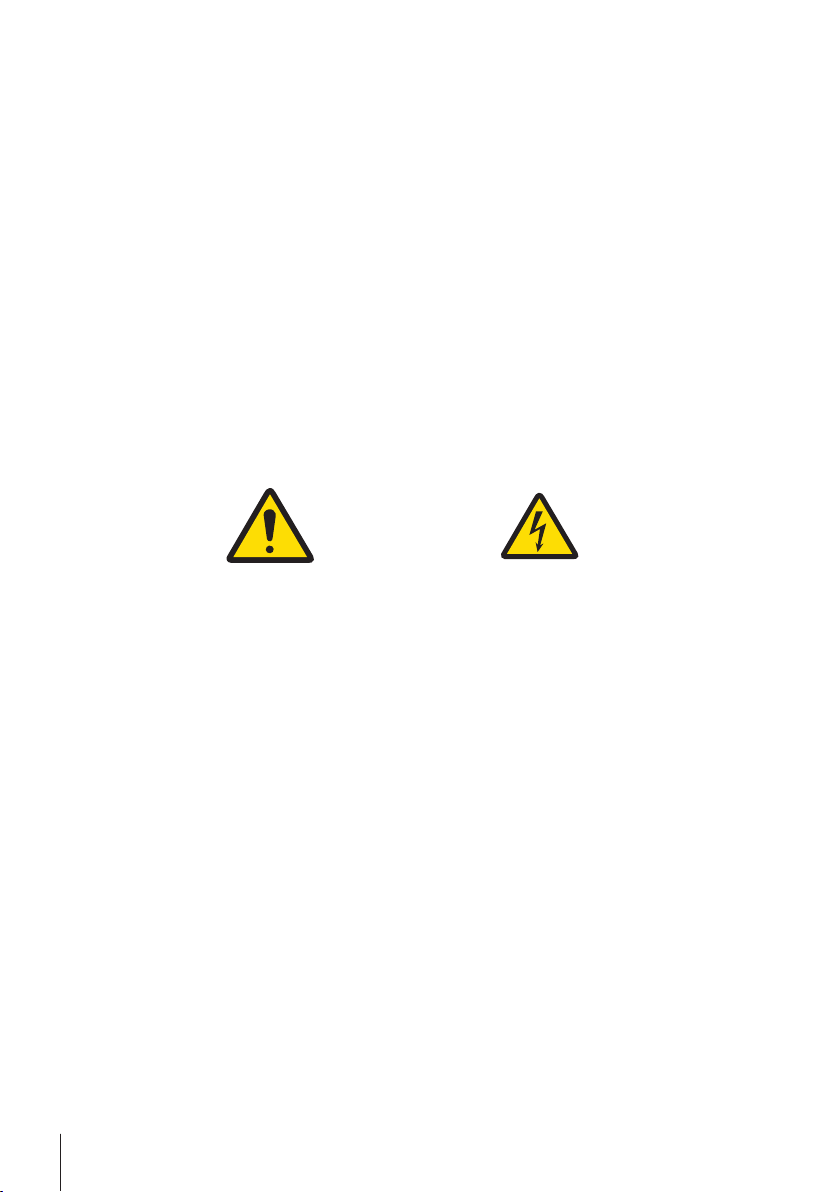
1.1 Definition of signal warnings and symbols
Safety notes are marked with signal words and warning symbols. These show safety issues and
warnings. Ignoring the safety notes may lead to personal injury, damage to the instrument,
malfunctions and false results.
WARNING
CAUTION
NOTICE
Note
1.2 Product specific safety notes
Your instrument corresponds to the state of the art technology and complies with all recognized safety
rules, however, certain hazards may arise in extraneous circumstances. Do not open the housing of
the instrument: It does not contain any parts which can be maintained, repaired or replaced by the
user. If you ever have problems with your instrument, contact your authorized METTLER TOLEDO
dealer or service representative.
This printed document must be read and understood before using the instrument. This printed
document must be retained for future reference.
Always operate and use your instrument only in accordance with the instructions contained in this
document. The instructions for setting up your new instrument must be strictly observed.
If the instrument is not used according to the Operating Instructions, protection of the instrument
may be impaired and METTLER TOLEDO assumes no liability.
The instrument must not be altered or modified in any way. Only use METTLER TOLEDO original spare
parts and accessories.
for a hazardous situation with medium risk, possibly resulting in death or severe
injury if not avoided.
for a hazardous situation with low risk, resulting in minor or moderate injury if not
avoided.
for a hazardous situation with low risk, resulting in damage to the balance, other
material damage, malfunctions and erroneous results, or loss of data.
(no symbol)
for useful information about the product.
General hazard Electrical shock
Safety Information4 Printer
Page 5

WARNING
Risk of electric shock
1 Do not open the AC adapter housing. Make sure that the AC adapter does not come
in contact with liquids.
2 Use only the 3-pin power cord with equipment grounding conductor which was
supplied with your instrument and only a 3-pin grounded outlet must be used.
Operating conditions
• The printer must be used in dry interior rooms only.
For the ambient conditions see at section [General technical data}11].
• The printer should be acclimated to room temperature.
• The printer should not be used in the presence of humidity and liquids.
Safety Information 5Printer
Page 6

2 Installation and putting into operation
Finding more information
Additional information about this printer can be found in the Operating Instructions on the CD-ROM or
online.
u www.mt.com/lab-printers
2.1 Scope of delivery
1 Open the package and remove the printer and the accessories.
2 Check the completeness of the delivery.
The following accessories are part of the equipment:
• P-52RUE dot matrix printer
• Paper rotary axis (already installed)
• 1 ribbon cartridge (already installed)
• 2 rolls of paper
• Universal AC adapter
• Country-specific power cable
• USB cable
• RS232 cable
• User Manual
• Declaration of conformity
• CD-ROM (containing software and operating instructions in different languages)
2.2 Connecting the printer to the power supply
WARNING
Risk of electric shock
1 Do not open the AC adapter housing. Make sure that the AC adapter does not come
in contact with liquids.
2 Use only the 3-pin power cord with equipment grounding conductor which was
supplied with your instrument and only a 3-pin grounded outlet must be used.
NOTICE
Use only the original AC adapter delivered with your printer.
− Do not try to use this AC adapter for other METTLER TOLEDO instruments, otherwise
they could be damaged.
Installation and putting into operation6 Printer
Page 7

§ The printer must be switched off.
1 Connect the AC adapter to the
connection socket on the back of
the printer.
2 Lock the connector with the
screw nut.
3 Connect the 3-pin grounded
power cable to the socket for the
AC adapter.
4 Connect the power cable to the
mains.
2.3 Inserting the paper roll
Note
We recommend to use only specified paper from METTLER TOLEDO (see at section Accessories and
spare parts).
Note
The printer has a push-to-open mechanism to open the printer cover. The printer cover must be
pushed down in the middle at the mark.
§ The printer is switched on.
1 Push down the printer cover.
2 Open the printer cover.
3 Remove the paper cutter.
4 Remove the paper rotary axis from the printer
frame.
5 Insert the rotary axis into the paper roll.
Note
The paper roll must unroll in the correct direction
(see picture).
6 Place the paper roll into the printer frame.
7 Unroll the paper and stick the paper end into the
5 mm slot between the printer head and the metal
plate.
Installation and putting into operation 7Printer
Page 8

8 Press .
ð The printing head pulls the paper in.
9 Press and hold
fed.
10 Close the printer cover.
until some paper has been
2.4 Connecting the printer to a METTLER TOLEDO instrument
NOTICE
We recommend connecting the printer to only one instrument at a time. If several
instruments are connected to the printer at the same time METTLER TOLEDO cannot
assume the correct functionality of the printer.
2.4.1 Connecting the printer via the RS232 connection
§ The printer has been connected to the mains.
1 Use the RS232 cable to connect the printer to the METTLER TOLEDO instrument.
Note
The RS232 connection settings of the printer and of the instrument must be identical.
2 Switch on the printer.
Note
The function Auto baudrate detection is switched off by default. It can be switched on if the printer is
connected with the RS232 connection and if the connection settings (Baudrate, Bits / Parity,
Handshake) of the printer differ from the settings of the balance. More information about activating
the function Auto baudrate detection can be found in the section Menu.
System default settings
Baudrate: 9600 Stop bits: 1 Bit
Bits / Parity: 8 / None Handshake: XOn/XOff
Auto Baudrate Off Char Set UTF-8
2.4.2 Connecting the printer via the USB connection
Use the USB connection cable to connect the printer to a balance or a PC.
Note
For connecting the printer to a PC, a printer driver must be installed on the PC. The printer driver
should automatically being installed by the operating system when the printer is connected to the PC
with the USB cable. If there is an issue with the printer driver, it can be downloaded from http://
www.ftdichip.com/Drivers/VCP.htm. If there is still an issue, please contact your IT expert or a local
METTLER TOLEDO representative.
Installation and putting into operation8 Printer
Page 9

2.5 Connecting the printer via the Ethernet connection
The printer can be connected to an instrument via Ethernet. Before connecting to the Ethernet, the
printer network settings must be configured with the software NetSettings that can be found on the
CD-ROM or ordered at your METTLER TOLEDO representative.
Note
For installation and configuration of the Ethernet interface you need to have basic knowledge of TCP/
IP-based networks, and of network technology in general. If necessary, contact the network administrator of your IT department or your IT support.
§ The NetSettings software has been saved on the PC.
1 Switch on the printer
2 Connect the printer to the PC with the USB connection cable.
ð The PC installs the printer driver.
3 Start the NetSettings software.
ð The following window opens:
4 Chose Connection port / COM (USB).
5 Press Get.
ð The system automatically fills out the settings. The value for Alias Name and MAC Adress are
automatically generated from the system.
6 Select Static IP or DHCP to define the values for IP Adress, Subnet Mask and Default Gateway.
ð The Ethernet definition of the printer has been defined. The printer can be connected to the
Ethernet.
Installation and putting into operation 9Printer
Page 10

3 Maintenance
WARNING
Risk of electric shock
1 Before cleaning or performing maintenance work, disconnect the printer and the AC
adapter from the power supply.
2 Take care that no liquid penetrates into the printer or the AC adapter.
NOTICE
Never open the housing of the printer or the AC adapter – they contain no components,
which can be cleaned, repaired or replaced by the user.
Use only the power cable from METTLER TOLEDO.
3.1 Cleaning the housing
Note
The printer housing is made of top grade, resistant materials. Therefore, all commercially available
mild cleaning agents can be used.
3.2 Disposal
In conformance with the European Directive 2002/96/EC on Waste Electrical and
Electronic Equipment (WEEE) this device may not be disposed of in domestic waste. This
also applies to countries outside the EU, per their specific requirements.
Please dispose of this product in accordance with local regulations at the collecting point
specified for electrical and electronic equipment. If you have any questions, please contact
the responsible authority or the distributor from which you purchased this device. Should
this device be passed on to other parties (for private or professional use), the content of
this regulation must also be related.
Thank you for your contribution to environmental protection.
Maintenance10 Printer
Page 11

4 Technical data
4.1 General technical data
AC/DC Adapter: Primary: 100 V - 240 V, ±10%, 50/60 Hz
Secondary: 24 V DC, 2.5 A (with electronic overload protection)
Power supply to the
printer:
Protection and Standards
Overvoltage category II
Degree of pollution 2
Standards for safety and
EMC
Range of application Indoor use only
Environmental Conditions
Height above mean sea
level
Ambient temperature
range
Relative air humidity 20% ~ 80% up to 31°C decreasing linearly to 50% at 40°C, non-condensing
Connections • RS232 port (Male DB 9)
Printer Features
Print technology Dot matrix
Printing unit Dot matrix printer 5x7, 24-character line length
Printing speed 2.3 lines per second
Print quality Light resistant and thermally stable printing (GLP, GMP, ISO 9001)
Materials
Top housing Die-cast zinc, chromed and plastics (PBT)
Bottom housing Plastics (PBT)
Paper cutter Plastics (PBT)
Paper cutter slot Polycarbonate plastics (PC)
Software NetSettings
System requirements PC with Microsoft Windows 7, 8, 10
Printer driver
Link http://www.ftdichip.com/Drivers/VCP.htm
Dimension / Weight
Length 220 mm
Height 88 mm
Width 130 mm
Net Weight 1.25 kg, without AC/DC adapter
24 V DC, 2.5 A
Declaration of Conformity (part of standard equipment)
up to 4000 m
Operation: 5°C ~ 40°C
Storage: -25°C ~ 60°C
• USB device port (B-type)
• Ethernet 10/100base-TX port (RJ-45)
Technical data 11Printer
Page 12

Technical data12 Printer
Page 13

Page 14

Page 15

Page 16

Mettler-Toledo GmbH
30348454
Im Langacher 44
8606 Greifensee, Switzerland
www.mt.com/contact
Subject to technical changes.
© Mettler-Toledo GmbH 09/2016
30348454A en
www.mt.com/lab-printers
For more information
 Loading...