

Mettler Toledo Impact S Quick Start Manual
Impact S Quick-Start Guide
4. Further Assistance
Please visit www.mt.com/retail then click on Counter
Scales and Impact S to nd a downloadable version of the
Impact S User’s Guide for additional information.
2. General Precautions
Select a rm, level, vibration-free surface on
which to place the scale.
Maintain a temperature range of -10ºC to 40ºC
(14ºF to 104ºF). Avoid areas where the temperature changes rapidly.
Avoid excessive drafts, such as from fans and
open windows.
This unit requires 100-240 VAC, 50/60 Hz,
2.2A power. For continued protection against
shock hazard, connect to properly grounded
outlet only. Do not remove or modify the
ground prong. Do not connect the unit to electrical lines that are shared with noise generating equipment such as motors, compressors,
uorescent lighting, heating elements, or thermostats. If these conditions exist, a dedicated
power circuit or power line conditioner might
be required.
METTLER TOLEDO
1900 Polaris Parkway,
Columbus, OH 43240
Tel. (800) 786-0038 / (614) 438-4511
Fax (614) 438 4900
64067683 R01 5/12
©2012 Mettler-Toledo, LLC
Impact S Quick-Start Guide
Contact a METTLER TOLEDO representative to purchase any
of the following accessories for your scale.
• Display tower - raises customer display 10 inches.
• Wireless RF card.
• Fish pan platter for seafood weighing.
• SMARTX - remote item management software for
the PC.
• Smartlabel - label design management software for
the PC.
• Windataback software that includes le and preset
editing as well as backup and restore functionality.
• All sizes of compatible label stock, both standard
and custom, are available.
• Service contracts are available to protect your
investment.
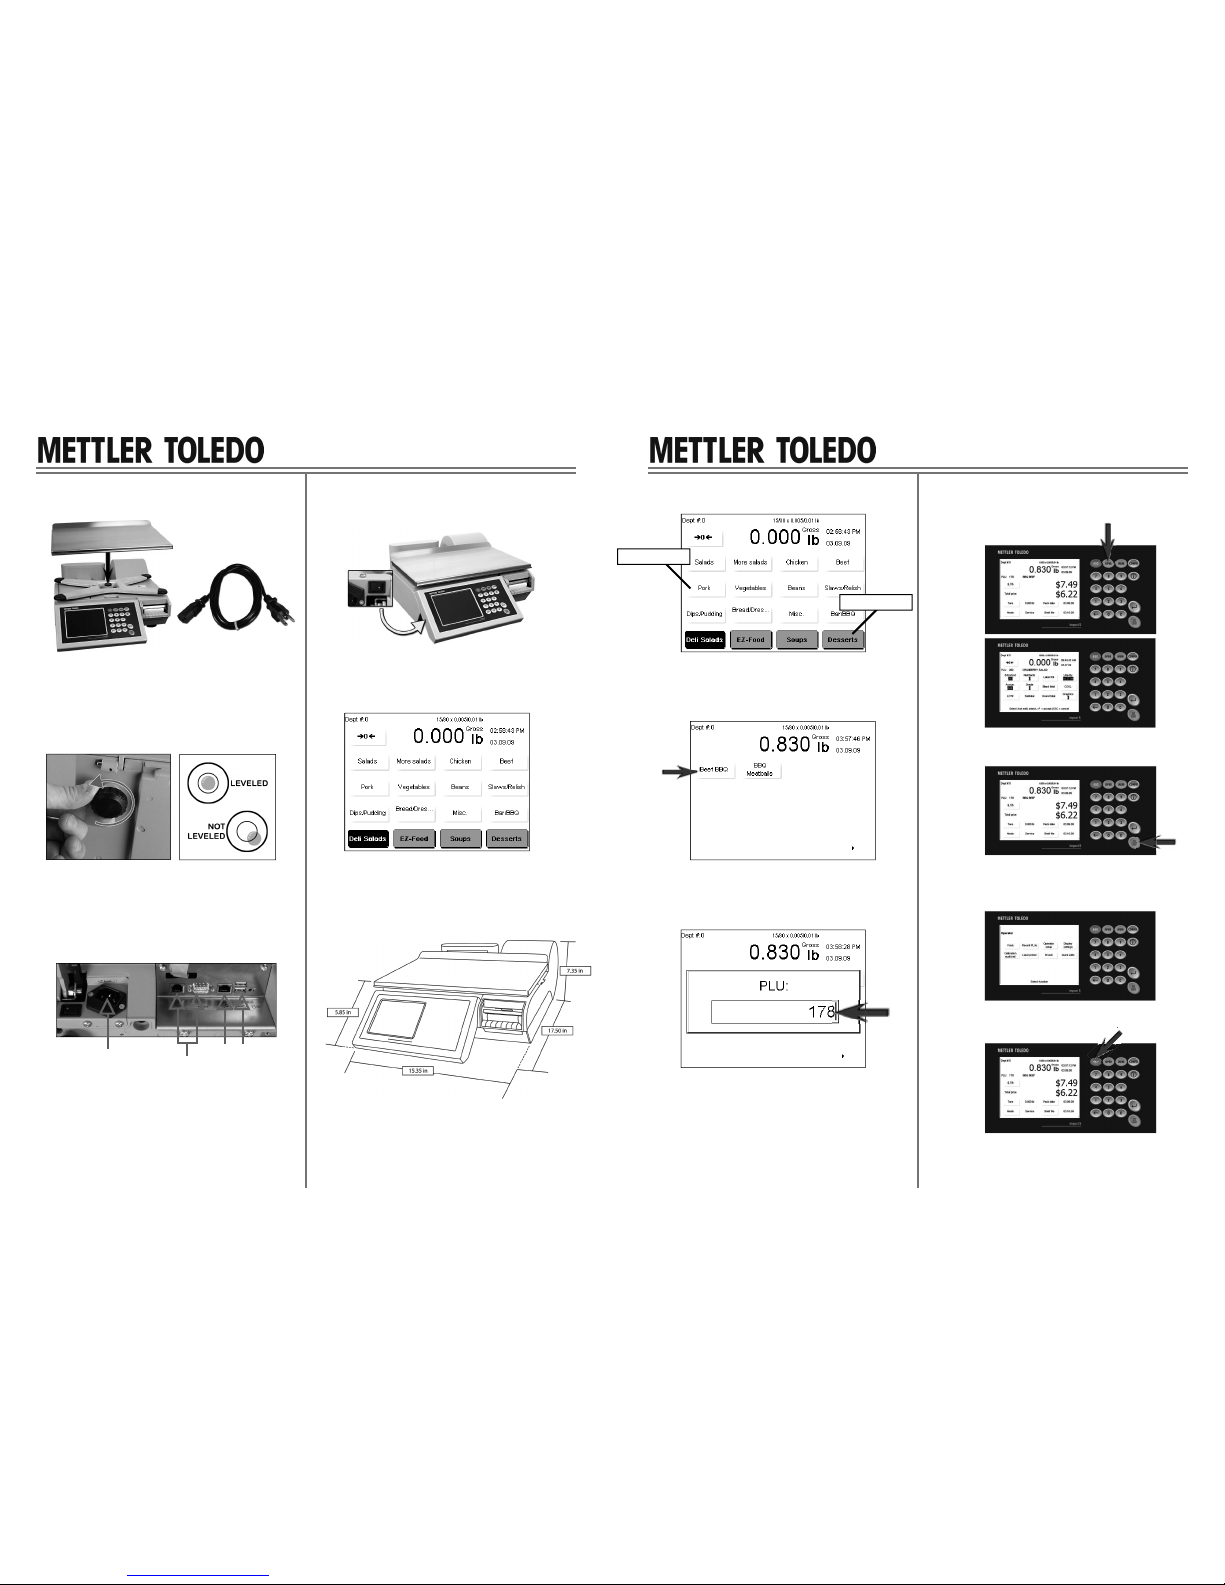
Thank you for purchasing the METTLER TOLEDO Impact S
scale. The Impact S has an intuitive user interface incorporating a touchscreen and keyboard. The printer has been
designed to use enhanced fonts and graphics to deliver
attractive labels. The bright, backlit customer display will get
your customers’ attention with your marketing messages and
graphic images.
Wireless network security
supported
• WEP 40/64 &
104/128 bit
• WPA/ PSK* – TKIP
• WPA/ PSK* – AES
• WPA2/ PSK* – TKIP
• WPA2/ PSK* – AES-CCM
*PSK - Pre-Shared Key
1. Introduction 3. Accessories
5. Weights and Measures
Before using this scale, it must be calibrated and may require inspection by local Weights and Measures. NJ sealing
kit is available by ordering 0977-0207.
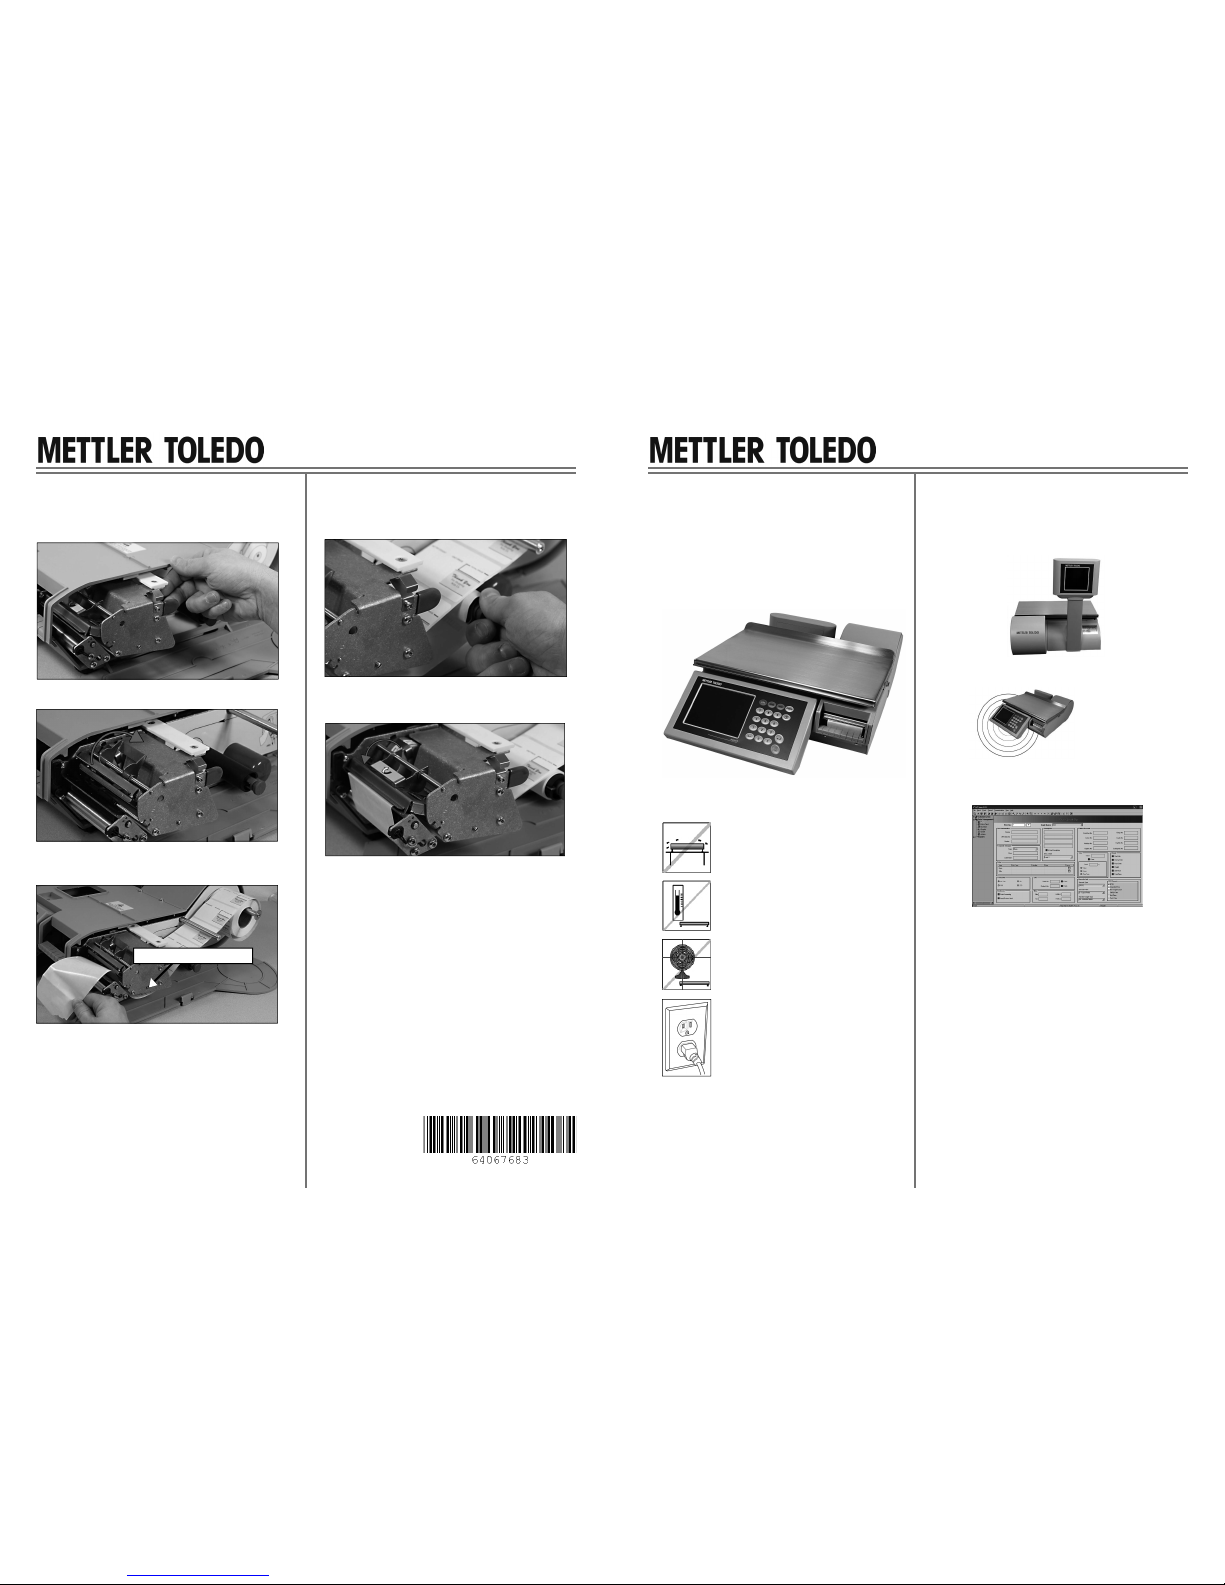
8. Load and Calibrate Labels
Load labels into the Impact S printer module using the following
steps.
8.1. Gently pull the printer from its housing.
8.2. Release the printhead lock to lift the printhead
8.4. Secure label liner in the takeup roller by pulling out on
the green knob and sliding the paper into the slot.
Press the knob back in to secure.
8.5. Lower and lock the printhead and then push the printer
back into its housing
9. Label Calibration
When initially loading labels or changing label sizes, press
the following sequence of buttons to arrive at the label selection screen:
CONFIG (on the right-hand keypad)
PRINTER (on the touchscreen)
LABEL GROUP (on the touchscreen)
From there, select the label size that matches the label
stock. Back out to the Printer Cong menu by pressing ESC
and then press the MEASURE LABEL button.
After removing the three ejected labels, press ESC to return
to the main menu. The unit is now ready for use.
8.3. Feed the label stock through the printer rollers as per the
guide on the printer slide plate (behind the label roll)
Note: the printer is set up for 2.64” (67mm) width labels.
When using a different width, the label guides must be
adjusted using the width adjustment screw.
width adjustment screw
Impact S Quick-Start GuideImpact S Quick-Start Guide
7.4. The PLU screen will then display. Touching various elds on the display, or pressing the OPER key,
will bring you to additional overrides.
7.3. To call up PLUs using the PLU number, enter the
PLU number of the item on the keypad.
7.5. Press the PRINT button on the right-hand keypad to
print the label.
7.2. To call up PLUs using the preset keys, rst touch
a category key then touch a preset key.
7. Basic Operation
7.1. The home screen will display upon power-up.
category keys
6.2. Place the scale on a level surface and rotate the individual
feet until the leveling bubble is in the middle of its circle.
turn the levelling feet
center the bubble
6.3. Connect the power cord to the Impact S unit and then to a
grounded 110V power source. If connecting to a
wired ethernet network, plug the cord into the RJ45
socket on the bottom-front of the unit.
power cord
ethernet
6.4. Press the power switch, located under the left side of the
operator display, to power up the unit.
6.5. The home screen will display after a few moments.
The example screen below is populated - yours will
look different upon initial startup, as the programmable
preset and category keys will not yet have been set.
6.6. Refer to the User’s Guide for details on programming the
Impact S scale.
6.7. Dimensions
7.6. When the OPER button is pressed at the HOME screen,
you will be presented with other options such as Voids,
Operator Setup, Display Settings and more.
7.7. Press the ESC key to cancel out of any of the screens.
6. Installation Overview
6.1. The shipping carton contains the following items:
Power Cord
Impact S Unit and Scale Platter*
*Not included with dead-deck versions of the scale.
preset keys
USB
remote scale base
connectors
 Loading...