

Page 1
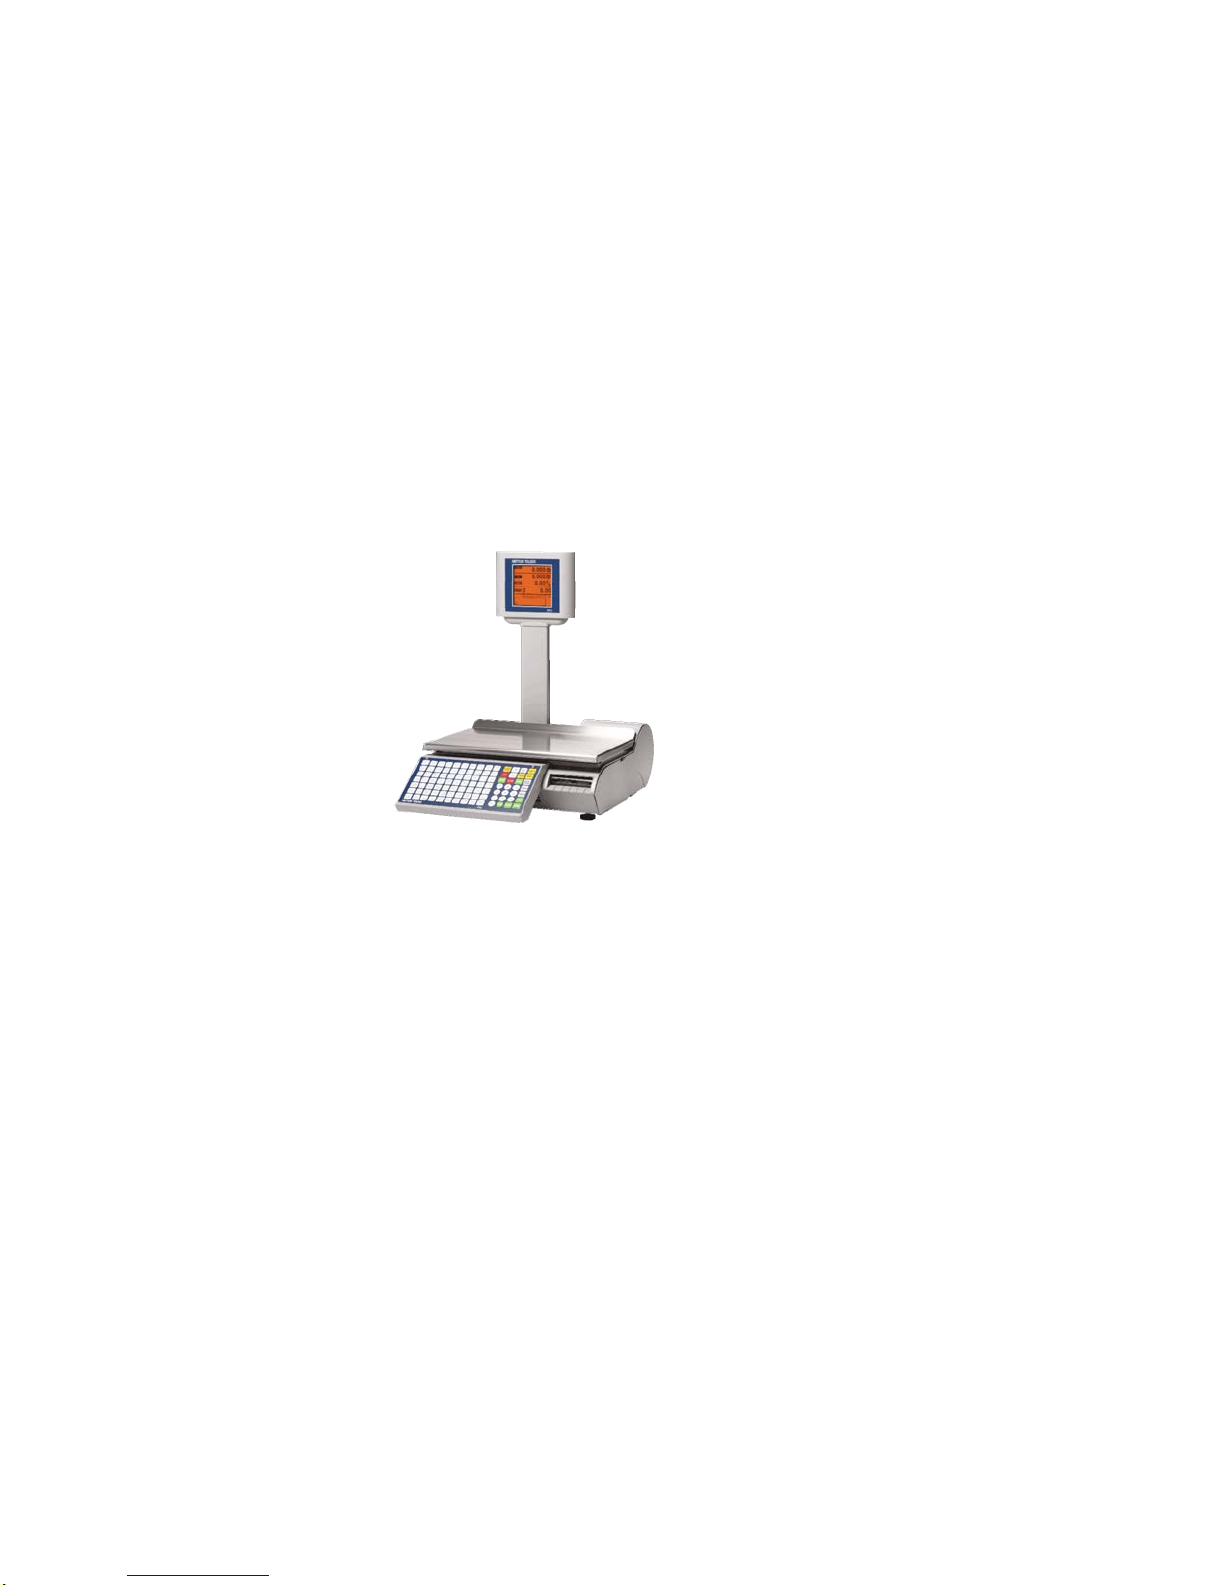
bPro
Compact Scale
User’s Guide
®
64067202.R1
Page 2

©Mettler-Toledo, LLC 2012
No part of this manual may be reproduced or transmitted in any form or by any means,
electronic or mechanical, including photocopying and recording, for any purpose without the
express written permission of Mettler-Toledo, LLC.
U.S. Government Restricted Rights: This documentation is furnished with Restricted Rights.
Page 3

Publication Revision
History
Trademarks
Part Number Date Revisions
64067202
64067202
METTLER TOLEDO
Columbus, OH, USA.
12/08 New manual
04/10 Revisions to chapters 1, 2, 3, 5 and 6
®
bPro® are registered trademarks of Mettler-Toledo, LLC
Page 4

PRECAUTIONS
READ this manual BEFORE
operating or servicing this
equipment.
FOLLOW these instructions
carefully.
SAVE this manual for future
reference.
DO NOT allow untrained
personnel to operate, clean,
inspect, maintain, service, or
tamper with this equipment.
ALWAYS DISCONNECT this
equipment from the power
source before cleaning or
performing maintenance.
CALL METTLER TOLEDO
parts, information, and service.
METTLER TOLEDO
right to make refinements or
changes without notice.
®
for
®
reserves the
WARNING
ONLY PERMIT QUALIFIED PERSONNEL TO SERVICE THIS
EQUIPMENT. EXERCISE CARE WHEN MAKING CHECKS, TESTS AND
ADJUSTMENTS THAT MUST BE MADE WITH POWER ON. FAILING
TO OBSERVE THESE PRECAUTIONS CAN RESULT IN BODILY HARM
AND/OR PROPERTY DAMAGE.
WARNING
POWER OUTLETS MUST BE EASILY ACCESSIBLE AND LOCATED NO
FURTHER THAN THE LENGTH OF THE POWER CORD SUPPLIED
WITH THE PRODUCT. FAILURE TO DO SO COULD RESULT IN
PERSONNEL INJURY AND/OR PROPERTY DAMAGE.
WARNING
FOR CONTINUED PROTECTION AGAINST SHOCK HAZARD CONNECT
TO PROPERLY GROUNDED OUTLET ONLY. DO NOT REMOVE THE
GROUND PRONG.
WARNING
DISCONNECT & LOCK OUT ALL POWER TO THIS UNIT BEFORE
REMOVING THE FUSE OR SERVICING.
CAUTION
BEFORE CONNECTING OR DISCONNECTING ANY INTERNAL ELECTRONIC
COMPONENTS OR INTERCONNECTING WIRING BETWEEN ELECTRONIC EQUIPMENT,
ALWAYS REMOVE POWER AND WAIT AT LEAST THIRTY (30) SECONDS BEFORE ANY
CONNECTIONS OR DISCONNECTIONS ARE MADE. FAILURE TO OBSERVE THESE
PRECAUTIONS COULD RESULT IN DAMAGE TO, OR DESTRUCTION OF THE EQUIPMENT
OR BODILY HARM.
CAUTION
OBSERVE PRECAUTIONS FOR HANDLING ELECTROSTATIC SENSITIVE DEVICES.
Page 5

CONTENTS
1 Introduction .................................................................................................... 1-1
General .............................................................................................................................. 1-1
Specifications ..................................................................................................................... 1-2
Power Switch ...................................................................................................................... 1-3
Network Connection ............................................................................................................ 1-3
Leveling the Scale ............................................................................................................... 1-4
2 Operating Instructions ..................................................................................... 2-1
Machine Configuration ........................................................................................................ 2-1
Keyboard ............................................................................................................................ 2-2
Text Editing Mode ............................................................................................................... 2-4
Main Screen ....................................................................................................................... 2-6
PLU Pricing Modes .............................................................................................................. 2-7
By-Weight PLU ....................................................................................................................... 2-7
By-Count PLU ........................................................................................................................ 2-7
Standard Pack PLU ................................................................................................................. 2-7
PLU Screens ....................................................................................................................... 2-8
Calling Up PLUs .................................................................................................................. 2-9
Printing Labels .................................................................................................................. 2-10
Temporary Overrides ......................................................................................................... 2-11
3 Configuration ................................................................................................. 3-1
Introduction ........................................................................................................................ 3-1
Program Menu .................................................................................................................... 3-2
Database ............................................................................................................................ 3-3
Quick PLU Change ................................................................................................................. 3-4
Database PLU ....................................................................................................................... 3-5
Database Extra Text .............................................................................................................. 3-7
Database Nutrifacts ............................................................................................................... 3-8
Database Special Message .................................................................................................... 3-9
Database COOL Text .............................................................................................................. 3-9
Database Traceability .......................................................................................................... 3-10
Database Delete ................................................................................................................. 3-11
Clone Scale ...................................................................................................................... 3-12
Print Reports ..................................................................................................................... 3-12
Service Mode .................................................................................................................... 3-12
Password Setup ................................................................................................................ 3-12
Unit Setup ......................................................................................................................... 3-13
PLU Auto Call ..................................................................................................................... 3-15
PLU Display Options ............................................................................................................ 3-15
Active Tare ......................................................................................................................... 3-16
PLU Display Align ............................................................................................................... 3-16
PLU Presets ........................................................................................................................ 3-17
Default Label Format ........................................................................................................... 3-17
Delete Custom Formats ....................................................................................................... 3-18
Serial Port .......................................................................................................................... 3-18
Network Address ................................................................................................................. 3-19
Page 6

Wireless Configuration ........................................................................................................ 3-20
Store Information ................................................................................................................ 3-20
Store Logo .......................................................................................................................... 3-21
Scale Number ..................................................................................................................... 3-21
Marquee ............................................................................................................................. 3-22
Barcode Settings ................................................................................................................. 3-23
PLU Settings ....................................................................................................................... 3-23
Set Time and Date ............................................................................................................... 3-24
Assign Group Names ........................................................................................................... 3-24
Enable Function Keys .......................................................................................................... 3-25
Language ............................................................................................................................ 3-25
User Define ........................................................................................................................ 3-26
Sales Online ....................................................................................................................... 3-27
Process Mode ................................................................................................................... 3-28
4 Labels ............................................................................................................ 4-1
Loading Labels .................................................................................................................... 4-1
Default Label Styles ............................................................................................................ 4-5
Label Requirements ............................................................................................................. 4-6
Label Paper .......................................................................................................................... 4-6
Label Stripping ..................................................................................................................... 4-7
Finished Label Roll Requirements .......................................................................................... 4-7
Finished Label and Roll Dimensional Requirements ............................................................... 4-10
Preprinted Labels .............................................................................................................. 4-12
Special Shaped Labels ...................................................................................................... 4-14
Definition of Transmission Optical Density .......................................................................... 4-14
Label and Liner Optical Density .......................................................................................... 4-15
Black Stripe Optical Density ............................................................................................... 4-15
5 Maintenance .................................................................................................. 5-1
Unit Cleaning ...................................................................................................................... 5-1
Printer Cleaning .................................................................................................................. 5-2
6 Appendix ....................................................................................................... 6-1
Define barcode Digits .......................................................................................................... 6-1
`
Page 7
1 Introduction
General
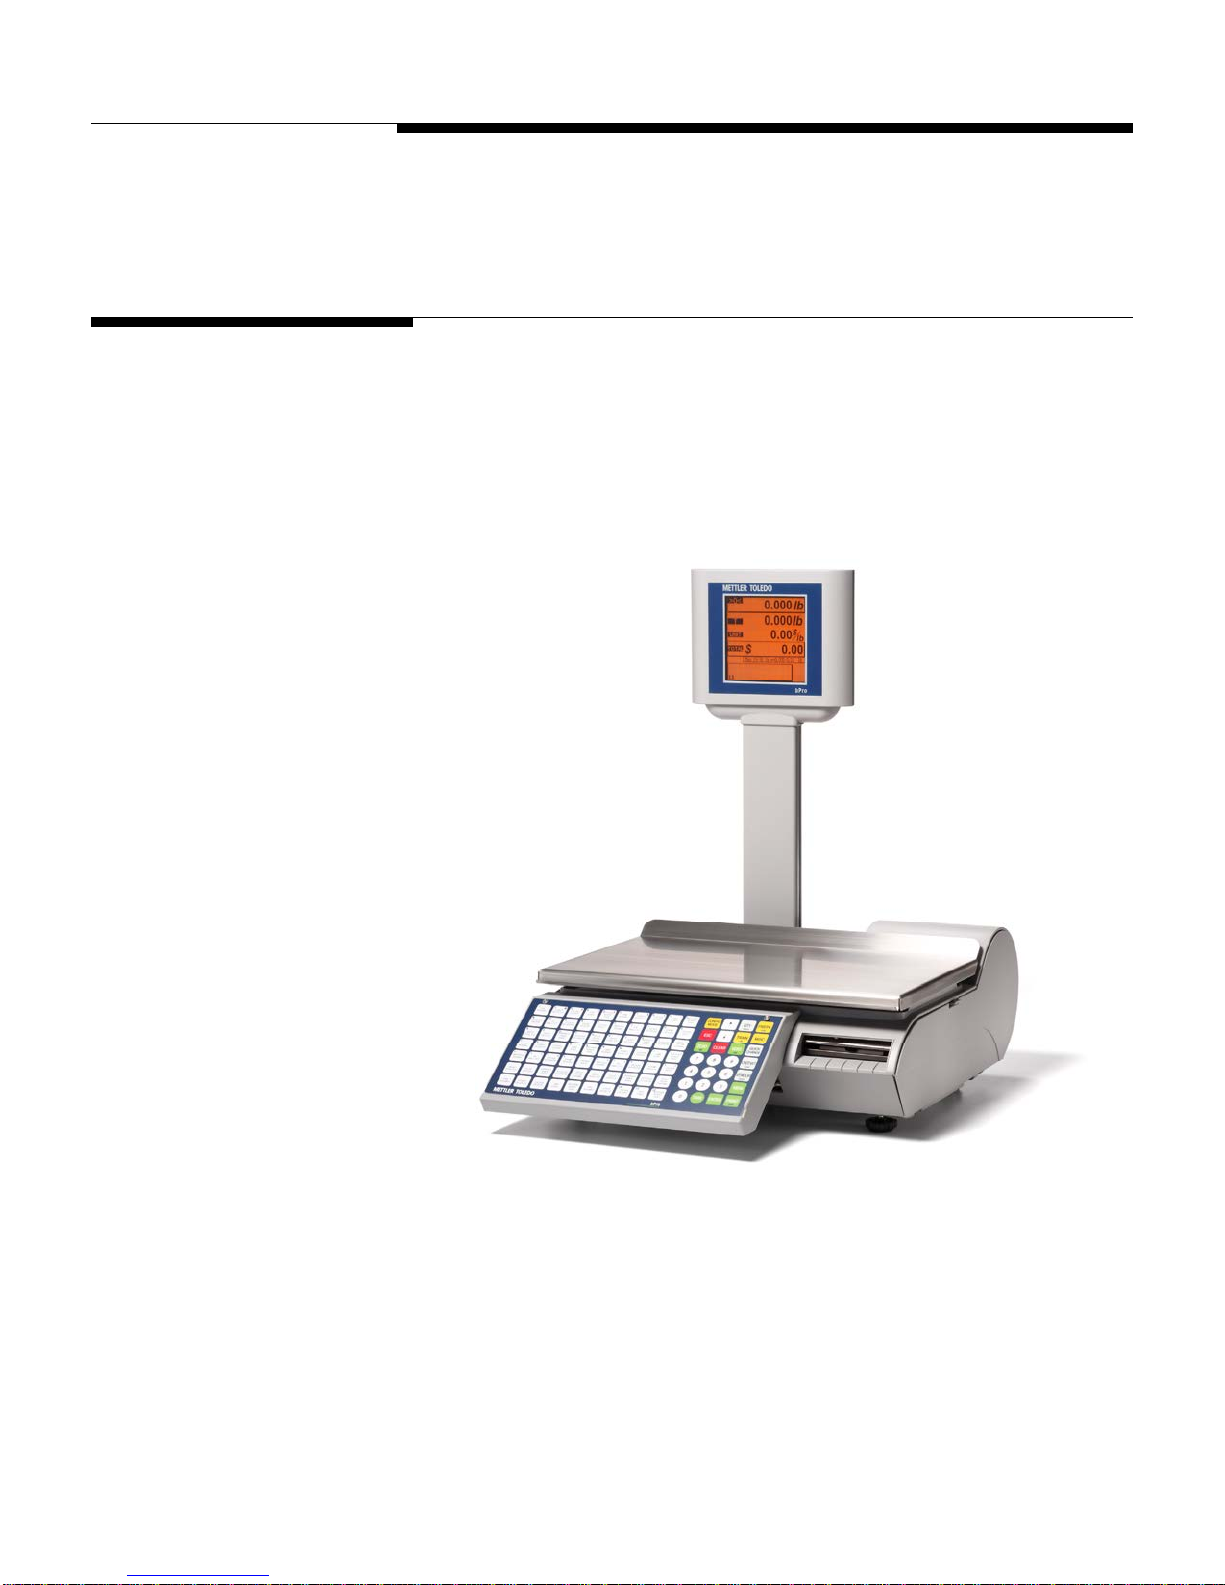
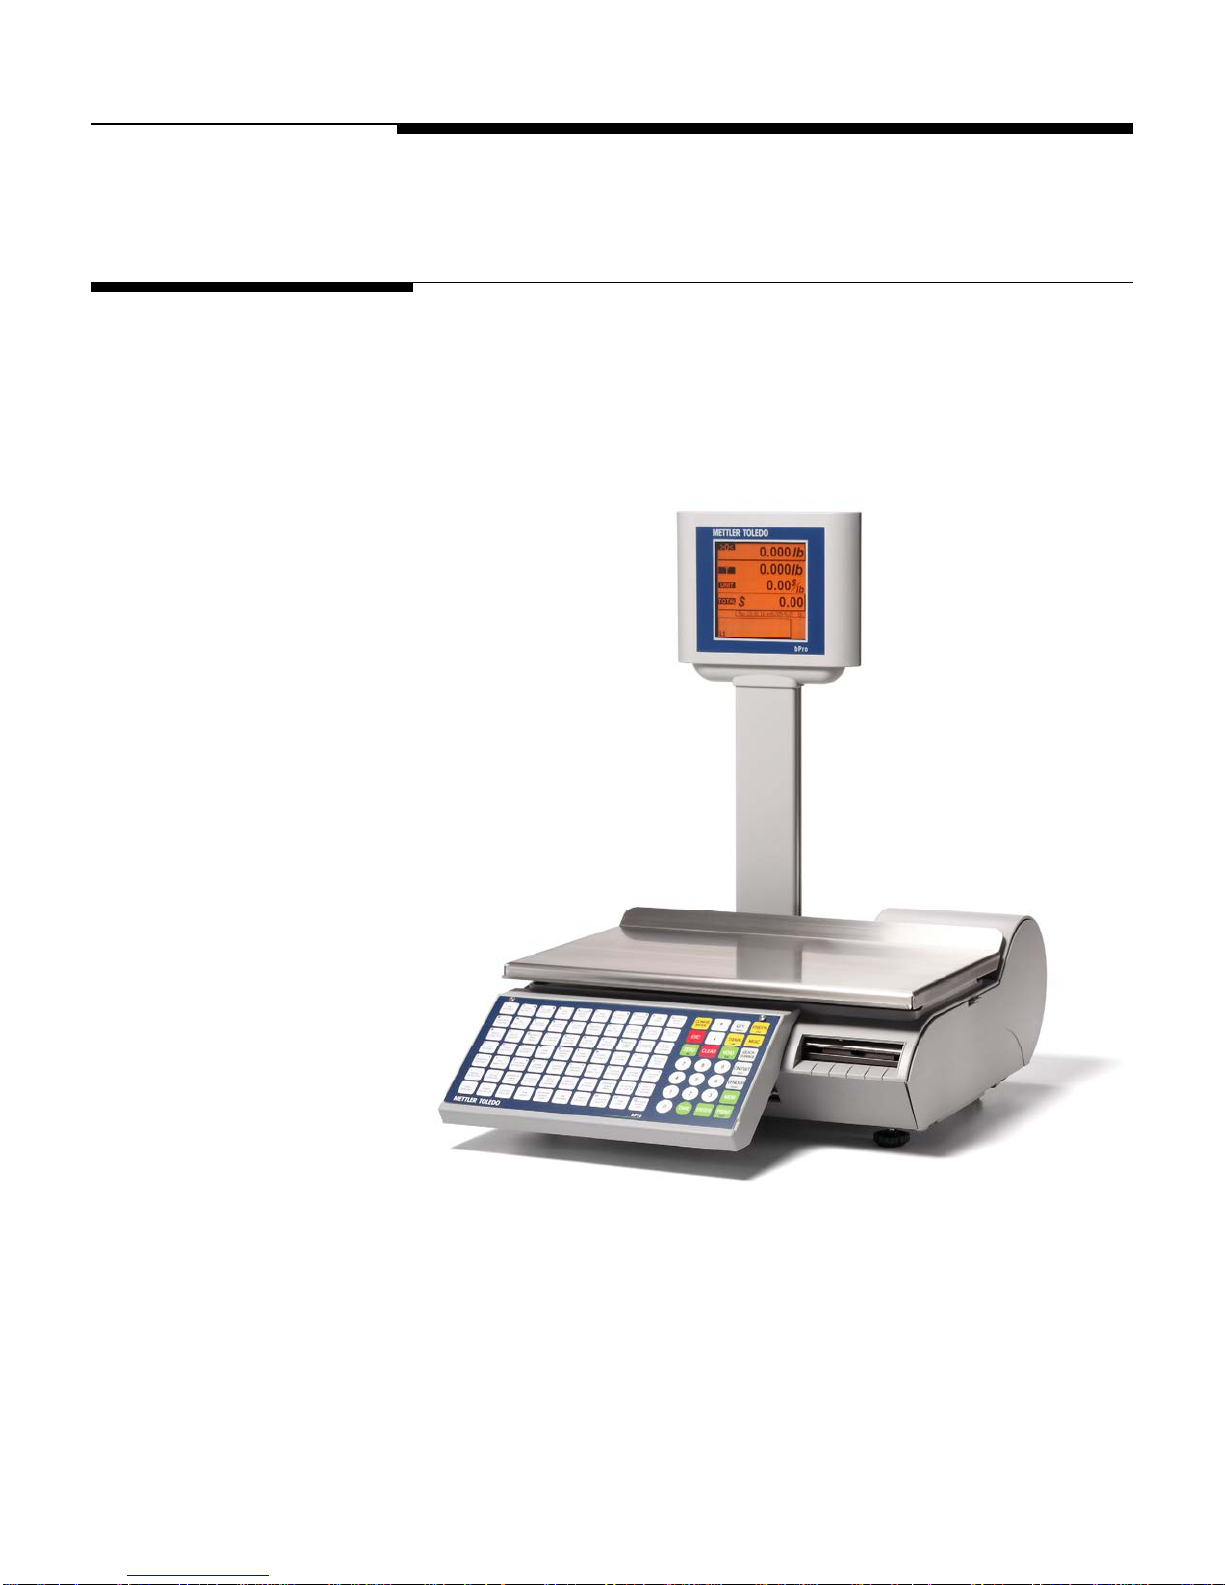
Thank you for purchasing the feature rich bPro® scale. METTLER TOLEDO designed the
bPro series as a solution for both current and future requirements. The bPro can handle
a variety of operations and easily adapts to changing process and data requirements.
This flexibility protects your investment and helps you keep pace with rapidly changing
production and customer demands.
Chapter 1: Introduction
The METTLER TOLEDO bPro scale offers intuitive functionality with a user friendly
interface. All scales contain a built-in thermal label printer designed for easy roll
changes and maintenance as well as a reliable, state-of-the-art load cell to ensure
years and years of accurate product usage.
1-1
Page 8
METTLER TOLEDO bPro User's Guide
Specifications
Description Specifications – bPro
Capacity x Division
Weighing Modes lb , kg, (single and dual interval)
Dimensions
Platter Dimension W: 15.75” x D: 9.75”
Weight of Unit 23.0 lb (10.5 kg)
Shipping Weight 24.9 lb (11.3 kg)
Base Construction Aluminum die cast
Operator Display Backlit monochrome 240 x 240 LCD
Operator Keyboard 98 key tactile keypad with rubber overlay
Customer Display Backlit monochrome 240 x 240 LCD
Printer
Power 100-240 VAC, 50/60 Hz, 1.0A
Operating Temperature
6 x 0.002 kg / 15 x 0.005 kg
15 x 0.005 lb / 30 x 0.01 lb
H: 19.3”, W: 15.4”, D: 20.9”
H: 492mm, W: 390mm, D: 530mm (max)
2.2” (56mm) max width labels at up to 4.5”
(115mm)/sec
4.7”/120mm roll capacity
0º C to 40º C, humidity
5% to 95% non condensing
Storage Temperature
Network Interface
Memory 4 Megabytes SDRAM
Optional Extended Memory 8 Megabyte expansion
Available Serial port One
-20º C to 70º C with humidity from
5% to 95% non -condensing
Ethernet Standard 10/100 MBPS
RF optional 802.11b/g RF
RS-232 Host Communications
1-2
Page 9

Power Switch
Chapter 1: Introduction
The power switch and power cord jack are located under the keypad at the left front of
the scale.
Press | to turn the scale on. Before turning the unit off, exit any screen-editing menus.
Network Connection
The bPro can connect to your Ethernet network using a cable or via the optional wireless
radio. If you use a wired network connection and experience connection problems,
make sure your Ethernet cable is connected and seated securely in the jack, located
under the keypad at the front of the scale.
The bPro wireless card connects to the normal Ethernet port via a supplied cable that
must be routed through either of the two access holes shown in the above photograph.
1-3
Page 10
METTLER TOLEDO bPro User's Guide
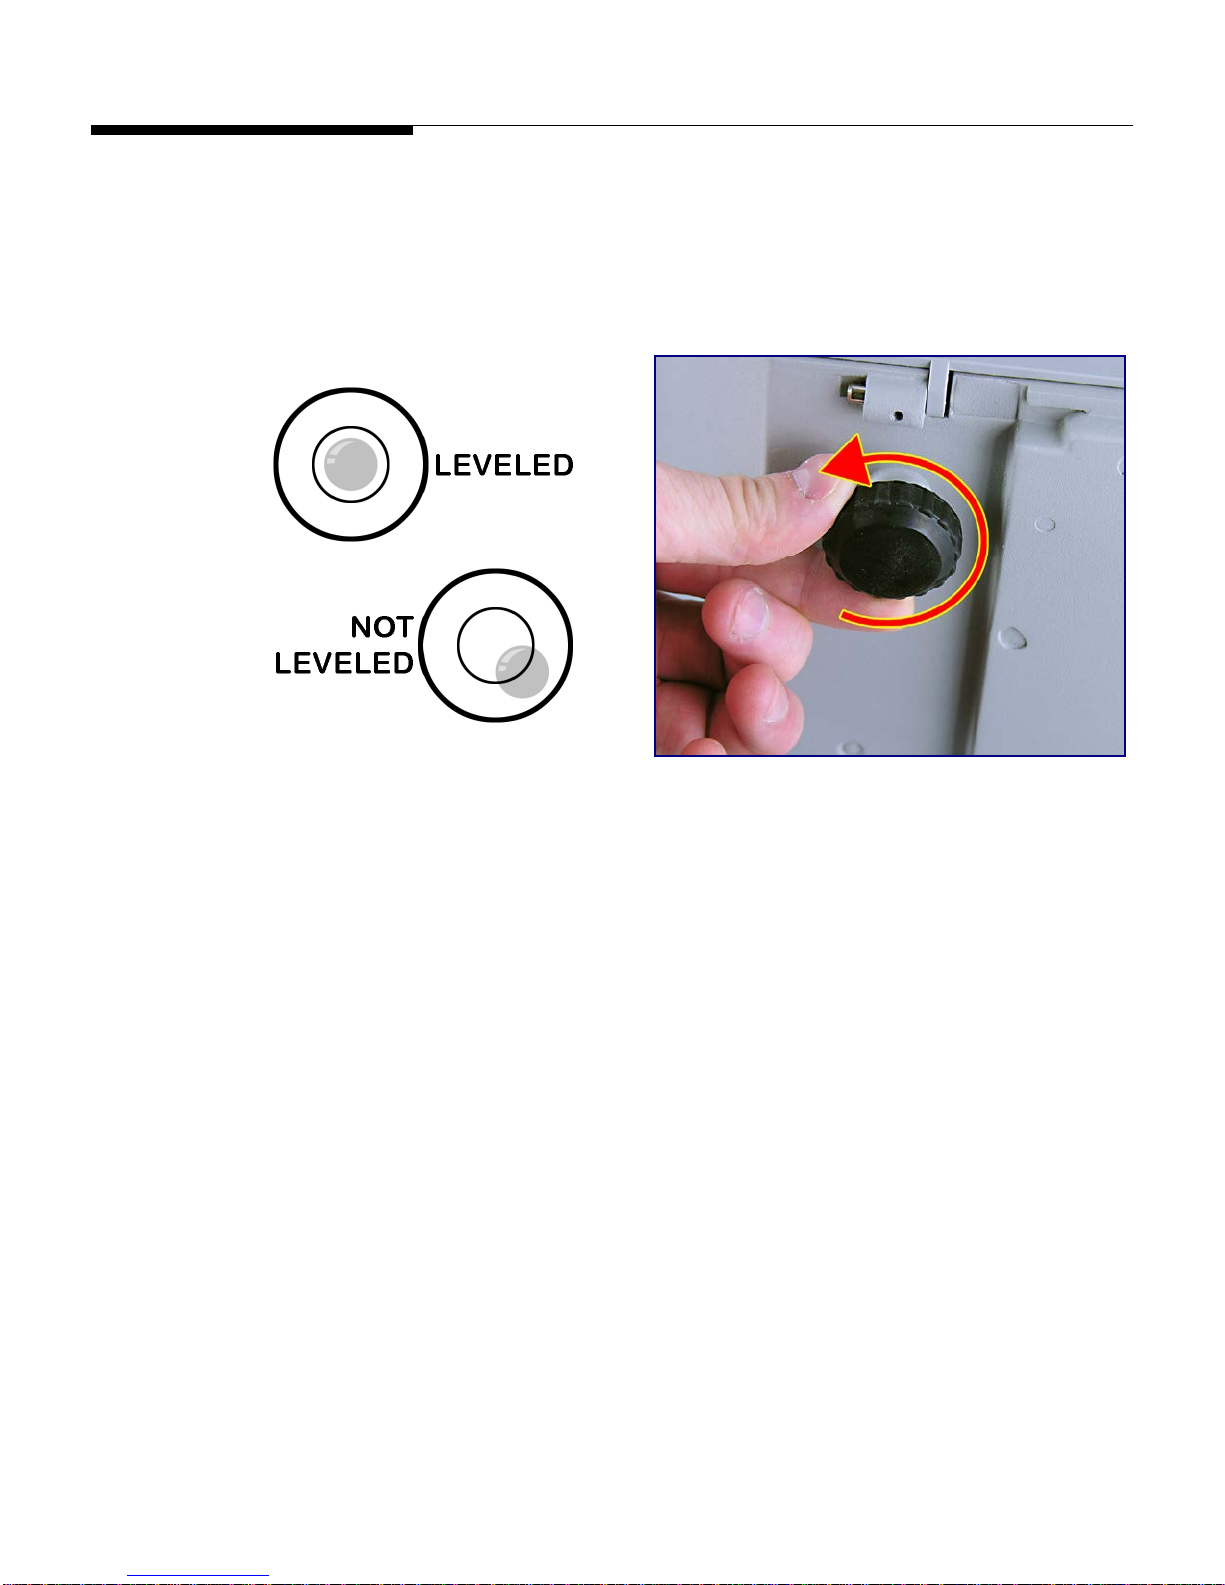
Leveling the Scale
Adjust the four feet until the bubble, located under the scale platter, is in the center of the
leveling circles. Adjust the foot-lock jam-nuts until the feet are secure.
1-4
Page 11
2 Operating Instructions
Machine Configuration
The customer/operator display of the bPro unit mounts to the tower behind the weigh
platter and has a vivid orange over black. The primary user interface is the keypad at the
front of the scale; the right side of the keypad hosts the navigation functions whereas the
left side is used mostly for typing, preset selection and specific numbering.
Chapter 2: Operating Instructions
Machine Configuration
2-1
Page 12
METTLER TOLEDO bPro User's Guide
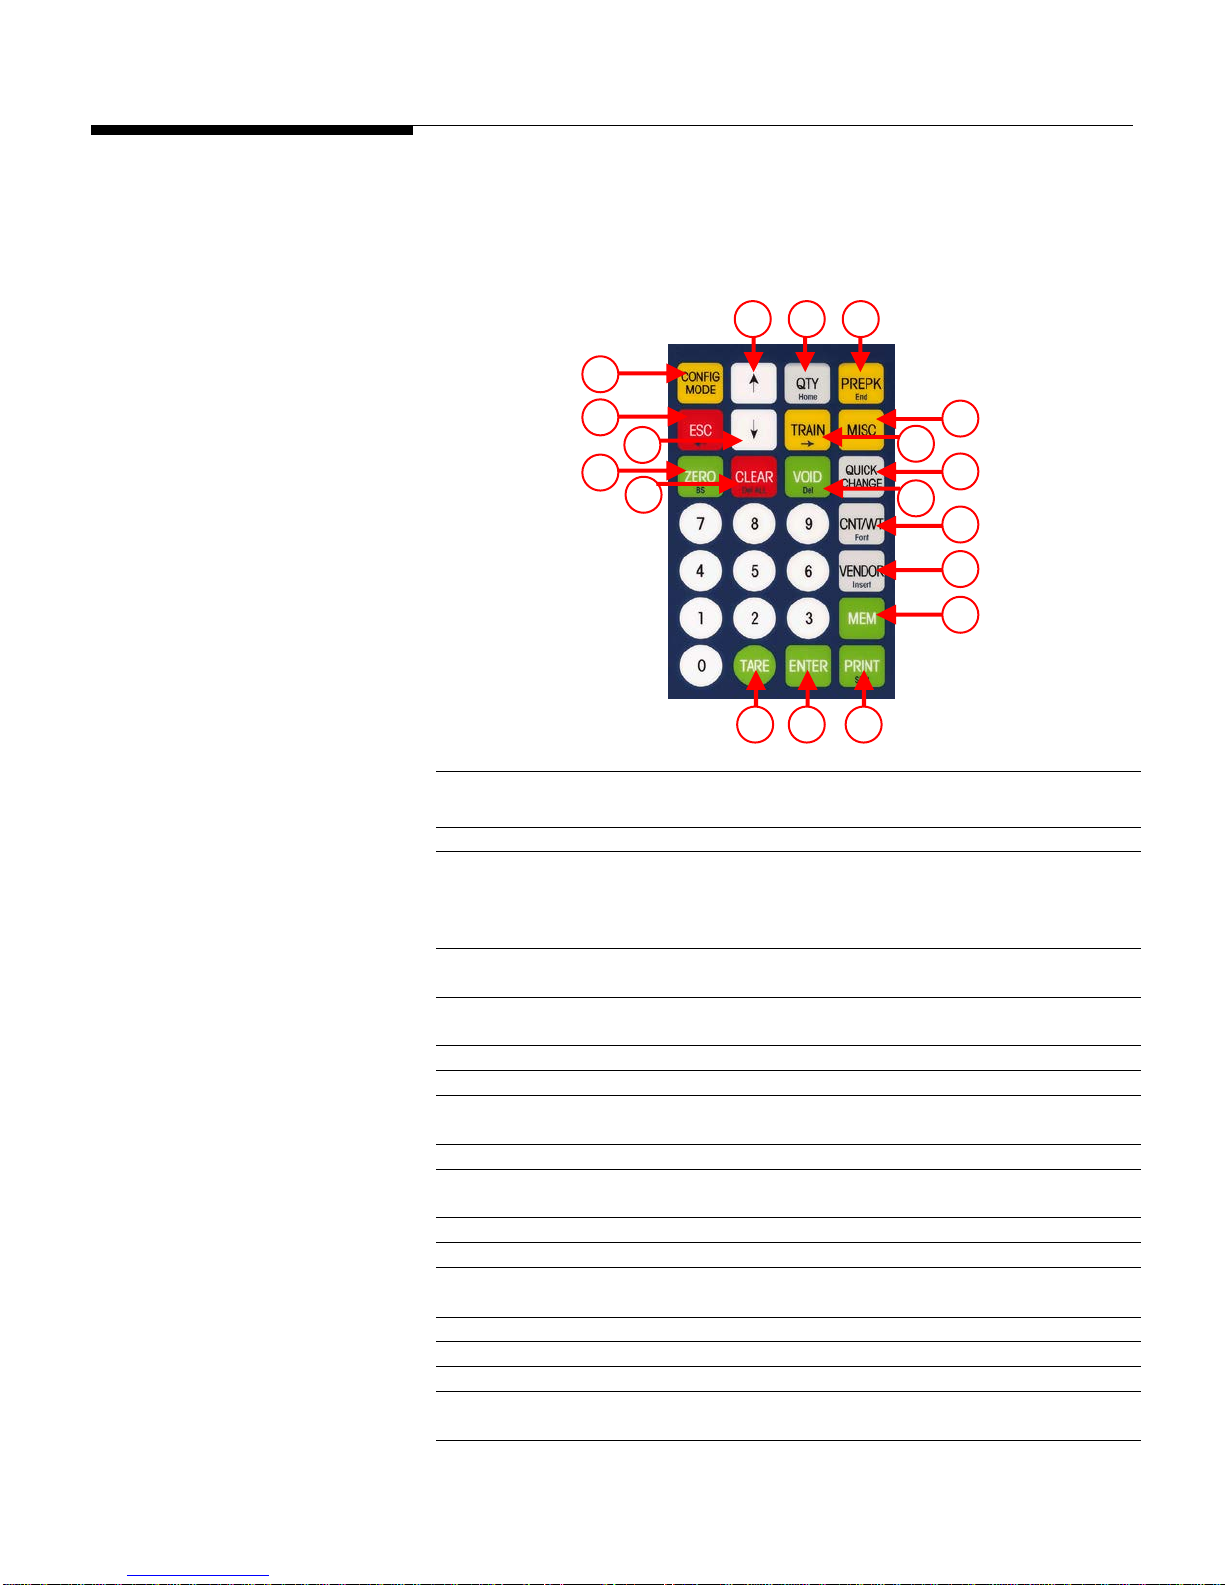
Keyboard
The keyboard consists of a membrane switch-pad and an overlay that provides tactile
feedback and an audible tone when the keys are pressed. The 28 keys on the righthand keypad are used for entering basic scale functions in the various scale modes.
Any alternate functionality is listed in smaller text on each key.
04
02 01
17
16
18
15
14
05
03
06
07
08
09
10
11 12 13
Keyboard Functions
1 Used to scroll through possible selections including yes/no paths and selects
between preset layers 1 and 2
2 Enters the quantity of PLU labels to be printed in batch mode
3 Training Mode – transactions are not registered in reports when in this mode. In
receipt mode, “training” will be printed on the ticket. In label mode a horizontal
line will be painted on the label to indicate an invalid label. This function can be
password protected
4 Toggles between Prepack and Service mode. In Prepack mode, a label is printed
each time the weight on the platter fluctuates (corresponding to a new package)
5 Miscellaneous key allows the user to enter a unit price and print a label for an
item that is not in the PLU database. This function can be password protected
6 Accesses the menu for temporary overrides of Price, Shelf Life, Date, etc.
7 Voids a PLU transaction from accumulation totals
8 Overrides quantity/count of Standard Pack/By Count PLUs. Overrides the net
weight field within a Standard Pack PLU
9 Input operator ID
10 Input PLU in transactional receipt mode; input functional preset key in
programming mode
11 Prints a label or feeds a blank label when the weight value is at zero
12 Accepts displayed data or displayed selection
13 Overrides programmed tare of a called By-Weight PLU. Enter the tare numerically
(keyboard tare) or place an item on the platter and press TARE twice
14 Clears incorrect entries or messages from the display. Backs out of PLU screens
15 Sets weight value to zero
16 Backs up in the Menu
17 Accesses Setup Mode and Database functions; press CONFIG and PRESET for
functionality quick key
18 Call PLU by item number
2-2
Page 13

Chapter 2: Operating Instructions
Keyboard
Special functions
Pressing PRINT when there is no weight on the platter will advance a blank label.
Pressing CONFIG then PRINT will list the scale information on a label such as software
version, IP address, MAC Address, scale type, scale ID, as well as the Product ID of the
scale.
Power On while pressing Tare will show the IP Address
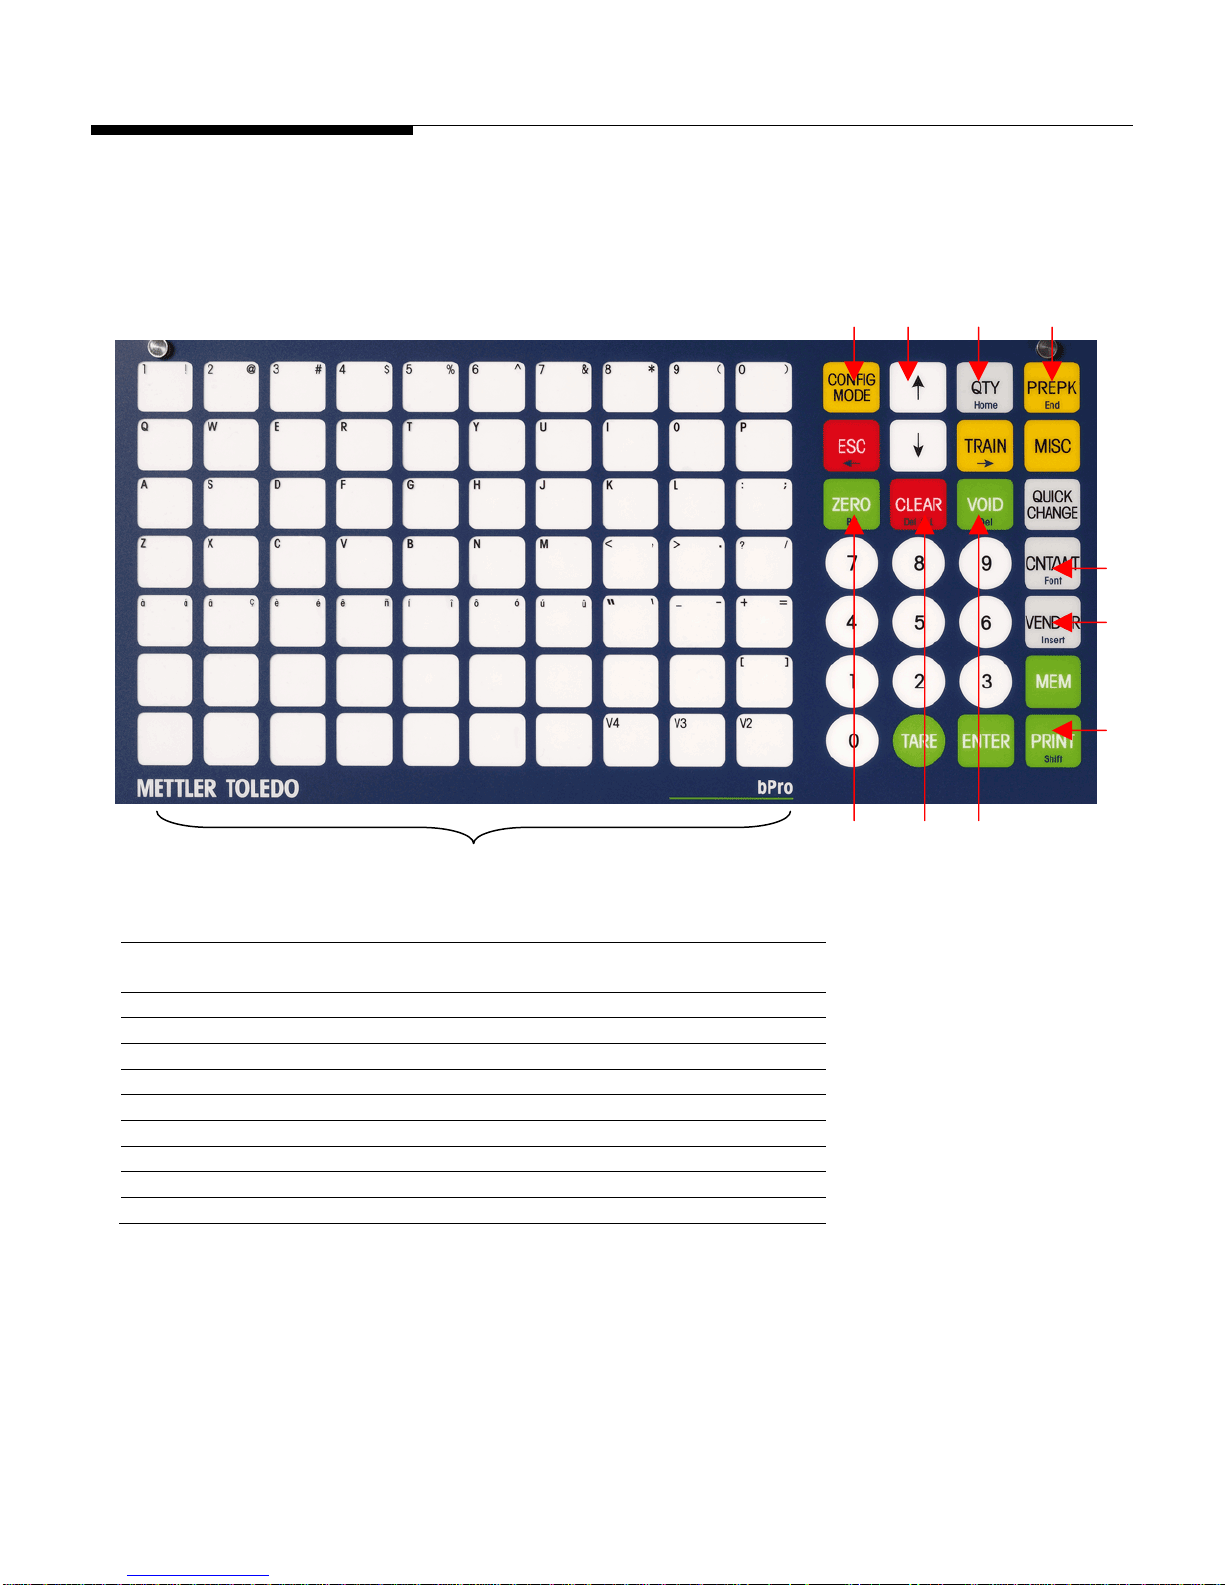
The 70 keys on the left keypad can be programmed as direct access keys (Presets).
There are two levels to the preset keys for a total of 140 PLU Presets. The Preset keys
should be configured first before being used.
To recall a PLU simply press the key once to access the Level 1 preset. To access the
Level 2 Preset, hit the key twice. Alternatively, select the proper level by pressing the ↑
key to view L1 (Level 1) or L2 (Level 2) on the display, than press the desired Preset.
The key provides PLU selection via item number.
Shortcut keys can also be programmed as quick access keys to particular setup
functions.
To set a key as a quick access key, go to the desired point in the setup menu and
press MEM , then press the preset key, then press ENTER.
To access the functional preset, press CONFIG then press the newly-appointed
preset key.
To clear a functional button, press MEM, clear and the desired preset button.
Press ENTER to delete a shortcut key.
In addition, the Preset keys (Left side) also provide the QWERTY keyboard for whenever
the scale allows text editing. These keys can be used as word processing keys while
entering the PLU description, store address, Extra Text Ingredients, COOL statements,
etc.
2-3
Page 14
METTLER TOLEDO bPro User's Guide
Text Editing Mode
When editing text fields, the user will find the bPro very flexible. The buttons do doubleduty when typing, allowing the previously defined functions to change toward a more
language-friendly configuration (as seen below).
1 2 3 4
EMPTY KEYS = SPACE KEYS
1
Press CONFIG to escape text editing mode
2
Navigation group – ESC moves cursor left, Train moves cursor right
3
Acts as home key to move cursor to the beginning of the line
4
Acts as end key to move cursor to the end of the line
5
Font used to access symbols, Unicode or Pin/YIN characters
6
Switch between insert and overwrite modes
7
Acts as shift lock to change between uppercase and lowercase keystrokes
8
Deletes selected character
9
Clears all text
10
Acts as backspace to delete previous character
5
6
7
10 9 8
Type Functions
2-4
Page 15

Chapter 2: Operating Instructions
Text Editing Mode
Text Editing Window
There are up to 15 lines per Text item. There can be multiple sentences per line. A line is
a hard carriage return. To go to the next line, press the ↓ or ↑ keys. In each line the text
will wrap in the allocated space as needed.
Bottom Left (Lower) shows the status of the Text.
Bottom Right (198) shows how many characters are remaining for that TEXT
description.
In pressing Font (5 – CNT/WGT) while in Text Editing Mode, you can navigate through
entering a Symbol, Unicode character or PIN YIN character
2-5
Page 16
METTLER TOLEDO bPro User's Guide
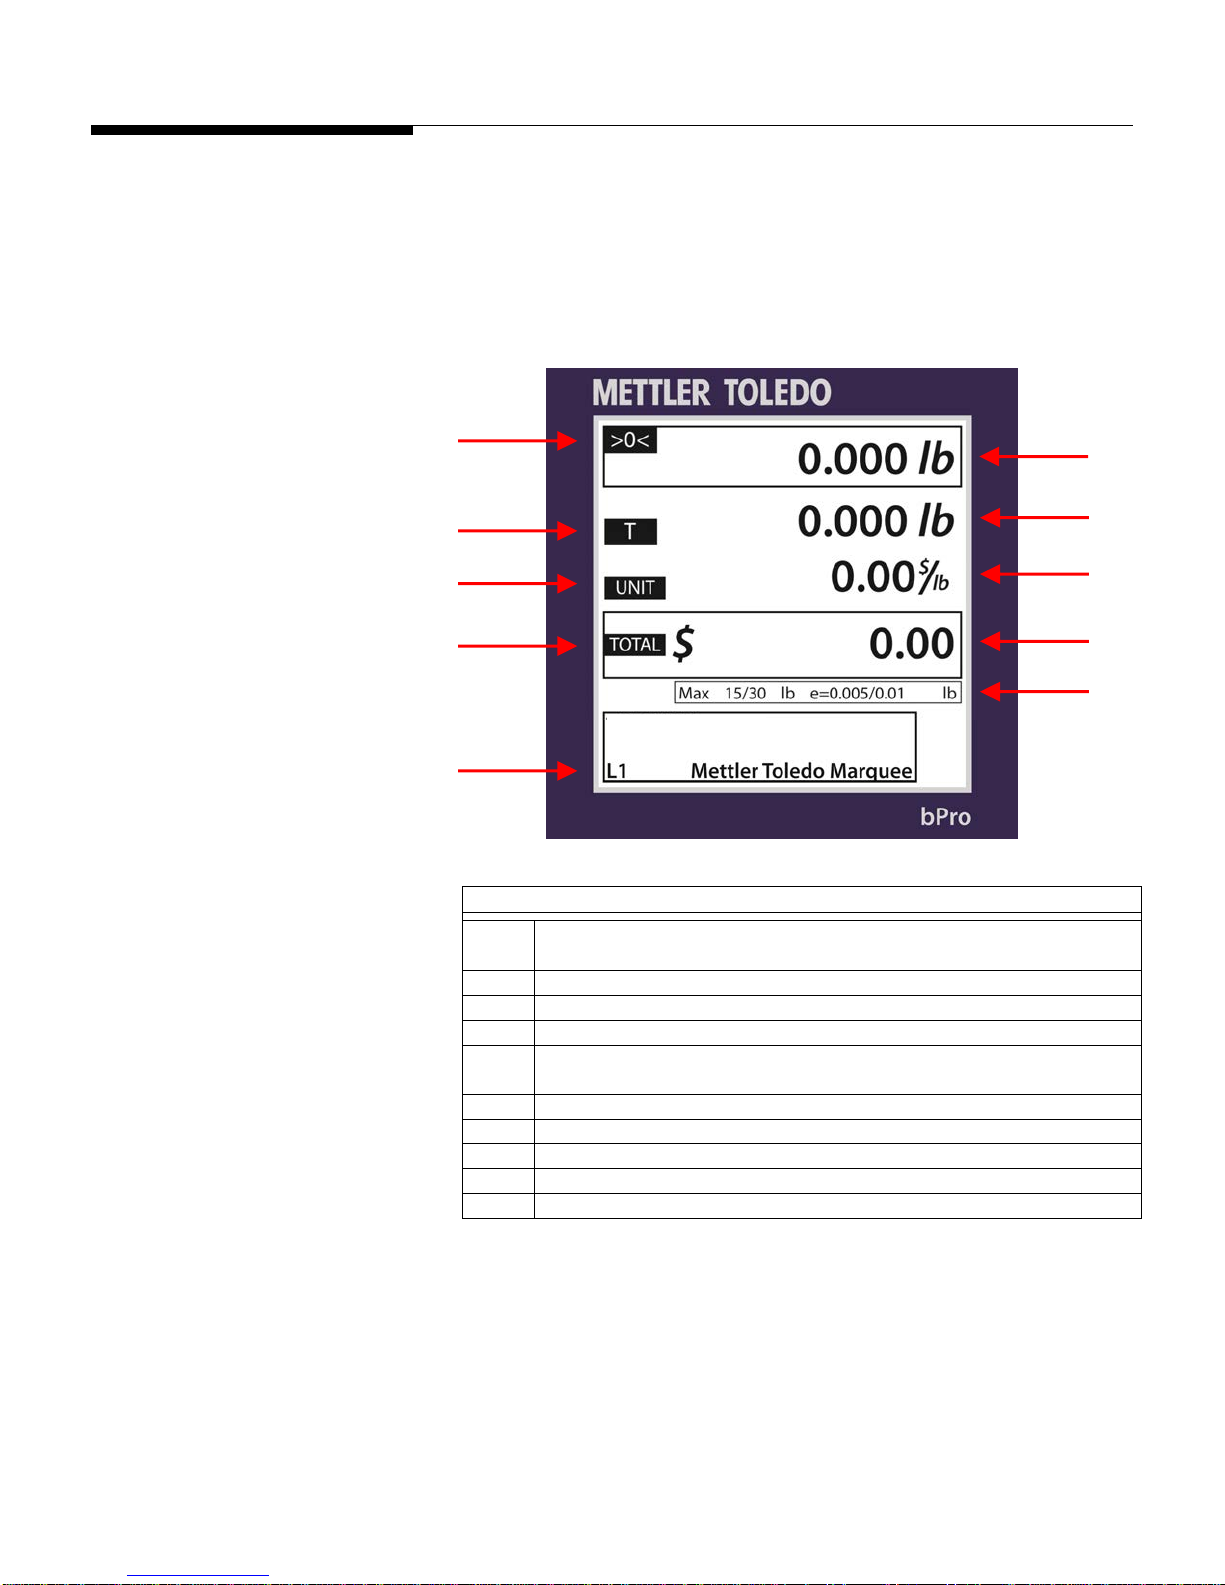
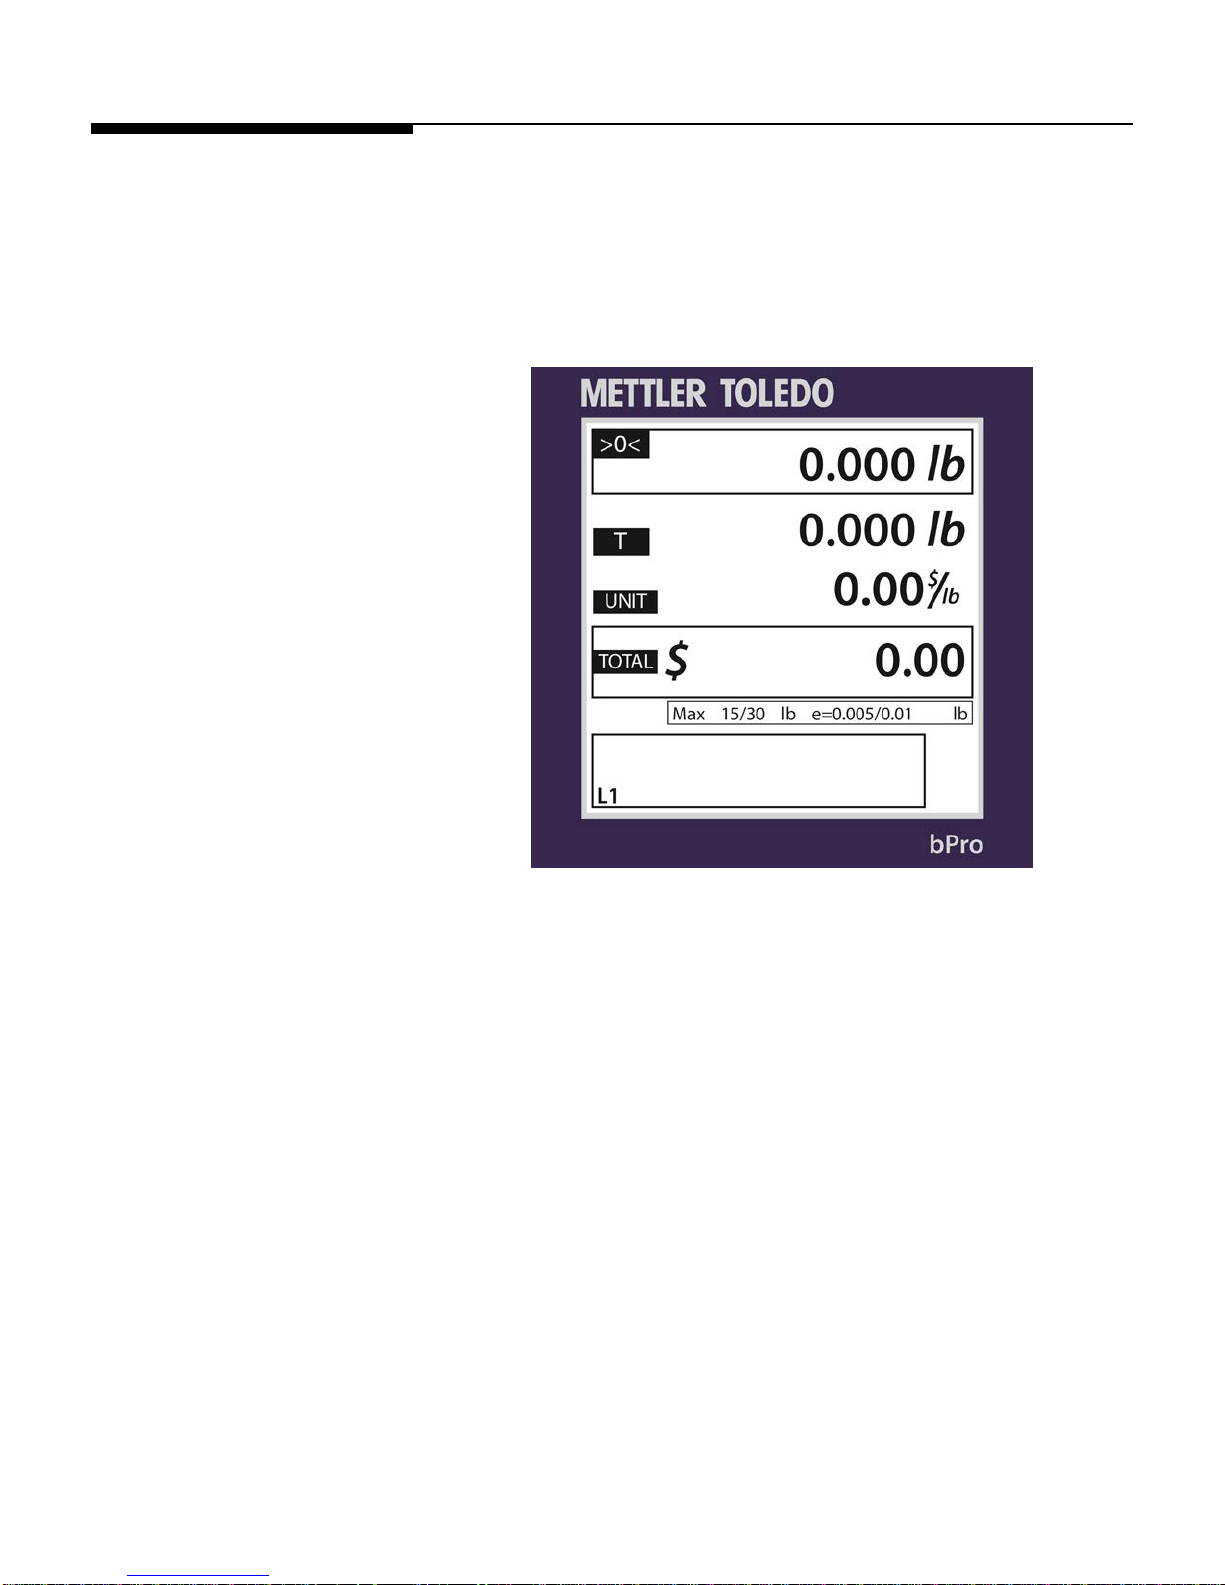
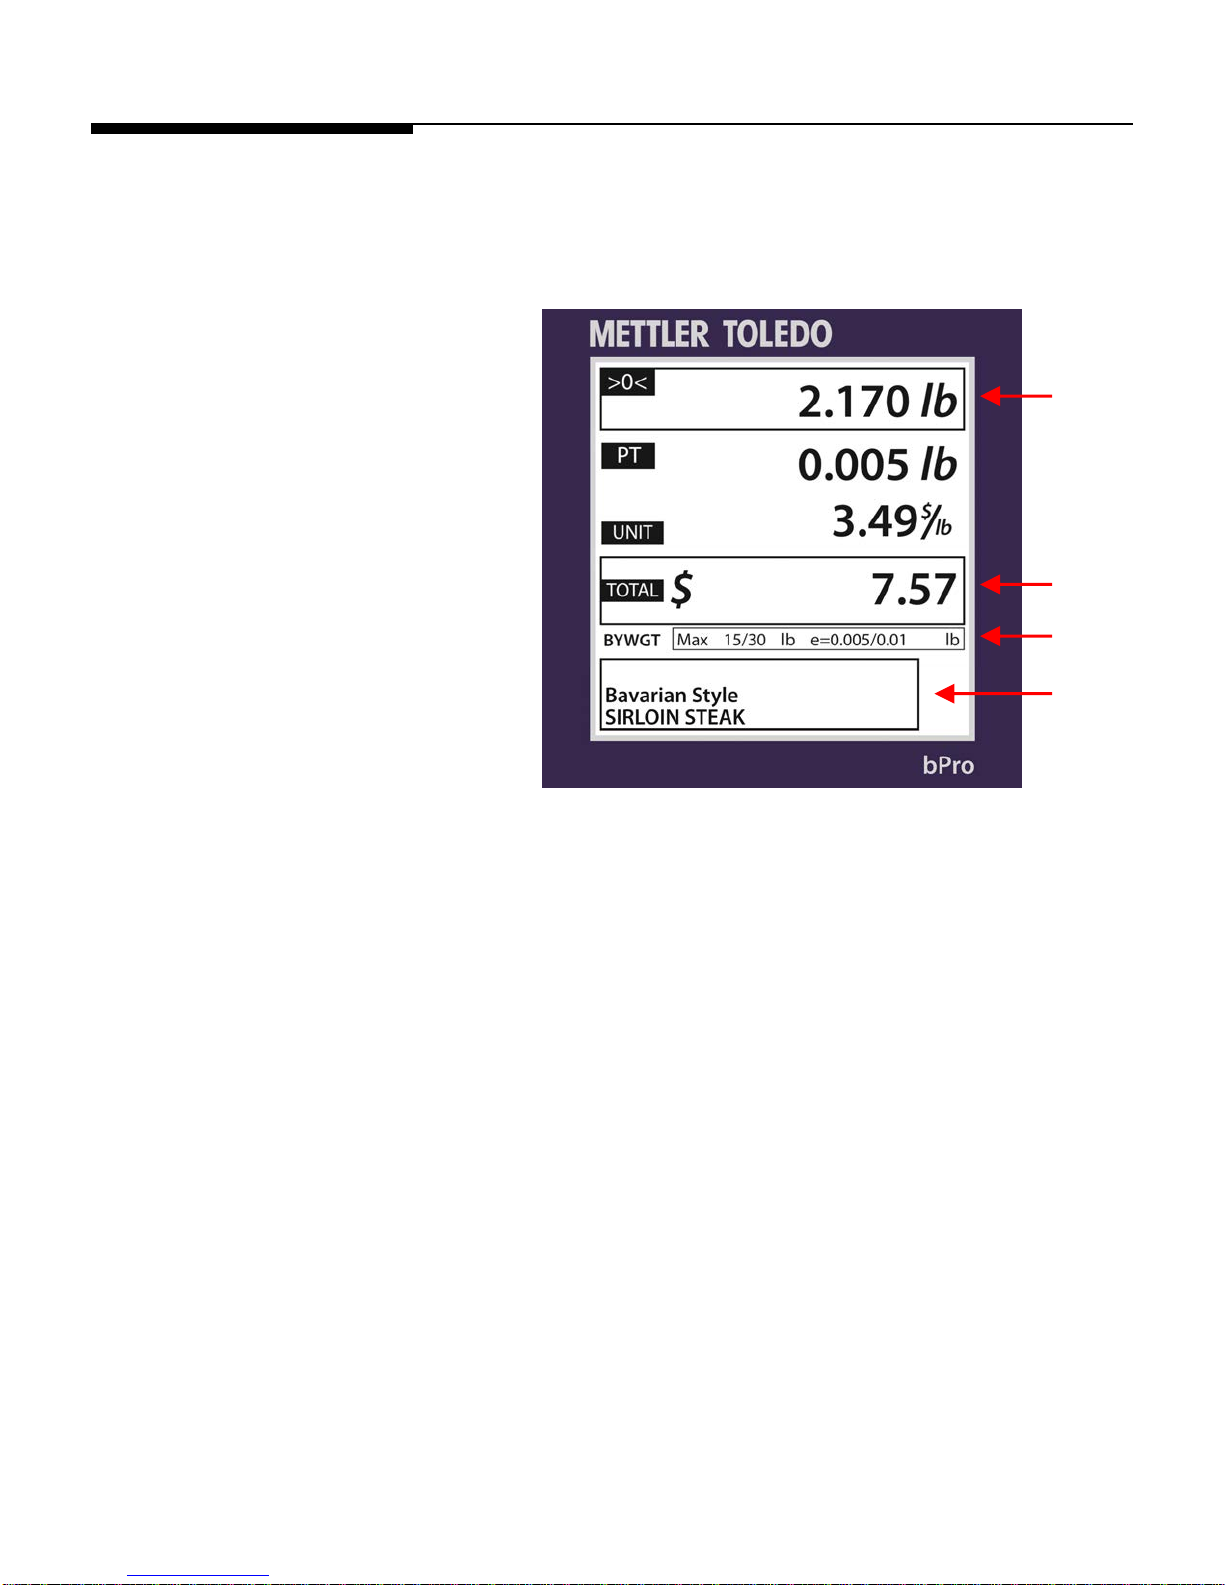
Main Screen
Initially, the bPro boots to a screen that looks much like the one pictured below. This
home screen allows for direct input of PLUs via the keyboard at the front of the unit as
well as editing of various parameters that are attached to said PLUs. Depending on the
PLU, this screen can take various forms (detailed below), with each containing an array
of slightly-different fields.
1
2
3
4
6
7
8
9
10
5
>0< indicates scale is at zero weight
1
NET indicates scale is in net weight mode and a tare value is in use
2 Tare symbol
3 Unit price
4 Total price
5 L1 indicates Preset layer 1 will be used
L2 indicates Preset layer 2 will be used
6 Platter weight display
7 Tare weight value being used
8 Unit cost of the specified PLU
9 Total price display value
10 Displays scale capacity and weighing increments as well as weight units
Operator Main Screen Components
2-6
Page 17
PLU Pricing Modes
By-Weight PLU
Chapter 2: Operating Instructions
PLU Pricing Modes
PLU is an abbreviation for Price Look Up. The PLU is a reference number assigned to a
product's record including fields such as the description, price, tare, etc.
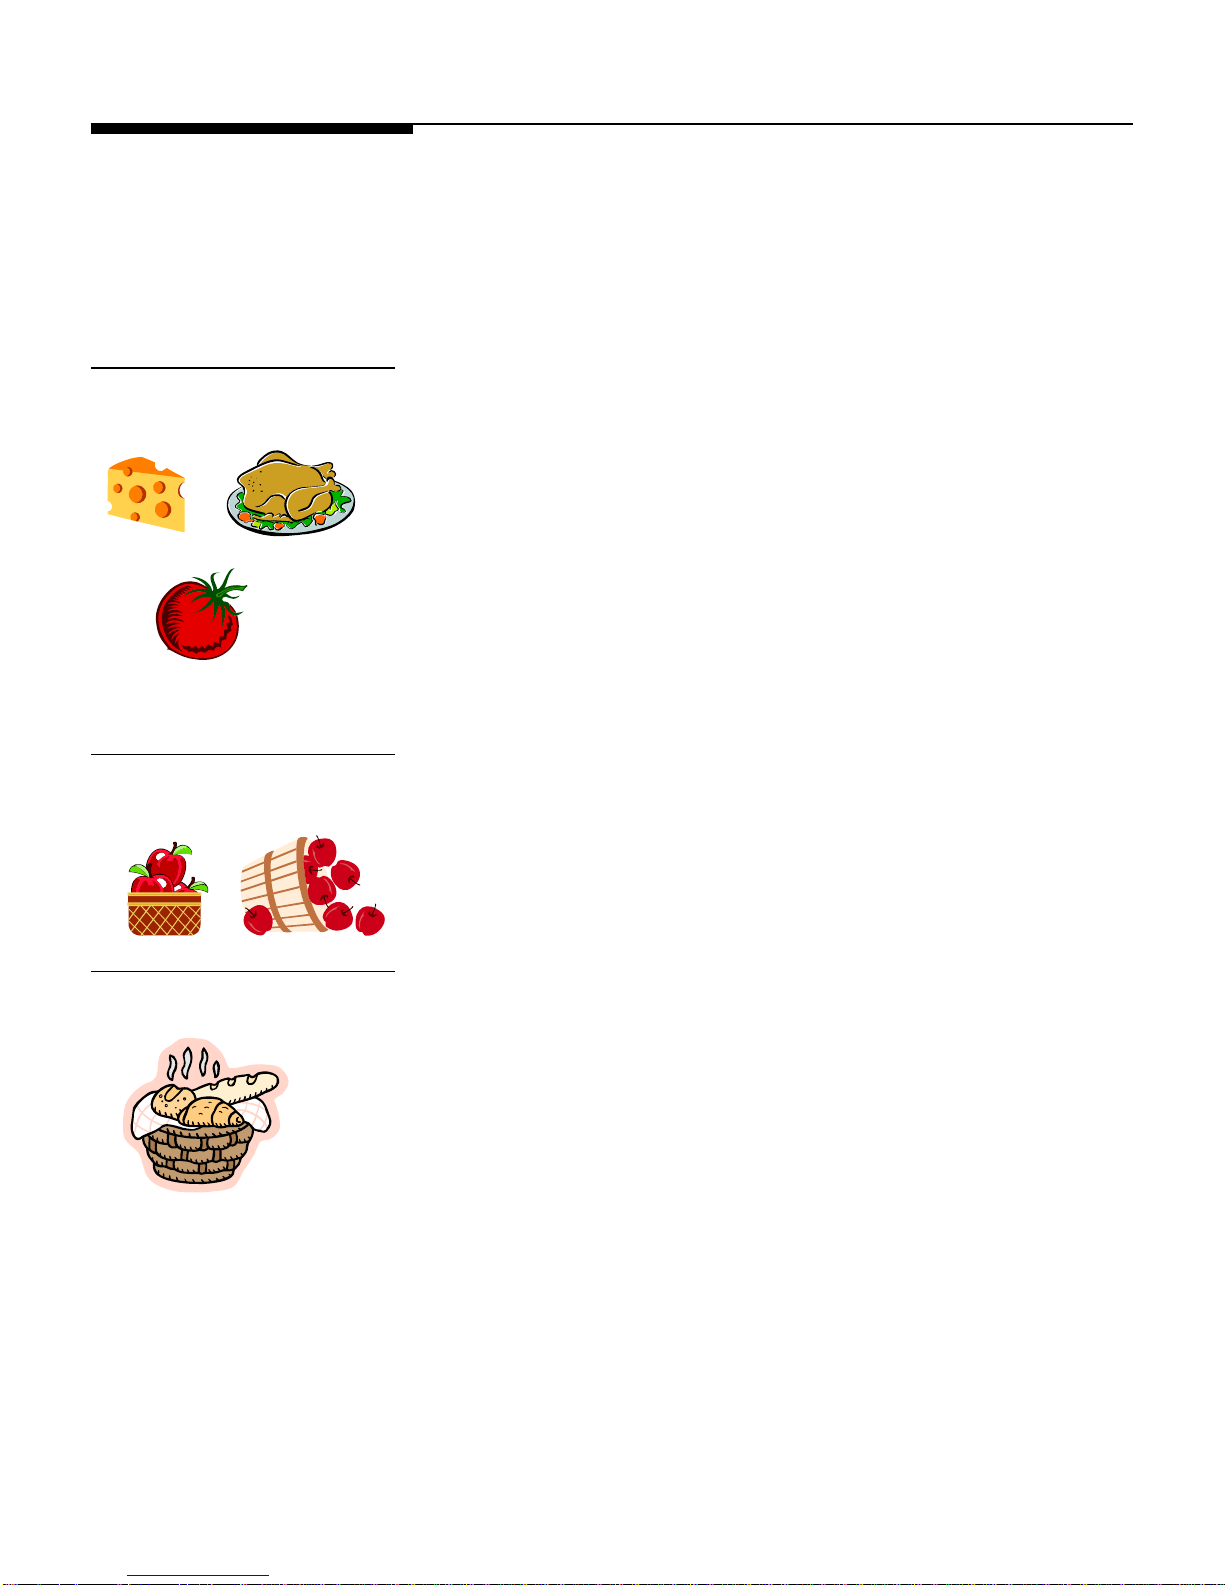
Different PLUs will have different pricing modes. Meat is normally sold "By Weight" by
the pound or kilogram. Many bakery products are sold "By Count". Other products may
be sold in a “standard package”.
Examples of products sold By Weight are meats, cheese, poultry, and produce. ByWeight items can be priced in three ways:
Priced "Per Pound/kg" - Typically weighed items are priced per pound or kilogram. The
weight multiplied by the unit price equals the total price of the product.
Priced "Per Fraction of a Pound/Kg" (fractional) - The item may be priced by the
fraction of the pound or kilogram (where legal and desired). When the unit is calibrated
in lb. mode, ¼ and ½ pricing are available. In kg mode, 100 gram pricing is available.
"Pounds/kilos for price" - The PLU may be sold with a pounds-for-price (rather than
price per pound). For example, “2 pounds for $1.00” rather than “$0.50/pound.”
By-Count PLU
Standard Pack PLU
Examples of items sold by the count are cookies, donuts, rolls, bread, etc. Example: 4
Apples for $0.69. Pricing is entered as a certain quantity of items for a set price.
An example of an item sold by Standard Pack would be whole, precooked chickens, a
sheet cake or a loaf of bread. These labels use a fixed net weight and total price for the
item.
2-7
Page 18
METTLER TOLEDO bPro User's Guide
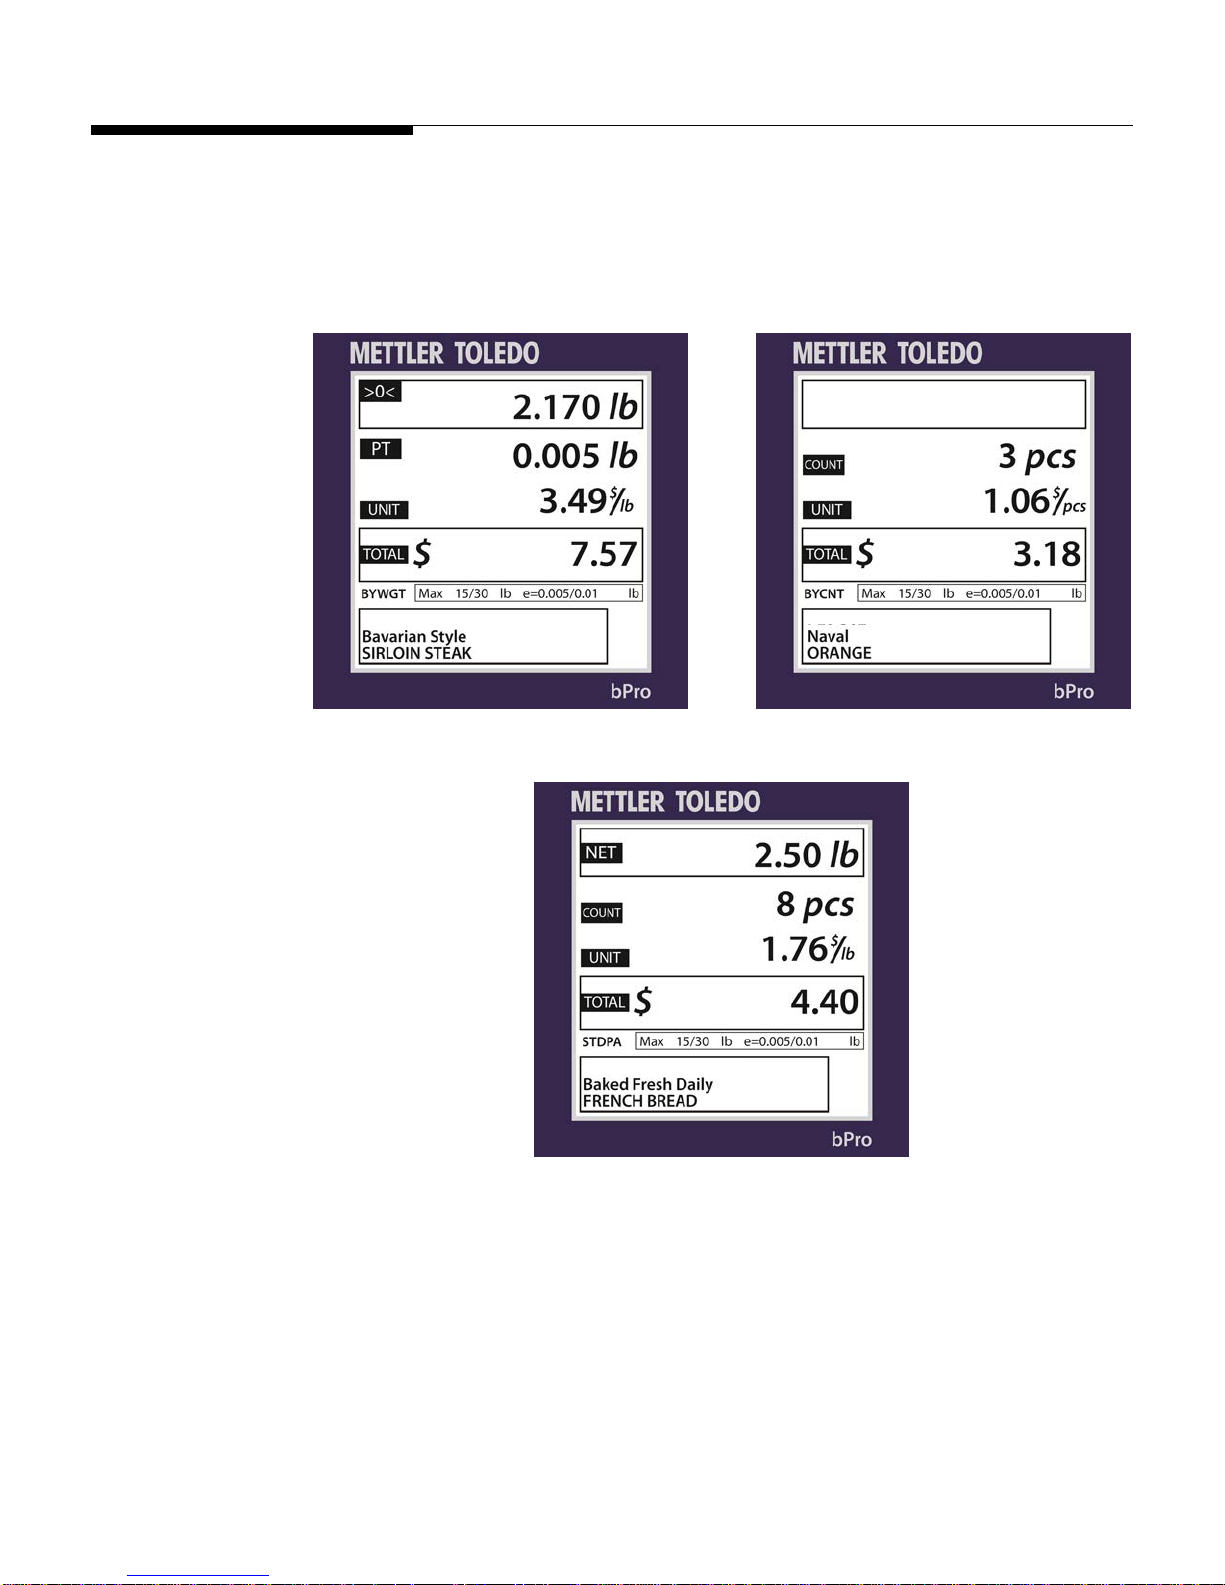
PLU Screens
The PLU screen will vary based on the type of PLU that is being displayed: By Weight,
By Count or Standard Pack.
By Weight By Count
Standard Pack
2-8
Page 19
Calling Up PLUs
Chapter 2: Operating Instructions
Calling Up PLUs
When the bPro® is in Service Mode, the screen will display the Main PLU management
array, from which all transactions may be conducted.
Note: “Service Mode” is normally the default on the PLU/PLU Edit screen. After the
product has been weighed, a label has been printed and the item has been removed
from the scale, the PLU will clear and the scale will return to the home screen, ready for
the next item.
To begin a transaction, call up the PLU record by keying in the PLU number or pressing
a Preset key. Depending on the scale’s PLU auto call setting, the PLU record will be
automatically called after entering a defined number of digits.
To use the Preset keys, it is possible to select Layer 1 or Layer 2 by using the up arrow.
The default state is Layer 1.
For by-weight PLU, place the item on the weight platter; this can be done before or after
a PLU number has been called. The machine will compensate depending on which
method you choose.
Call up the PLU Record. To do this, find or key-in the Preset PLU related to the product. It
may be a By-Weight, By-Count or Standard Pack item.
After keying-in the PLU, the screen will vary slightly in appearance depending on
whether it is a By Weight, By Count or Standard Pack entry.
Depending on how the PLU has been set up, you may be able to edit some of the
values for this current selection. If allowed, you can change items such as Shelf Life,
Tare, etc by pressing the Quick Change button and navigating to the appropriate field.
Any changes made will remain until the called PLU is overridden by pressing the clear
button.
Quick changes are specific to the transaction and do not make permanent changes to
the PLU record.
2-9
Page 20

METTLER TOLEDO bPro User's Guide
Printing Labels
Once the PLU has been called up, make any needed changes, and then press the Print
button on the keypad to print a label.
Take the label and remove the item from the scale to complete the transaction.
The bPro can be configured to be used in Service Mode or Prepack Mode depending
on the needs of the user.
In Service Mode, once the PLU has been called, it will be necessary to press the PRINT
key to get additional labels. The scale can be set for “Auto Clear” enable, whence it will
clear out of the selected PLU after the label has been printed. If Auto Clear is disabled,
then it will be possible to remove the first item, place a second item on the platter and
then press the PRINT key to get a label for that item. Service Mode is the normal default
mode.
In Prepack Mode, each time a new item is placed on the platter, a label will be printed
(corresponding with a fluctuation in the weight on the platter). This mode allows for
weighing multiple packages without pressing the PRINT key.
2-10
Page 21
Temporary Overrides
Chapter 2: Operating Instructions
Temporary Overrides
Temporary Overrides are certain values can be adjusted for the current transaction
through the Quick Change button on the right center of the keypad. The changes are
temporary – on a per-transaction basis, in other words – and will NOT be retained in the
original PLU data.
Depending on how the bPro has been configured, you may be able to perform
Temporary Overrides on some of the PLU values for the current PLU. These include Unit
Price, Tare, Use By Date, etc. The changes are temporary on a per-transaction basis
and, thus, are NOT retained in the original PLU’s dataset.
To change a value, call up a PLU and then press the Quick Change key. This will bring
you to a scrollable list of the values that can be changed. Use the up and down arrows
to navigate and then press the ENTER key to select the field to perform a temporary
override. Enter the temporary value and then press ENTER to accept or ESC to not
accept. Press the ESC key to get back to the PLU.
If the message No Selection is displayed, no fields have been enabled in the Quick
Change setup menu. If only Price Change has been enabled, the Price Change menu
will be displayed without going to the scrollable list.
2-11
Page 22

METTLER TOLEDO bPro User's Guide
For your notes
2-12
Page 23
3 Configuration
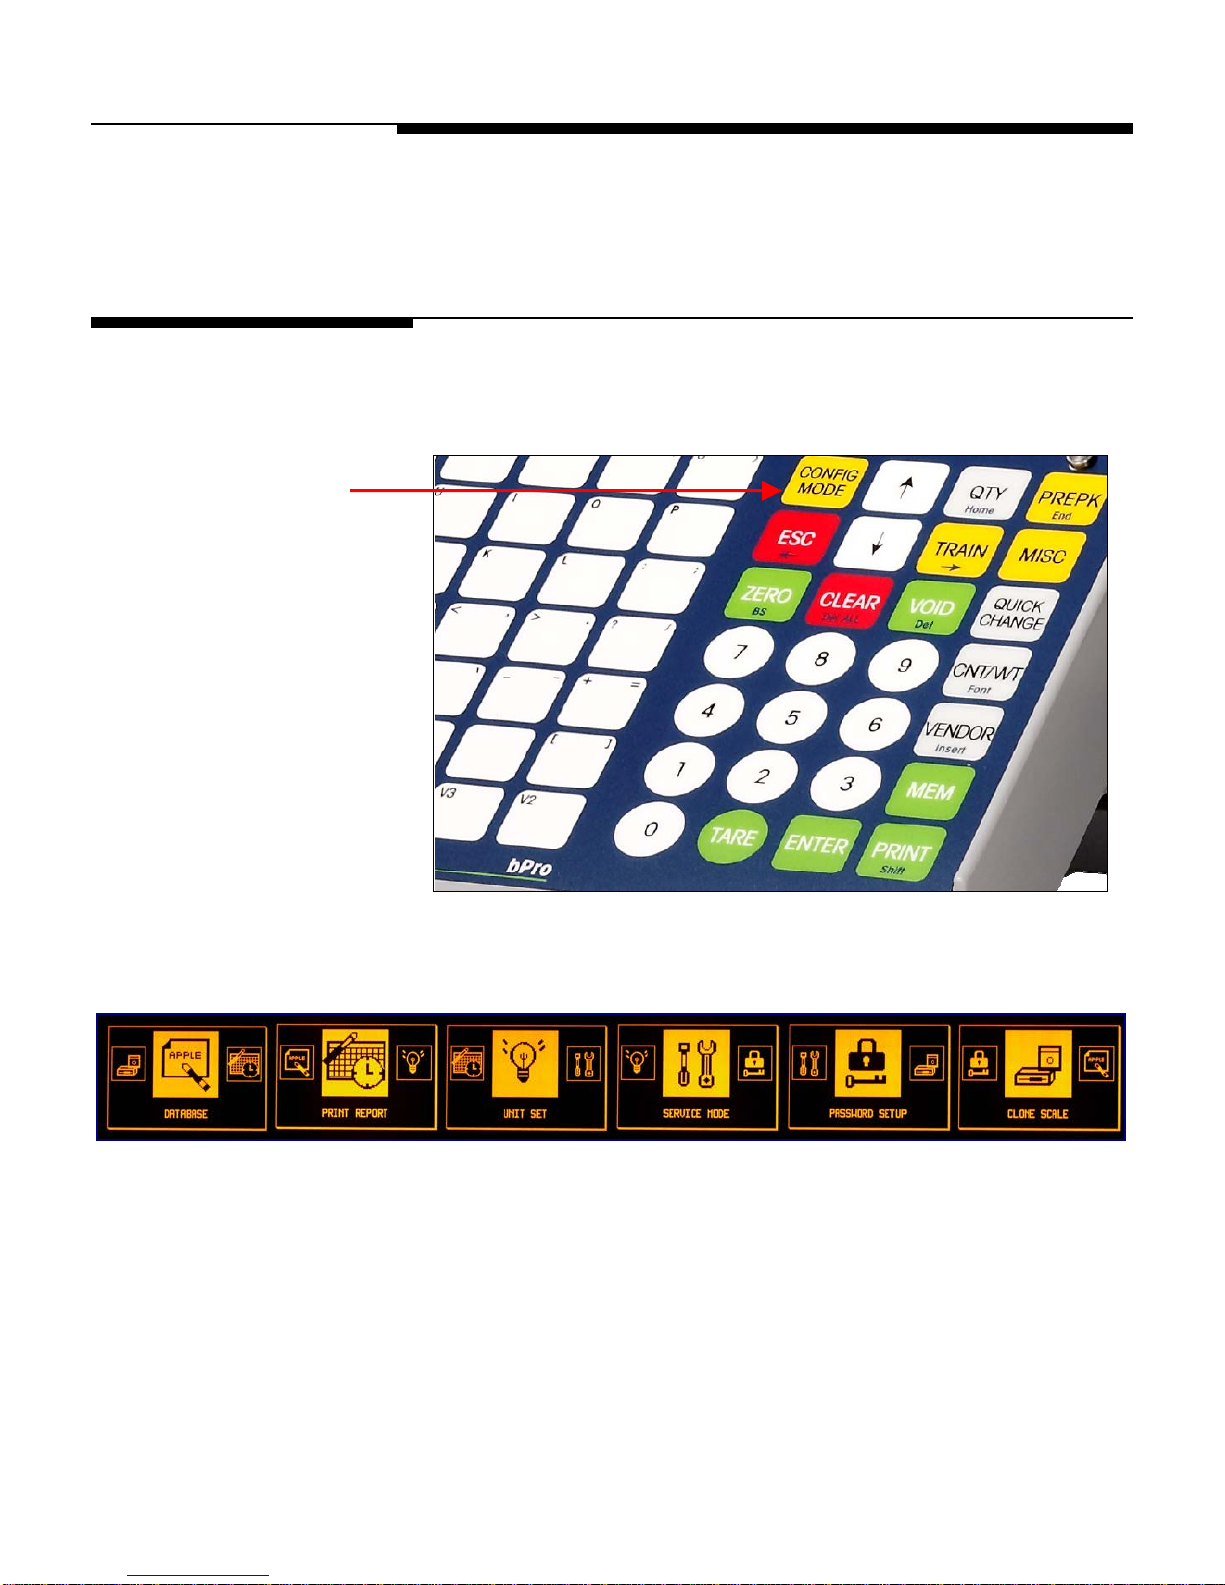
Introduction
Setup for the bPro® is controlled from the Configuration screen. This is accessed by
pressing the yellow CONFIG MODE button on the Operator keypad.
Chapter 3: Configuration
Introduction
From here the Database, Print Report, Unit Setup, Service Mode, Password Setup and
Clone Scale options can be accessed and modified.
At any time, the user may press ESC to return to the main transaction screen. Use the
and arrows to scroll through the various options and press Enter to make a selection.
3-1
Page 24

METTLER TOLEDO bPro® User's Guide
Program Menu
Database
Quick PLU Change Edit Lot Nr, Proc date, Supplier info Enable- Void Key, Over-ride, Etc Reset to Default
Quick Price Change List Lot Nr, Proc date, Supplier info Language Scale Total
Quick Tare 1 Change Copy Lot Nr, Proc date, Supplier info User Define PLU Total
Quick Tare 2 Change Database : Delete Display – Marquee, Tare, Screen Saver Promote Total
Quick use by date – see items above Print Label Configure Group Reports
Quick shelf life Change Print Receipt Config Group Timely
Quick Extra Text 1 Unit Setup
Quick Extra Text 2 PLU Auto Call – Set Qty Digits Sales Online Settle Report
Quick COOL Change PLU Display Option – PLU Description Process Mode ST/VOID Report
Quick Trace Lot Change PLU Display Alignment Operator Report
Quick Process Date PLU Presets Service Mode
Quick Supplier Info Assign Presets – Manual, Auto Initialize Database Monthly Report
Quick Label Change Delete All Presets Reset Configuration Yearly Report
Quick Spec Message List Presets Assign Memory Combine Reports
Quick Nutrifact List all Short Key Calibration – Press Cal switch Clear Reports
Graphic 1 Active Tare Price Format - Currency Clear Accumulator
Graphic 2 Default Label Format Expand Wt Solution
COOL Production By-Weight – Service, Prepack Minimum Print Password Setup
COOL Country By-Count– Service, Prepack Digi Filter – Light, Heavy Change PW: Database
COOL Pretext Standard Pack – Service, Prepack Geo Code? Change PW: Unit
TLV Handbyweight – Service, Prepack Load cell – Int, External Change PW: Service
Frequent Shopper Handbycount – Service, Prepack Weight Separator Change PW: Password
Database: PLU Total Allow Fractional WT Change PW: Quick Change
Edit PLU – PLU Type, Item #, Dpt # Delete Custom Formats Qty Label By Wgt Change PW: Misc Key
Description 1 – 4
Fix WT, tare1/1%/2/2%, Shelf Life, Host Baud Rate Label Printer Setup
Use By, Spec Msg, Allow Price Chg, Host Data Bits Print Speed Clone Scale
ET, ET2, Label/PLU, Force Flag, Host Parity Printer Dot Density Local - Remote
Blank Flag Host Stopbits Strip Motor Remote - Local
Copy PLU Host Timeout MS Label Type
List PLU Network Enable Take-Up Sensor
Verify Labels IP Address Label Backup
Edit PLU Added Items – NF, use SH, User Subnet Label Eject Length
Graphic ½, COOL Text, COOL Gateway Label Take-up Sensor
production, COOL country, COOL MAC Test Printer Sensor
pretext, TLV, freq. shop type, Trace Idle Time Printer Test
Lot Nr, Trace Proc Date, Supplier Wireless Configuration Receipt Printer Setup
Info, 2nd Price Store Information Resistance
Copy PLU Added Items Store Logo Print Speed
Database: ET Scale Number Printer Dot Density
Edit Extra Text Marquee Paper End Check
List Extra Text Bar Code Settings Test Printer Sensor
Copy Extra Text Bar Code Number Printer Test
Database: Nutrifacts Bar Type Function Tests
Copy Nutrifacts Define Bar Code Digits Display Test
List Nutrifacts PLU Setting Printer Test
Nutrifact Format Power Up – Service, Prepack Keyboard Test
Database: Spec Message Print Mode – Print Key, After Motion Display Configuration
Edit Special Message Auto clear Contrast Adjust
List Special Message Back to zero Invert Background
Copy Special Message Set Time Date History Path Grey
Database Cool Text Set - Date, Time Beeper – On/Off
Edit COOL Format – Year, Time, Date Separator Debug
List COOL Assign Group Name Serial Port Debug
Copy COOL Edit Group Name Assert Debug
Copy Group Name Predictive Maintenance
Delete a Group Name Print Head
Delete All Group Names Check Text
List Group Names Print All Menus
,Group, Price, Qty,
atabase Traceability Enable Function Keys Print Reports
Print Paper Type – Receipt, Label Hourly Report
Weekly Report
Serial Port Calibrate Change PW: Training
3-2
Page 25

Database
Chapter 3: Configuration
Database
This path takes the user to the Database cascade where he or she may make changes
to the individual PLUs.
Use the or keys to make a choice. Press the Enter key to bring up the selected
menu options or ESC to return to the main screen. They are as follows:
Quick PLU Change
Use this menu to make permanent changes to selected PLU data. This menu allows
easier access to PLU specifics without having to scroll through the massive list of
parameters the user is otherwise faced with. Data is entered only for the specifically
chosen PLU.
Quick PLU Change Select (shown left)
Brings up a list of selectable options that can be toggled with the Enter key. Use the
arrow keys to select fields from the list.
DB PLU
This menu allows a user to make permanent changes to any and all PLU data. Data is
entered for a specific PLU number.
DB Extra Text
Add, edit, copy or list the extra text options for the selected PLU via linked record number
DB Nutrifacts
Ability to copy or list embedded Nutrifact data to another link number. Also allows for
the selection of the Nutrifact format.
DB Special Message
Add, edit, copy or list the special message attached to the specified record number
DB COOL
Add, edit, copy or list the COOL text attached to the selected PLU
DB Traceability
Add, edit, copy or list a Traceability Statement with its linked record number for the Lot
Number, Process Date or Supplier Information.
DB Delete
Remove a record or all records of a type from the list. WILL DELETE ALL DATA!
3-3
Page 26

METTLER TOLEDO bPro® User's Guide
Quick PLU Change
The Quick PLU Change menu is meant to allow for modification of the selected PLU with
fewer keystrokes than if the user went through the other Database menus. By listing
many of the most commonly changed categories in a head-to-tail fashion, the Quick
PLU Change menu will likely become an oft-visited destination for unit operators.
NOTE: Available list is configured via Quick PLU Change Select.
As should be evident by the list layout, the editable parameters are arranged in a moreor-less “most-often modified” order beginning with Price Change and moving outward
both up and down. A complete list of the categories follows.
Quick Price Change (shown left; all screens in this category follow this layout)
Change the selected PLU’s unit price
Quick Tare 1 and Tare 2 Change
Change the selected PLU’s tare weight. The below screen is representative of the dataentry fields used in the rest of the screens in this cascade.
Quick Use-By Date Change
Change the selected PLU’s Use-By date. Should only be modified for new products.
Quick Shelf Life Change
Change the selected PLU’s shelf life.
Quick Extra Text 1 and 2 Change
Change the selected PLU’s primary and secondary extra text entries.
Quick COOL Change
Enable, disable or modify the selected PLU’s COOL information.
Quick Trace Lot Number Change
Enable or disable the selected PLU’s trace lot number functionality
Quick Process Date Change
Change the selected PLU’s process date
3-4
Quick Supplier Info Change
Change the selected PLU’s supplier information
Page 27

Chapter 3: Configuration
Quick Label Change
Change the selected PLU’s first and second label printing characteristics
Quick Special Message Change
Add or modify the selected PLU’s special message(s)
Quick Nutrifacts Change
Change the selected PLU’s Nutrifacts
Graphic 1
Assign a graphic number to the first graphic field on the label
Graphic 2
Assign a graphic number to the second graphic field on the label
COOL Production
To be implemented in a future software version
COOL Country
To be implemented in a future software version
COOL Pretext
To be implemented in a future software version
TLV
To be implemented in a future software version
Database
Database PLU
Frequent Shopper
Allow frequent shopper option to be used
The Database PLU cascade allows for fine-point editing of the available PLUs. From
here, a user will be able to do everything from simply listing all available products to
verifying the labels assigned to each PLU to actually modifying which products
correspond to which PLU numbers.
A breakdown of the individual categories follows.
3-5
Page 28

METTLER TOLEDO bPro® User's Guide
Edit PLU
Via the Edit PLU menu, a user may completely redefine a product entry. Listed in a
continuous loop are the categories PLU Type, Item Number, [4] Description lines,
Group, Unit Price, Unit Quantity, Input Fixed Weight, Tare, Shelf Life (days), Use-By
(days), Special Message text, Extra Text Number and Labels per PLU.
Within this area, you may also set permissions for price changes to the specified PLU.
Copy PLU
Creates a redundant entry of the selected PLU within the database under a new PLU
number
List PLUs
Prints a list of consecutive PLUs with their product designations. The user may select the
range of PLUs which will be printed, i.e. 1 – 6 or 650000 – 655000.
Verify Labels
Prints a series of labels to verify the format and number as per the PLU data
Edit PLU Added Items
This menu allows the user to edit and otherwise modify any of the added parameters of
the PLU. These parameters include Nutrifact, Safe Handling, Graphics 1&2, COOL
Text, Frequent Shopper Type, Traceability, Trace Process, Supplier and Second
Price.
Copy PLU Added Items
As with the Edit PLU Added Items menu, this one deals with the extraneous bits of data
attached to the specified PLU. Through this menu, a user can clone entries for use in
other PLUs
3-6
Page 29

Database Extra Text
Chapter 3: Configuration
Database
The Database Extra Text menu is responsible for the modification of existing extra text
entries as well as the addition of new ones.
A user may use this cascade to make changes to any of the extra text entries in the
system. Simply enter an entry number and add text until satisfied.
Refer to Chapter 2, Text Edit Mode, for text edit key functions.
Press Enter when complete.
3-7
Page 30

METTLER TOLEDO bPro® User's Guide
Database Nutrifacts
In order to best use the Database Nutrifacts menu, the user should be familiar with the
process of assigning numbers to and modifying Nutrifact entries.
Copy Nutrifacts
Allows the user to duplicate a Nutrifacts entry for use in another PLU
List Nutrifacts
The user selects a range of Nutrifact entries which the machine then prints on whatever
label stock it has available. Useful for cataloguing purposes.
Nutrifacts Format
This menu enables the user to select between various Nutrifact formats depending on
the part of the world in which the scale resides.
3-8
The choices are shown above and can be selected with the arrow keys and the Enter
key.
Page 31

Database Special
Message
Chapter 3: Configuration
Database
The Database Special Message menu allows the user to alter, copy or list-print the
special messages in the system memory.
Database COOL Text
Simply choose which path you’d like to take and press Enter. As per the previous
menus, the Edit function allows the user to modify existing messages; the Copy
command duplicates the existing information for use elsewhere and the List function
prints a run of the current messages within a user-selected range.
This menu allows the Database COOL Text to be modified along the same lines as the
extra text and special messages detailed above. As such, the same protocol applies.
Press Enter when finished.
3-9
Page 32

METTLER TOLEDO bPro® User's Guide
Database Traceability
Edit Lot Number; Edit Process Date; Edit Supplier Information
Upon entering any of these three arrays, the user will be prompted to type in the number
of a specific entry. After that, a text window will appear wherein he may edit or add to
any of the information contained within.
Press the Enter key when finished and Escape to back out to the main Traceability
menu.
List Lot Number; List Process Date; List Supplier Information
Selecting among these three menus will allow the user to print a range of the queried
data on whatever label stock is available.
Copy Lot Number; Copy Process Date; Copy Supplier Information
Each of these menus works in the same way. The unit operator selects the number of a
current entry, selects a new number for the duplicate entry and hits Enter. From that
point on, the new number will reference a data string identical to the copied bit.
3-10
Page 33

Database Delete
Chapter 3: Configuration
Database
As one might expect, this menu is used to permanently delete entries from the unit
database.
CAUTION! UNLESS YOU HAVE A BACKUP OF YOUR DATABASES, THEY WILL BE LOST
UPON EXECUTION OF THIS COMMAND. BE SURE YOU ARE PREPARED BEFORE
DELETING ANY DATA.
As the names would suggest, the Delete All _____ entries revolve around emptying the
database completely of those data strings.
The more-specific Delete A _____ are for the precision elimination of single entries
within each heading. As is the case with the editing and management of PLUs and PLU
data bits, simply key in the number of the PLU, Extra Text entry, Special Message, etc.
and choose to delete it.
No deletions should be made before a complete and known-working backup image of
the scale is on hand, as deleted entries cannot be retrieved once erased.
3-11
Page 34

METTLER TOLEDO bPro® User's Guide
Clone Scale
Print Reports
Service Mode
DISCLAIMER: The Clone Scale function is meant to be used by trained Mettler-Toledo
technicians ONLY. Failure to properly execute the process will result in an unusable
product and the scheduling of a service call.
If this is something with which you are comfortable, reference the bPro Service Manual
(PN 64067201) section (x-x) for explicit instructions.
DISCLAIMER: The Print Reports function is meant to be used by trained Mettler-Toledo
technicians ONLY. Failure to properly execute the process will result in an unusable
product and the scheduling of a service call.
DISCLAIMER: The Service Mode functions are meant to be used by trained MettlerToledo technicians ONLY. Failure to properly execute these processes will result in an
unusable product and the scheduling of a service call.
Password Setup
DISCLAIMER: The Password Setup function is meant to be used by trained Mettler-
Toledo technicians ONLY. Failure to properly execute the process will result in an
unusable product and the scheduling of a service call.
3-12
Page 35

Unit Setup
Chapter 3: Configuration
Unit Setup
The Unit Setup menu contains many of the options necessary to tune the bPro unit to a
user’s specific needs. To access it, the user will need to press the Config Mode button
on the keypad and cycle past the Database and Print Reports options.
The various submenus of the Unit Setup main screen are listed below with short
descriptions; that you may go immediately to the area concerning your needs.
PLU Auto Call
Set the auto call limit – the number of digits entered before the database is searched for
a corresponding PLU of that number.
PLU Display Options
Select between the various PLU display options (L1, L12, L24, etc.) as well as which
PLU lines to display
PLU Display Align
Choose either left or center alignment for the PLU display
PLU Presets
Manage presets via modification, assignment, deletion and listing
Active Tare
Denote whether Tare 1 or Tare 2 will be applied to the PLU
Default Label Format
Select the default label format to be used for the different modes of operation.
Delete Custom Formats
Used to delete all custom formats that exist in the scale. IRREVERSIBLE.
Serial Port
The user may view and modify the port information via this menu
Network Address
View all manner of IP, Network, Subnet, MAC, etc. addresses assigned to the scale unit
Wireless Configuration
Configures the wireless card, if installed
3-13
Page 36

METTLER TOLEDO bPro® User's Guide
Store Information
Edit the store info text field. This data is printed on the label in the field of the same
name. Typically includes store location and addresses.
Store Logo
Use this menu to select a specific store logo from the list of uploaded graphics
Scale number
Select a network identification number for the scale
Marquee
Use this menu to make changes to the scrolling marquee text
Barcode Settings
Define the style and specifics of the unit’s barcode recognition and printing
PLU Settings
Configure Power-Up Mode, Prepack Print Mode, Auto Clear and Back to Zero.
Set Time and Date
Specify the time and date
Assign Group Names
Modify, copy, delete or list the group names available on the scale
Enable Function Keys
Enable or disable the various function keys on the keypads
Language
Select the scale’s displayed language
User Define
Modify the settings for the bPro display as well as the parameters for the printer
Sales Online
Enable or disable the sales online application
Process Mode
Enable/Disable process mode feature and configure process mode parameters
3-14
Page 37

PLU Auto Call
Chapter 3: Configuration
Unit Setup
The PLU Auto Call menu allows the user to determine how many keystrokes will be
required to be entered before starting a PLU search.
Setting the number at one, for example, will allow a user to press one on the keypad
and have the database pull up the corresponding PLU. Conversely, if the number is set
to six, the unit will not automatically bring up data corresponding to a PLU until either
a.) all six of the PLU’s digits are entered or b.) the Enter key is pressed after a smaller
PLU string is keyed in.
PLU Display Options
To change the layout of the PLU descriptions on the scale display, the user will need to
visit the PLU Display Options menu.
Up to TWO lines of PLU description may be displayed on the PLU edit screen. Select
which lines to show and in what order to display them.
3-15
Page 38

METTLER TOLEDO bPro® User's Guide
Active Tare
Selects whether Tare 1 or Tare 2 will be used when a PLU is called.
PLU Display Align
Simply put, the PLU Display Align menu allows the user to choose whether the PLU
description text will be left aligned or centered on the PLU screen. Use the arrow keys to
move the cursor and press Enter to make a selection.
3-16
Page 39

PLU Presets
Chapter 3: Configuration
Unit Setup
The PLU Presets menu allows the user to assign PLUs to the left-hand keys on the bPro
keypad.
In manual mode, the user selects particular PLUs to assign to the first and second levels
of each button (as desired). This is simply done by pressing a preset button and then
keying in a PLU number. Repeat as necessary.
Default Label Format
NOTE: within each label format, it is
possible to define a label number. Refer
to chapter 4 for a table of the default
label formats and their numbers.
If the stock label types are not adequate,
you may use a custom label format
number to define a particular setup that
has been added to the system.
Automatic assignment takes the first 140 PLUs in the database and assigns them in
sequence, 1-70 and 71-140, to levels L1 and L2 respectively.
In the name of efficiency, the label formats are easy to change with a quick glance at
the Default Label Format menu. Here a user is able to choose the particulars of the
default label format for each of the various scale modes.
Within each label submenu, the user will be able to enable various switches such as
Print Pack Date, Print Sell-By Date, Print Use-By Date, etc. Simply use the arrows to
select yes or no for each and press Enter to change between selections. Hit the ESC key
to exit after making your choices.
3-17
Page 40

METTLER TOLEDO bPro® User's Guide
Delete Custom Formats
Serial Port
This option allows you to delete the custom label formats in the database. Select yes or
no on the popup.
WARNING! Once you select YES, all of your custom label formats will be deleted. There
is no recovery function, so be sure this is something you wish to do.
The Serial Port menu allows the User to view and modify (within ranges) the serial
communication parameters of the bPro unit.
Host Baud Rate
The user may select from a variety of choices within the range of 300 – 115200.
Host Data Bits
Select between five, six, seven or eight
Host Parity
Either “None”, “Even” or “Odd” at the user’s discretion
Host Stop Bits
The user may select either one or two
Host Timeouts (in milliseconds)
The timeout can be set to anything the user desires. Be sure to input the choice in
milliseconds and not base seconds.
3-18
Page 41

Network Address
Chapter 3: Configuration
Unit Setup
To check the various address specifics of the unit, a user needs simply go to the
Network Address menu. Here they will find a list of the current addresses attached to
the machine and its immediate network(s).
After toggling to NETWORK, press the ENTER key. Use the up/down arrows to toggle
between IP ADDR, SUBNET, GATEWAY, MAC Address, and IDLE TIME. The MAC
address selection is for information only and cannot be changed. Press ESC key to exit
and then ENTER to save the setting.
121BIP ADDRESS
Press ENTER at NETWORK to display the current scale IP address. The IP Address
identifies the client on the network. The IP Address is a unique number consisting of four
parts separated by periods (Ex: 146.207.40.1).
To change the IP Address, press ENTER, and then enter the new IP Address. The IP
address is entered one octet at a time. The default value for this field is
255.255.255.000.
122BSUBNET
The Subnet Mask is used to identify the local network when accessing IP address on the
Ethernet network. The mask is entered one octet at a time. The default value is
255.255.255.000.
123BGATEWAY
Gateway Router IP address is used when accessing devices outside of the local
network. The IP address is entered one octet at a time. The default value is
255.255.255.000.
124BSERVER ADDRESS
Displays and allows for modification of the server’s IP address.
125BMAC
This is the hardware MAC (Media Access Control) address. The MAC address will be
displayed but cannot be changed. It will display 6 sets of 2 numbers that start with
00:E0:7C:xx:xx:xx. The last 6 digits will vary with each scale.
126BIDLE TIME
This is the time (measured in seconds) that the bPro will wait after no communication
before it closes an Ethernet socket connection.
3-19
Page 42

METTLER TOLEDO bPro® User's Guide
Wireless Configuration
Store Information
This section allows you to set up your wireless device via a few simple switches –
Wireless CONFIG to ON or OFF
Set default number to ON or OFF
Set Auto IP to ON or OFF
Enter SSID
Enter Infrastructure
The Store Information menu allows the user to type out a description or catch phrase
associated with their store. Simply use the keypad to enter a message or statement and
then press Enter. This text will be printed on labels using the store info field.
3-20
Page 43

Store Logo
Chapter 3: Configuration
Unit Setup
To select a Store Logo that will print on many of the unit’s labels, a user must simply
make a selection from the database of uploaded images. Key in the number of your
choice and press Enter to apply the graphic to the appropriate functions.
Scale Number
The Scale Number menu allows the user to quickly identify a unit on the network. The
selection of scale numbers is 1 – 255.
3-21
Page 44

METTLER TOLEDO bPro® User's Guide
Marquee
A user may enable or modify the marquee features of the bPro by accessing the
Marquee menu in the Unit Setup cascade. As with the other user-friendly menus, one
simply follows the intuitive menus to choose when the marquee begins to scroll, how
fast it moves across the screen and what exactly it says.
Press Enter when finished with each section.
3-22
Page 45

Barcode Settings
Chapter 3: Configuration
Unit Setup
In the Barcode Settings menu, the user can not only select the format of the barcodes
that will be produced on every receipt, but also the specific digit-definitions for those
barcode strings*. As with all other bPro menus, simply navigate up and down with the
arrow keys and press Enter to make a selection.
When finished, the ESC button will take you back to the main Unit Setup screen.
PLU Settings
*See Define Barcode Digits in the appendix for more information
The PLU Settings menu allows the user to select what mode the scale will boot into as
well as the label printing configuration when in prepack mode. Also included are the
options to set Auto Clear and Back to Zero (which affect the weighing conventions
between placement of product on the weigh platter or after printing of a label).
Power-up modes include Service, Prepack and Last.
The prepack printing modes include Auto and Manual.
Auto Clear is a toggle which requires the scale to return to the ready screen after a label
is printed
Back to Zero requires that the weigh platter be vacated and reloaded between printings.
3-23
Page 46

METTLER TOLEDO bPro® User's Guide
Set Time and Date
As its name suggests, the Set Time and Date menu deals with synchronizing the scale
to the current time and date. Here the user may also select such trivialities as formatting
of the individual values and the punctuation marks separating the fields.
Assign Group Names
Press ESC when finished.
The Assign Group Names menu array deals mainly with the management of existing
groups with an allowance for copying complete groups to new numbers.
3-24
Page 47

Enable Function Keys
Chapter 3: Configuration
Unit Setup
This menu allows the user to set the functionality for each of the unit’s keys. The
individual keys can be switched on or off for users of a certain permission level.
Pressing Enter toggles the key on or off.
Language
Press the ESC key when finished making changes.
The Languages menu allows the user to choose the language in which all unit text will
be displayed. Simply use the arrow keys and press Enter to confirm your choice.
Pressing ESC exits the screen.
3-25
Page 48

METTLER TOLEDO bPro® User's Guide
User Define
The User Define menu allows various parameters to be changed that dictate the
appearance of the display screen and various printed materials. Select a category and
press ENTER to see more menus.
Display – allows the user to determine whether or not the marquee, tare and screen
saver will be displayed. Should the screen saver be enabled here, further menus will
appear wherein the user may choose the clock or picture (selected from list) as well as
the activation time delay (from 1 – 255 seconds).
Pressing ENTER selects/deselects and pressing ESC advances the menus without
making changes and will eventually return you to the main User Define screen.
See the bPro Service Manual for more details.
Print Label Configuration – the user may define what prints on the label within the
following list: PLU number, store name, header, footer, stub, barcode (stub or receipt)
and total weight. ENTER toggles, ESC cancels.
Print Receipt Configuration – the user may define what prints on the receipt within the
following list: PLU number, store name, header, footer, stub, barcode (stub or receipt)
and total weight. ENTER toggles, ESC cancels.
Print type – select what will print at the end of a transaction: receipt mode, label mode
receipt + total, total.
3-26
Page 49

Sales Online
Chapter 3: Configuration
Unit Setup
SALES ONLINE is a scale application that allows floating vendor functionality where
multiple PLU transactions are placed on one label or receipt. The Sales Online
application will communicate the transaction list to the POS system. The Sales Online
Scale application needs to work with the Sales online Server software (external
application not included with the scale). By selecting Enable, the scale will look to
communicate with the server software application, and send the transactional data as
required.
Press Enter to choose and ESC to unpack the corresponding menu tree. Upon selection
of either choice, the following options will appear, able to be modified per necessity.
Offline Barcode – select a number for the PLU’s offline barcode.
Online Barcode – select a number for the PLU’s online barcode.
Label print Direction – choose between normal and convert, which will print label
information top-to-bottom or bottom-to-top, respectively.
Department Number – select a number for the PLU’s department.
UPC Number – select a number for the PLU’s UPC.
3-27
Page 50

METTLER TOLEDO bPro® User's Guide
Process Mode
The Process Mode menu allows the user to designate PLUs as certain types, thus
assigning them certain barcode formats, by way of transaction.
When this option is enabled, the user will be prompted to select from the five choices
listed. Once chosen, the user will have the option of renaming the category per the
barcode number (format style) they select.
The window that houses the five choices can be brought up at any point in the PLU
editing process by pressing the MISC button on the keypad.
Once a selection is made, successive PLU transactions will acquire the barcode format
assigned to the initial PLU. In order to avoid this, if you do not wish a string of PLUs to
be specifically branded, simply disable Process Mode.
3-28
Page 51

4 Labels
Loading Labels
Chapter 4: Labels
Loading Labels
NOTE: A label loading
diagram can be found on
the printer for quick
reference.
NOTE: When changing a
label roll, always look for
any buildup. See Chapter 5
for cleaning procedures.
The bPro label loading procedure is a simple one and can be worked through by any
user who reads the following section.
1.) Open the printer door by pressing down on the release tab.
2.) Pull the printer out using the green pull-tab.
4-1
Page 52

METTLER TOLEDO bPro® User's Guide
3.) Unlock the printhead by pressing on the green lock-lever.
4.) Install the label roll on the supply spool and remove about 6 inches of labels from
the liner. Slide the labels under the guides and printhead as shown in the illustration.
4-2
Page 53

NOTE: The green knob does not
come all the way out! Do not
use excessive force to pull out
on the green knob! Using
excessive force to push the knob
in can result in broken locking
tabs on the green knob.
Chapter 4: Labels
Loading Labels
5.) Pull the liner back and route it under the bottom guide. Gently pull out on the green
knob on the liner take-up spool (1) and then slide the liner into slot in the roller (2).
6.) Gently push in on the green knob to lock the liner into place, and then turn the roller
clockwise to take up some of the slack in the liner.
4-3
Page 54

METTLER TOLEDO bPro® User's Guide
7.) Press down on the printhead latch until it locks down.
8.) When the printer has been loaded with properly installed labels, as below, push the
printer back in and close the door.
4-4
Page 55

Default Label Styles
Chapter 4: Labels
Default Label Styles
Below is a list of default label styles broken into their default numbers (left
column) and a description of their size and function (right column).
Bolded text has been used to differentiate label styles based on common size.
Default Label Format Number Label Format Name
101 48_ByWgt_SellBy.blbl
102 48_ByCnt_SellBy.blbl
103 48_StdPack_SellBy.blbl
104 48_ByWgt_PackDate.blbl
105 48_ByCnt_PackDate.blbl
106 48_StdPack_PackDate.blbl
110 53_ByWgt_SellBy.blbl
111 53_ByCnt_SellBy.blbl
112 53_StdPack_SellBy.blbl
113 53_ByWgt_PackDate.blbl
114 53_ByCnt_PackDate.blbl
115 53_StdPack_PackDate.blbl
120 60mmByWgt_SellBy_BCtop.blbl
121 60mmByCnt_SellBy_BCtop.blbl
122 60mmStdPack_SellBy_BCtop.blbl
123 60mmByWgt_SellBy_BCmid.blbl
124 60mmByCnt_SellBy_BCmid.blbl
125 60mmStdPack_SellBy_BCmid.blbl
126 60mmByWgt_SellBy_ET_BCtop.blbl
127 60mmByCnt_SellBy_ET_BCtop.blbl
128 60mmStdPack_SellBy_ET_BCtop.blbl
129 60mmByWgt_SellBy_ET_BCmid.blbl
130 60mmByCnt_SellBy_ET_BCmid.blbl
131 60mmStdPack_SellBy_ET_BCmid.blbl
140 84mmByWgt_SellBy_ET_BCtop.blbl
141 84mmByCnt_SellBy_ET_BCtop.blbl
142 84mmStdPack_SellBy_ET_BCtop.blbl
143 84mmByWgt_SellBy_ET_BCmid.blbl
144 84mmByCnt_SellBy_ET_BCmid.blbl
145 84mmStdPack_SellBy_ET_BCmid.blbl
146 84mmByWgt_SellBy_ET_SH_BCtop.blbl
150 94mmByWgt_SellBy_ET_BCtop.blbl
151 94mmByCnt_SellBy_ET_BCtop.blbl
152 94mmStdPack_SellBy_ET_BCtop.blbl
153 94mmByWgt_SellBy_ET_SH_BCtop.blbl
160 107mmByWgt_SellBy_ET_BCtop.blbl
161 107mmByCnt_SellBy_ET_BCtop.blbl
162 107mmStdPack_SellBy_ET_BCtop.blbl
163 107mmByWgt_SellBy_ET_SH_BCtop.blbl
170 119mmByWgt_SellBy_ET_BCtop.blbl
171 119mmByCnt_SellBy_ET_BCtop.blbl
172 119mmStdPack_SellBy_ET_BCtop.blbl
173 119mmByWgt_SellBy_ET_SH_BCtop.blbl
180 130mmByWgt_SellBy_ET_BCtop.blbl
182 130mmByCnt_SellBy_ET_BCtop.blbl
183 130mmStdPack_SellBy_ET_BCtop.blbl
184 130mmByWgt_SellBy_ET_SH_BCtop.blbl
4-5
Page 56

METTLER TOLEDO bPro® User's Guide
These t
Label Requirements
Label Paper
These thermal labels requirements apply to the BPro® printers. This section includes
dimensional requirements, for labels and label rolls, as well as general requirements for
label paper, thermal coatings, preprinting inks and adhesives.
Use of label materials and designs which meet with these requirements is necessary to
ensure operation of the printers in compliance with their respective functional
specifications and satisfactory performance of the label in the end use environment.
Labels which do not comply with all of the requirements may function with limitations,
but would need to be tested by the customer to insure adequate performance in their
application. Customer specified (COD) software is not covered under this specification.
DESCRIPTION, PRICE LABEL: Premium white color, black imaging, with protective
coating
WEIGHT: 72 ± 7 grams/square meter
THICKNESS: 82 ± 14 μ meter (0.0032 inch)
ACTIVATION TEMPERATURE
STANDARD: Initial 74°C (165°F); Optimum 83°C (181°F)
HIGH SPEED: Initial 66°C (151°F); Optimum 77°C (170°F) – for highest speed
printing
HOT BOX: Initial 83°C (181°F); Optimum 91°C (195°F) - for use on food items
which are kept warm (Slow print speed setup required)
SURFACE SMOOTHNESS: The surface of the finished coated paper must be smooth to
prevent premature print head failure. Smoothness must be 40 Sheffield units or
smoother.
ION CONTENT: Ions such as sodium (Na) and chlorine (Cl) can cause premature failure
of the glass overcoat of a thermal print head. Paper manufactured specifically for
thermal printing with low ion content must be used.
STORAGE LIFE: 18 months minimum when stored at less that 85% relative humidity
and less than 35°C (95°F)
ADHESIVE
Permanent pressure sensitive – Nominal thickness 10 μ meter (0.0004 inch)
Label must adhere to product with a surface temperature of -15° C (5° F) minimum.
Bond strength must remain permanent over a temperature range of 2°C to 35°C
(35°F to 95° F)
4-6
RELEASE LINER
DESCRIPTION: White semi-bleached supercalendered Kraft paper with silicone
release coating.
BASIS WEIGHT: 68 ± 3 gram/square meter
THICKNESS: 67 ± 7 μ METER (0.0026 INCH)
Page 57

Label Stripping
Chapter 4: Labels
Label Requirements
TOTAL THICKNESS LABEL + ADHESIVE + LINER
Total Thickness Label + Adhesive + Liner: 159 ± 17 μ METER (0.0056 to 0.0069
inch)
LIGHT TRANSMISSION FOR GAP SENSOR OPERATION:
Light transmission at 800 to 900 NM wave length through the liner only must be at
least 3 times the transmission through the liner and label together. This means that the
transmission optical density of the liner must be at least 0.48 less than the that of the
liner and label together.
Light transmission at 800 to 900 NM wave length through the liner and label together
must be at least 2% of incident light. This corresponds to an optical density of 1.7.
Also see OPTICAL DENSITY DEFINITION further in this chapter.
Labels must strip from the liner over a temperature range of 2°C (26°F) at 50% RH
to 43°C (110°F) at 85% RH.
Finished Label Roll
Requirements
CORE AND METHOD OF LABEL ATTACHMENT
The label stock must not be permanently attached to the cardboard core. The liner must
separate cleanly from the core with 1.0 pound pull tangent to the core as shown in the
figure below. No core material, tape, or adhesive is to remain on the label or liner after
separation. Material, especially hot melt adhesive, remaining on the label will damage
the print head.
DIE CUTTING
Die cutting of the labels must not perforate the release liner.
4-7
Page 58

METTLER TOLEDO bPro® User's Guide
SLITTING
The release liner must be slit cleanly and be made free of edge slivers and dust by
vacuuming or some equally effective process.
WINDING
The labels must be wound face out as shown
in the figure to the right. The finished roll must
be made free of paper dust and loose particles
by vacuuming or some equally effective
process.
LABEL CURL
Stripped labels must not curl more than 0.20 inch as specified in the figure below.
Note: Dimensions in
inches with
millimeters
shown in ( ).
4-8
Page 59

Chapter 4: Labels
Label Requirements
SPLICING
Each roll may contain one splice on non-label side of liner using 0.002 inch maximum
thickness tape as shown in the next figure.
4-9
Page 60

METTLER TOLEDO bPro® User's Guide
Finished Label and Roll
Dimensional
Requirements
A B
C
A
D
Item Description Range
A Liner Width
B
C
D Label Width
E Gap Width
F Label Length
G
H
Roll
Diameter
Core Inside
Diameter
Effective
Print Width
Left side
Offset
Max 3.268 83
Min 1.575 40
Max 4.7 120
Min 1.575 40
Max 3.150 80
Min 1.575 40
Max 0.236 15
Min 0.078 2
Max 7.8 200
Min 0.9 23
Max 2.10 54
Min 0.157 4
BPro
2"
Inches MM
E
F
H
G
4-10
Page 61

Typical Dimensions – 2” Label Roll
Chapter 4: Labels
Label Requirements
4.7 [120] max
0.9 min [23]
12 max [300]
0.9 min [23]
7.8 max [200]
1.575 min [40]
3.15 max [80]
NOTE: Dimensions in inches with millimeters
shown in [ ].
bPro only prints 54mm wide
4-11
Page 62

METTLER TOLEDO bPro® User's Guide
Preprinted Labels
To ensure trouble free operation of the printer gap sensor, and to achieve normal print
head life, no pre printing should be placed on the label in the gap sensor path or in
areas which will be printed by the scale printer (see following figure). However, since
preprinting is commonly used by many customers the following guidelines must be
followed.
1. Inks used for preprinting must be specially formulated for use in thermal printers. If
proper inks are not used they can adhere to the print head. This ink build up on the
print head will interfere with heat transfer from the print head to the paper and cause
printing elements to burn out. Another problem with inks not formulated for thermal
printing is that they can contain chemicals which will cause the glass overcoat to chip
off of the print head, causing failure to print in the chipped areas.
2. If black ink is used in preprinting in the gap sensor path shown in the figure below, a
dense black stripe will have to be printed on the back of the liner, as shown in the Black
Stripe figure, to prevent the gap sensor from being affected by the black preprinting.
(Colors other than black might also be a problem and should be tested by the
customer) The black stripe must have gaps which correspond to the label gaps. The
black stripe on the liner must have a minimum transmission optical density of 2.3 and
must be uniform. In addition, the gap sensor circuit will need to be adjusted for
operation with the black stripe as explained in the product service manual. This
adjustment will need to be checked any time label paper is changed, for example when
labels are procured from a new supplier.
GAP SENSOR PATH BLACK STRIPE
4-12
Page 63

Chapter 4: Labels
Preprinted Labels
3. If an optical density of at least 2.3 cannot be achieved in the black stripe on the
back of the liner. The sensor path in the center of the label must be free of black
preprinting.
No Dark Preprinting in this
area
4-13
Page 64

METTLER TOLEDO bPro® User's Guide
Special Shaped Labels
Labels with shapes other than rectangular will cause gap detection errors if the gap
dimension (in the gap sensor path) is outside the limits given in this document, or if the
edge of the label shape crosses into and out of the sensor path as shown below. For
these cases the black stripe will have to be printed on the back of the liner as shown
previously. Tests will be needed to determine if the stripe will be adequate or if
additional liner width will be required. The safe approach is to use the black stripe
configuration shown previously on all odd shaped labels.
EXAMPLES OF ODD SHAPPED LABELS
WHICH WILL CAUSE GAP SENSOR
PROBLEMS AND WILL NEED BLACK STRIPE
Definition of
Transmission Optical
Fish Oval or Round
Density
4-14
Transmission optical density is defined as:
Optical Density = log
(incident light / transmitted light) = log10 (100 / % light
10
transmission)
Transmission optical density can be measured with a transmission densitometer that
meets ANSI standards. Examples are the Macbeth model TD903 and TD932.
Optical density for 100% light transmission = log
Optical density for 0.1% light transmission = log
(100/100) = log10 (1) = 0
10
(100/0.1) = log10 (1000) = 3
10
Page 65

Label and Liner Optical
Density
Chapter 4: Labels
Label and Liner Optical Density
If liner paper transmits 2% of the light which is incident on it, the optical density
(100/2) = 1.7
is log
10
If the light transmitted through the liner is 3 times the light transmitted through the liner
and label, the relative optical densities are:
Black Stripe Optical
Density
Optical Density of Liner + Label = log
Optical Density of Liner Only = log
= log
= log
= log
(100 / X)
10
(100 / 3X)
10
(0.3333X)
10
0.3333 + log10 (X)
10
(X) – 0.48
10
Therefore, if the liner must transmit 3 times the light that the liner and label transmits,
the transmission optical density of the liner must be 0.48 less than the transmission
optical density of the liner and label.
If only 0.5 % of incident light is transmitted through the black stripe, the optical density
is:
log
(100 / 0.5) = log10 (200) = 2.3
10
The purpose of specifying a transmission optical density of at least 2.3 for the printed
black stripe on the back of the label is to minimize any variation in light transmission as
a result of black pre-printing on the front of the label. This variation due to black
preprinting can cause the gap sensor to give gap detection errors.
4-15
Page 66

METTLER TOLEDO bPro® User's Guide
For your notes
4-16
Page 67

5 Maintenance
Unit Cleaning
Disconnect all power to this unit before installing, servicing,
cleaning, or removing the fuse. Failure to do so could result in
bodily harm and/or property damage. Do not spray or wash down.
Hazard of electrical shock or burn.
Disconnect Power
Open the printer door by pressing down on the release tab.
Do not use solvents or commercial cleaners on the unit. They may harm the surfaces
or damage the Keypad.
Do not spray directly on or at the unit!
Chapter 5: Maintenance
Unit Cleaning
WARNING
Keypad and Customer Displays - Only use a soft clean cloth dampened with mild
detergent and water to clean the Keypads and Customer display screen. Do not
scrape with sharp objects.
Covers and Platter – Clean using a soft clean cloth dampened with a mild cleaner or
detergent and water.
5-1
Page 68

METTLER TOLEDO bPro® User's Guide
Printer Cleaning
Clean the printhead anytime you notice the print quality has degraded.
Slide the printer out, lift the printhead, and clean the printhead where it contacts the
labels on the bottom using the cleaning pen or alcohol and a cotton swab to remove
any label debris or glue.
WARNING
Do not use any metal or sharp object to scrape the printhead. This may cause
serious damage.
Press the latch to release and raise the printhead
Use the Cleaning Pen to clean any glue or debris from the black stripe area of the
printhead. A cotton swab and alcohol may also be used in place of the cleaning pen.
5-2
Page 69

Chapter 5: Maintenance
Printer Cleaning
When doing regular maintenance, or when changing a label roll, check for any buildup
on the Printer Roller (located under the tear strip).
When the printer is pulled out and before the new label roll is installed, rotate the labels.
And then use the Cleaning Pen to get rid of excess buildup.
If dirt and dust have built up on the rubber portion of the Printer Roller, it too can be
cleaned with alcohol and a cotton swab.
Again, use the Stage Label button to rotate the Roller and wipe it with an alcoholmoistened cotton swab. Rotate the Roller again and repeat the above procedure until the
Roller is clean.
WARNING
FOR SAFETY: Do NOT touch Rollers with your fingers while the
Rollers are in motion.
5-3
Page 70

METTLER TOLEDO bPro® User's Guide
For your notes
5-4
Page 71

6 Appendix
Define barcode Digits
Chapter 6: Appendix
Define barcode Digits
Barcode Identification Symbols
A = Item Number 4 – 12 figures
B = Total Price 4/5/6 figures
C = Check Digit 1 figure
D = Date 2/4/6 figures
N = Ticket Number 4 figures
P = PLU Code 4/5/6 figures
Q = Weight/Quantity 4/5 figures
W = Group Number 2 figures
U = Unite Price
R = Department #
O = Operator #
M = Process Mode
0 – 9 Figures 1 – 12 figures
Examples
0AAAAAAAAAA (UPC, Ten digit Item Number)
2AAAAACBBBB (UPC, 5-D Item/Price Check Digit/4-D Price)
2AAAAA0BBBB (UPC, 5-D Item/Zero Fixed/4-D Price)
2AAAAABBBBB (UPC, 5-D Item/No Price Check/5-D Price)
2AAAAACQQQQ (UPC, 5-D Item/Wgt Check Digit/4-D Wgt)
2AAAAAAQQQQ (UPC, 6-D Item/ No Price Check /4-D Wgt)
2AAAAAQQQQQ (UPC, 5-D Item/No Price Check/5-D Wgt)
21AAAAABBBBB (EAN, 5-D Item/5-D Price)
21AAAABBBBBB (EAN, 4-D Item/6-D Price)
21AAAAACBBBB (EAN, 5-D Item/Price Check Digit/4-D Price)
21AAAACBBBBB (EAN, 4-D Item/Price Check Digit/5-D Wgt)
21AAAAAQQQQQ (EAN, 5-D item/5-D WGT)
21AAAAACQQQQ (EAN, 4-D Item/Wgt Check Digit/5-D Wgt)
6-1
Page 72

METTLER TOLEDO bPro® User's Guide
For your notes
6-2
Page 73

Page 74

METTLER TOLEDO
1900 Polaris Parkway
Columbus, Ohio 43240
www.mt.com
METTLER TOLEDO® and bPro® are registered
trademarks of Mettler-Toledo, LLC
©2012 Mettler-Toledo, LLC
Printed in USA
14001
Quality Management System certification.
Development, production, and auditing in
accordance with ISO9001. Environmental
management system in accordance with
ISO14001.
Worldwide service. Our dense service
network, among the best in the world,
ensures the maximum availability and
lifespan of your product.
Conformité Européene. This label is your
guarantee that our products conform to the
latest guidelines.
On the Internet. You can find important
information about our products and
services, as well as our company, quickly
and easily at http://www.mt.com/support
 Loading...