

Page 1
Operator Manual
bTwin
Retail scale
Page 2

2
05/08
Contents
METTLER TOLEDO Operator Manual bTwin Order number 72179502
Page 3

3
05/08
Contents
1 Your new retail scale ................................................................5
1.1 Most important functions .............................................................5
1.2 Device overview .........................................................................5
1.3 Safety instructions ......................................................................9
1.4 Calibration instructions .............................................................10
2 Setup and device settings ......................................................11
2.1 Contents ..................................................................................11
2.2 Requirements for scale's location ...............................................11
2.3 Setting up the scale ..................................................................11
2.4 Inserting paper ......................................................................... 13
2.5 Inserting the battery ..................................................................15
2.6 Connecting to mains power ....................................................... 16
2.7 Turning on/off .......................................................................... 16
2.8 Turning on background lighting/saving energy .............................16
2.9 Cleaning .................................................................................17
2.10 Disposal .................................................................................17
3 Fast and easy operation .........................................................18
3.1 Free input ................................................................................18
3.2 Working with PLUs ................................................................... 19
3.3 Entering large quantities ............................................................21
3.4 Weighing with 100 g price unit ..................................................22
3.5 Using quantity PLU and multiplication ........................................22
3.6 Using tare ................................................................................23
3.7 Zeroing ...................................................................................23
3.8 The scale as a calculator ..........................................................24
3.9 The scale as a clock .................................................................24
MET TLER TOLEDO Operator Manual bTwinOrder number 72179502
Page 4

4
05/08
Contents
4 Active selling .........................................................................25
4.1 Voiding ...................................................................................25
4.2 Granting a discount .................................................................. 26
4.3 Granting a rebate on the total sum .............................................27
4.4 Refunding (ST) ........................................................................28
4.5 Suspending a transaction (ticket parking) ...................................29
4.6 Working with several vendors ....................................................30
4.7 Customer change function .........................................................31
4.8 Various payment methods .........................................................32
4.9 Basket function ........................................................................ 35
4.10 Working with 2 PLUs per preset key ...........................................37
5 Setup .....................................................................................39
5.1 Overview .................................................................................39
5.2 List of all setup points ...............................................................40
5.3 Setup operation ........................................................................42
5.4 Setup group 1 .......................................................................... 45
5.5 Setup group 2 .......................................................................... 57
5.6 Setup group 3 .......................................................................... 59
5.7 Setup group 4 .......................................................................... 60
5.8 Setup group 5 .......................................................................... 65
5.9 Setup group 6 .......................................................................... 66
5.10 Setup group 7 .......................................................................... 71
5.11 Setup group 8 .......................................................................... 75
5.12 Setup group 10 ........................................................................ 77
6 What do you do if....? .............................................................. 81
7 Technical data and accessories ................................................83
7.1 Technical data ......................................................................... 83
7.2 Accessories ............................................................................. 83
8 Appendix ................................................................................84
8.1 Unicode Table ..........................................................................84
8.2 Label formats ...........................................................................86
8.3 Declaration of conformity ..........................................................87
MET TLER TOLEDO Operator Manual bTwin Order number 72179502
Page 5
5
05/08
1 Your new retail scale
1.1 Most important functions
Congratulations on your new scale.
This robust scale with its battery operation, connectable cash drawer
and integrated ticket printer facilitates comfortable, mobile selling while
maintaining the highest accuracy.
Your new scale not only stands out due to its mobility, but also due to its
network-capability and fast data transfer to and from a computer. This
lets you, for example, operate integrated scales which are connected
to quickly and easily create sales reports.
1.2 Device overview
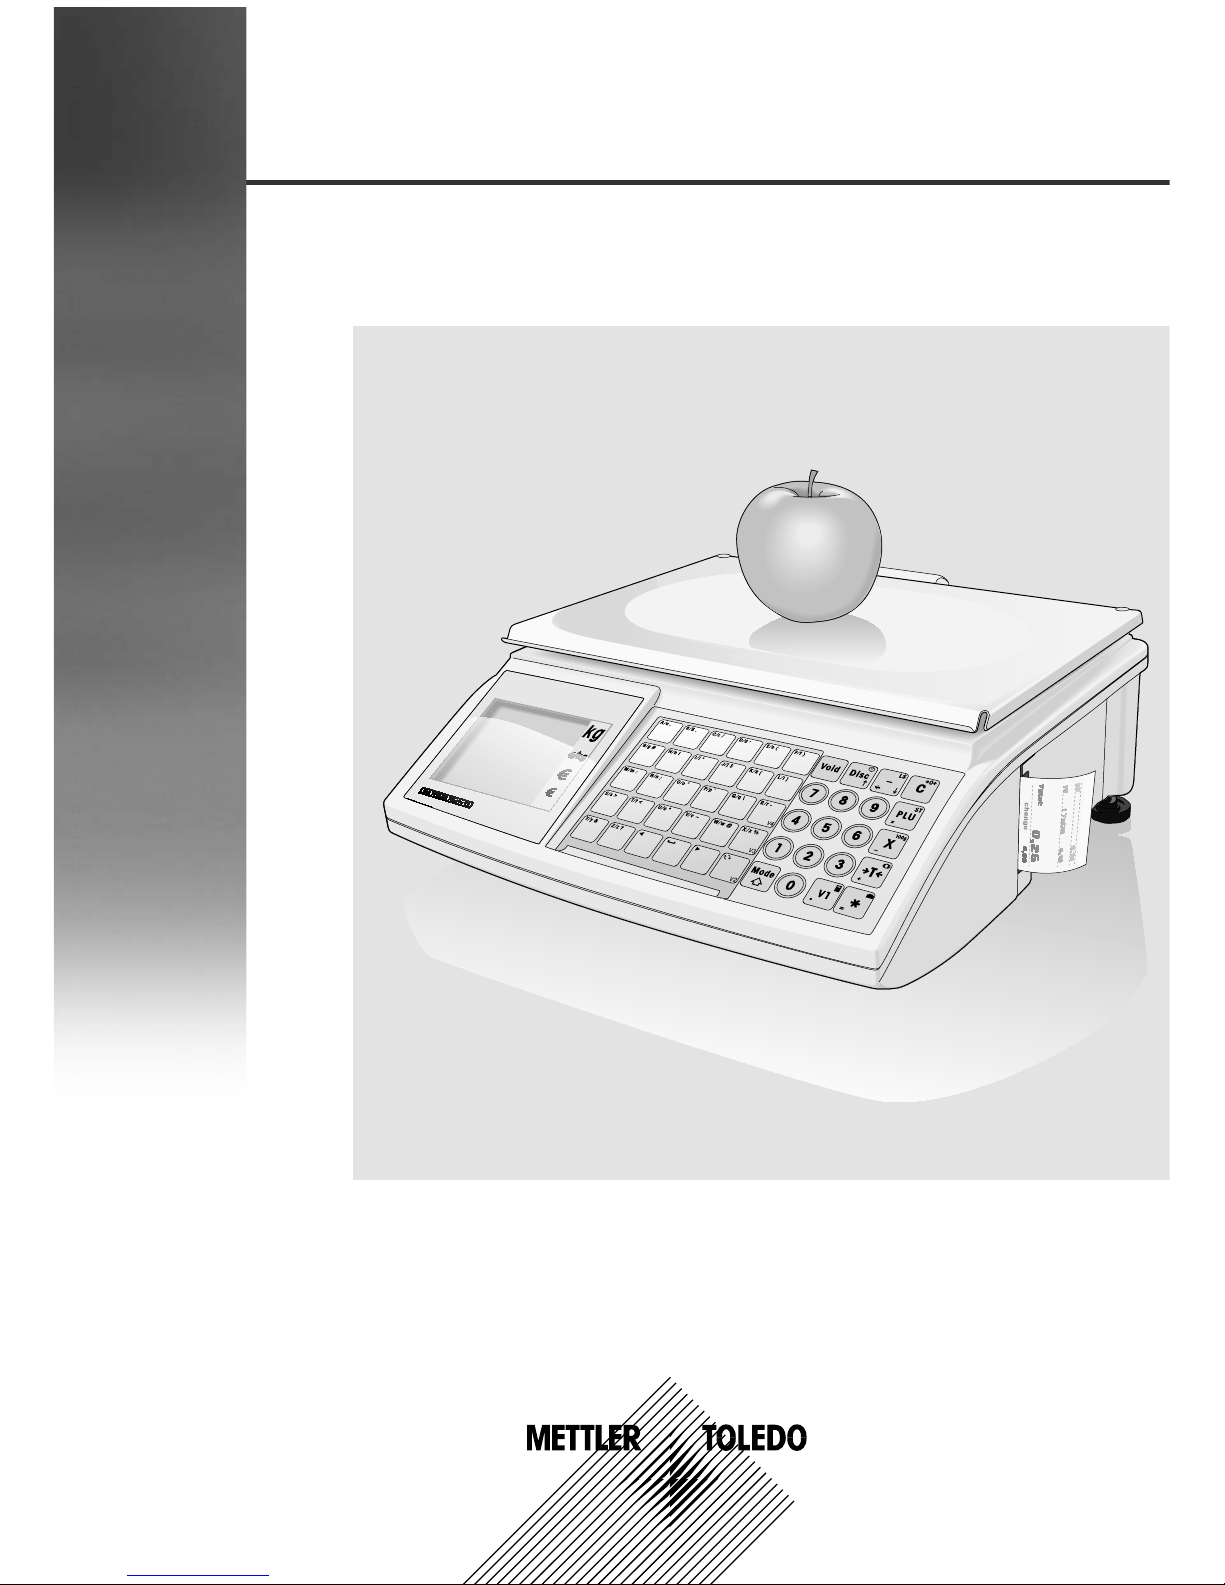
1.2.1 Display
This display is laid out as follows from the customer and vendor point
of view:
Weight display1
Unit price 2
Price3
Level indicator4
Field for instructions or status messages5
Calibration plate6
In addition to the weight and price, the following status messages and
indicators can be displayed:
–>0<– Gross weight is 0
P P Prepack mode
ST Refund mode
X Quantity mode
100G Price per 100 g
NET Net weight
LS Large sale mode
PLU PLU number is displayed
FIX Unit price and/or tare are not hidden when the item is
removed from the weighing pan or when several items
are accumulated
kg
MET TLER TOLEDO bTwin Operator ManualOrder number 72179502
Page 6
Your new retail scale
6
05/08
Connected to mains power supply
Network operation: the scale functions as a master and
is connected to at least one slave
Network operation: the scale functions as a slave and
is connected to the master
Illuminated: the scale is in battery-powered operation
Flashing: battery too low
charge or replace battery
Flashing and power supply operation symbol illuminated:
battery is charging
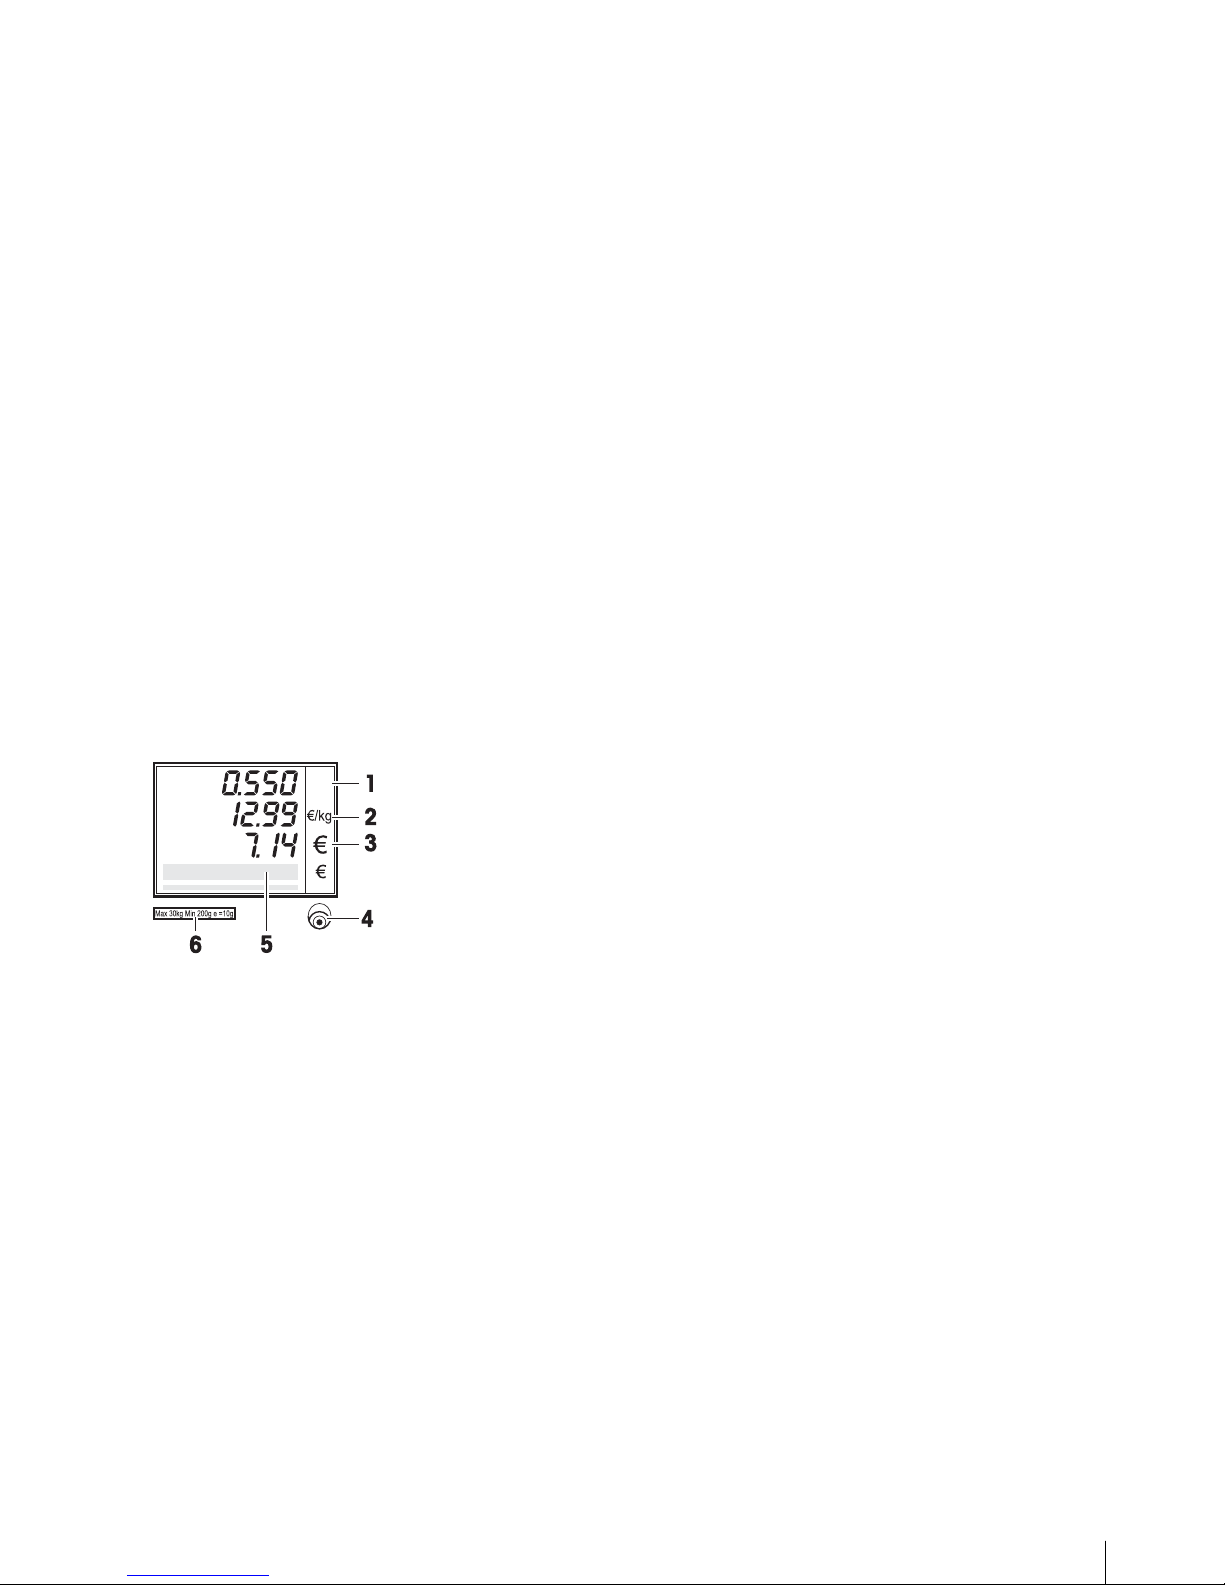
1.2.2 Keyboard
The keyboard is divided into three sections:
Function keys1
Number keys2
Key panel for entering text / direct keys / vendor keys (V2-V8) 3
In addition to their main function, most of the function keys have one
or more auxiliary functions which are shown on the upper right and
lower left of the key.
METTLER TOLEDO bTwin Operator Manual Order number 72179502
Page 7

7
05/08
Key Name Function
Void
Void key Cancel the item
Disc
Discount key Enter the discount in percent
Minus key Absolute decrease
C
Delete key Delete the entry
PLU
PLU key Call up a PLU
X
Quantity key Enter quantity
T
Tare key Tare the scale
Asterisk key Complete the transaction, print ticket
V1
Vendor key Book items to Vendor V1.
The vendor keys, V2 to V8, are located
to the left of the number panel.
Mode
Mode key Enter/leave the setup mode, call up the
auxiliary function
Function keys
Main function
MET TLER TOLEDO bTwin Operator ManualOrder number 72179502
Page 8
Your new retail scale
8
05/08
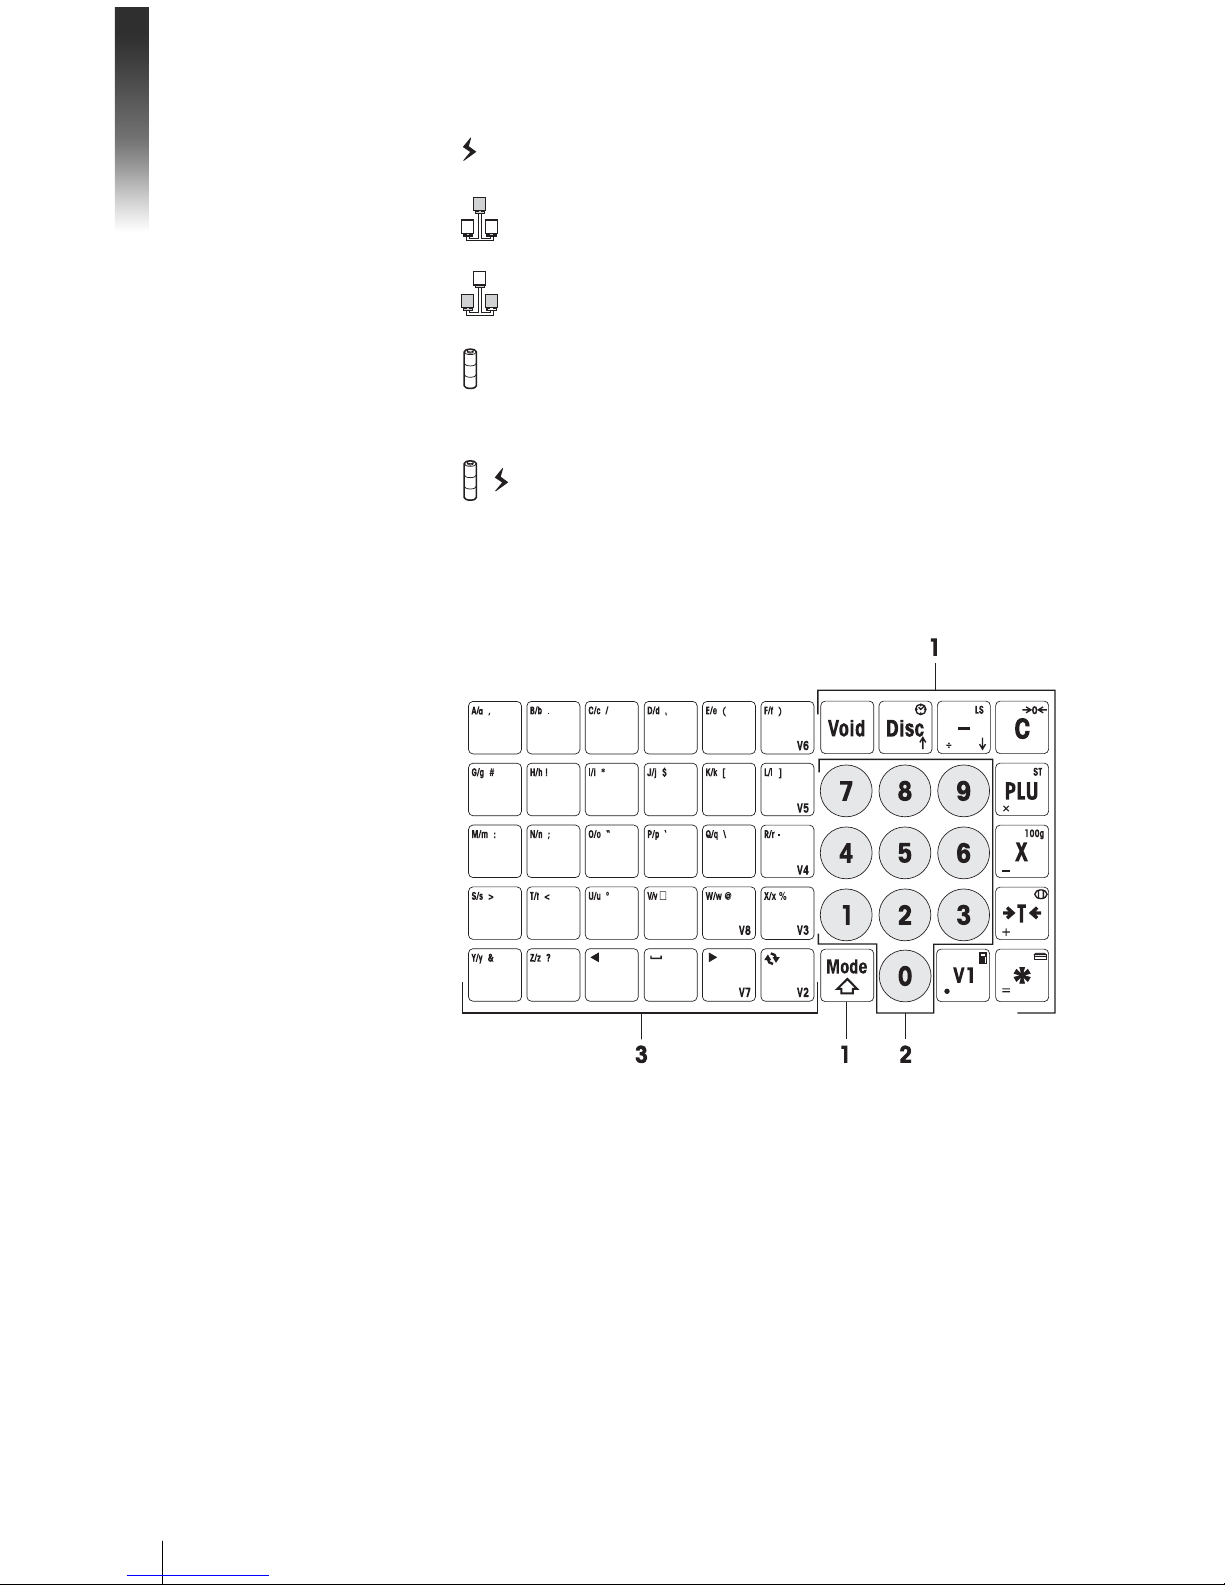
Used in combination with the mode key, the function keys have the
following secondary functions:
Key Function
Mode
+
Disc
Display/hide date/time *
Mode
+
LS
Activate large sale mode **
Mode
+
0
C
Zero the scale *
Mode
+
PLU
ST
Turn refund mode on/off *
Mode
+
100g
X
Toggle between price/100 g and price/kg **
Mode
+
T
Park ticket
Mode
+ Open cash drawer
Mode
+
V1
Turn calculator on/off *
* Activate/deactivate using key combinations:
while holding the mode key, press the function key.
** To activate, either a price must first be entered or a PLU must be
called up. After the transaction is completed, the scale returns
to the normal operating mode.
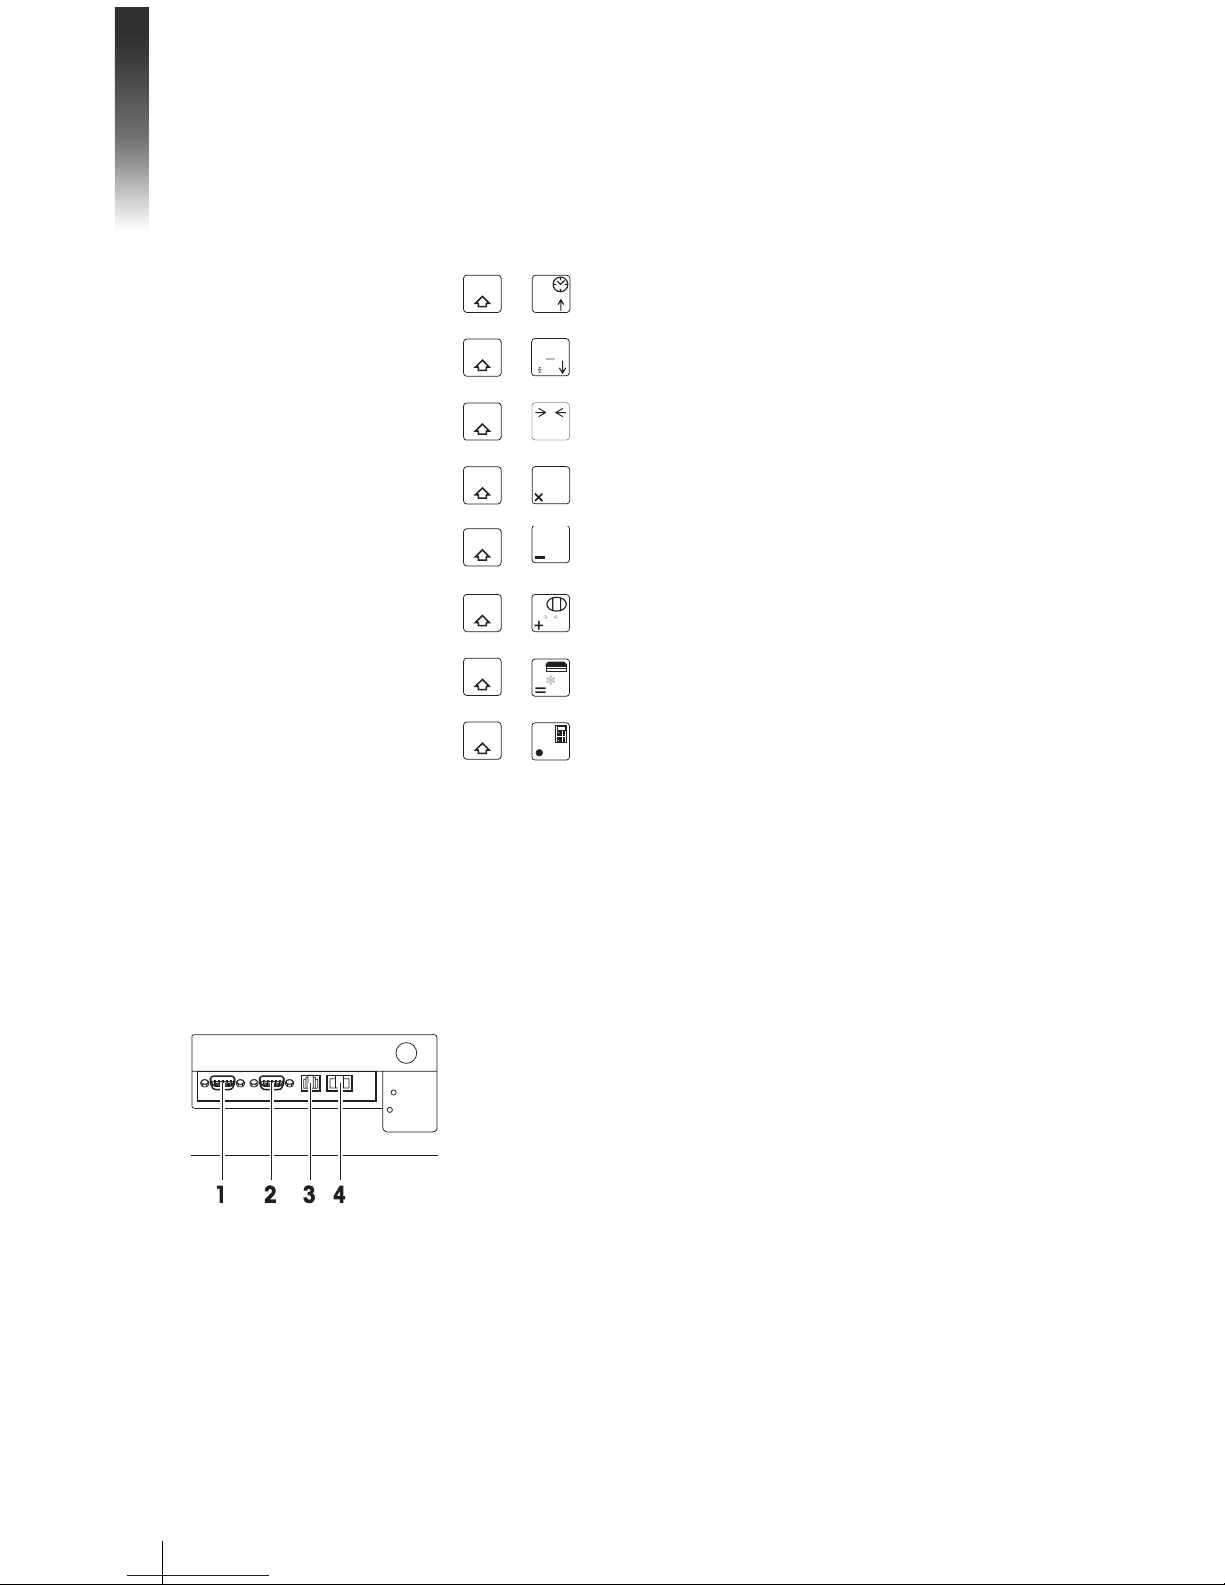
1.2.3 Connections
The following connections are located on the underside of the scale:
RS-232/COM1 for a scanner or computer1
RS-232/COM2 for a scanner or computer2
Cash drawer connection3
Ethernet connection to set up a network of scales4
Function keys
Auxiliary function
METTLER TOLEDO bTwin Operator Manual Order number 72179502
Page 9

9
05/08
1.2.4 Options/Accessories
The following options/accessories are available to enhance the performance of your scale:
Tower to position the customer display at eye level•
Battery for mobile operation•
Cash drawer•
Integrated calculation function•
If you want to add an option/accessory to your scale, please contact
your sales representative.
1.3 Safety instructions
Basic safety instructions
Read these operating instructions prior to using your scale. f
Store these operating instructions in the vicinity of the scale for f
future reference.
Do not open the scale. f
Always unplug the scale before cleaning. f
Safety instructions for battery operation
The battery must not come into contact with chemical solvents, f
oil or water.
Keep batteries away from heat and fire. f
Do not open the battery. f
MET TLER TOLEDO bTwin Operator ManualOrder number 72179502
Page 10

Your new retail scale
10
05/08
1.4 Calibration instructions
Scales that have been factory-calibrated have a label indicating this
on the packaging.
Scales with a green M on the type plate are ready for operation.
Scales that are calibrated in two stages have a label indicating this
on the packaging.
These scales have only been calibrated in a first stage (declaration of
conformity in accordance with EN 45501-8.2). The second stage of
the calibration must be done on-site by authorized service personnel.
Please contact your local representative.
Medium accuracy scales that are used in commerce where certified
calibration is required must be calibrated and certified.
Observe the respective measurement data guidelines in your country.
M
M
METTLER TOLEDO bTwin Operator Manual Order number 72179502
Page 11
11
05/08
2 Setup and device settings
2.1 Contents
Check that the delivery is complete: f
Scale –
Stainless steel weighing pan –
Power cable –
Ticket roll –
Operating instructions –
Quick guide –
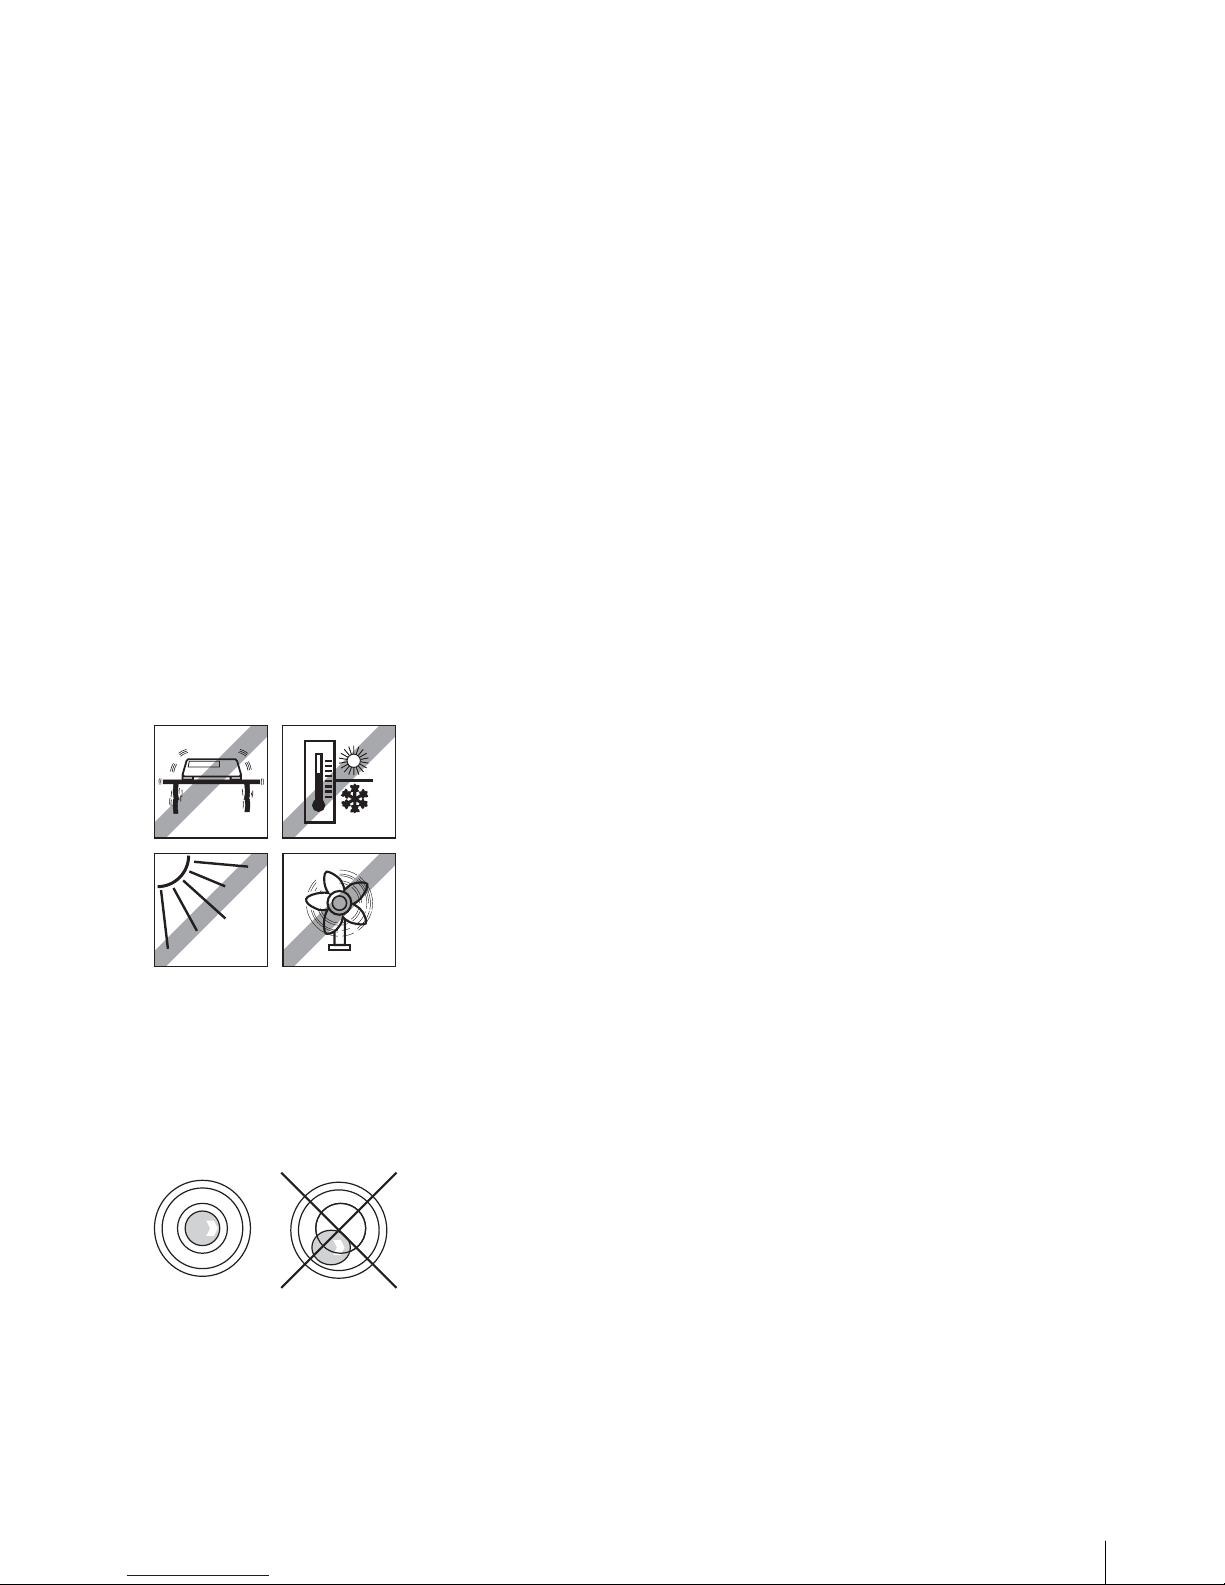
2.2 Requirements for scale's location
The right location is critical to weighing accuracy.
Conditions for an ideal location:
No shocks and vibrations•
No excessive temperature fluctuations•
No direct sunlight•
No strong drafts•
Select a stable, vibration-free and preferably horizontal location for •
your scale.
2.3 Setting up the scale
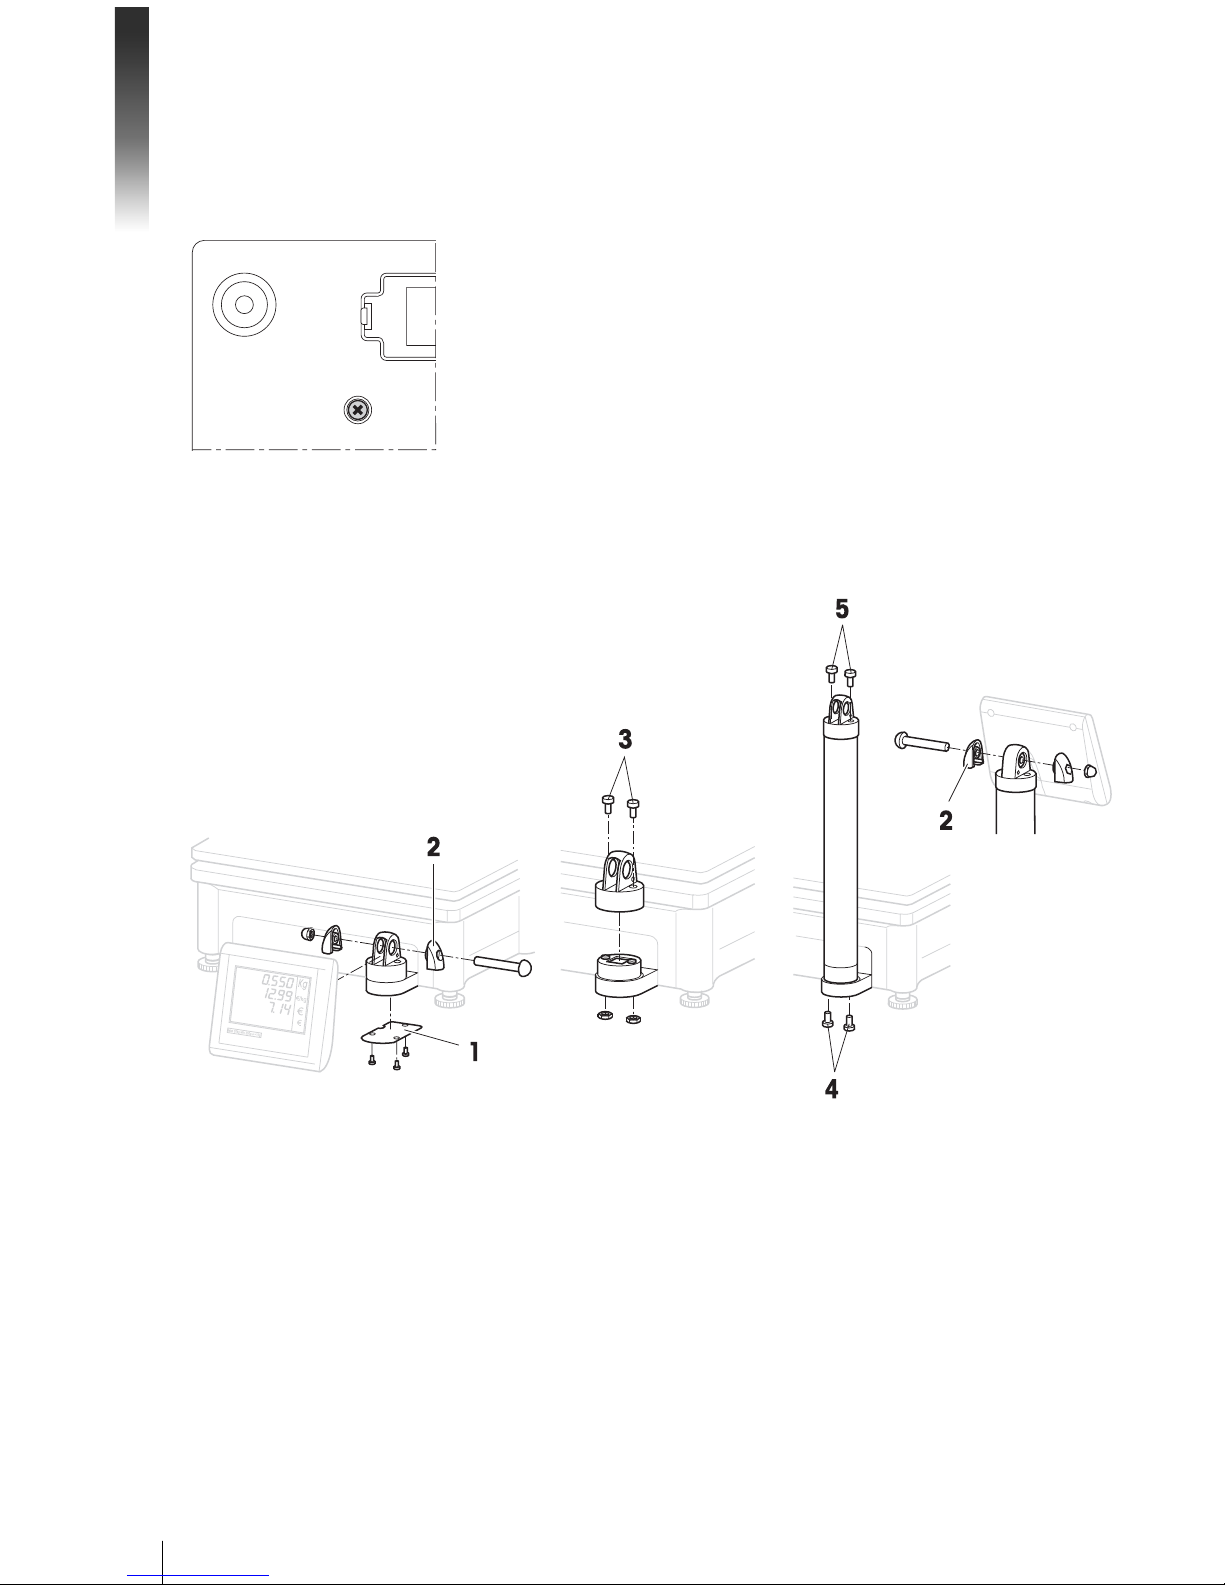
2.3.1 Levelling the scale
Only a perfectly levelled scale delivers accurate weighing results. The
scale is equipped with a level indicator to make it easier to level the
scale.
To level the scale, turn the scale's adjustable feet until the air bub- f
ble in the level indicator is positioned in the inner circle.
MET TLER TOLEDO bTwin Operator ManualOrder number 72179502
Page 12
Setup and device settings
12
05/08
2.3.2 Removing the transportation lock
3 kg scales are equipped for transport with a locking bolt.
1. Remove the weighing pan.
Unscrew the locking bolt and put the weighing pan back on.2.
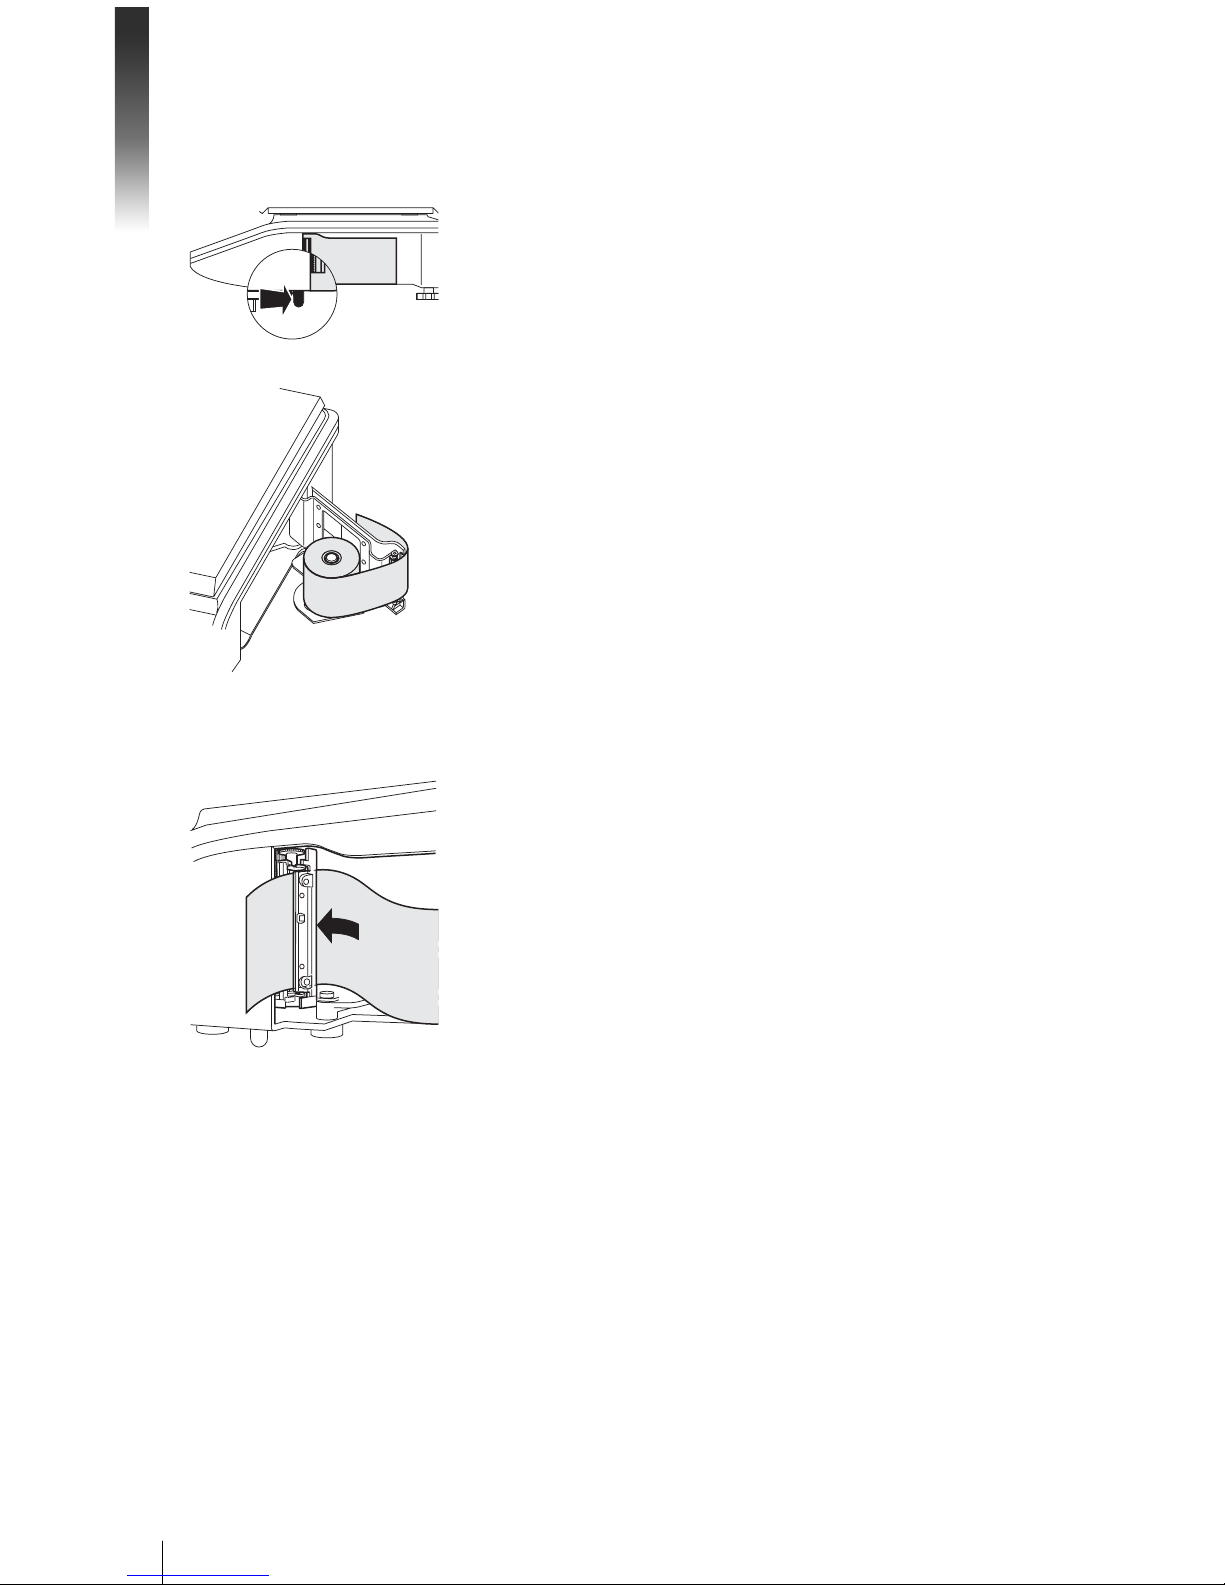
2.3.3 Mounting the tower (optional)
The tower is available as an option to mount the customer display at
eye level.
Loosen the 3 screws on the underside of the scale to remove the 1.
cover plate (1).
Remove the screws and nuts from the side screw caps (2).2.
Remove the screws (3) that fasten the customer display to the 3.
display holder.
Remove the display from the display holder and pull the display 4.
cable out of the cable duct.
Lay the cable in the tower.5.
Put the tower on the display holder and fasten it to the scale with 6.
2 screws (4).
METTLER TOLEDO bTwin Operator Manual Order number 72179502
Page 13

13
05/08
Put the customer display on the tower and fasten it to the tower 7.
with 2 screws (5).
Fasten both side screw caps (2) with screws and nuts.8.
2.4 Insert ing paper
2.4.1 Paper format
Ticket rolls or label rolls must comply with the following measures:
• The paper used (incl. carrier paper) must not be thicker than
0.12 mm.
Do not slam the printer door as this will damage the printer.•
Legend
A at least 12 mm
B max. 68 mm
C 57 mm
D 50 mm
E 2 mm
F 20 - 60 mm
G 2 mm
H 46 mm
MET TLER TOLEDO bTwin Operator ManualOrder number 72179502
Page 14
Setup and device settings
14
05/08
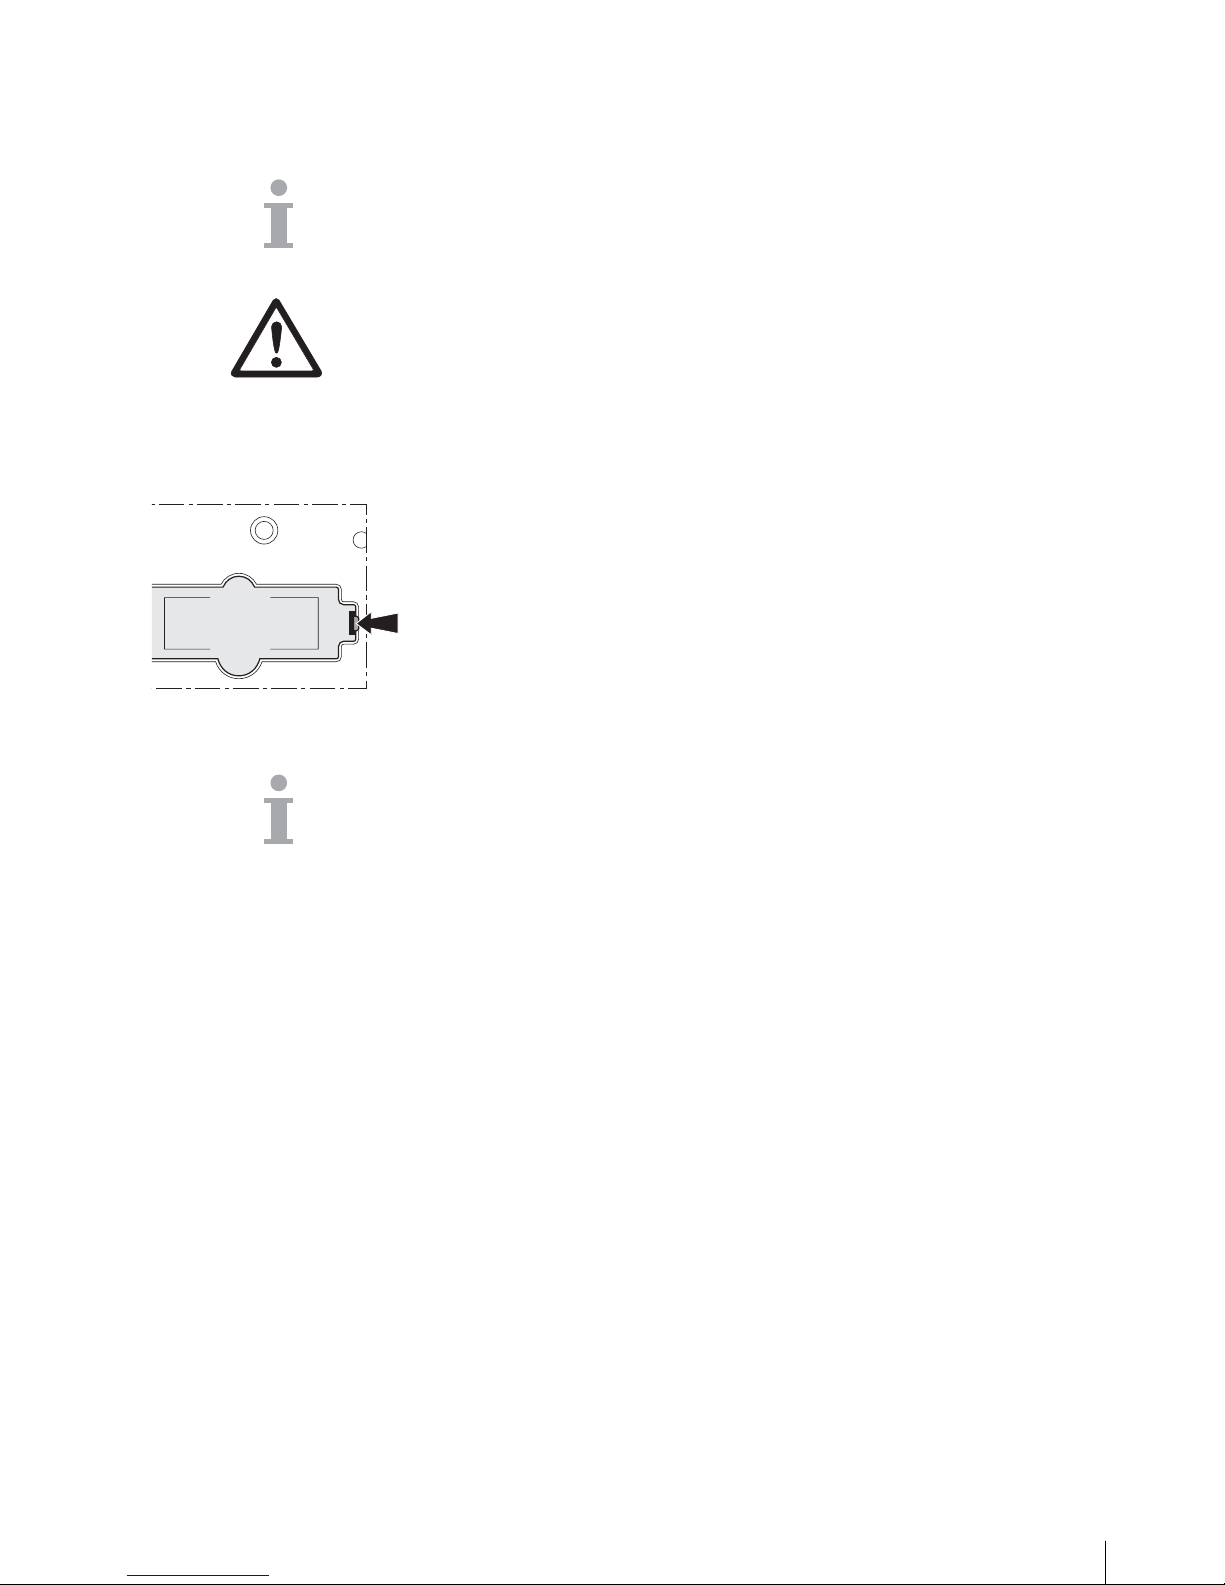
2.4.2 Inserting the ticket roll
1. To open the printer door press back the small lever on the right
side (towards the customer) underneath the scale.
2. Push the ticket roll onto the spindle as shown.
Pull the paper to the outside over the black spool.3.
Close the printer door and tear off the excess paper. 4.
2.4.3 Insert ing t he label roll
1. Open the printer door as described under inserting the ticket roll.
Push the label roll onto the spindle.2.
Remove the first two labels.3.
Pull the carrier paper through the plastic guide behind the paper 4.
cutter as shown.
Close the printer door.5.
METTLER TOLEDO bTwin Operator Manual Order number 72179502
Page 15
15
05/08
2.5 Insert ing t he battery
The scale can only be battery-operated when this function has been
activated with a license. If this is not yet the case for your scale, contact
your sales representative.
CAUTION
The battery can be damaged if it is incorrectly installed.
Pay attention to the correct battery polarity. The positive pole (+) f
and negative pole (-) cannot be short circuited.
Only use original manufacturer batteries. f
1. Remove the weighing pan.
Remove the battery compartment cover.2.
Place the battery in the compartment so that the terminal ends 3.
face upwards.
Connect the red terminal end to the positive pole (red or +) and 4.
the black terminal end to the negative pole (black or -).
Close the battery compartment.5.
Put the weighing pan back on.6.
• The battery life is affected by charging and discharging conditions.
If correctly used, the battery life can reach approx. 300 charging •
cycles.
A fully charged battery lasts up to 30 hours. The battery capacity •
decreases with age.
The battery's operating time is reduced when the battery has not been •
used over a longer period of time (two months).
It is recommended that the battery be charged at least every •
3 months.
If the battery was not used over a longer period of time, then charge •
the battery at least three times and use it until it is completely discharged.
The charging time decreases if the battery is not fully discharged.•
Battery specification: 12 V / 5 Ah.•
MET TLER TOLEDO bTwin Operator ManualOrder number 72179502
Page 16

Setup and device settings
16
05/08
2.6 Connect ing to mains power
1. Connect the supplied power cable to the power connection socket
on the bottom of the scale.
Plug the power plug into a correctly grounded power outlet.2.
2.7 Turning on/off
Turn the scale on using the switch on the bottom of the scale. f
• After it is turned on, the scale runs through a short display test. All
segments and status messages briefly light up.
The GEO value and the software version are displayed.•
The scale is ready when the weight display appears.•
2.8 Turning on background lighting/saving energy
• The scale comes equipped with a backlit display. If the ambient
lighting is not sufficient, background lighting can be turned on so
that the display can be easily read.
During power supply operation, the background lighting stays on •
until you turn it off.
To extend the battery's operating life, the background lighting turns •
off automatically when the scale is not used for more than one
minute.
When a weight is placed on the scale or a key is pressed, the back-•
ground lighting automatically turns on again.
f Press and hold the C key until a signal sounds and the background
lighting turns on.
f Press and hold the C key until a signal sounds and the background
lighting turns off.
Turning on background
lighting
Turning off background
lighting
METTLER TOLEDO bTwin Operator Manual Order number 72179502
Page 17

17
05/08
2.9 Cleaning
CAUTION
Damages to the scale
Turn off and unplug the device before cleaning. f
Do not open the device. f
Make sure that no fluids get inside the device. f
Do not use scouring powders or plastic dissolving cleaning agents f
for cleaning.
f Remove the weighing pan and clean it with a commercially avail-
able household detergent.
If heavily soiled, clean the surface of the device with a damp cloth f
that has been dipped in water containing a mild washing-up liquid
and then well wrung out.
2.10 Disposal
In accordance with the requirements of European Directive 2002/96
EC on Waste Electrical and Electronic Equipment (WEEE), this device
may not be disposed of with domestic refuse. This also applies for
countries outside the EU in accordance with their respective national
regulations.
Please dispose of this product in accordance with local regula- f
tions for the separate collection of waste electrical and electronic
equipment.
Should you have any questions, please contact the corresponding
authorities or the dealer from whom this device was purchased.
If this device is passed on (for example for further private or commercial/
industrial use), this regulation is also to be passed on.
Many thanks for your contribution to the protection of the environment.
Batteries contain heavy metals and therefore cannot be disposed of in
the normal refuse.
Observe local regulations on the disposal of materials that are f
hazardous to the environment.
Cleaning
Battery disposal
MET TLER TOLEDO bTwin Operator ManualOrder number 72179502
Page 18
Fast and easy operation
18
05/08
3 Fast and easy operation
The applications described in this chapter pertain to working with one
vendor.
3.1 Free input
You can immediately use your scale for weighing and selling - without
prior configuration.
With the factory settings, the scale can total several entries and calculate the customer change.
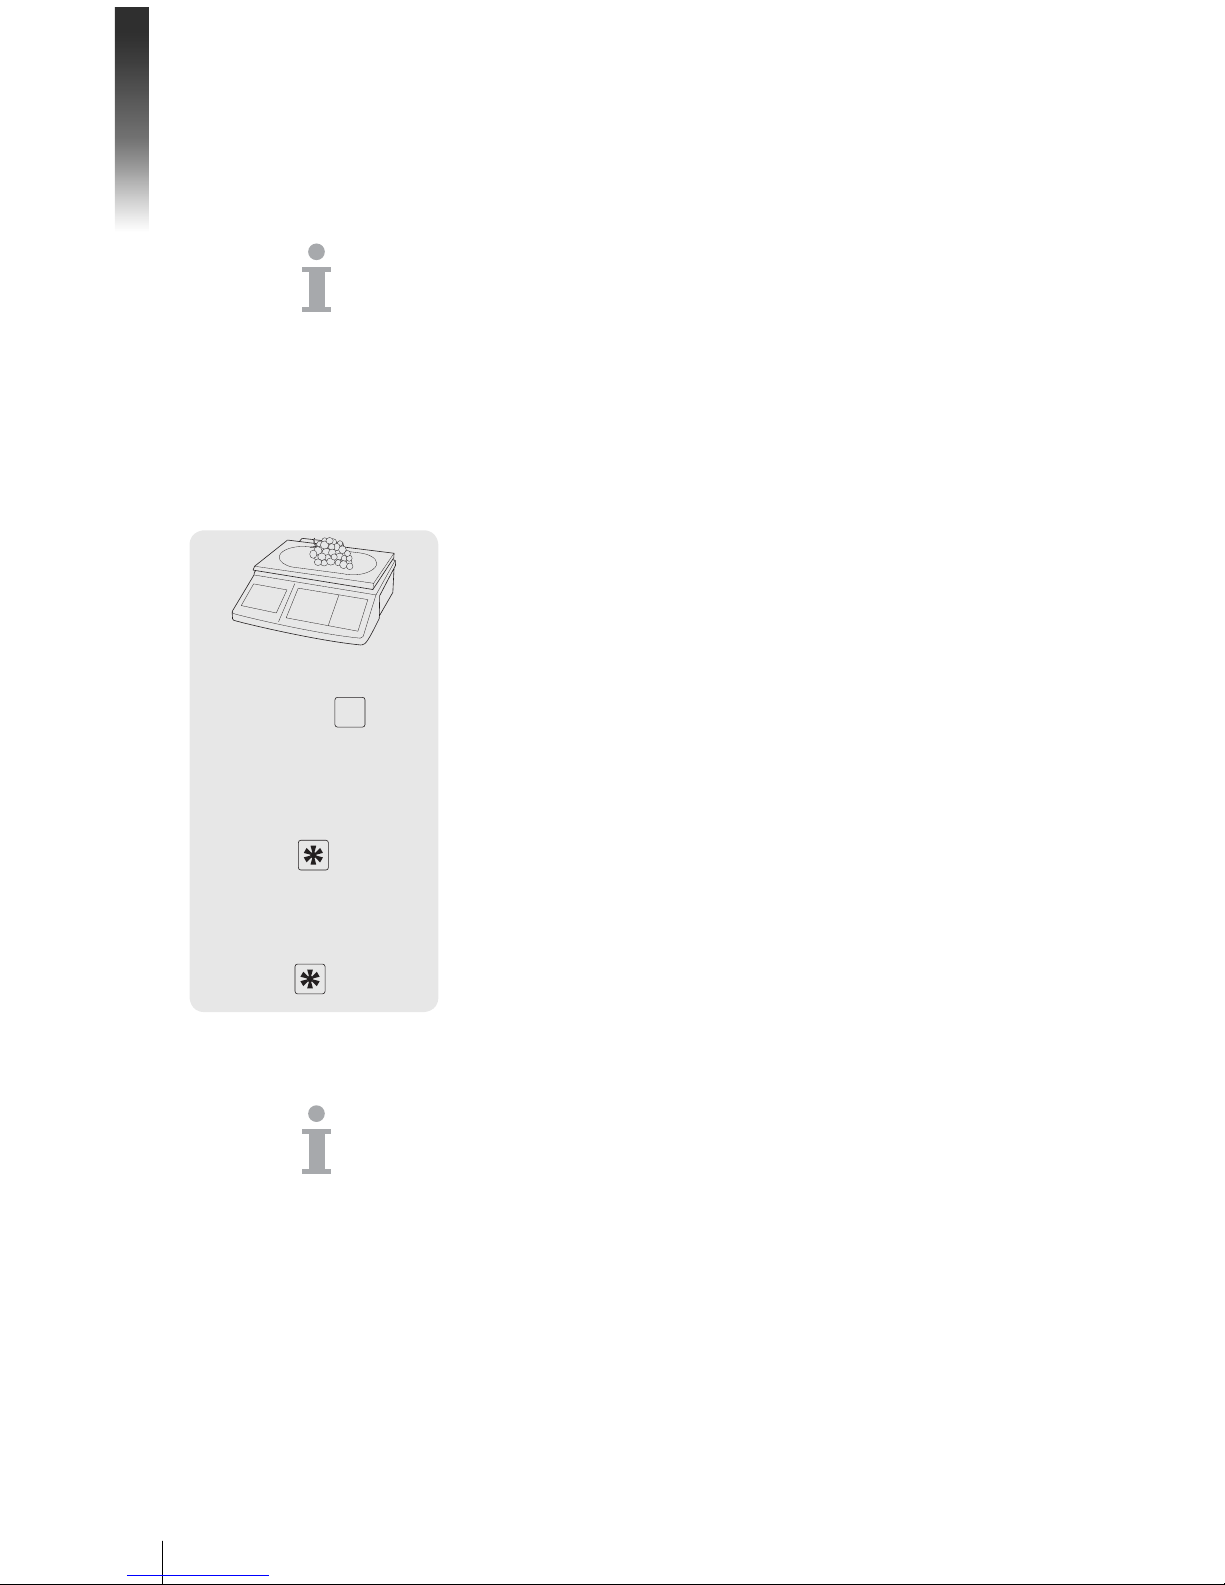
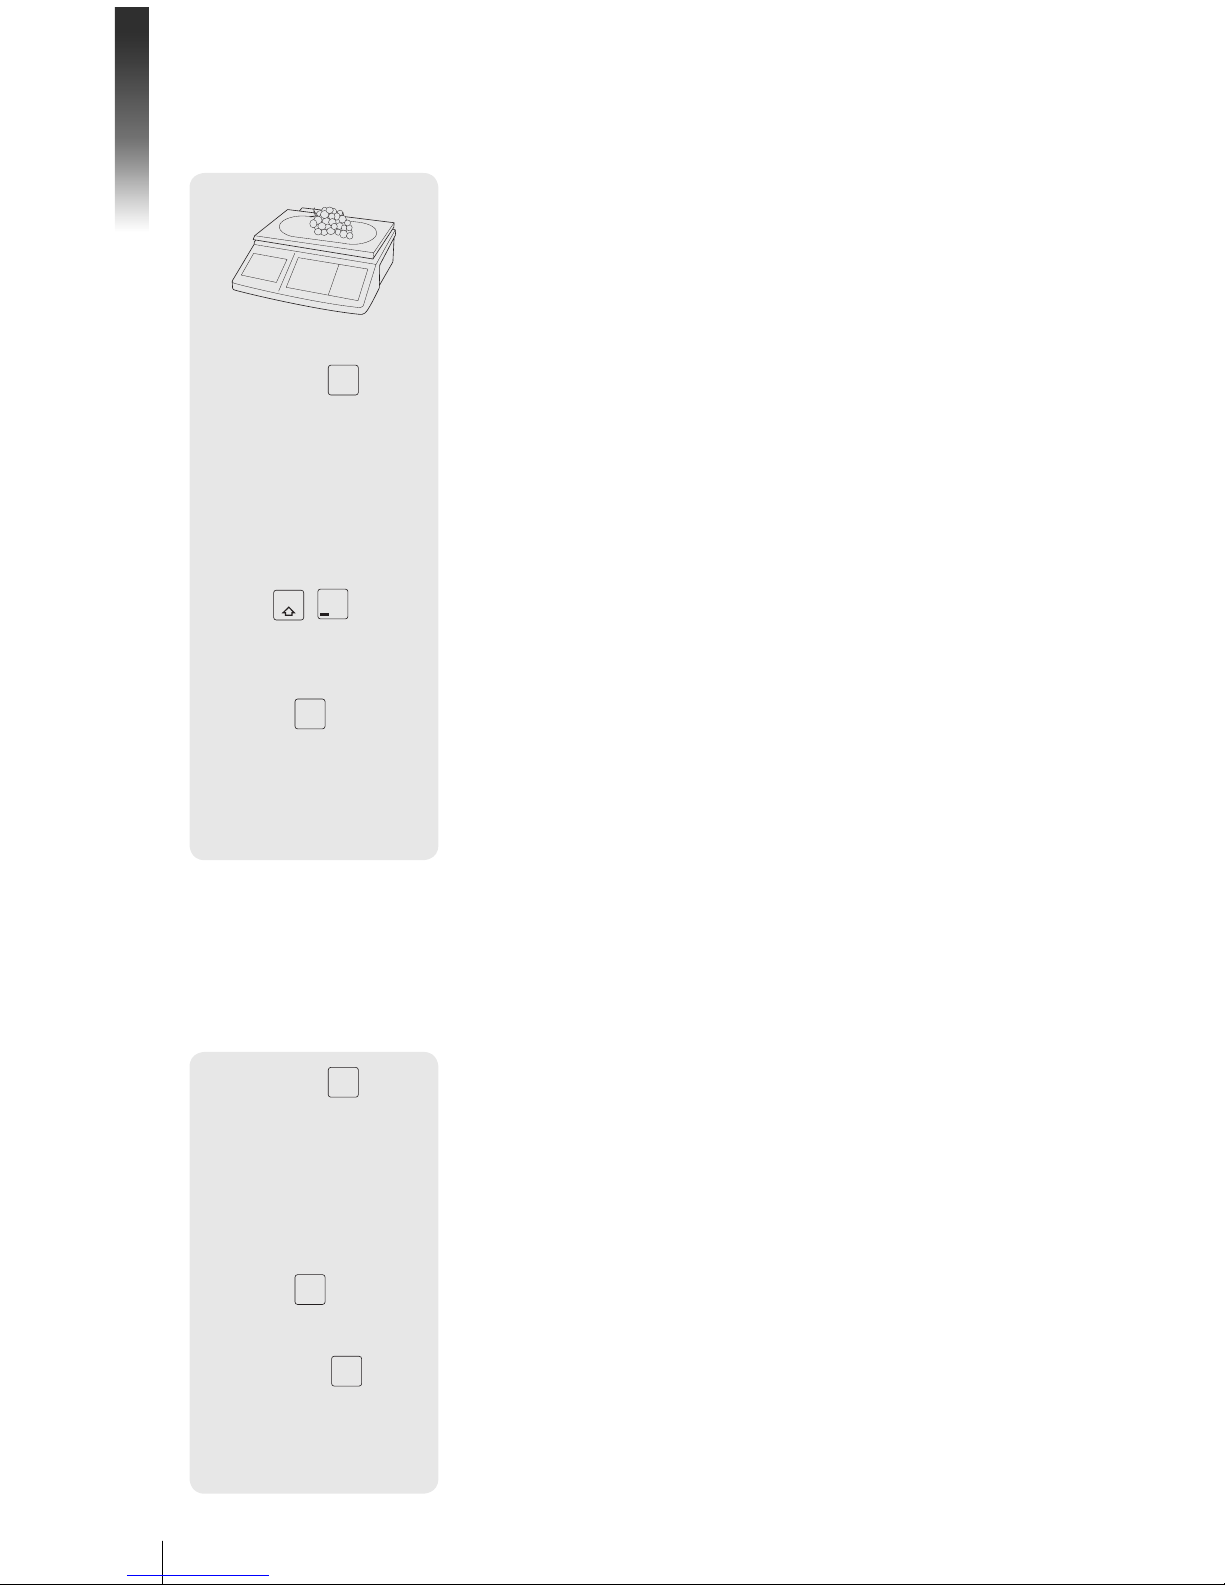
1. Place the item on the scale.
Enter the unit price (price/kg) and enter by pressing the V1 vendor 2.
key.
3. For more items, repeat steps 1 and 2.
4. Total the items with the asterisk key.
5. Enter the customer payment.
6. Complete the transaction with the asterisk key.
The scale calculates the change and prints the ticket.
• If you do not want to use the customer change function, omit step 5.
In this case, press the asterisk key twice to total up and print the
ticket.
Enter the price as usual without the decimal point, but with all the •
decimal places.
0 ... 9
V1
...
0 ... 9
METTLER TOLEDO bTwin Operator Manual Order number 72179502
Page 19
19
05/08
3.2 Working with PLUs
You can save your item data in the scale's PLU memory and simply
call it up later.
With the factory settings, a PLU contains the item name, price type (per
kg or per piece) and unit price.
PLUs are created in the scale setup.
Creating a PLU
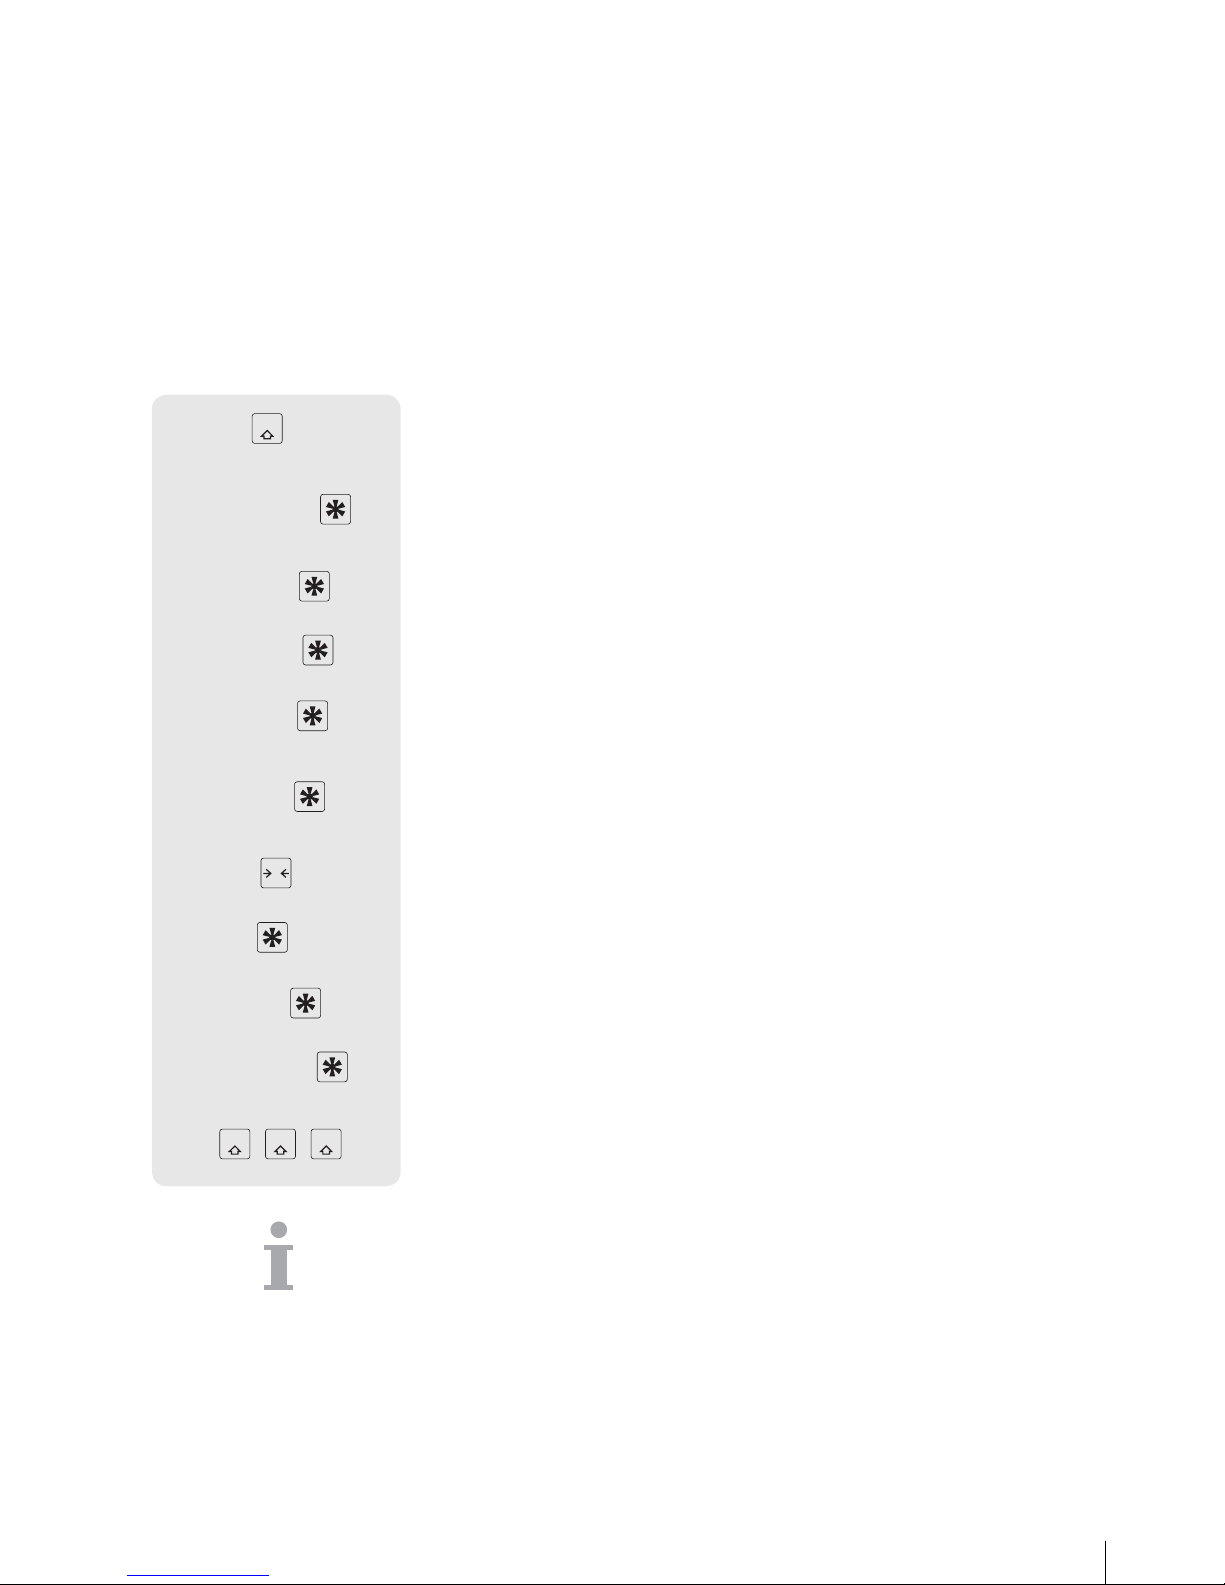
1. Use the mode key to go to setup and then press 2.
Enter password: enter the number 6 six times and confirm with 2.
the asterisk key.
3. Activate setup group 01 with the asterisk key.
4. Activate setup point 101 with the asterisk key.
Enter the desired PLU no. and confirm with the asterisk key.5.
6. Enter the item name using the keys in the left key field and confirm
with the asterisk key.
7. Select the price type (weight or quantity) with the tare key.
8. Confirm the price type with the asterisk key.
9. Enter the unit price and confirm with the asterisk key.
10. Confirm PLU SAVE with the asterisk key.
11. To exit the setup mode, press the mode key 3 times.
The scale prints a list of the saved PLUs for your files.
• Enter other PLUs as described in steps 5 to 10.
Setup can be accessed in two different ways with different authori-•
zations. Further information can be found in section 5.11, setup
group 8
Mode
2
6 6 6 6 6 6
GR 01
5 101
0 ... 9
ABC...
weight
T
count
0 ... 9
plu save
Mode Mode Mode
METTLER TOLEDO bTwin Operator ManualOrder number 72179502
Page 20
Fast and easy operation
20
05/08
Calling up PLUs
1. Place item on the scale.
Enter the corresponding PLU NUMBER and press the PLU key.2.
The unit price and item name appear in the display as a check.
3. Confirm the entry with the vendor key.
4. Complete the transaction with the vendor key and the asterisk key
as described in section 3.1.
If you discover that you have entered the wrong PLU number, before
you have confirmed the entry with the vendor key, then you can clear
it with the C- key and then enter the correct PLU.
You can save the most important PLUs to the keys in the left-hand
key field.
Setting up preset keys
1. Press the desired preset key, e.g. A, for approx. 3 seconds until
PLU appears in the bottom left of the display.
Enter the relevant PLU no. and confirm with the asterisk key.2.
Two acoustic signals confirm that the PLU was assigned to the preset
key.
• This key field comes with a card insert for custom key labelling.
If you want to work with more than one vendor, then the vendor keys •
(V2 ... V8) cannot be used as PLU preset keys.
2 PLUs can be assigned to a preset key, refer to section 4.10.•
V1
...
PLU preset keys
A 3 sec U
0 ... 9
METTLER TOLEDO bTwin Operator Manual Order number 72179502
Page 21
21
05/08
Calling up PLUs with preset keys
1. Place item on the scale.
Press relevant preset key.2.
The unit price and item name appear in the display as a check.
3. Accept the entry with the vendor key.
4. Enter further items and complete the transaction with the asterisk
key as described in section 3.1.
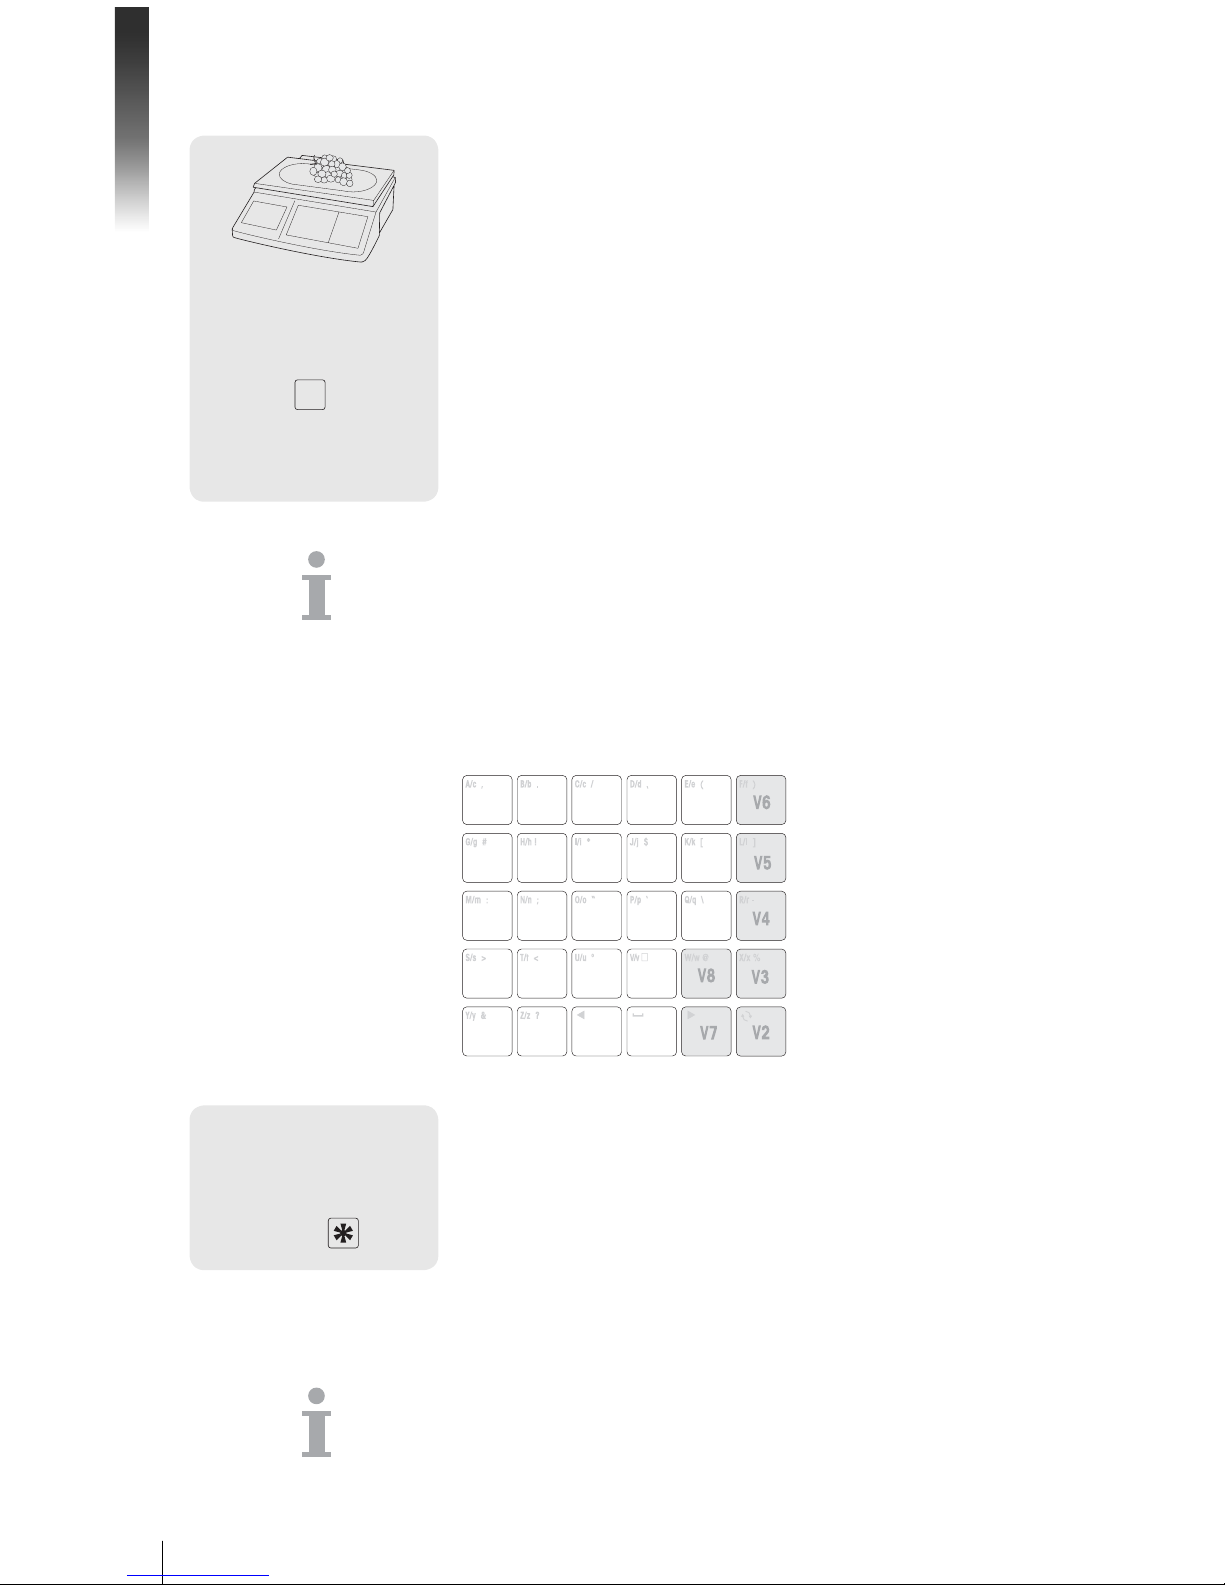
3.3 Entering large quantities
Using the large sale function, you can also enter weights that are larger
than the scale's capacity, e.g. when you want to sell a whole package
with a known weight.
Enter the respective PLU number and press the PLU key.1.
The unit price and the item name appear in the display as a
check.
or
f Enter the unit price.
2. To go to the large sale function, press the LS key while pressing the mode key.
LS appears at the bottom of the display.
3. Enter the known weight and confirm with the vendor key.
The large sale mode is ended.
4. Enter further items and complete the transaction with the asterisk
key as described in section 3.1.
A
V1
...
0 ... 9
PLU
0 ... 9
Mode
LS
0 ... 9
V1
...
METTLER TOLEDO bTwin Operator ManualOrder number 72179502
Page 22
Fast and easy operation
22
05/08
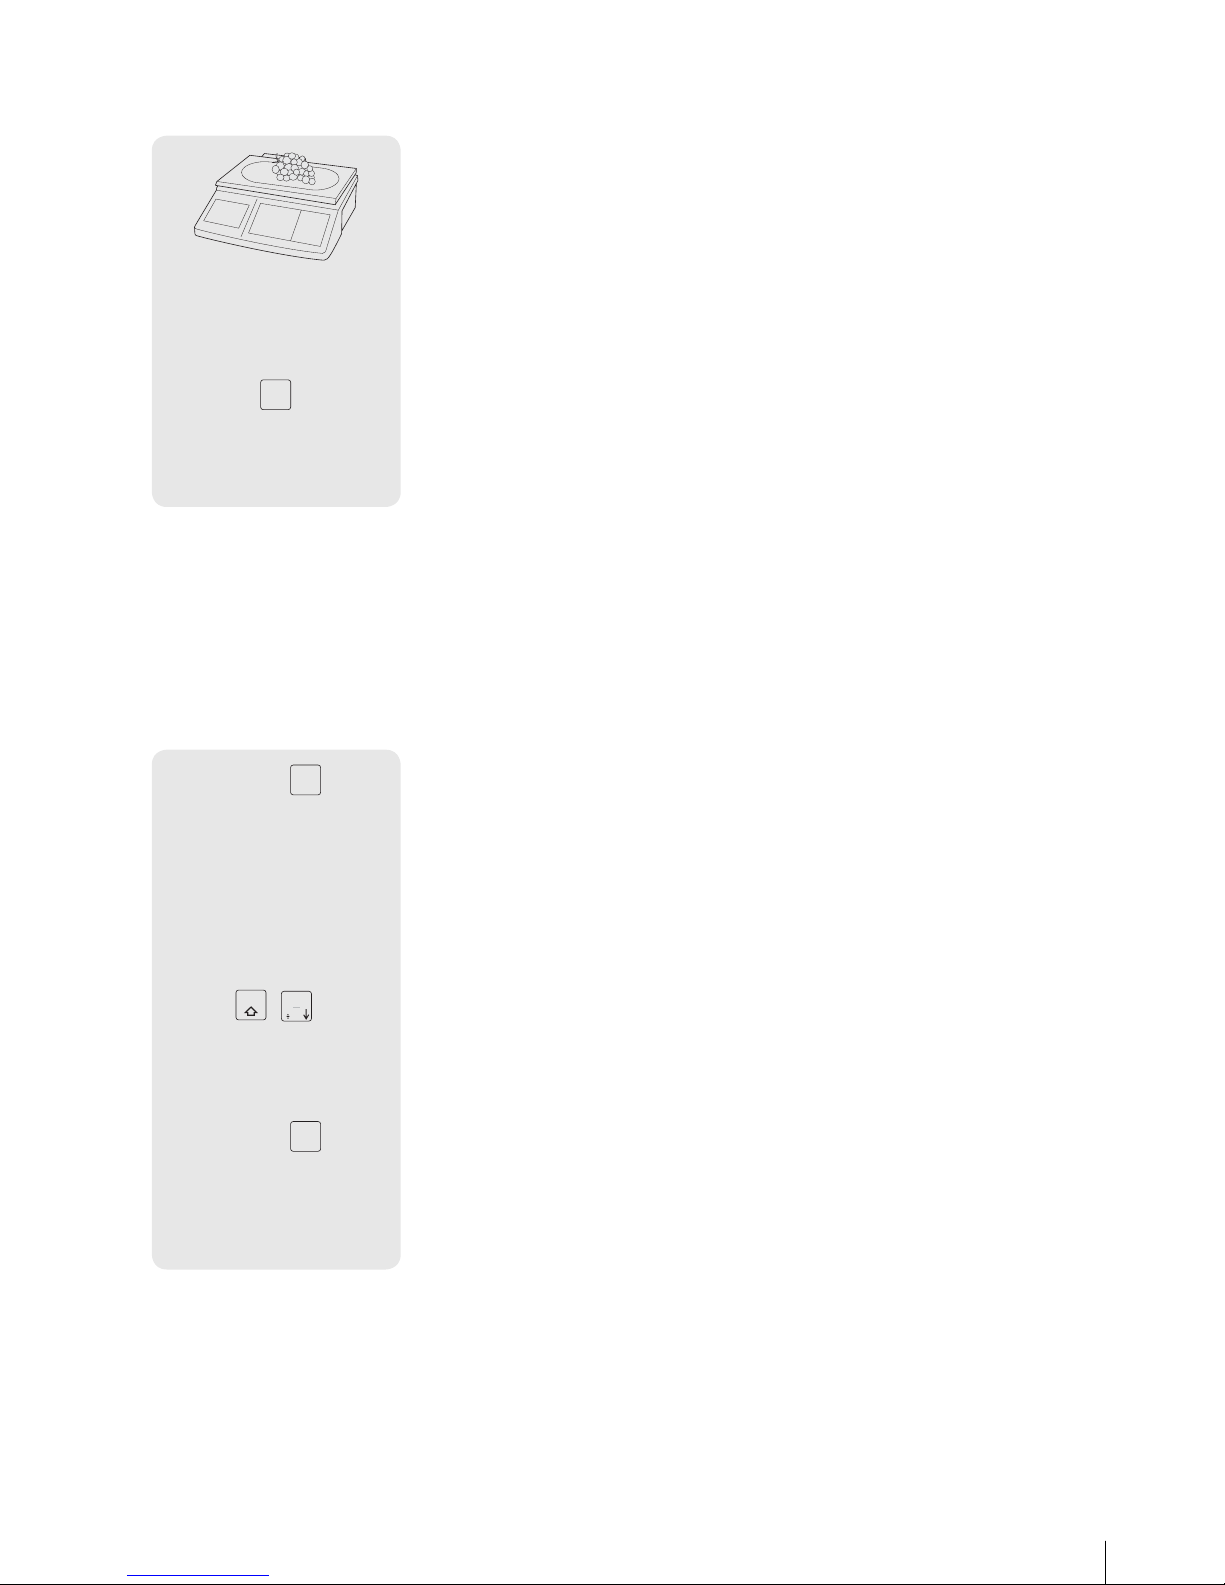
3.4 Weighing with 100 g price unit
For many products, customers are used to a price per 100 g.
1. Place item on the scale.
Enter the associated PLU number and press the PLU key.2.
The unit price and the item name appear in the display as a
check.
or
f Enter the unit price.
3. To go to the 100 g mode, press the 100 g key while holding the
mode key.
The unit price per 100 g will be displayed.
4. Accept the entry with the vendor key.
The 100 g mode is ended.
5. Enter further items and complete the transaction with the asterisk
key as described in section 3.1.
3.5 Using quantity PLU and multiplication
With the multiplication function, you can enter several items for a PLU.
How to create a PLU for items is described in section 3.1.
1. Enter the PLU number of the item and press the PLU key.
The unit price and the item name appear in the display as a
check.
or
f Enter the unit price.
2. Press the X key to call up the multiplication function.
3. Enter the number of items and confirm with the vendor key.
The multiplication mode is ended.
4. Enter further items and complete the transaction with the asterisk
key as described in section 3.1.
0 ... 9
PLU
0 ... 9
Mode
100g
X
V1
...
0 ... 9
PLU
0 ... 9
X
0 ... 9
V1
...
METTLER TOLEDO bTwin Operator Manual Order number 72179502
Page 23
23
05/08
3.6 Using tare
You fill containers with your products or customers bring their own
container. The tare function makes sure than only the goods are entered
and paid.
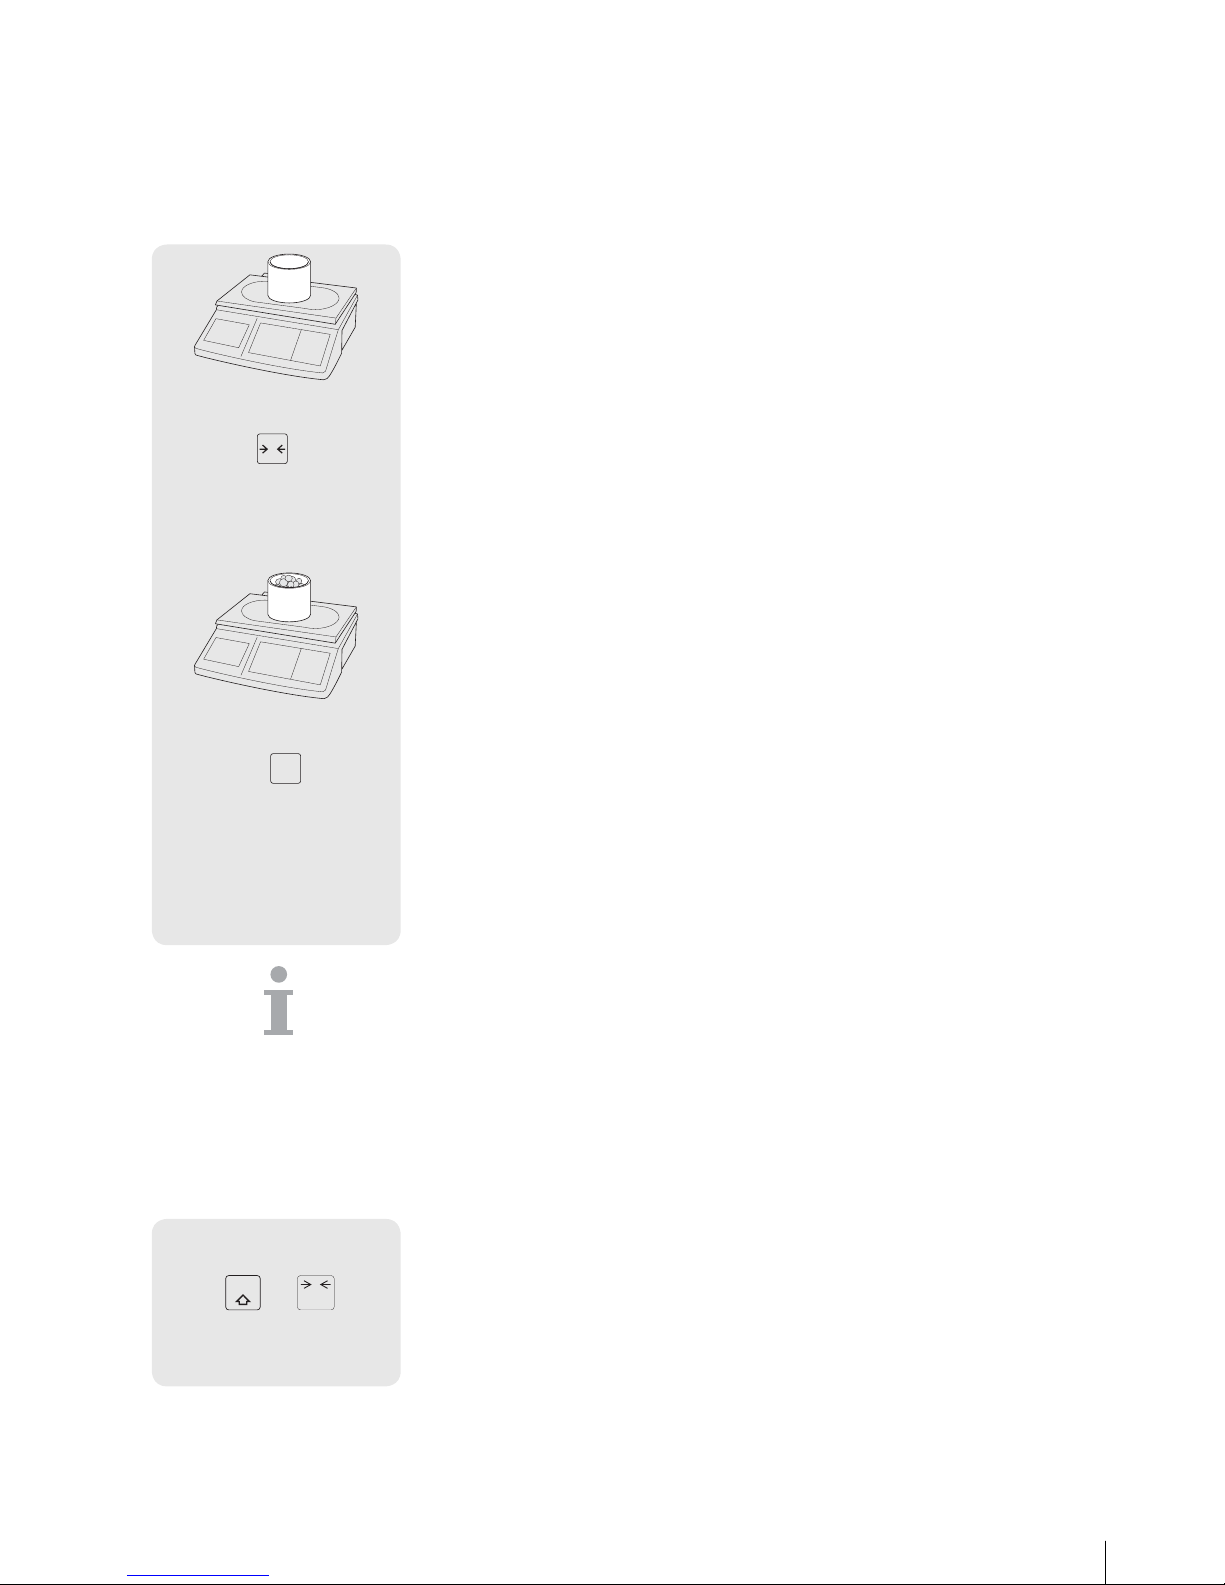
1. Place the empty container on the scale.
2. Press the tare key.
The scale is tared.
The weight display is reset to 0.000 kg and the NET symbol appears.
The tare weight is displayed in the bottom line of the display.
3. Fill the container with the goods to be weighed.
4. Carry out the transaction as described in section 3.1 and complete
it with the vendor key.
The tare value is cleared.
5. Enter further items and complete the transaction with the asterisk
key as described in section 3.1.
Known tare weights can also be entered via the keyboard, refer to
manual tare in setup point 445.
3.7 Zeroing
Due to soiling on the weighing pan or unfavourable external influences, it is possible that the weight display of an unloaded weighing
pan may no longer be 0.000 kg. In such cases, the scale must be
reset to zero.
f While holding the mode key, press the zeroing key.
The weight display is set to zero.
T
...
V1
...
0.010 kg
Mode
+
0
C
0.000 kg
METTLER TOLEDO bTwin Operator ManualOrder number 72179502
Page 24
Fast and easy operation
24
05/08
3.8 The scale as a calculator
The scale not only performs all calculations for you during sales; it also
performs any other calculations.
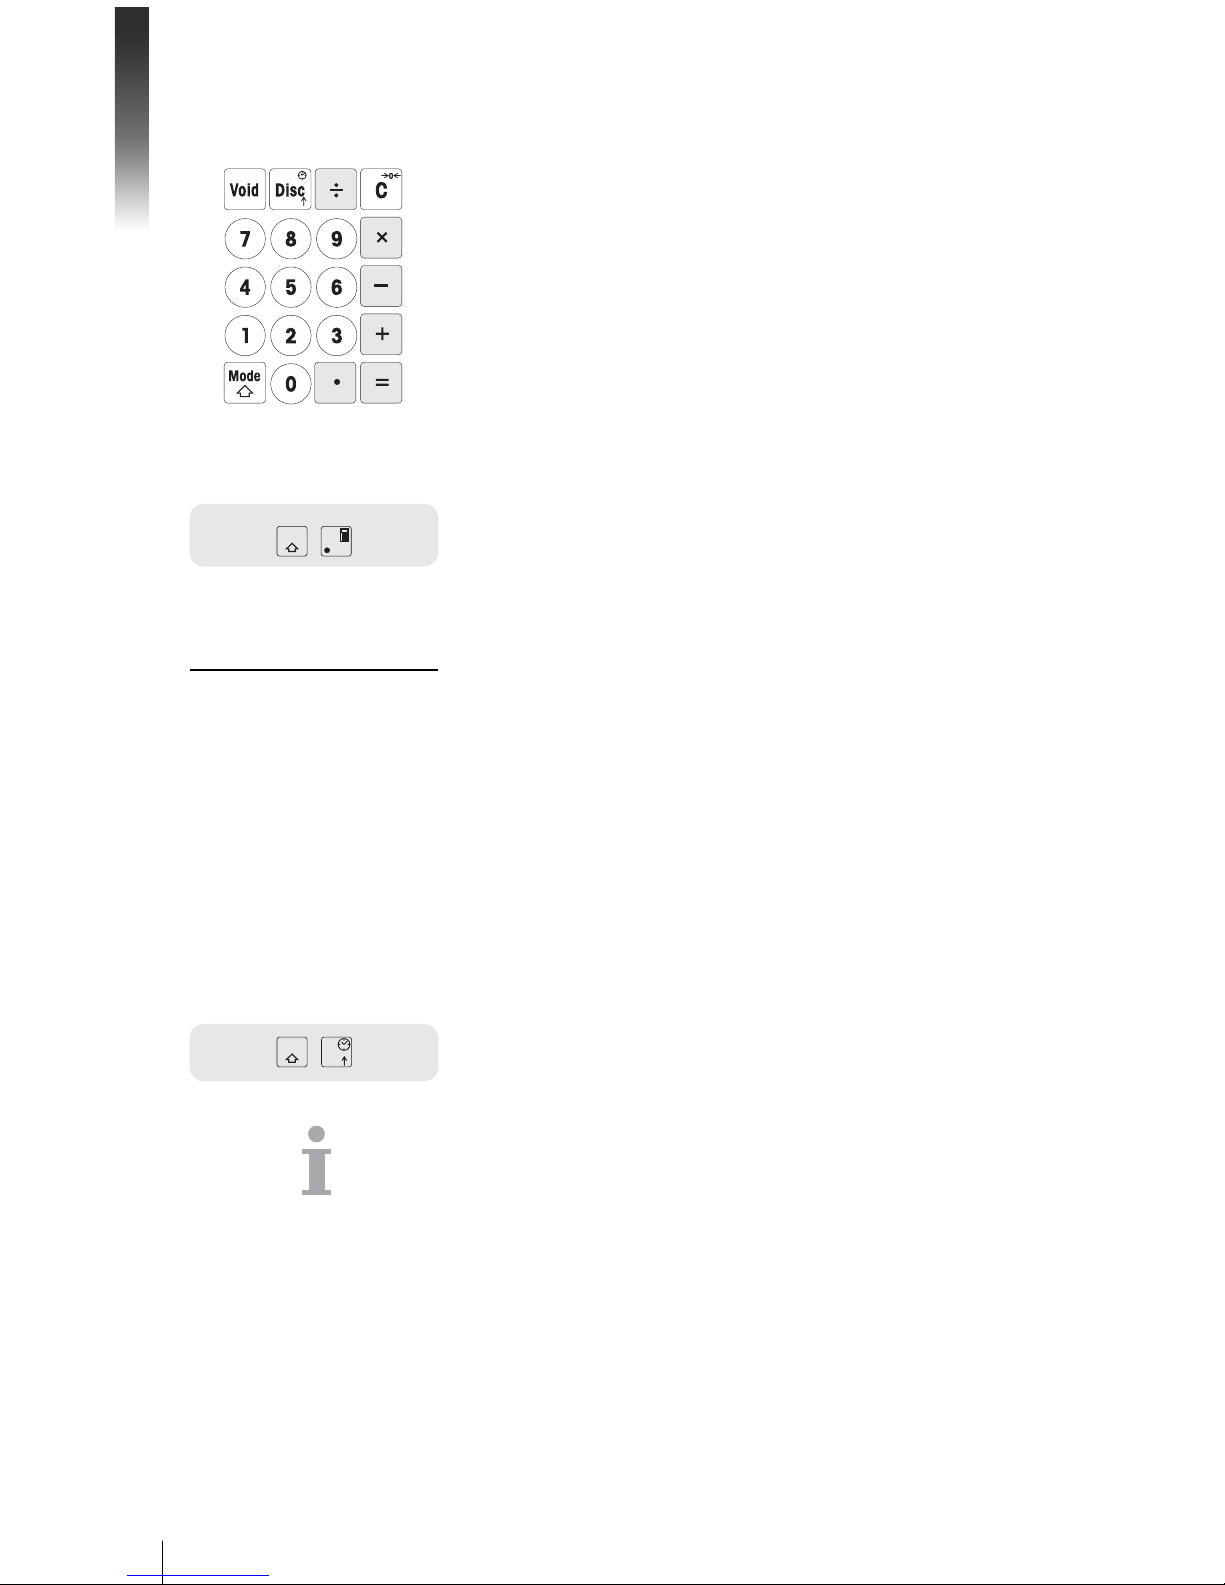
In the calculator mode, the keys have the shown values.
The mathematical operators are shown on the lower left of the keys.
Calling up the calculator mode
f While holding the mode key, press the calculator key (V1).
CALCULA appears on the display. The calculator mode is active.
Example: 3x5+5.67
Notes
The calculation is finished when the = key is pressed. It is not pos-•
sible to continue with this calculation.
To end the calculation mode, again press and hold the mode key •
and then press the calculation key (V1).
3.9 The scale as a clock
You can display the date and time in the display at any time.
f While holding the mode key, press the clock (DISC) key.
The date and time are displayed.
• When the date and time are displayed on the scale, you cannot
weigh or enter values.
To return to the scale mode, again press and hold the mode key and •
then press the DISC key.
The clock as a screen saver
When the "sleep mode" is activated in setup point 412, the scale always
displays the time when there has been no scale activity for 3 minutes.
As soon as a weight is put on the scale or a key is pressed, the weight
display again appears.
Mode
V1
Input Display
3 x
3
5 5
+ 15
5.67 5.67
= 20,67
Mode
Disc
METTLER TOLEDO bTwin Operator Manual Order number 72179502
Page 25

25
05/08
4 Active selling
4.1 Voiding
Your customer decides not to buy one or more items that have already
been weighed, but not paid. In this case, you can void the items that
are not wanted.
Before totalling, you can void one or more vendor entries.
The following procedures are described based on the factory settings.
Voiding individual entries
1. Enter, but not total one or more PLUs or direct price items to a
vendor key, also refer to chapter 3 on entering.
2. Press the void key.
Unit price, total price per PLU and PLU number of the item that was
last entered appear in the display.
3. Use the minus key or the discount key to select the entry to be
voided.
4. Confirm the selected entry with the asterisk key.
VOID OK appears in the display.
5. If more entries should be voided, repeat steps 2 to 4.
6. Enter further items and complete the transaction with the asterisk
key as described in section 3.1.
The voided entries are printed on the ticket.
...
Void
or
Disc
...
...
MET TLER TOLEDO bTwin Operator ManualOrder number 72179502
Page 26

Active selling
26
05/08
Voiding all entries
1. Enter, but not total one or more PLUs or direct price items to a
vendor key, also refer to chapter 3 on entering.
2. Press the void key.
Unit price, total price per PLU and PLU number of the item that was
last entered appear in the display.
3. Press the vendor key.
The message VOID ALL appears in the display. All of the vendor's
entries are voided.
A void ticket is created.
Now you can serve the next customer.
4.2 Granting a discount
You want to grant your customer a discount in percent. With the factory settings, you can grant a discount on a single entry or on the total
sum.
Granting a discount on a single entry
1. Weigh the PLU item as described in chapter 3, but do not confirm
it with the vendor key.
2. Press the discount key and enter the discount in percent.
3. Confirm the discount with the vendor key.
4. Enter further items and complete the transaction with the asterisk
key as described in section 3.1.
The discount is printed on the ticket.
...
Void
V1
...
Disc
0 ... 9
V1
...
MET TLER TOLEDO bTwin Operator Manual Order number 72179502
Page 27
27
05/08
Granting a discount on the total sum
1. Enter items and total with the asterisk key as described in chapter 3.
2. Press the discount key and enter the percent discount for the total
sum.
3. Confirm the discount with the asterisk key.
4. Complete the transaction as described in section 3.1.
The discount is printed on the ticket.
In setup point 116, you can define automatic discount promotions for
a specific time period for individual PLUs or groups.
4.3 Granting a rebate on the total sum
You want to decrease or round down single entries or end amounts.
The rebate function allows - contrary to the discount function - to give
absolute price reductions.
1. Enter items as described in chapter 3.
2. Press the minus key.
3. Enter the amount of the rebate to two decimal places and confirm
with the asterisk key.
4. Enter further items and complete the transaction with the asterisk
key as described in section 3.1.
The decrease is printed on the ticket.
If you always want to reduce the total sum or single items by one or two
decimal places, then you can enter these settings in setup point 431.
...
Disc
0 ... 9
...
...
0 ... 9
...
MET TLER TOLEDO bTwin Operator ManualOrder number 72179502
Page 28

Active selling
28
05/08
4.4 Refunding (ST)
Your customer has paid for an item, but wants to return it. To partially
or completely refund the sales price, use the refund function.
The following processes are described based on the factory settings.
1. While holding the mode key, press the PLU key.
The scale switches to the refund mode, the status ST appears in
the lower line of the display.
Enter the direct price or the PLU number of the items that are to be 2.
refunded and press the PLU key.
The unit price or item price and the item name appear in the display
as a check.
3. Place the item that is to be refunded on the scale or enter the
quantity.
4. Confirm the negative entry with the vendor key.
5. For more refunds, repeat steps 2 to 4.
6. Press the asterisk key twice to complete the refund.
A refund ticket is printed.
7. To return to the weighing mode, simultaneously press the mode
key and the PLU key.
Mode
PLU
0 ... 9
PLU
V1
...
Mode
PLU
MET TLER TOLEDO bTwin Operator Manual Order number 72179502
Page 29

29
05/08
4.5 Suspending a transaction (ticket parking)
You have weighed and entered the items the customer wanted. The
customer is not able to pay immediately. In this case, you can suspend the already entered transaction and serve other customers in the
meantime.
The following procedure is described based on the factory settings.
1. Carry out the transaction as described in section 3.1 and confirm
it with the vendor key, but do not total it.
2. While holding the mode key, press the tare key.
SUSPEND appears in the display.
3. Press the vendor key.
SUSPEND appears in the display. Two short acoustic signals
confirm that the transaction was suspended.
4. You can now serve other customers.
5. To recall the suspended transaction, press the tare key while
holding the mode key.
SUSPEND appears in the display.
6. Press the vendor key.
SUSPEND appears in the display. Two short acoustic signals
confirm that the suspended transaction was recalled.
7. Complete the transaction as described in section 3.1.
The ticket is printed.
• Each vendor can only suspend one transaction.
If a suspended transaction is not completed, then the message •
NO MORE SUSPEND appears when you try to suspend another
transaction.
V1
Mode
T
suspend
V1
suspend
...
Mode
T
suspend
V1
suspend
...
MET TLER TOLEDO bTwin Operator ManualOrder number 72179502
Page 30

Active selling
30
05/08
4.6 Working with several vendors
Up to 8 vendors can be activated on the scale. They are automatically
assigned to the vendor keys V1 to V8.
The factory setting is one activated vendor.
Condition
Working with several vendors is activated under setup point 1.
409.
Vendor names can be entered under setup point 105 if desired.2.
Individual passwords for the vendors can be defined under setup 3.
point 801 if desired.
4.6.1 Activating several vendors
1. Go to setup with the mode key and then press 2.
2. Enter the password: Enter the number 6 six times and confirm
with the asterisk key.
3. Activate setup group 04: enter the number 4 and confirm with the
asterisk key.
4. Call up setup point 409: enter the number 9 and confirm with the
asterisk key.
5. Enter the number of vendors (1 to 8) and confirm with the asterisk
key.
6. Exit setup: press the mode key 3 times.
The number of vendors entered is now activated on the scale.
• When working with more than one vendor, the occupied vendor keys
can no longer be used as preset keys.
In the basic state, the scale displays the logged-in vendor in the •
bottom line of the display. For example, "V 123 BON" means that
vendors 1, 2 and 3 are logged in.
Setup can be accessed in two different ways with different authori-•
zations. Further information can be found in section 5.11, setup
group 8
Mode
2
6 6 6 6 6 6
GR 04
5 409
1 ... 8
Mode Mode Mode
MET TLER TOLEDO bTwin Operator Manual Order number 72179502
Page 31

31
05/08
4.6.2 Working with several vendors
When working with several vendors, each vendor has to use his/her
vendor key to enter items.
Vendor 2 has weighed several items and wants to complete his/her
transaction.
1. To total up, press the vendor key V2 and then the asterisk key.
2. Complete the transaction as described in section 3.1 .
The ticket is printed.
• If more than one vendor is active, then a vendor's entries are hidden
after approx. 2 seconds to prevent incorrect entries.
If a vendor tries to complete a transaction directly with the asterisk •
key without his/her vendor key, then the message USER IDENT
appears.
The vendor messages are retained when the scale is turned off and •
back on.
4.7 Customer change function
The scale calculates the customer's change for you.
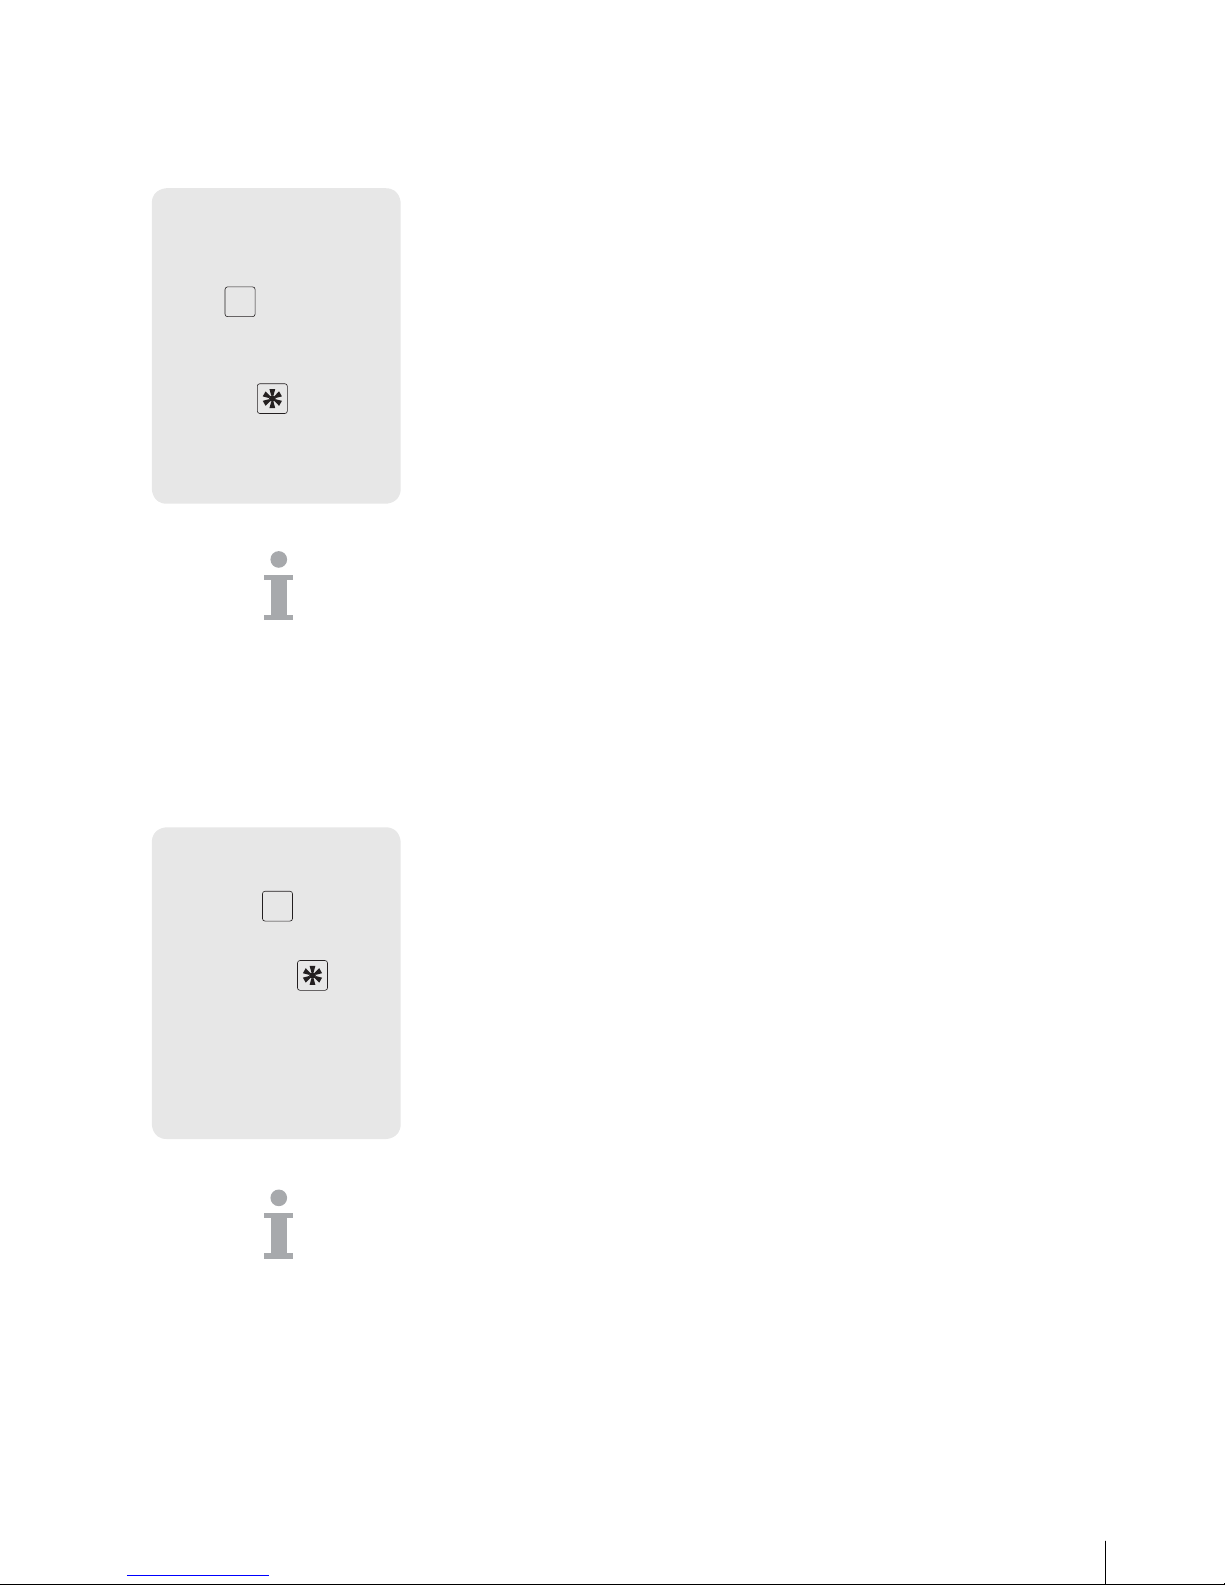
1. Total the items using the asterisk key.
2. Enter the customer's payment and confirm with the asterisk key.
The scale displays the change and prints the ticket.
If the change should not be printed on the ticket, then this can be turned
off in setup point 222.
Example
V2
...
total 7.53
pay 10.00
change 2.47
MET TLER TOLEDO bTwin Operator ManualOrder number 72179502
Page 32

Active selling
32
05/08
4.8 Various payment methods
With the factory settings, the scale only accepts cash payment. However, you can also enter vouchers, credit cards and cheques as payment
methods. To do this, MULTI-PAY must be enabled in setup point 443.
4.8.1 Enabling multiple payment
1. Use the mode key to go to setup and then press 2.
Enter password: enter the number 6 six times and confirm with 2.
the asterisk key.
3. Activate setup group 04: enter the number 4 and confirm with the
asterisk key.
4. Call up setup point 443: enter the numbers 4 and 3 and confirm
with the asterisk key.
5. Use the tare key to select MULTI-PAY and confirm with the asterisk
key.
6. Exit setup: press the mode key 3 times.
In addition to cash, it is now possible to pay by voucher, credit card
and cheque.
Key assignments
The various payment methods are assigned to the following keys:
1 Voucher
Credit card2
Cheque3
4.8.2 Paying by credit card
1. Carry out the transaction as described in section 3.1 and total it
with the asterisk key.
2. Press the Z key.
The ticket is printed with the information that it is a credit card
payment. The cash drawer does not open.
Mode
2
6 6 6 6 6 6
GR 04
5 443
T
multti-pay
Mode Mode Mode
MET TLER TOLEDO bTwin Operator Manual Order number 72179502
Page 33

33
05/08
4.8.3 Paying by cheque
1. Carry out the transaction as described in section 3.1 and total it
with the asterisk key.
2. Press the "left" cursor key.
The ticket is printed with the information that it is a cheque payment. The cash drawer does not open.
4.8.4 Paying with a voucher
The amount of the voucher exceeds the total sum. You give the customer
the difference in cash.
1. Carry out the transaction as described in section 3.1 and total it
with the asterisk key.
2. Press the Y key.
Enter the amount of the voucher and confirm with the asterisk 3.
key.
The message C CHG appears in the bottom line of the display. The
ticket is printed with the information that it is a voucher payment
and with the amount of cash change. The cash drawer opens.
The amount of the voucher exceeds the total sum. You give the customer
the difference in the form of another voucher.
4. Carry out the transaction as described in section 3.1 and total it
with the asterisk key.
1. Press the Y key.
Enter the amount of the voucher and confirm with the Y key.2.
The message V CHG appears in the bottom line of the display. The
ticket is printed with the information that it is a voucher payment
and with the amount returned in the form of a voucher. The cash
drawer does not open.
Version 1
1 ... 8
Version 2
MET TLER TOLEDO bTwin Operator ManualOrder number 72179502
Page 34

Active selling
34
05/08
The amount of the voucher does not completely cover the total sum. The
customer can pay the difference in cash or with a credit card.
1. Carry out the transaction as described in section 3.1 and total it
with the asterisk key.
2. Press the Y key.
Enter the amount of the voucher and confirm with the Z key to pay 3.
the difference with a credit card.
The ticket is printed with the information that it is a credit card and
voucher payment. The cash drawer does not open.
or
f Enter the amount of the voucher and confirm with the asterisk key
to pay the difference in cash.
f Enter the amount of the cash payment and confirm with the
asterisk key.
The ticket is printed with the information that it is a voucher and
cash payment and with the amount of cash change. The cash
drawer opens.
It is not possible to combine voucher and cheque payment.
Version 3
1 ... 9
1 ... 9
1 ... 9
MET TLER TOLEDO bTwin Operator Manual Order number 72179502
Page 35

35
05/08
4.9 Basket function
Your customers pick themselves, e.g. strawberries, and bring their own
baskets. If the basket function is enabled, you can save the weight of
each basket and recall it when weighing. In this way, your customer
only pays for what was actually picked.
4.9.1 Enabling the basket function
1. Use the mode key to go to setup and then press 2.
Enter password: enter the number 6 six times and confirm with 2.
the asterisk key.
3. Activate setup group 04: enter the number 4 and confirm with the
asterisk key.
4. Call up setup point 444: enter the number 4 twice and confirm
with the asterisk key.
5. Use the tare key to select ENABLE and confirm with the asterisk
key.
6. Exit setup: press the mode key 3 times.
The basket function is now enabled.
Key functions when the basket mode is enabled
V Saves the tare weight
Space key Calls up the saved tare weight
• The V key and the space key can no longer be used for PLUs.
Manual tare can be enabled in setup point 445. Known tare weights •
can then be entered using the P key.
Mode
2
6 6 6 6 6 6
GR 04
5 444
T
enable
Mode Mode Mode
MET TLER TOLEDO bTwin Operator ManualOrder number 72179502
Page 36

Active selling
36
05/08
4.9.2 Working with the basket function
Saving the basket weight
1. Place the empty basket on the scale.
2. Press V.
The basket weight is saved. A ticket with the number and weight
of the basket is printed.
• A max. of 999 different basket weights can be saved in the scale.
If you have reached basket number 999, the scale automatically •
creates and prints a basket report. The basket number is then reset
to 1.
Calling up the basket weight
1. Place the filled basket on the scale.
2. Press the space key to call up the saved basket weight.
3. Enter the basket number and confirm with the asterisk key.
The symbol NET, the net weight and the tare weight appear in the
instruction field.
Enter the associated PLU number and press the PLU key.4.
The unit price and item name appear in the display as a check.
5. Confirm the transaction with the vendor key.
6. Complete the transaction as described in chapter 3.
0 ... 9
0 ... 9
PLU
V1
...
MET TLER TOLEDO bTwin Operator Manual Order number 72179502
Page 37

37
05/08
4.10 Working with 2 PLUs per preset key
PLUs can be assigned to PLU preset keys on 2 levels.
To do this, 2 PLU must be enabled in setup point 405.
4.10.1 Enabling 2 PLUs per preset key
1. Use the mode key to go to setup and then press 2.
Enter password: enter the number 6 six times and confirm with 2.
the asterisk key.
3. Activate setup group 04: enter the number 4 and confirm with the
asterisk key.
4. Call up setup point 405: enter the number 5 and confirm with the
asterisk key.
Use the tare key to select 2 PLU and confirm with the asterisk 5.
key.
6. Exit setup: press the mode key 3 times.
Now, 2 PLUs can be stored per preset key.
Mode
2
6 6 6 6 6 6
GR 04
5 405
T
2 plu
Mode Mode Mode
MET TLER TOLEDO bTwin Operator ManualOrder number 72179502
Page 38

Active selling
38
05/08
4.10.2 Assigning 2 PLUs to a preset key
1. Press down and hold the desired preset key, e.g. the A key, for
approx. 3 seconds.
The message L1 appears in the display.
2. Enter the PLU number for level 1 and confirm with the asterisk key.
Two short acoustic signals confirm that the PLU is assigned to
level 1.
3. Press down and hold the desired preset key, e.g. the A key, for
approx. 2 seconds.
The message L1 appears in the display.
4. Briefly press the preset key once.
The message L2 appears in the display. You can assign a level
2 PLU.
5. Enter the PLU number for level 2 and confirm with the asterisk key.
Two short acoustic signals confirm that the PLU is assigned to
level 2.
4.10.3 Calling up PLUs
Calling up a level 1 PLU
f Briefly press the relevant preset key, e.g. the A key one time.
The unit price and the item name appear in the display as a
check.
Calling up a level 2 PLU
f Briefly press the relevant preset key, e.g. the A key two
times.
The unit price and the item name appear in the display for checking purposes.
2 sec l1
0 ... 9
2 sec l1
l 2
0 ... 9
MET TLER TOLEDO bTwin Operator Manual Order number 72179502
Page 39

39
05/08
5 Setup
5.1 Overview
In the setup mode, you can set up the scale to handle your special sales
and back office tasks. Specific functions and groups are only accessible
if you have a license. Ask your sales representative.
The setup mode features are organized in 10 groups:
In this group you enter your item data (PLUs) and ticket and label
printing information.
In this group you define what information should appear on the printout.
In this group you delete item data.
In this group you define operating sequences.
This group can only be accessed by the service engineer.
Only exception: setup point 518 - language settings
The scale assists you with evaluations. In this group you set up your
reports.
In this group, you enter the settings to communicate with a computer
or to operate the scale in a network, e.g. to work in the integrated
operation mode.
The setup mode is password protected. You can enter passwords and
authorizations here.
This group can only be accessed by the service engineer.
This group can only be accessed with a network license and contains
additional functions such as self service and label printing.
01 – Info Input
02 – Label/Ticket
03 – Data Clear
04 – Operation
05 – Service Mode
06 – Reports
07 – Network
Configuration
08 – Password
09 – Tests and Servicing
10 – Extra
MET TLER TOLEDO bTwin Operator ManualsOrder number 72179502
Page 40

Setup
40
05/08
5.2 List of all setup points
The most important and most frequently used points are indicated in
bold print.
Group 1: Information input
101 PLU EDIT
102 PRICE CHANGE
103 PLU CONTENT
104 GROUP EDIT
105 VENDOR EDIT
106 DATE/TIME
107 SHOP EDIT
108 SCALE NO.
109 HEAD/FOOTER
111 TARE EDIT
112 BARCODE
113 BAR C VS T/L
116 DISCOUNT ITEMS
122 PRINT PLU
Group 2: Label/ticket
201 RESTORE DEF
203 PRINTING
205 PRN STUB
206 PRN COPY
207 PRN METHOD
216 AFTER DESCRP
217 PRN SCALE
218 PRN VENDOR
219 PRN DATE
220 PRN TICK.NO.
222 PRN CHG
223 PRN BARCODE
224 PRN VOID
225 PRN LOGO
230 TARE PRN
231 PRN TOTAL
Group 3: Deleting data
301 DELETE PLU
302 DELETE GROUP
305 RESET SCALE
306 PID LID
307 DEL LOG
Group 4: Operation
401 RESTORE DEF
402 CALL PLU TEXT
403 LOAD PLU TYPE
404 PRINT EDIT
405 PRESET PLU
406 PRICE CHANGE
408 HAND PRICE
409 VENDOR QTY
411 TARE/P CLEAR
412 SLEEP MODE
413 LIGHT TYPE
414 ST
415 VOID
416 QTY SOLD
430 ROUND CONFIG
431 CUT CONFIG
432 CUT EFFECT
433 CUT KEY
434 CUT CHANGE
438 PRINT SPEED
439 CONTRAST
440 FIRST DAY TYPE
441 FILTER TYPE
442 ECR CHECKOUT
443 MULTI-PAY
444 BASKET-FUNC
445 TM KEY
446 TRAINING
450 PLU CONFIG
451 SAVE LOG
Group 5: Service mode
518 SET LANGUAGE
METTLER TOLEDO bTwin Operator Manual Order number 72179502
Page 41

41
05/08
Group 6: Reports
601 RESTORE DEF
602 SALES REPORT
603 PLU REPORT
604 PROMOTION REP
605 GROUPS
607 HOURLY RPT
610 ST/RETN RPT
611 VENDOR RPT
613 WEEKLY RPT
616 COMBINE
617 LOG
618 BASKET RPT
622 VAT REPORT
623 DEL REPORT
624 DEL ALL REPT
625 DEL AU/MA
Group 7: Network configuration
701 RS-232
702 ETHERNET
703 WORK MODES
Group 8: Password
801 PW MANAGER
802 RIGHT LIMIT
Group 10: Extra
1003 PRODUCT DATE
1004 EXTRA TEXT
1005 PRN TYPE
1006 D L W FORMAT
1007 D L Q FORMAT
1008 D P W FORMAT
1009 D P Q FORMAT
1010 D L T FORMAT
1011 ACT TO V1
1016 SELF-SERVICE
1017 GROUP H RPT
1020 CASHDRAW RPT
1021 MONTHLY RPT
1022 YEARLY RPT
1025 PLU REPORT
1026 MODE SWITCH
MET TLER TOLEDO bTwin Operator ManualsOrder number 72179502
Page 42

Setup
42
05/08
5.3 Setup operation
5.3.1 Entering setup
1. Use the mode key to go to setup and then press 1.
Enter password: enter the number 8 six times and confirm with 2.
the asterisk key.
The first setup group is displayed.
Setup can be accessed in two different ways with different authorisations.
Further information can be found in section 5.11, setup group 8.
5.3.2 Key functions during setup
The following keys can be used during setup:
Confirm selection / complete entry
T
Page forwards, e.g. Gr 01 T Gr 02 T Gr 03 ...
X
Page backwards, e.g. S 405 X S 404 X S 403 ...
Mode
Go back a level, e.g. S 405
Mode
Gr 04
Mode
0.000 kg
Within a setup group, a point can be called up directly by its number.
5.3.3 Ending setup
f Press the mode key repeatedly until the weight display appears
again.
The scale is now again in the normal operating mode.
Mode
1
8 8 8 8 8 8
GR 01
GR 01
T
GR 02
405
X 404
405
Mode
GR 04
Mode Mode
...
0.000 kg
METTLER TOLEDO bTwin Operator Manual Order number 72179502
Page 43

43
05/08
5.3.4 Example: price change for PLU 25
1. Enter setup as described in section 5.3.1.
2. Activate setup group 01 with the asterisk key.
S 101 is displayed.
3. Use the tare key to go to S 102 and confirm with the asterisk
key.
4. Enter an existing PLU number (in the example: 25) and confirm
with the asterisk key.
Enter the new unit price and confirm with the asterisk key.5.
6. To change other PLUs, repeat steps 4 and 5.
7. To exit the setup mode, press the mode key 3 times.
5.3.5 Direct access using t he setup shortcut keys
It is possible to directly access a setup point using shortcut keys in
the left key field.
To call up setup, refer to section 5.3.1.1.
Press the shortcut key. 2.
The corresponding setup point is called up.
You can print a list of all shortcut keys and the assigned menu points
by pressing the mode key and then key V6.
...
GR 01
101
T
102
2 5
0 ... 9
...
Mode Mode Mode
MET TLER TOLEDO bTwin Operator ManualsOrder number 72179502
Page 44

Setup
44
05/08
5.3.6 Text input
Text is entered using the alphanumeric key field.
The bottom row of the alphanumeric key field and the upper row of the
right key field have the following function keys for entering text:
1 Left cursor key
Space2
Right cursor key (V7)3
Shift key uppercase/lowercase/special symbols (V2)4
One line up5
One line down6
Delete characters7
The entered characters are shown in the display. Repeatedly pressing
the shift key shows the following values in the given sequence:
I Upper case letters
s Lower case letters
, Special characters
C Unicode characters
Entering "Fruit –10%"
Switch Type Input
–
l F
s r u i t
C 00150 (–)
l 10
, %
All allowed characters are listed in the "Unicode Characters" table in
the appendix.
Function keys
Upper/lower case
Example
METTLER TOLEDO bTwin Operator Manual Order number 72179502
Page 45

45
05/08
5.4 Setup group 1
In this group you enter your item data (PLUs) and ticket and label
printing information.
5.4.1 Tips for setting up and configuring PLUs
f Save your items (PLUs) in setup point 101.
With the factory settings, a PLU contains the following components
(item specifications) that describe the item:
PLU number•
PLU name•
Price type (by weight/by count)•
Unit price •
Depending on your operating sequence requirements, 1 to 10 pieces
of information can be assigned to a PLU, e.g. the item number from
your merchandise information system.
Configure the contents of a PLU in setup point f 103.
Thus, the PLUs contain exactly the information that is important to
you.
Categorize your sales in groups (cheese, fruit, vegetables, ...).
An individual value added tax rate can be assigned to each group
(VAT rate).
Create your groups in setup point f 104.
Store the tare weight in the PLU when the product is always sold in the
same packaging.
Create your groups in setup point f 111.
You can choose whether the PLU should be automatically called up
when the PLU number is entered or via the PLU key.
Factory setting: call up via PLU key
Enter your operating sequence in setup point f 403.
Edit PLUs (101)
PLU contents (103)
Groups (104)
PLU tare (111)
Call up a PLU (403)
MET TLER TOLEDO bTwin Operator ManualsOrder number 72179502
Page 46

Setup
46
05/08
5.4.2 Example
You want to
Assign an item number from your merchandise information system •
as well as a PLU number to your items
Categorize your items in groups•
Assign a VAT rate to your PLUs•
Assign a tare weight to a specific PLU•
Entering item contents in setup point 103
In the example, the following item contents will be needed:
ID1 – DESCRIPT (item number)•
ID3 – Group and VAT rate•
ID7 – Tare•
1. Use the mode key to go to setup and then press 2.
Enter password: enter the number 6 six times and confirm with 2.
the asterisk key.
3. Confirm setup group 01 with the asterisk key.
4. Call up setup point 103: enter the number 3 and confirm with the
asterisk key.
Use the tare key to select ID1 DESCRIPT ON and confirm with the 5.
asterisk key.
6. Accept ID2 DESCRIPT ON with the asterisk key.
7. Use the tare key to select ID3 GROUP ON and confirm with the
asterisk key.
8. Skip ID4 to ID6: to do this, press the asterisk key 3 times.
9. Use the tare key to select ID7 TARE ON and confirm with the
asterisk key.
10. Exit setup point 103 with the mode key.
The scale goes to the next setup point 104.
When you enter PLUs in setup point 101, you will be asked for the item
number, group and tare.
1. Step
Mode
2
6 6 6 6 6 6
GR 01
5 103
T
descript on
T
group on
T
tare on
Mode
s 104
METTLER TOLEDO bTwin Operator Manual Order number 72179502
Page 47

47
05/08
Setting up groups in setup point 104
This lets you better categorize your product range.
1. After finishing setup point 103, confirm setup point 104 with the
asterisk key.
Enter the desired group No. and confirm with the asterisk key.2.
3. Enter the name of the group, e.g. fruit, using the keys in the left key
field (refer to section 5.3.6) and confirm with the asterisk key.
4. Enter the VAT rate with two decimal places, e.g. 7.00, and confirm
with the asterisk key.
With the factory settings, the VAT will be printed on the ticket.
5. Repeat points 2 to 4 for other groups.
6. To exit setup point 104, press the mode key 2 times.
The scale goes to the next setup point 105.
or
f To enable/disable printing of the VAT on the ticket, press the mode
key once.
PRN VAT Y/N appears in the display.
f Press the asterisk key and use the tare key to toggle between PRN
VAT and NOT PRN VAT.
f Confirm the print settings with the asterisk key.
The scale goes to the next setup point 105.
• The VAT for direct price items can be entered in group 0.
A maximum of 20 groups can be entered.•
2. Step
5 104
5 104
0 ... 9
ABC...
0 ... 9
...
Mode Mode
Mode
...on T ...off
MET TLER TOLEDO bTwin Operator ManualsOrder number 72179502
Page 48

Setup
48
05/08
Entering PLU tare weights in setup point 111
1. After finishing setup point 104, call up setup point 111: enter the
number 1 twice and confirm with the asterisk key.
Enter the desired tare No. and confirm with the asterisk key.2.
3. Enter the tare weight and confirm with the asterisk key.
or
f Place the empty container on the scale, accept with the LS key
(down arrow) and confirm with the asterisk key.
4. Repeat points 2 and 3 for other groups.
5. Exit setup point 111 with the mode key.
The scale goes to the next setup point 106.
A maximum of 20 tare weights can be saved.
3. Step
5 104 5 111
0 ... 9
0 ... 9
LS
...
Mode
METTLER TOLEDO bTwin Operator Manual Order number 72179502
Page 49

49
05/08
Entering item information (edit PLUs) in setup point 101
After all item contents have been defined, you can start entering your
item data.
1. After finishing setup point 111, call up setup point 101: enter the
number 1 and confirm with the asterisk key.
Enter the desired PLU No. and confirm with the asterisk key.2.
Enter the desired description (item number) and confirm with the 3.
asterisk key.
4. Enter the item name using the keys in the left key field and confirm
with the asterisk key.
Enter the desired group number and confirm with the asterisk 5.
key.
6. Select the price type (weight or quantity) with the tare key.
7. Confirm the price type with the asterisk key.
8. Enter the unit price and confirm with the asterisk key.
Enter the correct tare weight and confirm with the asterisk key.9.
10. Confirm PLU SAVE with the asterisk key.
11. For more items, repeat steps 2 to 10.
12. To exit the setup mode, press the mode key 3 times.
4. Step
5 101
0 ... 9
0 ... 9
ABC...
0 ... 9
weight
T
count
0 ... 9
0 ... 9
plu save
...
Mode Mode Mode
MET TLER TOLEDO bTwin Operator ManualsOrder number 72179502
Page 50

Setup
50
05/08
5.4.2 Ticket layout
You can lay out your cash register ticket as desired. At the factory, the
scale is setup so that the PLU name, unit price, weight/quantity and
price appear on the ticket. You can add the following information:
1. Logo - set up in setup point 225
Shop name - set up in setup point 1072.
Header - set up in setup point 109 (header/footer)3.
Vendor name- set up in setup point 1054.
Date and time - set up in setup point 2195.
VAT - set up in setup point 1046.
Footer - set up in setup point 109 (header/footer)7.
Ticket number - set up in setup point 2208.
Scale number - set up in setup point 2179.
5.4.3 Remarks on barcodes
• Printing barcodes in the following formats:
EAN 8, Code 25, EAN13, Code 39, Code 25, EAN128, UPC8,
Code 13+5.
Calling up PLUs in EAN13 and EAN8 formats with a scanner.•
Reading in tickets in EAN13 format with a scanner. •
To do this, the ECR CHECKOUT function must be enabled in setup
point 442.
Creat ing barcodes
Barcodes are configured in setup point 112.
The information that your barcode should contain is defined with the
following parameters:
Parameter Explanation Note
0-9 Numbers max. 12 digits
A Item number max. 12 digits
B Amount max. 7 digits
C Checksum 1 digit
N Ticket number 4 digits
P PLU number 4 digits
Q Weight/quantity max. 5 digits
W Group no. max. 2 digits
Barcode applications
Barcode parameters
METTLER TOLEDO bTwin Operator Manual Order number 72179502
Page 51

51
05/08
Creating EAN 13 with ID 23, 5-digit item name, 5-digit amount and
checksum
Call up setup point 112.1.
Enter the desired barcode number and confirm with the asterisk 2.
key.
Select the desired barcode format, e.g. EAN 13.3.
Enter barcode parameters e.g. 23 AAAAA BBBBB C.4.
Enter the number of places the item number should be moved 5.
using the cursor keys and confirm with the asterisk key.
Enter the number of places the amount should be moved using 6.
the cursor keys and confirm with the asterisk key.
Select the checksum type using the tare key and confirm with the 7.
asterisk key.
Enter other barcode formats: to do this, repeat steps 2 to 7.8.
• After entering a barcode, select setup point 113 to create a relationship between the defined barcode format and a ticket/label.
If a barcode format starts with two digits, then these two digits cannot •
be used for other formats.
Entering a positive number under the sub-points A shift, B shift ... •
means moving to the right, a negative number means moving to
the left.
Linking the barcode format to the ticket or label.
Barcode 3 should be printed on ticket format 1.
Call up setup point 113.1.
Select the ticket or label type using the tare key and confirm with 2.
the asterisk key.
Select the ticket format using the tare key, e.g. format 1, and 3.
confirm with the asterisk key.
Select the desired barcode using the tare key, e.g. barcode 3, and 4.
confirm with the asterisk key.
To exit the setup mode, press the mode key repeatedly until the 5.
weight display appears.
• In order for the barcode to be printed, "PRN BARCODE" must be
selected in setup point 223.
The item number cannot be printed as a barcode on tickets with •
several entries.
Example
Example
MET TLER TOLEDO bTwin Operator ManualsOrder number 72179502
Page 52

Setup
52
05/08
Reading in barcodes with a scanner
• You can read in PLUs as barcodes using a scanner.
You can read in complete entries incl. the price as a barcode using •
the scanner. Please note the following:
Setup point 442 "ECR CHECKOUT" must be enabled. –
Only barcode format EAN 13 is allowed. –
Only one vendor can be active. –
5.4.4 Grant ing a discount
Discounts can be granted in two different ways:
manually using the discount key and•
automatically after entering the discount parameters in setup point •
116.
In setup point 116, the scale provides several ways of defining an
automatic discount:
Discount promotion for a specific period of time•
Discounts on individual PLUs•
Discounts on individual groups•
Discounts on all items•
Discounts on the total sum•
Quantity discounts•
You want to grant a 5 % discount on veal cutlet for weights over 500 g
from 10.01.2008 until 14.01.2008. The promotion will start on January 10 at 8:30 a.m. and end on January 14 at 6:30 p.m.
Call up setup point 116 and sub-point DISCPROMO with the 1.
asterisk key.
Enter the starting date of the discount promotion in the following 2.
order: day, month, year and confirm with the asterisk key.
Enter the time the discount promotion shall start in the following 3.
order: hour, minute, second and confirm with the asterisk key.
Enter the date when the discount promotion ends and confirm 4.
with the asterisk key.
Enter the time the discount promotion should end and confirm 5.
with the asterisk key.
Use the tare key to scroll to the sub-point PLU and confirm with 6.
the asterisk key.
Enter the PLU number of the item to be discounted and confirm 7.
with the asterisk key.
Enter the discount rate and confirm with the asterisk key.8.
Enter the minimum weight for which the discount will be granted 9.
(condition) and confirm with the asterisk key.
Example
METTLER TOLEDO bTwin Operator Manual Order number 72179502
Page 53

53
05/08
5.4.5 Overview of setup group 1
• For access and navigation in setup, refer to section 5.3.1.
For entering text, refer to section 5.3.3.•
Factory settings are indicated in • bold print.
No. Display Description Notes
101 PLU EDIT Enter PLUs
PLU NUMBER Enter desired PLU number Possible values: 1 ... 9999
PLU NAME Enter PLU name Max. 15 characters
BY WEIGHT/BY
COUNT
Select price by weight or item price Select with the tare key
UNIT PRICE Enter unit price
PLU SAVE/
PLU ABORT
Save or cancel inputs Select with the tare key
Depending on the settings in point 103, more parameters can appear
here.
Then, either enter the next PLU or use the mode key to go to the next
setup point.
102 PRICE CHANGE Change the prices of existing PLUs
PLU NUMBER Select desired PLU number Enter number or scroll
through with the tare key or
X key.
UNIT PRICE Enter new price
Then, either change the next PLU or use the mode key to go to the next
setup point.
103 PLU CONTENT Defi ne the contents of a PLU that should be printed
ID1 DESCR NO. Switch working with additional item
number on and off, e.g. numbers from
the merchandise information system
Factory setting: NO
ID2 DESCRIPTION Switch item description on/off Factory setting: on
ID3 GROUP Switch group on/off Factory setting: NO
ID4 PRICE Switch unit price on/off Factory setting: on
ID5 QUANTITY Switch quantity by piece or weight
on/off
Factory setting: on
Only for USA
ID6 FIX WT Switch working with a fi xed tare weight
on/off
Factory setting: NO
ID7 TARE NO. Switch tare number on/off Factory setting: NO
ID8 SELL BY * Switch sell by date on/off Factory setting: NO
ID9 BEST BEFORE * Switch best before date on/off Factory setting: NO
ID10 LABEL NO. * Switch ticket No. assignment on/off Factory setting: NO
ID11 EXTRA TEXT * Switch extra text on/off Factory setting: NO
* These functions can only be used when the scale is equipped with a
network license. Contact your sales representative.
MET TLER TOLEDO bTwin Operator ManualsOrder number 72179502
Page 54

Setup
54
05/08
No. Display Description Notes
104 GROUP EDIT Create group
GROUP NO. Enter the desired group number Possible values: 1 ... 20
GROUP NAME Enter the name of the group Max. 20 characters
INPUT VAT Enter the value added tax Enter with two decimal
places, e.g. 7.00 %
Then, either create the next group or continue with the mode key.
PRN VAT Y/N Print the VAT on the ticket
PRN VAT/NOT PRN
VAT
Switch printing of the VAT on the ticket on/
off
Factory setting: on
105 VENDOR EDIT Enter vendor
VENDOR NO. Enter vendor number Max. 8 vendors
VENDOR NAME Enter vendor name Max. 20 characters
Then, either enter the next vendor or use the mode key to go to the next
setup point.
106 DATE/TIME Setting date and time
DD-MM-YY Enter day, month, year Enter date and time in the
displayed format
HH-MM-SS Enter hours, minutes, seconds
107 SHOP EDIT Enter shop data
SHOP EDIT Enter name, address, ... Max. 9 lines with 25 char-
acters each
108 SCALE NO. Scale number(when the scale is connected to a network)
SCALE NO. Enter the scale number Possible values: 1 ... 99
109 HEAD/FOOTER Enter the text for the ticket header and footer
HEADER Enter the header text for the ticket Max. 9 lines with 33 char-
acters each
FOOTER Enter the footer text for the ticket
111 TARE EDIT Enter known tare weights
TARE NO. Enter the tare number Possible values: 1 ... 20
TARE Enter the corresponding tare weight
or place the empty container on the scale
and accept with L
Tare < scale capacity
Then, either enter the next tare weight or use the mode key to go to the
next setup point.
METTLER TOLEDO bTwin Operator Manual Order number 72179502
Page 55

55
05/08
No. Display Description Notes
112 BARCODE Create barcodes
BAR Enter barcode number Possible values: 1 ... 12
EAN 13/... Select the desired barcode format using
the tare key and enter barcode text
Refer to section 5.3.3
A SHIFT Move the item number Possible values: -12 ... +12
Negative values: to the left
Positive values: to the right
B SHIFT Move the amount
Q/W SHIFT Move the unit price per weight
Q/Q SHIFT Move the item price
C PARITY Select 1 (uneven) or 2 (even) using the
tare key
Then, either enter the next barcode or use the mode key to go to setup
point 113 to assign the entered barcode formats to a ticket/label.
113 BAR C VS T/L Assign entered barcodes to t he ticket or label.
LABEL*/TICKET Select label or ticket
Enter label/ticket
BARCODE Enter relevant barcode number Barcodes are defi ned in
setup point 112.
Printing of barcodes must be
activated in setup point 223.
* It is only possible to print labels when the scale has a network license.
Contact your dealer.
Then, either enter the next label/ticket or use the mode key to go to the
next setup point.
116 DISCOUNT ITEMS Enter discount promotion
DISCPROMO Enter a promotion which automatically grants a discount
FROM DD-MM-YY Start of discount: Day, Month, Year
FROM HH-MM-SS Start of discount: Hours, Minutes, Seconds
TO DD-MM-YY End of discount: Day, Month, Year
TO HH-MM-SS End of discount: Hours, Minutes, Seconds
ALL ITEMS Same discount for all items
PERCENT* Enter discount in percent
GROUP Discount by group
GRP Enter group
PERCENT* Enter discount in percent
Then, either enter the next group or use the mode key to go to the next
setup point.
MET TLER TOLEDO bTwin Operator ManualsOrder number 72179502
Page 56

Setup
56
05/08
No. Display Description Notes
PLU Discount for individual PLUs
NO. Enter PLU number
PERCENT */
NEW PRICE
Discount / enter new price
CONDITION Min. quantity to receive discount
Then, either process the next PLU or use the mode key to go to the next
setup point.
TOTAL Discount on the total sum
PERCENT* Enter discount in percent
CONDITION Min. quantity to receive discount
CLEAR ALL Delete all discount settings
SAVE YES/NO Confi rmation prompt
* Enter with two decimal places, e.g. 3.00 %
DISC KEY Discount will only be granted in specifi c cases using the DISC key
PLU + TOTAL Discount possible on PLU and total sum
PLU ONLY Discount only possible on PLUs
TOTAL ONLY Discount only possible on total sum
DISABLE Not possible to grant discount using the
DISC key
122 PRINT PLU Print out a list of the PLUs entered
FROM ... Enter the starting value
TO ... Enter the fi nal value
METTLER TOLEDO bTwin Operator Manual Order number 72179502
Page 57

57
05/08
5.5 Setup group 2
5.5.1 Printing tips
You can optimize the printer settings to fit your operating sequences.
When printing with stubs (setup point 205), the scale prints a total
ticket for your files as well as a customer ticket.
In setup points 216 to 231, you can set up the exact information that
should be printed on your ticket.
If you have entered settings in another group, here you can make sure
these are also printed out.
E.g. after a logo is loaded, printing of the logo must be activated in
setup point 225.
5.5.2 Overview of setup group 2
No. DISPLAY Description Notes
201 RESTORE DEF Restore the factory settings for group 2
DEFAULT YES/NO Should the settings should be restored,
yes or no
203 PRINT T Select when t he ticket should be printed
PRINT TICKET The ticket is only printed after the transac-
tion is completed
Factory setting
WEIGHING T Only weighing goods are printed; if piece
goods are sold separately, then there is no
printout
205 STUB ? Enable/disable printing of stub
NO STUB Stub will not be printed Factory setting
SIMPLE Ticket total will be printed as a ticket
DETAIL Stub will be printed
206 PRN COPY Enable/disable printing of a copy of t he
ticket (ticket)
NO COPY Print copy of ticket Factory setting
PRINT COPY Do not print copy of ticket
207 PRN METHOD Set up printing method
ONE TIME PRN Print ticket at the end of the transaction Factory setting
LINE BY LINE Ticket printed out line by line Only possible when using
one vendor
Stub
Save paper / protect
thermal bar
MET TLER TOLEDO bTwin Operator ManualsOrder number 72179502
Page 58

Setup
58
05/08
No. DISPLAY Description Notes
216 AFTER DESCRP Print additional item informat ion
EMPTY Leave fi eld empty Factory setting
ITEM NO Print item number The item number is ID1 in
setup point 103
PLU Print PLU number
217 PRN SCALE #? Print scale number on the ticket
NOT PRN S Print scale number Factory setting
NOT PRN S NO Do not print scale number
218 PRN VENDOR Print vendor number on t he t icket
PRN VENDOR Print vendor name Factory setting
NOT PRN VEND Do not print vendor name
219 PRN DATE Print date and t ime on t icket
PRN DATE Print date and time Factory setting
NOT PRN DATE Do not print date and time
220 PRN S/N Print ticket number on t he ticket
PRN S/N Print ticket number on the ticket Factory setting
NOT PRN S/N Do not print ticket number on the ticket
222 PRN CHG Print the customer change
PRN CHG Print customer's change on the ticket Factory setting
NOT PRN CHG Do not print customer's change on the
ticket
223 PRN BARCODE Print barcode on the ticket
NOT PRN BAR Do not print barcode on the ticket Factory setting
FRANCE BAR C Print the French barcode which has FRF
and not EUR
Barcodes are set up in setup
points 112 and 113
PRN BARCODE Print barcode
224 PRN VOID Print void data on the ticket
PRN VOID Print the void data Factory setting
NOT PRN VOID Do not print void data
225 PRN LOGO Print t he shop logo
NOT PRN LOGO Do not print the logo Factory setting
PRN LOGO Print logo
230 TARE PRN Print tare weight on the ticket
NO TARE PRN Do not print tare weight Factory setting
PRN TARE Print tare weight
231 PRN SUM ROUND Rounding Rounding is set up in setup
point 430
PRN ROUND Print rounded prices Factory setting
NO ROUNDING Print prices with all decimal places
METTLER TOLEDO bTwin Operator Manual Order number 72179502
Page 59

59
05/08
5.6 Setup group 3
In this group, item data can be deleted and additional functions can
be enabled with licenses.
5.6.1 Licensing
You can add functions to your scale with one of the following
licenses:
• Battery operation for mobile use
• Enable the integrated operation function
Group 10 functions (label printing, self-service ...)•
5.6.2 Overview of setup group 3
No. DISPLAY Description Notes
301 DELETE PLU Delete one or more PLUs
DEL FROM---- Enter the starting value
DEL TO------ Enter the fi nal value
SURE NO/YES Confi rmation prompt before
deletion
302 DEL GROUP Delete group
DEL FROM---- Enter the starting value
DEL TO------ Enter the fi nal value
SURE NO/YES Confi rmation prompt before
deletion
305 RESET SCALE Restore t he scale's factory settings
SURE NO/YES Confi rmation prompt before
deletion
Caution: RESET SCALE deletes
all your settings. E.g. PLUs, GRP,
formats ...
306 PID LID Licensing for the battery and network options
MAINBOARD NO. Display mainboard number
LICENSE Display license number 1: no option enabled
7: options enabled
PID Display 20-digit product ID Tell your handler the PID when an
option is required.
LID Display 20-digit license ID You get the LID from your dealer
307 DEL LOG Delete log fi le
SURE NO/YES Confi rmation prompt before
deletion
The scale logs all entries in the log
fi le.
Battery license
Network license
MET TLER TOLEDO bTwin Operator ManualsOrder number 72179502
Page 60

Setup
60
05/08
5.7 Setup group 4
5.7.1 Operating sequences
Your retail scale can be set up to handle your everyday business processes.
When the training mode is activated, you can train your employees on
the scale without affecting existing reports.
Your customers bring their own baskets with them to pick fruit themselves in one of your fields. The basket function helps you save up to
999 tare weights and then call them up again later when weighing the
goods. Also refer to section 4.9
Define the number of vendors you have.
Define whether you want to enter a PLU directly or by confirming it with
the PLU key.
Training mode (446)
Basket function (447)
Set up vendor (409)
Load a PLU (403)
METTLER TOLEDO bTwin Operator Manual Order number 72179502
Page 61

61
05/08
5.7.2 Overview of setup group 4
No. DISPLAY Description Notes
401 RESTORE DEF Restore factory sett ings
DEFAULT NO | YES Restore the factory settings, yes or
no
402 CALL PLU TYPE Call up t he PLU by PLU number or item number
BY PLU Select by PLU number Factory setting
BY ITEM NO Select by item number To do this, the item number must
be enabled as ID1 in setup point
103.
403 LOAD PLU TYPE Method to call up t he PLU
BY PLU KEY Confi rm the PLU number with the
PLU key
Factory setting
AUTO LOAD Automatically call up the PLU when
the PLU number is entered
404 PRINT EDIT Print the group 1 data
PRINT YES Print data after it is entered Factory setting
PRINT NO Do not print data
405 PRESET PLU Assign PLUs to a preset key
1 PLU Assign one PLU to a preset key Factory setting
2 PLU Assign two PLUs to a preset key Refer to section 4.10.
406 PRICE CHANGE Enable PLU price change
PRC CHG NO Do not enable PLU price change Factory setting
PRC CHG YES PLU price change is enabled in
setup point 102
Price change process: call up the
PLU, press the PLU key again and
enter the new price.
408 HAND PRICE Enable manual entry of the price - working without PLUs
HAND PRICE 0 Manual entry enabled Factory setting
HAND PRICE 1 Manual entry disabled
409 VENDOR QTY Defi ne number of vendors
HANDLER Enter the number of vendors who
work with the scale
Max. 8 vendors
411 TARE/P CLEAR Delete tare
CLEAR AUTO Tare and price are automatically
cleared when there is no weight on
the scale
Factory setting
CLEAR MANUAL Tare and price must be manually
cleared
FIX T W/O P Fixed tare, price will be automatically
cleared after the entry is registered
MET TLER TOLEDO bTwin Operator ManualsOrder number 72179502
Page 62

Setup
62
05/08
No. DISPLAY Description Notes
412 SLEEP MODE Enable the sleep mode when there is no change in weight
NO SLEEP Do not enable the sleep function Factory setting
3M LATER Enable the sleep function after three
minutes
If there is no change in weight for
3 minutes, then the date and time
appear in the display.
413 LIGHT TYPE Turn on the background lighting
LIT AS REQUI The background lighting turns on
when there is a change in weight or
a key is pressed
Factory setting
ALWAYS Background lighting is always on
414 ST Allow refunds
ST YES Allow refunds Factory setting
REF NO Do not allow refunds
415 VOID Void
VOID YES Allow voiding Factory setting
VOID NO Do not allow voiding
416 QTY SOLD Quant ity of this item sold
Function not available in Europe
430 ROUND CONFIG Confi gure rounding To print rounded prices, PRN
ROUND must be enabled in setup
point 231.
SUM ROUND Rounding of the total price when totalling
NO ROUND No rounding Factory setting
ROUND TO 0/5 Round to 0.05
4 CUT 5 UP Round down numbers 1 to 4
Round up numbers 5 to 9
ROUND UP Round up the last decimal place
PRICE ROUND Rounding of the given PLU's unit price
NO ROUND No rounding Factory setting
ROUND TO 0/5 Round to 0.05
4 CUT 5 UP Round down numbers 1 to 4
Round up numbers 5 to 9
ROUND UP Round up the last decimal place
1/4 ROUND Round to 0.25
TOTAL ROUND Rounding of individual items
Settings as under PRICE ROUND
METTLER TOLEDO bTwin Operator Manual Order number 72179502
Page 63

63
05/08
No. DISPLAY Description Notes
431 CUT CONFIG Standard rebate on the total price
SUM CUT Rebate on the total sum
TOTAL CUT Rebate on individual items
NO CUT DEFAULT No standard rebate on the total
price
Factory setting
CUT TO X.XX Maintain two decimal places To do this, CUT AUTO must be
enabled in setup point 432.
CUT TO X.X0 Delete last decimal place
CUT TO X.00 Delete all decimal places
432 CUT EFFECT Grant rebate
CUT BY KEY By pressing the minus key Factory setting
To do this, KEY ENABLE must be
enabled in setup point 433.
CUT AUTO Automatic
433 CUT KEY Minus key
KEY ENABLE Minus key enabled Factory setting
KEY DISABLE Minus key disabled
434 CUT CHANGE Rebate by increasing customer change
CUT CHG NO No rebate correction
CUT CHG YES Rebate correction possible Rebates can be granted and
then corrected before the entry is
completed.
438 PRINT SPEED Set up the printing speed
SPEED FAST Fast printing speed Factory setting
SPEED FASTER Very fast printing speed
SPEED NORMAL Normal printing speed
439 CONTRAST Set up print contrast
CONTRAST 0–8 Set up the print contrast between
0 and 8
Factory setting: 4
440 FIRST DAY TYPE Defi ne the fi rst day of the week
MONDAY The fi rst day of the week is Monday Factory setting
SUNDAY The fi rst day of the week is Sunday
441 FILTER TYPE Set up the scale sensitivity
FILT NORMAL 1 Normal sensitivity Factory setting
FILT MIDDLE 2 Medium sensitivity The higher the sensitivity setting,
the more accurate, but slower the
scale is.
FILT HEAVY 3 High sensitivity
FILT VERY HEAVY 4 Highest sensitivity
FILT LIGHT 0 Low sensitivity
442 ECR CHECKOUT Enable cash drawer
ECR CKO NO Disable cash drawer Factory setting
ECR CKO YES Enable cash drawer
MET TLER TOLEDO bTwin Operator ManualsOrder number 72179502
Page 64

Setup
64
05/08
No. DISPLAY Description Notes
443 MULTI-PAY Allow different payment methods
CASH ONLY Only allow cash payments Factory setting
MULTI-PAY Allow different payment methods Payment by credit card, cheque or
voucher, refer to section 4.8
444 BASKET FUNC Basket function
NOT PERMIT/PERMIT
Enable basket function, yes or no Save and call up container
weight, refer to section 4.8
445 TM KEY Manual tare input for known tare using the P key
NOT PERMIT Disable manual tare input Factory setting
PERMIT Enable manual tare input Sequence: Press the P key. Enter
tare and again press the P key.
NET appears in the display.
446 TRAINING Enable/disable training mode
TRAINING OFF Switch off training mode Factory setting
TRAINING ON Switch on training mode
450 PLU CONFIG Confi gure PLU
NUMBER OF PLUS Defi ne the number of PLUs Max. 1000 PLUs
NUM OF LOGS The number of logs is displayed The more PLUs there are, the
fewer logs can be saved.
SAVE NO/YES Confi rmation prompt before saving
451 SAVE LOG Save log fi le
SAVE AUTO Save automatically Factory setting
When the maximum number of
logs has been reached, the oldest
entry will be overwritten.
SAVE MANUAL Save manually
NOT SAVE Do not save
METTLER TOLEDO bTwin Operator Manual Order number 72179502
Page 65

65
05/08
5.8 Setup group 5
This group can only be accessed by the service engineer.
Only exception: setup point 518 - language settings
No. DISPLAY Descript ion
518 SET LANGUAGE Set up language
DEFAULT English
ENGLISH English
CHINESE Chinese
FRENCH French
GERMAN German
SPANISH Spanish
ITALIAN Italian
HUNGARIAN Hungarian
POLISH Polish
CZECH Czech
CROATIAN Croatian
DUTCH Dutch
SLOVAK Slovak
SLOVENIAN Slovenian
GREEK Greek
DENMARK Danish
SWEDEN Swedish
NORWAY Norwegian
FINLAND Finnish
• Display text and printouts are available in German, English, French,
Spanish and Italian.
For all other languages, only the printouts are localised. Display text •
is shown in English.
Danish, Swedish, Norwegian and Finnish are in process.•
Languages will be updated regularly. •
MET TLER TOLEDO bTwin Operator ManualsOrder number 72179502
Page 66

Setup
66
05/08
5.9 Setup group 6
The scale assists you with evaluations. In this group you set up your
reports.
• Reports can be printed on the scale or transferred to a PC.
If a report is printed on the scale, another report can be selected •
afterwards or the printed report can be deleted.
No. DISPLAY Description Notes
601 RESTORE DEF Restore factory settings
DEFAULT YES/NO Restore the factory settings, yes or no
602 SALES REPORT Create sales report
TODAY Create a sales report for this day
DETAIL/SIMPLE
REPORT
Create detailed/simple report for
today's sales
PRINT /
NOT PRINT
Print the report, yes or no
ANOTHER YES/NO Create other reports, yes or no YES: go to 603
NO: go to DEL REPS
DEL REPS NO/YES Delete all reports created, yes or no
SURE NO/YES Confi rmation prompt before deletion
LAST VALID Sales for the time period since t he
last sales report
If available, the date of the last
report will be displayed.
Further settings as under TODAY
TOTAL Sales report covering all registered entries in the log fi le
Further settings as under TODAY
ALL Summary of all sales reports
(today + last valid + total)
Further settings as under TODAY
METTLER TOLEDO bTwin Operator Manual Order number 72179502
Page 67

67
05/08
No. DISPLAY Description Notes
603 PLU REPORT Create report for all PLUs
TODAY Report about PLUs used today
ALL PLUS Create report for all PLUs
FROM ... TO PLU
NO.
Create a report for a range of PLUs Enter the beginning and end
values.
SORT BY SUM/PLU Sort by amount/PLU number
PRINT /
NOT PRINT
Print the report, yes or no
ANOTHER YES/NO Create other reports, yes or no YES: go to 604
NO: go to DEL REPS
DEL REPS NO/YES Delete all reports created, yes or no
SURE NO/YES Confi rmation prompt before deletion
LAST VALID PLU report for the time period since
the last PLU report
If available, the date of the last
PLU report will be displayed.
Further settings as under TODAY
TOTAL PLU report covering all registered entries in the log fi le
Further settings as under TODAY
ALL Summary of all PLU reports
(today + last valid + total)
Further settings as under TODAY
604 PROMOTION
REPORT
Create discount report
Refer to 603
605 GROUPS RPT Create group report
TODAY Report covering all groups used today
ALL GROUPS Create report covering all groups
FROM ... TO GRP
NO.
Create a report for a range of groups Enter the beginning and end
values.
SORT BY SUM/GRP Sort by amount/number
SIMPLE/DETAIL
REPORT
Create simple/detail report for the
current groups
PRINT /
NOT PRINT
Print the report, yes or no
ANOTHER YES/NO Create other reports, yes or no YES: go to 607
NO: go to DEL REPS
DEL REPS NO/YES Delete all reports created, yes or no
SURE NO/YES Confi rmation prompt before deletion
LAST VALID Group report for the time period
since the last group report
If available, the date of the last
group report will be displayed.
Further settings as under TODAY
TOTAL Group report covering all registered entries in the log fi le
Further settings as under TODAY
MET TLER TOLEDO bTwin Operator ManualsOrder number 72179502
Page 68

Setup
68
05/08
No. DISPLAY Description Notes
605 ALL Summary of all group reports
(today + last valid + total)
Further settings as under TODAY
607 HOURLY RPT Create hourly report
TODAY Create report on the hourly sales today
PRINT /
NOT PRINT
Print the report, yes or no
ANOTHER YES/NO Create other reports, yes or no YES: go to 611
NO: go to DEL REPS
DEL REPS NO/YES Delete all reports created, yes or no
SURE NO/YES Confi rmation prompt before deletion
LAST VALID Hourly report since the last valid report
Further settings as under TODAY
TOTAL List of all registered hourly reports in the log fi le
Further settings as under TODAY
ALL Summary of all hourly reports
(today + last valid + total)
Further settings as under TODAY
610 ST/RETN RPT Create refund report
Refer to 605
611 VENDOR RPT Create vendor report
TODAY Report of the vendor's transactions today
ALL VENDORS Create report for all vendors
FROM ...
TO VENDOR NO.
Create a report for a range of vendors Enter the number of the fi rst and
last vendor.
BY SUM / BY VEN Sort by amount/vendor number
SIMPLE RPT /
DETAIL RPT
Create simple/detail report for the
vendors
PRINT /
NOT PRINT
Print the report, yes or no
ANOTHER YES/NO Create other reports, yes or no YES: go to 613
NO: go to DEL REPS
DEL REPS NO/YES Delete all reports created, yes or no
SURE NO/YES Confi rmation prompt before deletion
LAST VALID Vendor report for the time period
since the last vendor report
If available, the date of the last
vendor report will be displayed.
Further settings as under TODAY
TOTAL Overview of all registered vendor reports in the log fi le
Further settings as under TODAY
ALL Summary of all vendor reports
(today + last valid + total)
Further settings as under TODAY
METTLER TOLEDO bTwin Operator Manual Order number 72179502
Page 69

69
05/08
No. DISPLAY Description Notes
613 WEEKLY RPT Create weekly report
PRINT /
NOT PRINT
Print the report, yes or no
ANOTHER YES/NO Create other reports, yes or no YES: go to 616
NO: go to DEL REPS
DEL REPS NO/YES Delete all reports created, yes or no
SURE NO/YES Confi rmation prompt before deletion
616 COMBINE RPT Create combined report from report 602 to 614
602 YES/NO Include sales report, yes or no
603 YES/NO Include PLU report, yes or no
605 YES/NO Include group report, yes or no
607 YES/NO Include hourly report, yes or no
610 YES/NO Include refund report, yes or no
611 YES/NO Include vendor report, yes or no
613 YES/NO Include weekly report, yes or no
618 YES/NO Include basket report, yes or no
PRINT /
NOT PRINT
Print the report, yes or no
ANOTHER YES/NO Create other reports, yes or no YES: go to 617
NO: go to DEL REPS
DEL REPS NO/YES Delete all reports created, yes or no
SURE NO/YES Confi rmation prompt before deletion
617 LOG Create log
SALES LOG Create sales log
FROM ...
TO T NO.
Create log for a range of tickets Enter the beginning and end
values.
PRINT/NOT PRINT Print the report, yes or no
PROMOTE LOG Create log for automat ic discounts
Further settings as underSALES LOG
ST/VOID LOG Create log of refunds
Further settings as underSALES LOG.
618 BASKET RPT Report for t he basket funct ion
PRINT /
NOT PRINT
Print the report, yes or no
DELETE NO/YES Delete the report, yes or no
ANOTHER YES/NO Create other reports, yes or no YES: go to 616
NO: go to DEL REPS
DEL REPS NO/YES Delete all reports created, yes or no
SURE NO/YES Confi rmation prompt before deletion
MET TLER TOLEDO bTwin Operator ManualsOrder number 72179502
Page 70

Setup
70
05/08
No. DISPLAY Description Notes
622 VAT REPORT Create value added tax report
TODAY Create VAT report for this day
PRINT /
NOT PRINT
Print the report, yes or no
ANOTHER YES/NO Create other reports, yes or no YES: go to 623
NO: go to DEL REPS
DEL REPS NO/YES Delete all reports created, yes or no
SURE NO/YES Confi rmation prompt before deletion
LAST VALID VAT report for the t ime period since
the last VAT report
If available, the date of the last
VAT report will be displayed.
Further settings as under TODAY
TOTAL VAT report for all registered entries
Further settings as under TODAY
ALL Summary of all VAT reports
Further settings as under TODAY
623 DEL REPORT Automat ic delet ion of all reports except for weekly, mont hly and
annual reports
SURE NO/YES Confi rmation prompt
624 DEL ALL REPT Delete all reports
SURE NO/YES Confi rmation prompt before deletion
625 DEL AU/MA All reports automatically deleted each day at 0:00 a.m.
RPT DEL AUTO Automatically delete report
RPT DEL MANU Manually delete report
SURE NO/YES Confi rmation prompt
METTLER TOLEDO bTwin Operator Manual Order number 72179502
Page 71

71
05/08
5.10 Setup group 7
In this group, you enter the settings for communicating with a computer/scanner or for operating the scale in a scale network (integrated
operation function).
The integrated operation function can only be enabled with a network
license. Please contact your sales representative.
5.10.1 Connect t he scale to a computer.
The computer connection lets you download item data and formats from
the computer or upload them to the computer for further processing.
Please contact your sales representative.
5.10.2 Connecting a scanner
To quickly and accurately read in PLUs, you can use a scanner.
To connect a scanner to the scale, please contact your sales representative.
5.10.3 Integrated operation in a scale network
You have an extensive range of cold cuts and cheese and want to set
up more than one scale on the counter. A network of up to 10 scales
lets your vendors enter items on several scales and then complete the
transaction on one of the scales used. In this case, one of the scales
functions as the master, all the others are slaves. The item data and
settings are transferred from the master scale to the slave scales and
are therefore available to all scales.
The integrated operation function saves your vendors time and lets you
serve your customers faster.
MET TLER TOLEDO bTwin Operator ManualsOrder number 72179502
Page 72

Setup
72
05/08
• 2 scales can be connected directly with a commercially available
CAT5 cross cable via the Ethernet interface.
For a network of more than 2 scales, a hub must be used. •
HUB
Setting up a scale network
1. On scale 1, select setup point 702 and confirm with the asterisk
key.
Confirm "Host" with the asterisk key.2.
Enter IP address 192030007001 and confirm with the asterisk 3.
key.
Enter network mask 255255248000 and confirm with the asterisk 4.
key.
Call up setup point 703 and confirm with the asterisk key.5.
Use the tare key to select "FV Master" and confirm with the asterisk 6.
key.
Press the mode key twice to exit the setup mode.7.
Turn off the scale.8.
• Each scale in the network needs its own IP address.
All scales in the network need the same network mask.•
If scales in an existing network need to be connected to other com-•
puters, then the network mask and IP address must be coordinated
with the network. Ask your network administrator.
Required accessories
Configure scale 1
(master)
METTLER TOLEDO bTwin Operator Manual Order number 72179502
Page 73

73
05/08
1. On scale 2, select setup point 702 and confirm with the asterisk
key.
Confirm "Host" with the asterisk key.2.
Enter a different IP address as for scale 1, e.g. 192030007002, 3.
and confirm with the asterisk key.
Enter the same network mask 255255248000 and confirm with 4.
the asterisk key.
Press the mode key to go to setup point 703.5.
Call up setup point 703 and confirm with the asterisk key.6.
Use the tare key to select "FV Slave" and confirm with the asterisk 7.
key.
Press the mode key twice to exit the setup mode.8.
Turn off the scale.9.
For more slaves, repeat steps 1 to 9.10.
1. Connect the scales via the Ethernet interface with cross cables.
For more than 2 scales, use a hub.
Turn on the master. 2.
The following symbol appears on the display:
.
Turn on the slave(s). 3.
The following symbol appears on each display:
.
The data in the master is transferred to the slave(s).
Working with integrated operation
Vendor 5 sells meat on scale 1, cold cuts on scale 2 and cheese on
scale 3.
Enter the meat on scale 1 with V5.1.
Enter the cold cuts on scale 2 with V5.2.
Complete the transaction on any of the scales with V5 as described 3.
in working with several vendors.
• In a scale network, the master scale always has to be turned on
first, and then the slaves.
When working in the integrated operation network, not all setup •
functions are active.
If you have questions or problems, please contact your sales rep-•
resentative.
Configure scale 2 and
others (slaves)
Connect scales
Example
MET TLER TOLEDO bTwin Operator ManualsOrder number 72179502
Page 74

Setup
74
05/08
5.10.4 Overview of setup group 7
Factory settings are indicated in bold print.
No. DISPLAY Description Possible settings
701 RS-232 Confi gure COM 1 and COM 2
COM ... Select connection COM 1 or COM 2 COM 1: scanner connection for
reading in barcodes
COM 2: computer connection
BAUDRATE Set up baud rate 115200, 2400, 4800, 9600,
19200, 38400, 57600 Baud
BITS Set up data bits 7 Bit / 8 Bit
PARITY Set up parity check Even parity
Odd parity
No parity
STOP BITS Set up the number of stop bits 1 stop bit / 2 stop bits
CONTROL Set up handshake Hardware handshake, no hand-
shake
702 ETHERNET Enter network settings
HOST Confi gure host
HOST LOCAL Enter local IP address e.g. 192030007200
Each scale in the network needs
its own IP address.
HOST MASK Enter mask code Code-Nr.: 255255248000
All scales in the network need this
mask code.
IDLE (MS) Enter timeout 1 ... 99 ms, 10
HOST ROUTER IP Enter the IP address of the router
MAC ADDRESS Display the MAC address
703 WORK MODES Defi ne the operating mode of t he scale
STAND ALONE The scale operates alone
FV SLAVE The scale functions as a slave in the
network
FV MASTER The scale functions as the master in
the network
METTLER TOLEDO bTwin Operator Manual Order number 72179502
Page 75

75
05/08
5.11 Setup group 8
In this group, you can assign passwords and authorizations for accessing the scale.
• A 5-digit vendor password to access the scale can be set up in
setup point 801.
Factory setting: no vendor password •
• Setup access for the chief executive.
Access to all setup groups•
Password in the factory settings: 888888•
• Setup access for the manager.
Access to setup groups 1, 2, 4, 6 and 7 (factory settings)•
Password in the factory settings: 666666•
5.11.1 Working with vendor passwords
If a vendor password is assigned, vendors can only use the scale after
they have logged in with their password.
Vendor login
1. To login, press the vendor key for approx. 2 seconds.
2. Enter the vendor password using the number keys and confirm
with the asterisk.
Vendor X is logged in when the messages VENDOR LOG IN and VENDOR
TICKET appear in the bottom line of the display.
Vendor log off
1. To log off, press the vendor key for approx. 2 seconds.
2. Enter password using the number keys and confirm with the
asterisk.
Vendor X is logged off when the messages VENDOR LOG OFF appears
in the bottom line of the display.
Always log off when you are not using the scale.
12345
Mode
1 888888
Mode
2 666666
2 sec
V2
1 ... 9
2 sec
V2
1 ... 9
MET TLER TOLEDO bTwin Operator ManualsOrder number 72179502
Page 76

Setup
76
05/08
5.11.2 Overview of setup group 8
No. DISPLAY Description Notes
801 PW MANAGER Password administration
CHG PW MANAGER Change the manager's password Factory setting:
mode 2 666666
MANAGER PW NEW Assign new password Max. 5 characters
AGAIN Repeat new password
CHG PW VENDOR Change vendor password
VEND 1….8 Enter the number of the vendor
whose password should be changed
Max. 8 vendors
VEND X PW NEW Assign new password for vendor X Max. 5 characters
AGAIN Repeat new password
Then, either process the next vendor or use the mode key to go to the
next setup point.
CHG PW BOSS Change the boss's password Factory setting:
mode 1 888888
BOSS PW NEW Assign new password Max. 5 characters
AGAIN Repeat new password
802 RIGHT LIMIT Assign access rights
MANAGER Setup groups that the manager can
edit
Enter more groups with the tare
key
Factory setting:
groups 1, 2, 4, 6, 7
VEND Setup groups that the vendor can edit Enter more groups with the tare
key
Factory setting: no access
Record your passwords in a safe location.
METTLER TOLEDO bTwin Operator Manual Order number 72179502
Page 77

77
05/08
5.12 Setup group 10
This group can only be accessed with a network license.
5.12.1 Label printing
• You can use your scale to print labels:
in the sales mode or –
in the prepack mode –
The scale has predefined label formats. Up to 10 additional label •
formats can be configured with a PC.
If you have questions, please contact your sales representative.•
Required settings
Define label information in groups 1 and 2•
Setup point 1026: select sales mode or prepack mode•
Setup point 1005: select ticket printing or label printing•
5.12.2 Overview of setup group 10
No. DISPLAY Description Notes
1003 PRODUCT DATE Enter t he product date for the
printout
e.g. manufacturing date, sell by
..., best before date.
Today's date is automatically
displayed.
CURRENT – Number of days that the date should
be moved forward
Max. 99 days
CURRENT +
Number of days that it should be
backdated
Max. 99 days
1004 EXTRA TEXT N Enter additional text Only for label printing
TEXT 1 ...50 Enter the number of the extra text Max. 50 extra text entries
Enter additional text Max. 183 characters
1005 PRN TYP Select print method
PRINT TICKET Print ticket Factory setting
PRINT LABEL Print label
LABEL ENDLESS Print endless label
1006* D L W FORMAT Select label format for weight PLU
D L W FORMAT Select label format Factory setting: 101
1007* D L Q FORMAT Select label format for quantity PLU
D L Q FORMAT Select label format Factory setting: 102
1008* D P W FORMAT Select label format for prepacking for weight PLU
D P W FORMAT Select label format Factory setting: 103
1009* D P Q FORMAT Select label format for prepacking for quantity PLU
D P Q FORMAT Select label format Factory setting: 104
MET TLER TOLEDO bTwin Operator ManualsOrder number 72179502
Page 78

Setup
78
05/08
No. DISPLAY Description Notes
1010* D L T FORMAT Select the format of t he total label
D L T FORMAT Select label format Factory setting: 105
* Notes on label
formats
Possible formats: 1 to 10 and 101 to 110
The formats 101 to 110 are preconfi gured and saved in the scale, refer
to the format overview in the appendix.
The formats 1 to 10 a free-form formats that can be downloaded from
the computer.
1011 ACT TO V1 Reaction to pressing the vendor key in t he label print ing mode
LABEL/NO TOT Print label without totalling Factory setting
LABEL/TOT Print label and total
NO LABEL/TOT Total, but do not print label
1016 SELF-SERVICE Confi gure self-service for the scale
VENDOR M Scale is operated by the vendor Factory setting
SELF-SERVICE Self-service scale operation
MANUAL Select manual self-service operation
of the scale
Various items can be weighed
by the customer. The customer
places the item on the scale and
presses the alphabetical key cor-
responding to that item.
AUTOMATIC Automatic self-service
PLU NUMBER Enter the PLU number that should be
weighed in the self-service mode
One and the same item can be
weighed by the customer, e.g.
salad buffet sales. The customer
only has to place the item on the
scale and the scale automatically
prints the ticket.
1017 GROUP H RPT Create a group report every hour
TODAY Report covering all groups used today
ALL GROUPS Create hourly report of all groups
FROM ...
TO GROUP NO.
Create a report for a range of groups Enter the beginning and end
values.
SORT SUM /
SORT GRP
Sort by amount or by group
PRINT /
NOT PRINT
Print the report, yes or no
ANOTHER YES /
ANOTHER NO
Create other reports / Don't create
other reports
YES: go to 1017
NO: go to DEL REPS
DEL REPS NO /
DEL REPS YES
Delete all reports created, yes or no
SURE NO/ SURE
YES
Confi rmation prompt before deleting
the report
METTLER TOLEDO bTwin Operator Manual Order number 72179502
Page 79

79
05/08
No. DISPLAY Description Notes
1017 LAST VALID Report for the time period since the last group report
Further settings as under TODAY
TOTAL Report covering all registered groups in the log fi le
Further settings as under TODAY
ALL Summary of all reports
(today + last valid + total)
Further settings as under TODAY
1020 CASHDRAW RPT Create cash drawer report
Refer to 1017
1021 MONTHLY RPT Create monthly report
Refer to 1017, TODAY
1022 YEARLY RPT Create yearly report
Refer to 1017, TODAY
1025 PLU REPORT Create PLU report
Other settings as under 1017
1026 MODE SWITCH Switch between t he sales mode and t he prepack mode
OPERATION Sales mode Factory setting
PP Prepack mode
MET TLER TOLEDO bTwin Operator ManualsOrder number 72179502
Page 80

What do you do if....?
80
05/08
6 What do you do if....?
In the case of an operating error, the error message will be displayed
for approx. 1second in the bottom line of the display. Error messages
can be cleared with the C key.
Error Cause Remedy
TOO SMALL Data entered too small
INPUT ERROR Incorrect input
SAVE ERROR Error during saving
0 TOO SMALL Zero value during calibration too small
0 TOO LARGE Zero value during calibration too large
WT TOO SMALL
Weight on scale too low•
Item was removed from the weigh-•
ing pan too quickly
During label printing or when total
weight < 20 e
Only remove the item f
from the weighing pan
after confirming the entry
with the vendor key.
WT TOO LARGE The weight on the scale during calibra-
tion is too heavy
WT TOO HEAVY The weight on the weighing pan
exceeds the maximum load by more
than 9 e
To enter large quantities, f
refer to section 3.3.
NOT STABLE The weight display is not stable when
the scale is turned on
CONF. ERROR Incorrect confi guration when the scale
is turned on
Please contact your f
dealer.
AMOUNT IS 0 When a label is printed or when total-
ling, the total price is 0
PLU NOT FOUND PLU not found when called up
Enter the PLU, refer to f
section 3.2.
NO THIS PLU This PLU is not stored
TARE TOO BIG Preset tare exceeds the maximum load
NOT LOG IN The vendor has not logged in
Vendor login, refer to f
section 4.6.
CHANGE PAPER The paper is empty Replace the ticket roll or f
label roll.
WRONG VENDOR The vendor does not exist Vendor login, refer to f
section 4.6.
NO DISCOUNT Discount not enabled Enable the discount key, f
refer to setup point 116.
DISC IMPOSS The input does not meet the discount
conditions
Change the discount f
conditions.
MET TLER TOLEDO bTwin Operator Manual Order number 72179502
Page 81

81
05/08
Error Cause Remedy
NO VOID There is no transaction to be voided
NO CUST MEM There is no customer record in the
database
MEMORY FULL Memory full
ERROR 203 Database checksum is incorrect
KEY NO FUNCTION The key is not valid for the transaction
Use a key that is valid for f
the transaction.
SET TO SLAVE There are two master scales in the
network
Change one of the mas- f
ter scales to a slave.
MULTI SERVER
NETWORK ERROR Network not working correctly
Please contact your f
administrator.
VENDOR BUSY Vendor number already in use Wait until the vendor f
number is free.
CMD UNAVAIL Command is disabled
METTLER TOLEDO bTwin Operator ManualOrder number 72179502
Page 82

Technical Data
82
05/08
7 Technical data and accessories
7.1 Technical data
Scale data
Maximum load 3 kg, 6 kg, 15 kg or 30 kg
Increments 1 g, 2 g, 5 g or 10 g
Display
Weight display 6 digits
Unit price display 6 digits
Total price 7 digits
Tare 4 digits
Ambient conditions
Operating temperature –10° C to +40° C
Storage temperature -25° C to +50° C
Electrical data
Mains connection 100–240 V AC
Battery (optional) 12 V / 5 Ah.
Interfaces
Cash drawer Cash drawer connection
2 x RS232 for PC or scanner
Ethernet (optional) to set up a scale network
Memory
No. of PLUs 9999
No. of groups 20
No. of tare weights 20
7.2 Accessories
The following optional accessories are available from your sales representative:
Printer paper•
Labels•
Spare battery•
Network cable/computer cable•
Hub•
METTLER TOLEDO bTwin Operator Manual Order number 72179502
Page 83

83
05/08
8 Appendix
8.1 Unicode Table
Code Type
00000
00001
00002
00003
00004
00005
00006
00007
00008
00009
00010
00011
00012
00013
00014
00015
00016
00017
00018
00019
00020
00021
00022
00023
00024
00025
00026
00027
00028
00029
00030 00031
00032
00033 !
00034 "
00035 #
00036 $
00037 %
00038 &
00039
Code Type
00040 (
00041 )
00042 *
00043 +
00044 ,
00045 00046 .
00047 /
00048 0
00049 1
00050 2
00051 3
00052 4
00053 5
00054 6
00055 7
00056 8
00057 9
00058 :
00059 ;
00060 <
00061 =
00062 >
00063 ?
00064 @
00065 A
00066 B
00067 C
00068 D
00069 E
00700 F
00710 G
00720 H
00730 I
00074 J
00075 K
00076 L
00077 M
00078 N
00079 O
Code Type
00080 P
00081 Q
00082 R
00083 S
00084 T
00085 U
00086 V
00087 W
00088 X
00089 Y
00090 Z
00091 [
00092 \
00093 ]
00094 ^
00095 _
00096 `
00097 a
00098 b
00099 c
00100 d
00101 e
00102 f
00103 g
00104 h
00105 i
00106 j
00107 k
00108 l
00109 m
00110 n
00111 o
00112 p
00113 q
00114 r
00115 s
00116 t
00117 u
00118 v
00119 w
Code Type
00120 x
00121 y
00122 z
00123 {
00124 |
00125 }
00126 ~
00127
00128
00129
00130 ,
00131 ƒ
00132 „
00133 …
00134 †
00135 ‡
00136 ~
00137 ‰
00138 ~
00139 <
00140 Œ
00141
00142
00143
00144
00145 ‘
00146 ’
00147 “
00148 ”
00149 ˚
00150 –
00151 —
00152 ¨
00153 ™
00154 ~
00155 >
00156 œ
00157
00158
00159 Ÿ
Code Type
00160
00161 ¡
00162 ¢
00163 £
00164 ¤
00165 ¥
00166 ~
00167 §
00168 ¨
00169 ©
00170 ª
00171 «
00172 ¬
00173
00174 ®
00175 ˉ
00176 ˚
00177 ±
00178 ~
00179 ~
00180 ˙
00181 μ
00182 ¶
00183 ˙
00184 ¸
00185 ~
00186 º
00187 »
00188 ~
00189 ~
00190 ¾
00191 ¿
00192 À
00193 Á
00194 Â
00195 Ã
00196 Ä
00197 Å
00198 Æ
00199 Ç
Code Type
00200 È
00201 É
00202 Ê
00203 Ë
00204 Ì
00205 Í
00206 Î
00207 Ï
00208 ~
00209 Ñ
00210 Ò
00211 Ó
00212 Ô
00213 Õ
00214 Ö
00215 ~
00216 Ø
00217 Ù
00218 Ú
00219 Û
00220 Ü
00221 ~
00222 ~
00223 ß
00224 à
00225 á
00226 â
00227 ã
00228 ä
00229 å
00230 æ
00231 ç
00232 è
00233 é
00234 ê
00235 ë
00236 ì
00237 í
00238 î
00239 ï
Code Type
00240 ~
00241 ñ
00242 ò
00243 ó
00244 ô
00245 õ
00246 ö
00247 ÷
00248 ø
00249 ù
00250 ú
00251 û
00252 ü
00253 ~
00254 ~
00255 ÿ
00256
Ā
00257
ā
00258
Ă
00259
ă
00260
Ą
00261
ą
00262
Ć
00263
ć
00264
Ĉ
00265
ĉ
00266
Ċ
00267
ċ
00268
Č
00269
č
00270
Ď
00271
ď
00272
Đ
00273
đ
00274
Ē
00275
ē
00276
Ĕ
00277
ĕ
00278
Ė
00279
ė
MET TLER TOLEDO bTwin Operator ManualOrder number 72179502
Page 84

Appendix
84
05/08
Code Type
00280
Ę
00281
ę
00282
Ě
00283
ě
00284
Ĝ
00285
ĝ
00286
Ğ
00287
ğ
00288
Ġ
00289
ġ
00290
Ģ
00291
ģ
00292
Ĥ
00293
ĥ
00294
Ħ
00295
ħ
00296
Ĩ
00297
ĩ
00298
Ī
00299
ī
00300
Ĭ
00301
ĭ
00302
Į
00303
į
00304
İ
00305
ı
00306
IJ
00307
ij
00308
Ĵ
00309
ĵ
00310
Ķ
00311
ķ
00312
ĸ
00313
Ĺ
00314
ĺ
00315
Ļ
00316
ļ
00317
Ľ
00318
ľ
00319
Ŀ
00320
ŀ
00321
Ł
00322
ł
00323
Ń
00324
ń
00325
Ņ
00326
ņ
00327
Ň
00328
ň
00329
ʼn
Code Type
00330
Ŋ
00331
ŋ
00332
Ō
00333
ō
00334
Ŏ
00335
ŏ
00336
Ő
00337
ő
00338
Œ
00339
œ
00340
Ŕ
00341
ŕ
00342
Ŗ
00343
ŗ
00344
Ř
00345
ř
00346
Ś
00347
ś
00348
Ŝ
00349
ŝ
00350
Ş
00351
ş
00352
Š
00353
š
00354
Ţ
00355
ţ
00356
Ť
00357
ť
00358
Ŧ
00359
ŧ
00360
Ũ
00361
ũ
00362
Ū
00363
ū
00364
Ŭ
00365
ŭ
00366
Ů
00367
ů
00368
Ű
00369
ű
00370
Ų
00371
ų
00372
Ŵ
00373
ŵ
00374
Ŷ
00375
ŷ
00376
Ÿ
00377
Ź
00378
ź
00379
Ż
Code Type
00380
ż
00381
Ž
00382
ž
00383
00384
00385
00386
00387
00388
00389
00390
00391
00392
00393
00394
00395
00396
00397
00398
00399
ә
00400
00401
00402
ƒ
00403
00404
00405
00406
00407
00408
00409
00410
00411
00412
00413
00414
00415
00416
Ơ
00417
ơ
00418
00419
00420
00421
00422
00423
00424
00425
00426
00427
00428
00429
Code Type
00430
00431
Ư
00432
ư
00433
00434
00435
00436
00437
00438
00439
Ȝ
00440
00441
00442
00443
00444
00445
00446
00447
00448
00449
00450
00451
00452
00453
00454
00455
00456
00457
00458
00459
00460
00461
Ă
00462
ă
00463
Ĭ
00464
ĭ
00465
Ŏ
00466
ŏ
00467
Ŭ
00468
ŭ
00469
Ǖ
00470
ǖ
00471
Ǘ
00472
ǘ
00473
Ǚ
00474
ǚ
00475
Ǜ
00476
ǜ
00477
00478
00479
Code Type
00480
00481
00482
00483
00484
Ǥ
00485
ǥ
00486
Ğ
00487
ğ
00488
Ǩ
00489
ǩ
00490
Ǫ
00491
ǫ
00492
00493
00494
Ǯ
00495
ǯ
00496
00497
DZ
00498
Dz
00499
dz
00500
00501
00502
00503
00504
00505
00506
Ǻ
00507
ǻ
00508
Ǽ
00509
ǽ
00510
Ǿ
00511
ǿ
00512
Ȁ
00513
ȁ
00514
Ȃ
00515
ȃ
00516
Ȅ
00517
ȅ
00518
Ȇ
00519
ȇ
00520
Ȉ
00521
ȉ
00522
Ȋ
00523
ȋ
00524
Ȍ
00525
ȍ
00526
Ȏ
00527
ȏ
00528
Ȑ
00529
ȑ
Code Type
00530
Ȓ
00531
ȓ
00532
Ȕ
00533
ȕ
00534
Ȗ
00535
ȗ
00536
Ș
00537
ș
00538
Ț
00539
ț
00540
Ȝ
00541
ȝ
00542
00543
00544
00545
00546
00547
00548
00549
00550
00551
00552
00553
00554
00555
00556
00557
00558
00559
00560
00561
00562
Ȳ
00563
ȳ
00564
00565
00566
00567
00568
00569
00570
00571
00572
00573
00574
00575
00576
00577
00578
00579
Code Type
00580
00581
00582
00583
00584
00585
00586
00587
00588
00589
00590
00591
METTLER TOLEDO bTwin Operator Manual Order number 72179502
Page 85

85
05/08
8.2 Label formats
#101: 40 x 50 mm #102: 40 x 50 mm #103: 35 x 50 mm
#104: 35 x 50 mm #105: 20 x 40 mm #106: 35 x 50 mm
#107: 30 x 40 mm #108: 30 x 40 mm #109: 30 x 40 mm
MET TLER TOLEDO bTwin Operator ManualOrder number 72179502
Page 86

Mettler-Toledo (ChangZhou) Measurement Technology Ltd.
Legal Metrology
EC-Declaration of Conformity
EC-Konformitätserklärung
EC-Déclaration de conformité
EC-Declaración de Conformidad
EC-Conformiteitsverklaring
EC-Dichiarazione di conformità
________________________________________________________________________________________________________
We, Wir, Nous, Nosotros, Wij ,Noi,
Mettler-Toledo (ChangZhou) Measurement Technology Ltd.
No.111, West TaiHu Road, XinBei District, ChangZhou, JiangSu, 213125, P.R.China
declare under our sole responsibility that the product,
erklären, in alleiniger Verantwortung, daß dieses Produkt,
déclarons sous notre seule responsabilité que le produit,
declaramos, bajo nuestra sola respon sabilidad, que el producto,
verklaren onder onze verantwoordelijkheid, dat het product,
dichiariamo sotto nostra unica responsabilitá, che il prodotto,
Model/Type: bTwin series scale (EC type certificate No.:T6761)
To which this declaration relates , is in conformity with the following standard(s) or other normative document(s),
auf das sich diese Erklärung bezieht, mitder/den folgenden Norm(en) oder Richtlinie(n) übereinstimmt.
Auquel se réfère cette déclaration est conforme à la (aux) norme(s) ou au(x) document(s) normatif(s).
Al que se refiere esta declaración es conforme a la(s) norma(s) u otro(s) documento(s) normativo(s).
Waarnaar deze verklaring verwijst, aan de volende norm(en) of richtlijn(en) beantwoordt.
A cui si riferisce questa dichiarazione è conforme alla/e sequente/i norma/e o documento/i normativo/i.
EC marking EC Directive: Applicable Standards:
2006/95/EC
Low Voltage Directive
2004/108/EC
EMC Directive
EN60950-1:2006
EN61326-1:2006 (Class B)
EN61000-3-2
EN61000-3-3
For non-automatic weighing instrument used in an Article 1,2.(a) application ,additional
metrological marking according to Annex IV of Council Directive 90/384/EEC must be
attached to the instrument
year
xxxx
90/384/EEC
Non-automatic Weighing
EN45501 1)
Instruments Directive
1) Applies only to certified non-automatic weighing instruments.
gilt nur für geeichte nicht selbsttätige Waagen
s'applique uniquement aux instruments de pesage à fonctionnement non automatique verifiées
applicable solamente a strumenti di pesatura a funzionamento non automatico omologate
Enkel van toepassing op gecertificeerde Niet Automatische Weegwerktuigen
aplicable solamente a instrumentos de pesaje aprobados de funcionamiento no automático verificadas
No.111, West TaiHu Road, XinBei District, ChangZhou, JiangSu, 213125, PRC, February 18, 2009, Mettler-Toledo (ChangZhou)
Measurement Technology Ltd.
Yang JiaWu
Important notice concerning verified instruments see overleaf!
Yang JiaWu
Quality Assurance Manager
Page 87

Mettler-Toledo (ChangZhou) Measurement Technology Ltd.
g
r
Legal Metrology
Important notice for verified weighing instruments
M M
M M
The first step of the verification has been carried out at the manufacturing plant. It comprises all tests according to EN 45501-8.2.2.
If national regulations in individual countries limit the period of validity of the certification, the operator of such a scale is himself
responsible for its timely re-certification.
Weighing Instruments verified at the place of manufacture bear the preceding mark on the packing
label and a green “M” sticker on the descriptive plate. They may be set to work immediately.
Weighing Instruments which are verified in two steps have no green “M” on the descriptive plate
and bear the preceding identification mark on the packing label. The second step of the verification
must be carried out by the approved Mettler-Toledo service or by the W&M authorities. Please
contact your Mettler-Toledo organization.
Wichtiger Vermerk für geeichte Waagen in EU-Ländern
Werksgeeichte Waagen tragen vorstehendes Kennzeichen auf dem Packetikett und einen grünen “M”-
M M
M M
Der erste Schritt der Eichung wurde im Herstellerwerk durchgeführt. Er umfasst alle Prüfungen gemäss EN45501-8.2.2.
Sofern gemäss den nationaten Verschriften in den einzelnen Staaten die Gültigkeitsdauer der Eichung beschränkt ist, ist der
Betreiber einer solchen Waage für die rechtzeitige Nacheichung Selbst verantwortlich.
Kleber auf dem Eichschild. Sie dürfen sofort in Betrieb genommen werden.
Waagen, die in zwel Schritten geeicht werden und kein grünes “M” auf dem Eichschild haben, tragen
vorstehendes Kennzeichen auf dem Packetikett. Der zweite Schritt der Eichung ist durch den
behördlich anerkannten Mettler-Toledo Service oder durch den Eichbeamten durchzuführen. Bitte
nehmen Sie mit dem Mettler-Toledo Kundendienst Kontakt auf.
Remarque Importante pour les Instruments de pesage vérifiées dans les pays membre de ľUnion Européenne
Les instruments de pesage vérifiés en usine portent ľidentification ci-contre sur leur emballage et un
M M
M M
La première étape de la vérification a été effectuée en usine. Cela comprend tous les essais suivant la norme EN45501-8.2.2.
Dans la mesure aù la durée de la vérification est limitée en fonction des prescriptions nationales dans les différents pays, I’ utilisateur
ďune telle balance est lui-même responsable de la vérification ultérieure dans les délais.
autocollant “M“ vert sur la plaque d’identification. Ils peuvent être utilisés après leur installation.
Les instruments de pesage vérifiés en deux étapes portent ľidentification ci-contre sur leur emballage
et n’ant pas d’autocollant “M“ vert sur la plaque d’identification. La seconde étape de la vérification doit
être effectuée par la service technique Mettler-Toledo autorisé responsables. Veuillez s.v.p. contacter
le service technique Mettler-Toledo.
Nota importante para básculas verificadas en paises de la UE
Las balanzas verificadas en origen llevan esta indicación en la etiqueta del embalaje y con la etiqueta
M M
M M
La primera fase de la verificación ha sido realizada en origen. Incluye todos los ensayos según lo norma EN45501-8.2.2.
Si el plazo de validez de la verificación está limitado por las normas nacionales de cada estado, el usuario será responsable de las
verificaciones posteriores reglamentarias de su balanza.
“M“ sobre londo verde en la placa de caracteristicas pueden ser utilizadas inmediatamente.
Balanzas cuya verificación se realiza en dos fases llevan esta indicación en la etiqueta del embalaje
(ninguna etiqueta “M“ verde en la placa de caracteristicas). La segunda fase de la verificación debe ser
realizada por personal Mettler-Toledo acreditado, o por la autoridad competente. Rogamos contacten
con el Servicio Técnico de Mettler-Toledo.
Nota Importante per la balance approvate nei paesi UE
M M
M M
La prima fase della verifica è stata eseguila dal produttore e comprende lutte le prove previste dalla norma EN 45501-8.2.2.
Se la durota di validità della verifica è limitata in accordo con le prescrizioni nazionali vigenti nei singoli paesi, I’utilizzatore stesso di
una bilancia di tale tipa sorà responsabile dell’esecuzione, entro le date di scadenza previsle, delle verifiche periodiche.
Le balance verificate in fabbrica portano questo contrassegno sull’etichetta dell’imballo e con il sigillo
“M” su stando verde sulla tar
Le balance che vengono verificate in due fasi, portano questo contrassegno sull’etichetta dell’imballo e
non portano il sigillo “M” sulla targhetta metrological. La seconda fase delia verifica dev’essere eseguita
dal servizio assistenza Mettler-Toledo autorizzato, oppure dalla autorità competente. Prego contaltare il
vostro servizio assistenza Mettle
hetta metrological possono essere messe in uso immediatamente.
-Toledo.
Page 88

Für eine gute Zukunft Ihres Produktes:
METTLER TOLEDO Service XXL sichert
Ihnen auf Jahre Qualität, Messgenauigkeit und Werterhaltung
dieses Produktes.
Informieren Sie sich über unser
attraktives Service-Angebot.
For more information
www.mt.com/service
Subject to technical changes
© 05/2008 Mettler-Toledo AG
Printed in Switzerland
Order number 72179502
Mettler-Toledo AG
Sales International
CH-8606 Greifensee
Switzerland
Tel. + 41 44 944 22 11
Fax + 41 44 944 30 60
 Loading...