

Mettler Toledo bMobile User Manual
bMobile
Retail Scale
User Guide


Table of Contents
1 Your new retail scale 3
1.1 Most important functions .................................................................................. 3
1.2 Safety instructions............................................................................................ 3
1.3 Further documents ........................................................................................... 3
1.4 Maintenance ................................................................................................... 3
1.5 Intended use ................................................................................................... 3
1.6 Conventions and symbols used in this user manual ............................................ 4
1.7 Device overview .............................................................................................. 5
1.7.1 Display............................................................................................ 5
1.7.2 Keyboard ......................................................................................... 6
1.7.3 Function keys ................................................................................... 6
1.7.4 Connections ..................................................................................... 8
1.8 Legal for trade ................................................................................................. 8
2 Setup and device settings 9
2.1 Contents ......................................................................................................... 9
2.2 Setting up the scale.......................................................................................... 9
2.2.1 Requirements for scale's location........................................................ 9
2.2.2 Levelling the scale............................................................................. 9
2.2.3 Mounting the tower (optional) ............................................................ 10
2.3 Inserting paper ................................................................................................ 11
2.3.1 Paper format .................................................................................... 11
2.3.2 Inserting the ticket roll........................................................................ 11
2.4 Inserting the battery.......................................................................................... 12
2.5 Connecting to mains power .............................................................................. 13
2.6 Turning on ...................................................................................................... 13
2.7 Turning off ...................................................................................................... 13
2.8 Restarting ....................................................................................................... 13
2.9 Cleaning......................................................................................................... 14
2.10 Disposal......................................................................................................... 14
3 Fast and easy operation 15
3.1 Log in / log out................................................................................................ 15
3.2 Free input ....................................................................................................... 15
3.3 Working with PLUs .......................................................................................... 16
3.3.1 Calling up a PLU............................................................................... 16
3.3.2 Calling up a PLU with preset keys ....................................................... 16
3.3.3 Using quantity PLUs and multiplication................................................ 17
3.3.4 Changing by-weight PLU into by-count PLU and vice versa.................... 17
3.4 Taring ............................................................................................................ 18
3.4.1 Taring a container............................................................................. 18
3.4.2 Manual tare...................................................................................... 18
3.4.3 Multiple preset tare............................................................................ 19
3.5 Zeroing........................................................................................................... 19
3.6 Large quantities............................................................................................... 20
3.7 Weighing with 100 g price unit ......................................................................... 20
3.8 Working with several scales (floating vendor)..................................................... 21
3.9 Subtotal ticket.................................................................................................. 21
3.10 Printing a copy of the ticket............................................................................... 22
3.11 Voiding........................................................................................................... 22
3.12 Refunding ....................................................................................................... 23
3.13 Suspending..................................................................................................... 23
3.14 Reopening a ticket ........................................................................................... 24
Table of Contents 1bMobile

3.15 Changing prices .............................................................................................. 25
3.15.1 Overwriting a price temporarily ........................................................... 25
3.15.2 Overwriting a price permanently.......................................................... 25
3.15.3 Using multiple prices for a PLU ........................................................... 26
3.16 Granting discounts........................................................................................... 26
3.16.1 Granting a discount on a single item ................................................... 26
3.16.2 Granting a discount on the total sum................................................... 27
3.16.3 Granting a pre-defined discount .......................................................... 27
3.17 Working with fast tender ................................................................................... 28
3.18 Payment......................................................................................................... 28
3.18.1 Working with return ........................................................................... 28
3.18.2 Working without return....................................................................... 29
3.19 Cash in / cash out ........................................................................................... 29
3.20 Backup / restore data via USB device ................................................................. 29
3.20.1 Recommended USB devices ............................................................... 29
3.20.2 Backup data to a USB device / restoring data from a USB device ............ 30
4 Menu 31
4.1 Menu operation ............................................................................................... 31
4.1.1 Entering the menu............................................................................. 31
4.1.2 Key functions in the menu.................................................................. 31
4.1.3 Navigating in the menu...................................................................... 31
4.1.4 Ending the menu............................................................................... 32
4.1.5 Text input......................................................................................... 32
4.2 Menu description ............................................................................................. 33
4.2.1 Overview.......................................................................................... 33
4.2.2 Data menu....................................................................................... 35
4.2.3 Configuration menu........................................................................... 39
4.2.4 Reports menu................................................................................... 47
4.2.5 Advanced menu................................................................................ 48
4.3 Configuration tips ............................................................................................ 51
4.3.1 Tips for setting up and configuring PLUs .............................................. 51
4.3.2 Example for creating a PLU ................................................................ 52
4.3.3 Setting up a barcode ......................................................................... 53
4.3.4 Setting up the keyboard ..................................................................... 55
4.3.5 Setting up a floating vendor scale network with data synchronization ...... 56
4.3.6 Reports............................................................................................ 58
4.3.6.1 Setting up basic reports ................................................................ 58
4.3.6.2 Setting up combination reports ...................................................... 59
5 What to do, if ...? 60
6 Technical data and accessories 63
6.1 Technical data................................................................................................. 63
6.2 Compliance .................................................................................................... 63
6.3 Options/Accessories......................................................................................... 63
Table of Contents2 bMobile
1 Your new retail scale
1.1 Most important functions
Congratulations on your new scale. This robust scale with its battery operation, connectable cash
drawer and integrated ticket printer facilitates comfortable, mobile selling while maintaining the
highest accuracy.
Your new scale not only stands out due to its mobility, but also due to its network-capability and fast
data transfer to and from a computer. This lets you, for example, operate integrated scales which are
connected to quickly and easily create sales reports.
1.2 Safety instructions
Basic safety instructions
• Read these operating instructions prior to using your scale.
• Follow these operating instructions carefully.
• Store these operating instructions near the scale for future reference.
• Do not allow untrained personnel to operate or to clean the scale.
• Do not open the scale.
• Always unplug the scale before cleaning and maintenance.
Safety instructions for battery operation
• The battery must not come into contact with chemical solvents, oil or water.
• Keep batteries away from heat and fire.
• Do not open the battery.
CAUTION
Risk of explosion if the battery is replaced by an incorrect type
− Dispose of used batteries according to the instructions.
1.3 Further documents
For further documents regarding your new retail scale (e.g., Manuals, Data Sheet) please refer to the
following website:
http://www.mt.com/retail-manuals
1.4 Maintenance
• Only authorized personnel is allowed to open and repair the scale. Please contact your local
representative.
1.5 Intended use
• Use the scale only for weighing in accordance with this manual.
• Use the scale in dry locations only.
• Any other type of use and operation beyond the limits of the technical specifications is considered
as not intended.
Misuse
• Do not use the scale in industrial and harsh environment.
Your new retail scale 3bMobile
1.6 Conventions and symbols used in this user manual
Symbol Description
Safety sign that warns the user of situations resulting in death, serious injury or
material damage, in case of non-compliance with the indicated safety advices.
General information that makes working with the device easier.
Configuration requirements and tips.
Precondition for an action.
Individual action that must be carried out.
Action sequence that must be carried out in the order stated.
Result of an action or an action sequence.
Cross-reference (example: reference to page 18)
System is
restarting
Message on the scale's display
[Save Price] key Preset key on the scale's keyboard [Keyboard}Page6]
"Void" • Menu or sub-menu name
• Setting in a menu/sub-menu
Your new retail scale4 bMobile
1.7 Device overview
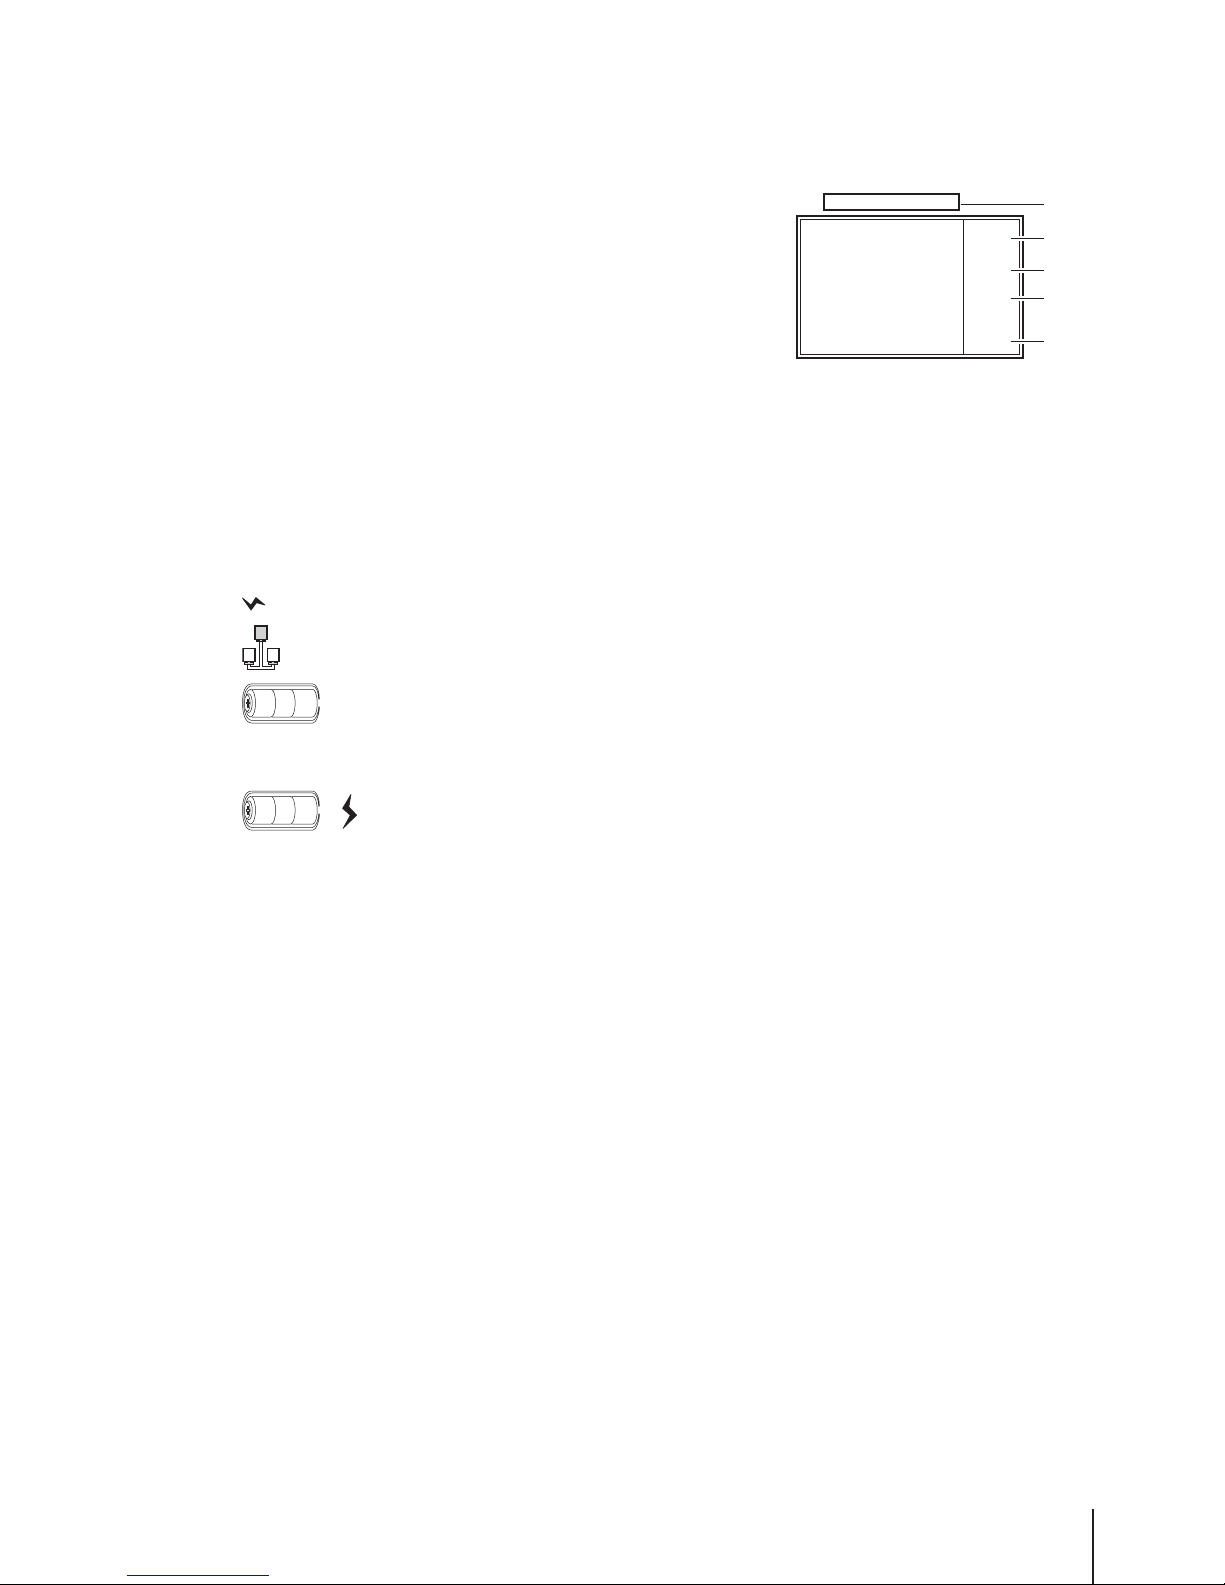
1.7.1 Display
The display is laid out as follows, seen both from the customer and the vendor point of view:
1
Metrological information
Max 6/15kg Min 40g e=2/5g
kg
$/kg
$
$
2
1
3
4
5
2
Weight display
3
Unit price
4
Price
5
Field for instructions or status messages
In addition to the weight and price, the following status messages and indicators can be displayed:
–>0<–
Gross weight is zero
NET
Net weight
X
Quantity mode
PLU
PLU number is displayed
ST
Refund mode
LS
Large sale mode
Connected to mains power supply
Network/communication status
Illuminated: the scale is in battery-powered operation, the number of illuminated segments
is indicating the charging status
Flashing: battery too low
Charge or replace battery.
Flashing and power supply operation symbol illuminated: battery is charging
Your new retail scale 5bMobile
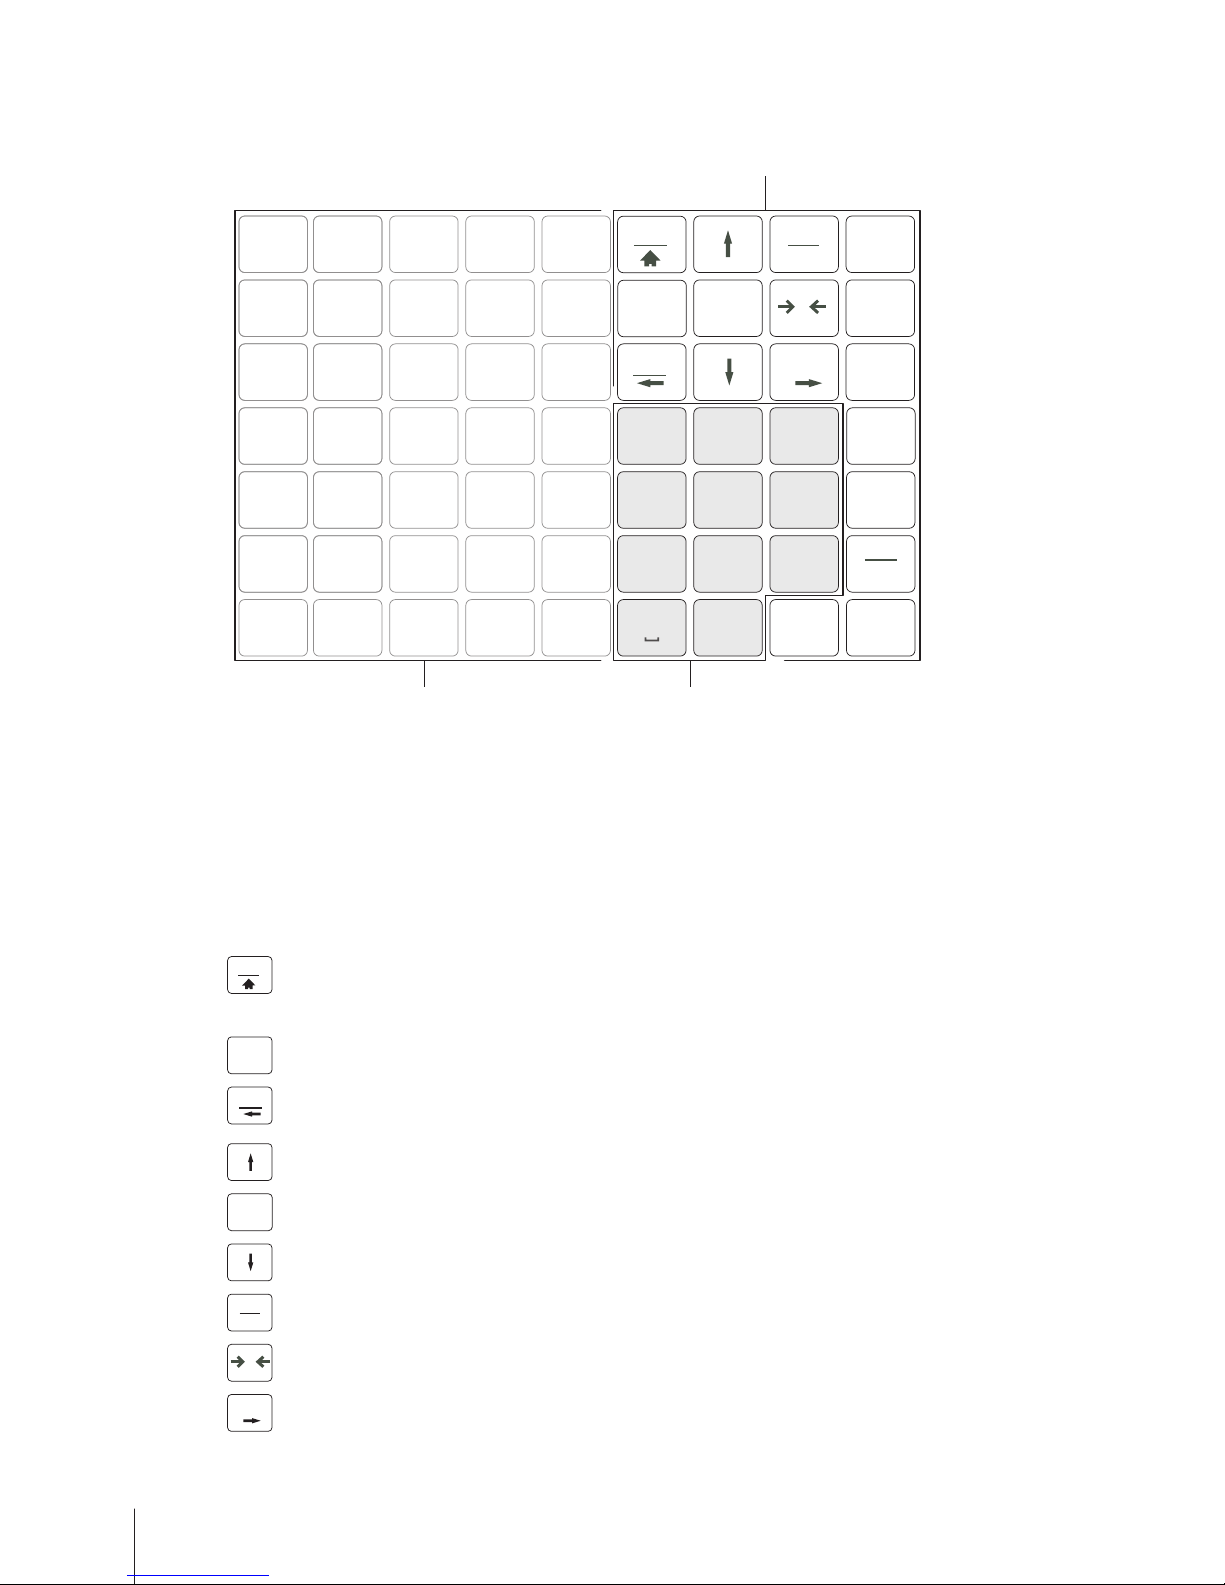
1.7.2 Keyboard
The keyboard is divided into three sections:
7
!?
8
ABC
9
DEF
5
JKL
4
GHI
6
MNO
2
TUV
1
PQRS
3
WXYZ
0
_
00
#
C
1
2
3
Menu
Login
Logout
Fn
Disc
TOK
Back
-
Void
X
PLU
*
Pay
V
Zero
1
Number keys
3
Preset keys
2
Function keys
In addition to their main function, some function keys have one or more auxiliary functions.
1.7.3 Function keys
Key Name Function
Menu
Menu key • Enter the menu
• Press and hold or double click to quickly return to the
weighing mode
Back
Back key Go back to previous screen or clear booking and PLU calling
Zero
Zero key Zeroing
Left key Go to left item
Arrow up key Go to previous item
OK
OK key Confirm selection
Arrow down key Go to next item
Login
Logout
Login / Logout key Enter the vendor assignment menu
T
Tare key Tare the scale
Void
Void key Cancel the item
Right key Go to right item
Your new retail scale6 bMobile

Fn
Function key Map a function to this key
Disc
Discount key Enter the discount in percent or absolute value
_
Minus key Access negative price entry
X
Quantity key Enter quantity
PLU
PLU key Switch between entering the price by PLU number and directly
entering the unit price
*
Pay
Star key Subtotal items or close payment
V
Vendor key Confirm item entry, call up ticket or close payment
C
Clear key Clear all entries
Your new retail scale 7bMobile

1.7.4 Connections
The following connections are located at the bottom side of the scale:
1 2 3 4 5
1
RS-232/COM A, for a scanner or computer
4
LAN A, to set up a network of scales
2
RS-232/COM B, for a scanner or computer
5
USB 1, to connect a USB stick
3
Cash drawer connection
1.8 Legal for trade
When the scale is used in trade or a legally controlled application, it must be set up, verified and
sealed in accordance with local weights and measures regulations. It is the responsibility of the
purchaser to ensure that all pertinent legal requirements are met. As verification requirements vary by
jurisdiction, the purchaser should contact their local weights and measures office if they are not
familiar with the requirements.
For products sold in Europe, the verification process has been completed at the place of manufacture.
These products have been sealed and the type plate includes supplemental metrology markings. They
may be put into service immediately. If required by local W & M authorities, additional stickers will
already be applied on the device.
For products sold in other regions, the verification process must be performed at the place of use.
To prevent access to calibration and metrological settings, the scale must be sealed using a paper
seal or wire seal.
Your new retail scale8 bMobile

2 Setup and device settings
2.1 Contents
Check that the delivery is complete:
• Scale
• Stainless steel weighing pan
• Power cable
• Ticket roll
• Manual
2.2 Setting up the scale
2.2.1 Requirements for scale's location
The right location is critical to weighing accuracy.
Conditions for an ideal location:
• No shocks and vibrations
• No excessive temperature fluctuations
• No direct sunlight
• No strong drafts
− Select a stable, vibration-free and preferably horizontal location for
your scale.
2.2.2 Levelling the scale
Only a perfectly levelled scale delivers accurate weighing results. The
scale is equipped with a level indicator to make it easier to level the
scale.
− To level the scale, turn the scale's adjustable feet until the air
bubble in the level indicator is positioned in the inner circle.
Setup and device settings 9bMobile

2.2.3 Mounting the tower (optional)
The tower is available as an option to mount the customer display at eye level.
1
2
3
1 Remove the 4 screws (1) on the bottom of the scale to remove the cover plate.
2 Disconnect the cables and pull the cable out of the scale.
3 Remove the 4 screws (2) from the black pad and take off the black pad.
4 Take off the display.
5 Pull the display cable out and connect it to the display.
6 Set the display on top of the tower and fix the two halves of the tower with 2 screws (3).
7 Mount the tower on the tower base.
8 Mount the black pad with 4 screws (2).
9 Mount the cover plate with the 3 screws (1).
Setup and device settings10 bMobile
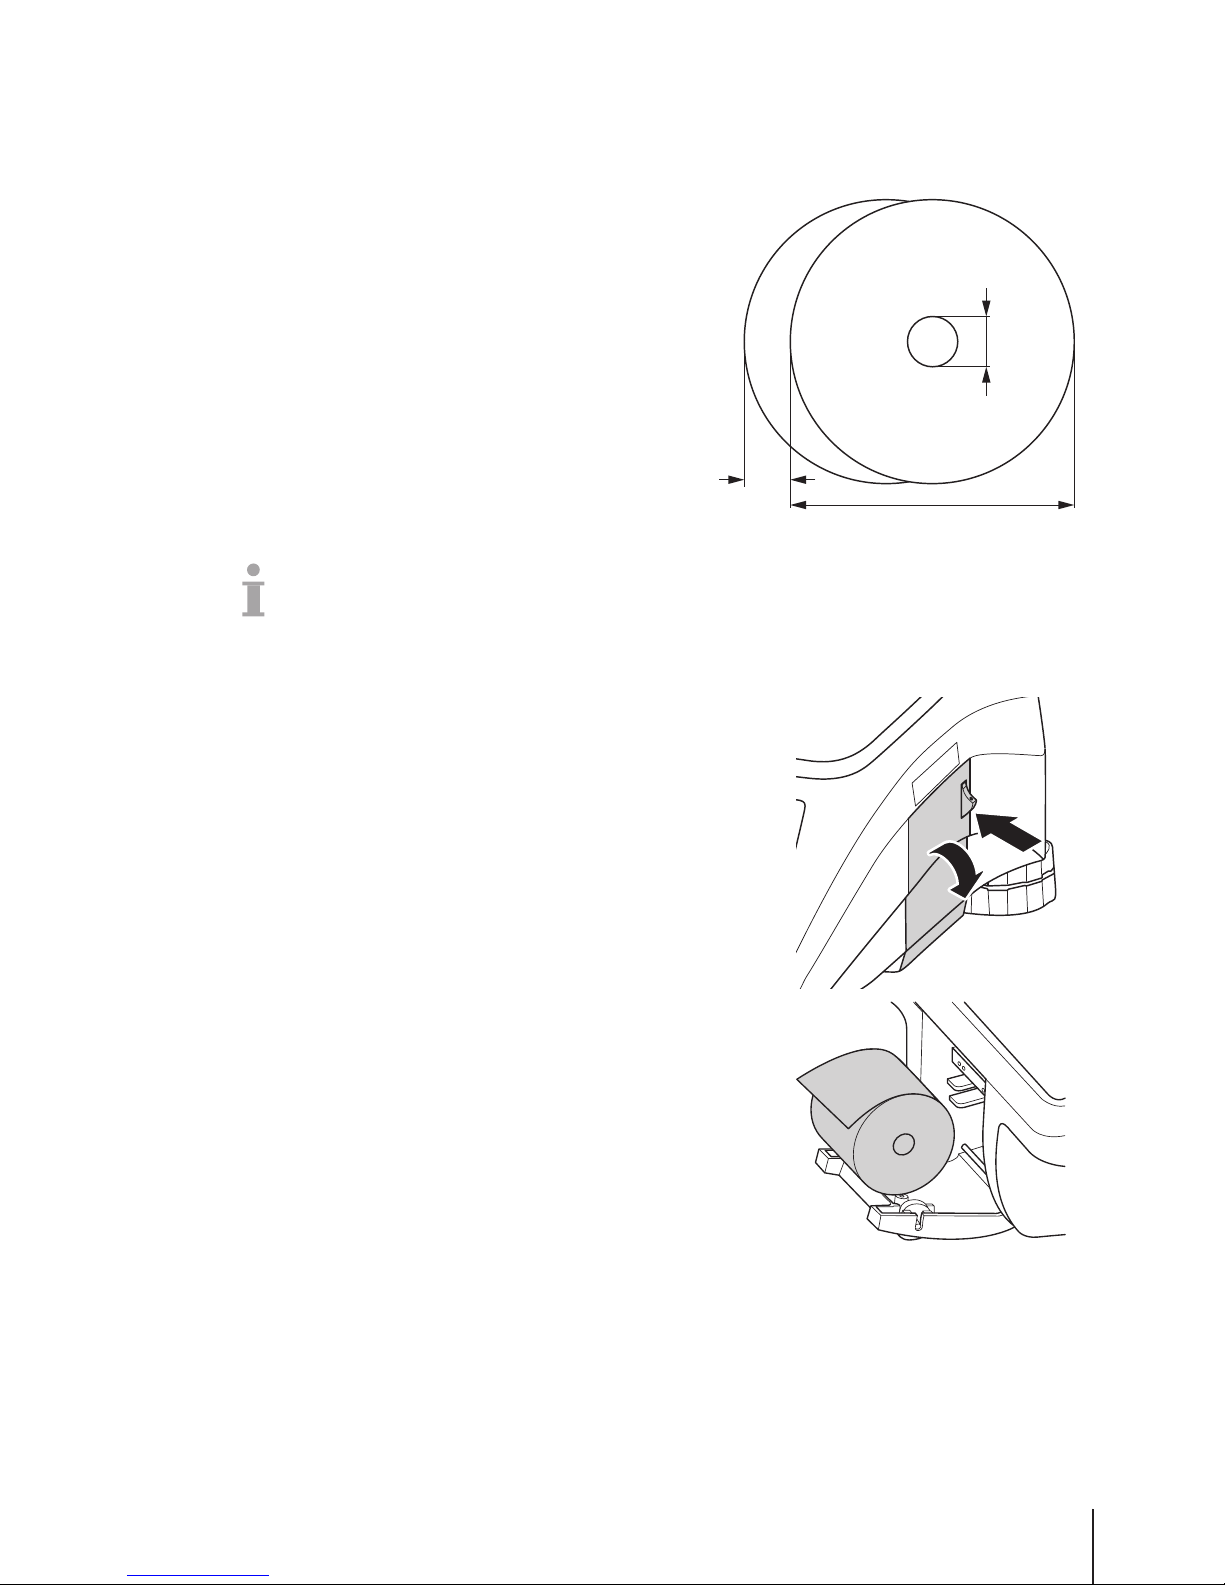
2.3 Inserting paper
2.3.1 Paper format
Ticket rolls must have the following dimensions:
A
max. 57 mm
A
B
C
B
max. 68 mm
C
10.5 - 14 mm
• The paper used must not be thicker than 0.12 mm.
• The paper weight should not be less than 48 g/m
2
, the paper weight recommended is 55 g/m2.
• Do not slam the printer door as this will damage the printer.
2.3.2 Inserting the ticket roll
− To open the printer door press the button on the printer door.
1 Put the ticket roll into the paper compartment.
2 Pull the paper to the outside.
3 Close the printer door and tear off the excess paper.
Setup and device settings 11bMobile
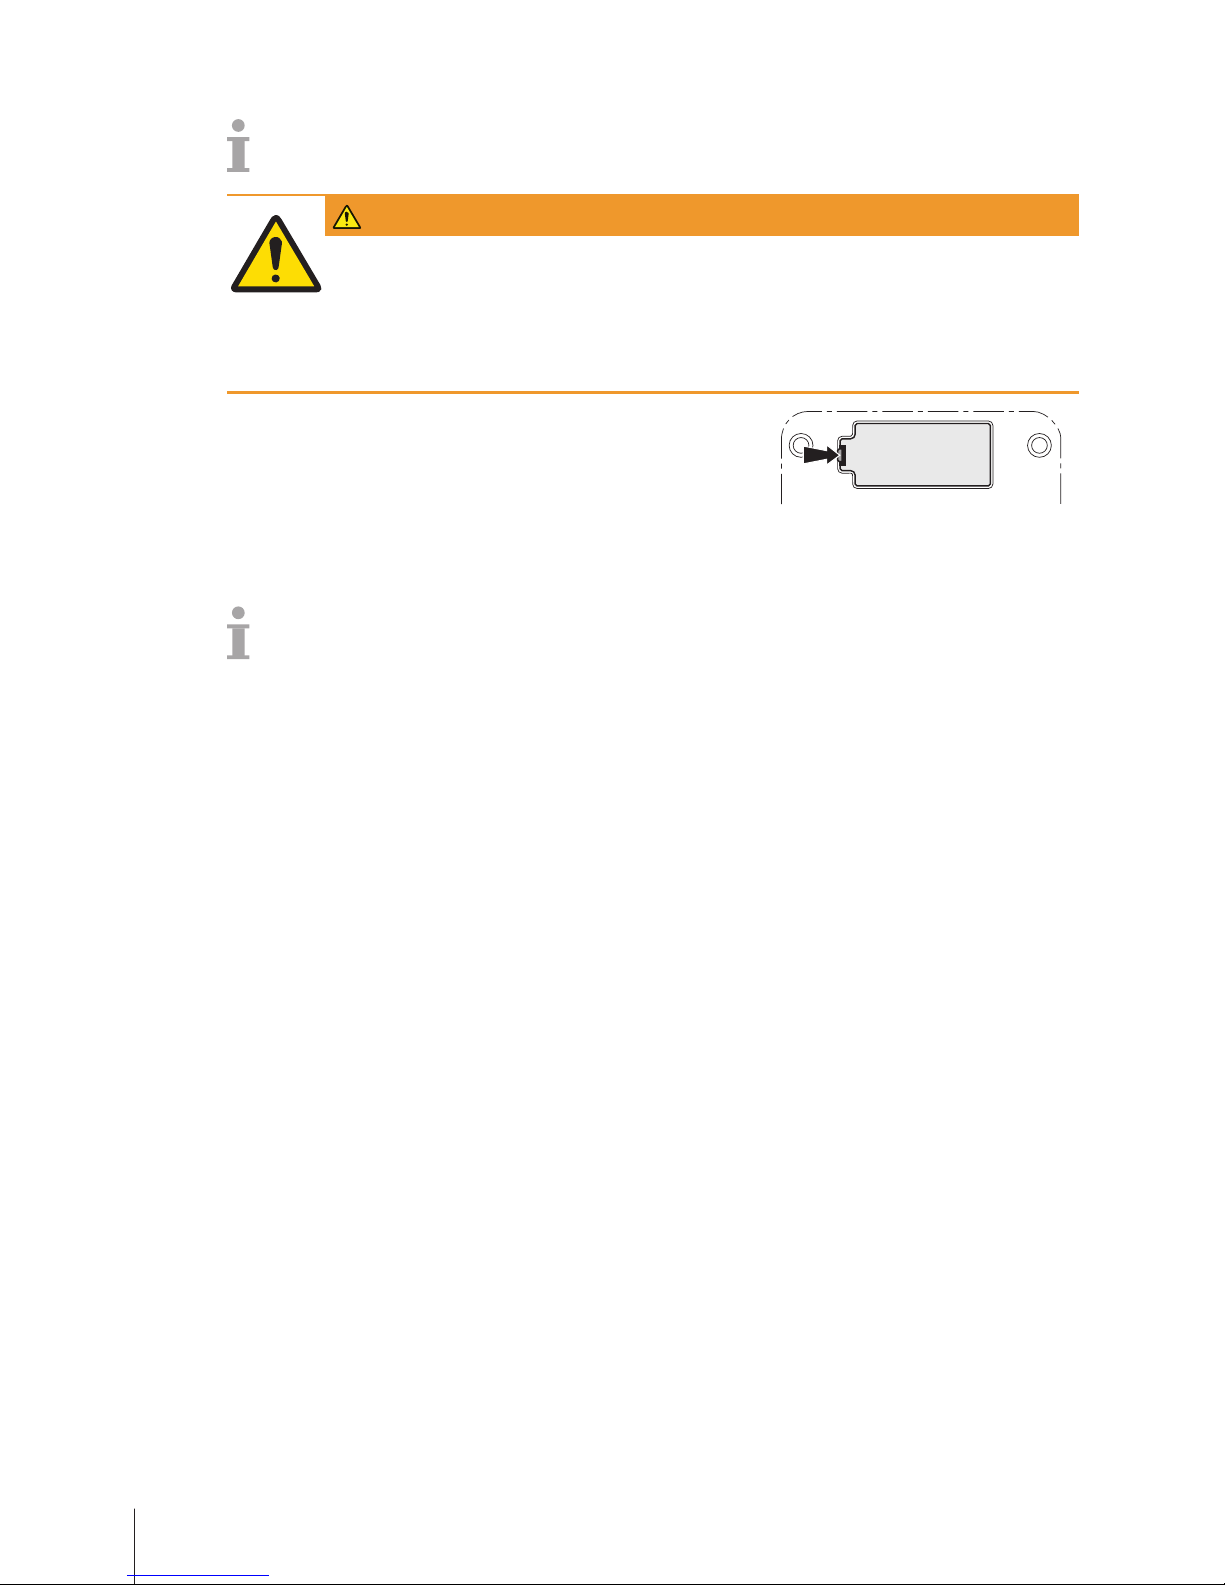
2.4 Inserting the battery
The scale can be battery-operated.
WARNING
Damage to the battery
The battery can be damaged if it is installed incorrectly.
1 Pay attention to the correct battery polarity. The positive pole (+) and negative
pole(–) must not be short circuited.
2 Only use original manufacturer batteries.
1 Remove the weighing pan.
2 Remove the battery compartment cover.
3 Connect the battery to the connector in the battery compartment.
4 Place the battery in the battery compartment.
5 Close the battery compartment.
6 Put the weighing pan back on.
• The battery life is affected by charging and discharging conditions.
• If correctly used, the battery life can reach approx. 500 charging cycles.
• A fully charged battery lasts up to 20 hours. The battery capacity depends on the intensity of use
and decreases with age.
• The battery's operating time is reduced when the battery has not been used over a longer period of
time (two months).
• It is recommended that the battery is charged at least every 3 months.
• If the battery was not used over a longer period of time, charge the battery at least three times and
use it until it is completely discharged.
• The charging time decreases if the battery is not fully discharged.
• Battery specification: Lead acid battery, 12 V / 5.5 Ah.
Setup and device settings12 bMobile

2.5 Connecting to mains power
DANGER
Electrical shock hazard
1 Only connect the device to a properly grounded outlet.
2 Only use the power cord supplied with the device.
3 Use power outlets which are easily accessible and located no further than the
length of the power cord.
4 Do not remove the ground plug.
1 Connect the supplied power cable to the power connection socket
at the bottom of the scale.
2 Plug the power plug into a correctly grounded power outlet.
2.6 Turning on
− Turn the scale on using the switch at the right bottom of the scale.
ð The GEO value and the software version are displayed.
ð The scale is ready when the weight display appears.
The display may turn off automatically after 10 minutes if this is configured in the energy saving
settings.
2.7 Turning off
− Turn the scale off using the switch at the right bottom of the scale.
After 5 minutes an automatic backup is initiated. Restarting the scale during this process may take
more time than usually.
2.8 Restarting
− Press the switch at the right bottom of the scale until the message System is restarting
appears.
Setup and device settings 13bMobile
2.9 Cleaning
CAUTION
Damage to the device
1 Turn off and unplug the device before cleaning.
2 Do not open the device.
3 Make sure that no fluids get inside the device.
4 Do not use scouring powders or plastic dissolving cleaning agents for cleaning.
1 Remove the weighing pan and clean it with a commercially available household detergent.
2 If heavily soiled, clean the surface of the device with a damp cloth that has been dipped in water
containing a mild washing-up liquid and has been wrung out well.
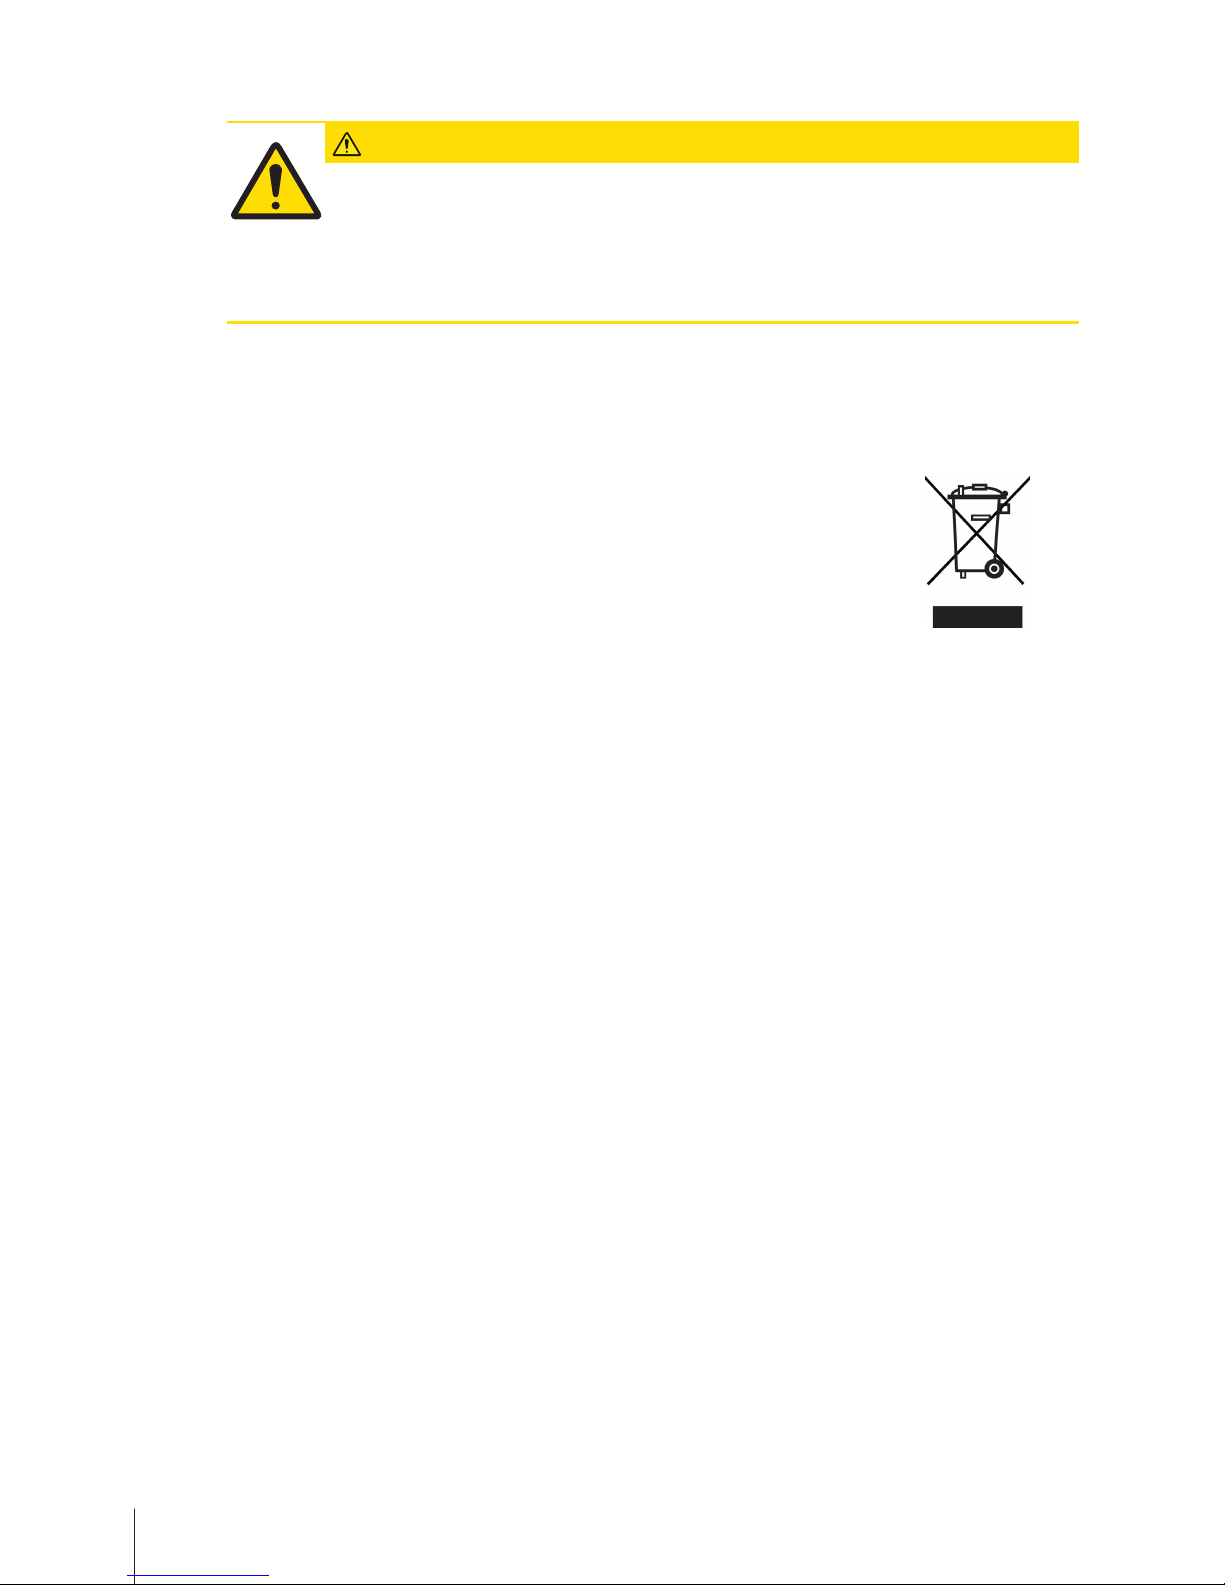
2.10 Disposal
In accordance with the requirements of European Directive 2002/96/EC on Waste
Electrical and Electronic Equipment (WEEE), this device may not be disposed of
with domestic refuse. This also applies for countries outside the EU in accordance
with their respective national regulations.
− Please dispose of this product in accordance with local regulations for the separate collection of
waste electrical and electronic equipment.
Should you have any questions, please contact the corresponding authorities or the dealer from
whom this device was purchased.
If this device is passed on (for example for further private or commercial/industrial use), this
regulation is also to be passed on.
Many thanks for your contribution to the protection of the environment.
Battery disposal
Batteries contain heavy metals and therefore cannot be disposed of in the normal refuse.
− Observe local regulations on the disposal of materials that are hazardous to the environment.
Setup and device settings14 bMobile

3 Fast and easy operation
The applications described in this chapter refer to working with one vendor.
3.1 Log in / log out
The scale allows to have different Vendor keys for different vendors. Each active vendor has to be
assigned to a particular Vendor key. Prior to using a vendor, the user needs to log in on the scale, in
order for the assignment to become active.
There are two ways to log in:
For vendors already assigned to a Vendor key
− Use the key for the first time.
For vendors not yet assigned to a Vendor key
− Press the Vx key for several seconds.
ð The scale logs in the related vendor or asks for the password when needed.
Alternative option via Login/ Logout menu
1 Press the [Login/ Logout] key.
ð The display shows the list of vendors with their status.
2 Use the arrow keys to navigate between the vendors.
3 Use the OK key to log in/ log out.
3.2 Free input
You can immediately use your scale for weighing and selling, without prior configuration. With the
factory settings, the scale can total several entries and calculate the customer change.
1 If Enter PLU number is displayed, press the PLU key.
ð Direct Price is displayed.
2 Place the item on the scale.
3 Enter the unit price (price/kg) using the number keys.
4 Confirm the entry with the Vendor key.
5 For more items, repeat steps 1 to 4.
6 Total items with the Star key.
7 Enter the customer payment.
8 Complete the transaction with the Vendor key or the Star key
(depends on payment closing key configuration).
ð The scale calculates the change and prints the ticket.
0 … 9
V
.../kg
…
*
Pay
0 … 9$
V
/
*
Pay
• When pressing the PLU key long, the default switches permanently from "Enter PLU number" to
"Direct price".
• If you do not want to use the customer change function, omit step 7. In this case, press the Vendor
key immediately after the Star key.
• Enter the price as usual without the decimal point, but with all the decimal places.
Fast and easy operation 15bMobile

3.3 Working with PLUs
3.3.1 Calling up a PLU
1 If Direct Price is displayed, press the PLU key.
ð Enter PLU number is displayed.
2 Place the item on the scale.
3 Enter the corresponding PLU number.
ð The unit price and item name appear in the display.
4 Confirm the entry with the Vendor key.
5 For more items, repeat steps 1 to 4.
6 Complete the transaction as described in section [Free
input}Page15].
0 … 9
V
PLU
• When pressing the PLU key long, the default switches permanently from "Direct price" to "Enter PLU
number".
• If you discover that you have entered the wrong PLU number before you have confirmed the entry
with the Vendor key, you can clear it with the Clear key and then enter the correct PLU.
3.3.2 Calling up a PLU with preset keys
• You can save the most important PLUs to the keys in the keyboard.
• There are two layers of preset keys.
Preset keys on the first layer
1 Place the item on the scale.
2 Press the relevant preset key, e.g., "Grape".
ð The unit price and item name appear in the display.
3 Confirm the entry with the Vendor key.
4 For more items, repeat steps 1 to 3.
5 Complete the transaction as described in section [Free
input}Page15].
V
Grape
Preset keys on the second layer
1 Place the item on the scale.
2 Press the relevant preset key twice.
ð The unit price and item name appear in the display.
3 Confirm the entry with the Vendor key.
4 For more items, repeat steps 1 to 3.
5 Complete the transaction as described in section [Free
input}Page15].
V
Grape
Grape
Fast and easy operation16 bMobile

3.3.3 Using quantity PLUs and multiplication
With the multiplication function, you can enter several items for a PLU.
1 If Direct Price is displayed, press the PLU key.
ð Enter PLU number is displayed.
2 Enter the PLU number of the item.
ð The unit price and the item name appear in the display.
3 Press the X key to call up the multiplication function.
4 Enter the number of items.
5 Confirm the entry with the Vendor key.
ð The multiplication function ends.
6 For more items, repeat steps 2 to 5.
7 Complete the transaction as described in section [Free
input}Page15].
0 … 9
0 … 9
V
X
PLU
#
3.3.4 Changing by-weight PLU into by-count PLU and vice versa
For changing a by-weight PLU into a by-count PLU or vice versa, a key must be defined as [ByWeight
to ByCount] in sub-menu F232.
Changing by-weight PLU into by-count PLU
1 Place the item on the scale.
2 Call up the PLU.
ð The first unit price and item name appear in the display.
3 Press the [Weight by count] key.
ð The PLU with unit price and item name is displayed as by-
count item.
4 Confirm the change with the Vendor key.
5 For more items, repeat steps 1 to 4.
6 Complete the transaction as described in section [Free
input}Page15].
V
3.95 /kg
3.95 /pcs
Weight
by
count
PLU
Changing by-count PLU into by-weight PLU
Changing a by-count PLU into a by-weight PLU works the same way.
Fast and easy operation 17bMobile
3.4 Taring
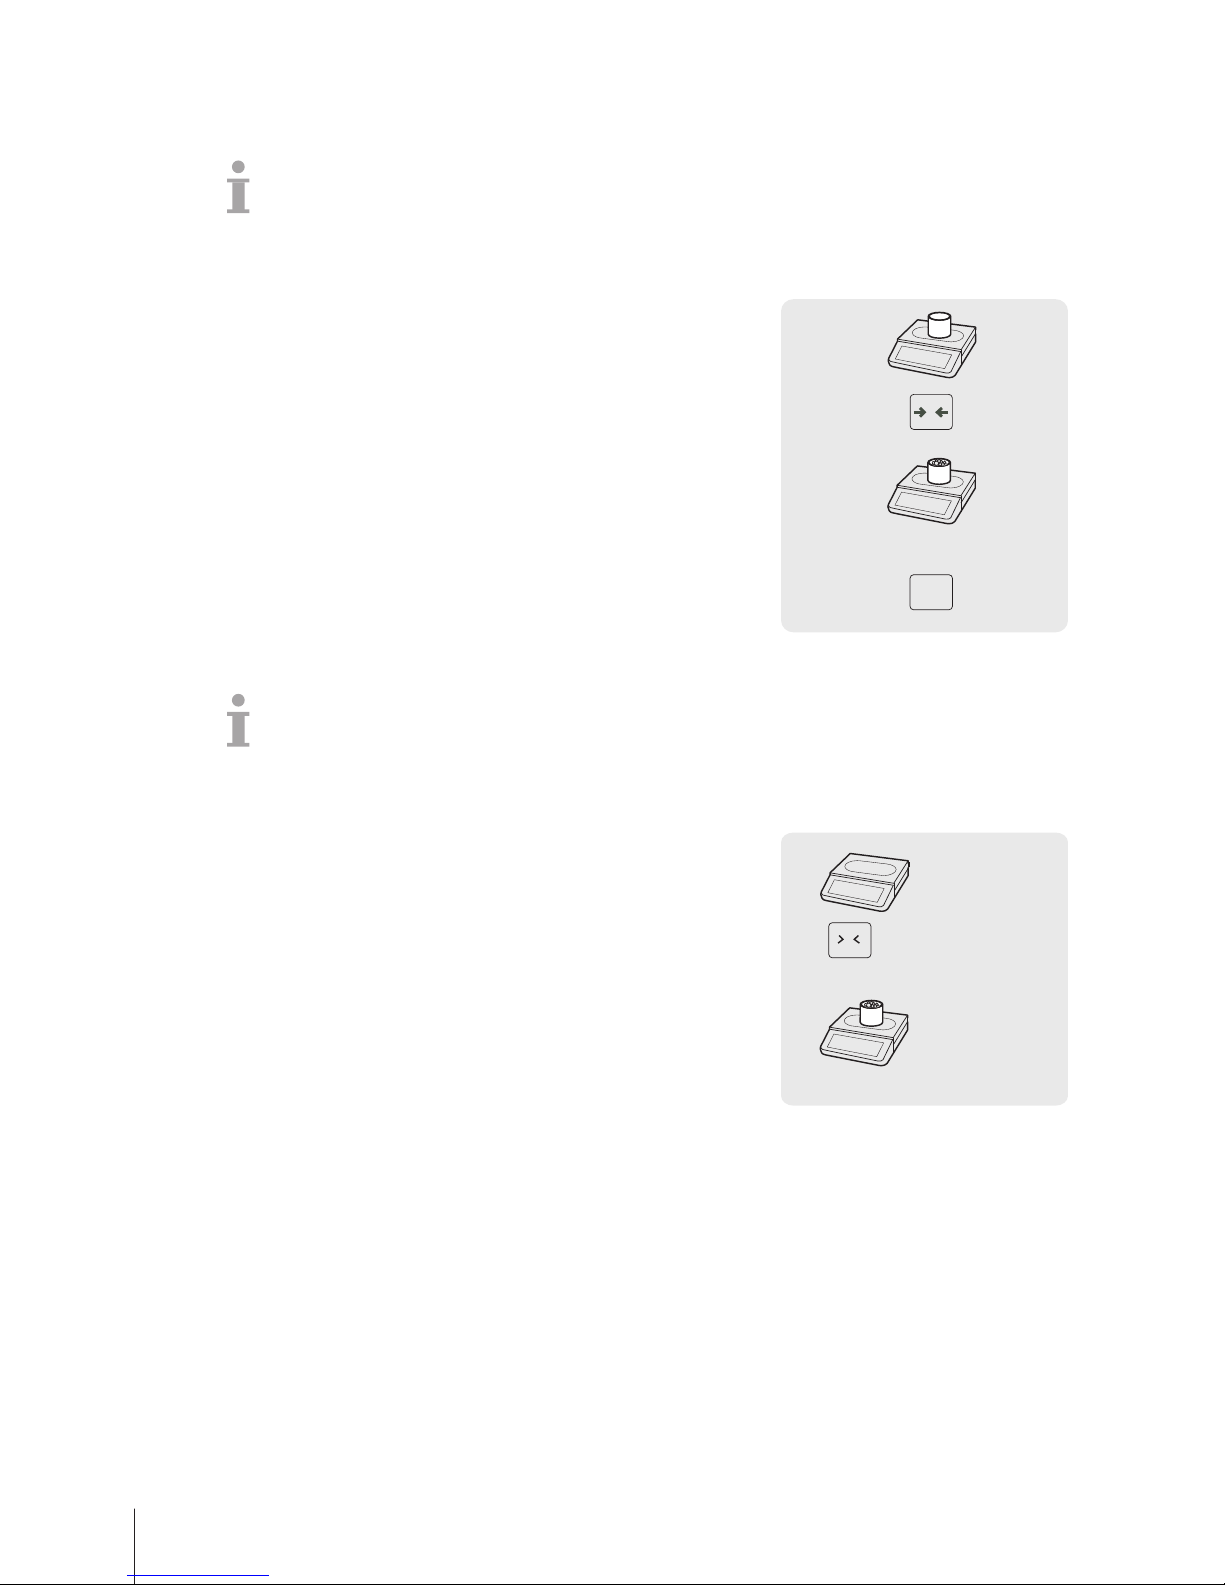
3.4.1 Taring a container
This function depends on the metrological limitation of the scale.
If you fill containers with your products or customers bring their own container, the tare function
makes sure that only the contents are weighed and paid.
1 Place the empty container on the scale.
2 Press the Tare key.
ð The scale is tared.
ð The weight display is reset to 0.000 kg and the NET symbol
appears.
3 Fill the container with the goods to be weighed.
4 Call up the PLU by PLU number or directly enter the unit price.
5 Confirm the entry with the Vendor key.
6 Complete the transaction as described in section [Free
input}Page15].
V
0 … 9
PLU
T
3.4.2 Manual tare
This function depends on the metrological limitation of the scale.
If you know the weight of the container you can enter the tare weight via keyboard and weigh the full
container.
§ The scale is empty and the weight display is 0.
1 Press the Tare key.
2 Enter the tare weight via keyboard.
ð The scale is tared.
ð The weight display shows the negative tare weight.
3 Place the full container on the scale.
ð The net weight and the tare weight are displayed.
4 Call up the PLU by PLU number or directly enter the unit price.
5 Confirm the entry with the Vendor key.
6 Complete the transaction as described in section [Free
input}Page15].
0 … 9
0.000 kg
-0.345 kg
PT 0.345 kg
1.375 kg
PT 0.345 kg
…
T
Fast and easy operation18 bMobile
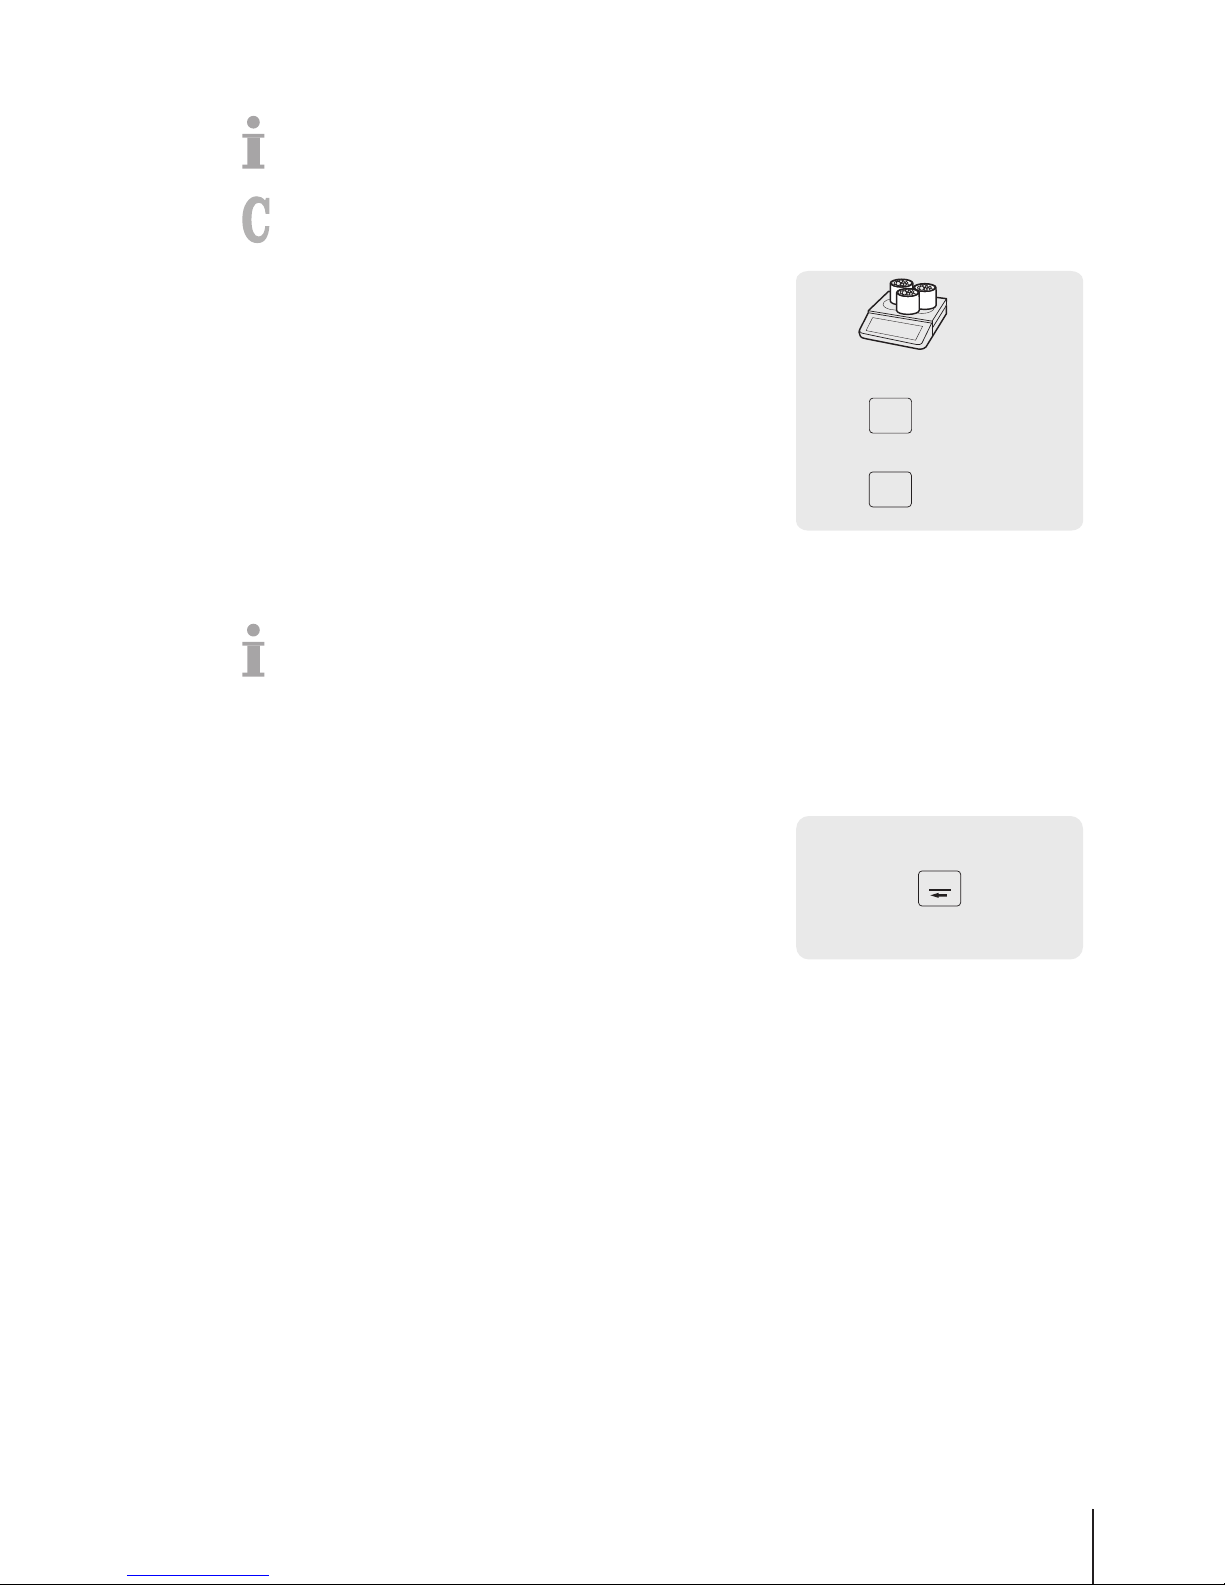
3.4.3 Multiple preset tare
When selling, e.g., several boxes of the same PLU, the tare value of a single box needs to be
multiplied.
To do so, the following settings must be made:
• A key defined as [Multiple Tare] in sub-menu F232.
1 Place the full containers on the scale.
2 Call up a PLU with a preset tare.
3 Press the [Multiple Tare] key.
4 Enter the number of preset tares (e.g., 3 cans) and confirm with
the OK key.
ð The net and tare weights are displayed.
5 Complete the transaction as described in section [Free
input}Page15].
Multiple
Tare
0.820 kg
PT 0.110 kg
0 … 9PLU
0 … 9
0.600 kg
PT 0.330 kg
OK
3.5 Zeroing
This function depends on the metrological limitation of the scale.
Due to soiling on the weighing pan or unfavourable external influences, it is possible that the weight
display of an unloaded weighing pan may no longer be 0.000 kg. In such cases, the scale must be
reset to zero.
− Press the Zero key.
ð The weight display is set to zero.
0.010 kg
0.000 kg
Zero
Fast and easy operation 19bMobile
 Loading...