

Page 1

Looking for more information?
Visituson the
•
Price
web
Quotations •
at http://www.artisan-scientific.com for more information:
Drivers·
Technical
Specifications.
Manuals and Documentation
Artisan
Scientific
•
TensofThousandsofIn-Stock
•
HundredsofManufacturers
is
You~
Source
Items
Supported
for:
Quality
Service Center Repairs
Experienced Engineers and Techniciansonstaffinour
State-of-the-art Full-Service In-House Service Center Facility
We
bUy
used
equipment!
Sell
your
excess.
Talk to a liveperson: 88EM38-S0URCE fB88-887-68721 I Contact
underutilized. and idle used equipment. Contact oneofour
We
New
•
Fast
•
Leasing
and
Certified-Used/Pre:-awned ECJuiflment
Shipping and
/ Monthly
DelIve1y
Rentals
• Equipment Demos
•
Consignment
InstraView Remote Inspection
Remotely inspect equipment before purchasing with
Innovative InstraView-website at http://www.instraview.com
also
offer
credit
usbyemail: sales@artisan-scientific.com I Visit ourwebsite: http://www.artisan-scientific.com
for
Buy-Backs
and
Customer
Trade-Ins
Service
Representatives todayl
our
Page 2
To protect your METTLER TOLEDO product‘s future:
METTLER TOLEDO Service assures the quality, measuring accuracy and
preservation of value of all METTLER TOLEDO products for years to come.
Please send for full details about our attractive terms of service.
Thank you.
*P11780209*
Subject to technical changes and to the availability
of the accessories supplied with the instruments.
© Mettler-Toledo GmbH 1998 11780209A Printed in Switzerland 9807/2.12
Mettler-Toledo GmbH, Laboratory & Weighing Technologies, CH-8606 Greifensee, Switzerland
Phone +41-1-944 22 11, Fax +41-1-944 30 60, Internet: http://www.mt.com
Operating instructions
METTLER TOLEDO
AT balances
Operating instructions METTLER TOLEDO AT balances
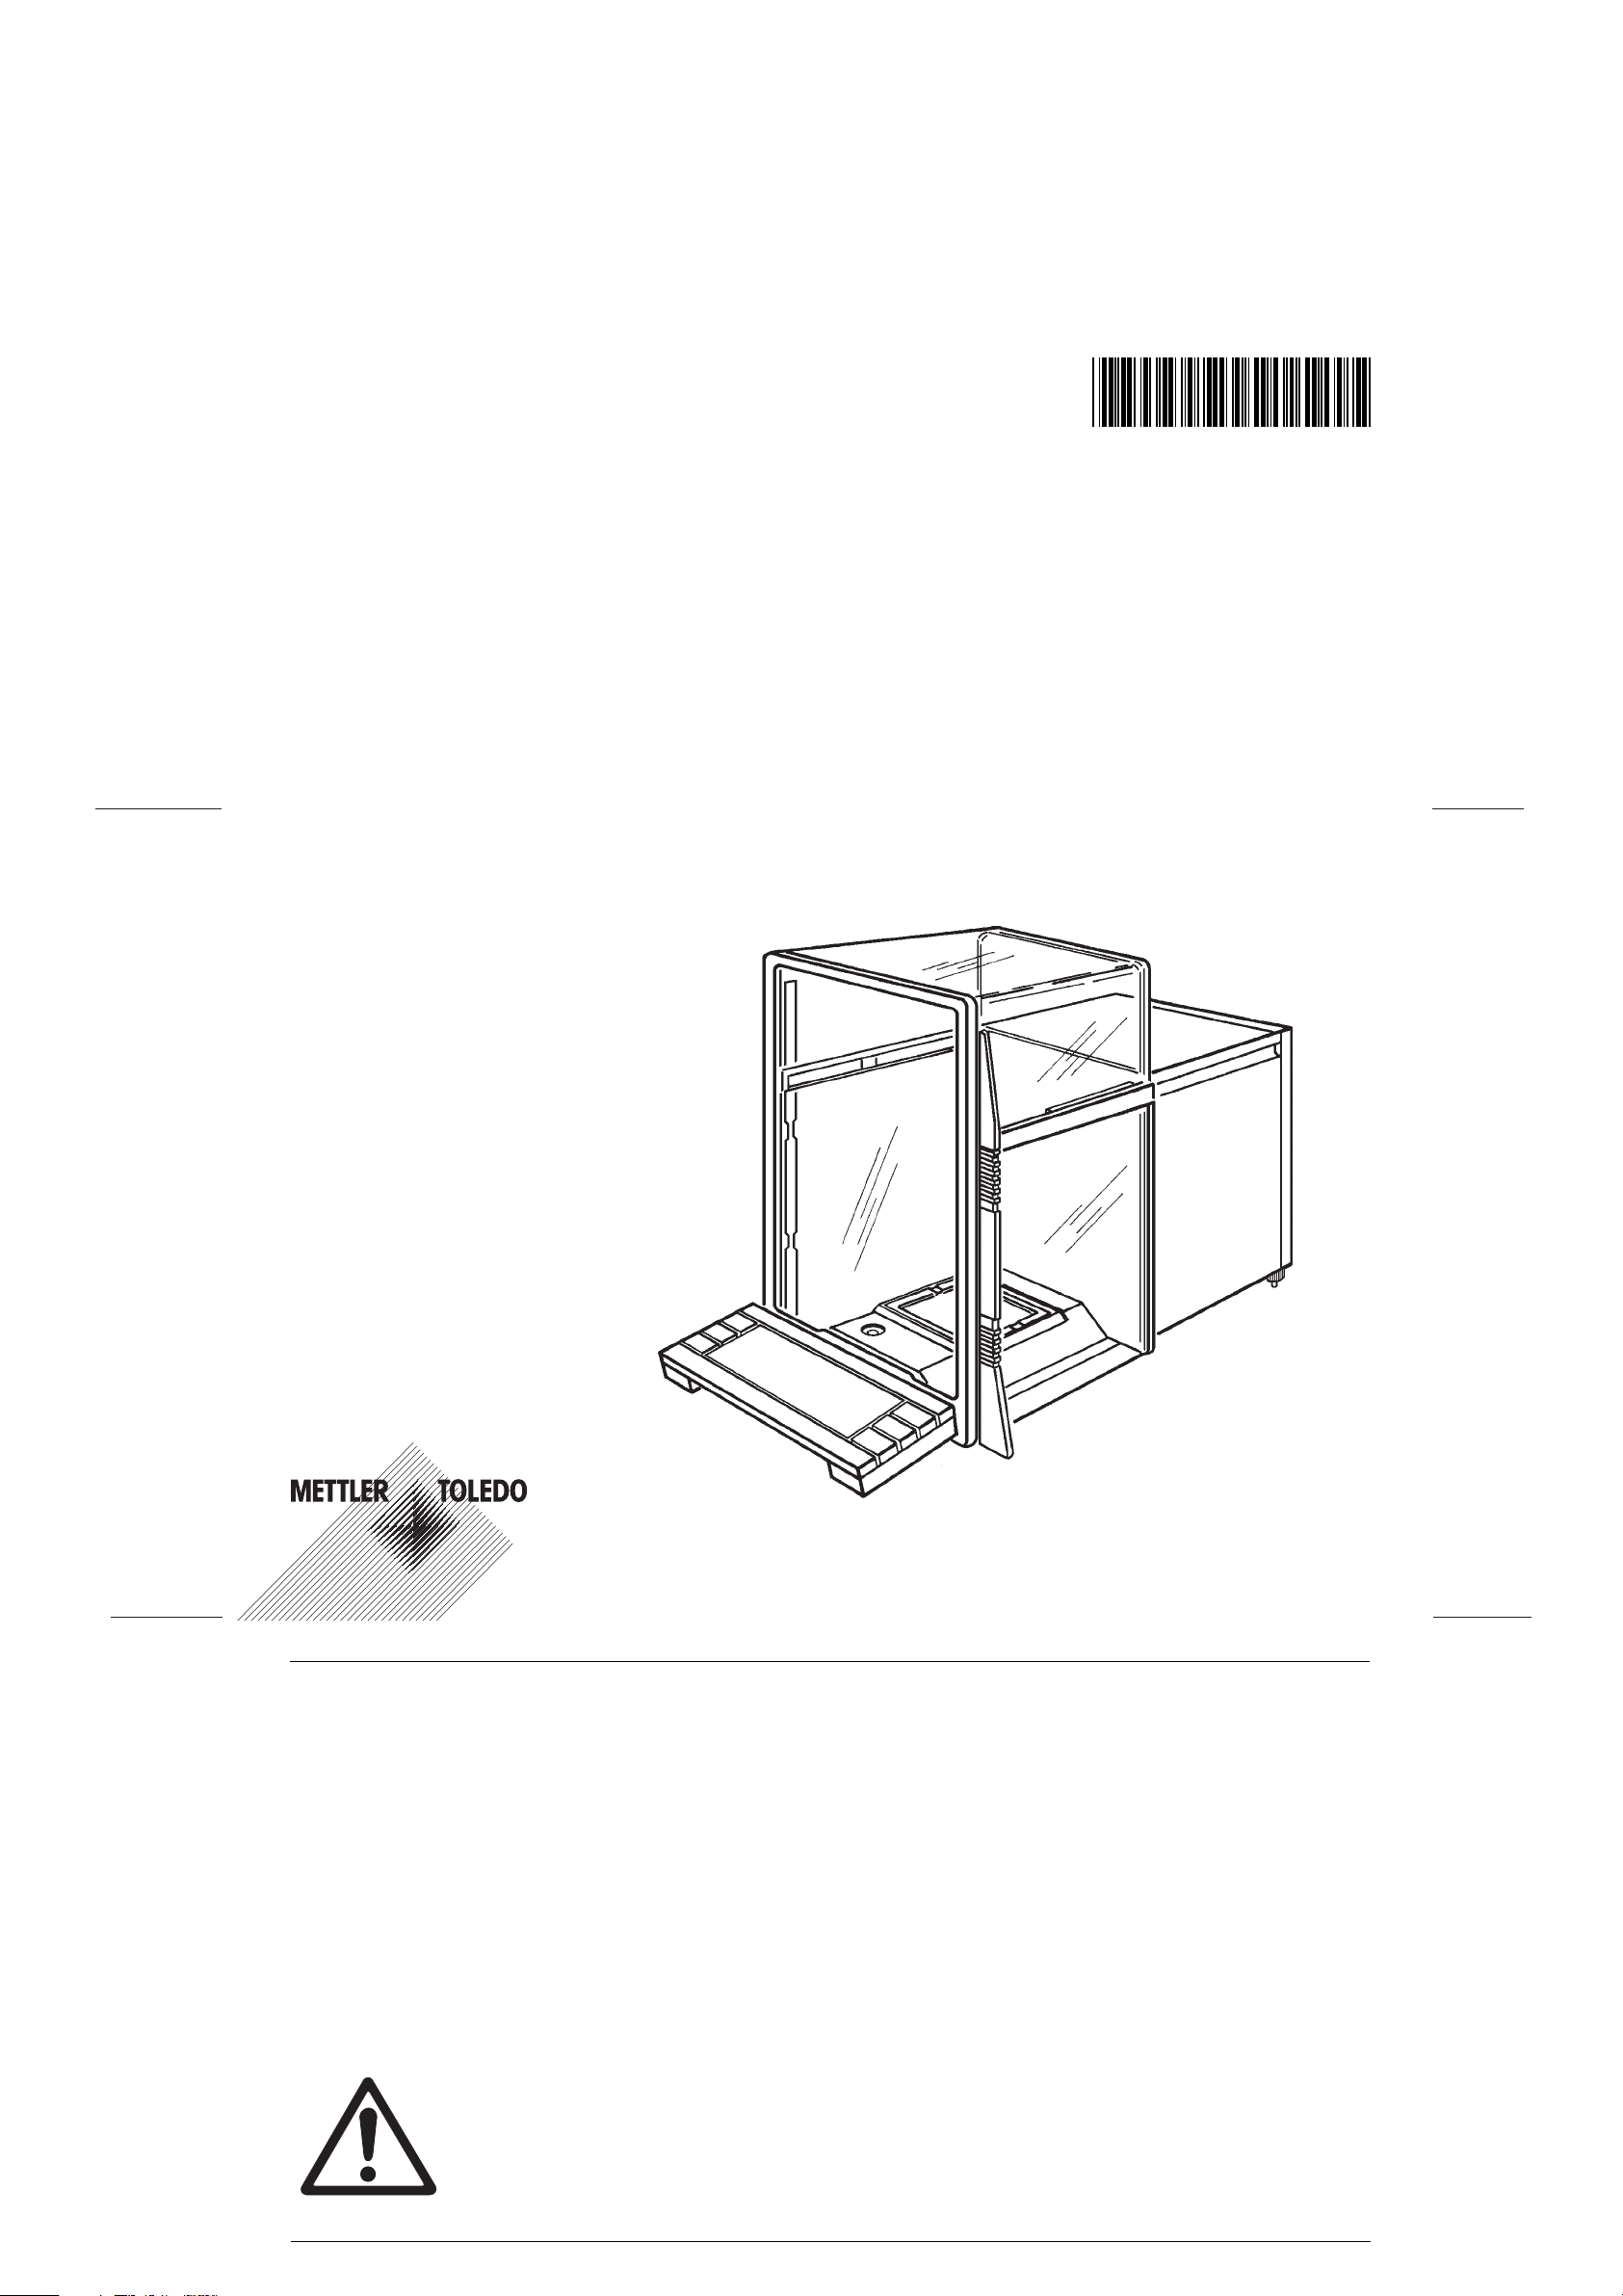
Thank you for purchasing a METTLER TOLEDO AT analytical balance.
The AT balances combine a wide range of weighing and setting options with an exceptional ease of operation.
Please read these operating instructions through carefully so that you can utilize all possibilities offered by your AT balance to the
full. These operating instructions also offer valuable support in the form of a glossary and an index.
The present operating instructions apply to all METTLER TOLEDO balances of the AT series. As the various models have different
performance characteristics, however, special mention is made in the text where this is important for the operation.
Please read through the enclosed booklet “Weighing the right way”. It is intended as a supplement to these operating instructions
and contains additional important tips and informations.
If you fold out this page, you will have an overview of your AT balance that shows you all features at a glance.
Safety has priority
– It is essential you consult the instructions in section 1.2 regarding putting your new balance into
operation.
– The AT balances may be operated when connected to receptacle outlets with a ground connection.
– The AT balances must not be operated in hazardous surroundings.
– Never open the balance, it contains no parts which can be serviced, repaired or changed by the user.
In the unlikely event you experience problems with your balance, please contact the responsible
service facility.
Page 3
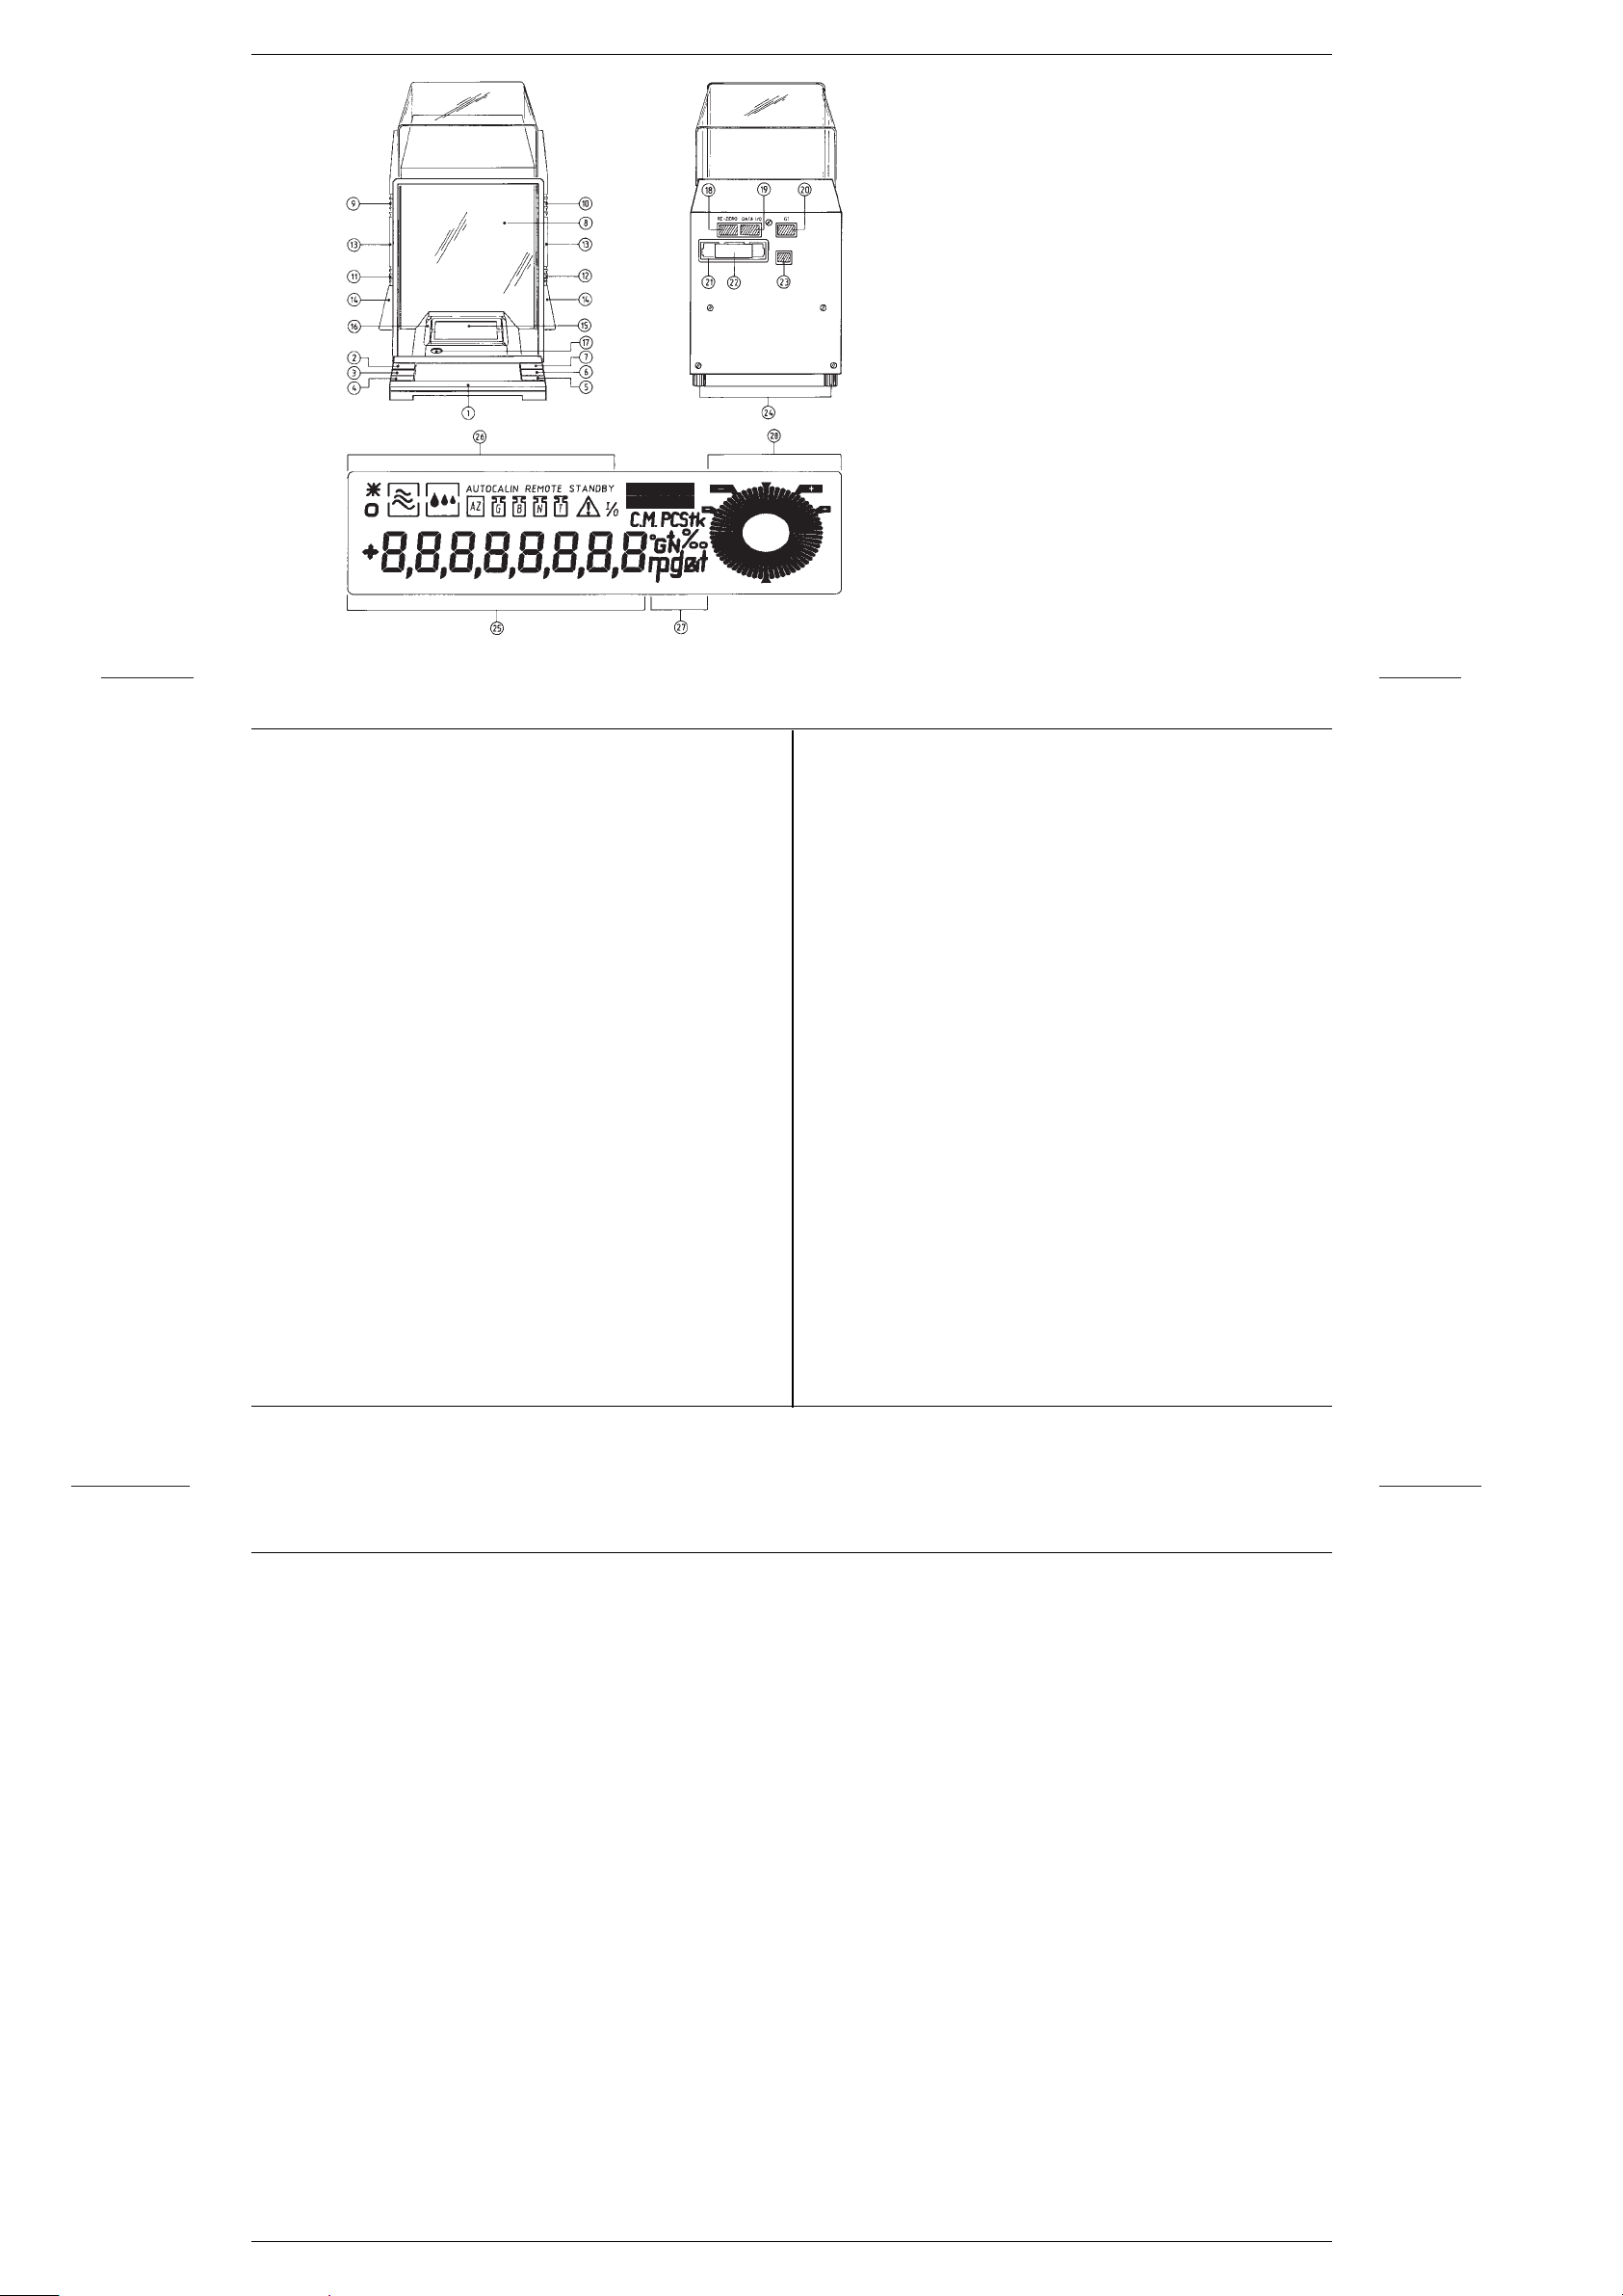
1 Key «Re-Zero», «Set», «On/Off»
2 Key «0.1/0.01 mg» (with dual-range balances only),
«Cancel»
3 Key «Menu», «Configuration»
4 Key «Select 1»
5 Key «Select 2»
6 Key «Print»
7 Key
8 Glass draft shield
9 Coupling element
10 Coupling element
11 Coupling element
12 Coupling element
13 Door handle
14 Door drive handle
15 Weighing pan
16 Draft cover
17 Level
18 Connection for foot or hand switch and electrical
contacts
19 Connection for data interface
20 Connection to overhead display
21 Plug-in slot for program cassette
22 Program cassette, protection of the configuration
parameters
23 Connection for AC adapter
24 Screw feet
25 Digital display (VFD or LCD)
26 Status indicators
27 Weight units
28 DeltaTrac®
Operating instructions METTLER TOLEDO AT balances
““
“
““
⇔⇔
Contents
Page
1 The AT smooths the way .............................................................. 1
1.1 The new weighing feeling................................................................ 1
1.2 Preparing your AT ........................................................................... 2
1.3 Weighing made simple .................................................................... 5
2 Your AT - a balance with extreme ease of operation ................. 8
2.1 A glass draft shield with unlimited possibilities................................ 8
2.2 The Mettler DeltaTrac - an informative display ............................. 11
2.3 Is your AT a Mettler DeltaRange balance? ................................... 11
2.4 How you can weigh in the coarse and fine range ......................... 12
3 Individual adaptation of your AT ............................................... 14
3.1 What is the menu? ........................................................................ 14
3.2 How to adapt your AT to different types of weighing..................... 17
3.3 How to adapt your AT to the local conditions ................................ 19
3.4 How to switch off the fully automatic door function ....................... 20
4 Additional possibilities in the configuration register .............. 22
4.1 What is the configuration register?................................................ 22
4.2 How is the configuration register used? ........................................ 23
4.3 In the first sector you return to the factory setting ......................... 26
4.4 The second sector offers you numerous adaptation
possibilities .................................................................................... 27
4.5 In the third sector you select the weight units
and additional settings .................................................................. 32
4.6 In the fourth sector the AT reveals itself as a balance
ready to communicate ................................................................... 35
4.7 Print out the current configuration ................................................. 38
4.8 How to protect your settings against inadvertent
changes......................................................................................... 39
5 Special applications and functions of your
Page
AT balance ................................................................................... 40
5.1 Your AT can work with two weight units........................................ 40
5.2 Your AT also weighs in percent and displays plus/minus
deviations ...................................................................................... 41
5.3 Should your AT count pieces? ...................................................... 43
5.4 How to trigger the adjustment manually ........................................ 46
5.5 How to check whether the balance is still
adjusted correctly .......................................................................... 49
5.6 How to print out the weighing result .............................................. 51
5.7 Your AT can also be remote controlled ......................................... 52
6 Important information regarding your AT................................. 53
6.1 The AC adapter offers you various installation
options........................................................................................... 53
6.2 If you change the location of your AT............................................ 55
6.3 A well maintained balance is a joy forever .................................... 56
6.4 What your AT brings with it ........................................................... 57
6.5 Additional information and accessories for your
AT balance .................................................................................... 57
7 Any questions? ........................................................................... 58
7.1 What happens if the weight display is unstable? .......................... 58
7.2 How can the weighing speed be increased?................................. 61
7.3 What happens if...? ....................................................................... 62
7.4 What does this error message mean? .......................................... 66
7.5 What does this term mean? .......................................................... 67
7.6 How are weight units converted? .................................................. 78
7.7 Where will I find details of...? ........................................................ 80
Technical specifications ................................................................ 84
Operating instructions METTLER TOLEDO AT balances
Operating instructions METTLER TOLEDO AT balances
Printed on 100 % chlorine-free Paper, for the sake of our environment.
Page 4

Operating instructions METTLER TOLEDO AT balances
1 The AT smooths the way
1.1 The new weighing feeling
Your AT balance offers a wide range of
functions, yet is simple to operate.
For example, there is no need whatever to concern yourself with the
adjustment - your AT performs the
adjustment fully automatically. Your AT
is equipped with an adjustable glass
draft shield with a fully automatic door
function. Just two examples to give you
a preview of the full range of equipment
of your new balance.
Your AT balance is distinguished
primarily, however, by its user friendliness. You set the balance up, connect
it to the power supply and after a few
minutes warm-up time you can immediately start weighing. You thus obtain
your first weighing result in the shortest
time possible.
The AT offers you the operating convenience and the complete range of
options you expect from a top-quality
analytical balance. There is, however,
no need for you to grapple at the
moment with functions you will not
need until later.
In this first section you will find out how
simply you can start up your AT and
perform normal weighings.
1
Page 5
2
1.2 Preparing your AT
If you fold out the front fold-out, you
have in front of you an immediate
overview of all general illustrations
at a glance.
You need undertake the following
operations only on first-time installation
and each time you change the balance
location.
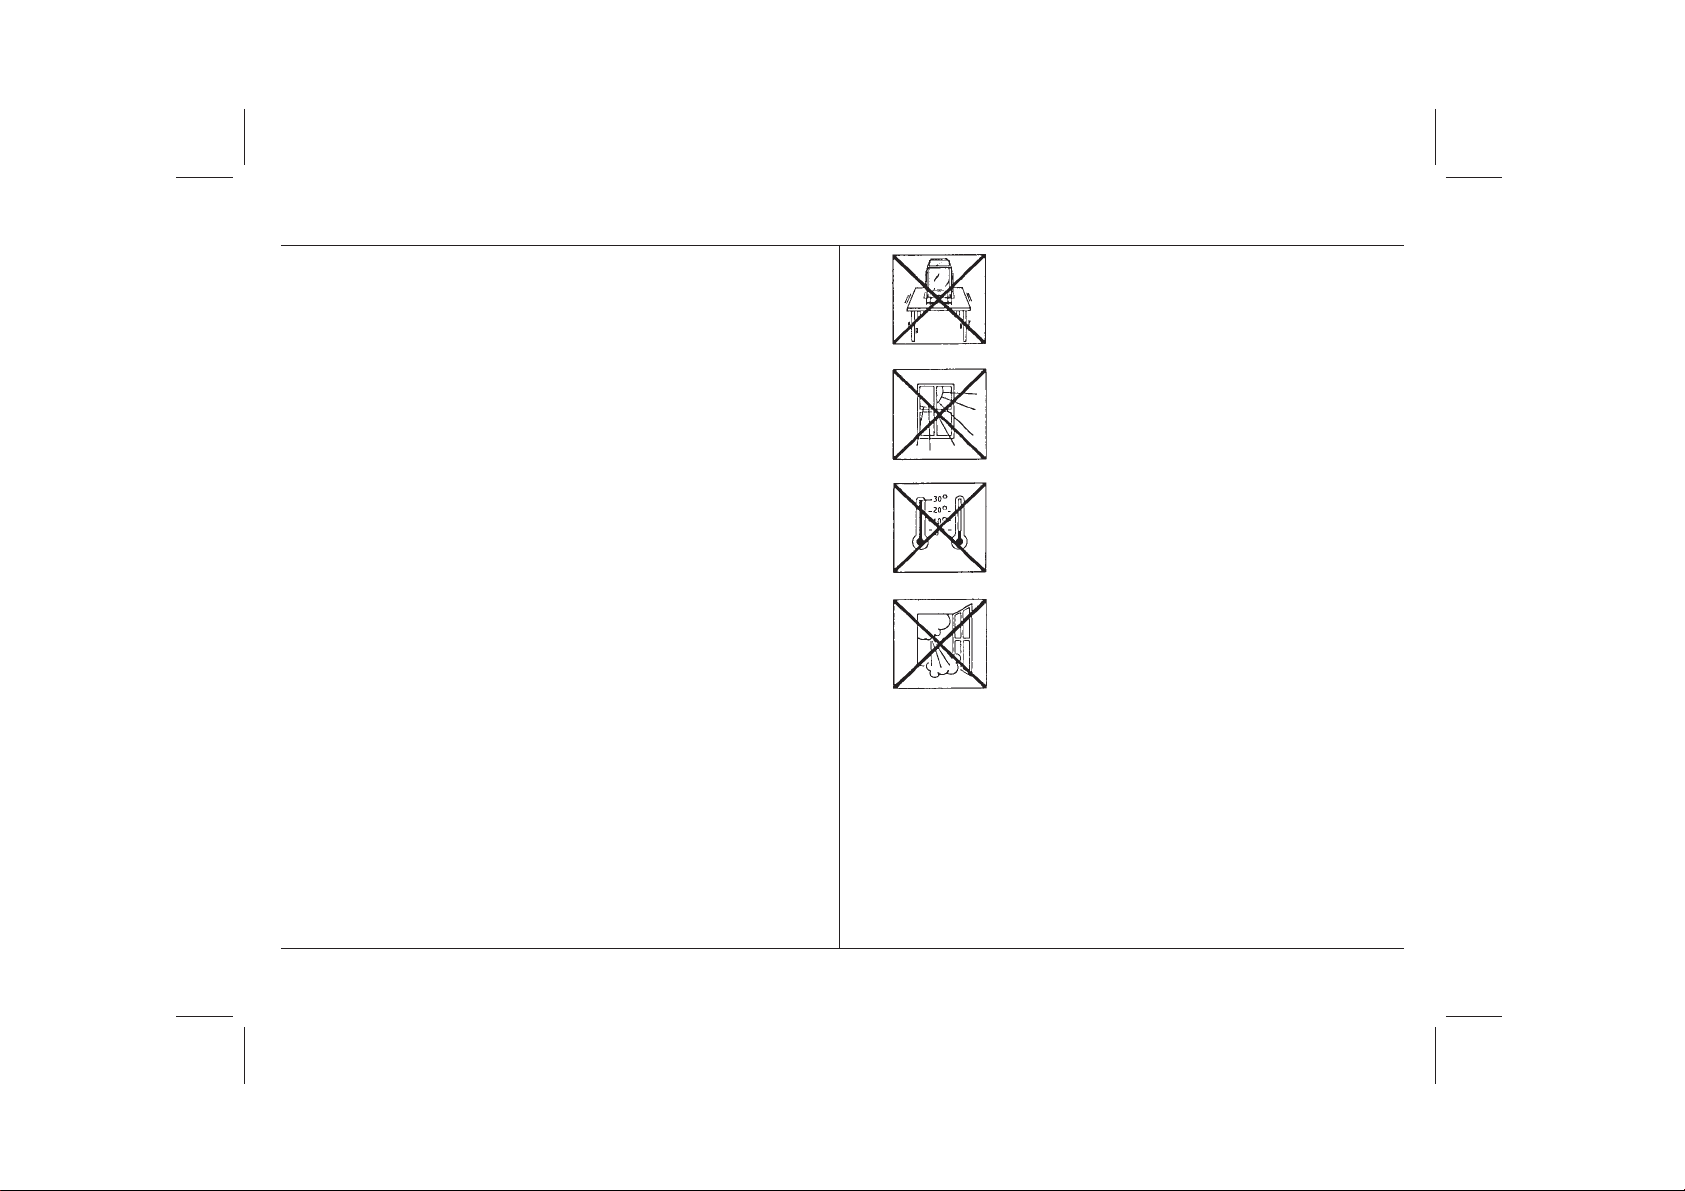
Select a suitable location
Your AT expresses its thanks for an
optimum location by providing you with
excellent weighing results:
- Firm, vibration-free location, as level
as possible
- No direct sunlight
- No extreme temperature fluctuations
- No excessive drafts (e.g. through
powerful air aWnditioning)
Additional tips and information regarding an optimum location can be found
in the METTLER TOLEDO brochure “Weighing the right way”, which is
enclosed with your balance.
Operating instructions METTLER TOLEDO AT balances
Page 6
Operating instructions METTLER TOLEDO AT balances
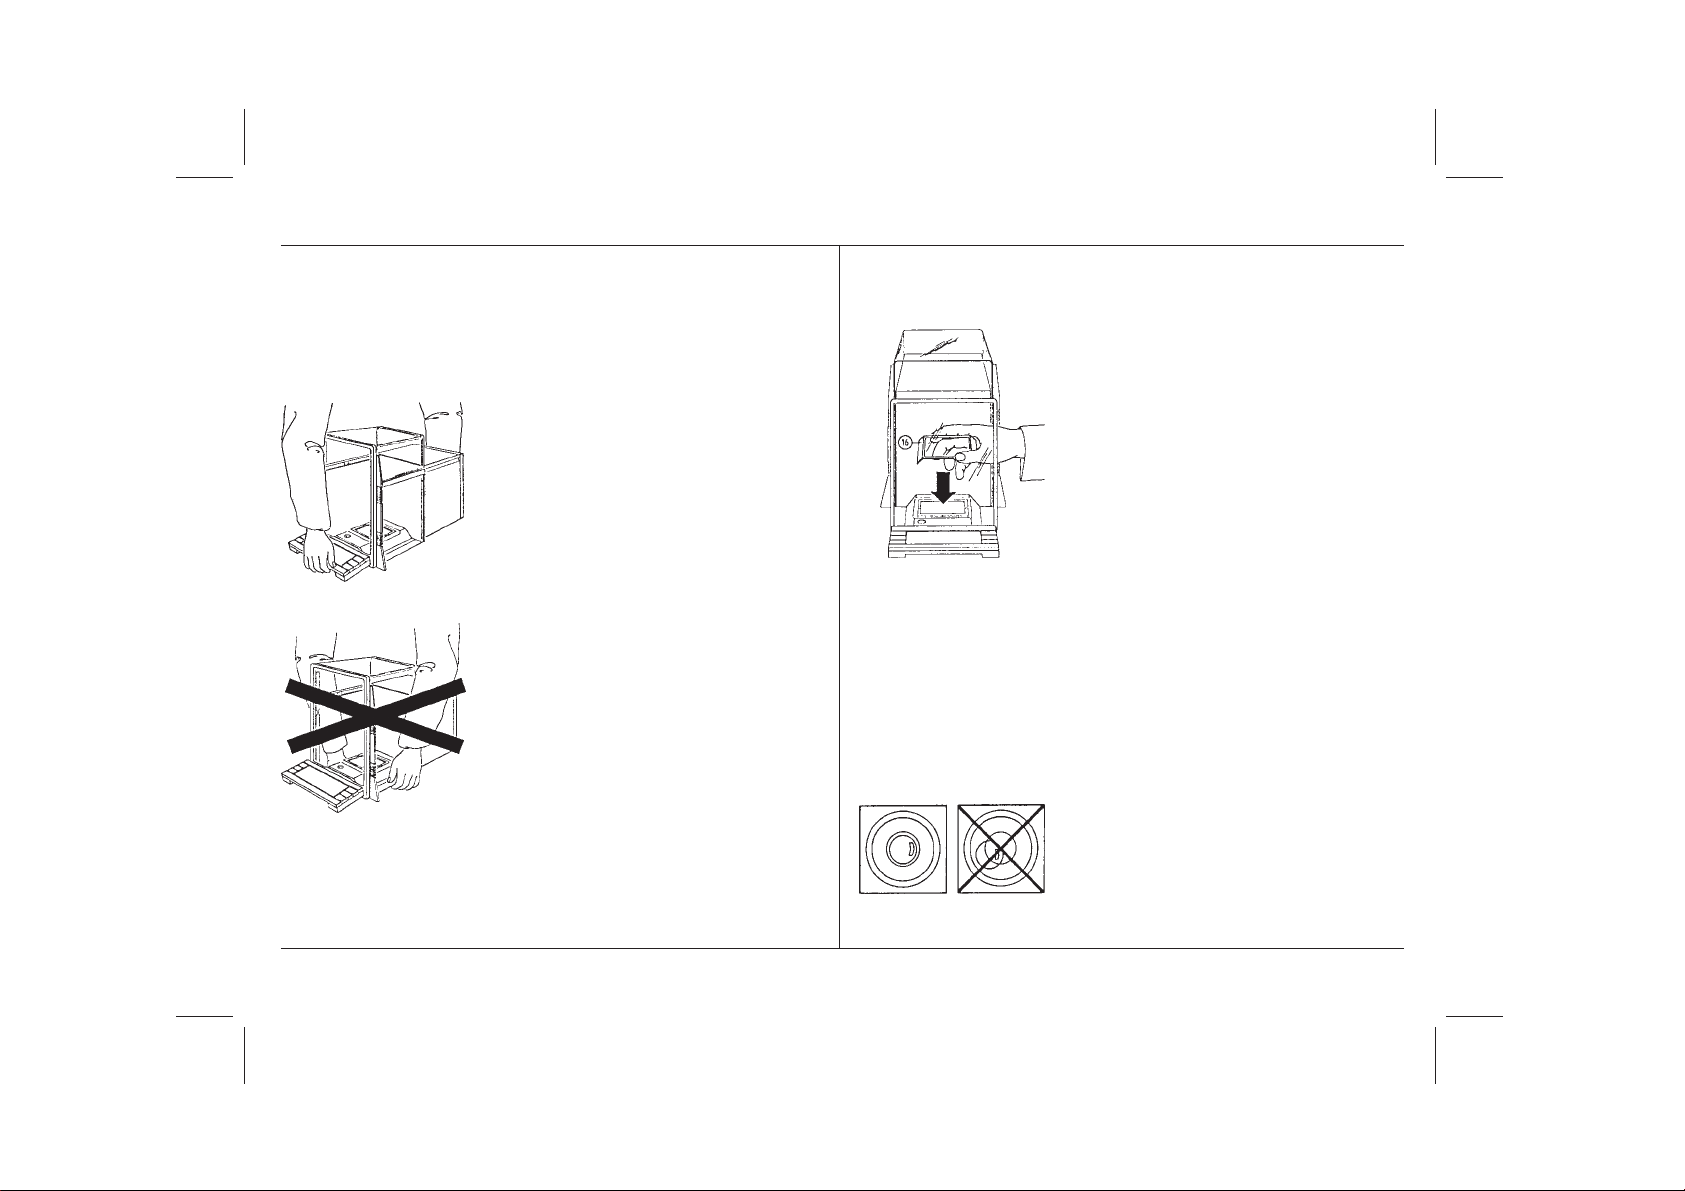
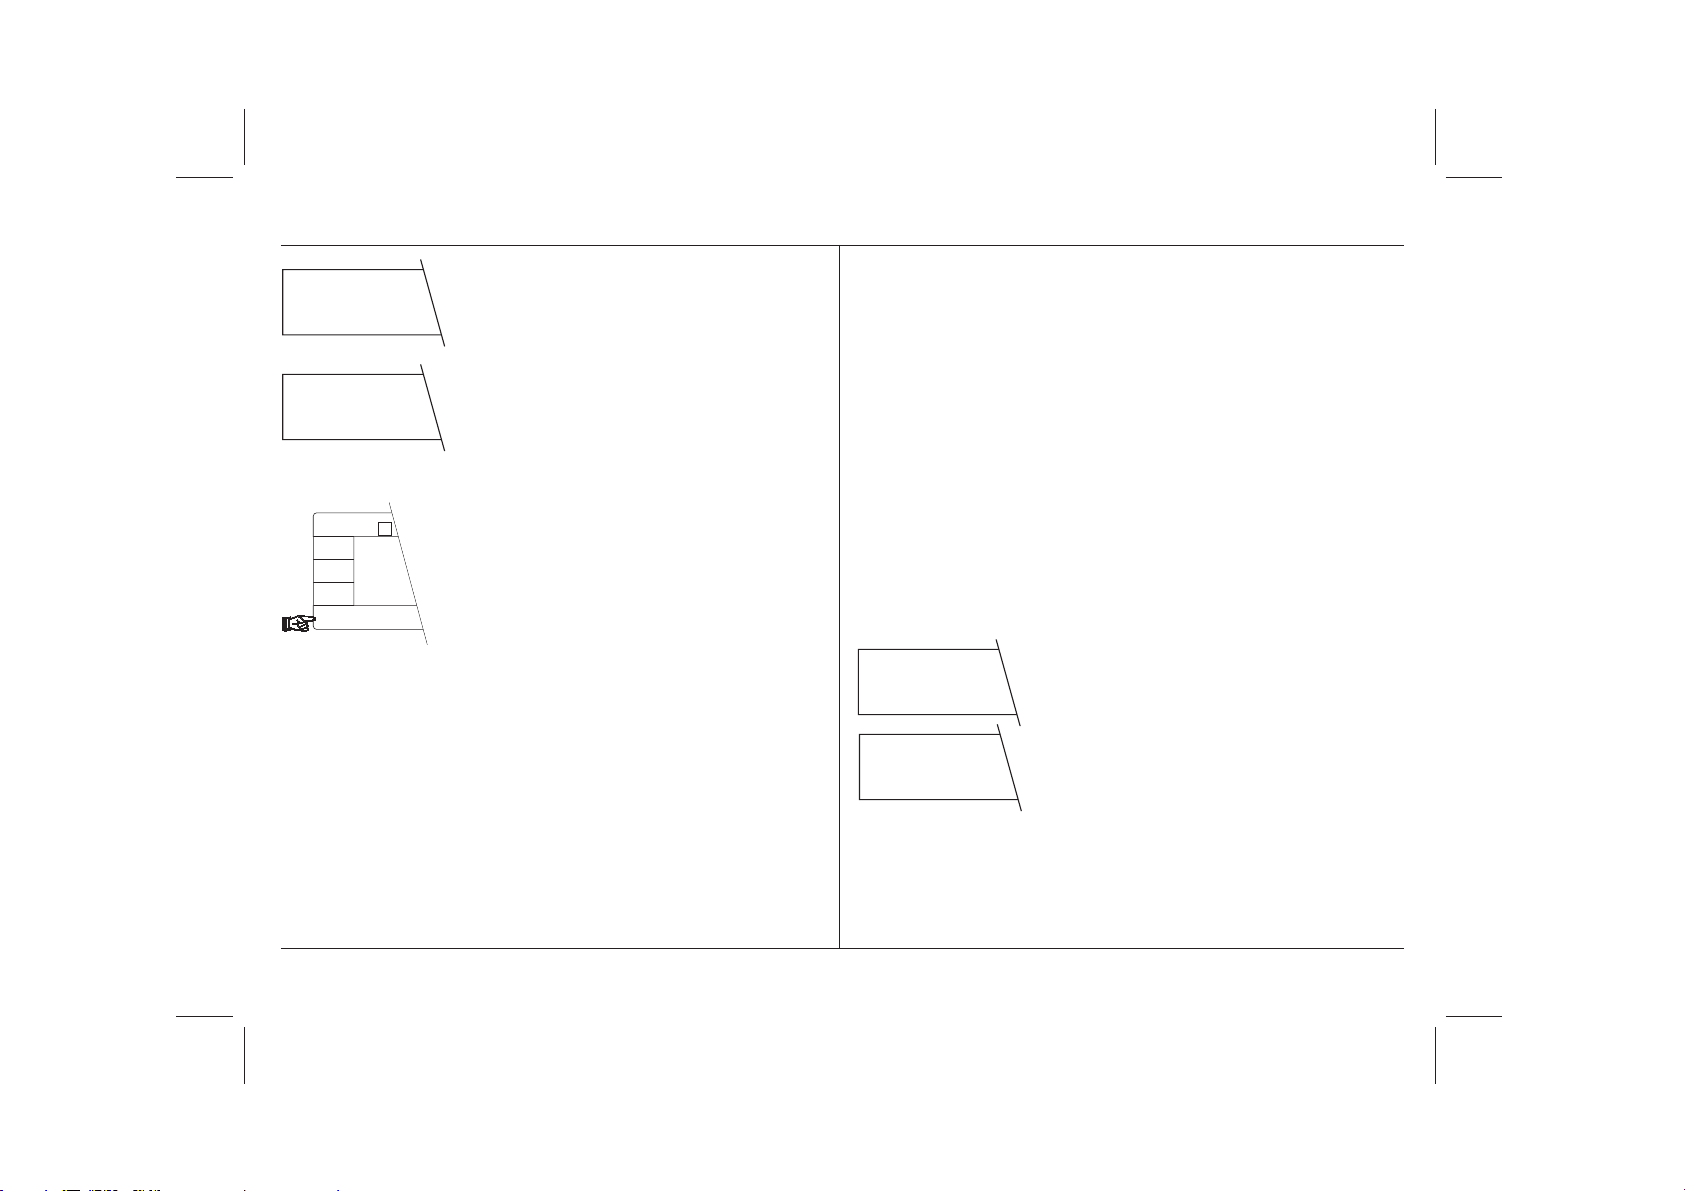
How you can transport the balance
When you position your AT balance at
its location, please note the following:
To transport the balance, hold it at the
front under the display and at the rear
beneath the balance housing. Never lift
your AT using the draft shield or the
«Re-Zero» key!
Mount the draft cover and level the
balance
- Place the draft cover 16 supplied
separately in position. When positioning the draft cover, ensure that it
is not touched by the weighing pan,
which must move freely in its
recess. If necessary, turn the
weighing pan to the correct
position. The draft cover is useful
primarily for balances with the
semimicro range (readability 0.01
mg). In many cases it need not be
installed in weighings in the
analytical range (readability 0.1
mg).
As an option, semimicro balances
can be equipped with an additional
inner draft shield whose installation
is described in the enclosed
mounting instructions.
- Turn the two screw feet 24 at the
rear of the balance housing until
the air bubble is in the middle of
level 17.
3
Page 7
4
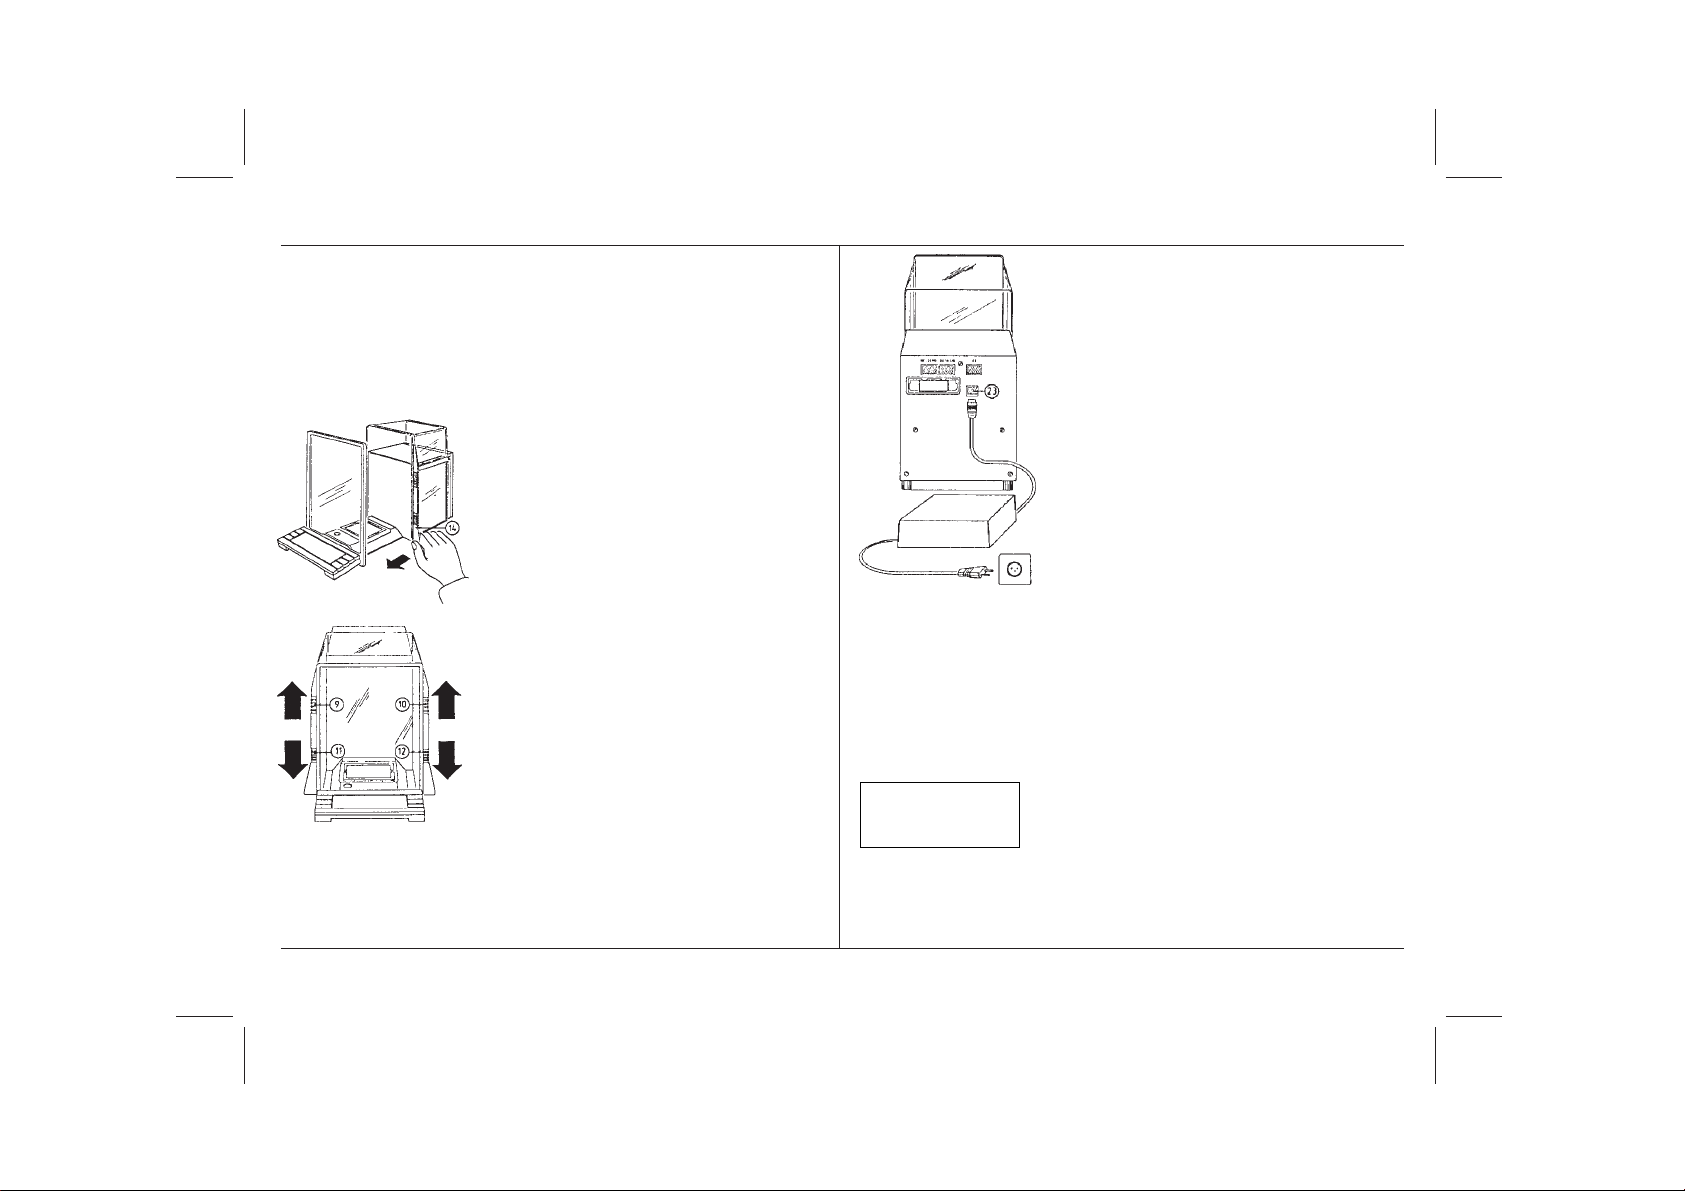
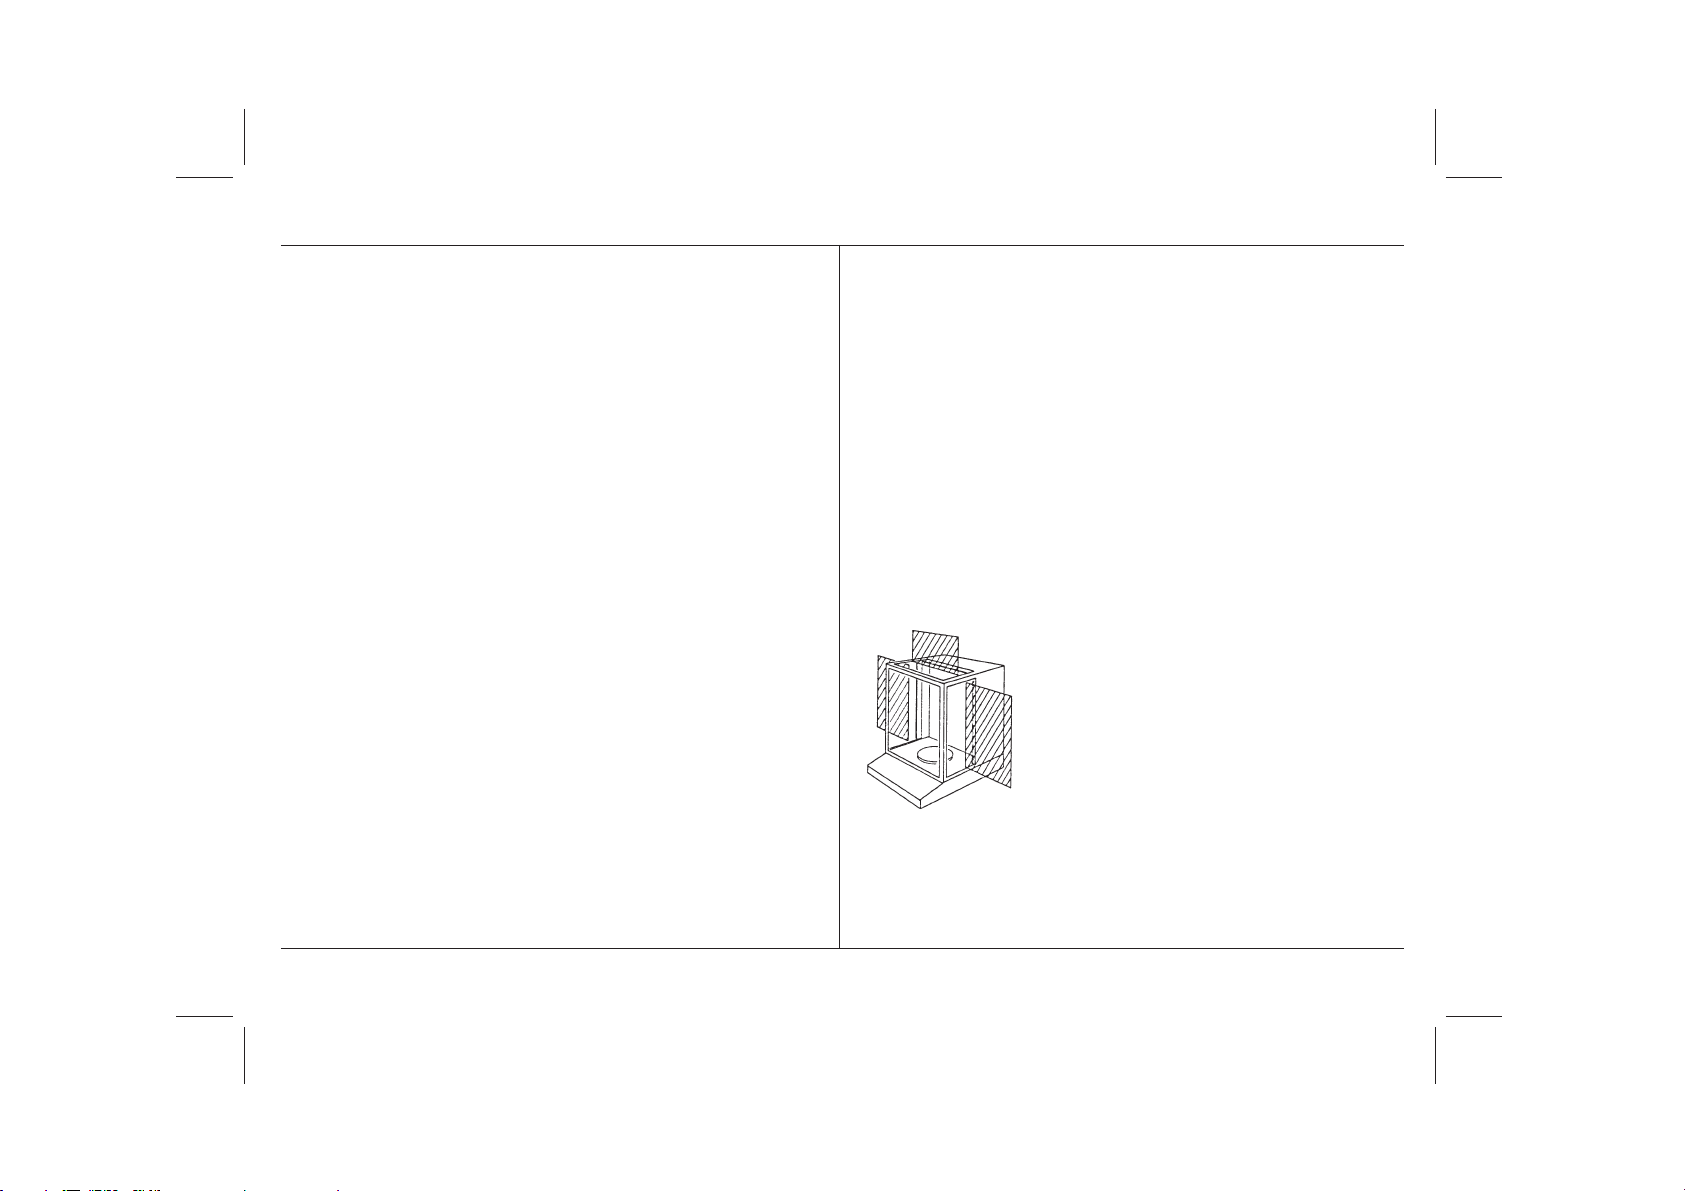
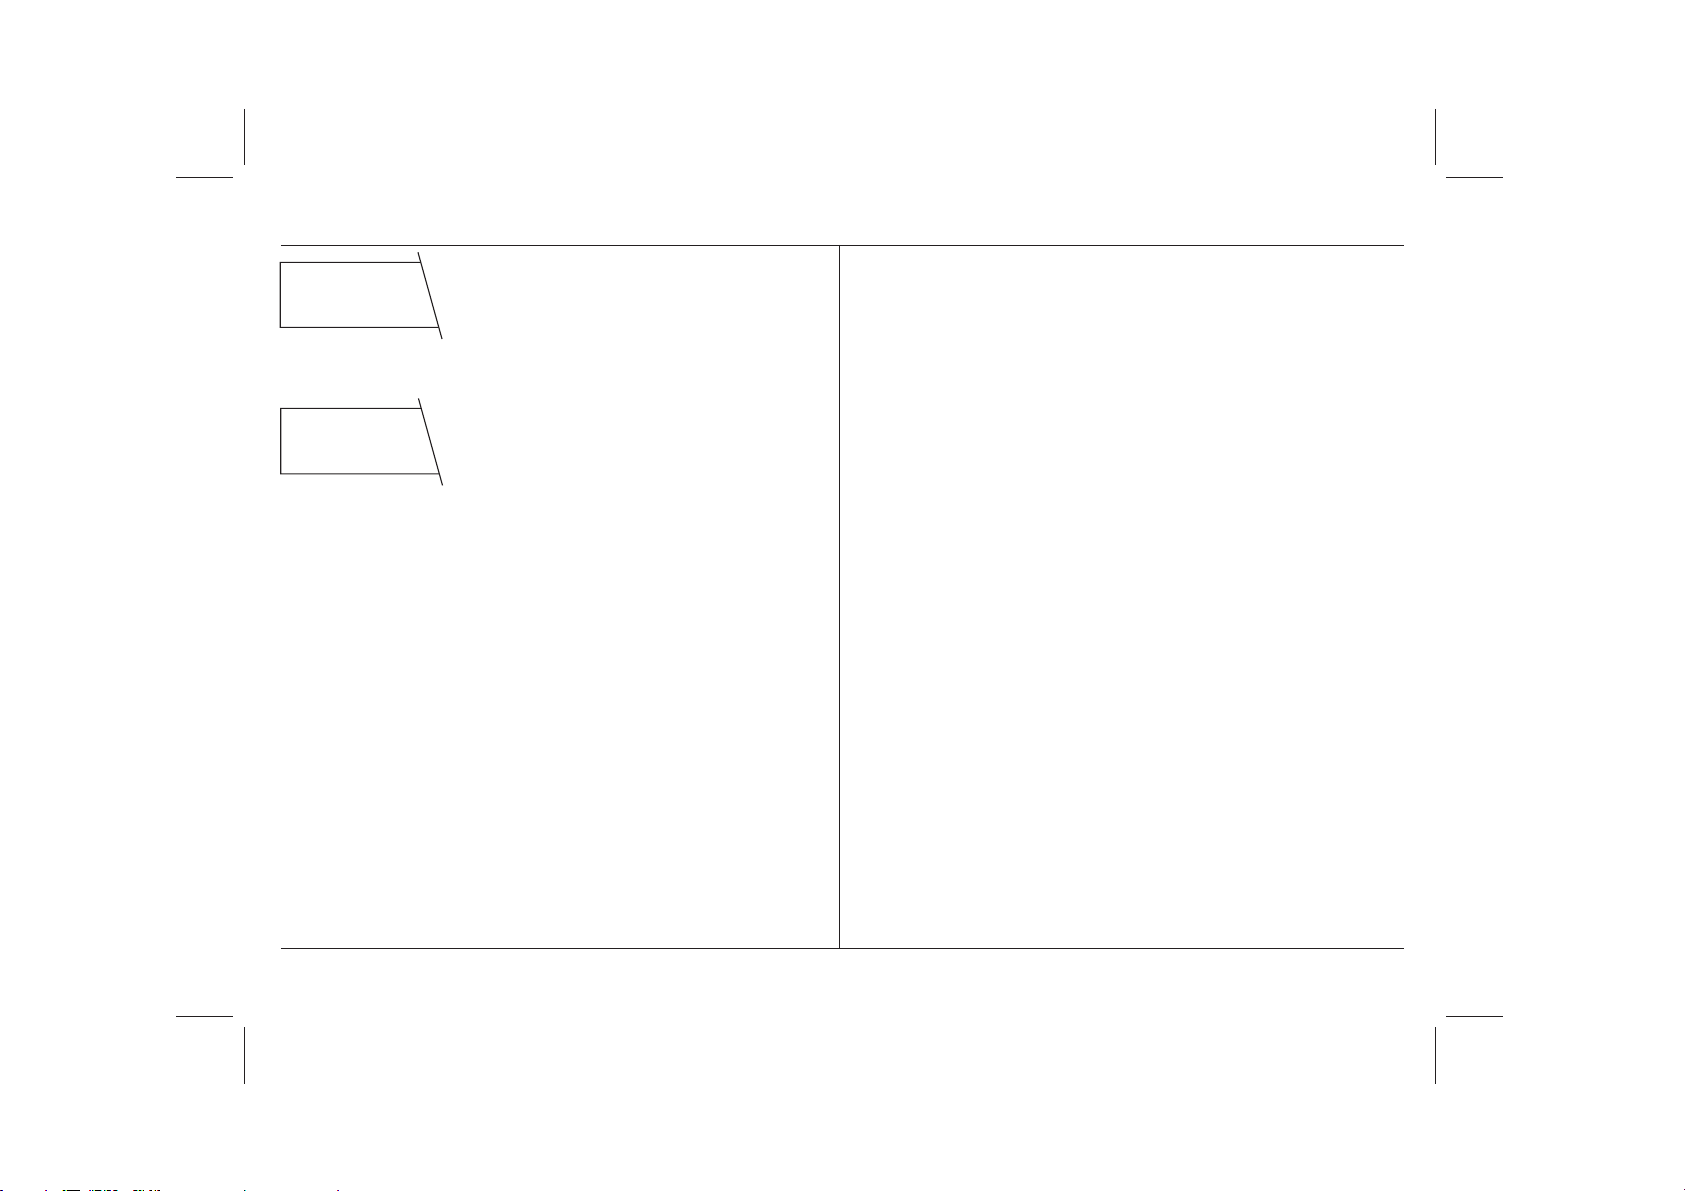
Prepare the glass draft shield
The draft shield of your AT balance
comprises several parts which can be
combined in a number of ways using
the coupling elements. To preclude
transport damage, these coupling
elements are not locked in position
when shipped. Connect the individual
parts of the draft shield as follows:
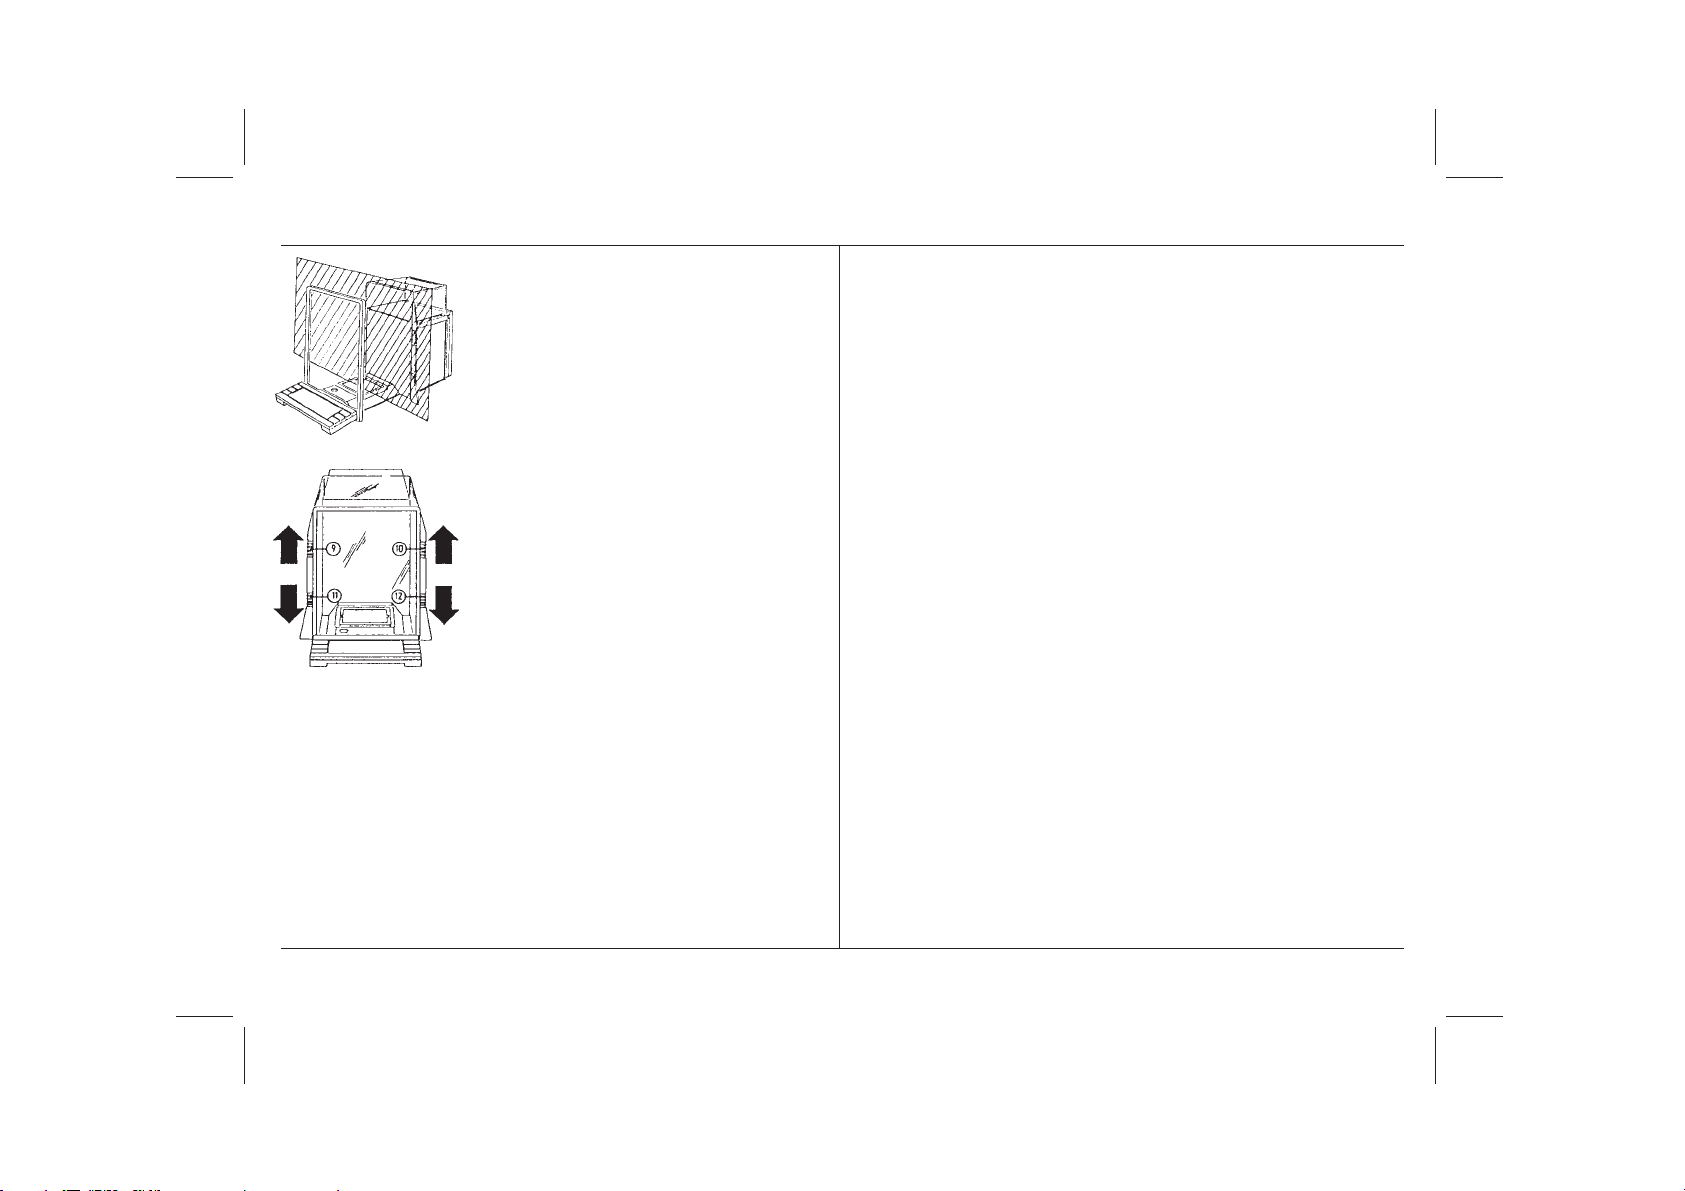
- Pull all doors of the draft shield and
the opposing door holder 14 forwards as far as possible.
- Push the two upper coupling
elements 9 and 10 upward and the
two lower coupling elements 11 and
12 downward until they lock.
When in this position, the whole draft
shield opens. Additional combination
possibilities of the individual doors are
described in Section 2.1.
STANDBY
Connect your AT to the power
supply
- Connect the AC adapter supplied to
connection socket 23 at the rear of
your AT balance and then to the
power supply.
- The AC adapter can either be
placed on the bench, attached to
the balance or, to save space, be
mounted on the wall. The AC adapter holder and the installation set
with dowels and screws are used
for this. Appropriate details are
given in Section 6.1.
After connection, your AT balance is
on standby and ready for weighing
after a brief warm-up time of about 5
minutes. (See also Technical
specifications page 84).
Operating instructions METTLER TOLEDO AT balances
Page 8
AT201
Max 205 g d = 0.1 mg
Operating instructions METTLER TOLEDO AT balances
pro
FACT
METTLER TOLEDO
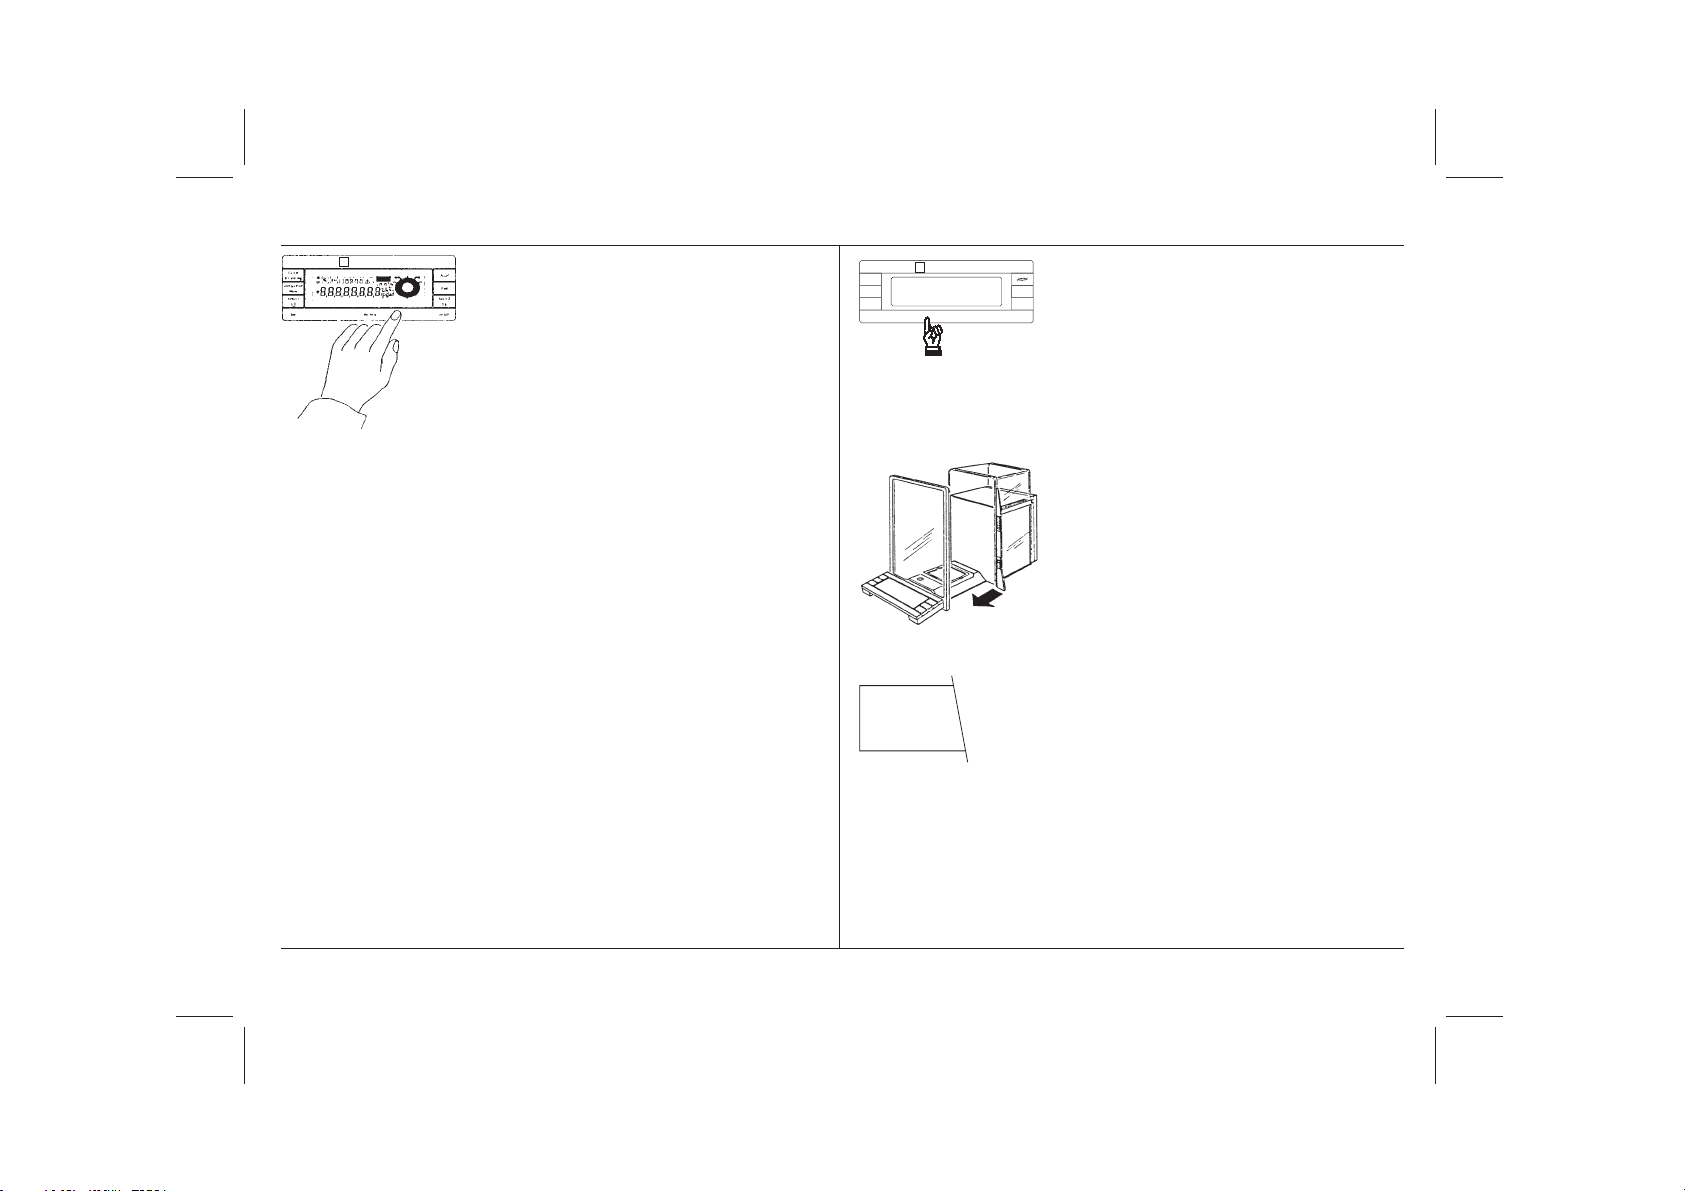
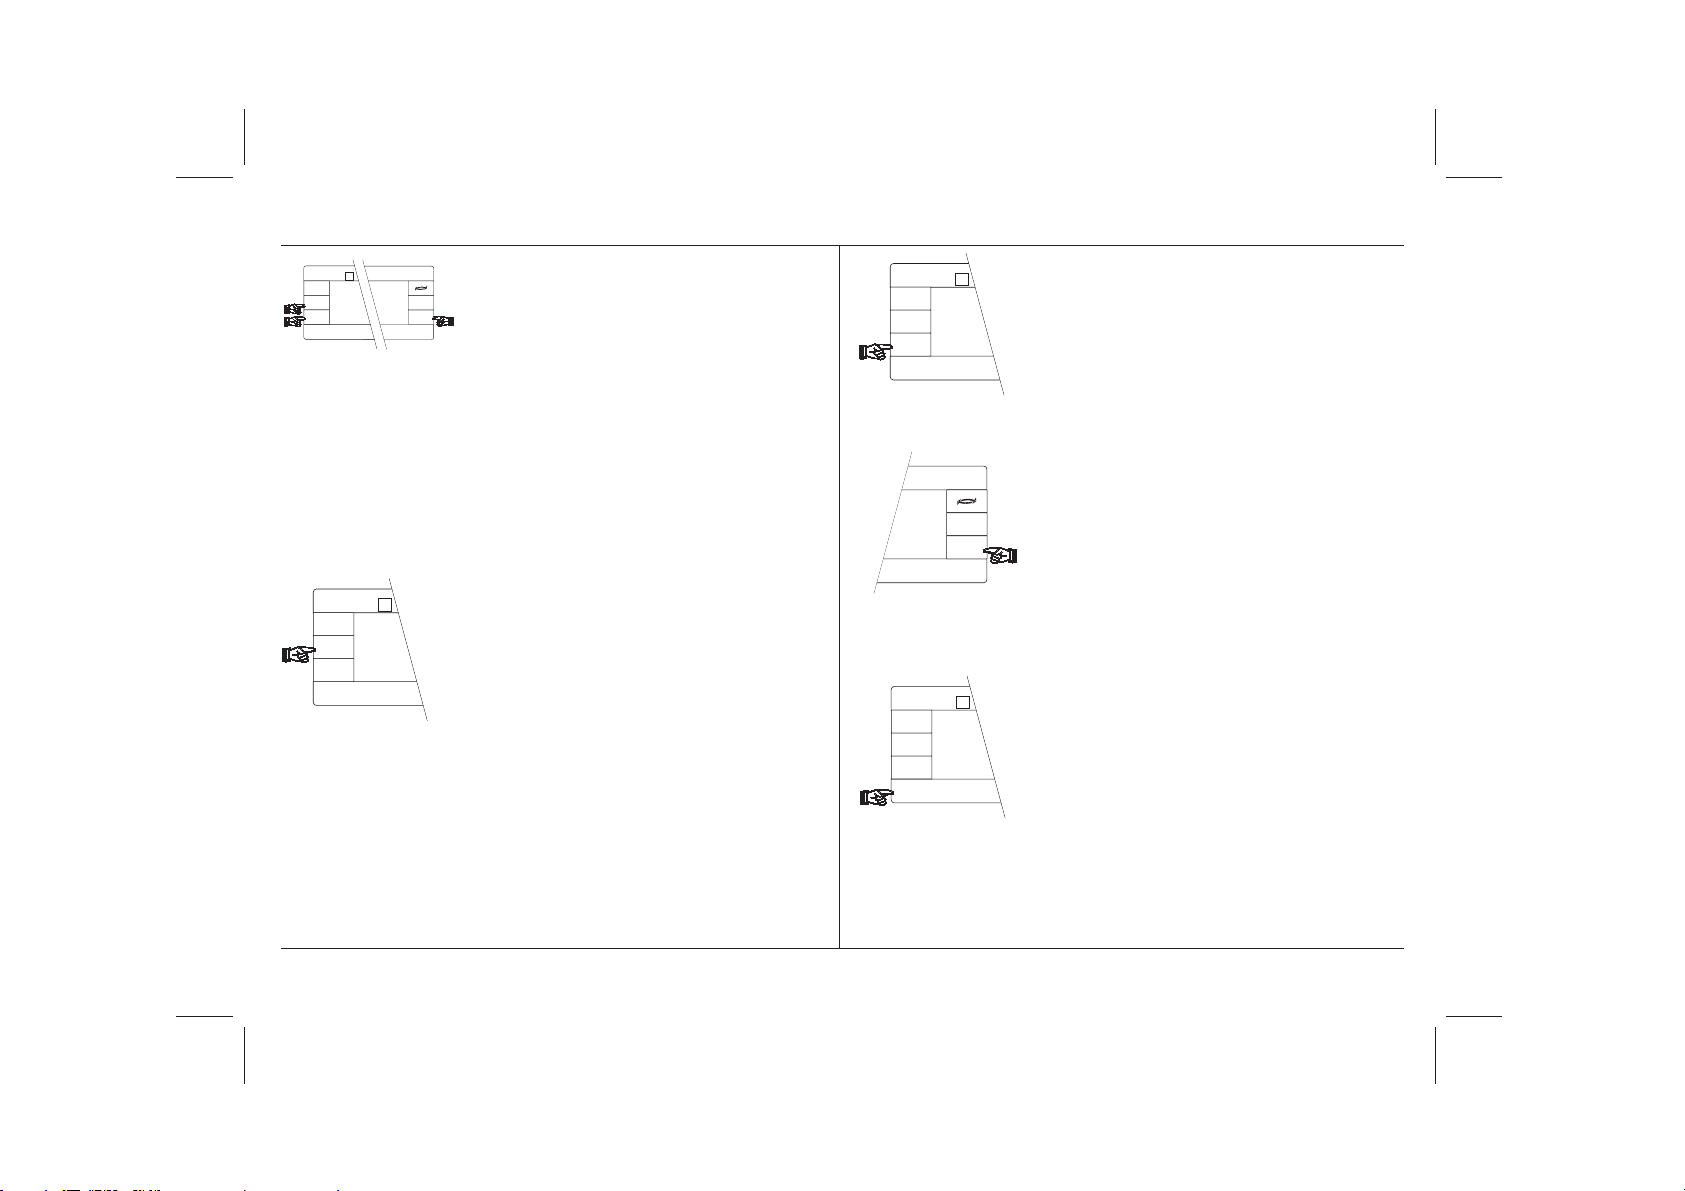
1.3 Weighing made simple
- By pressing the «On/Off» key you
switch your AT from standby to the
pro
FACT
Max 205 g d = 0.1 mg
AT201
Cancel
0.1/0.001 mg
Configuration
Menu
χ
⇔
Set Re-Zero On/Off
METTLER TOLEDO
METTLER
Set your balance to zero (taring):
Print
Select 2Select 1
χ
⇔
- If you wish to tare a container, place
it on the balance.
weighing mode. The balance now
performs a brief self-test and all
display segments light up briefly.
- Press the «Re-Zero» key. The fully
automatic door function closes the
draft shield.
- If the draft shield is open, you can
close it by pressing one of the two
⇔
keys .
Your AT balance is fitted with a fully
automatic door function, which ensures
that the draft shield is always open or
closed at the right time. Section 3.4
describes how you can switch off this
automatic mechanism. On completion
of the self-test, this function opens the
draft shield completely automatically.
- - - - - -
Zeroing of the display (taring) is automatic. While the zeroing is in progress
and the horizontal segments appear in
the display, you can abort the process
by briefly pressing the «Re-Zero» key
again.
5
Page 9
6
0.0000
METTLER TOLEDO
5.34678
5.34678
Print
Select 2
On/Off
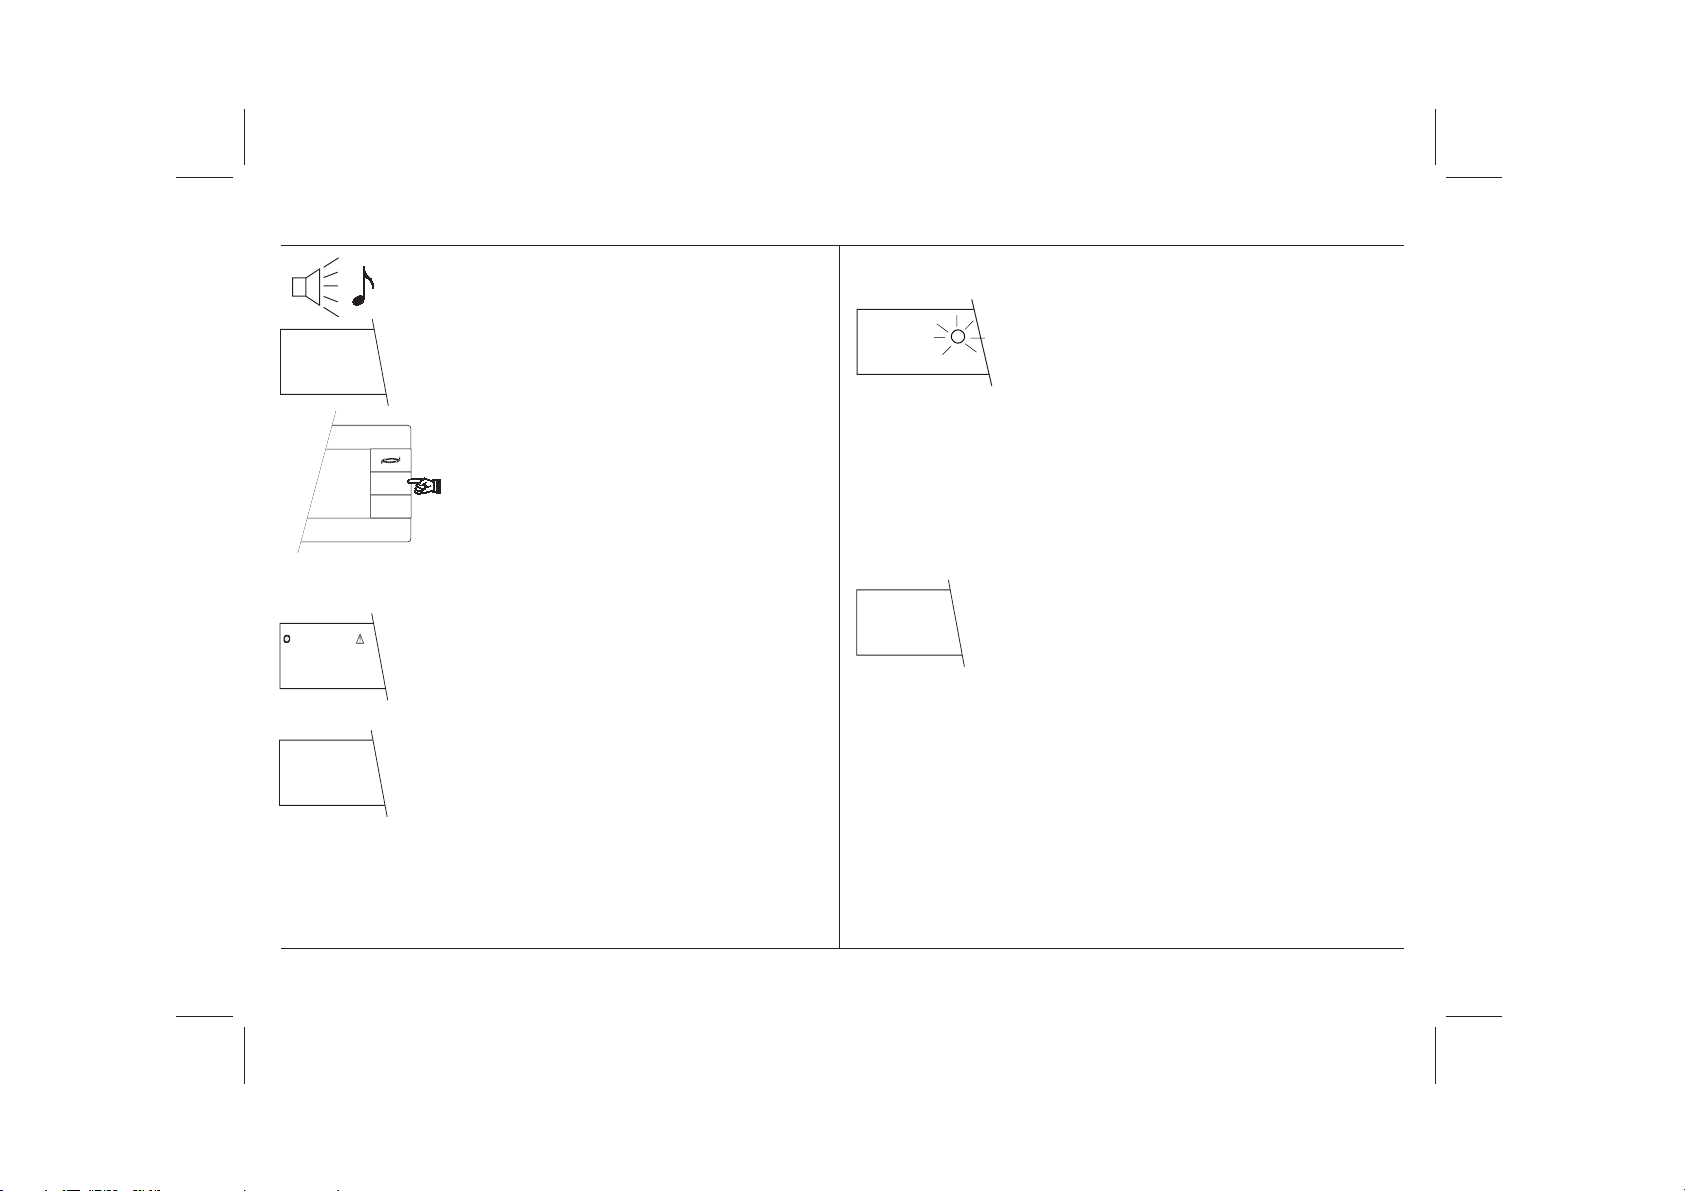
As soon as the warning beep sounds,
zeroing of the balance is complete and
the fully automatic door function opens
the draft shield.
5.34678
g
- Read off the weighing result. The
result remains “frozen” on the
display for 5 seconds. This can be
recognized by the flashing circle
above the weighing unit. If the
balance is attached to a printer, the
weighing result is automatically
- Load the weighing sample and
press the «Print» key. The fully
automatic door function closes the
⇔
draft shield.
printed out.
With this automatic door function, your work steps in weighing
are reduced from 9 to 5! (You
don't have to open and close the
draft shield twice.)
It is possible that the warning beep
sounds during a weighing and the
adjacent symbol appears in the display.
Your AT balance uses this to show that
it would like to adjust itself. But there is
- The triangle symbol (print symbol)
and the circle symbol of the stability
detection (ASD) appear in the
display.
AUTOCALIN
0.3675
no need for you to interrupt your work
- When the symbol of the stability
detector (ASD) fades, the warning
beep sounds; the triangle symbol
also fades and the draft shield
opens automatically.
Note: You can also open and close
the draft shield with one of the keys
or by hand.
⇔
as the balance waits until you have not
carried out any weighings for a period
of about 5 minutes and then performs
the fully automatic self-adjustment
(proFACT). The symbol remains lit up
until the balance has adjusted itself or
until you trigger the adjustment by a
Operating instructions METTLER TOLEDO AT balances
Page 10
Operating instructions METTLER TOLEDO AT balances
STANDBY
keystroke. Section 5.4 shows you how
to trigger the adjustment yourself.
- For switching off the balance, lift
up the «On/Off» key briefly from
below. This closes the draft shield
automatically if the fully automatic
door function is switched on. Otherwise, close the draft shield manually
to prevent the ingress of dust and
dirt.
After being switched off, the balance is
on standby. When it is switched on
again, it needs no warm-up time and is
in immediate operational readiness.
Some additional tips:
- If you have made a mistake during
weighing, there is no need to worry:
Simply switch your AT off and then
immediately on again. You will later
learn of other possibilities to bring
your AT to weighing readiness
again.
- You can also effect the zeroing
(taring) of the balance using the
foot or hand switch (available as
an accessory) attached to the
balance via connection 18. Operation with the foot switch leaves you
both hands free for loading your AT.
7
Page 11
8
- If you ever have to disconnect your
AT from the power supply, first
switch it off by lifting up the «On/
Off» key. After the balance has
been reconnected, it is in the
standby mode and “
appears in the display.
After an unexpected power outage,
however, or if you have not
switched off your AT before disconnecting it from the power supply,
when power is restored again
“–
OFF
–” appears in the display.
When the «On/Off» key is now
pressed, in this case an extended,
internal self-test is first performed.
Here the model designation and the
software version are briefly displayed, and all display segments
light up for a short space of time.
STANDBY
”
2 Your AT - a balance with extreme
ease of operation
2.1 A glass draft shield with unlimited possibilities
With the glass draft shield you can
adapt your AT balance to the local
conditions (principally drafts), to your
individual style of weighing, to the size
of the tare containers, and to the type
of weighing and loading.
The fixed bars of a traditional draft
shield prevent access to the weighing
chamber.
Operating instructions METTLER TOLEDO AT balances
Page 12
Operating instructions METTLER TOLEDO AT balances
The draft shield of the AT balance has
no fixed bars and the weighing chamber is freely accessible. Your AT is thus
also especially well suited to automatic
loading.
The left, right and upper doors of the
draft shield can be combined in any
way and hence matched to your
weighing needs by means of the
coupling elements 9 to 12.
Try out various combinations by shifting
the coupling elements upward and
downward. For the manual door
operation the coupling elements 11 and
12 must always be disengaged (top
position)!
When small weighing samples have
to be loaded, we advise you to open
only one of the two side doors. Your
balance then operates quicker since
the disturbing air currents are less
than when more doors of the draft
shield are open.
You can operate the draft shield
manually in the traditional manner.
9
Page 13
10
AT201
Cancel
0.1/0.01mg
Configuration
Menu
Select 1
Pro
FACT
METTLER TOLEDO
Print
Select 2
On/Off
⇔
Max 205 g d = 0.01 mg
⇔
Set
The semiautomatic operation can be
effected either with the left or the right
⇔
key. In this case, the draft shield is
⇔
opened and closed by the motor.
A further tip: You will obtain the most
accurate results in the quickest possible manner if you close the draft shield
completely during weighing! If this is
not possible, for instance with bulky
In certain applications, such as zeroing
(taring) of the balance, the draft shield
opens and closes fully automatically
as you already know from your first
weighing. Manual or semiautomatic
weighing samples, you should combine
the doors of the draft shield such that
the greatest possible part of the draft
shield remains closed during the
weighing.
operation is also possible when the
fully automatic door function is operative. The fully automatic door function
primarily facilitates work with the single
or twin foot switch. Section 3.4 shows
you how to switch off the fully
So that excellent weighing results can
also be achieved fast under difficult
weighing conditions, you can also use
an inner draft shield.
(Order number 210270)
automatic door function.
For loading the balance, open only
as many doors as necessary. With
relatively small weighing samples or
rather small tare containers, it is
normally sufficient to open a single
door. This lessens the influence of
drafts and speeds up the weighing
process.
Operating instructions METTLER TOLEDO AT balances
Page 14
Operating instructions METTLER TOLEDO AT balances
24.083
98.215
2.2 The DeltaTrac® - an
informative display
The DeltaTrac® 28 is a supplement to
the digital display 25. It provides you
with a pictorial representation of the
weighing range in use and that still
remaining. The dynamics of a
weighing process can be followed on
the DeltaTrac® extremely well. Simply
observe the DeltaTrac® during a
weighing and you will immediately
understand its function.
The DeltaTrac® gives you a new feel
for weighing, even with special
applications, for example in repeated
weighing in to a specified target value
and in percent weighings. You will find
further details in Section 5.2.
2.3 Is your AT a DeltaRange® balance?
The AT261 and AT460 models are
DeltaRange® balances. They have a
ten times more accurate, movable fine
range, which shows an additional
decimal place. Thus, for example, the
AT261 has a resolution of 0.1 mg over
the entire weighing range and a
movable fine range with a resolution of
0.01 mg.
This fine range can be called up at any
point in the whole weighing range as
often as liked.
The movable fine range covers 62 g for
both models. Each time you set the
balance to zero (tare) with the «ReZero» key, the fine range is switched in.
If the span of the fine range is
exceeded, the balance automatically
switches into the coarse range. The fine
range can be called up again by
rezeroing the balance once more using
the «Re-Zero» key.
11
Page 15

12
Note:
This ten times more accurate movable
fine range also remains active in
differential weighing.
2.4 How you can weigh in the coarse and fine range
Semimicro and DeltaRange® balances
of the AT series are equipped with a
switch key which you can use to switch
from the coarse range to a ten times
more accurate fine range.
The AT thus allows you to work in the
range best suited to your needs.
If, for example, instead of a high
resolution you need a stable weighing
result as rapidly as possible, you switch
from the fine range to the course range
using the switch key. This makes your
AT very fast and the weighing results
are extremely stable.
You can thus also disable the
DeltaRange® if you do not need it.
Operating instructions METTLER TOLEDO AT balances
Page 16
Operating instructions METTLER TOLEDO AT balances
12.6439
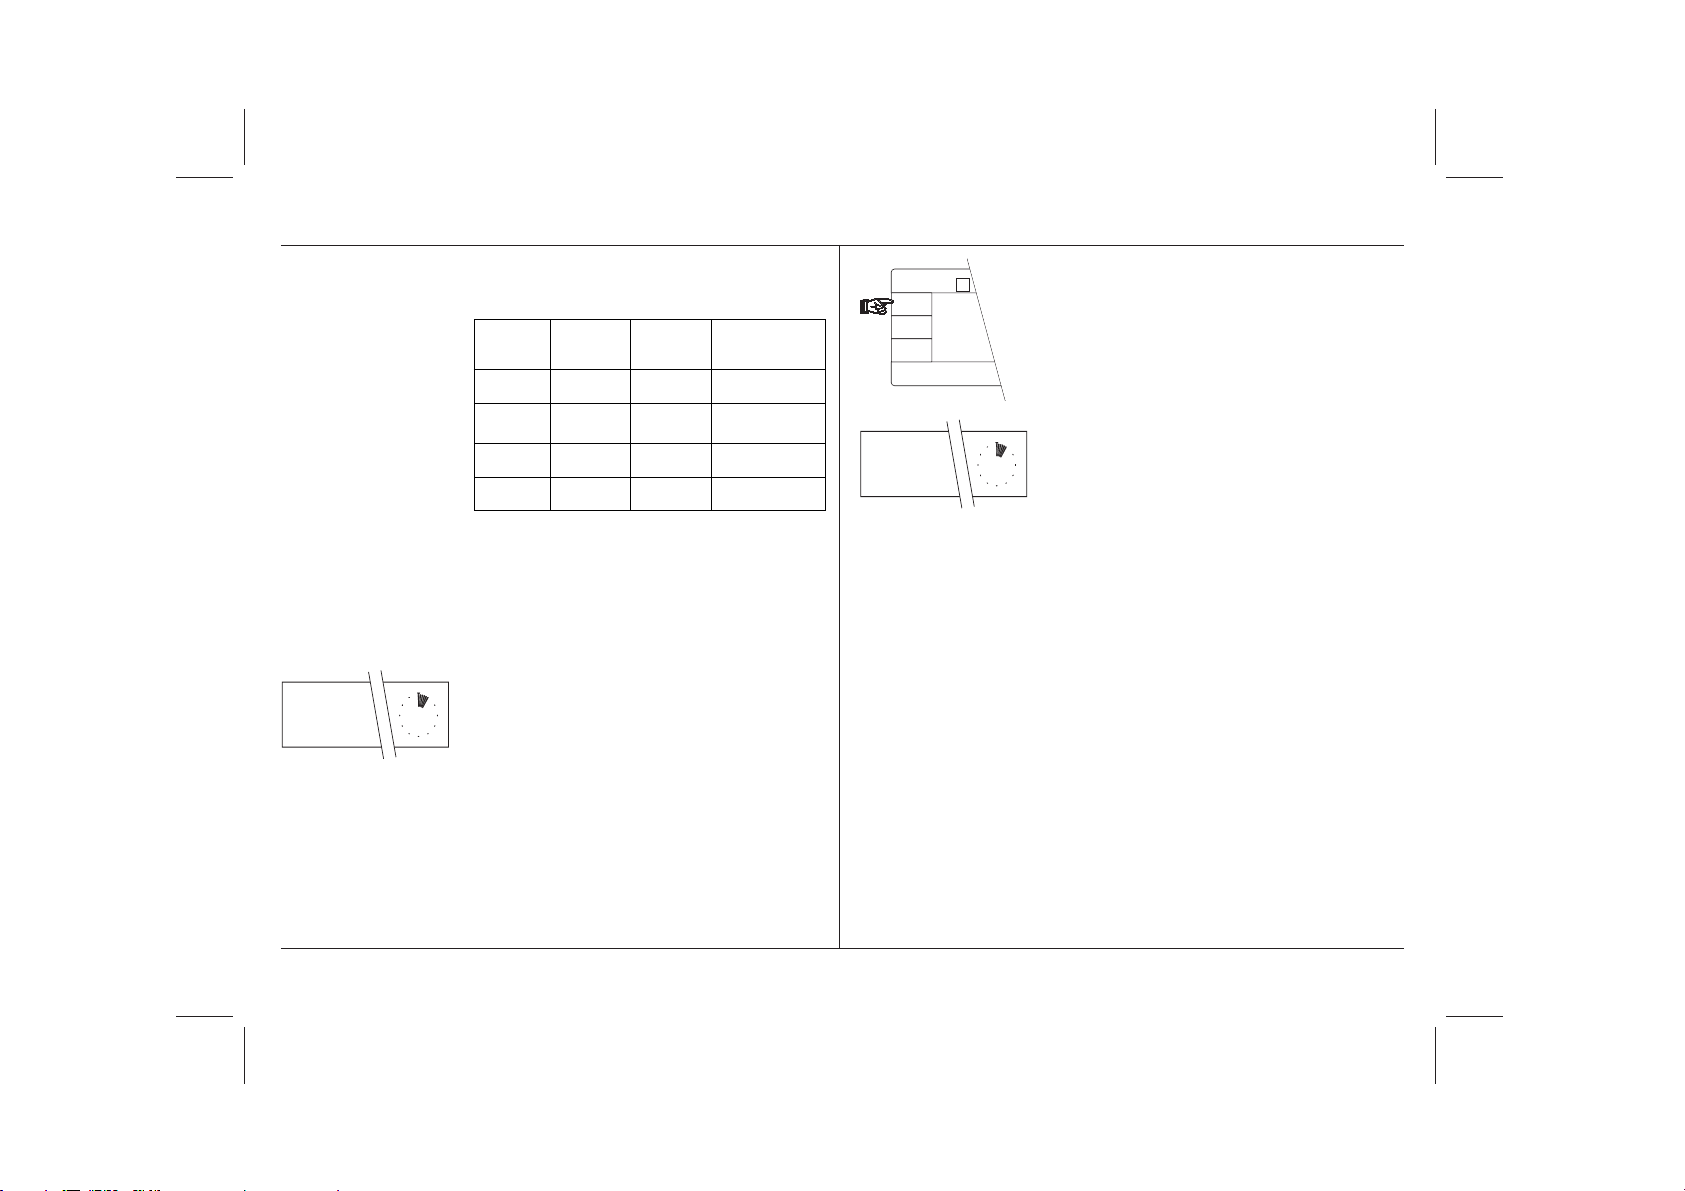
You have the following selectable
ranges available:
Balance Coarse Fine Key
range range
AT20 0.01 mg 2 µg 10 / 2 µg
AT201 0.1 mg 0.01 mg 0.1 / 0.01 mg
AT261 0.1 mg 0.01 mg 0.1 / 0.01 mg
AT460 1 mg 0.1 mg 1 / 0.1mg
With the «0.1/0.01 mg» key (e.g. with
AT201/AT261 DeltaRange®) you can
switch between the coarse and the fine
range:
- The balance is measuring in the
coarse range
Max 205 g d = 0.01 mg
AT201
Cancel
0.1/0.01mg
Configuration
Menu
Select 1
⇔
Set
12.64387
Pro
FACT
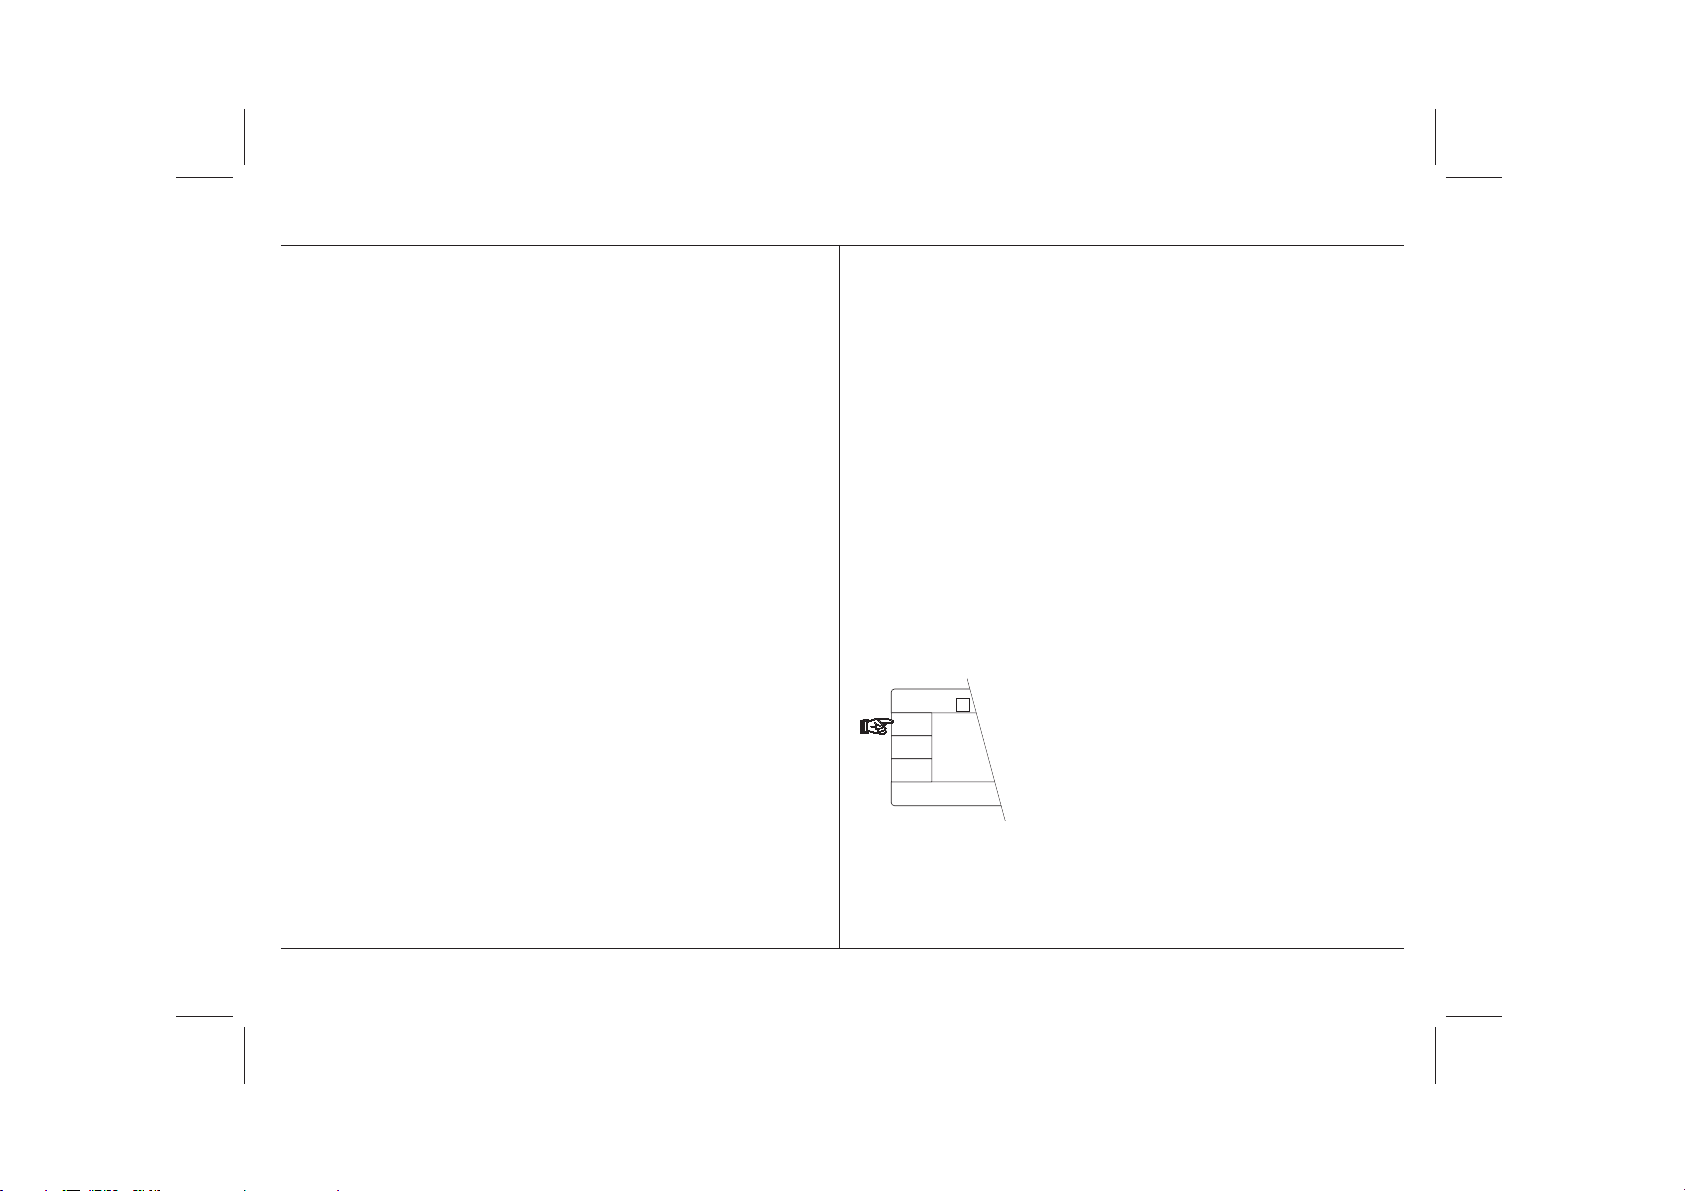
- Press the «0.1/0.01 mg» key (e.g.
with AT201/AT261 DeltaRange®)
and …
- …the balance operates in the ten
times more accurate fine range.
- By pressing the «0.1/0.01 mg» key
again, you can return to the coarse
range.
13
Page 17
14
3 Your AT is an adaptable balance
For the optimization of your weighing
results and adaptation to your weighing
needs, the AT offers you additional
setting options. You undertake these
adaptations in the menu, which you will
now be introduced to.
You can set additional parameters in
the second menu tree of your AT, the
configuration register (section 4).
3.1 What is the menu?
In the menu you match your balance to
the local conditions and to the weighing
tasks. The menu contains various
adaptation possibilities, the menu
options, which in turn offer different
setting options.
AT201
Cancel
0.1/0.01mg
Configuration
Menu
Select 1
Set
Max 205 g d = 0.01 mg
⇔
Overview of the menu functions:
- reference weight in %
- reference weight in pieces
- adjustment
- weighing process adapter
- vibration adapter
- fully automatic door function
You will find a detailed overview of
the menu on pages 82 and 83.
In addition, you can also perform several operational steps in the menu for
special applications (percent weighing
and piece counting). Section 5 of these
operating instructions provides you with
more information.
Pro
FACT
We encourage you to experiment with
the menu to familiarize yourself with it.
You need have no worries here: By
pressing the «Cancel» key you can
return to the weighing mode at any
time without changing the stored
settings!
Operating instructions METTLER TOLEDO AT balances
Page 18
Operating instructions METTLER TOLEDO AT balances
AT201
Cancel
0.1/0.01mg
Configuration
Menu
Select 1
⇔
Set
AT201
Cancel
0.1/0.01mg
Configuration
Menu
Select 1
⇔
Set
Max 205 g d = 0.01 mg
Max 205 g d = 0.01 mg
You perform your weighings in the
weighing mode, the operational mode
of your balance. Weighing mode and
menu are separate. By pressing and
holding the «Configuration» key you
can call up the configuration register.
You can also select the different menu
AT201
Cancel
0.1/0.01mg
Configuration
Menu
Select 1
Set
Max 205 g d = 0.01 mg
⇔
Pro
FACT
«Set» key
- Confirmation of your selection and
return to the weighing mode. The
selected settings are stored and
remain so even after the balance
has been switched off.
options and setting possibilities with
keystrokes.
«Menu» key
Pro
FACT
- Selection of the menu by briefly
AT201
0.1/0.01mg
Configuration
pressing the key in the weighing
mode
Cancel
Menu
Select 1
Set
Max 205 g d = 0.01 mg
⇔
Pro
FACT
«Cancel» key
- Exit the menu and return to the
weighing mode without any chan-
ges being made. If you have made
a wrong selection, you can leave
the menu at any time by pressing
the «Cancel» key. You are then in
- Selection of the individual menu
options
the weighing mode again without
any change in the settings.
Instead of pressing the «Cancel»
key, you can naturally switch the
scale off and then on again.
Pro
FACT
«Select 1» key
- Selection of the setting in a menu
option
15
Page 19
16
CAL Int
door Auto
By repeated pressing of the «Menu»
key, all available menu options appear
in the display in succession:
- proFACT
fully automatic adjustment and
linearization
- Adaptation to the type of weighing
(weighing process adapter)
- Adaptation to the local conditions
(vibration adapter)
- Automatic door function of the draft
shield
A complete overview of the menu can
be found on the pages 82 and 83.
Some additional tips:
- Not all menu options are constantly
or exactly displayed in the form
shown; some of them, e.g. the
setting of reference weights (“Set
100%”) depend on additional
settings in the configuration register,
which we will introduce you to in
Section 4 of these operating instructions.
- If you are in the menu and press no
key for about 1 minute, the AT
returns automatically to the
weighing mode. Any changes in
the settings made up to this point
are ignored in this case.
Operating instructions METTLER TOLEDO AT balances
Page 20
Operating instructions METTLER TOLEDO AT balances
- In the following 3 sections you will
get to know the three menu options
(weighing process adapter, vibration
adapter and automatic door function) in detail. The additional setting
options for special applications
(weighing in reference weights for
percent weighings or piece counting
and the adjustment) will be introduced in Section 5.
AT201
Cancel
0.1/0.01mg
Configuration
Menu
Select 1
Set
AT201
Cancel
0.1/0.01mg
Configuration
Menu
Select 1
Set
Max 205 g d = 0.01 mg
⇔
Max 205 g d = 0.01 mg
⇔
3.2 How to adapt your AT to
different types of weighing
Your AT balance can be matched to
different types of weighing (fine dispensing, absolute weighing, etc.) very
simply. It is equipped for this purpose
with the so-called weighing process
Pro
FACT
Pro
FACT
adapter, which can be set in the menu.
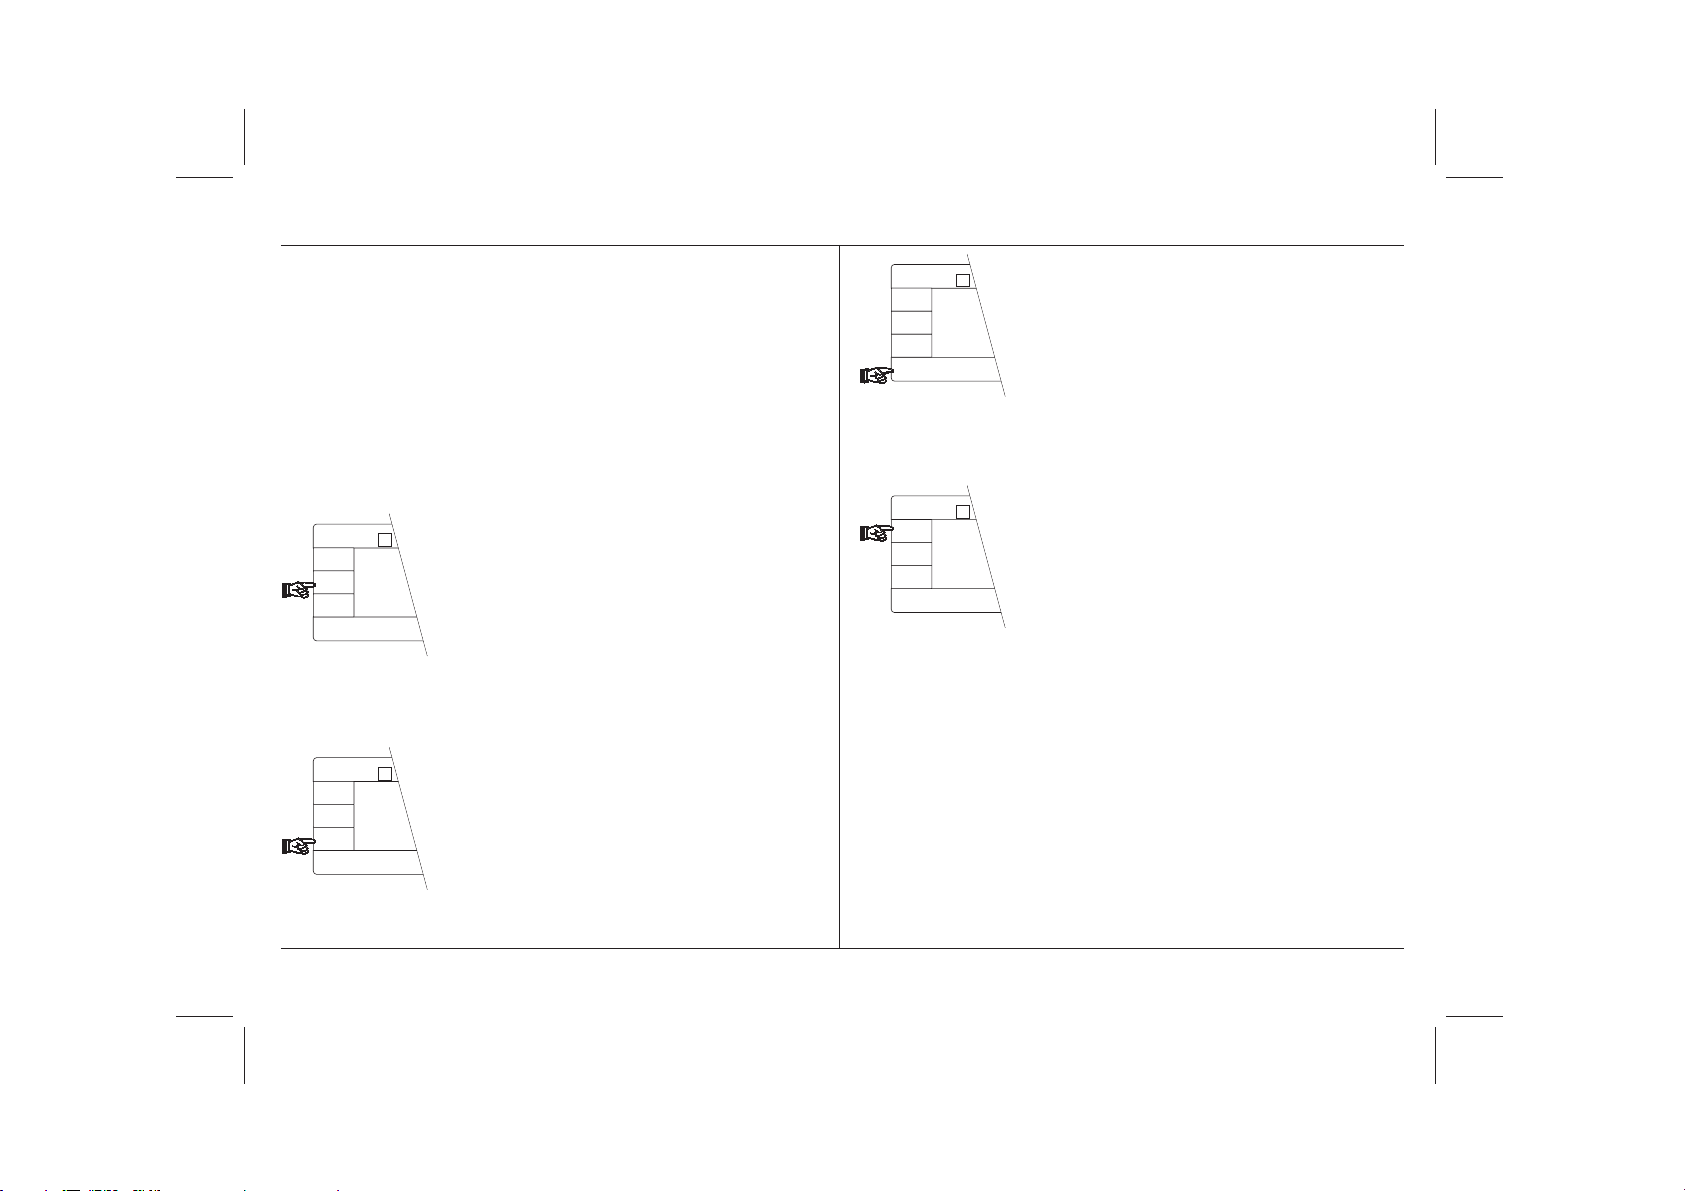
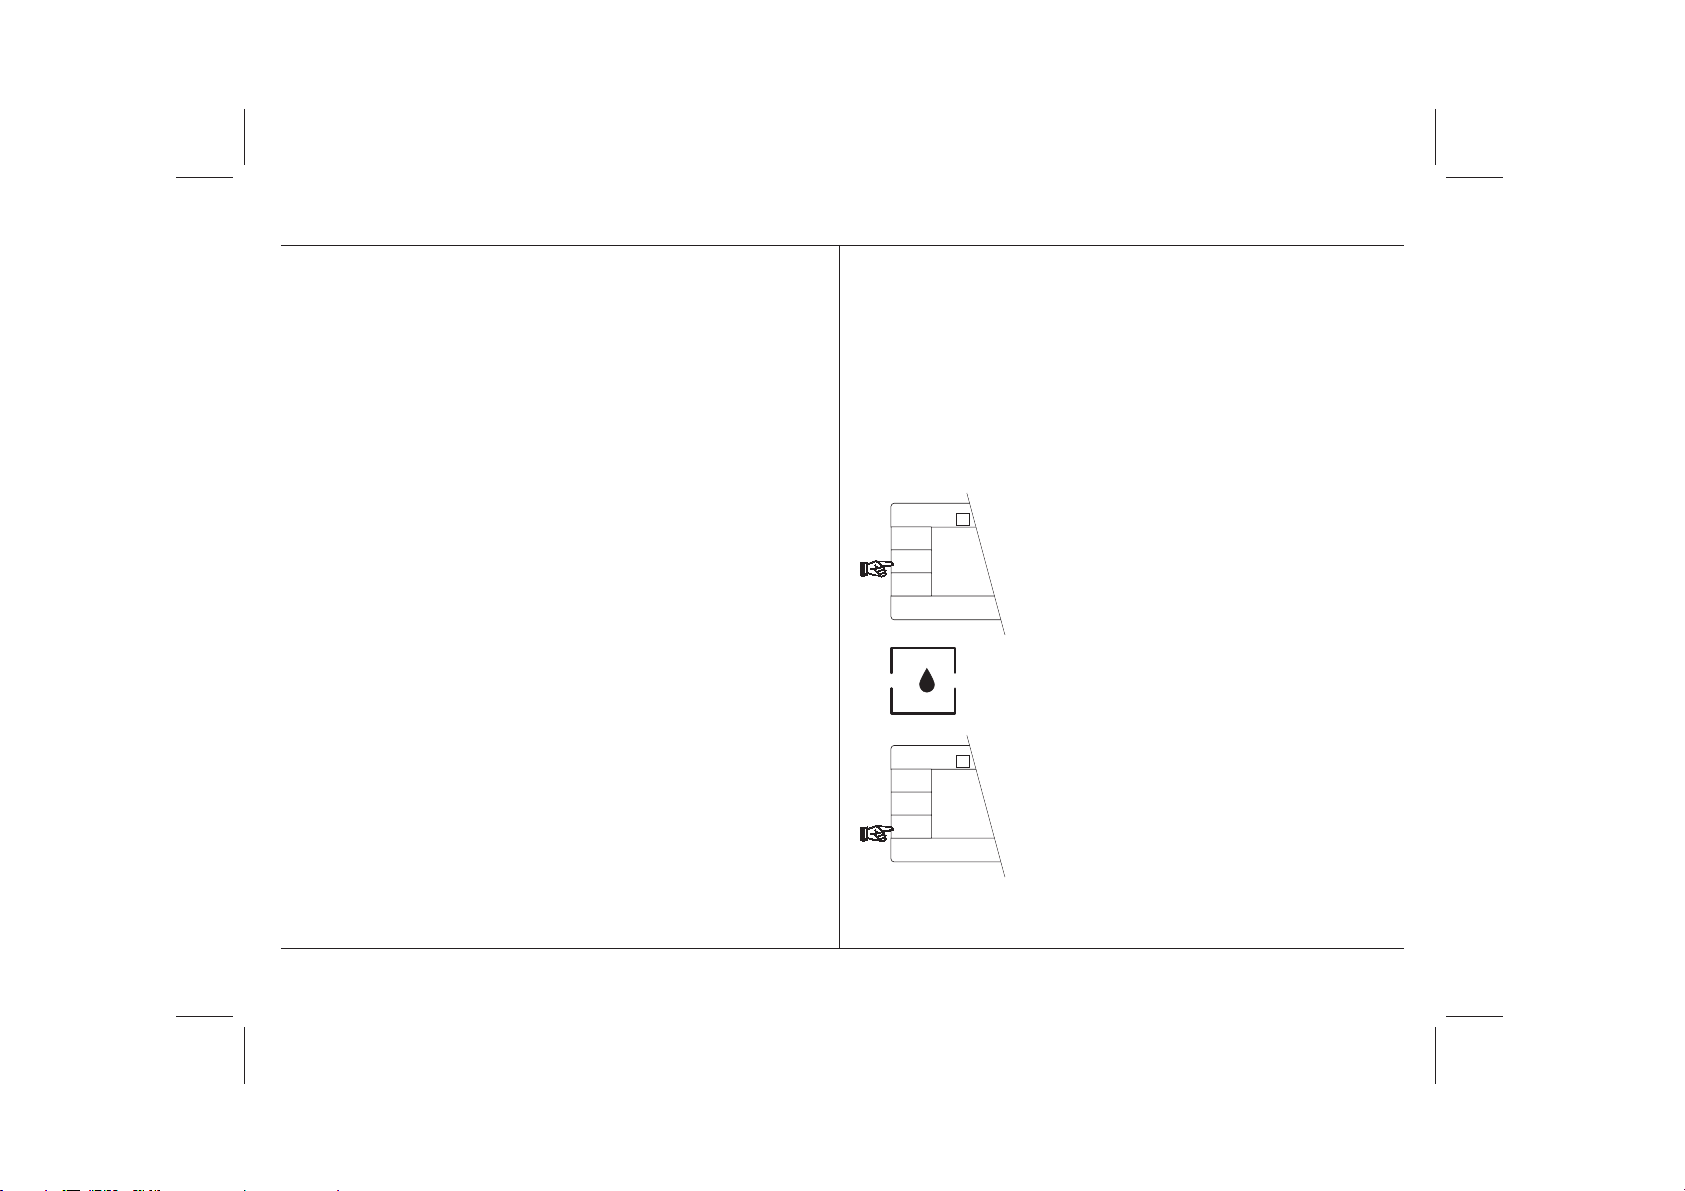
- Select the menu by pressing the
«Menu» key briefly.
- Press the «Menu» key repeatedly
until the drop symbol of the weighing process adapter appears in the
display.
- Select the appropriate setting with
the «Select 1» key:
17
Page 21
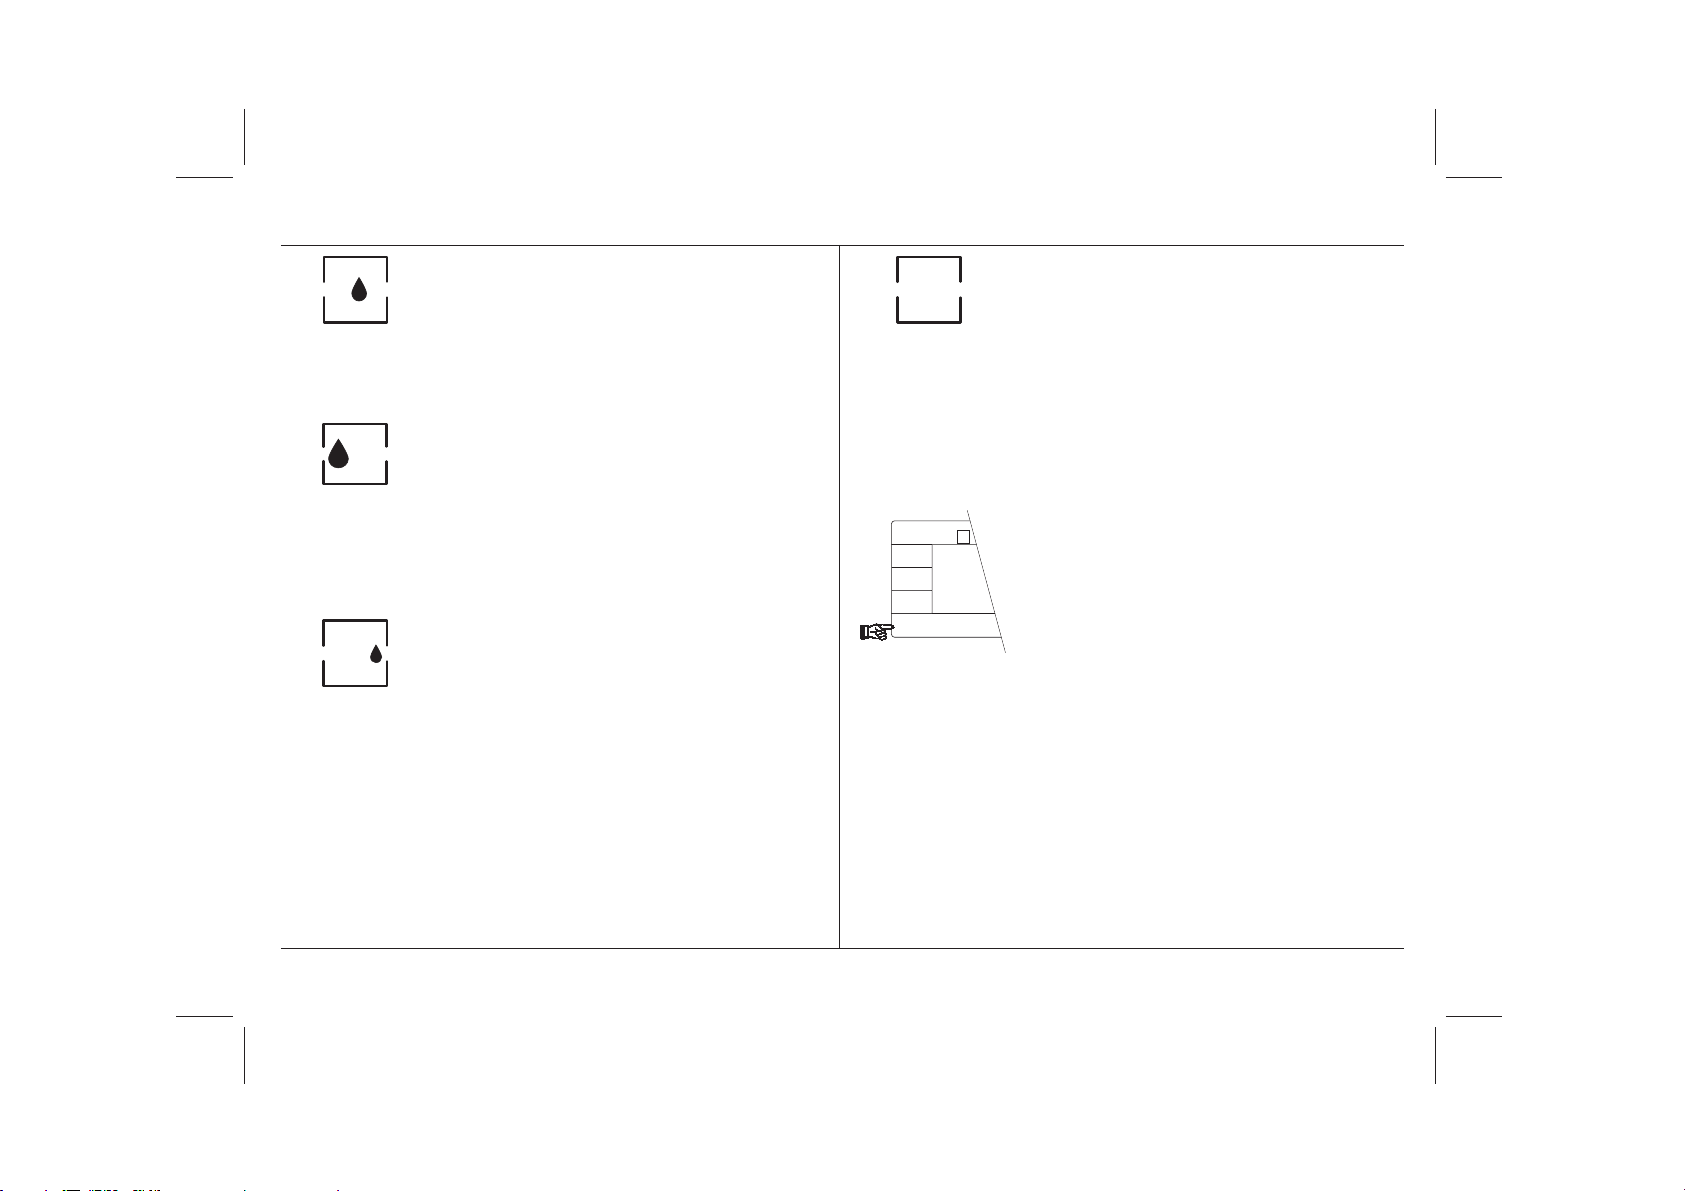
18
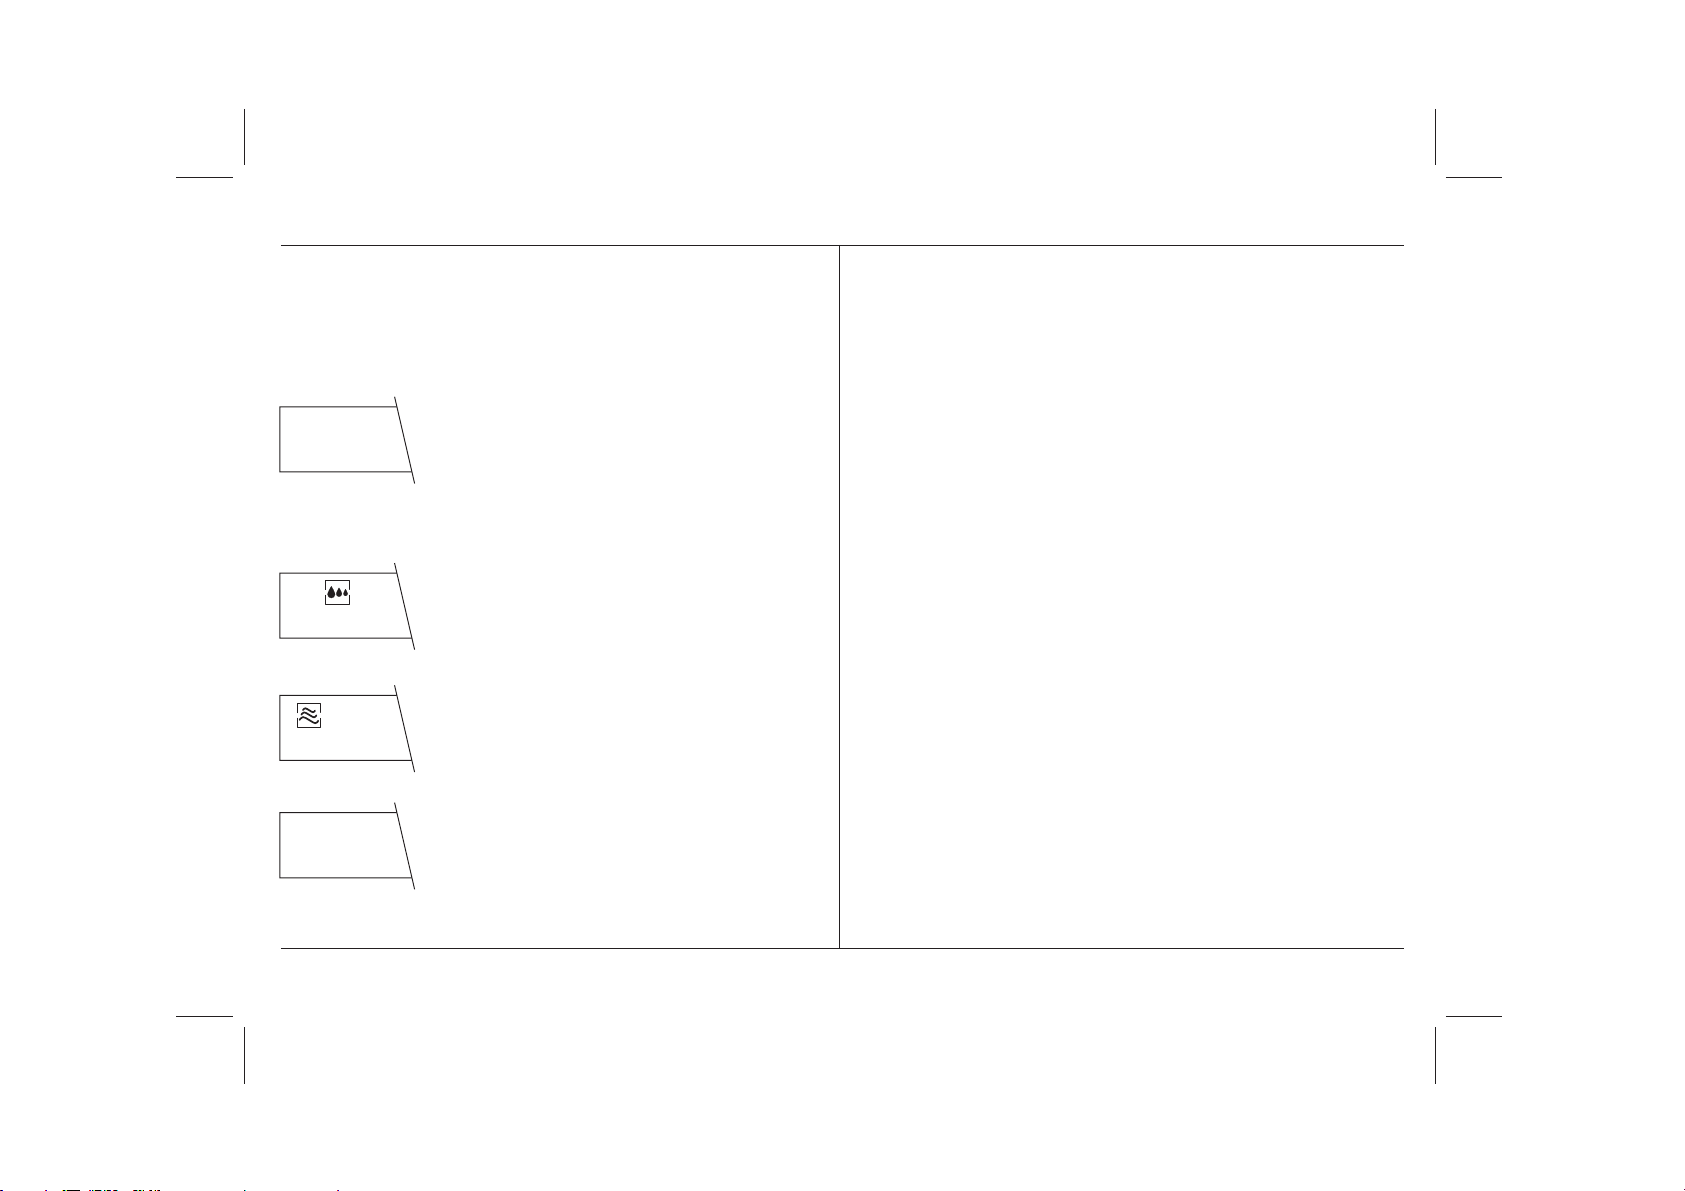
This is the universal setting
suitable in principle for all types of
weighing. This setting is preset in
the factory.
The position absolute weighing is
suitable for the rapid checking of a
weight. During the weighing in, the
last decimal place is suppressed.
If you wish to employ fine dispensing (weighing in) of a fine
powder or small amounts of liquid,
select the weighing in position.
This provides a continuous display
of all decimal places, and the weight
increase can thus be followed
easily.
AT201
Cancel
0.1/0.01mg
Configuration
Menu
Select 1
Set
Max 205 g d = 0.01 mg
⇔
In this position the drop symbol is
invisible, the weighing process
adapter is switched off. This setting
is suitable only for special appli-
cations in which not only the final
result but also the dynamics of the
weighing process are of interest, for
example the recording of weight
changes due to evaporation against
time.
Pro
FACT
- When you have selected the appro-
priate setting, press the «Set» key.
This makes the settings active
immediately, and the balance
returns to the weighing mode.
Operating instructions METTLER TOLEDO AT balances
Page 22
Operating instructions METTLER TOLEDO AT balances
3.3 How to adapt your AT to the local conditions
For all weighings, we advise you
always to open the draft shield only as
far as necessary. You thus achieve
stable weighing results as quickly as
possible.
If, despite a closed draft shield, no
stable weighing results are found, the
cause could lie with unfavorable local
conditions such as vibrations. Very
minor, hardly noticeable vibrations of
the weighing table are usually involved.
AT201
Cancel
0.1/0.01mg
Configuration
Menu
Select 1
⇔
Set
AT201
Cancel
0.1/0.01mg
Configuration
Menu
Select 1
Set
Max 205 g d = 0.01 mg
Max 205 g d = 0.01 mg
⇔
With the so-called vibration adapter
your AT balance can be matched in the
menu to the local conditions.
Pro
FACT
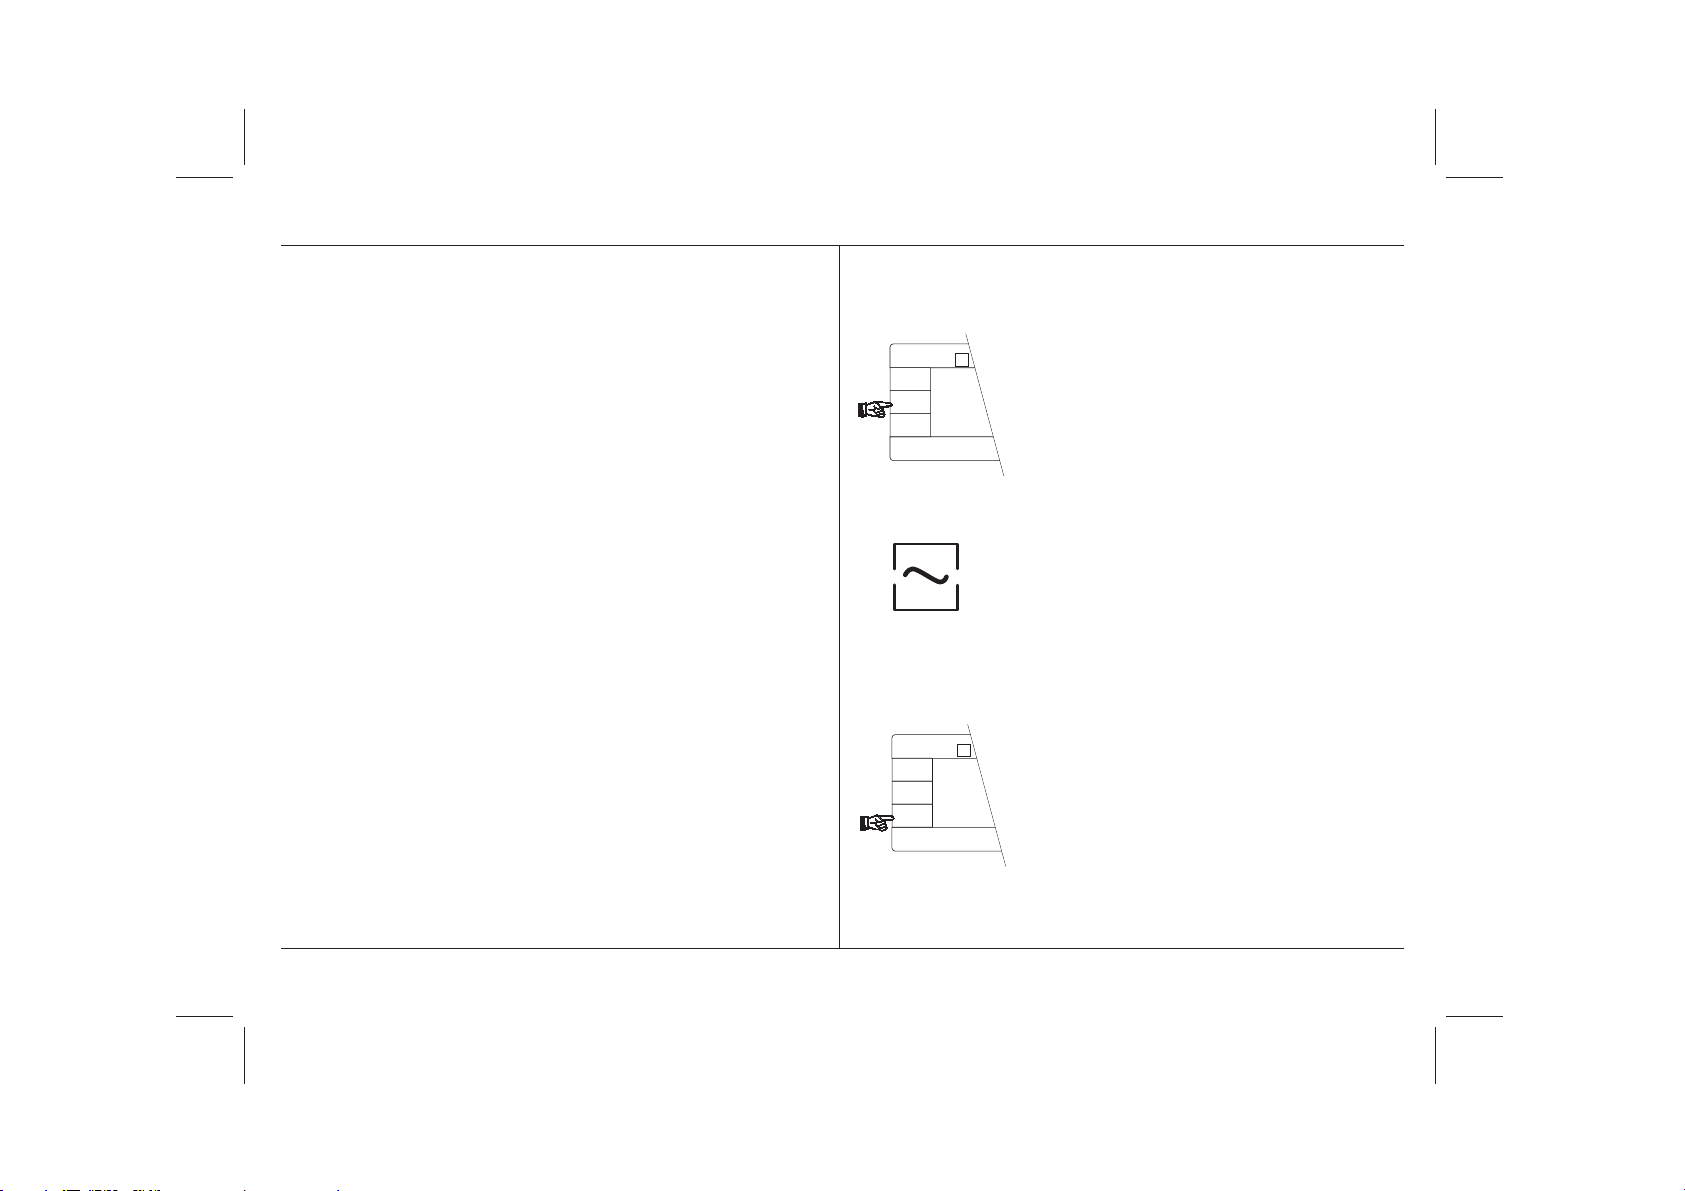
- Select the menu.
- Press the «Menu» key repeatedly
until the wave symbol of the vibration adapter appears in the display.
Pro
FACT
- Select the appropriate setting with
the «Select 1» key:
19
Page 23

20
AT201
Cancel
0.1/0.01mg
Configuration
Menu
Select 1
⇔
Set
Max 205 g d = 0.01 mg
This setting is suitable for normal
ambient conditions; the balance
operates at moderate speed in this
case. This position is set in the factory.
Note:
A further reason for an unstable display
of the weighing result could lie, for
instance, with electrostatic charging of
the weighing sample or the container.
You will find additional information
regarding this in Section 7.1.
This setting is suitable for work in
unquiet surroundings. The balance
operates more slowly, but is less
sensitive to external disturbances.
3.4 How to switch off the fully automatic door function
This setting is suitable for very quiet
and stable surroundings. The balan-
ce operates very rapidly, but is relatively sensitive to external disturbances.
Pro
FACT
- When you have selected the appropriate setting, press the «Set» key.
The chosen setting then immediately becomes active, and the balance
returns to the weighing mode.
You are already familiar with the
convenient automatic door function of
your AT balance from your first weighing. When the automatic door operation
is switched on, the draft shield closes
automatically after the «Re-Zero» key
(zeroing/taring) or the «Print» key
(printout of the weighing result, see
Section 5.6) has been pressed. As
soon as the weight display is stable,
the draft shield is reopened for the next
weighing operation (e.g. weighing in,
loading the balance). The draft shield is
thus always in the correct position for
the next weighing process. Routine
Operating instructions METTLER TOLEDO AT balances
Page 24
Operating instructions METTLER TOLEDO AT balances
work is particularly facilitated by this
automatic operation. It is also useful in
the percent weighing (Section 5.2) and
piece counting (Section 5.3) applications. When the twin foot switch (see
brochure is used, the automatic operation leaves both hands free for weighing in.
If you wish to operate the draft shield
manually or semiautomatically via the
two keys, however, you can switch
⇔
off the automatic door operation:
Pro
Max 205 g d = 0.01 mg
Cancel
Menu
Select 1
FACT
⇔
Set
AT201
0.1/0.01mg
Configuration
door Auto
Pro
Max 205 g d = 0.01 mg
Cancel
Menu
Select 1
FACT
⇔
Set
AT201
0.1/0.01mg
Configuration
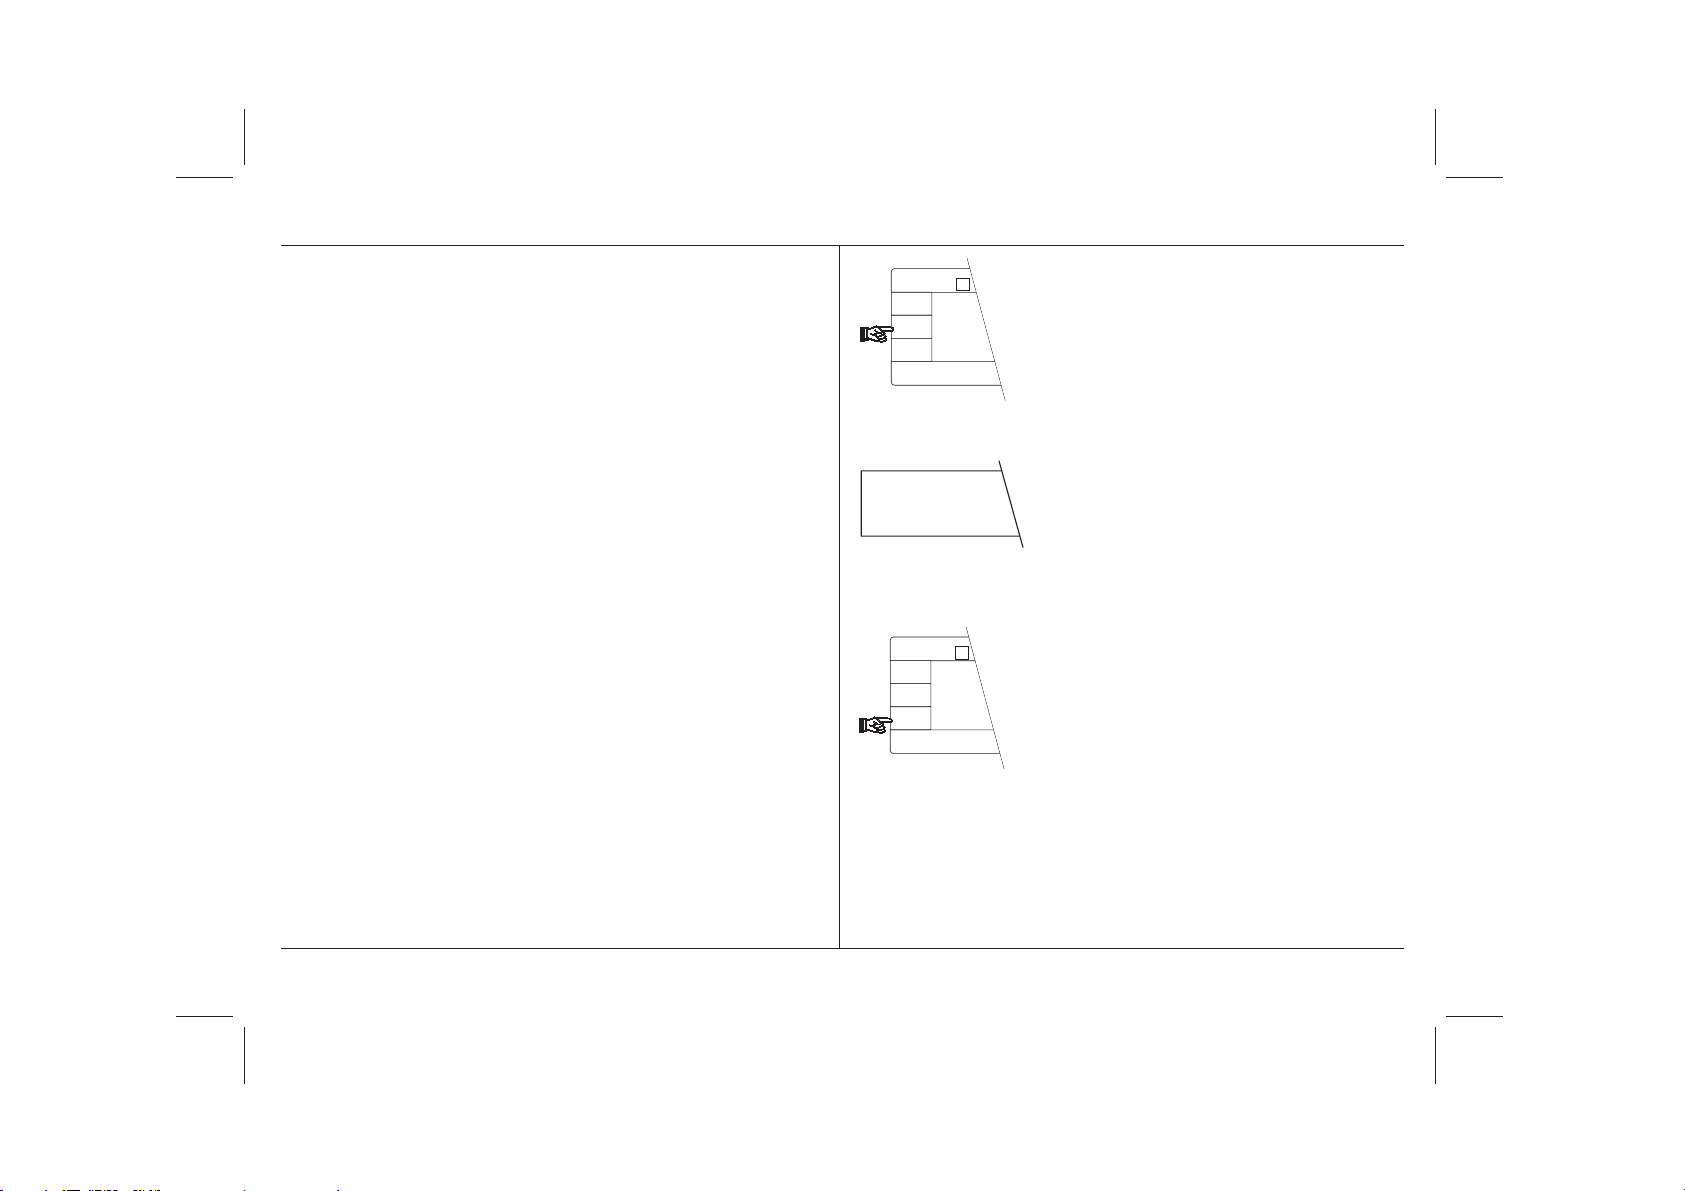
- Select the menu.
- Press the «Menu» key repeatedly
until the adjacent display appears.
- Using the «Select 1» key, you can
now switch the automatic door operation off and on again:
21
Page 25
22
door Auto
door Std
Pro
Max 205 g d = 0.01 mg
Cancel
Menu
Select 1
FACT
⇔
Set
AT201
0.1/0.01mg
Configuration
Fully automatic door function
switched on
Fully automatic door function
switched off
- Activate the chosen setting by
pressing the «Set» key and you will
be returned once again to the
weighing mode.
4 Additional possibilities with your AT
In addition to the menu, the AT offers
you further, very specific adaptation
possibilities. You perform these adaptations in the configuration register,
which we will introduce you to in the
following section.
4.1 What is the configuration register?
The configuration register is divided
into four sectors in which you can vary
SEtt INGS
SCALE
the following settings:
- Operational setting
• Reset
- Basic settings
• ASD, automatic stability detector
• Readability
• Readability in the semimicro
range
• Autozero
• proFACT, adjustment and
linearization
Operating instructions METTLER TOLEDO AT balances
Page 26
Operating instructions METTLER TOLEDO AT balances
Unit
Int -FACE
- Weighing units
weighing unit 1
weighing unit 2
status indicator
beeper
- Interface
data transmission mode
data transmission rate
parity
transmission protocol
end-of-line mode
You will find further details on the
adjustment parameters on pages 82
and 83.
4.2 How is the configuration register used?
Hold the short-form operating
instructions in your hand. You will
then have the complete configuration register at a glance in front of
you.
We would like to encourage you to
experiment with the configuration
register to familiarize yourself with it.
You need have no worries on this
score: By pressing the «Cancel»
key, you can return at any time to
the weighing mode without any of
the stored settings being altered!
23
Page 27
24
AT201
Cancel
0.1/0.01mg
Configuration
Menu
Select 1
Max 205 g d = 0.01 mg
⇔
Set
AT201
Cancel
0.1/0.01mg
Configuration
Menu
Select 1
⇔
Set
Pro
FACT
Max 205 g d = 0.01 mg
METTLER TOLEDO
Select 2
On/Off
Pro
FACT
By pressing and holding the
«Configuration» key, you call up the
Print
configuration register.
⇔
⇔
You select the different
- sectors («Configuration» key)
- parameters («Select 1» key)
- settings («Select 2» key)
by simply pressing the appropriate key.
In contrast to the menu, you also need
the «Select 2» key for operation of the
configuration register.
«Configuration» key
Selection of the configuration
register from the weighing mode by
pressing and holding the key
(about 5 seconds). You are then
already in the first sector.
Selection of the individual sectors
in the configuration register with a
brief keystroke. After the last sector
you are returned to the first.
Max 205 g d = 0.01 mg
AT201
Cancel
0.1/0.01mg
Configuration
Menu
Select 1
⇔
Set
METTLER TOLEDO
Max 205 g d = 0.01 mg
AT201
Cancel
0.1/0.01mg
Configuration
Menu
Select 1
⇔
Set
Pro
FACT
Print
Select 2
On/Off
Pro
FACT
«Select 1» key
Selection of the parameters in a
sector. After the last parameter in
this sector you are returned to the
first.
«Select 2» key
Selection of the desired setting of a
⇔
parameter. After the last setting of a
parameter, you are returned to the
first.
«Set» key
Confirmation of your selection and
return to the weighing mode. The
selected settings are stored and
remain so even after the balance
has been switched off or disconnected from the power supply.
Operating instructions METTLER TOLEDO AT balances
Page 28

Operating instructions METTLER TOLEDO AT balances
Max 205 g d = 0.01 mg
AT201
Cancel
0.1/0.01mg
Configuration
Menu
Select 1
⇔
Set
2400 bd
Pro
FACT
«Cancel» key
Exit the configuration register and
return to the weighing mode with-
out any changes being stored. If
you have made a wrong selection,
you can quit the configuration
A further tip:
If you are in the configuration register
and you do not press a key for about 1
minute, your AT automatically returns
to the weighing mode. In this case, any
alterations in the settings are ignored.
register at any time by pressing the
«Cancel» key. You are then again in
the weighing mode without any
setting having been altered.
Instead of pressing the «Cancel»
key, you can also switch the balance off, then immediately on again.
In the following sections you will learn
what parameters you can select in what
sectors, and what settings are avail-
able. You will find the first example in
the setting of the parameter “Auto-
matic stability detection” (ASD) in
Section 4.4. In the following sections,
you will also find recommendations for
the correct setting of your AT balance.
Your AT balance is naturally not supplied with an empty configuration
register. We have already included
Further useful tips are contained in the
enclosed booklet “Weighing the right
way”.
standard settings for you. You can
recognize these factory settings by
the asterisk in the upper left corner of
the display.
25
Page 29

26
4.3 In the first sector you return to the factory settings
As you have learned in the preceding
section, the configuration register of
your AT balance has been preset in the
factory. Even if you have modified the
settings, you can return to the factory
setting at any time.
But here all specific settings, even
those in the menu, will be replaced
by the factory settings!
You undertake the return to the factory
settings in the first sector (operational
settings). This sector contains only a
single parameter:
-ConF-
SEttINGS
rESEt
0.0000
- Select the configuration register by
pressing and holding the «Configu-
ration» key. As soon as the display
shown opposite appears, release
the key.
- You are now in the first sector
(
Settings
) of the configuration
register.
- Select the first (and only) parameter
(«Select 1» key).
- Activate the resetting by pressing
the «Set» key, and the scale
returns automatically to the weighing mode. You again work with the
factory settings.
Operating instructions METTLER TOLEDO AT balances
Page 30

Operating instructions METTLER TOLEDO AT balances
SCALE
ASd
0.35
4.4 The second sector offers you numerous adaptation possibilities
- Select the configuration register by
pressing and holding the «Configuration» key. Then select the second
sector (basic settings) by pressing
the «Configuration» key briefly.
In this sector you can select the
following parameters and their
settings:
Automatic stability detection (ASD)
Your AT possesses an automatic
stability detection. As long as the
balance is unstable, the stability
detection symbol remains lit up in the
upper left corner of the display. The
symbol fades and the weighing result is
released only when the result is within
the limits selected by you for the
stability.
You have a choice of eight settings. In
the setting
ASd–1–
the display must be
within a preset tolerance limit for one
second for the result to be released as
stable. In the setting
ASd–7–
the result
must be within a preset tolerance limit
for several seconds before being
released.
- Select the first parameter, the
automatic stability detection (
ASD
),
with the «Select 1» key.
- Select the appropriate setting with
the «Select 2» key. The following
illustration shows the relationship
between the repeatability and the
weighing speed.
27
Page 31

28
Stage Weighing Repeata-
speed bility
off
very fast good
1
2
3 *
4
5
6
7 fast very good
In the
oFF
position, the balance does
not wait for attainment of stability; each
result is considered stable. This setting
is used in special applications in
connection with the serial data interface
(see also Section 4.6 “Data transmission mode”).
* = factory setting
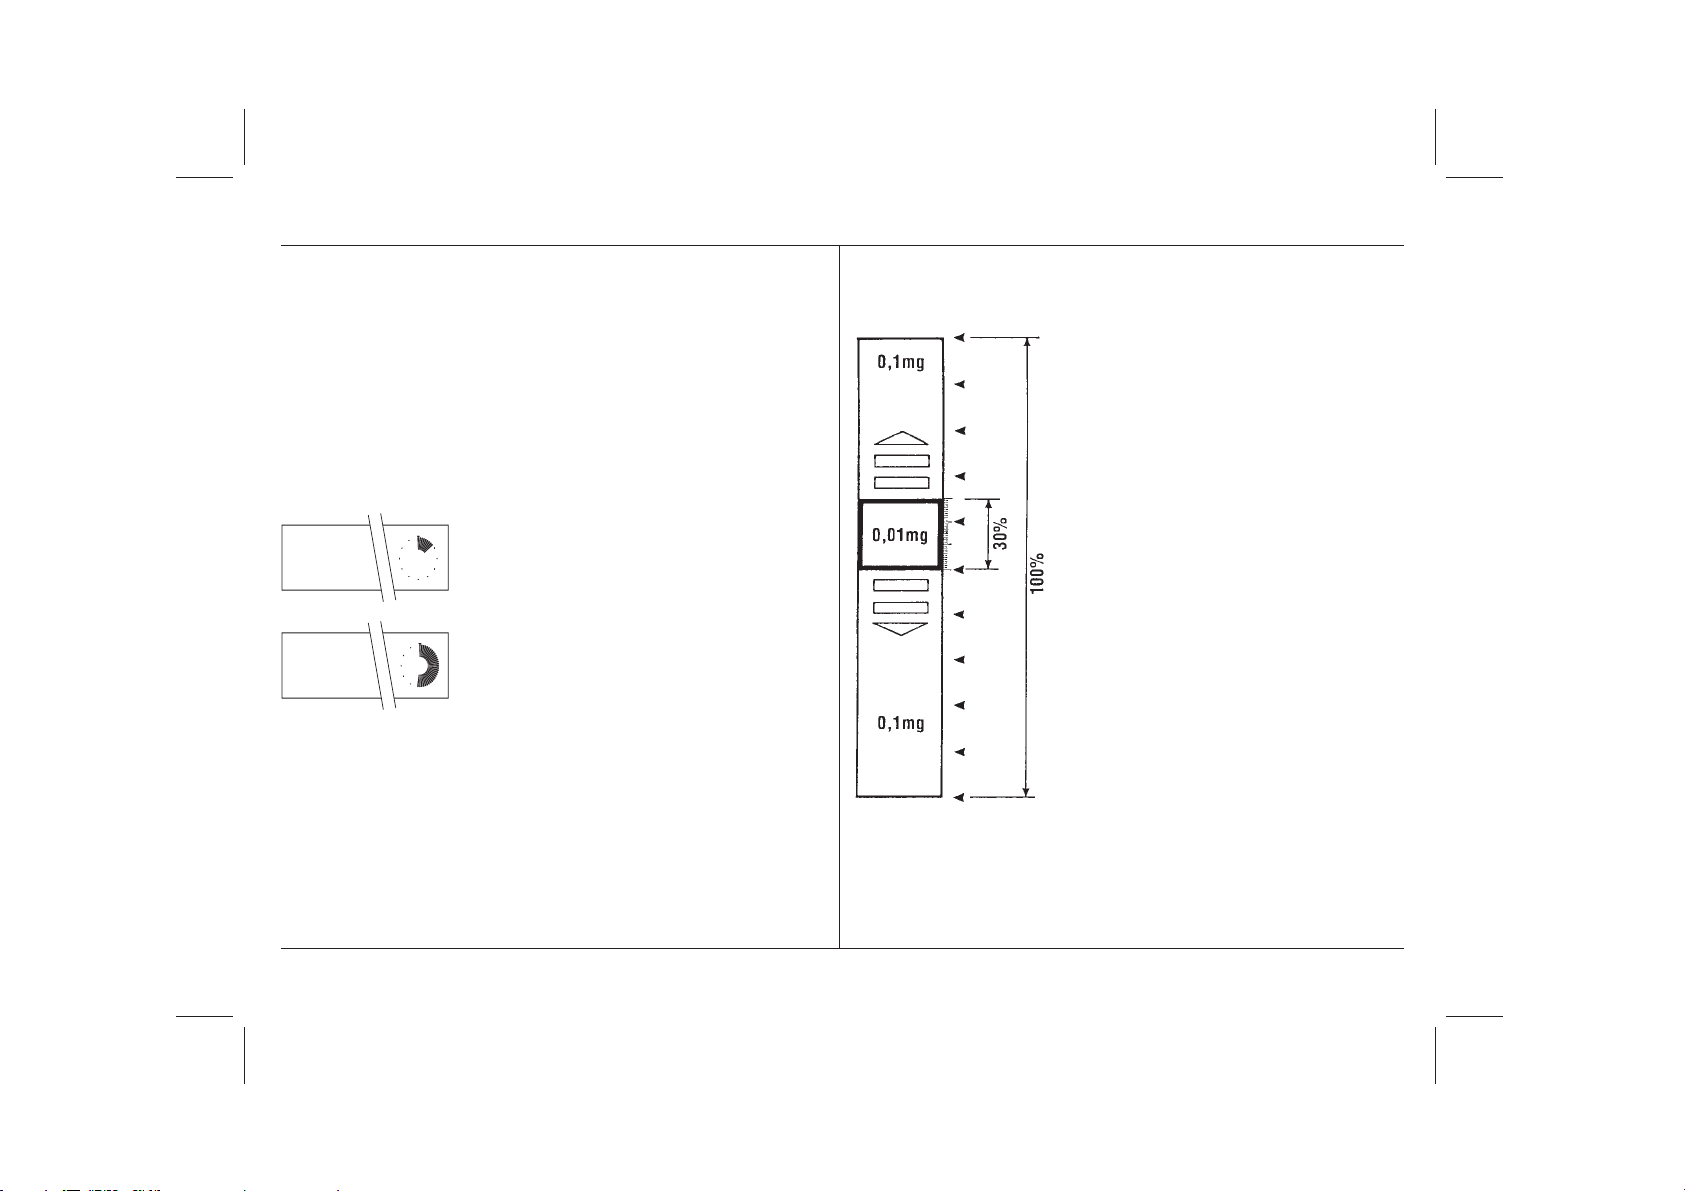
d
dF
Readability (selection of the readout
increments)
In this parameter you define the readout increments (digits) for the last
decimal place. Readout increments of
1, 2, 5 and 10 are available, and these
are symbolized by the following setting
options:
AT20 AT201 / AT261 AT460
DeltaRange® / DeltaRange®
AT200 / AT400
0.01 mg* 0.1 mg* 1 mg*
0.02 mg 0.2 mg 2 mg
0.05 mg 0.5 mg 5 mg
0.1 mg 1 mg 10 mg
* = factory settings
Select readout increments as large as
your application allows; the larger the
readout increments, the faster the
operation of your balance.
Readability (Selection of the readout
increments) in the fine range
This parameter is available only with
semimicro and DeltaRange® balances)!
Operating instructions METTLER TOLEDO AT balances
Page 32

Operating instructions METTLER TOLEDO AT balances
Here you define the readout increments
(digits) for the last decimal place in
weighings in the fine range. Readout
increments of 1, 2, 5 and 10 are available, and symbolized by the following
setting options:
AT20 AT201 / AT261 AT460
DeltaRange® DeltaRange®
2 µg* 0.01 mg* 0.1 mg*
5 µg 0.02 mg 0.2 mg
10 µg 0.05 mg 0.5 mg
0.1 mg 0.1 mg 1 mg
* = factory settings
Select readout increments as large as
your application allows; the larger the
readout increment, the faster the operation of the balance.
With the «0.1/0.01 mg» key you toggle
between the coarse and fine range of
DeltaRange® balances. Swit-ching is
possible only below a limit which
depends on the model (see also Section
2.4).
on
oFF
AZ
Autozero (AZ)
In this parameter you switch the auto-
matic zeroing (autozero) on or off.
When switched on, the zero is automatically corrected for drift or contamination of the weighing pan.
AZ
AZ
- Autozero on *
- Autozero off
* = factory setting
For particular applications (e.g. evapo-
ration measurements), it can be an
advantage to switch the autozero
function off.
29
Page 33

30
CALIN
CALIN
Auto on
Adjustment and linearization with
proFACT
In this parameter you define the
adjustment mode i.e., the way in which
your balance should be adjusted and
linearized. The following possibilities
are available:
- The AT balance adjusts and
linearize itself fully automatically
by loading two internal adjustment
weights. The process is initiated as
soon as a change in the operating
conditions makes this necessary.
One of the most important initiation
criteria is a temperature fluctuation
in the surroundings of ± 1.5 °C. You
do not have to concern yourself with
the adjustment of the balance. The
adjustment and the simultaneous
linearization provide you with the
surety that the displayed value
matches the mass of the loaded
weight over the entire weighing
range of your AT.
y
2
y
1
Display value
100%
50%
proFACT
professional fully automatic adjustment and linearization technology
1. Adjustment
The two internal adjustment weights
are loaded. The display is adjusts so
that the loaded weight matches the
display-ed value. (Correction of the
slope of the straight line).
2. Linearity
The internal weight m1 is loaded alone
and together with the weight m2. The
linearity is adjusted using the different
display values for m1 in both measurements. If the two displayed values,y
1
and y2, are equal, the linearity is
adjusted. (Correction of the deviation
from the shape of an ideal straight line).
100%
m
1
m
2
Loaded weight
m
1
Operating instructions METTLER TOLEDO AT balances
Page 34

Operating instructions METTLER TOLEDO AT balances
CALIN
Auto oFF
In this mode you can also initiate the
fully automatic adjustment and linearization at any time with a keystroke. This
is practical, for instance, when your AT
reports during a weighing that it wishes
to adjust itself. Section 5.4 shows you
how to proceed in such a case.
- The fully automatic self-adjustment
with linearization adjustment
(proFACT) described above is
switched off. You can trigger the
adjustment with the internal
adjustment weights at a keystroke.
After initiation, the adjustment runs
automatically, and at the same time
the measuring range is linearized.
Section 5.4 shows you how to
proceed in this case.
USEr
CALIN
- You use your own, external
adjustment weight for the
adjustment. The procedure is
described in Section 5.4 of these
operating instructions. proFACT is
not active in this setting.
* = factory setting
31
Page 35

32
Unit
Unit 1
4.5 In the third sector you select the weight units and additional settings
Select the third sector (weight units) in
dwt pennyweight
ct carat, metric
C.M. carat, metric (GB)
mo momme
* = factory setting
the configuration register.
In this sector you can select the follow-
ing parameters and their settings:
Weight unit 1
û
The following weight units are
available:
Display Name
g* gram
mg milligram
oz ounce
ozt Troy ounce
tl tael (see note)
HONg
GN grain
The number of decimal places in each
unit is dependent of the balance model.
By pressing the
between weight unit 1 (
weight unit 2 (
““
“ key, you toggle
““
Unit 1
Unit 2
). Section 5.1
) and
provides you with further details
regarding this switching. A conversion
table for the weight units is given in
Section 7.6.
Note for weight unit tael:
You have the possibility to choose
between three national tael units:
If you have selected the tael unit with
the «Select 2» key, press the
«Select 1» key until the adjacent
display appears.
Operating instructions METTLER TOLEDO AT balances
Page 36

Operating instructions METTLER TOLEDO AT balances
ON
g
H
S9P NAL
rOC
With the «Select 2» key you can now
select the desired national tael unit:
Hong Kong (factory setting)
Singapore, Malaysia
Taiwan (Republic of China)
Confirm your selection by pressing the
«Set» key.
You need perform the selection of the
national tael unit you require only once.
After this, whenever you configure tael
as a weight unit, the national tael unit
you have preselected will be used.
Unit 2 û
Weight unit 2
You have available the same weight
units as with weight unit 1 and also the
application units piece and percent:
Display Name
g gram
mg* milligram
oz ounce
ozt Troy ounce
tl tael (see note Tael under
weight unit 1)
GN grain
dwt pennyweight
ct carat, metric
C.M. carat, metric (GB)
mo momme
PCS pieces
Stk pieces (German)
% percent
* = factory setting
The number of decimal places in each
unit depends on the balance model.
33
Page 37

34
Auto
Unit 2
). You will find
““
“, you toggle
““
Unit 1
) and
By pressing the key
between weight unit 1 (
weight unit 2 (
further details in Section 5.1. A
conversion table for the weight units is
given in Section 7.6.
The application units «piece» and
«percent» are described in detail in
Sections 5.2 and 5.3.
Graphic indicators
The graphic indicators 26, such as the
symbols for the vibration adapter and
the weighing process adapter, provide
you with an overview of the selected
settings. These graphic indicators can
be switched on or off.
- A few minutes after the balance has
been switched on, the symbols
fade*.
on
bEEP
bEEP on
bEEP oFF
- The symbols are displayed permanently.
* = factory setting
Beeper setting
The audio acknowledgement beep
supports the operation of the balance
and the display audibly. You can switch
it off or on.
- audio acknowledgement beep
switched on *
- audio acknowledgement beep
switched off
* = factory setting
Operating instructions METTLER TOLEDO AT balances
Page 38

Operating instructions METTLER TOLEDO AT balances
Int-FACE
4.6 In the fourth sector the AT reveals itself as a balance ready to communicate
- Select the fourth sector in the
configuration register (interface).
For the attachment of a non-METTLER
TOLEDO printer or a PC you can select
the parameters for the data
transmission via the serial data
interface and their settings in this
sector. You will find more detailed
information regarding use of the
interface in the instructions
“Bidirectional Interface of the
METTLER TOLEDO AT balances”,
which is available from METTLERTOLEDO.
S.
S. Stb
S. ALL
S. Auto
S. Cont
Data transmission mode
The following setting options are
available:
- Send stable: The first stable value
is transferred after initiation of the
print command after release by the
automatic stability detection. *
- Send all: The current value is
transmitted after initiation of the
print command.
- Send automatically: The first
stable value is transmitted
automatically after every weight
increase of at least 0.01 g.
- Send continuously: All prepared
values are transmitted continuous-
ly.
35
* = factory setting
Page 39

36
bd
2400 bd
Important note:
If you have switched off the automatic
stability detection in sector 2 (
ASD oFF
all weight values are regarded as being
stable. After the «Print» key has been
pressed in this case, the following
values are transmitted:
In setting
the setting
In setting
S.Stb
: The current value as in
S.ALL
.
S.Auto
: The first value after a
weight change of more than 0.01 g.
Data transmission rate (baud rate)
The data transmission rate (baud rate)
determines the speed of the transmission via the serial interface. The unit is
the baud (1 baud (bd) = 1 bit/second).
The following transmission rates are
available:
),
PAr
PAr -E-
PAr -O-
- 150 db
- 300 db
- 600 bd
- 1200 bd
- 2400 bd *
- 4800 bd
- 9600 bd
* = factory setting
Parity
With the aid of the parity test, simple bit
errors in the data transmission can be
recognized by a parity check. The
following setting options are available:
- Parity Even *
- Parity Odd
Operating instructions METTLER TOLEDO AT balances
Page 40

Operating instructions METTLER TOLEDO AT balances
PAr oFF
PAr SPc
HS
HS PAUSE
HS CL
- Parity Off
- Parity Space
* = factory setting
Transmission protocol (HandShake)
These settings allow matching of the
data transmission to various serial
receivers. The following settings are
available:
Pause of 1 second (for METTLERTOLEDO GA42 Printer) *
- METTLER TOLEDO transmission
protocol. In this operating mode, the
end-of-line mode is automatically
set to “crLF” and can not be
changed.
HS oFF
HS HArd
HS Soft
EOL
EOL crLF
EOL cr
- No handshake
- Hardware handshake (DTR/CTS)
- Software handshake (XON/XOFF)
* = factory setting
End-of-line mode
Two setting options are available:
- Balance return and line feed at end
of line*
- Balance return at end of line
* = factory setting
37
Page 41

38
Important note:
If
HS CL
is set in the transmission
protocol, the end-of-line mode is set
automatically to
EOL
crLF and can not
be changed.
4.7 Print out the current
configuration
You can print out the configuration
currently stored on an attached printer.
This record is useful if you work with
different configurations. You then know
at all times which values should be set
for which application.
METTLER TOLEDO
Print
Select 2
⇔
On/Off
Proceed as follows for the printout:
- Select the configuration register.
- Press the «Print» key, and the
current configuration will be printed
out.
A further tip: Always print out your
specific configuration. You thus
have a record of your settings and
even if you return to the factory
settings, you can restore your
configuration at any time.
Operating instructions METTLER TOLEDO AT balances
Page 42

Operating instructions METTLER TOLEDO AT balances
4.8 How to protect your settings against inadvertent
change
As you know, with one press of the
«Set» key your individual settings in the
configuration register are stored. These
are available at any time (even if the
balance has since been disconnected
from the power supply). You are not,
however, protected against inadvertent
alterations, for instance by other
balance users.
To safeguard the settings, proceed as
follows:
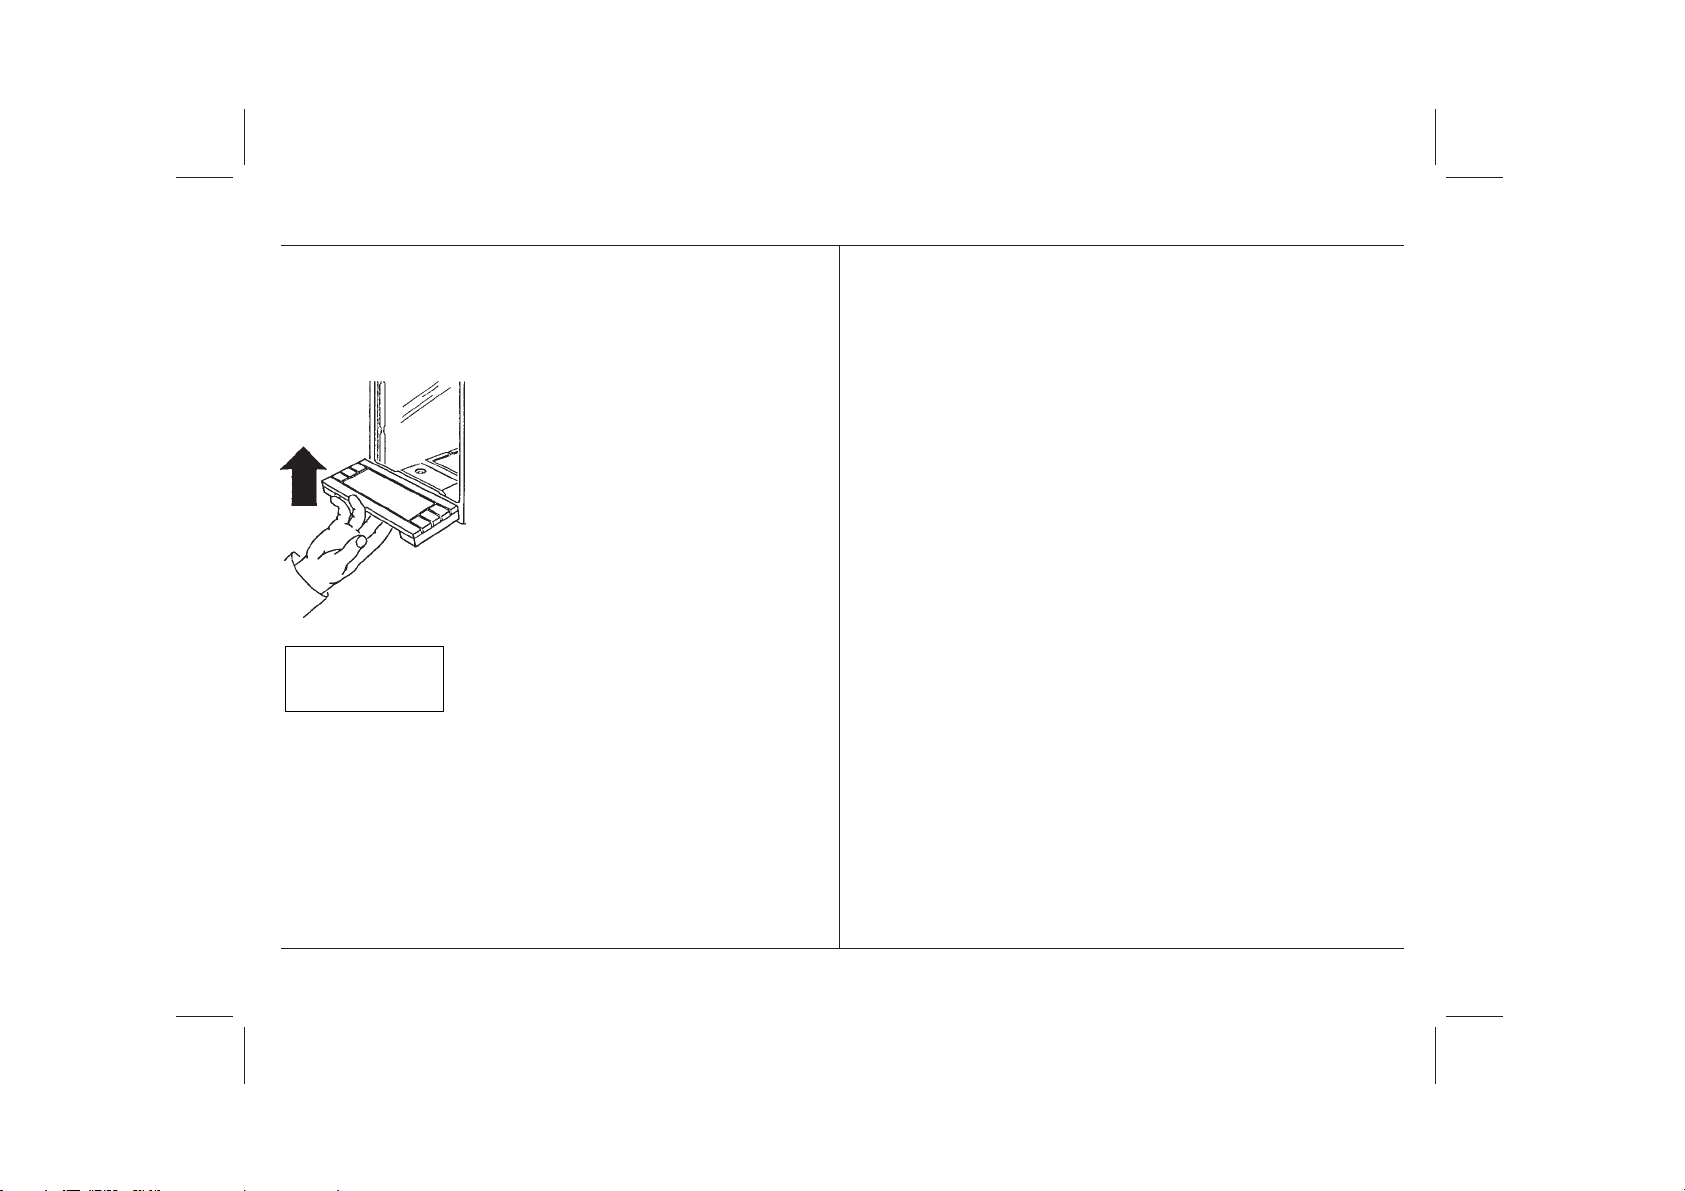
- Disconnect the cable of the AC
adapter from the receptacle.
- Remove the cover of the plug-in slot
21 at the rear of your AT balance.
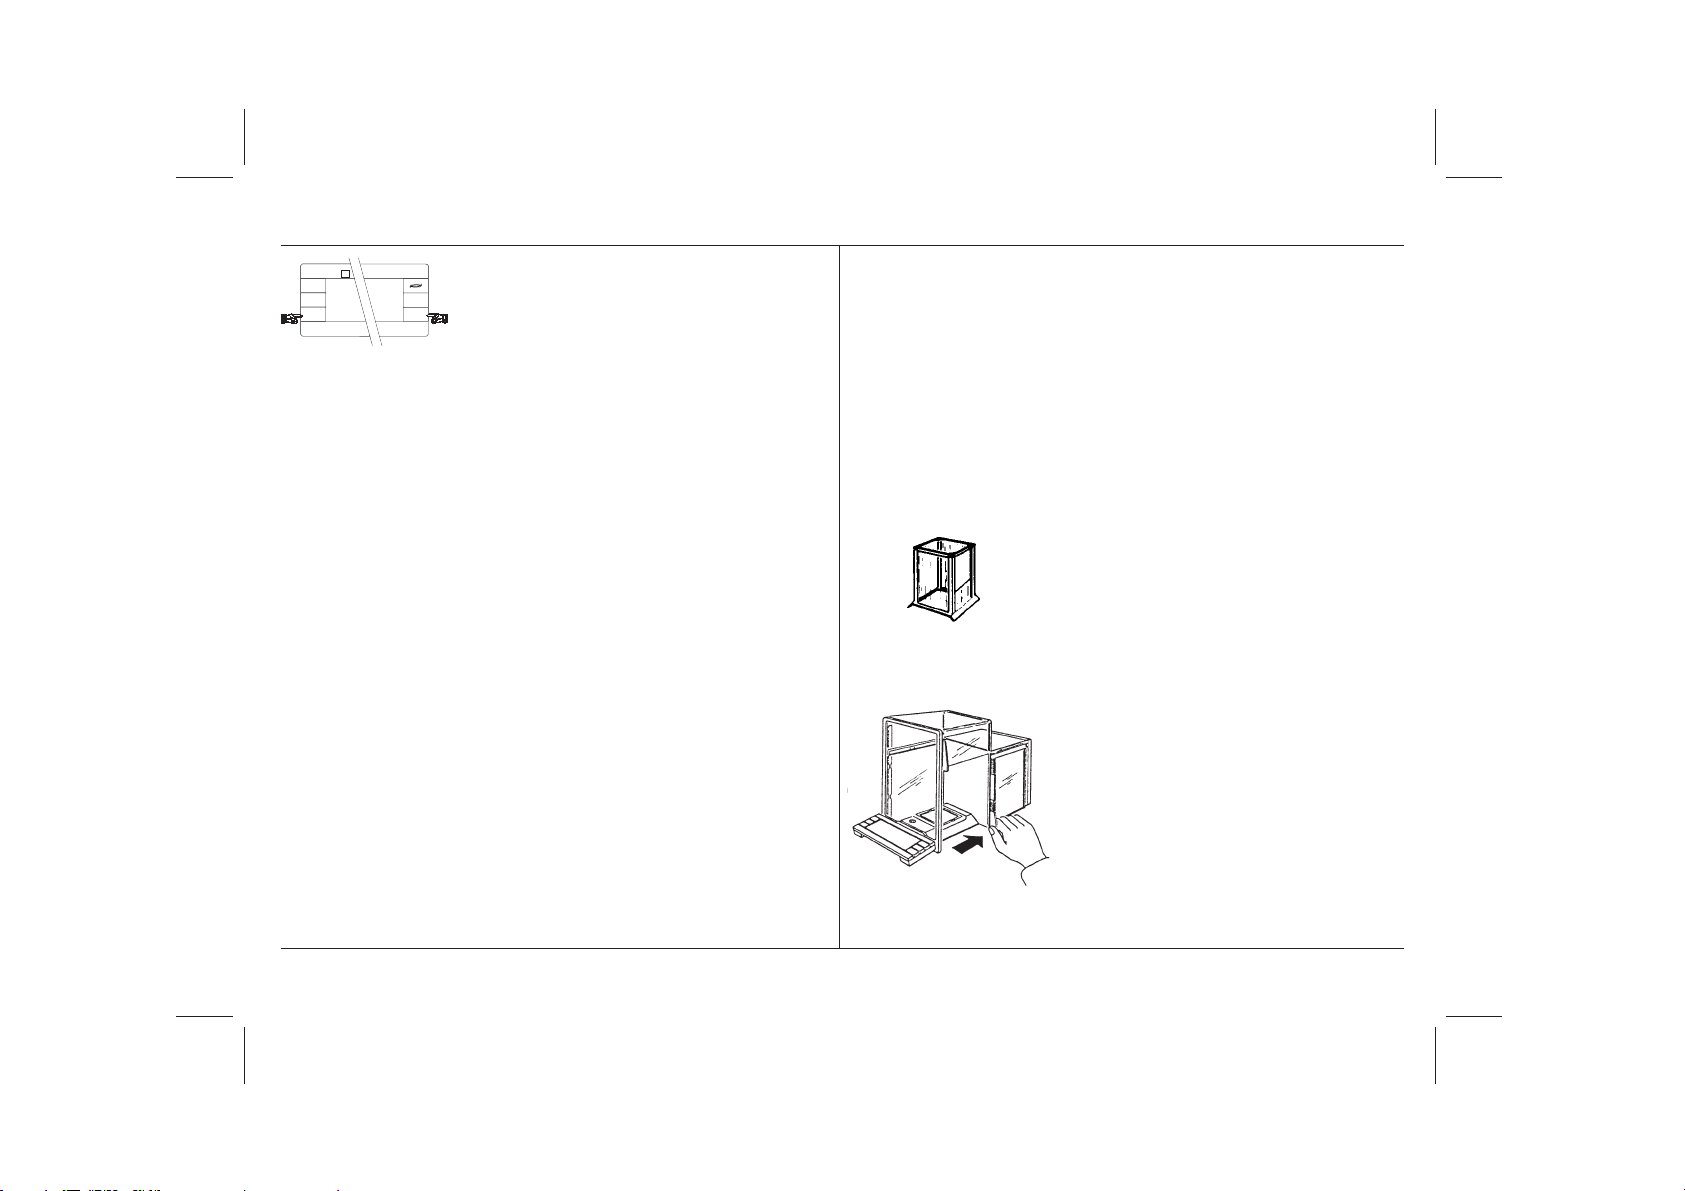
unprotected
protected
- Grasp the bracket of the program
cassette 22 and withdraw this
carefully from the plug-in slot 21.
- Remove the jumper with a thin pin
or a needle from the contact pins.
- If you wish to protect your individual
settings in the configuration register
against inadvertent changes, place
the jumper across both contact pins.
- Slide the program cassette 22 into
the plug-in slot 21 up to the stop
and replace the cover. Plug the
cable of the AC adapter into the
receptacle.
39
Page 43

40
If you have secured your settings,
the configuration register is no
longer accessible and no more alterations can be made.
- To remove the safeguard, proceed
in the reverse sequence.
5 Special applications and functions of
your AT balance
Your AT balance is also prepared in the
best possible way for special cases.
Applications and functions built in as
standard expand the possibilities of
your AT balance and facilitate the
operation. The following section familiarizes you with these applications and
functions.
5.1 Your AT can work with two weight units
With your AT balance you can toggle
between two preselected weight units
at any time. Section 4.5 of these
operating instructions shows you how
to select and store these two weight
units in the configuration register.
Operating instructions METTLER TOLEDO AT balances
Page 44

Operating instructions METTLER TOLEDO AT balances
68.4 µ
METTLER TOLEDO
Select 2
On/Off
0.3422
You have, for example, selected “mg”
as weight unit 1 and “ct” as weight unit
2 in the configuration register. You can
switch between these two units at a
keystroke:
5.2 Your AT also weighs in percent and shows plus/ minus deviations
This built-in application allows you to
weigh in to a preset value (100%) and
The balance is now operating with
weight unit 1.
to determine deviations from this
target value.
So that this application appears in the
menu, you must set the unit to percent
(%) under the parameter “Weight unit
2” (
Unit 2
- Press key
Print
⇔
- …the balance now works with
ct
weight unit 2. By pressing the
key again, you can return to weight
unit 1.
““
“ briefly and…
““
““
“
““
AT201
Cancel
0.1/0.01mg
Configuration
Menu
Select 1
⇔
Set
Max 205 g d = 0.01 mg
sector of the configuration register as
described in Section 4.5.
Pro
FACT
- Press the «Menu» key briefly and
The table in section 7.6 shows you the
conversion factors between the various
weight units.
SEt 100 %
) in the “Weight units” (
the AT requests you to load the
reference weight.
Note: This request appears only if
weight unit 2 is set to percent (%).
Unit
)
41
Page 45

42
- - - - - -
- Open the draft shield and load the
reference weight.
- Press the «Set» key and the draft
shield closes automatically if the
automatic door function is switched
on. If not, close the draft shield
manually or by pressing one of the
two keys and then press key
⇔
«Set».
As long as the horizontal dashes are
displayed, your AT is weighing the
reference weight.
-2.5% 100% +2.5%
- As soon as the horizontal dashes
disappear, the reference weight has
been read in and your AT is ready
for weighing. If the automatic door
function is switched on, the draft
shield opens automatically after
completion of the weighing process.
If not, open it yourself. Remove the
reference weight.
The DeltaTrac® now shows a plus and
a minus marking that displays the
tolerances of plus and minus 2.5%.
Now first weigh in coarsely:
- Place the empty container on the
pan and set the balance to zero
(taring).
Operating instructions METTLER TOLEDO AT balances
Page 46

Operating instructions METTLER TOLEDO AT balances
67.40 %
coarse indicator
fine indicator
98.70 %
100.00
- Add the weighing sample at a
steady rate to the container until the
coarse indicator on the DeltaTrac®
is pointing vertically downward.
This shows that the approximate
target weight has now been
reached.
Now perform the fine weighing:
- After the coarse weighing in, you
now add the weighing sample
carefully until the fine indicator on
the DeltaTrac® is pointing vertically
upward.
- When the fine and the coarse
pointers form a vertical line, the set
weight is within ± 0.25% of the
target.
If you possess a dual-range balance
(semimicro balance), you also have a
fine range available in the weight
unit %, in which additional decimal
places are displayed.
With the key
““
“ you can display either
““
the percentage or the weight (see
also Section 5.1).
5.3 Should your AT count pieces?
First your AT needs to know that you
wish to perform piece counting. You
make this setting in the third sector of
the configuration register (
you set weight unit 2 (
This setting is described in Section 4.5.
Unit
Unit 2
), where
) to
PCS
.
43
Page 47

44
AT201
Cancel
0.1/0.01mg
Configuration
Menu
Select 1
⇔
Set
Max 205 g d = 0.01 mg
Pro
FACT
- Open the draft shield manually or by
pressing one of the two keys .
⇔
- If you wish to count into a container, load the empty container.
pro
FACT
Max 205 g d = 0.1 mg
AT201
Cancel
0.1/0.001 mg
Configuration
Menu
χ
⇔
Set Re-Zero On/Off
AT201
Cancel
0.1/0.01mg
Configuration
Menu
Select 1
⇔
Set
Max 205 g d = 0.01 mg
Pro
FACT
METTLER
METTLER TOLEDO
- Set the scale to zero (taring).
Print
Select 2Select 1
χ
⇔
- Your AT now needs the weight of a
reference piece number. Press the
«Menu» key briefly.
Note:
SEt 10
PCS
This menu selection appears only
when weight unit 2 is set to piece .
- If you wish to count out of a container, load the full container.
AT201
Cancel
0.1/0.01mg
Configuration
Menu
Select 1
⇔
Set
Max 205 g d = 0.01 mg
Pro
FACT
- Select the desired reference piece
number with the «Select 1» key.
The following piece numbers are
available:
Operating instructions METTLER TOLEDO AT balances
Page 48

Operating instructions METTLER TOLEDO AT balances
SEt 10
SEt 20
SEt 50
SEt 100
PCS
PCS
PCS
PCS
10 20 50 100
Note: We advise you to select a
reference piece number as large as
possible since your AT determines
the average weight per piece. Since
it is seldom the case that all pieces
are equally heavy, the reference
weight that is stored is naturally
more accurate the greater the
reference piece number.
- If you wish to count into a
container, add the selected number
of pieces (reference piece number)
of the weighing sample to the
container.
- - - - - -
- If you wish to count out of a
container, remove the selected
number of pieces from the container.
- Press the «Set» key, and the draft
shield closes automatically if the
automatic door function is switched
on. If not, close the draft shield
manually or by pressing the right-
hand key and then press the
⇔
«Set» key.
As long as the horizontal dashes are
displayed, your AT is weighing the
reference weight.
45
Page 49

46
PCS
+67
-24
PCS
- As soon as the horizontal dashes
disappear, the reference piece
number and the reference weight
have been read in and your AT is
ready for counting or weighing.
If the automatic door function is
switched on, the draft shield opens
automatically on completion of the
weighing-in process. If not, open it
yourself.
Depending on how you have weighed
in the reference weight, you can now:
- Count into the container with
display of the total number of pieces
in the container or…
-…count out of the container with
display of the number of pieces
removed from the container.
AUTOCALIN
0.3675
With the key
““
“ you can display either
““
the piece count or the weight (see
also Section 5.1).
5.4 How to trigger the adjustment manually
In the factory the balance is preset to
proFACT. The AT balance adjusts and
linearizes itself as soon as a change in
the ambient conditions makes this
necessary. You thus need not concern
yourself with the adjustment. But you
also have the possibility to trigger the
motorized adjustment with the internal
adjustment weights at all times at a
keystroke. This can be practical if the
audio warning beep sounds during a
weighing and the adjacent symbol
appears in the display. This is your
AT’s way of showing you that it would
like to adjust itself. You can now either
interrupt your work at the next
convenient opportunity for about 5
minutes, when the AT will adjust itself,
or, you yourself can trigger the
motorized adjustment by pressing a
key.
Operating instructions METTLER TOLEDO AT balances
Page 50

Operating instructions METTLER TOLEDO AT balances
CALIN
Auto off
CAL
USEr
You select the adjustment mode in
sector 2 (
SCALE
) of the configuration
register (see Section 4.4). In addition to
the fully automatic self-adjustment,
you have two further adjustment
possibilities available:
- You trigger the automatic
adjustment with the internal
adjustment weights, with
simultaneous automatic linearization
of the measuring range at a
keystroke.
- The manual adjustment with an
external adjustment weight,
without linearization of the measuring range.
AUTOCALIN
CAL Int
If you have switched off the automatic
self-adjustment, you should adjust the
balance occasionally.
Automatic adjustment with the
internal adjustment weights at a
keystroke
You have this adjustment mode available if you have set the parameter
“adjustment and linearization” in sector
2 of the configuration register (basic
settings) either to
CALIN Auto oFF
CALIN Auto on
.
or
- Repeatedly press the «Menu» key
briefly until the adjacent display
appears.
47
Page 51

48
Max 205 g d = 0.01 mg
AT201
Cancel
0.1/0.01mg
Configuration
Menu
Select 1
⇔
Set
CAL End
0.0000
Pro
FACT
- Trigger the adjustment procedure by
pressing the «Set» key. The draft
Manual adjustment with external
adjustment weight
shield now closes automatically if
the automatic door function is
switched on. If not, close the draft
shield manually or by pressing one
of the two keys.
⇔
You wish to use your own external
adjustment weight for the adjustment
and have set the parameter proFACT
(adjustment and linearization) to «CAL
USEr» in sector 2 of the configuration
- You can follow the adjustment and
linearization procedure in the
numerical display and on the
DeltaTrac®, and you also hear
register (basic settings). In this mode
the automatic adjustment and
linearization with the built-in
adjustment weights is switched off.
when the internal weights are
loaded.
- Repeatedly press the «Menu» key
CAL USEr
briefly until the adjacent display
appears.
Completion of the adjustment and
linearization process is displayed
briefly,…
…the audio warning beep sounds and
the balance returns to the weighing
AT201
Cancel
0.1/0.01mg
Configuration
Menu
Select 1
⇔
Set
Max 205 g d = 0.01 mg
Pro
FACT
- Trigger the adjustment procedure by
pressing the «Set» key. The draft
shield now closes automatically if
the automatic door function is
switched in. If not, close the draft
shield manually or by pressing one
of the two keys.
⇔
mode.
Operating instructions METTLER TOLEDO AT balances
Page 52

Operating instructions METTLER TOLEDO AT balances
CALIN
200.0000
CALIN
0.0000
0.0000
After a short time, the audio warning
beep sounds and the requested,
model-dependent adjustment weight
appears in the display, for example,
200 g.
- Open the draft shield, load the
requested adjustment weight and
close the draft shield.
- Wait until the audio warning beep
sounds. The display now requests
the removal of the adjustment
weight.
- Open the draft shield, remove the
adjustment weight and close the
draft shield.
As soon as the audio warning beep
sounds and the adjacent display
appears, the adjustment is finished and
your AT is again in the weighing mode.
AT201
Cancel
0.1/0.01mg
Configuration
Menu
Select 1
⇔
Set
Max 205 g d = 0.01 mg
5.5 How to check whether the balance is still adjusted correctly
In the factory, the balance is set to
proFACT, professional fully automatic
adjustment and linearization
technology. A check of the adjustment
is not necessary in this mode. If you
have selected the automatic
adjustment mode with manual
triggering (
of the configuration register (see
Section 4.4), it is advisable to check the
adjustment with the internal adjustment
weights occasionally.
Pro
FACT
- Select the menu by pressing briefly
the «Menu» key.
CALIN Auto oFF
) in sector 2
49
Page 53

50
AUTOCALIN
CAL Int
CAL tESt
- Repeatedly press the «Menu» key
briefly until the adjacent display
appears.
Note:
This display does not appear if you
have set the parameter “adjustment
and linearization” to
CAL USEr
in
the configuration register
(adjustment with your own external
adjustment weight). Please also see
the note at the end of this section.
- Select the adjustment test by pressing the «Select 1» key.
- Start the test by pressing the «Set»
key. If the fully automatic door
function is switched on, the draft
shield now closes automatically. If
not, you first close the draft shield
manually or by pressing one of the
⇔
two keys and then the «Set» key.
199.9999
0.0000
The internal weights are now loaded,
without the balance being adjusted,
and the current, model-dependent
adjustment value displayed, interrupted
by the display
tESt
.
- When you have read off the value,
abort the test by pressing the «Set»
or «Cancel» key. The balance is
then again in the weighing mode.
Notes:
If the deviation of the adjustment
weight is more than ±0.00015% (1.5
ppm) from the full load, the balance
should be adjusted (see Section 5.4).
If you work with your own, external
adjustment weight (parameter
“adjustment and linearization” set to
CAL USEr
in the configuration register),
you can check the adjustment of the
balance by loading your own, external
adjustment weights.
Operating instructions METTLER TOLEDO AT balances
Page 54

Operating instructions METTLER TOLEDO AT balances
METTLER TOLEDO
Print
Select 2
⇔
On/Off
5.6 How to print out the weighing result
You can output the weighing result via
the interface connection 19 on a printer. If you wish to attach a nonMETTLER TOLEDO printer, you match
the para-meters of the data interface to
the specifications in the printer
handbook (see Section 4.6). You will
find further details in the instructions
“Bidirectional interface of the
METTLER TOLEDO AT balances”,
which you can order from
METTLER TOLEDO.
- In the weighing mode press the
«Print» key briefly.
68.4325
68.4325 g
- As soon as the result is stable, it is
transferred via the interface
connection 19 to the printer. Up to
the transmission, the triangle
symbol is lit up in the display. If the
transmission has not yet taken
place, you can abort the procedure
by pressing the «Print» key again
briefly.
After the transmission, the result is
kept for about 5 seconds in the
display for checking purposes, and
a ring symbol flashes at the upper
right.
- Notes:
The type of transmission depends
on the selected data transmission
mode, which you have set in the
fourth sector of the configuration
register (see Section 4.6). If you
have selected the
S.Stb
or
S.Auto
mode and the automatic door
function is switched on, the draft
shield is closed, the result transmitted and then the draft shield opened
again. If not, you close the draft
shield manually or by pressing one
51
Page 55

52
of the two keys.
⇔
- The transmission command can
also be triggered with the hand or
foot switch (available as an accessory).
5.7 Your AT can also be
remote controlled
The complete operation (keypad and
draft shield) as well as the menu and
the configuration register of your AT
balance can also be controlled via a
computer. This allows you to incorporate your AT in an automation system
and, for instance, is also suitable for
loading by a robot.
The draft shield, the zeroing (taring) of
the balance and the print command can
also be controlled externally via an
electrical contact (relay, proximity
switch). The connections for the electrical contacts 18 are at the rear of your
AT balance.
Further information regarding the
connection of an external robot or an
electrical contact can be found in the
operating instructions “Bidirectional
data interface of the AT balances”.
Operating instructions METTLER TOLEDO AT balances
Page 56

Operating instructions METTLER TOLEDO AT balances
6 Important information regarding your
AT balance
6.1 The AC adapter offers
you various installation
options
You can naturally place the AC adapter
supplied anywhere in the vicinity of the
balance within the radius of the connection cable. But in addition, the AC
adapter also offers you two advantageous and space-saving installation
possibilities.
Direct attachment to the balance
You can attach the AC adapter directly
to your AT balance.
Note:
Owing to the heat developed by the AC
adapter, this type of installation is not
advisable with semimicro balances
(resolution 0.01 mg).
- Remove the two fastener screws at
the rear of your AT balance.
- Attach the AC adapter holder
supplied to the rear of the balance
with the two screws. The arrow on
the holder must be visible and point
upwards.
53
Page 57

54
- Position the four feet in the slots of
the AC adapter. Hold the connection
cable to the right and it slides into
the central slot of the holder automatically.
Note:
You can attach the AC adapter such
that the power cable exits at the
right.
- Press the AC adapter gently downward the stop.
- Connect the AC adapter first to
connection socket 23 of the balance
and then to the power supply.
Wall mounting
- If you wish to save space at the
workplace, you can mount the AC
adapter on the wall:
- Decide on a suitable place for the
AC adapter. Take the length of the
connection cable into account.
- Use the AC adapter holder as a
template to mark out the drill holes.
Operating instructions METTLER TOLEDO AT balances
Page 58

Operating instructions METTLER TOLEDO AT balances
- Drill the holes and use the dowels in
the installation set supplied should
the wall material require it. Fix the
AC adapter holder such that the
arrow is visible and pointing upward.
- Hold the unit so that the connection
cable exits from the top and position the four feet in the slots in the
holder. Hold the connection cable to
the right while doing so and it will
slide into the central slot of the
holder automatically.
Note:
You can also fix the AC adapter so
that the connection cable exits from
below. In this case hold the connection cable to the left when engaging
the AC adapter.
- Press the AC adapter gently downward to the stop.
- Connect the AC adapter first to
connection socket 23 and then with
the power supply.
6.2 If you change the loca-
tion of your AT
If you wish to relocate your AT, please
note the following:
- To transport your balance, grasp it
at the front beneath the display and
at the back under the balance
housing. Never lift up your AT by
the draft shield or by using the «ReZero» key!
55
Page 59

56
6.3 A well maintained balance is a joy forever
- Clean the weighing pan, the draft
shield and the housing of your AT
occasionally with the brush supplied.
If, for example, you wish to clean
the base inside the draft shield at
the left, start with the brush from
the right or from the top through
the weighing chamber and at the
same time open the left door with
the left hand. Residues that have
accumulated on the base can easily
be brushed out.
With the AT20 you open the draft
shield by pressing either the left or
right key.
⇔
- For a thorough cleaning, lift off the
weighing pan 15 and the draft cover
16 vertically upward. After cleaning,
replace the weighing pan and the
draft cover. When replacing the
weighing pan, ensure that it has free
movement in its slot and does not
touch the draft cover. If necessary,
turn the weighing pan to the correct
position.
Cleaning
The balance housing and the weighing
pan are made of high-grade, resistant
materials. You can thus use any
commercially available cleaning agent
for cleaning.
- AT balances can best be cleaned
with a damp cloth.
Cautionary note
Ensure that no liquid can enter the AC
adapter or the balance.
Operating instructions METTLER TOLEDO AT balances
Page 60

Operating instructions METTLER TOLEDO AT balances
6.4 What your AT brings with it
The following accessories are supplied
with your AT:
- AC adapter with holder and installa-
tion set
- Operating instructions
- Short-form operating instructions
- “Weighing the right way”
- Cleaning brush
- METTLER TOLEDO weighing
tweezers (for semimicro balances
only)
6.5 Additional information and accessories for your AT balance
For below-the-balance weighings
your AT is equipped with an opening
for a hanger. Open the draft shield and
place the balance on its back. Swing
the cover of the opening on the underside of the balance aside. You can now
attach a pan or a holder to the hook in
the opening.
For the expansion of your AT balance,
for special applications and for different
types of weighing problems a variety of
peripheral units and information
brochures are available from
METTLER TOLEDO.
57
Page 61

58
7 Any questions?
7.1 What happens
Since it is not always easy to determine
the exact cause of an unstable display
the most frequent sources of error are
listed below.
You will find detailed explanations in
the enclosed booklet “Weighing the
right way”.
An unsuitable location
Strong drafts (e.g. from air conditioning
systems) or vibrations of the bench are
factors that can cause disturbances.
- Look for a suitable location, adapt
the vibration adapter to the local
conditions (see Section 3.3) and
close the draft shield as fully as
possible (see Section 2.1).
if the weight display
is unstable?
An insufficiently closed draft shield
- Close the draft shield as fully as
possible (see Section 2.1).
Electrostatic charging of weighing
samples and containers
This charging frequently appears in
heated rooms with dry air (below 4045% rel. humidity) and with weighing
samples made of glass or plastic. The
electrical charges generate forces that
can disturb the weighing.
Operating instructions METTLER TOLEDO AT balances
Page 62

Operating instructions METTLER TOLEDO AT balances
- In the simplest case, it may be
sufficient to remove the draft cover
16 and place the weighing sample
in a metal container.
Magnetic weighing samples or
containers
- In simple cases, it may be sufficient
to increase the distance between
the weighing sample and the
weighing pan. For this, place the
weighing sample on a nonmagnetic
metallic (e.g. aluminum) or glass
vessel. A further improvement can
be achieved by removing the draft
cover 16.
Weighing samples or containers
that are not at ambient temperature
Weighing samples or containers that
are warmer or colder than the ambient
temperature of the balance can cause
disturbing air currents and buoyancy
errors. Weight changes due to the
uptake or evolution of surface moisture
can also be the cause. These lead to
wrong or unstable weighing results.
- Wait until the weighing sample and
the container have attained the
ambient temperature. Do not touch
the weighing sample or the container with your hand (about 35 °C),
but use only the tongs or the
tweezers.
59
Page 63

60
Weighing samples or containers that
absorb or evolve moisture readily
All weighing samples or containers
made of wood, cardboard, paper,
cork (e.g. holder for round-bottomed
flasks), plastic or rubber can absorb
or evolve enough moisture to make the
display unstable and cause display of
nonreproducible or wrong weighing
results.
- If at all possible, containers made of
such material should be replaced by
metal or glass vessels. If this is not
possible, operations should at least
be performed in a room with a
constant atmospheric humidity.
The weighing sample or the container touches the draft cover
- In such a case remove draft cover
16.
The weighing pan is placed at an
angle and touches the draft cover or
the base
- Turn the pan to the center position
(see Section 6.3).
Contamination
Powder, liquid or other residues at the
edge of the weighing pan or between
the weighing pan and the draft cover
can lead to unstable displays if the
weighing pan no longer has completely
unrestricted movement.
- Clean the weighing pan and the
draft cover (se Section 6.3).
Operating instructions METTLER TOLEDO AT balances
Page 64

Operating instructions METTLER TOLEDO AT balances
The weighing process adapter is
switched off
If the weighing process adapter is
switched off, the weight display does
not always achieve stability when the
local conditions are unfavorable and
measurements are performed in the
semimicro range.
- Use this setting of the weighing
process adapter exclusively for
applications in which the dynamics
of the weighing process are of prime
interest (see Section 3.2).
7.2 How can the weighing
speed be increased?
The weighing speed or the stabilization
time of your AT is influenced considerably by the following factors and
settings:
Vibration adapter
If the local conditions allow (see Section 3.3), you can shorten the stabilization time of your AT by setting the
medium or small wave symbol of the
vibration adapter. Changing the setting
of the vibration adapter by one step
causes your AT to react around a third
faster.
Readability
If your application allows, you should
reduce the readout increments for the
last decimal place. The larger the
readout increments (e.g. steps of 5
instead of 1), the more rapid the operation of your AT balance (see Section
4.4).
61
Page 65

62
Automatic stability detection
Your AT achieves stability quicker if
you reduce the stability detection. If you
select, for example, stage 1(
instead of stage 6 (
ASD –1–
ASD –6–
), the
balance releases the weighing result as
stable decidedly more quickly (see
Section 4.4).
Glass draft shield, Inner draft shield
Your AT operates faster if you open
the draft shield to load the balance
only as much as necessary. So that
excellent weighing results can also be
achieved fast under difficult weighing
conditions, you can also use an inner
draft shield. (Order number 210270).
The disturbing effects of any incoming
drafts in the weighing chamber are
thus lessened (see Section 2.1).
Always select the fastest setting in the
menu or configuration register that
your application allows. You can
naturally combine all measures and
)
hence produce a marked increase in
the weighing speed of your AT.
7.3 What happens if…?
…the display remains completely
blank?
Possible causes are:
- no power line voltage
- power cable not connected
- wrong power line voltage
Check and if necessary rectify the
specified error sources. If the balance
does not function after switching on
with the «On/Off» key, contact
METTLER TOLEDO service.
Operating instructions METTLER TOLEDO AT balances
Page 66

Operating instructions METTLER TOLEDO AT balances
AUTOCALIN
68.4325
– AUTOCALIN –
…during a weighing the audio
warning beep sounds and the
adjacent symbol appears in the
display?
- If the fully automatic self-adjustment
is switched on (see Section 4.4),
your AT shows that it wishes to
adjust itself (AUTOCALIN =
Automatic Calibration and
Linearisation). But there is no need
for you to interrupt your work for this.
Your AT will wait until you have not
worked with the balance for about 5
minutes and will then adjust and
linearize itself. During this process,
the symbol “AUTOCALIN” flashes.
You also have the possibility,
however, to trigger the adjustment
immediately with a keystroke. Your
method of procedure is described in
Section 5.4. The symbol in the
display fades when adjustment is
ended.
-OFF-
…after connection to the power
supply the adjacent display appears?
- You have disconnected your AT
from the power supply without
previously switching it off by lifting
the «On/Off» key,< or a power
outage has interrupted the balance
operation. After reconnection to the
power supply or when the power is
restored, the balance is not switched to standby.
- Press the «On/Off» key to switch
the balance on again. An extended
internal self-test is then run with
display of the model designation
and the software version. All display
segments light up briefly and your
AT is then ready for weighing again.
63
Page 67

64
0.0000
…the display shows overload or
underload?
- Overload is displayed when the
weight of the loaded weighing
sample is larger than the weighing
range.
- Underload is displayed when the
weighing range is not reached. This
applies when the weighing pan is
missing, or the weighing pan touches the draft cover and no longer
has unrestricted movement. In this
case switch the balance off, position
the weighing pan correctly and then
switch your AT on again.
…the display “0.0000” flashes?
Zero is not defined:
- Place the weighing pan on the
balance.
- Remove the load from the weighing
pan.
…the glass draft shield is somewhat
difficult to open in manual operation?
- Free the motor coupling by gently
jerking the draft shield slider back
and forth.
…the graphic indicators suddenly
disappear?
- Depending on the setting in the
configuration register, the graphic
indicators are either displayed
permanently or only for a few
minutes after the balance has been
switched on (see Section 4.5).
Operating instructions METTLER TOLEDO AT balances
Page 68

Operating instructions METTLER TOLEDO AT balances
…the balance returns automatically
from the menu or the configuration
register to the weighing mode?
- You have selected the menu or the
configuration register and not
pressed a key for 1 minute. Your AT
thus assumes that you do not wish
to make any changes and returns to
the weighing mode.
…no weighing results or nonsensical characters are printed out on the
attached printer?
- To ensure correct functioning of the
attached printer, different settings
have to be made in the configuration register, including values for the
data transmission and the parity
(see Section 4.6). Information regarding the correct settings can be
found in the handbook of your
printer.
…the triangle symbol appears in the
display?
68.4325
- You have pressed the «Print» key.
Your AT signals that it is ready to
transmit a released weighing result
(stability indicator faded) via the
interface (e.g. to a printer).
…a flashing circle appears above
the weight unit?
68.4325 g
- If a weighing result has been
transmitted via the interface (with
the «Print» key), in fully automatic
operation the draft shield opens
automatically. So that you can
check the result or if need be note it
down, the display remains “frozen”
for 5 seconds, and this is indicated
by the flashing circle.
65
Page 69

66
7.4 What does this error message mean?
- Error messages in the display draw
your attention to faulty operation,
namely that the balance was not
able to perform a procedure properly. Error messages are supported by
an audio signal (“twitter”).
Wrong or missing reference weight
- If one of the application units per-
cent (%) or piece (
been selected as weight unit 2, the
balance must have a reference
weight available. The following
errors can appear:
Stk
or
PCS
) has
no rEF
Err rEF
Err LOAd
- No reference weight has been
loaded.
- A wrong reference weight has been
loaded.
- The balance returns automatically to
the weighing mode.
The weight lies outside the tolerance
The following causes could be responsible:
- a wrong external adjustment weight.
- the weighing pan is loaded during
the adjustment.
The adjustment procedure is aborted
automatically and the balance returns
to the weighing mode.
bAd LOAd
Operating instructions METTLER TOLEDO AT balances
- You have started the adjustment
test. A weighing sample is still on
the weighing pan. Remove it.
Page 70

Operating instructions METTLER TOLEDO AT balances
Err. unStb
Err tiNE
Fault in the adjustment
- The adjustment procedure of the
balance has been disturbed.
- The adjustment is automatically
aborted and the balance returns to
the weighing mode.
The wait time of 1 minute has run
out
This could have the following causes:
- You have set the automatic stability
detection (ASD) at a too high stage.
After pressing the «Print», «ReZero» or «Set» key (
with %, Stk
or
PCS), stability is not reached within
1 minute.
- The weight for the external
adjustment has not been loaded.
CAL tESt
- A wrong weight has been loaded.
The corresponding procedure is abor-
ted automatically and the balance
returns to the weighing mode.
7.5 What does this term mean?
We have “translated” the most important technical terms for you. References (in italics) show you the section(s)
in which you can find further information.
Adjustment
Matching the balance to a reference
weight. Adjustment, see also proFACT.
Sections 4.4, 5.4 and 5.5
Adjustment test
Test function which can be called up in
the menu to allow checking of the
adjustment without adjustment actually
being performed.
Section 5.5
67
Page 71

68
Ambient conditions
Local conditions at the location of the
balance. The following local conditions
can lead to display errors during
weighing: unsuitable location, changes
in the temperature, atmospheric humidity or the atmospheric pressure,
magnetic fields, electrostatic forces,
vibrations, drafts caused by air
conditioning.
Section 7.1
Analytical balance
Balance with a readability of 1 d
(1 digit) = 0.1 mg.
Analytical range
Weighing range with a readability of 1 d
(1 digit) = 0.1 mg.
Section 2.4
Application unit
Unit selectable in the configuration
register that is used for applications in
which not only the weight, but also a
quantity derived from it (piece, percent)
is determined and displayed.
Sections 4.5, 5.2 and 5.3
Automatic door function
Automatic opening and closing mechanism for the glass draft shield that
ensures that the balance and the draft
shield are always in the correct position
for the next weighing step.
Section 3.4
Automatic stability detection
Continuous automatic check of the
weight value for stability. The weight
display is considered stable when its
change with time lies within a preset
limit. Different stages can be configured
by the user and correspond to various
limits. The stability of the display is
attained when the stability detection
symbol in the upper left corner of the
display fades.
Also with Re-Zero (taring) the display is
set to zero only when stability has been
achieved.
Section 4.4
Operating instructions METTLER TOLEDO AT balances
Page 72

Operating instructions METTLER TOLEDO AT balances
Autozero
Automatically corrects the zero display
if drifting occurs or the weighing pan is
contaminated.
Section 4.4
Baud rate
See “Data transmission rate”.
Bit (Binary digit)
Unit used for the information content of
a communication.
Section 4.6
Coarse range
Normal weighing range with ten times
less resolution than the fine range. See
also “Dual-range balances” (semimicro
balances) and “DeltaRange®
balances”.
Sections 2.3 and 2.4
Configuration
The sum total of all settings selected
for the parameters in the configuration
register.
Section 4
Configuration register
Register with tree-like structure in
which operational settings, weight units
and much more can be matched to the
needs of the user. The configuration
register can be protected against
inadvertent changes with the aid of the
jumper.
Section 4 and pages 82 and 83
Configuring
Changing the settings in the configuration register.
Section 4
69
Page 73

70
Data transmission rate
Specifies the rate at which the data are
transferred. Also called baud rate: 1
baud = 1 bd = 1 bit/second.
Section 4.6
DeltaRange® balance
Balance with a fine range recallable at
any time over the entire weighing
range.
Section 2.4
DeltaTrac®
Dynamic graphic indicator with 60
radial indicators. Displays the used and
remaining weighing range. Graphic
complement to the alphanumeric
display; also suitable for use as a
weighing-in aid.
Sections 2.2 and 5.2
Differential weighing
Determination of the weight of a sample before and after a weight change.
Digit
Display unit; a digit corresponds to a
display increment of the last decimal
place.
- 1 digit = 1d = 0.1 mg in the analyti-
cal range
- 1 digit = 1d = 0.01 mg in the semi-
micro range
See also “Readability”
Section 5.5
Dispensing
Fine weighing in of powder or small
quantities of liquid.
Section 3.2
Display
Used for communication between
balance and user. Shows weighing
results, setting options, etc.
Front fold-out
Operating instructions METTLER TOLEDO AT balances
Page 74

Operating instructions METTLER TOLEDO AT balances
Door drive handle
Device which allows motorized opening
of the draft shield.
Section 2.1
Factory setting
Settings preselected by the manufacturer in the menu or configuration register
for normal applications and ambient
conditions. Characterized in the configuration register by an asterisk in the
upper left corner of the display. Can be
changed by the user, but also reset at
any time.
Sections
3 and 4
Fine range
Section of the entire weighing range
with a ten times greater accuracy, see
also “Dual-range balances” (semimicro
balances) and “DeltaRange®
balances”.
Sections 2.3 and 2.4
Foot switch
Available as an accessory in single or
twin versions. Control element for
zeroing (taring) the display, for triggering the data transmission («Print» key)
and for operation of the automatic door
function of the draft shield. Frees both
hands for operations.
Handshake
Special control lines or data signals for
synchronization of the data flow via the
serial interface (feedback between
sender and transmitter).
Section 4.6
Interface
Connector with standardized data
transfer between the balance and
another component of the system
(printer, computer).
Section 4.6
71
Page 75

72
Jumper
Safety device in the program cassette.
Rearrangement of contacts blocks the
configuration register and thus protects
the stored settings against inadvertent
change.
Section 4.8
LCD
Liquid Crystal Display. Display which
does not itself light up but reflects the
ambient light.
Front fold-out
Level
Device which facilitates the horizontal
alignment of the balance. Operates on
the principle of a spirit level with an air
bubble in a liquid. See also “Leveling”.
Section 1.2
Leveling
Horizontal aligning of the balance.
Should be performed before startup.
Section 1.2
Linearization
Adjustment of the balance
characteristic curve. To establish the
proportionality between the loaded
weight and the display. Performed by
the AT for every adjustment in the fully
automatic self-adjustment and in the
automatic adjustment with the built-in
adjustment weight.
Section 4.4
Menu
A menu is generally understood to
mean a series of selections which the
user can match to his needs. In the
menu of the AT the user can match the
balance to the ambient conditions,
adjust the balance and undertake other
adjustments.
Section 3 and pages 82 and 83
Overload/underload display
Signals the overloading or underloading of the balance through illumination
of the horizontal segments in the
display.
Section 7.3
Operating instructions METTLER TOLEDO AT balances
Page 76

Operating instructions METTLER TOLEDO AT balances
Parameter
Part of a sector in the configuration
register. Each of the four sectors of the
AT contains parameters (e.g. automatic
stability detector, readability, etc.).
Section 4 and pages 82 and 83
Parity
Checking information in the data
transmission.
Section 4.6
Percent weighing
Application for the weighing in to a
preset reference value (= 100%) and
with the possibility to display the
deviation in percent.
Section 5.2
Piece counting
Weighing application for the determination and display of the piece count of
weighing samples of equal weight.
Section 5.3
proFACT
Fully automatic adjustment and
linearization with two internal weights
when necessitated by the operating
conditions. proFACT: professional Fully
Automatic Calibration Technology.
Section 4.4
Program cassette
Cassette with stored microcomputer
program needed by the balance for its
functioning.
Section 4.8
Readability
Smallest, still distinguishable display
difference = 1 d (1 digit); for
METTLER TOLEDO analytical
balances 1d = 0.1 mg.
Section 4.4
73
Page 77

74
Reference weight
Representative reference weight.
Needed among other things for the
performance of percent weighings and
piece counting.
- In percent weighings. Reference
weight = 100%
- In piece counting: Reference weight
= weight of the reference piece
number
Sections 5.2 and 5.3
Repeatability
Consistency of the weighing result in
several repetitions on the same balance with the same weighing sample and
under identical weighing conditions. It
is unnecessary that each individual
weighing lies within the limits; rather a
statistical function is involved. The
repeatability is usually expressed as
the standard deviation s of 10
weighings.
Resolution (resolving power) of a
balance
See “Readability”
Re-Zero
International designation for the zeroing
of the display and for the zeroing key.
Also used for zero setting, taring and
the tare bar, although the definitions
are not identical.
Section 1.3
Sector
Part of the configuration register. The
configuration register of the AT comprises four sectors, each of which contains various parameters.
Section 4 and pages 82 and 83
Segment
The smallest part of a display. The
display of a letter or a number comprises several segments.
Front fold-out
Operating instructions METTLER TOLEDO AT balances
Page 78

Operating instructions METTLER TOLEDO AT balances
Self-test
After connection to the power supply,
the balance automatically performs a
test of its functions.
Section 1.3
Semimicro balance (semimicro
analytical balance)
Balance with a readability of 1 d
(1 digit) = 0.01 mg = 0.00001 g.
Semimicro range
Fine range in dual-range balances with
a resolution of 0.01 mg.
Stability detection
See “Automatic stability detection”.
Stabilization time
Also known as weighing speed. It is
defined as the time between the loading of the weighing sample on the
weighing pan and the attainment of
stability of the weight display (see also
“Automatic stability detection”). The
stabilization time can be matched to
special needs with the vibration adapter
being the most important influencing
factor.
Sections 3.3, 4.4 and 7.2
Standby
Wait condition. Balance is in operational readiness (connected to the power
supply via the AC adapter), but not
switched on, i.e. the display is dark,
only the standby symbol is lit up.
Section 1.3
75
Page 79

76
Status indicators
Symbols that show the most important
settings (vibration adapter, weighing
process adapter). The symbols can be
displayed permanently or for just a few
minutes after switching on the balance.
Section 4.5
Tare weight
Weight of a container, vessel or the
packing that should not be taken into
account in the weighing.
Section 1.3
Target weight
See “Reference weight”.
Taring
Compensation of tare weights, i.e.
setting the display of the balance with
loaded tare weight to zero. Often called
zeroing, zero setting or re-zero. See
also “Re-zero”.
Section 1.3
VFD
Vacuum Fluorescence Display. Self-
illuminating display that is not dependent on the ambient lighting.
Front fold-out
Vibration adapter
Possibility to adapt the balance to the
local conditions prevailing at the weighing station. Set in the menu in the case
of the AT.
Section 3.3
Wait condition
See “Standby”.
Weighing-in aid
See “DeltaTrac®”.
Weighing mode
Your balance is ready for weighing
operations, i.e. it will display the weighing result and is not in the menu, the
configuration register or the standby
state.
Operating instructions METTLER TOLEDO AT balances
Page 80

Operating instructions METTLER TOLEDO AT balances
Weighing process adapter
Possibility to adapt the balance to
special types of weighing; set in the
menu.
Section 3.2
Weighing speed
See “Stabilization time”.
Weight unit
Unit (e.g. g, mg, oz, etc.) that can be
selected in the configuration register.
Section 4.5
Zeroing
See “Taring” and “Re-Zero”.
77
Page 81

78
7.6 How are weight units converted?
The following table will facilitate the conversion between the weight units available for the AT
.
Gram Milligram Carat Ounce Troy Ounce Pennyweight
g mg ct/C.M. oz ozt dwt
1 g = 1 1000 5 0.03527396 0.03215075 0.6430149
1 mg = 0.001 1 0.005 0.0000352740 0.0000321508 0.000643015
1 ct/C.M. = 0.2 200 1 0.007054792 0.006430150 0.1286030
1 oz = 28.34952 28349.52 141.7476 1 0.9114585 18.22917
1 ozt = 31.10347 31103.47 155.5174 1.097143 1 20
1 dwt = 1.555174 1555.174 7.775869 0.05485714 0.05 1
1 GN = 0.06479891 64.79891 0.3239946 0.002285714 0.002083333 0.041666667
(metr.) (avdp)
koil
1 tl (HK) = 37.429 37429 187.1450 1.320269 1.203370 24.06741
1 tl (SGP/Mal) = 37.79937 37799.37 188.9968 1.333333 1.215278 24.30556
1 tl (Taiwan) = 37.5 37500 187.5 1.322774 1.205653 24.11306
1 mo = 3.75 3750 18.75 0.1322774 0.1205653 2.411306
Operating instructions METTLER TOLEDO AT balances
Page 82

Operating instructions METTLER TOLEDO AT balances
Grain Tael Tael Tael Momme
GN tl tl tl mo
1 g = 15.43236 0.02671725 0.02645547 0.02666667 0.2666667
1 mg = 0.01543236 0.0000267173 0.0000264555 0.0000266667 0.000266667
1 ct/C.M. = 3.086472 0.005343450 0.005291094 0.005333333 0.05333333
1 oz = 437.5 0.7574213 0.7500000007 0.7559874 7.559873
1 ozt = 480 0.8309993 0.8228570 0.8294261 8.294260
1 dwt = 24 0.04154997 0.04114285 0.04147131 0.4147130
1 GN = 1 0.001731249 0.001714286 0.001727971 0.01727971
1 tl (HK) = 577.6178 1 0.9902018 0.9981068 9.981068
1 tl (SGP/Mal) = 583.3334 1.009895 1 1.007983 10.07983
(Hongkong) (Singapur) (Taiwan)
(Malaysia)
1 tl (Taiwan) = 578.7134 1.001897 0.9920800 1 10
1 mo = 57.87134 0.1001897 0.09920800 0.1 1
79
Page 83

80
7.7 Where will I find details
of…?
The following index shows you the
page number of these instructions on
which you will find the information
appropriate to a particular theme. The
page numbers in bold print refer to the
most important information for the
specific search word.
Absolute weighing 18
AC adapter 4, 53
Accessories 57
Adjustment 30, 46, 48, 66, 67
Adjustment mode 31, 47, 49
Adjustment weight 49
Adjustment test 50
Application unit 33, 68
Applications 41, 43
Automatic door function 20, 68
Automatic door operation 20
Automatic stability detection 27, 68
Autozero 29, 69
Beeper setting 34
Below-the-balance weighing 57
Cleaning 56
Configuration register 22, 69
Data interface 35
DeltaTrac® 11, 42, 48
DeltaRange® balance 11
Dispensing 18
Draft shield 8
Drop symbol 17
Electrostatic charging 58
Error message 66
External adjustment weight 31, 48
Factory setting 27, 71
Fine dispensing 18
Fine range 11, 71
Glass draft shield 8
Interface 35, 71
Jumper 39
Operating instructions METTLER TOLEDO AT balances
Linearization 30, 47, 72
Page 84

Operating instructions METTLER TOLEDO AT balances
Magnetic weighing samples
or containers 59
Manual adjustment 47, 48
Menu 14
Operational setting 22, 26
Overload 64
Percent 41
Percent weighing 41, 73
Piece counting 21, 43, 73
Power outage 8, 63
Printer 38, 51
proFACT 30, 46, 73
Program cassette 39, 73
Readout increment 28
Reference weight 41, 45, 74
Repeatability 28, 74
Resolution 11, 74
Re-Zero 74
Self-adjustment, fully automatic 31, 46
Self-test 5, 8, 75
Semimicro balance 12, 75
Setting options 14, 22
Stability detection 27, 68, 75
Stabilization time 61, 75
Standby 7, 75
Status indicators 34, 76
Switching off the balance 7, 63
Taring 5, 76
Underload 64
Unstable display 20, 58
Vibration adapter 19, 76
Vibrations 19
Wait condition 76
Wave symbol 19
Weighing in 18
Weighing mode 5, 76
Weighing process adapter 17, 77
Weighing speed 28, 61, 76, 77
Weight unit 32, 33, 40, 77
81
Page 85

82
Weighing mode
press and hold key
Menu Configurations register
Set reference 1)
weight for %
SEt 100 %
///
J
Set reference 1)
weight for piece
SEt Stk
J
Operational
setting
SEttINGS
J
Return to
factory setting
rESET
J
100 10
50 20
Internal
adjustment
CAL
External 3)
adjustment
CAL USEr
J
2)
tESt Int
J
Basic settings
SCALE
J
Automatic stability
detection
ASd
J
J
oFF -1-
-7- -2-
-6- -3-
-5- -4-
Readability 5)
d
J
J
d 1 mg
d 0.5 mg d 0.2 mg
d 0.1 mg
*
*
Weight units
/
Unit
J
Weight unit 1
Unit 1
mo g
CM mg
ct oz
dwt ozt
GN tI
Weight unit 2
Unit 2
J
J
J
Interface
Int-FACE
/
J
Data
transmission mode
S.
*
Data
transmission rate
bd
J
J
Cont Stb
Auto ALL
J
*
J
9600 150
4800 300
*
2400 600
1200
Page 86

Set weighing
process adapter
J
Set vibration
adapter
—
fully automatic
door function
door Auto
J
–—
_
J
Std Auto
J
J
J
J
*
*
*
Parity
PAr
Transmission
protocol
H5
End-of-line
mode
EOL
J
SPc -E-
oFF -O-
J
*
PAUSE CL
Soft oFF
HArd
J
cr crLF
J
J
J
*
*
%g
Readability 4)
semimicro range 5)
dF
*
Autozero
*
*
proFACT (Adjustment
and linearization)
CALIN
J
dF 0.1 mg
dF 0.05mg dF 0.02mg
AZ
dF 0.01mg
J
oFF on
J
USEr Auto on
Auto oFF
J
J
J
*
*
*
Stk mg
PCS oz
mo ozt
CM tI
ct GN
dwt
Status indicators
- ,
J
on Auto
Beeper setting
bEEP
J
oFF on
J
J
Menu Configuration register
Selection of the menu Selection of the
Menu
Selection of the menu options configuration register
Selection of the settings Selection of the parameters
Select 1
Cancellation of the changes Selection of the settings
Cancel
and return to the weighing mode
Storage of the current menu Cancellation of the changes
Set
and return to the weighing mode and return to the weighing mode
Switching off the balance by Storage of the current configuration
Set
pressing key upward and return to the weighing mode
Configuration
Selection of the sectors
Select 1
Select 2
Cancel
Set
1) Appears only if weight unit 2 is set in the configuration register to
percent (%) or piece (
2) Appears only if the internal adjustment (
configuration register.
3) Appears only if the external adjustment (
configuration register.
4) Appears only with semimicro and DeltaRangeR balances.
5) The following appears with the AT20:
d = 0.01 mg*, 0.02 mg, 0.05 mg, 0.1 mg / dF = 2 µg*, 5 µg, 10 µg
The following appears with the AT460 DeltaRange®:
d = 1 mg*, 2 mg, 5 mg, 10 mg / dF = 0.1 mg*, 0.2 mg, 0.5 mg, 1 mg
* Factory setting
Stk
or
PCS
).
Auto Off
) is set in the
USEr
) is set in the
Page 87

84
Technical specifications
(after a warm-up time of at least 120 min.)
Modell AT21 AT20 AT201 AT261 DeltaRange® AT200 AT400 AT460 DeltaRange®
Readability 1 µg2 µg 0.01 mg 0.01 mg 0.1 mg 0.1 mg 0.1 mg 0.1 mg 1 mg
Weighing capacity 22 g 22 g 205 g 62 g 205 g 205 g 405 g 62 g 405 g
Taring range (by subtraction) 0…22 g 0…22 g 0…205 g 0…205 g 0…205 g 0…205 g 0…405 g 0…405 g 0...405 g
Repeatability (s) full load 2 µg4 µg 0.04 mg 0.04 mg 0.05 mg 0.07 mg 0.15 mg 0.15 mg 0.3 mg
Repeatability (s) 0...50 g 0.015 mg 0.015 mg 0.04 mg 0.05 mg 0.05 mg
Linearity ± 6 µg ± 10 µg ± 0.12 mg ± 0.08 mg ± 0.15 mg ± 0.15 mg ± 0.5 mg ± 0.5 mg ± 1.4 mg
Linearity within 500 mg
Linearity within 10 g
1)
1)
Stabilization (typical) 14...18 s 10...14 s 10...14 s 8...12 s 3...5 s 3...5 s 4...6 s 4...6 s 3...5 s
Built-in adjustment weights 2x10 g 2x10 g 2x100 g 2x100 g 2x100 g 2x100 g 2x100 g
Adjustment proFACT Fully automatic motorized self-adjustment with two built-in weights.
Adjustment with external weight: 20 g 20 g 200 g 200 g 200 g 400 g 400 g
Display with DeltaTrac® LCD (liquid crystal) VFD (Vakuumfluoreszenz)
Display sequence 0.2...0.4 s variable
Sensitivity: - Temperaturedrift
- Long-term stability 3)with self-adjustment proFACT: ±1.5 ppm
Linearization Automatic self-linearization of the weighing curve (simultaneously with motorized adjustment proFACT)
Data interface CL and RS232C, bidirectional, built in as standard, all lines galvanically separated.
Glass draft shield No hindering guideways; automatic motorized opening or at a keystroke.
Inner draft shield Standard Accessory
Equipment designed test conditions P: 115 V or 230 V, admissible voltage fluctuation: -20% +15%, frequency 50/60 Hz, max. power consumption 15.5 W.
Power supply (national codes) S: 12.8 V=, 6.5 V=, 10.8 V=, 16.7 V=
Weighing pan with feedthrough for ø 28 mm ø 32 mm 80x80 mm; stainless steel
below-the-balance weighing suspended
Measures Free height above weighing pan 239 mm, Balance housing 241x433x289 mm (W x L x H), power supply 115x140x53 mm (W x L x H)
Weight Balance 9.3 kg, AC adapter 1.2 kg
1)
: In the temperature range 10...30 °C 2): 1 ppm = 1/1'000'000 (relative to the current weight display)
Comparator 60g DeltaRange® 200g 60g DeltaRange® 400g
± 4 µg ± 6 µg
± 0.03 mg ± 0.03 mg
The accuracy of the adjustment depends on the geographic location and the height above sea level.
1) 2)
±1.5 ppm/°C
Pollution degree 2. Overvoltage category II.
Temperature: 5...40 °C. max. relative atmospheric humidity: 80% for temperatures up to max. 31 °C linearly decreasing to 50% at 40 °C.
Height: 6000 m. Use only indoors in closed rooms.
3)
: Sensitivity deviation / year with self-adjustment proFACT switched on
Operating instructions METTLER TOLEDO AT balances
Page 88

Looking for more information?
Visituson the
•
Price
web
Quotations •
at http://www.artisan-scientific.com for more information:
Drivers·
Technical
Specifications.
Manuals and Documentation
Artisan
Scientific
•
TensofThousandsofIn-Stock
•
HundredsofManufacturers
is
You~
Source
Items
Supported
for:
Quality
Service Center Repairs
Experienced Engineers and Techniciansonstaffinour
State-of-the-art Full-Service In-House Service Center Facility
We
bUy
used
equipment!
Sell
your
excess.
Talk to a liveperson: 88EM38-S0URCE fB88-887-68721 I Contact
underutilized. and idle used equipment. Contact oneofour
We
New
•
Fast
•
Leasing
and
Certified-Used/Pre:-awned ECJuiflment
Shipping and
/ Monthly
DelIve1y
Rentals
• Equipment Demos
•
Consignment
InstraView Remote Inspection
Remotely inspect equipment before purchasing with
Innovative InstraView-website at http://www.instraview.com
also
offer
credit
usbyemail: sales@artisan-scientific.com I Visit ourwebsite: http://www.artisan-scientific.com
for
Buy-Backs
and
Customer
Trade-Ins
Service
Representatives todayl
our
 Loading...