

Mettler Toledo Ariva, Ariva-B, Ariva-H, Ariva-S Quick Manual

Edition October 2016 | Mettler-Toledo GmbH
Quick Guide
EN
Ariva
Checkout Scales
Quick Guide
Oversigtsvejledning
Hurtigguide
Snabbguide
DK
NO
SE

2 Ariva Quick Guide | 30353728

EN
DK
Contents Page
1 Introduction ........................................................................................................ 6
1.1 Overview ............................................................................................................. 6
1.2 Specifications ...................................................................................................... 6
1.3 Precautions ......................................................................................................... 7
1.4 Legal for Trade ..................................................................................................... 7
1.5 Cleaning and Maintenance .................................................................................... 7
1.6 Disposal ............................................................................................................. 7
2 Start-up and Setup .............................................................................................. 8
2.1 Environment ........................................................................................................ 8
2.2 Leveling .............................................................................................................. 8
2.3 Power up ............................................................................................................ 8
2.4 Indication of SW-IDs ............................................................................................. 9
2.5 Setup .................................................................................................................. 9
3 Operation ......................................................................................................... 12
3.1 Displays and Buttons .......................................................................................... 12
3.2 Backlight ........................................................................................................... 12
3.3 Weighing .......................................................................................................... 12
3.4 Re-zero ............................................................................................................. 13
3.5 Tare Function ..................................................................................................... 13
3.6 Errors ............................................................................................................... 14
Indholdsfortegnelse Side
1 Indledning ........................................................................................................ 15
1.1 Oversigt ............................................................................................................ 15
1.2 Specifikationer ................................................................................................... 15
1.3 Vigtigt ............................................................................................................... 16
1.4 Lovlig til detailhandel .......................................................................................... 16
1.5 Rengøring og vedligeholdelse .............................................................................. 16
1.6 Bortskaffelse ...................................................................................................... 16
2 Opstart og indstilling ......................................................................................... 17
2.1 Omgivelser ........................................................................................................ 17
2.2 Opretning .......................................................................................................... 17
2.3 Opstart .............................................................................................................. 17
2.4 Indikation af SW-ID ............................................................................................ 18
2.5 Indstilling .......................................................................................................... 18
30353728 | Ariva Quick Guide 3

NO
3 Betjening .......................................................................................................... 21
3.1 Skærme og knapper ........................................................................................... 21
3.2 Baggrundsbelysning ........................................................................................... 21
3.3 Vejning ............................................................................................................. 21
3.4 Gennulstilling ..................................................................................................... 22
3.5 Funktionen Tara ................................................................................................. 22
3.6 Fejl ................................................................................................................... 23
Innhold Side
1 Introduksjon...................................................................................................... 24
1.1 Oversikt ............................................................................................................ 24
1.2 Egenskaper ....................................................................................................... 24
1.3 Forhåndsregler ................................................................................................... 25
1.4 Lovlig for handel ................................................................................................ 25
1.5 Rengjøring og vedlikehold ................................................................................... 25
1.6 Avhending ......................................................................................................... 25
2 Oppstart og konfigurering .................................................................................. 26
2.1 Miljø ................................................................................................................. 26
2.2 Utjevning ........................................................................................................... 26
2.3 Slå på ............................................................................................................... 26
2.4 Indikasjon for SW-IDs ......................................................................................... 27
2.5 Konfigurering ..................................................................................................... 27
3 Drift ................................................................................................................. 30
3.1 Skjerm og knapper ............................................................................................. 30
3.2 Bakgrunnslys ..................................................................................................... 30
3.3 Veiing ............................................................................................................... 30
3.4 Nullstille ............................................................................................................ 31
3.5 Egenvektsfunksjon .............................................................................................. 31
3.6 Feil ................................................................................................................... 32
4 Ariva Quick Guide | 30353728

SE
Innehåll
Sida
1 Introduktion ...................................................................................................... 33
1.1 Översikt ............................................................................................................ 33
1.2 Specifikationer ................................................................................................... 33
1.3 Försiktighetsåtgärder ........................................................................................... 34
1.4 Relevant lagstiftning för handeln ........................................................................... 34
1.5 Rengöring och underhåll ..................................................................................... 34
1.6 Slutomhändertagande ......................................................................................... 34
2 Uppstart och inställning ..................................................................................... 35
2.1 Miljö ................................................................................................................. 35
2.2 Vågställning ...................................................................................................... 35
2.3 Uppstart ............................................................................................................ 35
2.4 Visning av SW-IDs ............................................................................................. 36
2.5 Inställning ......................................................................................................... 36
3 Användning....................................................................................................... 39
3.1 Displayer och knappar ........................................................................................ 39
3.2 Bakgrundsljus .................................................................................................... 39
3.3 Vägning ............................................................................................................ 39
3.4 Omnollning ....................................................................................................... 40
3.5 Tara-funktion ..................................................................................................... 40
3.6 Fel .................................................................................................................... 41
30353728 | Ariva Quick Guide 5
EN
1 Introduction
Overview 1.1
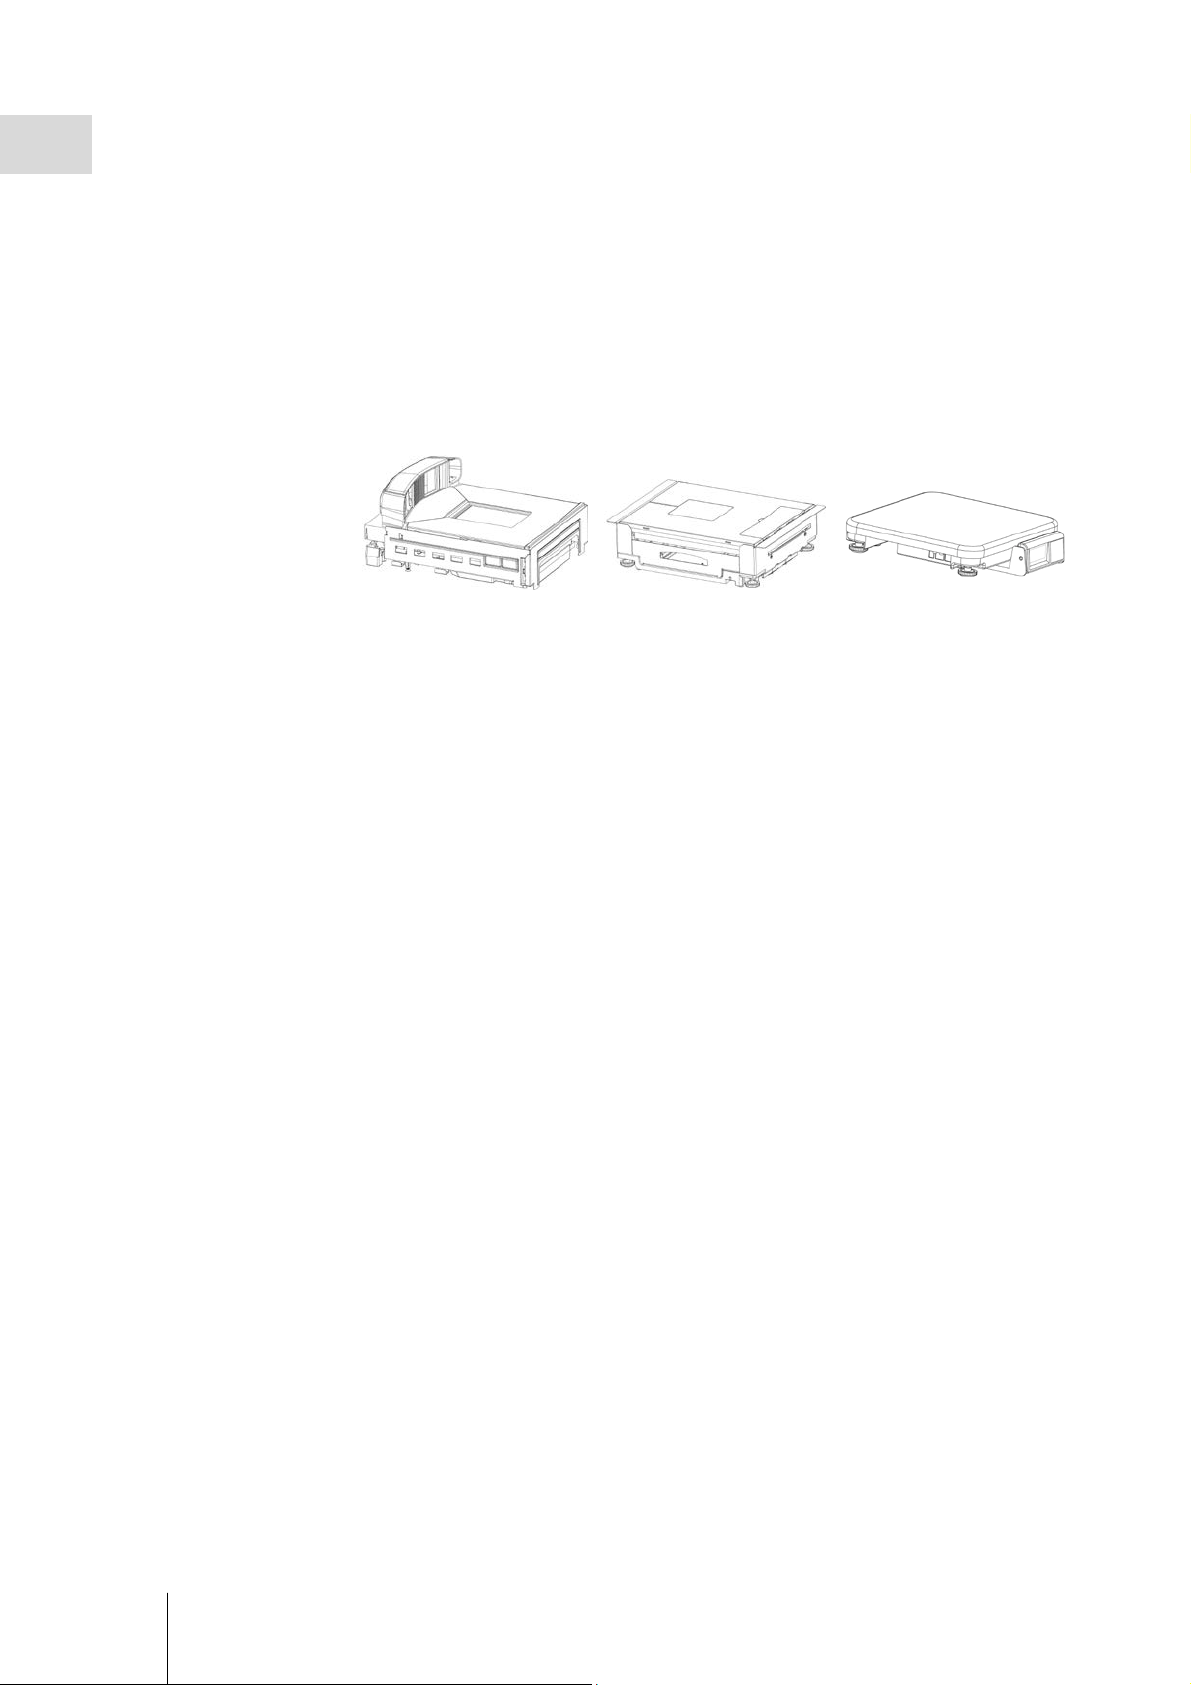
The Ariva family of checkout products all share common technology designed for the point-of-sale
checkout environment.
The Ariva-B (Bioptic) scales closely integrate with various bioptic scanners.
The Ariva-H (Horizontal) scale provides a weighing platform into which single-plane scanners can
be placed. The Ariva-S (Stand-Alone) is a standalone scale made for the point-of-sale
environment. Ariva scales are designed to work with a wide variety of point-of sale terminals.
Ariva scales can be connected to POS systems via RS-232 or USB.
(for bioptic scanners)
Specifications 1.2
Capacity, Divisions Dual-Intervall 6/15 kg, 2/5 g
(Ariva-S: optional Dual-Intervall 3/6 kg, 1/2 g)
Minimum weight 40 g (Ariva-S: optional 20 g)
Weight display 5 digits
Unit price display 6 digits (price computing version only)
Total price display 6 digits (price computing version only)
Tare display 4 digits (price computing version only)
Operating temperature -10 °C to +40 °C
Storage temperature -25 °C to +50 °C
Power supply Ariva-B: Power supplied by scanner
Ariva-H, Ariva-S: Wall plug transformer
(Input: 100-240 V / 0,3 A, Output: 12 V / max. 0,84 A)
Power consumption approx. 0,4 W (without display), approx. 0,6 W (with display)
Technical data subject to change.
Ariva-B
Ariva-H
(for single plane scanners)
Ariva-S
(Stand-alone)
6 Ariva Quick Guide | 30353728

Precautions 1.3
Please read this manual before operating or servicing this equipment.
Save this manual for future reference.
Call METTLER TOLEDO for parts, information, and service.
CAUTION
Only permit qualified personnel to service this equipment. Exercise care
when making checks, tests and adjustments that must be made with
power on.
CAUTION
Always disconnect this equipment from the power source before
cleaning, performing maintenance or connecting / disconnecting any
cabling.
CAUTION
Use only genuine METTLER TOLEDO accessories and cable assemblies
with this product.
Use of unauthorized or counterfeit accessories or cable assemblies may
result in voided warranty, improper or erroneous operation, or damage to
property (including the unit) and personal injury.
NOTICE
Observe precautions for handling electrostatic sensitive devices.
Legal for Trade 1.4
Scales used in legal for trade applications must be set up, verified and sealed in accordance with
local weights and measures regulations. It is the responsibility of the purchaser to ensure that all
pertinent legal requirements are met. As verification requirements vary by jurisdiction, the purchaser
should contact their local weights and measures office if they are not familiar with the
requirements. If the Ariva scale is connected to a POS system, the complete system has to undergo
declaration of conformity (legal verification) at the place of use. METTLER TOLEDO can perform this
system verification. The suitablility of the POS system must be proved based on test certificates
granted by a notified body (e.g. PTB, Physikalisch Technische Bundesanstalt).
Please contact the local METTLER TOLEDO representative for any questions.
The EU Declaration of Conformity is enclosed in the product box as a separate document.
Cleaning and Maintenance 1.5
• Remove power by unplugging the scale from the scanner or by removing the wall outlet.
• Use a clean, damp cloth to wipe the exterior surfaces.
• Do not use solvents and chemicals to clean the unit.
• Do not attempt to remove the cover or perform service or maintenance on the internal parts of
the scale.
Disposal 1.6
In accordance with the requirements of European Directive 2002/96 EC on Waste Electrical and
Electronic Equipment (WEEE), this device may not be disposed of with domestic refuse. This also
applies for countries outside the EU in accordance with their respective national regulations.
Please dispose of this product in accordance with local regulations for the separate collection of
waste electrical and electronic equipment.
Should you have any questions, please contact the corresponding authorities or the dealer from
whom this device was purchased. If this device is passed on (for example for further private or
commercial / industrial use), this regulation is also to be passed on.
30353728 | Ariva Quick Guide 7
Many thanks for your contribution to the protection of the environment
.
2 Start-up and Setup
Environment 2.1
Proper environment enhances the operation and longevity of the scale. The following factors could
have a negative influence on the scale's operation.
• Vibration diminishes the scale’s ability to measure accurately.
Excessive vibration from equipment such as conveyors can cause inaccurate and nonrepeatable readings.
• Level the scale properly.
• Air currents can also diminish the scale’s performance. Avoid placing the scale in front of
or directly under air vents.
• Other than items being weighed, keep the scale free from objects rubbing or pressing
against the platter.
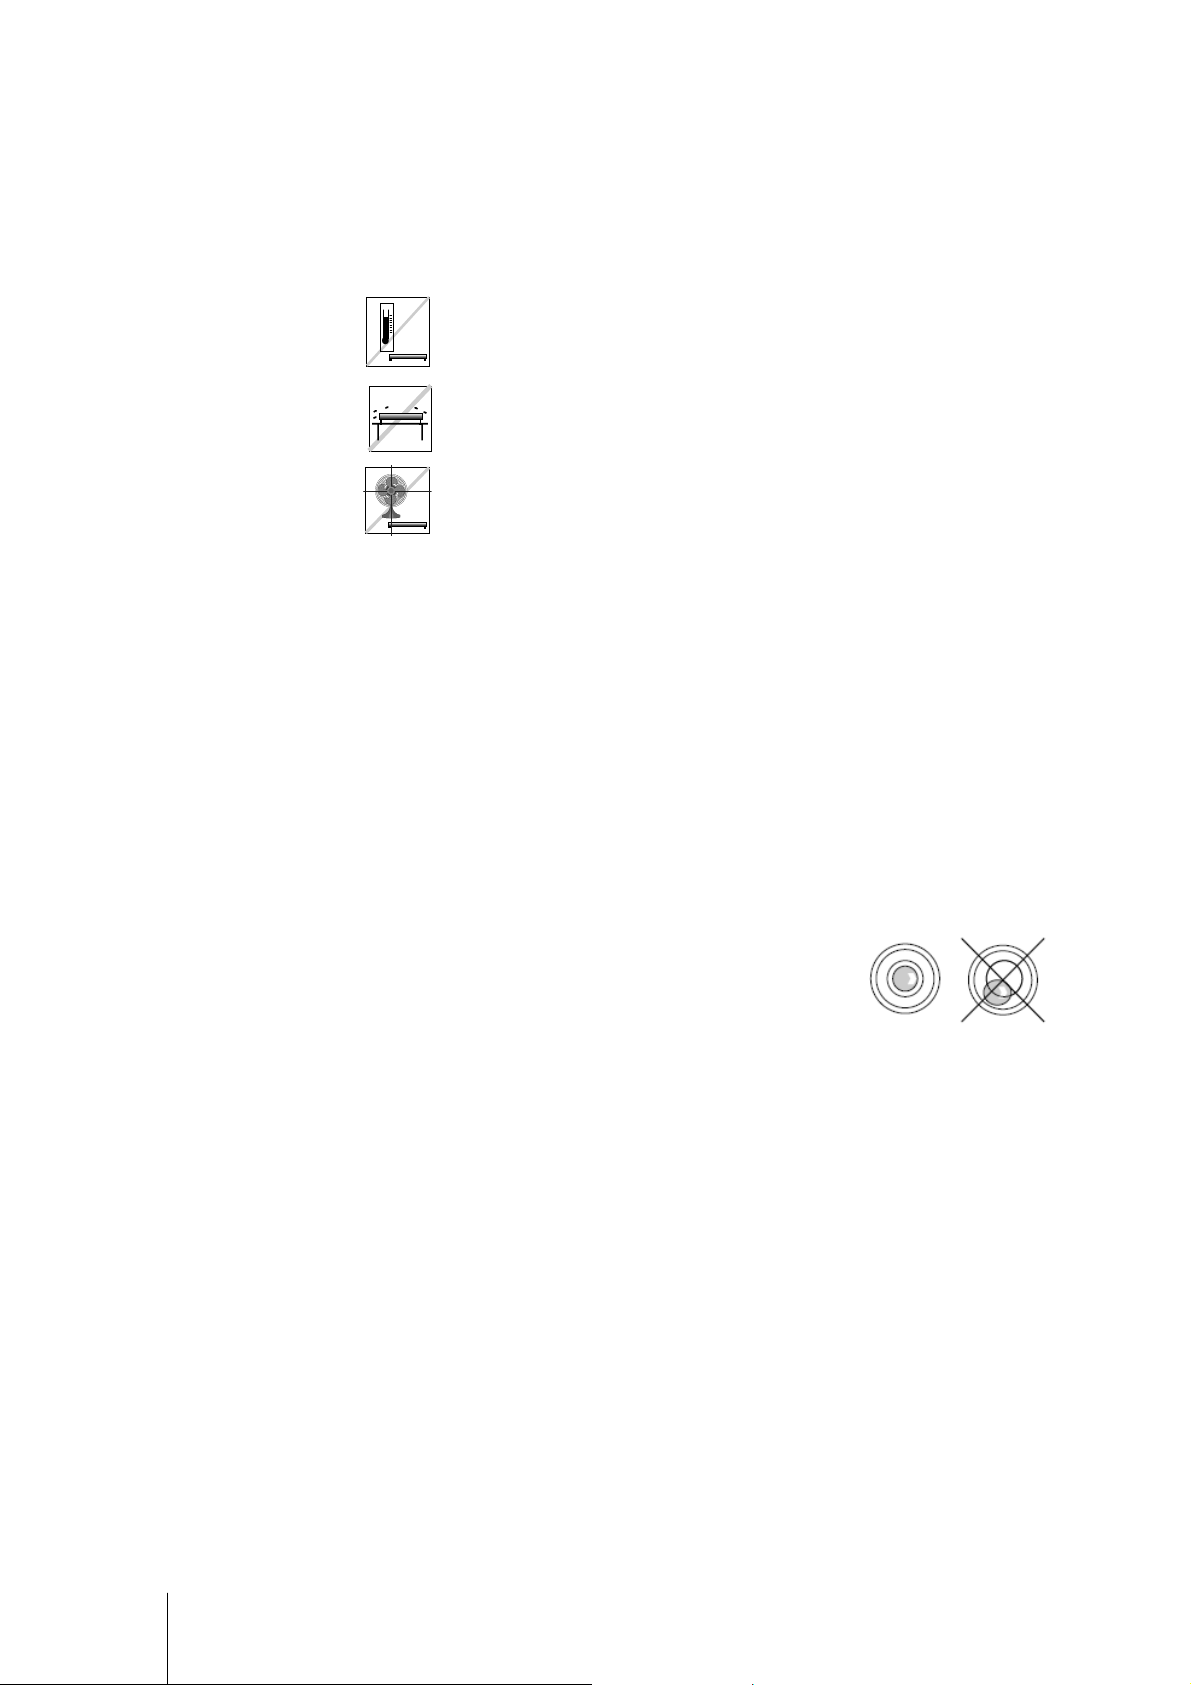
Maintain a temperature range of -10 °C to +40 °C.
Avoid areas where the temperature changes rapidly.
Select a firm, level, vibration-free surface on which to place the scale.
Avoid excessive drafts, such as from fans and open windows.
Leveling 2.2
Place the scale on a stable, flat, and level surface. Adjust the leveling feet on the scale base until
the scale is level. The center pad on all leveling feet should each touch the surface, and the scale
should not rock or teeter.
Check to make sure the level bubble (located underneath the platter) is centered as shown below.
Level the scale after every location change.
Power up 2.3
Note: Before powering on the Ariva scale, always make sure there is nothing on the platter.
The Ariva-B scale is powered directly by the scanner, so it will power up when the scanner is
turned on.
The Ariva-H and Ariva-S scales are powered by plugging in the wall plug transformer.
After the scale is turned on, it runs through a short display test. All segments briefly light up, then a
cycle of information is displayed, including the firmware version (SW-IDs).
The scale is ready when the weight display appears.
8 Ariva Quick Guide | 30353728
WP
Appl
SP
Indication of SW-IDs 2.4
The Ariva scale firmware is composed of a software, type "Rainbow", and an application software
(Appl.).
The Rainbow software is composed of following components:
- Rainbow Core (RB), if applicable
- Rainbow Weighing package (WP)
- Rainbow Signal processing (SP)
The Ariva scale firmware is certified by the NMi (Netherlands Measurement Institute), test certificate
TC8039.
Dependent on the version of the component Rainbow WP, following items will be shown during
start-up. The table reflects the item sequence, as depicted in the following example.
Rainbow WP <= 2.0.6 Rainbow WP >= 2.0.7
Country and GEO code e.g.: de 20 Country and GEO code e.g.: de 20
Software part number e.g.: 0247187 Software part number e.g.: 0246187
e.g.: 2.0.0
SP
Appl.
Model indication e.g.: D5
License indication e.g.: LID ON Model indication e.g.: D5
License indication e.g.: LID ON
Indicating the firmware version (SW-IDs) at run time
To indicate the SW-IDs for a longer period of time, push the Zero button twice in close succession
(double-click). The SW-IDs will now be indicated for about 6 seconds.
With single-line displays (for weight-only applications) the SW-IDs will be indicated in several
steps in succession.
Dependent on the version of the component Rainbow WP, the SW-IDs will be indicated in the order
as shown in below table, including examples.
Rainbow WP <= 2.0.6 Rainbow WP >= 2.0.7
WP
SP
Appl.
e.g.: 2.0.0
e.g.: 1.70.28
e.g.: 1.202
e.g.: 1.70.28
e.g.: 1.202
Appl.
RB (if applicable)
WP
.
RB (if applicable)
WP
SP
e.g.: 1.301
e.g.: 2.3.0
e.g.: 2.2.0
e.g.: 1.70.37
e.g.: 1.301
e.g.: 2.3.0
e.g.: 2.2.0
e.g.: 1.70.37
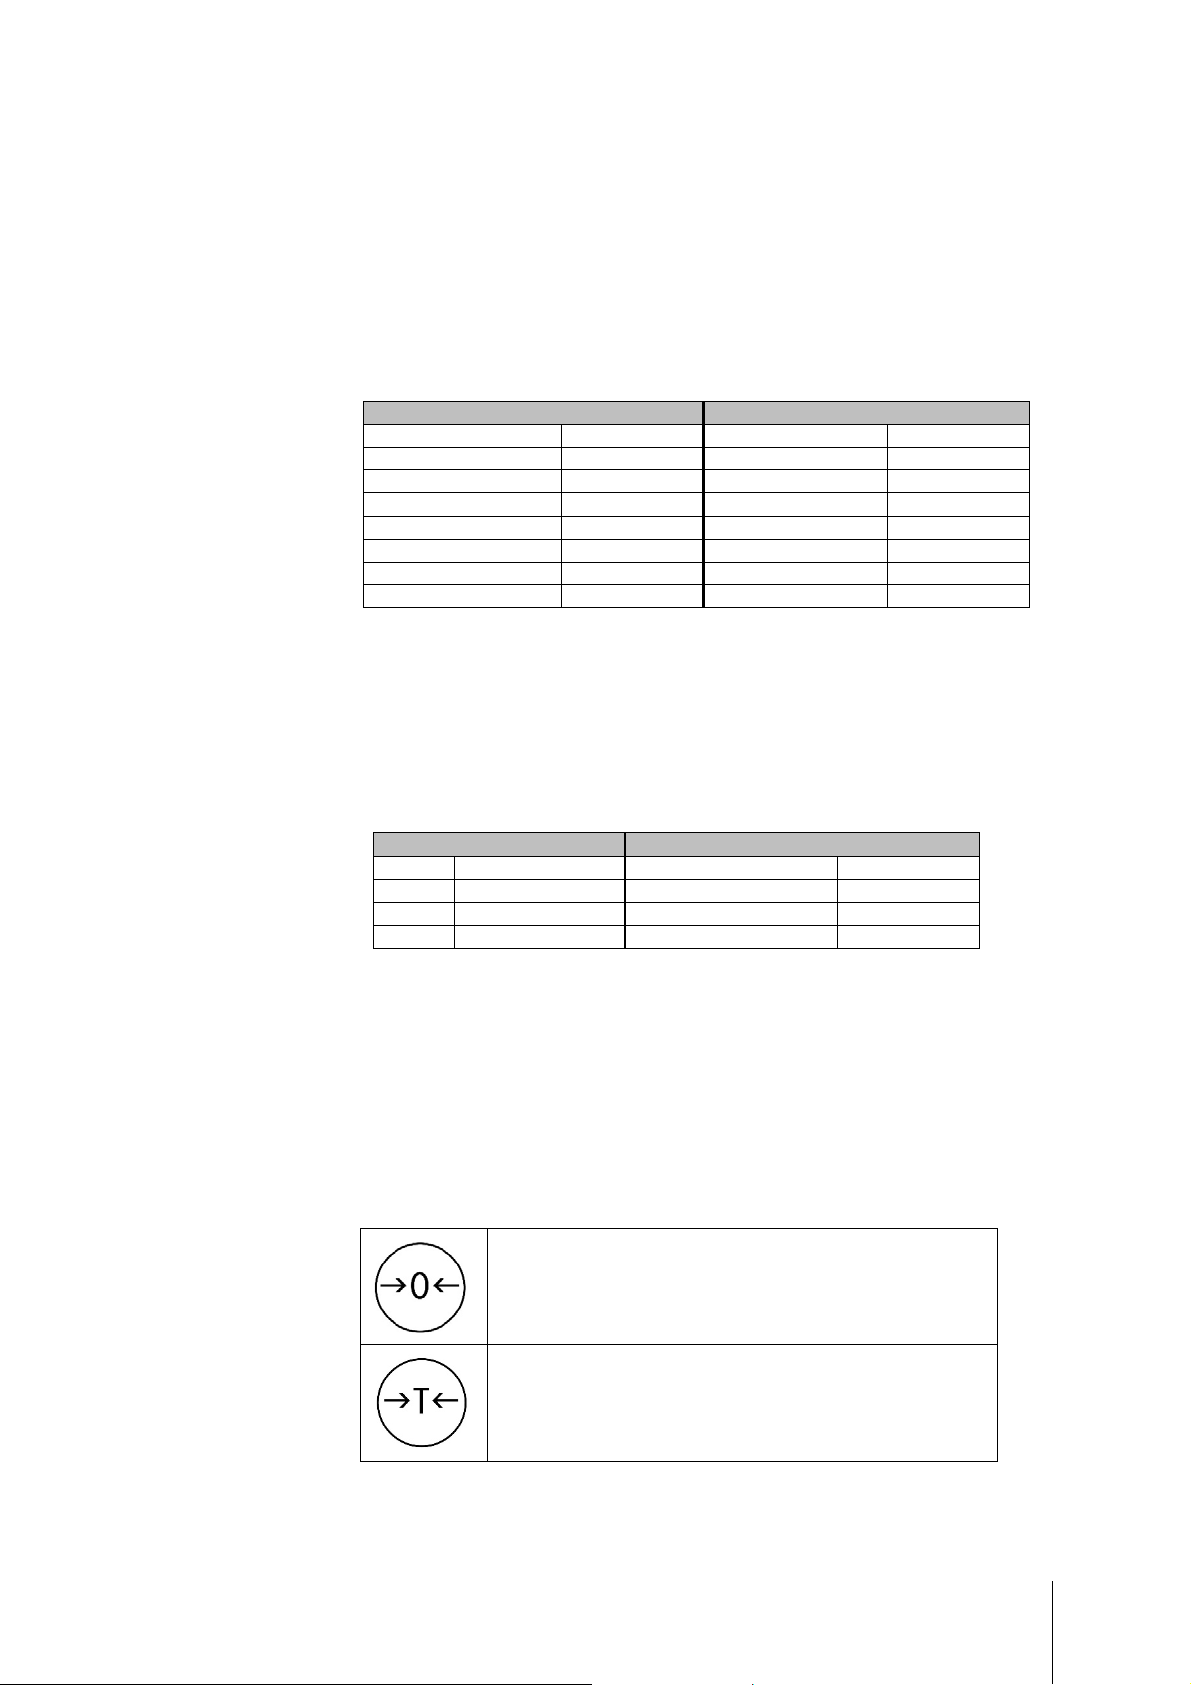
Setup 2.5
The scale is configurable for specific needs by changing soft switches with help of the Tare- and
Zero-buttons. To access the setup mode press and hold the >T< button for about 5 seconds, until
“CONF” is displayed.
In order to accomplish the settings, use the buttons as follows:
30353728 | Ariva Quick Guide 9
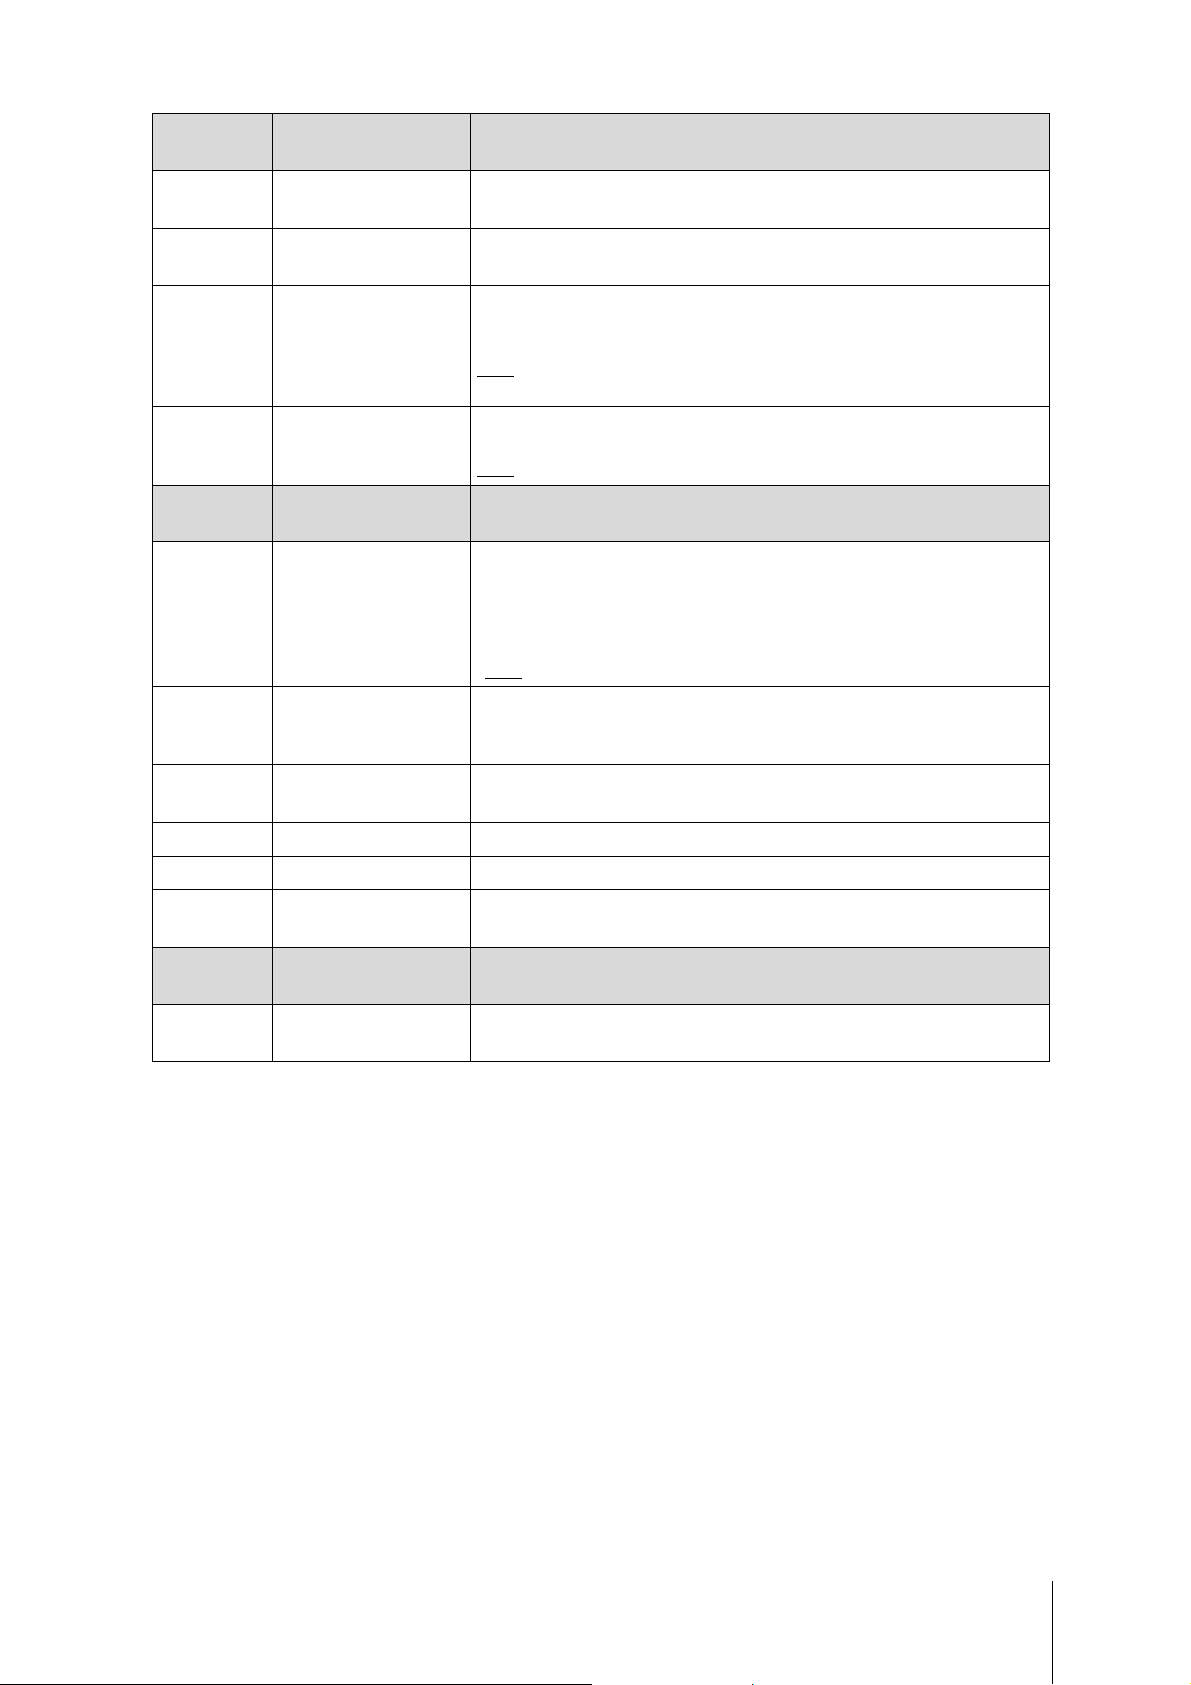
The Zero button is used to confirm a choice and then go to the next
step.
The Tare button is used to step through the set up groups. Once a
group is selected, this key is used to select the specific soft switch
settings.
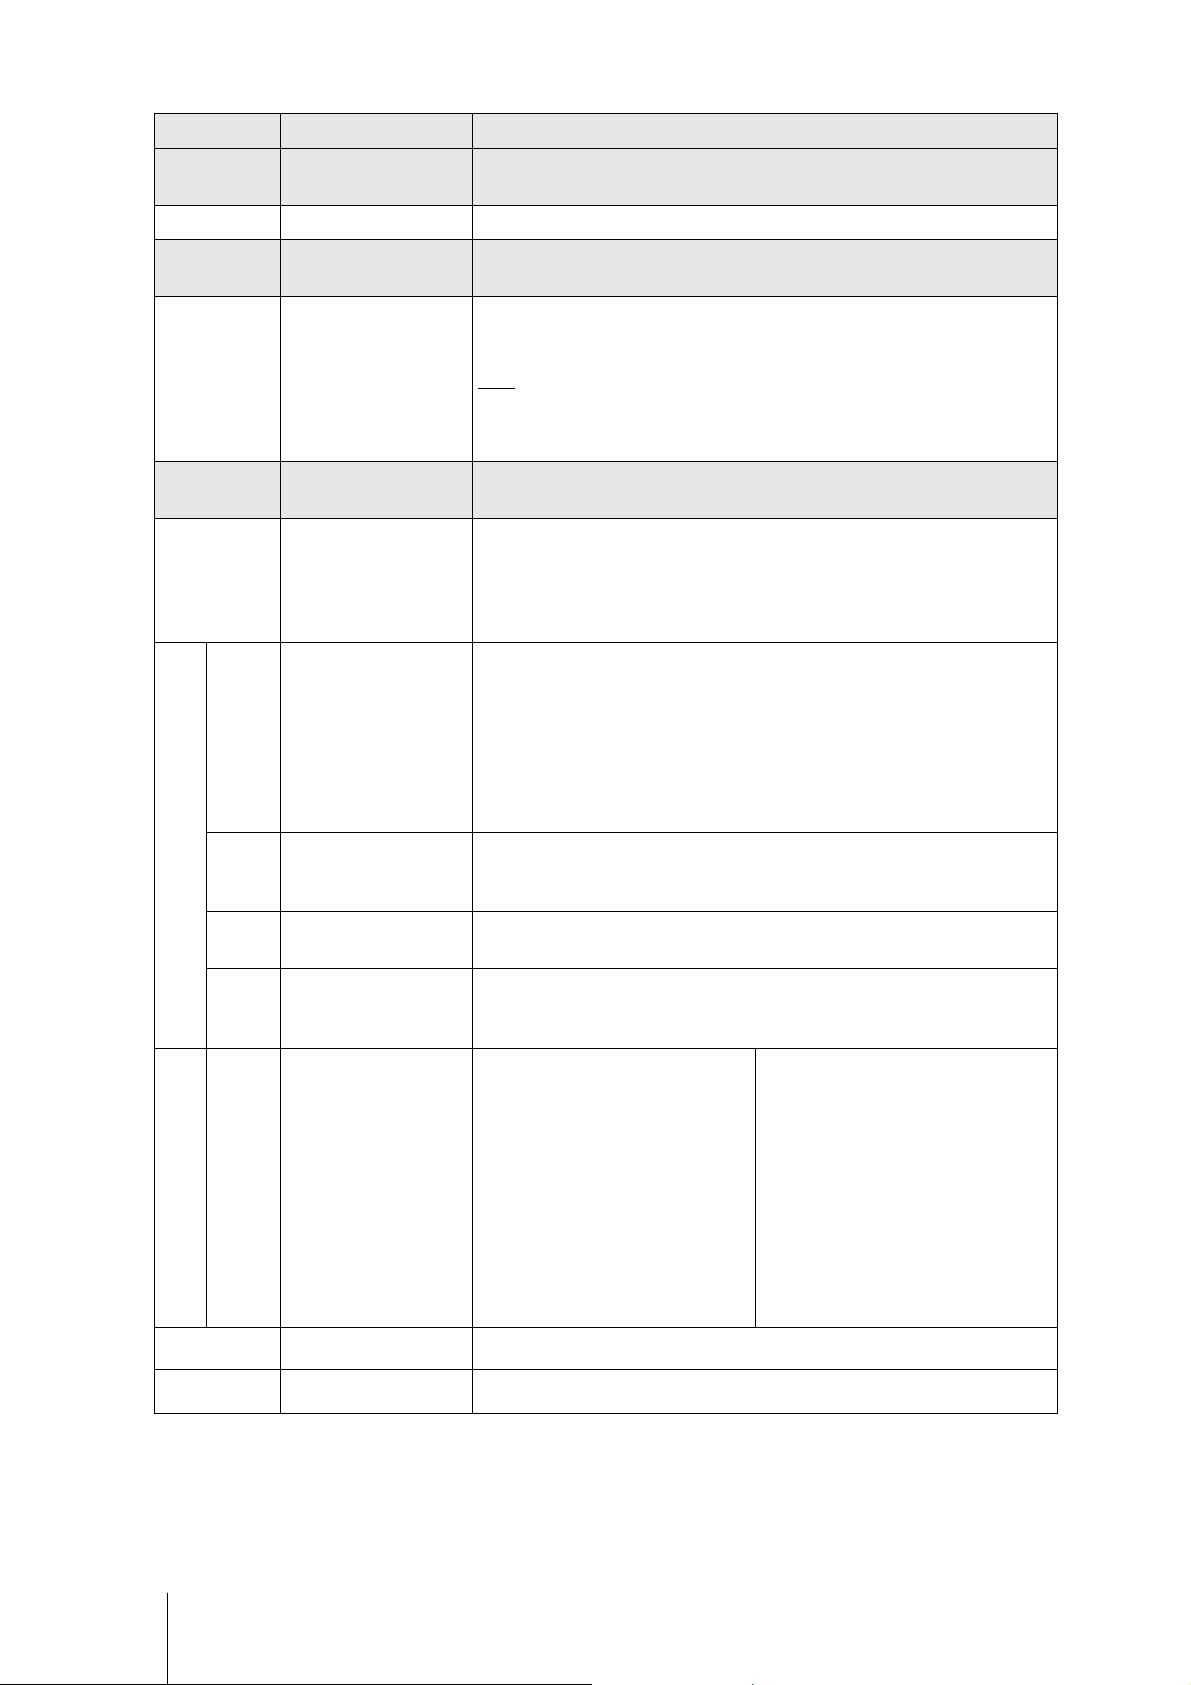
Group.Step
Function
Possible Selections
Press Zero to enter Group 2
0
0
Group 1
1.10 (reserved)
Group 2
2.3 Expanded Weight Mode
Group 3
3.1 Communication Type
3.2 Baud rate
Press Zero to enter Group 1
Press Tare to go to Group 2
Press Tare to go to Group 3
OFF – Weight is displayed in normal display increments.
ON – Weight is displayed in high resolution (ten times normal resolution).
Note:
1. No weighing transactions can occur in Expanded Weight Mode.
2. POS protocols are not operational in this mode.
3. Press >T< key to exit Expanded Weight Mode.
Press Zero to enter Group 3
Press Tare to go to Group 4
0 – RS-232
1 – USB Ser/CDC (Virtual COM Port)
2 – USB Ser/HID
3 – USB HID POS
4 – USB IBM OEM HID
– 1200
1 – 2400
2 – 4800
3 – 9600
4 – 19,200
5 – 38,400
6 – 57,600
7 – 115,200
0 – None
3.3 Parity
RS-232 only
3.4 Data bits
3.5 Stop bits
3.6 Protocol Selection
Only if 3.1 = 0, 1 or 2.
3.7 (reserved)
3.8 (reserved)
1 – Even
2 – Odd
0 – 7 data bit
1 – 8 data bit
0 – None
1 – 1 stop bit
2 – 2 stop bit
= (reserved)
1 = (reserved)
2 = NCI Weightronix (WO/PC)
3 = 8217 Mettler-Toledo (WO)
4 = 8213 Mettler-Toledo (WO)
5 = EPOS 1 (WO)
6 = EPOS 2 (WO)
7 = SL4700/TEC MA
8 = Dialog 06 (PC)
9 = Dialog 04/02 (PC)
10 = Extended Dialog 06 (PC)
11 = ICL (WO)
12 = Shekel (WO)
13 = RIVA 5462/Nixdorf 2 (WO)
14 = IP3 (PC)
15 = (reserved)
16 = Colruyt
17 = MT L2
18 = Berkel (WO)
19 = Berkel (PC)
20 = Anker
21 = CAS (WO)
22 = Epelsa
10 Ariva Quick Guide | 30353728
Press Zero to enter Group 4
ON
Group 4
4.1 Button Tare
4.2 Chain Tare
4.3 Auto-clear of Button Tare
4.4
(only Ariva-S)
Group 5
5.1 Beeper
5.2 Blank Weight Enable
Preset Tare requires stable
weight
Press Tare to go to Group 5
ON – Enables button tare.
OFF – Disables button tare.
– Enables multiple tares.
OFF – Only one tare per transaction is allowed.
ON – Tare is automatically cleared when weight is removed.
OFF – Tare is not cleared when weight is removed.
Note: This function only applies to push button tares (it does not apply to preset
tares).
ON – Preset tare requires stable weight (Argentina)
OFF – Preset tare does not require stable weight (rest of world)
Note: Only Argentina requires this item to be set = ON.
Press Zero to enter Group 5
Press Tare to go to EXIT
0 – No beeper.*
1 – Scale beeps only when Keypad is pressed.
2 – Scale beeps only when data is sent to POS.
3 – Scale beeps with both POS data and keypad press.
*Note: The calibration button always beeps.
ON – Only display stable weight. (Display will be blank during weight settling
time)
OFF – Display weight all the time (even if unstable)
5.3 Zero cursor (ZERO)
5.4 (reserved)
5.5 (reserved)
5.6
EXIT
SAVE Save or abort and exit
ScaleSentry (only with
Magellan 9400i / 9800i)
ON – Enable ZERO indicator.
OFF – Disable ZERO indicator.
NO – ScaleSentry not supported.
YES – ScaleSentry supported.
Press Zero to enter SAVE
Press Tare to go to Group 1
SAVE – Save all settings and reboot.
ABORT – Abort all settings and return to weighing mode.
30353728 | Ariva Quick Guide 11
3 Operation
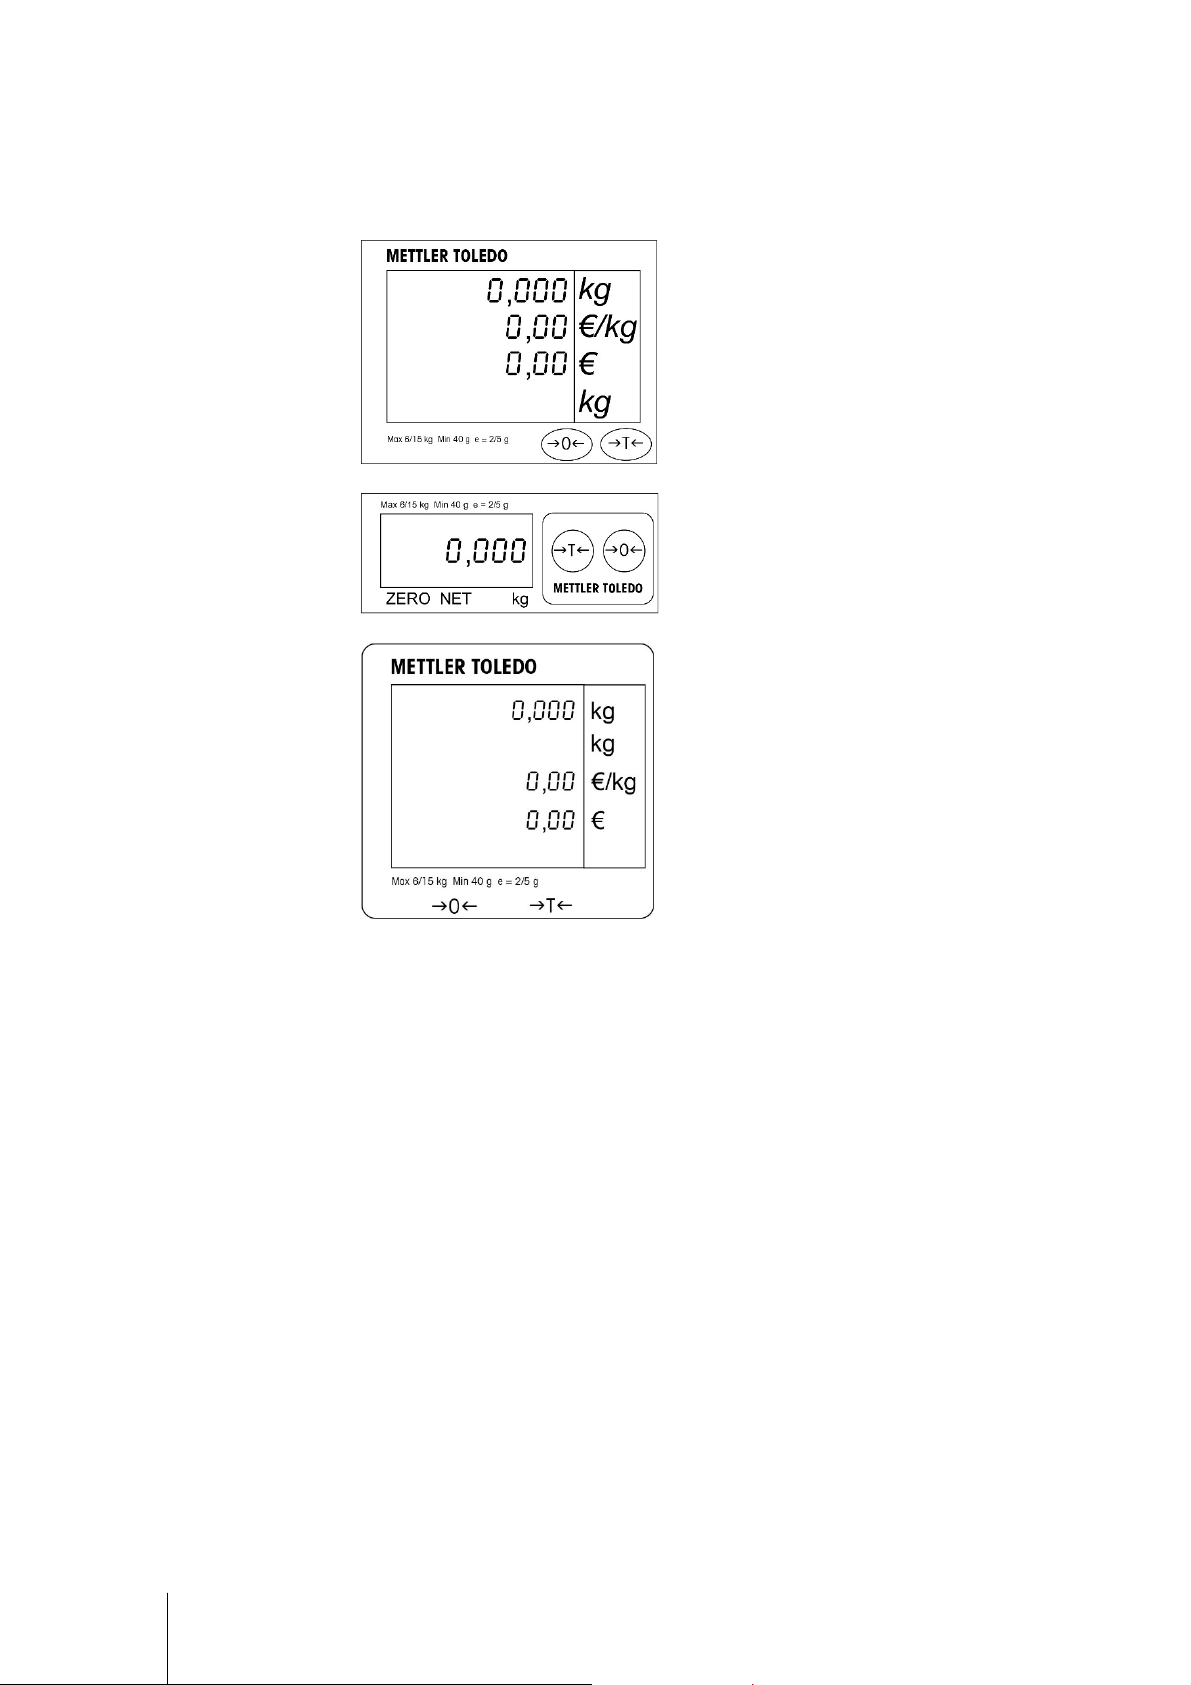
Displays and Buttons 3.1
Display for price computing
applications, with Zero and Tare
buttons.
Display for weight-only applications,
with Zero and Tare buttons.
Indicators
NET Net weight. Indicated when tare is active.
T Indicated when button tare is active.
PT Indicated when preset tare is active.
ZERO Indicated when gross weight is zero.
Text display for price computing
applications, with Zero and Tare
buttons.
Backlight 3.2
The Ariva scale is equipped with a backlit display. To save energy, the scale will turn off the
backlight when not in use for 60 seconds.
The backlight will illuminate when the scale is back in use.
Weighing 3.3
Place the item to be weighed on the platter and the weight will be displayed. POS protocol
commands remotely control most scale functions including data transfer, zero, and tare,
depending on the protocol.
If applicable, tare, unit price and calculated sales price of the item to be weighed will also be
displayed.
12 Ariva Quick Guide | 30353728

Re-zero 3.4
There are two ways to re-zero the Ariva scale:
Power-up Zero
The scale will automatically capture zero when it is turned on. The power-up zero capture range is
between -2% and +18% of the scale capacity. When the scale is turned on with a weight on the
platter of more than +18% of capacity, the scale will not capture zero (the weight display will
show "
use.
Likewise, if the scale is turned on without its platter, for example, then the scale will be
underweight and will not be able to capture zero.
"). After removing the excess weight, the scale will capture "zero" and be ready for
Pushbutton Zero
The Zero button re-zeros the scale over a range of +/-2% of the scale capacity. To use this
function, the scale must be in the gross weighing mode (NET cursor must be off) and in a nonmotion condition. When the weight on the platter is more than +/-2% of the scale capacity,
depressing the zero key will not be accepted.
Tare Function 3.5
Button Tare
The Tare button subtracts the weight of items like packaging or wrapping material.
1. Place an empty container or wrapping material on the platter.
2. Press the Tare button.
3. The "NET" and "T" indicators will illuminate, the tare display will show the tare weight, and the
weight display will show net zero weight.
4. Place the item to be weighed in the container or on the wrapping material on the platter. The
scale will show the net weight of the item.
Preset Tare
If the weight of a packaging material is known, a preset tare value can be sent automatically from
the POS system through the serial connection, as associated with the PLU for that item.
The preset tare will be deleted once the weighing transaction is completed and the item to be
weighed is removed. While a preset tare is active the "NET" and "PT" indicators will illuminate and
the tare display will show the preset tare.
Note: Only one tare method can be used at the same time. If a button tare is active, a preset tare
sent by the POS system will not be accepted. And button tare is not accepted if a preset tare is
active.
30353728 | Ariva Quick Guide 13
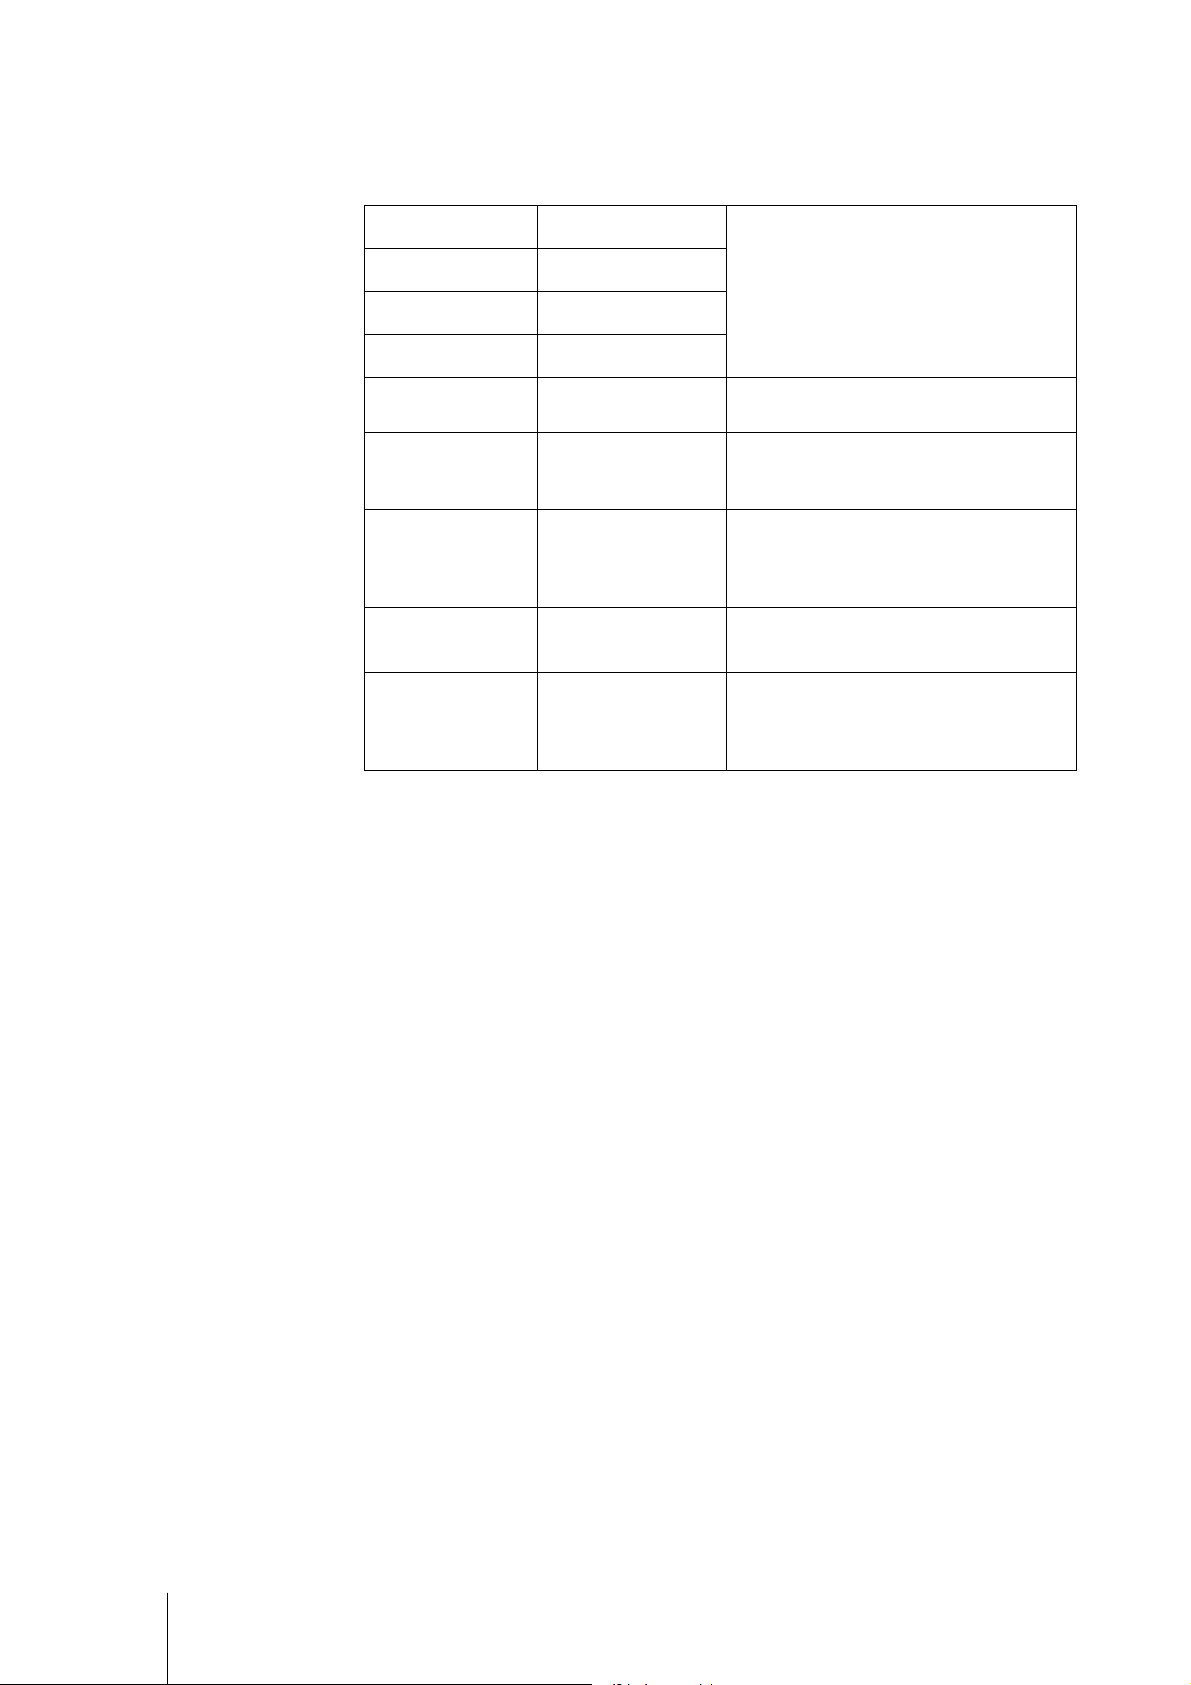
Errors 3.6
The following table lists error messages, descriptions, and corrective actions.
System error
in weight display
in total price display
in weight display
The “” after each error code are two numbers used to uniquely identify an error. Please record
this number and report this specific error to METTLER TOLEDO along with the general error.
Data error
EEPROM error
General error
Calibration error
Communication error
Over capacity
(weight > max. cap.)
Overflow Total price too large to display.
Under zero
(weight < 0)
Cycle power to the scale. For continued
problems call METTLER TOLEDO for
replacement.
Cycle power to the scale and restart
calibration.
Check scale communications parameters (via
the menu) to insure they are the same as the
POS system.
Remove weight from Platter, if that does not
work try cycling the power to the scale. For
continued problems call METTLER TOLEDO for
replacement.
Place the platter on the scale. Either press the
Zero button or cycle power to the scale. For
continued problems call METTLER TOLEDO for
replacement.
14 Ariva Quick Guide | 30353728
 Loading...