

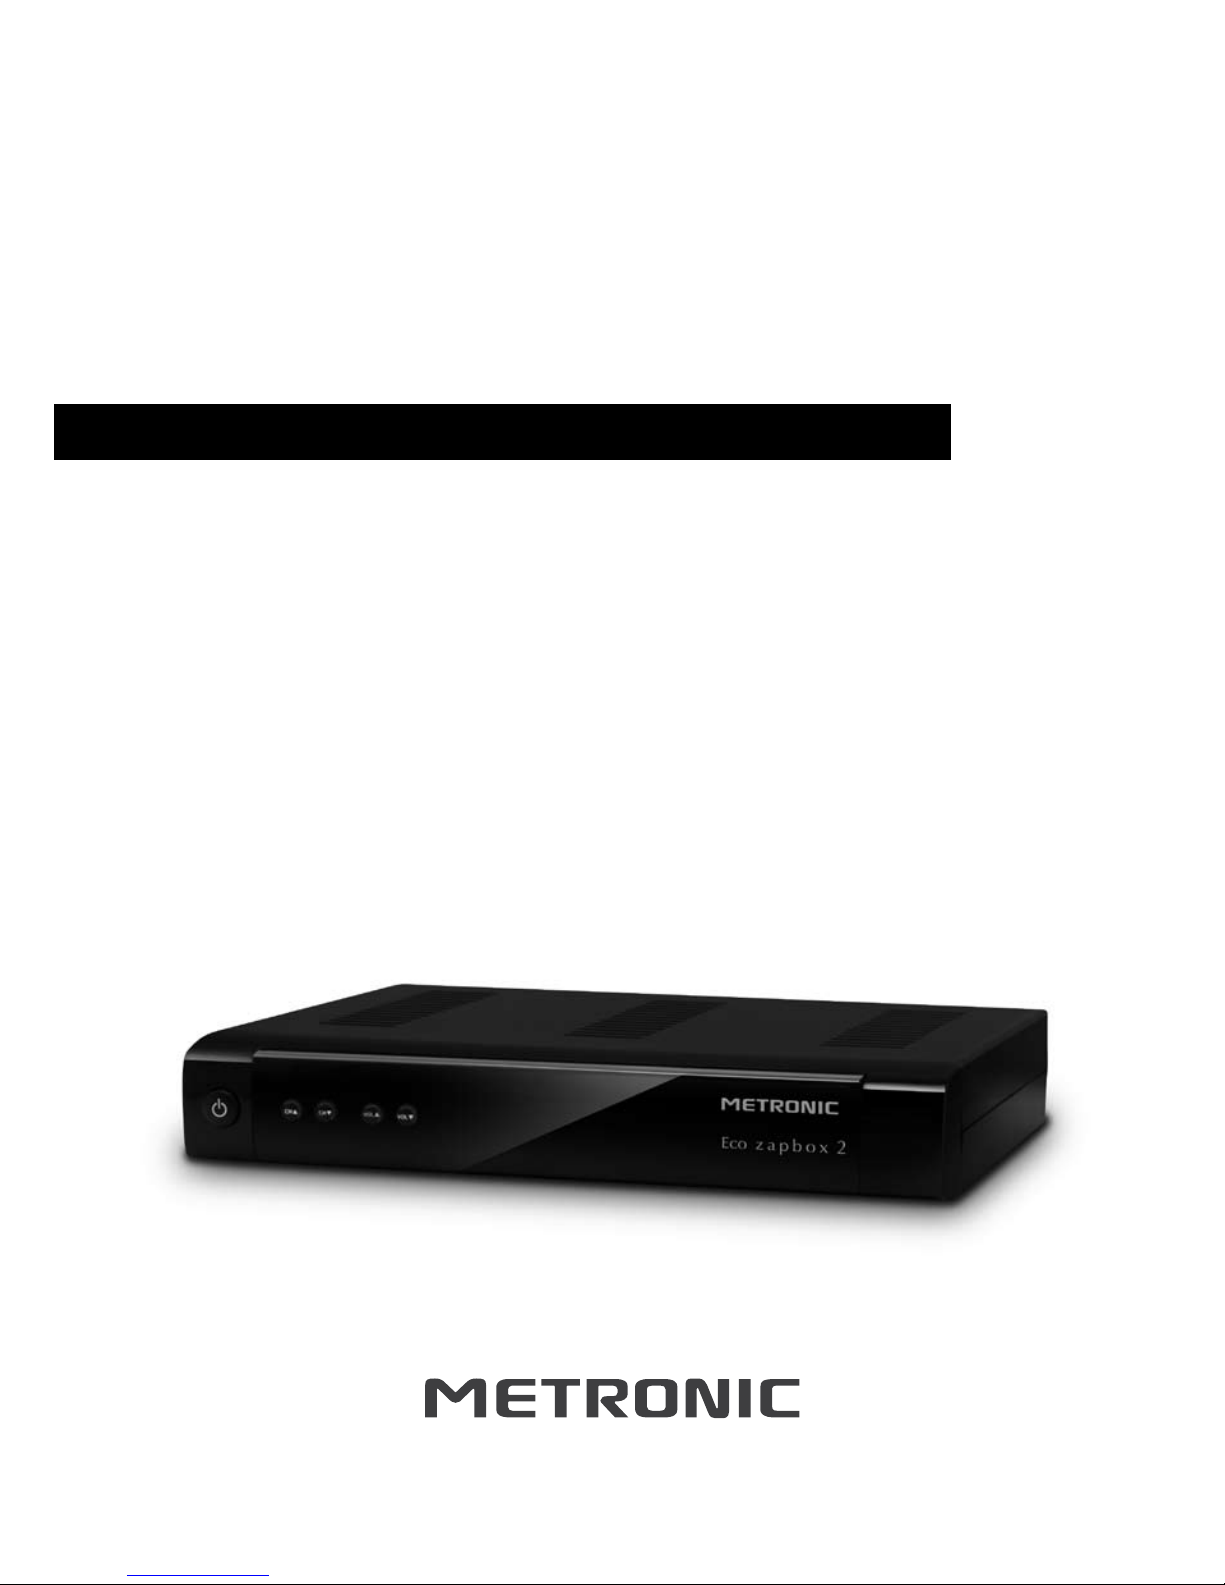
Instruction manual
Eco zapbox 2
with Auto-retune
Ref. 441808
MET950

3
This Eco zapbox lets you access
the free digital channels that are
broadcast in the UK. It uses a
digital signal, received through
your normal aerial and lets you
watch it through your existing
television.
This FREEVIEW Eco zapbox gives you up to 48 digital TV channels and up to 24 digital radio
stations, without a subscription or
contract. For more information on
FREEVIEW, and to check reception in your area please visit :
www.freeview.co.uk
Digital TV
Thank you for choosing this METRONIC Eco zapbox.
Not only can it receive over 40 Freeview channels, you can also listen to digital
radio all at the touch of a button.
Use of any electrical equipment should be undertaken with care. Please
read the safety section on page 17-§11 before using your Eco zapbox. This
appliance is for household use only.
Roof top aerial : it is recommended that you use a wideband rooftop aerial in
order for your Eco zapbox to work properly. For more information visit :
www.digitaluk.co.uk.
Scart cable : you need a Scart cable to connect your Eco zapbox to your TV.
If you want to connect a DVD recorder to your Eco zapbox, you will need an
additional Scart cable.


5
Contents
01 Connecting up 06
02 Getting started 07
03 Your Eco zapbox 08
04 Your remote control 09
05 Using your Eco zapbox 10
06 Daily use 12
07 Advanced features 12
08 Re-tuning 15
09 Troubleshooting 15
10 Specications 16
11 Electrical information 17
12 Warnings 18
After the digital switchover some Freeview channels will move to diffe-
rent frequencies.
When this happens, you will lose some (or even all) channels in some areas.
This loss of channels may also arise occasionally due to some network changes. To recover the channels, you can reset your zapbox to factory default, as
explained in section §7-C page 14.
The operation is even simpler with your Eco zapbox which features the SOS
key. Simply press and hold the blue key marked SOS on the remote control for
3 seconds and your receiver will automatically start an “auto-retune” scan for
easy and fast channel recovery.
6
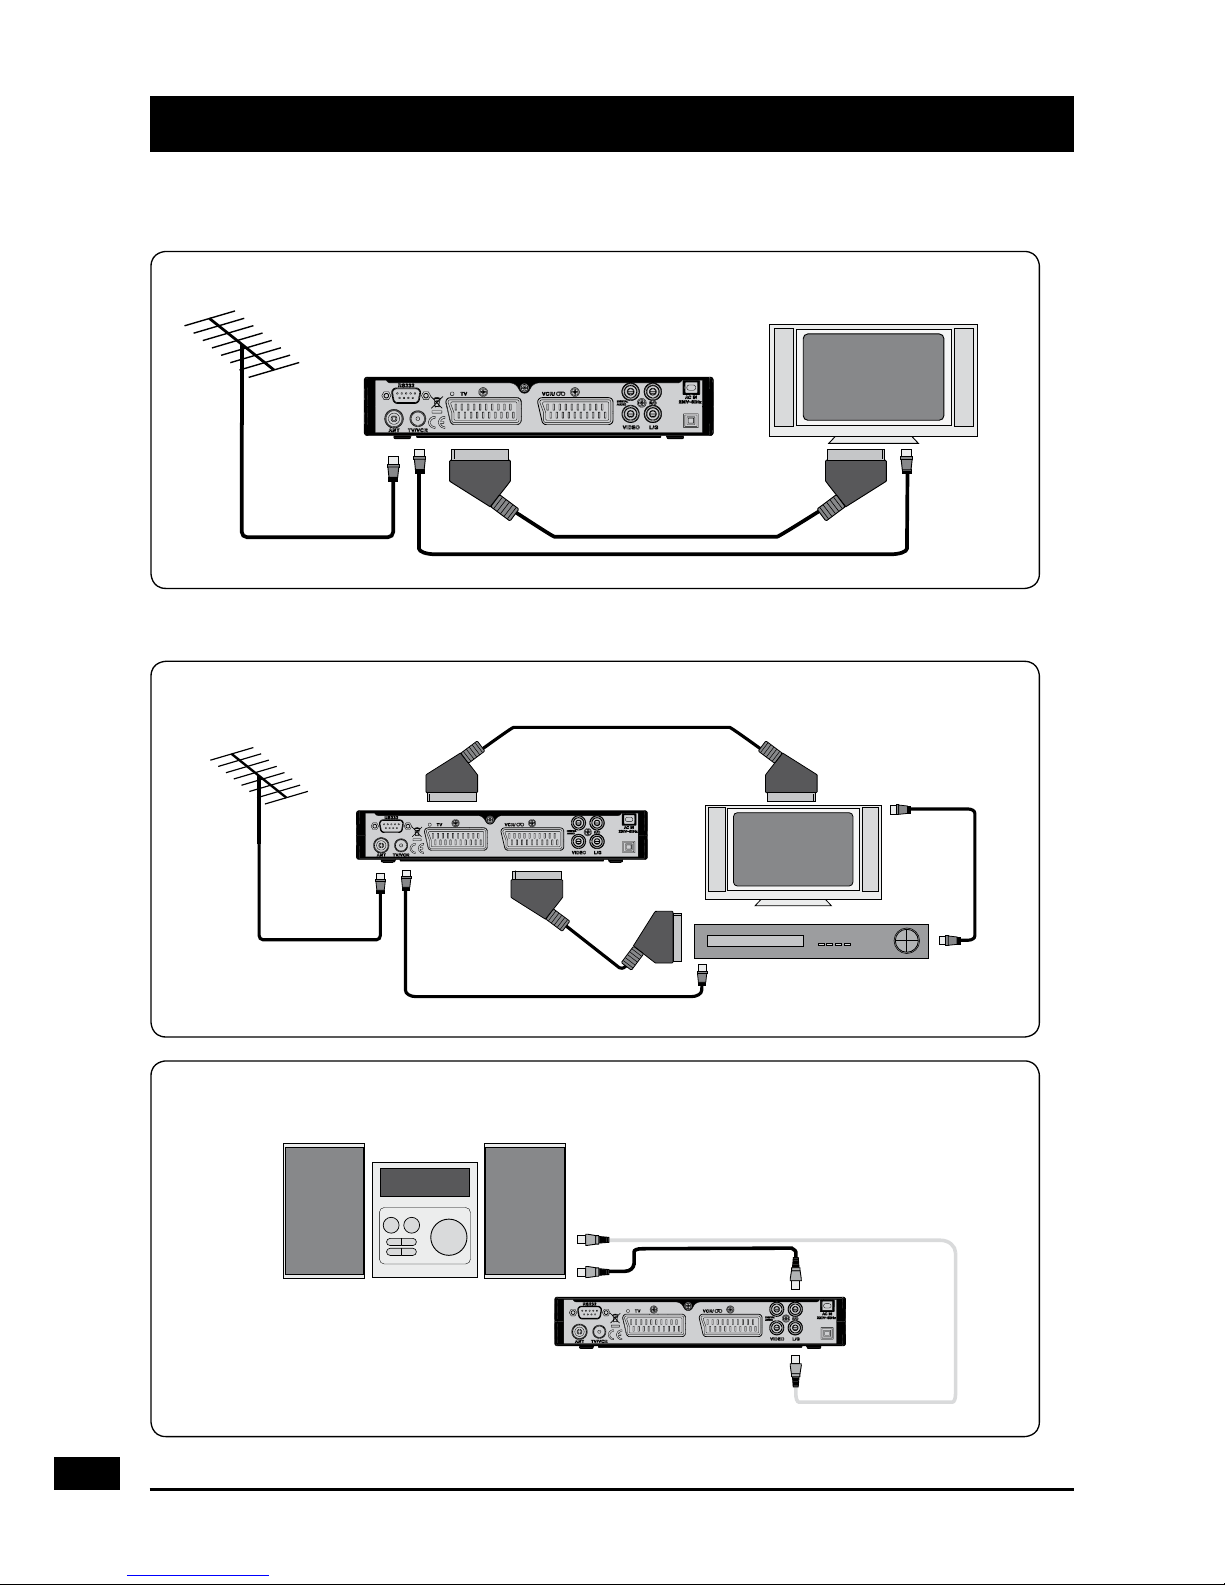
01 - Connecting up
TV
Connecting to the TV and DVD recorder with SCART
TV
SCART Cable*
RF Cable*
RF Cable*
RF Cable*
SCART Cable*
SCART Cable*
RF Cable*
RF Cable*
Connecting a Hi-Fi system
Audio L/R Cable*
Connecting to the TV with SCART
* Not included in the box
DVD/RECORDER
Getting connected
Other connections

7
02 - Getting started
A - Install batteries in remote
Remove the battery cover. Insert two size AAA batteries so
that the ‘+’ and ‘-’ marks on the batteries match the ‘+’ and ‘-’
marks inside the unit.
Replace the battery cover.
B - Plug in and switch on
Insert the Eco zapbox mains plug into a
mains socket. The power on light (green)
on the front will come on.
Switch your TV on.
C - Automatic installation screen
The rst time installation screen will
appear.
Press OK. The Eco zapbox will automatically begin to tune.
The scan progress screen will be
displayed, showing you how many channels have been found and saved. Scanning may take several minutes to complete. When the search is complete, your
Eco zapbox is ready to use. The programme at the top of the channel list will
be shown on your TV when the search is
complete.

8
VOL
CH CH
VOL
VOL
CH CH
VOL
03 - Your Eco zapbox
A
Standby button.
B
Volume up / down and Channel up / down
C
Aerial Input. Connect the aerial to this socket.
D
Aerial Output. Connect the TV to this socket, if you want to watch analog
channels on your TV.
E
Serial port (Service use only).
F
TV scart. Connection to TV.
G
AUX scart. For connection to a VCR or a DVD Recorder.
H
Coaxial Digital.
I
Composite video.
J
Audio stereo output.
K
AC Mains cable.
A B
C D E F G I KH J

9
1
Digit pad : enter values and select the
channel directly by entering its number.
2
: power on / Standby
3
MENU : allows you to open the menu so
that you can change the settings of your
Eco zapbox.
4
Volume up / down
5
Channel up / down
6
OK : conrm selection in menu / on
screen displays.
7
EXIT : allows you to go back one step in
the menus.
8
EPG : display the EPG, Electronic Program Guide.
9
: turns the volume on and off.
10
: to access to the favorite list.
11
: press once to display information
about the current programme. Press
twice to display technical information
about the current programme and
signal.
12
: to enable or disable the subtitles
(DVB).
13
: to go in Radio mode or in TV
mode.
14
TV/VCR : to force VCR routing to TV.
15
: adjust the aspect ratio of the video output.
16
LANG : to select another audio track (other language, Dolby Digital, ...) when available.
17
: to use the digital text content.
18
Colour buttons : for interactive function.
19
: exit all menus or go to previous channel.
20
34
65 : navigate up / down / left / right in menus / on screen displays.
21
SOS blue key. Press and hold for 3 seconds to re-tune channels automatically.
04 - Your remote control
21

10
05 - Using your Eco zapbox
As with most of your electrical goods, there will be functions you use
everyday, and others that you need only occasionally.
We’ve put the most commonly used functions in this section so you can
get your Eco zapbox up and running as quickly as possible.
We suggest you read this section carefully, then use the other sections to dip in
to whenever you need some extra details or some guidance for settings.
A - Using the EPG
The Electronic Programme Guide,
or EPG, is an on-screen TV guide.
It shows all scheduled programmes
seven days in advance for every
channel. Press the EPG button on the
remote control to access the guide.
You can use the 56 buttons to
select a different channel. Press OK
to watch the selected channel, the
EPG window will close automatically.
Press the green button to move to the
next day’s schedule and the red button
to move to the previous.
Your EPG also contains digital radio
channels. These are usually saved to
the higher numbers, starting around
channel 700.
B - Changing the channel
You can select the channel you want to watch by using the CH5 and CH6
buttons on the remote control.
Alternatively use the number buttons to key in the channel number.

11
When you change the channel the Info bar will be displayed for a few seconds.
This shows details of the currently showing and the next programme for the
selected channel.
C - Changing the volume
You can change the volume of your Eco zapbox by using the VOL5 and VOL6
buttons on the remote control. VOL5 will increase the volume and VOL6 will
decrease the volume. To turn the volume off, press the mute button on the
remote control. To turn it back on, press the mute button again.
DON’T FORGET! The volume level of the VCR Scart is adjustable,
therefore do not adjust the volume level of your Eco zapbox whilst making
a recording.
D - Using subtitles
To use subtitles, press the button on the remote control.
When subtitles have been turned on this screen will be
shown and the subtitle text will start to display on screen.
DON’T FORGET! Subtitles are only shown when they are broadcast with
the programme. Not all programmes have subtitles.
E - Using digital text
Many digital channels also provide digital text.
For example this could be information about
programmes, the weather, news and many
other topics.
To use digital text, press the
button on the
remote control. An example is shown.
DON’T FORGET! Not all channels have
digital text.
F - The info banner
The info banner can be accessed when your are
watching a TV programme, by pressing the
button.
The info banner gives you date, time and signal

12
strength information, and also shows you details of the programme your watching and the programme following it.
06 - Daily use
07 - Advanced features
Setting a reminder
You can set your TV to remind you when a programme you want to watch is
about to start.
• Press the EPG button.
• Scroll to the programme you want to be
reminded about using the arrow buttons.
• Press the yellow button.
• The information are automatically set in a
wake-up timer. You could adjust the ON
Time and the Duration if necessary.
• Press OK button.
• The reminder has now been set. Press the
EXIT button to go back to the programme
you were watching.
A - Organising your channels
You can lock, skip, delete and move channels in your channel list.
• Press the MENU button.
• Select Channel Organiser with 4 arrow
key and then press the OK button.
• The channel list will be shown. From this
menu you can press 2 to lock a channel, press 3 to skip a channel, press 4 to
delete a channel and press 5 to move a
channel.

13
DON’T FORGET! You can re-tune your Eco
zapbox to retrieve channels you have deleted. See Re-tuning on page 15.
B - System setup
The settings menu lets you alter the default settings of your Eco zapbox.
• Press the MENU button.
• Select System Conguration and then press
the OK button.
• System Setup has six sub menus :
Language, OSD, TV, Time, Wakeup Timer
and Parental Lock.
• The Language is used to select the langua-
ges that will be selected by default.
• The OSD is used to set the OSD Theme,
the Subtitle display, the Information banner
Timeout and position and set the LCN (Logical Channel Number).
• In TV select the settings which best suits your
setup.
• The Time is automatic by default. You don’t
need to change these parameters.
• The Wakeup Timer (Timer recording) is
used to program a reminder manually without
going through EPG.
• The Parental Lock is used so that you can
set an age restriction on the content that is
allowed to be viewed. You can also change
the passcode to a different number in this
menu.
• Antenna power activates the 5volt supply for
a compatible indoor aerial or for a compatible
mast amplifier.
DON’T FORGET ! The default pincode for
Parental Lock is 0000.

14
C - Factory default
• To reset your Eco Box to the original factory settings, select the Factory
Default menu.
• Press OK button and enter your passcode. Your Eco Box will now reset all the
default settings and re-tune all channels.
D - Low power mode
The Low power mode reduces the amount of electricity that your Eco zapbox
uses. The factory default is low power enabled. When the receiver is in standby
mode, please allow a few seconds for the zapbox to switch on. You can disable
the low power consumption by changing the settings in the MENU / SYSTEM
CONFIGURATION / SYSTEM SETTINGS / TV. By changing the settings the
current consumption will be increased in standby mode (3W instead of less then
1W in low power mode).
E - The accessories and games menu
From this menu you can play games and nd out
information about your Eco zapbox.
• Press the MENU button.
• To play the games, access the Game menu. You
have a choice of two games, Snake and Tetris.
• Use the arrow buttons on the remote control to
play the games, following the instructions on
screen. To exit games, press the EXIT button.
The Version window gives you information about
your Eco zapbox.
DON’T FORGET! The information shown on
your screen may be different to the one
shown above.

15
08 - Re-tuning
09 - Troubleshooting
Re-tuning your Eco zapbox
As digital switchover happens in your region, and extra channels and services
are launched, you will need to re-tune your Eco zapbox.
Option 1
This option allows you to re-tune the channels automatically without going
through the Menu.
Channels which were lost due to frequency changes will be recovered and
newly launched channels and services will be added.
Hold the blue key for 3 seconds to start the auto-scan.
Option 2
• Press the MENU button.
• Select System Installation and then press the OK button.
• Select Auto Scan and then press the OK button.
• Press OK button to delete all current channels and
start a full auto scan.
• Enter your passcode.
DON’T FORGET! If you have set your parental code you will need to enter
it to retune your Eco zapbox. The default code is 0000.
• The tuning progress screen will be displayed,
showing you how many channels have been
found and saved. Scanning may take several
minutes to complete.
• Your Eco zapbox has now been retuned.
Please note indoor aerial are not recommended for use with this product (this
includes loft aerials) otherwise you may experience problems with reception or
picture break ups on some channels.

16
10 - Specications
Problem Possible cause What to do
Standby light not lit Mains lead unplugged
Mains fuse blown
Check mains lead
Check fuse
No signal found Aerial is disconnected
Aerial is damaged / misaligned
Check aerial lead
Check aerial
Ensure that you are capable of
receiving Digital TV.
No picture or sound Tuned to digital teletext chan-
nel
Switch to another channel
Scrambled channel message Channel is scrambled This Eco zapbox is not able to
decode scrambled channels
No response to remote control New batteries required Plug in and turn on switch at
mains
Forgotten PIN code Contact the helpline
You have moved your TV and
you nd you are no longer able
to receive digital channels
The aerial feed maybe sent
through a distribution system
which can / may reduce the
digital signal now received by
the Eco zapbox.
Try a signal booster or a direct
feed from the aerial.
Tuner and channel • RF input connector
(IEC-TYPE, IEC169-2, female)
• RF output connector
(IEC-TYPE, IEC169-2, male)
• Frequency range:
470MHz ~862MHz (UHF)
Decoder
• Transport stream
• Prole level
• Input rate
• Video format
• Audio format
• Video output
MPEG-2 ISO/IEC 13818
MAX. 15Mbit/s
MPEG-2 Main prole@Main level
4:3/16:9 Switchable
MPEG Layer I & II, 32 / 44.1 / 48KHz
RGB, CVBS
Connection
• Main power cable
• Tuner
• Video
• Audio
• Data port
Fixed type
Antenna input
Composite video output, twin scart
Stereo audio output, digital coaxial audio output
RS-232 (for service use only)
Power supply
• Input voltage
• Power consumption
AC 230V~50Hz
MAX. 8W/standby <1W
IMPORTANT: Due to continual revision and improvements to our products
design, specications are subject to change without notice.

17
11 - Electrical Information
This Eco zapbox is tted with a BS1363/A 13 amp plug. If it is not suitable for
your supply sockets it must be removed and replaced with an appropriate plug.
If the plug becomes damaged and/or needs to be replaced please follow the
wiring instructions below. The plug removed must be disposed of immediately.
It must not be plugged into a supply socket as this will be an electrical hazard. If
the fuse needs to be replaced it must be of the same rating and ASTA approved
to BS1362. If the plug is changed, a fuse of the appropriate rating must be tted
in the plug, adapter or at the distribution board. If the fuse in a moulded plug is
replaced, the fuse cover must be retted before the appliance can be used.
Wiring Instructions
The supply cable will be either 2-core or 3-core. Follow the appropriate wiring
instructions given below. In both cases ensure that the outer sheath of the cable
is rmly held by the cable clamp.
2 - Core plug 3 - Core plug
WARNING : Do not connect either wire to the
earth terminal.
WARNING : This appliance must be earthed.
This symbol indicates that this 2-core appliance is
Class II and does not require an earth connection.
The wire coloured blue must be connected to the terminal marked with the letter N or coloured black.
The wire coloured brown must be connected to the terminal marked with the letter L or coloured red.
The wire coloured green and yellow must be connected
to the terminal marked with the letter E, or by the earth
symbol
, or coloured green or green and yellow.
The wire coloured blue must be connected to the terminal marked with the letter N or coloured black.
The wire coloured brown must be connected to the terminal.
Fuse
Brown (Live)Blue
(Neutral)
Green & yellow
(Earth)
Fuse
Brown (Live)Blue
(Neutral)

18
12 - Warnings
• Attempts to repair this will invalidate the warranty.
• Refer repairs to this Eco zapbox to a qualied service personnel only.
• Do not disassemble this Eco zapbox.
• There are dangerous-voltage parts inside that may cause electric shock even
after power is disconnected.
• Store your Eco zapbox in a clean, dry environment.
• Unplug the Eco zapbox immediately if it gets wet, and consult a servicing
technician.
• Always unplug the Eco zapbox beforecleaning it.
• Wipe dust off the cabinet of the Eco zapbox with a clean, dry and soft cloth.
• Do not place any objects on top of the Eco zapbox.
• Avoid exposing your Eco zapbox directly to sunlight or other heat sources.
• Put your Eco zapbox in a well-ventilated area away from high humidity.
• Do not expose this Eco zapbox to rain or moisture, dripping or splashing.
• For stubborn stains use a damp (not dripping) cloth.
• Do not use any cleaning solutions on this Eco zapbox.
Safety Tips
If smoke, abnormal noise or odour comes out of this Eco zapbox, unplug from
the mains supply immediately and contact the retailer. Never try to repair the
Eco zapbox on your own. Always contact the dealer.
Note
This manual contains for-reference-only graphics and information that are subject to change without notice.
WEEE
This appliance is labelled in accordance with European Directive 2002/96/EG concerning
used electrical and electronic appliances (waste electrical and electronic equipment - WEEE).
The guideline determines the framework for the return and recycling of used appliances as
applicable throughout the EU.
EN 060065
As per the EN 60065 norm requirements, please pay particular attention to the following safety
guidelines.
Do not obstruct the air vents with objects such as newspapers, table cloths, curtains etc. Allow at
least 5 cm around the product to allow enough ventilation. Do not place the product on or near amable objects such as lit candles. The device may not be exposed to dripping or splashing and no
object lled with liquid, such as vases, must be put on the device. If the mains power supply is used
as the on / off control, it must be easily accessible.
Please respect the environment and the law : do not throw batteries with the household rubbish ;
take them back to your retailer and dispose of them in the correct container.

19
How the Digital switchover may
affect you :
Television in the UK is going digital,
bringing us all more choice and new
services.
Starting in late 2007 and ending in
2012, television services in the UK will
go completely digital, TV region by TV
region.
The map shows when your area will
switchover to digital. When the TV switchover happens in your area, there are
at least two occasions when you will
need to re-tune your Eco zapbox in
order to continue receiving your existing TV channels, and also to pick up
new ones.
Digital UK, the body leading the digital
TV switchover, will advise you when you
need to re-tune during the switchover.
For re-tuning instructions for this
Eco zapbox please see page 15 of
this instruction book.
If you nd you can’t receive the extra
digital channels, it may be because
your area is not covered by Freeview
yet or that you need an aerial upgrade.
Visit www.digitaluk.co.uk to check.
If you have any questions, please
contact your equipment supplier or call
Digital UK on 0845 6 50 50 50 or visit
www.digitaluk.co.uk

Metronic Ltd
Park House,
15-23 Greenhill Crescent,
Watford,
Herts,
WD18 8PH.
UK
www.metronic.com
Product made in Asia
 Loading...