

Page 1
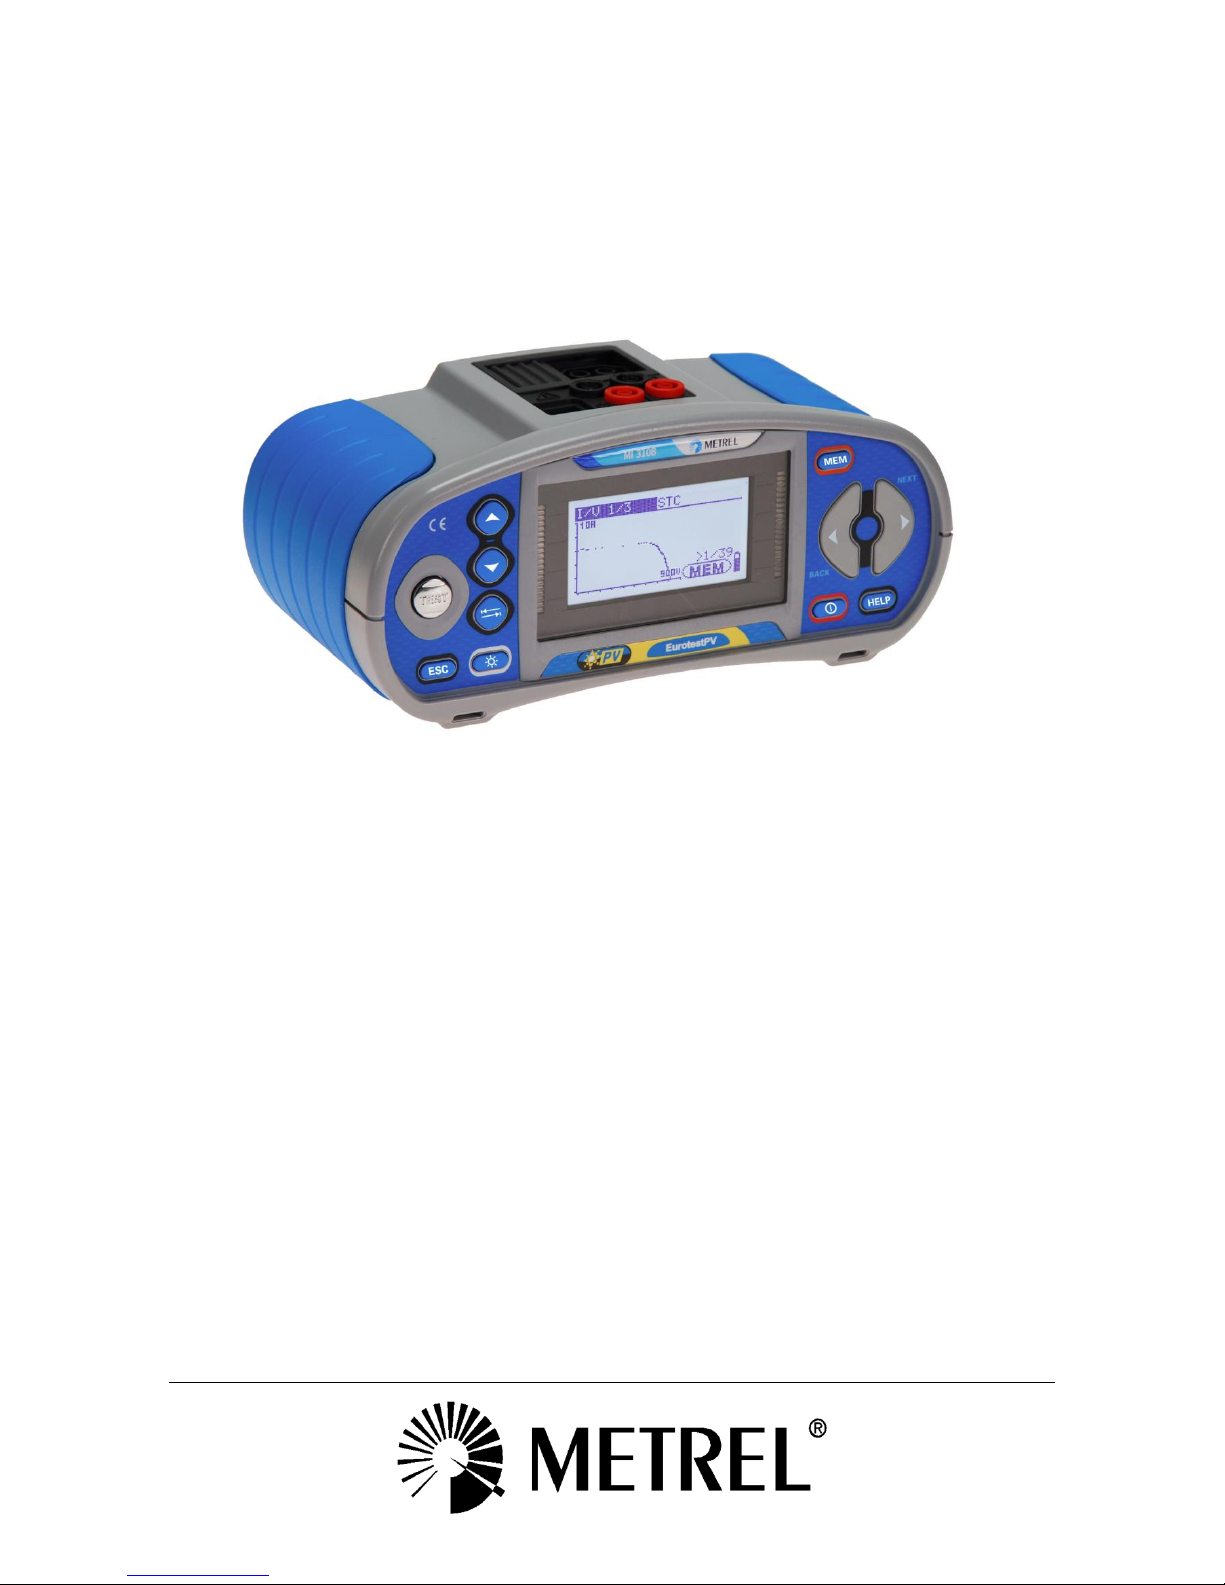
EurotestPV
MI 3108
Instruction manual
Version 1.7, Code no. 20 752 095
Page 2
2
Distributor:
Manufacturer:
METREL d.d.
Ljubljanska cesta 77
1354 Horjul
Slovenia
web site: http://www.metrel.si
e-mail: metrel@metrel.si
Mark on your equipment certifies that this equipment meets the requirements of the EU
(European Union) concerning safety and electromagnetic compatibility regulations
© 2013 – 2017 METREL
The trade names Metrel, Smartec, Eurotest, Autosequence are trademarks registered or pending in Europe
and other countries.
No part of this publication may be reproduced or utilized in any form or by any means
without permission in writing from METREL.
Page 3

MI 3108 EurotestPV Table of contents
3
Table of contents
1 Preface .................................................................................................................... 6
2 Safety and operational considerations ................................................................. 7
2.1 Warnings and notes .......................................................................................... 7
2.2 Battery and charging ....................................................................................... 12
2.3 Standards applied ........................................................................................... 14
3 Instrument description ......................................................................................... 16
3.1 Front panel ...................................................................................................... 16
3.2 Connector panel .............................................................................................. 17
3.3 Back side ................................ ................................ ................................ ......... 18
3.4 Carrying the instrument ................................................................................... 19
3.5 Instrument set and accessories ....................................................................... 20
3.5.1 Standard set MI 3108 ............................................................................................ 20
3.5.2 Optional accessories ............................................................................................. 20
4 Instrument operation ............................................................................................ 21
4.1 Display and sound ........................................................................................... 21
4.1.1 Terminal voltage monitor ....................................................................................... 21
4.1.2 Battery indication ................................................................................................... 21
4.1.3 Messages .............................................................................................................. 21
4.1.4 Results .................................................................................................................. 22
4.1.5 Sound warnings ..................................................................................................... 22
4.1.6 Help screens ......................................................................................................... 22
4.1.7 Backlight and contrast adjustments ....................................................................... 23
4.2 Function selection ........................................................................................... 23
4.3 Instruments main menu ................................................................................... 25
4.4 Settings ........................................................................................................... 25
4.4.1 Memory ................................................................................................................. 26
4.4.2 Language .............................................................................................................. 26
4.4.3 Date and time ........................................................................................................ 26
4.4.4 RCD standard ....................................................................................................... 27
4.4.5 Z factor .................................................................................................................. 28
4.4.6 Commander support .............................................................................................. 29
4.4.7 Communication ..................................................................................................... 29
4.4.8 Initial settings ........................................................................................................ 32
4.4.9 Clamp Settings ...................................................................................................... 34
4.4.10 Synchronization (A 1378 - PV Remote unit) ....................................................... 34
4.4.11 Solar settings ..................................................................................................... 36
5 Measurements – a.c. LV installations ................................................................. 40
5.1 Compensation of test leads resistance ............................................................ 40
5.2 Voltage, frequency and phase sequence ........................................................ 41
5.3 Insulation resistance ........................................................................................ 43
5.4 Resistance of earth connection and equipotential bonding ............................. 45
5.5 Ring Continuity ................................................................................................ 47
5.6 Testing RCDs .................................................................................................. 52
5.6.1 Contact voltage (RCD Uc) ..................................................................................... 53
5.6.2 Trip-out time (RCDt) .............................................................................................. 54
5.6.3 Trip-out current (RCD I) ................................................................ ......................... 54
Page 4

MI 3108 EurotestPV Table of contents
4
5.6.4 RCD Autotest ........................................................................................................ 56
5.7 Fault loop impedance and prospective fault current ........................................ 59
5.8 Line impedance and prospective short-circuit current / Voltage drop .............. 61
5.8.1 Line impedance and prospective short circuit current ............................................ 62
5.8.2 Voltage drop .......................................................................................................... 63
5.9 Earth resistance .............................................................................................. 65
5.10 PE test terminal ............................................................................................... 67
6 Solar measurements - PV systems ..................................................................... 69
6.1 Insulation resistance on PV systems ............................................................... 69
6.2 PV inverter test ................................................................................................ 71
6.3 PV panel test ................................................................ ................................ ... 75
6.4 Measuring of environmental parameters ......................................................... 77
6.2.1 Operation with A1378 PV Remote Unit ................................................................... 79
6.5 Uoc / Isc test .................................................................................................... 79
6.6 I / V curve measurement ................................................................................. 81
6.7 Measurement of cell temperature before test .................................................. 82
7 Measurements - Power & Energy ........................................................................ 84
7.1 Power .............................................................................................................. 84
7.2 Harmonics ....................................................................................................... 85
7.3 Scope .............................................................................................................. 86
7.4 Current ............................................................................................................ 87
7.5 Energy ............................................................................................................. 89
8 Data handling ........................................................................................................ 90
8.1 Memory organization ....................................................................................... 90
8.2 Data structure .................................................................................................. 90
8.3 Storing test results ........................................................................................... 92
8.4 Recalling test results ....................................................................................... 93
8.5 Clearing stored data ........................................................................................ 94
8.5.1 Clearing complete memory content ....................................................................... 94
8.5.2 Clearing measurement(s) in selected location and its sub-locations ...................... 94
8.5.3 Clearing individual measurements ......................................................................... 95
8.5.4 Renaming installation structure elements (upload from PC) .................................. 96
8.5.5 Renaming installation structure elements with serial barcode reader or RFID reader
96
8.6 Communication ............................................................................................... 98
8.6.1 USB and RS232 communication ........................................................................... 98
Bluetooth communication .................................................................................................. 99
9 Upgrading the instrument .................................................................................. 101
10 Maintenance .................................................................................................... 102
10.1 Fuse replacement .......................................................................................... 102
10.2 Cleaning ........................................................................................................ 102
10.3 Periodic calibration ........................................................................................ 102
10.4 Service .......................................................................................................... 102
11 Technical specifications................................................................................. 103
11.1 Insulation resistance (ISO L/N, ISO L/E, ISO N/E, ISO L/L), Insulation
resistance of PV systems (Roc+, Roc-).................................................................... 103
Page 5

MI 3108 EurotestPV Table of contents
5
11.2 Continuity & Ring (r1, r2, rN, R1+R2, R1+RN) .................................................. 104
11.3 RCD testing ................................................................................................ ... 104
11.3.1 General data .................................................................................................... 104
11.3.2 Contact voltage RCD-Uc ................................................................................. 105
11.3.3 Trip-out time .................................................................................................... 105
11.3.4 Trip-out current ................................................................................................ 105
11.4 Fault loop impedance and prospective fault current ...................................... 106
11.4.1 No disconnecting device or FUSE selected ..................................................... 106
11.4.2 RCD selected .................................................................................................. 107
11.5 Line impedance and prospective short-circuit current / Voltage drop ............ 107
11.6 Resistance to earth ....................................................................................... 108
11.7 Voltage, frequency, and phase rotation ......................................................... 108
11.7.1 Phase rotation ................................................................................................. 108
11.7.2 Voltage ............................................................................................................ 108
11.7.3 Frequency ....................................................................................................... 109
11.7.4 Online terminal voltage monitor ....................................................................... 109
11.8 . TRMS Clamp current ................................................................................... 109
11.9 Power tests .................................................................................................... 110
11.10 PV tests ..................................................................................................... 112
11.10.1 Accuracy of STC data ...................................................................................... 112
11.10.2 Panel, Inverter ................................................................................................. 112
11.10.3 I-V curve .......................................................................................................... 113
11.10.4 Uoc - Isc .......................................................................................................... 113
11.10.5 Environmental parameters ............................................................................... 114
11.10.6 Insulation Resistance of PV systems ............................................................... 114
11.11 General data .............................................................................................. 115
Appendix A - Impedance tables................................................................................ 116
A.1 Impedance tables - for fuses, circuit-breakers and RCBO’s .......................... 116
Appendix B - Accessories for specific measurements .......................................... 118
Appendix C – Country notes .................................................................................... 120
Appendix D – Commander (A 1401) ................................ ................................ ......... 121
D.1 Warnings related to safety .......................................................................... 121
D.2 Battery ............................................................................................................... 121
D.3 Description of commander ................................................................................. 121
D.4 Operation of commander ................................................................................... 122
Appendix E – PV measurements - calculated values ............................................. 124
Page 6

MI 3108 EurotestPV Preface
6
1 Preface
Congratulations on your purchase of the Eurotest instrument and its accessories from
METREL. The instrument was designed on a basis of rich experience, acquired through
many years of dealing with electric installation test equipment.
The Eurotest instrument is a professional, multifunctional, hand-held test instrument
intended to perform all the measurements on a.c. electrical LV installations and d.c.
photovoltaic systems.
The following measurements and tests can be performed on a.c. electrical LV
installations:
Voltage and frequency,
Continuity tests,
Insulation resistance tests,
RCD testing,
Fault loop / RCD trip-lock impedance measurements,
Line impedance / Voltage drop,
Phase sequence,
Earthing resistance tests,
Current measurements,
Power, harmonics and energy measurements.
Measurements and tests on PV systems:
Voltages, currents and power in PV systems (Inverter and PV panels),
Calculation of efficiencies and STC values in PV systems,
Uoc / Isc measurements,
Environmental parameters (Temperature and Irradiance),
I-V curve test,
Insulation resistance on PV systems.
The graphic display with backlight offers easy reading of results, indications,
measurement parameters and messages. Two LED Pass/Fail indicators are placed at
the sides of the LCD.
The operation of the instrument is designed to be as simple and clear as possible and no
special training (except for the reading this instruction manual) is required in order to
begin using the instrument.
In order for operator to be familiar enough with performing measurements in general and
their typical applications it is advisable to read Metrel handbook Guide for testing and
verification of low voltage installations.
The instrument is equipped with the entire necessary accessory for comfortable testing.
Page 7
MI 3108 EurotestPV Safety and operational considerations
7
2 Safety and operational considerations
2.1 Warnings and notes
In order to maintain the highest level of operator safety while carrying out various tests
and measurements, Metrel recommends keeping your Eurotest instruments in good
condition and undamaged. When using the instrument, consider the following general
warnings:
General warnings related to safety:
The symbol on the instrument means »Read the Instruction manual with
special care for safe operation«. The symbol requires an action!
If the test equipment is used in a manner not specified in this user manual,
the protection provided by the equipment could be impaired!
Read this user manual carefully, otherwise the use of the instrument may be
dangerous for the operator, the instrument or for the equipment under test!
Do not use the instrument or any of the accessories if any damage is noticed!
Consider all generally known precautions in order to avoid risk of electric
shock while dealing with hazardous voltages!
If the 315 mA fuse blows follow the instructions in this manual in order to
replace it! Use only fuses that are specified!
Do not disassemble or repair the high breaking current fuse block! In case it
fails the entire block must be replaced with a new original one!
Do not use the instrument in AC supply systems with voltages higher than
550 Va.c.
Service, repairs or adjustment of instruments and accessories is only
allowed to be carried out by a competent authorized personnel!
Use only standard or optional test accessories supplied by your distributor!
Consider that protection category of some accessories is lower than of the
instrument. Test tips and Tip commander have removable caps. If they are
removed the protection falls to CAT II. Check markings on accessories! (cap
off, 18 mm tip)…CAT II up to 1000 V
(cap on, 4 mm tip)… CAT II 1000 V / CAT III 600 V / CAT IV 300 V
The instrument comes supplied with rechargeable Ni-MH battery cells. The
cells should only be replaced with the same type as defined on the battery
compartment label or as described in this manual. Do not use standard
alkaline battery cells while the power supply adapter is connected, otherwise
they may explode!
Page 8
MI 3108 EurotestPV Safety and operational considerations
8
Hazardous voltages exist inside the instrument. Disconnect all test leads,
remove the power supply cable and switch off the instrument before
removing battery compartment cover.
Do not connect any voltage source on C1 and P/C2 inputs. They are intended
only for connection of current clamps and sensors. Maximal input voltage is
3 V!
All normal safety precautions must be taken in order to avoid risk of electric
shock while working on electrical installations!
If the instrument is not in SOLAR operating mode the instrument displays a
warning if an external DC voltage of higher than 50 V is applied to the
instrument. Measurements are blocked.
Warnings related to safety of measurement functions:
All PV functions
Use only dedicated accessories for testing on PV electrical installations.
Accessories for PV installations have yellow marked connectors.
Appropriate warnings are displayed.
PV Safety probe A1384 has inbuilt protective circuit that safely disconnects the
instrument from the PV installation in case of a failure in the instrument.
PV test lead A1385 has integrated fuses that safely disconnects instrument from
the PV installation in case of a failure in the instrument.
Do not use the instrument in PV systems with voltages higher than 1000 V
d.c. and/ or currents higher than 15 A d.c. ! Otherwise the instrument can be
damaged.
PV sources can produce very high voltages and currents. Only skilled and
trained personnel should perform measurements on photovoltaic systems.
Local regulations should be considered.
Safety precautions for working on the roof should be considered.
In case of a fault in the measuring system (wires, devices, connections,
measuring instrument, accessories), presence of flammable gases, very
high moisture or heavy dust an electrical arc can occur that will not
extinguish by itself. Arcs can lead to fire and can cause heavy damage. Users
must be skilled to disconnect the PV system safely in this case.
Insulation resistance, Insulation resistance of PV systems
Insulation resistance measurement should only be performed on de-energized
objects!
Do not touch the test object during the measurement or before it is fully discharged!
Risk of electric shock!
Page 9
MI 3108 EurotestPV Safety and operational considerations
9
When an insulation resistance measurement has been performed on a capacitive
object, automatic discharge may not be done immediately! The warning message
and the actual voltage are displayed during discharge until voltage drops below
10 V.
Continuity functions
Continuity measurements should only be performed on de-energized objects!
Parallel loops may influence on test results.
Testing PE terminal
If phase voltage is detected on the tested PE terminal, stop all measurements
immediately and ensure the cause of the fault is eliminated before proceeding with
any activity!
Notes related to measurement functions:
General
The indicator means that the selected measurement cannot be performed
because of irregular conditions on input terminals.
Insulation resistance, continuity functions and earth resistance measurements can
only be performed on de-energized objects.
PASS / FAIL indication is enabled when limit is set. Apply appropriate limit value
for evaluation of measurement results.
In the case that only two of the three wires are connected to the electrical
installation under test, only voltage indication between these two wires is valid.
Insulation resistance, Insulation resistance of PV systems
Insulation resistance:
If a voltage of higher than 30 V (AC or DC) is detected between test terminals, the
insulation resistance measurement will not be performed.
Insulation resistance of PV systems:
Different pre-tests are carried out. If conditions are proper and safe the
measurement will be continued.
Otherwise or or message is displayed.
The instrument automatically discharge tested object after finished measurement.
A double click of TEST key starts a continuous measurement.
Continuity functions
If a voltage of higher than 10 V (AC or DC) is detected between test terminals, the
continuity resistance test will not be performed.
Compensate test lead resistance before performing a continuity measurement,
where necessary.
RCD functions
Parameters set in one function are also kept for other RCD functions!
Page 10

MI 3108 EurotestPV Safety and operational considerations
10
The measurement of contact voltage does not normally trip an RCD. However, the
trip limit of the RCD may be exceeded as a result of leakage current flowing to the
PE protective conductor or a capacitive connection between L and PE conductors.
The RCD trip-lock sub-function (function selector switch in LOOP position) takes
longer to complete but offers much better accuracy of fault loop resistance (in
comparison to the RL sub-result in Contact voltage function).
RCD trip-out time and RCD trip-out current measurements will only be performed
if the contact voltage in the pre-test at nominal differential current is lower than the
set contact voltage limit!
The autotest sequence (RCD AUTO function) stops when trip-out time is out of
allowable time period.
Z-LOOP
The low limit prospective short-circuit current value depends on fuse type, fuse
current rating, fuse trip-out time and impedance scaling factor.
The specified accuracy of tested parameters is valid only if the mains voltage is
stable during the measurement.
Fault loop impedance measurements will trip an RCD.
The measurement of fault loop impedance using trip-lock function does not
normally trip an RCD. However, the trip limit may be exceeded if a leakage current
flows to the PE protective conductor or if there is a capacitive connection between
L and PE conductors.
Z-LINE / Voltage drop
In case of measurement of Z
Line-Line
with the instrument test leads PE and N
connected together the instrument will display a warning of dangerous PE voltage.
The measurement will be performed anyway.
Specified accuracy of tested parameters is valid only if mains voltage is stable
during the measurement.
Power / Harmonics / Energy / Current
Before starting any Power measurement the current clamp settings in Settings
menu should be checked. Select appropriate current clamp model and measuring
range that are best fitted to the expected current values.
Consider polarity of current clamp (arrow on test clamp should be oriented toward
connected load), otherwise result will be negative!
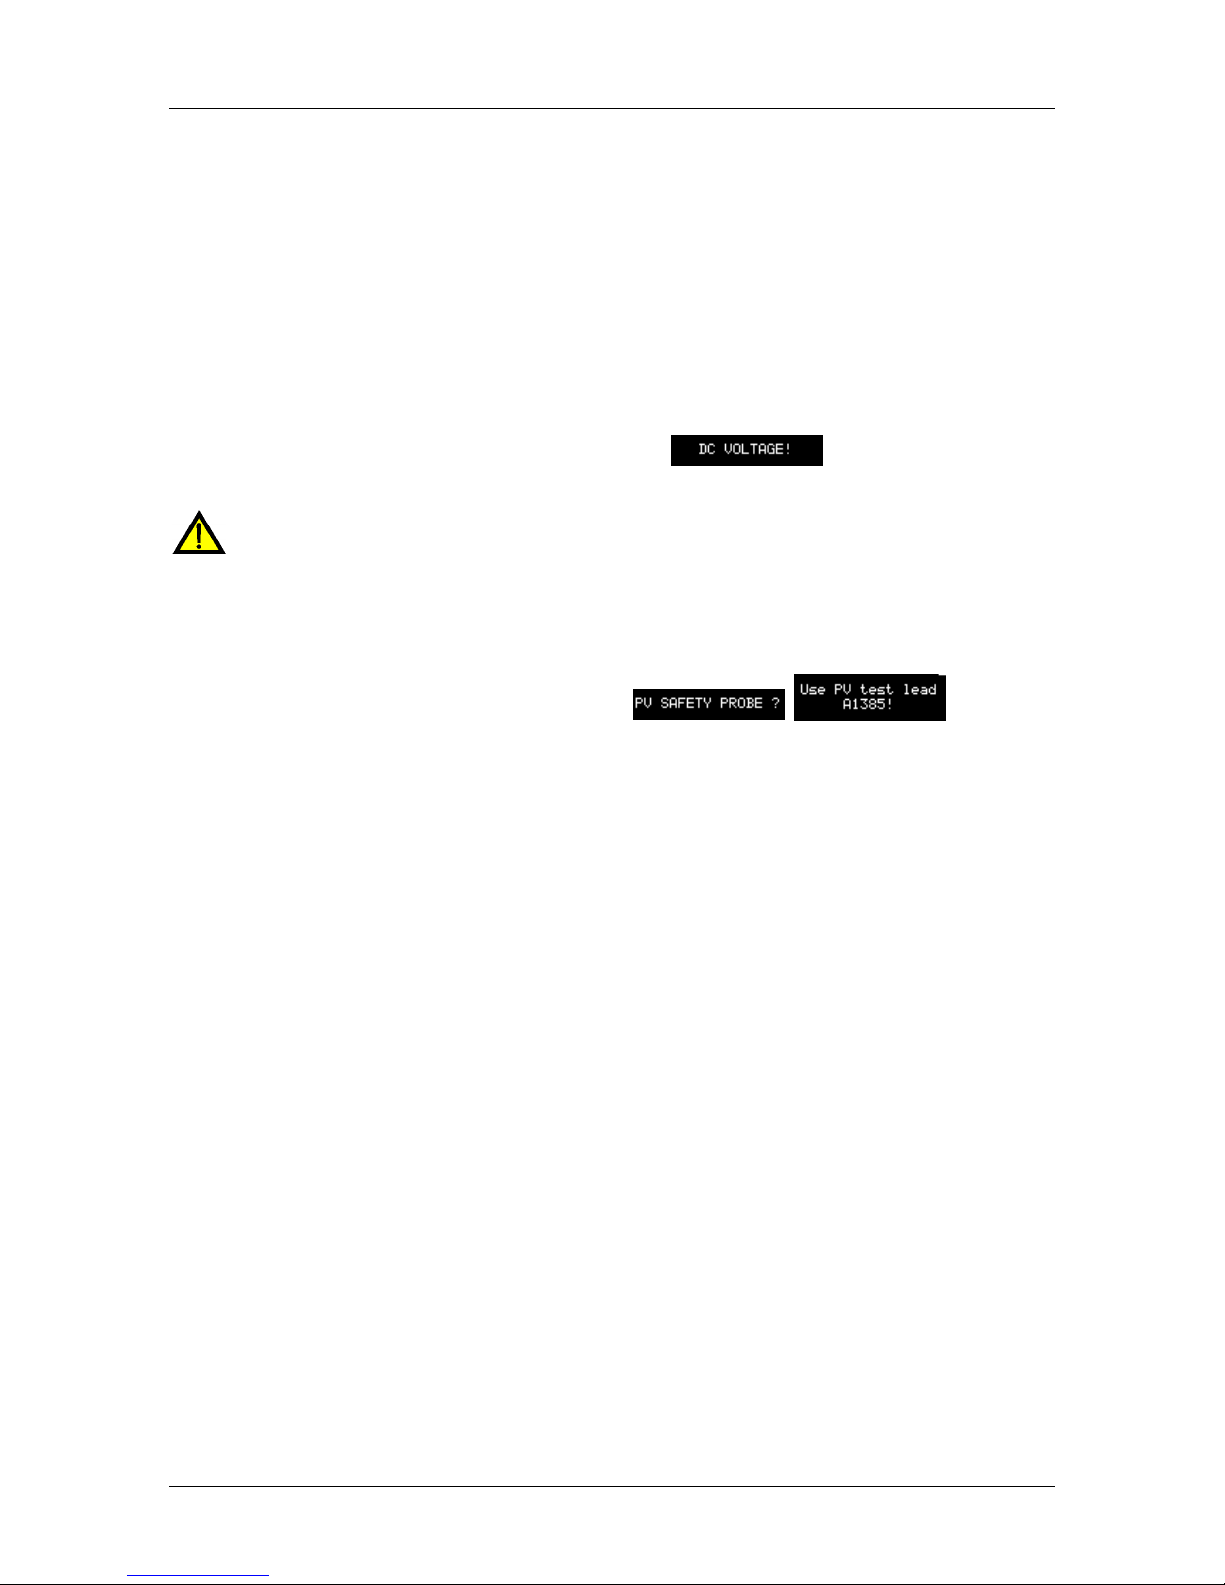
PV measurements
A 1384 PV Safety Probe must be used for PANEL, UOC/ISC, I/V and INVERTER
(AC, DC), and ISO PV measurements.
A 1385 PV test lead must be used for INVERTER AC/DC measurements.
Before starting a PV measurement the settings of PV module type and PV test
parameters should be checked.
Environmental parameters (Irr, T) can be measured or entered manually.
Environmental conditions (irradiance, temperature) must be stable during the
measurements.
Page 11

MI 3108 EurotestPV Safety and operational considerations
11
For calculation of STC results measured Uoc / Isc values, irradiance, cell
temperature, and PV module parameters must be known. Refer to Appendix E for
more information.
Always perform zeroing of DC current clamps before test.
Page 12
MI 3108 EurotestPV Safety and operational considerations
12
2.2 Battery and charging
The instrument uses six AA size alkaline or rechargeable Ni-MH battery cells. Nominal
operating time is declared for cells with nominal capacity of 2100 mAh. Battery condition
is always displayed in the lower right display part. In case the battery is too weak the
instrument indicates this as shown in figure 2.1. This indication appears for a few seconds
and then the instrument turns itself off.
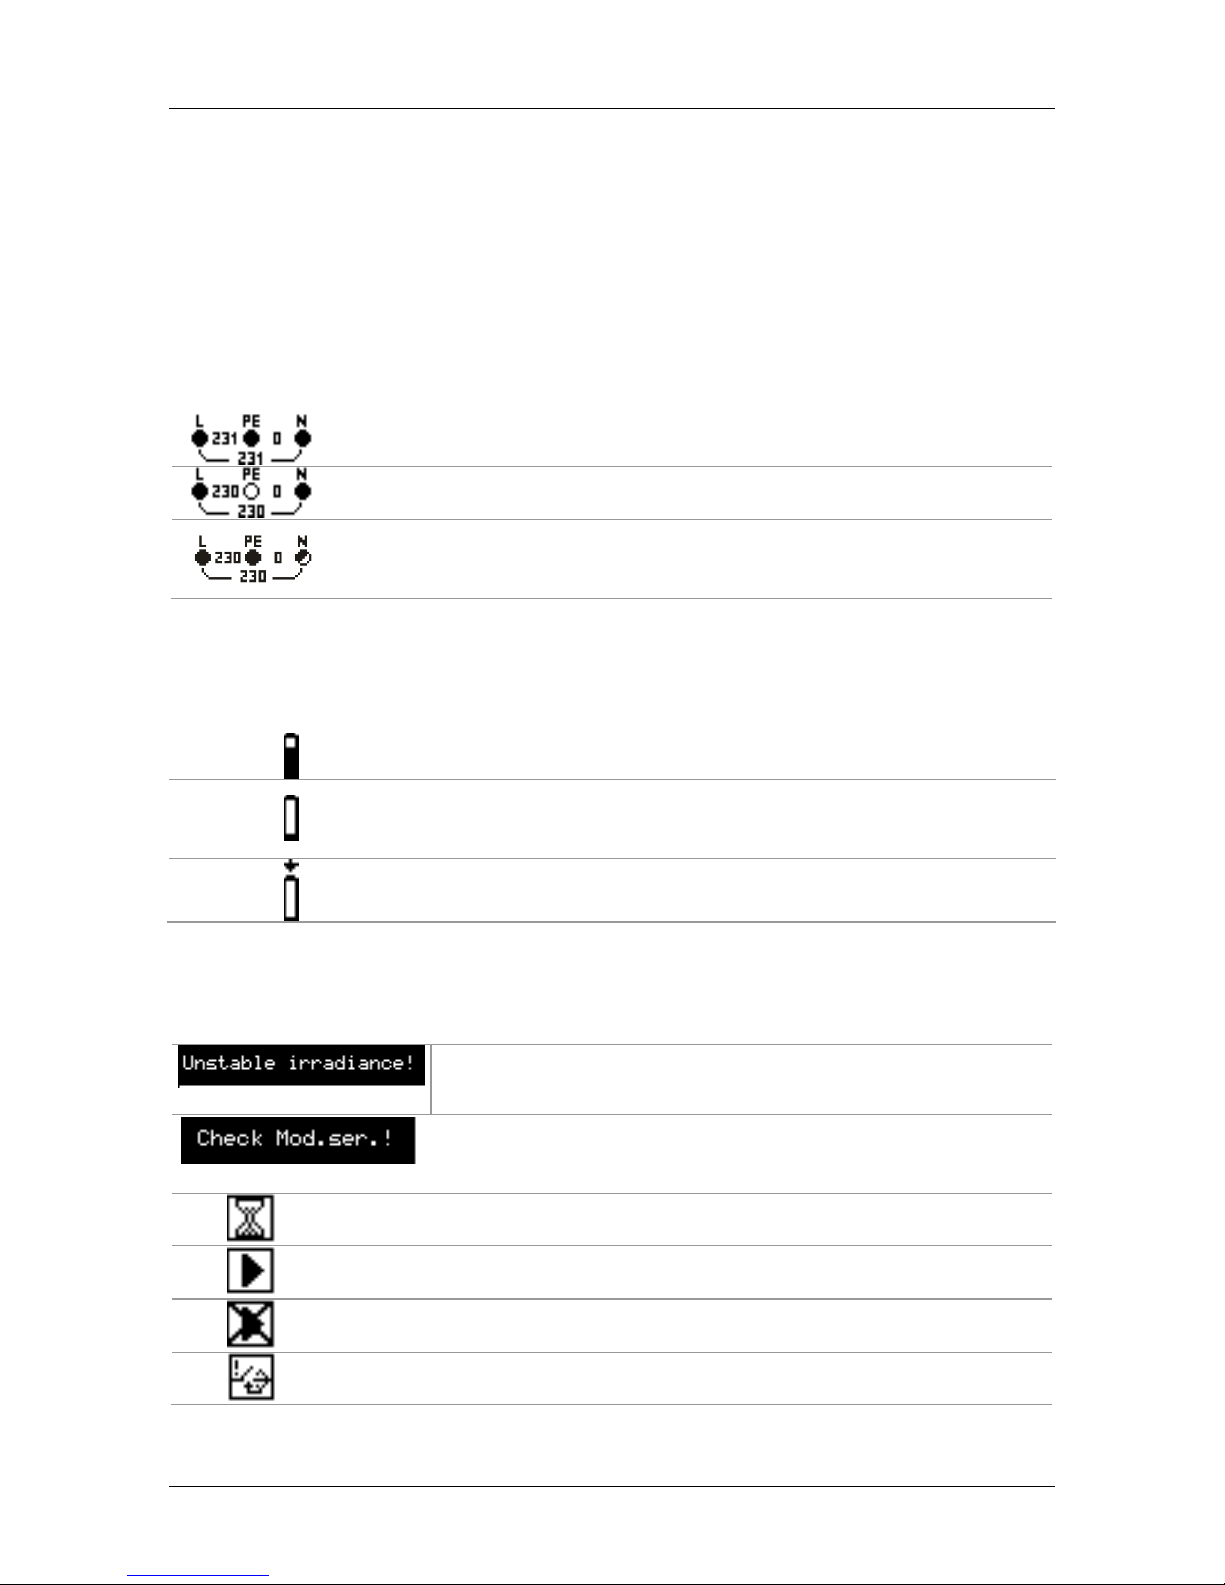
Figure 2.1: Discharged battery indication
The battery is charged whenever the power supply adapter is connected to the
instrument. The power supply socket polarity is shown in figure 2.2. Internal circuit
controls charging and assures maximum battery lifetime.
+
-
Figure 2.2: Power supply socket polarity
Symbols:
Indication of battery charging
Figure 2.3: Charging indication
Warnings related to safety:
When connected to an installation, the instruments battery compartment can
contain hazardous voltage inside! When replacing battery cells or before
opening the battery/fuse compartment cover, disconnect any measuring
accessory connected to the instrument and turn off the instrument,
Ensure that the battery cells are inserted correctly otherwise the instrument will
not operate and the batteries could be discharged.
Do not recharge alkaline battery cells!
Use only power supply adapter delivered from the manufacturer or distributor of
the test equipment!
Notes:
The charger in the instrument is a pack cell charger. This means that the battery
cells are connected in series during the charging. The battery cells have to be
equivalent (same charge condition, same type and age).
Page 13

MI 3108 EurotestPV Safety and operational considerations
13
If the instrument is not to be used for a long period of time, remove all batteries
from the battery compartment.
Alkaline or rechargeable Ni-MH batteries (size AA) can be used. Metrel
recommends only using rechargeable batteries with a capacity of 2100 mAh or
above.
Unpredictable chemical processes can occur during the charging of battery cells
that have been left unused for a longer period (more than 6 months). In this case
Metrel recommends to repeat the charge / discharge cycle at least 2-4 times.
If no improvement is achieved after several charge / discharge cycles, then each
battery cell should be checked (by comparing battery voltages, testing them in a
cell charger, etc). It is very likely that only some of the battery cells are deteriorated.
One different battery cell can cause an improper behavior of the entire battery
pack!
The effects described above should not be confused with the normal decrease of
battery capacity over time. Battery also loses some capacity when it is repeatedly
charged / discharged. This information is provided in the technical specification
from battery manufacturer.
Page 14

MI 3108 EurotestPV Safety and operational considerations
14
2.3 Standards applied
The Eurotest instruments are manufactured and tested in accordance with the following
regulations:
Electromagnetic compatibility (EMC)
BS EN 61326
Electrical equipment for measurement, control and laboratory
use – EMC requirements
Class B (Hand-held equipment used in controlled EM environments)
Safety (LVD)
BS EN 61010-1
Safety requirements for electrical equipment for measurement, control
and laboratory use – Part 1: General requirements
BS EN 61010-2030
Safety requirements for electrical equipment for measurement, control
and laboratory use – Part 2-030: Particular requirements for testing and
measuring circuits
BS EN 61010031
Safety requirements for electrical equipment for measurement, control
and laboratory use – Part 031: Safety requirements for hand-held probe
assemblies for electrical measurement and test
BS EN 61010-2032
Safety requirements for electrical equipment for measurement, control,
and laboratory use - Part 2-032: Particular requirements for hand-held
and hand-manipulated current sensors for electrical test and
measurement
Functionality
BS EN 61557
Electrical safety in low voltage distribution systems up to 1000 VAC and
1500 VAC – Equipment for testing, measuring or monitoring of protective
measures
Part 1 General requirements
Part 2 Insulation resistance
Part 3 Loop resistance
Part 4 Resistance of earth connection and equipotential
bonding
Part 5 Resistance to earth
Part 6 Residual current devices (RCDs) in TT and TN systems
Part 7 Phase sequence
Part 10 Combined measuring equipment
Part 12 Performance measuring and monitoring devices (PMD)
Reference standards for electrical installations and components
BS EN 61008
Residual current operated circuit-breakers without integral overcurrent
protection for household and similar uses
BS EN 61009
Residual current operated circuit-breakers with integral overcurrent
protection for household and similar uses
EN 60364-4-41
Electrical installations of buildings Part 4-41 Protection for safety –
protection against electric shock
BS 7671
IEE Wiring Regulations (17th edition)
AS/NZS 3017
Electrical installations – Verification guidelines
Reference standard for photovoltaic systems
BS EN 62446
Grid connected photovoltaic systems – Minimum requirements for
system documentation, commissioning tests and inspection
BS EN 61829
Photovoltaic (PV) array – On-site measurement of
current - voltage characteristics
Page 15

MI 3108 EurotestPV Safety and operational considerations
15
Note about EN and IEC standards:
Text of this manual contains references to European standards. All standards of
EN 6XXXX (e.g. EN 61010) series are equivalent to IEC standards with the same
number (e.g. IEC 61010) and differ only in amended parts required by European
harmonization procedure.
Page 16
MI 3108 EurotestPV Instrument description
16
3 Instrument description
3.1 Front panel
Figure 3.1: Front panel
Legend:
1
LCD
128 x 64 dots matrix display with backlight.
2
UP
Modifies selected parameter.
3
DOWN
4
TEST
TEST
Starts measurements.
Acts also as the PE touching electrode.
5
ESC
Goes one level back.
6
TAB
Selects the parameters in selected function.
7
Backlight,
Contrast
Changes backlight level and contrast.
8
ON / OFF
Switches the instrument power on or off.
The instrument automatically turns off 15 minutes after the
last key was pressed
9
HELP / CAL
Accesses help menus.
Calibrates test leads in Continuity functions.
Starts Z
REF
measurement in Voltage drop sub-function.
10
Function selector
- RIGHT
Selects test function.
11
Function selector
- LEFT
12
MEM
Store / recall memory of instrument.
Store clamp and solar settings.
13
Green LEDs
Red LEDs
Indicates PASS / FAIL of result.
Page 17

MI 3108 EurotestPV Instrument description
17
3.2 Connector panel
Figure 3.2: Connector panel (picture of MI 3108)
Legend:
1
Test connector
Measuring inputs / outputs
2
Charger socket
3 USB connector
Communication with PC USB (1.1) port
4
Protection cover
5
C1
Current clamp measuring input #1
6
P/C2
Current clamp measuring input #2
Measuring input for external probes
7
PS/2 connector
Communication with PC serial port
Connection to optional measuring adapters
Connection to barcode /RFID reader
Connection to Bluetooth dongle
Warnings!
Maximum allowed voltage between any test terminal and ground is 600 V a.c.,
1000 V d.c.!
Maximum allowed voltage between test terminals on test connector is 600 V
a.c., 1000 V d.c.!
Maximum allowed voltage between test terminals P/C2, C1 is 3 V!
Maximum short-term voltage of external power supply adapter is 14 V!
Page 18
MI 3108 EurotestPV Instrument description
18
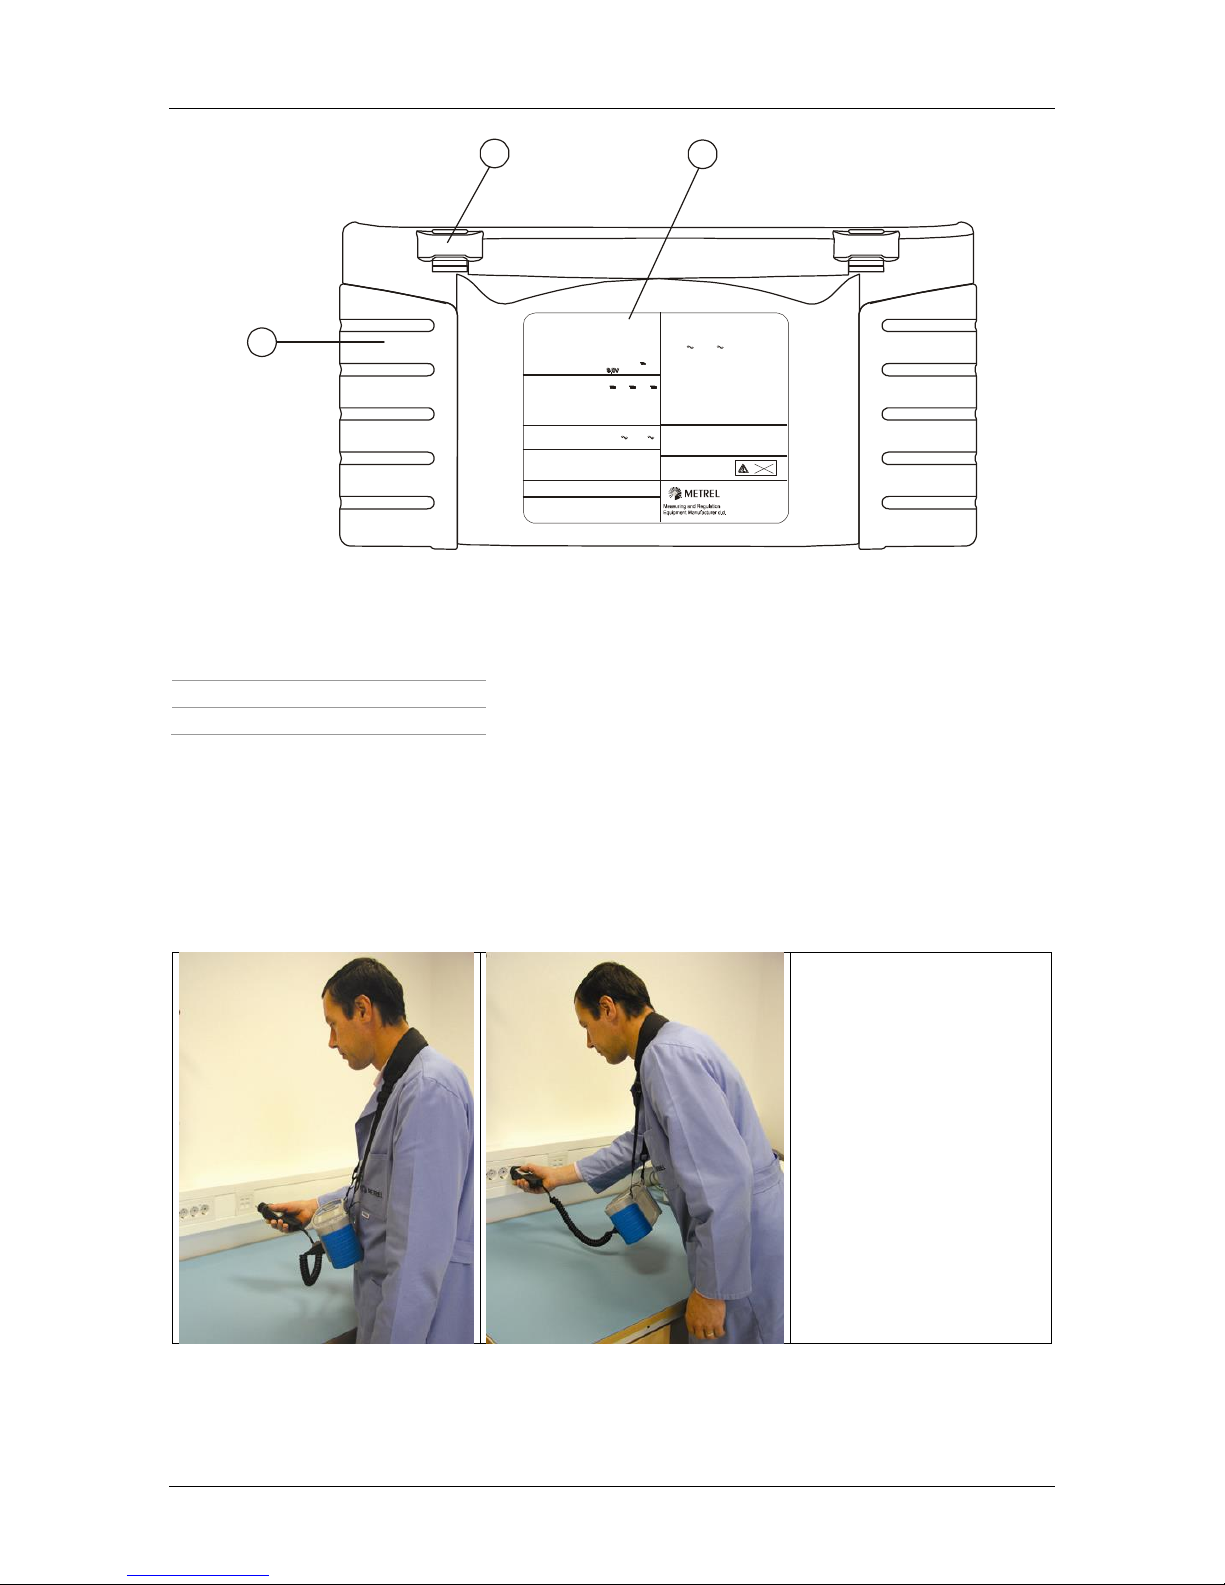
3.3 Back side
1
2
3
Figure 3.3: Back panel
Legend:
1
Battery / fuse compartment cover
2
Back panel information label
3
Fixing screws for battery / fuse compartment cover
Figure 3.4: Battery and fuse compartment
Legend:
1
Fuse F1
FF 315 mA / 1000 V d.c.
(Breaking capacity: 50 kA)
2
High breaking current fuse block
4 Serial number label
5 Battery cells
Size AA, alkaline / rechargeable NiMH
Page 19
MI 3108 EurotestPV: Instrument description
19
3
1
2
R: 0.0 1999 Test current: max. 8.5mA
Open-circuit voltage:6.5V
Continuity 7mA
R: 0.18M 199.9M , U =50V ,100 ,
R: 0.12M 999M , U = 500V , 1kV
U: 0V 12 00V
Nominal voltages: 100V , 250V , 500V , 1kV
Measuring current: min. 1mA at R =U 1k /V
Short-circuit current: < 3mA
N
N
N N
Insulation resistance (EN 61557-2)
V 2 50V
Continuity
Tripping time
non-delayed (time-delayed) RCDs
1: 0ms 300ms (500ms)
2: 0ms 150ms (200ms)
5: 0ms 40ms (150ms), U : 0.0V 100.0V
C
Tripping current
I : 0.2 I 1.1 I AC (
t : 0ms 300ms, U : 0.0V 100.0V
C
N N N
1.5 I A)
Multiplier: 0.5, 1, 2, 5
Contact voltage
U : 0.0V 100.0V
R : 0.00 10.00k (R =U / I )
C
S S C N
R : 0. 1999 I : 0. A . kAL-N(L) PSC17 20 1 4
Nominal voltage: 100V 440V/ 15Hz 500Hz
Line impedance(EN 61 557-3)
Fault loop (EN 61557-3)
R : 0. 1999
I : 0. A . kA
PFC 14 1 4
Nominal voltage: 100V 264V/ 15Hz 500Hz
impedance
L-PE 17
Voltage, frequency
U: 0V 440V / f: 15Hz 500Hz
Phase rotation (EN 61557-7)
Nominal voltage: 100V 440V / 1 00
Results: 1.2.3 or 2.1.3
5Hz 5 Hz
RCD (EN 61557-6)
I : 10mA, 30mA, 100mA, 300mA, 500mA, 1A
Nominal voltage: 100V 264V / 15Hz 500Hz
R Low (EN 61557-4)
R: 0.12 1999
Test current: min. ±200mA at 2
Open-circuit voltage: 6.5V 9.0V
Resistance to earth (EN 61557-5)
R: 0.04 9999
Open-circuit voltage:
Short-circuit current
< 45V
: < 20mA
RMS
Ljubljanska 77
SI - 1354 Horjul
Tel: +386 1 75 58 200
http://www.metrel.si
20 224 832
CAT III 600V
550V
Figure 3.5: Bottom
Legend:
1
Bottom information label
2
Neck belt openings
3
Handling side covers
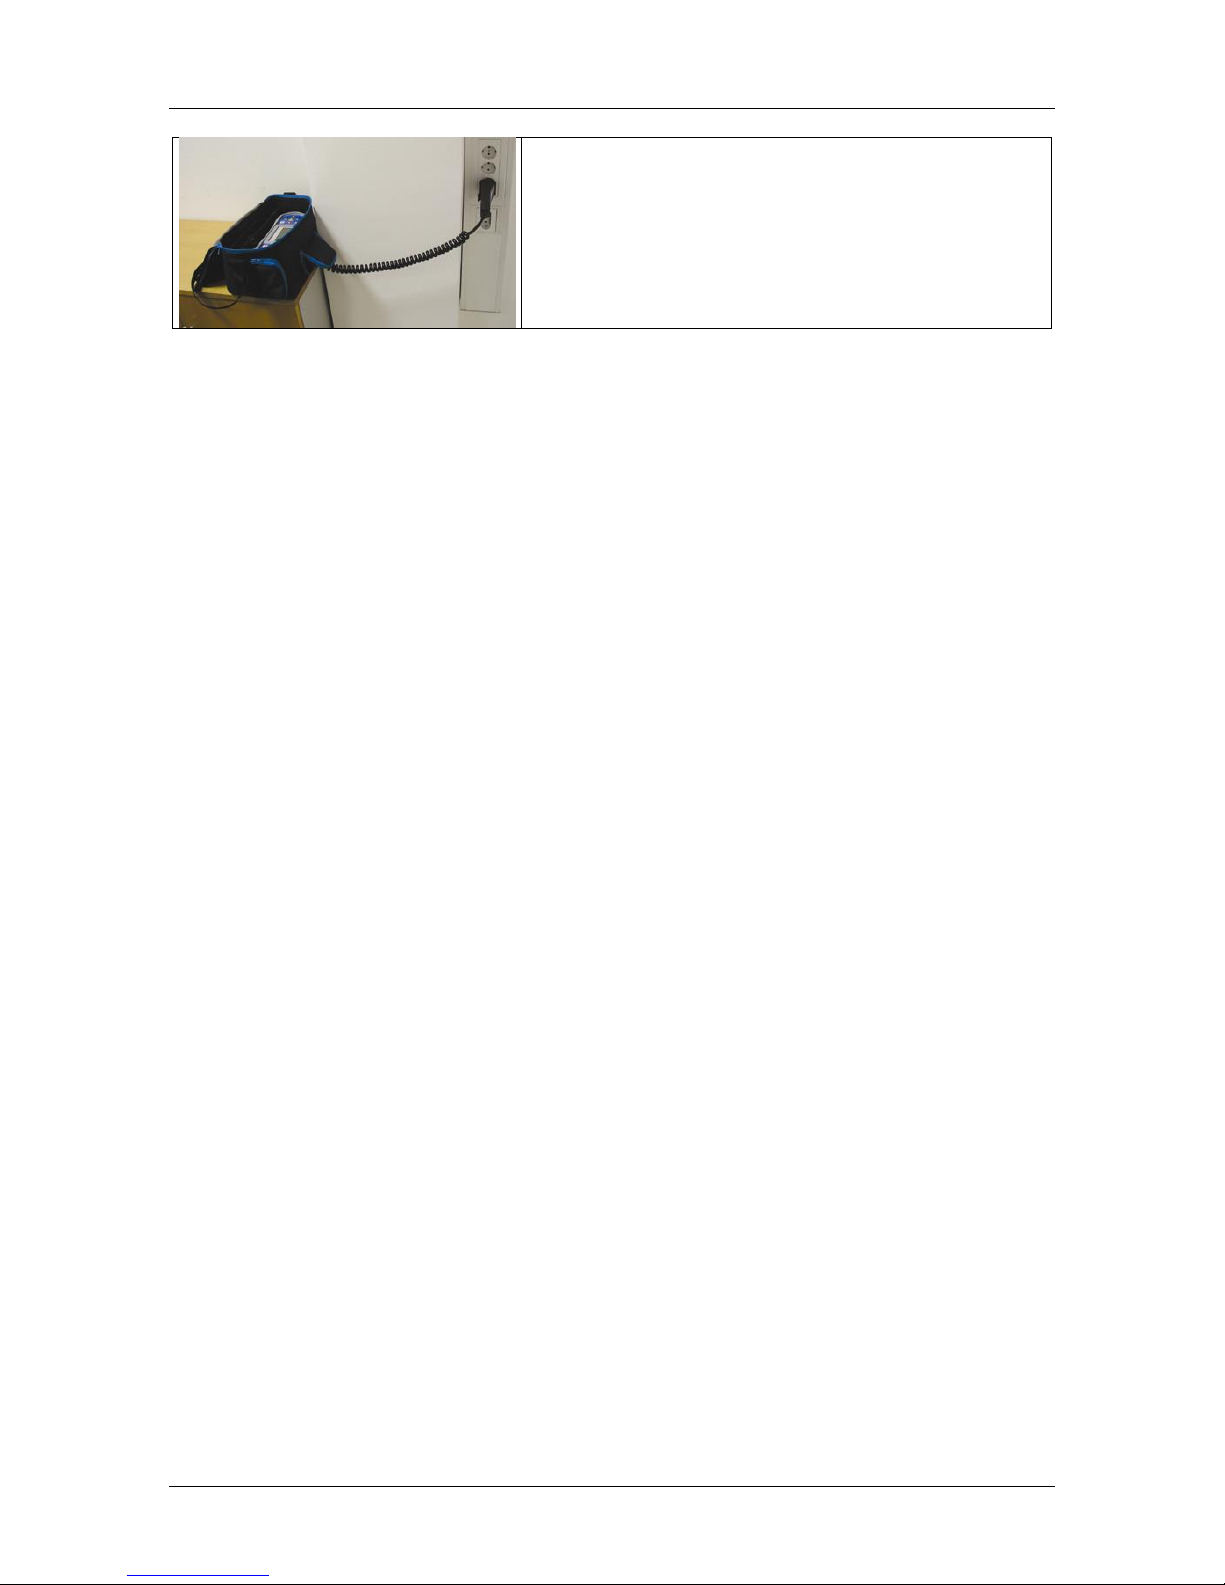
3.4 Carrying the instrument
With the neck-carrying belt supplied in standard set, various possibilities of carrying the
instrument are available. Operator can choose appropriate one on basis of his operation,
see the following examples:
The instrument hangs
around operators neck
only - quick placing and
displacing.
Page 20
MI 3108 EurotestPV: Instrument description
20
The instrument can be used even when placed in
soft carrying bag – test cable connected to the
instrument through the front aperture.
3.5 Instrument set and accessories
3.5.1 Standard set MI 3108
Instrument
Soft carrying bag, 2 pcs
PV Safety Probe
Monocrystal PV reference cell
PV Temperature probe
AC/ DC current clamp
Plug test cable
Test lead, 3 x 1.5 m
Test probe, 4 pcs
Crocodile clip, 4 pcs
Set of carrying straps
PV MC 4 adapter male
PV MC 4 adapter female
PV MC 3 adapter male
PV MC 3 adapter female
RS232-PS/2 cable
USB cable
Set of NiMH battery cells
Power supply adapter
CD with instruction manual, and “Guide for testing and verification of low voltage
installations” handbook.
Short instruction manual
Calibration Certificate
3.5.2 Optional accessories
See the attached sheet for a list of optional accessories that are available on request from
your distributor.
Page 21
MI 3108 EurotestPV Instrument operation
21
4 Instrument operation
4.1 Display and sound
4.1.1 Terminal voltage monitor
The terminal voltage monitor displays on-line the voltages on the test terminals and
information about active test terminals in the a.c. installation measuring mode.
Online voltages are displayed together with test terminal indication. All
three test terminals are used for selected measurement.
Online voltages are displayed together with test terminal indication. L
and N test terminals are used for selected measurement.
L and PE are active test terminals; N terminal should also be connected
for correct input voltage condition.
4.1.2 Battery indication
The battery indication indicates the charge condition of battery and connection of external
charger.
Battery capacity indication.
Low battery.
Battery is too weak to guarantee correct result. Replace or
recharge the battery cells.
Charging in progress (if power supply adapter is connected).
4.1.3 Messages
Following warnings and messages are displayed.
The change in irradiance during the measurement was above
the set limit (Warn. Irr).
The difference between the Uoc STC based on measurement
and Uoc STC value based on set PV module and number of
modules in the string is above the set limit (Warn. Uoc).
Measurement is running, consider displayed warnings.
Conditions on the input terminals allow starting the measurement;
consider other displayed warnings and messages.
Conditions on the input terminals do not allow starting the
measurement, consider displayed warnings and messages.
RCD tripped-out during the measurement (in RCD functions).
Page 22
MI 3108 EurotestPV Instrument operation
22
Instrument is overheated. The measurement is prohibited until the
temperature decreases under the allowed limit.
Result(s) can be stored.
High electrical noise was detected during measurement. Results may
be impaired.
L and N are changed.
Warning! High voltage is applied to the test terminals.
Warning! Dangerous voltage on the PE terminal! Stop the activity
immediately and eliminate the fault / connection problem before
proceeding with any activity!
Test leads resistance in Continuity measurement is not compensated.
Test leads resistance in Continuity measurement is compensated.
High resistance to earth of test probes. Results may be impaired.
Too small current for declared accuracy. Results may be impaired.
Check in Current Clamp Settings if sensitivity of current clamp can be
increased.
Measured signal is out of range (clipped). Results are impaired.
Fuse F1 is broken.
External DC voltage is detected. Measurements in this operating mode
are blocked.
4.1.4 Results
Measurement result is inside pre-set limits (PASS).
Measurement result is out of pre-set limits (FAIL).
Measurement is aborted. Consider displayed warnings and messages.
4.1.5 Sound warnings
Continuous sound
Warning! Dangerous voltage on the PE terminal is detected.
4.1.6 Help screens
HELP
Opens help screen.
Help menus are available in all functions. The Help menu contains schematic diagrams
for illustrating how to properly connect the instrument to electric installation or PV system.
After selecting the measurement you want to perform, press the HELP key in order to
view the associated Help menu.
Page 23
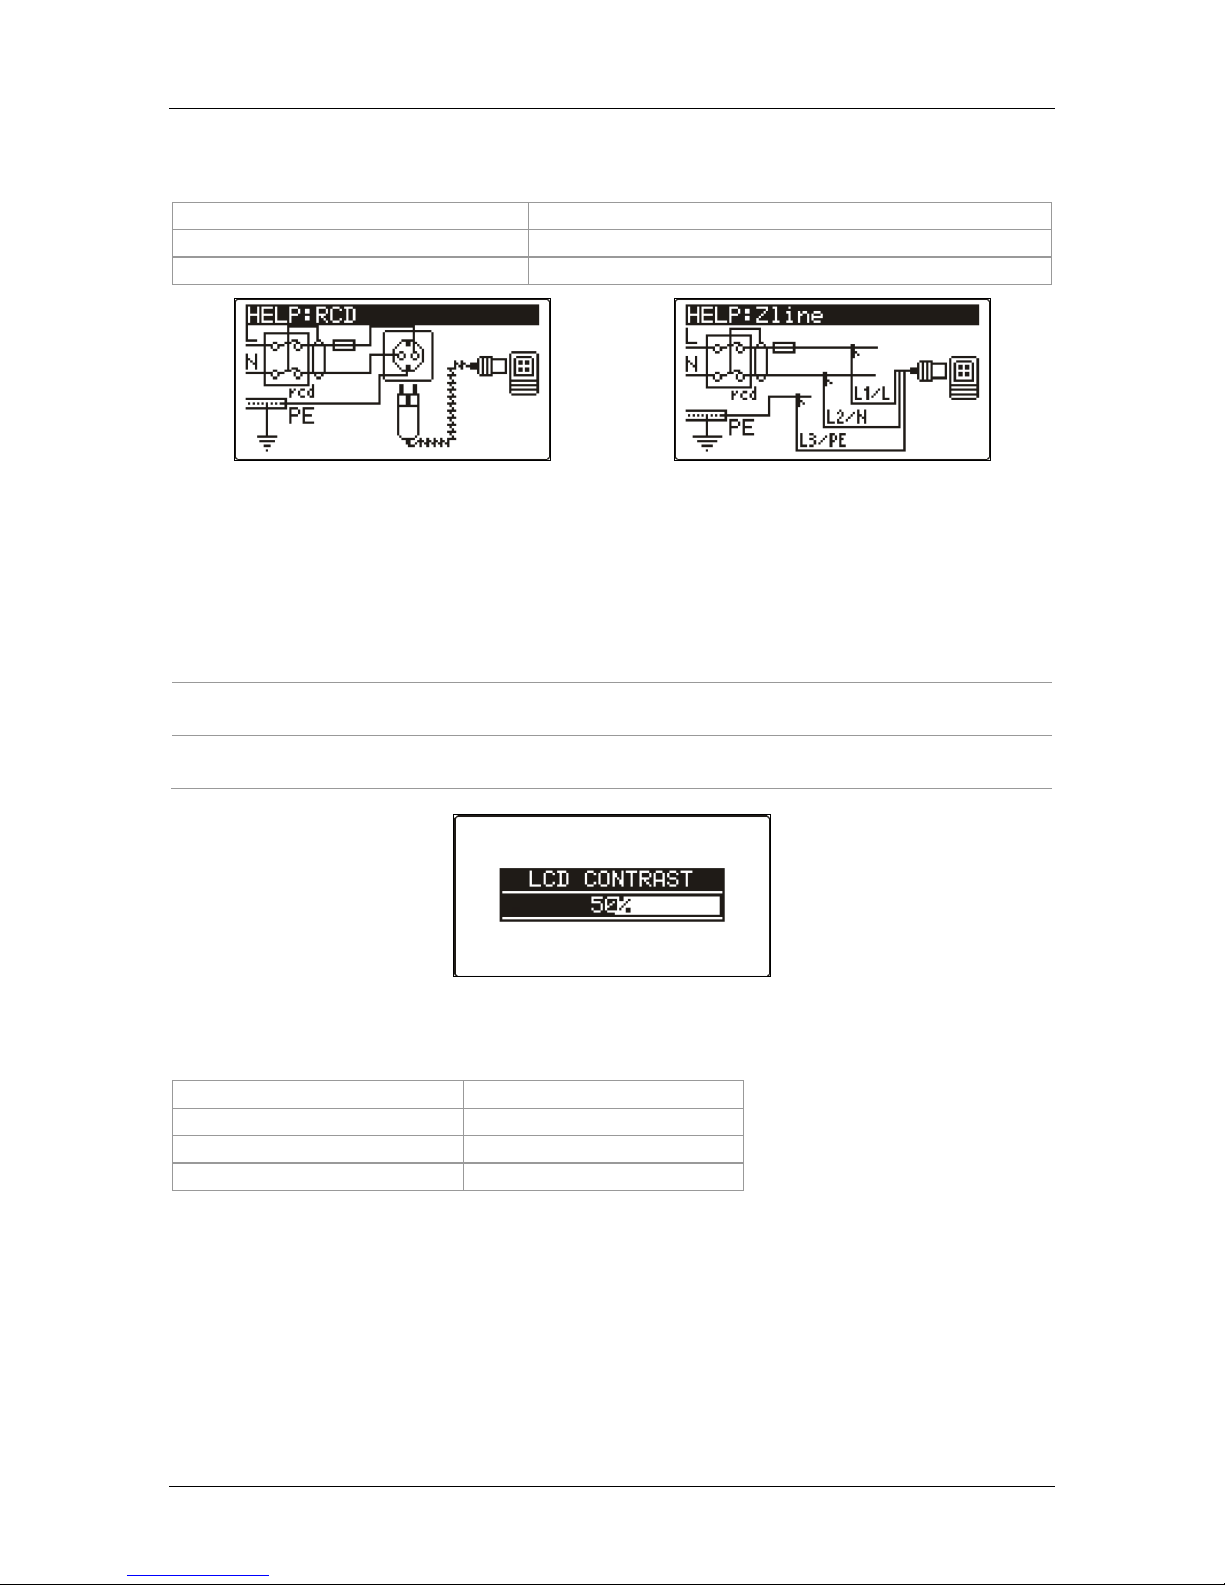
MI 3108 EurotestPV Instrument operation
23
Keys in help menu:
UP / DOWN
Selects next / previous help screen.
HELP
Scrolls through help screens.
Function selector / ESC
Exits help menu.
Figure 4.1: Examples of help screens
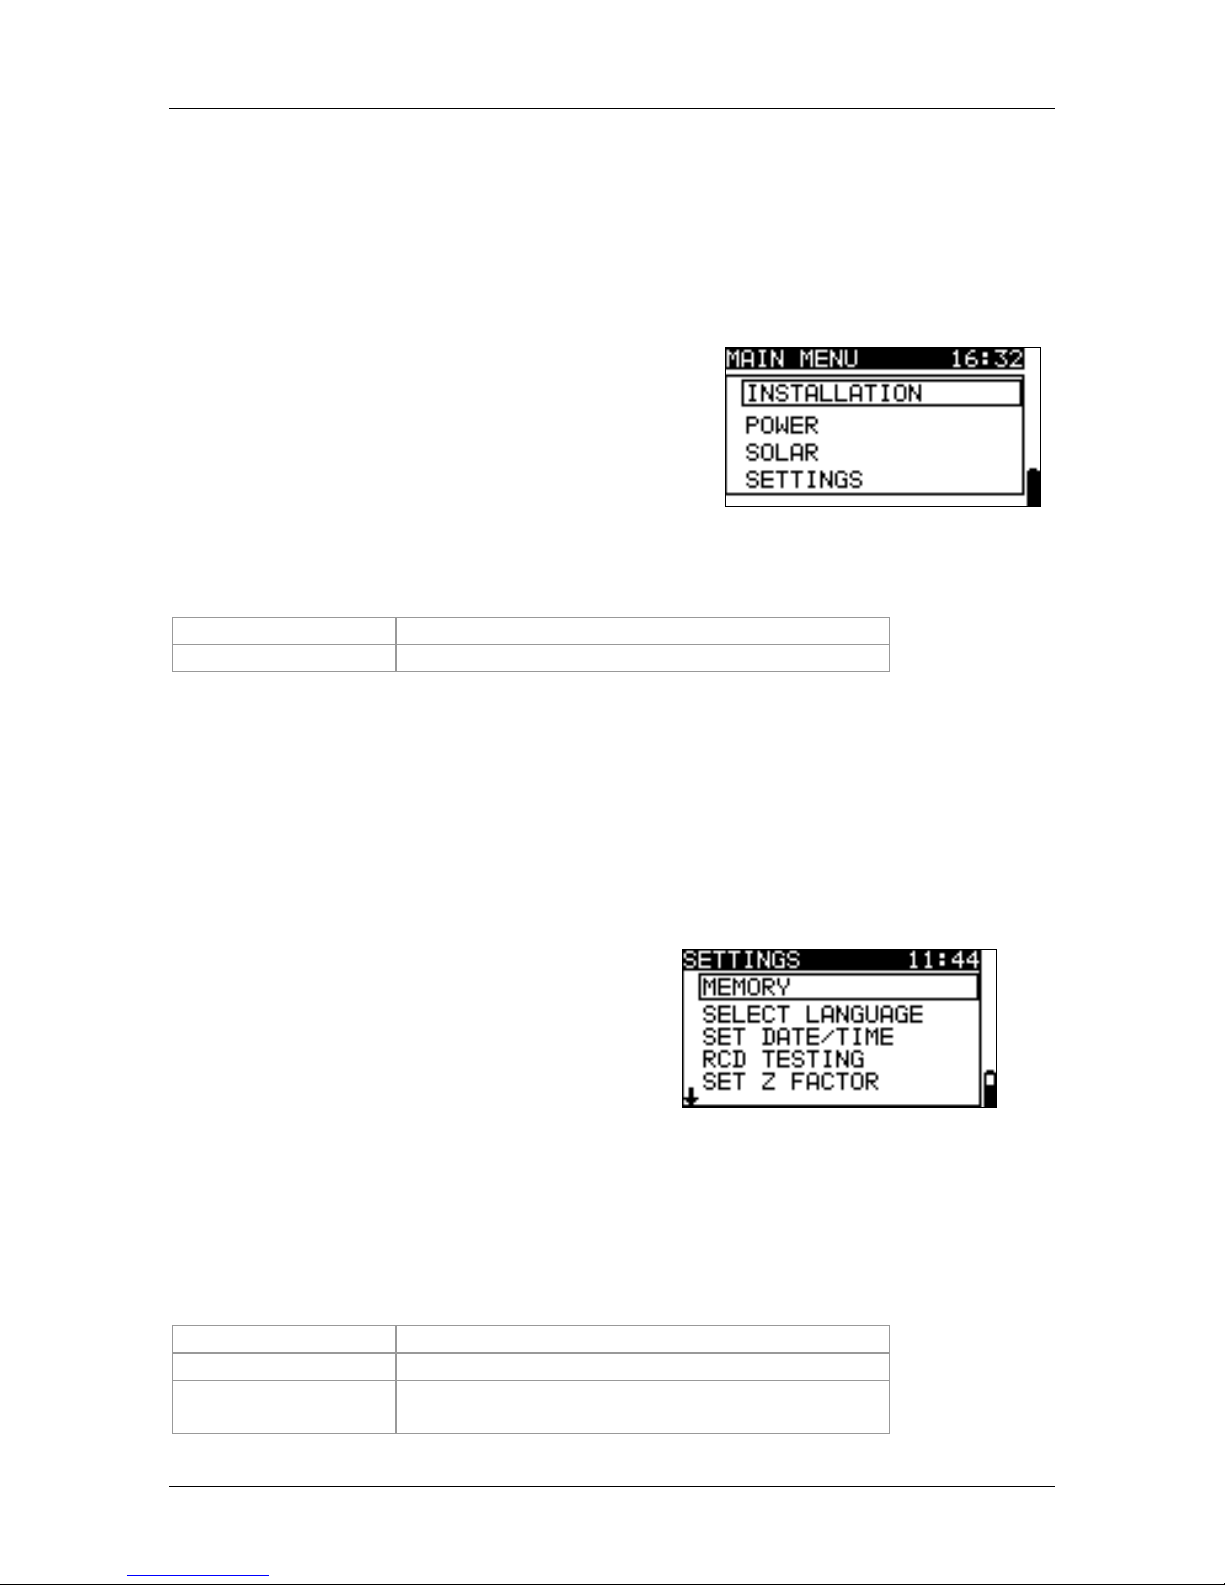
4.1.7 Backlight and contrast adjustments
With the BACKLIGHT key backlight and contrast can be adjusted.
Click
Toggles backlight intensity level.
Keep pressed for 1
s
Locks high intensity backlight level until power is turned off or
the key is pressed again.
Keep pressed for 2
s
Bargraph for LCD contrast adjustment is displayed.
Figure 4.2: Contrast adjustment menu
Keys for contrast adjustment:
DOWN
Reduces contrast.
UP
Increases contrast.
TEST
Accepts new contrast.
Function selector
Exits without changes.
4.2 Function selection
For selecting test / measurement function within each test mode the FUNCTION
SELECTOR keys shall be used.
Keys:
Page 24

MI 3108 EurotestPV Instrument operation
24
Function selector
Selects test / measurement function.
UP/DOWN
Selects sub-function in selected measurement function.
Selects screen to be viewed (if results are split into more screens).
TAB
Selects the test parameter to be set or modified.
TEST
Runs selected test / measurement function.
MEM
Stores measured results / recalls stored results.
ESC
Exits back to main menu.
Keys in test parameter field:
UP/DOWN
Changes the selected parameter.
TAB
Selects the next measuring parameter.
Function selector
Toggles between the main functions.
MEM
Stores measured results / recalls stored results
General rule regarding enabling parameters for evaluation of measurement / test result:
Parameter
OFF
No limit values, indication: _ _ _.
ON
Value(s) – results will be marked as PASS or FAIL in accordance
with selected limit.
See Chapter 5 for more information about the operation of the instrument test functions.
Page 25
MI 3108 EurotestPV Instrument operation
25
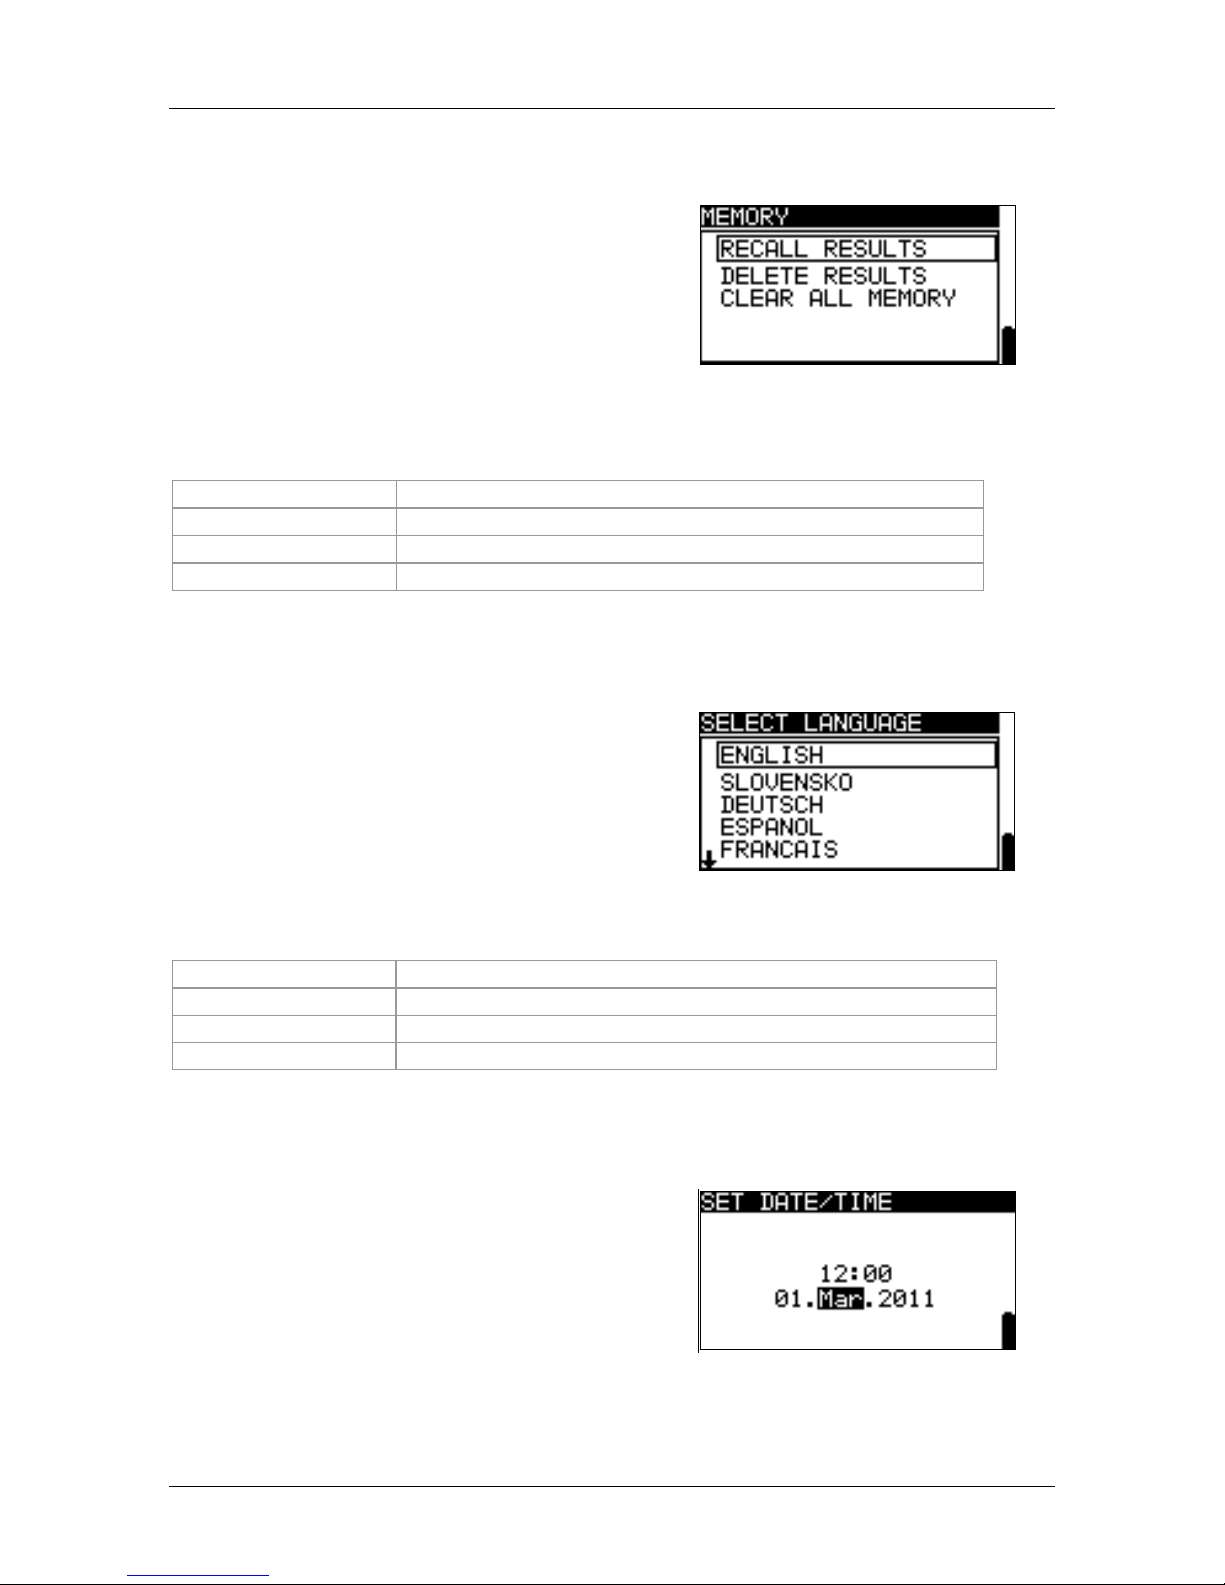
4.3 Instruments main menu
In instrument’s main menu the test mode can be selected. Different instrument options
can be set in the SETTINGS menu.
<INSTALLATION> a.c. LV installation testing
<POWER> Power & Energy testing
<SOLAR> PV systems testing
<SETTINGS> Instrument settings
Figure 4.3: Main menu
Keys:
UP / DOWN
Selects appropriate option.
TEST
Enters selected option.
4.4 Settings
Different instrument options can be set in the SETTINGS menu.
Options are:
Recalling and clearing stored results
Selection of language
Setting the date and time
Selection of reference standard for
RCD tests
Entering Z factor
Commander support
Setting the instrument to initial
values
Settings for Bluetooth
communication
Settings for current clamps
Menu for synchronization with PV
Remote unit
Settings for PV measurements
Figure 4.4: Options in Settings menu
Keys:
UP / DOWN
Selects appropriate option.
TEST
Enters selected option.
ESC /
Function selector
Exits back to main menu.
Page 26
MI 3108 EurotestPV Instrument operation
26
4.4.1 Memory
In this menu the stored data can be recalled or
deleted. See chapter 8 Data handling for more
information.
Figure 4.5: Memory options
Keys:
UP / DOWN
Selects option.
TEST
Enters selected option.
ESC
Exits back to settings menu.
Function selector
Exits back to main menu without changes.
4.4.2 Language
In this menu the language can be set.
Figure 4.6: Language selection
Keys:
UP / DOWN
Selects language.
TEST
Confirms selected language and exits to settings menu.
ESC
Exits back to settings menu.
Function selector
Exits back to main menu without changes.
4.4.3 Date and time
In this menu date and time can be set.
Figure 4.7: Setting date and time
Page 27
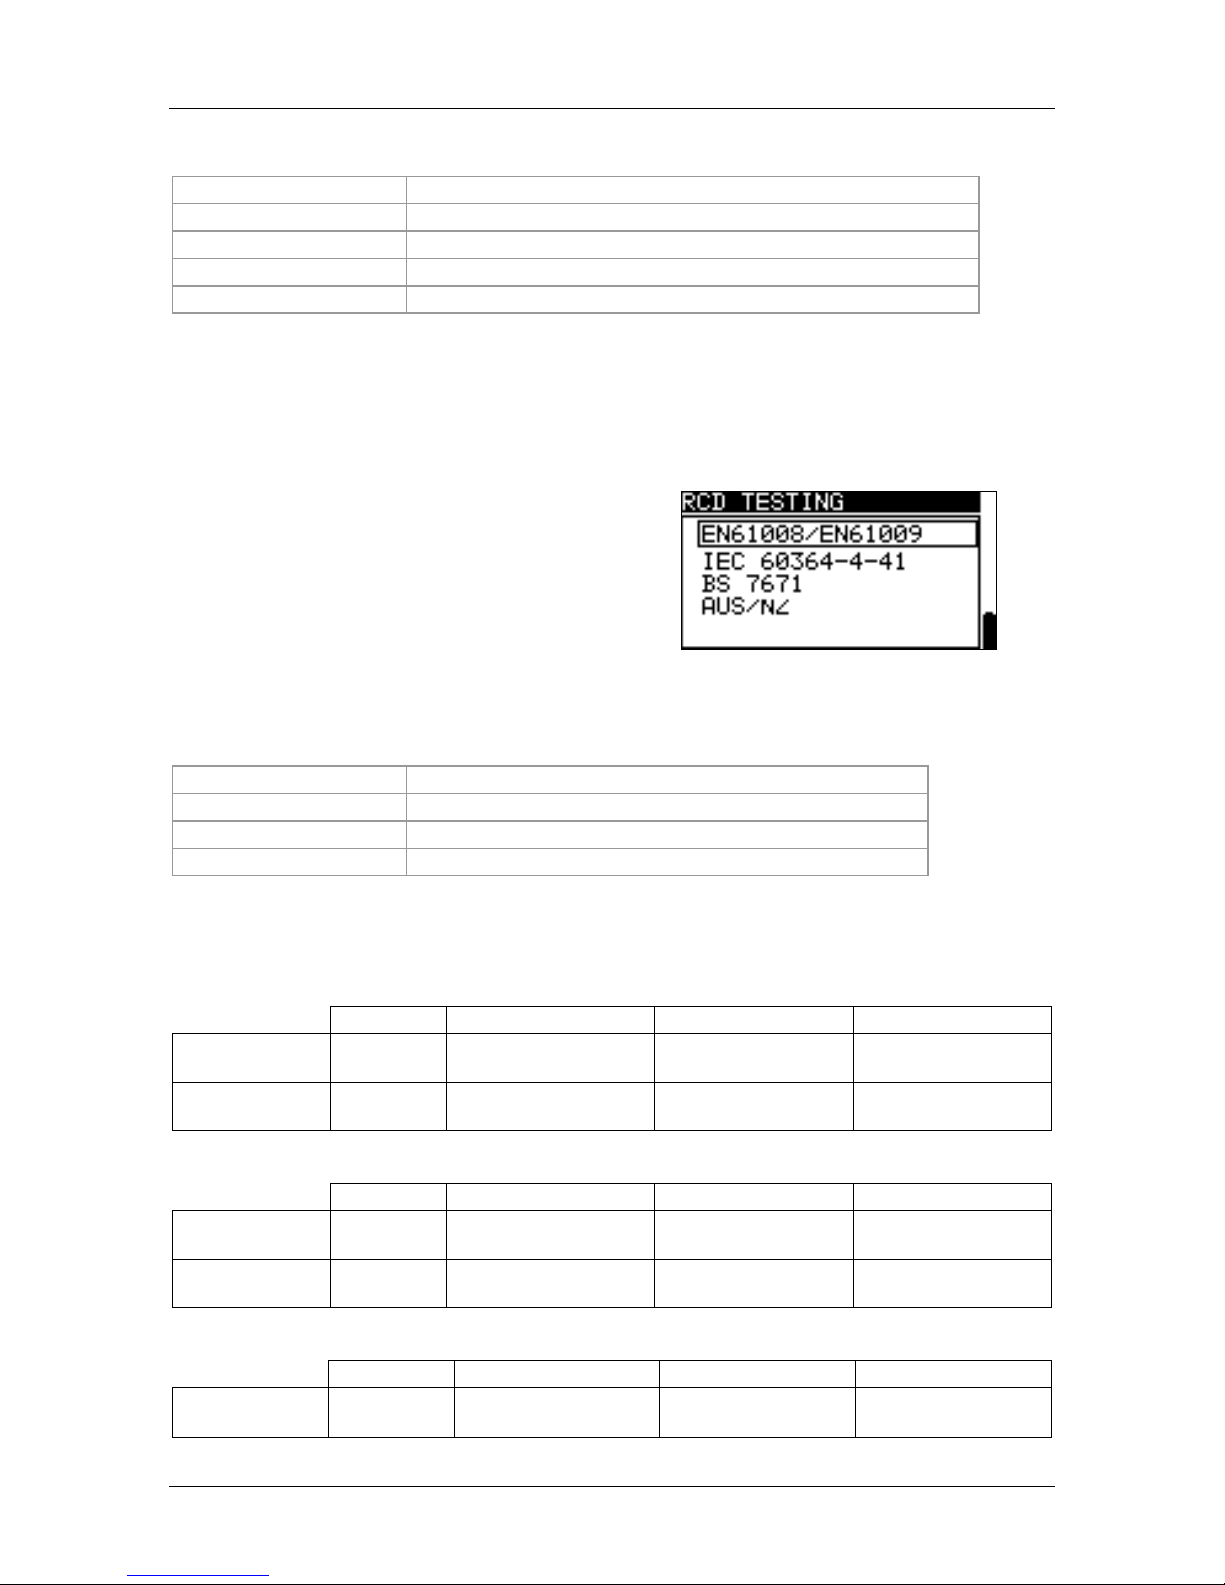
MI 3108 EurotestPV Instrument operation
27
Keys:
TAB
Selects the field to be changed.
UP / DOWN
Modifies selected field.
TEST
Confirms new date / time and exits.
ESC
Exits back to settings menu.
Function selector
Exits back to main menu without changes.
Warning:
If the batteries are removed for more than 1 minute the set date and time will be
lost.
4.4.4 RCD standard
In this menu the used standard for RCD
tests can be set.
Figure 4.8: Selection of RCD test
standard
Keys:
UP / DOWN
Selects standard.
TEST
Confirms selected standard.
ESC
Exits back to settings menu.
Function selector
Exits back to main menu without changes.
Maximum RCD disconnection times differ in various standards.
The trip-out times defined in individual standards are listed below.
Trip-out times according to EN 61008 / EN 61009:
½I
N
*)
I
N
2I
N
5I
N
General RCDs
(non-delayed)
t > 300 ms
t < 300 ms
t < 150 ms
t < 40 ms
Selective RCDs
(time-delayed)
t > 500 ms
130 ms < t < 500 ms
60 ms < t < 200 ms
50 ms < t < 150 ms
Trip-out times according to EN 60364-4-41:
½I
N
*)
I
N
2I
N
5I
N
General RCDs
(non-delayed)
t > 999 ms
t < 999 ms
t < 150 ms
t < 40 ms
Selective RCDs
(time-delayed)
t > 999 ms
130 ms < t < 999 ms
60 ms < t < 200 ms
50 ms < t < 150 ms
Trip-out times according to BS 7671:
½I
N
*)
I
N
2I
N
5I
N
General RCDs
(non-delayed)
t > 1999
ms
t < 300 ms
t < 150 ms
t < 40 ms
Page 28

MI 3108 EurotestPV Instrument operation
28
Selective
RCDs
(time-delayed)
t > 1999
ms
130 ms < t < 500
ms
60 ms < t < 200
ms
50 ms < t < 150
ms
Trip-out times according to AS/NZS 3017
**)
:
½I
N
*)
I
N
2I
N
5I
N
RCD type
IN [mA]
t
t
t
t
Note
I
10
> 999 ms
40 ms
40 ms
40 ms
Maximum break time
II
> 10 30
300 ms
150 ms
40 ms
III
> 30
300 ms
150 ms
40 ms
IV
S
> 30
> 999 ms
500 ms
200 ms
150 ms
130 ms
60 ms
50 ms
Minimum non-actuating time
*)
Minimum test period for current of ½IN, RCD shall not trip-out.
**)
Test current and measurement accuracy correspond to AS/NZS 3017 requirements.
Maximum test times related to selected test current for general (non-delayed) RCD
Standard
½I
N
I
N
2I
N
5I
N
EN 61008 / EN 61009
300 ms
300 ms
150 ms
40 ms
EN 60364-4-41
1000 ms
1000 ms
150 ms
40 ms
BS 7671
2000 ms
300 ms
150 ms
40 ms
AS/NZS 3017 (I, II, III)
1000 ms
1000 ms
150 ms
40 ms
Maximum test times related to selected test current for selective (time-delayed) RCD
Standard
½I
N
I
N
2I
N
5I
N
EN 61008 / EN 61009
500 ms
500 ms
200 ms
150 ms
EN 60364-4-41
1000 ms
1000 ms
200 ms
150 ms
BS 7671
2000 ms
500 ms
200 ms
150 ms
AS/NZS 3017 (IV)
1000 ms
1000 ms
200 ms
150 ms
4.4.5 Z factor
In this menu Z correction factor for limit of
maximum Line / Loop impedance can be
set.
Figure 4.9: Selection of Z factor
Keys:
UP / DOWN
Sets Z factor value.
TEST
Confirms Z factor value.
ESC
Exits back to settings menu.
Function selectors
Exits back to main menu without changes.
Maximum impedance in the supply system is important for selection or verification of
protective circuit breakers (fuses, over-current breaking devices, RCDs).
Page 29
MI 3108 EurotestPV Instrument operation
29
The default value of Z factor is 0.80. The value should be set according to local regulative.
Z factor can be selected between 0.80 and 1.00.
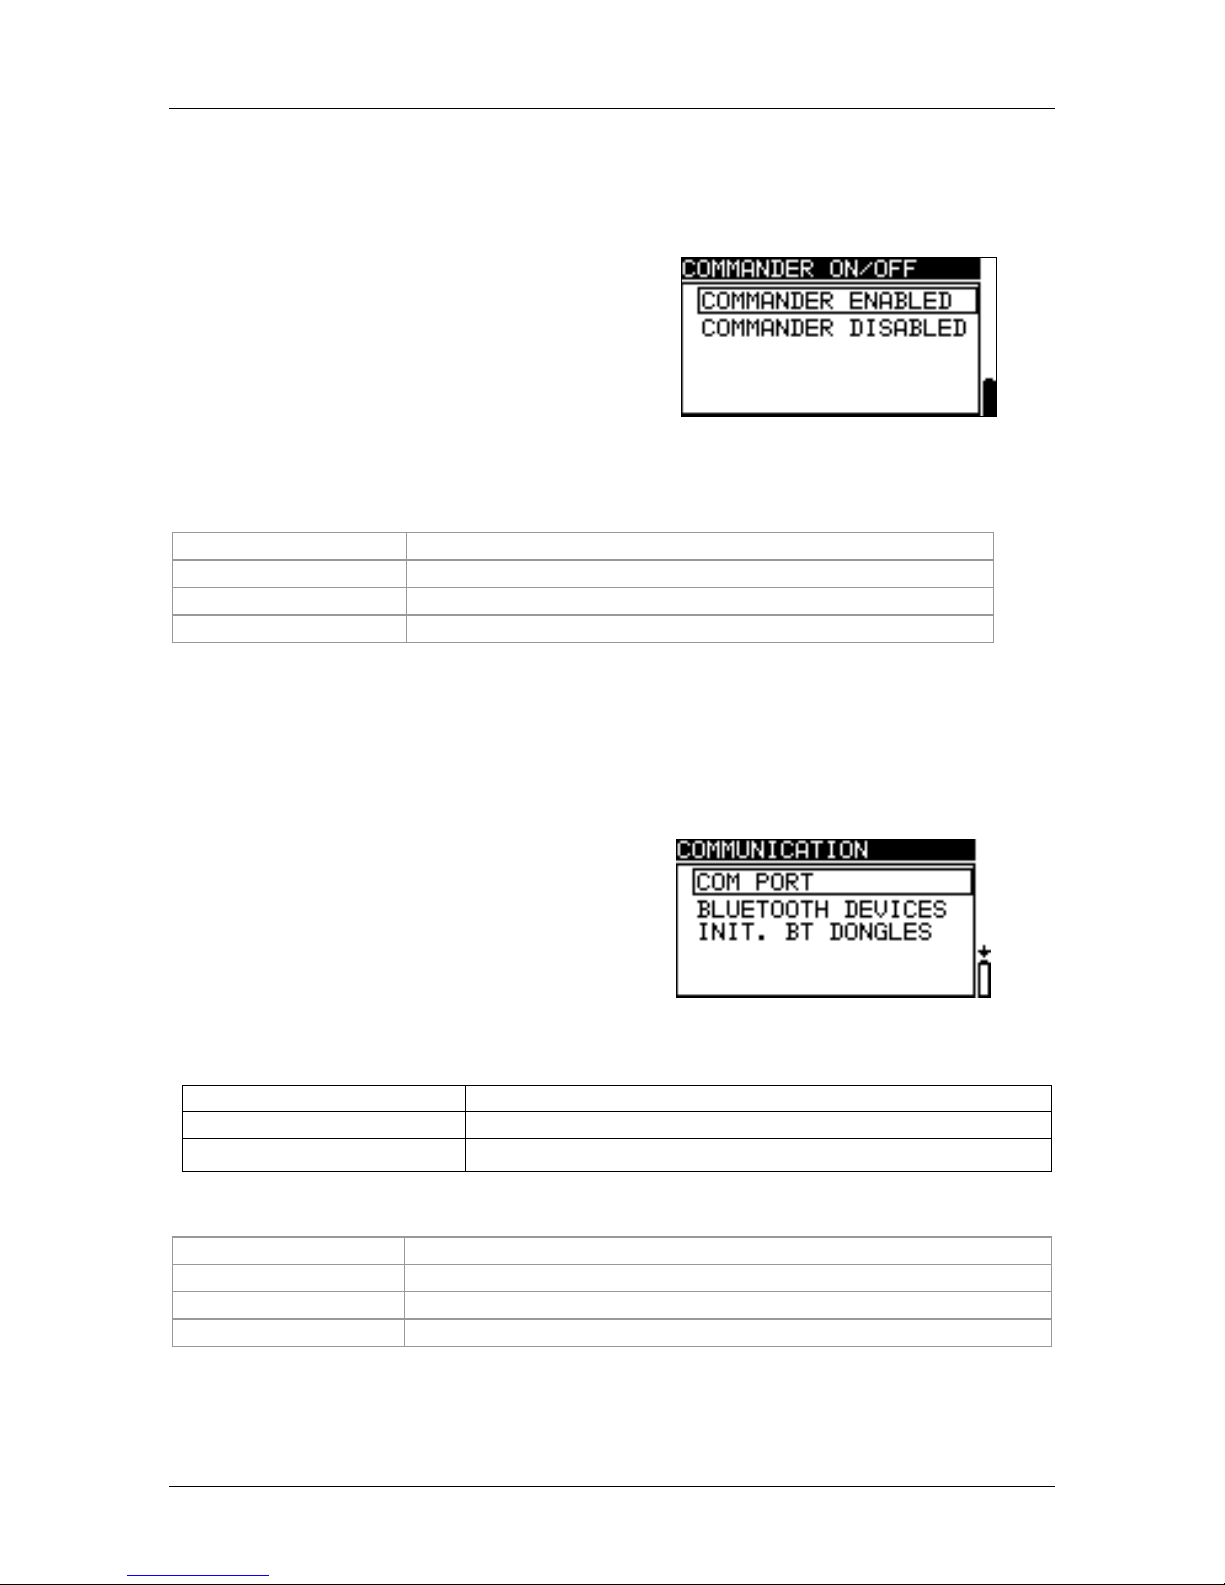
4.4.6 Commander support
The support for remote commanders can be
enabled or disabled in this menu.
Figure 4.10: Selection of commander
support
Keys:
UP / DOWN
Selects commander option.
TEST
Confirms selected option.
ESC
Exits back to settings menu.
Function selector
Exits back to main menu without changes.
Note:
Commander disabled option is intended to disable the commander’s remote keys.
In the case of high EM interfering noise the operation of the commander can be
irregular.
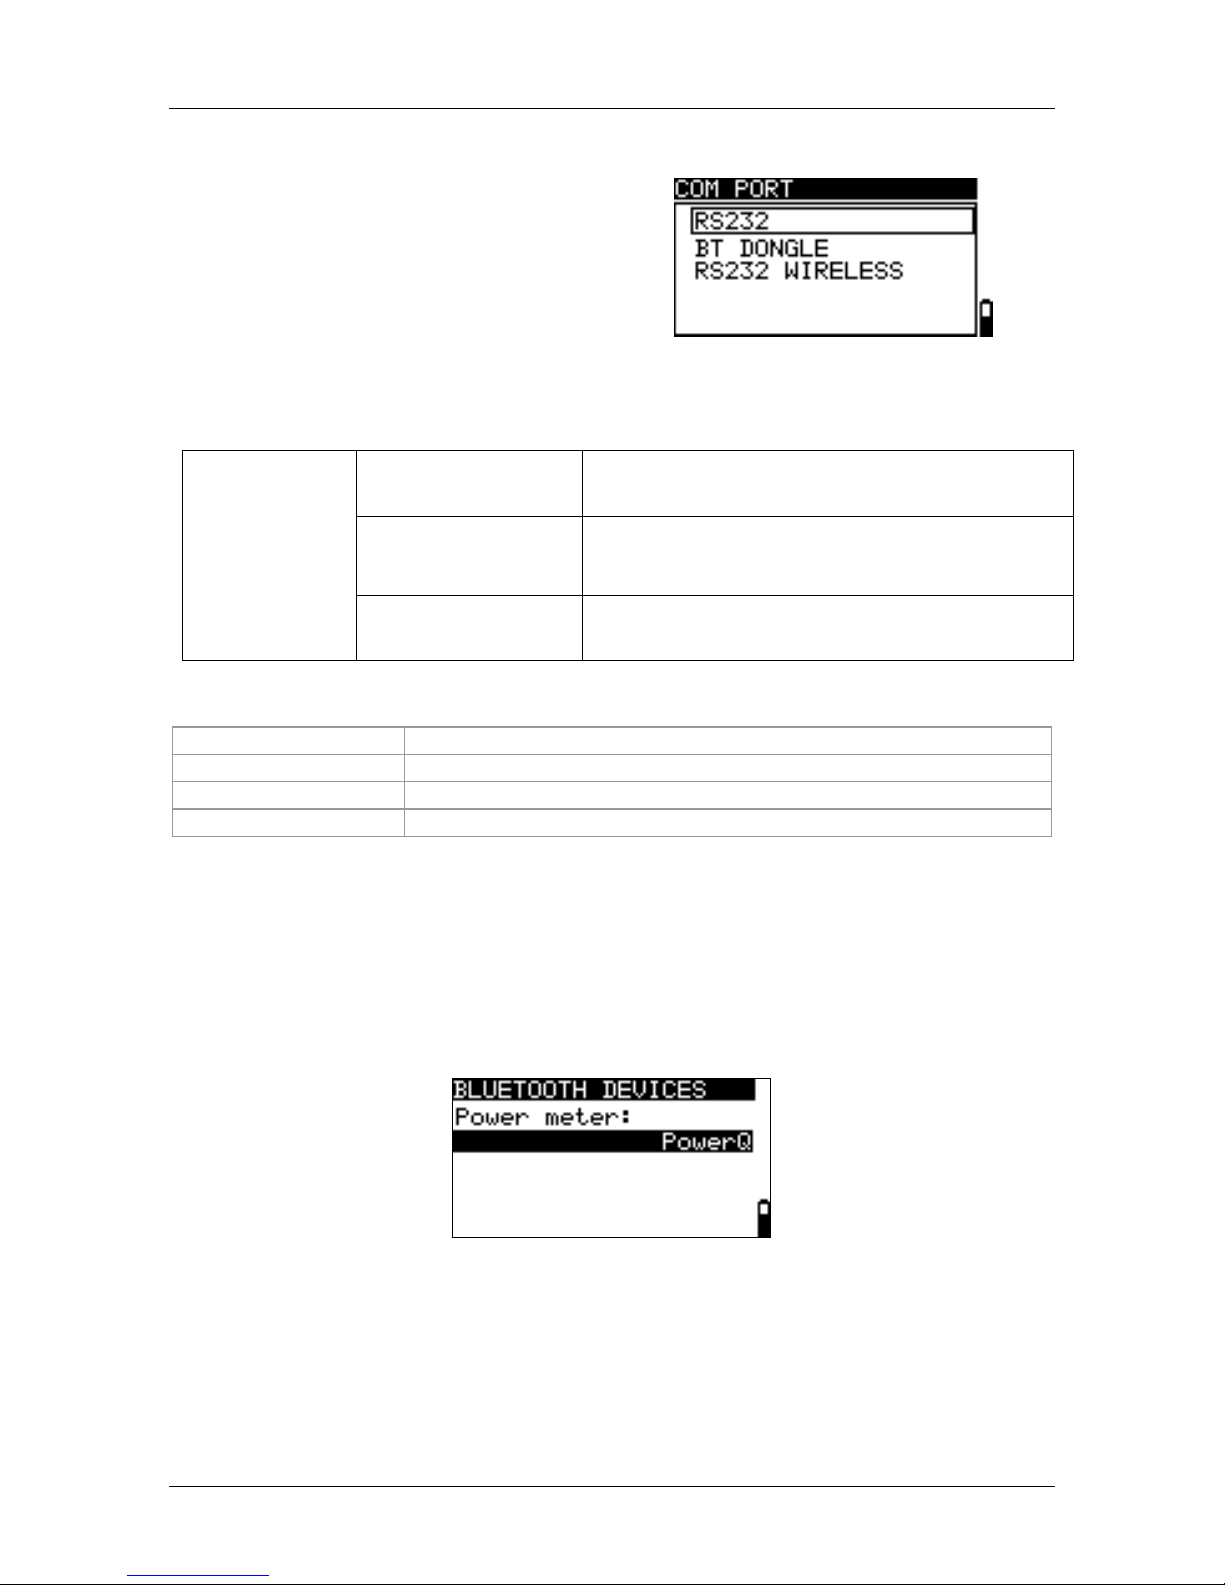
4.4.7 Communication
In this menu the instrument’s serial
communication port can be configured and
Bluetooth dongles A 1436 can be initialized.
Figure 4.11: Communication menu
Options:
COM PORT
Enters menu for setting serial communication.
BLUETOOTH DEVICES
Enters menu for viewing and selecting Bluetooth devices.
INIT. BT DONGLES
Enters menu for initialization of Bluetooth dongle(s).
Keys:
UP / DOWN
Selects option.
TEST
Confirms selected option.
ESC
Exits back to settings menu.
Function selector
Exits back to main menu without changes.
Page 30
MI 3108 EurotestPV Instrument operation
30
4.4.7.1 Selecting serial communication
In the COM PORT menu the serial
communication can be set (wired,
Bluetooth or wireless).
Figure 4.12: Menu for serial
communication
Options:
COM PORT
RS232
Communication with external devices via
RS232 cable.
BT DONGLE
Communication with mobile devices, Metrel
Powermeters, PCs or other external devices via
Bluetooth.
RS232 WIRELESS
Wireless communication with external devices
(A 1378 PV remote unit).
Keys:
UP / DOWN
Selects option.
TEST
Confirms selected option.
ESC
Exits back to settings menu.
Function selector
Exits back to main menu without changes.
4.4.7.2 Searching for the Metrel Powermeter with Bluetooth connection and
pairing with EurotestPV instrument
In the BLUETOOTH DEVICES menu a Metrel Powermeter with Bluetooth connection can
be found, selected and paired with the instrument. The Metrel Powermeter must have
connected a properly initialized Bluetooth dongle A 1436. See chapter Initialization of the
Bluetooth dongle(s) for more details.
Figure 4.13: Bluetooth devices menu
To select a new Powermeter with Bluetooth connection press TEST in BLUETOOTH
DEVICES menu. A list of found Bluetooth devices will be displayed. Select the appropriate
device using the arrow keys. Confirmation with TEST key will pair those two instruments.
Page 31

MI 3108 EurotestPV Instrument operation
31
Figure 4.14: Searching and selection of Metrel Powermeter Bluetooth connection
Keys:
UP / DOWN
Selects appropriate Bluetooth device.
TEST
Confirms selected device.
ESC
Exits back to Bluetooth devices menu.
Function selector
Exits back to main menu without changes.
Note:
This operation must be performed when working with the Powermeter for the first
time or if its settings were changed.
4.4.7.3 Initialization of the Bluetooth dongle(s)
The Bluetooth dongle(s) A 1436 should be
initialized when they are used for the first
time. During initialization the instrument
sets the dongle parameters and name in
order to communicate properly.
Figure 4.15: Menu for initialization of
Bluetooth dongle(s)
INIT. BT DONGLES
EurotestPV
Initializes Bluetooth dongle for EurotestPV
instrument.
PowerQ series
Initializes Bluetooth dongle for Metrel
Powermeter.
Keys:
UP / DOWN
Selects option.
TEST
Starts initialization of Bluetooth dongle.
ESC
Exits back to Communication menu.
Function selector
Exits back to main menu without changes.
Initialization procedure (Bluetooth dongle for the EurotestPV instrument):
1. Connect Bluetooth dongle A 1436 to the instrument’s PS/2 port.
2. Switch on the instrument.
3. Press a RESET key on the Bluetooth dongle A 1436 for at least 10 seconds.
Page 32

MI 3108 EurotestPV Instrument operation
32
4. EurotestPV should be selected in INIT. BT DONGLES menu. Press the TEST key.
5. Wait for confirmation message and beep. Following message is displayed if dongle
was initialized properly:
EXTERNAL BT DONGLE SEARCHING OK!
Initialization procedure (Bluetooth dongle for the Metrel Powermeter):
1. Connect Bluetooth dongle A 1436 (intended to be used with the Metrel Powermeter) to
the EurotestPV instrument’s PS/2 port.
2. Switch on the EurotestPV instrument.
3. Press a RESET key on the Bluetooth dongle A 1436 for at least 10 seconds.
4. PowerQ series should be selected in INIT. BT DONGLES menu. Press the TEST
key.
5. Wait for confirmation message and beep. Following message is displayed if dongle
was initialized properly:
EXTERNAL BT DONGLE SEARCHING OK!
6. The successfully initialized Bluetooth dongle A 1436 is now ready to be connected to
a Metrel Powermeter.
Notes:
The Bluetooth dongle A 1436 should always be initialized before first use with the
EurotestPV instrument or Metrel Powermeter.
If the dongle was initialized by another Metrel instrument it will probably not work
properly when working with the previous instrument again. Bluetooth dongle
initialization should be repeated in that case.
For more information about communication via Bluetooth refer to chapter 8.6
Communication and A 1436 manual.
4.4.8 Initial settings
In this menu the instrument settings,
measurement parameters and limits can be set to
initial (factory) values.
Figure 4.16: Initial settings
dialogue
Keys:
UP / DOWN
Selects option [YES, NO].
TEST
Restores default settings (if YES is selected).
ESC
Exits back to settings menu.
Function selector
Exits back to main menu without changes.
Page 33

MI 3108 EurotestPV Instrument operation
33
Warning:
Customized settings will be lost when this option is used!
If the batteries are removed for more than 1 minute the custom made settings will
be lost.
The default setup is listed below:
Instrument setting
Default value
Language
English
Contrast
As defined and stored by adjustment procedure
Z factor
0.80
RCD standards
EN 61008 / EN 61009
Commander
Enabled
Communication
RS232
Clamp settings
CLAMP 1
CLAMP 2
A1391, 40A
A1391, 40A
Solar settings
See chapter 4.4.10 Solar Settings
Test mode:
Function
Parameters / limit value
Sub-function
INSTALLATION:
EARTH RE
No limit
R ISO
L/N, L//E, N/E, L/L
No limit
Utest = 500 V
CONTINUITY
(r1,rN,r2, R2, R1+R2, R1+RN)
No limit
Z - LINE
Fuse type: none selected
VOLTAGE DROP
ΔU: 4.0 %
Z
REF
: 0.00 Ω
Z - LOOP
Fuse type: none selected
Zs rcd
Fuse type: none selected
RCD
RCD t
Nominal differential current: IN=30 mA
RCD type: AC
non-delayed
Test current starting polarity: (0)
Limit contact voltage: 50 V
Current multiplier: 1
POWER:
CURRENT
C1
SCOPE
U,I
HARMONICS
U
I
U
h:1
ENERGY
I: 40A, U: 260A
SOLAR:
ISO PV
No limit
Utest = 500 V
Page 34

MI 3108 EurotestPV Instrument operation
34
ENV.
Measured
I/V
Measured
INVERTER
AC/ DC
Note:
Initial settings (reset of the instrument) can be recalled also if the TAB key is
pressed while the instrument is switched on.
4.4.9 Clamp Settings
In Clamp settings menu the C1 and C2/P
measuring inputs can be configured.
Figure 4.17: Configuration of current clamp
measuring inputs
Parameters to be set:
Model
Model of current clamp [A1018, A1019, A1391].
Range
Measuring range of current clamp [20 A, 200 A], [40 A, 300 A].
Selection of measuring parameters
Keys
UP / DOWN
Selects appropriate option.
TEST
Enables changing data of selected parameter.
MEM
Saves settings.
ESC
Exits back to clamp settings menu.
Function selectors
Exits back to main menu without changes.
Changing data of selected parameter
Keys
UP / DOWN
Sets parameter.
TEST
Confirms set data.
ESC
Disable changing data of selected parameter.
Function selectors
Exits back to main menu without changes.
Note:
Measuring range of the instrument must be considered. Measurement range of
current clamp can be higher than of the instrument.
4.4.10 Synchronization (A 1378 - PV Remote unit)
Page 35

MI 3108 EurotestPV Instrument operation
35
The main purpose of the synchronization is:
- to get correct values of temperature and irradiance for calculation of STC
measurement results.
- to get values of cell temperature up to 15 minutes before the PV tests in order to
have an evidence that the measurement conditions were equilibrated during the
PV tests.
During the PV tests the displayed STC results are calculated on base of set or measured
environmental data in the instrument’s Environmental menu. These values are not
necessarily measured at the same time as other measurements.
Synchronization (of time stamps) enables to later update the PV measured results with
environmental data that were measured simultaneously with the A 1378 PV Remote unit.
Stored STC values are then corrected accordingly.
Selecting this option will allow
synchronization of data between the
instrument and PV Remote unit.
Figure 4.18: Synchronize menu
Data to be synchronized:
TIME
Instrument’s time and date will be uploaded to the PV Remote unit.
RESULT
Values of measured environmental parameters will be downloaded to
the instrument. Saved STC results will be corrected accordingly.
Keys:
UP / DOWN
Selects data to be synchronized.
TEST
Synchronizes data. Follow the information on the LCD. If the
synchronization succeeded a confirmation beep will follow
after short connecting... and synchronizing... messages.
ESC
Exits back to settings menu.
Function selectors
Exits back to main menu.
Connection for synchronization
Figure 4.19: Connection of the instruments during synchronization
Page 36

MI 3108 EurotestPV Instrument operation
36
Note:
Refer to A 1378 PV Remote unit user manual for more information.
4.4.11 Solar settings
In Solar settings parameters of PV modules
and settings for PV measurements can be
set.
Figure 4.20: Solar settings
Keys:
UP / DOWN
Selects option.
TEST
Enters menu for changing parameters.
ESC
Exits back to settings menu.
Function selector
Exits back to main menu without changes.
PV module settings
Parameters of PV modules can be set in this menu. A database for up to 20 PV modules
can be created / edited. Parameters are used for calculation of STC values.
Note:
The database can also be created on the PC or mobile device and then sent to the
instrument. PCSW EurolinkPRO and some Android applications support this
feature.
Figure 4.21: PV module settings menu
Parameters of PV module:
Module
PV module name
Pmax
1 W ..2000 W
Nominal power of PV module
Umpp
1.0 V .. 999 V
Voltage on maximum power point
Impp
0.01 A .. 15.0 A
Current on maximum power point
Uoc
1.0 V .. 999 V
Open circuit voltage of module
Isc 0.01 A .. 15.0 A
Short circuit current of module
NOCT
1.0 °C .. 99.0 °C
Nominal working temperature of PV cell
alfa
-5.00 mA/°C .. 300 mA/°C
Temperature coefficient of Isc
beta
-5.00 V/°C .. -0.001 V/°C
Temperature coefficient of Uoc
gamma
-5.00 %/°C .. 0.999 %/°C
Temperature coefficient of Pmax
Rs
0.01 Ω .. 9.99 Ω
Serial resistance of PV module
Selection of PV module type and parameters
Page 37

MI 3108 EurotestPV Instrument operation
37
Keys:
UP / DOWN
Selects appropriate option.
TEST
Enters menu for changing type or parameters.
ESC, Function selector
Exits back.
MEM
Enters PV module type memory menu.
Changing a PV module type / parameter
Keys:
UP / DOWN
Sets value / data of parameter / PV module type.
TEST
Confirms set value / data.
ESC, Function selector
Exits back.
PV module type memory menu
ADD
Enters menu for adding a new PV module type.
OVERWRITE
Enters menu for storing changed data of selected PV module type.
DELETE
Deletes selected PV module type.
DELETE ALL
Deletes all PV module types.
Keys:
UP / DOWN
Selects option.
TEST
Enters selected menu.
Function selectors
Exits back to main function menu.
If Add or Overwrite is selected the menu for setting the PV module type name is
displayed.
Figure 4.22: Setting name of PV module type
Keys:
/
Selects a character.
TEST
Selects the next character.
MEM
Confirms new name and stores it in the memory. Then returns to Module
settings menu.
ESC
Deletes last letter.
Returns to previous menu without changes.
If Delete or Delete all is selected a warning will be displayed.
Page 38

MI 3108 EurotestPV Instrument operation
38
Figure 4.23: Delete options
Keys:
TEST
Confirms clearing. In Delete all option YES must be
selected.
ESC / Function selector
Exits back to main function menu without changes.
PV measurements settings
Parameters for PV measurements can be
set in this menu.
Figure 4.24: Selection of PV
measurement settings
Parameters for PV measurements:
Test std
Testing standard [IEC 60891, CEI 82-25]
Irr. Sens.
Type of irradiance measuring sensor [PV cell, Pyran.]
Irr. min.
Minimal valid solar irradiance for calculation [500 – 1000 W/m2]
T. sensor
Temperature for calculation [Tamb, Tcell]
Mod.Ser.
Number of modules in serial [1 – 30]
Mod.Par.
Number of modules in parallel [1 – 10]
Correct. T
Correction of measured cell temperature to compensate for the
difference between the actual cell temperature and the measured
temperature. [0 °C – 5 °C]. According to the EN 61829 standard the
difference is typicall 2 °C. [Off, 1 °C – 5 °C]
Warn. Irr
Limit for the unstable irradiance warning [Off, 1 % – 20 %]
Warn. Uoc
Limit for the inproper Uoc warning [Off, 5 % – 50 %]
Selection of PV test parameters
Keys:
UP / DOWN
Selects appropriate option.
TEST
Enables changing data of selected parameter.
MEM
Saves settings.
ESC / Function selectors
Exits back.
Page 39

MI 3108 EurotestPV Instrument operation
39
Changing data of selected parameter
Keys:
UP / DOWN
Sets parameter.
TEST
Confirms set data.
ESC / Function selectors
Exits back.
Page 40

MI 3108 EurotestPV Measurements – a.c. LV installations
40
5 Measurements – a.c. LV installations
5.1 Compensation of test leads resistance
This chapter describes how to compensate the test leads resistance in Continuity
function. Compensation is required to eliminate the influence of test leads resistance and
the internal resistances of the instrument on the measured resistance. The lead
compensation is therefore very important to obtain correct result. There are two separated
calibration values:
- one for r1, rN, r2, R1+R2 and R2,
- one for R1+RN.
The symbol is displayed in the Continuity message fields if the compensation was
carried out successfully.
Circuits for compensating the resistance of test leads
Figure 5.1: Examples of connections for compensation
Compensation of test leads resistance procedure
Select Continuity function.
Connect test cable to the instrument and short the test leads together
appropriately (see figure 5.1).
Press CAL key to perform test lead compensation.
If the leads were successfully calibrated the resistance with old calibration data
is displayed first and 0.00Ω afterwards.
Figure 5.2: Results with old calibration
values
Figure 5.3: Results with new calibration
values
Note:
The highest value for lead compensation is 5 . If the resistance is higher the
compensation value is set back to default value.
is displayed if no calibration value is stored.
Page 41

MI 3108 EurotestPV Measurements – a.c. LV installations
41
5.2 Voltage, frequency and phase sequence
Voltage and frequency measurement is always active in the terminal voltage monitor. In
the special VOLTAGE TRMS menu the measured voltage, frequency and information
about detected three-phase connection can be stored. Measurements are based on the
BS EN 61557-7 standard.
See chapter 4.2 Function selection for instructions
on key functionality.
Figure 5.4: Voltage in single
phase system
Test parameters for voltage measurement
There are no parameters to be set.
Connections for voltage measurement
Figure 5.5: Connection of 3-wire test lead and optional adapter in three-phase system
Figure 5.6: Connection of plug cable and 3-wire test lead in single-phase system
Page 42

MI 3108 EurotestPV Measurements – a.c. LV installations
42
Voltage measurement procedure
Select the VOLTAGE TRMS function using the function selector keys.
Connect test cable to the instrument.
Connect test leads to the item to be tested (see figures 5.5 and 5.6).
Store voltage measurement result by pressing the MEM key (optional).
Measurement runs immediately after selection of VOLTAGE TRMS function.
Figure 5.7: Examples of voltage measurement in three-phase system
Displayed results for single phase system:
Uln ........... Voltage between phase and neutral conductors,
Ulpe ......... Voltage between phase and protective conductors,
Unpe ........ Voltage between neutral and protective conductors,
f ............... frequency.
Displayed results for three-phase system:
U12 .......... Voltage between phases L1 and L2,
U13 .......... Voltage between phases L1 and L3,
U23 .......... Voltage between phases L2 and L3,
1.2.3 ........ Correct connection – CW rotation sequence,
3.2.1 ........ Invalid connection – CCW rotation sequence,
f ............... frequency.
Page 43

MI 3108 EurotestPV Measurements – a.c. LV installations
43
5.3 Insulation resistance
The Insulation resistance measurement is performed in order to ensure safety against
electric shock through insulation. It is covered by the BS EN 61557-2 standard. Typical
applications are:
Insulation resistance between conductors of installation,
Insulation resistance of non-conductive rooms (walls and floors),
Insulation resistance of ground cables,
Resistance of semi-conductive (antistatic) floors.
Four Insulation resistance sub-functions are available:
ISO L/E,
ISO L/N
ISO L/L
ISO N/E
The insulation resistance tests are carried out in the same way regardless which subfunction is selected. However it is important to select the appropriate sub-function in order
to classify the measurement to be correctly considered in verification documents
(Electrical Installation Certificate, Periodic Inspection Report etc.).
See chapter 4.2 Function selection for instructions
on key functionality.
Figure 5.8: Insulation
resistance
Test parameters for insulation resistance measurement
Measurement
Subfunction [ISO L/E, ISO L/N, ISO N/E, ISO L/L]
Uiso
Test voltage [50 V, 100 V, 250 V, 500 V, 1000 V]
Limit
Minimum insulation resistance [OFF, 0.01 M ÷ 200 M]
Test circuits for insulation resistance
Page 44

MI 3108 EurotestPV Measurements – a.c. LV installations
44
Figure 5.9: Connections for insulation measurement
Insulation resistance measuring procedure
Select the R ISO function using the function selector keys.
Select the insulation subfunction with / keys.
Set the required test voltage.
Enable and set limit value (optional).
Disconnect tested installation from mains supply (and discharge insulation as
required).
Connect test cable to the instrument and to the item to be tested (see figure
5.9).
Press the TEST key to perform the measurement (double click for continuous
measurement and later press to stop the measurement).
After the measurement is finished wait until tested item is fully discharged.
Store the result by pressing the MEM key (optional).
Figure 5.10: Example of insulation resistance measurement result
Displayed results:
R.........................Insulation resistance
Um......................Test voltage – actual value.
Page 45

MI 3108 EurotestPV Measurements – a.c. LV installations
45
5.4 Resistance of earth connection and equipotential bonding
The Continuity measurement is performed in order to ensure that the protective measures
against electric shock through earthing connections and bondings are effective. Six
continuity sub-functions are available:
r
1
,
r
N
r
2
R
1+R2
R
2
R
1+RN
It is important to select the appropriate sub-function in order to classify the measurement
to be correctly considered in verification documents (Electrical Installation Certificate,
Periodic Inspection Report etc.).The r1, rN, r2, R1+R2 and R2 continuity tests are carried
out between L and PE terminals in the same way regardless of which sub-function is
selected. The R1+RN continuity test is carried out between L and N terminals.
See chapter 4.2 Function selection for instructions
on key functionality.
Figure 5.11: Example R
2
Test parameters for Continuity measurement
Measurement
Subfunction [r1, r2, rN, R2, R1+R2, R1+RN]
Limit
Maximum resistance [OFF, 0.1 ÷ 20.0 ]
The Continuity measurement is performed with automatic polarity reversal of the test
voltage according to BS EN 61557-4.
Page 46

MI 3108 EurotestPV Measurements – a.c. LV installations
46
Test circuits for Continuity measurement
r1
rN
r2
R1+RN
Figure 5.12: Connections for testing the r1, rN, r2 and R1+RN sections of the wiring in ring
circuits
R2
R1+R2
Figure 5.13: Connections for testing the R2 and R1+R2 sections of the wiring in final circuits
Continuity measurement procedure
Select Continuity function using the function selector switch.
Set sub-function with / keys
Enable and set limit (optional).
Connect test cable to the the instrument.
Compensate the test leads resistance (if necessary, see section 5.1).
Page 47

MI 3108 EurotestPV Measurements – a.c. LV installations
47
Disconnect tested installation from mains supply.
Connect the test leads to the appropriate PE wiring (see figures 5.12 and 5.13).
Press the TEST key to perform the measurement.
After the measurement is finished store the result by pressing the MEM button
(optional).
Figure 5.14: Example of Continuity result
Displayed result:
R................Continuity result
R+..............Result at positive polarity
R-...............Result at negative test polarity
5.5 Ring Continuity
With Easy Switch A1214 the resistance measurements in final ring circuits can be
simplified. The Easy Switch cares for correct connectivity at the switchboard. r1, rN, r2 or
R1+R2, R1+RN measurements can be performed in one go.
See chapter 4.2 Function selection for
instructions on key functionality.
Figure 5.15:Ring Continuity r1, rN, r
2
Figure 5.16: Ring Continuity R1+R2,
R1+RN
Page 48
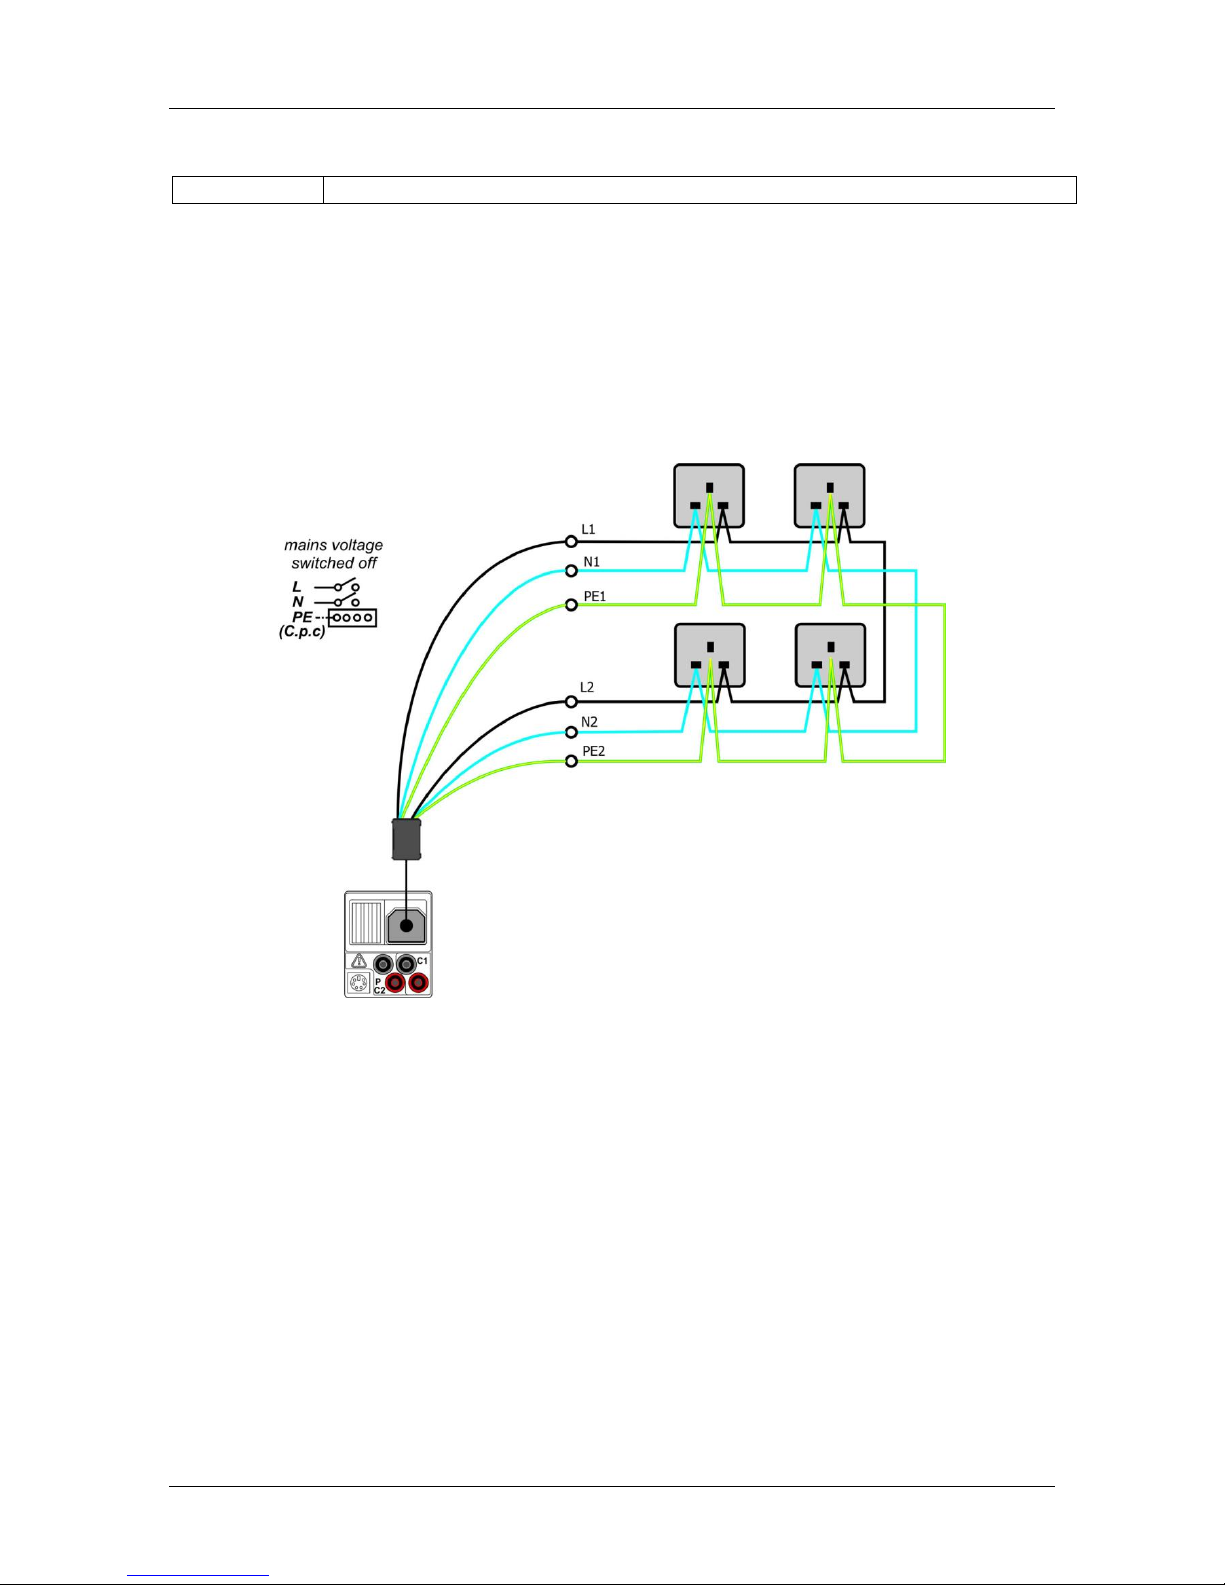
MI 3108 EurotestPV Measurements – a.c. LV installations
48
Test parameters for Ring Continuity measurement
Measurement
Subfunction [(r1, r2, rN), (R1+R2, R1+RN)]
The Ring Continuity measurement is performed with automatic polarity reversal of the
test voltage according to BS EN 61557-4.
Test circuits for Ring Continuity measurement
Figure 5.17: Step 1 - measurement of resistances r1, rN and r
2
Page 49

MI 3108 EurotestPV Measurements – a.c. LV installations
49
Figure 5.18: Step 2 - measurement of resistances R1+R2, R1+RN
Page 50

MI 3108 EurotestPV Measurements – a.c. LV installations
50
Ring Continuity measuring procedure
Step 1: r1, rN, r
2
resistance measuring procedure
Select the RING function.
Set sub-function r1, rN, r2
Compensate test leads resistance (if necessary, see chapter 5.1).
Connect Easy Switch to the instrument (see figure 5.18)
Connect Easy switch to the final ring circuit. The electrical installation must be
de-energized during the test (see figure 5.18).
Press the TEST key to perform the measurement.
Perform measurements of r1, rN, and r2.
Commit results (TAB key) to r1, rN, and r2.
The r1, rN, r2
results can be cleared with the TAB key.
Store the results (optional).
From r1, rN and r2 results reference values (R1+RN)/4, (R1+R2)/4 are calculated. The
results are kept until they are changed or cleared. Take care that measuring leads are
compensated.
Figure 5.19: Examples of Ring Continuity test – Step 1
Displayed results:
r1 ............. Ring resistance of line conductors (committed and measured)
rN ............ Ring resistance of neutral conductors (committed and measured)
r2 ............. Ring resistance of protective conductors (committed and measured)
Step 2: R1+RN, R1+R2 resistance measuring procedure
Easy switch must stay connected to the final ring circuit. The electrical
installation must be de-energized during the test (see figure 5.19).
Select the RING function.
Set sub-function R1+RN, R1+R2
Connect plug cable or test cable to the instrument.
Compensate test leads resistance (if necessary, see chapter 5.1).
Connect plug cable or test cable to a socket in final ring circuit.
Press the TEST key for measurements.
For correct ring wiring the results must be approximately the same as reference
value (r1+rN)/4 and (r1+r2)/4. The resistance R1+R2 slightly increases with
length if cross-section of PE conductor is smaller than of line conductor.
Commit results (TAB key) to R1+RN and R1+R2 positions.
Page 51

MI 3108 EurotestPV Measurements – a.c. LV installations
51
Perform measurement on the next socket in final ring circuit.
Commit results (TAB key) again. The results will be committed only if they are
higher as the previous results.
The R1+RN and R1+R2 results can be cleared with the TAB key
Repeat the measurement on all sockets of the final ring circuit.
The R1+RN and R1+R2 results can be cleared with the TAB key
After the measurements are finished, store the result (optional).
Figure 5.20: Examples of Ring Continuity test – step 2
Displayed results:
R1+RN. ......... Reference test value, committed and measured
R1+R2 ........... Reference test value, committed and measured
(r1+r2)/4 ........ Calculated reference value,
(r1+rN)/4 ........ Calculated reference value.
Page 52

MI 3108 EurotestPV Measurements – a.c. LV installations
52
5.6 Testing RCDs
Various test and measurements are required for verification of RCD(s) in RCD protected
installations. Measurements are based on the BS EN 61557-6 standard.
The following measurements and tests (sub-functions) can be performed:
Contact voltage,
Trip-out time,
Trip-out current,
RCD autotest.
See chapter 4.2 Function selection for instructions
on key functionality.
Figure 5.21: RCD test
Test parameters for RCD test and measurement
TEST
RCD sub-function test [RCDt, RCD I, AUTO, Uc].
IN
Rated RCD residual current sensitivity IN [10 mA, 30 mA, 100 mA, 300 mA,
500 mA, 1000 mA].
type
RCD type AC, A, F, B, B+, starting polarity [ , , , ,
,
],
selective
S
or general characteristic.
MUL
Multiplication factor for test current [½, 1, 2, 5 IN].
Ulim
Conventional touch voltage limit [25 V, 50 V].
Notes:
Ulim can be selected in the Uc sub-function only.
Selective (time delayed) RCDs have delayed response characteristics. As the
contact voltage pre-test or other RCD tests influence the time delayed RCD it takes
a certain period to recover into normal state. Therefore a time delay of 30 s is
inserted before performing trip-out test by default.
Connections for testing RCD
Figure 5.22: Connecting the plug cable and the 3-wire test lead
Page 53

MI 3108 EurotestPV Measurements – a.c. LV installations
53
5.6.1 Contact voltage (RCD Uc)
A current flowing into the PE terminal causes a voltage drop on earth resistance, i.e.
voltage difference between PE equipotential bonding circuit and earth. This voltage
difference is called contact voltage and is present on all accessible conductive parts
connected to the PE. It shall always be lower than the conventional safety limit voltage.
The contact voltage is measured with a test current lower than ½ I
N
to avoid trip-out of
the RCD and then normalized to the rated IN.
Contact voltage measurement procedure
Select the RCD function using the function selector keys.
Set sub-function Uc.
Set test parameters (if necessary).
Connect test cable to the instrument.
Connect test leads to the item to be tested (see figure 5.21).
Press the TEST key to perform the measurement.
Store the result by pressing the MEM key (optional).
The contact voltage result relates to the rated nominal residual current of the RCD and is
multiplied by an appropriate factor (depending on RCD type and type of test current). The
1.05 factor is applied to avoid negative tolerance of result. See table 5.1 for detailed
contact voltage calculation factors.
RCD type
Contact voltage Uc
proportional to
Rated IN
AC
1.05IN
any
AC
S
21.05IN
A, F
1.41.05IN
30 mA
A, F
S
21.41.05IN
A, F
21.05IN
< 30 mA
A, F
S
221.05IN
B, B+
21.05IN
any
B, B+
S
221.05IN
Table 5.1: Relationship between Uc and I
N
Loop resistance is indicative and calculated from Uc result (without additional
proportional factors) according to:
N
C
L
I
U
R
.
Figure 5.23: Example of contact voltage measurement results
Page 54

MI 3108 EurotestPV Measurements – a.c. LV installations
54
Displayed results:
Uc ........ Contact voltage.
Rl ......... Fault loop resistance.
Rmax ... Maximum earth fault loop resistance value according to BS 7671
5.6.2 Trip-out time (RCDt)
Trip-out time measurement verifies the sensitivity of the RCD at different residual
currents.
Trip-out time measurement procedure
Select the RCD function using the function selector keys.
Set sub-function RCDt.
Set test parameters (if necessary).
Connect test cable to the instrument.
Connect test leads to the item to be tested (see figure 5.21).
Press the TEST key to perform the measurement.
Store the result by pressing the MEM key (optional).
Figure 5.24: Example of trip-out time measurement results
Displayed results:
t ........... Trip-out time,
Uc ........ Contact voltage for rated IN.
5.6.3 Trip-out current (RCD I)
A continuously rising residual current is intended for testing the threshold sensitivity for
RCD trip-out. The instrument increases the test current in small steps through appropriate
range as follows:
RCD type
Slope range
Waveform
Start value
End value
AC
0.2IN
1.1IN
Sine
A, F (IN 30 mA)
0.2IN
1.5IN
Pulsed
A, F (IN = 10 mA)
0.2IN
2.2IN
B, B+
0.2IN
2.2IN
DC
Maximum test current is I (trip-out current) or end value in case the RCD didn’t trip-out.
Page 55

MI 3108 EurotestPV Measurements – a.c. LV installations
55
Trip-out current measurement procedure
Select the RCD function using the function selector keys.
Set sub-function RCD I.
Set test parameters (if necessary).
Connect test cable to the instrument.
Connect test leads to the item to be tested (see figure 5.21).
Press the TEST key to perform the measurement.
Store the result by pressing the MEM key (optional).
Trip-out
After the RCD is turned on again
Figure 5.25: Trip-out current measurement result examples
Displayed results:
I…….Trip-out current,
Uci…Contact voltage at trip-out current I or end value in case the RCD didn’t trip,
t…….Trip-out time.
Page 56

MI 3108 EurotestPV Measurements – a.c. LV installations
56
5.6.4 RCD Autotest
RCD autotest function is intended to perform a complete RCD test (trip-out time at
different residual currents, trip-out current and contact voltage) in one set of automatic
tests, guided by the instrument.
Additional key:
HELP / DISPLAY
Toggles between top and bottom part of results field.
RCD autotest procedure
RCD Autotest steps
Notes
Select the RCD function using the function selector keys.
Set sub-function AUTO.
Set test parameters (if necessary).
Connect test cable to the instrument.
Connect test leads to the item to be tested (see figure
5.23).
Press the TEST key to perform the test.
Start of test
Test with I
N
, 0 (step 1).
RCD should trip-out
Re-activate RCD.
Test with I
N
, 180 (step 2).
RCD should trip-out
Re-activate RCD.
Test with 5I
N
, 0 (step 3).
RCD should trip-out
Re-activate RCD.
Test with 5I
N
, 180 (step 4).
RCD should trip-out
Re-activate RCD.
Test with ½IN, 0 (step 5).
RCD should not tripout
Test with ½IN, 180 (step 6).
RCD should not tripout
Trip-out current test, 0 (step 7).
RCD should trip-out
Re-activate RCD.
Trip-out current test, 180 (step 8).
RCD should trip-out
Re-activate RCD.
Store the result by pressing the MEM key (optional).
End of test
Page 57

MI 3108 EurotestPV Measurements – a.c. LV installations
57
Result examples:
Step 1
Step 2
Step 3
Step 4
Step 5
Step 6
Step 7
Step 8
Figure 5.26: Individual steps in RCD autotest
Top
Bottom
Figure 5.27: Two parts of result field in RCD autotest
Page 58

MI 3108 EurotestPV Measurements – a.c. LV installations
58
Displayed results:
x1 ........ Step 1 trip-out time ( , IN, 0º),
x1 ........ Step 2 trip-out time ( , IN, 180º),
x5 ........ Step 3 trip-out time ( , 5IN, 0º),
x5 ........ Step 4 trip-out time ( , 5IN, 180º),
x½ ....... Step 5 trip-out time ( , ½IN, 0º),
x½ ....... Step 6 trip-out time ( , ½IN, 180º),
I ......... Step 7 trip-out current (0º),
I ......... Step 8 trip-out current (180º),
Uc ........ Contact voltage for rated IN.
Notes:
The autotest sequence is immediately stopped if any incorrect condition is
detected, e.g. excessive Uc or trip-out time out of bounds.
Auto test is finished without x5 tests in case of testing the RCD types A, F with
rated residual currents of In = 300 mA, 500 mA, and 1000 mA. In this case auto
test result passes if all other results pass, and indications for x5 are omitted.
Tests for sensitivity (I ,, steps 7 and 8) are omitted for selective type RCD.
Page 59

MI 3108 EurotestPV Measurements – a.c. LV installations
59
5.7 Fault loop impedance and prospective fault current
Fault loop is a loop comprised by mains source, line wiring and PE return path to the
mains source. The instrument measures the impedance of the loop and calculates the
short circuit current. The measurement is covered by requirements of the BS EN 615573 standard.
See chapter 4.2 Function selection for
instructions on key functionality.
Figure 5.28: Fault loop impedance
Test parameters for fault loop impedance measurement
Test
Selection of fault loop impedance sub-function [Zloop, Zs rcd]
Fuse type
Selection of fuse type [---, BS88-2, BS88-3, BS3036, BS1362, B, C, D]
Fuse I
Rated current of selected fuse
Fuse T
Maximum breaking time of selected fuse
Lim
Minimum short circuit current for selected fuse.
See Appendix A for reference fuse data.
Circuits for measurement of fault loop impedance
Figure 5.29: Connection of plug cable and universal test cable
Page 60

MI 3108 EurotestPV Measurements – a.c. LV installations
60
Fault loop impedance measurement procedure
Select the Zloop or Zs rcd sub-function using the function selector keys and
/ keys.
Select test parameters (optional).
Connect test cable to the instrument.
Connect test leads to the item to be tested (see figures 5.29 and 5.21).
Press the TEST key to perform the measurement.
Store the result by pressing the MEM key (optional).
Figure 5.30: Examples of loop impedance measurement result
Displayed results:
Z .............. Fault loop impedance,
ISC ............ Prospective fault current,
Lim .......... High limit fault loop impedance value.
Prospective fault current I
PFC
is calculated from measured impedance as follows:
factorscalingZ
U
I
PEL
N
PFC
_
where:
Un ........ Nominal U
L-PE
voltage (see table below),
Scaling factor.......Impedance correction factor (see chapter 4.4.5).
Un
Input voltage (L-PE)
110 V
(93 V U
L-PE
134 V)
230 V
(185 V U
L-PE
266 V)
Notes:
High fluctuations of mains voltage can influence the measurement results (the
noise sign is displayed in the message field). In this case it is recommended to
repeat few measurements to check if the readings are stable.
The Zloop test will trip-out the RCD in RCD-protected electrical installation.
Select Zs rcd to prevent trip-out of RCD in RCD protected installation.
Page 61

MI 3108 EurotestPV Measurements – a.c. LV installations
61
5.8 Line impedance and prospective short-circuit current /
Voltage drop
Line impedance is measured in loop comprising of mains voltage source and line wiring.
Line impedance is covered by the requirements of the BS EN 61557-3 standard.
The Voltage drop sub-function is intended to check that a voltage in the installation stays
above acceptable levels if the highest current is flowing in the circuit. The highest current
is defined as the nominal current of the circuit's fuse. The limit values are described in the
standard EN 60364-5-52.
Sub-functions:
Z LINE - Line impedance measurement according to BS EN 61557-3,
ΔU – Voltage drop measurement.
See chapter 4.2 Function selection for instructions
on key functionality.
Figure 5.31: Line impedance
Figure 5.32: Voltage drop
Test parameters for line impedance measurement
Test
Selection of line impedance [Zline] or voltage drop [ΔU] sub-function
FUSE type
Selection of fuse type [---, BS88-2, BS88-3, BS3036, BS1362, B, C, D]
FUSE I
Rated current of selected fuse
FUSE T
Maximum breaking time of selected fuse
Lim
Minimum short circuit current for selected fuse.
See Appendix A for reference fuse data.
Additional test parameters for voltage drop measurement
ΔU
MAX
Maximum voltage drop [3.0 % ÷ 9.0 %].
Page 62

MI 3108 EurotestPV Measurements – a.c. LV installations
62
5.8.1 Line impedance and prospective short circuit current
Circuits for measurement of line impedance
Figure 5.33: Phase-neutral or phase-phase line impedance measurement – connection
of plug cable and 3-wire test lead
Line impedance measurement procedure
Select the Zline sub-function.
Select test parameters (optional).
Connect test cable to the instrument.
Connect test leads to the item to be tested (see figure 5.33).
Press the TEST key to perform the measurement.
Store the result by pressing the MEM key (optional).
Figure 5.34: Examples of line impedance measurement result
Displayed results:
Z .............. Line impedance,
ISC ............ Prospective short-circuit current,
Lim .......... High limit line impedance value.
Prospective fault current I
PFC
is calculated from measured impedance as follows:
factorscalingZ
U
I
LNL
N
PFC
_
)(
where:
Un ........ Nominal U
L-N(L)
voltage (see table below),
Scaling factor.......Impedance correction factor (see chapter 4.4.5).
Un
Input voltage range (L-N or L1-L2)
Page 63

MI 3108 EurotestPV Measurements – a.c. LV installations
63
110 V
(93 V U
L-N
134 V)
230 V
(185 V U
L-N
266 V)
400 V
(321 V U
L-L
485 V)
Note:
High fluctuations of mains voltage can influence the measurement results (the
noise sign is displayed in the message field). In this case it is recommended to
repeat few measurements to check if the readings are stable.
5.8.2 Voltage drop
The voltage drop is calculated based on the difference of line impedance at connection
points (sockets) and the line impedance at the reference point (usually the impedance at
the switchboard).
Circuits for measurement of voltage drop
Figure 5.35: Phase-neutral or phase-phase voltage drop measurement – connection of
plug cable and 3-wire test lead
Voltage drop measurement procedure
Step 1: Measuring the impedance Zref at origin
Select the ΔU sub-function using the function selector keys and / keys.
Select test parameters (optional).
Connect test cable to the instrument.
Connect the test leads to the origin of electrical installation (see figure 5.35).
Press the CAL key to perform the measurement.
Step 2: Measuring the voltage drop
Select the ΔU sub-function using the function selector keys and / keys.
Select test parameters (Fuse type must be selected).
Connect test cable or plug commander to the instrument.
Connect the test leads to the tested points (see figure 5.29).
Press the TEST key to perform the measurement.
Store the result by pressing the MEM key (optional).
Page 64

MI 3108 EurotestPV Measurements – a.c. LV installations
64
Step 1 - Zref
Step 2 - Voltage drop
Figure 5.36: Examples of voltage drop measurement result
Displayed results:
ΔU ........... Voltage drop,
ISC ............ Prospective short-circuit current,
Z .............. Line impedance at measured point,
Zref .......... Reference impedance
Voltage drop is calculated as follows:
100
)(
%
N
NREF
U
IZZ
U
where:
ΔU ........ calculated voltage drop
Z………impedance at test point
Z
REF
…...impedance at reference point
IN………rated current of selected fuse
UN…….nominal voltage (see table below)
Un
Input voltage range (L-N or L1-L2)
110 V
(93 V U
L-PE
134 V)
230 V
(185 V U
L-PE
266 V)
400 V
(321 V U
L-N
485 V)
Notes:
If the reference impedance is not set the value of Z
REF
is considered as 0.00 Ω.
The Z
REF
is cleared (set to 0.00 Ω) if pressing CAL key while instrument is not
connected to a voltage source.
I
SC
is calculated as described in chapter 5.8.1 Line impedance and prospective
short circuit current.
If the measured voltage is outside the ranges described in the table above the ΔU
result will not be calculated.
High fluctuations of mains voltage can influence the measurement results (the
noise sign is displayed in the message field). In this case it is recommended to
repeat few measurements to check if the readings are stable.
Page 65

MI 3108 EurotestPV Measurements – a.c. LV installations
65
5.9 Earth resistance
Earth resistance is one of the most important parameters for protection against electric
shock. Main earthing arrangements, lightning systems, local earthings, etc can be verified
with the earthing resistance test. The measurement conforms to the BS EN 61557-5
standard.
See chapter 4.2 Function selection for instructions
on key functionality.
Figure 5.37: Earth resistance
Test parameters for earth resistance measurement
Limit
Maximum resistance OFF, 1 ÷ 5 k
Connections for earth resistance measurement
Figure 5.38: Resistance to earth, measurement of main installation earthing
Page 66
MI 3108 EurotestPV Measurements – a.c. LV installations
66
Figure 5.39: Resistance to earth, measurement of a lighting protection system
Earth resistance measurements, common measurement procedure
Select EARTH function using the function selector keys.
Enable and set limit value (optional).
Connect test leads to the instrument.
Connect the item to be tested (see figures 5.38, 5.39).
Press the TEST key to perform the measurement.
Store the result by pressing the MEM key (optional).
Figure 5.40: Example of earth resistance measurement result
Displayed results for earth resistance measurement:
R.............. Earth resistance,
Rp............ Resistance of S (potential) probe,
Rc ............ Resistance of H (current) probe.
Notes:
High resistance of S and H probes could influence the measurement results. In
this case, “Rp” and “Rc” warnings are displayed. There is no pass / fail indication
in this case.
High noise currents and voltages in earth could influence the measurement results.
The tester displays the warning in this case.
Probes must be placed at sufficient distance from the measured object.
Page 67

MI 3108 EurotestPV Measurements – a.c. LV installations
67
5.10 PE test terminal
It can happen that a dangerous voltage is applied to the PE wire or other accessible metal
parts. This is a very dangerous situation since the PE wire and MPEs are considered to
be earthed. An often reason for this fault is incorrect wiring (see examples below).
When touching the TEST key in all functions that requires mains supply the user
automatically performs this test.
Examples for application of PE test terminal
Figure 5.41: Reversed L and PE conductors (tip commander)
L1
N
Reversed phase and
protection conductors!
MOST DANGEROUS
SITUATION!
PE
LPEN
L/L1
N/L2
PE/L3
Figure 5.42: Reversed L and PE conductors (application of 3-wire test lead)
Page 68

MI 3108 EurotestPV Measurements – a.c. LV installations
68
PE terminal test procedure
Connect test cable to the instrument.
Connect test leads to the item to be tested (see figures 5.41 and 5.42).
Touch PE test probe (the TEST key) for at least one second.
If PE terminal is connected to phase voltage the warning message is displayed,
instrument buzzer is activated, and further measurements are disabled in Zloop
and RCD functions.
Warning:
If dangerous voltage is detected on the tested PE terminal, immediately stop all
measurements, find and remove the fault!
Notes:
PE test terminal is active in the INSTALLATION operating mode (except in the
VOLTAGE, Low ohm, Earth and Insulation functions).
PE test terminal does not operate in case the operator’s body is completely
insulated from floor or walls!
For operation of PE test terminal on commanders refer to Appendix D
Commanders.
Page 69

MI 3108 EurotestPV Solar measurements – PV systems
69
6 Solar measurements - PV systems
The following measurements for verification and troubleshooting of PV installations can
be performed with the instrument:
Insulation resistance on PV systems
PV inverter test
PV panel test
Environmental parameters
Open voltage and short circuit test
I-V curve test
6.1 Insulation resistance on PV systems
The Insulation resistance measurement is performed in order to ensure safety against
electric shock through insulation between live parts on PV installations and earth.
The followed by a test between panel / string / array positive and earth).measurement is
carried out according to test method 1 in IEC / EN 62446 (test between panel / string /
array negative and earth
See chapter 4.2 Function selection for instructions
on key functionality. The input voltage is displayed
in order to check proper connection before carrying
out the test.
Figure 6.1: Insulation
resistance
Test parameters for insulation resistance measurement on PV systems
TEST
Roc- , Roc+
Uiso
Test voltage [50 V, 100 V, 250 V, 500 V, 1000 V]
Limit
Minimum insulation resistance [OFF, 0.01 M ÷ 200 M]
Page 70

MI 3108 EurotestPV Solar measurements – PV systems
70
Test circuits for insulation resistance on PV systems
Figure 6.2: Connections for insulation resistance measurement on PV systems
Insulation resistance measuring procedure
Select the Roc- sub-function using the function selector keys and / keys.
Set the required test voltage.
Enable and set limit value (optional).
Connect PV safety probe to the instrument (see figure 6.2)
Connect accessories to the PV system (see figure 6.2).
Press the TEST key to perform the measurement (double click for continuous
measurement and later press to stop the measurement).
After the measurement is finished wait until tested item is fully discharged.
Store the result by pressing the MEM key (optional).
Select the Roc+ sub-function using the / keys.
Reconnect DC+ lead (see figure 6.2).
Press the TEST key to perform the measurement (double click for continuous
measurement and later press to stop the measurement).
After the measurement is finished wait until tested item is fully discharged.
Store the result by pressing the MEM key (optional).
Figure 6.3: Examples of insulation resistance measurement result
Displayed results:
Roc+, Roc...........Insulation resistance
Um......................Test voltage – actual value.
U: ...................... Actual voltage on test inputs
Page 71

MI 3108 EurotestPV Solar measurements – PV systems
71
6.2 PV inverter test
The test is intended to check proper operation of the PV inverter. Following functions are
supported:
Measuring of DC values at inverter’s input and AC values at inverter’s output.
Calculation of the efficiency of the inverter.
With the EurotestPV instrument one DC and one AC signal can be measured at the same
time.
For 3-phase inverters one DC and three AC signals can be measured at the same time
with a combination of a Metrel Powermeter and the EurotestPV instrument. During the
measurement the Power meter and EurotestPV instrument must be connected via cable
or Bluetooth link. At the end of the measurement the results from Powermeter are sent to
and displayed on the EurotestPV instrument.
See chapter 4.2 Function selection for instructions on key functionality. The input voltages
are displayed in order to check proper connection before carrying out the test.
Figure 6.4: Examples of PV inverter test starting screens
Figure 6.5: Examples of PV inverter test starting screens – three phase a.c.output
Settings and parameters for PV inverter test
Input
Inputs/ Outputs being measured [ AC, DC, AC/DC, AC3, AC3/DC]
Page 72

MI 3108 EurotestPV Solar measurements – PV systems
72
Connections for PV inverter test
Figure 6.6: PV inverter test - DC side
Figure 6.7: PV inverter test - AC side
Figure 6.8: PV inverter test - AC and DC sides
Page 73

MI 3108 EurotestPV Solar measurements – PV systems
73
Figure 6.9: PV inverter test – 3 phase - AC side
Figure 6.10: PV inverter test – 3 phase AC and DC sides
PV inverter test procedure (with EurotestPV instrument)
Select INVERTER sub-function using the function selector keys and / keys.
Connect PV safety probe and current clamp to the instrument (see figures 6.6
and 6.7) or
Connect PV test lead A 1385 and current clamps to the instrument (see figure
6.8)
Connect accessories to the PV system (see figures 6.6 to 6.8).
Check input voltages.
Press the TEST key to perform the measurement.
Store the result by pressing the MEM key (optional).
Page 74

MI 3108 EurotestPV Solar measurements – PV systems
74
PV inverter test procedure (with EurotestPV instrument and Metrel Powermeter)
Note:
The Communication settings of Metrel Powermeter must be following:
Source = RS232
Baud Rate = 9600
Select INVERTER sub-function using the function selector keys and / keys.
Be sure that the EurotestPV instrument and Powermeter are connected via serial
cable or Bluetooth.
Connect PV safety probe and DC current clamp to the EurotestPV instrument
(see figures 6.9 and 6.10).
Connect voltage test leads and AC current clamps to the Powermeter.
Connect voltage test leads to L1, L2, L3 and N at the output side of the inverter
(see figures 6.9 and 6.10).
Connect accessories to the PV system (see figures 6.9 and 6.10).
Check input voltages on the instrument and measurement results on the
Powermeter (best to be in Power measurements menu).
Press the TEST key to perform the measurement. Results from both instruments
are displayed on the EurotestPV screen. A.C. measurement results in detail are
displayed on Powermeter also.
Store the result by pressing the MEM key (optional).
Figure 6.11: Examples of PV inverter test results screens - 1 phase a.c. output
Figure 6.12: Examples of PV inverter test results screens - 3 phase a.c. output
Figure 6.13: Example of Powermeter result screen - 3 phase a.c. output
Displayed results for PV inverter test:
Page 75

MI 3108 EurotestPV Solar measurements – PV systems
75
DC column:
U.............. measured voltage at the input of the inverter
I ............... measured current at the input of the inverter
P .............. measured power at the input of the inverter
AC column:
U.............. measured voltage at the output of the inverter
I ............... measured current at the output of the inverter
P .............. measured power at the output of the inverter
AC (3 phase power) column
Pt ............. measured total power at the output of the inverter
P1 ............ measured power of phase 1 at the output of the inverter
P2 ............ measured power of phase 2 at the output of the inverter
P3 ............ measured power of phase 3 at the output of the inverter
η…......... .. calculated efficiency of the inverter
Notes:
With one current clamp the complete test can be performed in two steps. Input
should be set to DC and AC separately.
For the INVERTER AC/DC test fused test lead A 1385 must be used!
For more information about measuring and setup of the Metrel Powermeter refer
to Metrel Powermeter’s instruction manual. Contact Metrel or distributor for
detailed information which Metrel Powermeters are suitable for this measurement.
6.3 PV panel test
PV panel test is intended to check proper operation of PV panels. Following functions are
supported:
measuring of output voltage, current and power of PV panel,
comparison of measured PV output values (MEAS values) and calculated nominal
data (STC values)
comparison of measured PV output power (Pmeas) and theoretical output power
(Ptheo)
The PV panel test results are divided into three screens. See chapter 4.2 Function
selection for instructions on key functionality. The input voltage is displayed in order to
check proper connection before carrying out the test.
Figure 6.14: PV module test starting screens
Page 76

MI 3108 EurotestPV Solar measurements – PV systems
76
Connections for PV panel
Figure 6.15: PV panel test
PV panel test procedure
Select PANEL sub-function using the function selector keys.
Connect PV safety probe, current clamp(s) and sensors to the instrument.
Connect the PV system to be tested (see figure 6.15).
Check input voltage.
Press the TEST key to perform the test.
Store the result by pressing the MEM key (optional).
Figure 6.16: Examples of PV measurement results
Displayed results are:
MEAS column
U.............. measured output voltage of the panel
I ............... measured output current of the panel
P .............. measured output power of the panel
STC column
U.............. calculated output voltage of the panel at STC
I ............... calculated output current of the panel at STC
P .............. calculated output power of the panel at STC
Pstc… ...... measured output power of the panel at STC
Pmax…... nominal output power of the panel at STC
η1….. ....... efficiency of the panel at STC
Pmeas… . measured output power of the panel at momentary conditions
Page 77
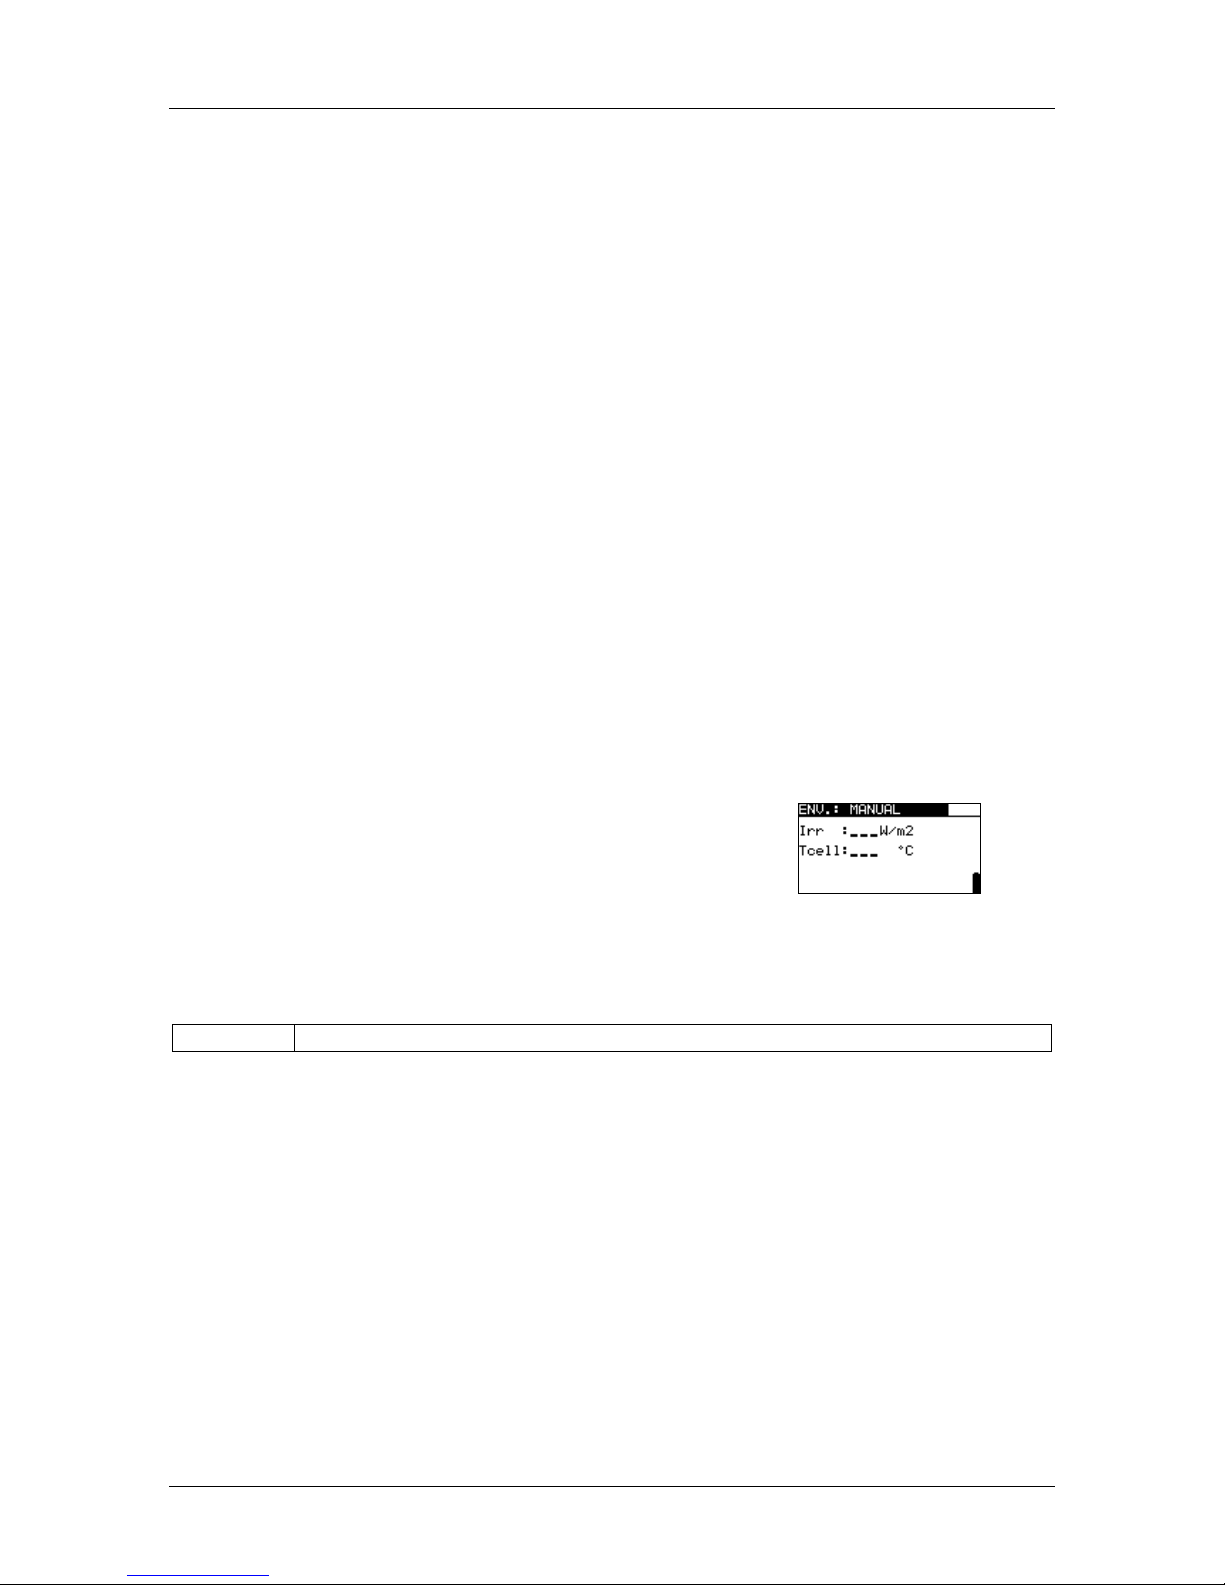
MI 3108 EurotestPV Solar measurements – PV systems
77
Ptheo…. .. calculated theoretical output power of the panel at momentary conditions
η2…...... ... calculated efficiency of the panel at momentary conditions (simplified
method, see appendix E)
Notes:
Before starting the PV measurements settings of PV module type and PV test
parameters should be checked.
For calculation of STC results PV module type, PV test parameters, Uoc, Isc, Irr
and Tcell values must be measured or be entered manually before the test. The
results in ENV. and Uoc/Isc menus are considered. If there are no results in Uo/Isc
menu the instrument will consider results in I-V menu.
The Uoc, Isc, Irr and T measurements should be carried out immediately before
the PANEL test. Environmental conditions must be stable during the tests.
For best results PV remote unit A 1378 should be used.
6.4 Measuring of environmental parameters
Temperature and solar irradiance values must be known for:
Calculation of nominal values at standard test conditions (STC),
Checking that environmental conditions are suitable for carrying out the PV tests.
The parameters can be measured or entered manually. The probes can be connected to
the instrument or to the PV remote unit A 1378.
See chapter 4.2 Function selection for instructions on
key functionality.
Figure 6.17: Environmental
parameters screen
Test parameters for measuring / setting of environmental parameters
INPUT
Input of environmental data [ MEAS, MANUAL]
Page 78

MI 3108 EurotestPV Solar measurements – PV systems
78
Connections for measuring of environmental parameters
Figure 6.18: Measurement of environmental parameters
Procedure for measuring of environmental parameters
Select ENV. function and MEAS sub-function using the function selector keys
and / keys.
Connect environmental probes to the instrument (see figure 6.18).
Connect the item to be tested (see figure 6.18).
Press the TEST key to perform the measurement.
Store the result by pressing the MEM key (optional).
Figure 6.19: Example of measured results
Displayed results for environmental parameters:
Irr………………...solar irradiance
Tamb or Tcell…. temperature of ambient or PV cells
Note:
If the Irradiance result is lower than the set minimal value Irr min the STC results
will not be calculated (message is displayed).
Procedure for manual entering of environmental parameters
If the data is measured with other measuring equipment they can be entered manually.
Select ENV. function and MANUAL sub-function using the function selector keys and
/ keys.
Keys:
TEST
Enters menu for manual setting of environmental parameters.
Enters menu for changing selected parameter.
Confirms set value of parameter.
/
Selects environmental parameter.
Selects value of parameter.
Page 79

MI 3108 EurotestPV Solar measurements – PV systems
79
Function
selector
Exits environmental menu and select PV measurement.
Figure 6.20: Example of manually entered results
Displayed results for environmental parameters:
Irr………………...solar irradiance
Tamb or Tcell…. temperature of ambient or PV cells
Note:
Environmental parameters are cleared when the SOLAR test mode is exited.
6.2.1 Operation with A1378 PV Remote Unit
See PV Remote Unit User Manual.
6.5 Uoc / Isc test
The Uoc / Isc test is intended to check if protection devices in the d.c. part of the PV
installation are effective. The measured data can be calculated to nominal data (STC
values).
See chapter 4.2 Function selection for
instructions on key functionality.
Figure 6.21: Uoc / Isc test
The input voltage is displayed in order to check proper connection before carrying out the
test.
Page 80

MI 3108 EurotestPV Solar measurements – PV systems
80
Connection for Uoc / Isc test
Figure 6.22: Uoc / Isc test
Uoc / Isc test procedure
Select Uoc / Isc sub-function using the function selector keys and / keys.
Connect PV safety probe and sensors (optional) to the instrument.
Connect the item to be tested (see figure 6.22).
Check input voltage.
Press the TEST key to perform the measurement.
Store the result by pressing the MEM key (optional).
Figure 6.23: Example of Uoc / Isc measurement results
Displayed results for PV panel test:
MEAS column
Uoc .......... measured open voltage of the panel
Isc............ measured short circuit current of the panel
STC column
Uoc .......... calculated open voltage at STC
Isc............ calculated short circuit current at STC
Notes:
Before starting the PV measurements settings of PV module type and PV test
parameters should be checked.
For calculation of STC results correct PV module type, PV test parameters, Irr and
Tcell values must be measured or be entered manually before the test. The Irr and
T results in ENV. menu are considered. Refer to Appendix E for further information.
The Irr and T measurements should be carried out immediately before the Uoc /
Isc test. Environmental conditions must be stable during the tests.
For best results PV remote unit A 1378 should be used.
Page 81

MI 3108 EurotestPV Solar measurements – PV systems
81
6.6 I / V curve measurement
The I / V curve measurement is used to check correct operation of the PV panels. Different
problems on PV panels (failure of a part of the PV panel / string, dirt, shadow etc.) can
be found.
Figure 6.24: I / V curve starting screens
The data to be measured is divided into three screens. See chapter 4.2 Function
selection for instructions on key functionality.
Settings parameters for I / V curve test
1/3
Number of screen.
STC
Results (STC, measured, both) to be displayed.
Connection for the I / V curve test
Figure 6.25: I / V curve test
Page 82

MI 3108 EurotestPV Solar measurements – PV systems
82
I / V curve test procedure
Select I / V sub-function using the function selector keys and / keys.
Check or set PV module and PV testing parameters and limits (optional).
Connect PV safety probe to the instrument.
Connect environmental probes to the instrument (optional).
Connect the item to be tested (see figure 6.25).
Press the TEST key to perform the measurement.
Store the result by pressing the MEM key (optional).
Figure 6.26: Example of I / V curve results
Displayed results for I / V curve test:
Uoc .......... measured / STC open circuit voltage of the panel
Isc............ measured / STC short circuit current of the panel
Umpp ....... measured / STC voltage at maximal power point
Impp ........ measured / STC current at maximal power point
Pmpp ....... measured / STC maximal output power of the panel
Notes:
Before starting the PV measurements settings of PV module type and PV test
parameters should be checked.
For calculation of STC results correct PV module type, PV test parameters, Irr and
Tcell values must be measured or be entered manually before the test. The Irr.
and T results in ENV. menu are considered. Refer to Appendix E for further
information.
The Irr. and T measurements should be carried out immediately before the I / V
curve test. Environmental conditions must be stable during the tests.
For best results PV remote unit A 1378 should be used.
6.7 Measurement of cell temperature before test
The standard IEC 61829 recommends procedure for choosing and recording appropriate
conditions for measurement. One of the recommendations is that the temperature of the
PV array must be equilibrated before the test. In combination with the PV remote unit A
1378 the instrument enables to store the measured cell temperatures 0 min, 5 min, 10
min and 15 minutes before PV tests (I/ V curve measurement, Uoc/Isc test and PV panel
test).
The cell temperature should be measured with A1378 before the PV test. After
synchronization of results between the instrument and A1378 the instrument enables to
add temperature values before the test to stored I/ V curve, Uoc/Isc, and PV panel test
results.
Page 83

MI 3108 EurotestPV Solar measurements – PV systems
83
The results can be viewed in recall memory screens (see 8.4 Recalling test results for
more information).
Figure 6.27: Example of cell temperature before test result screen
Displayed results:
T15 .......... cell temperature 15 minutes before the PV test
T10 .......... cell temperature 10 minutes before the PV test
T5 ............ cell temperature 5 minutes before the PV test
T0 ............ cell temperature at the moment before the PV test
Page 84

MI 3108 EurotestPV Measurements - Power & energy
84
7 Measurements - Power & Energy
1- phase power measurements and tests (sub-functions) can be performed with the
EurotestPV instrument. Main features are:
Measurement of standard power parameters,
Harmonic analysis of voltage and current,
Displaying of voltage and current waveforms,
Energy counting.
7.1 Power
The Power function is intended to measure the standard power parameters P, Q, S,
THDU and PF.
See chapter 4.2 Function selection for instructions on
key functionality.
Figure 7.1: Power menu
Settings and parameters for Power test
There are no parameters to be set in this menu.
Connection for Power test
Figure 7.2: Power measurement
Page 85

MI 3108 EurotestPV Measurements - Power & energy
85
Power test procedure
Select POWER sub-function using the function selector keys and / keys.
Connect the voltage test leads and current clamp to the instrument.
Connect the voltage test leads and current clamp to the item to be tested (see
figure 7.2).
Press the TEST key to start the continuous measurement.
Press the TEST key again to stop the measurement.
Store the result by pressing the MEM key (optional).
Figure 7.3: Power measurement results
Displayed results for the Power measurements:
P .............. active power
S .............. apparent power
Q ............. reactive power (capacitive or inductive)
PF…… .... power factor ( capacitive or inductive)
THDU……voltage total harmonic distortion
Notes:
Consider polarity and setup of current clamps (see chapter 4.4.8 Clamp settings).
Results can also be stored while the measurement is running.
7.2 Harmonics
Harmonics are components of the voltage and currents signal with an integer multiple of
the fundamental frequency. The harmonic values are an important parameter of power
quality.
See chapter 4.2 Function selection for
instructions on key functionality.
Figure 7.4: Harmonics menu
Settings and parameters in Harmonics function
Input
Displayed parameters [ voltage U or current I]
h:0..h:11
Selected harmonic
Connection for the Harmonics measurement
(See figure 7.2)
Page 86

MI 3108 EurotestPV Measurements - Power & energy
86
Harmonics measurement procedure
Select HARMONICS sub-function using the function selector keys and /
keys.
Connect voltage test leads and current clamp to the instrument.
Connect the voltage test leads and current clamp to the item to be tested (see
figure 7.2).
Press the TEST key to start the continuous measurement.
Press the TEST key again to stop the measurement.
Store the result by pressing the MEM key (optional)
Figure 7.5: Examples of Harmonics measurement results
Displayed results for the Harmonics measurements:
Uh............ TRMS voltage of selected harmonic
Ih ............. TRMS current of selected harmonic
THDU……voltage total harmonic distortion
THDI…… . voltage total harmonic distortion
Notes:
Parameters (input and number of harmonic) can be changed and results can also
be stored while the measurement is running.
Displayed graph is auto-ranged.
7.3 Scope
The Scope function is intended to check the shape of voltage and current.
See chapter 4.2 Function selection for
instructions on key functionality.
Figure 7.6: Scope menu
Settings and parameters in Scope function
Input
Displayed parameters [ voltage U or current I or both]
Connection for the Scope measurement
(See figure 7.2)
Page 87

MI 3108 EurotestPV Measurements - Power & energy
87
Scope measurement procedure
Select SCOPE sub-function using the function selector keys and Up/Down keys.
Connect voltage test leads and current clamp to the instrument.
Connect the voltage test leads and current clamp to the item to be tested (see
figure 7.2).
Press the TEST key to start the continuous measurement.
Press the TEST key again to stop the measurement.
Store the result by pressing the MEM key (optional)
Figure 7.7: Example of Scope measurement results
TRMS values of voltage and current are displayed.
Notes:
The parameter input can be changed and results can also be stored while the
measurement is running.
Displayed waveforms are auto-ranged.
7.4 Current
This function is intended for measurement of load and leakage currents with current
clamps. Two independent measuring inputs are available.
See chapter 4.2 Function selection for instructions on
key functionality.
Figure 7.8: Current menu
Settings and parameters for current measurement
Input
Selected channel [C1, C2, both]
Page 88

MI 3108 EurotestPV Measurements - Power & energy
88
Connection for current measurement
Figure 7.9: Leakage and load current measurements
Current measurement procedure
Select CURRENT function using the function selector keys.
Select input channel (optional).
Connect current clamp(s) to the instrument.
Connect the clamp(s) to the item to be tested (see figure 7.9).
Press the TEST key to start the continuous measurement.
Press the TEST key again to stop the measurement.
Store the result by pressing the MEM key (optional).
Figure 7.10: Examples of current measurement result
Displayed results for Current measurement:
I, I1, I2 …..…..Current
Note:
Channel C2 is intended for measuring with clamps A 1391 only.
Page 89

MI 3108 EurotestPV Measurements - Power & energy
89
7.5 Energy
In this function consumed and generated energy can be measured.
See chapter 4.2 Function selection for instructions on
key functionality.
Figure 7.11: Energy menu
Settings and parameters for the Energy measurement
I
MAX
Maximal expected TRMS current during measurement [I
range
, I
range
/10,
I
range
/100]
U
MAX
Maximal expected TRMS voltage during measurement [ 260 V, 500 V]
Connection for the Energy measurements
(See figure 7.2)
Energy measurement procedure
Select ENERGY sub-function using the function selector keys and / keys.
Connect the voltage test leads and current clamp to the instrument.
Connect the voltage test leads and current clamp to the item to be tested (see
figure 7.2).
Press the TEST key to start the measurement.
Press the TEST key again to stop the measurement.
Store the result by pressing the MEM key (optional).
Figure 7.12: Example of Energy measurement results
Displayed results for the Energy measurements:
E+ ............ consumed energy (load)
E-............. generated energy (source)
P .............. momentary active power during energy measurement
t…………. time
Notes:
Consider polarity and setup of current clamps (see chapter 4.4.8 Clamp settings).
I
MAX
and U
MAX
should be set high enough in order to avoid clamping of measured
signals. Clamping will results in wrong energy result.
If measured currents and voltages are lower than 20% of set I
MAX
, U
MAX
the
accuracy will be impaired.
Page 90

MI 3108 EurotestPV Data handling
90
8 Data handling
8.1 Memory organization
Measurement results together with all relevant parameters can be stored in the
instrument’s memory. After the measurement is completed, results can be stored to the
flash memory of the instrument, together with the sub-results and function parameters.
8.2 Data structure
The instrument’s memory place is organized in a four-level structure as follows:
Object (1
st
structure level, the highest level),
Distribution Board (2
nd
structure level),
Circuit, Earth Electrode, Bonding conductors (3
rd
structure level),
Connection (4
th
structure level).
OBJECT 001
DISTRIBUTION BOARD 001
CIRCUIT 001
CIRCUIT 002
...
CIRCUIT 199
EARTH ELECTRODE
BONDING Water
BONDING Oil
BONDING Lightning
BONDING Gas
BONDING Structural Steel
BONDING Other
BONDING Earthing conductor
CONNECTION 001
…
CONNECTION 199
DISTRIBUTION BOARD 002
CIRCUIT 001
CIRCUIT 002
...
CIRCUIT 199
EARTH ELECTRODE
BONDING Water
BONDING Oil
BONDING Lightning
BONDING Gas
BONDING Structural Steel
BONDING Other
BONDING Earthing conductor
CONNECTION 001
…
CONNECTION 199
DISTRIBUTION BOARD 199
CIRCUIT 001
CIRCUIT 002
...
CIRCUIT 199
EARTH ELECTRODE
BONDING Water
BONDING Oil
BONDING Lightning
Page 91

MI 3108 EurotestPV Data handling
91
BONDING Gas
BONDING Structural Steel
BONDING Other
BONDING Earthing conductor
CONNECTION 001
…
CONNECTION 199
OBJECT 002
...
OBJECT 199
Figure 8.1: Instrument memory organization
The memory structure is organized in a way that is suited to BS 7671 and other verification
documents (Electrical Installation Certificate, Periodic Inspection Report etc.). If the
results are stored in appropriate memory locations an automatic creation of a certificate/
report is possible.
Display organization
The installation structure field describes the location of the measurement (which object,
board, circuit, connection).
In the measurement field there is information about type and number of measurements
that belong to the selected structure element (object and block and circuit and
connection).
The main advantages of this system are:
Test results can be organized and grouped in a structured manner that reflects the
structure of the electrical installation.
Customized names of data structure elements can be uploaded from EurolinkPRO
PCSW.
Simple browsing through the structure and results.
Test certificates/ reports can be created with no or little modifications after
downloading results to a PC.
Figure 8.2: Installation structure and measurement fields
Installation structure elements
Memory operation menu
Data structure field
1
st
level:
OBJECT: Default location name (object and its
successive number).
2
nd
level:
Page 92

MI 3108 EurotestPV Data handling
92
D.BOARD: Default location name (distribution board
and its successive number).
3
rd
level:
CIRCUIT: Default location name (circuit and its
successive number).
EARTH ELECTR.: Default location name (earth
electrode).
BONDING xxx: Default location names (7 bonding
connections).
4
th
level:
CONNECTION: Default location name (connection and
its successive number).
003: No. of selected element.
No. of measurements in selected location
[No. of measurements in selected location and its sublocations]
Measurement field
No. of selected test result / No. of all stored test results in
selected location.
Type of stored measurement in the selected location.
8.3 Storing test results
After the completion of a test the results and parameters are ready for storing ( icon is
displayed in the information field). By pressing the MEM key, the user can store the
results.
Figure 8.3: Save test menu
Memory space available for storing results.
Keys in save test menu - installation structure field:
TAB
Selects the location element (Object / D. Board / Circuit or
Bonding or Electrode/ Connection)
UP / DOWN
Selects the location element in selected level.
MEM
Saves test results to the selected location and returns to the
measuring menu.
Function selector /
TEST
Exits back to main function menu.
Notes:
Page 93

MI 3108 EurotestPV Data handling
93
The instrument offers to store the result to the last selected location by default.
If the measurement is to be stored to the same location as the previous one just
press the MEM key twice.
8.4 Recalling test results
Press the MEM key in a main function menu when there is no result available for storing
or select MEMORY in the SETTINGS menu.
Figure 8.4: Recall menu - installation
structure field selected
Figure 8.5: Recall menu - measurements
field selected
Keys in recall memory menu (installation structure field):
TAB
Selects the location element (Object / D. Board / Circuit or
Bonding or Electrode / Connection).
UP / DOWN
Selects the location element in selected level.
Function selector /
ESC
Exits back to main function menu.
TEST
Enters measurements field.
Keys in recall memory menu (measurements field):
UP / DOWN
Selects the stored measurement.
TAB / ESC
Returns to installation structure field.
Function selector
Exits back to main function menu.
TEST
View selected measurement results.
Figure 8.6: Example of recalled measurement result
Keys in recall memory menu (measurement results are displayed)
UP / DOWN
Displays measurement results stored in selected location
HELP
Toggle between multiple result screens.
Page 94

MI 3108 EurotestPV Data handling
94
MEM / ESC
Returns to measurements field.
Function selector /
TEST
Exits back to main function menu.
8.5 Clearing stored data
8.5.1 Clearing complete memory content
Select CLEAR ALL MEMORY in MEMORY menu. A warning (see fig. 6.6) will be
displayed.
Figure 8.7: Clear all memory
Keys in clear all memory menu
TEST
Confirms clearing of complete memory content. (YES
must be selected with / keys).
Function
selectors
Exits back to main function menu without changes.
Figure 8.8: Clearing memory in progress
8.5.2 Clearing measurement(s) in selected location and its sub-
locations
Select DELETE RESULTS in MEMORY menu.
Page 95

MI 3108 EurotestPV Data handling
95
Figure 8.9: Clear measurements menu (data structure field selected)
Keys in delete results menu (installation structure field selected):
TAB
Selects the location element (Object / D. Board / Circuit or
Bonding or Electrode / Connection).
UP / DOWN
Selects the location element in selected level.
Function selector
Exits back to main function menu.
ESC
Exits back to memory menu.
TEST
Enters dialog box for deleting all measurements in selected
location and its sub-locations.
Keys in dialog box for clearing results in selected location and its sub-locations:
TEST
Deletes all results in selected location/ sub-location(s)
MEM / ESC
Exits back to installation structure field menu without
changes.
Function selector
Exits back to main function menu without changes.
8.5.3 Clearing individual measurements
Select DELETE RESULTS in MEMORY menu.
Figure 8.10: Menu for clearing individual measurement (installation structure field
selected)
Keys in delete results menu (installation structure field selected):
TAB
Selects the location element (Object / D. Board / Circuit or
Bonding or Electrode/ Connection).
UP / DOWN
Selects the location element in selected level.
Function selector
Exits back to main function menu.
ESC
Exits back to memory menu.
MEM
Enters measurements field.
Keys in delete results menu (measurements field selected):
TAB / ESC
Returns to installation structure field.
UP / DOWN
Selects measurement.
TEST
Opens dialog box for confirmation to clear selected
measurement.
Function selector
Exits back to main function menu without changes.
Page 96
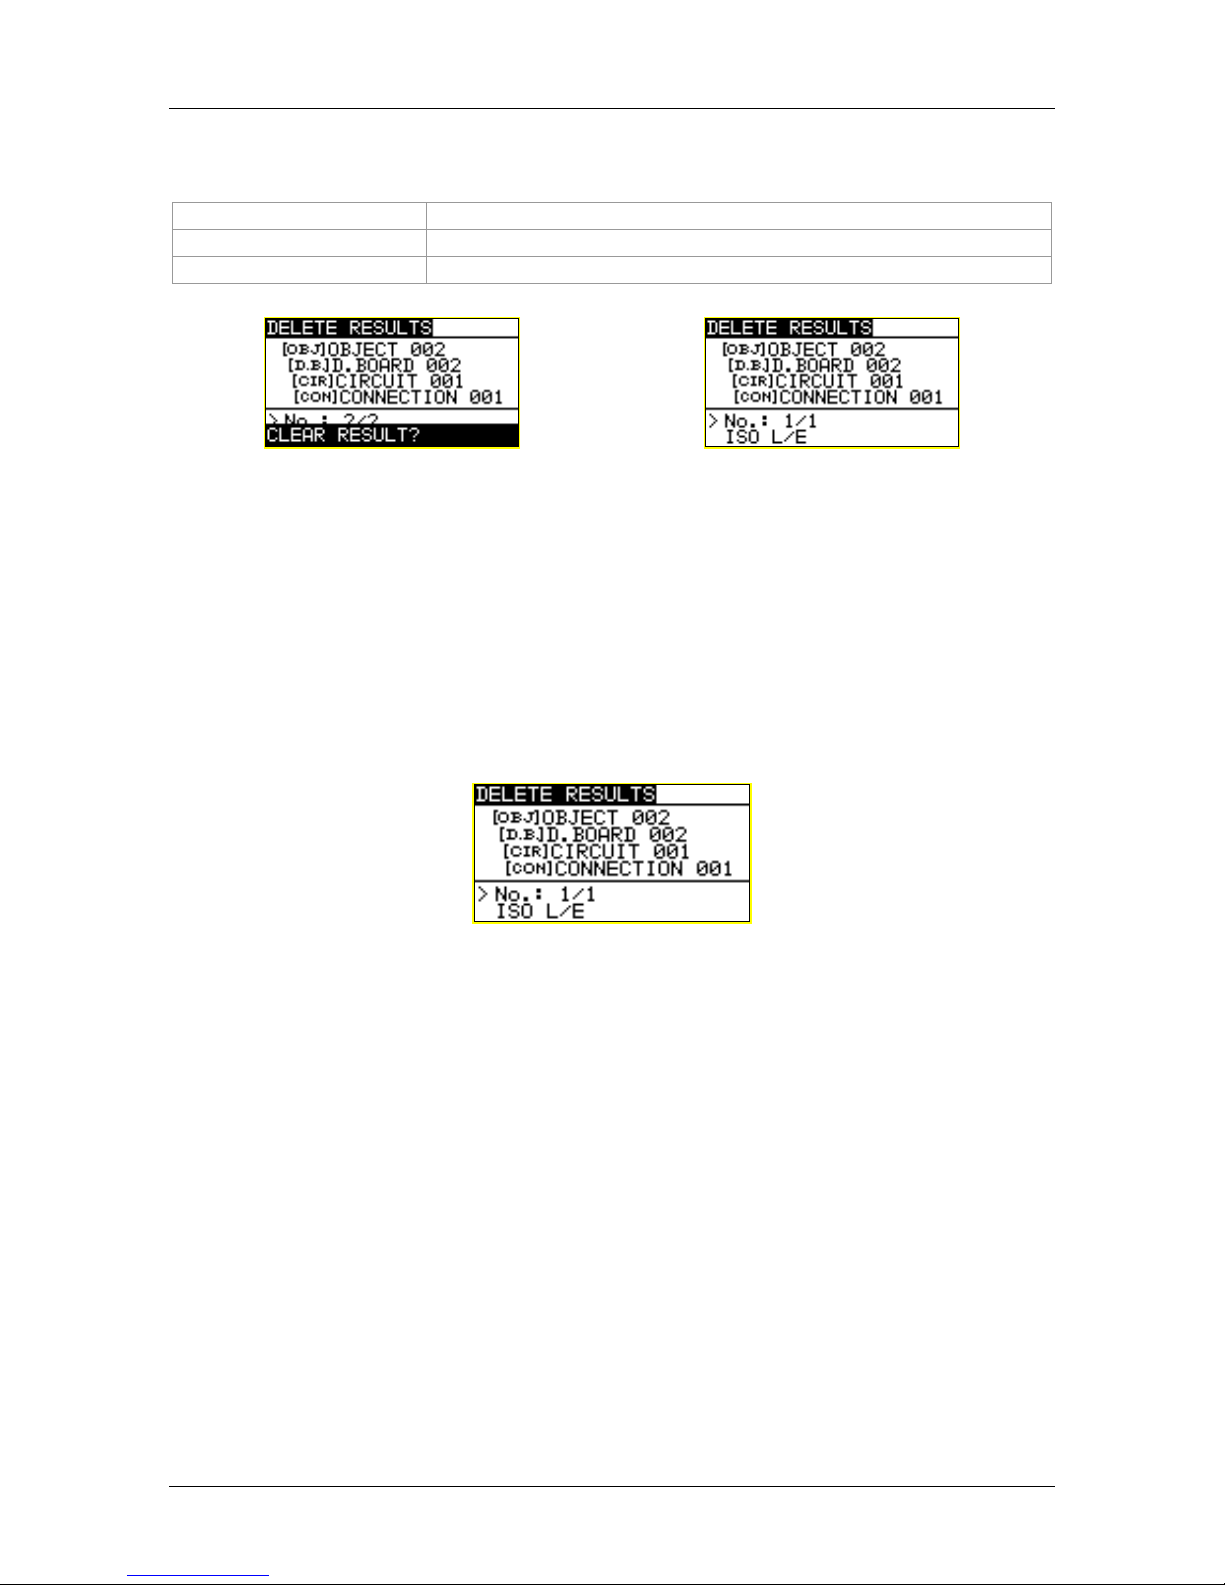
MI 3108 EurotestPV Data handling
96
Keys in dialog for confirmation to clear selected result(s):
TEST
Deletes selected measurement result.
MEM / TAB / ESC
Exits back to measurements field without changes.
Function selector
Exits back to main function menu without changes.
Figure 8.11: Dialog for confirmation
Figure 8.12: Display after measurement
was cleared
8.5.4 Renaming installation structure elements (upload from PC)
Default installation structure elements are ‘Object’, ‘D.Board’, ‘Circuit’, ‘Electrode’ ‘Circuit’
and ‘Connection’. In the PCSW package EurolinkPRO default names can be changed
with customized names that corresponds the installation under test. Refer to PCSW
EurolinkPRO HELP for information how to upload customized installation names to the
instrument.
Figure 8.13: Example of menu with customized installation structure names
8.5.5 Renaming installation structure elements with serial barcode
reader or RFID reader
Default installation structure elements are ‘Object’, ‘D.Board’, ‘Earth Electr.’ and
‘Connection’. When the instrument is in the Save results menu location ID can be scanned
from a barcode label with the barcode reader or can be read from a RFID tag with the
RFID reader.
Page 97

MI 3108 EurotestPV Data handling
97
Figure 8.14: Connection of the barcode reader and RFID reader
How to change the name of memory location
Connect the barcode reader or RFID reader to the instrument.
Make sure that RS232 is selected in Communication menu.
In Save menu select memory location to be renamed.
A new location name (scanned from a barcode label or a RFID tag) will be
accepted by the instrument. A successful receive of a barcode or RFID tag is
confirmed by two short confirmation beeps.
Note:
Use only barcode readers and RFID readers delivered by Metrel or authorized
distributor.
Page 98

MI 3108 EurotestPV Data handling
98
8.6 Communication
There are two communication interfaces available on the instrument: USB or RS 232.
With the optional Bluetooth dongle A 1436 the instrument can communicate via Bluetooth
too.
8.6.1 USB and RS232 communication
The instrument automatically selects the communication mode according to detected
interface. USB interface has priority.
Figure 8.15: Interface connection for data transfer over PC COM port
How to configure a USB link between instrument and PC
Connect a PC USB port to the instrument USB connector using the USB interface
cable.
Switch on the PC and the instrument.
Run the EurolinkPRO program.
The PC and the instrument will automatically recognize each other.
The instrument is prepared to communicate with the PC.
How to configure a RS232 link between instrument and PC
Connect a PC COM port to the instrument PS/2 connector using the PS/2 -
RS232 serial communication cable;
Switch on the PC and the instrument.
Set communication settings to RS232.
Run the EurolinkPRO program.
Set COM port and baud rate.
The instrument is prepared to communicate with the PC.
The program EurolinkPRO is a PC software running on Windows XP, Windows Vista,
Windows 7, Windows 8, and Windows 10. Read the file README_EuroLink.txt on CD for
instructions about installing and running the program.
Notes:
USB drivers should be installed on PC before using the USB interface. Refer to
USB installation instructions available on installation CD.
The RS232 port supports other services too (for example upgrading the
instrument, connections of sensors, adapters, etc.
Page 99

MI 3108 EurotestPV Data handling
99
Bluetooth communication
How to configure a Bluetooth link between instrument and PC
For Bluetooth communication with PC a Standard Serial Port over Bluetooth link for
Bluetooth dongle A 1436 must be configured first.
Switch Off and On the instrument.
Be sure that the Bluetooth dongle A 1436 is properly initialized. If not the
Bluetooth dongle must be initialized as described in chapter 4.4.7
Communication.
On PC configure a Standard Serial Port to enable communication over Bluetooth
link between instrument and PC. Usually no code for pairing the devices is
needed.
Run the EurolinkPRO program.
The PC and the instrument will automatically recognize each other.
The instrument is prepared to communicate with the PC.
How to configure a Bluetooth link between instrument and Android device
Switch Off and On the instrument.
Be sure that the Bluetooth dongle A 1436 is properly initialized. If not the
Bluetooth dongle must be initialized as described in chapter 4.4.7
Communication.
Some Android applications automatically carry out the setup of a Bluetooth
connection. It is preferred to use this option if it exists.
This option is supported by Metrel's Android applications.
If this option is not supported by the selected Android application then configure
a Bluetooth link via Android device’s Bluetooth configuration tool. Usually no code
for pairing the devices is needed.
The instrument and Android device are ready to communicate.
How to configure a Bluetooth link between EurotestPV instrument and Metrel
Powermeter
Switch Off and On the EurotestPV instrument.
Be sure that the EurotestPV Bluetooth dongle A 1436 is connected and properly
initialized. If not the Bluetooth dongle must be initialized as described in chapter
4.4.7 Communication.
Switch On the Metrel Powermeter. A second Bluetooth dongle A 1436 should be
inserted to the Powermeter’s PS/2 port.
Be sure that the second Bluetooth dongle A 1436 is properly initialized (as
PowerQ device). If not, the Bluetooth dongle must be initialized as described in
chapter 4.4.7 Communication.
The settings in instrument’s Communication menu (see chapter 4.4.7
Communication) should be as following:
COM PORT: BT DONGLE
BLUETOOTH DEVICES: PowerQ
The EurotestPV instrument and Powermeter are ready to communicate.
Page 100

MI 3108 EurotestPV Data handling
100
Notes:
Sometimes there will be a demand from the PC or Android device to enter the
code. Enter code ‘NNNN’ to correctly configure the Bluetooth link.
The name of a correctly configured Bluetooth device must consist of the instrument
type plus serial number, eg. MI 3108-12240429D. If the Bluetooth dongle got
another name, the configuration must be repeated.
 Loading...