

Page 1

TE-DVR-MM User Manual
iBeamUSA.com
MetraDealer.com
techsupport@metra-autosound.com
� TECH SUPPORT
l ::: J
800-253-8324
Page 2
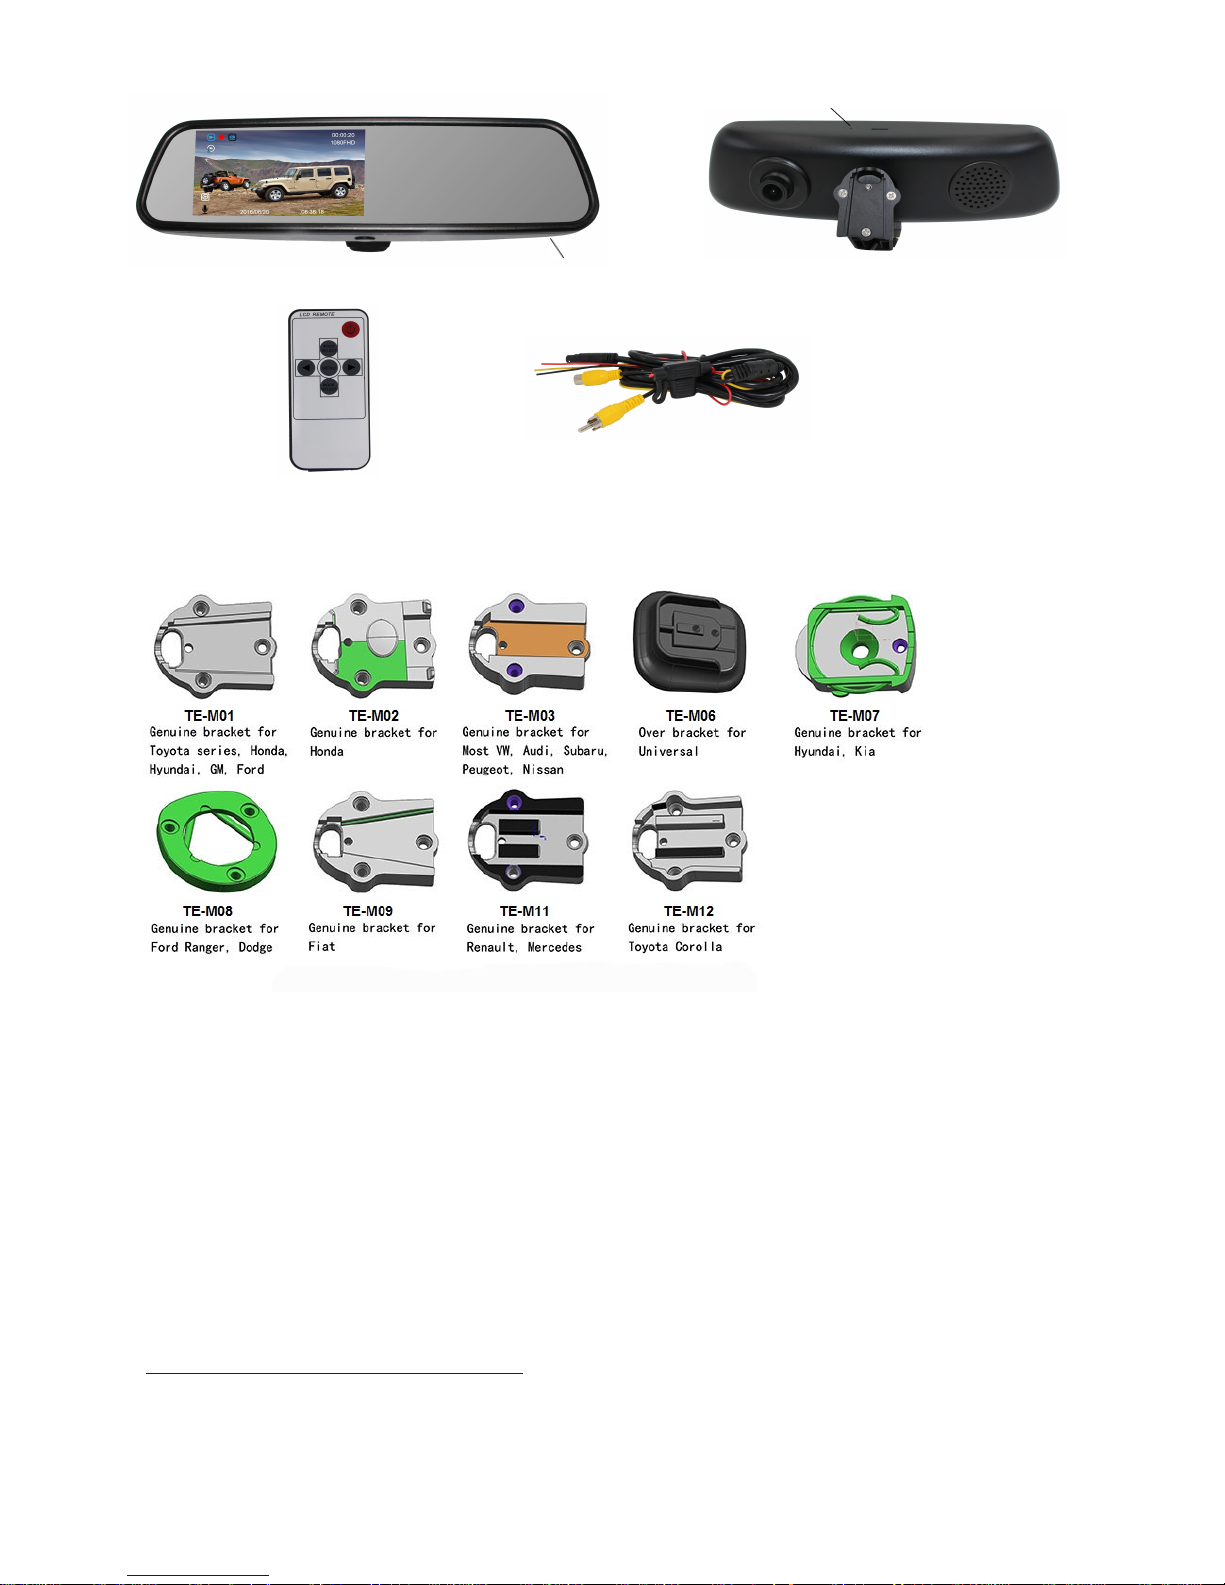
1. Mirror
(Res et bu tto n)
(Face )
(Remo te control)
2. OE Brackets
IR Receiver
(Back )
Wire connection:
Red wire: Battery +
Yellow wire: ACC +
Black wire: Ground
(Power cable)
3. Operation
Rear View:
AV2 connects to the reverse camera, and when in reverse the monitor is
automatically switched to display real-time backup image. After reverse is
disengaged the display will automatically switches back to the previous channel
condition.
When on DVR / AV1 Source:
A short button press: on / off screen
A long button press: Switch between DVR & AV1
·Intelligent Ambient Sensor Function:
The screen brightness will be adjusted according to ambient light changes. In high
light condition, the screen brightness will be higher; In dark condition, the screen
brightness will be weaker.
1
Page 3
Remote Control Operation:
Power Button: on/off DVR Machine
Under DVR condition,
Press Menu Button: on/off Recording
How to Set Time:
Under Non Recording Condition
① Press Mode Select button twice enters Setup, and ▶ for Setup selection, then Menu button enters
Date Setup.
② Press ▶ / ◀ for Date Selection, and Menu button goes to the next setup, then ▶ / ◀ for Time
Selection.
③ After time is set, press Mode Select button to return to the upper menu
Mode Setup:
Under Non Recording Condition
press Video Select button switch between Video / Photo / Playback
HOW TO SET PARKING RECORD
Under AV1, press Menu button, then Mode Select button until to Parking Record is selected. Press
Menu, then press ▶ / ◀ to switch between OFF / 12 H / 24H selection.
Short Cuts
Under Recording Condition
① ▶ On / Off Sound ② ◀ On / Off motion detection ③ Video Select Button: Lock / Unlock video
Under Non-Recording Condition
① ◀ Zoom Out ② ▶ Zoom In
Attention: When Motion Detection (Sport Detection) On, DVR recording is not continual, please shut off
this function during normal use.
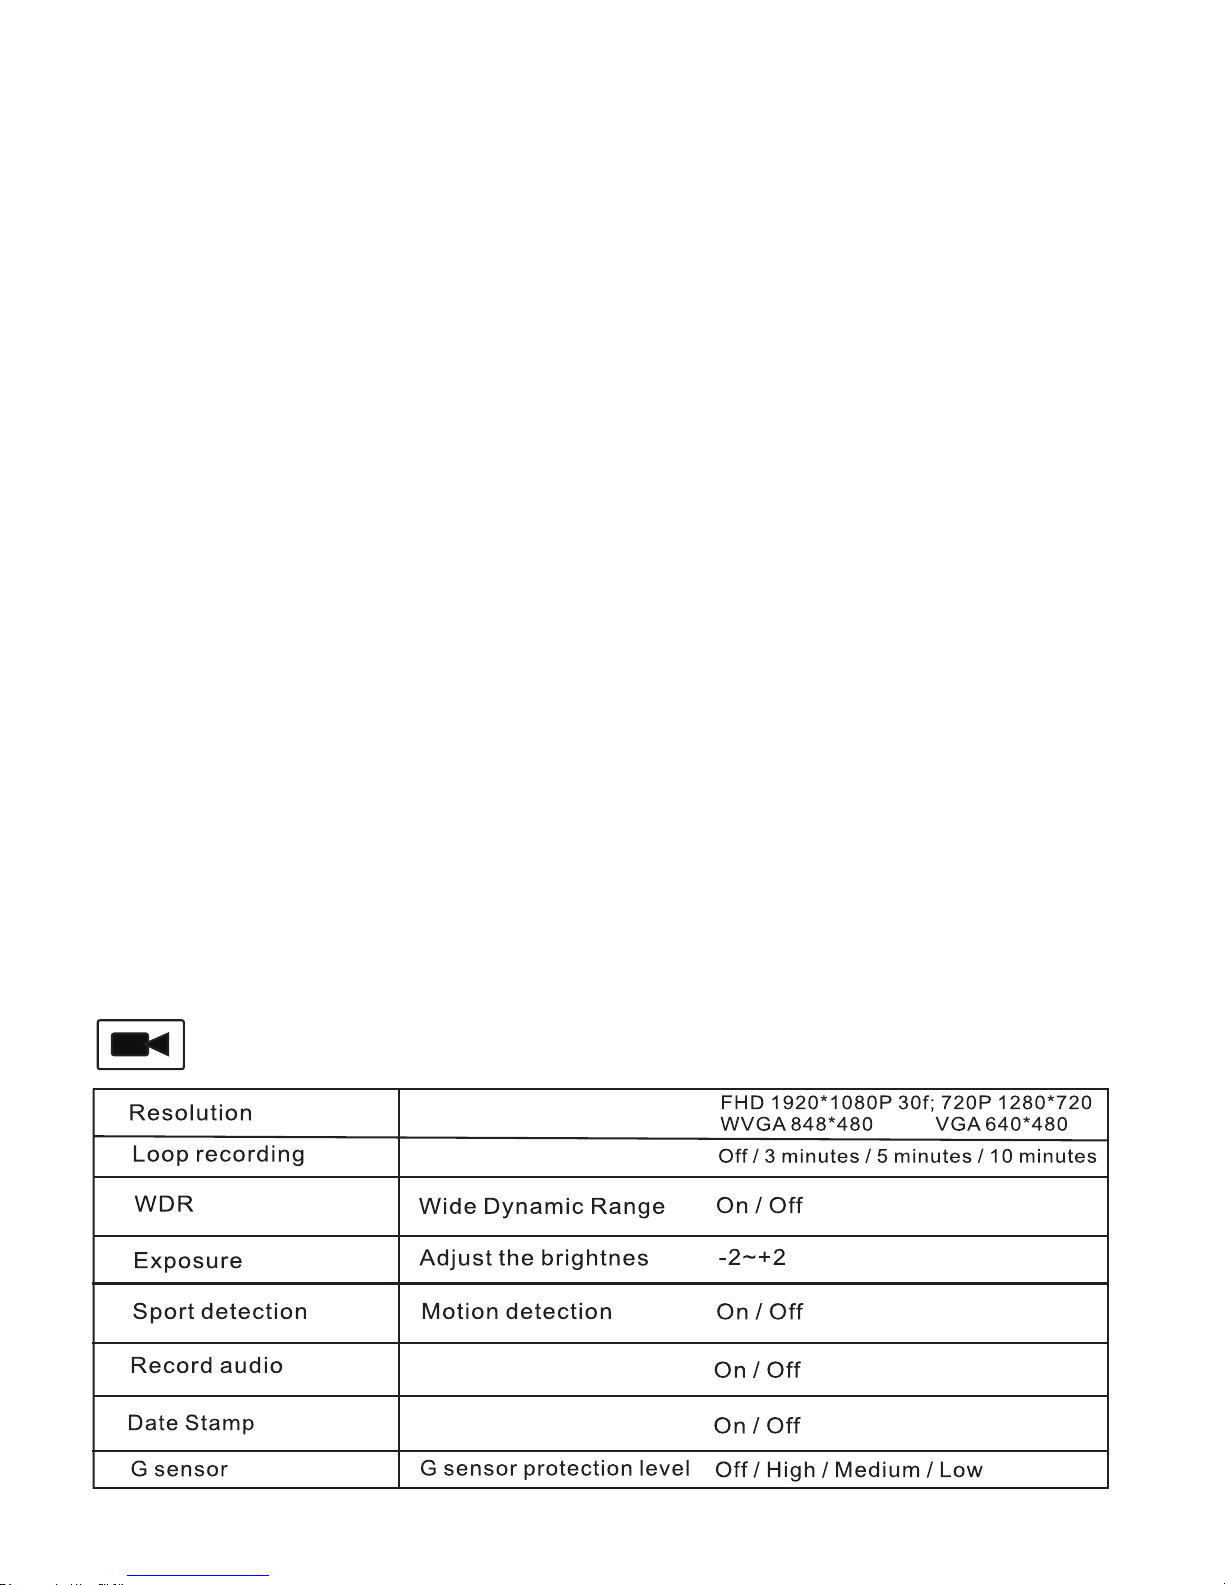
4. DVR Menu
Video
Select video resolution
Select video loop time
Record video audio
Date stamp on video
2
Page 4

Still capture
Playback
Setting
Delete videos or photos
3
Page 5

5. Parameters
4.5" TFT LCD, Ultra high Brightness, Resolution:" TFT LCD,
4
Built in Hi-Fi speaker
Built in
4
Page 6

Attention
1) When connecting with power cable, please make sure not to mistake the positive and
negative pole, otherwise the fuse will blow immediately for security protection. If it happens,
please replace the blown fuse with a new one with same specification, after connecting properly
to the right pole. Don’t randomly increase the current rating of the fuse, and NEVER use metal
wire as a substitute.
2) DON’T ROTATE the DVR camera heavily, and DON’T PUSH the DVR camera in.
3) If the DVR freezes, please reset it pushing the reset button with a pin.
Notes:
_______________________________________________________________________________
_______________________________________________________________________________
_______________________________________________________________________________
_______________________________________________________________________________
_______________________________________________________________________________
_______________________________________________________________________________
_______________________________________________________________________________
_______________________________________________________________________________
_______________________________________________________________________________
_______________________________________________________________________________
_______________________________________________________________________________
_______________________________________________________________________________
_______________________________________________________________________________
_______________________________________________________________________________
5
Page 7

_______________________________________________________________________________
_______________________________________________________________________________
_______________________________________________________________________________
_______________________________________________________________________________
_______________________________________________________________________________
_______________________________________________________________________________
_______________________________________________________________________________
_______________________________________________________________________________
_______________________________________________________________________________
_______________________________________________________________________________
_______________________________________________________________________________
_______________________________________________________________________________
_______________________________________________________________________________
_______________________________________________________________________________
_______________________________________________________________________________
_______________________________________________________________________________
_______________________________________________________________________________
_______________________________________________________________________________
_______________________________________________________________________________
_______________________________________________________________________________
_______________________________________________________________________________
_______________________________________________________________________________
_______________________________________________________________________________
Page 8

IMPORTANT
If you
of this
are having difficulties with the installation
product, please call our Tech Support line
at 1-800-253-TECH. Before doing so, look over
the instructions a second time, and make sure
the installation was performed exactly as the
instructions are stated. Please have the vehicle
apart and ready to perform troubleshooting
steps before calling.
Version 1.0
KNOWLEDGE IS POWER
Enhance your installation and fabrication skills by
enrolling in the most recognized and respected
mobile electronics school in our industry.
Log onto www.installerinstitute.com or call
800-354-6782 for more information and take steps
toward a better tomorrow.
Metra recommends MECP
certified technicians
When connecting with
negative pole, otherwise the fuse
please replace the blown fuse with a new one with same specification, after connecting
properly to the right pole. Don’t randomly increase the current rating of the fuse, and NEVER
use metal wire as a substitute.
power cable, please make sure not to mistake the positive and
will blow
immediately for security protection. If it happens,
 Loading...