

Page 1
INSTALLATION INSTRUCTIONS FOR PART SWC-01
ON
ON
CAR
RADIO
1 2 3 4 5 6 7 8 1 2 3 4 5 6 7 8
RADIO APPLICATIONS
Alpine, Clarion, Denon, Eclipse, JVC
Kenwood, Panasonic, Pioneer, Pioneer2, Sony
VEHICLE APPLICATIONS
hevrolet
C
Avalanche 2002
valanche 2003-2005
A
lazer 1999-2002
B
Blazer 2003-2005
amaro 2000-2002
C
quinox 2005
E
Impala 2000-2005
umina 1998-1999
L
Malibu 2004-2005
onte Carlo 1998-1999
M
onta Carlo 2000-2005
M
ontiac
P
Aztek 2001-2005
Bonneville 1998-1999
Firebird 1998-2002
G6 2005
Grand Am 1998-2000
Grand Am 2001-2005
Grand Prix 1999-2003
GTO 2004-2005
Montana 1999
Montana 2000-2005
Dodge
Intrepid 2001
Intrepid 2002-2004
Ram 2002-2004
Stratus 2001
Stratus 2002-2004
ord
F
Crown Victoria 19982002
Excursion 1998-2003
Excursion 2004
Expedition 1998-2003
Expedition 2004
Explorer 1998-2004
F150 2004
Focus 2002
Freestar 2004
Thunderbird 2002
Windstar 1999-2002
Jeep
Grand Cherokee 1999
Grand Cherokee 2000-2001
Grand Cherokee 2002-2004
Liberty 2002-2004
hevrolet
C
S10 1999-2002
10 2003-2004
S
ilverado 2001-2002
S
Silverado 2003-2005
SR 2003-2005
S
uburban 2001-2002
S
Suburban 2003-2005
ahoe 2001-2002
T
Tahoe 2003-2005
railblazer 2002-2005
T
Venture 1998-1999
Venture 2000-2005
GMC
Envoy 1999-2001
Envoy 2002-2005
Jimmy 1999-2002
Jimmy 2003
Sierra 2001-2002
Sierra 2003-2005
Sonoma 1999-2002
Sonoma 2003-2004
Yukon 2001-2002
Yukon 2003-2005
SWC-01
uick
B
Century 1998-2003
entury 2004-2005
C
esabre 1998-1999
L
Park Ave. 1998-2005
ainier 2004-2005
R
Rendezvous 2002-2005
egal 1998-2003
R
egal 2004
R
Riviera 1998-1999
kylark 1998
S
Hummer
H2 2003-2005
Isuzu
Ascender 2005
Oldsmobile
Alero 1999-2000
Alero 2001-2004
Aurora 1996-1999
Bravada 1999-2001
Bravada 2002-2004
Chrysler
300M 2001
300M 2002-2004
Sebring 2001
Sebring 2002-2004
Cadillac
atera 1997-2001
C
CTS 2003-2005
Deville 1997-2005
ldorado 1997-2002
E
Escalade 2002
scalade 2003-2005
E
Seville 1997-2004
SRX 2004-2005
LR 2004-2005
X
ldsmobile
O
Eighty-Eight 1998-1999
Intrigue 1998-2001
Intrigue 2002
LSS 1998
Silhouette 1998-1999
Silhouette 2000-2004
Dodge
Caravan 2001
Caravan 2002-2004
Dakota 2001
Dakota 2002-2003
Durango 2001
Durango 2002-2003
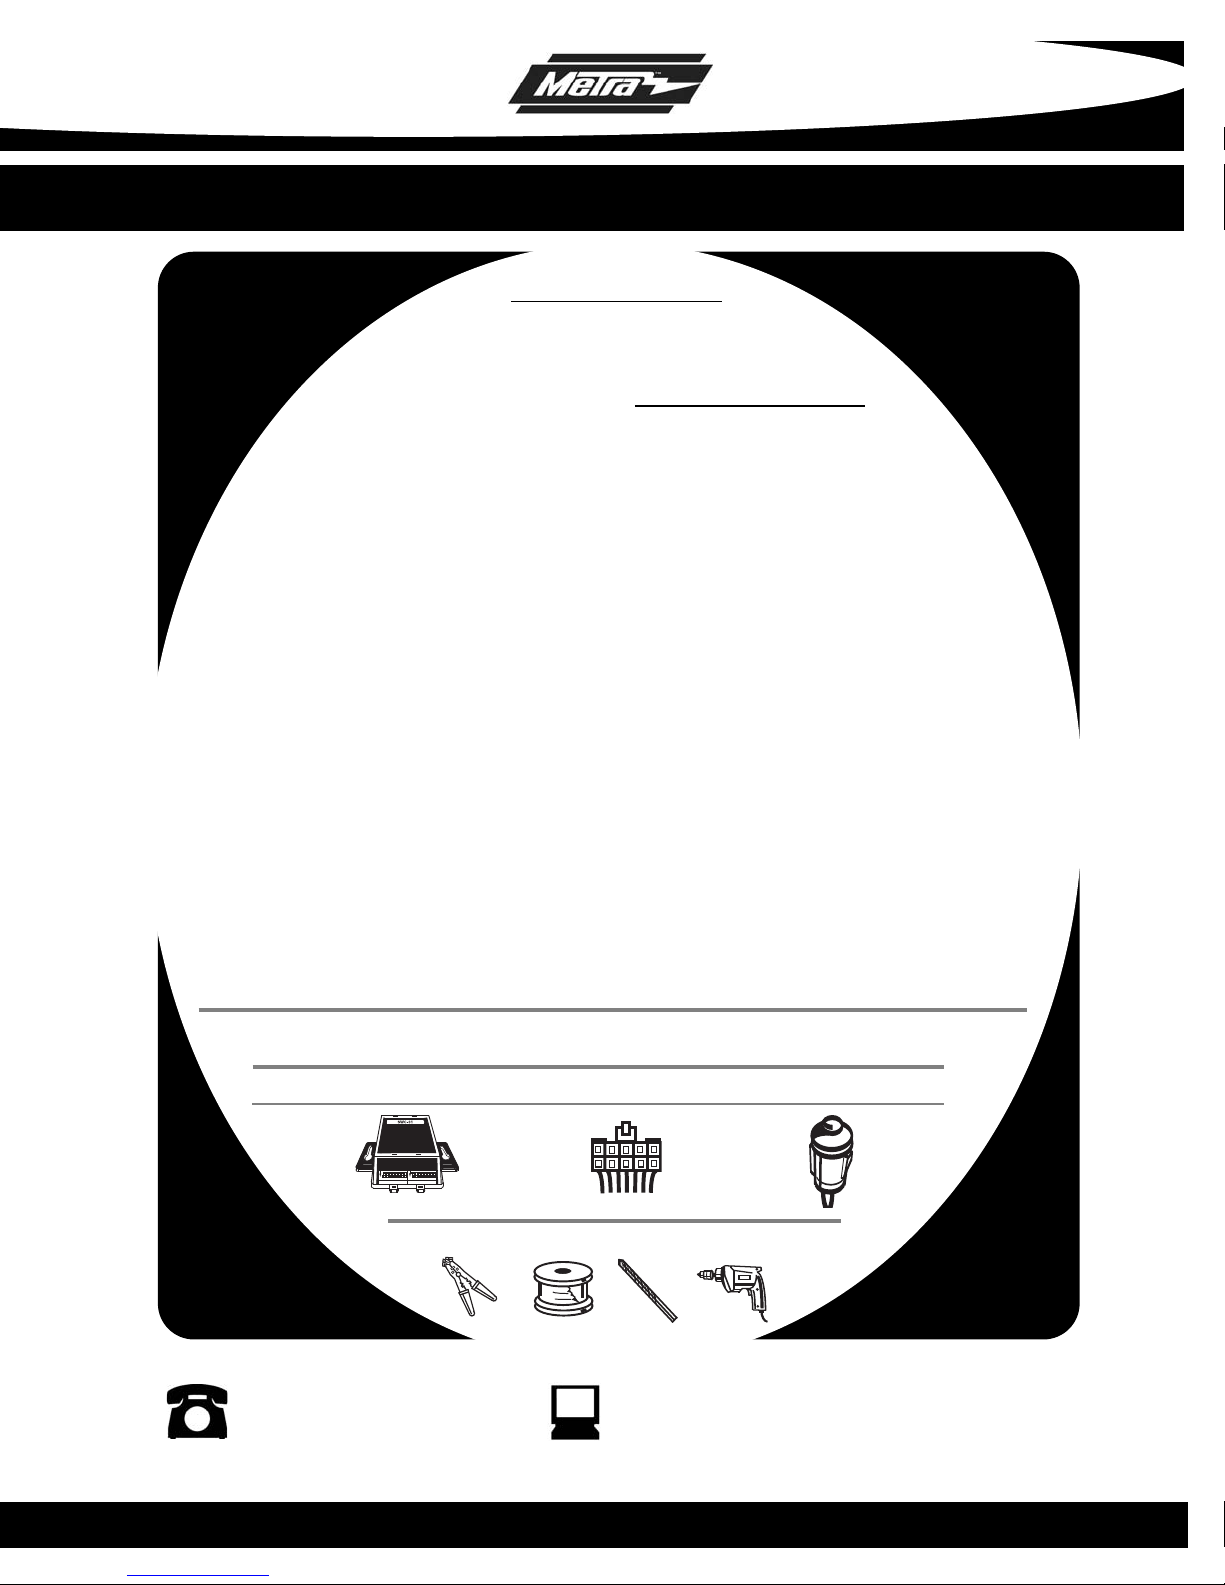
KIT FEATURES: The SWC-01 is designed to retain the factory steering wheel controls that are normally
lost when replacing the original factory radio with an aftermarket radio.
incoln
L
Aviator 2000
Continental 1998-2002
LS 2000-2002
Navigator 1999-2003
Town Car 1998-2002
Mercury
Grand Marquis 1998-2002
Marauder 2003
Mountaineer 1999-2001
Mountaineer 2002-2003
Villager 1999-2002
KIT COMPONENTS:
A) SWC-01 B) 10 Way Wire Harness C) Infrared LED with Harness
A
1-800-221-0932 www.metraonline.com
© COPYRIGHT 2004 METRA ELECTRONICS CORPORATION
B
TOOLS REQUIRED:
Wire strippers - Tape - 5/16” Drill Bit - Drill
C
Page 2

SWC-01
1-800-221-0932 www.metraonline.com
© COPYRIGHT 2004 METRA ELECTRONICS CORPORATION
Page 3

SWC-01
- Wiring the SWC-01 ---------------------------------------------------------- 1
- Radio DIP Switch Settings---------------------------------------- 2
- Vehicle Applications--------------------------------------------------------- 3
- 20 - Way GM Plug -----------------------------------------------------------3
- 24 - Way GM Plug------------------------------------------------------ 4,5,6
- 32 - Way GM Plug---------------------------------------------------------7,8
- 22 - Way Chrysler Plug------------------------------------------------------9
- 2 - Way Chrysler Plug------------------------------------------------------10
- 20 - Way Ford Plug ---------------------------------------------------------11
- 24 - Way Ford Plug ---------------------------------------------------------12
- 17 - Way Ford Plug ---------------------------------------------------------13
- 16 and 20 - Way VW Plugs ------------------------------------------------14
- Mounting the Infrared L.E.D.----------------------------------------------15
- Final Testing-----------------------------------------------------------------16
TABLE OF CONTENTS
Page 4
SWC-01
ON
ON
CAR
RADIO
1 2 3 4 5 6 7 8 1 2 3 4 5 6 7 8
ON
ON
CAR
RADIO
1 2 3 4 5 6 7 8 1 2 3 4 5 6 7 8
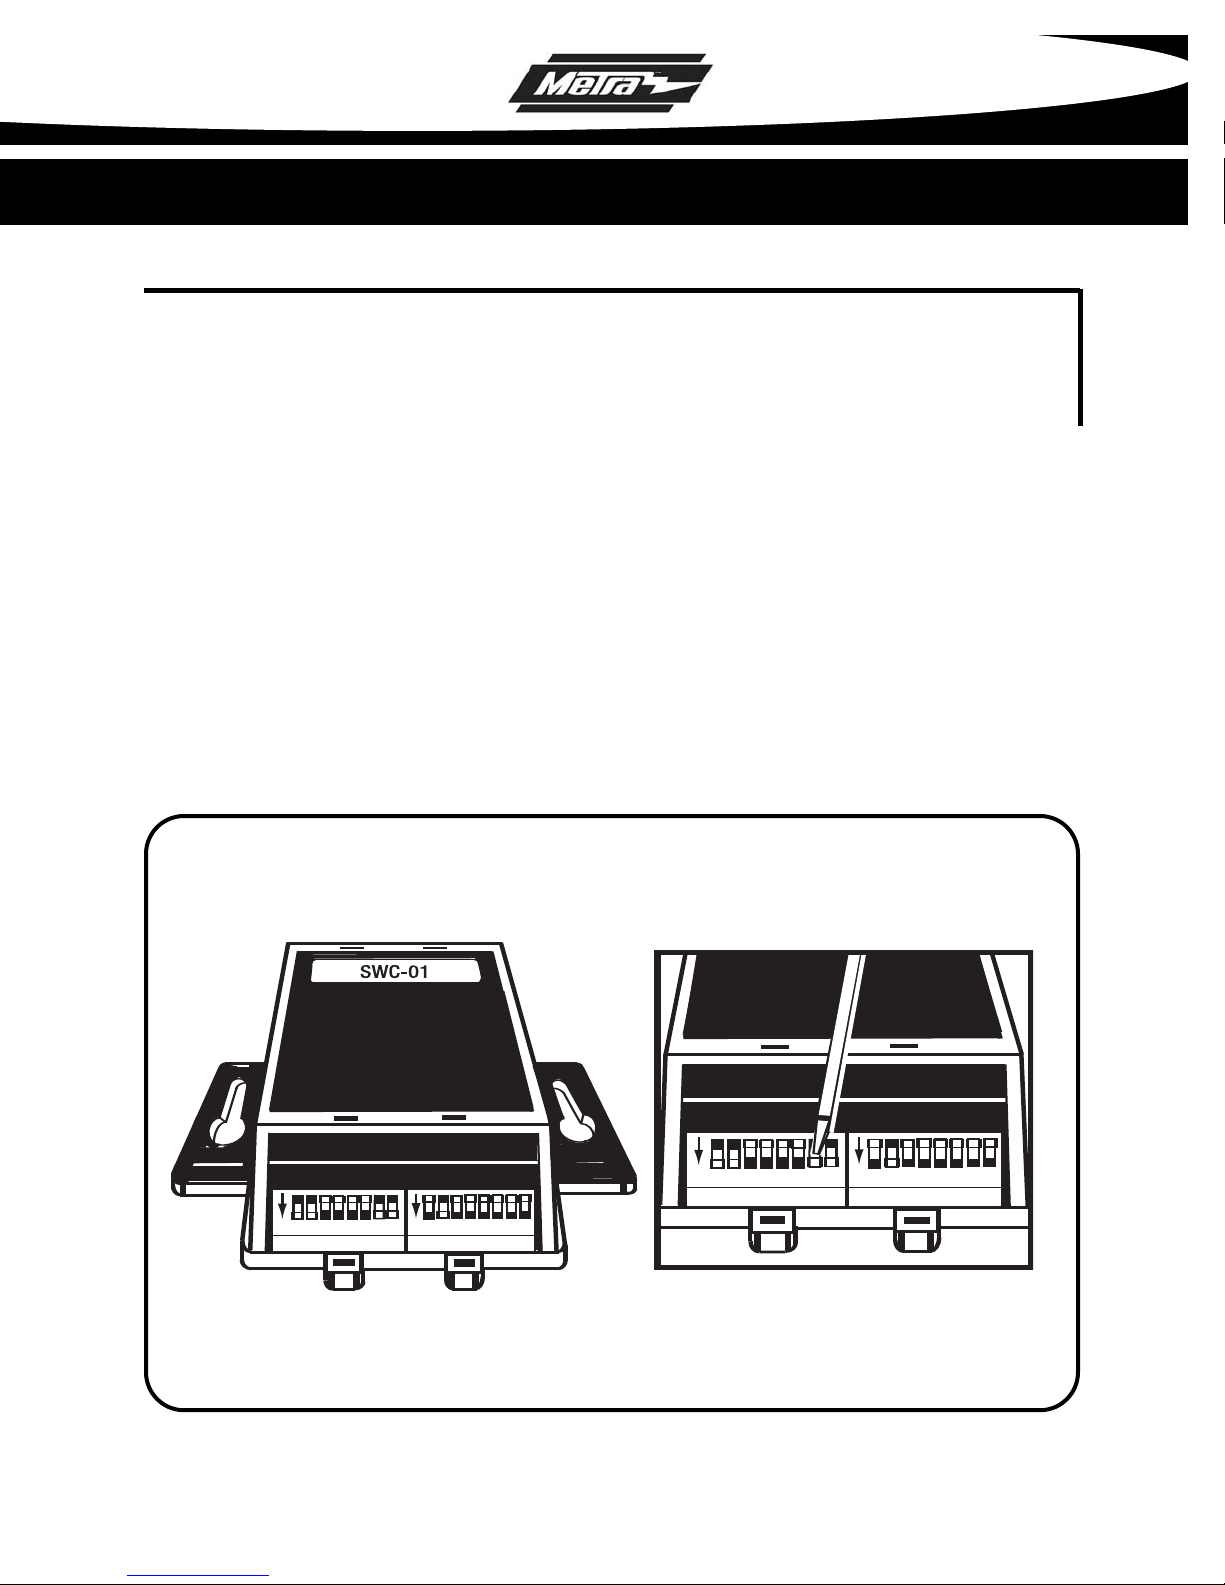
Refer to Vehicle Chart to select the proper dip switch position and move
switch "up" or "down" with a small screwdriver to select vehicle model,
radio brand, and external CD changer or external tuner/XM if present.
Example above represents a Chevrolet Suburban 2004-2005 with Sony radio
and no external CD changer or external tuner/XM present.
Wiring The SWC-01
Red (+) wire: connect this wire to a fused 12 volt accessory wire
Black (-) wire: connect this wire to the vehicles chassis ground
Green wire: steering wheel control wire for resistive type systems (see applications)
Pink wire: steering wheel control wire for Data type systems (see applications)
• * Note: Do NOT plug in wiring harness into the SWC-01 until all DIP switch settings are set.
Radio DIP Switch Settings
If you look at the DIP switches on SWC-01 you will see that they are separated into 2
groups of 8 DIP
labeled CAR. The chart below will show the DIP switch settings for the RADIO side.
The CAR side will be listed with each individual vehicle inside this manual.
switches each. One side is labeled RADIO and the other side is
1
Page 5

SWC-01
Radio DIP Switch Settings
Locate the radio you are installing and set the DIP switches according to the chart
below:
Radio Switch 1 Switch 2 Switch 3 Switch 4 Switch 5 Switch 6 Switch 7 Switch 8
Alpine up up down up up up up up
Clarion down down up up up up up up
Denon down up down up up up up up
Eclipse up up up down up up up up
JVC down up down up up up up up
Kenwood up up up up up up up up
Panasonic up down down up up up up up
Pioneer* down up up up up up * *
Pioneer2* down down down up up up * *
Sony up down up up up up up up
• * Note: For Pioneer radios installed with a Pioneer CD Changer or Satellite tuner use the following DIP switch
settings:
Without cd changer or satellite tuner – Switch 7 up, Switch 8 up
With cd changer only– Switch 7 up, Switch 8 down
With satellite tuner only– Switch 7 down, Switch 8 up
With cd changer and satellite tuner – Switch 7 down, Switch 8 down
2
Page 6
SWC-01
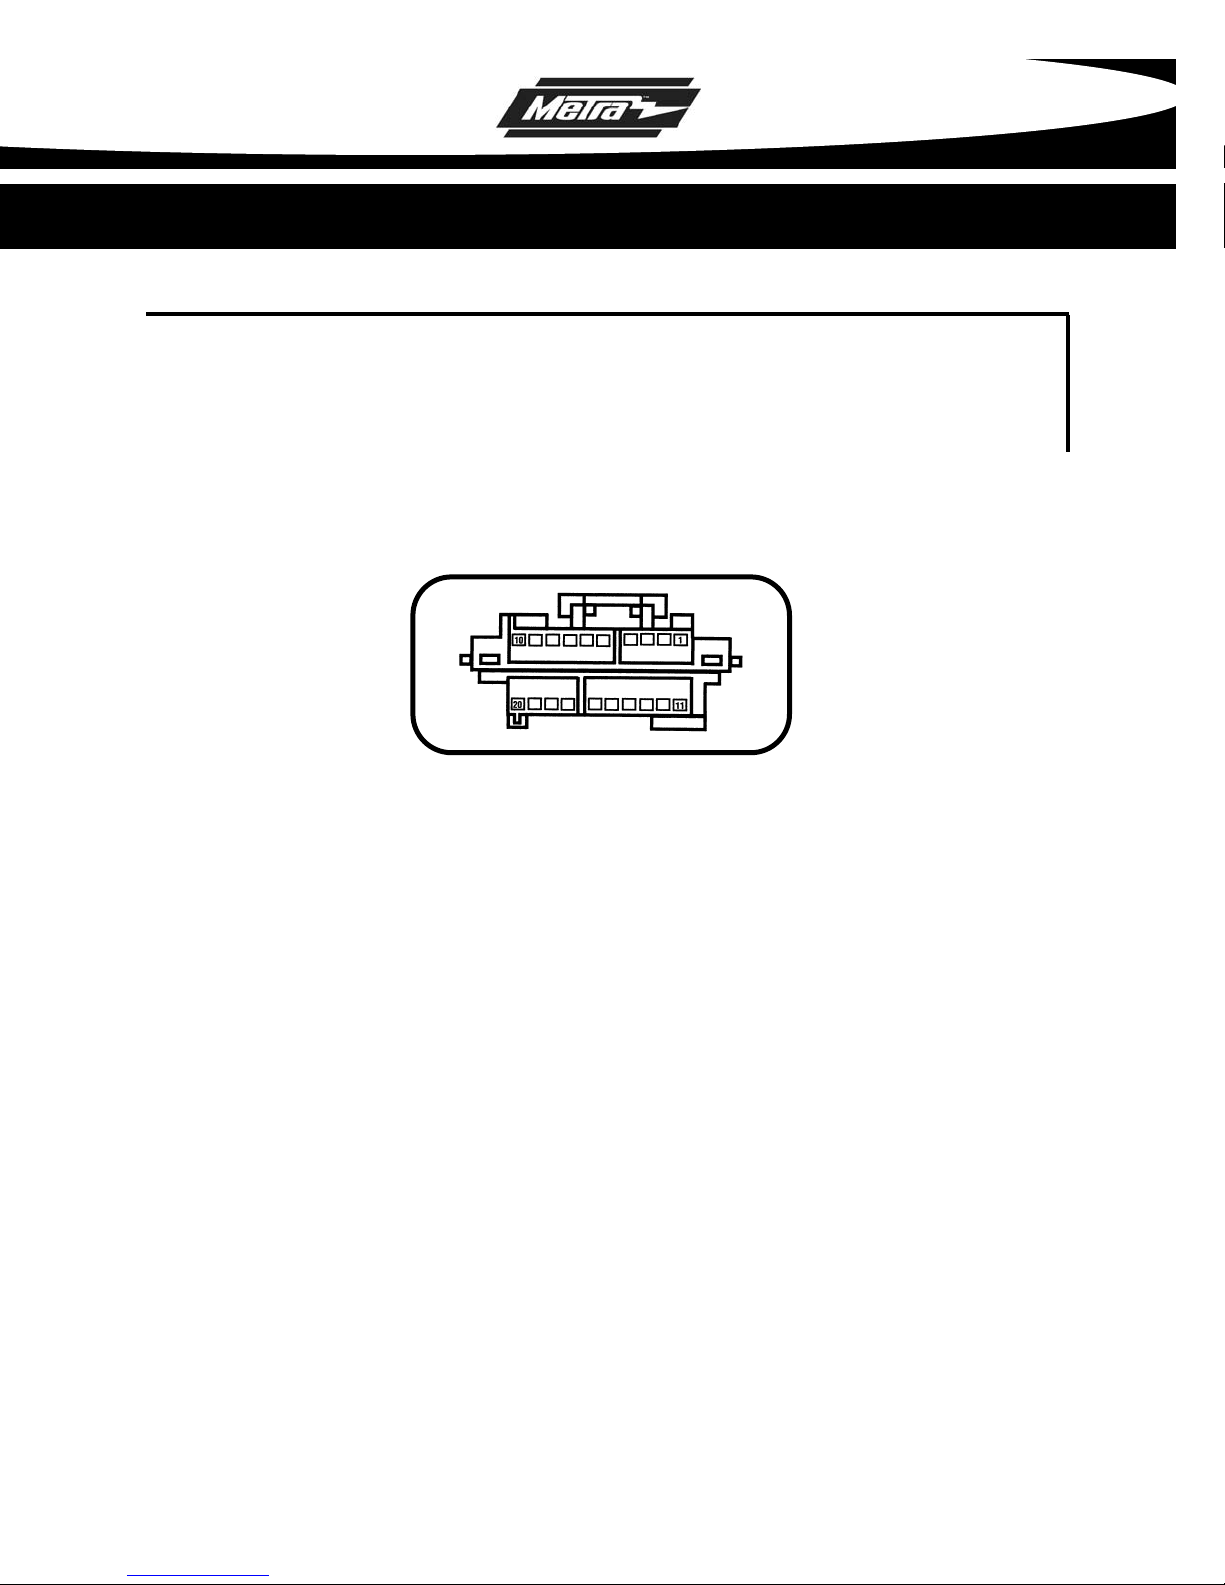
Vehicle Applications
Each application will have a connector view of the plug that is in the vehicle along
with the wire color and location. The CAR DIP switch settings for the vehicles will
also be listed along with any other action required to finish the wiring in the vehicle.
20 - Way GM Plug
Year Make Model Pin Wire Color
Location
2002 Cadillac Escalade 14 Dk. Blue
2002 Chevy Avalanche 14 Dk. Blue
1999-02 Chevy Blazer 14 Dk. Blue
2000-02 Chevy Camaro 14 Dk. Blue
1999-02 Chevy S10 14 Dk. Blue
2001-02 Chevy Silverado 14 Dk. Blue
2001-02 Chevy Suburban 14 Dk. Blue
2001-02 Chevy Tahoe 14 Dk. Blue
1998-99 Chevy Venture 14 Dk. Blue
1999-01 GMC Envoy 14 Dk. Blue
1999-02 GMC Jimmy 14 Dk. Blue
2001 GMC Sierra 14 Dk. Blue
1999-02 GMC Sonoma 14 Dk. Blue
2001-02 GMC Yukon 14 Dk. Blue
1998-99 Oldsmobile Silhouette 14 Dk. Blue
1998-02 Pontiac Firebird 14 Dk. Blue
1999-03 Pontiac Grand Prix 14 Dk. Blue
1999 Pontiac Montana 14 Dk. Blue
1998-99 Chevy Lumina 14
1998-99 Chevy
1998-99 Pontiac Bonneville 14 Lt. Green
1998-00 Pontiac Grand
Monte Carlo 14 Lt. Green
Am 14 Lt. Green
Lt. Green
3
Page 7

SWC-01
(GM Continued From Previous Page)
For the vehicles listed above use the Green wire on the SWC-01 and set the CAR DIP
Switch settings as follows:
Dip 1 Dip 2 Dip 3 Dip 4 Dip 5 Dip 6 Dip 7 Dip 8
Up Down Up Up Up Down Up Up
24 - Way GM Plug
Year Make Model Pin Wire Additional Wiring Needed
Location Color
2002-05 Buick Rendezvous A7 Dk. Blue Connect A6, Purple, to a 12 volt
accessory wire
2003-05 Chevy Blazer A7 Dk. Blue Connect A6, Dk. Green, to chassis
ground
2000-05 Chevy Impala A7 Dk. Blue Connect A6, Pink, to chassis ground
2000-05 Chevy Monte Carlo A7 Dk. Blue Connect A6, Pink, to chassis ground
2003-04 Chevy S10 A7 Dk. Blue Connect A6, Dk. Green, to chassis
ground
2003 GMC Jimmy A7 Dk. Blue Connect A6, Dk. Green, to chassis
ground
2002 Oldsmobile Intrigue A7 Dk. Blue Connect A6, Purple, to chassis ground
2005 Pontiac G6 A9 Dk. Blue Connect A10, White/Black, to
chassis ground
2001-04 Oldsmobile Alero A7 Lt. green Connect A6, Pink, to chassis ground
2001-05 Pontiac Grand Am A7 Lt. green Connect A6, Pink, to chassis ground
For the vehicles listed above use the Green wire on the SWC-01 and set the CAR DIP
Switch settings as follows:
Dip 1 Dip 2 Dip 3 Dip 4 Dip 5 Dip 6 Dip 7 Dip 8
Down Down Up Up Up Down Up Up
4
Page 8

SWC-01
(GM Continued From Previous Page)
Year Make Model Pin Wire Additional Wiring Needed
Location Color
2000-05 Chevy Venture A7 Dk. Blue Connect A6, Pink, to a 12 volt accessory wire
2000-04 Oldsmobile Silhouette A7 Dk. Blue Connect A6, Pink, to a 12 volt accessory wire
2001-05 Pontiac Aztek A7 Dk. Blue Connect A6, Purple, to a 12 volt accessory wire
2000-05 Pontiac Montana A7 Dk. Blue Connect A6, Pink, to a 12 volt accessory wire
2003-04 GMC Sonoma A7 Dk. Blue Connect A6, Dk. Green, to chassis ground
For the vehicles listed above use the
follows:
Dip 1 Dip 2 Dip 3 Dip 4 Dip 5 Dip 6 Dip 7 Dip 8
Up Down Up Up Up Down Up Up
Year Make Model Pin Wire Additional Wiring Needed
2004-05 Buick Century A7 Dk. Blue Connect A6, Purple, to chassis ground
2004 Buick Regal A7 Dk. Blue Connect A6, Purple, to chassis ground
2005 Chevy Equinox A9 Dk. Blue Connect A10, White/Black, to chassis ground
2004-05 Chevy Malibu A9 Dk. Blue Connect A10, White/Black, to chassis ground
For the vehicles listed above use the
lows:
Dip 1 Dip 2 Dip 3 Dip 4 Dip 5
Down Down Down Up Up Down Up Up
Green wire on the SWC-01 and set the CAR DIP Switch settings as
Location Color
Green wire on the SWC-01 and set the CAR DIP Switch settings as fol-
Dip 6 Dip 7 Dip 8
Year Make
2004-05 Buick Rainier A1 Orange
For the vehicles listed above use the
Dip 1 Dip 2 Dip 3 Dip 4
Down Up Down Up Up Down Up Up
Model Pin Wire
Location Color
Pink wire on the SWC-01 and set the CAR DIP Switch settings as follows:
Dip 5 Dip 6 Dip 7 Dip 8
5
Page 9

SWC-01
(GM Continued From Previous Page)
Year Make Model Pin Wire
Location Color
2003-05 Cadillac Escalade A1 Orange
2003-05 Chevy Avalanche A1 Orange
2003-05 Chevy Silverado A1 Orange
2003-05 Chevy SSR A1 Orange
2003-05 Chevy Suburban A1 Orange
2003-05 Chevy Tahoe A1 Orange
2002-05 Chevy Trailblazer A1 Orange
2002-05 GMC Envoy A1 Orange
2003-05 GMC Sierra A1 Orange
2003-05 GMC Yukon A1 Orange
2003-05 Hummer H2 A1 Orange
2005 Isuzu Ascender A1 Orange
2002-04 Oldsmobile Bravada A1 Orange
For the vehicles listed above use the
follows:
Dip 1 Dip 2 Dip 3 Dip 4 Dip 5 Dip 6 Dip 7 Dip 8
Down Up Up Up Up Down Up Up
Pink wire on the SWC-01 and set the CAR DIP Switch settings as
6
Page 10

SWC-01
32 - Way GM Plug
Year Make Model Pin Wire
Location Color
1996-99 Oldsmobile Aurora E5
Lt. Green
For the vehicles listed above use the
Switch settings as follows:
Dip 1 Dip 2 Dip 3 Dip 4 Dip 5 Dip 6 Dip 7 Dip 8
Down Up Up Down Up Down Up Up
Year Make Model Pin Wire
1998-99 Oldsmobile Eighty-Eight E5 Lt. Green
1998 Oldsmobile LSS E5 Lt. Green
For the vehicles listed above use the
Switch settings as follows:
Dip 1 Dip 2 Dip 3 Dip 4 Dip 5 Dip 6 Dip 7 Dip 8
Up Down Up Down Up Down Up Up
Year Make Model Pin Wire
1998-99 Buick Riviera E5 Lt. Green
1998-05 Buick Park Ave. E5 Lt. Green
1998-99 Buick Lesabre E5 or E6 Lt. Green
1998-03 Buick Century E6 Dk. Blue
1998-03 Buick Regal E6 Dk. Blue
Green wire on the SWC-01 and set the CAR DIP
Location Color
Green wire on the SWC-01 and set the CAR DIP
Location Color
7
Page 11

SWC-01
(GM Continued From Previous Page)
For the vehicles listed above use the Green wire on the SWC-01 and set the CAR DIP
Switch settings as follows:
Dip 1 Dip 2 Dip 3 Dip 4 Dip 5 Dip 6 Dip 7 Dip 8
Up Down Down Up Up Down Up Up
Year Make Model Pin Wire
Location Color
1998 Buick Skylark E6 Lt. Green
1999-01 Oldsmobile Bravada E6 Dk. Blue
1998-01 Oldsmobile Intrigue E6 Dk. Blue
For the vehicles listed above use the
Switch settings as follows:
Dip 1 Dip 2 Dip 3 Dip 4 Dip 5 Dip 6 Dip 7 Dip 8
Up Down Up Up Up Down Up Up
Year Make Model Pin Wire
1997-05 Cadillac Deville E6 or F6 Purple
1997-02 Cadillac Eldorado E6 or F6 Purple
1997-04 Cadillac Seville E6 or F6 Purple
2004-05 Cadillac XLR E6 Orange
For the vehicles listed above use the
Switch settings as follows:
Dip 1 Dip 2 Dip 3 Dip 4 Dip 5 Dip 6 Dip 7 Dip 8
Down Up Up Up Up Down Up Up
Year Make Model Pin Wire Additional Wiring Needed
1997-01
Cadillac
Catera F8 Blue/red Connect F9, Black, to chas-
Green wire on the SWC-01 and set the CAR DIP
Location Color
Pink wire on the SWC-01 and set the CAR DIP
Location Color
sis ground
For the vehicles listed above use the
Switch settings as follows:
Dip 1 Dip 2 Dip 3 Dip 4 Dip 5 Dip 6 Dip 7 Dip 8
Down Down Up Up Down Down Up Up
Green wire on the SWC-01 and set the CAR DIP
8
Page 12

SWC-01
1
11
12
22
22 - Way Chrysler Plug
Year Make Model Pin Location Wire Color
2002-04 Dodge Ram 14 Violet/Lt. Blue
2002-04 Chrysler 300M 14 Violet/Yellow
2002-03 Dodge Dakota 14 Violet/Yellow
2002-03 Dodge Durango 14 Violet/Yellow
2002-04 Dodge Intrepid 14 Violet/Yellow
2002-04 Jeep Liberty 14 Violet/Yellow
2002-04 Chrysler Sebring 14 White/Violet
2002-04 Dodge Caravan 14 White/Violet
2002-04 Dodge Stratus 14 White/Violet
2002-04 Jeep Grand Cherokee 14 Yellow/Violet
For the vehicles listed above use the
Switch settings as follows:
Dip 1 Dip 2 Dip 3 Dip 4 Dip 5 Dip 6 Dip 7 Dip 8
Down Up Up Up Up Down Down Up
Pink wire on the SWC-01 and set the CAR DIP
9
Page 13

SWC-01
1
2
2 - Way Chrysler Plug
Year Make Model Pin Wire
Location Color
2001 Chrysler 300M 1 Violet/Yellow
2001 Chrysler Sebring 1 Violet/Yellow
2001 Dodge Dakota 1 Violet/Yellow
2001 Dodge Durango 1 Violet/Yellow
2001 DodgeI Intrepid 1 Violet/Yellow
2001 Dodge Stratus 1 Violet/Yellow
1999 Jeep Grand Cherokee 1 Violet/Yellow
2001 Dodge Caravan 1 Violet/Yellow
2001 Jeep Grand Cherokee 1 Yellow/Violet
For the vehicles listed above use the
Switch settings as follows:
Dip 1 Dip 2 Dip 3 Dip 4 Dip 5 Dip 6 Dip 7 Dip 8
Down Up Up Up Up Down Down Up
Pink wire on the SWC-01 and set the CAR DIP
10
Page 14

SWC-01
20 - Way Ford Plug
Year Make Model Pin Wire
Location Color
1998-02 Lincoln Continental 14 brown
1998-02 Ford Crown Vic 14 lt. blue/red
1998-03 Ford Expedition 14 lt. blue/red
1998-04 Ford Excursion 14 lt. blue/red
1999-02 Ford Windstar 14 lt. blue/red
2003 Lincoln Aviator 14 lt. blue/red
1998-02 Lincoln Town Car 14 lt. blue/red
1999-03 Lincoln Navigator 14 lt. blue/red
1998-02 Mercury Grand Marquis 14 lt. blue/red
1999-01 Mercury Mountaineer 14 lt. blue/red
2002 Ford Thunderbird 14 white/black
2000-02 Lincoln LS 14 white/black
1999-02 Mercury Villager 14 white/black
1998-04 Ford Explorer 14 yellow
2002-03 Mercury Mountaineer 14 yellow
For the vehicles listed above use the
Switch settings as follows:
Dip 1 Dip 2 Dip 3 Dip 4 Dip 5 Dip 6 Dip 7 Dip 8
Down Down Up Up Up Up Down Up
Green wire on the SWC-01 and set the CAR DIP
11
Page 15

SWC-01
1
2
7
8
12
13
14
20
21
24
24 - Way Ford Plug
Year Make Model Pin Wire
Location
2004 Ford Expedition 18 lt. blue/red
2004 Ford F-150 1 18 lt. blue/red
2004 Ford Freestar 18 lt. blue/red
2003 Lincoln Avaitor w/ CD6 radio 18 lt. blue/red
2003 Mercury Marauder 18 lt. blue/red
Color
For the vehicles listed above use the
Green wire on the SWC-01 and set the CAR DIP
Switch settings as follows:
Dip 1 Dip 2 Dip 3 Dip 4 Dip 5 Dip 6 Dip 7 Dip 8
Down Down Up Up Up Up Down Up
12
Page 16

SWC-01
6
7
9
1
17
15
14
17 - Way Ford Plug
Year Make Model Pin Wire Color Additional Wiring Needed
Location
2002 Ford Focus 11 white/black Connect pin 12,
Brown/Yellow, to chassis
ground
For the vehicles listed above use the
Green wire on the SWC-01 and set the CAR DIP
Switch settings as follows:
Dip 1 Dip 2 Dip 3 Dip 4 Dip 5 Dip 6 Dip 7 Dip 8
Down Down Up Up Up Up Down Up
13
Page 17

SWC-01
1
4
7
10
13
16
19
2
5
8
11
14
17
20
6
3
12
9
15
18
C2
C3
1
2
1
2
3
4
3
4
5
6
5
6
7
8
7
8
16 and 20 - Way VW Plugs
Year Make Model Pin
Wire Color Additional Wiring Needed
Location
2003-05 Cadillac CTS C1 pin 13 Dk.Blue Connect pin 2 on C3,Purple,
to chassis ground
2004-05 Cadillac SRX C1 pin 13 Dk.Blue Connect pin 2 on C3,Purple,
to chassis ground
For the vehicles listed above use the
Green wire on the SWC-01 and set the CAR DIP
Switch settings as follows:
Dip 1 Dip 2 Dip 3 Dip 4 Dip 5 Dip 6 Dip 7 Dip 8
Down Down Up Up Up Down Up Up
Year Make Model Pin Wire Color Additional Wiring Needed
Location
2004-05 Pontiac GTO C1 pin 11 Brown Connect pin 12 on C1,
Black/Yellow, to chassis
ground
For the vehicles listed above use the
Green wire on the SWC-01 and set the CAR DIP
Switch settings as follows:
Dip 1 Dip 2 Dip 3 Dip 4 Dip 5 Dip 6 Dip 7 Dip 8
Down
Down
Up Up Down Down Up Up
14
Page 18

SWC-01
Mounting The Infrared L.E.D.
The infrared L.E.D. (I.R.E.D.) can be flushed mounted in a variety of locations within
the cabin of the vehicle, the higher the location the better to prevent anything blocking
the I.R.E.D. . The I.R.E.D. is high intensity so it does not need to be pointed directly at
the radio, however the more towards the radio it points the better it will work. The diagram below shows possible mounting locations in a vehicle. These are just suggestions and you should use your best judgment as to the location of the I.R.E.D.
15
Page 19

SWC-01
Continued From Previous Page
To mount the I.R.E.D. follow these steps:
1)Before drilling any holes be sure to test the I.R.E.D. in the location you desire to
mount it in by either holding the I.R.E.D. in place or use double sided tape to hold it
into position.
2)If the SWC-01 works properly you can now mount the I.R.E.D. If possible remove the
panel from the vehicle and drill a 5/16th inch hole. If the panel cannot be removed be
sure to check clearance behind the panel so not to damage any wiring with the drill bit.
3)Take the I.R.E.D. and place the snap in mount over it. Feed the cable through the
mounting hole and snap the I.R.E.D. into the hole.
4)Run the I.R.E.D. cable up to the SWC-01 and connect it. Tie up any loose wiring to
prevent it from getting it caught on any moving parts.
Final Testing
Once all connections have been made, turn the radio on and adjust the steering wheel
volume controls up and down. If the volume controls do not work:
1)Check to see if there is 12 volts on the red wire and the black wire is connected to a
good ground.
2)Make sure the correct steering wheel control wire is used, green for resistive type
steering wheel controls and pink for data type steering wheel controls.
3)Make sure the Dip switch settings are set correctly for your radio and vehicle.
16
Page 20

1-800-221-0932 www.metraonline.com
© COPYRIGHT 2004 METRA ELECTRONICS CORPORATION
 Loading...