

Page 1
INSTALLATION INSTRUCTIONS FOR PART DP-3021B
METRA – The World’s best kits.
®
CAUTION!
All accessories, switches, climate controls panels,
and especially air bag indicator lights must be connected before
cycling the ignition. Also, do not remove the factory radio with
the key in the on position, or while the vehicle is running.
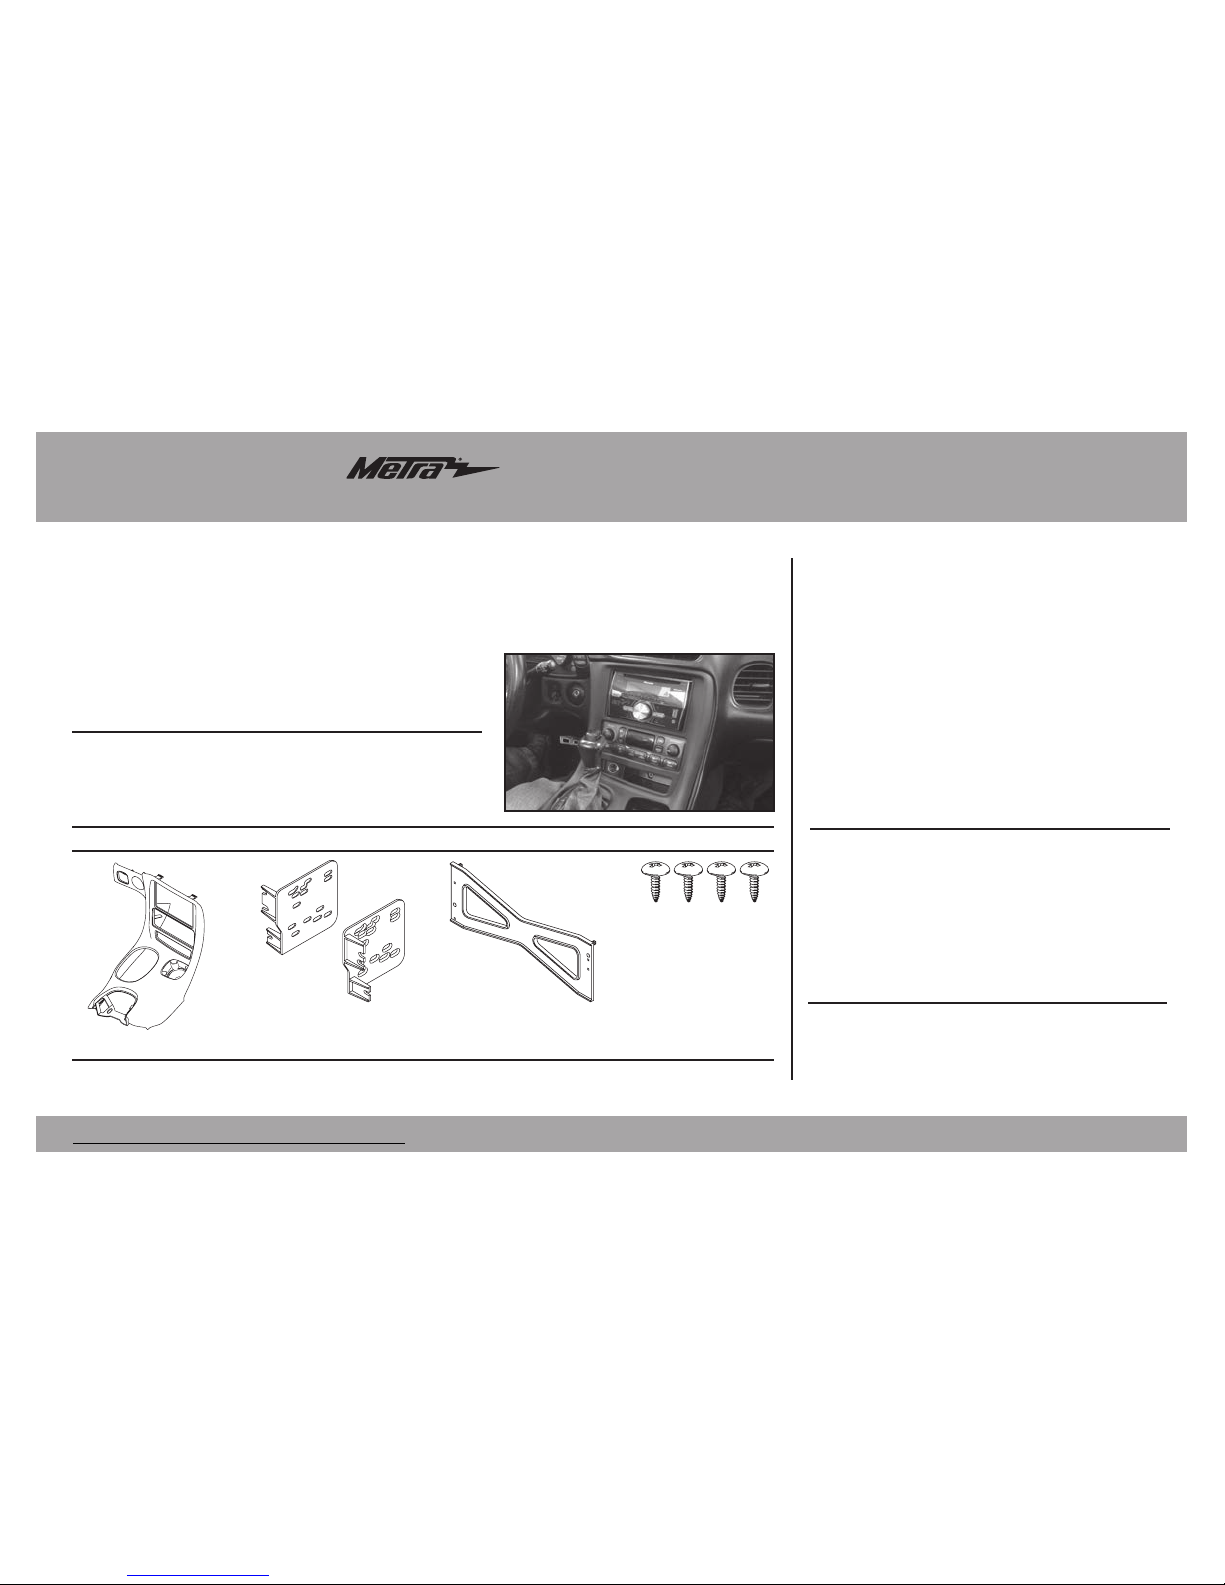
• ISO DDIN radio provision
• Painted black to match the factory dash
• A) Radio dash panel • B) Radio brackets • C) Drill template • D) (4) #8 x 1/2” Phillips truss-head screws
KIT FEATURES
KIT COMPONENTS
• Panel removal tool • Phillips screwdriver
• Metal cutting tool • 10mm socket wrench
• 9/32” socket wrench • T-15 Torx screwdriver
• 1/8” drill bit
TOOLS REQUIRED
Chevrolet Corvette 1997-2004
DP-3021B
Table of Contents
A B C D
Dash Disassembly .............................................. 2-3
Kit Preparation ....................................................... 4
Kit Assembly .......................................................... 5
WIRING & ANTENNA CONNECTIONS (sold separately)
Wiring Harness: • XSVI-2004-NAV Antenna Adapter: 40-GM10
Page 2
DP-3021B
2
Dash Disassembly
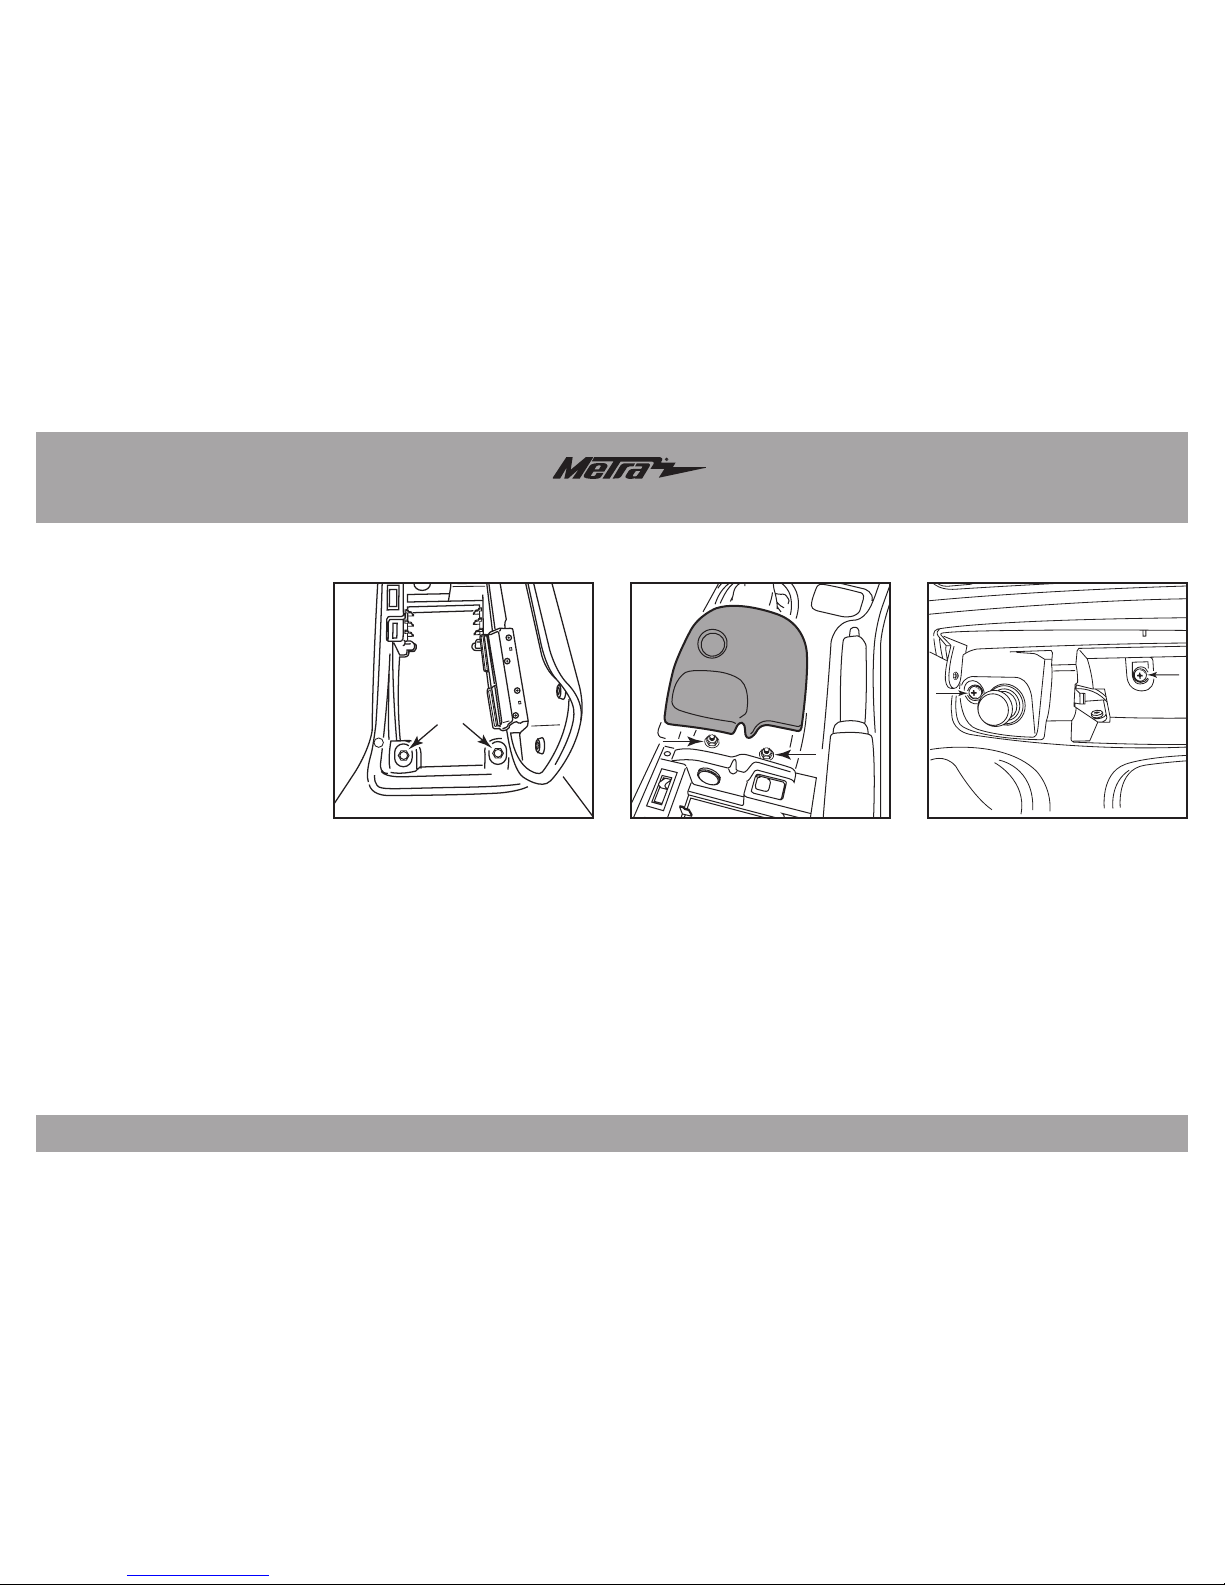
1. Open the center console door,
remove the (2) nut covers and the
(2) 10mm nuts exposed. (Figure A)
2. Pull up on the rear of the traction/
ride control switch panel to release
it, and then unplug and remove.
(Figure B)
3. Remove the (2) 10mm nuts
exposed. (Figure B)
4. Open the ashtray door, and then
remove the (1) Phillips screws
exposed. (Figure C)
5. Remove the ashtray, and then
remove the (1) 9/32” screw
exposed. (Figure C)
Continued on the next page
(Figure B)(Figure A) (Figure C)
Page 3

DP-3021B
Dash Disassembly
3
(Figure D) (Figure F)(Figure E)
6. Unclip the small grille to the left
of the ignition switch, and then
remove the (1) 9/32” screw
exposed. (Figure D)
7. Unclip the radio dash panel starting
from the base of the center
console, unplug the cigarette
lighter, and then unclip and remove
the entire panel. (Figure E)
8. Remove the (2) 9/32” screws
securing the radio, and then
unplug and remove.
Convertibles only:
Remove the (2) T-15 Torx screws from
the top and the (2) T-15 Torx screws
from the lower sides securing the
center seat divider. Lift the seat divider
straight up to remove it. (Figure F)
Continue to Kit Preparation
Page 4

DP-3021B
4
Kit Preparation
Climate control sub-dash
modification:
1. Remove the (2) 9/32” screws
securing the climate control panel
and temporarily move it out of the
way. No need to unplug it unless so
desired. (Figure A)
2. Utilizing the large screw holes,
temporarily secure the included
drill template to the sub-dash
using the factory hardware.
(Figure B)
3. Drill a 1/8” hole in the (4) small
screw holes, and then remove the
template. (Figure B)
(Figure B)
(Figure A) (Figure C)
4. Cut and remove the metal
climate control and radio support
brackets to allow clearance for the
aftermarket radio. (Figure C)
5. Utilizing the new holes drilled in
step 3, secure the climate control
panel to the sub-dash using the
(2) #8 x 1/2” Phillips truss-head
screws provided.
Continue to Kit Assembly
Remove
shaded area
Page 5

DP-3021B
5
ISO DDIN radio provision
1. Attach the radio brackets to the
radio using the screws supplied
with the radio. (Figure A)
2.
Locate
the factory wiring harness
and antenna connector in the dash
and complete all necessary
connections to the radio. Metra
recommends using the proper
mating adapter from Metra and/or
Axxess. Test the radio for
proper operation.
(Figure A)
(Figure B)
Kit Assembly
3. Using the upper brackets in the
completed assembly, secure it to
the dash using the factory screws.
(Figure B)
4. Drill an 1/8” hole in the (2)
remaining screw holes in the lower
brackets, and then use the (2)
#8 x 1/2” Phillips truss-head
screws provided to fully secure the
radio. (Figure B)
5. Reassemble the dash in reverse
order of disassembly using the
radio dash panel.
 Loading...