

Page 1
INSTALLATION INSTRUCTIONS FOR PART 99-5806
Ford Focus
2000-2004
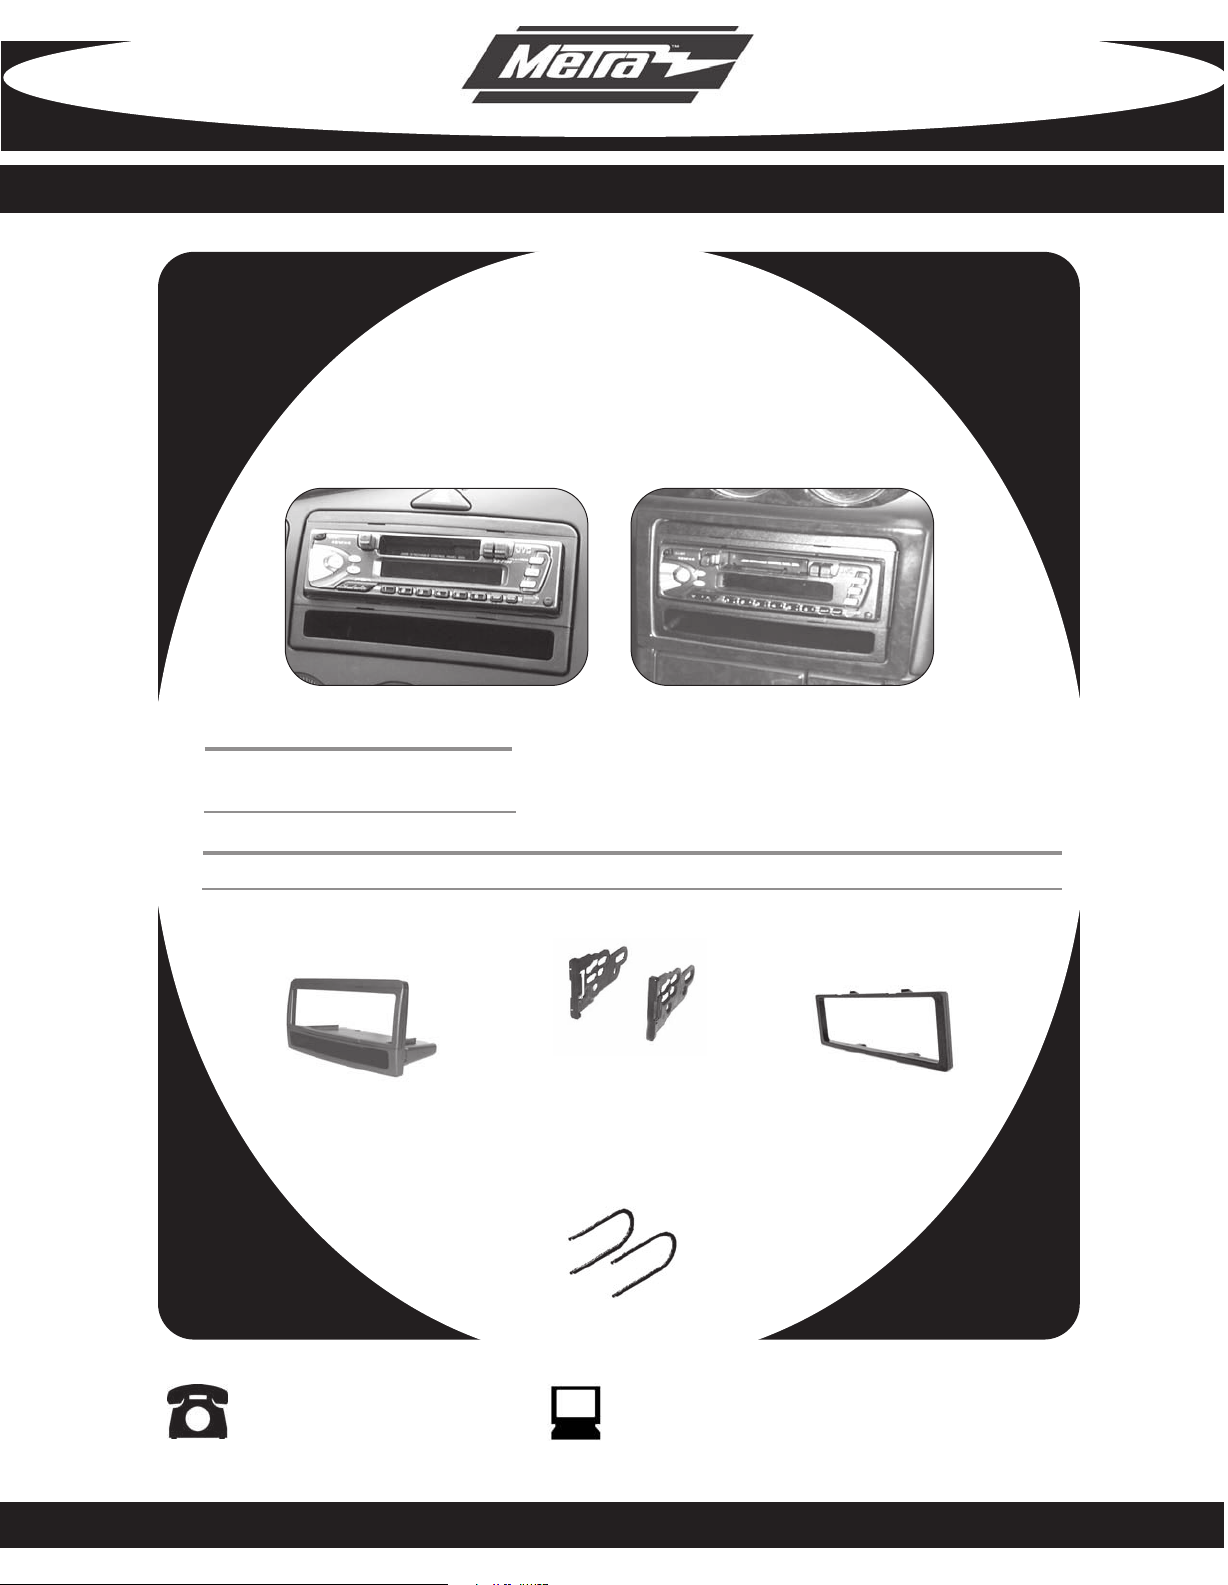
KIT FEATURES
• ISO DIN head unit provision with pocket
• DIN head unit provision with pocket
KIT COMPONENTS
A) Radio Housing l B) ISO Brackets l C) Trim Plate
B
A
Mercury Cougar
1999-2002
99-5806
C
TOOLS REQUIRED:
86-5618 Head Unit Removal Keys
1-800-221-0932 www.metraonline.com
© COPYRIGHT 2004-2009 METRA ELECTRONICS CORPORATION
••••••••••••• •
•••••••••
Page 2

99-5806
2000-2004 Ford Focus
1999-2002 Mercury Cougar
Dash Disassembly .......................................................... 1
Kit Assembly .................................................................. 2
Head Unit Provision Assembly ...................................... 3
T STNETNOCFOELBA
Final Assembly .............................................................. 4
Notes........................................................................... 5-6
KNOWLEDGE IS POWER
Enhance your installation and fabrication skills
by enrolling in the most recognized and respected
mobile electronics school in our industry.
Log onto www.installerinstitute.com
or call 800-354-6782 for more information
and take steps toward a better tomorrow.
••••••••••••• •
•••••••••
Page 3
99-5806
2000-2004 FORD FOCUS
1999-2002 MERCURY COUGAR
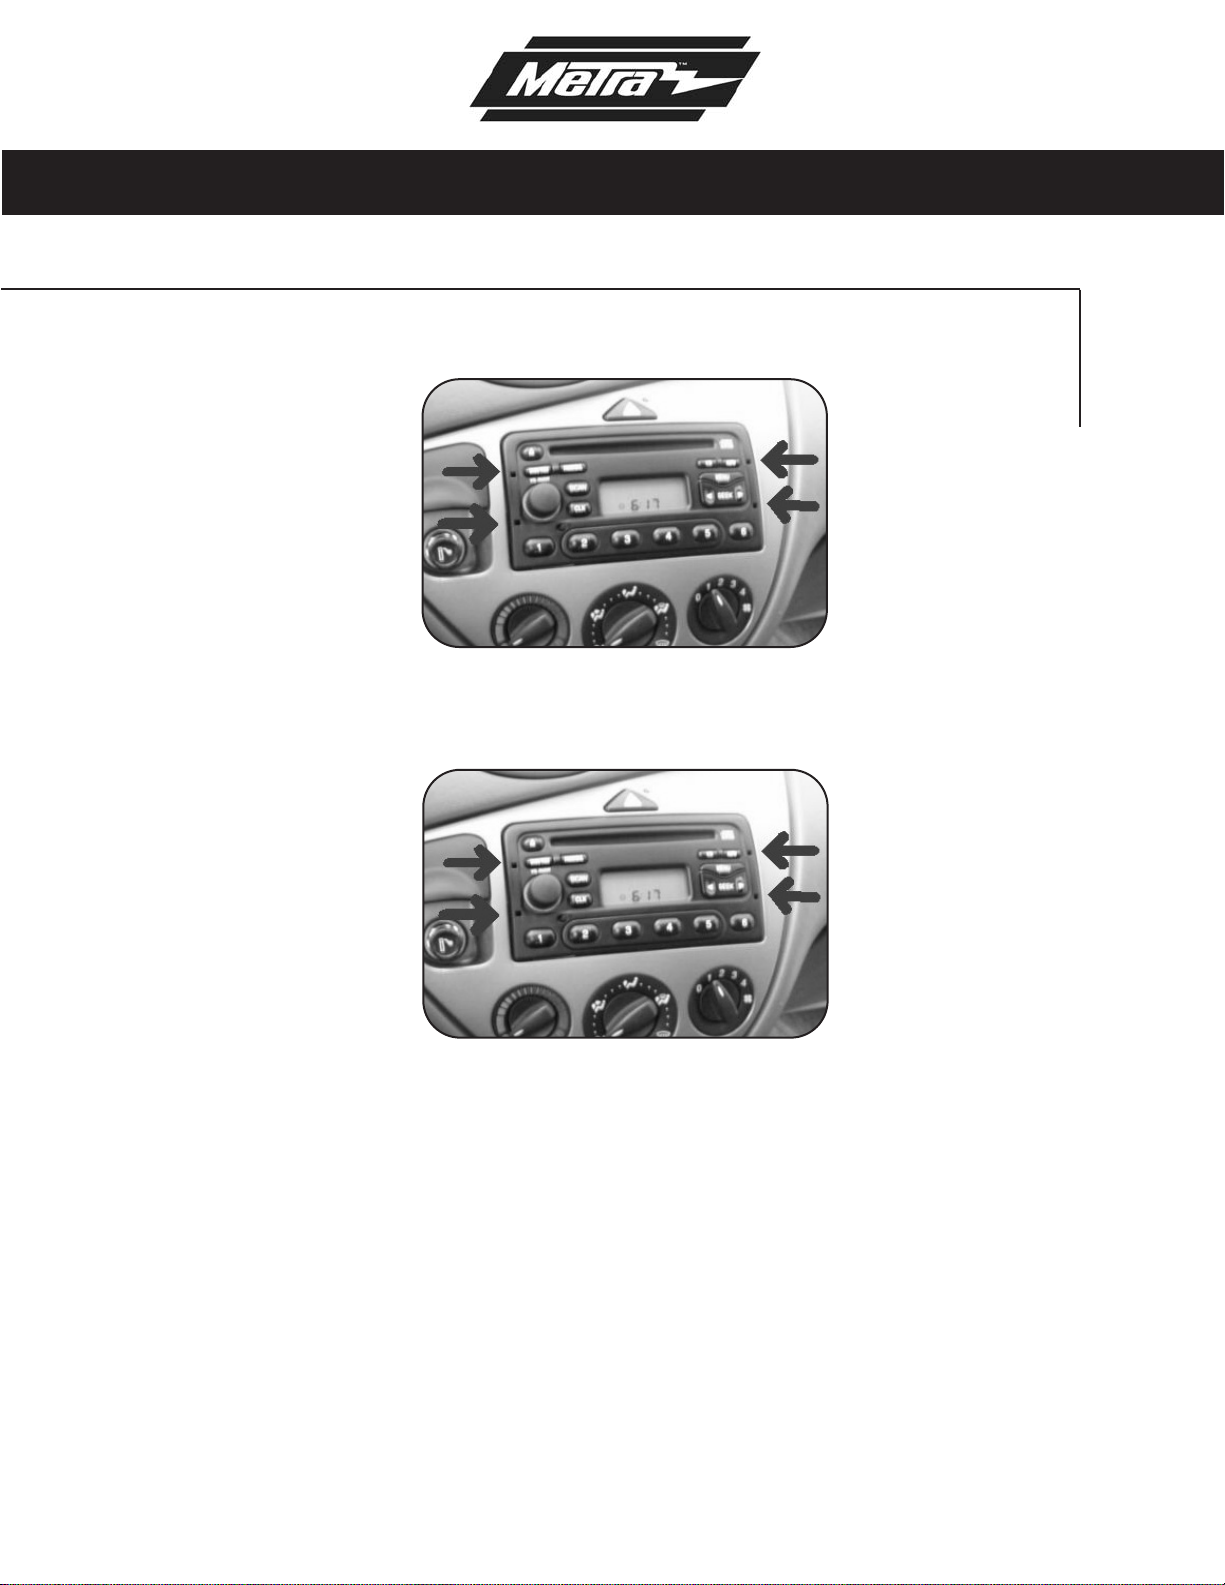
DASH DISASSEMBLY
1
Using Metra’s 86-5618, pull the
factory head unit from the dash
and disconnect the wiring.
1
Page 4
YLBMESSA TIK
99-5806
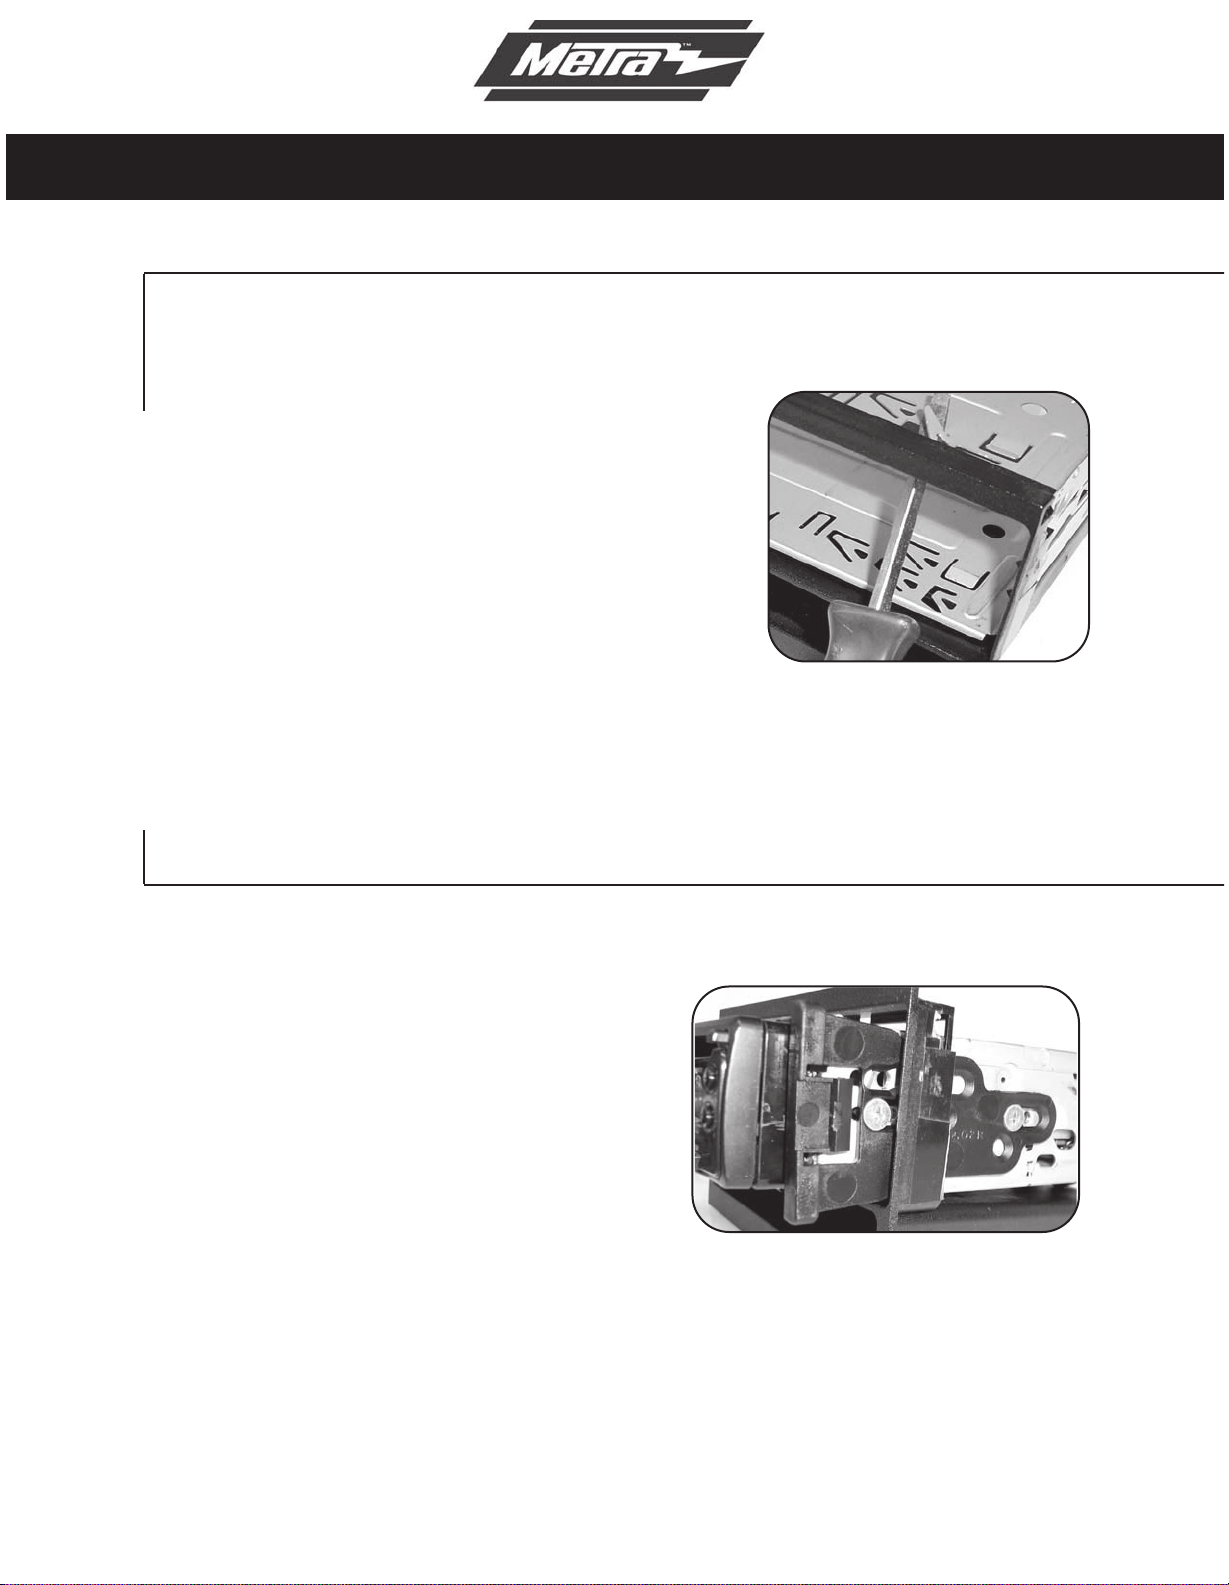
DIN HEAD UNIT PROVISIONS:
Slide the DIN cage into the
1
Radio Housing and secure
by bending the metal locking
tabs down.
Slide the after-market head
2
unit into the cage and
secure. Snap the Trim plate
into the Radio Housing.
ISO DIN HEAD UNIT PROVISIONS:
Mount the ISO Brackets to
1
the head unit with the screws
supplied with the unit.
Slide the head unit into the
2
radio opening until the side
clips engage. Snap the Trim
plate into the Radio Housing.
NOTE: When reinstalling the screws
into the bottom of the 99-5806 use the
(2) supplied Phillips screws instead of
the factory screws removed in step 5
in Dash Disassembly.
3
Page 5

99-5806
A
B
C
D
Locate the factory wiring har-
1
ness in the dash. Metra recommends using the proper mating
adapter and making the connections as shown. (Isolate and
individually tape off the ends of
any unused wires to prevent
electrical short circuit)
A) Strip wire ends back 1/2"
B) Twist ends together
C) Solder
D) Tape
FINAL ASSEMBLY
Re-connect the negative battery
2
terminal and test the unit for
proper operation.
Snap radio / kit assembly into the
3
factory radio opening.
4
Page 6

____________________________________________________________
____________________________________________________________
____________________________________________________________
____________________________________________________________
NOTAS
____________________________________________________________
____________________________________________________________
____________________________________________________________
____________________________________________________________
99-5806
____________________________________________________________
____________________________________________________________
____________________________________________________________
____________________________________________________________
____________________________________________________________
____________________________________________________________
____________________________________________________________
____________________________________________________________
____________________________________________________________
____________________________________________________________
____________________________________________________________
5
Page 7

INSTRUCCIONES DE INSTALACIÓN PARA LA PIEZA 99-5806
Ford Focus
2000-2004
CARACTERÍSTICAS DEL KIT
• Accesorio para unidades centrales
DIN ISO con bolsillo
• Accesorio para unidades centrales DIN
con bolsillo
COMPONENTES DEL KIT
A) Alojamiento del radio B) Soportes ISO C) Placa de terminación
B
A
Mercury Cougar
1999-2002
99-5806
C
HERRAMIENTAS REQUERIDAS
86-5618 Llaves de extracción para la unidad central
1-800-221-0932 www.metraonline.com
© COPYRIGHT 2004-2009 METRA ELECTRONICS CORPORATION
•••••••••••• • •
•••••••• •
Page 8

99-5806
2000-2004 Ford Focus
1999-2002 Mercury Cougar
ÍNDICE
Desmontaje del tablero ................................................... 1
Montaje del kit ............................................................... 2
Montaje del accesorio para unidades centrales ............ 3
Montaje final .............................................................. 4
Notas.............................................................................. 5
•••••••••••• • •
•••••••• •
Page 9

99-5806
2000-2004 FORD FOCUS
1999-2002 MERCURY COUGAR
DESMONTAJE DEL TABLERO
1
Utilizando el 86-5618 de Metra,
quite la unidad central de fábrica
del tablero y desconecte el cableado.
1
Page 10

99-5806
ACCESORIOS PARA UNIDADES CENTRALES DIN:
MONTAJE DEL KIT
Deslice la caja DIN en el alojamiento
1
del radio y sujétela doblando las
lengüetas de cierre de metal hacia
abajo.
Deslice la unidad central en la
2
abertura del radio hasta que enganchen los ganchos laterales. Coloque
a presión la placa de terminación en
el alojamiento del radio.
ACCESORIOS PARA UNIDADES CENTRALES DIN ISO:
Monte los soportes ISO en la
1
unidad central con los tornillos
suministrados con la unidad.
Deslice la unidad central en la
2
abertura del radio hasta que
enganchen los ganchos laterales. Coloque a presión la placa
de terminación en el alojamiento
del radio.
NOTA: Cuando reinstale los tornillos en la parte inferior de la pieza 99-5806,
utilice los (2) tornillos Phillips suministrados en lugar de los tornillos de
fábrica que retiró en el paso 5,
3
Page 11

99-5806
A
B
C
D
Ubique el arnés del cableado de fábrica en el tablero.
1
Metra recomienda usar el adaptador de acoplamiento
adecuado y realizar las conexiones como se muestra.
(Aísle y encinte individualmente los extremos de cualquier
cable que no esté en uso, a fin de evitar un cortocircuito
eléctrico).
Vuelva a conectar el terminal negativo de la batería y pruebe
2
A) Pele ½ in de los extremos
de los cables
B) Tuerza los extremos juntos
C) Suelde
D) Encinte
MONTAJE FINAL
la unidad para verificar que funcione correctamente.
Coloque a presión el conjunto del radio/kit en la abertura del
3
radio de fábrica.
4
Page 12

99-5806
____________________________________________________________
____________________________________________________________
____________________________________________________________
____________________________________________________________
NOTAS
____________________________________________________________
____________________________________________________________
____________________________________________________________
____________________________________________________________
____________________________________________________________
____________________________________________________________
____________________________________________________________
____________________________________________________________
____________________________________________________________
____________________________________________________________
____________________________________________________________
____________________________________________________________
____________________________________________________________
____________________________________________________________
____________________________________________________________
5
 Loading...