

Page 1
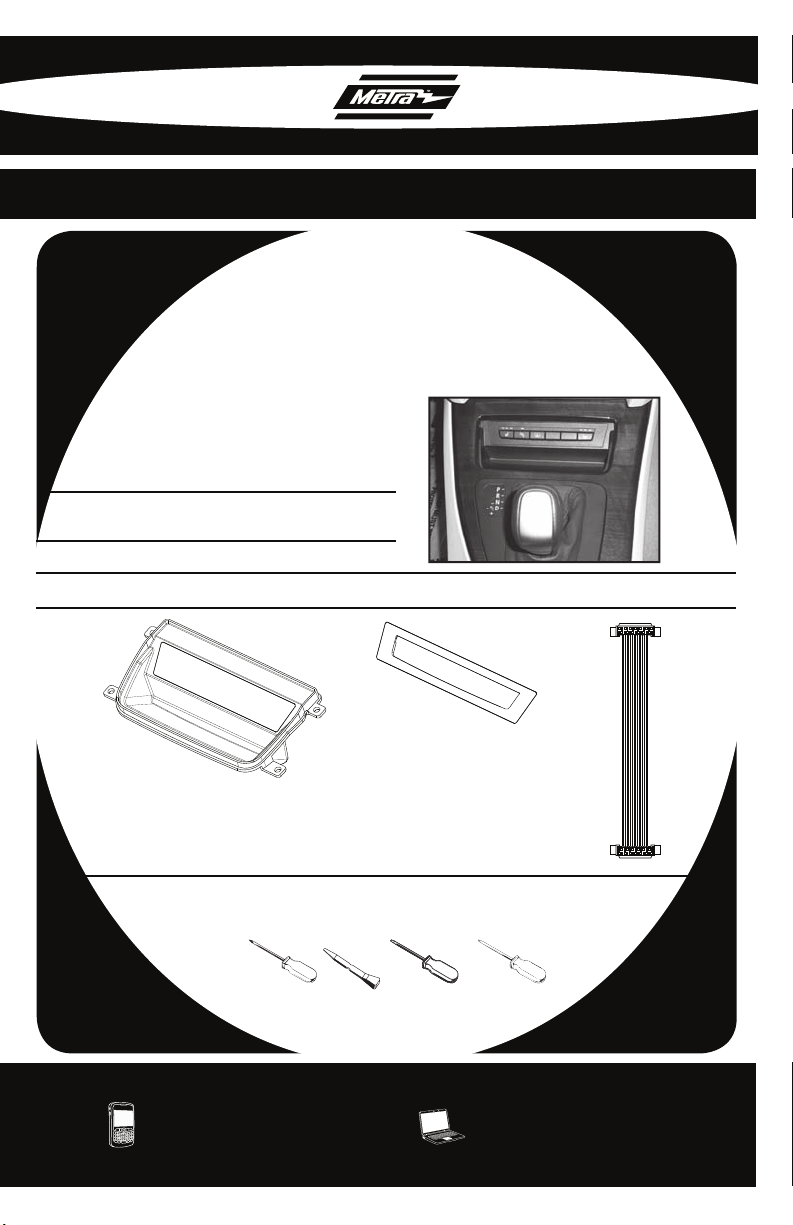
INSTALLATION INSTRUCTIONS FOR PART 98-9306
APPLICATIONS
BMW
3 SERIES 2006-2010
(Not for models with Factory Navigation)
98-9306
(Used For Heated Seat Models When
Using The 95-9306B)
KIT FEATURES
Relocates Heated Seat Switches•
KIT COMPONENTS
• A) Pocket • B) Heated Seat Switch Trim Panel • C) Extension Harness
A
B
C
TOOLS REQUIRED
• Phillips Screwdriver • Panel Removal Tool • Small Flat Blade Screwdriver
METRA. THE WORLD’S BEST KITS.™
1-800-221-0932 metraonline.com
© COPYRIGHT 2004-2010 METRA ELECTRONICS CORPORATION
• Torx Screwdriver
Page 2
INSTALLATION INSTRUCTIONS FOR PART 98-9306
TABLE OF CONTENTS
DASH DISASSEMBLY
•BMW 3 Series 2006-10 . . . . . . . . . . . . . . . . . . . 1-2
KIT ASSEMBLY
•BMW 3 Series 2006-10 . . . . . . . . . . . . . . . . . . . 3-4
CAUTION: Metra recommends disconnecting the negative battery terminal
before beginning any installation. All accessories, switches, and especially
air bag indicator lights must be plugged in before reconnecting the battery
or cycling the ignition.
*NOTE: Refer also to the instructions included with the aftermarket radio.
KNOWLEDGE IS POWER
Enhance your installation and fabrication skills by
enrolling in the most recognized and respected
mobile electronics school in our industry.
Log onto www.installerinstitute.com or call
800-354-6782 for more information and take steps
toward a better tomorrow.
Metra recommends MECP certified
technicians
Page 3
98-9306 DASH DISASSEMBLY
BMW 3 SERIES 2006-2010
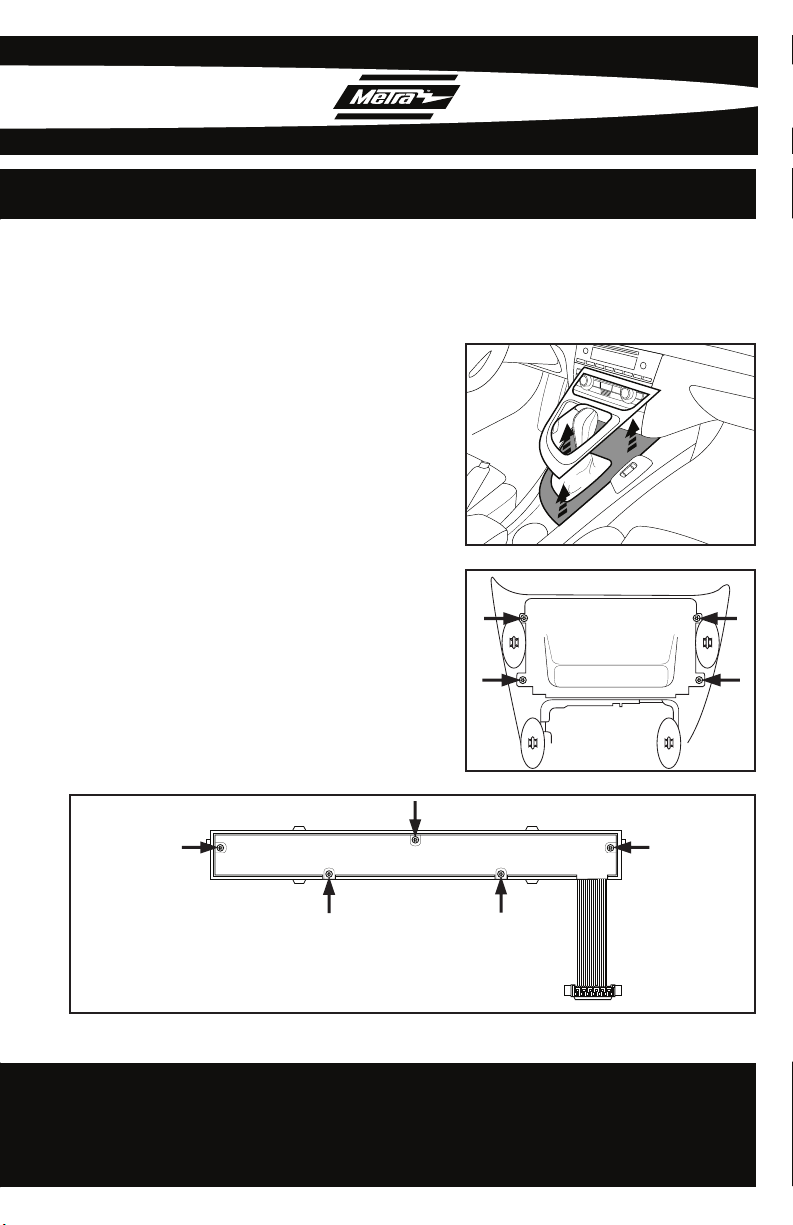
Carefully unclip and remove the
1
shifter trim panel. (Fig. A)
Remove (4) Torx screws securing
2
the pocket or ash tray assembly to
the shifter trim panel. (Fig. B)
3
Unclip and remove the heated seat
switch assembly from the climate
control panel.
Remove (5) Torx screws securing
4
the back cover on the heated seat
switch assembly. (Fig. C)
A
B
C
Continue to PG.2...........................
1
Page 4
98-9306 DASH DISASSEMBLY
BMW 3 SERIES 2006-2010
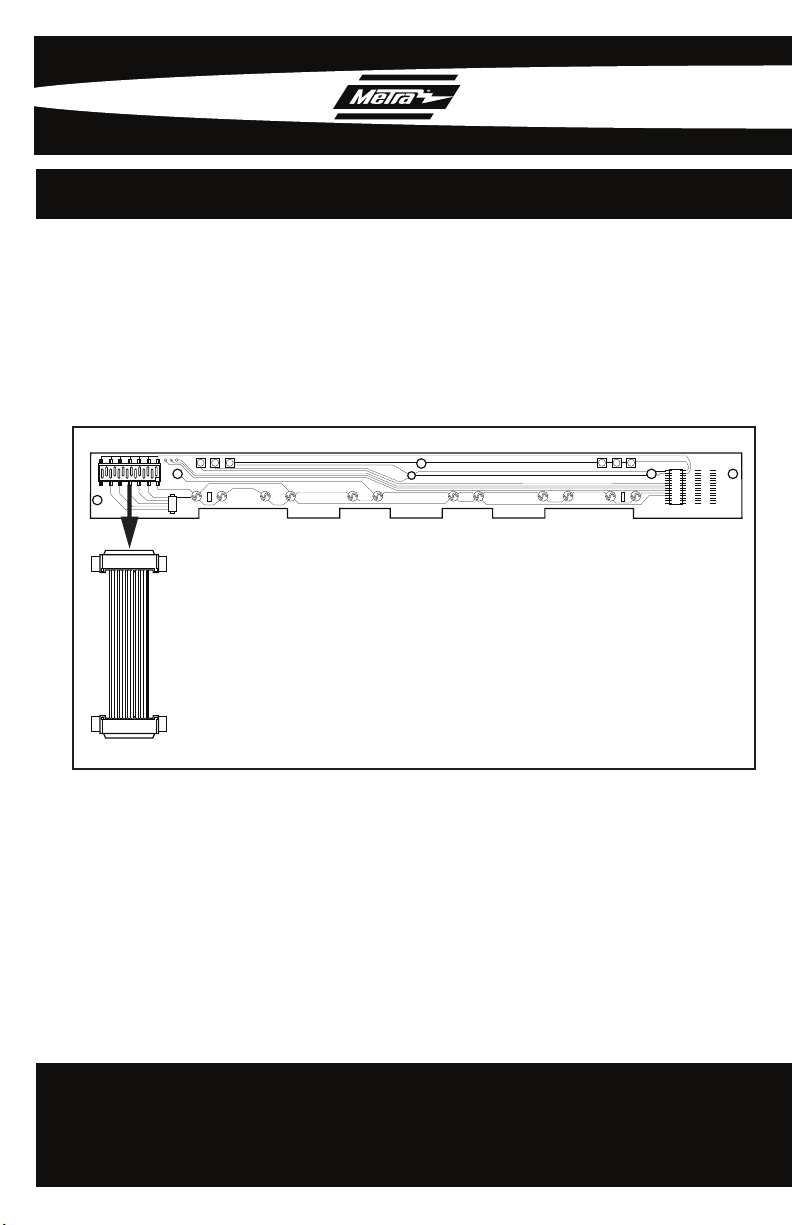
Remove the circuit board and unplug the factory harness. (Fig. D)
5
D
2
Continue to Kit Assembly..............
Page 5

98-9306 KIT ASSEMBLY
BMW 3 SERIES 2006-2010
Plug the extension harness onto the circuit board. Then reassemble the
1
heated seat switch assembly. (Fig. A)
A
3
Continue to PG.4...........................
Page 6

98-9306 KIT ASSEMBLY
BMW 3 SERIES 2006-2010
2
Clip the heated seat switch trim panel into the pocket. (Fig. B)
3
Clip the heated seat switch assembly into the pocket/trim panel assembly. (Fig. B)
Reattach the 98-9306 pocket assembly to the shifter trim panel using the
4
factory hardware.
5
Route the extension harness through the left side of the dash cavity and plug
it into the climate control.
B
4
Page 7

INSTRUCCIONES PARA LA INSTALACIÓN DE PARTE 98-9306
APLICACIONES
BMW
SERIE 3 2006-2010
(No apto para modelos con navegación de fábrica)
98-9306
(Empleado para los modelos de asiento con
calefacción cuando se utiliza el 95-9306B)
CARACTERÍSTICAS DEL KIT
• Reubica interruptores del asiento con
calefacción
COMPONENTES DEL KIT
• A) Bolsillo • B) Panel de terminación con interruptor para el asiento con calefacción
• C) Extension Harness
A
B
C
HERRAMIENTAS REQUERIDAS
• Destornillador Phillips • Destornillador Torx • Herramienta para retirar paneles
METRA. THE WORLD’S BEST KITS.™
1-800-221-0932 metraonline.com
© COPYRIGHT 2004-2010 METRA ELECTRONICS CORPORATION
• Destornillador de hoja plana pequeño
Page 8

INSTRUCCIONES PARA LA INSTALACIÓN DE PARTE 98-9306
PÁGINA DE ÍNDICE
DESMONTAJE DEL TABLERO
•BMW Serie 3 2006-2010 . . . . . . . . . . . . . . . . . 1-2
MONTAJE DEL KIT
•BMW Serie 3 2006-2010 . . . . . . . . . . . . . . . . . 3-4
Precaución: Metra recomienda desconectar el terminal negativo de la
batería antes de comenzar cualquier instalación. Todos los accesorios,
interruptores y, especialmente, las luces indicadoras de airbag deben estar
enchufados antes de volver a conectar la batería o comenzar el ciclo de
ignición.
* NOTA: Consulte también las instrucciones incluidas con la radio del mer-
cado de accesorios.
KNOWLEDGE IS POWER
Enhance your installation and fabrication skills by
enrolling in the most recognized and respected
mobile electronics school in our industry.
Log onto www.installerinstitute.com or call
800-354-6782 for more information and take steps
toward a better tomorrow.
Metra recommends MECP certified
technicians
Page 9

98-9306 DESMONTAJE DEL TABLERO
BMW SERIE 3 2006-2010
Desenganche y retire con cuidado el
1
panel de terminación de la palanca
de velocidades. (FIg. A)
2
Retire (4) tornillos Torx que sujetan
el conjunto del bolsillo o del cenicero
en el panel de terminación de la
palanca de velocidades. (FIg. B)
Desenganche y retire el conjunto
3
del interruptor del asiento con
calefacción del panel de control de
clima.
4
Retire (5) tornillos Torx que sujetan
la cubierta posterior sobre el
conjunto del interruptor del asiento
con calefacción. (FIg. C)
A
B
C
Continuar con la PG.2 .........................
1
Page 10

98-9306 DESMONTAJE DEL TABLERO
BMW SERIE 3 2006-2010
Retire el tablero de circuitos y desenchufe el arnés de fábrica. (Fig. D)
5
D
2
Continuar con la Asamblea Kit......
Page 11

98-9306 MONTAJE DEL KIT
BMW SERIE 3 2006-2010
Enchufe el arnés de extensión al tablero de circuitos. Luego vuelva a montar
1
el conjunto del interruptor del asiento con calefacción. (Fig. A)
A
Continuar con la PG.4 .........................
3
Page 12

98-9306 MONTAJE DEL KIT
BMW SERIE 3 2006-2010
2
Enganche el panel de terminación del interruptor del asiento con calefacción
dentro del bolsillo. (Fig. B)
3
Enganche el conjunto del interruptor del asiento con calefacción dentro del
conjunto del bolsillo/panel de terminación. (Fig. B)
4
Vuelva a colocar el conjunto del bolsillo 98-9306 en el panel de terminación
de la palanca de velocidades usando los elementos de fábrica.
5
Coloque el arnés de extensión a través del lado izquierdo del hueco del
tablero y enchúfelo en el control de clima.
B
4
 Loading...