

Page 1
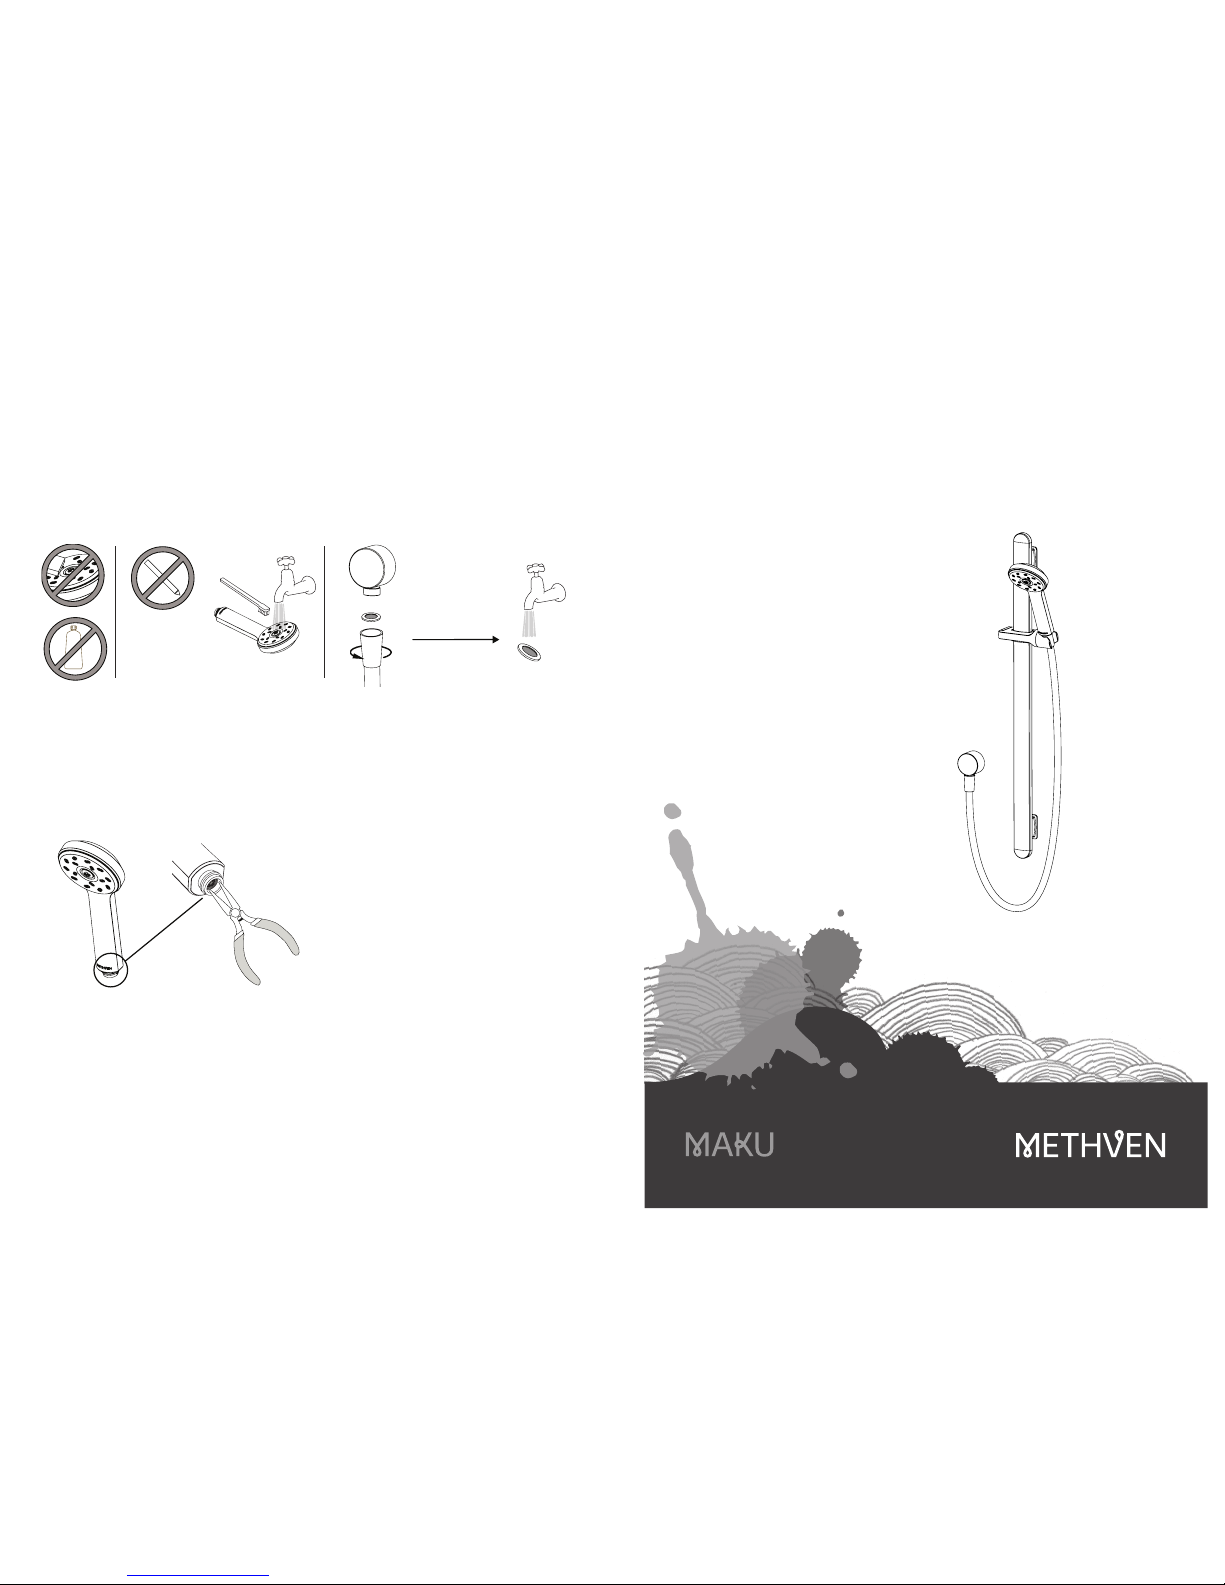
Do not use any
shap objects to
clean nozzles
Clean filter washer
periodicallly
MAKU SATINJET SLIDE RAIL SHOWER
INSTALLATION GUIDE
TECHNICAL SPECIFICATIONS
Operating Pressure:
Min 35 kPa, Max 500 kPa.
Recommended installation of a pressure
limiting valve if supply exceeds 500kPa.
Operating Temperature:
Max 70°C.
NB: New Zealand Building Code Clause G12 Water Supplies specifies all outlets used
primarily for personal hygiene shall deliver
water at a safe temperature.
Inlet Connections: All ½" BSP.
Issue A
436932
Methven warrants this product against manufacturing defects and that it is suitable for use
under the operating conditions specified in this instruction sheet.
For your warranty please refer to www.methven.com or call Customer Service
New Zealand
0800 804 222
Australia
1300 638 483
UK
0800 195 1602
To clean the chrome-plated surface use a soft
cloth, soap and warm water. Never use cleaning
agents that contain a corrosive acid or a scouring
additive.
CLEANING
Water contains lime which remains on the
surface after the water has evaporated. These
lime deposits can be prevented from forming by
wiping immediately after use.
NOTES:
1) Low and unequal systems:
Removal of the flow restrictor with pliers may be
necessary to optimise flow performance in low or
unequal pressure systems only. Flow restrictor is
lodged firmly in the end of the handset.
Page 2
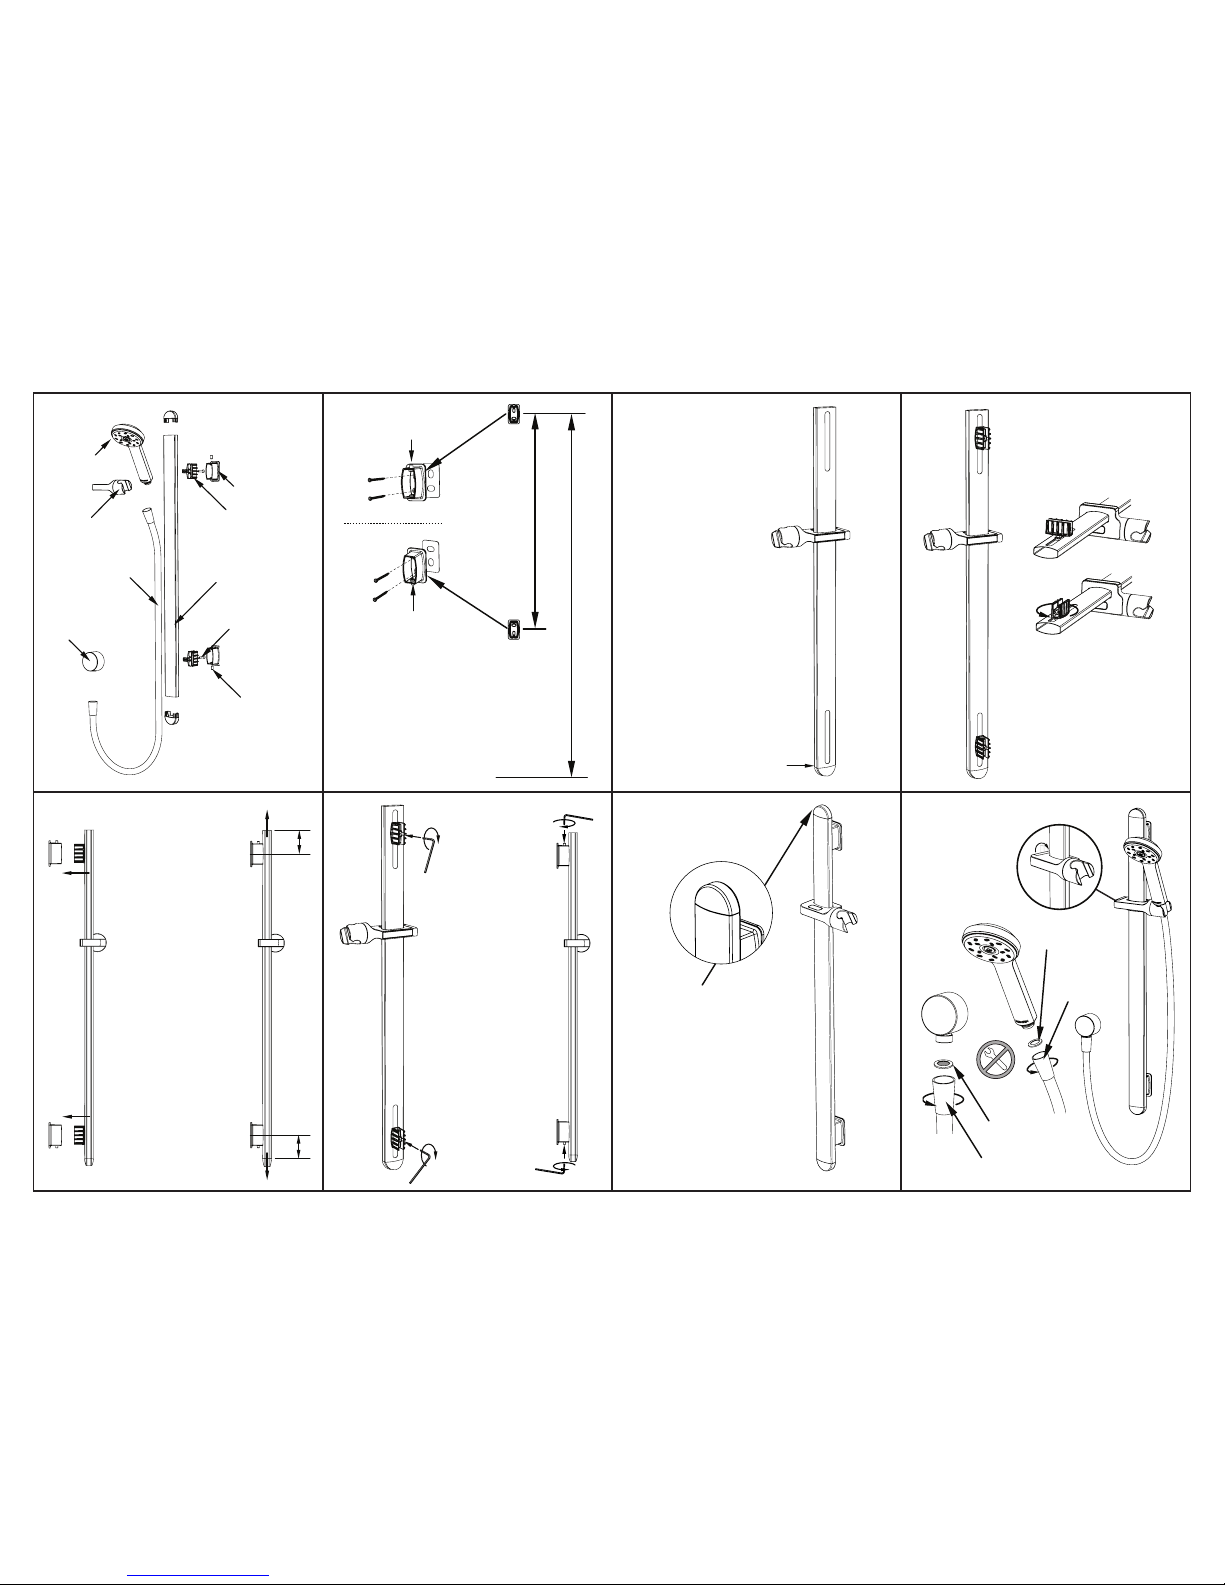
NOTE: TO LOOSEN SLIDERS
GRIP ON RAIL ROTATE SIDE
PIECE ANTI-CLOCKWISE.
ROTATE CLOCKWISE TO
TIGHTEN
Orientate rail so that
pre-fitted endcap is at
bottom of rail
Fitted endcap
1.
5.
3.
7.
2.
6.
4.
8.
Secure the wall boss housings in
desired position with 4 screws.
Check the mounts are vertical.
Ensure the grub screws are
located as shown.
NOTE: ENSURE
PROTECTION
PADS ARE USED
BETWEEN WALL
BOSSES AND TILES
Fit end cap to top of
rail. Ensure drainage
hole is at back
Non-Swivelling Cone
Filter Washer
Flat Washer
Swivelling
Cone
Match the mountings
up to the wall bosses
and push into place.
Slide the rail up and
down if required to
centralise the rail on
the brackets
Once satisfied that
the rail is centralised
remove the rail and
tighten the tensioning
screws until they lock.
Relocate the rail
onto wall bosses and
tighten grub screws
top and bottom.
Fit the internal mounting
brackets by locating in slot
and rotating 90° as shown.
Once located tighten the
screws finger-tight.
grub screw underside
grub screw topside
Wall Boss Housing
Grub Srew
Rail
Hose
Slider
Maku Handset
Elbow
Screw
Internal Mounting Bracket
Floor
510-645mm
1850mm (recommended)
 Loading...