

Page 1
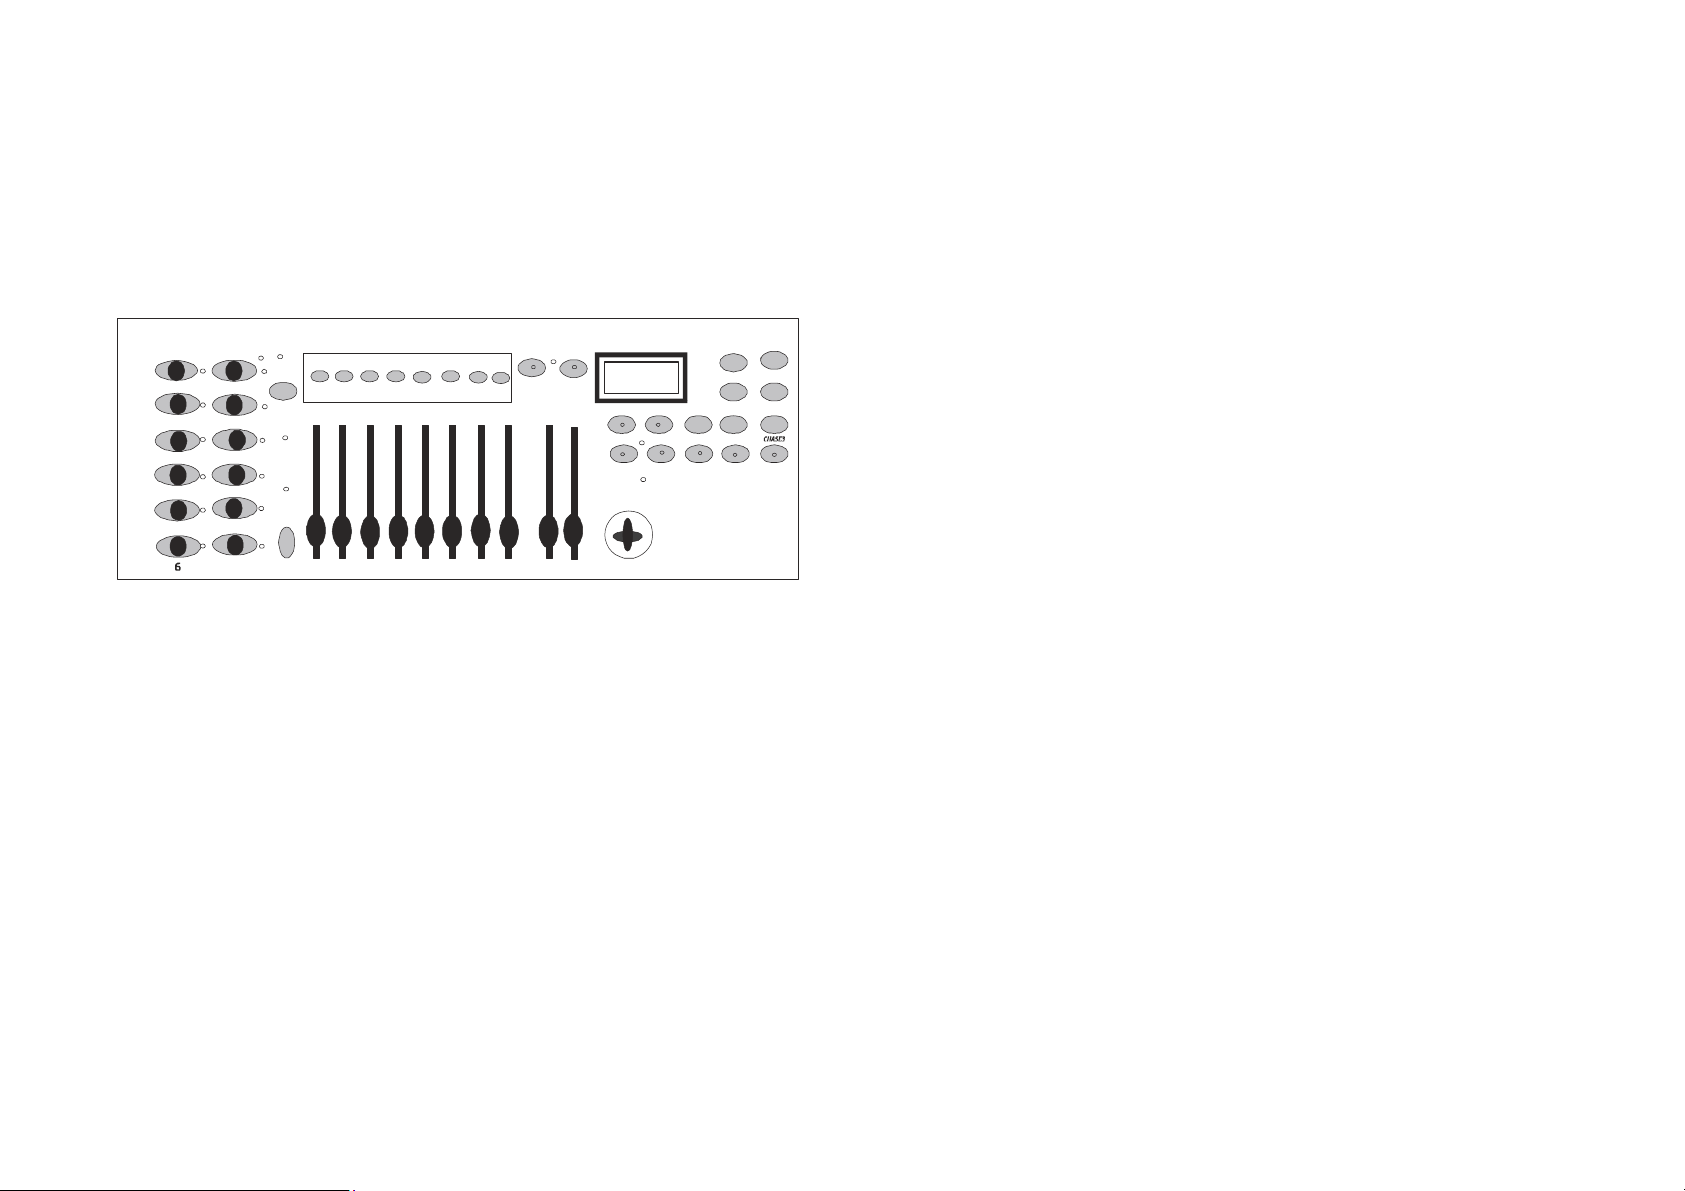
C-240
METEOR-KLS
Program
Bank-Copy
0.i /Sec.
FADE TIME
PAN(9-19)
TILT(10-20)
TAP DISPLAY
CHASE 5
CHASE 6
HEATING ELEMENT
BANK
CHASE 1
CHASE2
CHASE 4
C-240
BLACKOUT
DMX LIGHTING CONTROLLER
Scenes
1
7
FOG
2
3
4
5
MACHINE
8
PAGES
9
10
PAGE
SELECT
11
12
2 3
4
6 7 81 5
A
B
10 Min
SPEED
Music
30 sec.
0
MIDI
RECORD
FINE MODE
AUTO
DELETE
Operators Manual
MLSC Inc.
MLSC Inc.
MLSC Inc.MLSC Inc.
8000 Madison Pike, Madison, Alabama 35758
Tel (256) 461–8000 Fax: (256) 461–7708
Website: meteor-global.com e-mail: [email protected]
METEOR C
Please read these instructions carefully before attempting to operate /
program controller. Once you feel you understand the instructions,
locate the instructions in a place where you will remember where they
are for future reference and additional help in using your controller
METEOR C----240
METEOR CMETEOR C
240
240240
CONTROLLER
CONTENTS:
1.
12 fixtures up to 20 channels each
30 banks of 8 Scenes each for a total of 240 scenes
6 Chases – each up to 240 Scenes
1 -
INTRODUCTION / FEATURES
2 -
FUNCTIONS
3 -
OPERATING INSTRUCTIONS
4 -
TROUBLE SHOOTING
(PAGES 11 / 12)
INTRODUCTION / FEATURES
The C- 240 CONTROLLER is a standard DMX 512 Controller
capable of controlling up to 240 DMX channels simultaneously.
The main features include:
8 Faders to adjust DMX output level from 0 – 255.
2 Faders control Speed / Fade Time
control through MIDI Interface
MIDI
Built in Microphone for Sound to Light / or Audio Jack
Blackout Button
Ease of Operation and Programming and copying scenes
Mix and Match any DMX Lighting fixture
(PAGE 1)
(PAGES 2 / 3)
(PAGES 3 – 11)
SPECIFICATIONS:
Power Input: DC9 – 12v 300mA
DMX OUTPUT: 3 Pin Female XLR connector
Size: 19” (rack-mountable) x 5.25” h x 3” d
Power supply
: included
(1)
Page 2

METEOR-KLS
Program
Bank-Copy
0.i /Sec.
FADE TIME
PAN(9-19)
TILT(10-20)
TAP DISPLAY
CHASE 5
CHASE 6
HEATING ELEMENT
2
FUNCTIONS / Buttons:
Front Control Panel
1) Scanners: to select any or all of the 12 units
2) Scenes: To store or run scenes
3) Page Select: To select Page A for Channel
1 to 8, or B for channels 9-16.
4)
LCD Display:
4 digit showing numeric
value of DMX channel / Level
5) Bank ( up / down) : 30 banks are available
for use in selecting
6) Chases: To Select 1 – 6 Chases
7) Blackout – Disables all active channel
outputs without going into a DMX
reset
8) Program: to activate the program mode.
Display flashes when activated
9) Midi / Add: To control MIDI operations of
activates save functions.
10) Auto/Del: to Select Auto Run in Chase
mode or delete scenes and / or
chases
11) Music / Bank Copy: to trigger the Sound
Activation in Chase mode or to copy a
bank of scenes from one to another in
program mode
12) Tap SYNC/ Display: In Auto Chase mode
used to change the Rate of Chase
and in Program Mode to change LCD
display value.
13) Fade Time Slider: To adjust the Fade Time
– fade time is the time takes the
completely cross fade from one scene to
another scene.
14) 2- Speed Slider: to adjust the chase rate
in Auto Mode
15) Faders ( 1 – 8 ): to adjust the output level
from 0 – 255 or the intensity from 0% 100% of each channel
(2)
C-240 to
2
REAR CONTROL PANEL:
16)
Midi In:
17) DMX Polarity Select: make sure Polarity
of your fixture and set the SCENEMASTER
C-240 to the proper polarity.
18) DMX Output: to send All DMX signals to
fixture or powerpacks / dimmers.
19) DC Input: to supply a DC 9 – 12v power,
300 mA minimum
20) ON / OFF switch
1
7
FOG
2
3
4
5
MACHINE
8
9
10
SELECT
11
12
PAGES
PAGE
2 3
A
B
to receive MIDI data.
Scenes
4
6 7 81 5
10 Min
SPEED
Music
30 sec.
0
MIDI
RECORD
FINE MODE
AUTO
DELETE
BANK
CHASE 1
CHASE2
CHASE 4
C-240
BLACKOUT
3 - OPERATION INSTRUCTION:
Standard DMX 512 Addressing
Dip Switch Setting: Each Dip Switch has an address based on
Binary code
Dip Switch number: 1 2 3 4 5 6 7 8 9
DMX Value: 1 2 4 8 16 32 64 128 256
Select the address wanted: by adding the total of Dip Switches
on.
(note)
selectable functions, i.e. master/slave or sound
activation etc.
Each of the 12 fixtures is assigned 16 Channels (whether you
are using all those channels or not . The dip switches on
your fixtures are set as per the diagram on next page.
Dip switch # 10 is not used with DMX normally for
(3)
Page 3

Scanners Channels Dip Switches ON
Fixture 1 1 - 20 1
Fixture 2 21 - 40 1, 3, 5
Fixture 3 41 - 60 1, 4, 6
Fixture 4 61 - 80 1, 3, 4, 5, 6
Fixture 5 81 - 100 1, 5, 7
Fixture 6 101 - 120 1, 3, 6, 7
Fixture 7 121 - 140 1, 4, 5, 6, 7
Fixture 8 141 - 160 1, 3, 4, 8
Fixture 9 161 - 180 1, 6, 8
Fixture 10 181 - 200
1, 3, 5, 6, 8
Fixture 11 201 - 220 1, 4, 7, 8
Fixture 12 221- 240 1, 3, 4, 5, 7, 8
•
note:
When addressing your fixtures, use the starting addresses
used in this instruction manual, not the addressing found in your
fixture manual. (every thing in groups of 20)
SCENE PROGRAMMING:
1) Press and HOLD PROGRAM BUTTON for three (3)
seconds to activate PROGRAM Mode. The LCD next
to “PROGRAM” blinks. This indicates the program
has been started.
2) Select the fixture to program by pressing any or all
the scanner buttons 1 - 12.
3) Adjust / move the Faders / sliders to the desired
output levels for all channels (i.e., color gobo, pan
and tilt, etc.) of the fixture(s) you selected. Press
PAGE SELECT A/B if the fixture has more then 8
channels. When selecting from page A to B, you
have to move the sliders to activate the channels.
4)
gobo and you wish to program another fixture –
Press the Scanner button you have just finished
adjusting. This will hold that fixture and its values in
its final configuration. Select another fixture by
pressing the target Scanner Button and proceed to
adjust / set and change to the settings of your liking of
fixture two
5) Repeat Steps 2 and 3 until you have set the fixture to
its correct position
If you have set the fixture to its correct position, color
(4)
6) When all the fixtures you want to be programmed are
in there correct position. Press the MIDI / ADD button
7) Select the desired Bank to store scene using the UP and
DOWN bank select button. There are 30 BANKS you can
store up to eight scenes per BANK. For a total of 240
Scenes.
8) Then Press the SCENE BUTTON 1-8 to store the SCENE.
All LED’s will flash 3 times. The LCD Screen will display the
BANK and the SCENE where your SCENE was stored.
9) Repeat Steps 2-8 to record all your desired SCENES. You
can copy the settings from one Scanner button to another in
case you want to add more fixtures to your show. Just press
and HOLD the SCANNER Button you want to copy. Then
press the Scanner Button you want to copy to.
10) To exit PROGRAMMING Mode – Press and HOLD the
PROGRAM
button for 3 – 5 seconds.
(when you exit the Programming, the BLACKOUT LED is
on. Press BLACKOUT Button to disable BLACKOUT
function
SCENE EDITING:
This function allows you to make changes in an already
programmed scene.
1) Press the PROGRAM button for three seconds to enter the
Program mode.
2) Use the BANK UP and DOWN button to select the bank
that stores the scene you would like to edit.
3) Select the Scene you want to edit by pressing the SCENE
button.
4) Use the faders / sliders to make your changes.
5) Press the MIDI / Add button then followed by the SCENE
Button that corresponds to the scene you selected earlier
(otherwise you might accidentally record over an existing
scene).
SCENE COPY:
This function allows you to copy the setting of one scene
to another.
1. Press the PROGRAM button for three seconds to enter the
Program mode.
Page 4

2. Use the BANK Up and Down to locate the bank that has
a. that particular scene in it.
3. Select the desired SCENE you want to copy by pressing the
SCENE Button.
4. Use the BANK buttons UP and DOWN to select the Bank
where you want the to store the copied SCENE.
5. Press MIDI / Add button followed by the SCENE button where
you want to copy to.
3.
SCENE DELETE:
This function will rest all the DMX channels incorporated
within a SCENE to a DMX value of 0.
1) Select the desired SCENE you would like to delete.
2) While Pressing and Holding AUTO / Del. Press the SCENE
3.
button (1 – 8) you want to delete.
ERASE ALL SCENE:
This will ERASE all SCENES in ALL BANKS. All SCENES
are reset to DMX value zero (0). Make double sure this is
really what you are wanting to do
1) Press and hold down PROGRAM and BANK Down buttons
while turning power off.
2) Re-connect POWER. All SCENES should be erased.
NOTE: Once you have successfully erased all SCENES, there is no way
to retrieve them.
3.
COPY A BANK
:
This function enables you to copy the setting of one BANK
to another BANK.
1) Press and HOLD the PROGRAM Button for 3 seconds to
activate the PROGRAMMING Mode.
2) Select the BANK you want to copy.
Press and Release the
3)
MIDI / Add button.
4) Select the BANK into which you want to copy to.
5) Press the MUSIC / BANK-Copy Button. The LCD Display
will flash momentarily to indicate the process / copy has
been completed.
(6)
3
DELETE A BANK:
Press and
1)
HOLD
Activate the PROGRAM Mode.
2) Select the BANK to be deleted.. Press AUTO / Del and
MUSIC / Bank Copy at the same time to delete the BANK.
The LCD will flash momentarily to indicate it has been
successfully deleted.
3
CHASE PROGRAMMING:
You must already have programmed SCENES before you
can program any chases.
1) Press and HOLD the PROGRAM Button down for three (3)
seconds to enter the PROGRAMMING MODE
2) Choose any CHASE ( 1 – 6 ) to be programmed.
3) Select the desired SCENE from any of the BANKS.
SCENES run in the same order as they are entered into the
PROGRAM CHASE.
4) Pre the MIDI / Add Button. All the LED’s will FLASH three
(3) times.
5) Repeat steps 3 and 4 as many times as you want. You can
record up to
6) When you are finished PROGRAMMING a CHASE –
PRESS and HOLD the PROGRAM Button for three (3)
seconds.
3
COPY A BANK TO A CHASE:
the
PROGRAM
240 SCENES
in one
1. Press and HOLD the PROGRAM Button for three (3)
Seconds to enter the Programming Mode.
2. Select the BANK of SCENES you wish to copy.
3.
Select the CHASE to which you want to copy the bank
of SCENES. Press the MUSIC / BANK-Copy Button.
The LCD Display will flash momentarily to indicate the
process / copy has been completed.
4. Press MUSIC / Bank-Copy and MIDI / Add at the same
time. The SCENES of the BANK are now copied into
the CHASE.
5. Press and HOLD the PROGRAM Button for three (3)
seconds to exit the Programming Mode.
Button for 3 seconds to
CHASE.
Page 5

3
EDITING CHASES:
This feature allows you to add / delete SCENES from an
already existing CHASE.
1) Press and HOLD the PROGRAM Button down for three (3)
Seconds to enter the Programming Mode.
3
3
Select the
2)
CHASE
3) Press TAPSYNC / Display and the LCD shows the
SCENE and the BANK. That is the BANK containing the
SCENE you want to add to the CHASE.
4) Press TAPSYNC / Display again and the LCD shows the
CHASE that you have selected to add to.
5) Use the UP or DOWN Buttons to scroll through the CHASE
to reach the step AFTER which you wish to add.
6) Press MIDI / Add – the LCD will read one step number
higher.
7) Press the SCENE Button you wish to add.
8) Press the MIDI / Add again to add the new step.
9) Press and HOLD the PROGRAM Button down for three (3)
seconds to exit the Programming Mode.
DELETING A STEP OR TWO IN A CHASE:
1) Press and HOLD the PROGRAM Button for three (3)
Seconds to enter the Programming Mode.
2) Select the CHASE (1-6) from which you want to delete a
step (scene).
3) Press TAPSYNC / Display and the LCD shows the
CHASE you have selected.
4) Use the UP and Down Buttons to scroll through the
CHASE to reach the step (scene) you want to delete.
5) Press AUTO / Del and the SCENE will be deleted.
6) Press and HOLD the PROGRAM Button for three (3)
seconds to exit the Programming Mode.
DELETE CHASE ( all SCENES still available)
1) Press and HOLD down the BANK Down and AUTO / Del.
while turning power off.
2) Reconnect the Power and the CHASES should all be
deleted
(8)
(1-6) to which you want to add a step.
3
RUNNING SCENES:
MANUAL RUN SCENES
1) When the power is first turned on, the unit is in a MANUAL
Scene mode.
2) If in the Program Mode – Press and Hold the PROGRAM
Button for three (3) seconds. The
The SCENEMASTER is now in its MANAUL Mode.
3) Be Sure that the AUTO and MUSIC Button LED’s are off.
4) Select the BANK – using the UP or DOWN Button that
stores the SCENES you want to run.
5) Press the SCENE Button to run the SCENE you have
selected.
3
AUTO RUN SCENES:
3
3
Auto or MUSIC Run Mode.
RUNNING SCENES:
This function will run a BANK of PROGRAMMED
SCENES in a sequential loop.
1) Press AUTO / Del once to activate the AUTO RUN mode.
2) Use the UP or DOWN BANK Button to select a Bank of
SCENES to run.
Now you can use the
3)
SPEED
and
the SCENES to your liking
NOTE:
The FADE setting should never be slower then the
SPEED setting or the SCENES will not be completed.
4) You can change the BANKS “on the fly” by pressing the
UP or DOWN BANK Buttons.
RUNNING SCENES:
MUSIC RUN SCENES
1) Press the MUSIC / Bank-Copy Button and the
Corresponding indicator light will come on in the LCD.
2) Select the desired BANK that stores the SCENES you
want to CHASE by using the UP or DOWN Button
RUNNING SCENES:
1) Select BANK to run SCENES using MIDI – in MANUAL /
MIDI RUN SCENES
Program LED
FADE
sliders to adjust
will go out.
Page 6

1) Select BANK to run SCENES using MIDI – in MANUAL /
Auto or MUSIC Run Mode.
3
RUNNING CHASES:
MANUAL RUN CHASES:
This function will enable you to manually step through a
selected CHASE.
1) Press and HOLD the PROGRAM Button for three (3)
seconds to enter the Programming Mode.
2) Start a CHASE by selecting one of the six (6) CHASE
Buttons.
3) Press the TAP SYNC Button. Each time you press the
button, you will step through the CHASE.
4) Use the BANK Select Button to scroll through the
CHASES.
5) Press and HOLD the PROGRAM Button for three (3)
seconds to exit the Programming Mode
3
RUNNING CHASES:
AUTO RUN CHASES:
1) Press ANY or all of the 6 CHASE Buttons to select the
desired CHASE.
2) Press and Release the AUTO / Del. Button. The
corresponding LED will flash.
3) Adjust the FADE Time and SPEED to your desired setting.
The
CHASE
will run according to your settings.
4) You can override the Speed and Fade time by tapping the
TAP SYNC / Display button three (3) times. Then the
3
CHASE will be run based on the time interval of your taps.
NOTE A: Never adjust the FADE TIME slower then the SPEED
setting. Otherwise your CHASES will not be completed
before a new SCENE is sent
NOTE B: If you wish to include all the CHASES, Press AUTO /
Del. before selecting a CHASE.
RUNNING CHASES:
MUSIC RUN CHASES:
1) Press one of the six (6) CHASE Buttons to select the
CHASE desired.
Press and Release the MUSIC / Bank-Copy Button
3
3
2) The corresponding LED will FLASH in the LCD.
3) The CHASE will now run via the Sound / Music.
NOTE: When you exit a CHASE by Pressing the CHASE
Button, the Controller will automatically run the
SCENES that are in the last bank accessed.
To stop the movements of the light, either use the
BLACKOUT button or Press MUSIC if in the Music
Mode or in the AUTO Mode.
MIDI CHANNEL SETTING
MIDI RUNNING
1) Press and HOLD the MIDI / Add Button. The third and
Fourth digits on the LCD display will FLASH – indicating
MIDI Mode.
2) Use the UP or Down Buttons to select the Midi channel
(1 – 16) you would like to use / run.
3) Press and Hold the MIDI / Add Button once more to end
MIDI mode
MIDI CHANNEL SETTING
NOTE “ON”: RECEIVE NOTE “ON” SIGNALS TO EXECUTE
CORRESPONDING FUNCTIONS
THE SCENEMASTER RECIEVES ONLY MIDI
NOTES AND YOU MIGHT WANT TO
TRANSPOSE YOUR KEYBOARD TO FIND
THE PROPER MIDI NOTE.
ASSIGNING PAN & TILT CHANNELS TO THE
JOYSTICK
1) Press “Program” button for 2 seconds to enter Program
Mode (LED flashes). Turn off BLACKOUT LED
2) Press “FINE + MODE, (together- twice) it will Display SET
00 00 Up FI CH
3) Press SCANNER Button, to select fixture assigning
4) Adjust the slider on SPEED to Channel 1
5) Adjust the slider on FADE TIME to X (almost to the top).
6) Press Midi/Record (one button) to confirm the PAN on
Ch.1
7) Adjust the slider on SPEED to channel 2 (or whatever)
8) Adjust the FADE SLIDER to read Y
Finished – Press FINE + MODE to exit
Page 7

TROUBLE SHOOTING / OFTEN ASKED QUESTIONS:
COLORS DON’T RESPOND WHEN FADERS ARE MOVE
MAKE SURE DMX ADDRESS IS CORRECT / DIP SWITCHES
IF XLR CABLE IS MORE THEN 30 METERS (100FT), CHECK
TO SEE IF TERMINATED CORRECTLY.
MIRRORS DON’T RESPOND WHEN SLIDERS ARE MOVED
MAKE SURE DMX ADDRESS IS CORRECT / DIP SWITCHES
MAKE SURE SPEED IS ADJUSTED, IF AVAILABLE FOR
FASTER MIRROR MOVEMENT. NOT ALL UNITS HAVE
SPEED ADJUSTMENT
IF XLR CABLE IS MORE THEN 30 METERS (100FT), CHECK
TO SEE IF TERMINATED CORRECTLY.
SCENES DON’T RUN AFTER RECORDING THEM
MAKE SURE TO PRESS MIDI / ADD BUTTON BEFORE
PRESSING SCENE BUTTON. LED’s SHOULD FLASH
AFTER PRESSING EACH SCENE BUTTON.
BE SURE YOU ARE IN THE CORRECT BANK THAT THE
SCENES WERE RECORDED IN.
SCENES DON’T RUN CORRECTLY AS RECORDED
MAKE SURE ALL FIXTURES WERE RECORDED IN SCENE
MAKE SURE YOU ARE IN THE CORRECT BANK THAT THE
SCENES WERE RECORDED IN
CHASES DON’T RUN AFTER RECORDING THEM
HAVE YOU READ THIS MANUAL COMPLETELY AND
EC DECLARATION OF CONFORMITY: We declare that this product complies with the following
specifications and bears CE mark in accordance with the provisions of Electro- Magnetic
Compatibility (EMC) Directive 89/336/EEC EN55014-1:1994, EN61000-3-2:1995, EN61000-33:1995EN55014-2:1997CATEGORY ll EN61000-4-2:1995, EN61000-4-3:1995, EN61000-4-
4:1995EN61000-4-5:1995, EN61000-4-6:1995, EN61000-4-11:1994HARMONIZED STANDARD
EN60598-1:1993 Safety of Household and similar electrical appliances Par 1: General
Requirements Following the provisions of the Low voltage Directive 73/23 EEC and 93/68/EEC
MAKE SURE TO PRESS THE MIDI/ADD BUTTON AFTER
PRESSING THE SCENE BUTTON. LED SHOULD FLASH
AFTER PRESSING MIDI / ADD.
BE SURE YOU ARE IN THE CORRECT CHASE THAT HAS
THE STEPS RECORDED IN
IF IN AUTO MODE – DID YOU ADJUST SPEED AFTER
SELECTING AUTO
FADE TIME IS TOO LONG FOR SPEED SELECTED
FIXTURES AREN’T DOING ANYTHING
FOLLOWED ALL THE RECORDING STEPS FOR
SCENES AND CHASES
DID YOU SET YOUR DIP SWITCHES ACCORDING TO THIS
MANUAL
ARE ALL UNITS PROPERLY CONNECTED WITH POWER
ON AND PROPERLY CONNECTED VIA DMX.
FOR TECHNICAL HELP / SUPPORT
MLSC Inc.
MLSC Inc.
MLSC Inc.MLSC Inc.
8000 Madison Pike, Madison, Alabama 35758
Tel (256) 461–8000 Fax: (256) 461–7708
Website: meteor-global.com e-mail: [email protected]
 Loading...