

Metalux IB519094EN Installation Manual
INS #
Brand Logo
reversed out of
black
INS #
IB519094EN
Metalux
Installation Instructions – Tunable White
Directives d’installation – Blanc avec gradation
Instrucciones de instalación – Blanco dinámico
WARNING
Risk of Fire, Electrical Shock, Cuts or other Casualty Hazards- Installation and maintenance of this
product must be performed by a qualified electrician. This product must be installed in accordance
with the applicable installation code by a person familiar with the construction and operation of
the product and hazards involved.
Risk of Fire and Electric Shock- Make certain power is OFF before starting installation or
attempting any maintenance. Disconnect power at fuse or circuit breaker.
Risk of Fire- Minimum 90°C supply conductors.
Risk of Burn- Disconnect power and allow fixture to cool before handling or servicing.
Risk of Personal Injury- Due to sharp edges, handle with care.
Failure to comply with these instructions may result in death, serious bodily injury and property
damage.
DISCLAIMER OF LIABILITY: Cooper Lighting Solutions assumes no liability for
that may arise from the improper, careless, or negligent installation, handling or use of this product.
IMPORTANT: Read carefully before installing fixture. Retain for future reference.
NOTICE: Green ground screw provided in proper location. Do not relocate.
NOTICE: Fixture may become damaged and/or unstable if not installed properly.
Note: Specifications and dimensions subject to change without notice.
ATTENTION Receiving Department: Note actual fixture description of any shortage or noticeable damage on
delivery receipt. File claim for common carrier (LTL) directly with carrier. Claims for concealed damage must be
filed within 15 days of delivery. All damaged material, complete with original packing must be retained.
damages or losses of any kind
COOPER LIGHTING SOLUTIONS
IB519094EN Installation instructions
Installation Instructions – Tunable White
INSTALLATION
CCT and dimming connections
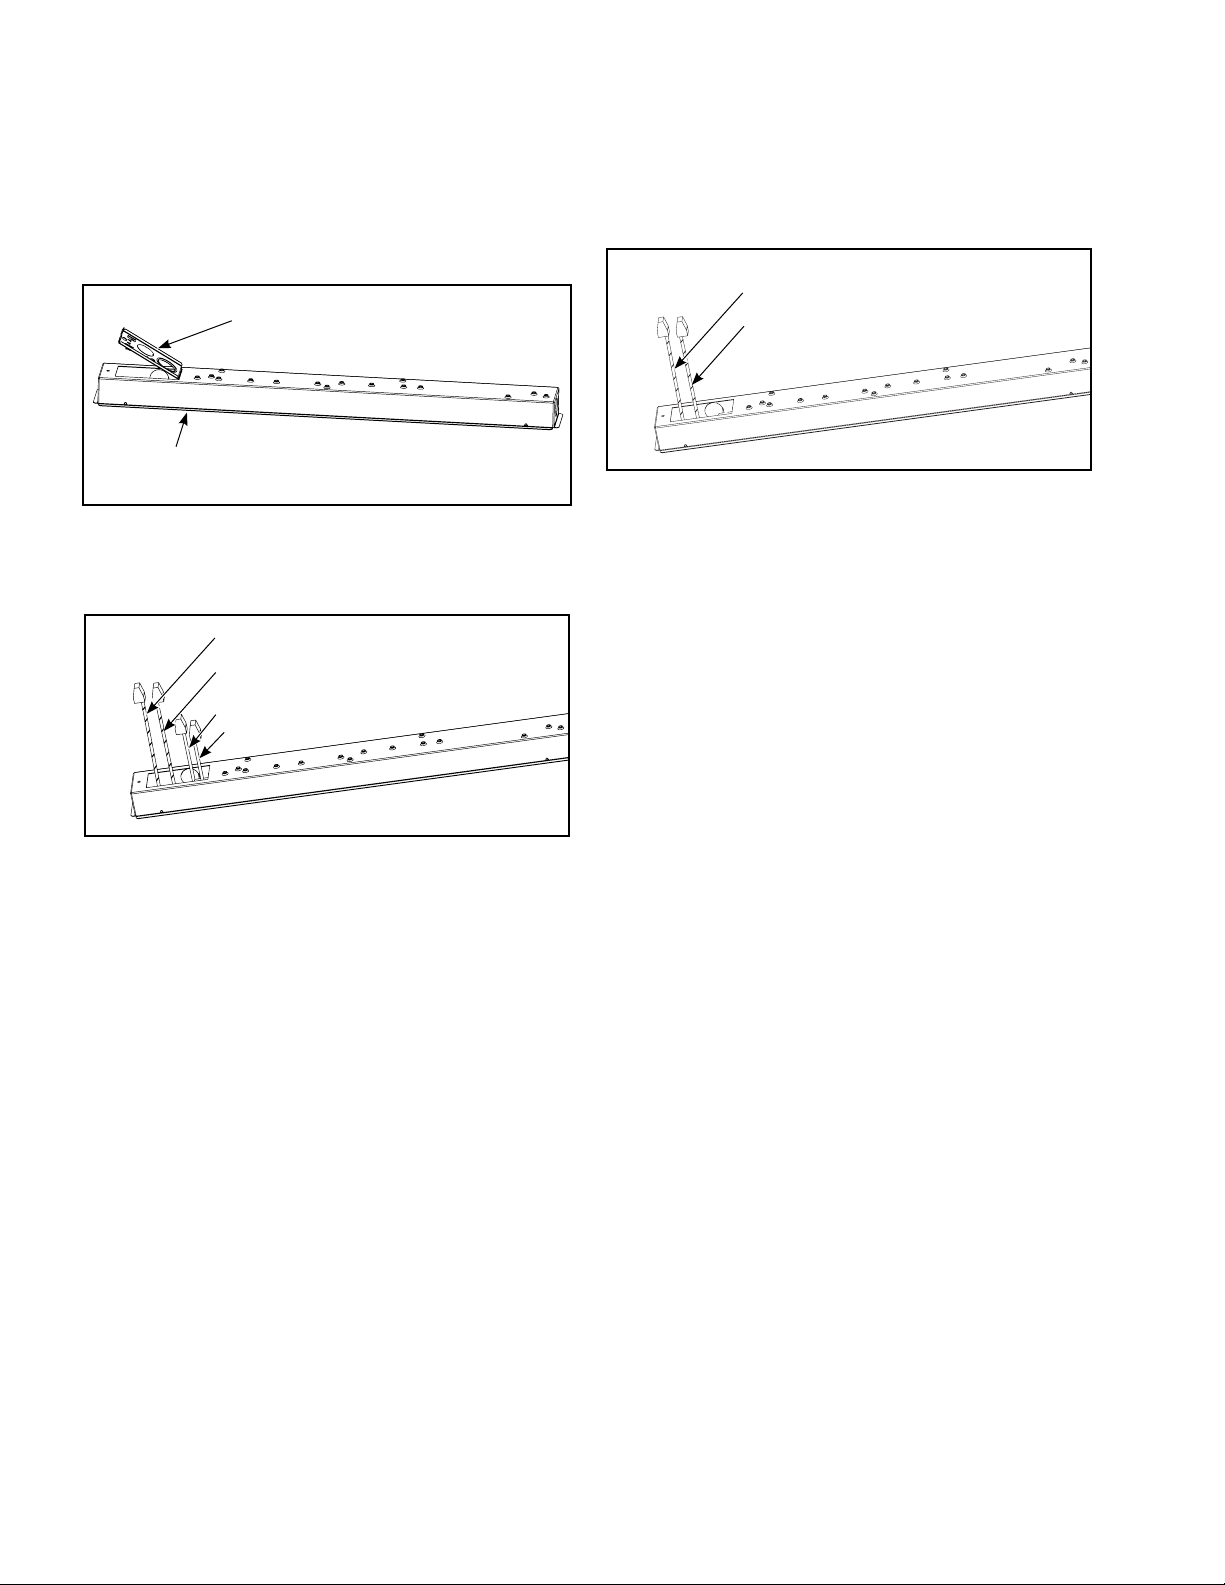
1. Remove access plate to access wires. (Figure 1.)
Access plate common
Junction box may be a different shape
Figure 1.
2a. For a fixture without an integrated sensor, locate four
control wires with push nuts (violet, gray, violet / white
stripe, gray / black stripe). (Figure 2.)
Violet / White Striped
Gray / Black Striped
Violet
Gray
2b. For a fixture with an integrated sensor, locate two
control wires with push nuts (violet / white stripe, gray /
black stripe) and skip to step 4. (Figure 3.)
Violet / White Striped
Gray / Black Striped
Figure 3.
3. Use the supplied push nuts to connect the control
input 0-10V dimming violet and gray wires to the
corresponding fixture violet and gray wires. (Figure 2.)
4. Use the supplied push nuts to connect the control input
0-10V CCT wires to the corresponding fixture violet/
white stripe and gray/black stripe wires.
(Figures 2 and 3.)
Figure 2.
2
 Loading...