

Page 1
Clock Radio with NFC
MCB328 v2185-01
Features
• NFC & Bluetooth wireless -
range: 60 ft.
• Built-in speaker
• Microphone for hands free
speakerphone operation
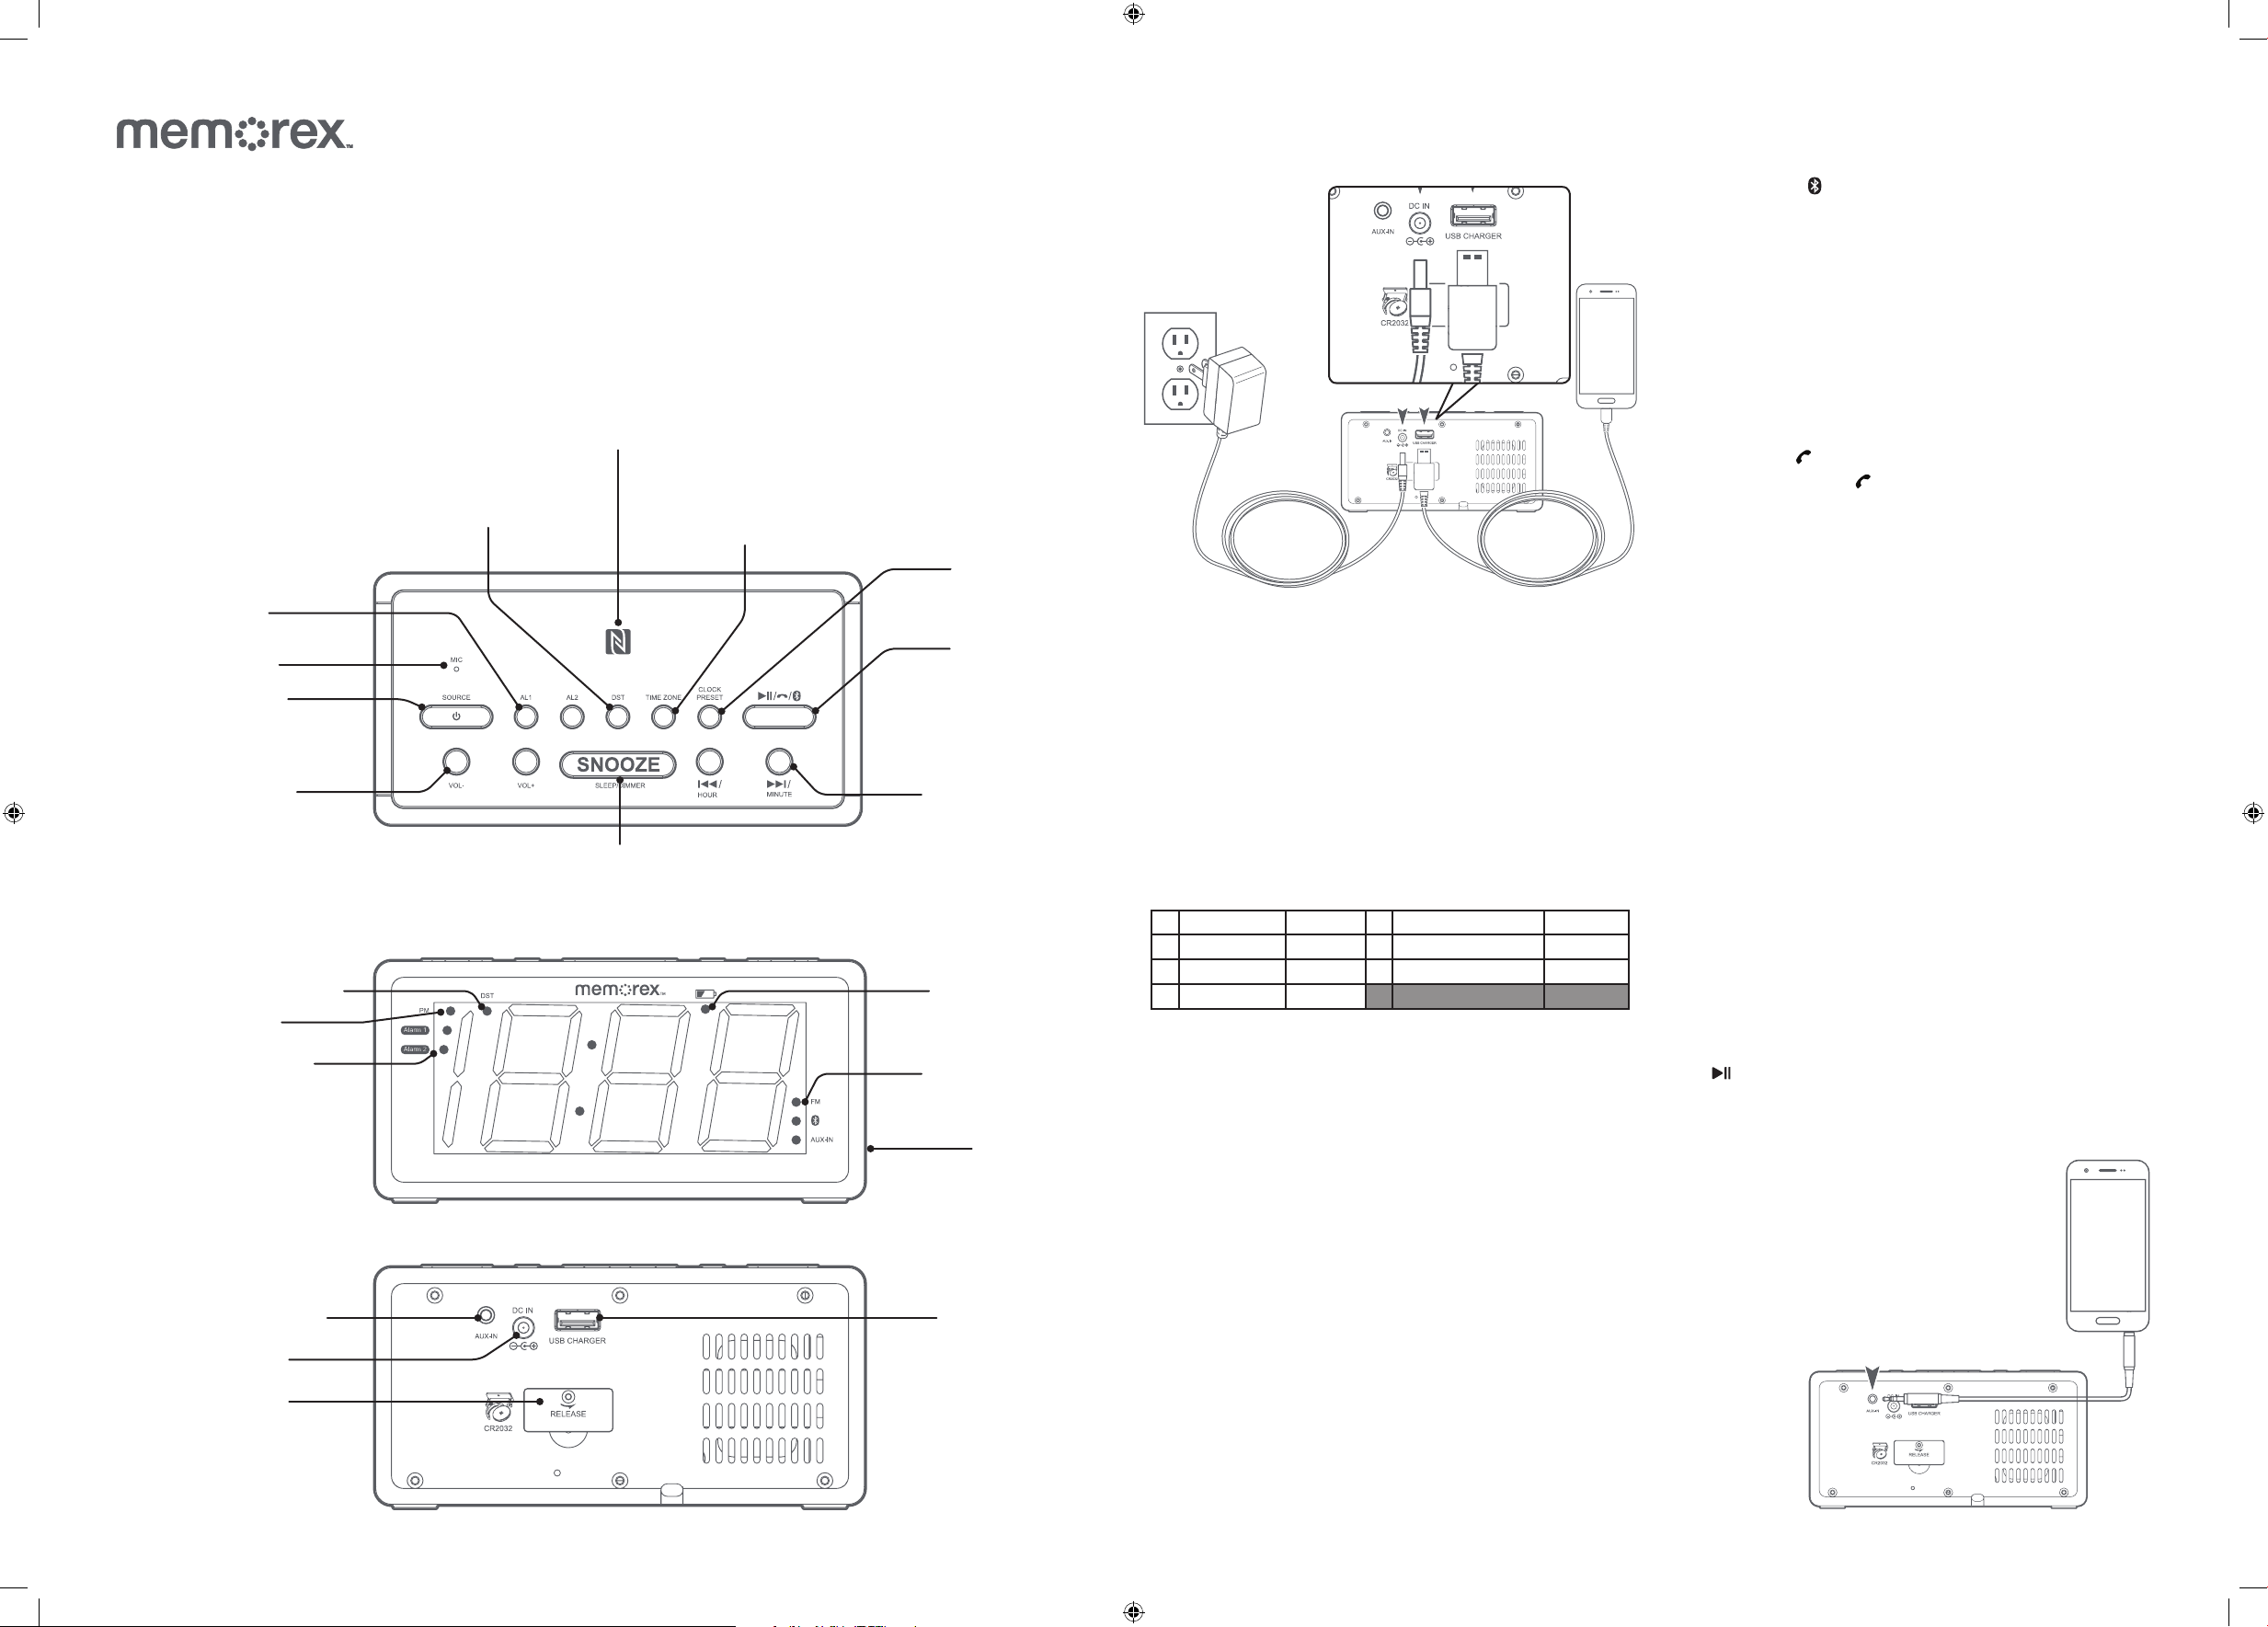
AL1/AL2
Press to set alarm times.
Microphone
Power/Source
Press and hold to power audio
features ON or OFF.
Press to change audio mode.
Volume Up/Down
Daylight Savings Time Indicator
PM Indicator
Alarm On/Off Indicator
Aux In (3.5mm audio input)
DC Power Port
Backup Battery
Compartment
(requires CR2032 battery)
• Built-in FM radio with up to 20
radio presets
• Digital clock
• 1.8˝ Blue LED display
• Aux In (3.5mm audio input)
NFC Connection Area
Daylight Savings Time
Press and hold to move the
time 1 hour ahead or behind.
Snooze/Sleep/Dimmer
Press and hold to dim the display.
Press to set the sleep timer.
Press to Snooze alarm after it has sounded.
• 5V 2A USB power port for mobile
device fast charging
• Battery backup - requires CR2032
button cell battery
Press and hold to begin setting Time
Zone. Press to cycle through different
zones (see Time Zone instructions).
Time Zone
Includes
• AC/DC power adapter
• Warranty
Clock/Preset
Press and hold to set the clock.
Press to cycle through radio presets
Play/Pause/Pair
Bluetooth
Press and hold to begin
pairing to a Bluetooth device
(Bluetooth Mode).
Press to play or pause audio
(Bluetooth Mode).
Skip Track/Hour/Minute
Press to Skip audio tracks
(Bluetooth Mode).
Pres to adjust the time when
setting the clock.
Low Battery Indicator
(Battery Backup)
Source Mode Indicators
FM / Bluetooth / Aux In
Speaker
USB Charging Port
Clock Power & Mobile Device Charging
Plug the AC/DC power adapter into a standard power outlet and
the DC power input on the rear of the clock to power it on.
Mobile devices can be
charged by connecting them
to the USB charging port on
the rear of the clock. Power
output is 5V 2A.
Clock
When the clock is plugged in, the correct time will be displayed after a few
seconds.
Setting the Clock Manually
1. Press and hold the Clock button. The display will begin ashing.
2. Use the Hour/Minute buttons to set the time. Note the PM indicator.
Daylight Savings Time
Press and hold the DST button to adjust the time one hour ahead or behind for
Daylight Savings Time.
Time Zone
Press and hold the Time Zone button to begin setting the desired time zone.
The display will begin ashing, press the Time Zone button repeatedly select
the appropriate zone.
1 Atlantic Time UTC-4 hrs 5 Pacic Time UTC-8 hrs
2 Eastern Time UTC-5 hrs 6 Alaska Time UTC-9 hrs
3 Central Time UTC-6 hrs 7 Hawaii - Aleutian Time UTC-10 hrs
4 Mountain Time UTC-7 hrs
Setting an Alarm
1. With the radio off, press and hold the AL1 or AL2 buttons to set the time
for Alarm 1 or Alarm 2. The display will ash and show the time the alarm
is set to go off. Press the Hour/Min buttons to adjust the time. Note the
PM indicator.
2. Press the AL1/AL2 buttons again to set a weekly alarm schedule.
1-7 rings Mon-Sun | 1-5 rings Mon-Fri | 6-7 rings Sat-Sun
3. After the alarm is set and the display has stopped ashing, press the AL1/
AL2 buttons again to select the alarm type (Buzzer or Radio). Press once
more to deactivate the alarm entirely. Note the Alarm ON/OFF indicators.
Alarm Details
• To cancel the alarm after it has sounded, press the AL button of the
alarm that is sounding.
• To delete the alarm, press the AL button of the alarm you wish to cancel
until the indicator on the display turns OFF.
Sleep Timer
• Press the Snooze button once to set the Sleep Timer. Press again to adjust
the time in 10 minute intervals from 90 to 0 (OFF).
Bluetooth Wireless
Pairing to a Bluetooth Device and Playing Audio
1. Press and hold the button, a voice prompt will sound from the speaker
indicating that the unit is in Bluetooth Mode and connecting. When pairing,
remain within 3 feet of the unit.
2. Using the controls on your Bluetooth device, select MCB328 from your
Bluetooth settings to pair. When successfully paired, the voice will
announce the successful connection. Refer to the user’s manual for your
specic device for more detailed instructions on pairing and connecting
Bluetooth devices.
3. Audio played through the connected Bluetooth device should now be
heard through the speaker. Use the controls on the connected Bluetooth
device to select and begin playing audio. Play, pause or skip audio using
the controls on the device or the unit.
Speakerphone
• To accept or end a phone call coming through the connected Bluetooth
phone, press the button on the speaker.
• To decline a call, press the button twice.
Previously Connected Devices
• This unit can remember multiple Bluetooth devices and will always try to
reconnect to the last device used.
• To reconnect to a different device, turn off Bluetooth on unwanted devices,
then access the Bluetooth settings menu on the device you wish to use
and connect to MCB328.
• If the unit should become unpaired or will not connect normally, delete the
unit for your device's Bluetooth settings menu ("Forget This Device"), turn
the unit off and on again, and perform the Bluetooth connection again.
NFC Connections
Note: Refer to your specic device’s manual for general information, and
instructions on how to check for NFC availability and turn the feature on.
1. Press the Source button to set the unit to Bluetooth mode.
2. After activating your mobile device's NFC, lightly touch your device to the
NFC logo on the unit and hold it there for several seconds. The unit will
connect to your mobile device automatically.
3. When successfully paired and connected, the Bluetooth Indicator on the
display will turn solid .
4. After initial pairing, the unit will stay paired unless unpaired manually by
the user or erased due to a reset of the device.
FM Radio
Note: This unit has a built-in FM antenna. To improve radio reception, adjust the
position of the unit.
1. Press the Source button to switch to FM Mode. A voice prompt will sound
from the speaker and the display will show the radio frequency.
2. To automatically scan radio frequencies and set presets, press and hold
the button. When nished, press the Preset button to change presets.
3. To manually set presets, press the Preset button to select a preset (1-20).
Tune the radio frequency with the Skip buttons, then press and hold the
Preset button to set it.
Aux In
Requires a 3.5mm audio cable (not included).
1. With the unit powered ON, connect a 3.5mm audio
cable to the Aux In port. Press the Source button to
switch to Aux-In Mode.
2. Use the controls on the connected device to play audio
through the unit.
Page 2
This symbol, located on back or bottom of the unit, is intended to alert the user to
the presence of important operating and maintenance (servicing) instructions in the
literature accompanying the appliance.
This symbol, located on back or bottom of the unit, is intended to alert the user to
the presence of uninsulated “dangerous voltage” within the product’s enclosure that
WARNING: This product can expose you to chemicals including lead, which
is known to the State of California to cause cancer and birth defects or other
reproductive harm. For more information go to www.P65Warnings.ca.gov. This
product meets and complies with all Federal regulations.
FCC Statement
This device complies with part 15 of the FCC Rules. Operation is subject to the following two
conditions:
1. This device may not cause harmful interference, and
2. This device must accept any interference received, including interference that may cause
undesired operation.
NOTE: This equipment has been tested and found to comply with the limits for a Class B digital
device, pursuant to Part 15 of the FCC Rules. These limits are designed to provide reasonable
protection against harmful interference in a residential installation. This equipment generates,
uses, and can radiate radio frequency energy and, if not installed and used in accordance with
the instructions, may cause harmful interference to radio communications. However, there is no
guarantee that interference will not occur in a particular installation. If this equipment does cause
harmful interference to radio or television reception, which can be determined by turning the
equipment off and on, the user is encouraged to try to correct the interference by one or more of
the following measures:
• Reorient or relocate the receiving antenna.
• Increase the separation between the equipment and receiver.
• Connect the equipment into an outlet on a circuit different from that to which the receiver is
connected.
• Consult the dealer or an experienced radio/TV technician for help.
•
responsible for compliance could void the user’s authority to operate the equipment.
Important Safety Instructions
• Read Instructions - All the safety and operating instruction should be read before the product
is operated.
• Retain Instructions - The safety and operating instruction should be retained for future
reference.
• Heed Warnings - All warning on the product and in the operating instructions should be
adhered to.
• Follow instructions - All operating and use instructions should be followed.
• Cleaning - Unplug this product from the wall outlet before cleaning. Do not use liquid cleaners
or aerosol cleaners. Clean only with a dry cloth.
• Attachments - Do not use attachments not recommended by the product manufacturer as
they may cause hazards.
• Water and Moisture - Do not use this product near water - for example, near a bath tub, wash
bowl, kitchen sink, or laundry tub; in a wet basement, or near a swimming pool, and the like.
liquids, such as vases, shall be placed on apparatus.
• Accessories - Do not place this product on an unstable cart, stand tripod, bracket, or table.
The product may fall, causing serious injury to a child or adult, and serious
damage to the product. Use only with a cart, stand, tripod, bracket, or table
recommended by the manufacturer, or sold with the product. Any mounting of
the product should follow the manufacturer’s instructions, and should use a
mounting accessory recommended by the manufacturer.
• A product and cart combination should be moved with care. Quick stops, excessive force,
• Ventilation - Slots and openings in the cabinet are provided for ventilation and to ensure
reliable operation of the product and to protect it from overheating, and these openings
must not be blocked or covered. The openings should never be blocked by placing the
product on a bed, sofa, rug, or other similar surface. This product should not be placed in a
built-in installation such as a bookcase or rack unless proper ventilation is provided or the
manufacturer’s instruction have been adhered to.
• Power Sources - This product should be operated only from the type of power source
indicated on the marking label. If you are not sure of the type of power supply to your home,
consult your product dealer or local power company. For products intended to operate from
battery power, or other sources, refer to the operating instruction.
• Grounding or Polarization - This product may be equipped with a polarized alternating current
only one way. This is a safety fully into the outlet, try reversing the plug. If the plug should
purpose of the polarizes plug.
• Power-Cord Protection - Power supply cords should be routed so that they are not likely to
be walked on or pinched by items placed upon or against them, paying particular attention to
cords at plugs, convenience receptacles, and point where they exit from the product.
• Protective Attachment Plug - The product is equipped with an attachment plug having
overload protection. This is a safety feature. See Instruction Manual for replacement or
resetting of protective device. If replacement of the plug is required, be sure the service
overload protection as the original plug.
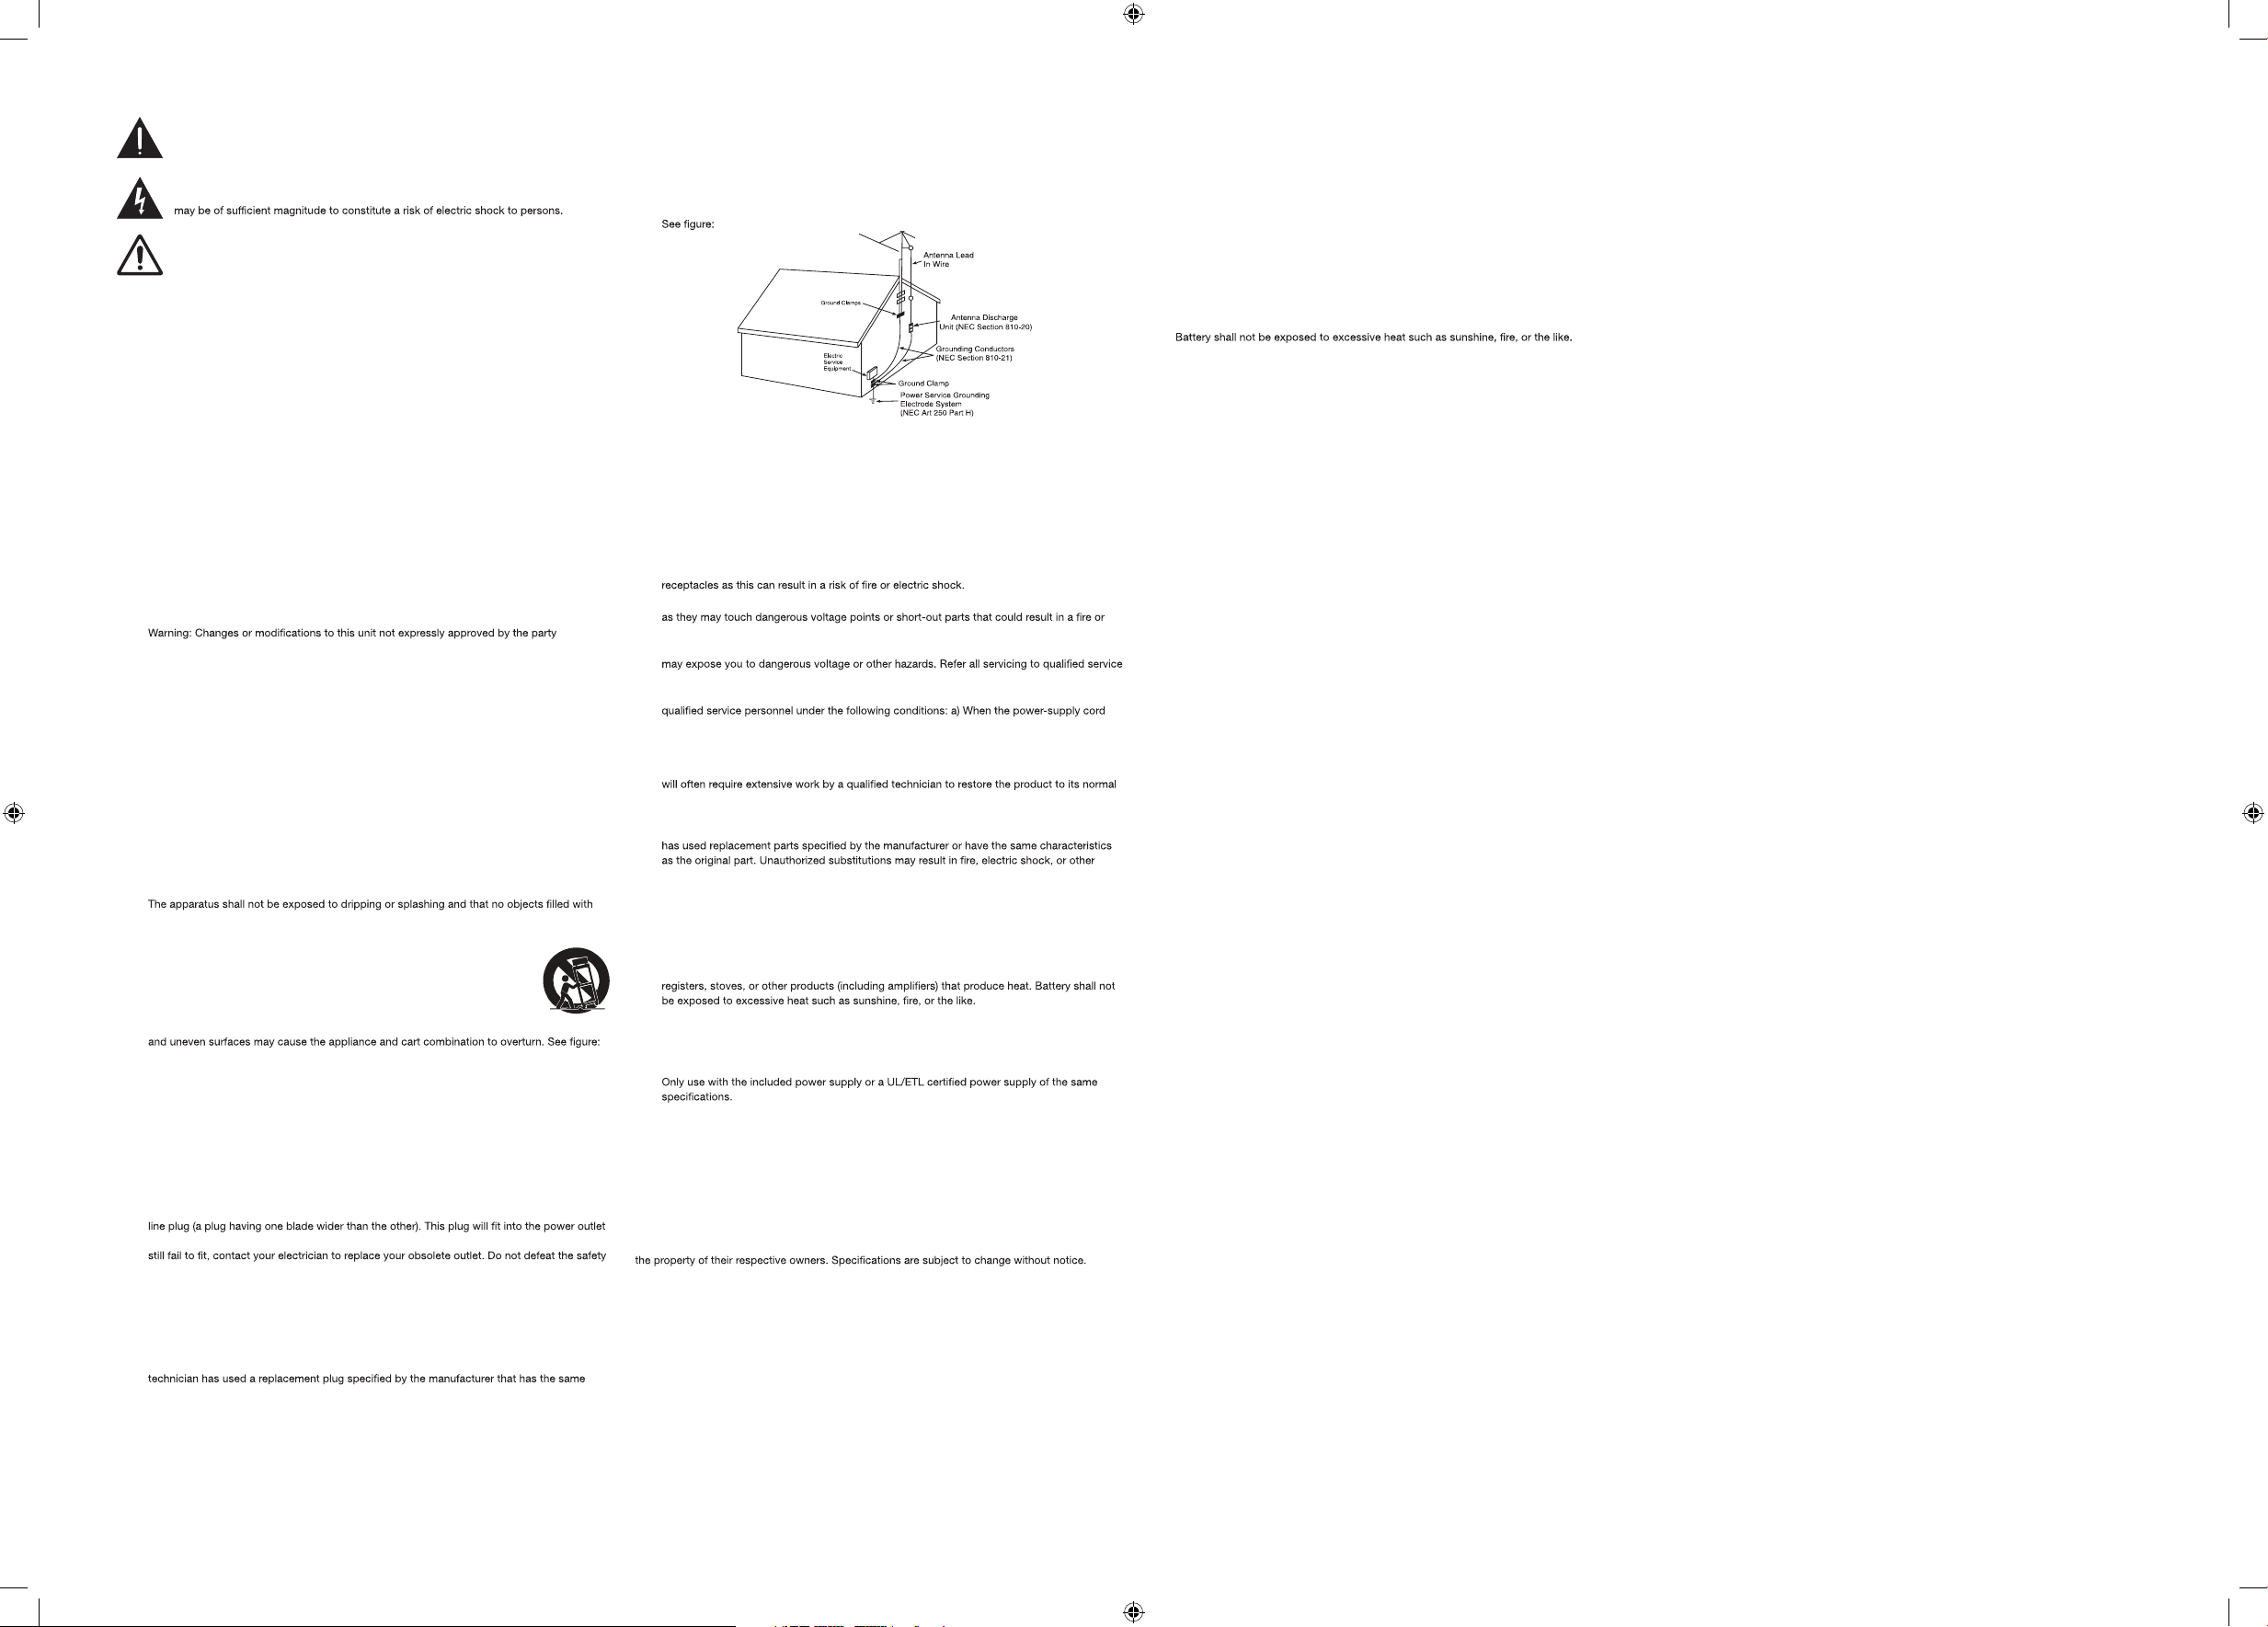
• Outdoor Antenna Grounding - If an outside antenna is connected to the receiver, be sure the
antenna system is grounded so as to provide some protection against voltage surges and
built-up static charges. Article 810 of the National Electrical Code, ANSI/NFPA 70, provides
information with regard to proper grounding of the mast and supporting structure, grounding
of the mast and supporting structure, grounding of the lead-in wire to an antenna-discharge
unit, size of grounding conductors, location of antenna discharge unit, connection to
grounding electrodes, and requirements for the grounding electrode.
• Lightning - For added protection for this product during a lightning storm, or when it is left
unattended and unused for long periods of time, unplug it from the wall outlet and disconnect
the antenna or cable system. This will prevent damage to the product due to lightning and
power-line surges.
• Power Lines - An outside antenna system should not be located in the vicinity of overhead
power lines or other electric light or power circuits, or where it can fall into such power lines
or circuits. When installing an outside antenna system, extreme care should be taken to keep
from touching such power lines or circuits as contact with hem might be fatal.
• Overloading - Do not overload wall outlets, extension cords, or integral convenience
• Object and Liquid Entry - Never push objects of any kind into this product through openings
electric shock. Never spill liquid of any kind on the product.
• Servicing - Do not attempt to service this product yourself as opening or removing covers
personnel.
• Damage Requiring Service - Unplug this product from the wall outlet and refer servicing to
or plug is damaged, b) If liquid has been spilled, or objects have fallen into the product, c) If
the product has been exposed to rain or water, d) If the product does not operate normally
by following the operating instructions. Adjust only those controls that are covered by the
operating instructions as an improper adjustment of other controls may result in damage and
operation. e) If the product has been dropped or damaged in any way, and f) When the
product exhibits a distinct change in performance - this indicates a need for service.
• Replacement Parts - When replacement parts are required, be sure the service technician
hazards.
• Safety Check - Upon completion of any service or repairs to this product, ask the service
technician to perform safety checks to determine that the product is in proper operating
condition.
• Wall or Ceiling Mounting - The product should be mounted to a wall or ceiling only as
recommended by the manufacturer.
• Heat - The product should be situated away from heat sources such as radiators, heat
• Main plug is used as disconnect device and it should remain readily operable during intended
use. In order to disconnect the apparatus from the mains completely, the mains plug should
be disconnected from the mains socket outlet completely.
• Excessive sound pressure from earphones and headphones can cause hearing loss.
•
This equipment complies with FCC radiation exposure limits set forth for an uncontrolled
•
environment. This equipment should be installed and operated with minimum distance 20cm
between the radiator & your body.
Customer Support
• Customer Service: 1-888-999-4215
• Email Support: prodinfo@dpiinc.com
• Email Parts: partsinfo@dpiinc.com
Copyright © 2018 Digital Products International (DPI, Inc.) All other trademarks appearing herein are
Battery Warnings
• WARNING: Do not ingest battery, Chemical Burn Hazard.
• If the remote control supplied with this product contains a coin/button cell battery and the
coin/button cell battery is swallowed, it can cause severe internal burns in just 2 hours and
can lead to death.
• Keep new and used batteries away from children. If the battery compartment does not close
securely, stop using the product and keep it away from children.
• If you think batteries might have been swallowed or placed inside any part of the body, seek
immediate medical attention.
• CAUTION: Danger of explosion if battery is incorrectly replaced. Replace only with the same
or equivalent type.
• WARNING: There is a danger of explosion if you attempt to charge standard Alkaline batteries
in the unit. Only use rechargeable NiMH batteries.
•
• Do not mix old and new batteries.
• Completely replace all old batteries with new ones.
• Do not mix alkaline, standard (carbon-zinc), or rechargeable (ni-cad, ni-mh, etc) batteries.
• Batteries should be recycled or disposed of as per state and local guidelines.
 Loading...