

Page 1
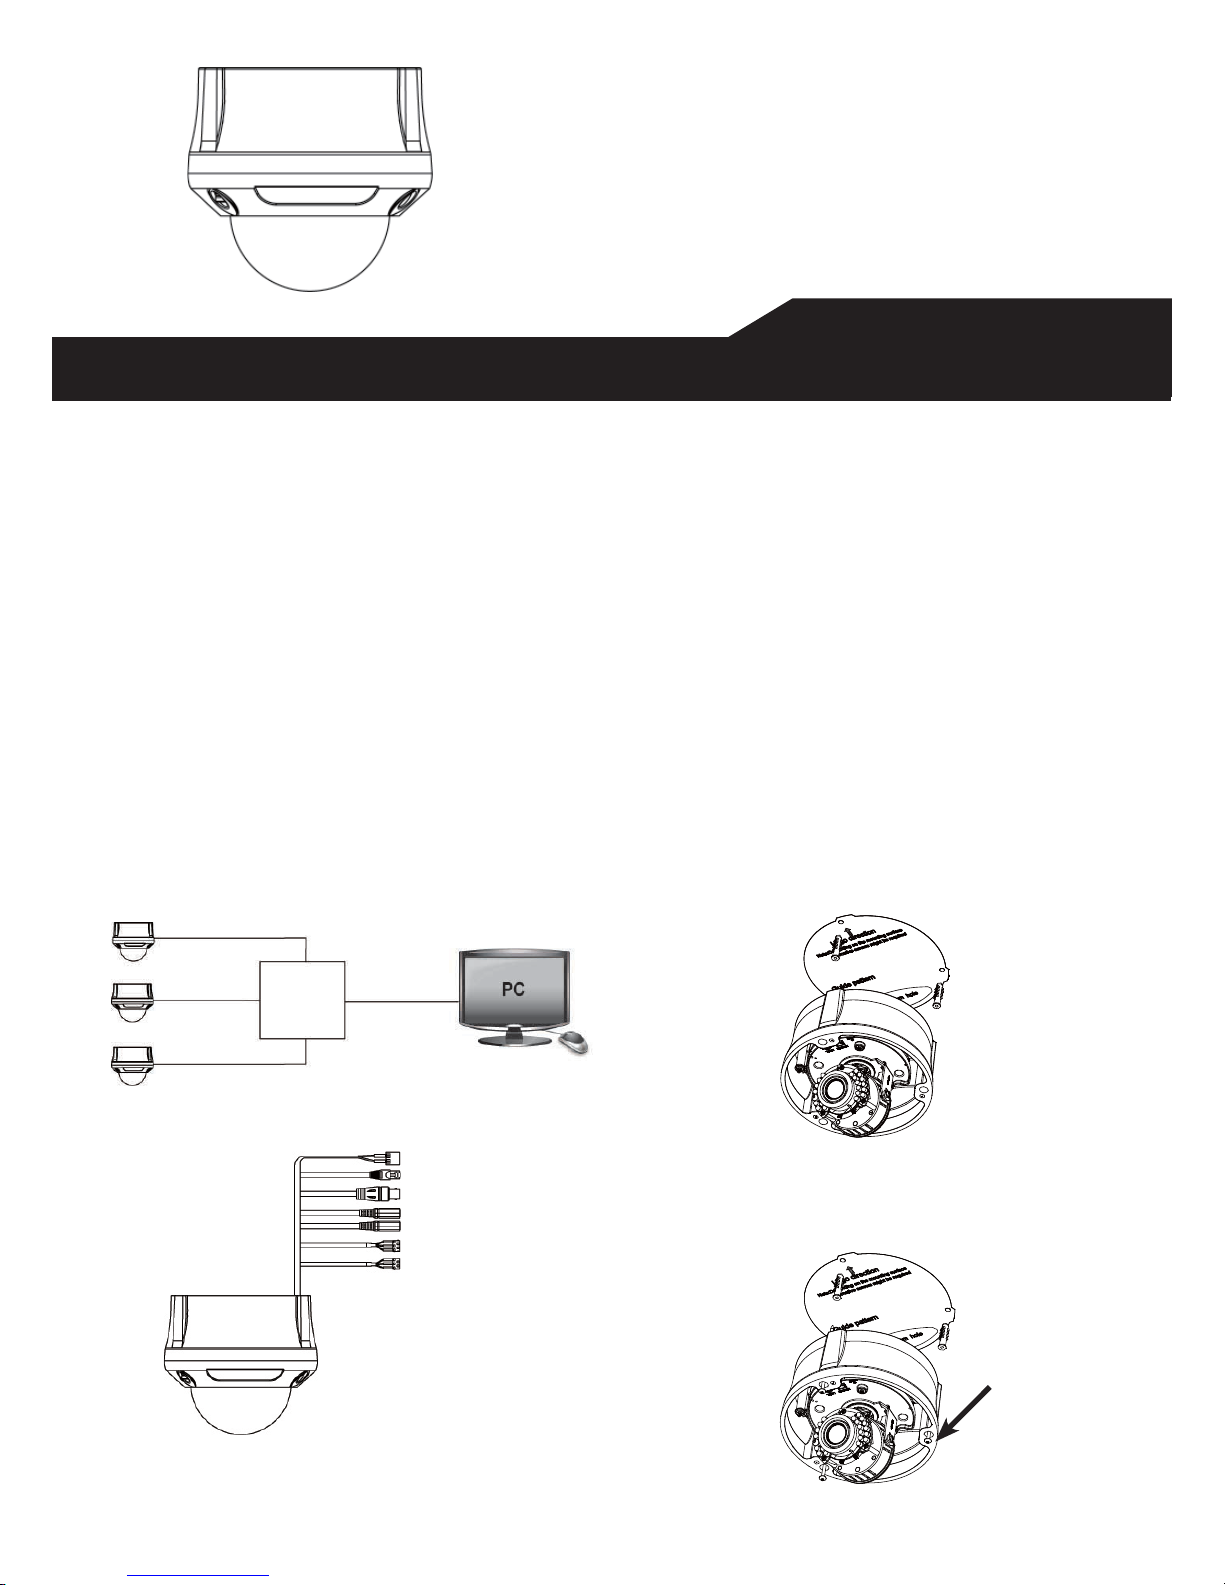
Megapixel Network IR Dome Camera
a
• SAFETY
1. This quick start guide is desigend for users who have adequate
knoweldage of network camera.
2. Do not touch the imaging surface of sensor. Use soft cloth moistened
with alcohol to clean the surface if it is touched accidentally.
3. Ensure the supply voltage is correct as specifi ed for the particular
variant of camera before operation.
4. Do not attempt to service this unit yourself unless you are authorised
to do so. Opening the camera may expose you to dangerous voltages
or other hazards. Refer all servicing to qualifi ed personnel only.
5. For more detail installation and operation, please refer to the full operating
instrucation on CD.
• PACKAGE CONTENTS
Camera *1 Screwdriver *1
Self-tapping screws (4x31mm)*3 Guide Pattern Sticker *1
Self-tapping screws (4x45mm)*3 Plastic anchor *3
Cable adaptor * 1 BNC connector * 1
Printed Quick Start Guide *1 Document CD *1
•PARTS' LOCATIONS AND FUNCTIONS
1. Power In (Red+/Black-): power connector, DC12V/AC24V.
2. RJ-45 Ethernet Connector: network connection. Support PoE
(Power over Ethernet).
3. BNC: video output
4. Audio Out (Green): audio output
5. Audio In (Red): audio input
6. Alarm Out (Orange): alarm signal output port.
7. RS485+(Green): alarm signal output port.
8. RS485- (Yellow): alarm signal output port.
9. GND: ground (electricity) in electrical circuits.
10. Alarm In (Red): alarm signal input port.
11. Alarm Reset (Brown): for resetting an external alarm device.
•Camera Installation
A. Mounting the camera- ceiling mount and wall mount
1.Mark hole positions: use the guide pattern sticker to mark hole positions
on the desired location. Drill 3 holes according the guide pattern and then
insert the plastic anchors into holes which you drill.
2.Install the camera: install the camera onto the ceiling/wall and fasten
securely using the screws provided.
use the screws
to fasten the camera
securely
• Concept of Network Camera
Please read this manual thoroughly before use, and keep it handy for future reference.
Quick Start
Guide
ZEIM-4000360G 890 A.2
Power In (Red+/Black-)
RJ-45 Ethernet Connector
BNC
Audio Out (Green)
Audio In (Red)
GND (Gray)
Alarm In (Red)
Alarm Reset (Brown)
Alarm Out (Orange)
RS485+ (Green)
RS485- (Yellow)
1
2
3
4
5
6
7
1
2
3
4
5
6
7
Hub/Switch
Page 2
Megapixel Network IR Bullet Camera
QUICK START GUIDE
3. Adjust the pan/tilt angle: rotate the main bracket adjust the pan
angle and rotate the pan adjustment to adjust the tilt angle. Then
adjust the camera zoom to a suitable position.
4.Adjust zoom/focus lever: loosen the zoom/focus lever
counterclockwise, and then rotate the zoom to adjust the image view or
adjust the focus for optimum picture sharpness. To fi x the setting, please
tighten after adjustment.
6.Install the dome cover: place the dome cover to match the screw
positions and then tighten 3 screws to lock it securely using the
screwdriver provided.
B. Assign an IP address
The network camera is desigend for use on an Ethernet network. You must
assign an IP address for access. Obtain an IP address automatically from the
DHCP server. If your network doesn't use a DHCP server, the camera
will use 192.168.1.30 as the default IP address.
1.Connect the network cable to the camera and then turn on the camera’s
power.
2.Set the personal computer’s IP address, other than the camera’s default
IP address: 192.168.1.30 and submask as 255.255.255.0.
3.To make sure if you have already connected the camera to the personal
computer, ping the IP address you set. Start a command prompt and type
the IP address you set. If the message of “Reply from…” appears, it means
the connection is done.
4.Start a browser and enter IP address: http://192.168.1.30. Then a pop-out
window comes out and requires you to login into the camera. Enter the
default user name: admin and password: 1234 to login into.
5.Please install ActiveX viewer that is required to monitor both MPEG4 and
Motion-JPEG video modes.
6.Images of the camera can be viewed through your computer’s IE.
Before viewing, you have to follow the following steps to enable displaying.
a.Enable Cookies
b.Set “Browser setting when proxy sever is used” when a proxy
server is used.
c.Change “security” in Internet options as below.
-On tool menu, click “Internet Option”.
-Press the Security tab.
-If the camera operates inside the intranet, click the “Intranet”
• SPECIFICATION
Image System
Image Sensor
1/2.5" 5MP Lumii image sensor optimized for low-light performance
Effective pixels
2592(H)x1944(H)
Image Compression
Method
Triple Streaming: MPEG4 X 2 / Motion JPEG X1
Resoluction/Frame MPEG4: HD 720P 1280 X 720 @30fps, 640 X480@30fps,
352 X192@30fps
MJPEG: 640 X 480@30fps, 640 X 352@30fps
Electric
Sync system Internal
Built-in lens f=2.7 ~ 9 mm, F1.2, Varifocal Megapixel lens
IR-corrected, Angle of view:30º~ 101º(Horizontal)
Shutter time
AES 1/10000 to 1/3.75 sec
Audio Two-way Mono Audio, Full-duplex, G.711 PCM 8kHz 64kbit/s
Alarm Yes; 1x Alarm-in, 1x Alarm-out
Motion detection
Yes; 4 x 3 MD window & 5 level sensitivity
SD Card
Support micro SDHC card (up to 32 Gb)
Day & Night Mode Mechanical ICR Filter
Minimum
illumination
IR LED OFF: 0.3lux (F1.2, 50 IRE)
IR LED ON: 0lux
IR LED IR LED 24pcs(850nm)
IR distance 25 meters (82 ft.)
IR turn on status Under 10 lux by auto control
LED life More than 10,000 hours (50ºC)
TV output NTSC, 720 X 480
@30fps
PAL, 720 X 576
@25fps
NTSC, 720 X
480 @30fps
PAL, 720 X 576
@25fps
Feature
BLC ON/Off
White Balance Auto/Daylight/Fluorescent/Incandescent
Sharpness
Low/ Middle/High
Saturation Low/ Middle/High
Brightness Low/ Middle/High
Contrast
Low/ Middle/High
Other Mirror, Flip, system log, snapshot
Power supply
Power requirement DC12V/ AC24V±10%/ PoE(IEEE 802.3af)
When using the heater:DC24V/ AC24V±10%
Power consumption < 8W (When using the heater: < 18W)
Power connector Screwless Terminal block
Environment
Operating temperature
-10ºC ~ 50ºC (14ºF ~ 122 ºF) -40ºC ~ 50ºC (-40ºF ~ 122 ºF)
Operating humidity 10~ 90% RH
Storage temperature
-20ºC ~ 60ºC (-4ºF ~ 140 ºF)
Network
Ethernet 10Base-T/100Base-TX
Internet protocal TCP/IP, UDP, HTTP, SMTP, DNS, DHCP, NTP, FTP, RTP,RTSP, ICMP,
uPNP
Connectors RJ-45 Ethernet 10Base-T/100Base-TX
Browser IE browser 6.0 or above
I/O connector
Video port BNC X1, 1.0Vp-p, 75Ω
Alarm port Terminal block
Audio port 3.5mm Phone Jack
Mechanism
Dimensions(øxH) ø158mmx144mm (ø6.22" x 5.7")
Weight 1.28 kg (2.82 lb.)
Protection Class IP66/IP67, vandal-proof: 1000 kg impact resistance
Option Without Heater With Heather
icon. If the camera operates on the Internet, click the “Internet”
icon.
-Click “Level customize”.
-Make sure the following radio buttons in the displayed list:
“ActiveX control and plug in execute” is enabled.
“Execution of script of ActiveX control marked safe even
when script is execute”.
Rotate the main
bracket
Adjust the
zoom lever
Adjust the
focus lever
 Loading...