

Page 1
Page 2
CATEGORY PAGE
CHECK LIST
2
QUICK START
3
SAFE OPERATION & PROGRAMMING
3
HOW TO OPEN YOUR SAFE
3
CHANGING THE USER CODE
3
LOW BATTERY WARNING
4
CHANGING YOUR BATTERIES
4
OVERRIDE KEY INSTRUCTIONS
5
© 2015 MESA SAFE COMPANY
Page 3
MSL-5
E LEC TRO NIC LO CK INSTR UCT ION S | PG.2
DEAR VALUED CUSTOMER:
Congratula tion s on cho osin g your new M esa Safe to s ecure and protect your
valu able s! You h ave made an excelle nt c hoice in your sec urit y m easu res.
ES A S AF E C OM PA NY has bui lt a sol id reputation on inte grit y an d quality
M
craf tsmanship.
We pri de o urse lves on deliverin g th e be st p roducts in the industr y and
consisten tly exceed custome r ex pec tations.
Before us i ng your un i t, thoroug h ly read a n d underst a nd the O p erating I nstruc t ions
of the u nit. This will e n sure maxim u m effici e ncy a n d usabili t y.
IMPO RTAN T : DO N OT RET URN S AF E TO S TOR E
!
If you a re missing part s, have di ffic ult y programming the loc k or ope ning your
safe, or a ny additional questions regard ing the use and care of your safe, DO
NOT RE TUR N you r sa fe to the store. Pl ease
Suppor t : 888.381 . 8514 [Mo n day thru Fri d ay 7AM - 4 PM / PST ] for a s s istance.
contact M
ES A SAF E COM PA NY
Tech n i cal
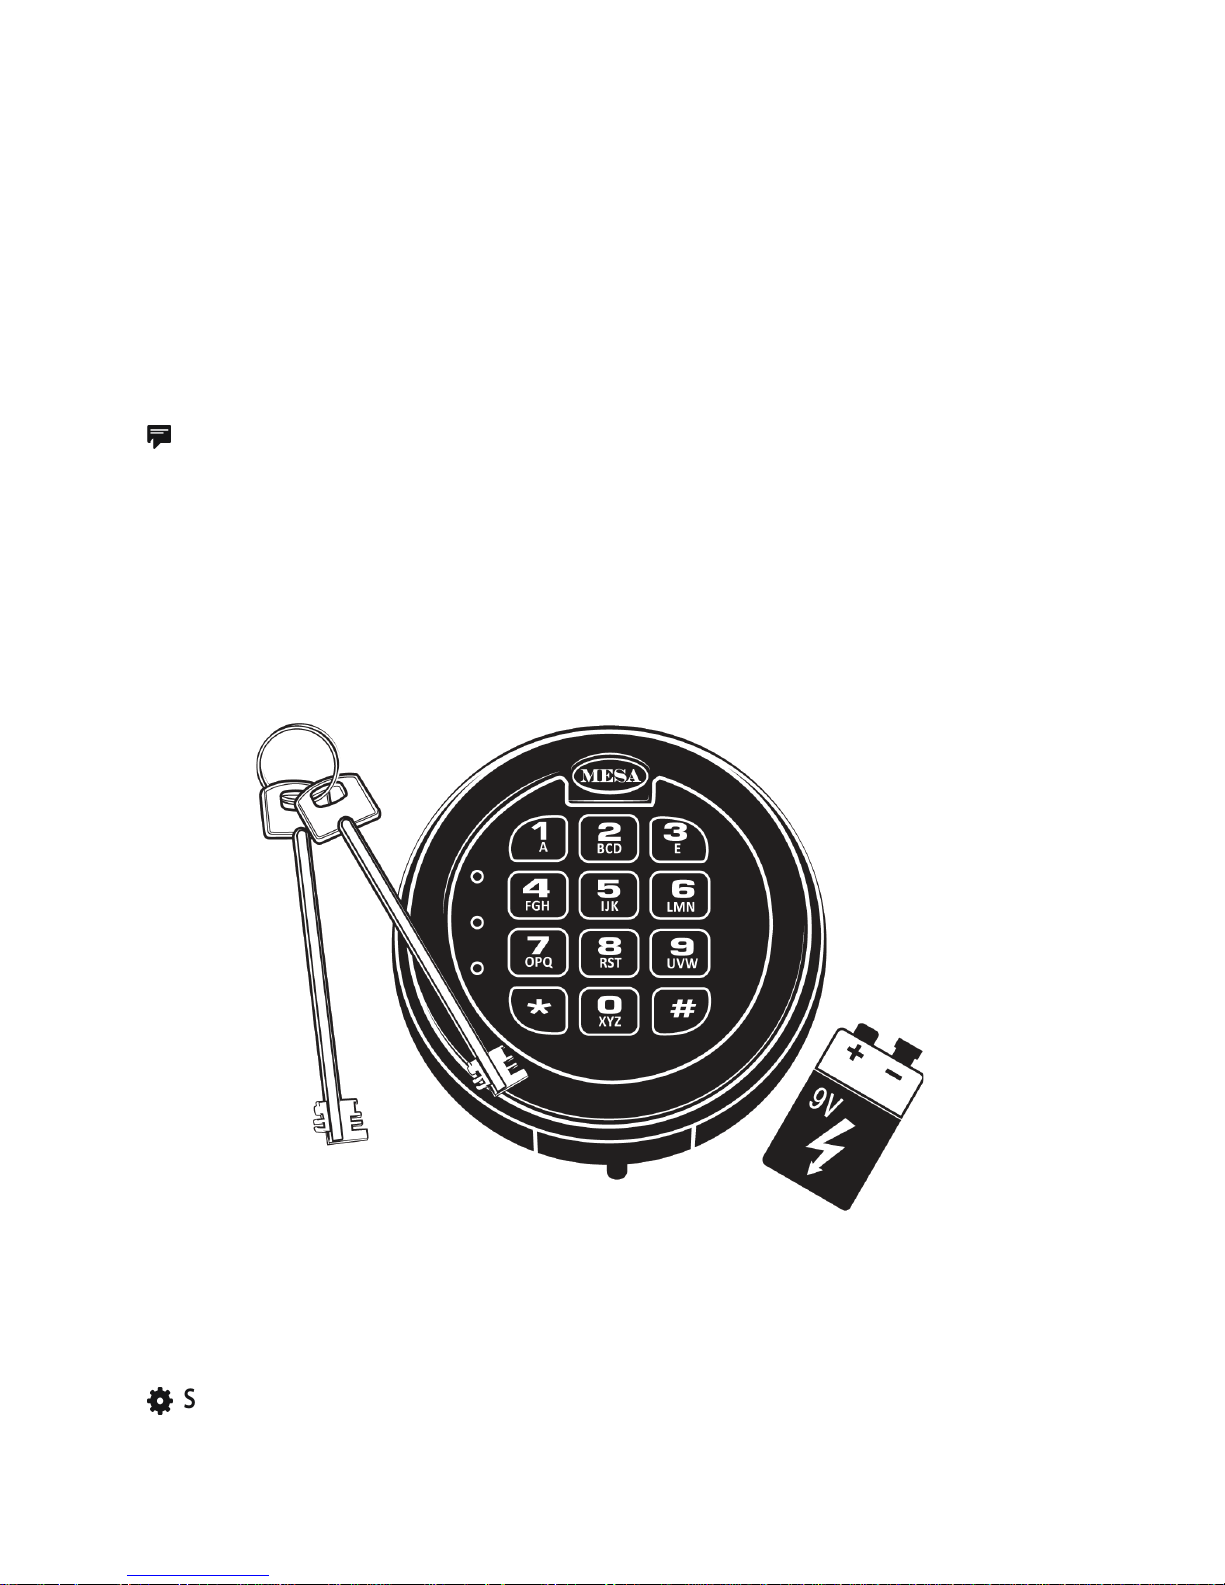
CHECK LIST
9V Battery [no t in clud ed]
n
2 O verr ide Keys
m
1 Ancho r Ki t
o
She lves & Sh elf Clips [re fer to you r mo del’s sp ecif icat ions to make sure all
requi red shelving is in yo ur s afe]
Page 4

PG .3 |
* * * * * * * *
* * * * * * * *
* * * * * * * *
* * * * * * * *
MSL-5
E LEC TRO NIC LO CK INSTR UCT ION S
QUICK START
In stal l a 9-Volt Batte ry [no t
1
incl uded ]
Ente r
2
Turn han dle before the gre en light
3
turn s off
To loc k you r sa fe, close door & turn
4
hand le b ack to t he l ocke d po siti on
IMP ORTA NT : Always ma ke su re yo ur s afe i s lo cked befo re wa lki ng aw ay!
If your code is correct a g reen lig ht will turn on for a pproximate ly 5 seconds
& you will also hear a ‘Cl ick’
If the code is inco rrec t, a red light w ill turn on, fol lowed by 5 ‘Beeps’
N OTE : Be s ure to press firm ly & ONLY use your finger tips to p ress the
keys on the ke ypad. DO NOT USE your finger nail, a pen , etc. This will
dama ge t he keys.
SAFE OPERATION & PROGRAMMING
USER CODE is fa c tor y set t o :
IMP ORTA NT : Because the cod e is fac tor y s et, we hi ghly reco mmen d
chan ging the code s to your own unique codes imm ediately!
HOW TO OPEN YOUR SAFE
In put : Code [light stays green for 5 seco nds]
1
Turn the han dle to the unloc ked posi tion befo re the gr een light di sapp ears
2
Exam ple :
Invalid Code : 5 ‘Beep s’
Wrong Try Penalty
If 3 wro ng codes are entered co nsec utively, th e ke ypad wil l shut down fo r a
peri od of 5 minutes. Dur ing this lo ck o ut p eriod, t he k eypa d wi ll n ot a ccept
any codes and the oran ge l ight wil l ap pear for 3 se conds wi th a ny entrie s.
CHANGING THE USER CODE
N OTE : ALWAYS perfo rm t hese foll owin g steps with the door open a nd test
the new codes se veral tim es b efore clos ing the door!
Code cann ot b e
Ente r 0 six times
1
Ente r the ex isti ng c ode
2
Ente r your new 6 digit co de [ Lock will ‘Beep’ 2 time s
3
[Lock w i ll ‘Bee p’ 2 tim es with 2 gre e n flas h es]
[Code le n gth: 6 digits ]
[Lock w i ll ‘Bee p’ 2 tim es with 2 gre e n flas h es]
with 2 gree n flash e s
]
Page 5

MSL-5
E LEC TRO NIC LO CK INSTR UCT ION S | PG.4
4
Ente r your new 6 digit co de a gain [Loc k wi ll ‘B eep’ 2 ti mes
with
2 gree n flash es
]
Uns ucces sful Code Change : 5 ‘Bee ps’ while the red light is on. T he l ock
will shu t down fo r 1 minu te and the orange lig ht w ill appe ar fo r 3
seconds with any entries duri ng t his period. [ The old code is still val id;
repea t steps 1 - 4]
LOW BATTERY WARNING
Gre en l ight and oran ge l ight app ear with 2 s ets of 5 ‘Beeps’
Ente r your co de & get a valid response but the lock d oes not respo nd
CHANGING YOUR BATTERIES
1
Loca te the batter y cover on t he b ottom ed ge o f th e ke ypad & o pen the
cover by s lidi ng t he b attery comp artment door to the lef t
2
Care full y & gently re move the 9-V batter y from the comp artment
C AUT I ON : Hold onto batt ery con nec tor to avoid pulli ng w ires out of
hous ing.
3
Care full y re -in ser t t he n ew 9 V ba tter y, do not force the batter y into th e
compartment
4
Th e lock will reta in a ll c urrent co des & se ttin gs
Page 6

PG .5 |
MSL-5
E LEC TRO NIC LO CK INSTR UCT ION S
OVERRIDE KEY INSTRUCTIONS
CHECK LIST
Before proce e ding, make s ure you have yo u r Overr i de Key ava i lable.
If you n eed to orde r a new O verride Key, contact M
ES A SAF E COM PA NY
Customer C a re : 888. 3 81.8514 [ Monday t h ru Friday 7AM - 4PM/PST ]
1 O verr ide Key
1 P hill ip’s Head S crew- Drive r
[not includ e d ]
CAUTION : REMOVE THE BATTERY. Do NOT pull or tug on keypad face or wires. It is
crucial that these wires stay intact & connected for the lock to operate. Please note: you
are liable for any damages that occur to the lock while accessing the override key slot.
LOC AT I NG THE OVERRIDE KEY
The Over ride Key is conceal e d yet eas y to access i n case o f an emerge n cy or loss of
code.
1
Remove t he batter y.
2
Look i ng at the keypad, lo c ate the “ME S A” bubble
sticker ; top, center.
3
Remove t his bubb l e sticke r.
Place the bu b ble stic k er aside, f ace down, s o to
not sti c k to anythi n g
Do not lo s e bubble s ticker
SeeFigure A
4
Using a Phillip’s He a d screw- d river, remove the
screw conn e cting t he keypa d face to t h e keypad
collar.
See Figure B
Ke y pad Face : the k eypad & s u rrounding chrome
edge
Ke y pad Colla r : the b l ack hous i ng that i s
attached to the sa fe. H ouses th e batter y, w ires &
elect ro n ic compon e nt
5
Careful l y let the keypad f a ce hang w i th wires s t ill
attached.
See Figure C
518
1
E
THE
B
s
1.85
1
2 3
4
5 6
7
8
9
#
*
0
! " #
Page 7

MSL-5
E LEC TRO NIC LO CK INSTR UCT ION S | PG.6
USING THE OVERRIDE KEY
1
With th e keypad f ace removed, lo c ate the
override k ey slot i nside th e keypad c o llar, on the
left.
$
See Figure E
2
Using y o ur key, with t h e larger/l o nger notc h es
facing D OWN, place the key i nto the sl o t.
$
You may need to angle t he key s l ightly in order
for it to s lide in p roperly.
$
See Figure D
3
Make sure the k e y slides completely
into the s lot.
$
See Figure E
4
Once k e y is snu g, turn clo c kwise [ r ight] to t h e
11 o’clock po s ition.You r safe will be unloc k ed.
$
See Figure F
REINSTAL L THE KEYPAD FACE
%
CAUTION : Be EXTREMELY careful with the wiring.
Do NOT pinch wires in between the keypad face & the
keypad collar.
1
With your fingers, c a refully gr i p the ke y pad face,
holding it so th e face is o ut & the n umbers a r e right si d e-up.
2
Re -attach t o the key p ad collar by inser ting bo t tom first , so the n otch conne c ts,
then ca re f ully pres s /push into keypad co l lar casi n g.
3
Once t h e keypad face is s n ug in pl a ce, screw the keypad f a ce back to the keyp a d
collar & replace the “ M ESA” b u bble sti c ker.
Page 8

 Loading...