

Page 1
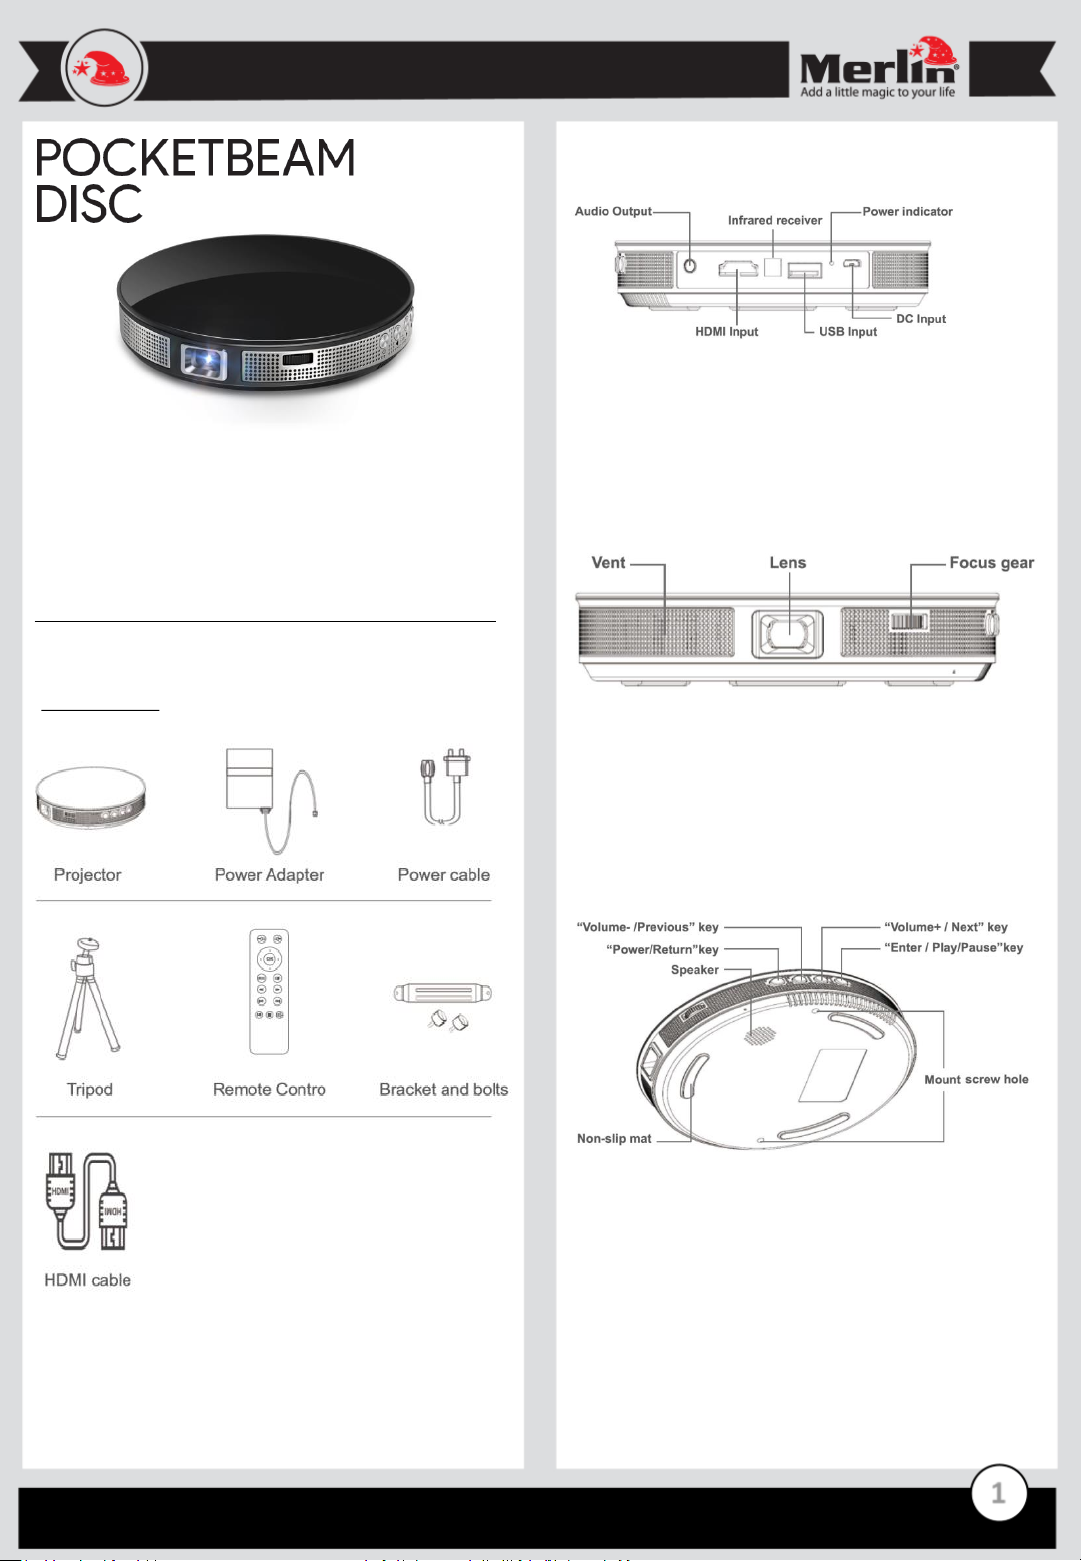
Parts and Functions
Audio Output – Allows you to use external audio device
Infrared Receiver – Where remote commands gets transmitted
HDMI Input – Which allows you to use devices like media player,
game console, etc. with the projector
USB Input – Allows you to use external storages like USB Drive to
play media files
Note: The possibility of external HDD to work varies
DC Input – Where you can charge the projector. It is a Micro USB
type connector.
Vent – Where cooling happens. Please do not cover this part of the
projector and make sure that it is clean.
Focus Gear – Allows you to adjust the clarity of the image.
Lens – Where the projection/Display is coming from. To get the
best output, point this into the projection screen perpendicularly
and adjust the focus accordingly.
Note: The quality of the image is affected by various elements and
the two main factors are Luminosity of the area and Projector
Screen Material and Color.
Volume- / Previous Key – Allows you to reduce the volume and
navigate in the projector menu.
Volume+ / Next Key – Allows you to increase the volume and
navigate in the projector menu.
Power / Return Key – Allows you to switch the projector ON/OFF
when pressed for 3 seconds. It also allows you go to the previous
page in the projector menu.
Enter / Play/Pause Key – Allows you to Play and Pause the
projector’s media player as well as to select items in the projector
menu.
Speaker – In-built audio output of the projector.
Mount Screw Hole – Where the mount of the projector for the
tripod can be attached or installed into
Non-slip Mat – Anti-slip mat for smooth platforms.
1
Thank you for purchasing this Merlin Product. Please read the
instruction manual carefully before using the product.
The documentation provided will allow you to fully enjoy all the
features this unit has to offer.
Please save this manual for future reference.
Package Contents
Page 2
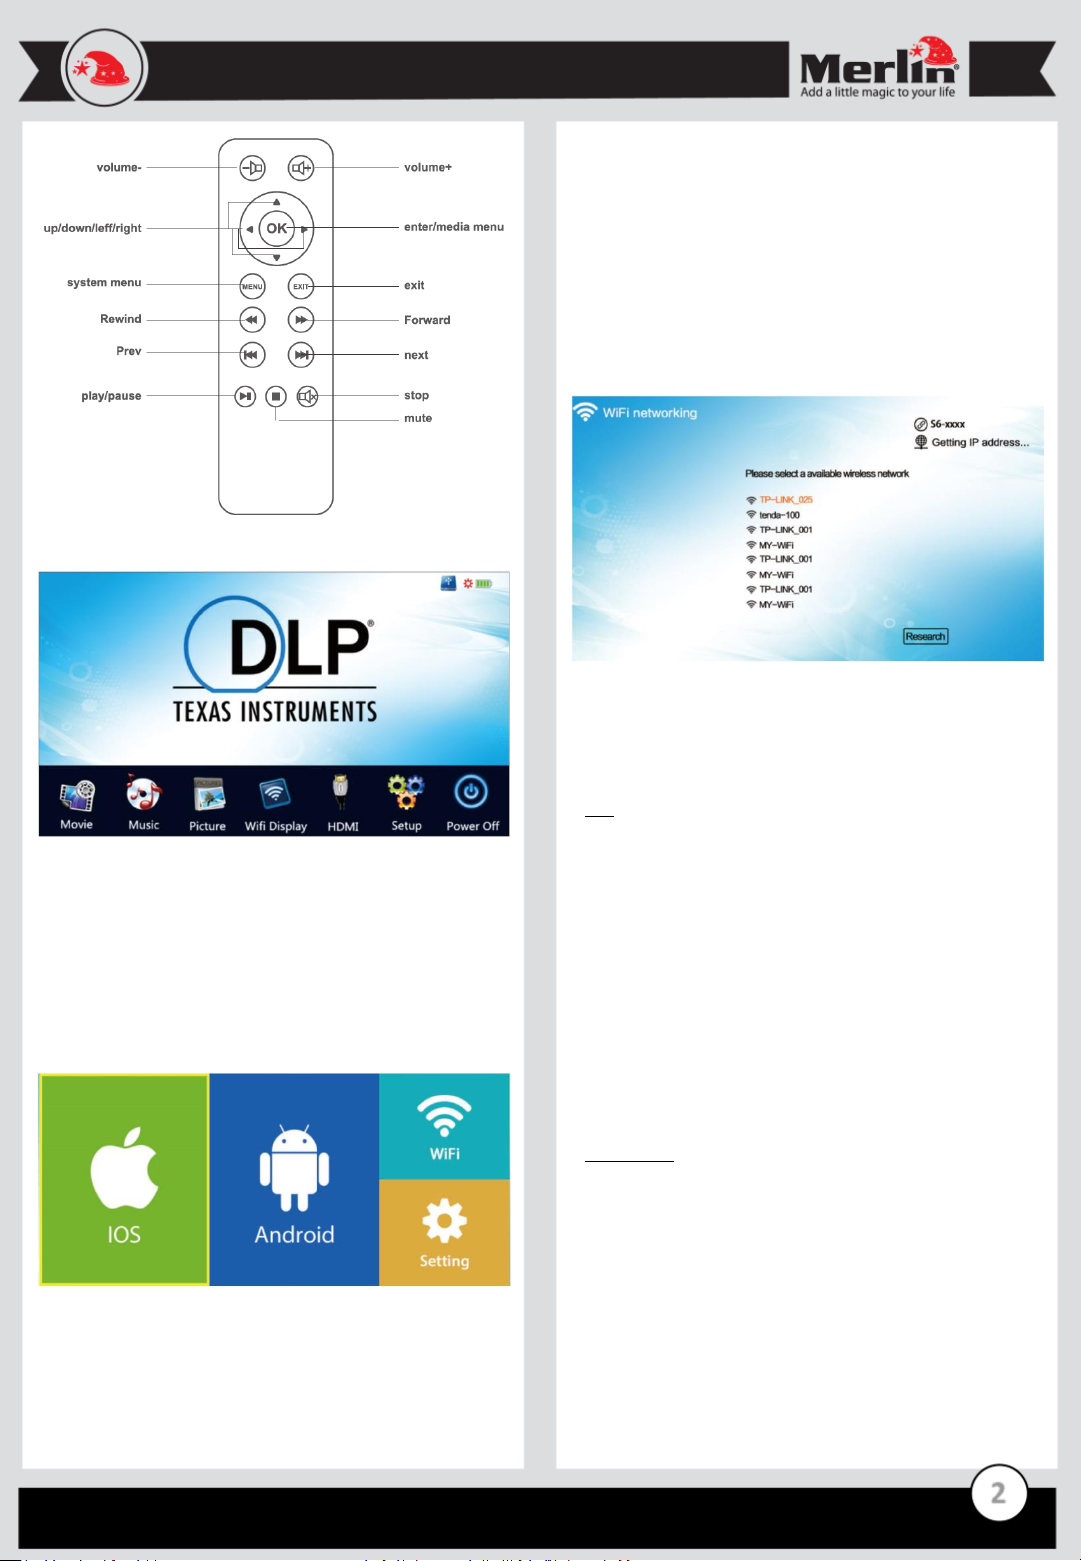
Home Screen Menu
Movie, Music, and Picture – Allows you to view and play media files
from external storage (USB / Micro SD card).
HDMI – Audio and Video input. Can be used for external devices
like media player, game console, computer, and many more.
Setup – allows you to restore the device to factory settings and
firmware update.
Power Off – another way of turning OFF the projector
Wi-Fi Display – Let’s you mirror your smartphone (iOS / Android).
Wi-Fi Display Configuration
iOS Mode
1) Select this mode if you wish to mirror an iOS device to your
projector.
2) The projector will then became a hotspot where its Wi-Fi name is
displayed (But if the Wi-Fi Display’s Wi-Fi setting of the Projector is
configured, you have to skip the next step# 3 and instead, connect
your iPhone to the same network where the projector is connected)
2
3) Connect your iPhone to the projector’s Wi-Fi (Internet service is
now depending on iPhone’s data connection)
4) Activate mirroring on your iPhone through Control Center, and
select the projector from the list of available devices
Android Mode
1) Select this mode if you wish to mirror an Android device to your
projector.
2) Activate the mirroring function on your android smartphone and
select the projector from the list of available devices after scanning
to mirror
Wi-Fi Display Wi-Fi Setup
- Allows you to connect your projector into a Wi-Fi with internet
access for mirroring iOS without consuming data services.
Simply select the desired access point and enter the password
if there’s any to connect
FAQ
Q) Why is the projector not turning ON?
A) Please make sure that there is enough charge on the device
before operating considering that its LED light is visible during
charging.
Q) Mirroring only gives Audio output but not Video?
A) Please be informed paid apps tend to have this feature that
blocks its products from being mirrored to avoid piracy. Most
of the time it blocks both Audio and Video.
Q) I cannot find the projector for mirroring.
A) Please make sure that the proper mode has been selected.
For iOS mirroring, it works through same network so make
sure that either your iPhone is connected to the Wi-Fi of the
projector or to the same Wi-Fi where the projector is
connected to.
Maintenance
1. Retain these instructions for future use.
2. Clean the product with a damp cloth and mild soap.
3. Use proper material when wiping its lens
4. Do not expose this product to rain or moisture.
5. Be careful not to turn or twist the cables used in this product
too much as it can lead to malfunction and failure.
6. This product is not designed to be submerged in water and
will malfunction if this occurs.
7. This product has no user serviceable items inside. Do not
open this product as the user risk injury and would void the
warranty.
8. Keep unit away from strong magnetic fields to avoid
interference with the product.
Page 3

3
 Loading...