

Page 1
Page 2
British Telecom Business Systems
Published by
British
Telecom Business Systems
Safety
information
APPROVED
for
use
with telecommuriication systems
run by British
Telecommunications
in
accordance
with
the
conditions
in
the
instructions
for
use.
S/1000/3/E/500047
Whilst
allpossible care has been takeninthe preparation ofthis publication,
British
Telecom BusinessSystems accept no responsibility
for
any inaccuracies
that
maybefound.
British
Telecom BusinessSystems reserve the
right
tomakechanges
without
notice both to this publication and to the equipment which itdescribes.
If
you
find
anyerrorsinthis
publicationorwould
liketomake
suggestions
for improvement,
please
write to
the
Technical Publications Unit at
British
Telecom BusinessSystems,
Room
533,
Anzani
House,
Trinity
Avenue,
Felixstowe,
IP11
8XB.
Telephone;
Felixstowe
(0394)
693787.
Telex:
987062
BTAN2,
Publication
NoTPU
57A
Item
Code
No
980216
Issue
2.0
(6/85)
Wntten
and designed byCastle, Chappell&Partners
Ltd.
COPYRIGHT®
British
Telecommunications pic 1985
BritishTelecommunications pic
Registered office:81 Newgate Street
LONDON
EC1A7AJ
Registered
in England No.
1800000
The
equipment mustbeearthed.
Never
use equipment
with
damaged or
worn
mainscables and connectors.
Always
disconnect the equipment
from
the mains before unpluaaina
individual
units.
Do not remove the equipmentcovers.
Do
not
trail
wires
undercarpetsor
where
people
might
trip
over
them.
Donotrestrictthe
ventilation
ofthe equipment.
Undernocircumstances
should
the
mains
adapterbe
replacedbyany
other
power
supply.
Page 3
4
Contents
Introduction
Using
the
M2105for
the
first
time
How
the
M2105
works
to
help
you
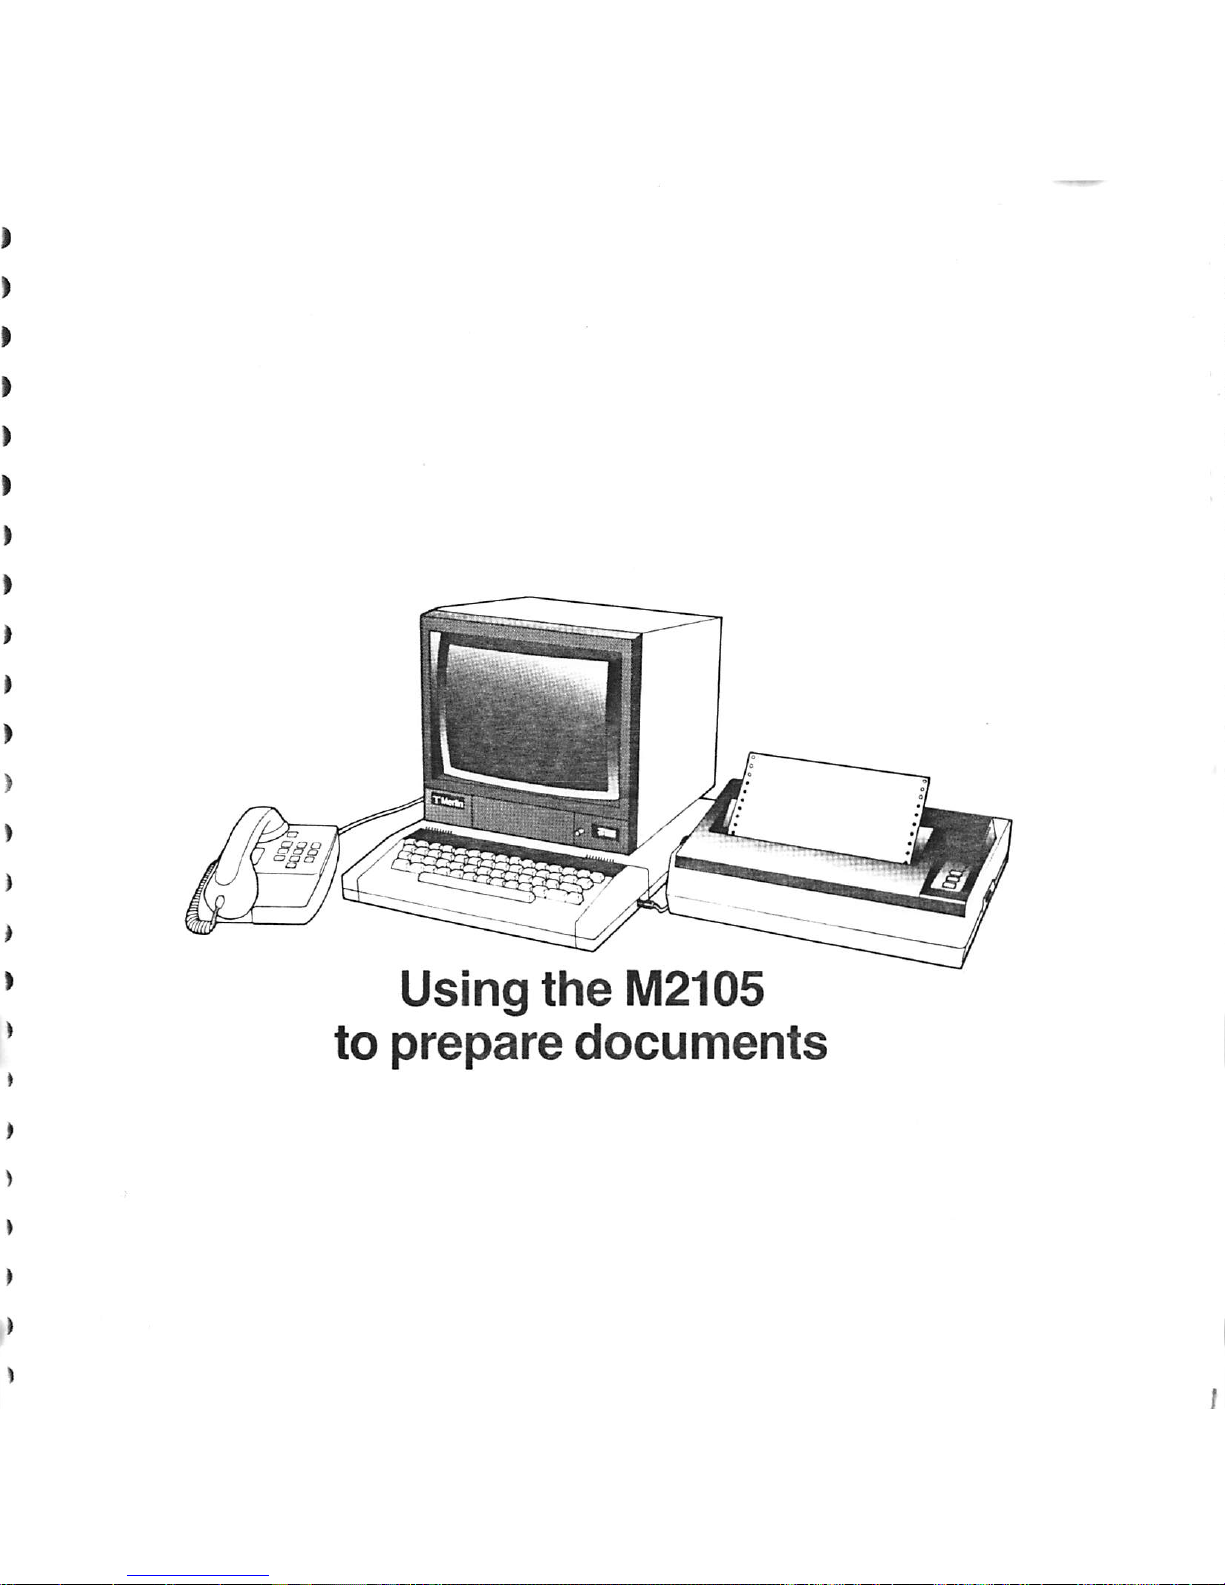
Using
the
M2105to
prepare
documents
3 Conventions used inthisguide
6
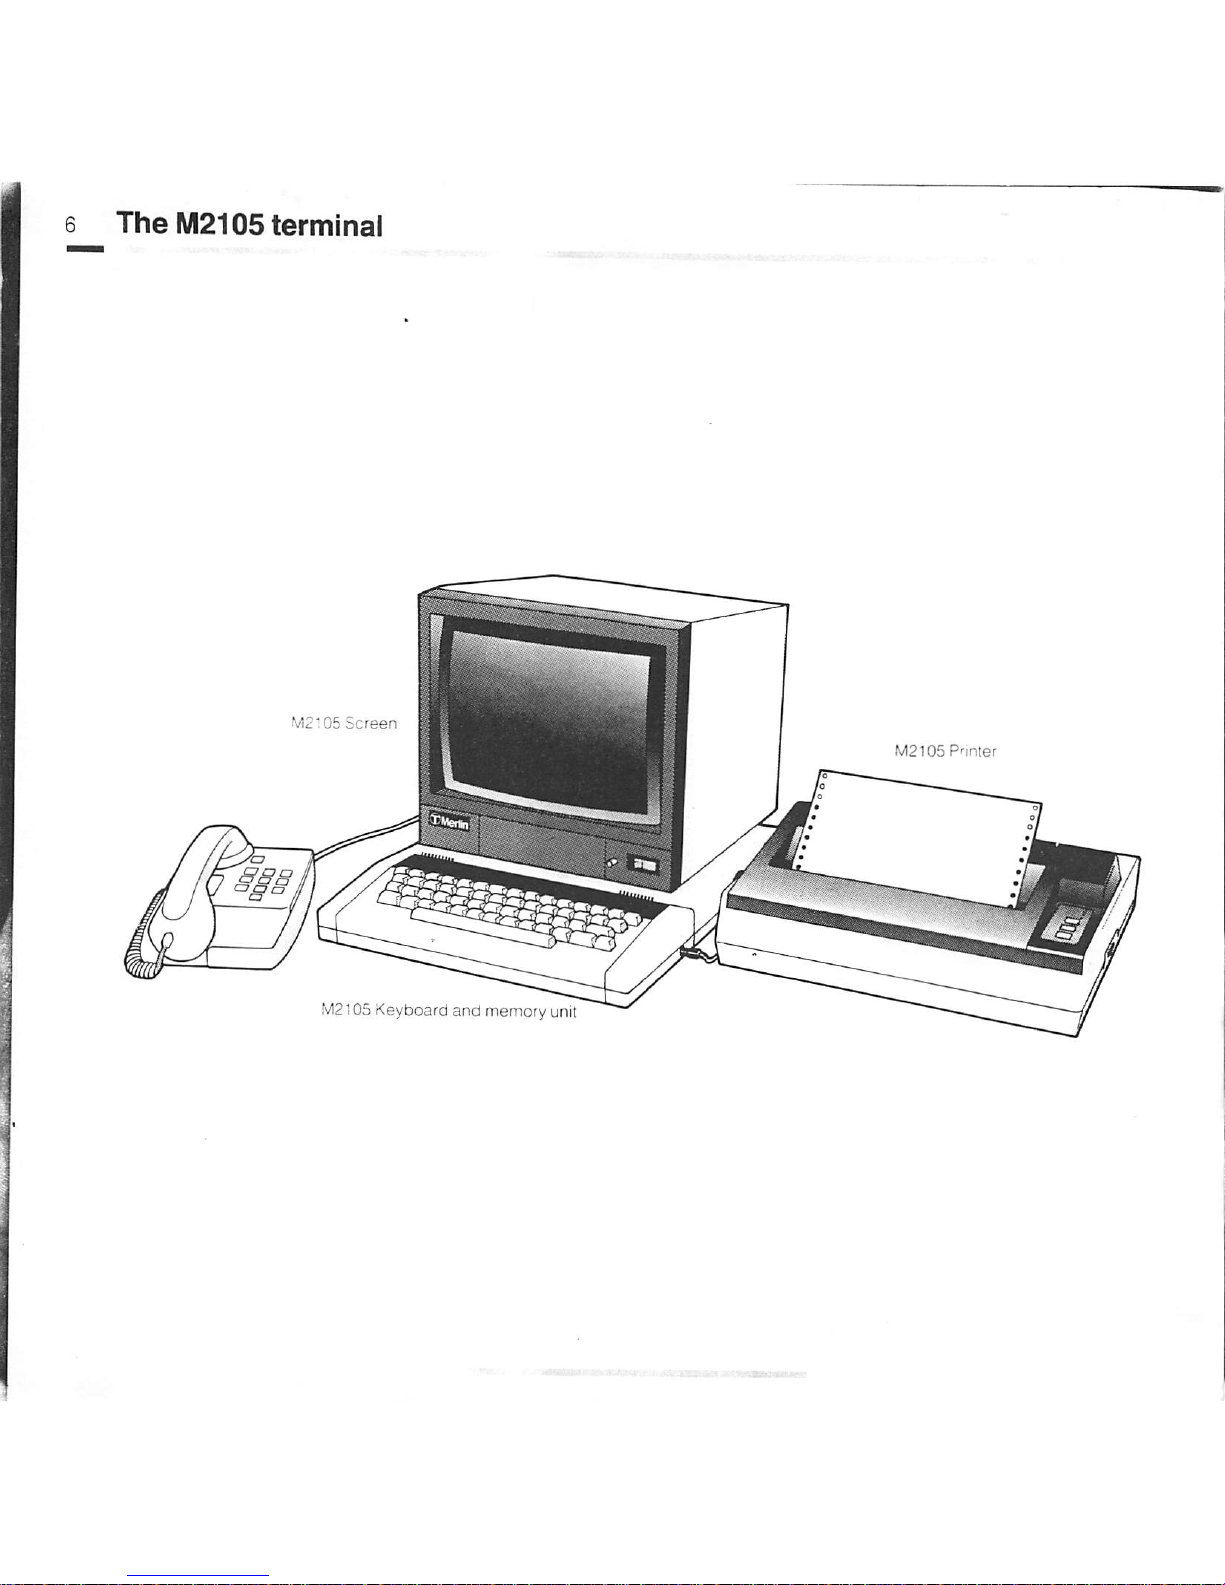
The
M2105
terminal
10
13
14
15
16
17
20
21
24
26
26
26
26
28
30
30
32
34
36
36
40
41
41
46
Simple
Instructions
Keyboard
and
key
functions
The
Display
Screen
User
Screen
Command
Screen
Selecting
commands
How
Ihe
terminal
takes
over
office
tasks
How
the files inthe terminalare organised
Reviewing
files
Scanning
through
documents
Next/Previous
screen
Next/Previous
page
Next/Previous
document
Preparing
documents
Storing
documents
Deleting
documents
Printing
documents
Preparinga simplemessage
Locating
ItemsIndocuments
Find
item
^Uslng
forms
Locating forms
Completing and validating forms
Signing forms
ft
ft
Page 4
Sending
and
receiving
messages
on
the
M2105
Installing
the
M2105
Initialising
the
M2105
Problem
solving
Specifications
anc
reference
48
50
52
52
53
53
53
54
54
55
55
56
56
57
59
62
64
65
70
71
72
74
76
B^8Qtti©§j^PH@n&rmina.
Sendinqsimple
messages
Answerback
Numberofqueued
messages
Retry
Incoming
messages
Voice
response
Escape
Receive
Send
all
for
Dial
number
PABX
procedure
Communication
Information
Header
Components
Wiring
instructions and connections to mains
Setting up the printer
Setting up the keyboard and memory unit
Settingupthe
screen
Screen
controls
80
Check
list
84
85
86
87
87
88
88
89
91
92
96
98
line
Approved PBX's
l^ybQ^dcifications
Screen
Printer
System
response
messagec
intormation
messages
Glossary
Summarv
of
commands
InUG
Page 5
Page 6
h
h*
How
the
M2105
sends
and
receives
messages:
an
outline
In
your
day-to-day
business
relationships,
you
communicate
with
other
people
basicallyinspeechorinwriting.
You
probably
doa
good
deal
of
communication bytelephone, because
you
can makecontact and pass or
receive
messages
quicklyand efficiently.
Othercommunications, forvarious reasons, need to be written ones, whether
brieforlengthy,
straightforward
textorcompleted
forms.
Inevitablyaslower
process,
whatever
sortofdelivery
systemisused,
and
sometimes
unacceptably
slow.
The
main
purpose
ofthe
M2105
terminal
istousethe
immediacy
ofthe
telephone
systemtotransfer
these
written
communicationsasprinted
documents fast, reliably
and
automatically.
The
M2105
isdesigned
for
efficiency
and
simplicityofoperation,
whether
for
the already proficientor forthe
first
timeuser.
Thisguide describes itsuse indetail.
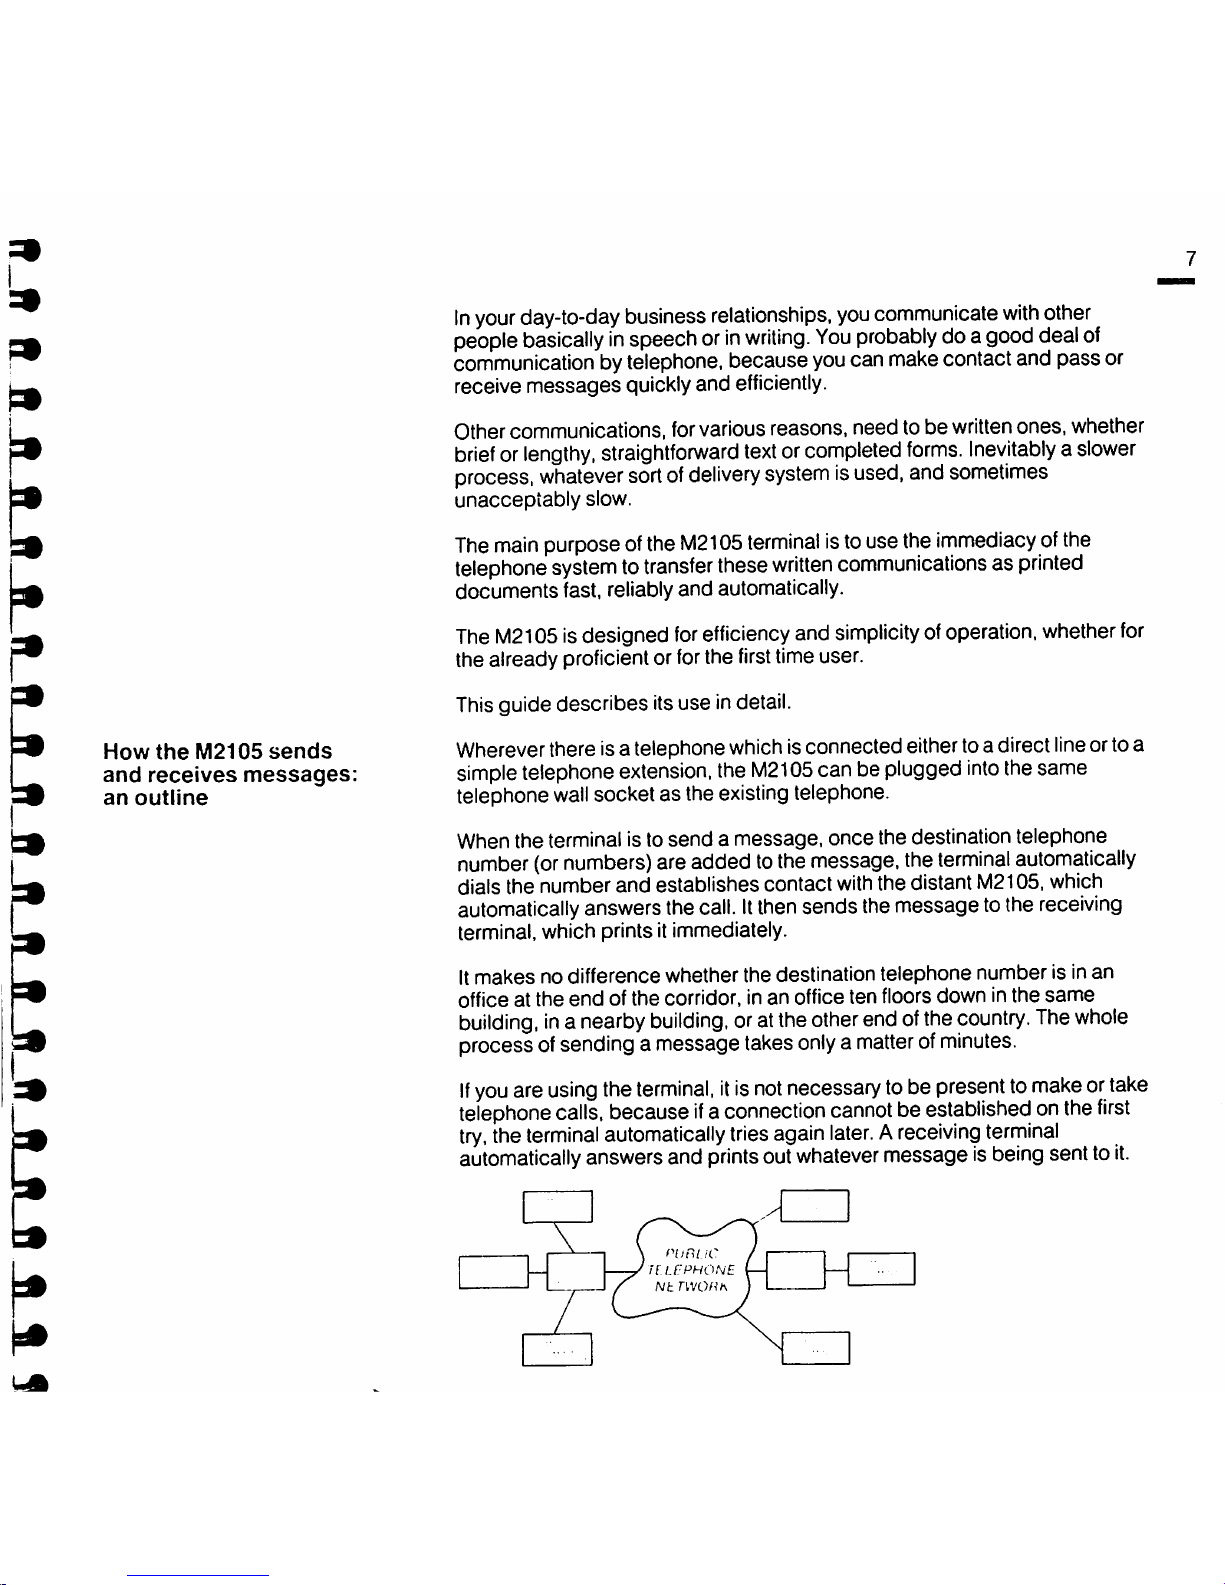
Whereverthere isa telephone whichisconnected eithertoa direct lineortoa
simple
telephone
extension,
the
M2105
can beplugged
into
thesame
telephone
wall
socket as the existingtelephone.
When the terminal is to
sendamessage,
once
the destination telephone
number
(or
numbers) are added tothe message, the
terminal
automatically
dials the number and establishescontact
with
the distant M2105.which
automatically
answersthe
call.Itthen
sends themessage tothe
receiving
terminal, which prints itimmediately.
It
makes
no difference whether the destination telephone number is inan
office at the
end
of the corridor, in an office ten floors down in the
same
building,ina
nearby
building,
oratthe
other
endofthe
country.
The
whole
processofsending a message
takes
onlyamatterofminutes.
If
you
are
using
the
terminal,itis
not
necessary
tobe
presenttomakeortake
telephone
calls,
becauseifa
connection
cannot
beestablished onthe
first
try.
the
terminal
automatically
tries
again
later.Areceiving
terminal
automatically
answersand
prints
out
whatever
message is
being
sentto
it.
Nb
Page 7
8 The M2105 terminal
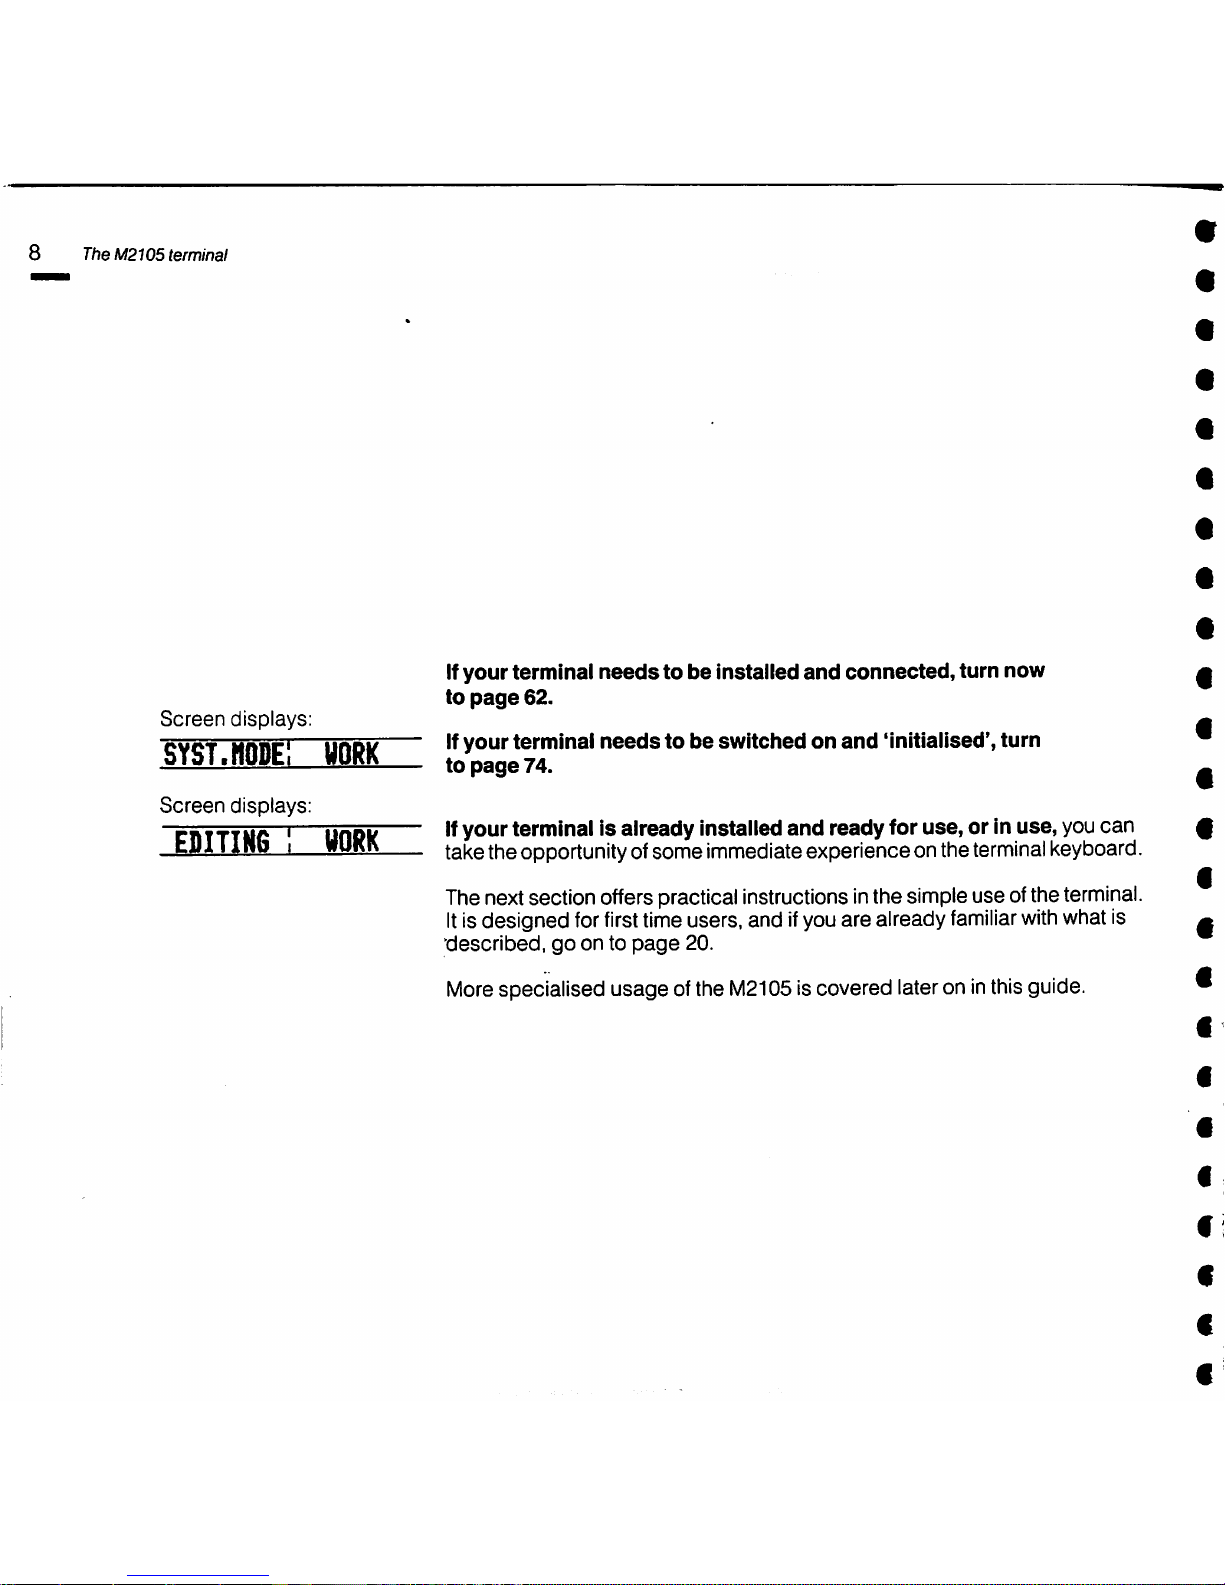
Screen
displays:
syst.hode;
UORK
Screen
displays:
EDITING I
UORK
If
your
terminal
needstobe
Installed
and
connected,
turn
now
to
page
62.
If
your
terminal
needstobe
switchedonand
'initialised', turn
to
page
74.
Ifyour terminal is already installed and ready for use, or in use, youcan
taketheopportunityofsome immediateexperienceonthe
terminal
keyboard.
Thenextsection offerspracticalinstructions inthe simple use ofthe terminal.
It
isdesigned for
first
timeusers, andifyouare already
familiar
with
whatis
'described,goontopage
20.
More
specialised usage ofthe
M2105
iscovered lateroninthisguide.
Page 8
•
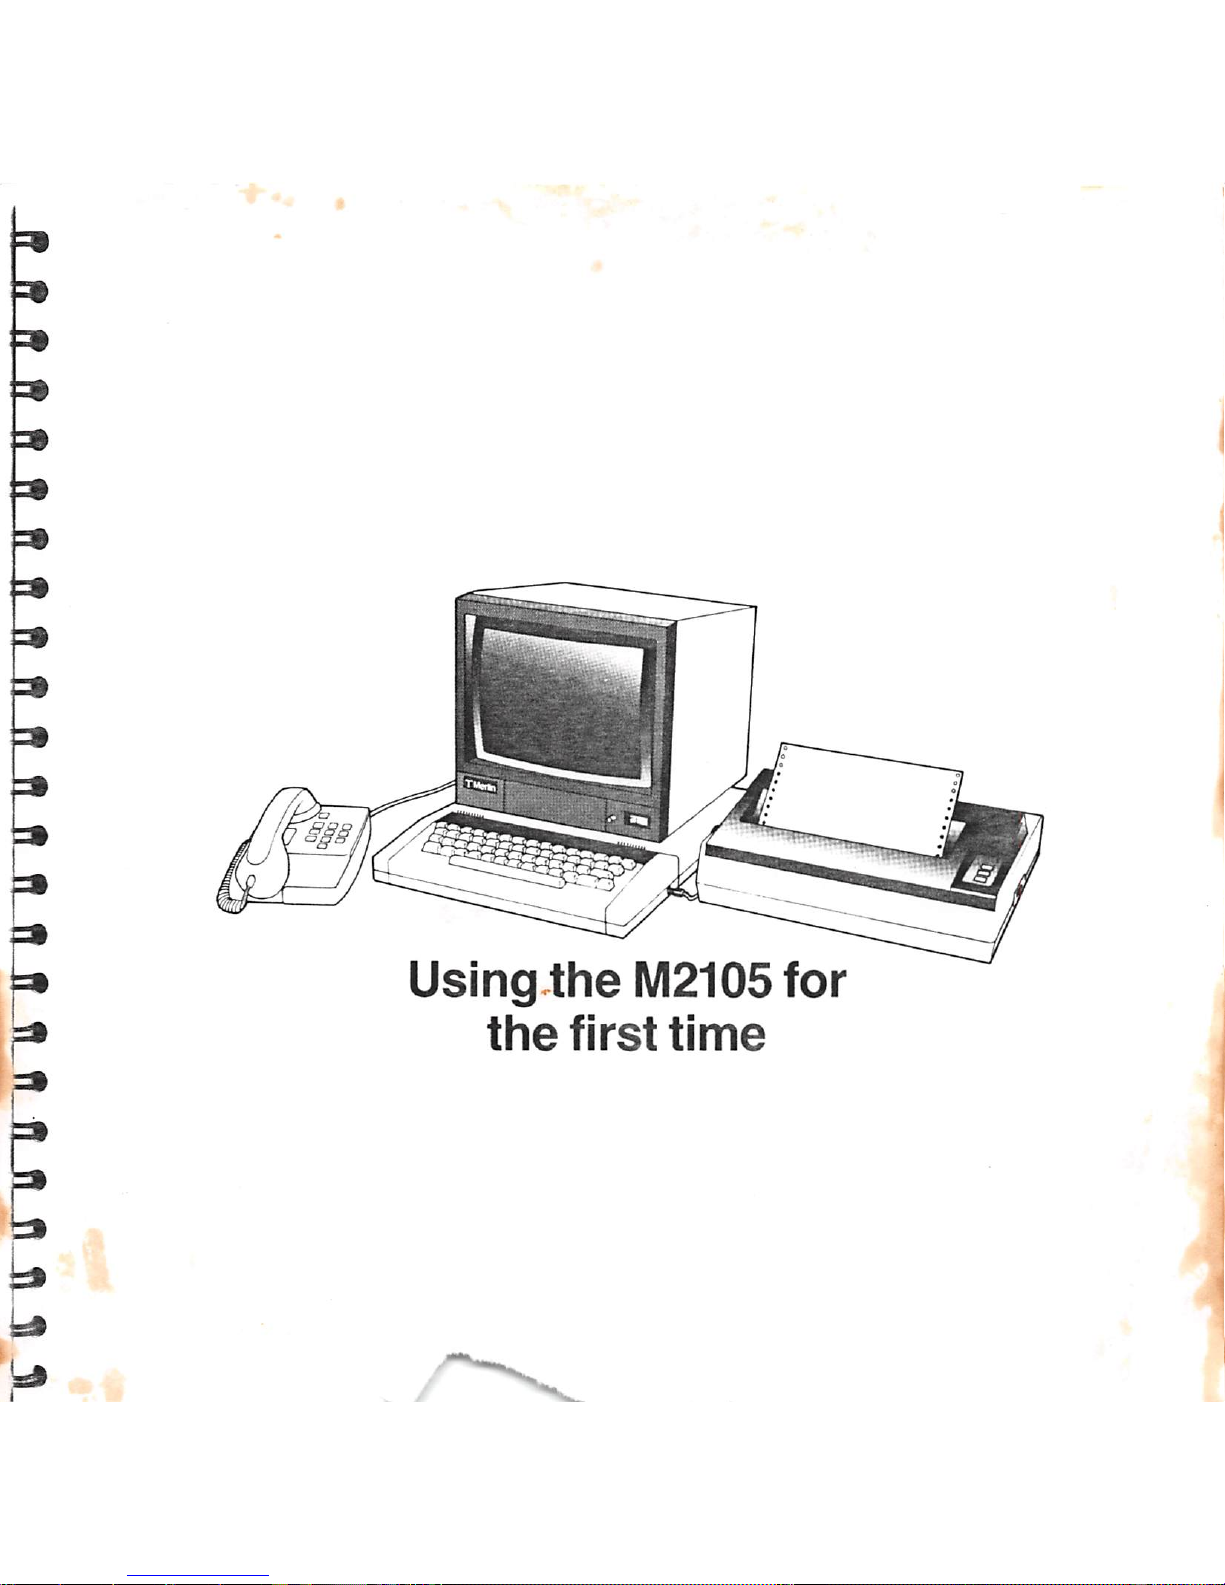
Using
the
M2105
for
the
first
time
Page 9
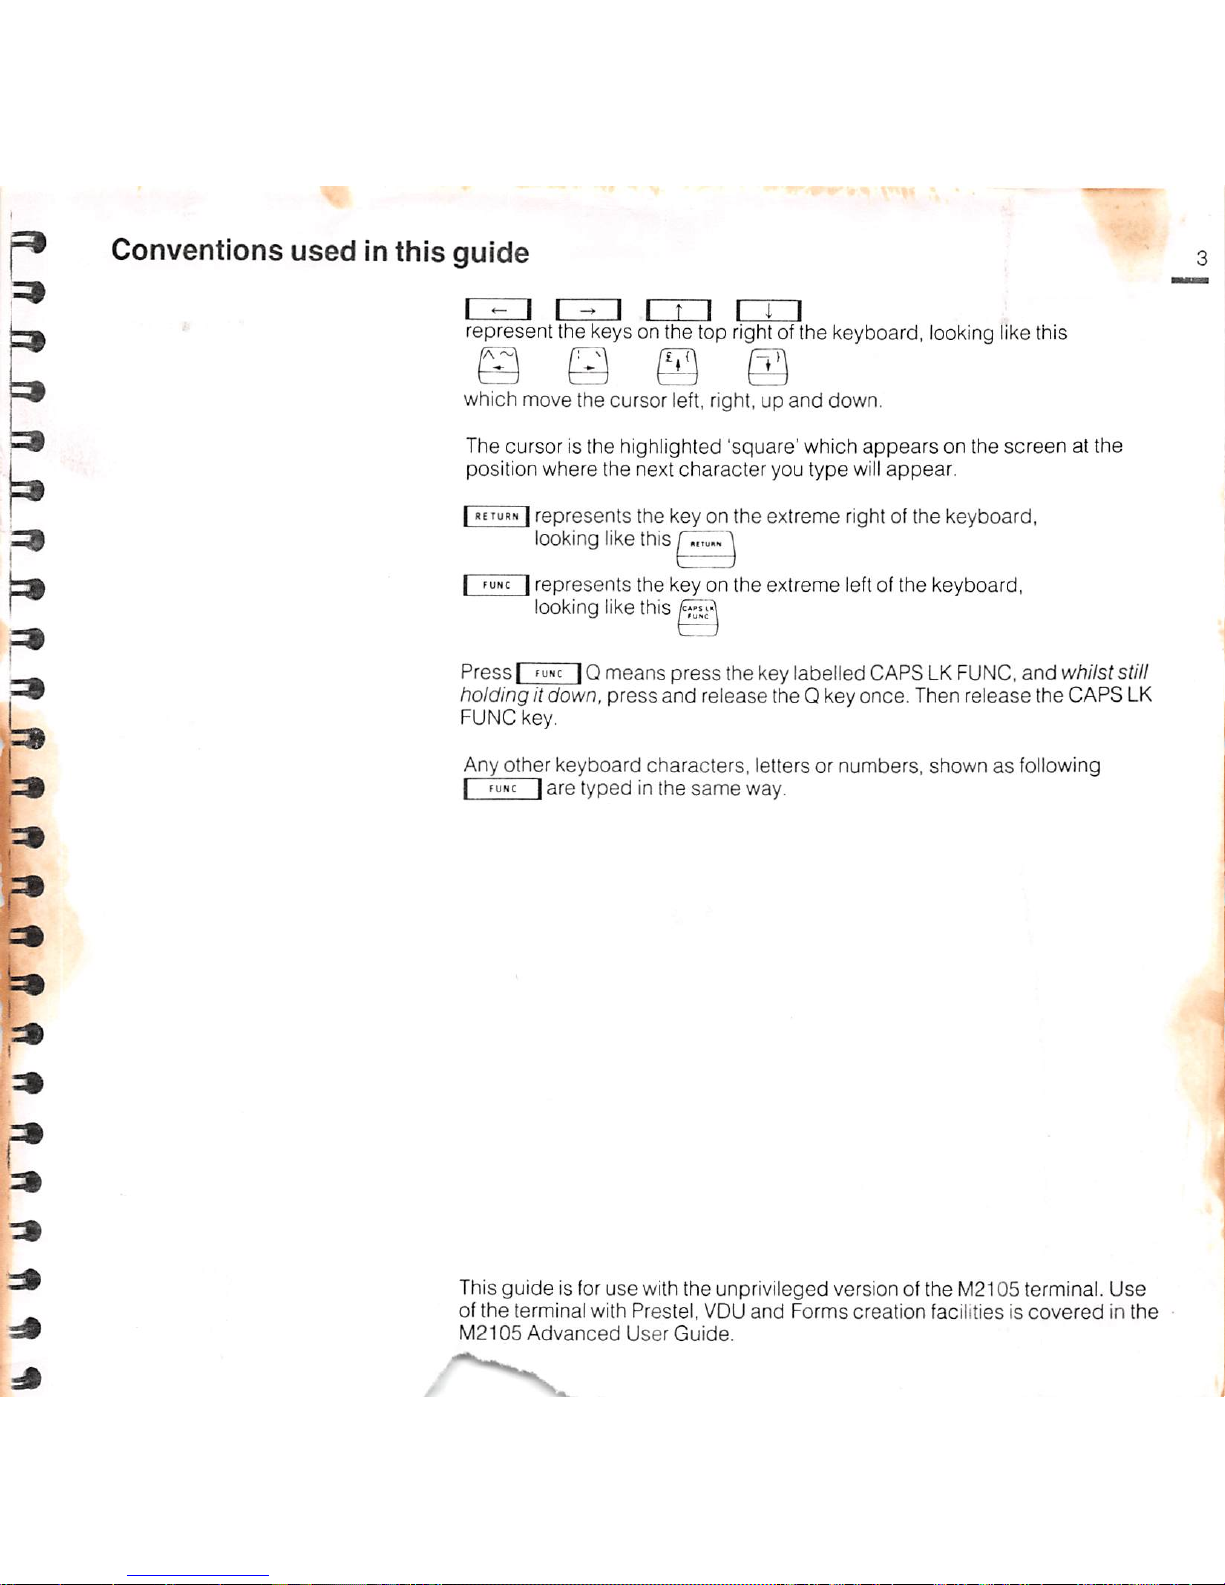
Conventions
used
in
this
guide
I i I I i T I I I I
represent the keys on the top rightofthe keyboard, looking likethis
fV
which move the cursor left,right, up and down.
The
cursor
is the highlighted
'square'
which
appears
on the
screenatthe
position
where
the
next
character
you
type
will
appear.
I 1
represents
the
key on
the
extreme
right of
the
keyboard,
looking like this
^uNcIrepresents
the
key on
the
extreme
left of
the
keyboard,
looking like this
Press
means
press
the key labelled CAPSLKFUNC,
and
whilst still
holding itdown,
press
and
release the Q key once. Then release the CAPS
LK
FUNC key.
Any
other
keyboard
characters,
letters or
numbers,
shownasfollowing
I
fuNcIare
typedinthe
same
way.
This
guide
is for
use
withthe unprivileged version of the M2105 terminal.
Use
of
the
terminal
with
Prestel,
VDU
and
Forms
creation
facilities is
coveredinthe
fv12105
Advanced
User
Guide.
Page 10
10
Using
the
M2105
for
the
first
time
The
display
screen
The
keys
These
siinple instructions
assume
that
the
terminal
has
been
switched on
and
initialised,
and
the
words
'EDITINGWORK'
are
displayedinthe
highlighted
band
on the lower halfof the screen. (Ifthis is notthe
case,
turn to
page).
'Editing' is
the
work you
are
about
to do,
and
covers
the
process
of
typing text on to the
screen
or amending text already shown on
it.
The complete
screen
is divided into two halves. The
upper
part is the 'User'
Screen,
and
this is
the
screen
on which
the
work youdowill
appear.
The lower part is
the
'Command'
Screen,
which is your 'control
centre'
where
various
commands
('the menu')
willbedisplayed
and
confirmed,
and
where
the
terminal
will
'prompt'
and
inform you.
The Command
Screen
maybeasking you to 'Select Command'. Now hold
down
theIfuhc|key
andatthe
same
time
press
the
'Q' key
once.
The
complete User
Screen
will
appear.
Nowrelease the I
func
| key.
Press
theIf"nc|and
'Q'
keys
againinthe
same
way, until
the
Command
Screen
is invitingyou to
'Select
Command'.
Press
them
a third time
and
you
have
the
User
Screen
again. Using
theIfuwc|and
'Q' keys like this
will
always
cause
the terminal to alternate the
screen
display between the
Command
and
User
screens.
Lookat the Command Screen and you
will
see
highlighted
bands
along its
top
and
bottom.
These
are
divided into a series of sections displaying
information
about
the
terminal. Allthis,
and
the
information within
the
screen,
is explained
fully
later.
Using I
func
| Q, Moveintothe User Screen.
Now,
using the keyboardasa
normal typewriter,
type
the
words
'THIS ISA
MESSAGE".
Notice how the
flashing block
character,
knownasthe
cursor,
moves
alongasyou type.
You
maybetyping in capitals, but ifyou wantto
type
in lower
case,
(small
letters)
press
and
hold down the I shift | key,
and
press
the I
caps
lk|
key
once.
Then
release
I shift |.
You
will
nowbeabletouse
| shift |
for
capitals
asona
normal
typewriter.
Pressing
and
releasing | capslk|
and
I shift | in the
same
way
will
once
again
return you to capitals,
andsoon. When you
are
typing in capitals, the yellow
lighton the leftof the keyboard
willbeilluminated.
You
can
ignore
the
legendsonthe
lower lines of
the
keys: they
are
not
used
in
this
terminalatthe
moment.
The
keys
havean'auto-repeat'
function, which
means
that
ifyou hold a key
down, it
will
automatically
continuetotype
the
same
character
until you
release
it.
Page 11
Editing
your
message
Using
the
| |
cursor
key,
move
the
cursor
under
the
'M' of MESSAGE.
Pressi
func
rr(fbr
InsertSpace)
and
open
3 or 4
spaces
between the
words.
The
space
will
alwaysbeinsertedonthe
right of
the
character
under
which
the cursor is positioned. Close the
message
up again, by using I
func
| 'D'
(forDelete Character)
anditwill
perform inexactly the opposite way, by
deleting
the
spaces
between
the
words.
If
you keep on pressing I
func
| D, you
will
start deleting all the
characters
on the rest of that line ofyour
message.
All
you
needtodoistype
backinany
characters
you
have
lost. You
will
also
find that you
can
remove
any
mistakes
by moving
the
cursor
over
the
mistaken
characterorsection
and
overtyping.
You
can
also
use
the
DELETE
key whilst typing, where it
will
delete
the
character
on
the
leftofthe
cursor.
Nowcontinue typing a
message
across
the
screen
untilyou
have
completed
another line or two. You
will
notice thatasyou go, the cursor
moves
down a
lineat a time,
and
the corresponding numeral '1' is highlighted
each
time on
the
right
hand
sideofthe
screen.
You
will
also
see
that ifa word is not
completed
by the time you
reach
the
right hand
edge
of the
screen,
the
complete
word
will
automatically move
down to the next line. This is called 'Wordwrap'.
I
mwc
IC (forClose Gap)
andjfumc
| O (forOpen Gap), workon the
same
principle as I
f"nc11and I
func
|D.
but
are
used
fordeleting
and
inserting
whole
lines.
Tryinserting a blank line between two of the lines you have typed. Press
I
FuwciOandaone
line
gap
will
open
between
the
line on which
the
cursor
is
currently
positioned
and
the
one
above
it.
Press the cursor key marked I |. The cursor
will
move
back
along the
line
one
space.
Ifyou
keep
the key
pressed
the cursor
will
continue to move
along untilyou
release
the key
and
the
same
will
happen
ifyou
press
the
I -» Ikey. in a forward direction.
Positionthe cursor under the
initial
T ofyour firstword THIS', by using the
I T ll I Iandl ^
||
Icursor keys.
Now
press I
fumc
11,
and keep
it
pressed
down untilthe whole
message
has
moved right
across
the
screen.
As the
message
moves
across
the
screen,
and
hits the right
hand
edge,itwill
move
down to
the
next line, word by word.
11
Page 12
12
Using
the
M2105
for
the
first
f/me
Clearing
ihe
screen
Printing and
sending
your
message
Position
the
cursor
onthe
empty
line,
and
close
upthegap
againbypressing
I
fUHc
iCand
your
message
returnstoits
original
form.
(Butifyou
continue
to
pressIFutirniCyour
message
willbedeleted
linebyline
untilitno
longer
remains on the screen).
You
can
now
continue totype
your
message.Ifyou
wishtoinsert
somespace
between
lines,
orparagraphs,as
you
go,
simply
pressthe|
return|key.
As
you
fill
thescreen a
numeral
showing
the page number
will
appearonthe
right
hand
margin
and
allow
thecursorto
move
down
correspondingly.
Asyourmessage continuesover a page (approximately 52linesonthe
screen)the
right
hand
margin
numeral
will
change
progressivelyto2,3,
and
4,inalternate
normal
and highlighted display.
Any
partofthemessage
currently
displayed
onthescreencan be
edited
by
usingthe cursor keys to go
left,
right,
up and
down,
orthe|
func
| For
I IB
keys
totab
forwards
and
backwards
(10
charactersat a
time).
If
atany
time
you
needtoclearthescreenandstart
again,
pressthe|
fuwc
|
andQkeysas described earlier, to
bring
you
into
the
Command
Screen.
Now
presstheI -» I
key
until
the
letters
DD
appear
highlighted
along
thetop
edgeofthe
Command
Screen.
Notice
that
the
command
you
are
selecting
is
expanded
on the leftofthe Command Screen, inthis
case
'DELETE
DOCUMENT'.
PresstheI
""urn|key.
PresstheY
keytoconfirm
your
action,
andpressthe
I I
key
once
more.
Now
pressthe|
fuwc
| andQ
keys
and
you
will
be
presented
with
a clear UserScreentostartagain.
'
Now
you
canput
together
a messageonthe
terminal,
it's
aneasy
matter
to
print it, or
send
itto
another
terminal.
Try
printing
it.
PressI
func~|Q.tobring
backthe
Command
Screen.Press the
I ^ Icursor key
until
the letters PRappear highlighted. Press the |
return
|
key
twice.
Your
printer
will
print
outthemessage
you
have
typed
onthe
screen.
You
cansend
your
messageto
another
terminal
justaseasily,ifyou
know
its
telephone number. Again, afteryouhave typed your message on the screen,
pressI
func
IQ.
Now
presstheI ^ Icursor
key
until
the
letters
QSappear
highlightedalong the top
edge
ofthe Command Screen. Press |
return
|.
once.
You
will
see the
cursor
flashinginthe
Command
Screen
asking
you
to
enterthetelephonenumber ofthe
terminal
you
want
tosend
your
message
to.
Typeitin,
making
sureitis
complete
and
correct.
Press|return|again.
Page 13

Your
message
is now 'posted' and on its way, and the Command
Screen
will
display information
about
its
progress.
Ifyou
erase
the
messagetoclear
the
screen
now.
the
message
will
still
have
been
held in
the
terminal's files
and
canbebrought
back
to look at or
do
further work on,asdescribed
later inthe guide, on p24.
Don't worry at this
stage
about
not
fully
understanding the
commands.
They
will
allbeexplained
in detail later in this
guide.
]w
ZDE
I
'"-t
IR
,
Read
iti.-jtKed
item
I
I'
inseil
space
Del^sieen
c^atacle'S
/
C^o
Open
space
between
lines
CursoT
lelt
letm.ri.i'
h.indsel
Picnous
, Cutsof
nqni
R
C'l.ifiiie
m<Hlf
Summary
of
keyboard
functions
'
SHI.t
y Z^
"N
X
r
v]{
B,\
r ^ f
f N\f
. ,
JL
-
_J
A
JS
P'PVIOllS
().l(|0
I ' IA
No«t |).i<ic
JX
PK'.iijci-.
(lociiinoni
:z
NoitilociiimTdl
CE3C
\
Close
ij.ip
I
IP
Dcicu'ctiirciil
ch.ir,u:to<
1
IB
H.tcKw.iiils
l.it)
3M
Mark
line
or
t)kx;K
C..'so(
do
An
C.i'irul
commanO
Implement
selected
command
UseIfuNt
IQtoswitch
between
User
and
Command
Screens.
Press
CTRLwith key to
select
top right
character
on keys with
three
characters.
Editing functions
Moving through files
and
documents
FUNC
I
D
O
C
F
INSERT
space
between
characters
FUNCW Display NEXTSCREEN (20 lines)
DELETEcurrent
character
FUNCE Display PREVIOUS SCREEN
OPEN
gap
(insert new line) FUNCA Display NEXTPAGE (50 lines)
CLOSE
gap
(delete
line) FUNCS Display PREVIOUS PAGE
FORWARD
tab
FUNCZ Display NEXTDOCUMENT
FUNC X Display PREVIOUS DOCUMENT
B
BACKWARDS
tab
FUNCMMARK
lineorblock/clear
mark
R
READ
marked
text
into
Work
File
13
Page 14

14
Usingthe M2105forthe firsttime
The
Display
Screen
The diagram belowshows how the screen is laidout inEditing
Work
mode,
wheninthe
Work
File.
The DisplayScreen is split intotwo parts. The upper part is the User Screen
and the lowerpart is the Command Screen. Both parts ofthe screen have a
linewidth of 80 characters. The User
Screen
hasadepth
of20 lines and the
Command
Screenadepth
of 5 lines.
1
08/11/841
terminal;
:
H2105
:
V2.80
I EDITING 1
WORK:15:54
1
D IZIRF FI crt
D
0
SF RC
DN
B
B
SO
a
a
•
1 : 1
I
FFs:
04758:
CDS:
00110;
;h!
SN: m 1n8h ee 1
Theleft
hand
marginisshown
as"]"
characters
and
the right
hand
margin is shownas"["
characters
plus
a two digit
number.
The
purposeofthese
brackets
is to
control
the
available line
length
to 74
characters,
offset to
the right of the
paper.
This
leaves
a blank left
hand
margin
for
punching
and
binding
when
the
documentisprinted.
The two digit
numberonthe
right
indicates
the
page
numberinthe
document
being
displayed.
For
page1and
following
odd-
numbered
pages,
this
numberisshown
highlighted. For
page2and
following
even-
numbered
pages,
itis
shown
normally. This
makesiteasy
(or
the
boundary
between
pagestobe
shown
clearly,
and
helps
you to
position
text in a multiple
page
document.
Page 15
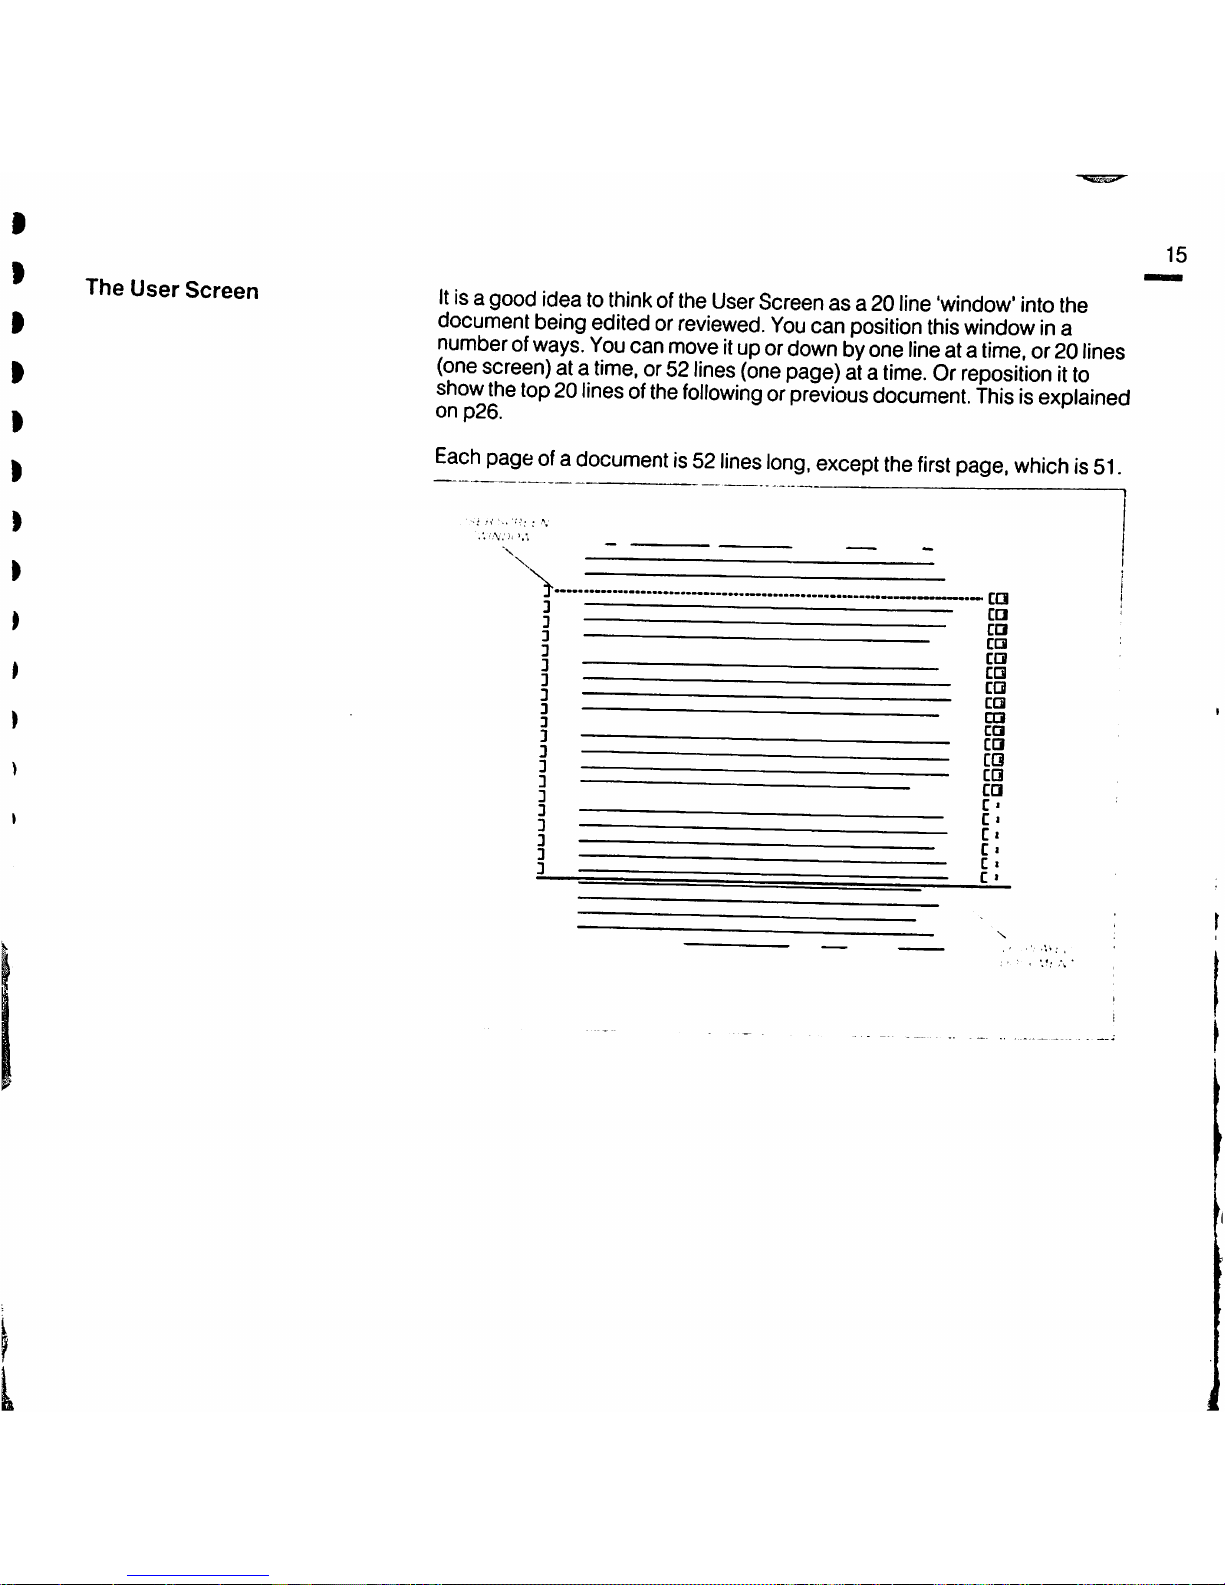
The
User
Screen
It
isa goodideato
think
ofthe
User
Screenas a 20
line
'window'
into
the
document
being
editedorreviewed.
You
can
position
this
windowina
numberofways.
You
can
moveitupor
down
byone
line
ata
time,
or20
lines
(one
screen)
ata
time,or52
lines
(one
page)
ata
time.Orrepositionitto
show
the
top20linesofthe
followingorprevious
document.
Thisisexplained
on
p26.
Each
pageofa
documentis52
lines
long,
except
the
first
page,
whichis51.
-ca
CD
CO
ca
CO
ca
ca
•3
ca
ca
CO
ca
CO
c
c
c
c
c
c
15
Page 16
16
Using
the
M2105
for
the
first
time
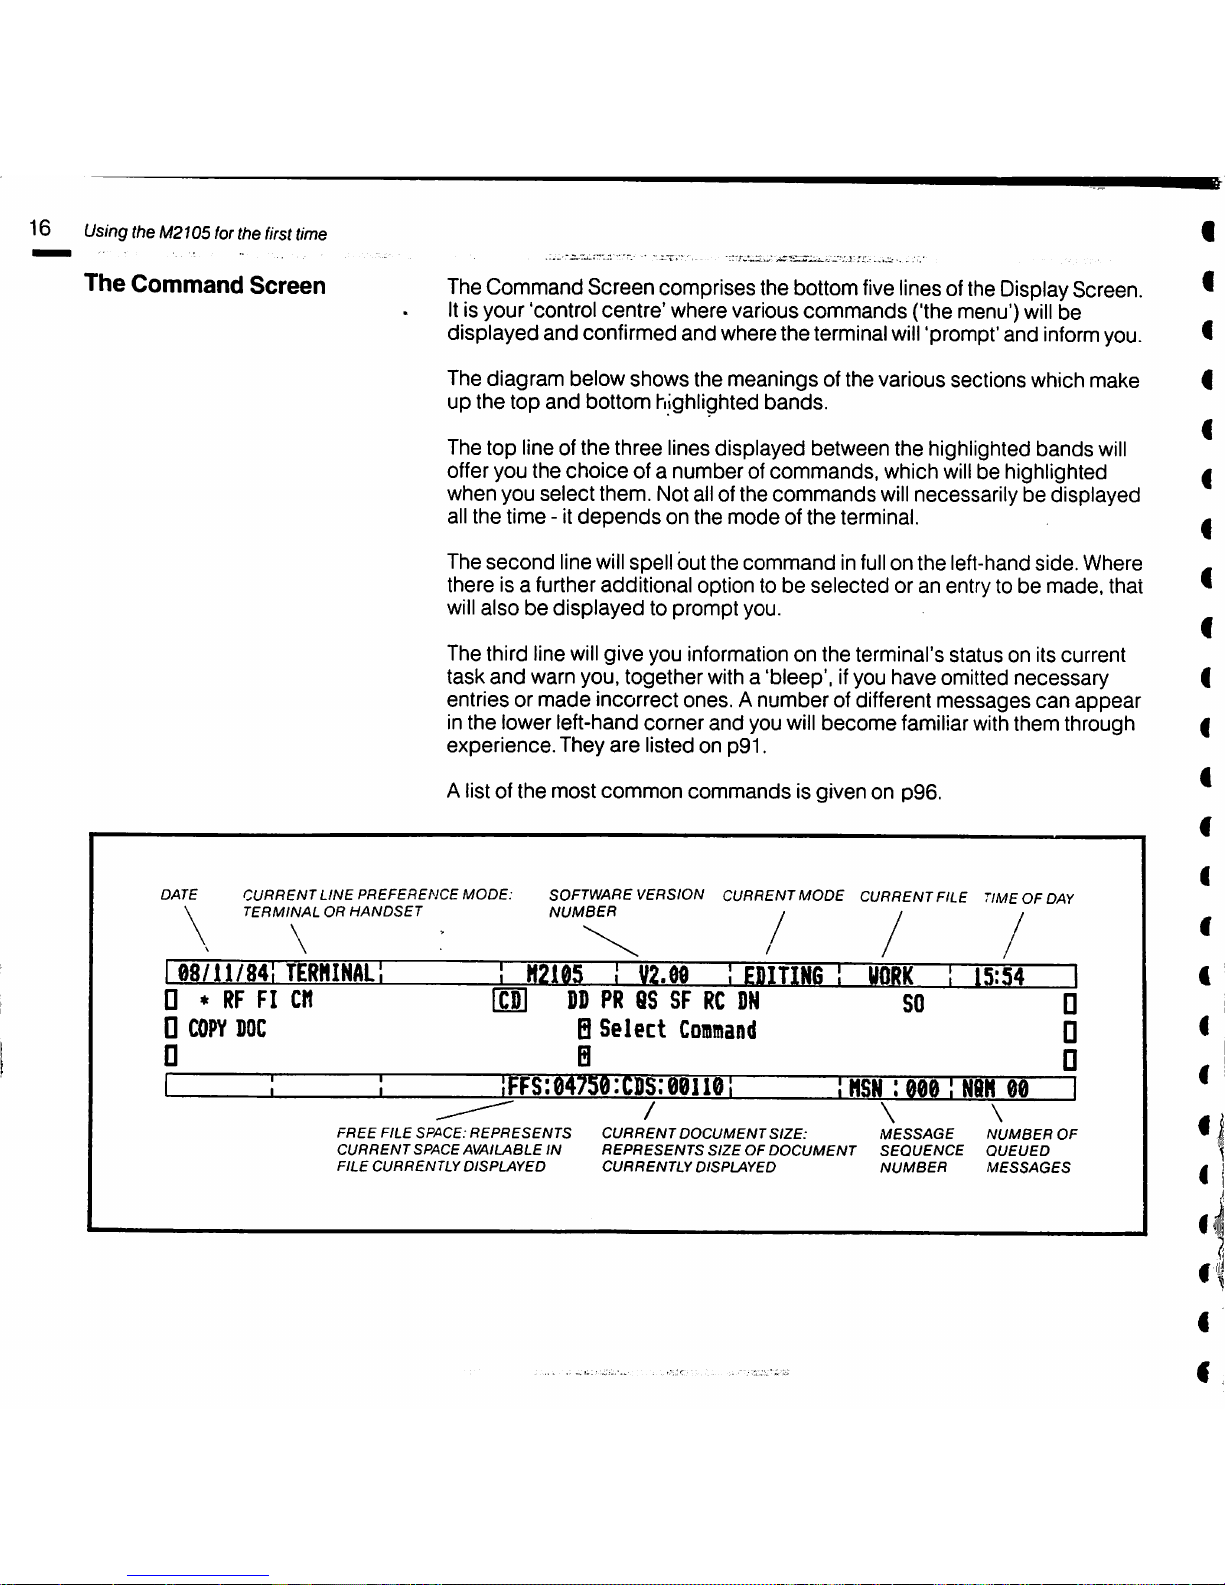
The
Command
Screen
TheCommand Screen comprises the bottom
five
linesofthe Display Screen.
Itis your 'control
centre'
where various
commands
('the menu')
will
be
displayed and confirmed and where the terminal
will
'prompt' and
inform
you.
The diagram below
shows
the meanings of the various sections which make
up
the
top
and
bottom highlighted
bands.
The top lineof the three lines displayed between the highlighted
bands
will
offer you the
choice
of a number of
commands,
which
will
be highlighted
when you
select
them. Not all of the
commands
will
necessarilybedisplayed
all
the
time
- it
depends
on
the
modeofthe
terminal.
The
second
line
will
spell but the command in
full
on the left-handside. Where
there is a further additional option tobeselected
or an entry tobemade,
that
will
alsobedisplayedtoprompt
you.
The third line
will
give you information on the terminal's status on its current
task
and
warn you,
together
witha
'bleep',
ifyou
have
omitted
necessary
entries or
made
incorrect ones. A number of different
messages
can
appear
inthe lower left-hand corner
and
you
will
become
familiarwiththem through
experience.
They
are
listed on p91.
A list of
the
most
common
commandsisgiven
on p96.
DATE
CURRENT
LINE
PREFERENCE
MODE:
TERMINAL
OR
HANDSET
\
SOFTWARE VERSION CURRENT MODE CURRENT FILE TIMEOF
DAY
NUMBER
/ /
08/11/841
terhinal;
1
H2185
!
V2.M
1 EBIT1M6
1
UORK
:
15:54
1
D •
RF
FI cn
DD
PR 6S SF
RC
SN
so
•
D
COPY
IOC
0
B
Select
Costnand
E
•
D
1 i
:FFs:e475d;C]is:0ene:
1
nsN:
eee
:
NBH
ee
\
MESSAGE
SEQUENCE
NUMBER
FREE
FILE
SPACE:
REPRESENTS
CURRENT
SPACE
AVAILABLE
IN
FILE
CURRENTLY
DISPLAYED
CURRENT
DOCUMENT
SIZE:
REPRESENTS
SIZEOFDOCUMENT
CURRENTLY
DISPLAYED
\
NUMBER
OF
QUEUED
MESSAGES
m
Page 17
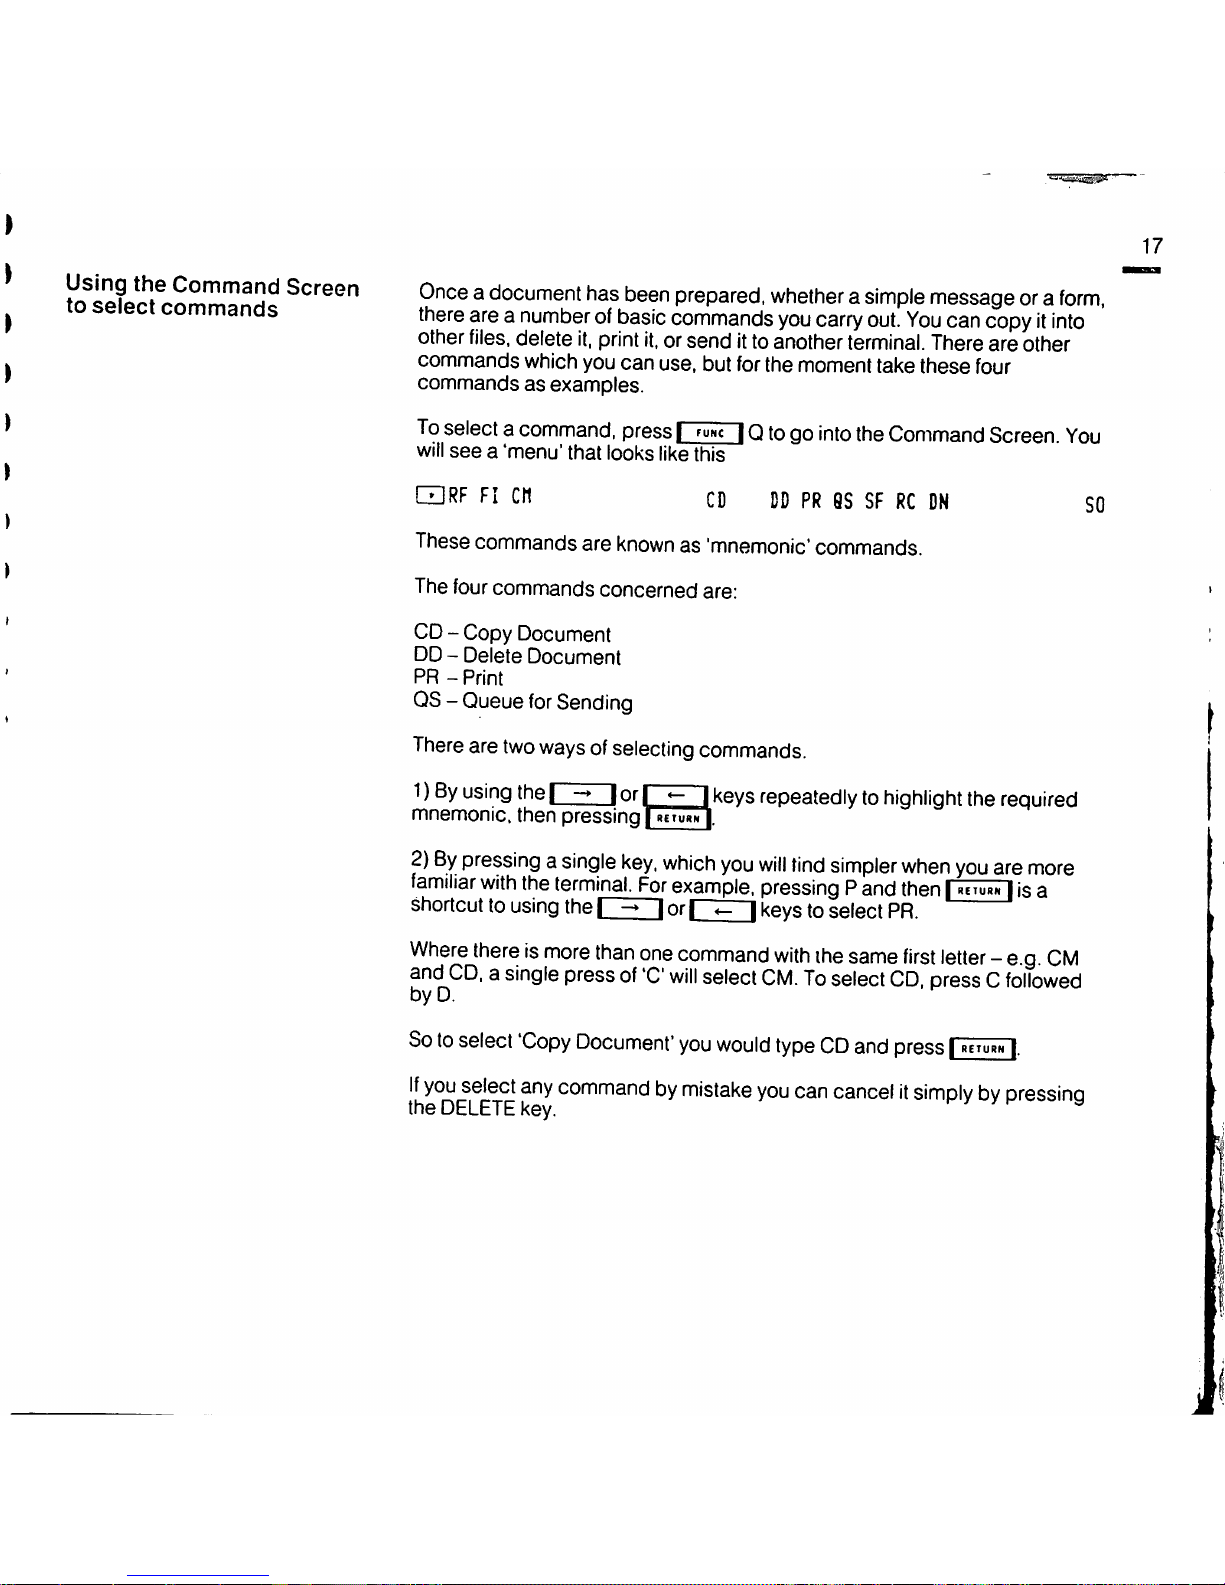
to^se?pr^t^rnm^TnHo
^
document
has
been
prepared,
whetherasimple
messageora
form,
lu
5»eieci
commanas
there
areanumberofbasic
commands
you
carry
out.
You
can
copyitinto
other
files,
delete
it,
print
it.
orsend itto another terminal. Thereare other
commands which you
can
use, but for the moment take
these
four
commandsasexamples.
To
select a
command,
pressI
^unc
| Qtogo
into
the
Command
Screen.
You
will
seea'menu'
that looks like this
n
C(1
CD
DDPR8S
SFRCDN
SO
Thesecommands are
known
as 'mnemonic' commands.
The four
commands
concerned
are:
CD- Copy Document
DD -
Delete
Document
PR-Print
QS- Queue
for
Sending
There
are
two
waysofselecting
commands.
1)Byusing
theI-»Ior
I I
keys
repeatedlytohighlight
the
required
mnemonic, then pressing I
RETuaN*!.
2)^y
pressingasingle
key.
which
you
will
tind
simpler
when
you
are
more
familiar
with
the
terminal,
f^or
example,
pressingPand
then|utiuaw|is
a
shortcuttousing
theI -* Ior| |
keys
toselect
PR.
Where
thereismore
than
one
command
with
ihe
same
first
letter
- e g
CM
and
CD.asingle
pressof'C
will
select
CM.Toselect
CD,
pressCfollowed
by D.
Sotoselect
'Copy
Document'
you
would
typeCDand
press[return
If
you
select
any
commandbymistake
you
can
cancelitsimplybypressino
the
DELETE
key.
y y^ y
17
Page 18
20
How
the
terminal
takes
over
office
tasks
TO
AND
FROM
OTHER
TERMINALS
PRINTER
SYSTEM
INFORMATION
1
WORK
FILE
MAIL
BOX
FILE
OPERATOR
INFORMATION
FILE
FORMS
FILE
'MESSAGES
RECEIVED'FILE
PENDING
FILE
'MESSAGES
SENT
FILE
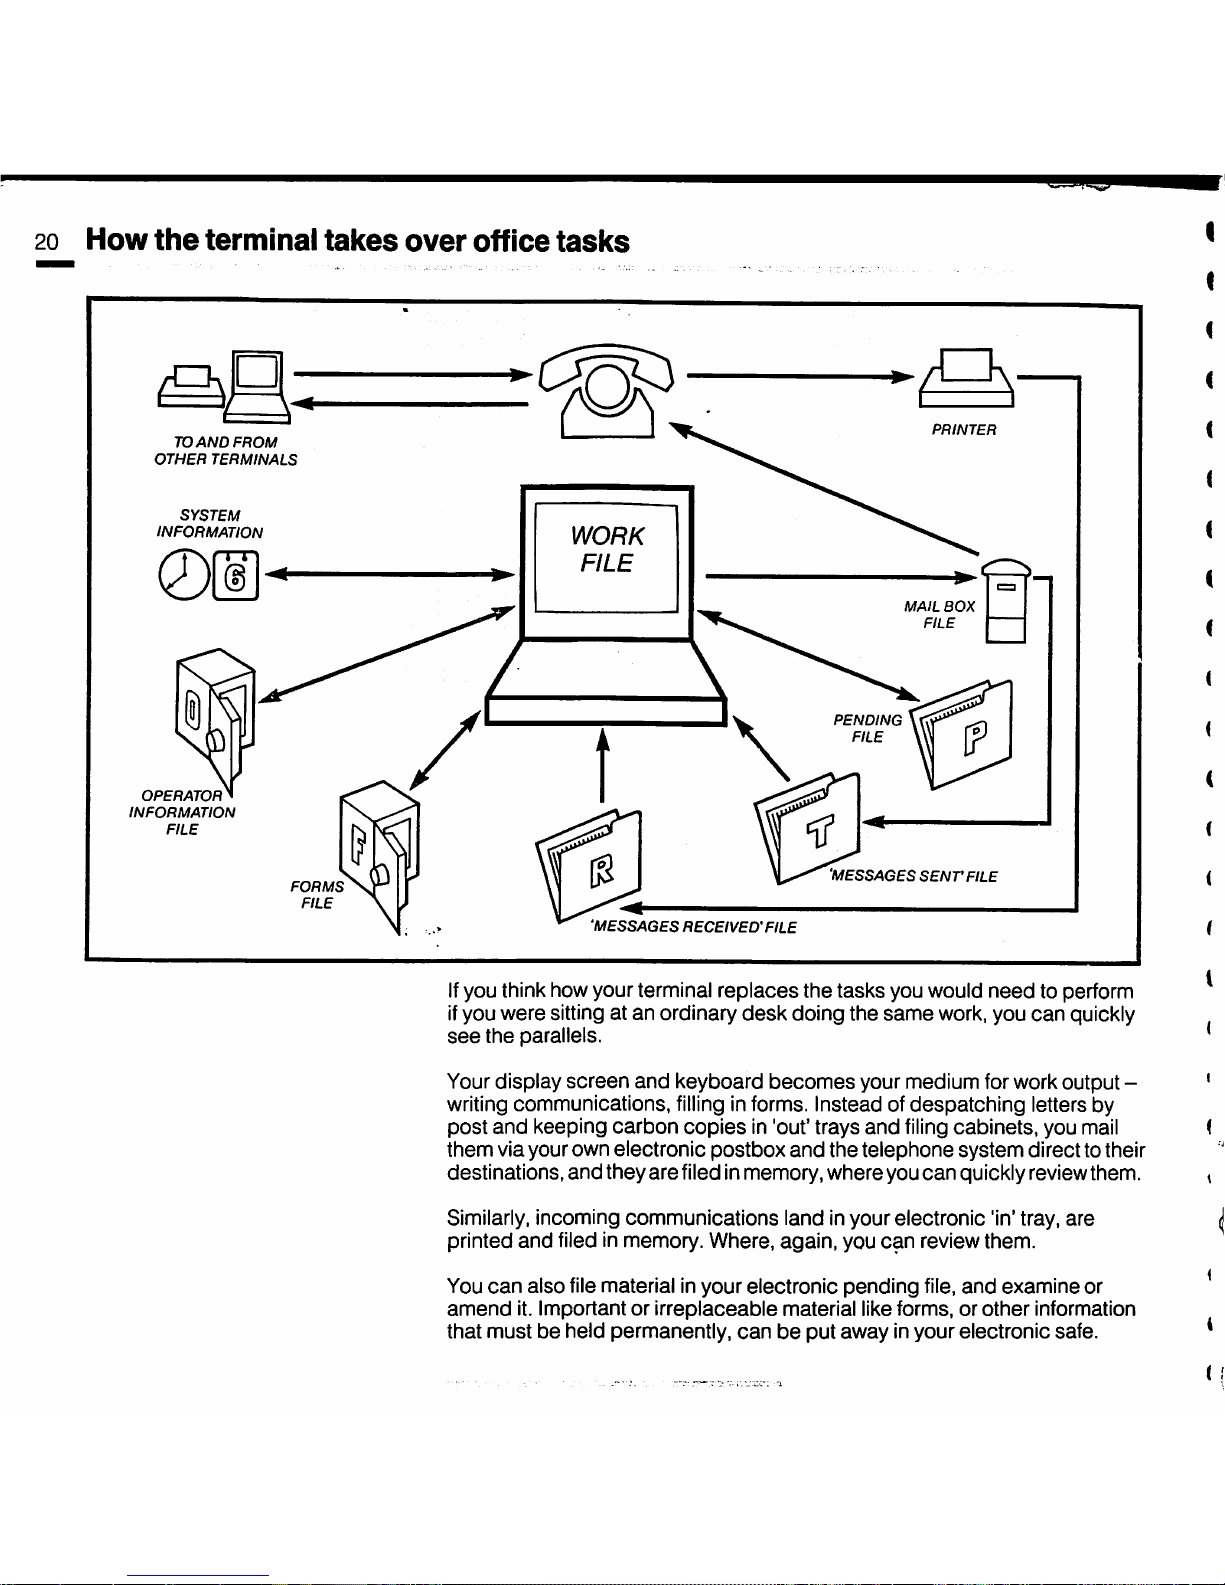
Ifyou think how your terminal
replaces
the
tasks
you would
need
to perform
ifyou were sitting at an ordinary
desk
doing the
same
work,you
can
quickly
see
the
parallels.
Yourdisplay
screen
and
keyboard
becomes
your medium forwork output -
writingcommunications,
filling
informs. Instead of
despatching
letters by
post
and
keeping
carbon
copies
in 'out' trays
and
filing
cabinets,
you mail
them
via your own electronic
postbox
and
the
telephone
system
directto their
destinations,
and
they
are
filedinmemory, whereyou
can
quickly reviewthem.
Similarly, incoming communications land in your electronic 'in' tray,
are
printed
and
filed in memory. Where, again, you
can
review them.
You
can
also
file material in
your
electronic
pending
file,
and
examine
or
amend
it.
Importantorirreplaceable
material
like forms, or
other
information
that
mustbeheld permanently,
canbeput
away
in yourelectronicsafe.
Page 19
m
i
9
How
the
files in
the
terminal
are
organised
Te
.'VorH
-ile
'he
lending
File
iP)
The
Mail
Box
File
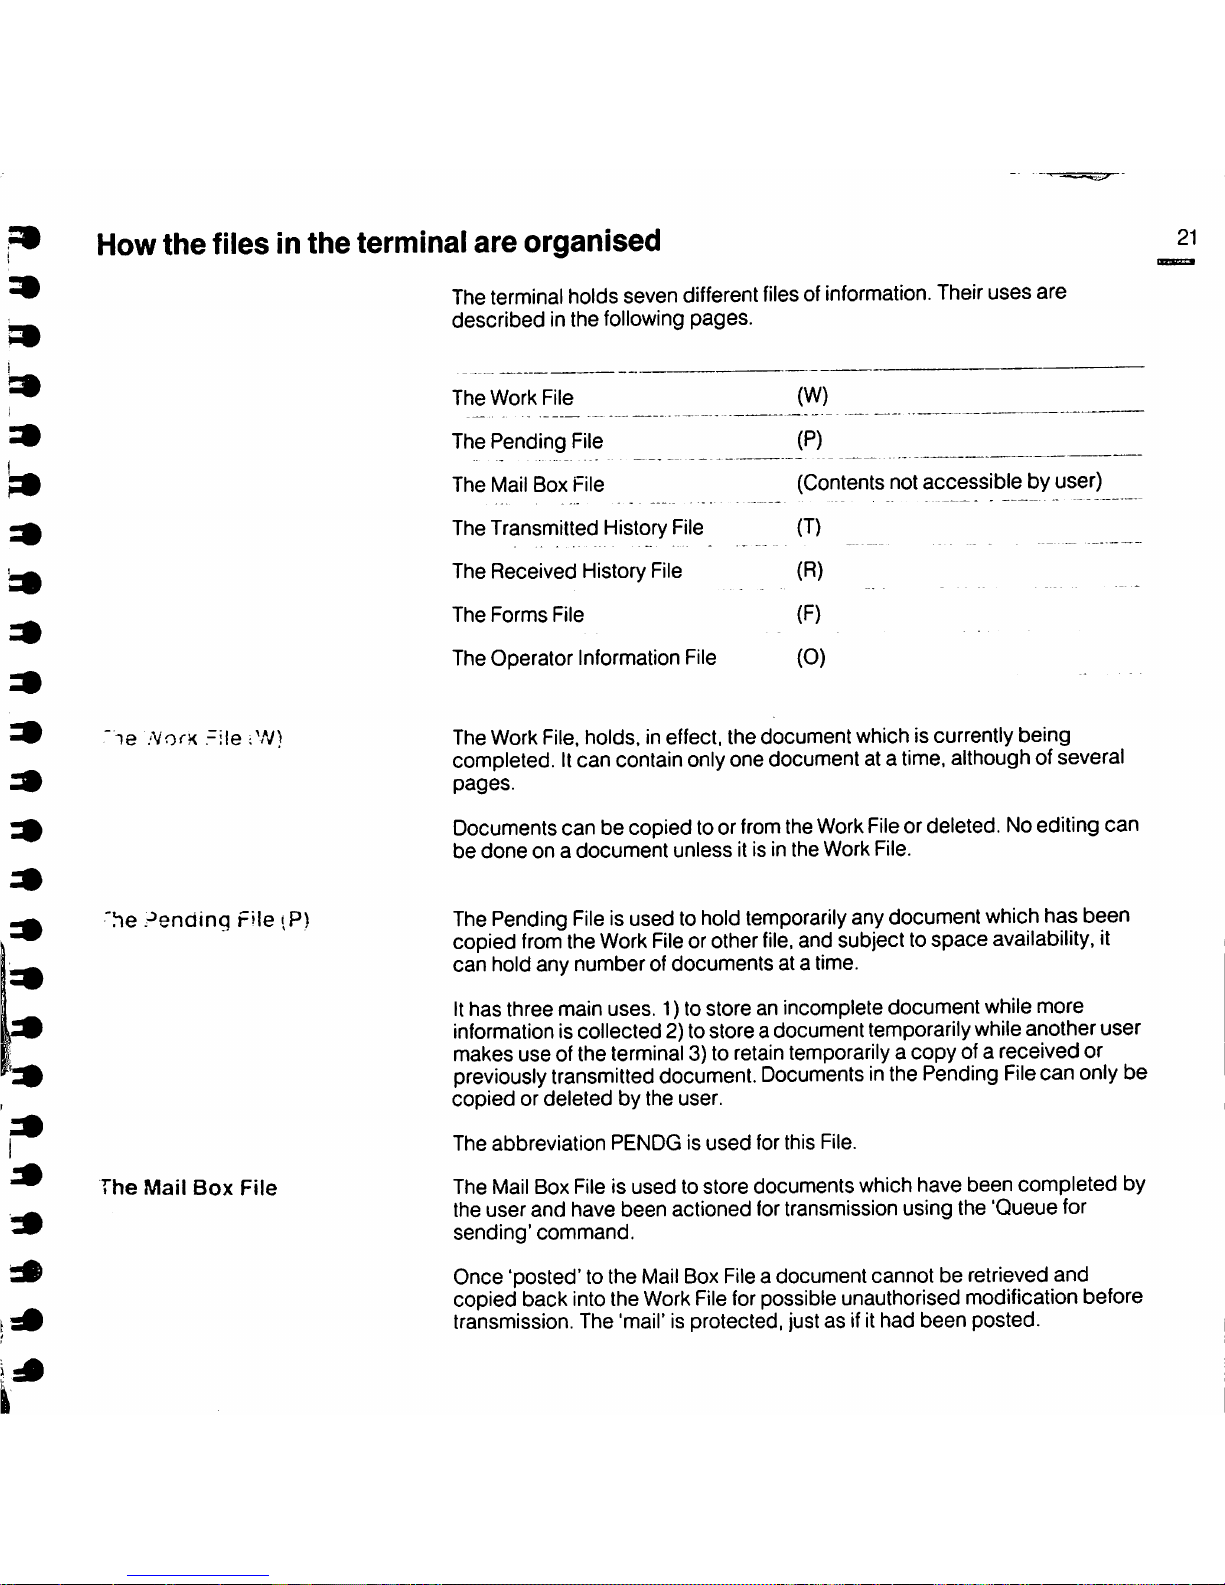
The terminal holds
seven
different files of information. Their
uses
are
describedinthe
following
pages.
The
Work
File
The
Pending
File
The
Mail
Box
File
The
Transmitted
History File
The
Received
History File
The
Forms
File
The
Operator
Information File
(W)
(P)
(Contents not accessible by user)
(T)
(R)
(F)
(0)
The Work File, holds, in effect,
the
document
which is currently
being
completed.Itcan containonlyone document at a
time,
althoughof several
pages.
Documents
can
be copied to or fromthe WorkFileor deleted. Noediting
can
be
doneona
document
unless
it is in
the
Work
File.
ThePending
File
isused to hold
temporarily
anydocument whichhas been
copied
from
the
Work
File
orother
file,
and subject to
space
availability,
it
can
hold any numberofdocuments at a time.
It
has
three main uses. 1) to store an incomplete document while more
informationis collected 2) to storea document temporarily whileanother
user
makes
use
of the terminal 3) to retain temporarily a copy of a received or
previously
transmitted document.
DocumentsinthePending
File
can
only
be
copiedordeleted
by the user.
The
abbreviation
PENDGisused
for
this
File.
The Mail Box File is
usedtostore
documents
which
have
been
completed
by
the
user
and
have
been
actioned for transmission using the
'Queue
for
sending'
command.
Once 'posted' to the
Mail
Box
File
a document cannot be retrieved
and
copied back intothe
Work
File
forpossible unauthorised modification before
transmission. The 'mail' is protected, justasifit
had
been
posted.
21
Page 20
22
How the files in the terminal
are
organised
The
Transmitted
History
Fi!e(T)
The
Received
History
File (R)
The
Forms
File (F)
The
Operator
Information
File
(O)
As
soonasthe
document
is put into
the
Mail
BoxFile,
the
terminal
automatically
starts
the
process
of dialling
the
telephone
numbersonthe
document
and
transmitting it.This
happens
completely independentlyofany
other
action
the
user
maybetaking,sowork
can
continue.
Immediately
thedocumenthas
been
transmitted, itisautomaticallytransferred
to
the
Transmitted History File.
The Transmitted History File
contains
copies
of the latest
documents
which
have
been
transmitted,
subjecttospace
availability.
Only
the
terminal is allowed to
copy
documents
INTO
this file.
The file
canbereviewed,sothatparts, or
the
whole, oftransmitted
documents
can
be
usedinthe
creation
of
new
documents
in
the
Work
File.
The
abbreviation
TXHSTisused
for
this
file.
The
Received
History File
contains
copiesofthe
latest
documents
which
have
been
received,
subjecttospace
availability.
Like
the
TXHST
file,only
the
terminal
can
put
documents
into this file.
The
abbreviation
RXHSTisused
for
this
file.
The Forms Fileis
usedtostore
copies
of blank forms. They
canbewithdrawn
and
copiedtothe
Work File tobe"filled in"asrequired.
Only forms
canbestored
in this file.
The
Operator
Information File is for storing
notes
and
information
that
is useful for continual
reference,
for
example
phone
lists.
The
abbreviation
OPINFisused
for
this
file.
Note
The
contentsofthe
Forms
and
Operator
Information files
are
in
battery-protected
memory
which is
semi-permanent.
The
contents
will
not normallybelost if
the
terminal is
switched
offfor several
days.
The Pending,
Mail
Box, Transmitted History
and
Received History files
compete
for
space
with
one
another
rather
like
suspension
files in
one
drawer
of a
desk.
The
Operator
Information
and
Forms files also
compete
for
space
in a
second
'drawer'.
Page 21
Important
note
iibout
the
terminal
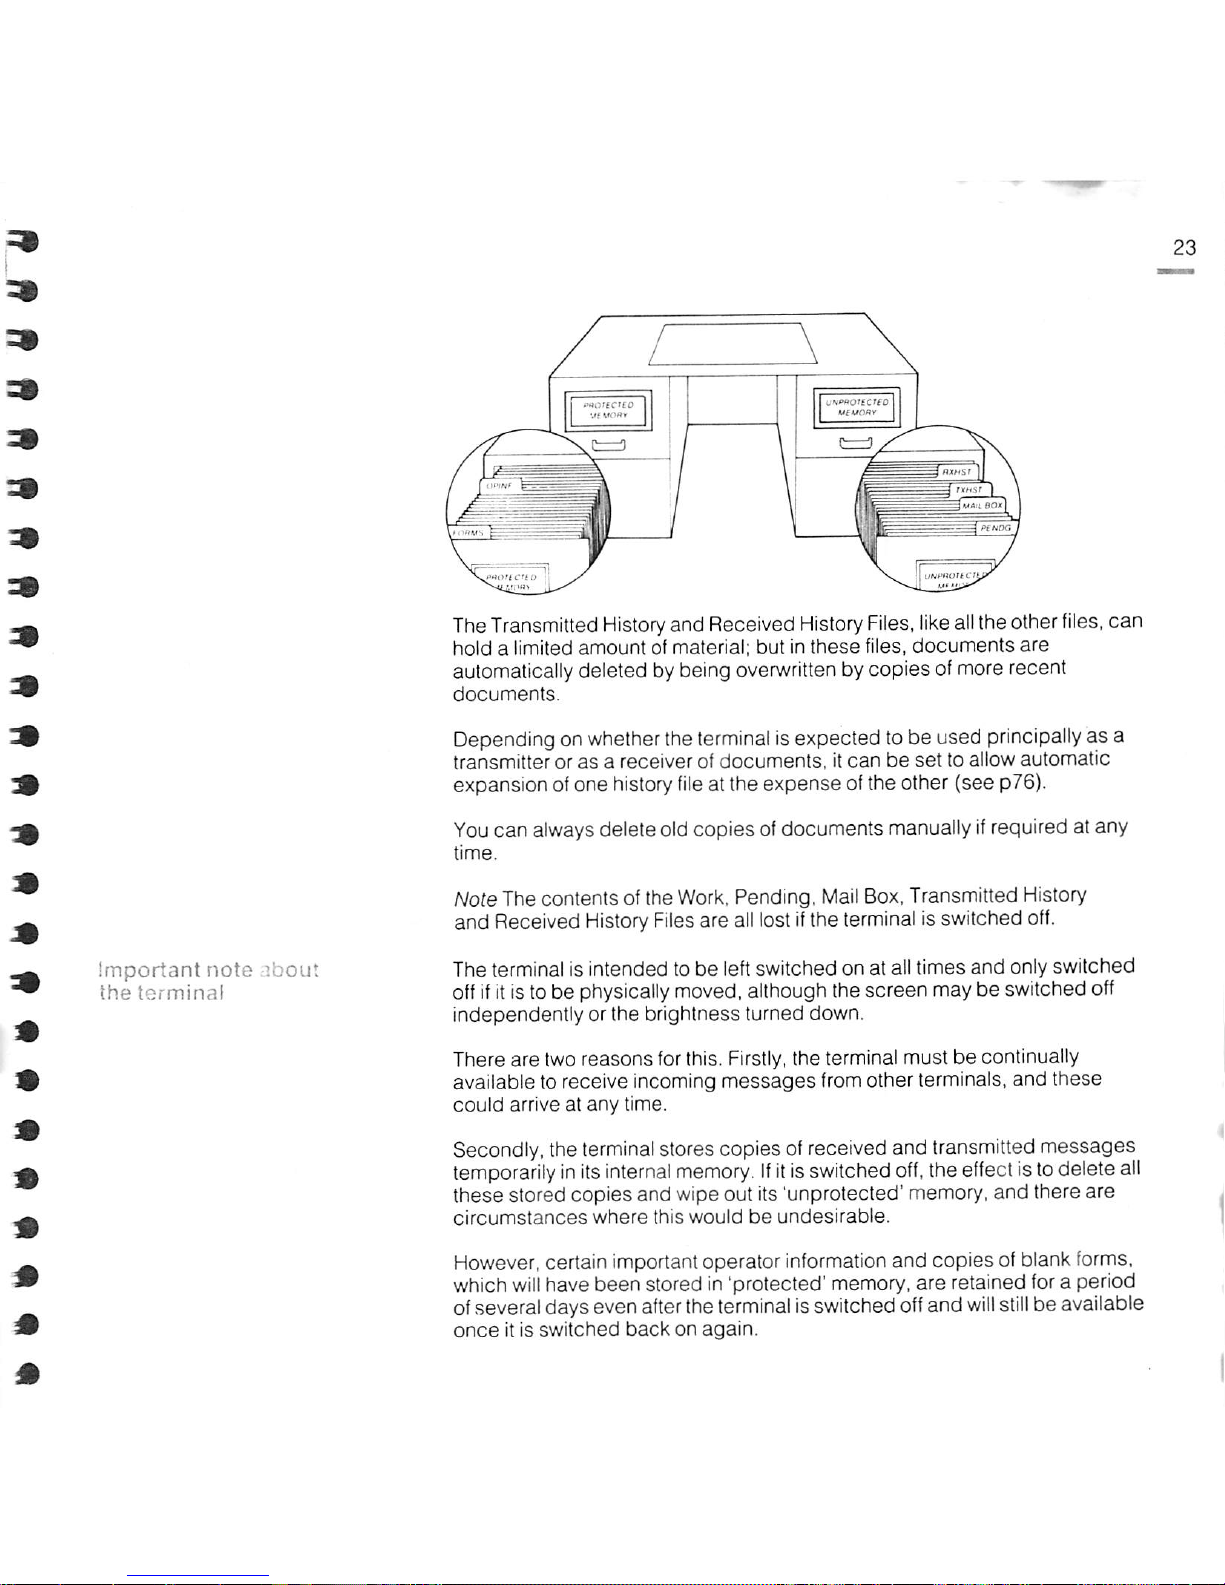
TheTransmitted
History
and Received
History
Files,
like
allthe other
files,
can
hold
a limited
amount
of material:
butinthese
files,
documents
are
automatically deleted by being overwritten bycopies ofmore recent
documents.
Dependingonwhether the
terminal
isexpected to be used
principally
as a
transmitter orasa receiver of
documents,itcanbeset
to allow
automatic
expansion ofone
history
file
at the expense ofthe other (see p76).
You
can
always delete old copies of documents manuallyifrequired at any
time.
Note The contents of the
Work.
Pending,
Mail
Box,Transmitted History
and Received
History
Files
are
all
lostifthe terminal isswitched
off.
The terminal is intended tobeleft switched on at all times
and
only
switched
offifitisto be physically moved, although the screen may be switched off
independentlyorthe
brightness
turned
down.
There are two reasons forthis.
Firstly,
the terminal must be continually
available to receive incoming
messages
fromother terminals,
and
these
could
arrive at
any
time.
Secondly, the terminal stores copies ofreceived and transmitted messages
temporarilyinits
internal
memory.Ifit
isswitched
off,
theeffectistodelete all
these stored copies and wipe out its 'unprotected' memory, and there are
circumstances
where
this
would
be
undesirable.
However, certain important operator information
and
copies
of blank forms,
which
will
have been stored in 'protected' memory, are retained
for
a period
ofseveral days even afterthe terminal isswitched offand
will
still
be available
once
it is
switched
backonagain.
Page 22
24
Reviewing files
102/11/84:
TERffliiAL
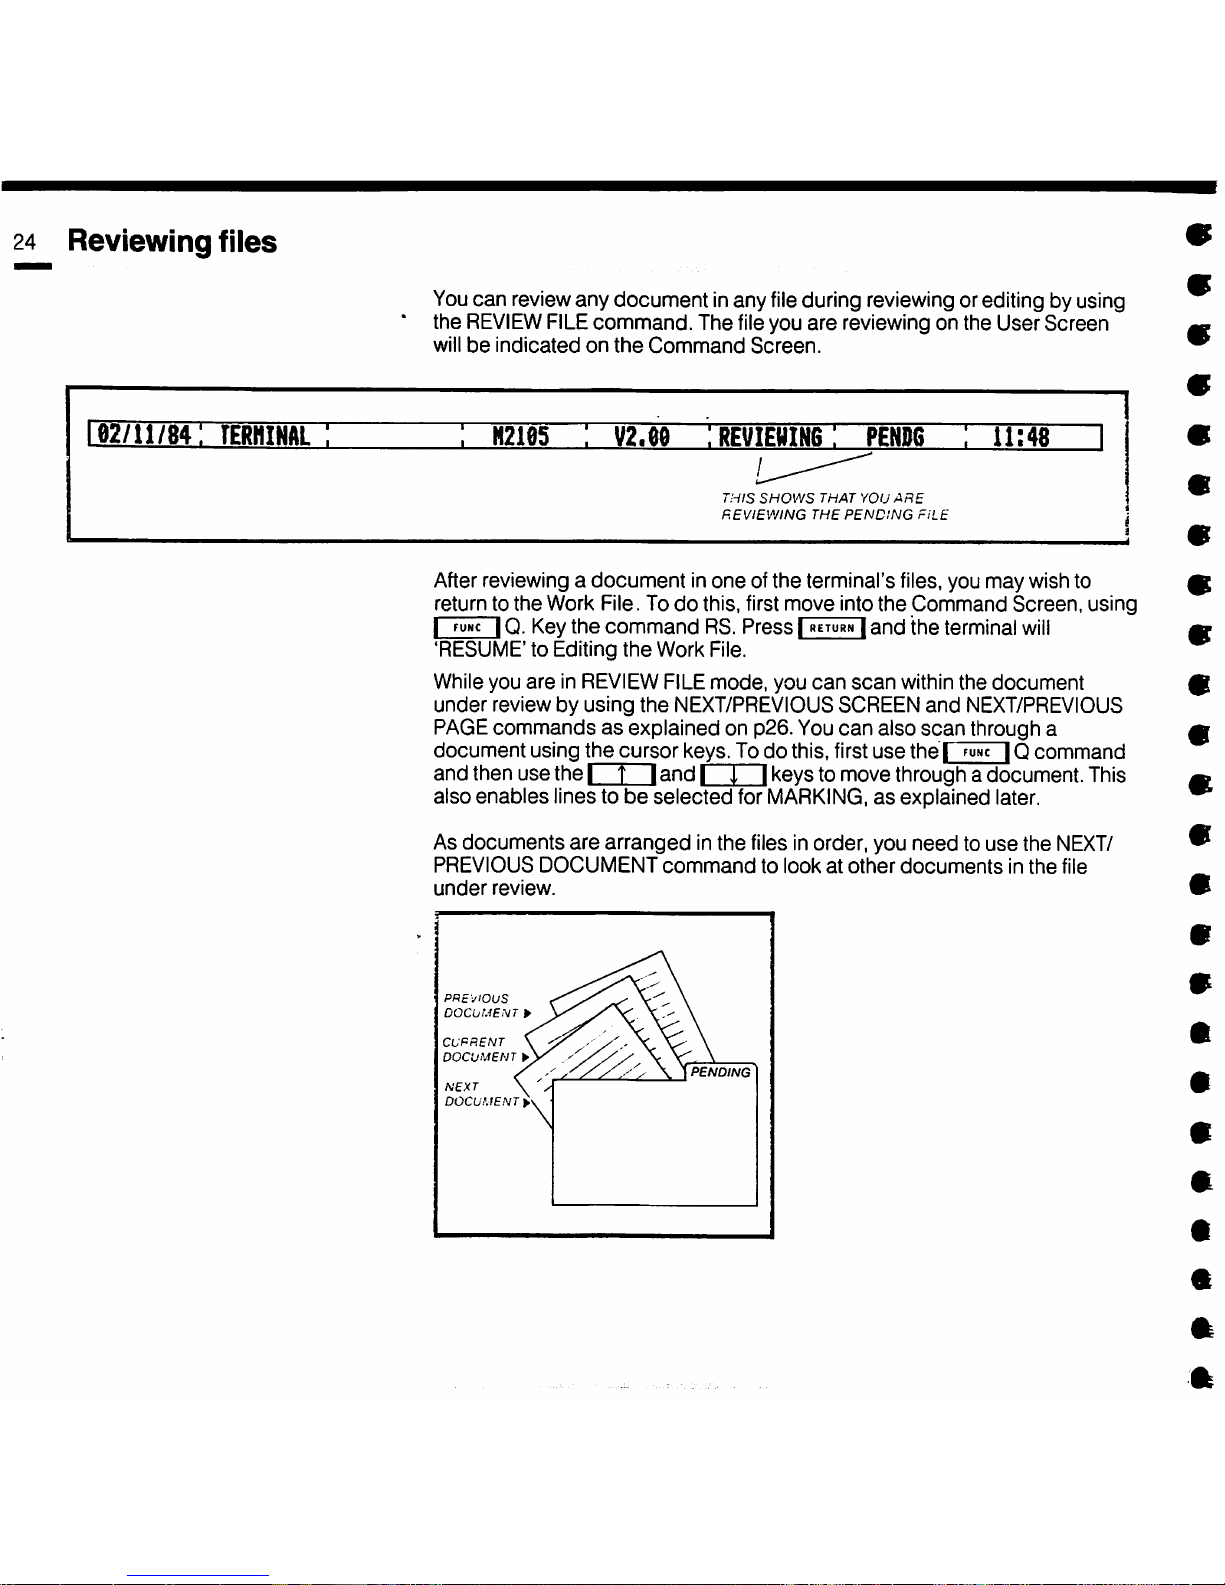
You
can reviewany document inany
file
during reviewing orediting by using
the
REVIEW
FILE
command.
The fileyou
are
reviewing on the UserScreen
willbeindicated
on
the
Command
Screen.
H210S
V2,eo
:reviewing:
penbs
THIS
SHOWS
THAT
YOU
ARE
REVIEWING
THE
PENDING
FiLE
11;48
I
After reviewing a
documentinoneofthe
terminal's files, you may wish to
return to
the
Work File. Todothis, first
move
into
the
Command
Screen,
using
I
fuNc
IQ.
Key
the
command
RS.
PressIreturn|and
the
terminal
will
'RESUME' to Editing
the
Work File.
Whileyou
areinREVIEW
FILEmode, you
can
scan
withinthe
document
under
review by
using
the
NEXT/PREVIOUS SCREEN
and
NEXT/PREVIOUS
PAGE
commandsasexplained on p26. You
can
also
scan
through a
document
using
the
cursor
keys. To do this, first
use
the!
| Q
command
and
then
use
the I T I
and
I j \keys to move through a document. This
also
enables
lines tobeselected
for
MARKING,asexplained later.
As
documents
are
arranged
inthe files in order, you
needtouse
the
NEXT/
PREVIOUS
DOCUMENT
command
to
lookatother
documents
in
the
file
under
review.
PREVIOUS
DOCUMENT
I
CUPFtENT
DOCUMENT
1
NEXT
DOCUMENT>
PENDING
Page 23
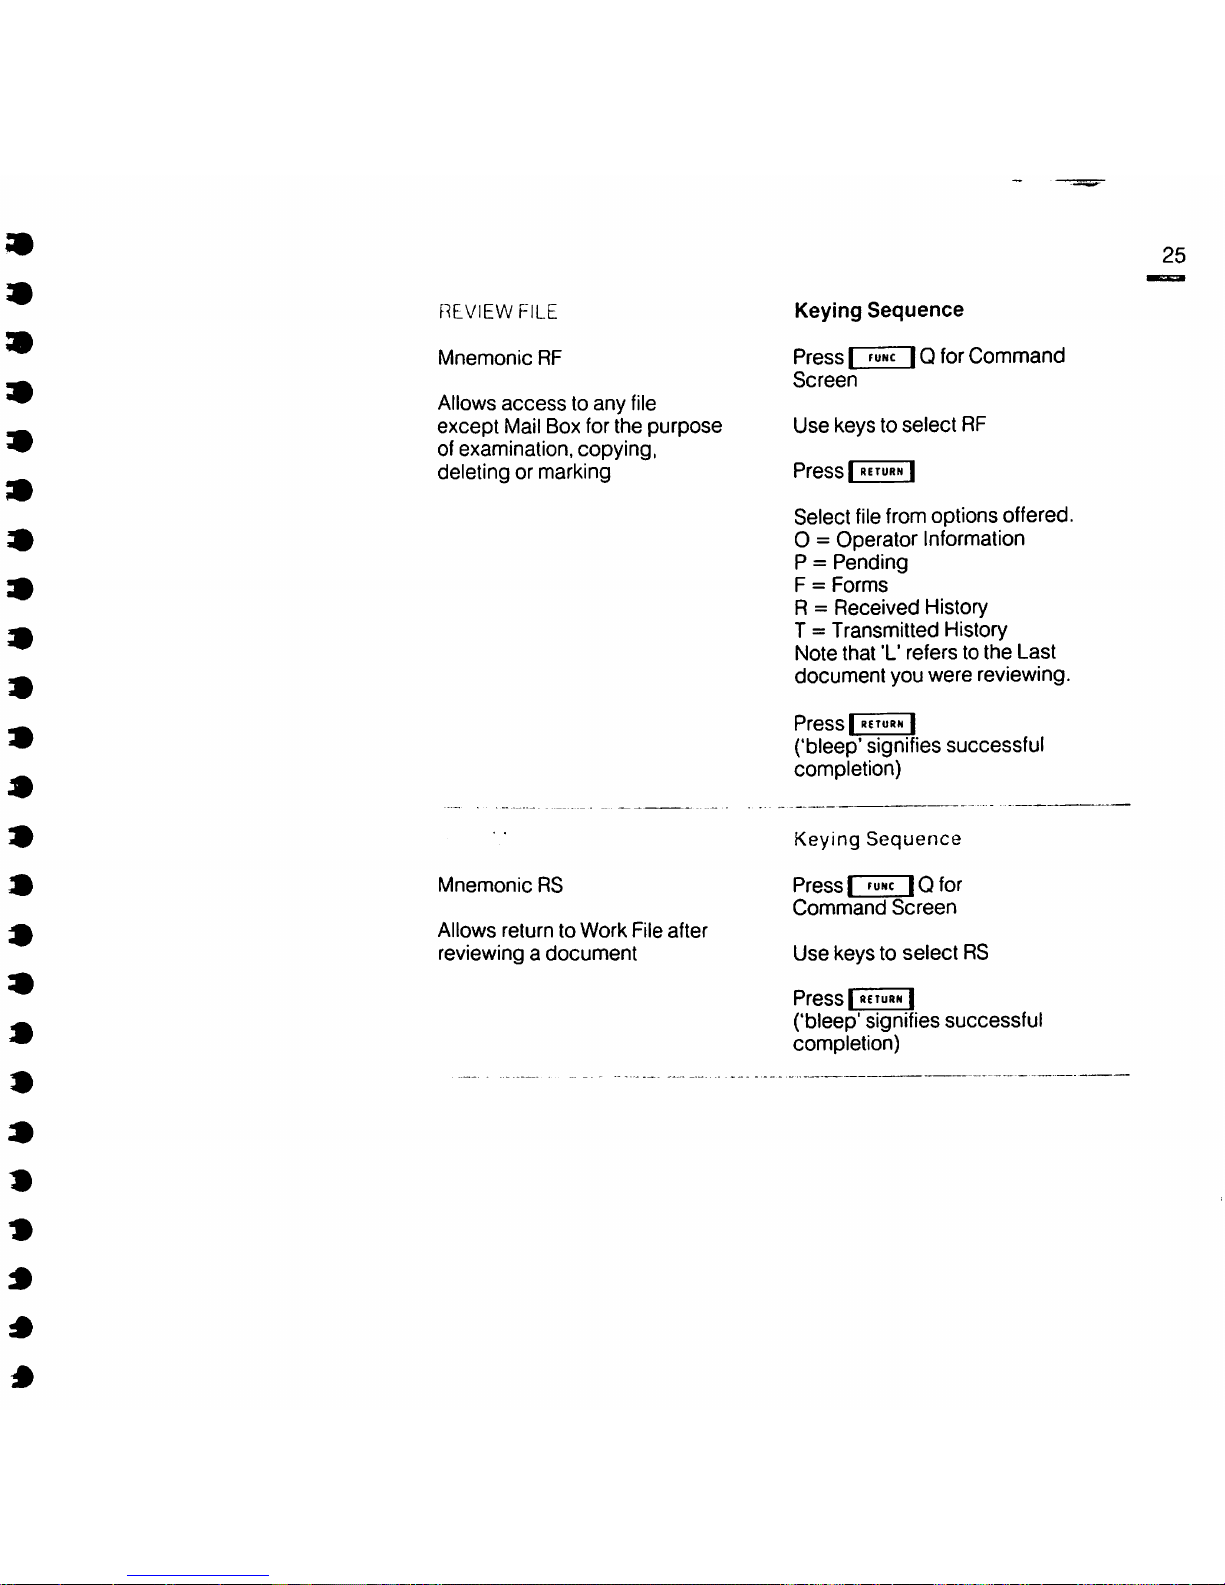
REVIEW
FILE
Mnemonic
RF
Allows
accesstoany
file
except
Mail Box for
the
purpose
of examination,
copying,
deleting
or marking
Mnemonic
RS
Allows
returntoWork
File
after
reviewing a
document
Keying
Sequence
PressIfuNcIQfor
Command
Screen
Use
keys to
select
RF
Press
I return I
Select
filefrom options offered.
0 = Operator Information
P =
Pending
F =
Forms
R =
Received
History
T =
Transmitted
History
Note
that
'L'
referstothe
Last
document
you were reviewing.
PressI"gTuRN
I
('bleep' signifies successful
completion)
Keying
Sequence
PressIfuHcIQfor
Command
Screen
Use keys to
select
RS
PressI"CTuaH
I
('bleep'
signifies
successful
completion)
25
Page 24
26
Scanning
through
documents
Next/Previous
screen
Next/Previous
page
Next/Previous
aocument
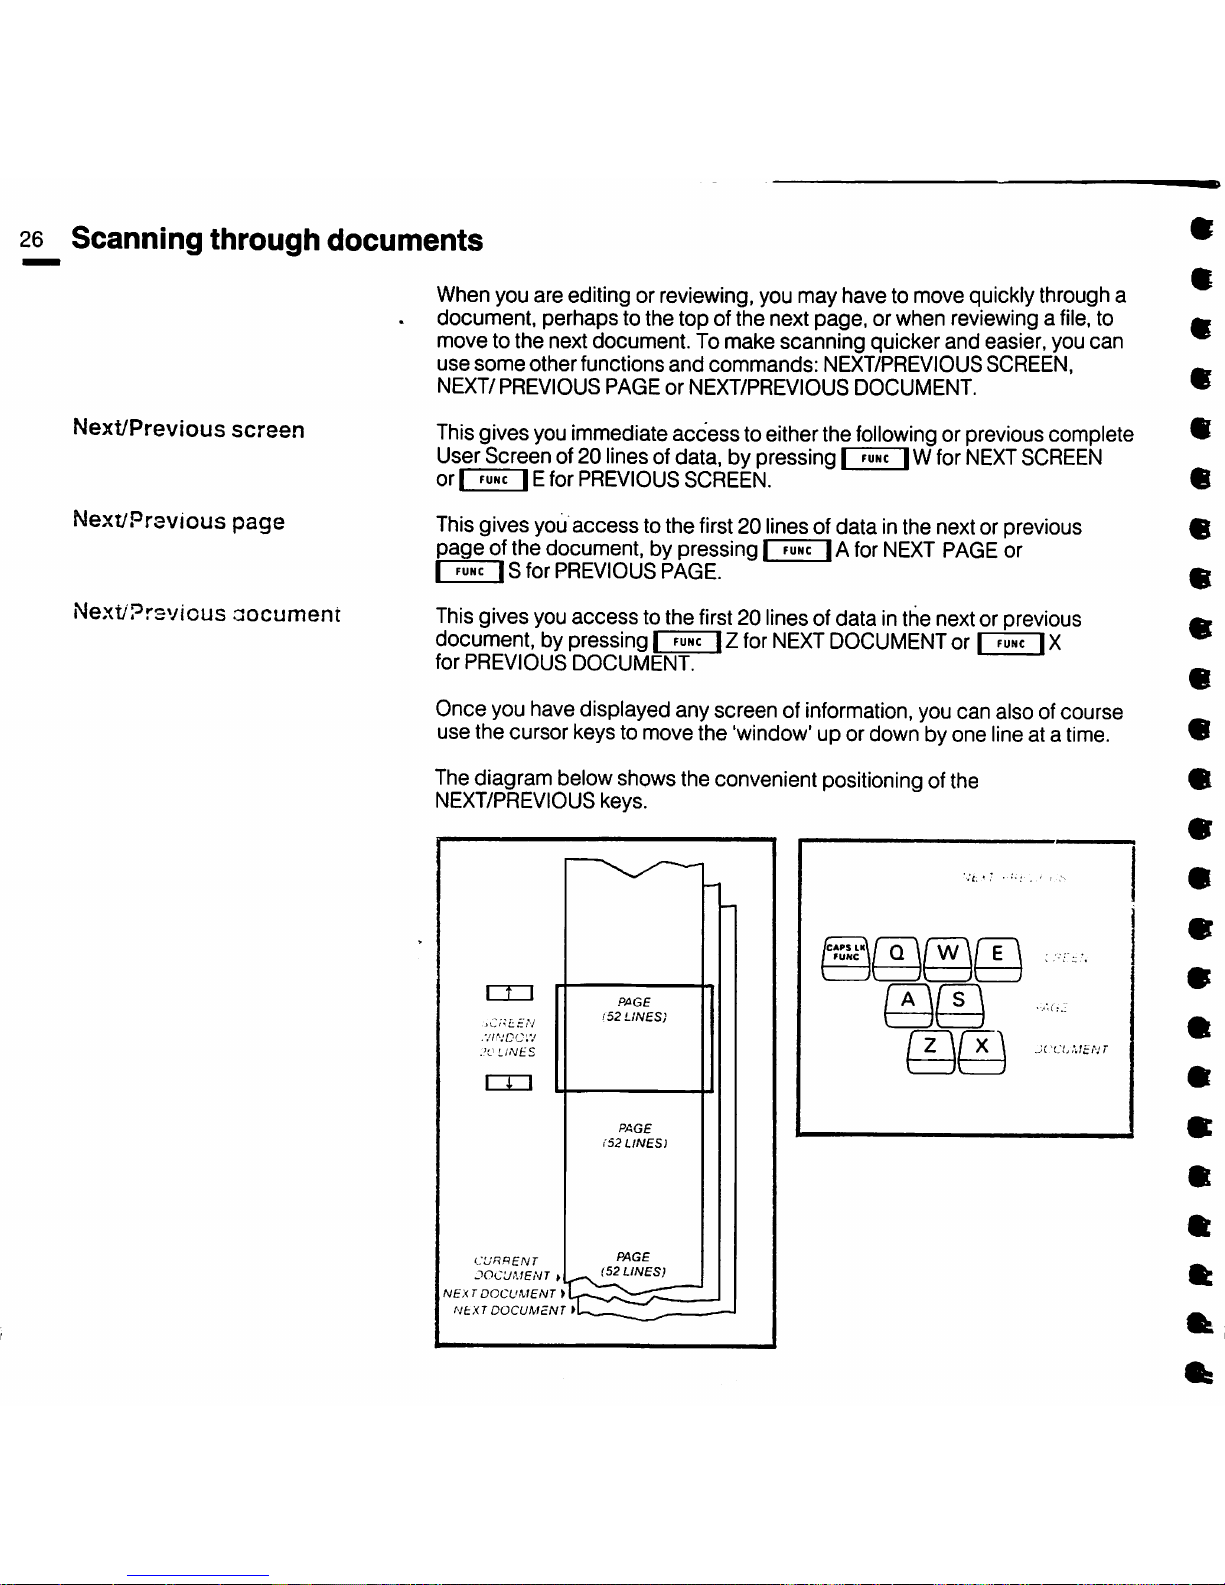
When you are editing or reviewing, you may have to move quickly through a
document,
perhaps
to the
topofthe
next
page,
or when reviewing a file, to
move to
the
next
document.Tomake
scanning
quicker
and
easier, you
can
use
some
other
functions
and
commands:
NEXT/PREVIOUS
SCREEN,
NEXT/
PREVIOUS
PAGEorNEXT/PREVIOUS
DOCUMENT.
Thisgives youimmediate
access
toeither the
following
or previous complete
User
Screen
of 20 lines of
data,bypressing|func
|Wfor
NEXT
SCREEN
orIfunc
IE
for
PREVIOUS
SCREEN.
Thisgives you
access
to the first20 lines of data inthe nextor previous
pageofthe
document,bypressing|func
| A for NEXT PAGE
or
I
func
I s
for
PREVIOUS
PAGE.
Thisgives you
access
to the first20 linesof data inthe nextor previous
document, by pressing |
func
| Z for
NEXT
DOCUMENT
or |
func
| X
for
PREVIOUS
DOCUMENT.
Once you have displayed any screen of
information,
youcan also ofcourse
use the cursor keysto move the 'window'up or down byone lineat a
time.
Thediagram belowshows the convenient positioning ofthe
NEXT/PREVIOUS keys.
n-i
.-.'ir-jDCr.'
.'0
LINES
CXI
CURRENT
DOCUMENT»
NEXT
DOCUMENT}
NEXT
DOCUMENT>
PAGE
(52
LINES)
PAGE
i52
LINES)
(52
LINES)
CAPS
LK
»UKC
m
m
m
m
m
«
e
Page 25
Page 26
28
Preparing
documents
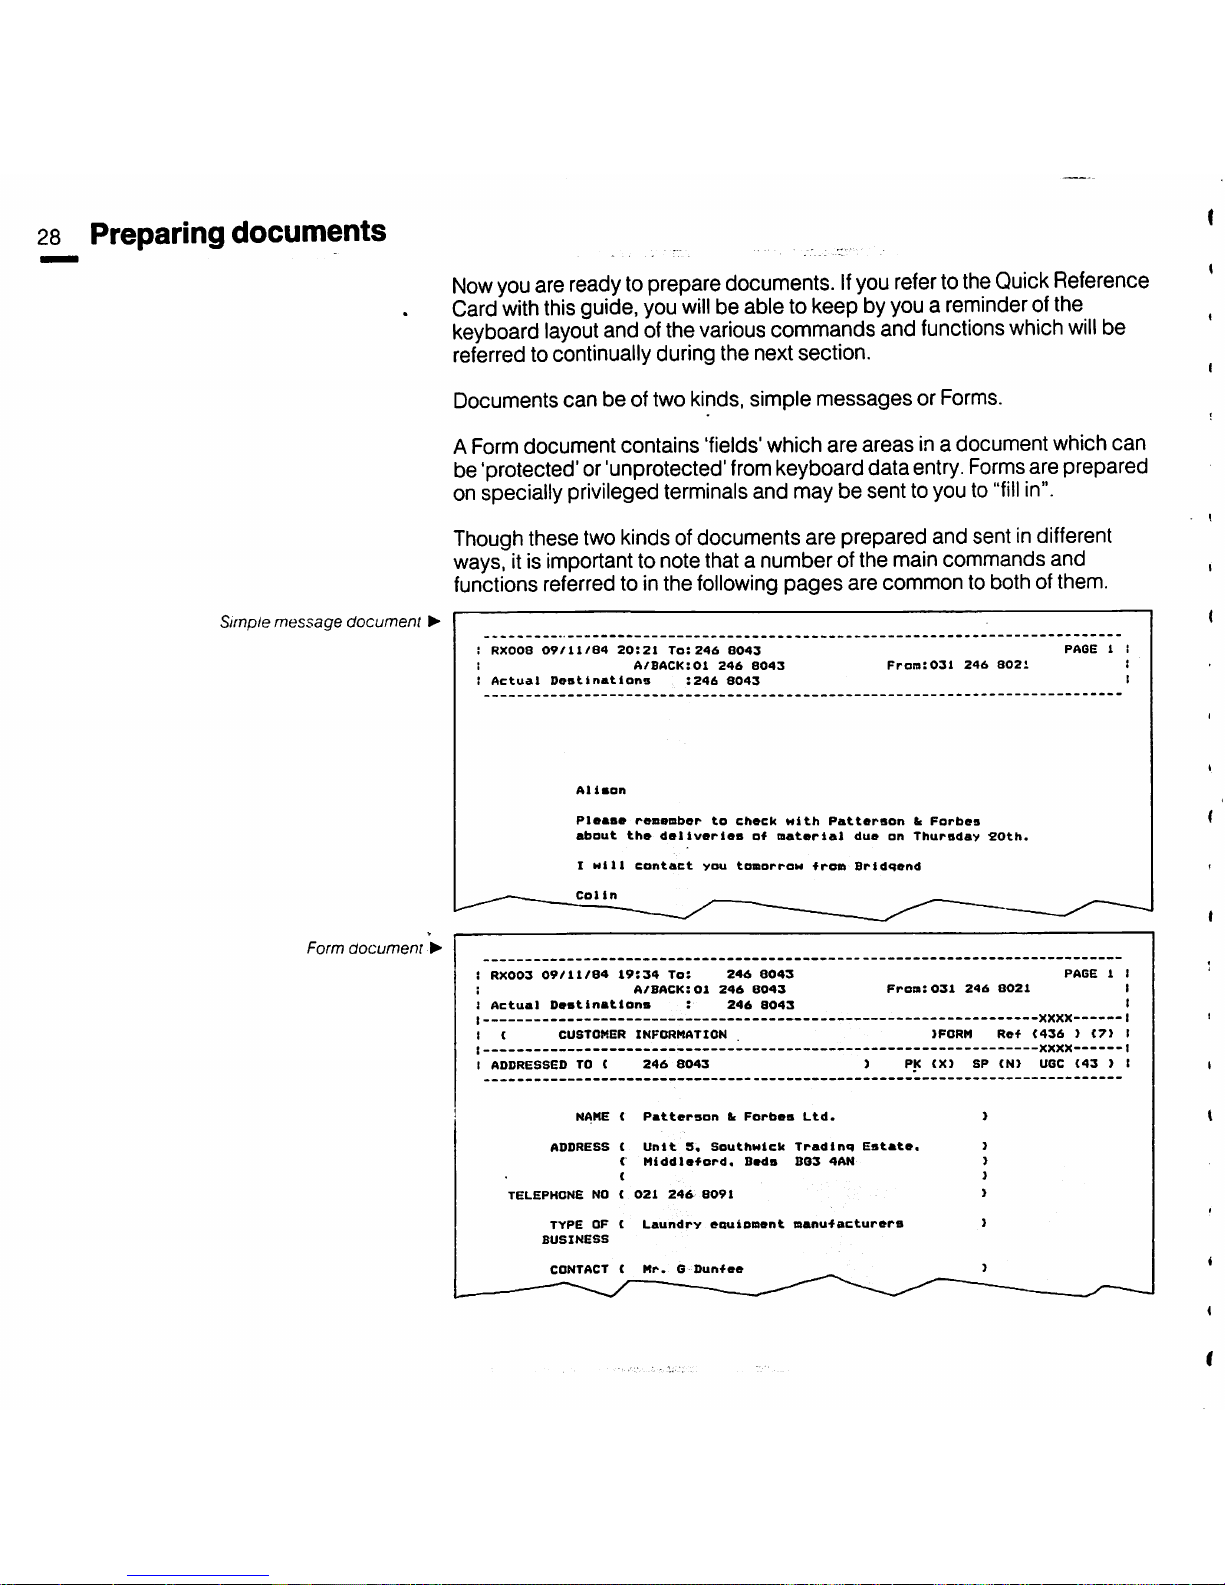
Now
you
are
readytoprepare
documents.Ifyou
refertothe
Quick
Reference
Card
with
thisguide, you
will
be able to keep byyoua reminder ofthe
keyboard
layout
andofthe
various
commands and
functions
which
will
be
referred to continually during the next section.
Documents
canbeof two kinds, simple
messages
or Forms.
A Form
document
contains
'fields'
which
are
areas
in a
document
which
can
be 'protected' or'unprotected'
from
keyboarddata
entry.
Forms
are prepared
on specially privileged terminals and may be sent toyouto
"fill
in".
Though
these
two
kindsofdocuments are prepared and sentindifferent
ways, itis important to note that a number ofthe maincommands and
functions referred to inthe following
pages
are common to both of them.
Simple
message
document
•
Form
documeni
>
;
RX008
09/11/84
20:21
To:246
8043
A/BACK:01
246
8043
!
Actual
Destinations
:246
8043
A1i«on
From:031
246
8021
Pleas*
resember
to
check
with
Patterson
b
Forbes
about
the
deliveries
of
material
due
on
Thursday
SOth.
I
Hill
contact
you
tomorroM
from
Bridqend
Colin
!
RX003
09/11/84
19:34
To:
246
8043
a/back:01
246
8043
Actual
Destinations
:
246
8043
CUSTOMER
INFORMATION
Fron:031
246
8021
PAGE
1 I
PAGE
1 I
I
I
XXXX
1
Ref
<436}I7i
I
XXXX
1
ADDRESSED
TO
(
246
8043
PK
(X)
8P
(N)
U6C
(43
} I
NAHE<Patterson
b
Forbes
Ltd.
ADDRESS
C
Unit
5.
Southwick
Trading
Estate.
{
Middleford,
Beds
883
4AN
{
TELEPHONE
NO C
021
246
8091
TYPEOF{
Laundry
eouionent
nanufacturera
BUSINESS
CONTACT
{
Mr.GDunfee
Page 27
How
documents
are
prepared
Documents
are
prepared
by keying
data
intothe User Screen.
When the Work Fileis empty, itis automatically inEditing mode. When a
document
is in the WorkFile, itis automatically in the
mode
of that document,
i.e. simple
messages
or Forms mode. The Command
Screen
will
be
displaying the
words
"Editing Work".
EDITING ;
UORK
DN
SO
You
mightbe preparing a simple message fora number ofreasons, perhaps
as a plain letter, a
message
or a memo, or fornotes or an aide-memoire to
keep
in the
PendingorOperator
Information files.
Anearlier section of the guide described simple use of the terminal
and
covered
the
useofsome
basic
editing functions. Younow
need
to know
about
further
commands.
Assume you
need
to preparea simple
message
by typing iton the keyboard.
You
will
see
iton the display
screenasyou type, where you
can
make sure it
iscorrect before you go through the procedure forsending
it,asdescribed
later
on.
Suppose that the message needs to incorporate a considerable amount of
material-maybe several differentsections
from
other documents.
You
could
of
course
recreate
them,
which
would
take
time.
Butifthose
various
documentswere already inyour terminal files you could simply retrieve them,
or
sections
of them,
and
insert
them
wherever
you wish in your
message.
This
canbedone
by using the copying or marking facilities, as explained
later. Before you
can
do this, you
will
need to lookat other filesinthe terminal
and trace the items you need, using the
REVIEW
FILEorFIND
ITEM
commands.
Once prepared, documents
canbestored, deleted, transmitted or printed.
29
Page 28
30
Preparingdocuments
Storing
documents
Deleting
documents
Assume that you have originated a simple
message
inthe
Work
Fileand that
you
wishtostore
it.You
can
use
the
COPY DOCUMENT
commandtodo
this.
When you COPY a
documenttoanother
file, it remains
alsointhe
source
file
(inthis
case
the Work File).
The
source
ofthe document being copied is always takenasthe document
currently on the User
Screen;sothat if
the
User
Screen
is being
used
to
review a file,the
document
under
review is
copied.
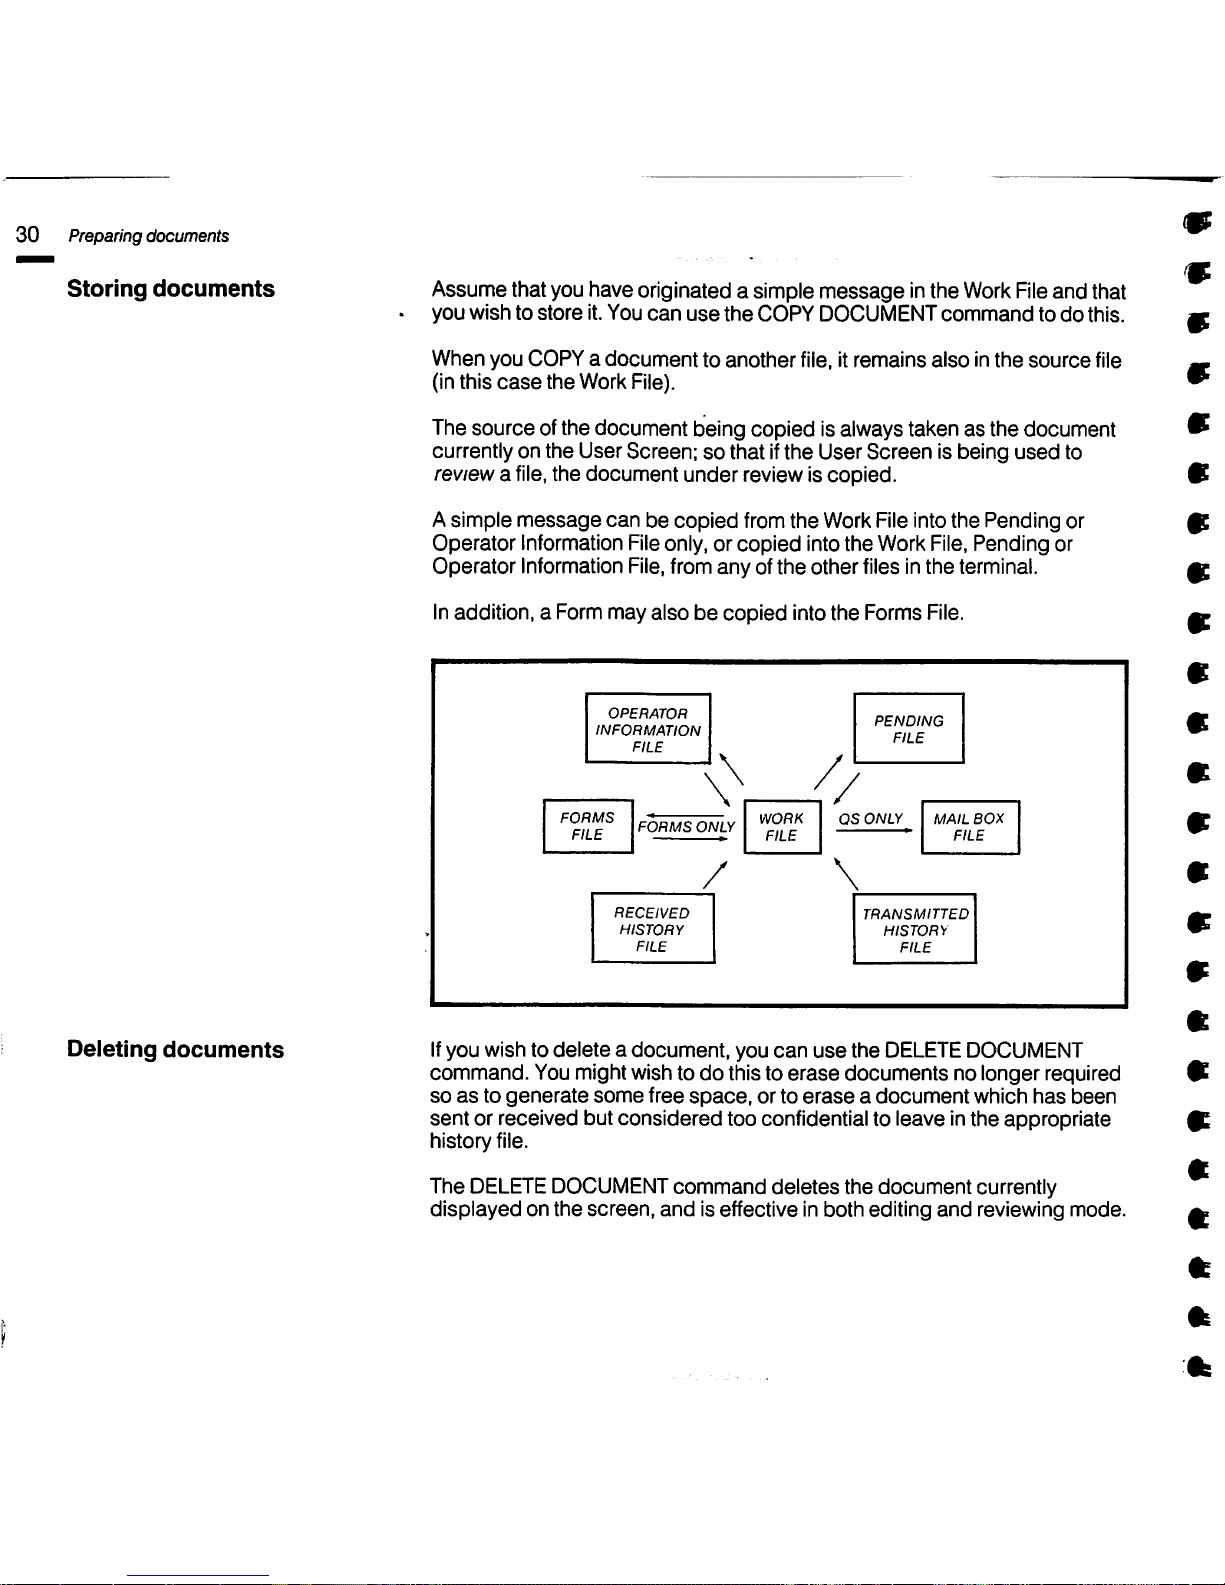
Asimple
message
canbecopied
from the Work File into the Pending or
Operator Information Fileonly, or
copied
into the Work File, Pending or
Operator Information File,from
anyofthe
otherfiles inthe terminal.
Inaddition, a Form may alsobecopied
into the Forms File.
OPERATOR
INFORMATION
FILE
\
/,
PENDING
FILE
FORMS
FILE
FORMS
ONLY
RECEIVED
HISTORY
FILE
/
WORK
FILE
OS
ONLY
\
MAIL
BOX
FILE
TRANSMITTED
HISTORY
FILE
Ifyou wish to
deleteadocument,
you
can
use
the
DELETEDOCUMENT
command.
You might wish todothis to
erase
documents
no longer required
soasto
generate
some
free
space,
or to
eraseadocument
which
has
been
sent
or received but
considered
too confidential to leave in
the
appropriate
history file.
The
DELETE
DOCUMENT
command
deletes
the
document
currently
displayedonthe
screen,
and
is effective in
both
editing
and
reviewing
mode.
9
9
Page 29
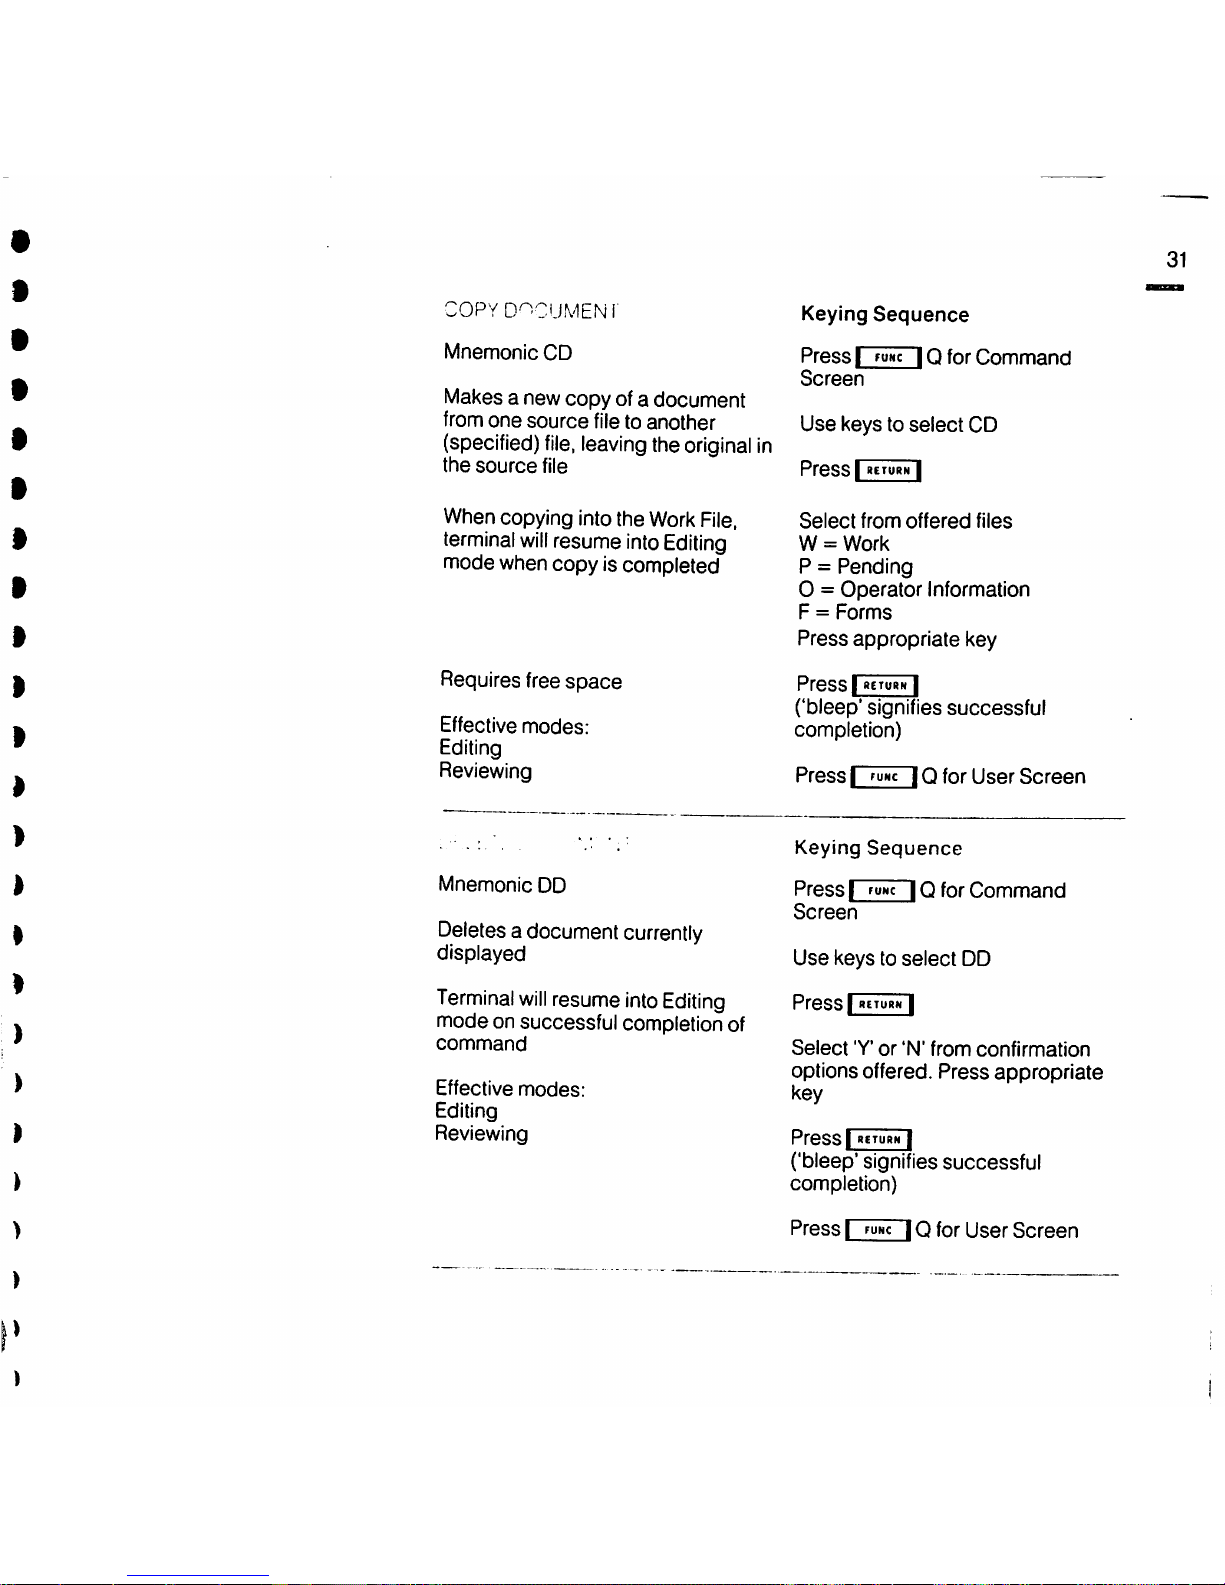
COPYD^'CUMENr
Mnemonic
CD
Makes a new copy of a document
from
one
source
file to
another
(specified)
file,
leaving
the
original
in
the
source
file
Whencopying intothe
Work
File,
terminal
will
resume
into
Editing
mode when copy is completed
Requires free
space
Effective
modes:
Editing
Reviewing
Mnemonic
DD
Deletesa document
currently
displayed
Terminal
will
resume
into
Editing
mode on successful completionof
command
Effective
modes:
Editing
Reviewing
Keying
Sequence
Press
I foic
IQ
for
Command
Screen
Use
keys to
select
CD
Press [
BETURN
I
Select
from
offered
files
W =
Work
P =
Pending
O =
Operator
Information
F =
Forms
Press
appropriate key
PressIbeturh
I
('bleep'
signifies
successful
completion)
PressIfuHcIQfor
User
Screen
Keying
Sequence
PressIFUNcIQfor
Command
Screen
Use
keys to
select
DD
Press [
RITUBW
I
Select
'Y*or'N'
from
confirmation
options offered.
Press
appropriate
key
Press [
RETURN
I
('bleep' signifies successful
completion)
PressIfuhc
IQ
for
User
Screen
31
Page 30

32
Preparingdocuments
Printing
documents
Pnnied
aocumeni
•
If
youwishto printa document at anytime,youmaydo so by using the
PRINT
command. Theterminal printer
will
then printthe document currentlydisplayed
on the User
Screen.
The
document
canbefrom
any
fileunder review by the
REVIEW FILE
command,orfrom
the
Work File.
If
the printer is busy,
due
to incoming
message
traffic,the
PRINT
command
willberejected
and
the terminal
will
warn you witha 'bleep'. The keyboard
will
be disabled
until
the
DELETE'key
is pressed.
You
can
choose
to print
the
contentsofthe
document
displayed on the User
Screeninone
of two ways:asa DOCUMENT (D)orasa SHEET(S).
If
you
choose
DOCUMENT
the
terminal
assumes
that the printer is
loaded
with
continuous
stationery
and
the
header
willbeprinted at
the
topofeach
page.
Ifyou
choose
SHEET,
the
terminal
will
assume
that
the
document
is to
be
printed
one
sheet
at a time,
and
will
not print
the
header
on any
sheet.
This
means
that
you
can
use
the
terminal simplyasan
electronic typewriter,
giving you
the
opportunity to
use
pre-printed
headed
stationery for mailing to
destinations
which
do
not
have
terminals.
When printingasa
SHEET,
the terminal
will
onlyprintthe
page
currently
displayed on
the
screen.Ifthe
document
is of more than
one
page,
then
the
NEXT/PREVIOUS
PAGEfunction mustbeusedtoselect
the next
page
for
printing
(seep26).
!
RX020
22/11/84
16:38
To:246
8043
!
A/BACK:01
246
B043
I
Actual
OestinationB
:246
8043
Fron:031
246
8021
John-this
could
b*
relevant
In
view
of
yesterday's
discussion
-
Mike
New
reoorts
and
studies
drawinq
attention
to
major
skills
shortaqes
appear
each
month.
The
latest.
Crisis
Facinq
UK
Information
Technoloqy.
comes
from
the
IT
Economic
Development
Committee.
Although
primarily
concerned
Mith
the
lack
of
investment
in
research
and
inadeouate
financlnq
for
fast-qrowinq.
medium-sized
companies,
it
states:
'One
of
the
most
critical
issues
of
all
Is
the
availability
of
suitable
skilled
manpoHer.
Shortaqes
occur
at
all
skill
levels,
but
are
probably
worst
in
software
enqineerinq,
systems
Inteqratlon
and
advanced
production
technoloqy.*
It
adds
later:
'Too
often
contracts
are
beinq
lost,
and
employment
opportunities
for
the
less
skilled
are
beinq
lost
with
them,
because
of
the
lack
ofafew
key
enqineers.
Competition
for
these
people
is
increasinq
from
users
and
overseas
companies
establishlnq
in
the
UK.
(END
OF
DOCUMENT)
Page 31

PRINT
Mnemonic
PR
Effective
modes:
Editing
Reviewing
Keying
Sequence
PressifUNcIQfor
Command
Screen
Prints the
documentorpage
currently
on the display
screen
Use keys to select PR
(Printer mustbefree
and
'ON LINE')
Pressjbeturn
|
Select
D (Doc) or 8 (Sheet) from
options offered.
Press
appropriate
key
Press
L
]
('bleep'
signifies
successful
completion)
PressIFUNC10for
User
Screen
33
Page 32

34
Preparingdocuments
Preparingasimple
message
Mark
item
Read
marked
item
Clear
mark
Clear
all
marks
If
the
message
you wish to prepare
and
send
requires sections ofother
documentstobe
incorporated, there
are
several otherfunctions you need to
know about.They are:
MARK
ITEM/CLEAR
MARK(Ifunc|M)
and
READ MARKED ITEM(|func
|R)
They
need
to be used inconjunction with
each
other,aswellaswiththe
editing commands referred fo under 'Using the M2105forthe first time'.
Suppose
that there is a section of
data
that you want to
copy
from a
documentinone
ofthe terminal's files,
and
that you
have
located itin the
appropriate
file
byusing
REVIEW
FILE
procedures.
You
can 'mark' itusing
'MARK
ITEM'
and then transfer itintothe WorkFileat the position you want by
using 'READ
MARKED
ITEM'.
Move into the User
Screenifnecessary,
using i
func
| Q. With
the
cursor
positioned inthe
first
lineofthe required section, press I
fuhc|M.
The line
willbe'highlighted' along its whole length.
Move
the
cursor
downtothe
last line of
the
required
section,
and
press
I
fuwc
IMagain. Thewhole section, includingthe last line,
will
be highlighted.
Itisnow
'marked'.
You
can
only mark
one
section ina document at a time, but the start
and
end
of
the
section
canbeas
far
apartasyou like, even
spanning
more than
one
User
Screen
or more than
one
page.
Ifonly a single line is required, simply
pressifuhcIMonce.
Using
Lj
Q to move intothe
Command
Screen, return to theWork Fileby
keying RS
(RESUME),
followed by I
"eturh|.Once
inthe Work File, position
the
cursor
to the linewhere you wish the marked section to be placed. Press
I
FUNc
IR,
for READ MARKED ITEM,
and
the
marked
section
willbeinserted
at
the
cursor
linewhilst moving
any
existing text down
the
document.
READ
MARKED
ITEM will
not
remove
the
marks
from
the
source
document,
so
that
you
can
use
it repeatedly, for
example
when using a
standard
headingoneach
page
of a
message.
You
can
also
mark
itemswithin
the
Work File to
enable
whole
paragraphstobe
copied
within a
document.
To
clear
marks
from
any
already
marked
line
where
the
cursor
is positioned,
pressIFUWC
IM. To
clear
a marked section, you
can
either
use
the
CM
commandasexplained
below, or
theIfuhc|Mkey on
the
first
and
last
line
of
the
marked
section.
The
CLEAR ALL
MARKS
command
clears
all marks in
the
memory. You
can
use
this if
the
message
'TOO
MANY
MARKS'
occursonthe
Command
Screen.
Page 33

MARK
ITEM
I
FUNc
Ikey command M
Use
RStoreturntoWork
File
Effective
modes:
Editing
Reviewing
READ
MARKED
ITEM
I
tuhc
I key
command
R
Effective
modes:
Editing
CLEAI^
MARK
I I key command M
Effective
modes:
Editing
Reviewing
CLEAR
ALL
MARKS
Mnemonic
CM
Effective
modes:
Editing
Reviewing
Keying
Sequence
Select
itemtobe
marked
on
User
Screen, by positioning
cursor
Use
keys to
selectifuNc
| M
Position
cursortoendofblocktobe
marked.
PressIfuhc
| M
again
Select position inWorkFilewhere
item is to
be
placed, by positioning
cursor
Use keys to
selectIfunc
| R
Select position of item tobecleared
by positioning
cursor
Use
keys to
selectImwc
IM
PressIFuwcIQfor
Command
Screen
Use
keystoselect
CM
Press
I «eturh I
('bleep'
signifies
successful
completion)
35
Page 34

36
Locating
items
in
documents
Find item . it
may
bethat
you
needto
identify
andlocate,
foranumber
ofreasons, an
item
whichcould be a word,a phrase or a sequenceoftextcharacters ofany
length. You might
need
to locate this information wherever itis in the files,
however
many
times it
occurs,
and
examine
it, mark itor edit it.
Todothis you
use
the
FIND
ITEM
command.
This is a powerful
command
with a
numberofcharacteristics
and
abilities.
Note that it is
used
withFormsaswellassimple
messages.
Using the
Command Screen, keytoFland press|
seturn|.You
will
be presented
with
two fields: "String"
and
"Extent".
Thecursor
will
be prompting you to make an entry intothe 'String'
field.
A'String' is literally any group ofcharacters whichcan be typed on the
keyboard. It
can
be a word, words and numbers, a phrase, sentence or
paragraph
ofvirtuallyany length. There
are
some
limitations, referred to later.
For
the
purposesofthe
FIND
ITEM
command
the
limitis 10
characters,
which
isthe length of the field.There are ways inwhich these 10 characters
can
be
expanded,asyou
will
see.
Assume for the moment that youare in reviewing mode and know that the
word
'YESTERDAY'
appears somewhere inthe
file
youare currently in,and
you wish to
locate
itexactly.
Type in
YESTERDAY
inthe 'String'
field
and press|
return
|.
The cursor
will
nowbeprompting you inthe 'Extent' field, which
will
be
displaying D,which represents Current (D)ocument. You
can
also enter into
this
field
'F'forCurrent
(F)ile
or'S'
for
Whole(S)ystem
(all
the
files).
Type in 'F' and pressI
keturm
|. The terminal is nowlooking forreference to
the word
YESTERDAY
inthe
file
youare currently in.Assuming that the word
appears
in a document withinthat
file,itwill
display the line inthe document
containing the matching word. The cursor
willbepositioned at the start ofthe
matching word. The Command Screen may display an appropriate
information message, such as
'DIFFERENT
DOC,
informing
youthat the
word
has
now
been
foundinanother
document.
If
the document is not already inthe
Work
File,
you may now use the COPY
command
(see
p31) or the
MARK
function
(see
p34)
to transfer it.
If
the
word
cannot
be
foundinthe
current
document
then
the
terminal
will
search
successively
through all remaining
documents
inthe currentfile.
Page 35

If
the word
YESTERDAY
does
not
appear
anywhere in the
file,
the Connmand
Screen
will
display the
message
'NO
MATCH".
If
you
had
selected
'D' for Current (D)ocument, the terminal's
search
would
have
finished at
the
endofthe
current
document,
andifunsuccessful,
would
have
displayedonthe
Command
Screen
'NO MATCH'.
If
you
had
typed in'S'- Whole (S)ystem. the search would have started inthe
file
currentlybeing reviewedand continued throughallthe
files
except the
Work
File,
inthe order of Pending, Received,
History,
Transmitted History.
Forms,
and Operator
Information.
Whilst
editingthe
Work
File
the search
order is the
same
except
that it
begins
withthe Work File.The
search
will
'wraparound' tothe beginning again as longas the Flcommand is repeated.
If
thesearch was unsuccessful,
"NO
MATCH'
would
be displayed.
Note:
When
youare searchingin(F)ileor(D)ocument
thesearch begins
from
thecurrentcursorpositioninthedocument being displayed.
This
means that
the
terminal
will
notlocate a string
which
existsbeforethe cursor position, or
in
any
earlier
documentinthe
same
file.
There
maybe several occurrences ofthesame
item
and you
might
be
searching
fora specific
one
which is not the
one
firstfound. Inthis
case,
pressI i0 andI Iand the
terminal
will
search
through
tothe next
occurrenceofthe
sequence.
To
clear
the
FIND
ITEM
command,
use|fuNc
| Q for
the
Command
Screen
and
press
the
DELETE
key to
cancel
the
command.
Find
item-advanced
usage
You
couldbesearching
for
something
longer
and
more
complex,
andtodo
thisitisnecessary
firstofalltodefine
the
composition
ofa 'string' more
exactly.
Any
ofthe
keyboard
characterscan be used tocomposea
string,
with
the
exceptionofthespacecharacter. Thesize ofa
string
can be anything
from
one character to 10characters (the lengthofthe 'string'
field).
You
will
wantthe stringyouenter inthe'String'
field
tobe matched
with
a
string
somewhereinthe
text.
This
isdone ona character bycharacter basis,
and althoughyoucan onlyenter capital lettersinthe'String'
field,
theycan be
matched
with
upperorlower-case characters.
Therefore
the
string
'TO-MORROW
will
be matched
with
thetext
string
'TO-MORROW
or
'to-morrow';
butnot
with
'TO
MORROW,
which
beingtwowords, isinfact
two text
strings.
37
Page 36

38
Locating
itemsin
documents
Finding
Forms
!
1
Htllo
t
1
Hdlo
2
i
1
j
i
Hfllo
3
1
Ktllo
4
CURSOR
POSITION
When<D)ISspecihoa
tor
me
extent<HELLO-i
will
Una
Hello3but
not
Hello
2.
lt(F)is
specitma
Hello
3
and
Hello
4 willtxtound
also.
Toexpandthe
limit
of10 characters allowableinthe 'String'
field,
youcan use
what
are
knownas'Wild
Card'
characters.
There are twoofthem, the hash (#) and the asterisk (*).They may be
positioned anywhere inthe string, and they
each
have their own particular
significance during
the
search.
The
hash
(#)
The hash
will
match withany one character including the hash and asterisk,
but
not with
the
space.
Soifyouenter the string FORM#,forexample, it
will
be matched
with
FORMS,
F0RM9orFORMS-but
not
with FORM 5.
You
can use any number of hash characters ina string, the maximumbeing
10. The effect of doing this (not a very
likely
need) would be to match allthe
wordsof10
characters.
The
asterisk
(*)
The difference between the asterisk and the hash is that itmatches
with
any
numberof characters including the hash, asterisk
and
space.
Itcan,
therefore, match withthe string, words longer than 10 characters, and more
than
one
word.
For
example,
the
string UNDER*
willbematched
with
the
words
UNDERNEATH, UNDERLINE,
and
also
with
the
word
UNDER.
The string B*
will
be matched
with
all
the words starting
with
Bor b,
*ING
will
be matched
with
allthe words ending
with
ING,
or ing.
UNDER*8
could also be matched
with,
say, the
sequence
ofwords
UNDER
THE
CLOCKAT8 provided thissequence is positioned
within
a single
display line, which is the largest word
sequence
possible.
To
takeanexample, ifyou
need
to find a form with
the
reference
AD61,
use
the
FIND
ITEM
command, specify the string
*AD61*and
the extent
as
(S)ystem. Whenthe string isfound, the document
will
be displayed on the
screenwiththe cursor positioned at the start ofthe string
AD61.
You
can then
copyormark
the
form.
The
largest
sequence
possible
wouldbelimited to 8
charactersinorder
to fit
the
'String' field
lengthof10
characters.
Page 37

FIND
ITEM
Mnemonic
FI
Effective
modes:
Editing
Reviewing
Keying
Sequence
Press
I
FUNcIQfor
Command
Screen
Use keys to
select
FI
PressIRcrunH
I
Enterappropriate 'String' in
CommandScreen, using# or *if
needed
PressIRtTURH
I
Select
from
offered options
(D.F.
orS)
Press[
BETUOH
I
('bleep' signifies successful
completion)
39
Page 38

40
Using
forms
Form
document
showina
ueias
'^ilecJ:n •
You
may
fill
ina
Form
inthe same wayas a simple message is prepared, by
keying
data
intothe terminal when itis displaying the WorkFile.The
difference is that this time the WorkFile
willbeinForm
Filling
mode.
As inthe preparation of simple
messages,
there
are
facilities in
the
terminal
forcompleting Forms quickly
and
efficiently,
and
inbuilt
checkstoensure
security
and
confidentiality.
The commands described earlier (CD,
DD,
PR,QS) and the functions, apply
whilstForm
Fillingaswellaswithsimple
messages
but there
are
certain
differencesinprocedure.
Firstly,
you need a formto
fill
in.The terminal,as you have seen, may have a
file
of forms for you to draw on. These forms consist entirelyof
successive
fieldstobe
filled
in.
t RXOOS
09/11/84
19:S3
To:
246
8043
PAGE 1 I
I
a/back:01
246
8043
Fraa:031
246
8021
t
I
Actual
OsBtlnatlons
246
8043
|
I UWUU 1
> (
SALES
RECORD )FORM
Re*
(69/2}
<K} I
I ,
I ADDRESSED TO (
246
8043
> PK
(U)
SP
CN} UGC
t54
> J
NAKE{PAtterson
Be
Forbvs
Ltd.
ADDRESS{Unit
9.
Southwick
Tradlnq
Estate.
<
Middleford.
B»da
BQ3
4AN
t
TELEPHONE
NO{021
246
8091
TYPE
OF {
Laundry
eQuipDent
raanufactursrs
BUSINESS
GOODS
SUPPLIED
(
24
castinqs
SPEC
AL/4664/RC4
ORDER
NO <
PF/SDP
3784
}
(END
OF
DOCUMENT)
€
€
€
€
€
Page 39

Locating
Forms
Completing
and
validating
Forms
Put
the
terminal into Review File
mode,
and
select
the
Forms
File. You
can
nowselect the
Form
youneed by using the varioussearching and reviewing
commands available to youasalready described for documents on p24.
Alternatively you
can
use
the FIND
ITEM
command,
giving the
name
or
reference number of the Form required
as
the 'String', e.g. *AD72*
(Ifthere
are
no Forms in the Forms File,
contact
your System
Manager
or
Merlin
Service
Desk
for
advice.)
Having
located
the
Form, you now
makeacopy
of it into
the
Work File by
using the 'COPY
DOC
command. This action
puts
the Work Fileinto Form
Filling
mode.
The Formthat you are going to
fillinwill
have been
designed
fora specific
purpose and
will
require data to be entered ina specific manner. The
data
entered
into
each
field is
checkedbythe
terminal
when
you
pressIbeturn
|;
this
checking
process
is knownas'Validation'.
When
the
Form
was
designed,
each
of its fields
was
given certain attributes,
eg.
date.
time, numeric alpha, etc..
and
these
attributes control
the
validation
of
the
data
entered
into
them.
Before you
can
complete any of the fields, you must
press
j | Q. The first
field that you
can
type into is the
"Addressed
To" field. This is the destination
telephone
number you
willbesending
the Form to.
and
itmay
have
been
previously filled in by the Forms designer. You may wish to
change
this
telephone
numberoraddanadditional
number
aftertyping in
acharacter.
The SP field inthe Form
header
may
also
have
been
setto(Y).Ifso.
then
the
brackets
marking the field
boundaries
will
notbeprinted
when
you
use
the
PRINT
command.
As you key
data
into
each
field, you
ask
the
terminal to validate the field by
pressingj«eturn
|. if
the
field is valid,
the
cursor
will
move
to the next
unprotected
field. If
the
field is invalid,
the
cursor
stays
in that field
and
the
Command
Screen
will
warn you with the
message
'INVALID
FIELD'.
Once
a field
has
been
checked,itbecomes
valid in
memory,
unless
new
data
is
entered
into
it.
The
fields in
the
Form
canbefilled in in
any
sequence.
41
Page 40

42
Using
forms
Blank
ail fields (BF)
Verifyform
(VF)
The
TAB
(j
IF)
and
BACK
TAB(IfuNc|B)
keys
will
position
the
cursor
atthe beginning ofthenextand
previous
unprotected
fieldinthe User
Screen.
Ther
]and[
, H keys
will
operate
only
within
an unprotected
field,
andthecursor
will
not
move
tothe
next
field
except by
usingjfunc
| F
orI
beturw|.You
will
only
be able totypebetweenthe brackets,
typing
anywhereelse resultsinthe
terminal
'bleeping'.
Note
thatthemessageNOOPEN
FIELD
means
thattheend
(or
beginning)
of
the
form
has
been
reached.
The
I T IandI i I
keys
areused
for
scrolling.
Searching
and
scanning
through
Formsiscarried
outinthesame
wayasfor
simple
messages.
Some
fields
may
be 'pre-set,
i.e.
theycannotbe alteredoncetheyare
correctly completed. These are
shown
with
anasteriskprecedingthe
field
*{
}.
When
a pre-set
fieldis'locked'byvalidating
it,
the
asterisk
will
disappear.
When
you
require
tosend thesame
form,
butcompleted
with
different
data
in
theunprotected
fields,
tooneora
numberofdifferent
destinations,
you
can
save
time
byusingthe
BLANK
ALL
FIELDS
command toempty
all
these
fields
and
fillinnew
data.
Simply
pressBFandj
«eturh
|once
you
have
transmitted
the
first
form
and repeatthe procedure as
oftenasyou
need.
You
may
wish
todo a
final
checkto
make
surethe
form
iscorrect
prior
to
printing, sending, or
filing
it.
Todothis,
useI
fuwc
| Qand the
VERIFY
FORM
command
(VF).Ifany
incorrectly
completed
fields
are
found,
these
willbeindicated on the
screen
foryou to put right.
The
VERIFY
FORM
procedureis
automatically
carriedoutbythe
terminal
before a
message
issent, unless otherwisespecified.
Page 41

I
You
can
copythe contents of an unprotected fieldor fields from a stored
Form into the current Form in the Work File by using the
MARK
ITEM
and
READ
MARKED
ITEM
functions.
You
cannot
read
marks
fromanormal
'simple
message'
into a Form, or
vice
versa.
Mark
item
When
you
have
located
the
field
you
wishtomark,byusing
the
REVIEW
FILE
commandifnecessary,
position the cursor in the field
and
pressIfuwc
| M.
The terminal
will
now carryout two
checks.
First, to confirm that
the
document
tobemarked is in fact a document of the
same
type i.e. a Form,
and
then to
confirm
that
the
fieldtobe
markedisnot
'sensitive'
and
that
it is
not
a
'signature'.
Certain fields may be considered too important forone reason or another to
allow routine
data
entry with the
READ
MARKED
ITEM
function.
These
are
called 'sensitive' fields. Anyattempt to
MARKorREAD
MARKED
ITEM
into
them
will
be blocked
and
the word
SENSITIVE
displayed on the Command
Screen.
The implications of 'signature'
are
explained later.
I Assuming that the
checks
are successful, the field is marked,
and
'highlighted' on the User Screen. Youcan mark up to ten fields inany one
y
Form,
but
only
one
Form
ata
time.
^
Read
marked
item
Unless
you
are
alreadyinthe
Work
File,
returntoitbyusingj^umc|Qand
I
keyingRS(RESUME)
and I "turn |. Position the cursor to the target field
required and pressI
^mc
|R.
and the firstmarked item
will
be copied into
this
field.
If
this is not the correct item, continue to
press|mwc
| R
until
the correct item
isdisplayed where you want
it.
Anycopied
field
that is longer than
permissible
willbeautomatically truncated.
b
When
you
are
satisfied
with
the
contentsofthe
target
field,
press|beturw
|
f
This
will
have
the
effectofvalidating
the
fieldasifithad
been
entered
from
I
the
keyboard.
)
>
i
r
43
Page 42

44
Using
forms
Clear
mark
Clear
all
marks
Using
the
MARK
ITEM
functioninthis
way
means
that
you
can
carryawhole
senesoffields,
for
example
Name,
Address.
DateofBirth,
intact
across
documents.
The
READ
MARKED
ITEM
function
will
not
remove
the
marks
from
thesource
document,sothatitcanbe
used
repeatedlyifrequired.
The
CLEAR
MARK
function
clears
marks
from
any
already
marked
field
where
the
cursorispositioned,bypressing[[FUHCIM.
The
CLEAR
ALL
MARKS
command
clears
all
marksinmemory.
How
fields
can
•
be
earned
intact
across
forms
RX004
09/11/84
19:39
To;
246
8043
a/sack:01
246
a043
Actual
OvstinAttons
246
6043
CUSTOnSR
IKPORMATION
:
:
ADDRCSSCD
TO (
246
8043
NAKe
{
ADORess
i
Patt#r«on1Forb*t
Ltd
Pfoai:d3t
246
e02l
)PORH
<436
PK
(X}SP(H)
UCC
)
(43
:
Unit9.Sauthwicb
Hi4jdl*«ord«
B»ds
BC3
4AN
TELEPHONE
NO (
021
246
0091
Patterson
b
Forbes
Ltd.
Unit
S.
Southwick
TradInq
Estate,
Middleford.
Beds
BOS
4AN
r (
Mr,0Ounf«»
4
19:S3
To:
246
8043
a/back:01
246
6043
atlOAft
246
6043
SALES
RECORO
246
6043
021
246
8091
Laundry
equipment
manufacturers
MAKE
(
A0DRE88
<
TELEPHONE
NO <
021
246
8091
Laundry
•QulDM«nt
aAnufactur^rt
TYPEOFi
8UStNC88
Pattvrmon
Forb»s
Ltd.
Unit9,Southwick
TradtnQ
Hlddi»ford«
Bvds
B03
4AN
<ENOOFDOCUMENT
I
Pro«:03l
246
6021
I
t
I
>P0RM
R*«
<69/2}
<K} 1
-UWWU**
{
PK (W>8P<N)
UOC
<94
) i
GOODS
St^PLlED
< 24
castlnqs
SPEC
AL/4664/RC4
date(20/11/84
I
ORDER NO <
PF/SDP
3764
(ENDOPDOCUMENT)
«C
Page 43

MARK
ITEM
I I
key
command
M
Effective
modes:
Editing
Reviewing
READ
MARKED
ITEM
I I
key
command
R
Effective
modes:
Editing
CLEAR
MARK
I Ikey
command
M
Effective
modes:
Editing
Reviewing
CLEAR
ALL
MARKS
Mnemonic
CM
Effective
modes:
Editing
Reviewing
Keying
Sequence
Select
field tobemarked
on
User
Screen, by positioning cursor
Use
keys to
selectIfuwc
| M
Repeat thiscommandifitis required
to
mark
more
than
onfe
item
Select
field in Work File
where
item is
to be placed by positioningcursor
Use keys toselect|
f»Hc
| R.Repeat
until
correct item
appears
infield
Select position of item tobecleared
by positioning cursor
Use
keystoselect|fuHc
| m
PressImwcIQfor
Command
Screen
Use
keys to
select
CM
PressIRETunH
I
('bleep' signifies successful
completion)
45
Page 44

46
Usingforms
Signing
Forms
One of the fields on a Form maybea signature field.
If
so.a
Formal
Name
and
Personal
Identity
Number
(PIN),
known
only
toits
user,
will
need to be entered. These
will
be twoadjoining
fields
onthesame
line,
inthatorder.
PIN
numbers are allocated as required.
The
PIN
field
will
neveractually display a
PIN
and
willbekeyed
'blind'.
(It
may
be
somebody
other
than
yourself
whoissigning
the
Form).
Once
the
PIN
numberhas been entered, it
will
appearas a
row
of'tildes' ( )
which
will
showthatthe
Form
has been signed.
This
character cannotbe entered
from
the
keyboard,
thereby
makingitvery
difficult
for
anybody
to'forge'a
signed
Form.
The
PIN
isvalidatedinthe same wayas other
fields
but
its
validation
isalso
linked
toa checkonthecomplete document
which
ensuresthat
all
the
fields
that mustbefilled
inhave beencompleted,
and
that they have been
completed withvalid information.
If
any
invalid
field
shouldbefoundatthis
stage,
the
cursorisleftinthe
invalid
field
and
the
Command
Screen
will
warn
you.
Once thedocumentisPIN-signed, nofurther editingcan be doneonthearea
above
the
signature.
The
PIN
field
operates
like
a toggle
switch:
signing
once 'locks'the
document,
signing
again
'unlocks'
it.
Only
the
signatory
hasthe
power
todo
this.
Some
forms
will
have been designed fortheaddition ofa counter-signature,
so
that,
for
example, theycan be senttoanother person
for
comment
and
counter-signature beforebeing
eventually
transmitted.
The
counter-signature isadded or
removedinexactly
thesame
way
as the
original
signature,
but
the
counter-signatory
cannot
getaccesstoany
portion
ofthe document above the first
PIN
signature. The counter-signature also
'locks' allfields (including the
first
signature) above
it.
Siqnsd
by
(
)
Slqnatur*
{
c/siqned
by
(
)
Si
FORMAL
NAME
FIELD
^IN
FIELD
Page 45

Page 46

48
Sending
and
receiving
messages
Sending
simple
messages
When your
message
is ready to
send,
you
can
transmit it by using the
QUEUE FOR SENDING
command.
The
documentisthen
automatically
copied
fromtheWork Fileto the
Mail
BoxFile
and
isautomaticallytransmitted
from
there.
The original
will
be leftinthe Work File,where you
can
copy it,printit,delete it,
or simply
send
itto
somebody
else.
First,
select
the
command
QUEUE FOR SENDING (QS)
and
pressI"tiuRH
The terminal
will
inviteyou to "enter telephone
number"
into a field on the
Command
Screen.
Nowtype the telephone number of the destination intothis field. You
can
use
spaces
and
dashes
(-)to make the number more readable. Don'tforget to
put an Xinfront of any extension number.
e.g:
<01-246
8091
X
2456>
When you have typed inthe telephone number,
press
i | and the
message
will
be 'posted' intothe
Mail
Box
File.
Youcannot now
get
any
access
to it. Note that
the
NQM (Number of
Queued
Messages)
goes
up by
one.
Afterthe
message
has
been
sent itisautomatically copied into the
Transmitted
History File.
WORK
MAIL
BOX
FILE
w
FILL
TRANSMITTED
HISTORY
FILE
RECEIVING
TERMINAL
Page 47

QUEUE
FOR
SENDING
(Simple
messages)
Mnemonic
QS
Copiesadocument
from
the
Work
Filetothe
Mail
Box
File
for
automatic
transmission
Effective
modes:
Editing only
Keying
Sequence
PressIyuwcIQfor
Command
Screen
Use keys to select QS
PressI"ttuaM
I
Enter
destination
telephone
number(s),
insert
semi-colon
(;)
between
numbersifmore
than
one
destination
PressIbetuum
I
(Command
Screen
displays
status,
'bleep'
signifies
successful
completion)
PressIfUHcIQfor
User
Screen
49
Page 48

50
Sending
and
receiving
messages
Sending
Forms
Theprocedure
for
sending
Formsisslightly
different
from
that
for
sending
simple
messages.
If
you
are
sending a Form inthe normal way,
onceithas
been
filledin
and
if
necessary,
signed,
select
the
commandQSand
press|«eturw
| The
Command Screen
will
ask you
NORMAL?
(Y/N).
flUreillKIillIH—•
IIII
a *RFFI
CK
BF
VF
D 6
FOR
SENDIN6<Y>
0
CD
DD
PR
e
SF RC
DN
B
Noraal?
a/N)
SO
Press
'Y'
andI"turn|and
the
terminal
will
check
that
the
Form
is valid
and,
if
necessary,
signed
and
will
transmit it to
the
destination
numbersinthe
Addressed
to: field in the Form header. (Note that you
can
add
extra
telephone
numberstothe
Form
header
before
the
Form
has
been
signed.)
Ifyou require to
send
a Form ina
manner
that is not 'normal', to a different
destination
telephone
number
from that on
the
Form
header,
press
'N'. The
terminal
will
ask
you CHECK
VALID?
(Y/N).
If
you
then
press
'Y'
andjreturn
|, the terminal invites you to
enter
the
telephone
number.
Once
you have
done
this
and
pressedIreturn
|, the
terminal
will
send
the
Form after having
checked
that it is valid.
The
same
procedure
applies
ifyou
press
'N'
andjreturn|.except
that
the
terminal will
makenocheck
for validation. You
will
needtouse
this if
sending
a
blank
Form.
The terminal
will
not allow a Form tobesent
ifthe
'Signed
by' field
has
been
completed
but
the
Form is not signed,
even
ifyou reply 'N' to CHECK
VALID?
Page 49

QUEUE FOR SENDING
(Forms)
Mnemonic
QS
Copies a
document
from
the
Work File to
the
Mail
Box File for automatic
transmission
Effective
modes;
Editingonly
Keying
Sequence
Press
I
IQ
for
Command
Screen
Use
keys to
select
QS
PressIRETuow
I
Select Yor N
from
options
offered
PressIaerurni
|
Ifprompted CHECK
VALID?
SelectYor
N
If
needed,
enter
destination
telephone number(s), insert
semi-colon (;)
between
numbersifmore
than
one
destination.
Press[
(Command
Screen
displays
status, 'bleep' signifies
successful completion)
Press i
fuNc
10
for
User
Screen
51
Page 50

52
Sendingand
receiving
messages
Multiple
destinations
Answerback
Messages
canbeaddressed
to more than
one
terminal at a time. To transmit
the
same
message
to several terminals you
use
theQScommandasbefore.
Thistime, however, after typing inthe firstnumberentera semi-colon (;) inthe
number
field,
then
add
the
second
number
(andsoon) until either all
the
numbers
are
entered
or
thereisno
roomtoenter
further
numbers.
e.g:
<01-583
2163;
285109:
276032>
Now
press
and
the
message
willbequeued
and
senttoeach
numtier
entered.
Note
that
the
NQM
goesupby
the
numberofdestinations
the
message
is tobesent
to.
If
the
message
needstobe
senttomore
numbers
than
there
is room to enter,
then
repeat
the
procedure
by using
theQScommand
again
and
enter
the
restofthe
numbers.
Ifamessage
is transmitted successfully for
each
destination
address
a log is
printed on
the
local printer showing
the
communication information
header
(see
p57) completed withAnswerback, Serial Number, Date
and
Time.
A
copy
of the
message
is also
storedinthe
Transmitted History File.
The telephone number of the receiving terminal is
usedasan Answerback
code,soitis
possibletodetermine
that
the
message
was
senttothe
correct
terminal.
The
transmitting terminal
does
some
checkingofthe
Answerback
against
the
actual
number
dialled. Itis likely, particularly
around
London, that
the
number
dialled by the terminal
willbedifferent from the Answerback number. This is
duetothe
use
of local dialling
codes
for
some
calls,
whereas
the
Answerback
should
alwaysbethe
fullSTD
code.
The
terminal
starts
checking
the
Answerback
from
the
righthand digit to
the
left
and
looks for at
least
three
matching
digits
before
decidingifthe
call
has
been
routed correctly.
e.g:
Actual
To
A/BACK
Dest
i
nations
call
connected
OK - last 3 digits
match
To
:
A/BACK
!
Actual
Destinations
:
call rejected - wrong number
01
031
031
031
246
8043
246
8043
246
8043
246
8091
246
8191
246
8091
Page 51

>
»
I
I
»
Number of
Queued
Messages
Retry
Incoming
messages
The
fieldonthe
Command
Screen
marked
NQM
shows
the
number
of
queued
messages
inthe 'mail box'. Itis only possible to enter a limited
numberof
messages
intothis
queue
before the 'mail box'
becomes
full,
i.e.the numberofmessages thatcan be queued dependsonthe size ofthe
documents to be transmitted.Italso depends on the size ofthe Pending,
Received and Transmitted
History
Files,
allofwhichcompete forthe
same
space
as
the
Mail
Box
File.
If
the
terminal
fails
toget throughtothe correct numberand successfully
transmita message, then the message is held inthe
'mail
box'for retrying.
Theterminal
will
attempt to transmitthe message
five
times
within
one hour
before aborting the attempt. Alog
will
be printedout each timethe terminal
attemptstosendamessage.
If
the message is nottransmitted successfully afterfour'retries' the entire
message
is printed out on your local printer. To draw attention that the
message has failed, itismarked
'BY
HAND'
signifying that itshould be
delivered byalternativemeans. Thismessage isstored inthe Transmitted
History File.
You
nowhave the optionofsending the message
'BY
HAND',
orcopying it
into
the
Work
File
and re-queueingit
for
transmission, possiblytoa different
terminal, orsetting up a manual phone calland using the
SEND
ALL
FOR
(SF)
command,
explained later.
Theterminal isavailable to receive incomingmessages whenever the
telephone lineis free and the terminal is switched on and inOperation Mode
(editing or reviewing).The printer must also be switched on and 'on line' fora
message
to be received successfully.
Theterminal
will
automatically answer allincoming callswheneverthe phone
rings,and a
message
transfer
will
be set up ifthe call is
from
anotherterminal.
Themessage is automaticallyprinted outand a copy
left
inthe Received
History
File.
This
message
could then be copied (CD)intothe WorkFileand
queued
for
sending
(QS)
toanother
terminal,
perhaps afterbeingedited.The
messagecouldalso be stored inthe Operator
Information
File
or Pending File
for
later
reference.
Whena message is received intothe Received
History
File,ifthe
fileisfull
it
automatically overwrites the oldest
message
inthe
file.
If
the memoryis
full
(several very large messages stored inthe Pending
File)
and there is
still
no room after oldest
messages
are deleted, then the
message is printedonly- not copied intothe Received
History
File.
53
Page 52

54
Sending
and
receiving
messages
Voice
Response
Escape
(switching
from
Terminal
to
Handset)
If
the
incoming
telephone
call is not from
another
terminal,
the
M2105
will
answer
the caller with a
synthesised
voice
message.
This
means
that ifyou
are
absent
fromthe terminal forany reason, a voice call
can be automatically answered by one ofa number of differentmessages.
The
messages
all begin: "This is a computer,
please
hold on... this is (our
telephone number)."
This is followed by
one
of four alternative
messages:
1)
Please
try
again
2)
Please
try
again
after (time)
3)
Please
try
(telephone
number)
4)
Please
try
(telephone
number) after (time)
The voice
message
canbeswitched off altogether ifnot required.
Toset these options, select the SO command and press|
return
|, then turnto
p76
and
78.
This key is
usedtochange
the priorityof the answering of incoming calls. Its
operation
causes
the field inthe top leftof the Command Screen to
change
from TERMINAL
MODE
to HANDSET MODE,
and
vice
versa.
In
TERMINAL
MODEallincoming calls are answered by the terminal
immediately.
The
terminal wouldbeused
inthis
modeifthe
office is
unattended or the terminal is
dedicated
to receiving incoming
messages
(no
speech
calls
expected).
When the terminal
answers
an incoming call it
will
automatically first
set
itself
into TERMINAL
MODE,
and
will
then
remain
in TERMINAL
MODE
even
after
the completion of
the
call.
In
HANDSET
MODE
the terminal
will
answer incoming calls after about 20
seconds.
This allows time for anybody inthe office to
answer
the
phone
when
mainly
voice
calls
are
expected
Inaddition, when a
messageisQueued
for sending while the terminal is in
HANDSETMODE, no
attempt
willbemadetosend
itfor 5 minutes. After 5
minutes, the terminal
will
bleep
and
display the
message
ABOUTTO
DIAL.
Pressing the j
escape
| key
again
will
suspend
the terminal's attempts for a
further5minutes.
IfI
escape
Iis
not
pressed
then
the
terminal
willdial
the
call
after
a 10
second
pause.
After
completionofthe
messageitwill
remain in
TERMINAL
MODE
unless
itis
changedbypressing|escape
|
Page 53

Receive
(RC)
Send
ail for (SF)
Asthe terminal
does
not knowwhen the telephone line is in use, itmay
attempt to dial a
message
call when
the
line is in
use
for a voice call.
I
"""EI
canbeused
to force the terminal to release the telephone line should
itstart todialduring a voice call, or toabort the transmission ofa message. In
each
case
the call wouldberetried later by the terminal.
If
the
telephoneisansweredbyhand
and
the caller is identifiedasan
incoming
message
fromanother terminal, by the distinctive short, high
pitched
bleeps
every few
seconds,
then the
RECEIVE
commandisused.
This is
selected
(when inthe Command
Screen)
either by using the
cursor
keysl
^ ^ lorbytyping
RC,
and
then
pressing
theIhetuh"Ikey.
The
terminal
will
then
take
over
the line
and
handle
the
incoming
message
and
the
telephone
handset
canbereplaced.
The
RECEIVE
command
can
alsobeused
by the destination terminal
when
the
SEND ALLFOR (SF)
commandisused.
Itmaybenecessary
for a particular
message,ormessages,betaken out of
the
transmission
queueinthe
MAIL
BOXFILEfor
reasons
of confidentiality, or
to give a
message
priority
over
other
queued
messages.
The
SEND
ALL
FOR
command
allows
thistobe
done.Italso
allows
a
messagetobe
sent
to a terminal which
cannotbedialled
direct
and
is
connected
viaanoperator,
and
itallows for
messagestobe
sent
during
a
'voice
call'.
1 Ifthe
messagetobe
sent
has
not previously
been
queued
for
sending
and
is displayed in the Work
file,
pressOSand
enter
the destination
telephone
number.
2
PressIescape
| for HANDSET Mode. This prevents the terminal from dialling
straightaway.
3
PressSFand
again
key inthe telephone number the
message
is tobesent
to. Do not
press
r^TURN
lyet.
4 Make a
telephone
(voice)call on the terminal telephoneto the destination
terminal
user.
If
the
userisnot
present
The receiving terminal
will
answer by giving a tone. Press your j
atruRw
| key,
and
all
messages
queued
for
sending
to that
telephone
number
will
now
be
sent.
Replace
your
telephone
handset.
55
Page 54

56
Sending
and
receiving
messages
Dial
number
(DN)
PABX
procedure
If
the
user
answers
Explain that you wish to
sendamessage
now,
and
ask
himto
press
his RC
command.
5 Wait until you
hearatone
on your
telephone
earpiece.
6
Press
yourj
beturw
[key,
and
all
messages
queued
for
sending
to that
telephone
number
will
nowbesent.
7
Replace
your
telephone
handset.
Itis
possibletouse
the
terminal to dial a
telephone
number
for you, for
exampletomake
a voice call or paging request, ifyou
are
engaged
on other
urgent
business.Todo
this,
select
DN,
enter
the
number
and
press|«etubn
|.
The
terminal
will
then
bleep,
the
message
'PICK UP HANDSET'
will
be
displayed,
and
the terminal
will
hold on for up to 10
seconds
to allow you to
pickupthe
handset
beforeitreleases
the
line.
Ifyou
are
entering
the
destination
number
of a terminal not
connectedtothe
same
PABX
or switchboard, when using QS, SF or DN,then the
exchange
line
access
code
(usually 9) shouldbeincluded in
the
number.
If
the
PABX
delay
has
been
set
to other
than
'0'
during initialisation
{see
p76)
then
the
terminal
will
automatically leave a short
pause
after dialling
the
first
digit. This allowstimefor
the
exchange
equipment
to findanoutside
line. This
delay
is only required on older type PABXs;your System
Manager
or Merlin
engineer
willbeabletoadvise
you.
Page 55

The
Communication
Information
Header
Before the terminal transmits any document you have prepared, it
adds
a
'communication
information'
header.
This
header
consists
of 3
linesoftext
within
the
first 5
linesofthe
document,
and
contains information which gives
each
documentanindividual
and
unique identity.
The
header
isonly displayed on the screen when a
message
has
been
transmitted or received. However, itisautomatically
added
by the terminal to
every document before itis sent, and
appears
at the top of every printed
document.
Thisiswhatitlooks
like.
1
2
3 4 5
6
1
RX008
!
After
1
Actual
21/11/84
09:01
To:246
8021
3
Retries
A/BACK:01
246
8021
Destinations
:246
802l;836
4311
?DUPLICATE?
:
From;01
246
8043
!
X
24
TRANSMITTED
OK :
7
8
io
9 11
1 Thisfieldis either blank, or contains the characters
'RX'.
Ittellsyou whether
the
document
displayed on the User
Screen
is a
copy
of a transmitted
message
(blank), or of a received
message
(RX).
2 Thisfieldis three digits and displays the
message
sequence
number. Every
transmitted
message
isautomatically given a unique sequential
message
number for identificationand checking purposes, running
from
001 to 999.
3 The date and 4)the timeoftransmission ofthe message.
5 The To' fielddisplays the telephone number which was actually dialled by
the transmitting terminal when the
message
was
sent.
57
Page 56

58
Thecommunication
information
header
6
The
display
7DUPLICATE?
ensures
that
should
you
decidetoprintacopy
of
any
document
being
displayed,
you
will
always
know
that
this
copy,
and
any
other
additional
copy,isa
possible
duplicateofa
message
previously
sent
or
received.
7
This
field
maybeblank,orit
may
display
AfterNRetries.Nbeing
1.2,3.or
4.
Ifitis
blank,itmeans
that
themessage
was
successfully
transmittedatthe
first
attempt.Ifthe number is
1.2,3,
or4 itindicates the numberofretries
madetosend
the
message;ifthe
4th
retryisunsuccessful,itautomatically
printsthe message at the transmittingterminal, and the wordsBYHAND
are
included in line3 of the communications information header.
8
This
field
displays
the
full
telephone
number
providedbythe
receiving
terminal. Because itis positioned directly belowthe number whichwas
dialled,youcan quicklyconfirmthat you have used the correct destination
number.
9
This
field
displays
the
full
telephone
number
ofthe
transmitting
terminal,
as
enteredinthe'ourtelno'
field
during
initialisation
(see
p74).
10
When
thedocumentisqueued
for
sending,itmaybe addressed tomorethan
one
destination at a time.
The
Actual Destinations; field
contains
all of the
telephone
numbers
to which
the
document
has
been
addressed.
11
This
field
indicateswhether themessage wassuccessfully
transmitted
(TRANSMITTED
OK)
orthe
transmission
failedonthis
particular
attempt
(FAILED
xxxxx,
where
xxxxx
isa
failure
code).
The
communication
information
header
foradocument
being
transmitted
is
always
printed
bythe
receiving
terminal
atthe
top
ofeach pageas the
documentisbeing
received,
and
this
documentisalways
the
original
document.
The
headerisalso
printed
outonthe
transmitting
terminal
printer,
whereitis
used as a logtoshowwhethera message has actually been sent or
not.
Page 57

Sendingand receiving messages: Q&A
Can
the
terminal dial
any
telephone
number?
Will
the
dialled
number
and
the
answerback
number
always
match
correctly?
Can the terminal be
stopped
from sending and receiving
messages?
What if NO
ROOM
is displayed
when
using
theOScommand?
If
the
terminalisunsuccessful
in transmitting a
message
after
4 retries, what
are
the
options?
If a
document
is
senttoa
multiple
destination,
whenisit
copied
into
the
TXHST
file?
Yes-it
canbean
extension
numberifthe
messageissent
internally
from
one
extension
telephone
pointtoanother,orit
might
bejusta telephone
number
without
the
STD
codeinthecase ofa
local
call,
for
example.
When
sending
a message,the
terminal
will
always
match
the
numbers
correctlyasfaraspossible, but
bear
in mind that there
are
some
situations
whereatelephone
number
whichisdialled
for
certain
local
calls
might
be
differentifit
were
dialled
bya
caller
from
outside
thearea
calling
thesame
number. When using the SF command the terminal
does
not
check
the
answerback.
Yes.
WhijstinEditing
Work
mode,
pressI
^unc
| QandSOto
return
to
initialisation
mode
(see
p74).
This
wouldbeusefulifyou
neededto
interrupt
messaging
temporarily
touse thetelephone
for
someotherpurpose.
Pressing SOagain
will
return
you
tothe
original
condition.
There
isnospaceinthe
Mail
Box
file
because ofexpansion bythe
TXHST.
RXHST
orPending
files.Itwill
be necessary todelete a document or
documents
manuallybyusing
the
DELETE
DOCUMENT
command
(see
p30).
Note
that
thisismore
likely
tohappen duetothepresenceofa large
documentinoneofthese
files
thananumber
of small
documents.
The
printed
message can be put
intoanenvelope
andsentby
mail,oryou
can
simply
restartthe transmission cycle byusing
COPY
DOCUMENT
from
the
Transmitted
History
file
into
the
Work
File
and
then
usingOSagain.
Alternatively,
youcan
dial
the number
manually,
makecontact, and send the
message duringthe same connectionusingtheSFcommand (see p55)or
change the destination address tothatofa closeby
receiving
terminal.
Only
whenithas been successfully transmittedtoallitsdestinations.Ifallthe
attemptstosend
itto
any
oneofthe
destinations
fail,
the
whole
document
is
copiedas
'BY
HAND'.
Thedetailscan be
confirmed
bycheckingthe printed
logs.
59
Page 58

60
Sending
andreceivinamessages:
O&A
When
are
the
words
7DUPLICATE?
not
printedona
message?
Howisthe
Message
Sequence
Number
(MSN)
allocated?
What
happens
when
the
message
sequence
number
reaches
999?
If
the
terminal
successfully
transmits a
documenttoanother
terminal at
the
first
attempt,
that
document
is printed at the receiving terminal without
the
words
7DLIPLICATE?.sothis identifies itclearlyasthe original copy.
However,ifa transmission is aborted, forexample
due
to printer error, any
message
subsequently
sent
successfully
will
neverthelessbeprinted withthe
words
7DUPLICATE7,to allow comparison. The
message
7DUPLICATE7
will
also
appearonsuchamessage
subsequently reviewed or printed.
Each time a
message
is successfully transmitted, the MSN
goes
up by one.
However,
suppose
the first attempt to
send
message
001 (for example) fails,
the log
willbeprinted out accordingly with
MSN
001.
If
the next
message
transmitted (whichcould be a different
message)
succeeds,
then
that
message
will
take the
MSN
001.
Now,ifthe first
message
is then subsequently successfully transmitted at the
second
attempt it
will
take the next available number - 002.
This
can
account
for the possibility of the
same
message
receiving two
different
Message
Sequence
Numbers, priortosuccessful transmission.
The
MSN
also
goes
up by one each timeyou enter and returnfromSystem
mode, although this is notshown on the Command Screen. This is because
the
status
log is allocated a MSN.
The terminal
will
start
numbering
again
at 001.
Page 59

i
Installing
the
M2105
Page 60

62
installing
tlie
M2105
The
components
The three maincomponents that make up the terminal are the keyboard and
memory
unit,
the
screen,
and
the
printer.
Firstof
all,
unpack them, makingsure that the contents ofthe packages are
correct,
and
undamaged.
You
should
have:
Keyboard
and
memory
unit
1
Keyboard
and
memory unit
2 One mains lead
with
adapter, fittedwithplug fused at 3
amps
Screen
1
Screen
2
One
video lead 75 ohm
RCA-RCA
(Phono)
3 One mains lead fitted
with
plug fused at 3
amps
Printer
1 Printer
unit,
complete
with
cover, mains lead fitted
with
plug fused at 3
amps
2 Ribbon
cartridge
3
Paper
guide
wire
rack
4 Lead for connection to keyboard
and
memory unit
A
mains
distribution
boardisalso
included.
m
m
m
«
m-
9-
Page 61

The
keyboard
and
memory
unit
This is the heartof the terminal. Itcontains:
The
microprocessor
Program
memory
and
display
memory
The
screen
The
printer
Connection
Memory for storing material temporarily
(unprotectedinthe
eventofpower
failure)
fvlemoryfor storing important material
suchasblank forms (battery
protected)
Modemtoconnect
the
terminal to
other
terminals or
remote
computers
via
the
telephone
line
Auto dial
and
auto
answer
equipment
for
sending
and
receiving
calls
Interfacetoconnect
the
terminal to a local
computer
Voice
generator
The
screen
is a 12"
amber
high resolution,
monochrome
monitor. A tilt
and
swivel
base
is availableasan
optional
extra
from your Merlin
equipment
supplier.
The
printer
is a
high
quality
dot
matrix printer.
These
three
units
can
nowbeconnected
to
each
other
andtothe
distribution
board
as
shown.
The
distribution
board
can
then
be
connected
to
the
mains
outlet
and
switched
on.
ID
1
fm
DO
.O.
&
63
Page 62

64
Installing the
M2105
Wiring
instructions
and
connections
to
mains
Thekeyboard, screen and printershould
all
come complete
with
13amp
plugscorrectlyfused at 3 amps. Shouldyouneed to replace anyofthe plugs
for
whatever
reason
follow
the
instructions below. Consult a qualified
electrician or contact your Merlinequipment supplierifyou are not sure what
to
do.
Warning:
this
equipment
mustbeearthed
IMPORTANT:
The mains plug must be
connectedasfollows:
The
wires in
the
mains
lead
areinaccordance
with
the
following
code:
BLUE Neutral (N)
BROWN Live (L)
GREENA'ELLOW Earth (E or
t)
As
the
colours of
the
wires in
the
mains
lead
may not
correspond
with
the
coloured markings identifyingthe terminals in your plug, proceedasfollows.
The
wire
thatiscoloured
BLUE
mustbeconnected
to
the
terminal
that
is
marked
with
the
letterNor
coloured
BLACK.
The
wire
thatiscoloured
BROWN
mustbeconnectedtothe
terminal
that
is
marked
with
the
letterLor
coloured
RED.
The
wire
thatiscoloured
GREEN
and
YELLOW
mustbeconnected
to
the
terminal
thatismarked
with
the
letter E or
the
symbol
t.
IMPORTANT:
The plug should be fitted witha 3 amp fuse to BS 1363.
Safety
note
If
inthe event of engineering maintenance the mains electrical earth
connection to terminal, printer or monitor is disconnected, then the terminal
MUST
NOTbe
connected
intothe telephone line. Note also that servicing or
maintenance of the terminal must only
be
carried out by qualified personnel.
There are no user serviceable parts inside the terminal, monitoror printer.
Terminal
power
supply
unit
- Wv^rning
The mains adapter supplied withthe terminal
has
been
specially tested by
BABT
and
certifiedassafe. No
other
mains
adapter
shouldbeused.
Failure
to comply withthis
will
invalidate the
BABT
approval certificate forthis
terminal. Therefore using the terminal withany other power supply whilst
connected
to the telephone line couldbean offenceaswellasdangerous.
Make certain that ifyou should cut offthe moulded mains plug to replace it
withanothertype, the old plug is disposed ofsecurelyasitwould be
dangerousifplugged
into a mains socket.
Page 63

Setting
up
the
printer
1 Remove the plastic
top
cover
2 Remove the shipping screws
(if
present) from the bottom ofthe printer
case
with a Philips screwdriver,asshown.
0 o
X '
s.
—JU
Installing
the
ribbon
3
With
the printer positioned infrontof youon a flatsurface, installthe ribbon
cartridge,asshown.
Remove
the
ribbon
cartridge
from
itsboxand
tighten
the
ribbon
byturning
the
plastic
knob
counter
clockwise.
Push the printer head to the far leftifitisnotalready inthat position.
65
Page 64

Holding
the cartridge
tilted
with
theplastic
knob
uppermostand tothe
left,
engage the
two
catchesonthe
left
and
right
sides
frame
hooks
onthe
printer.
Thenpress downthe
front
ofthe cartridge and engage the side tabs.
Tighten
the
ribbon
once
more,
ensuring
thatitslipsinfrontofthe
printer
head,
but behind the metal shield.
4
Place
the
printerina
convenient
position
closetothe
keyboard/memory
unit.
5
Connect
the
leadtothe
printer,
but
not
yettothe
keyboard/memory
unit,
as
shown.
6 Setthepaper
guide
wire
rack
(if
required)asshown
Page 65

Installing
the
paper
7
Feed
the
paper
into
the
printerasshown.
Position
the
paper
below
andtothe
rearofthe
printer.
Pull
the paper release
lever
towards
you,
tothe
RELEASE
position.
Feed
thepaperbeneaththe
wire
rack,
into
the
slot
and
right
around
tothe
tractors, adjustingthe tractorsas necessary to matchthe paper hole
spacing.
Open bothtractorcovers,
position
the paper holeson the tractorteeth and
closethecovers.
Make
sure thepaper
fits
satisfactorily
and isheld
firmly
in
place.
67
IM'fl lll«^
Page 66

68
Installing the
M2105
Feed the
paper
forward by turning the platen knob.
Adjust
thepaperso
thataperforation
between
sheetsis
positioned
slightly
above
the top of the ribbon.
If
thepaperis
fanfold
paper,
leave
the
leverintherelease
(forward)
position.
If
single
sheetpaper,
return
the
lever
tothe
normal
(friction)
position.
Closethe
printer
cover,
feeding
thepaper
through
the
tear-off
slot.
8
With
thepaper
installedtoyour
satisfaction,
the
printer
can
nowbetested.
Make
sure the mains lead is plugged into the distribution board and
switched on,
and
turn on the powerswitch on the printer.
POWER
Page 67

The
POWER.
READY,
and ON
LINE
lights
will
come on.Ifthe
PAPER
OUT
lightcomeson, checkthat the
paper
is properly installed.
mmft
9
RSAOr •
PAKROUJ*
ONUNCa
•
10
Press
the
ON LINE
button
several
times
- it
should
switchonand
off
both
the
ON LINE
and
READY
lights.
11
With
the ON
LINE
and
READY
lightsout. press the FF(FormFeed)
and
LF
(LineFeed) buttons. These should feed the
paper
accordingly, but they
should
not function
when
the
lights
are
lit.
12 Now turn
the
power
switch off.
Self
test
13 Hold down LFbutton
and
turn the power switch back on at the
same
time.
Theprinter
will
printa complete set ofcharactersand
will
continue as long as
you hold the
LF
buttondown. The test print
will
be made to80 characters per
line
width.
14Ifthe tests are satisfactory, plug inthe connecting lead tothe keyboard/
memory
unit,
ensuring that itis plugged inthe correct way up. (Some plugs
canbeconnected
either
way
up).
69
Page 68

70
Installing
the
M2105
Settingupthe
keyboard
and
memory
unit
The lead fromthe mains
adapter
supplied withthe keyboard/ memory unit
should be plugged intothe socket on the
right
hand side of the keyboard,
which is engraved on the underside '19VAC
POWER
IN'.
The mains lead
shouldbeplugged
into
the
distribution board.
Nowplug the video lead, supplied withthe screen, intothe keyboard 'Video'
socket (the third socketfrom the fronton the lefthand sideofthe keyboard
and
memory unit)
and
intothe 'Video In' socket at the rear of the screen.
Plugthe mains lead
from
the screen intothe distribution board, and switchon
the
screen
using the red on/offswitchonthe
front
panel. Apicture
will
appear
on
the
screen.
If
the keyboard bleeps, and the message
CHECK
PRINTER
isdisplayed on
the screen, check that the printeris switched on and that the ON
LINE
and
READY
lightsare illuminated, and thatthe paper is properlyinstalled.Ifthis
does
not
rectify
the situation, remove the printerlead
from
the keyboard unit
and
replaceitthe
other
way
up.
The
terminal
will
now print out a
'power
on'
status
log.
m
Page 69

Setting
up
the
screen
The
screencan be
positioned
onthe
keyboard/memory
unitasshown.
Make
sureitisnotinanexcessively
hot
location,
andthatthe
ventilation
holes
inthe bottom
and
back
of the
cabinet
are
unobstructed.
When
you
are
not
goingtouse
the
screen
foraconsiderable
periodoftime,
turnit
off
using the red switchon the
front
panel.
Never
expose
itto rain or moisture.
1
Having
switched
onas
described,
and
withapictureonthe
screen,
setthe
Graphics/Data
switch
ontherearofthecabinetto'Data'.
2
Check
that
the
Termination Switch is
set
to the 'HIGH' position.
3
Adjust
the
Brightness,
Contrast,
and
Hold
controls
as necessary
for
aclear
picture
and
optimum
display
quality.Ifthe
picture
tendsto
flicker,
adjust
the
vertical
hold
control.
The
terminal
issupplied
with
a standard
British
Telecomlineplug,whichmust
now
be plugged
into
a telephone
line
viaa suitabletelephone
wall
socket
before it
can
send
messages
to other terminals
(see
p84).
Once
thisisdone,
the
terminalisinstalled
and
ready
for
initialising
and
you^
should
turn to
p74.
71
Page 70

72 Installing the M2105
Screen
controls
(i>
©Merfai
®©-
(S>-
|9
9 9 9 9
<1)
-Q)
o
.:"_3Q0
0 9 9 d
0-
6^
<U)
Front
panel:
1
Power
on/off
switch
with pilot
lamp
2 Control
panel
door:
presstoopen
3
Contrast
control
4
Brightness
control
5
Vertical
hold
control
6
Horizontal
hold
control
7 Vertical picture
size
adjustment
control
8 Horizontal
picture
size
adjustment
control
Note: 7
and8are
factory adjusted controls, presetfor optimum performance,
and
should notbefurther
adjusted
except
by qualified service personnel.
Rear
panel;
9 AC input
10
Video
In
11
Video
Out
12
Termination
switch
13
Graphics/Data
switch
Page 71

Initialising
the
M2105
Page 72

74
Initialising
tlie
terminal
If
the terminal
bleeps,
and
the
message
CHECK
PRINTER
appearsonthe
screen,
check
that
the
printer is properly
connected
and
switched
on
(see
p68).
Should the terminalforany
reason
findafault
with
the
data
you
have
entered,
a
messageisdisplayed
on
the
Command
Screen
saying
"INVALID
FIELD
CONTENT'
and
the
cursor
is
repositionedatthe
start
of the invalid field waiting
for you to re-enter it
correctly. When you
have
done
this,
press
|
urw
|
again.
afiTTirIiiimiiiirri
isfmnipm
This
simply
means putting the
terminal
into
astate ready
for
youtouse.
"I
Ensure the terminal is switched on. Aftera moment or two,
during which the terminal performs
some
self tests, the
screen
will
display the System
Form,
shown opposite, foryouto
'fill
in'.
You
will
see
a smallsquare flashingat the beginning ofthe
'TODAY'SDATE'field. This is
the
'cursor',
and
the
'field' is the
area
between the brackets. Enter the
day's
date, inthe format
shown opposite, and press the |
beturw
| key.The cursor
will
skip to the beginning of the
"TIME"
field.
3 Enter the time of day, inthe format shown opposite,
and
press
I
beturw
|. The cursor
will
skip to the beginning of the 'OUR
TEL
NO.'
field.
Enter the
full
number ofthe telephone point at which the
terminal
has
been
connected,inthe
format 01
5791234x1234.
Ifona PABX,besure
the
extension
numberisincluded,
and
precededbythe
'x'. Do not
pressji»eTu«N
|.
Hold down the key marked j
mwc|and
press
the
'0'
key once.
Release
theI | key
and
press
the'S'
key
once.
Press
I
"TURN
|. The Command Screen
will
ask you
'PLEASE
WAIT",
while the printer prints out a 'status log'.
Thescreen
will
then change to lookas the standard User Screen (see p14).
Theterminalisnowready
for
youto use. and youshould turn back to p8.
If
you have any difficulty ingoing through
these
operations for the firsttime
or
press
any wrong keys, you
can
return directly to the initialisation
procedure
at
any
time by
pressing|fumc
| Q
and
SO.
Ifall
else
fails, switch off at
the
mains
and
start
the
initialisation
procedure
once
more.
Page 73

—
[13
(
n2ies
TERHINAL
W2.ee>
SYSTEH
}FORH
Ref (Tl }
(2)
[Q
[Q
ADDRESSEDTO<00 }
PK
n SP (N)
U6C
<SYS}
[Q
[•
[C3
[C3
[•
[•
PLEASE
ENTER
TODAYS
DATE
(@81184)
AND
TIME
{1554}
[CD
J
[•
OUR
TEL.
No.
{01 246 8043 }
[•
[•
[•
[Q
Noh
use
FUNCQ^the
SO
Connand
unless
further
chanses
are
required.
[•
[01
[•
[•
CQl
mtimmimm
DCD
0
D
i
mm
'
n,
VF
CD
B
!PP§:fl4y5fl:CB5:e0iiOi
TW
SO
!Hs>i:fl09!HftH
00"
If
you
wish,
you
can altercertainother'pre-sef options
within
the terminal
which
are
describedinthe
following
pages.
75
Page 74

76
Initialising
the
terminal
Initialisation -
resetting
options
You
mightneed to
confirm
that the options
within
the terminal are infact the
basic
'pre-set'
options, or you might
need
to alter
some
or all of them.
So there
are
twofurther
screens
containing information about what you
can
do
and
howtodo
it.
To look at the first of
these
screens,
you
will
needtopressIreturn
| after you
have
entered
your
telephone
numberasdescribedonp74.The
screen
will
change
to lookason
the
opposite
page.
The
first
question
you
are
asked
is RESET ALLOPTIONS?
and
the
terminal
asks
you to
type
in 'Y' (Yes) or 'N'(No)
where
the
cursor
is flashing.
If
you type in 'N',
the
effect
willbethat all the settings in
the
fields that follow
will
remain
the
sameasthey
were
before you
started
using
the
terminal.
These
might or might notbedifferent from
the
'pre-sef
options, but ifyou
know
they
are
the
ones
you
require,
simply
press
j |
and
continue
as
from
the
beginning
of BOX4 on
the
previous
page.
Ifyou
type
in 'Y',
the
effect
willbeto overwrite all
the
fields that follow with
the
basic
'pre-set'
options
(knownasdefault settings). Ifall you
needtodo
is to
confirm
these
settings, simply continueasfrom the beginning of BOX5 on
p74.
Itis
advisable
only to
use
the
'Y'setting ifyou wish to
completely
'clean
out' all
the old settings,
e.g.
iftaking
over
the
terminal for
the
first time.
However, ifyou require to alter
anyofthe
options, you
should
select
the
appropriate alternative. Type itinto the field
and
pressI«etu«n
|. Carry on
doing this down the
screen,
which
will
change
to the
second
of the two
screens
(headed
'Select
voice
response')asyou
progress.
To
move
more
swiftly
down
through
the
initialisation
screens
you
may
simply
keep
pressingIbetubn
|. Alternatively you
can
use
the
TAB function (I
ruNc
| F
or I
Fuwc
IB)asreferredtoon
p42,
or |
mwc
| W or |
func
| E for
the
Next or
Previous
Screen
(p26).
When you
have
completed
entering all
the
fields, do not
pressjretubn
|, but
continue
as
from
the
beginning
of BOX4 on the previous
page.
Pressing
IBETURNI
will
display
additional
screens
of option information which
are
not
relevant at this point.
The implications of
the
various options
are
describedonthe
opposite
page
and
overleaf.
Page 75

Normal
operation
! X
N,jn;nr-r
To
returntonormal
operation,
when
all
changes
are
complete,
press
I IQ
and
select
theSOcommand,
then
press|be
turn
|.a
log
will
be
printed
and
the
terminal
screen
willbedisplaying
the
empty
Work
File.
WhilstinSystem
Mode
the
initialisation
screens
canbe
copied
into
the
Pending.
FormsorOperator
Information
filesbythe
useof
the
COPY
DOCUMENT
command
(see
p30).
This
will
allow
them
tobe
printed
orsent
toanother terminallaterifrequired.
WlH;n '.;cltoY.
^mII
overwrite
all
v.ilues
vv,'//?
(iofault
seltinqs
1
]
]
]
]
RESET
ALL
OPTIONS?#<Y;N)
D
TERMINAL
OPTIONS.'
(See
User
Guide
for details!
3
AUTO
DELETE
FILE
{5}
U;5>
3
PAPER
SIZE
<66)
(00{66;7e|72>
00
I"'-
'•-••i/v I
PASX
DIAL
DELAY
<9)
iUl
[ca
[•I
[•
[•
[•
[Ql
[•
[•
[•
coi
[•
[CD
[•
[01
ca
[•
[Q
[01
L/SPKRX{0}
(0il)
l/SPKTX{0)
<0;U
mnmmwm
DCH
0
Q
Nutvbe-^.tis
ile'.-v ni
:-t;Cy=;iKis
[\;lwee''•'St
a'hidi.v!e^:
to.iUvv.'cexcrw'ge
r-'ne/'f
tu
Umi
(/e
.v;p
0 /r^-.v;e/ay
! -•}•'•rc.^nds
2 ~ 5
sescnds
J - 6
:;p
:o
VF
CD
BZlg5 ; VZ.0O
;stst.hobf:
um
is-M'
SO
B
Allows
switch:/-!,;}
on ct '-lomtor
loiid^ipeuHer
liurnu;st-i'iftgup
ol
tnwsmitted
niessjofs
or
detection ot.in nKo.'rhngvoice r.j//
I)
oft.
1 -
on
j
77
Page 76

78
Initialising
the
terminal
SELECT
VOICE
RESPONSE
(0}
(0;1;2;3;4)
(see
below)
0 ;NOVOICE
RESPONSE
1 :
"PLEASE
TRY
AGAIN"
2 :
"PLEASE
TRY
AGAIN
AFTER
'time'
"
3 ;
"PLEASE
TRY
'Tel.
No.' "
4 :
"PLEASE
TRY
'Tel.
No.
AFTER
'liine'
"
Where
'tine'
= ( ) and
'Tel.
No.' = (
[•
[•
CQI
[•
[Q
[•
[•
[•
[•
[•
[•
[•
[
C
} [
[
[
[
[
c
1flfl/11/84!
T^rhinal;
:
M2105
I V2.fl0
ISYST.HODE:
WORK
!
:
15:54
1
Dm
VF
CD
so
D
D
B
D
D
Q
D
1 ; : :f:|:S:o4750:CDS;ooiiO! :
MSN:
eeo:
Nsn
00 !
Whenever the terminal is switched on, the firstthing it
does
is to
automatically
run
a seriesofself-tests, andoncethese havebeen
completed,itprints
out
astatus
log
andselects
System
Mode.
One ofthe self-tests
ensures
that the terminal programs have not
become
corrupted.
Another
checks
whether
the
Forms
File
andthe
Operator
Information
File,
(explainedmore
fully
elsewhere inthisguide)
which
might
have been
previously
set to contain
important
information,
are also
uncorrupted.
If
thesetwofilesare corrupt,asthey invariably
willbeif
the terminalhas never
been used before, then a warning message is displayed and the terminal
erases
this
partofits
memory
and
signifies
withaprinted
messagethatitis
ready
for re-use.
This
ensures
that information
cannotberetrieved from files which
are
corrupt.
At
thesame
time,
the printed message ensures thata printed logiskeptof
each
such
occurrence.
Page 77

i
Problem
solving
Page 78

80
Problem solving: check list
If
you
haveaproblem
with
terminal
failingtowork
properly,
carry
out
the
following
series ofchecks
If
not
check
that
the
mains
indicator
(red
light)
ON
switchisilluminated.Ifthis
!s
noionand
you
cannot
switchonthe
display
using
the
ON
switch
check
that
the
mains
leadispluggedinand
the
plug
fuseisOK.
Check
also
that
the
power
socketisOKbyplugginginsome
other
piece
of
equipment.
It
the
mains
indicatorisilluminated
and
thereisstillnopicture.
Jt"®"
thLt
th^Jideo
lead
from
the
screentothe
keyboardisconnected
correctly.
and
that
the
Contrast
and
Brightness
controls
have
not
been
turned
down.
If
after
all
these
checks
thereisstillnopicture,
then
thereisprobablyafault
onthe screen orthekeyboard
unit.
Check
that
the
keyboard
unitisworking.
Make
*°
the
keyisilluminated
when
Sir^ad
is
chedUhit
the
power
supplyisconnectedtothe
mams
and
that
the
lead
is
plugged
into
the
right
hand
socketonthe
terminal.
The
keyboard
unit
containsanoverload
protection
circuitdfigned^cut
off
me
DOweHn
the
eventofa
fault.Toreset
the
overload
crcuU
swjtch
off
the
Doweratthe
mains
(or
remove
the
plugonthe
right
hand
sideofthe
keyboar^^^^^^^^^
Minute.
You
should
nowbeabletoswitch
back
on
and
reinitialise the terminal.
It
thereisstillnopictureor"yellow
light"
then
thereisprobablyapower
supply
or keyboard fault.
Does
the
screen
have
a
picture on It?
Is
there
stillnopicture,
but
the
mains
switch
is
illuminated?
Page 79

If
there
is a
pictureonthe
screen,
can
you
use
f
and
type a
message?
10
Hasthe terminal lockedup
in
the
'Power
On'
mode?
Is
CHECK
PRINTER
displayed
on
the
Command
Screen?
If
not,
then
the
terminal
has
possibly
experiencedatransient
fault.
There
may
be a
message
saying "System Error..."on screen.
If
so,
note
down
whatitsays.
Try
switching
off
the
mains
power
and
then
switchback on again.Ifyoucan nowreinitialise the
terminal
and continue
then
you
have
experiencedaTransient
Terminal
Error.
If,
however,
you
still
find
that
the
terminalis"locked
up"
then
this
shouldbereported
asa
fault.
If
you
consistently
experience
"Transient
Errors"
then
there
may
bea
faultinthe
terminal.
Most
errors
will
not
affect
the
terminal
but
instead
causea
"restart";
this
will
resultinthe
self
checks
being
carried
out
andastatus
log
being
printed
to
show
the
"system
restart".
Normally
you
will
beableto
carryonworking
after
this
restart.
If
so,
switch
off,
then
try
again.Ifitisstill
locked
up.
then
report
asa
fault,
giving
detailsofthe message on the screen.
Check
that
the
printerisworking
properly.
Can
the
terminal
"print"adocument?
If
not.
then
check
the
printerisON
and
theONLINE
lightisilluminated.
Check
the
printer
leadisconnected
and
pluggedinthe
right
way
round.
Does the printerhave paper?
If
the
printer
still
does
not
print,
then
switchitoff
and
carry
out
the
"self
test
procedure"byholding
down
theLFkeyonthe
printer
and
then
switching
it
back
on.Atest
pattern
shouldbeprinted:ifnot,
then
check
the
printer
mains
plug
and
fuse.
81
Page 80

82
Problem solving
Is
the
message
NO ROOM
displayed
on
the
screen?
r.
4. .icri.;;;
ic.
I-
uh
This
means
the terminal files
are
full
and
documents must be deleted fromits
filestomake
more
room.
When
trying
toQSa message that islargeitmaybe necessary toclearspace
inthe Received
History,
Transmitted
History
or Pending
Files.
Notealso that the Forms and Operator
Information
files
compete
with
one
another
for
space.
You
maybe experiencingcontinued
failure.
'NO
RESPONSE'
messages, or
complaints
from
other users who cannot send youa message.
It
is possible that the telephone lineis
faulty.
Check that your
terminal
is
plugged
into
thetelephone
wall
socket.
Try
power
off/on
toreset yourterminal.
If
possible pickup the associated telephone, or plugina "spare"telephone
from
another
line
tocheck yourtelephone socket.
Try
phoningyour
terminal
from
another phone or ask the operator fora 'callback'. Thebellshould
ring.
If
the phone socket
does
not workthen report as a telephone faultto the
Operatoror dial
151
(onanother telephone!)and reporttotheengineers.
If
the telephone isOKand the terminal is plugged inthere is probably a
fault
on the terminal.Thisshould be reported as directed on pi 00.
m
Page 81

Specifications
and
reference
Page 82

84
Connection
of
the
M2105 terminaltothe
telephone
line
Sothatthe
M2105
terminal
can send messages tootherterminals itmust
first
ofall be plugged intoa telephone
line.
Theterminal is supplied
with
a
standard
British
Telecomlineplug, and this must be plugged intoa suitable
telephone
wall socket. Note that the terminal must notbeconnected
to the
telephone
line by
any
other
method.
When the terminal is tobeused
witha normal telephone
handset
then either a
second
socket
shouldbeprovided for the terminal
telephone's
use
or an
approved
Tee'
connector
shouldbeused.
If
yourtelephone
does
not have the correctBTsockets, or you require
additionalsocketstobe installedthen contacteitheryoursystem administrator
oryourlocalTelephone Sales
Office
(you
will
find
the address and telephone
number in the frontofyour Telephone directory, or dial 100
and
ask for
Telephone
Sales).
The
approval
numberofthe
terminal listed on
the
"Green
Spot" label under the terminalshould be quoted.
S/1000/3/E/500047
The terminal
can
be connected to any telephone line(except Shared Service
or Coin Boxlines)or Private (switchboard) Exchange extension lineswhich
have
a suitable line socket. It
will
only work on "loop disconnect" lines - i.e.
standard
"dial type"
telephones.
If
yourterminalisto be connected to a PrivateExchange
with
'MP signalling
(telephones have
★and#
keysand make'bleeping'soundswhendialling)then
ensure that the Private Exchange
will
respond to'loopdisconnect'
dialling.
If
indoubt contact your System f^anager or
Merlin
equipment supplier.
The terminal
will
work
bestifconnected
into an ordinary telephone or
extension line with only a single telephone handset. The terminal
can
be
plugged intomultipletelephone installations, but operational problems
with
the terminal making calls on a
busy
line maybeexperienced.
Page 83

Usewith multiple
extensions
if
you
decide touse your
terminalinconjunction
with
severalextension
(RENs) telephones
you
should
beawareoftheconceptof
'Ringer
Equivalence
Numbers' (REN).Every telephone instrument or
modem
has
a REN;
the
M2105 terminal
has
a RENof
0.75
or 3/4. To
ensure
that
all
telephones
connected
to a line
will
ring,
the
sumofthe
RENs of all
connected
telephones
should not
exceed
4, therefore up to three extension
telephones
could
be
used
with
one
M2105 terminal. Anormal telephone
has
a RENof 1.
Note that only
one
M2105 terminal shouldbeconnected
to a
telephone
line,
and
also
that
itis not
advisable
for
the
terminal tobeused
in conjunction with
any
other
telephone
answering
machines
or Auto
Answer
Modems.
The M2105 is fully
tested
and
approved
for
connectiontothe
British
Telecom
network.
The
approval
of this terminal for
connectiontothe
British
Telecom
Public
Switched
Telephone
Network is invalidated if
the
apparatusissubjecttoany
modification in
any
material
way
not
authorised
by BABTor itis
used
with or
connected
to internal software that
has
not
been
formally
acceptedbyBABT.
This
terminal
will
auto
answerinaccordance
CCITT
recommendation
V25.
This
apparatusisapproved
for
the
useofthe
following facilities:
Call
Progress
Monitor
Storageoftelephone
numbers
for retrieval by a
pre-determined
code
Automatic
call
initiation
Operationinthe
absenceofproceed
initiation
Automatic
dialling facilities
Automatic
storage
of last
number
dialled
Repeat
attempt
facilities:
a) Single - last
number
dialled
b) Multiple
(automatic)
Auto
clear
from
the
call originating
end
Modem
Answering
machines
85
Page 84

86
Connection
ofthe
M2105
terminal
tothetelephone line
Approved
Private
Branch
Exchanges
Anyother
usage
will
invalidate the approval ofthe
apparatus
if,asa result, it
then
ceases
to conform to the
standards
against which approval was
granted.
It
cannot be guaranteed that the apparatus
will
operate correctlyunder all
possible conditions of connection to compatible PBX's. In
case
ofdifficulty
please
refer inthe firstinstance to your system Manager or
f*k/lerlin
equipment
supplier.
The
apparatusisapproved
for connection to compatible PABX's,aslisted
below, which return
secondary
proceed
indications. {Exchange dial tone
heard
after the first digit
has
been
dialled. Typically a 9 or 8). This list is
maintained by the Department of Trade
and
Industry
and
your
fvlerlin
Service
Desk
should
be
consulted
for
further
information.
PABXs
PABX1-5
and?
PABX6
UH
200,
900
Pentomat
P200
Pentomat
P1000CT
Pentomat
P1000T2
IBM
1750,
3750
ARD561.2
AKD791.2,3
EBX
8000
ITT4080
PDX
800,
2000
SL-1
IDX
(TDX)
Monarch
Ensign
Herald
Kinsman
(Royale SX 20)
Regent
(Royale SX 200)
Viceroy
Minimaster
1.2
MdllO
OCS300
PMBXs
3+10
5 +
20
10+30
10+50
10+60
1A.
IB,
4,11
12 (Premiere)
Page 85

M2105
-brief specifications
Keyboard/memory
unit
Microcomputer
Processor
Memory
Interfaces
Integral
Modem
Modes
Transmission
speeds
Keyboard
Power
Source
Dimensions
6502
2Mhz
96 Kbytes ROM
48 Kbytes
RAM
16 Kbytes non volatileCMOS
RAM
Telephone line
V24
connection
(RS
423)
Printer
(Centronics)
Composite video
RGB
colour
Modulated
UHF(TV)
Cassette tape
Auto
dial
Auto
answer
- V25
1200/75)
75/1200
>Full
Duplex
300/300
J
1200/1200 HalfDuplex
56 key
QWERTY
layout
2 key roll
over
Auto repeat
220/240V
via
18V
adapter
Width
345mm,depth 440mm,
height
55mm
87
Page 86

88
Brief
specifications
Screen
Printer
High resolution
Screen
size
(diagonal)
310mm
(12")
Screen
colour
Amber,
non
reflective
Input signal
Composite
video
Power
source
220/240V
AC
Dimensions
Width
300mm.
depth
300mm.
height
275mm
Weight
8.4kg
Printing
speed
80
characters
per
second,
bi-directional
Maximum
characters
per
line
80
normalor142
condensed
Paper
feed
Adjustable sprocket feed
and
frictionfeed
Paper
type
Fanfold or
single
sheet
Paper
width
101.6mm
to
254mm
Maximum
numberofcopies
Original
plus
three
copies
Ribbon
Cartridge
ribbon
Interface
Centronics
parallel
Power
source
220/240VAC
Dimensions
Width
377mm.
depth
295mm.
height
125mm
Weight
5.3kg
Page 87

System
Response
Messages
Message
Comms Busy
Different
Doc
Doc
End
Meaning
The terminal is
busy
sending
messages
over
the
telephone
line.
Response
from FIND
ITEM
- string found in
different
document.
EndofDocument.
Doc not Countersigned As for'Doc NotSigned'
Doc not Signed
Doc
Signed
Doc
Top
File
End
FileTop
Invalid
Field
Content
Check
Printer
No
Doc
No
Marked
Section
No
Match
No
Open
Field
No
Room
Signature Field on Formnot complete (Either
delete
'Signed by' field or
enter
PIN).
Document is
signed-cannotbealtered. Must
be
'unsigned'
to allow
change.
TopofDocument.
EndofFile.
Top of File.
A
Field
in a
Form
document
has
not
been
filled
in correctly by
the
user.
Warning that printer is not
connected
or not
ON
LINE,
or maybeout of
paper.
When
using SF
No document
has
been
previously QUEUED FOR
SENDING to this
telephone
number.
Attempt to
readinmarked
item which
doesn't
exist.
String
specified
in FIND
ITEM
cannotbefound.
End of Form- no furtherfields after this point.
File
space
is full,
use
DD to
delete
unwanted
documents.
89
Page 88

90
Systemresponse messages
PrinterinUse
Printer not
Ready
Sensitive
Too
Many Marks
The printer is in
use
forreceiving or transmitting
messages.
Printer is OFF
LINE
or unplugged, or out of paper.
This Field is
'sensitive'
and
cannotbe'marked'
or
have
marked
text
read
into
it.
Ablockisalready marked or 10fieldsina Formare
already marked. Use
CM
toclear marks.
•i
Page 89

Information
Messages
A
number
of information
messages
are
displayed on the
Command
Screen when the terminal is transmitting or receiving
messages.
They
are
listed below.
Message
Abouttodial
Call
answered
Dialling
XXXX
No
Response
Operator
Intervention
Possible
call
Receiving
RX
Completed
RX
Failed:
Reason
RX
Time
Out
Transmitting
Trying to Establish
TX
session
TX
Completed
OK
TX
Failed:
Reason
TX
Time
Out
Voice
call
Meaning
Terminalisabouttomake
call
within
next
10
seconds.
Use I "cape| to
abortifnecessary.
Terminal
has
answered
call.
Terminal is dialling
number
XXXX.
Attempttoestablish contact
with
receiving
terminal
has
failed. Terminal
will
tryagain.
Message
aborted
byuser
pressingIesc"*PE'|
Incoming ringing
has
been
detected.
Receiving
message.
Terminal
has
successfully received
and
printed a
message.
Receipt of
message
failed for specified reason.
Message
has
startedtobe
received
but
failed
due
to expiry of internal time
period.
User
need
take
no action,
automatic
retry
willbeeffected.
Transmitting
message.
Terminal is attempting to establish
contact
with receiving terminal.
Message
transmitted OK.
Transmission failed forspecified reason.
Message
has
startedtobe
transmitted, but failed
due
to expiry of internal time period. User
need
take
no action,
automatic
retry willbeeffected.
Incoming call is not from another terminal. May
be
from a 'human' caller. Pick up telephone
handset
and press
|3H*ED-
91
Page 90

92
Glossary
answerback
asterisk
attributes
auto
answer
auto
repeat
BABT
by
hand
CCITT
character
command
screen
communication
information
header
counter
signature
cursor
document
editing
This is thetelephonenumberof the"ReceivingTerminal"
andisusedtocheck
that
the
message
is being
senttothe
correct
number.
(*)Character used to allowthe Find Itemcommand to find'similar'strings to
those specified in the 'string' field.
Referred to a Forms
document,
these
describe
the
types
of fields
used
in a
form e.g. Date, Numeric, Mandatory, Preset etc.
The automatic
answeringofan
incoming
telephone
call by
the
computer.
The action of certain keys on the keyboard automatically continuing their
function whilst
held
pressed
down.
BritishApprovals Board forTelecommunications
apparatus
connected to
public networks.
A
message
has failed to be sent to a destination. Itshould be sent by
alternative
means,
or to a different
telephone
number.
Consultative
Committee
for
International
Telephones
and
Telegraphs.
Single letteror number or punctuation whichcan be printed or displayed
(includes a single 'space').
Areaofdisplay where 'commands' are entered and warningor
information
prompts
are
given.
This is a title block insertedontoeverydocument that
has
been'Transmitted".
It
shows
Date
and
Timeaswellaswho
the
message
was
From
and
To.
This is a field in a form which is similar to the "signature" field. This
actsasa
'double
lock'onthe
form.
Flashing
square
character inUser Screen showing the position where text
canbealteredortyped.
Agroup oftyped words which
form
a complete memo, letteror
form.
May
consistofseveral
pages.
The process of typing or inputting a piece oftext, also that of amending text
shown
on
the
screen.
Page 91

extent
field
file
find
item
form
forms
file
forms
header
handset
mode
hash
invalid
field
loop
disconnect
mail
box
file
mark
message
MF
Used
inconjunction withthe Find Item
command
to tell the terminal
where
to
'look'forthe specified string. Maybe the current document
(D),
the current
file
under review(F)orthe entire system (S)-every
file.
Aspace
withinaForm
document
which
can be typed
into.Itisshown by the
{ }brackets on either side.
An
area inthe terminal's
memory
which
isused
for
thestoringofone or more
similar
documents,
i.e.
Forms
File.
Command
for
finding
theoccurrence ofa particularwordina document.
Atype ofdocument consisting of'protected' and 'unprotected' areas, which
forces the user to type inthe 'unprotected' areas or fields.
Anon
volatile
(safe)
file
used
for
storing
Form
Documents
only.
This
isan additional
title
block
which
appears on the topofevery
Form
document,
giving a title,
reference
code
and
other
details.
The
terminal
will
answer
incoming
phonecallsaftera 20second delay.
When
set to Handset Mode the terminal
will
not dial any calls for5 minutes.
{#)Character used to
allow
the
Find
Item
commandtofind
'similar'
strings to
those specified inthe 'string'
field.
This
means
the
terminal
has
foundanerror in
the
validation of a form. The
cursorispositionedinthe
'Invalid Field'.
Telephone
dialling
using
line
disconnectionsat 10pulses persecond
(normal
dial).
An
area of
memoryinwhich
documentsormessages are
temporarily
stored
after
they
havebeen'Queued
for
sending'
whilst
the
terminal
is'posting'
them
to
their
destination.
Amarkisshown on the user screen as a 'highlighted' blockofcharacters.
Whenanitem
has
been
'marked'
in a
documentitcanberead
back
into
the
Work
File
document.
AsforDocument, but more generally used to refertoa document which has
been
transmitted or received by the terminal.
Multifrequency telephone dialling tospecification
MF4.
93
Page 92

94
Glossary
mnemonic
modem
operator
information
file
PABX
page
pending
file
PIN
received
history
file
screen
scrolling
sensitive
sheet
signature
simple
message
STD
code
string
system
Two letter
commands
which
canbeselected
from
the
keyboard.
These
commands
are
shownasa
menu
withinthe
'Command
Screen".
Electronic device to
enable
computers to 'talk' to
each
other over the
telephone
line.
(OPINF)
Anonvolatile (safe)
file
used
for
storing
Text
documents.
PrivateAutomatic BranchTelephone Exchange - i.e.privateswitchboard
usedinan
office.
Thisisa 52
line
longcollection of
text.Itisthe
maximum
amountof
information
thatthe terminal
can
printon a single 'sheet ofpaper'. The page number is
shown on the righthand margin ofthe 'User Screen'.
(PENDG)
Temporary
storage
file
(not
protectedifterminalisswitched
off).
This is
the
Personal Identification Number which is required tobeentered
to
'sign' a Form
document.
(RXHST)
File
area
which
isused bythe
terminal
tostoremessages
after
they
have
been
received.
This is
the
screenofthe
monochrome
monitor or
display
unit.
Moving
a document up or down on the screen.
This
appliestoa
fieldina
form
for
which
markingisnot
allowed.
This
can be specified when
printing
a document, to
print
only
a singlesheet,
withnotitleorheader
blocks.
Istheprocess of
signingaForm
document
using
the'Signed by'
field.
This
'locks'
the
Form,
preventing
any
change.
A
document
which is not a Form, that is.
does
not contain
any
protected
fields.
The
full
dialling
code needed to 'phone up' the
terminal
from
anywhereinthe
country.
Agroupof10characters
which
can be specified tothe
'Find
Item'
command
to tell itwhat you want tobefound.
Referring
(in
the 'Find
Item'
command)to a search throughevery
file
inthe
terminal.
Page 93

system
form
system
mode
tab
terminal
terminal
mode
tractors
transmitted
history
file
user
screen
validation
voice
call
wild
card
wordwrap
work
file
The initialisation
screenofthe
terminal, which is
designedasa
special
type
of
form.
The
stateofthe
terminalon'switch
on',orafter
selectionof'SO'
command,
which
enables
certain
parametersoroptionstobe
changedorset.
The function
command
that allows
the
usertostep
the
cursor
rapidly
forwards
(I
^uNc
IF) or
backwards
(I | B) in
the
User
Screen.
InForms, the cursor
will
step
to the next (I
fuNc
| F)or previous(r | B)
unprotected
field.
Insimple
messages,
the
cursor
will
move to align itselfwith the vertical
marks
in
the
highlighted
band
surrounding the
Command
Screen.
This is actually a
step
of 8.
then
10.10...
characters
at a time. The
user
cannot
set
his own
tab
stop
positions.
The combination of Printer, Keyboard/Memory unit
and
Display
Screen
plugged
together to form the M2105 Messaging Terminal.
This
means
the terminal
will
answer all incoming calls immediately. Italso
implies
that
the
Terminal'isusing
the
telephone
line.
Part of the printer mechanism which fitsinto guide holes on the paper.
(TXHST)
File
area
which is
used
by the terminal to store
messages
after they
have
been
transmitted.
Thisis a 20 line'window' on the 'document' currently on display. Three
screenfuls of information
makeupone
page.
When
filling in a Form
document
each
field is
checkedtosee
ifit
has
been
completedinaccordance
with
the
form
designer's
specification of
the
field
attributes. Validationon
each
fieldtakes placewhenever is
pressed,
also on the entering of the VFand QS commands during 'Form Filling' mode.
Incoming telephone call not
recognisedasbeing from another terminal.
A
special
character
(*#)
that allows the Find Item
command
to find 'similar'
strings to
those
specified in the 'string' field.
The
process
by which a singleword, ifitis too large to
fit
on the currentline, is
automatically moved down to the next line
as
itis being typed.
Only
file
interminal which
can
be 'edited', allowing the input or alteration of
text.
95
Page 94

96
Summary of commands
Selecting
commands
Document
commands
(use in Command Screen)
Key
or
command
code
]Q
Function
Change
from
UsertoCommand
Screenorvice
versa
Page
reference
13
I
RETURN^
Review
file RF
Copydocument
CD
Print
PR
Delete
document
DD
Move
the cursor to command on 13
Command
Screen
Implement
the
selected
command
13
Access
filed
documents.
OptionsW,P.O.R.F.TorL
Copy
documentonscreen.
Destination files W. P. 0 or F
25
31
Print
documenton screen. Select 33
whole(D)ocorsingle (S)heet
Delete
document
on
screen.
Confirm (Y)es or (N)o
Queue
for
sending
QS
Documentiscopied
from
Work
File to mail box to await
sending.
Enter
destination
telephone
number
(useto
separate
multiple
telephonenumbers)
31
49
Page 95

Additional
Form
commands
(useinCommand
Screen)
General
commands
'useinCDfnrnafKj
Scr..}-.'?'
Blank
all
fields
BP
Verifyform VF
Queue
forsending QS
Find
item
Fl
Clear
all
marks
CM
Resume
RS
Receive
RC
Send
all for
SF
Dial
number
DN
System
SO
Clears all
unprotected
fields on a 42
Form
Check
completed
Form is correct, 42
that
is.
that
all
fields
are
valid
Form is
copied
from Work File to
mail box. Selecting Normal takes
telephone
number
from
Form
header.
Otherwise
enter
number,
and
specify
ifvalidation
needed
Search
forstring. Options
(D)ocument, (F)ileor (S)ystem
51
39
All
marks
are
removed
from
File
35
Return to Work File (after
reviewing)
25
Set terminal to take over incoming 55
data
during
telephone
conversation
Send
all
the
documentsinthe
mail
55
box to this
telephone
number
now
after previously dialling telephone
number
Dial
telephone
number
56
Enter or return from System
mode
74
97
Page 96

98
Index
about
to dial
54,91
actual
destinations
52.57
answerback
52.59
asterisk
38
blank allfields (BF) 42
by
hand
53. 58.
59
capsLK10.80
check
printer 70. 74. 81. 89
check
valid
50
clear
all
marks
34.35,44.45
clear
mark
34.35.
44.45
close
gap
11
commands
cancelling
13.17
selecting 17
summary
96
communication information
header
52.57
connection
mains
63
telephone
line
84
copy document (CD)
17.30.31.36.41.59.
77
counter-signature
46
currentdoc size (CDS) 16
cursor
3.10
default setting 76
delete
character
11
key
17.32.37
delete document (DD)
17.30.31.59
dial
number
56
document
current
36
different
36
next/previous
24.26
printing
32
duplicate
58.60
editing 11
mode
29
escape
54.55
extent
36
failed
58
field
28.
40,
74
actual
destinations;
58
addressed
to:
41.50
invalid
41.46,
50
our
tel
no.
58.
74
PIN
46
signature
46.50
time
74
today's
date
74
files
current
36
forms
22.41.78.82
mail
box
21.48.53.59
operator
information
22.
30,
53.
77.
78.
82
pending
21.30.53.
59. 77 82
received history 22.
53.59.
82
reviewing 24
transmitted history
22.48.52,53,59.82
work
21.
29.30
find item
(Fl)29.36.39.41
clearing 37
forms
28
completing 41
header
50
locating 41
mode
29
sending
50
signing
46
using
40
validating 41
free file
space
(FFS) 16
FUNC
3,10
glossary
92
Page 97

 Loading...