

Page 1

user guide
Meridian 588 Compact Disc Player
Page 2

Meridian 588
Compact Disc Player
User Guide
Preface
i
Page 3

Sales and service in the UK
Meridian Audio Ltd
Stonehill
Stukeley Meadows
Cambs
PE29 6EX
England
Tel (01480) 52144
Fax (01480) 459934
World Wide Web
http://www.meridian-audio.com
Sales and service in the USA
Meridian America Inc
3800 Camp Creek Parkway
Building 2400
Suite 122
Atlanta
GA 30331
Tel (404) 344 7111
Fax (404) 346 7111
Designed and
manufactured in the UK by
Meridian Audio Ltd
Stonehill
Stukeley Meadows
Cambs
PE29 6EX
England
Copyright © 1993–2001
Meridian Audio Ltd
Part no: 588/1
Preface
ii
This guide was produced by
Human-Computer Interface Ltd,
http://www.interface.co.uk
Page 4

Contents
Introduction 1
Introduces the 588 Compact Disc Player,
and provides an overview of the other
products available in the Meridian 500
Series.
The Meridian 500 Series ........................ 2
Sample configurations ........................... 3
Specification and accessories ............... 5
Using the compact disc
player 7
Provides step-by-step instructions on how
to operate the compact disc player, using
either the front panel or the Meridian
System Remote.
Front panel ............................................. 8
Switching on and off .............................. 9
Playing a disc ......................................... 10
Stopping and pausing play .................... 11
Repeating play ....................................... 12
Programming a selection ....................... 13
Disc information and scanning .............. 15
Changing the absolute phase ................ 16
Setting up the compact
disc player 17
Describes how to unpack and install the
compact disc player.
Unpacking .............................................. 18
Positioning the
compact disc player .............................. 19
Connecting the
compact disc player .............................. 20
Connecting audio................................... 23
Preface
iii
Page 5

Configuring the compact
disc player 25
Explains how to configure the compact
disc player to suit the other equipment in
your system.
Troubleshooting 29
Preface
iv
Choosing standard settings ................... 26
Specifying information about
your system ........................................... 27
Provides suggested solutions to typical
problems.
Troubleshooting ..................................... 30
Maintenance .......................................... 33
Service and guarantee ........................... 34
Index ...................................................... 35
Page 6

Introduction
The 588 Compact Disc Player combines Meridian’s extensive experience
of producing audiophile compact disc players with their experience in
applying state-of-the-art digital signal processing techniques to audio
equipment, resulting in an outstanding compact disc player that takes full
advantage of the capabilities of compact disc.
The 588 uses a precision CD-ROM drive, with the data read
asynchronously and then triple buffered to isolate output timing from the
mechanics of the drive. The audio is also dejittered using very precise
master oscillators to give a clear, open, authoritative sound.
For instructions on setting up the unit turn to Setting up the compact disc
player, page 17. Once the compact disc player has been set up refer to the
next chapter, Using the compact disc player, for information about playing
discs.
Introduction
1
Page 7

The Meridian 500 Series
The Meridian 500 Series is a unique system of digital, analogue,
and video components designed to meet the demand for
absolute quality, ease of use, and lasting value.
The flexibility of the Meridian 500 Series is such that you can
assemble a system as simple or as complex as you need,
perfectly suited to your musical and environmental requirements,
and which can be added to or changed at a later date should
your requirements change.
Each Meridian 500 Series component is housed in a matching
slim line case. Front panel controls provide access to the most
important functions, and the full range of functions is available
from the Meridian System Remote using a simple and intuitive
control interface.
500 Series communications
The Meridian 500 Series includes a sophisticated
communications link, to ensure that any configuration of units
will work together as a fully integrated system.
The 500 Series communications system allows you to control
any combination of units using a single remote, and ensures that
your commands from the remote are interpreted unambiguously.
The communications system also allows you to extend your hi-fi
system into two or three rooms, with the ability to control the
sources in one room from the controller in another room.
Professional features
The 500 Series also includes features for professional users,
including RS232 computer control and balanced connections.
The following pages give examples of three suggested
configurations incorporating the 588 Compact Disc Player, to
illustrate the flexibility of the Meridian 500 Series.
Introduction
2
Page 8
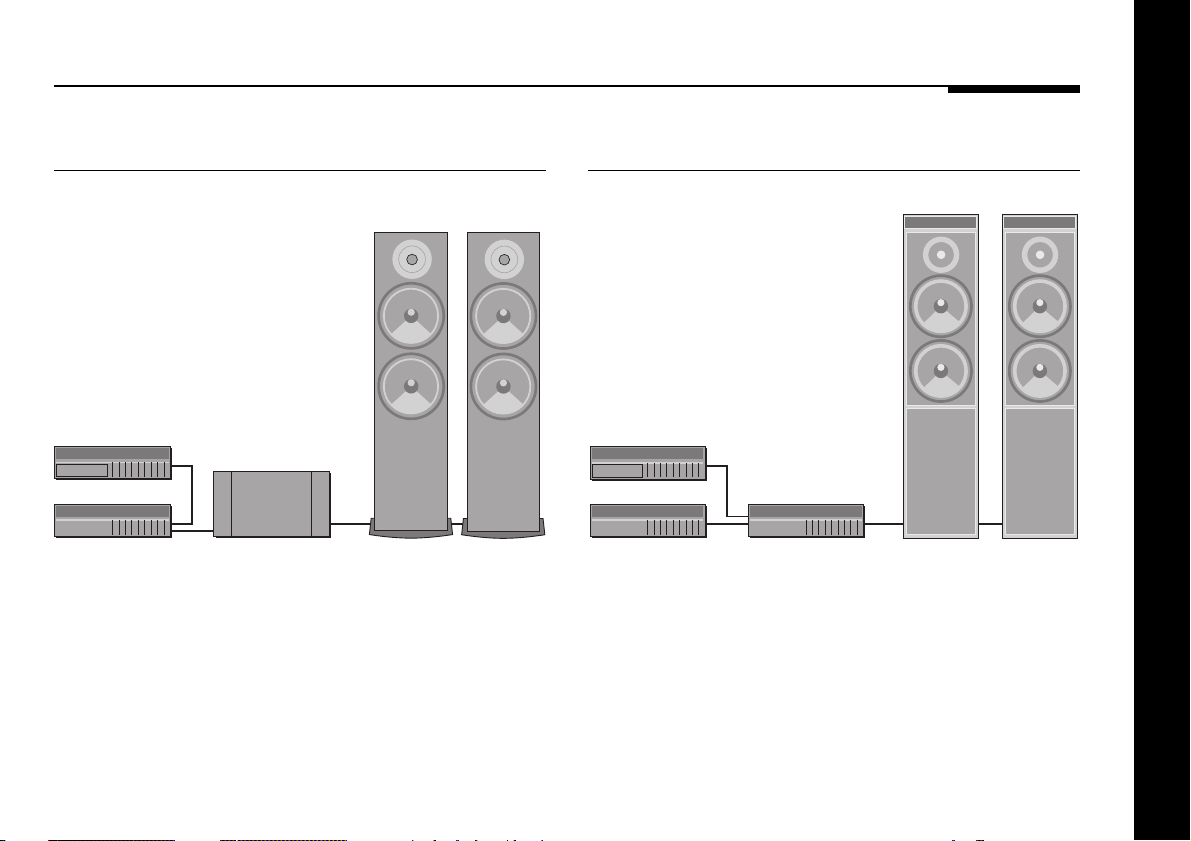
Sample configurations
502 Analogue controller 562 Digital Control Unit
DSP5000DSP5000
588
557
502
The 588 Compact Disc Player is ideally suited for use with the
Meridian 557 Stereo Power Amplifier and analogue
loudspeakers, with control over the volume and source selection
provided by the 502 Analogue Controller. These units provide
balanced inputs and outputs, allowing you to create a
completely balanced system.
588
504
562
The 588 Compact Disc Player provides a precision digital
output, and so is ideal for use with the 562 Digital Control Unit.
This can also cater for conventional analogue sources, and
provide source selection between up to 12 different analogue or
digital sources.
Introduction
3
Page 9
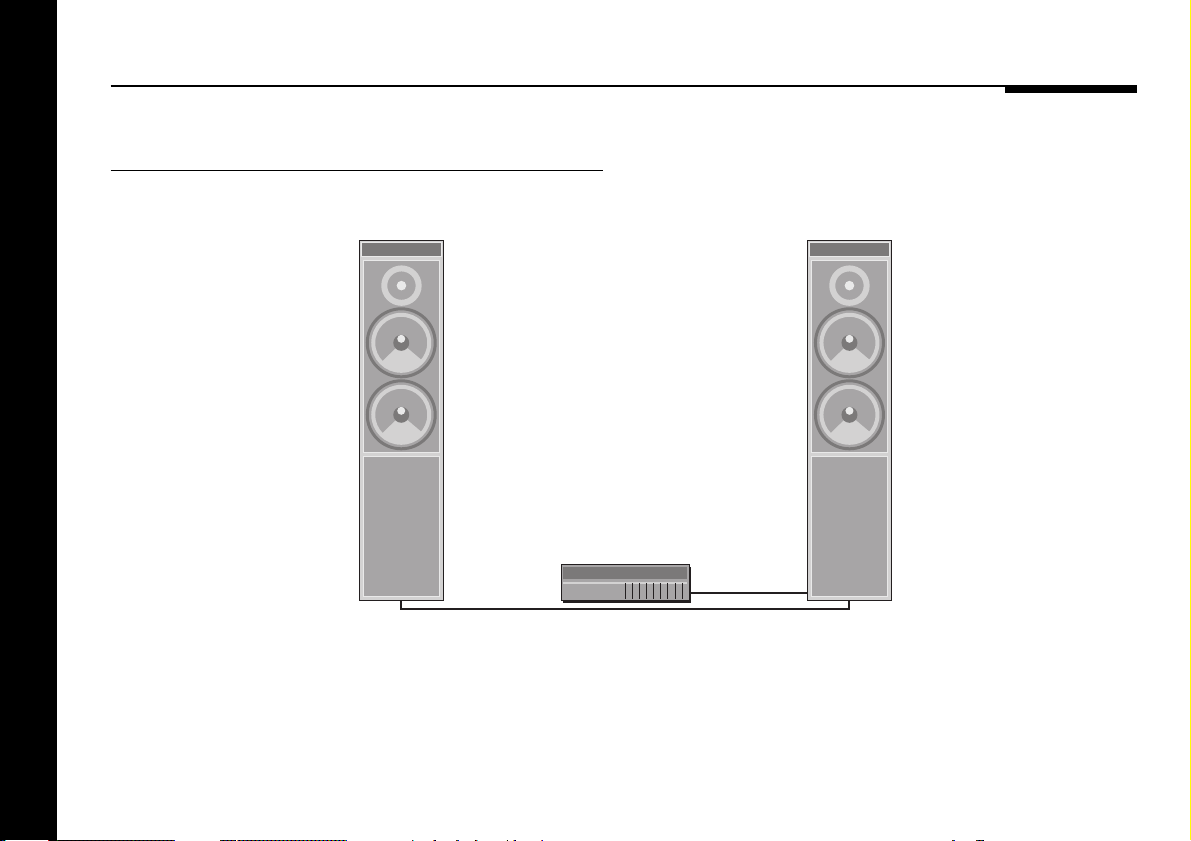
Meridian Digital Music System
DSP5000 DSP5000
588
Introduction
4
The digital output of the 588 Compact Disc Player can be
connected directly to Meridian DSP loudspeakers, as these
include DSP volume and tone controls.
The result is an outstanding music system for those who prefer a
minimum of separate units and interconnecting cables.
Page 10

Specification and accessories
Specification
THD Less than -93dBFS.
Noise Less than -93dBFS.
Mechanism Dual-lens pickup with red laser.
Formats CD Audio (CD-DA) and MP3.
Processing DSP software provides error correction
and on-board decoding for MPEG
Audio.
Conversion 24-bit Delta Sigma.
Finish Black textured enamel and glass.
Dimensions 88mm x 321mm x 332mm
(3.46" x 12.64" x 13.07").
Weight 6.4kg (14lbs).
Digiital outputs 1 x coax SPDIF/IEC1937.
1 x optical output, TosLink to EIAJ,
IEC958 and data compatible.
Analogue outputs 1 x pair balanced outputs XLR sockets,
1=ground, 2=positive phase output,
3=negative phase output.
1 x stereo analogue direct-coupled
design featuring 192kHz
24-bit conversion. All audio outputs
use FIFO and relocking to give
extremely low jitter.
Communications Two 5 pin 240° DIN sockets.
Full RS232 control and status for
custom integration or automation.
Power Universal supply 100-240V, 50-60Hz,
25W.
Introduction
5
Page 11

Available accessories
The following accessories are available from your dealer:
❍ Meridian System Remote.
❍ Power cord Europe.
❍ Power cord Canada and USA.
The Meridian System Remote provides access to all the facilities
provided by the 588 Compact Disc Player, including those
available from the front panel controls. In addition, it allows you
to control any other 500 Series units in your system.
If you have problems purchasing these items, you can order
them direct from Meridian Audio Limited, who can also supply a
range of digital cables suitable for connecting the 588 Compact
Disc Player to other equipment.
Introduction
6
Page 12

Using the compact disc player
This chapter provides a summary of the functions of the compact disc
player in order to identify the controls which you use to operate the unit.
It also describes all aspects of using the compact disc player, beginning
with essential instructions such as switching on and loading a disc, to the
more advanced functions such as programming.
Unless otherwise specified, each function is available from the front panel
or the Meridian System Remote.
Using the compact disc player
7
Page 13
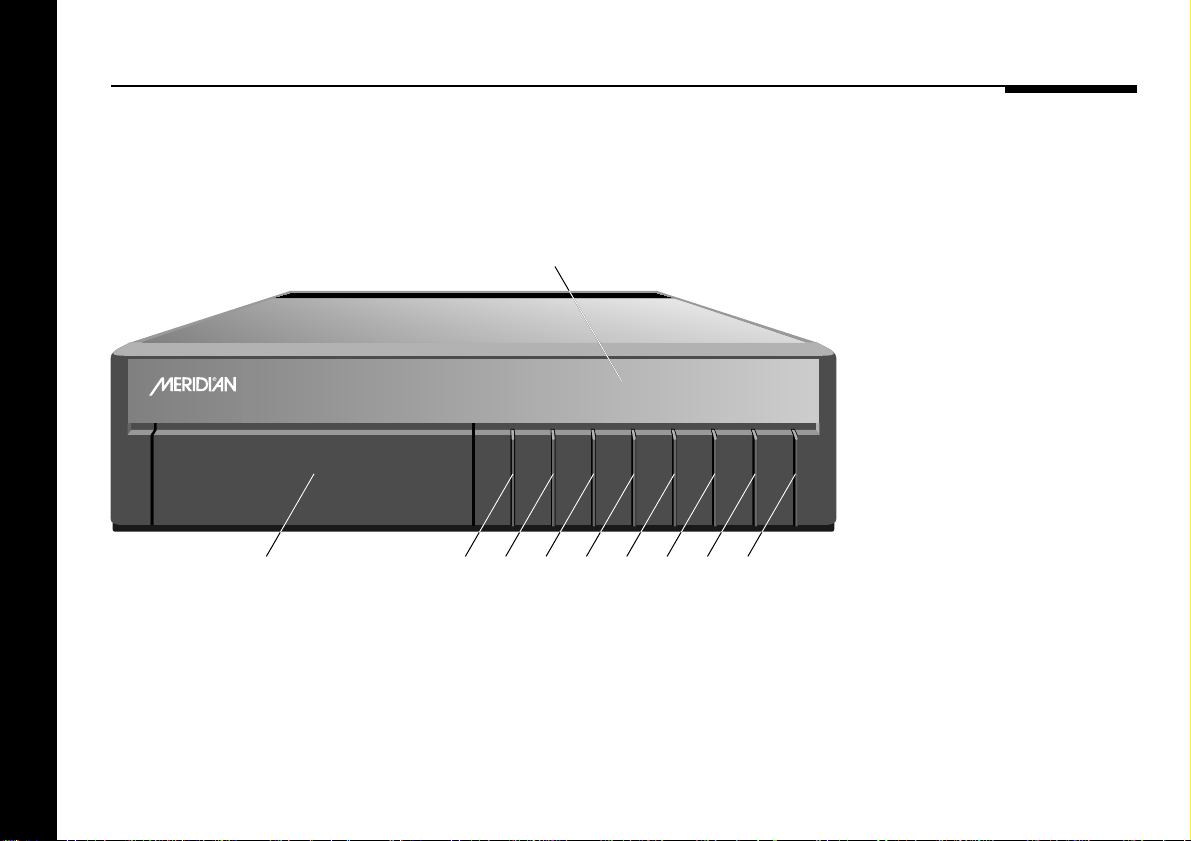
Front panel
1Open
Opens and closes the disc
tray.
BOOTHROYD STUART
24-bit CD Player
Using the compact disc player
8
588
Tray
Display
Play 14
Open > Display [*= ]Off
12345678
2 > (Play)
Plays a selected track, or
moves to the next track.
3 * (Stop)
Stops the disc.
4 = (Pause)
Pauses the disc.
5 Display
Selects the information
displayed.
6 [ (Previous)
Selects the previous track.
7 ] (Next)
Selects the next track.
8 Off
Switches to standby.
Page 14
Switching on and off
During normal use the compact disc player should be left in the
standby state. This uses a negligible amount of electricity, but
ensures that the components operate at maximum efficiency
from the moment you start playing a disc.
If you are not going to use the compact disc player for a period
of several days you should switch the unit completely off, at the
back panel, and disconnect it from the AC power supply.
To switch on from standby
● Press Open, *, or > (front panel), or select a source on the
remote.
● Switch on any other equipment connected to the compact
disc player which is not part of the Meridian 500 Series.
The display will flash for a few seconds. The compact disc
player is then ready for use.
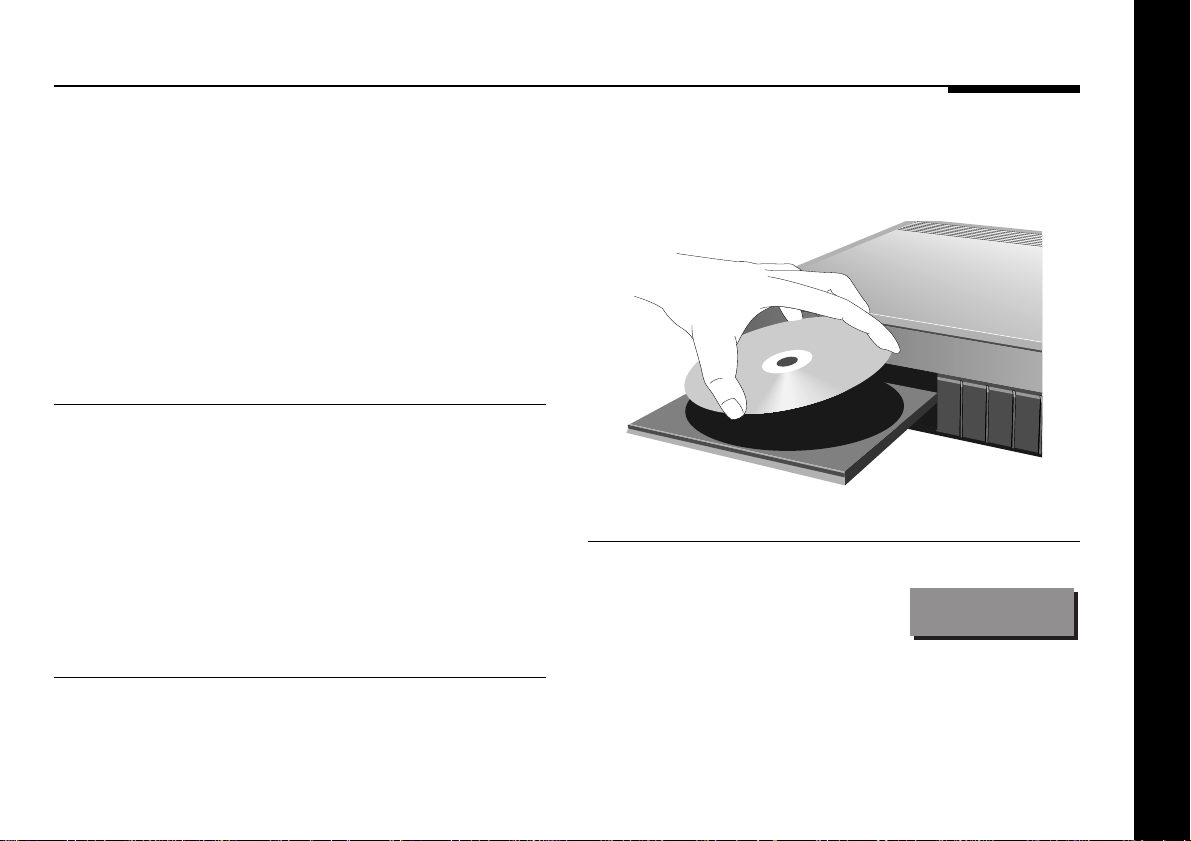
To insert a disc
● Press Open (front panel) or Function * (remote) to open the
tray.
● Place your disc, label side up, in the tray as shown opposite.
● Press Open (front panel), Function * (remote), or > to close
the tray.
To switch to standby
● Press Off.
The display will show:
If you have other Meridian 500 Series equipment connected to
the compact disc player, these units will also switch to standby.
If a disc is currently playing, switching to standby will stop the
disc, and the disc can safely be left in the unit.
.
Using the compact disc player
9
Page 15
Playing a disc
The compact disc player allows you to play an entire disc, or
start playing from any track. While a disc is playing you can go
back to the start of the track or skip to the start of the next track.
If you have programmed a selection, these functions also work
with the selection of tracks you have programmed. For
information about programming; see Programming a selection,
page 13.
To play the disc
● Press > (front panel or remote).
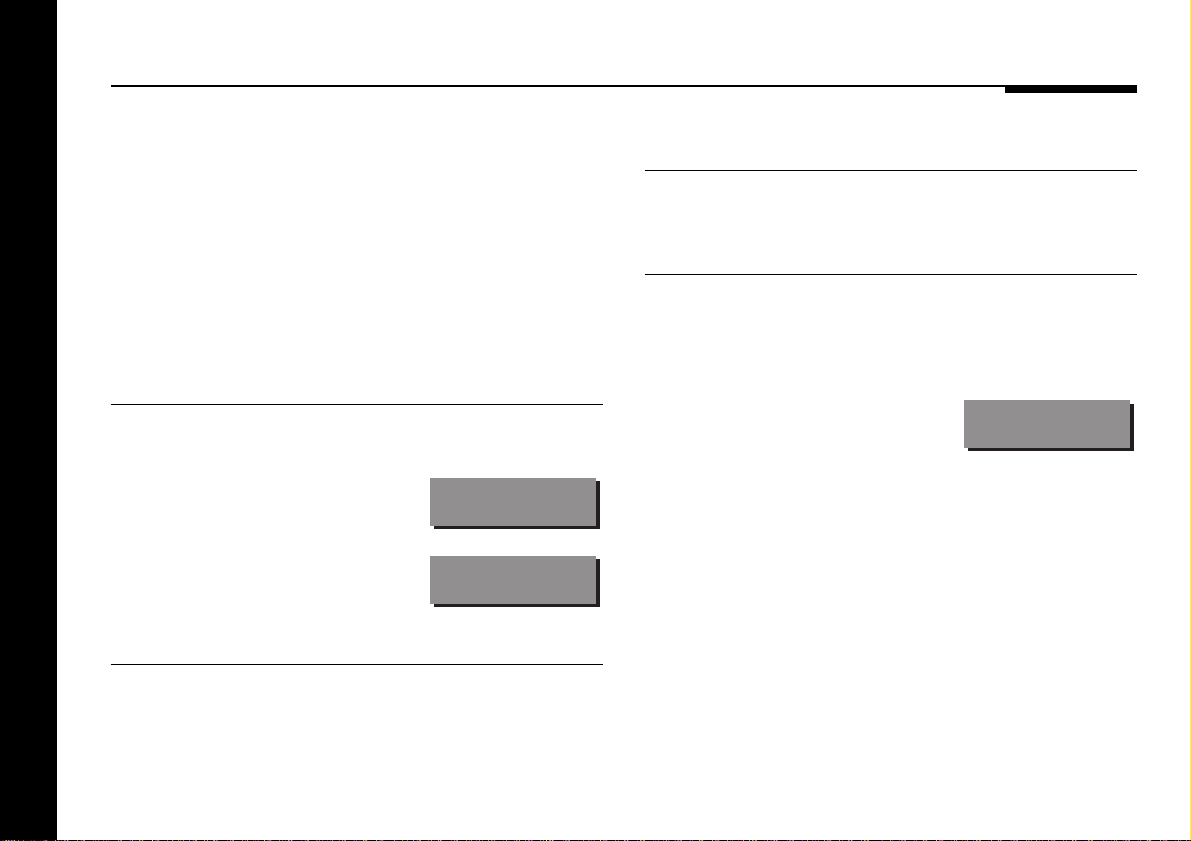
The display will show your
selection:
The display will then show
the track being played:
Play 1
1
To restart the current track
● Press [ (front panel or remote).
To move to the next track
● Press > (front panel or remote).
To play starting from a particular track
● Press ] or [ (front panel or remote) to step through the
track numbers until the track you want to play is displayed, or
type the number of the track (remote only).
For example:
After a short delay the track you have selected will start to play.
If you have other Meridian sources you should ensure that the
588 is the currently selected source.
Track 4
Using the compact disc player
10
Page 16
Stopping and pausing play
You can pause a disc while keeping it spinning, so that you can
resume play instantly.
To stop play
● Press * (front panel or remote).
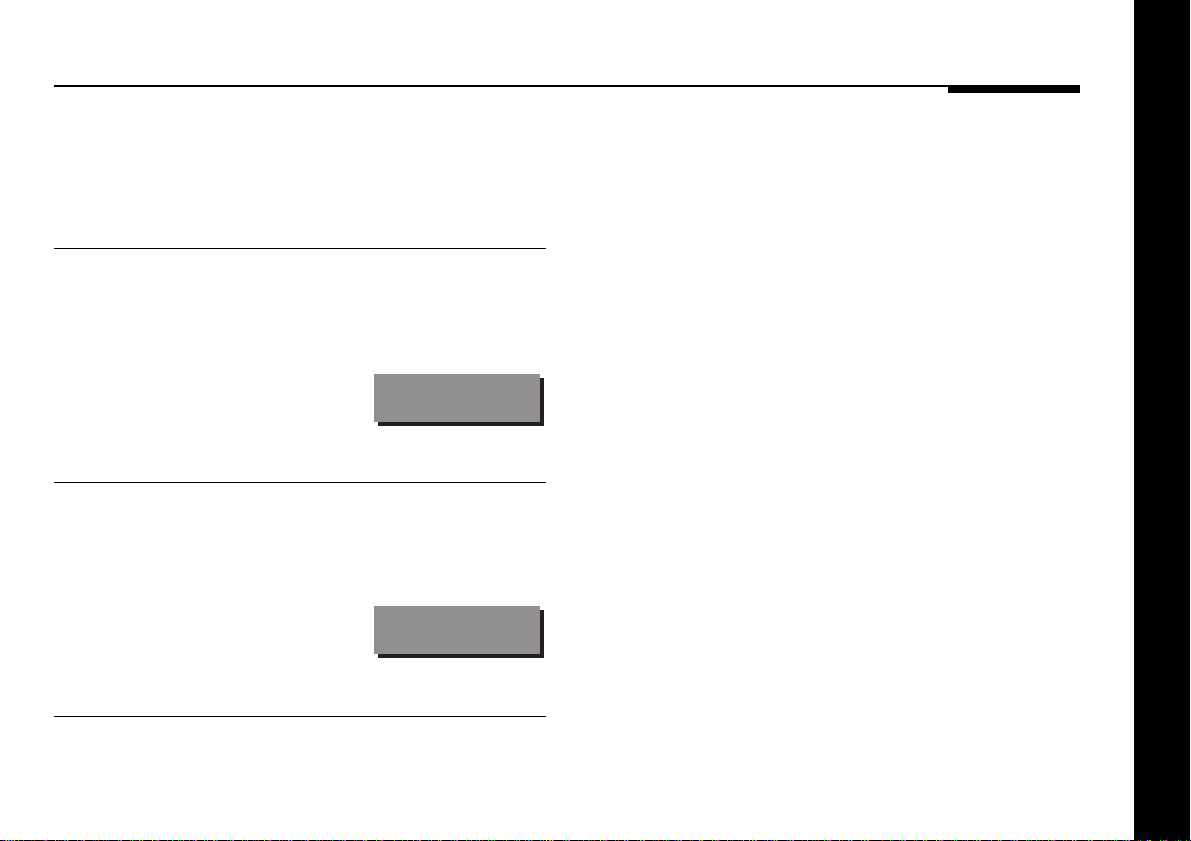
The display will show the total number of tracks on
the disc.
For example:
--2O
To pause play
● Press = (front panel or remote).
The disc will remain spinning and the display will show Pause.
For example:
3 Pause
To continue after pausing
● Press = or > (front panel or remote).
Using the compact disc player
11
Page 17
Repeating play
You can set a disc to play repeatedly, so that when the disc (or
selection) has played, it will begin again from the beginning. This
function is only available from the remote.
To continuously repeat a disc
● Press Repeat (remote) to select between the following
options:
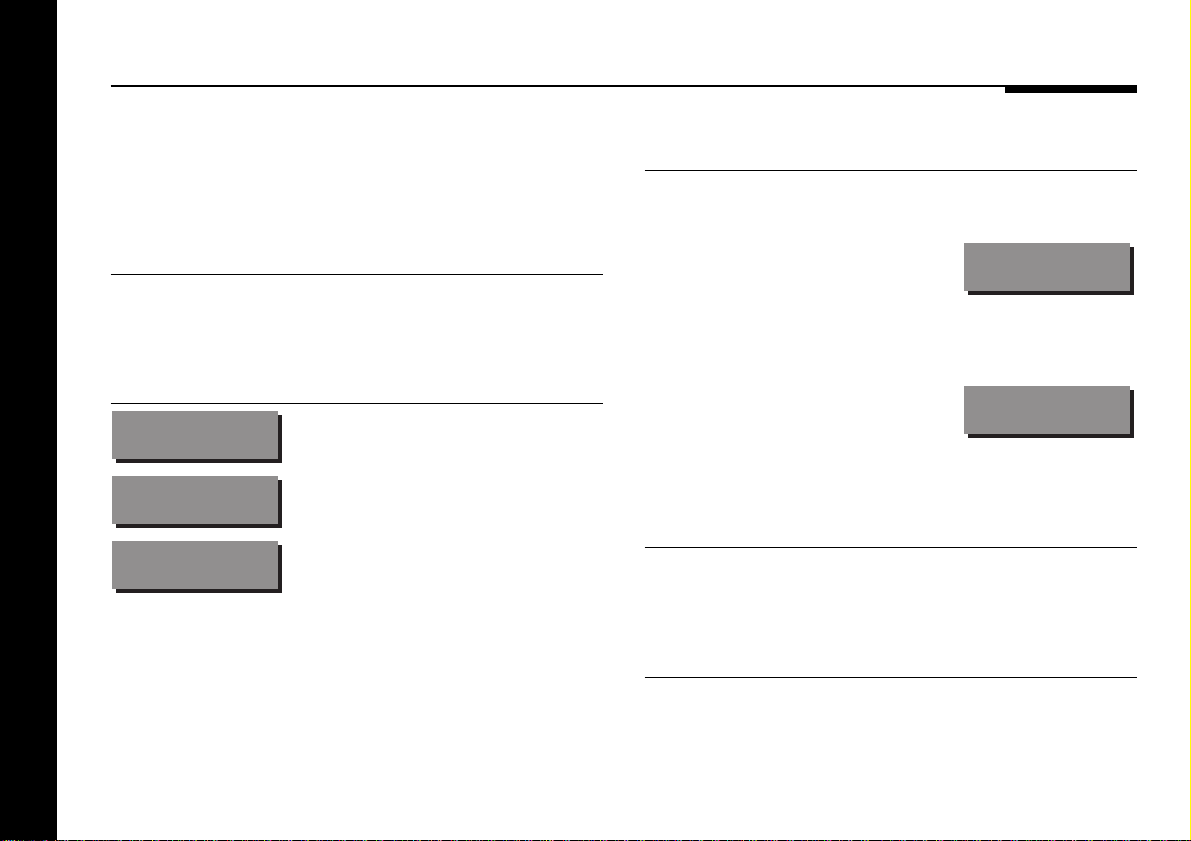
Display Description
Rpt trk
Rpt albm
Rpt disc
Repeat current track.
Repeat album (MP3 discs only).
Repeat entire disc.
To repeat between two positions
● Press A-B (Function Repeat on the remote) at the start of the
section you want to repeat.
The display shows:
● Move to the end of the section you want to repeat.
● Press A-B again.
The display shows:
The section you have specified will be played repeatedly.
Rpt A-
Rpt A-B
To cancel A-B repeat
● Press A-B.
To cancel the repeat function
● Press Repeat (remote) again.
Using the compact disc player
12
Page 18
Programming a selection
You can programme a selection of tracks and then play only the
tracks in your selection.
You can only programme a selection using the remote.
You can programme a selection either by storing the tracks you
want to play, or by clearing the tracks you do not want to play. If
you programme a selection by storing the tracks you want to
hear, you can play the tracks in any order and repeat tracks in
the sequence.
You can programme a selection while the disc is playing, in
which case the selection will be played after the current track
finishes.
Attempting to programme more than
31 tracks will display an error message:
Error
To choose a track to programme
● Press [ or ] to step through the track numbers until the
track you want is displayed, or type the number of the track
you want.
To programme by storing the tracks
you want to play
● Choose the first track you want to play, as described above.
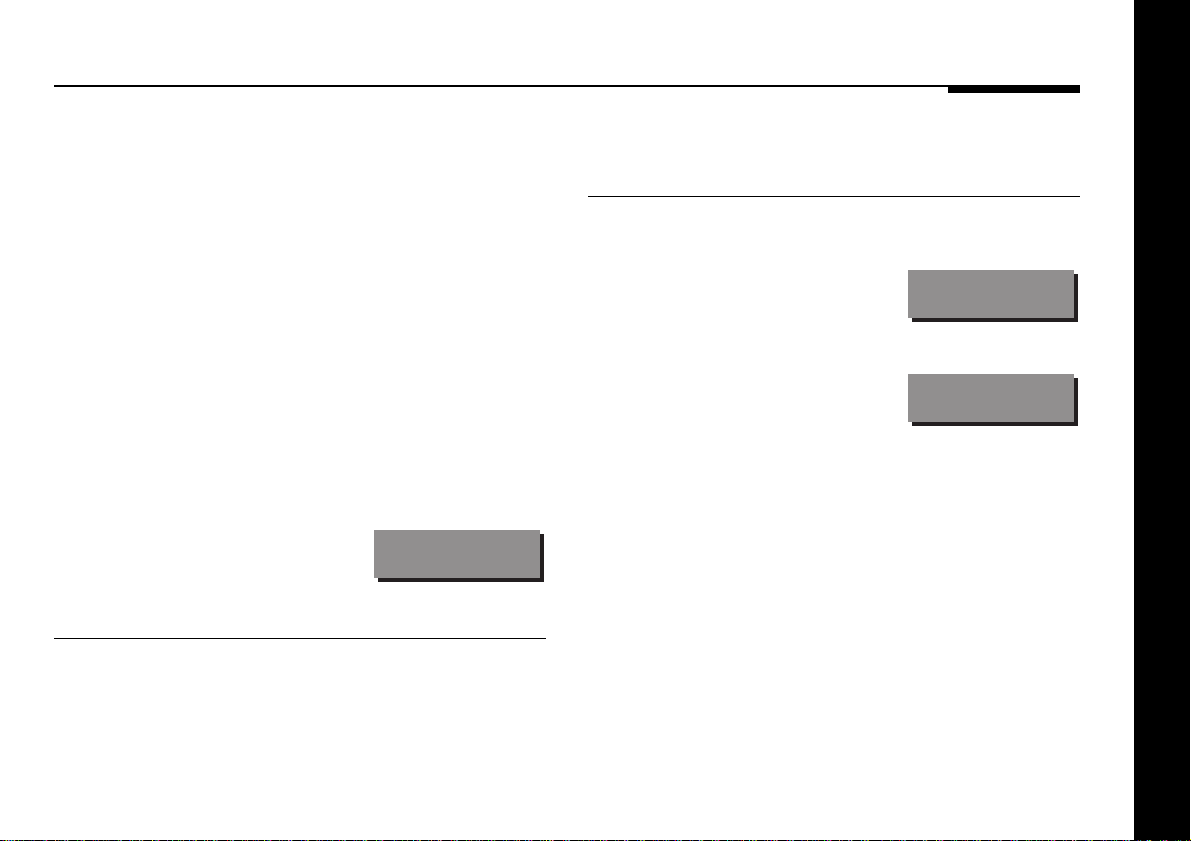
The display will show the track
number; for example:
● Press Store.
The display will change to:
You should store the track within two seconds, or it will begin to
play.
The track will be labelled Store.
All the other tracks are initially programmed not to play, and will
be labelled Clear.
Track 14
Store 14
Using the compact disc player
13
Page 19
To programme by clearing the tracks
you do not want to play
The Clear label will change to Store to indicate that the track is
stored.
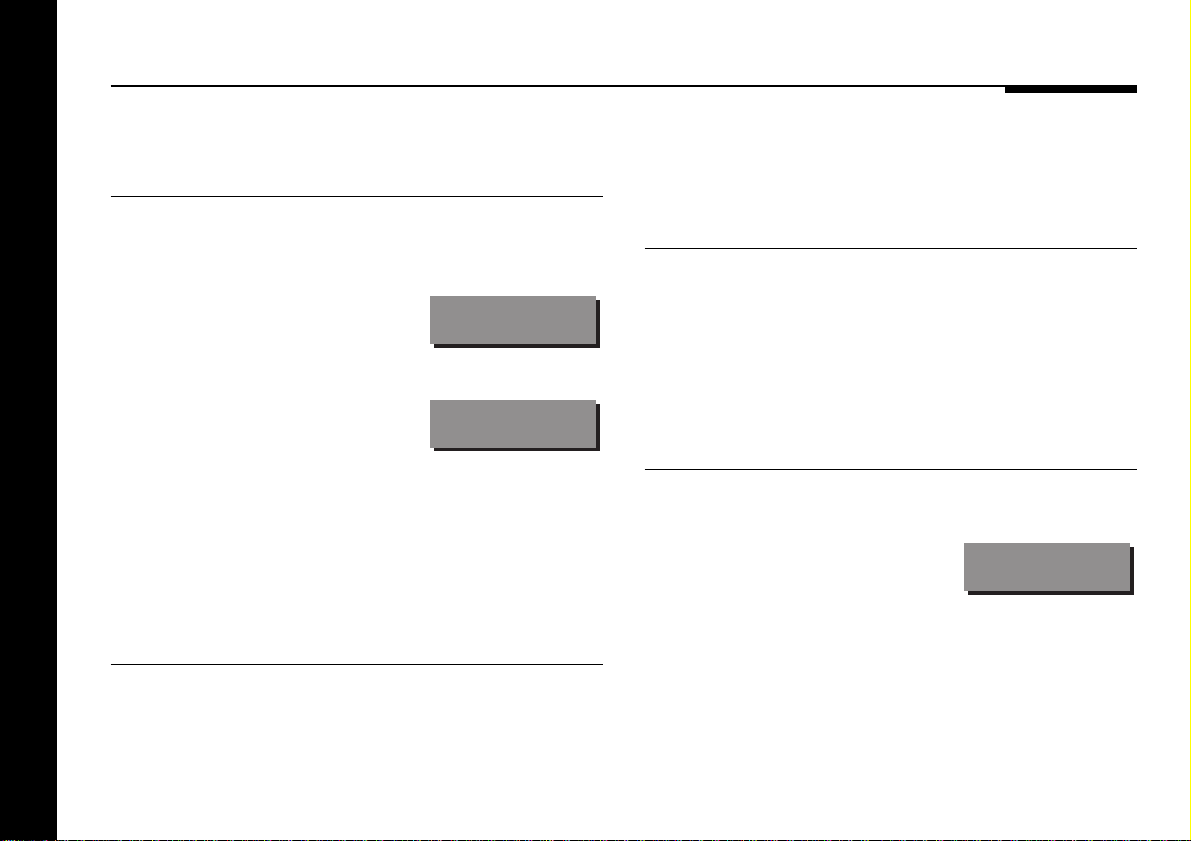
● Choose one of the tracks you do not want to play, as
described above.
The display will show the track
number; for example:
● Press Clear.
The display will change to:
You should clear the track within two seconds, or it will begin to
play.
The track will be labelled Clear. All the other tracks are initially
programmed to play, and will be labelled Store.
To add a track to a selection
● Select the track you want to add, as described above.
Using the compact disc player
14
● Press Store.
Track 12
Clear 12
To remove a track from a selection
● Select the track you want to remove, as described above.
● Press Clear (remote only).
The Store label will change to Clear to indicate that the track has
been cleared.
To clear a programme
● Press * twice (front panel or remote).
The display will show C.P. (Cancel
Programme):
A programme is automatically cancelled if you open the disc
drawer, or press Off.
C.P.
Page 20
Disc information and scanning
To change the display
● Press Display (front panel or remote).
Each time you press the appropriate key, the display will step
between the following display options:
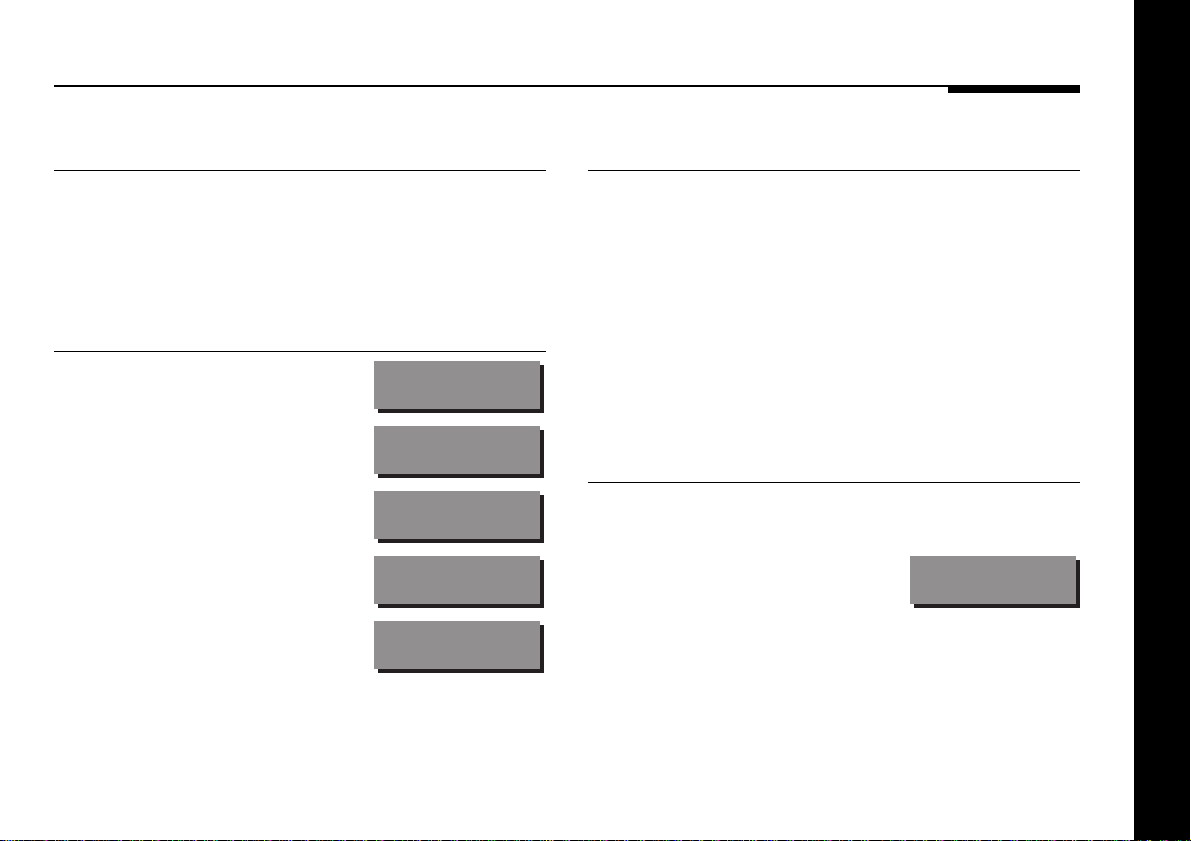
Display Example
Track number. This is the usual
display.
Elapsed time for the whole disc.
Elapsed time for the current track.
Time remaining for the whole disc.
Blank.
14
58:12 14
O:59 14
1:47 14
Scanning a disc
The scan controls allow you to move quickly to any position on
the disc at approximately 20 times normal speed.
During scanning you hear samples of the sound, and the display
automatically changes to show the elapsed time for the whole
disc unless you have already selected one of the other time
displays.
This function is only available from the remote.
To scan through a disc
● Press ˘ or ¯ (remote).
The display will show your position
on the disc; for example:
● Press > (front panel or remote) when you have reached the
position you want to play.
12:37 >>
Using the compact disc player
15
Page 21
Changing the absolute phase
You can use the remote to change the absolute phase of the
analogue output signal, which in some circumstances can give
noticeable improvement in realism.
To display the phase setting
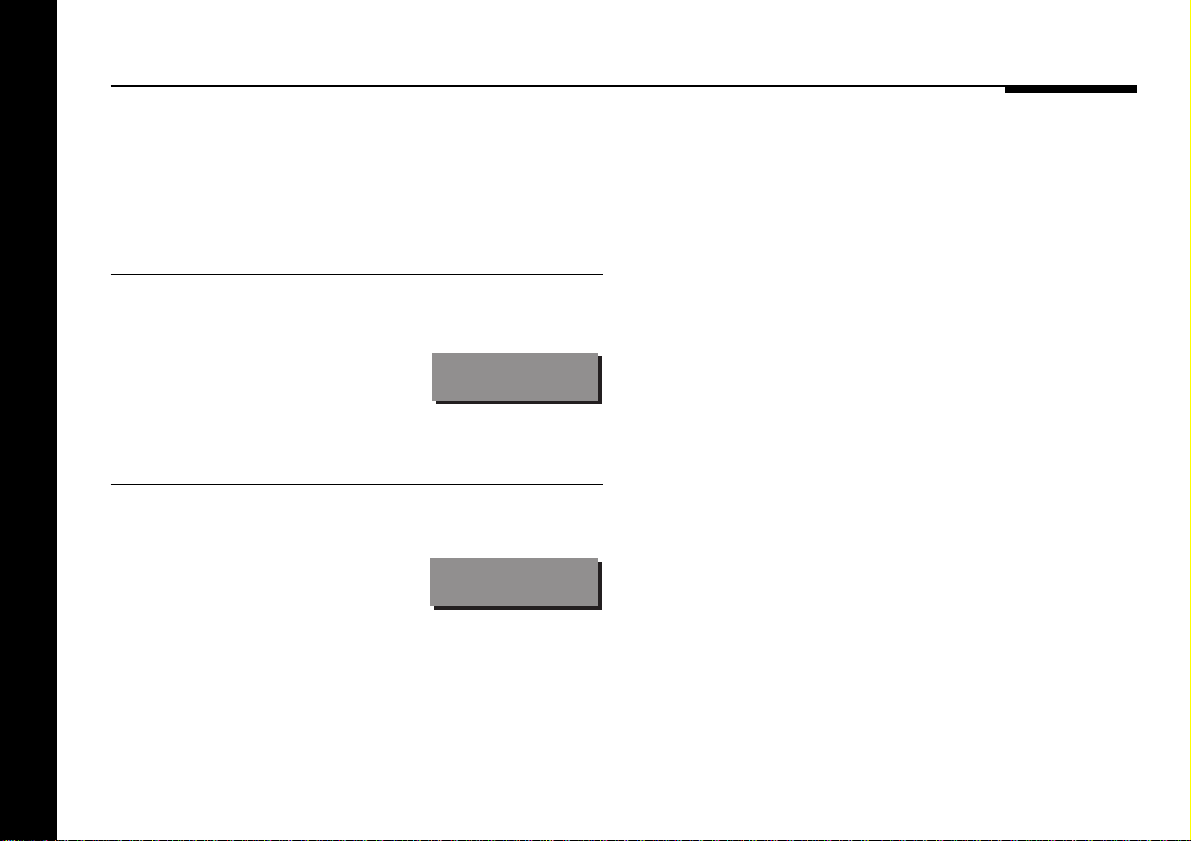
● Press Phase (function off on the remote).
The display will show:
To change the phase setting
● Press Phase.
The display will show the new
phase setting; for example:
Using the compact disc player
16
Phase +
Phase -
Page 22

Setting up the compact disc player
This chapter explains how to install the compact disc player. It describes
what you should find when you unpack the compact disc player, how you
should connect it to your other audio equipment, and the siting
constraints.
You should not make any connections to the compact disc player or to
any other component in your system whilst the AC power supply is
connected and switched on.
Setting up the compact disc player
17
Page 23
Unpacking
The 588 Compact Disc Player comes in a box containing the
following components:
❍Meridian 588 Compact Disc Player.
❍Meridian System Remote.
❍Meridian Comms lead.
❍Power cord.
❍Optical connector blanking plug.
❍This manual.
If any of these items are missing please contact your dealer. We
suggest that you retain the packing in case you need to
transport the unit.
Radio interference
FCC Warning: This equipment generates and can radiate radio
frequency energy and if not installed and used correctly in
accordance with our instructions may cause interference to
radio communications or radio and television reception. It has
been type-tested and complies with the limits set out in Subpart
J, Part 15 of FCC rules for a Class B computing device. These
limits are intended to provide reasonable protection against
such interference in home installations.
EEC: This product has been designed to comply with the limits
set out in EN55013 and EN55020C.
Setting up the compact disc player
18
Page 24

Positioning the compact disc player
Safety warnings
❍Do not expose the unit to dripping or splashing.
❍Do not place any object filled with liquid, such as a vase, on
the unit.
❍Do not place naked flame sources, such as lighted candles,
on the unit.
To avoid overheating
Do not position the compact disc player:
❍In direct sunlight.
❍Near heat sources, such as a radiator.
❍Directly on top of heat producing equipment, such as a power
amplifier.
Ensure that air can flow through the cooling slots on the base
and top cover.
To avoid interference
Do not position the compact disc player:
❍Near strong magnetic radiation, such as near a power
amplifier.
❍Near to a television, or where connecting cables may be
subject to or cause interference.
Setting up the compact disc player
19
Page 25
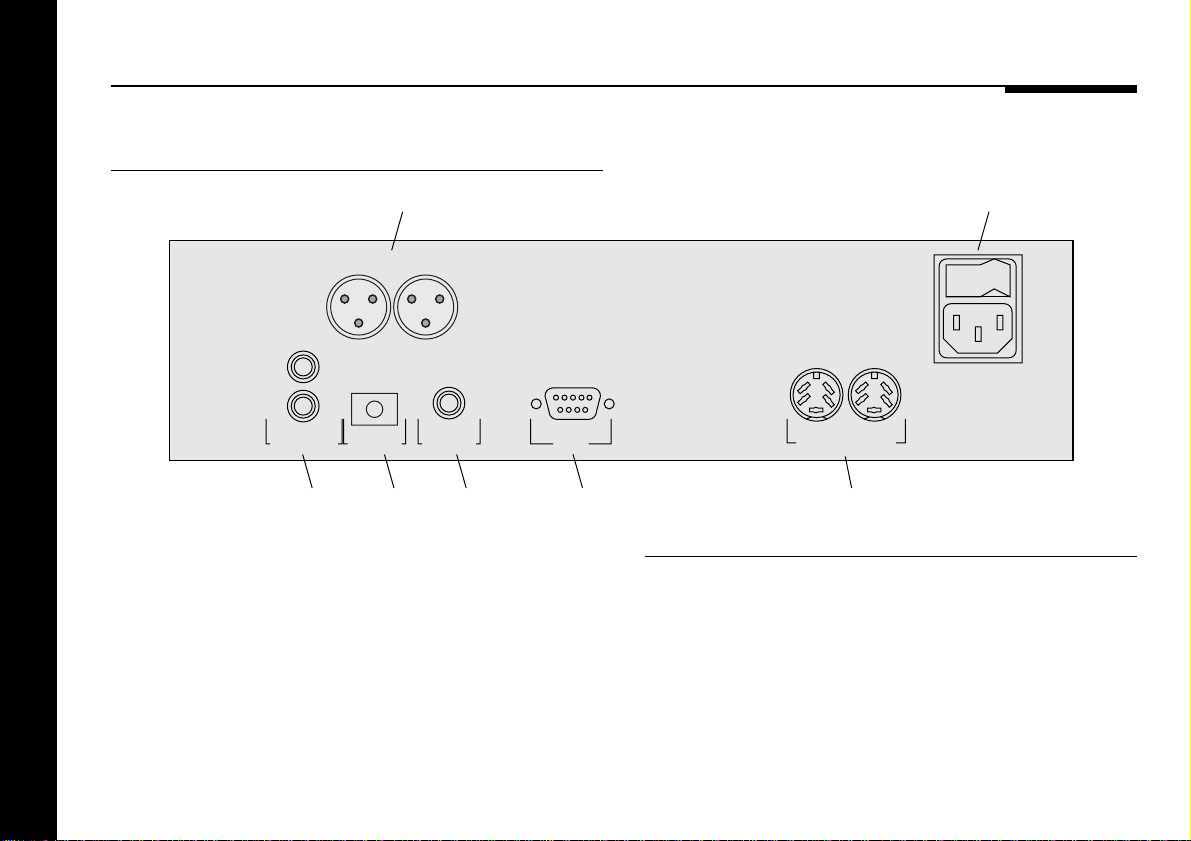
Connecting the compact disc player
Back panel
The compact disc player provides two analogue and two digital
outputs to allow you to choose the highest-quality method of
connection to your system.
The 588 Compact Disc Player produces an extremely low-noise
low-jitter electrical digital output, and this is the recommended
method of connection to digital equipment.
Setting up the compact disc player
20
Balanced
outputs
BALANCED
RIGHT
OUTPUT
RIGHT
ANALOGUE OUT DIGITAL OUT
OPTICAL OUT
Analogue
outputs
Optical
output
BALANCED
LEFT
OUTPUT
Digital
output
Power
MERIDIAN COMMSRS232
RS232
connection
Comms
Audio connections
The table opposite gives details of the alternative audio outputs.
The digital connections should be made with high quality 75Ω
screened cable. Suitable cables are available from Meridian. We
do not recommend using audio cables which do not have
adequate shielding or the correct impedance, or cables intended
for UHF applications, as these do not provide adequate
shielding in the 1–30MHz region.
OFFON
Page 26

The analogue connections should be made using high-quality
screened cable, taking care to connect the left and right
channels correctly.
Use this output To connect to this
DIGITAL OUT Meridian DSP Loudspeakers, a D/A
converter, or a digital preamplifier,
using digital cable.
OPTICAL OUT A D/A converter or digital preamplifier,
using optical fibre.
ANALOGUE OUT A 501 Control Unit, or other audio
equipment, using conventional
analogue audio leads.
BALANCED OUTPUTS A 502 Analogue Controller, or other
equipment with balanced analogue
inputs.
Communications connections
The following table gives details of the communications
connections:
Use this connection To connect to this
COMMS Other Meridian 500 series
equipment, or Meridian DSP
loudspeakers.
RS232 connection For future expansion, to allow
the 588 to be interfaced to a
computer. Contact your dealer
for more information.
Setting up the compact disc player
21
Page 27
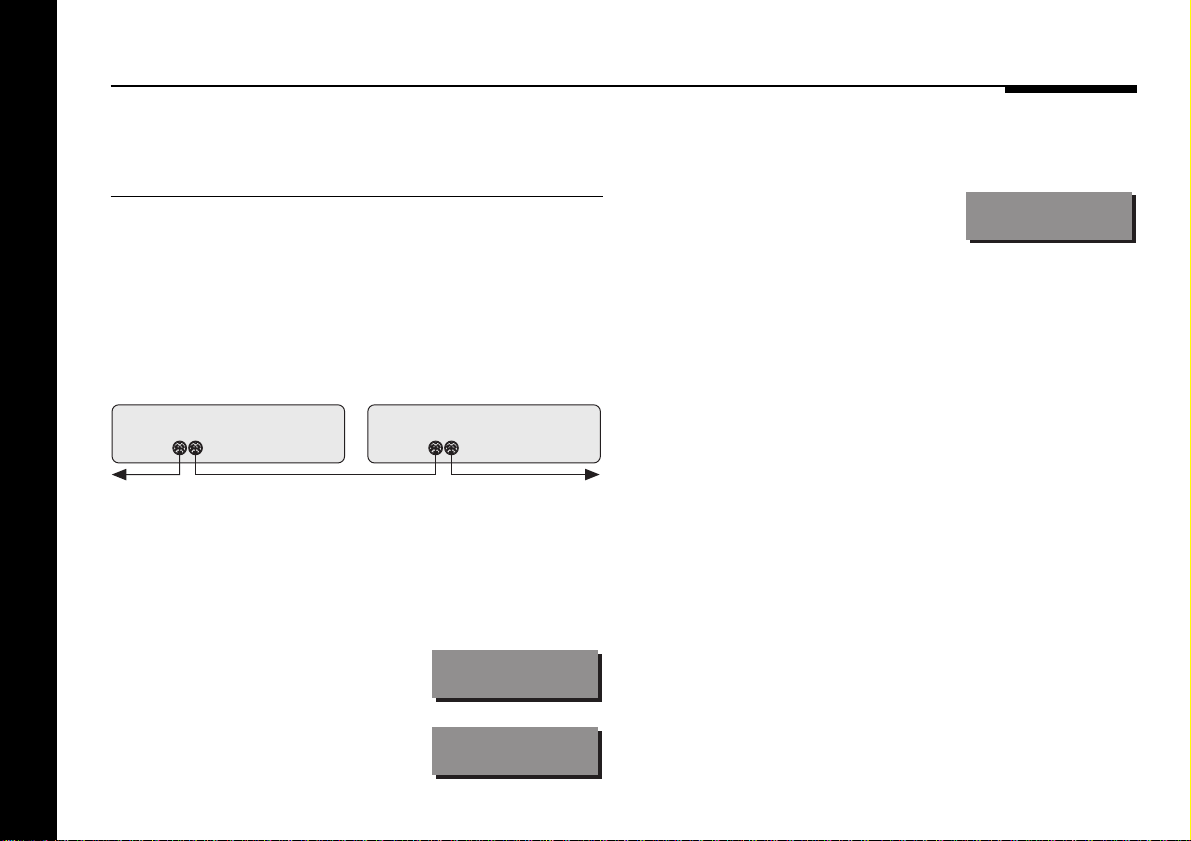
To connect to other Meridian 500
Series equipment
● Connect one of the COMMS sockets on the back panel of the
compact disc player to one of the COMMS sockets on
another 500 Series unit, using the 500 comms lead provided.
This is the unit that will respond to the remote.
All the other units will be configured
as non-controllers, and display:
Your system is now set up and ready for use.
N.Con.
The sequence in which you connect the units is not important.
588 CD Player 500 Series unit
COMMS COMMS
Then configure the units with the following automatic setup
procedure:
● Switch all the units to standby.
● Press Clear (remote).
Each unit will display:
Setting up the compact disc player
22
One unit will then be designated
as the controller, and display:
● If for any reason the automatic setup does not give the
configuration you want, restore the default operation by
selecting the standard type; see Choosing standard settings,
page 26.
Note: Do not, under any circumstances, connect any equipment
other than Meridian 500 or 800 Series to the socket marked
COMMS on the back of the compact disc player.
Auto
Con.
Page 28
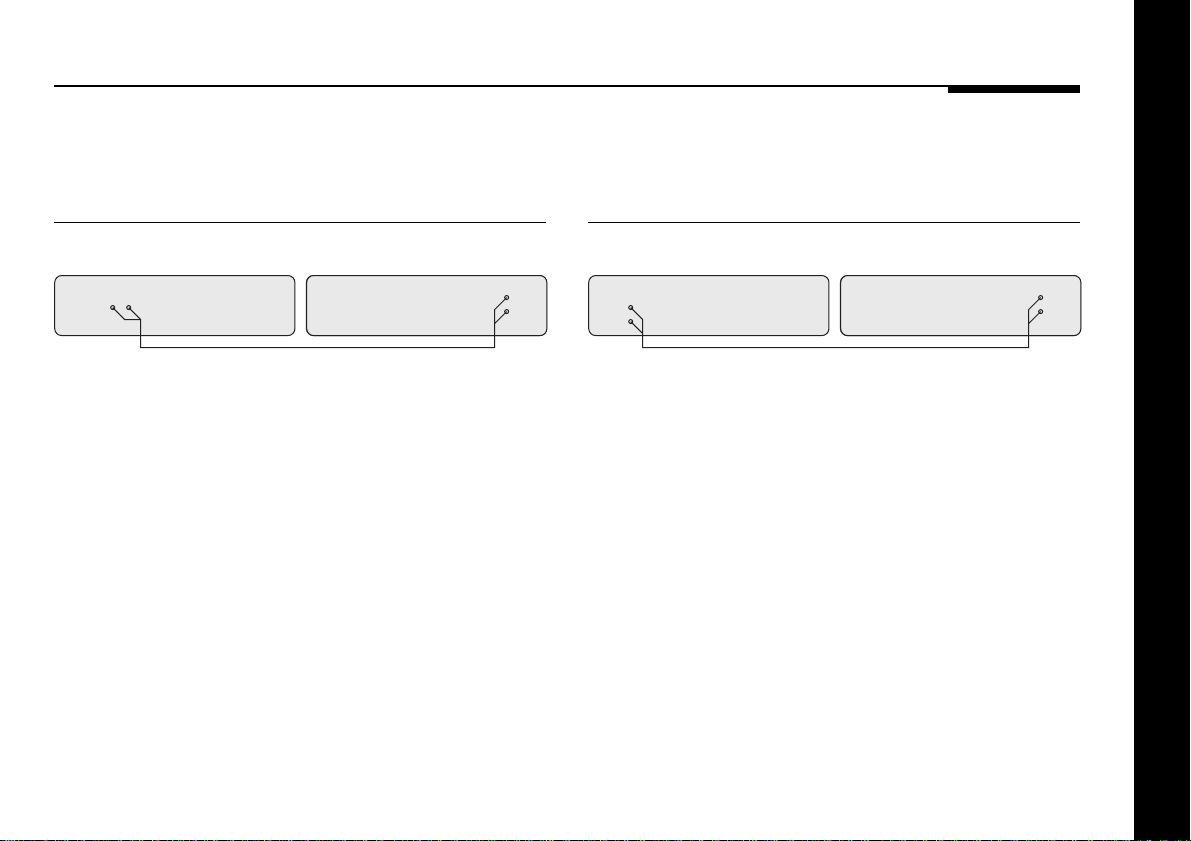
Connecting audio
To connect to a preamplifier with
balanced inputs (eg Meridian 502
Analogue Controller)
502 Analogue Controller588 CD Player
BALANCED
OUTPUTS
XLR leads
● Connect the BALANCED outputs from the 588 Compact Disc
Player to a suitable pair of balanced inputs on the
preamplifier, such as the CD inputs, using XLR leads.
CD
To connect to a preamplifier with
phono inputs (eg Meridian 501 Control
Unit)
501 Control Unit588 CD Player
ANALOGUE
OUT
Phono lead
● Connect the ANALOGUE OUT connections from the 588
Compact Disc Player to a suitable pair of audio inputs on the
preamplifier, such as the CD inputs, using phono leads.
CD
Setting up the compact disc player
23
Page 29
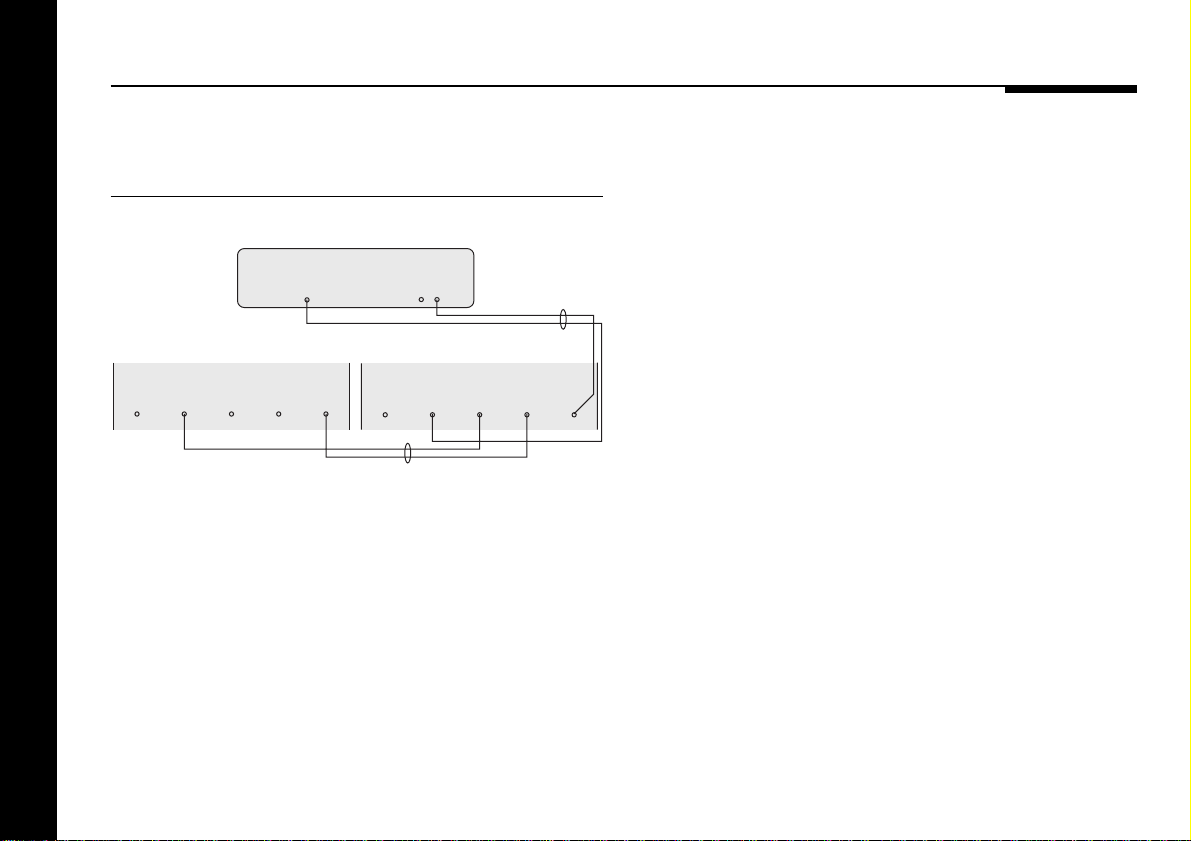
To connect to Meridian DSP
loudspeakers
DSP Loudspeaker – Main R (slave) DSP Loudspeaker – Main L
DIGITAL INPUTS
21
DIGITAL
OUTPUT
● Connect the DIGITAL OUT from the 588 Compact Disc Player
to DIGITAL INPUT 1 on the master DSP loudspeaker, using an
M5 lead.
● Connect one of the COMMS sockets on the 588 Compact
Disc Player to the COMMS input on the master DSP
loudspeaker, using an M5 lead.
● Connect the DIGITAL and COMMS output from the left DSP
loudspeaker to the DIGITAL and COMMS INPUTS on the
Setting up the compact disc player
slave DSP loudspeaker, using an S5 lead.
COMMS
OUTPUT INPUT
588 CD Player
DIGITAL
OUT
S5 lead
COMMS
DIGITAL INPUTS
21
DIGITAL
OUTPUT
M5 lead
COMMS
OUTPUT INPUT
24
Page 30

Configuring the compact disc player
Many advanced aspects of the 588 Compact Disc Player can be
configured to alter the way it operates with the other Meridian equipment
in your system.
These settings are initially set to standard values, which are suitable for
most situations, and this chapter describes how to restore the standard
settings.
It then gives details of the more advanced settings and explains how to
change them.
Page 31
Choosing standard settings
The compact disc player provides a standard setting, called
Type 1, which configures the 588 into the most commonly
needed configuration.
Choosing Type 1 overrides any other configuration you may
have performed, and so can be used to reset the configuration
of the unit.
To restore the standard settings
● Switch the 588 to standby.
● Hold down Off (front panel).
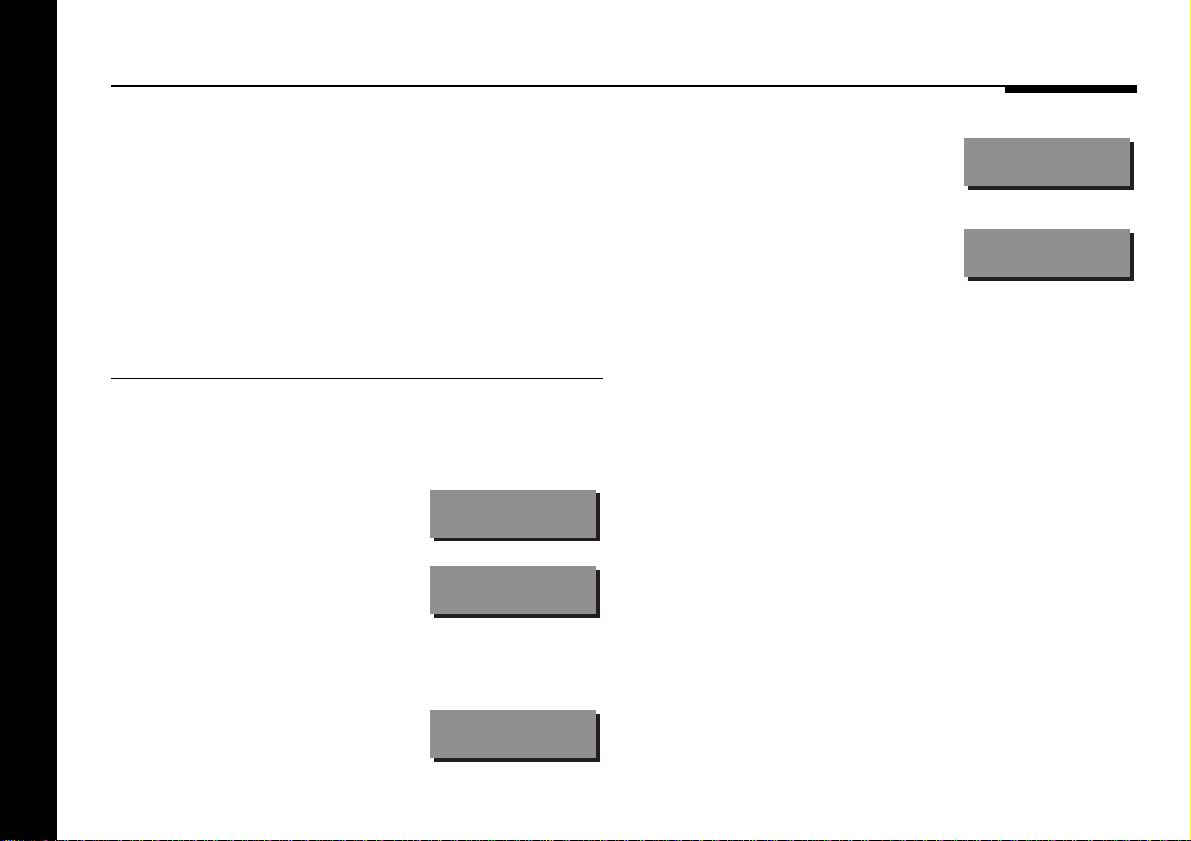
After a short delay the display
will show:
Followed by:
● Press [ or ] or on the front panel to confirm that you want to
reset the configuration.
Type...
Type
● Wait until the display shows:
The display then shows:
● Press Off to switch back to standby.
● Switch on again to use the 588 with the standard
configuration.
Wait...
Type 1
Configuring the compact disc player
26
The display shows:
Type 1
Page 32
Specifying information about your system
You can configure the operation of the 588 Compact Disc Player
to suit the way your system is set up, and the way in which you
want to use it.
These settings are configured automatically to appropriate
values when you choose the standard type settings, and you
should not normally need to alter them; see Choosing standard
settings, page 26.
To configure the compact disc player
● Switch the 588 to standby.
● Hold down the Display key on the front panel.
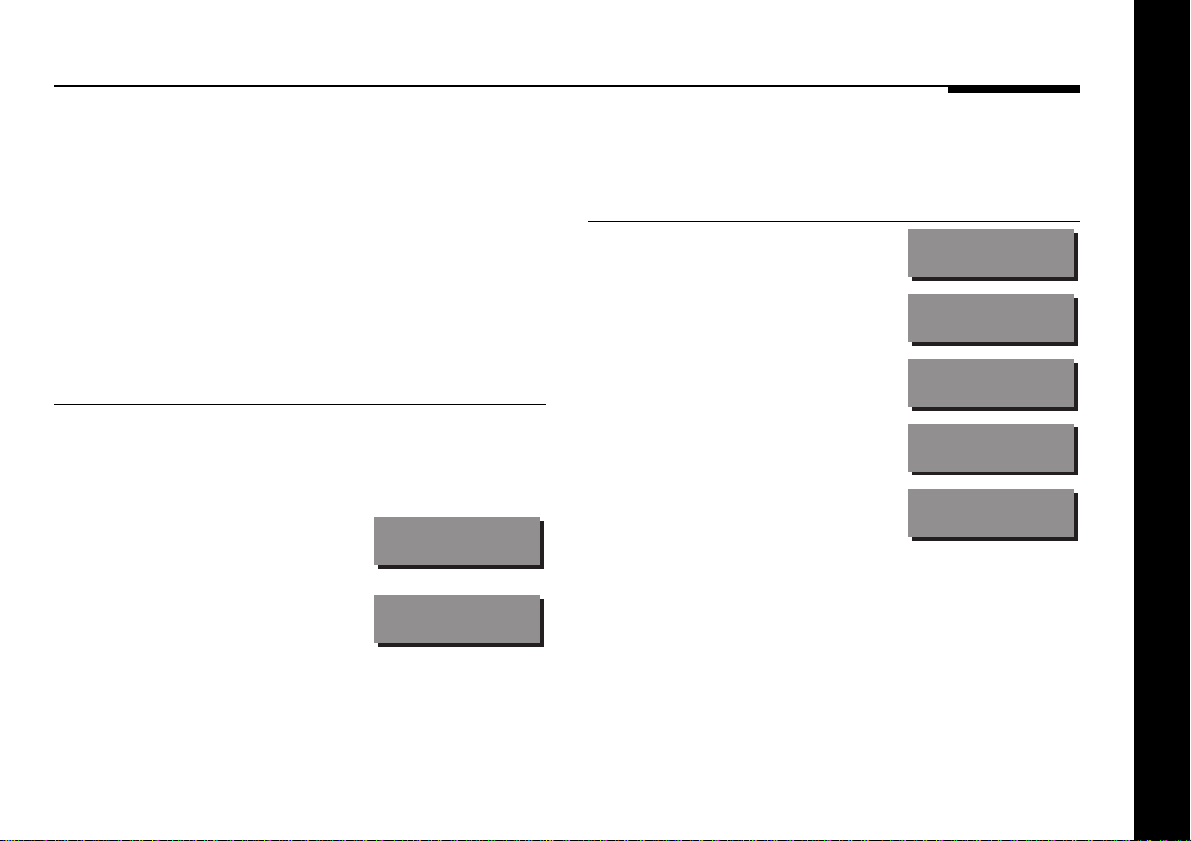
The display will initially show the
software revision number, then:
It will then show the first
configuration option:
● Press Display to move between the options.
● Press [ or ] to change the value of the current option.
Config
Auto
The table below shows the options you can configure:
Option Initial Value
Controller mode (Auto, Con, or NCon).
System address (1–8).
Product address (1–8).
Start source.
Volume displays (Y or N).
Auto
S.A. 1
P.A. 1
S.S. CD
Vol N
Configuring the compact disc player
27
Page 33

Configuring the compact disc player
28
Page 34

Troubleshooting
This chapter provides suggested solutions to typical problems that may
occur when setting up or using the compact disc player.
If you are still not able to resolve a difficulty with the help of this guide and
the suggestions in the following pages, please contact your Meridian
dealer or Meridian Audio Ltd.
Troubleshooting
29
Page 35

Troubleshooting
No lights are displayed when
switching on
❍Check that your AC power supply is connected correctly.
❍Check that the ON OFF switch on the back panel is in the ON
position.
❍Check that the fuse on the compact disc player back panel
and the fuse in the unit’s power plug have not blown; see To
change the mains fuse, page 33.
There is no sound when playing a disc
❍Check that your preamplifier is switched on, and the volume is
at an appropriate level.
❍Check that the compact disc player is connected correctly to
the other components of your system; see Connecting the
compact disc player, page 20.
❍Check that the correct source has been selected on your
preamplifier.
❍Check that the compact disc player is not paused.
There is interference on the radio and/
or television when the compact disc
player is switched on
Before following the steps below, ensure all units are switched
off.
If this equipment does cause or suffer from interference to/from
radio or television reception then the following measures should
be tried:
❍Reorient the receiving aerial (or antenna) or route the antenna
cable of the receiver as far as possible from the 588 Compact
Disc Player and its cabling.
❍Ensure that the receiver uses well-screened antenna cable.
❍Relocate the receiver with respect to the compact disc player.
❍Connect the receiver and this product to different AC outlets.
Troubleshooting
30
❍Try playing another disc. If this disc works, check the problem
disc for signs of dirt or damage.
Page 36

The display shows No disc when
attempting to play a disc
A single key press on the remote
causes multiple entries
❍Check that the disc is positioned correctly in the drawer, with
the label uppermost; see To insert a disc, page 9.
❍Try playing another disc. If this disc works, check the problem
disc for signs of dirt or damage.
The display shows Error when
attempting to programme a selection
❍Check that the disc includes the track number you are
attempting to programme.
❍Check that you have not already programmed 31 tracks, the
maximum number.
For example, you press 2 and the display shows Track 22. This
is because another Meridian unit on the Comms bus is also
sending the command.
● Check that the auto setup procedure worked correctly;
see To connect to other Meridian 500 Series equipment,
page 22.
● Try selecting NCon as the Controller mode; see Specifying
information about your system, page 27.
Troubleshooting
31
Page 37

Creating MP3 discs
MP3 discs can be created from a computer using appropriate
MP3 encoding software and a CD-ROM writer.
Generate the MP3 files with a date rate of at least 128Kbits per
second. Group the tracks into folders to create separate albums
on the disc. Do not create folders within the folders.
Tracks and albums are played in the order in which they are
recorded onto the CD-ROM. Usually this will be in alphabetical
order of filename.
Note: Multisession discs are not supported.
Troubleshooting
32
Page 38
Maintenance
Cleaning
When cleaning the compact disc player bear in mind that the
front of the compact disc player is plastic, and the display panel
and lid are glass.
Disconnect the power cord before cleaning the unit.
Note: Do not use abrasive cleaners on any part of the compact
disc player.
To clean the case, display panel, and
keypad
● Use a slightly damp cloth.
Ensure that no water is allowed to get inside the case, and do
not reconnect the power until you are certain that the compact
disc player is completely dry.
To clean the audio connections
The audio sockets on the back of the compact disc player are
gold-plated and need no cleaning if gold-plated phono plugs are
used. Otherwise, it is recommended that you unplug and
reconnect the plugs at least once a year. A proprietary contact
cleaner can be used to some advantage.
The electrical digital output should be treated in a similar way.
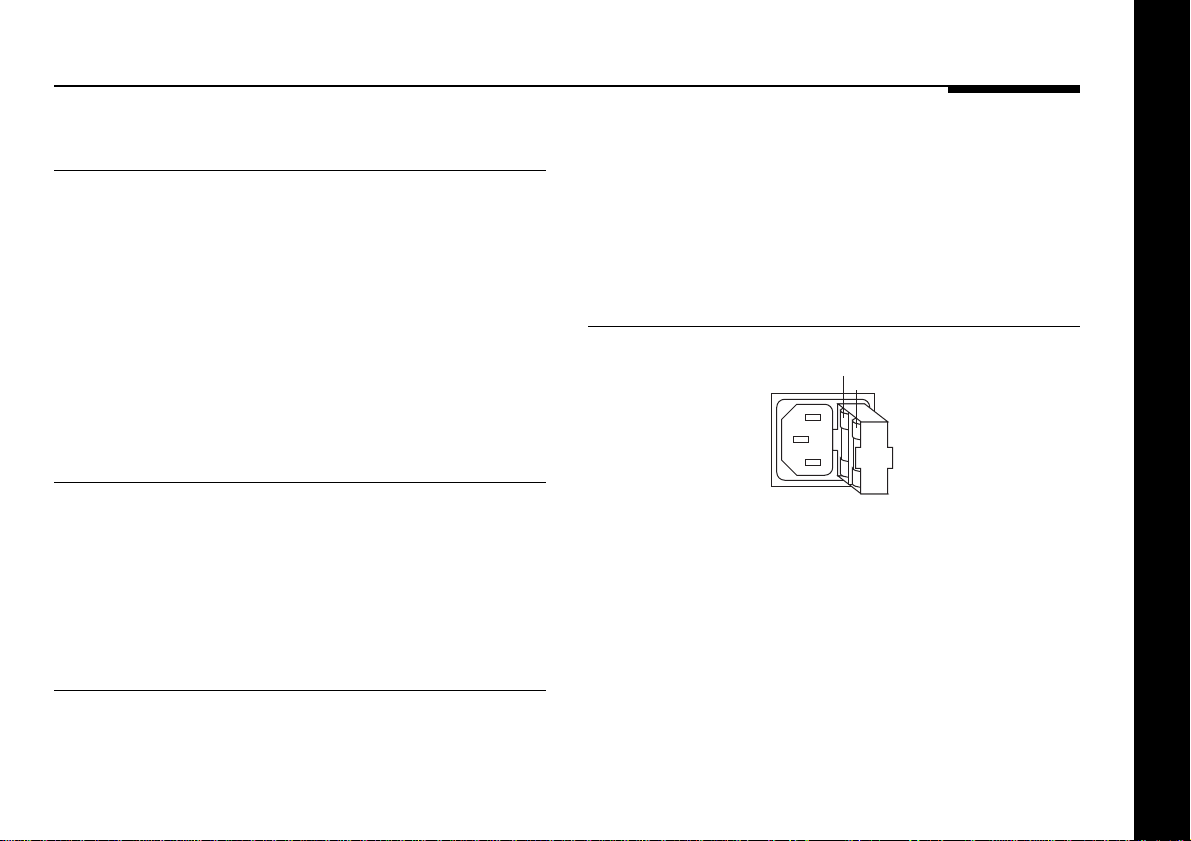
To change the mains fuse
Fuse
Spare
● Remove the mains connector, and pull out the drawer next to
the power input to access the fuses.
Troubleshooting
Before replacing a blown fuse, if possible ascertain the cause of
the failure.
The fuse drawer includes a spare fuse. This should be replaced
by a fuse of the same rating.
33
Page 39

Service and guarantee
Service
The Meridian 500 Series of hi-fi components have been carefully
designed to give years of untroubled service. There are no userserviceable parts inside the case, nor do the units require any
form of maintenance.
In the unlikely event that your compact disc player fails to
function correctly, it should be returned, in its original
packaging, to your Meridian dealer.
In case of difficulty within the UK or USA please contact the
appropriate sales and service address shown on page ii.
In case of difficulty outside the UK or USA, contact the importing
agent for the territory. A list of Meridian agents abroad is
available from Meridian Audio.
No responsibility can be accepted for the compact disc player
whilst in transit to the factory or an agent, and customers are
therefore advised to insure the unit.
When seeking service under guarantee, proof of the date of
Troubleshooting
purchase will be required.
Guarantee
The 588 Compact Disc Player is guaranteed against defects in
material and workmanship for 2 years from the date of purchase.
The guarantee is void if the 588 Compact Disc Player has been
subject to misuse, accident, or negligence, or has been
tampered with or modified in any way without the written
authorisation of Meridian Audio Limited. Note that connecting
anything other than the correct network lead to the COMMS
sockets may cause damage to the 588 Compact Disc Player
which will not be covered by this guarantee. Attempted servicing
by unauthorised people may also invalidate this guarantee.
Labour and carriage charges are not covered unless by local
agreement.
Outside the UK, local warranty liability is restricted to equipment
purchased within the territory. Our agents abroad are only under
contractual obligation to service under guarantee equipment
sold through them. They are entitled to make a non-refundable
charge for any service carried out on other equipment.
This guarantee does not limit your statutory rights within the
United Kingdom.
34
Page 40

Index
A
absolute phase 16
accessories 6
analogue outputs 21
audio connections 20
audio outputs 20
analogue 21
balanced 21
digital 21
optical 21
B
back panel 20
balanced outputs 21
C
cleaning 33
comms 21
communications connections 21
comms 21
RS232 21
components 18
configuration options 27
controller mode 27
product address 27
Start source 27
configuration options (continued)
system address 27
volume displays 27
configuring 27
connections
audio 20
communications 21
continuing play 11
D
digital output 21
disc information 15
blank 15
changing the display 15
disc time remaining 15
elapsed disc time 15
elapsed track time 15
track number 15
E
error display 31
error message 13
F
front panel 8
fuse, changing 33
G
guarantee 34
I
inserting a disc 9
M
maintenance 33
Meridian 500 Series 2
502 Analogue Controller 3
557 Stereo Power Amplifier 3
562 Digital Control Unit 3
communications 2
connecting to 22
Meridian DSP loudspeakers,
connecting to 24
Meridian System Remote 2
MP3 discs, creating 32
N
No disc display 31
O
optical output 21
P
pausing play 11
continuing after pausing 11
phase
changing 16
Index
35
Page 41

Index
phase (continued)
reviewing 16
playing a disc 10
from a particular track 10
repeatedly 12
repeatedly between two
positions 12
preamplifier, connecting to 23
programming a selection 13
clearing 14
R
radio interference 18
repeating play 12
between two positions 12
cancelling 12
restarting the current track 10
RS232 connection 21
S
safety warnings 19
scanning a disc 15
selections
adding a track 14
clearing 14
programming 13
selections (continued)
removing a track 14
specifying tracks not to play 14
specifying tracks to play 13
service 34
setting up the
compact disc player 17
specification 5
standard settings 26
restoring 26
standby 9
switching on from 9
switching to 9
stopping play 11
T
tracks
restarting the current track 10
starting play from a particular
track 10
troubleshooting 30
U
unpacking 18
V
ventilation 19
36
 Loading...