

MOTORIZED TREADMILL
KBR-JK103A
INSTRUCTION
Please read this instruction carefully before use it and keep the instruction at proper
place.
Custome r Service: csr@merax.com Tel: 626-912-8886 Ext. 100
1

1. CAUTION
To avoid any hurts, please read this manual carefully before using.
For safety purpose, do not stand on running belt while start.
Please stop immediately if you experience any kind pain, including but not limited to
chest pains, nausea, dizziness, or cramp.
Please speed up slowly if needed.
Adjustment of belt is prohibited during using.
It is suggested to wear sports shoes while using this equipment.
Children, the elder, the pregnant, and patients are prohibited from using this machine.
Please clip the safety key on your clothing during using.
Please firmly hold the handle bars during using.
2. SAFETY AND NOTIICE
Please put the machine on flat ground. It is unsuitable to put the machine at following
places:
① Outdoors.(The machine is specially designed for indoor use only)
② Slant ground or slant places on balcony.
③ Sunlight area or near heater .
④ Noisy places.
The proper power for the machine is A.C 110V.
Error may appear on display if the power is not stable. Please do not use the same
socket together with computer, air co ndit ioner etc.
It is suggested to wear sports shoes and gym suit while use the machine.
Please speed up or speed down slowly.
Make sure no child or other object is near while folding or unfolding the machine.
The treadmill should not be located near water or wet object. Error or damage may be
caused if water or other liquids drop into the equipment.
3. CAUTION DURING USE
If you do not feel well before using, please consult your doctor or coach.
Merax is not responsible for any injury or damage caused by improper use.
Please unplug the equipment when not in use.
Please unplug the treadmill before cleaning, moving or change parts for the machine.
Children, the elder and the pregnant are prohibited from using the machine. Patients
2
Product Name
Treadmill
Power
500W
Voltage
110V
Frequency
60Hz
Speed
1-12km/h
Net Weight
34kg
should consult their doctor before starting any exercise routine.
Please place the machine on a level flat surface. There should be 2M of clearance
behind the treadmill.
Do not start the machine when it is folded.
Keep all electrical components, especially motor, power cord and plug, away from
water or other liquids.
Do not wear clothes, such as long dress, that might catch on any part of the treadmill
while using.
Do not place the treadmill in area that will block any vent or air openings.
Do not put any objects on the machine.
Put away the plug from heated place or fire seat.
Please switch off all functions and pull out plug after using.
Do not stand on the belt while you’re preparing to use the treadmill.
Do not disassemble the machine without consulting professional technicians.
Please make sure the running belt is fastened before using.
4. Technical Specification
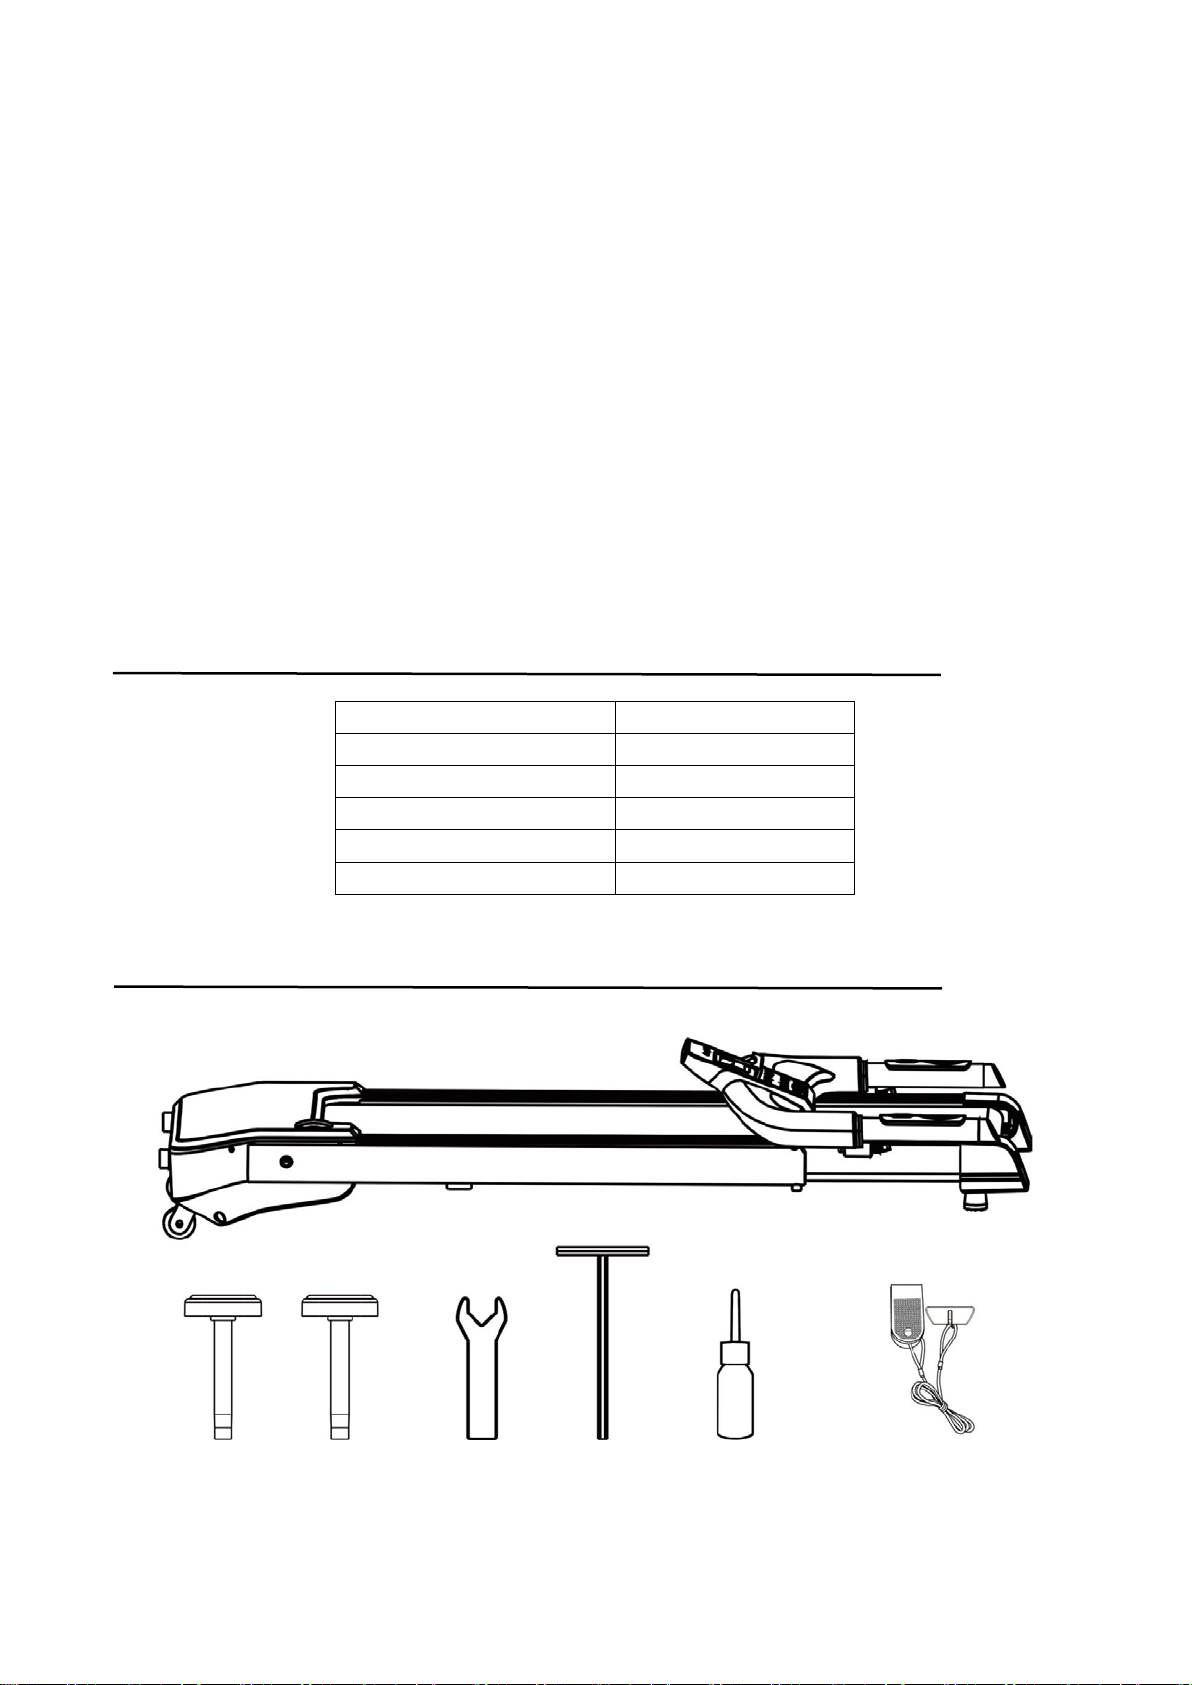
5. Hardware and Tools
3

6. Assemble Instruction
Please confirm all parts necessary are present before assembling t his machine:
1. We recommend that you have another person to help you take the equipment out
from the carton. Fix the upright tubes on the base frame with two M12 knobs. For
now, please do not tighten them completely.
2. Attach the console to the upright tubes with M6 screws (pre-assembled on the
upright tubes), and then connect the connector wires of the right handrail and
upright tube.
Attention: make sure both ends of the connector wires are connected correctly.
3. Hold the handrails of the console in the horizontal direction, and clip the pull pin
of the left and right handrails into the holes on the upright tubes.
4. Tighten M12 knobs completely on the base frame, and put safety key on the
yellow area on the console. Assembly complete!
4

7. Control Panel
① SPEED (KM/H): 1.0~12.0KM/H ② DISTANCE (METER): 1~9999METER
③ CALORIE (CAL): 1~9999CAL ④ TIME (MINUTE : SECOND): 00:00~60:00
1) Press "START" key, the machine will start from 1KM/H after 3 seconds.
2) Press"+" key to speed up and "-" key to slow down. The fastest speed is 12 KM/H and
lowest is 1 KM/H.
3) Press "MODE" key, the screen will show Speed, Time, and Calorie alternativ el y, each
information st ay s for 5 secon ds. The light under each category lights on if its
information is currently displayed.
4) 3 preset programs (P1-P3) are available. When the equipment is in standby, press
“PROG” to choose desired program and press “START” to begin your workout.
5

99
90
80
70
60
50
40
30
20
10
TIME
SPEED
99
90
80
70
60
50
40
30
20
10
TIME
SPE ED
P2
99
90
80
70
60
50
40
30
20
10
TIME
SPEED
P1
15 3 4.5 6 7 5 9 10.5 12 13 5 15 16.5 18 19.5 21 22.5 24 25.5 27 285 30. . . .
1 5 3 4.5 6 75 9 1 0.5 12 135 15 16.5 18 19.5 21 22.5 24 25.5 27 285 30. . . .
15 3 4.5 6 75 9 10.5 1 2 135 15 16.5 18 19.5 21 22.5 24 25.5 27285 30. . . .
5) If the machine is running under auto program, the (-) and (+) keys are not available. If
6) For emergency stop, please pull out the safety key, and the machine will stop very
7) Press "STOP" key to stop your workout.
you want to st op the auto program, press “STOP” or remove the safety key, and turn on
the machine again or place the safety key back. Select desired speed and you can
continue your workout session.
slowly. The screen will show “Err” if safety key is not in place. Put it back and the screen
will show “OFF”.
6

8. Unfold, Fold and Move
Unscrew the M12 knobs on the upright tubes and fold the tubes. Pull out the pull
pin on the handrail of console to fold the console
Use the same M12 knobs you just unscrewed to tighten the upright tubes to the
base frame.
Lift the machine up, and lean it against a wall. Attention: Keep children away
from the treadmill in case it falls down.
9. USAGE OF SILICONE OIL
Pull up the running belt slightly, apply silicone oil to the
backside of the belt an d the top sur face of th e running deck.
Start the machine and keep it running for 3 minutes so that
the oil spread and even out. It is necessary to maintain
your treadmill like this every 30 working hours of the
machine for optimal performance, which also helps extend the service life of parts.
7

10. Running Belt Adjustment
1) Running belt deviate to left
With the running machine running at 2-3Km/h, tighten the left bolt 1/4 turn at a time
clockwise (see fig1). Keep the machine running for 1-2 minutes to gauge if more
adjustment is needed. Repeat if necessary until the belt moves to the center.
2) Running belt deviate to right
With the running machine running at 2-3Km/h, tighten the right bolt 1/4 turn at a time
clockwise (see fig2). Keep the machine running for 1-2 minutes to gauge if more
adjustment is needed. Repeat if necessary until the belt moves to t he center.
3) Running belt is too loose
If the running surface becomes slipping, tighten bolts on both sides 1/4 turn clockwise
(see fig3). Repeat if necessary until the belt is properly adjusted.
4) Running belt is too tight
If the running belt is in dead condition, turn bolts on both sides counter-clockwise to
loosen the running surface.
11. Daily Maintain
1. Please switch off and cut off power before checking or cleaning the machine.
2. Clean the belt and con s ole after use, at least once a week.
3. Check and tighten screws and spines regularly.
4. Do not hang up clothes etc. to the machi ne.
8

Error Code
Meaning
Problem
Solution
1. Put the safety key in the
monitor.
Control board broken
control board
Control Board
Error
1. Open the motor cover and
the error still shows.
1. Open the motor cover, and
the error still shows.
12. Trouble Shooting
Err (or E00)
No safety key
on the panel
Safety key is not in
place or it is not
properly put on
yellow area of the panel.
2. If the error still shows or there
is no reaction, replace the
computer screen/display
E2
Control Board
Error
E4
E5
Overcurrent
Protection
E6 Motor Error
or pseudo solder ing on
Replace the control board.
Control board broken Replace the control board.
check whether the motor is
Control board short
circuit or motor
blocked
blocked. Remove the block if
yes.
2. Replace the control board if
check whether the motor is
broken or whether the motor line
Motor broken or motor
line fall off
is connected to control board
properly.
2. Replace the control board if
E7
Communication
E8
Failure
Overload
Protection
Wires from the control
board and panel board
are not properly
connected or broken
Excess of electricity or
user exceed max
weight capacity
9
1. Make sure the wires from the
control board and panel board
are connected securely and not
damaged.
2. Replace the control board if
the error still shows.
1. Make sure the user does not
exceed max weight capacity,
and then reconnect power and
re-start the machine.
2. Replace the control board if
the error code still shows.
 Loading...