

Page 1

!"#$%&'()*+*,-.-/*01%23&/*4567* *
Meraki MX60
Hardware Installation Guide
!
August 2011
!
!
!
!
!
!
!
!
!
!
!
!
!
Page 2
*
Meraki MX60 Installation Guide
MX60 Overview | 2
www.meraki.com
660 Alabama St.
San Francisco, California 94110
Phone: +1 415 632 5800
Fax: +1 415 632 5899
*
!
!
!
!
!
!
!
!
!
!
!
!
"#$%&'()*+!,!-./.!01&23'4!5678!9::!&'()*;!&1;1&<1=8!
>&2=1?2&3;+!01&23'@!';!2!&1(';*1&1=!*&2=1?2&3!#A!01&23'4!5678!
Page 3

*
Meraki MX60 Installation Guide
MX60 Overview | 3
Trademarks
Meraki, Meraki MX60, and Meraki Cloud Controller are trademarks of Meraki, Inc. Other brand and product names
are registered trademarks or trademarks of their respective holders.
Statement of Conditions
In the interest of improving internal design, operational function, and/or reliability, Meraki reserves the right to make
changes to the products described in this document without notice. Meraki does not assume any liability that may
occur due to the use or application of the product(s) or circuit layout(s) described herein.
Warranty
Meraki, Inc. provides a limited warranty on this product. Warranty details may be found at www.meraki.com/legal.
Scope of the Document and Related Publications
The MX60 Hardware Installation Guide describes the installation procedure for the MX60 MX60s. Additional
reference documents are available online at: www.meraki.com/library/products.
Page 4

*
Meraki MX60 Installation Guide
MX60 Overview | 4
Table of Contents
Trademarks ...................................................................................................................... 3!
Statement of Conditions ................................................................................................ 3!
Warranty .......................................................................................................................... 3!
Scope of the Document and Related Publications ...................................................... 3!
1! MX60 Overview .......................................................................................................... 5!
1.1! Package Contents ................................................................................................................................ 5!
1.2! The MX60 Front Panel ......................................................................................................................... 5!
1.2.1! LED Color Rules ................................................................................................................................ 5!
1.2.2! Power-on Sequence .......................................................................................................................... 5!
1.3! The MX60 Back Panel .......................................................................................................................... 6!
1.3.1! Internet Port ....................................................................................................................................... 6!
1.3.2! LAN Ports .......................................................................................................................................... 6!
1.3.3! USB Port ........................................................................................................................................... 6!
1.3.4! Reset Button ...................................................................................................................................... 6!
2! Pre-Deployment Setup .............................................................................................. 7!
2.1! Dashboard Settings .............................................................................................................................. 7!
2.1.1! Setting Up a New Dashboard Account .............................................................................................. 7!
2.1.2! Using an Existing Dashboard Account .............................................................................................. 7!
2.2! Firewall Settings ................................................................................................................................... 7!
2.3! Local Management Console ................................................................................................................. 7!
2.4! Network Settings .................................................................................................................................. 8!
2.4.1! Router Mode: Gateway to the Internet .............................................................................................. 8!
2.4.2! Passthrough Mode .......................................................................................................................... 10!
Page 5
*
Meraki MX60 Installation Guide
MX60 Overview | 5
1 MX60 Overview
The Meraki MX60 is an enterprise router designed for distributed
deployments that require remote administration. It is ideal for network
administrators who demand both ease of deployment and a state-of-theart feature set.
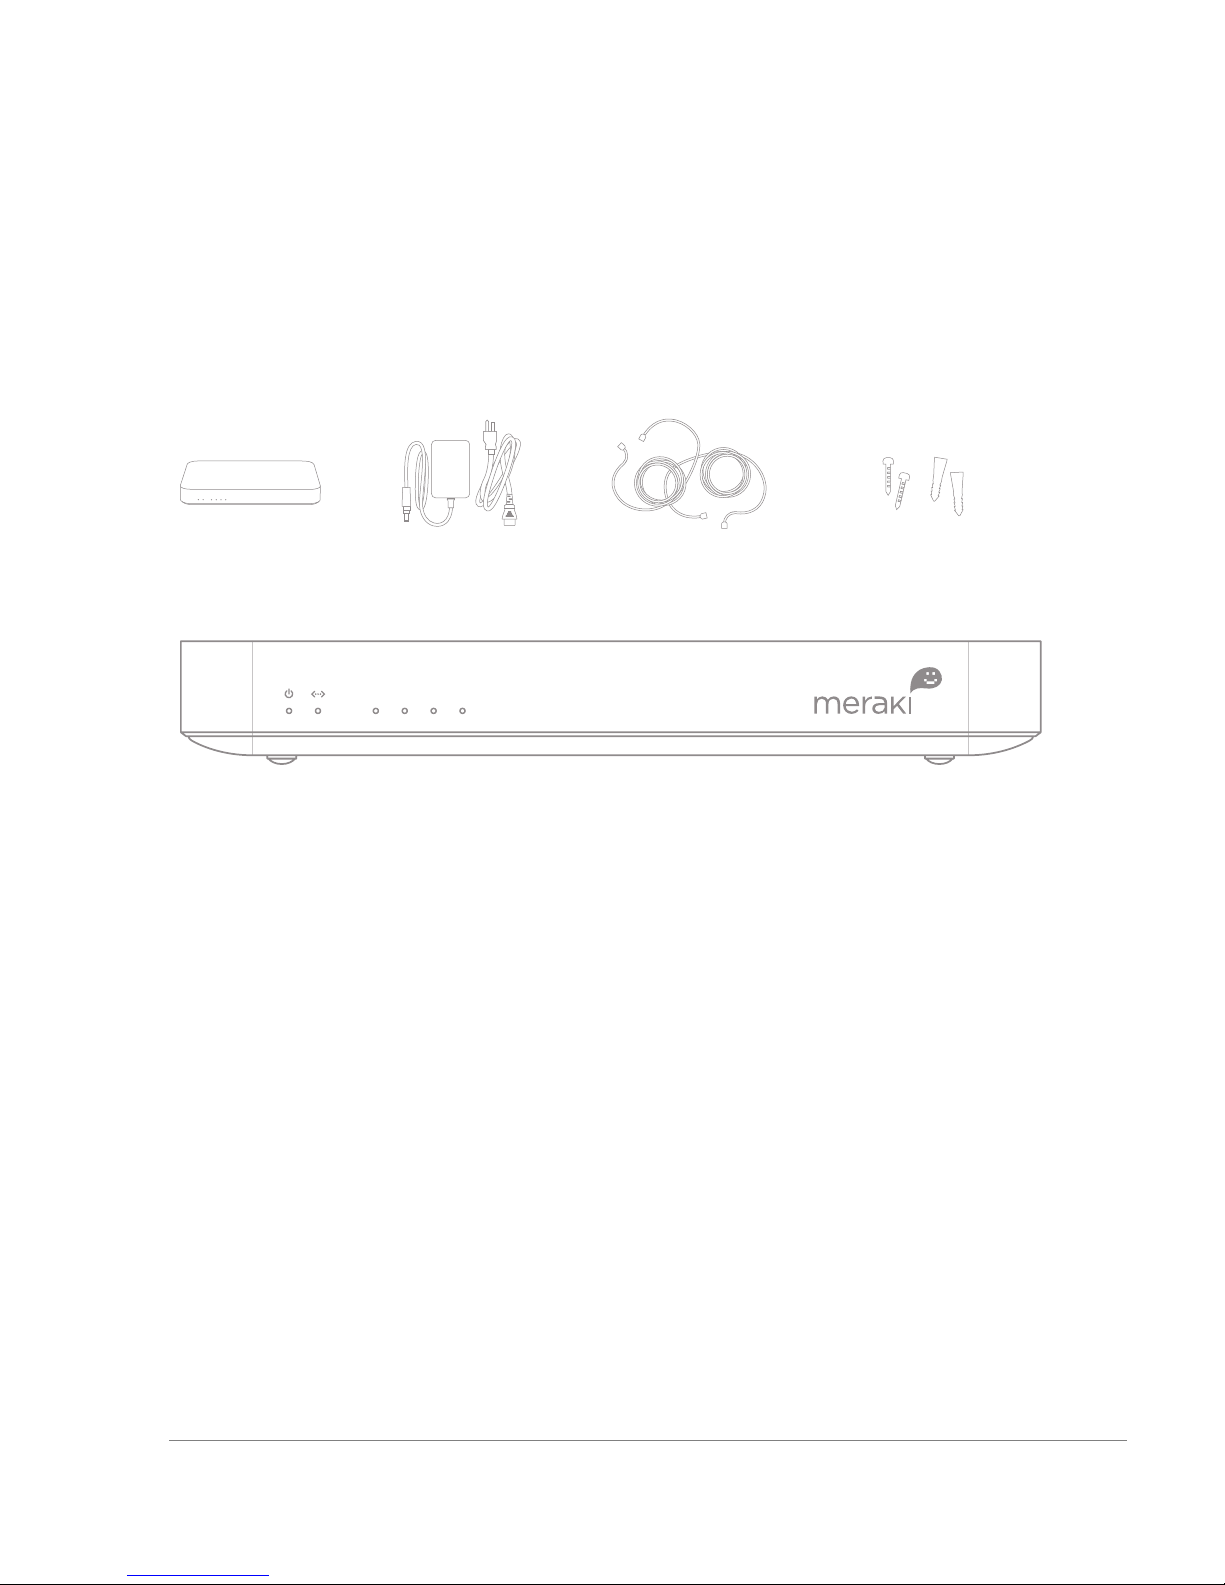
1.1 Package Contents
1.2 The MX60 Front Panel
There are 3 types of LED in MX60
• Power light: First one from the left.
• WAN light: Second one from the left.
• LAN lights: The four LEDs that are grouped together and
numbered 1 – 4.
1.2.1 LED Color Rules
• Solid Green: Fully operational.
• Flashing Green: Operational but operation in progress (e.g.
upgrade).
• Solid Orange: Attempting to establish connection.
• Flashing Orange: Alert indicating that device requires attention.
Dashboard will contain additional information about the alert.
1.2.2 Power-on Sequence
1. All lights will flash twice on power on.
2. Power light will turn solid orange after the flash.
3. Power light will turn green after the unit has been able to
contact the Meraki dashboard and download its configuration.
4. WAN light will be off during boot and when no WAN link.
5. WAN light will turn orange after boot up and initial link.
MX60 Power Adapter CAT5 Ethernet Cables Wal l S crew s & An chors
1234
Page 6
*
Meraki MX60 Installation Guide
| 6
6. WAN light will turn green when Internet connection detected.
7. WAN light will start flashing orange after 5 minutes, if a WAN
link is found, but there is no proper Internet connection.
8. LAN lights will turn green if any device is connected on the
LAN side or they will be off otherwise.
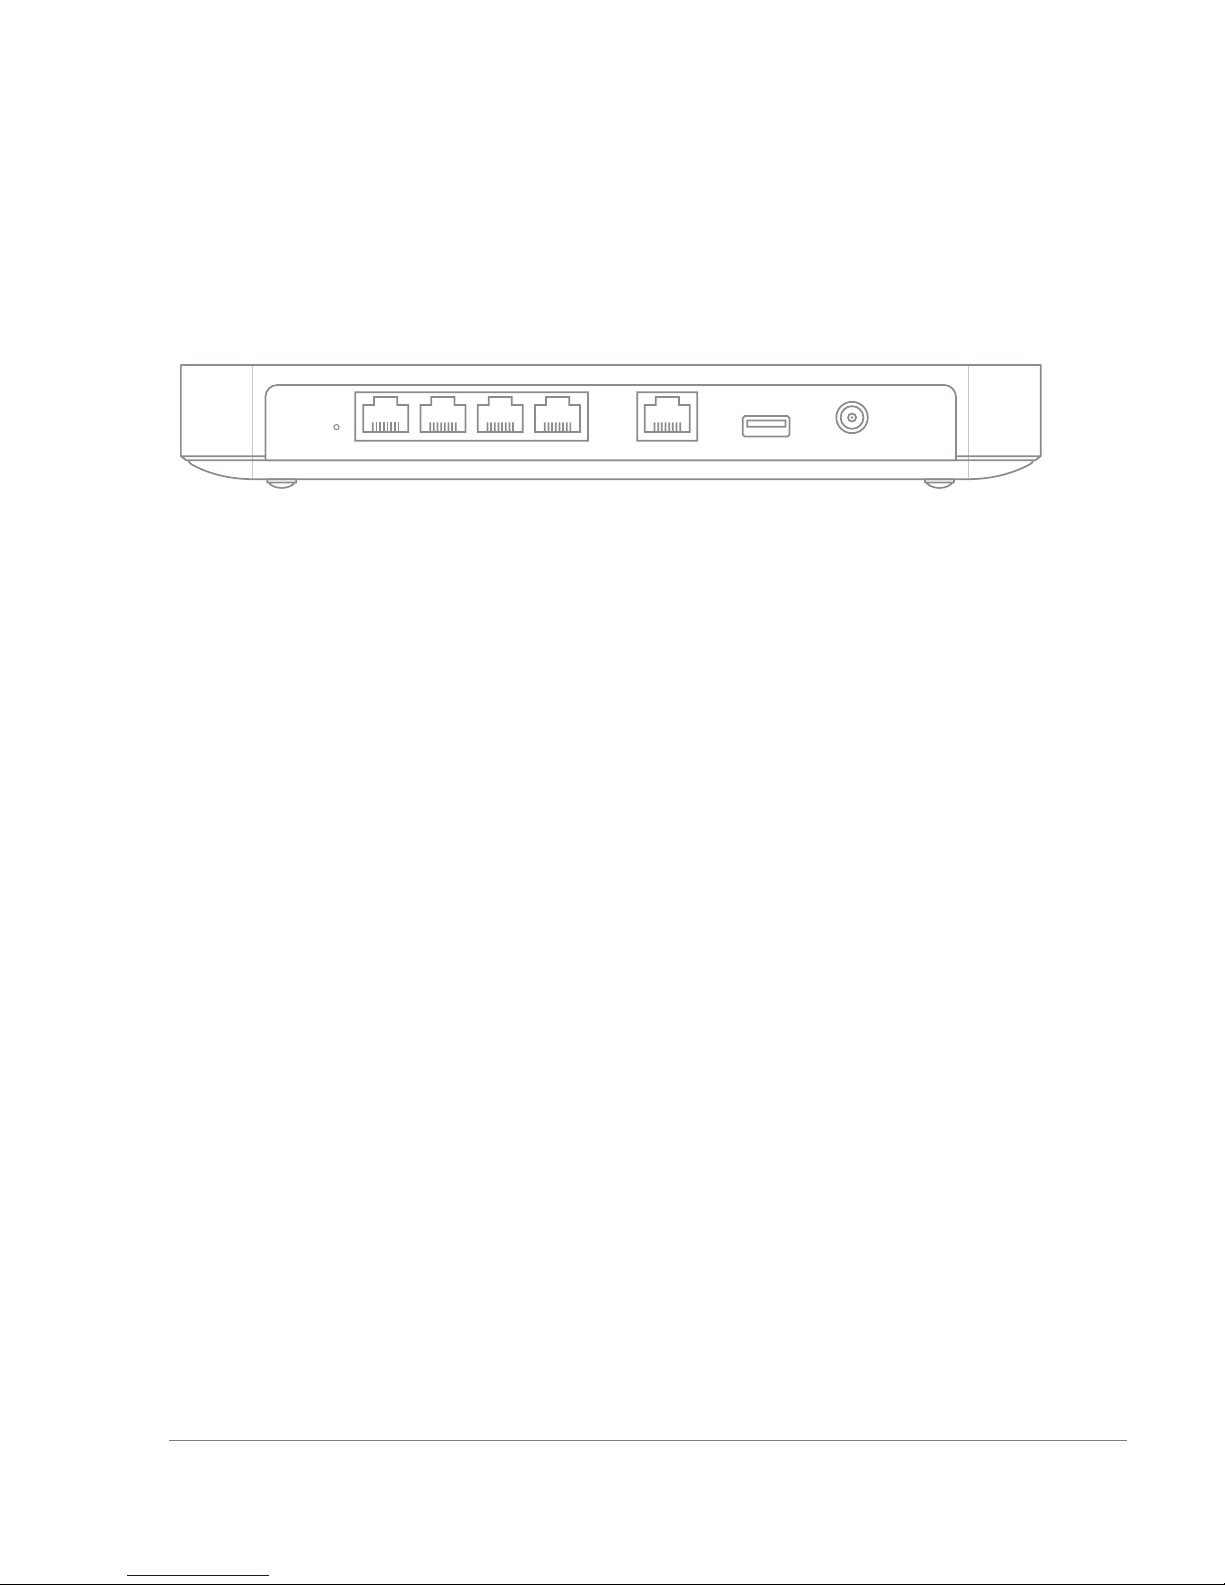
1.3 The MX60 Back Panel
1.3.1 Internet Port
The MX60 supports only one Internet / WAN connection.
1.3.2 LAN Ports
The MX60 has four LAN ports, called LAN 1, LAN 2, LAN 3, and LAN 4.
These ports can be connected to devices like computers, printers,
access points, or Ethernet switches.
1.3.3 USB Port
The MX60 has one USB 2.0 port. This port is reserved for future use.
1.3.4 Reset Button
A short press of 1s to 10s will force the device to delete its configuration
downloaded from the Dashboard and reboot. This will not remove the
locally configured WAN IP settings. A long press of > 10s will force the
unit into a full factory reset
Reset LAN 4 LAN 3 LAN 2 LAN 1 Internet USB Power
Page 7

*
Meraki MX60 Installation Guide
Pre-Deployment Setup | 7
2 Pre-Deployment Setup
2.1 Dashboard Settings
2.1.1 Setting Up a New Dashboard Account
Step 1: Create an account.
To manage Meraki networks through the Dashboard, you need to create
an account at http://dashboard.meraki.com.
Step 2: Add an MX60 to your account.
After logging into your account, click on “Configure” and then “Add
router.” Enter the order number or the serial number of the MX60,
choose a name for the router, and provide the router’s physical location
(in order to accurately place it on the integrated Google map or floor
plan). Click the “Add routers” button on the bottom of the page.
2.1.2 Using an Existing Dashboard Account
If you have an existing Dashboard account (organization) that you use
for Meraki wireless networks, you need to create a separate network in
the Dashboard for each MX60 that you plan to deploy.
You can use the “Network” pull-down option to create a new network
and add the MX60 serial number to the newly created network
2.2 Firewall Settings
If your MX60 will be placed behind a firewall, you will need to allow
outgoing connections on particular ports to particular IP addresses. The
most current list of outbound ports and IP addresses can be found here:
http://tinyurl.com/y79une3
2.3 Local Management Console
If you need to assign static IP to the MX60, you need to use the local
management console. The local console provides additional
connectivity status information, such as whether an upgrade is in
progress or the device is connected to the Internet.
To access the local management console, simply follow these
instructions:
1. Connect the router to a power supply.
2. Using a client machine (e.g., a laptop), connect to the MX60
through any of the LAN ports (by plugging one end of an
Ethernet cable into the client machine, and the other end of the
Ethernet cable into the one of the router’s LAN ports).
3. Using a web browser on the client machine, access the
router’s built-in web server by browsing to
http://setup.meraki.com.
Page 8
*
Meraki MX60 Installation Guide
Pre-Deployment Setup | 8
4. Note that you do not have to be connected to the Internet to
reach this address, as you are simply connecting to a web
service running locally on the router.
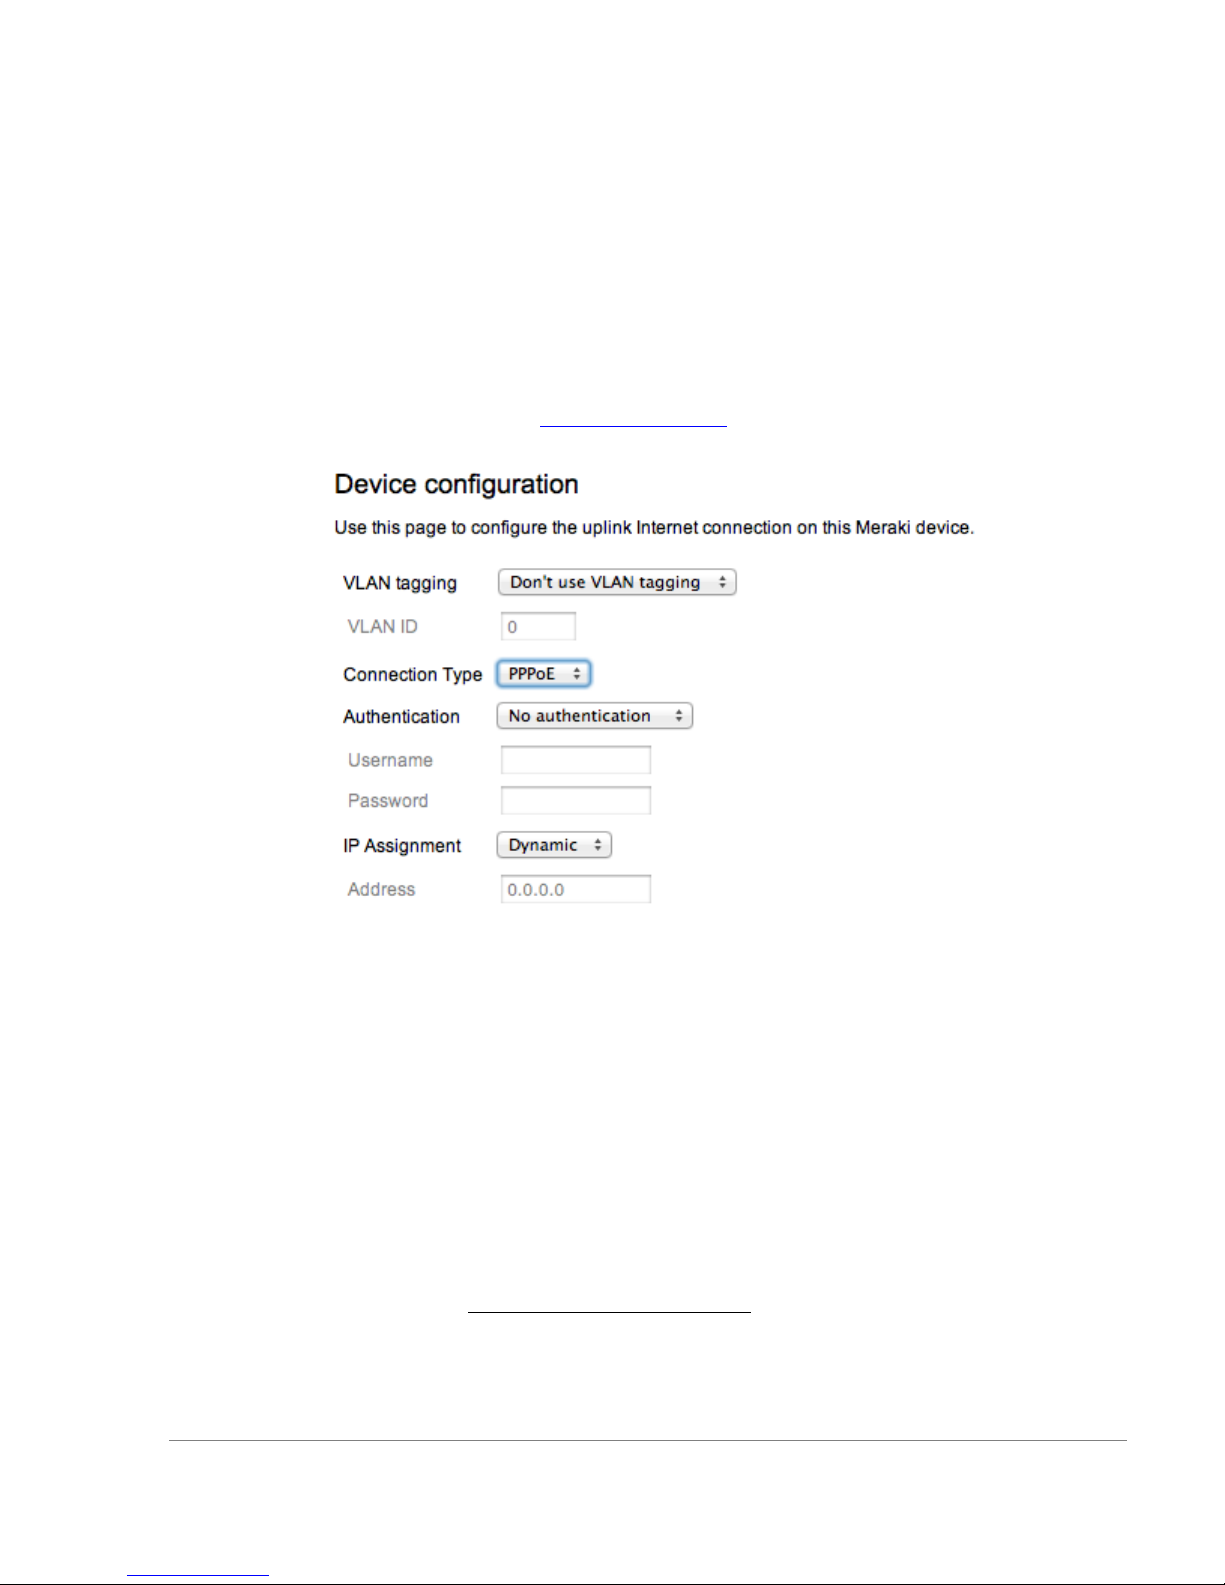
5. In the event your ISP requires you to handle PPPoE
termination, this can be configured on the same local setup
page. Please specify the connection type as “PPPoE” and
provide the required username and password (if applicable) to
properly terminate the connection.
6. If your WAN uplink is on a trunk port, you will need to specify
the correct VLAN. To do so, please visit
http://setup.meraki.com and specify the correct VLAN tag ID to
allow your device to properly connect.
2.4 Network Settings
All Meraki MX60 devices must have an IP address. The following
section describes how to configure your local area network prior to
deploying a Meraki MX60. Please check with your ISP to make sure you
have the adequate Ethernet handoff device (e.g., T1, MPLS, ADSL or
Cable modem), as the MX60 only supports RJ45 Ethernet connectivity.
2.4.1 Router Mode: Gateway to the Internet
In router mode, the MX60 will provide network address translation
(NAT) services. Therefore it requires two IP addresses, one that is
recognized by the WAN interface and another that is recognized by the
LAN interface.
Internet (WAN) IP address settings:
By default the router will obtain the configuration for its Internet port via
DHCP. If this is compatible with your upstream Internet connection, no
local configuration of the Internet port is required.
Page 9

*
Meraki MX60 Installation Guide
Pre-Deployment Setup | 9
If you need to set static IP address for the Internet port, please follow
these instructions:
1. If you need to assign static IP address, connect to the
router’s local management console using the instructions
in section 2.3.
2. Follow the on-screen instructions to set up a static IP
address.
3. Now connect the Internet port on the router to your ISP
modem or the upstream device that is ultimately
connected to the WAN.
4. On your client machine, connected to one of the LAN
ports, go to http://dashboard.meraki.com.
5. Login to your account and go to the network that you
already created for the new MX60 (see section 2.1).
Confirm that your router is connected to the Dashboard
and that the status is online. If you have a problem, visit
the Meraki online knowledge base at:
http://www.meraki.com/support/.
6. You are now ready to begin monitoring your network
through the Meraki Dashboard.
LAN IP address settings:
These settings let you create a new local subnet that will be served
through the LAN 1 – LAN 4 ports of the MX60.
1. Using a web browser on the client machine (e.g., a
laptop), go to http://dashboard.meraki.com.
2. Login to your account and go to the network that you
already created for the new MX60 (see section 2.1).
Confirm that your router is connected to the Dashboard
and that the status is online.
3. Navigate to “Configure ->Router settings.”
4. Choose “Run NAT only” or “Run a DHCP server and
NAT.”
5. Choose a local subnet base address and subnet mask.
6. Choose an IP address for the MX60. Please note that if
you have chosen “Run a DHCP server and NAT,”
Dashboard will prepopulate the “Router IP” field with a
suitable IP address for the MX60. If necessary, you can
override the IP address with a choice of your own.
7. Set up your DNS servers. You can use settings for Google
DNS, OpenDNS, or provide IPs for custom servers.
8. To test your settings, refresh your laptop / desktop
network settings (e.g., simply disconnect the client device
from the LAN port of the MX60 and then connect it again).
If you have a problem, visit the Meraki online knowledge
base at http://www.meraki.com/support/.
Page 10

*
Meraki MX60 Installation Guide
Pre-Deployment Setup | 10
9. You are now ready to begin monitoring your network
through the Meraki Dashboard.
2.4.2 Passthrough Mode
In passthrough mode, the Meraki MX60 is transparent to the rest of the
network. You should use passthrough mode if you don’t want your
router to provide NAT functions. In this mode, the router requires one
IP address in order to communicate with the Meraki Cloud Controller
Internet (WAN) IP address settings:
If you need to set static IP address, please follow the same instructions
for WAN IP configuration from the Router Mode section above.*
 Loading...