

Page 1
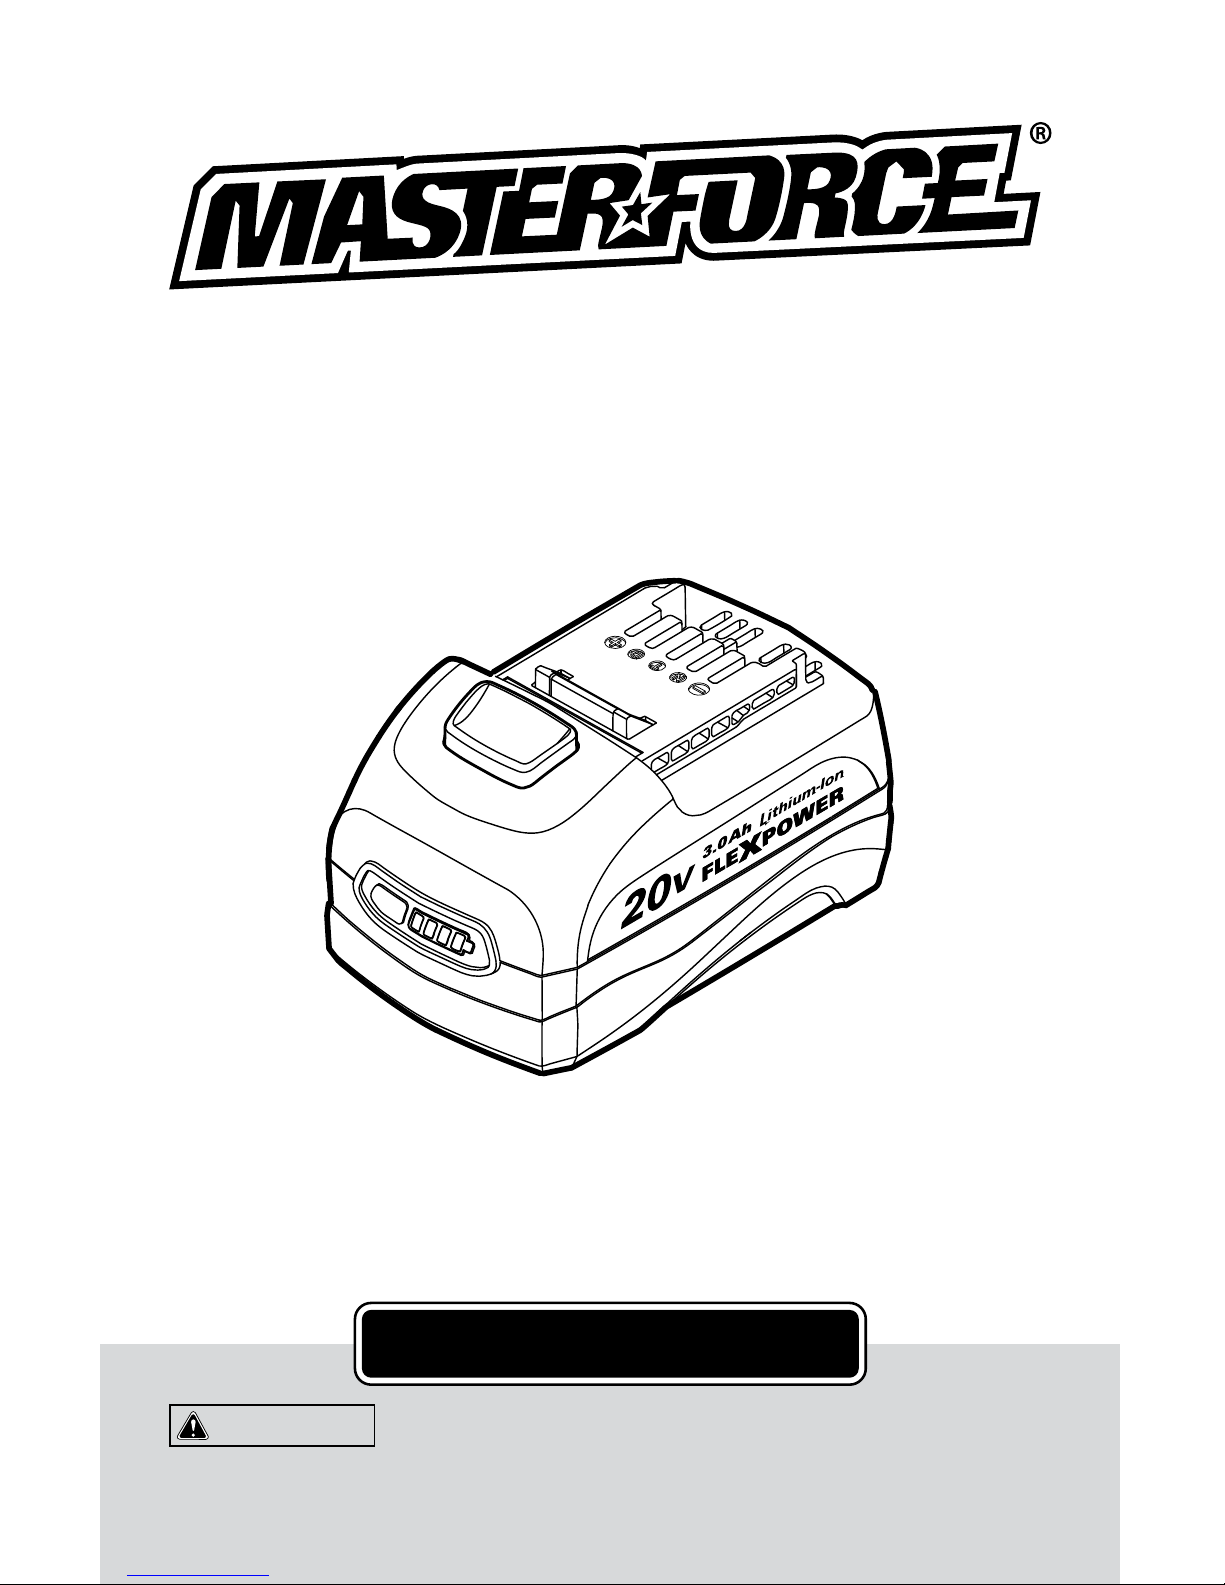
252-8033
20V Lithium-Ion
Battery Pack
OPERATOR’S MANUAL
CAUTION:
To Reduce The Risk Of Injury, User Must
Read And Understand Operator’s Manual. Save These
Instructions For Future Reference.
For questions/comments, technical assistance or repair parts –
Please call toll free: 1-866-917-4374 (M – F 8am – 6pm EST)
Page 2

TABLE OF CONTENTS
Safety Symbols ......................................................... Page 2
Safety Instructions ...................................................... Page 3
Overview/Specifications .................................................Page 6
Assembly .............................................................Page 7
Operation ............................................................. Page 8
Maintenance .......................................................... Page 11
Troubleshooting .......................................................Page 12
Warranty .............................................................Page 14
Page 3
Page 2
SAFETY SYMBOLS
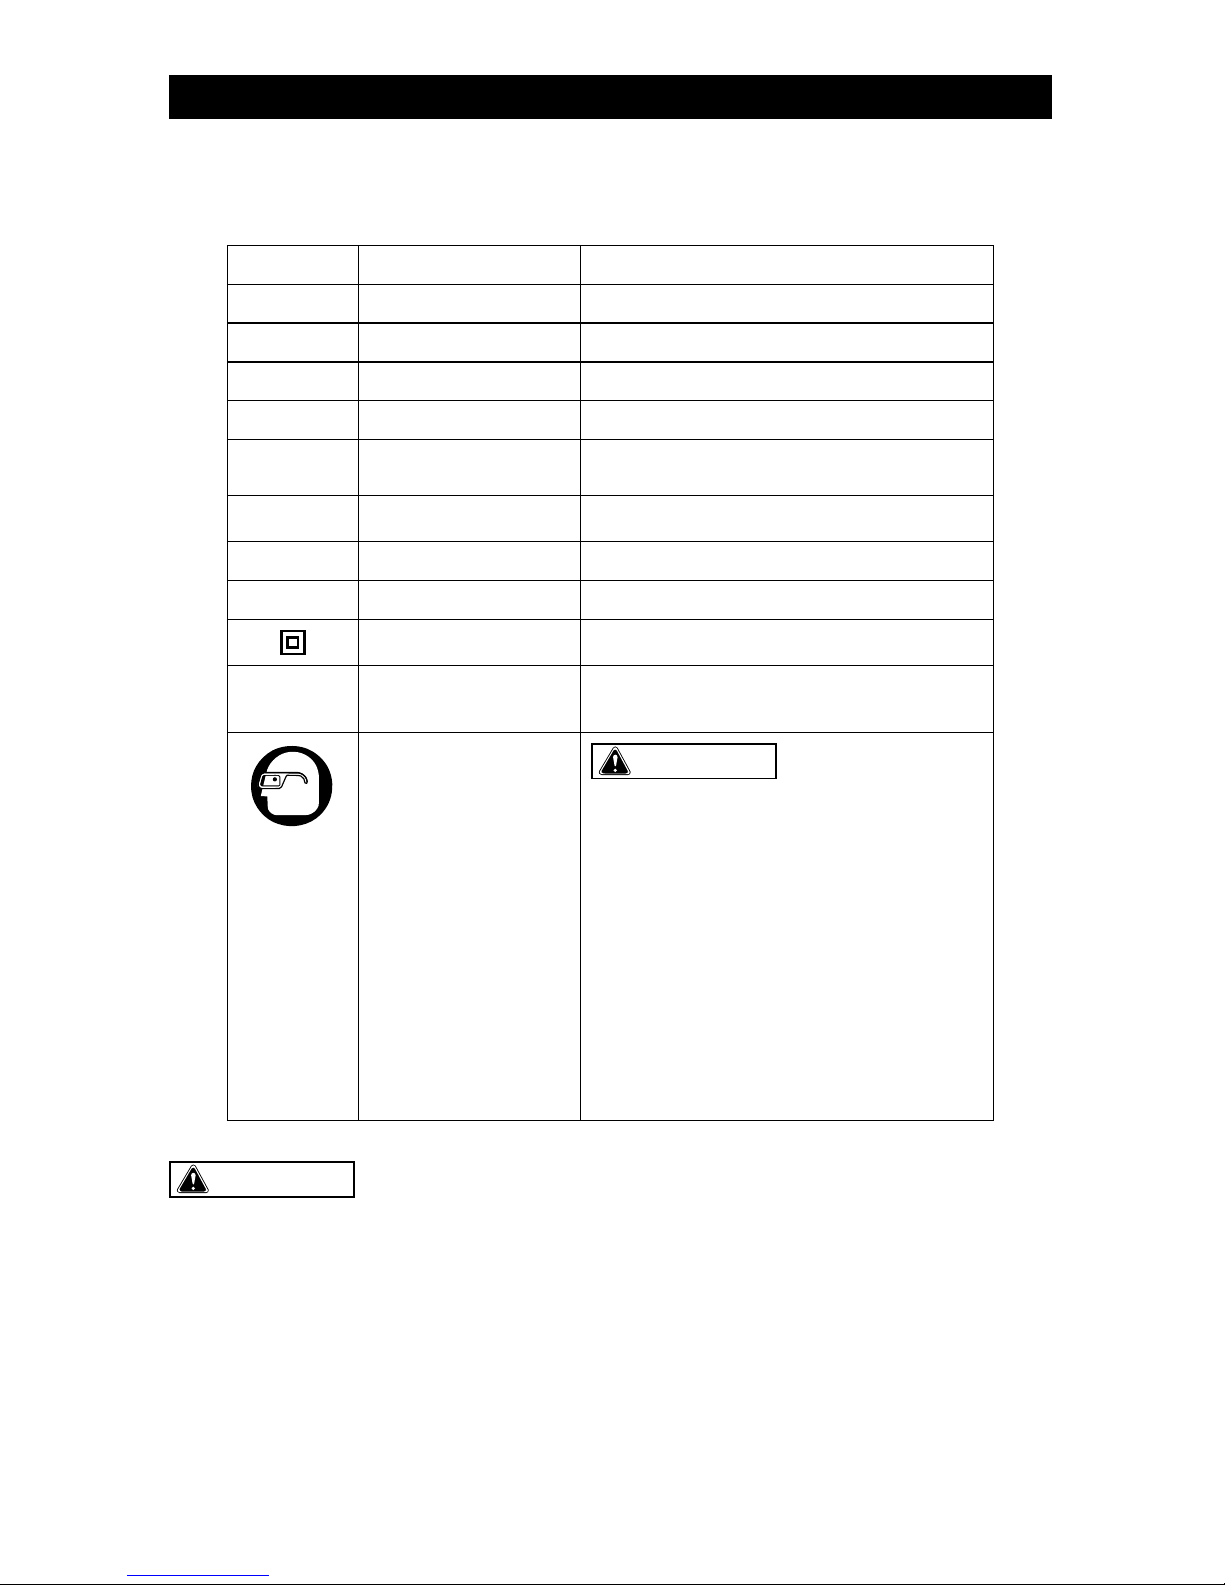
Some of these following symbols may be used on this tool. Please study them and learn their
meaning. Proper interpretation of these symbols will allow you to operate the tool better and
more safely.
Symbol
Name
Designation / Explanation
V Volts Voltage
A Amperes Current
Hz Hertz Frequency (cycles per second)
W Watts Power
∿
Alternating current Type of current
�
Direct current Type of characteristic of current
n
o
No-load speed Rotational speed at no load
lbs Pounds Weight
Class II construction Double insulated construction
.../min Per minute
Revolutions, strokes, surface speed
orbits, etc., per minute
Wear safety goggles
WARNING:
The operation of any
power tool can result in foreign objects
being thrown into your eyes, which can
result in severe eye damage. Before
beginning power tool operation, always
wear safety goggles or safety glasses
with side shields and a full-face shield
when needed. We recommend a Wide
Vision Safety Mask for use over eyeglasses or standard safety glasses with
side shields. Always use eye protection
which is marked to comply with
ANSI Z87.1.
WARNING:
To ensure safety and reliability, all repairs should be performed by a
qualified service technician.
Page 4
Page 3
SAFETY INSTRUCTIONS
The purpose of safety symbols is to attract your attention to possible dangers. The safety
symbols and the explanations with them deserve your careful attention and understanding.
The symbol warnings do not, by themselves, eliminate any danger. The instructions and
warnings they give are no substitutes for proper accident prevention measures.
WARNING:
Be sure to read and understand all safety instructions in this manual,
including all safety alert symbols such as “DANGER,” ”WARNING,” and “CAUTION”
before using this tool. Failure to following all instructions listed below may result in
electric shock, fire, and/or serious personal injury.
SYMBOL MEANING
SAFETY ALERT SYMBOL: Indicates DANGER, WARNING, OR CAUTION.
May be used in conjunction with other symbols or pictographs.
DANGER:
Indicates an imminently hazardous situation, which, if not avoided,
will result in death or serious injury.
WARNING:
Indicates a potentially hazardous situation, which, if not avoided,
could result in death or serious injury.
CAUTION:
Indicates a potentially hazardous situation, which, if not avoided, could
result in minor or moderate injury.
NOTICE: (Without Safety Alert Symbol) Indicates a situation that may result in property
damage.
SAVE THESE INSTRUCTIONS!
Page 5
Page 4
SAFETY INSTRUCTIONS
WARNING:
Read all safety
warnings and instructions!
Failure to follow the warnings and
instructions may result in electric shock, fire
and/or serious injury. Save all warnings and
instructions for future reference.
The “term power tool” in the warnings refers
to your mains-operated (corded) power tool
or battery-operated (cordless) power tool.
WARNING:
Risk of fire and
electric shock. Dry location use only. Do
not expose to rain. Risk of injury.
WORK AREA SAFETY
1. Keep the work area clean and well lit.
Cluttered or dark areas invite accidents.
2. Do not operate power tools in explosive
atmospheres, such as in the presence of
flammable liquids, gases or dust. Power
tools create sparks that may ignite the dust
or fumes.
3. Keep children and bystanders away
while operating a power tool. Distractions
can cause you to lose control.
ELECTRICAL SAFETY
1. Avoid body contact with earthed
or grounded surfaces, such as pipes,
radiators, ranges and refrigerators. There
is an increased risk of electric shock if your
body is earthed or grounded.
2. Do not expose power tools to rain or
wet conditions. Water entering a power tool
will increase the risk of electric shock.
BATTERY TOOL USE
AND CARE
1. Recharge only with the charger
specified by the manufacturer. A charger
that is suitable for one type of battery pack
may create a risk of fire when used with
another battery pack.
2. Use power tools only with specifically
designated battery packs. Use of any
other battery packs may create a risk of
injury and fire.
3. When the battery pack is not in use,
keep it away from other metal objects,
such as paper clips, coins, keys, nails,
screws or other small metal objects that
can make a connection from one terminal
to another. Shorting the battery terminals
together may cause burns or a fire.
4. Under abusive conditions, liquid may
be ejected from the battery; avoid contact.
If contact accidentally occurs, flush with
water. If liquid contacts eyes, also seek
medical help. Liquid ejected from the battery
may cause irritation or burns.
SERVICE
1. Have your power tool serviced by a
qualified repair person, using only identical
replacement parts. This will ensure that the
safety of the power tool is maintained.
SPECIFIC SAFETY RULES FOR
BATTERY PACK
1. Use battery only with chargers listed.
Battery pack Charger
252-8033
252-8036
252-8037
Page 6

Page 5
SAFETY INSTRUCTIONS
2. Know your power tool. Read the
Instruction Manual carefully. Learn the tool’s
applications and limitations, as well as the
specific potential hazards related to this
tool. Following this rule will reduce the risk
of electric shock, fire, and serious injury.
3. Do not place the battery near fire or
heat. This will reduce the risk of explosion
and possible injury.
4. Do not crush, drop or damage the
battery pack. Do not use a battery pack or
charger that has been dropped or received
a sharp blow. A damaged battery is subject
to explosion. Properly dispose of a dropped
or damaged battery immediately.
5. Batteries vent hydrogen gas and can
explode in the presence of a source of
ignition, such as a pilot light. To reduce
the risk of serious personal injury, never use
any cordless product in the presence of an
open flame. An exploded battery can propel
debris and chemicals. If exposed, flush the
exposed area with water immediately.
6. Do not charge the battery in a damp or
wet location. Following this rule will reduce
the risk of electric shock.
7. For best results, your battery should
be charged in a location where the
temperature is more 41°F (5°C)but less
that 122°F (50°C). Do not store outside or
in vehicles.
8. Under extreme usage or temperature
conditions, battery leakage may occur.
If liquid comes in contract with your skin,
wash immediately with soap and water,
then neutralize with lemon juice or vinegar.
If liquid gets in your eyes, flush them with
clean water for at least 10minutes, and
then seek immediate medical attention.
Following this rule will reduce the risk of
serious personal injury.
9. Do not let gasoline, oils, petroleum-
based products, etc. come in contract with
plastic parts. They contain chemicals that
can damage, weaken or destroy plastic.
10. Have your battery pack serviced by a
qualified repair person using only identical
replacement parts. This will ensure that the
safety of the battery pack is maintained.
11. Save these instructions. Refer to them
frequently and use them to instruct others
who may use this tool. If you lend someone
this tool, lend these instructions also to
prevent misuse of the product and possible
injury.
Page 7
Page 6
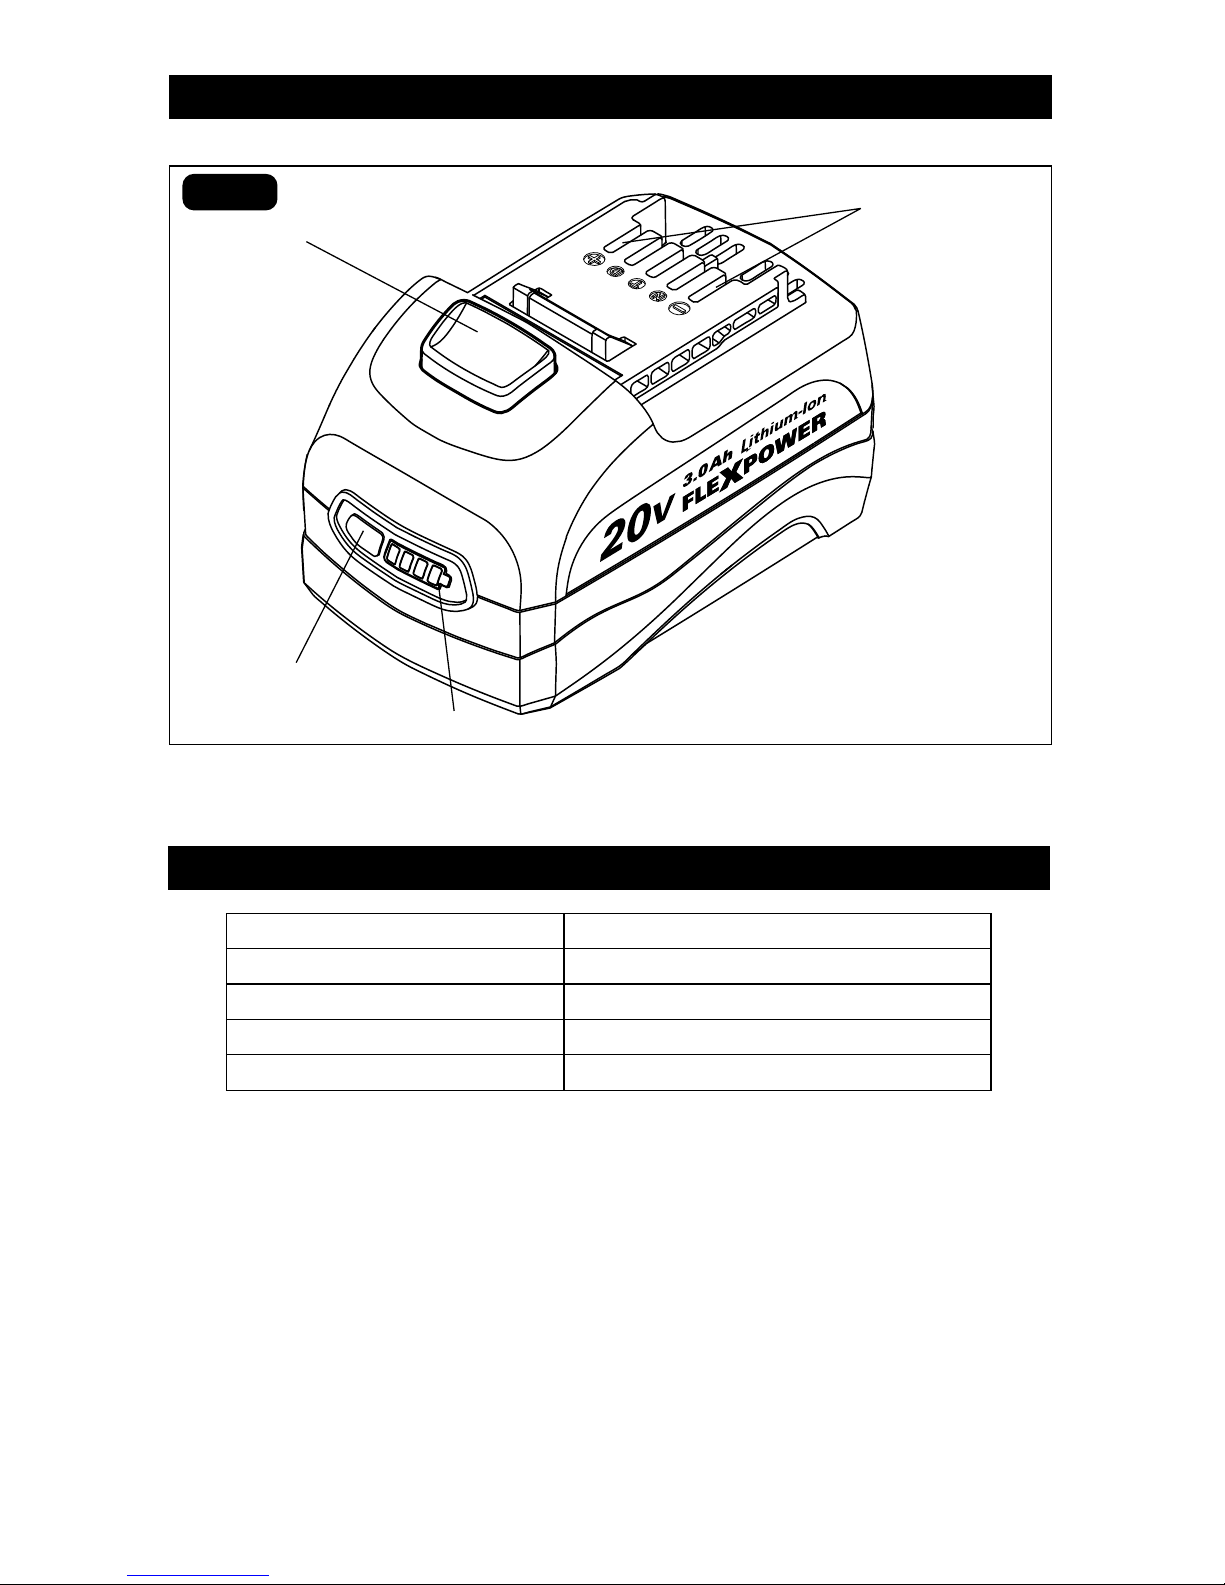
OVERVIEW
Electrical contacts
Power indicator button
Battery-release button
Power indicator
SPECIFICATIONS
Battery Type Lithium-Ion
Battery Voltage 20V DC
Battery weight 1lb. 9oz. (0.72kg)
Battery capacity 3.0Ah
Operating temperature -4°F(-20°C)—104°F (40°C )
FIG. 1
Page 8
Page 7
WARNING:
If any part is broken
or missing, do not attempt to plug in the
power cord or operate the tool until the
broken or missing part is replaced. Failure
to do so could result in possible serious
injury.
WARNING:
Do not attempt to
modify this tool or create accessories not
recommended for use with this tool. Any
such alteration or modification is misuse
and could result in a hazardous condition
leading to possible serious injury.
WARNING:
Your tool should
never be connected to the power source
when you are assembling parts, making
adjustments, cleaning, or when it is not in
use. Disconnecting the tool will prevent
accidental starting, which could cause
serious personal injury.
ASSEMBLY
CONTENTS
Battery pack and instruction manual
UNPACKING
1. This product has been shipped
completely assembled.
2. Carefully remove the tool and any
accessories from the box. Make sure
that all items listed in the packing list
are included.
3. Inspect the tool carefully to make sure
that no breakage or damage occurred
during shipping.
4. Do not discard the packing material
until you have carefully inspected and
satisfactorily operated the tool.
Page 9
Page 8
OPERATION
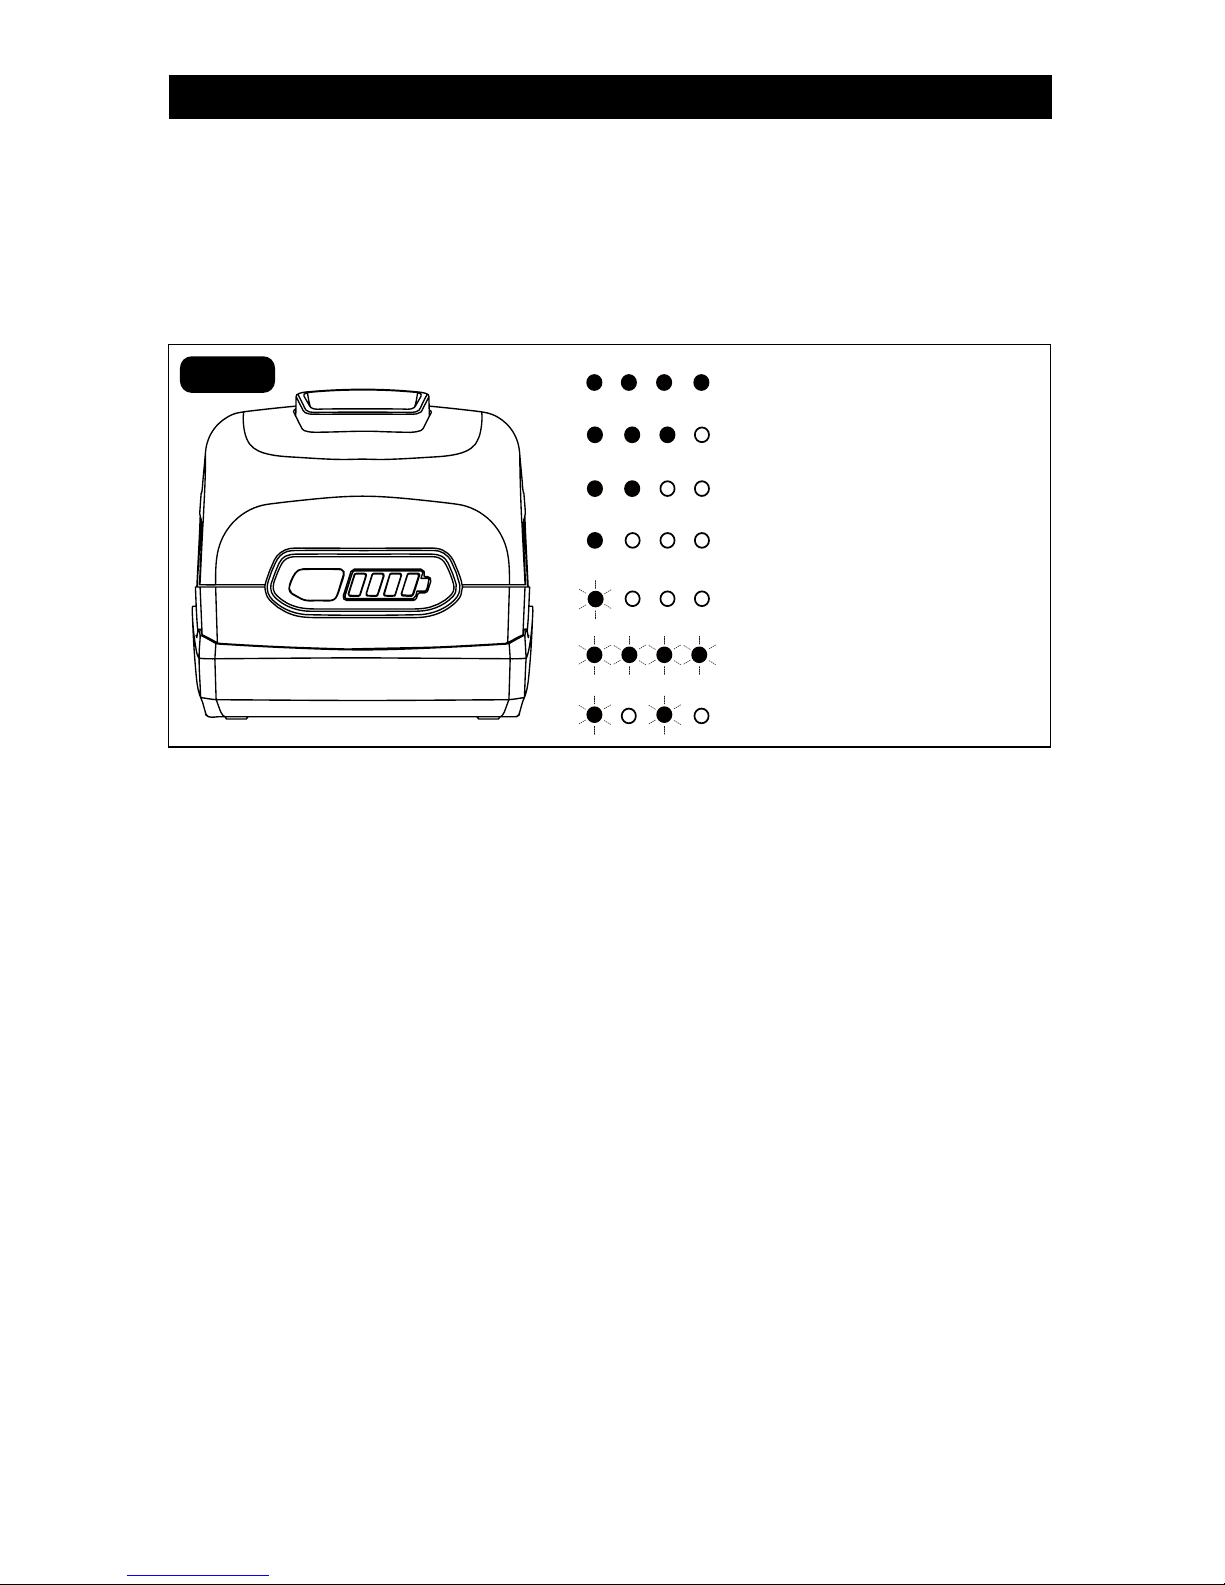
POWER INDICATOR (FIG. 2)
This Lithium-Ion battery pack is equipped
with a power indicator that displays the
battery pack’s charge status. Press the power
indicator button to display the LED lights.
LOW CAPACITY WARNING
If one LED on the power indicator begins to
flash, the battery pack’s charge is under 20%
capacity and should be recharged soon.
Unlike other battery pack types, Lithium-Ion
battery packs deliver fade-free power for their
entire run time. The tool will not experience a
slow, gradual loss of power as you work. To
signal that the battery pack is at the end of its
run time and needs to be charged, power to
the tool will drop quickly.
The power indicator will begin to display
four flashing LED lights when it is completely
discharged. When this happens, remove
the tool from the workpiece and charge the
battery pack as needed.
BATTERY PROTECTION
To protect the battery from damage and
prolong its life, the battery pack circuitry
will turn off the battery pack if it becomes
overloaded or if the temperature becomes too
high during use. This may happen in extremely
high torque, binding and stalling situations.
The battery pack will begin normal operation
when it cools down.
The power indicator will display four flashing
LED lights if the circuitry detects a momentary
overload. You can conveniently reset the
battery pack by releasing the power-tool
trigger. Press the power indicator button again
to display the remaining charge.
NOTICE: If the power indicator continues to
flash four LED lights after resetting, place the
battery pack on the charger to evaluate the
battery condition.
NOTICE: A significantly reduced run time after
fully charging the battery pack indicates that
the battery is near the end of its usable life and
must be replaced.
FIG. 2
80-100% Charge
60-79% Charge
40-59% Charge
20-39% Charge
Under 20% Charge
Completely Discharged
High/low temperature
The LED lights will stay lit for approximately
4 seconds.
NOTICE: The power indicator can be used
whether the battery is attached to or removed
from tool.
Page 10
Page 9
OPERATION
COLD WEATHER OPERATION
When the battery pack is very cold, it may
“pulse” for the first minute of use to warm
itself. Put the battery pack on a tool and use
the tool in a light application. After about a
minute, the battery pack will have warmed
itself and will operate normally.
WHEN TO CHARGE THE
BATTERY PACK
The Lithium-Ion battery can be charged at
any time and will not develop a “memory”
when charged after only a partial discharge.
It is not necessary to run down the battery
pack charge before recharging. Remove
the battery pack from the tool when it is
convenient for you and your job.
1. Use the power indicator to determine when
you need to recharge the battery pack.
2. You can “top-off” your battery pack’s
charge before starting a big job or long
period of use.
3. Due to Lithium-Ion’s fade-free
properties, the only time it is necessary
to charge the Lithium- Ion battery pack
is when the pack has reached the end of
its charge. To signal the end of charge,
power to the tool will drop quickly.
Charge the battery pack as needed.
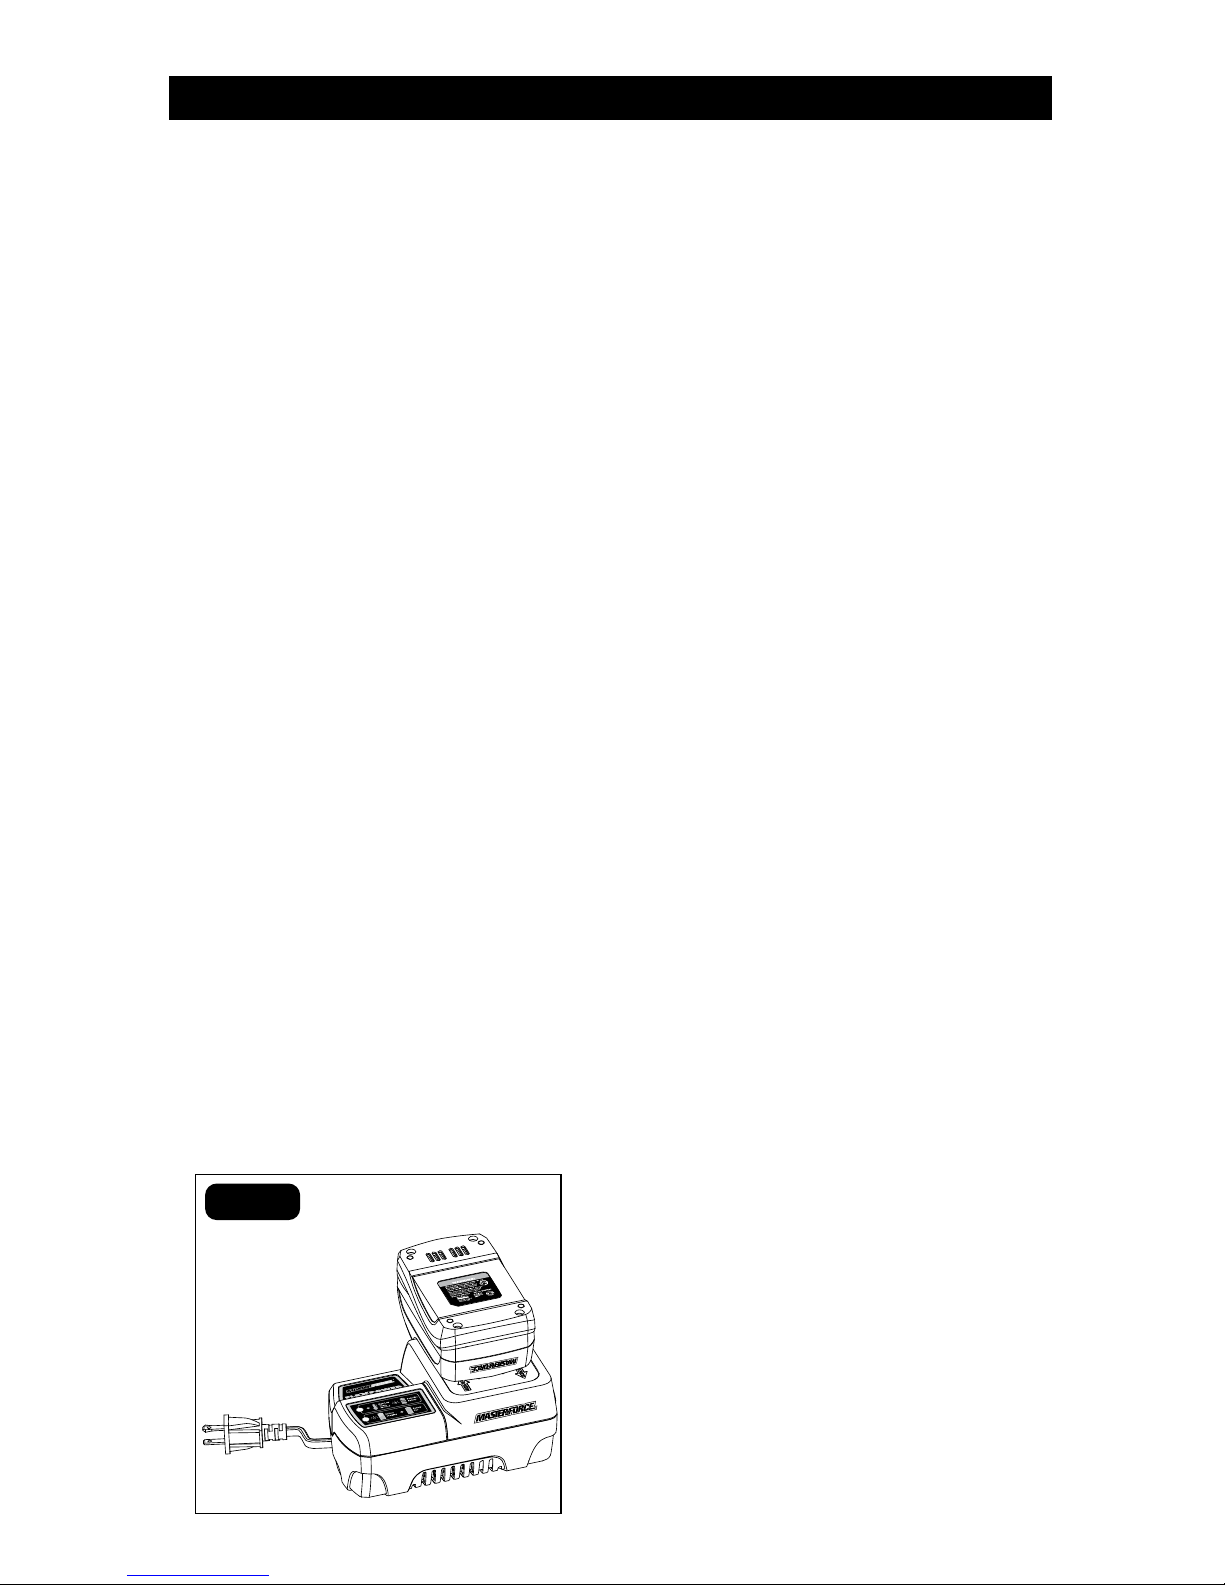
HOW TO CHARGE THE BATTERY
PACK (FIG. 3)
A fully discharged battery pack will charge
about 60 minutes (with charger 252-8037) in
the desired surrounding temperature.
1. Charge the battery pack with the correct
charger.
2. Connect the charger to a power supply .
3. Attach the battery pack to the charger
by aligning the raised ribs of the battery
pack with the slot in the charger. Slide
the battery pack onto the charger.
4. The charger will communicate with the
battery pack’s circuitry to evaluate the
condition of the battery pack.
5. During normal charging, the green LED
on the charger will flash continuously.
6. After charging is complete, the green
LED on the charger will be on. The
power indicator LED lights will not be
displayed when the power indicator
button is pressed while the battery pack
is on the charger.
7. The battery pack will fully charge, but
will not overcharge, if left on the charger.
FIG. 3
Page 11
Page 10
OPERATION
CHARGING A HOT
BATTERY PACK
If the battery pack is above the normal
temperature range, the red LED will illuminate
and the green LED will be off. When the
battery pack cools down to approximately
122°F, the charger will automatically begin
charging.
CHARGING A COLD
BATTERY PACK
If the battery pack is below the normal
temperature range, the red LED will
illuminate and the green LED will be off.
When the battery warms to a temperature
of more than 41°F (5°C), the charger will
automatically begin charging.
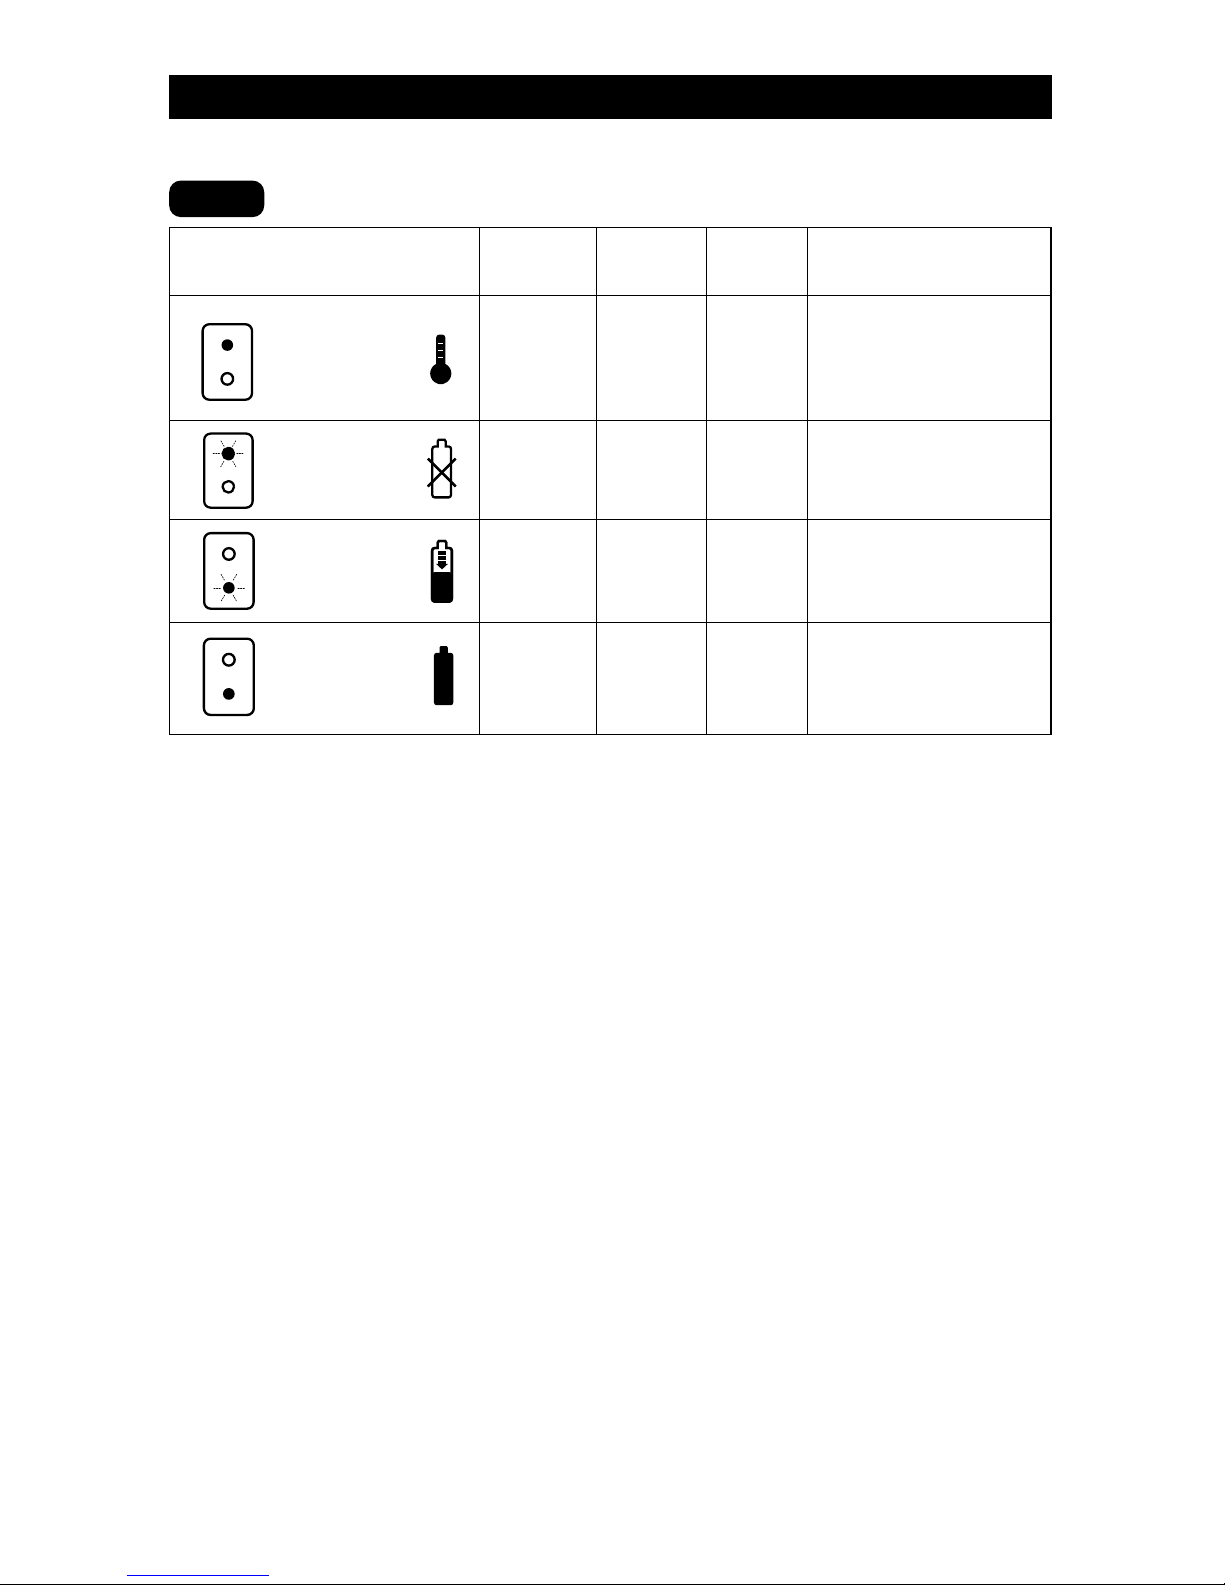
LED FUNCTIONS OF CHARGER (FIG. 4)
LED INDICATOR
BATTERY
PACK
RED
LED
GREEN
LED
ACTION
HI / LO TEMP.
Hot/Cold
battery
On Off
Fast charge will begin
when battery returns
to between 50°F (10°C)
and 104°F (40°C)
DEFECTIVE
BATTER Y
Defective Flashing Off
Battery pack or
charger is defective
BATTERY
CHARGING
Charging Off Flashing Charging
BATTERY
FULL
Fully
charged
Off On
Charging is
complete
DEFECTIVE BATTERY
If the charger detects a problem, the red LED
will begin flashing and the green LED will be off.
1. If registering as defective, remove and
reinsert the battery pack in the charger.
If the LED status reads “defective” a
second time, try to charge a different
battery pack.
2. If a different battery pack charges
normally, dispose of the defective
battery pack (see Maintenance section).
3. If a different battery pack also indicates
“defective,” the charger may be defective.
FIG. 4
Page 12
Page 11
MAINTENANCE
WARNING:
To ensure safety and
reliability, all repairs should be performed
by a qualified service technician.
WARNING:
Always wear safety
goggles or safety glasses with side
shields when using compressed air to
clean tool. If the operation is dusty, also
wear a dust mask.
WARNING:
To avoid serious
personal injury, always remove the battery
pack from the tool when cleaning or
performing any maintenance.
BATTERIES:
The battery pack is equipped with LithiumIon rechargeable batteries. The duration of
use from each charge will depend on the
type of work performed.
The batteries in this tool have been designed
to provide maximum trouble-free life. Like
all batteries, they will eventually wear out.
Do not disassemble the battery pack or
attempt to replace the batteries. Handling
the batteries, especially when wearing rings
and jewelry, could result in a serious burn.
To obtain the longest possible battery life,
read and understand the operator’s manual.
It is good practice to unplug the Charger
and remove the Lithium-Ion battery pack
when it is not in use. For Lithium-Ion battery
pack storage longer than 30 days:
1. Store the Lithium-Ion battery pack
where the temperature is below 80°F
(26°C) and free of moisture.
2. Store Lithium-Ion battery packs in a
30%-50% charged condition.
3. Every six months of storage, fully charge
the Lithium-Ion battery pack.
4. Exterior may be cleaned with a cloth or
soft non-metallic brush.
BATTERY PACK REMOVAL AND
PREPARATION FOR RECYCLING
To preserve natural resources, please
recycle or dispose of batteries properly.
This product contains Lithium-Ion batteries.
Local, state, or federal laws may prohibit
disposal of Lithium-Ion batteries in ordinary
trash. Consult your local waste authority for
information regarding available recycling
and/or disposal options.
WARNING:
Upon removal of the
battery pack for disposal or recycling,
cover the battery pack’s terminals
with heavy-duty adhesive tape. Do not
attempt to destroy or disassemble battery
pack or remove any of its components.
Lithium-Ion batteries must be recycled or
disposed of properly. Never touch both
terminals with metal objects and/or body
parts as short circuit may result. Keep
away from children. Failure to com-ply
with these warnings could result in fire
and/or serious injury.
Page 13

Page 12
TROUBLESHOOTING
PROBLEM CAUSE SOLUTION
The battery pack
isn’t charging
Unconnected to charger
Attach the battery pack to
the charger.
Page 14

Page 13
NOTES
Page 15

Page 14
SAVE YOUR RECEIPTS
THIS WARRANTY IS VOID WITHOUT THEM
20V Lithium-Ion Battery Pack
WARRANTY
90-DAY MONEY BACK GUARANTEE:
This MASTERFORCE® brand power tool carries our 90-DAY Money Back
Guarantee. If you are not completely satisfied with your MASTERFORCE® brand
power tool for any reason within ninety (90) days from the date of purchase, return
the tool with your original receipt to any MENARDS® retail store, and we will provide
you a refund – no questions asked.
3-YEAR LIMITED WARRANTY:
This MASTERFORCE® brand power tool carries our famous No Hassle 3-Year
Limited Warranty to the original purchaser. If, during normal use, this
MASTERFORCE® power tool breaks or fails due to a defect in material or
workmanship within three (3) years from the date of original purchase, simply bring
this tool with the original sales receipt back to your nearest MENARDS® retail store.
At its discretion, MASTERFORCE® agrees to have the tool or any defective part(s)
repaired or replaced with the same or similar MASTERFORCE® product or part
free of charge, within the stated warranty period, when returned by the original
purchaser with original sales receipt. Not withstanding the foregoing, this limited
warranty does not cover any damage that has resulted from abuse or misuse of the
Merchandise. This warranty: (1) excludes expendable parts including but not limited
to blades, brushes, belts, bits, light bulbs, and/or batteries; (2) shall be void if this
tool is used for commercial and/or rental purposes; and (3) does not cover any
losses, injuries to persons/property or costs. This warranty does give you specific
legal rights and you may have other rights, which vary from state to state. Be
careful, tools are dangerous if improperly used or maintained. Seller’s employees
are not qualified to advise you on the use of this Merchandise. Any oral
representation(s) made will not be binding on seller or its employees. The rights
under this limited warranty are to the original purchaser of the Merchandise and may
not be transferred to any subsequent owner. This limited warranty is in lieu of all
warranties, expressed or implied including warranties or merchantability and fitness
for a particular purpose. Seller shall not be liable for any special, incidental, or
consequential damages. The sole exclusive remedy against the seller will be for the
replacement of any defects as provided herein, as long as the seller is willing or
able to replace this product or is willing to refund the purchase price as provided
above. For insurance purposes, seller is not allowed to demonstrate any of these
power tools for you.
For questions / comments, technical assistance or repair parts – Please Call Toll
Free at: 1-866-917-4374. (M-F 8am – 6pm)
Page 16

07/2012
© 2012 Menard, Inc., Eau Claire, WI 54703
 Loading...