

Page 1

PULP
MP3 PLAYER WITH RADIO
Table of Contents
Precautions ..........................................................................................................................................................................................………..….2
Product Features..............................................................................................................................................................................................2
System Requirement ......................................................................................................................................................................................3
Basic Operation .................................................................................................................................................................................................3
Connecting to a PC ..........................................................................................................................................................................................3
Install Device Driver for Windows 98SE ................................................................................................................................3
Operation Procedure.......................................................................................................................................................................3
Removing Hardware........................................................................................................................................................................3
Battery Charging............................................................................................................................................................................................... 3
Copy Music Files to the Player....................................................................................................................................................................4
Start-up/down Procedure ...........................................................................................................................................................................4
Main Menu...........................................................................................................................................................................................................4
Music......................................................................................................................................................................................................................5
LCD Display ..........................................................................................................................................................................................5
Operation procedure .......................................................................................................................................................................5
FM Radio...............................................................................................................................................................................................................6
LCD Display ..........................................................................................................................................................................................6
Operation Procedure.......................................................................................................................................................................6
FM Submenu .......................................................................................................................................................................................6
FM Record ...........................................................................................................................................................................................................7
LCD Display ..........................................................................................................................................................................................7
Operation Procedure.......................................................................................................................................................................7
Cautions.................................................................................................................................................................................................7
Recordings...........................................................................................................................................................................................................7
LCD Display ..........................................................................................................................................................................................7
Operation Procedure.......................................................................................................................................................................7
Function of the Recordings...........................................................................................................................................................7
MIC. Record.........................................................................................................................................................................................................8
LCD Display ..........................................................................................................................................................................................8
Operation Procedure.......................................................................................................................................................................8
Cautions.................................................................................................................................................................................................8
Folder Navigation..............................................................................................................................................................................................8
Open the Folder Mode ....................................................................................................................................................................8
Select the folder or file.................................................................................................................................................................... 8
Open/Close folder ............................................................................................................................................................................8
Settings .................................................................................................................................................................................................................9
Operation Procedure.......................................................................................................................................................................9
Delete .....................................................................................................................................................................................................................9
Delete All ...............................................................................................................................................................................................9
Memory/FW ......................................................................................................................................................................................................9
Exit............................................................................................................................................................................................................................9
Trouble Shooting...............................................................................................................................................................................................9
Specification .....................................................................................................................................................................................................10
1
Page 2
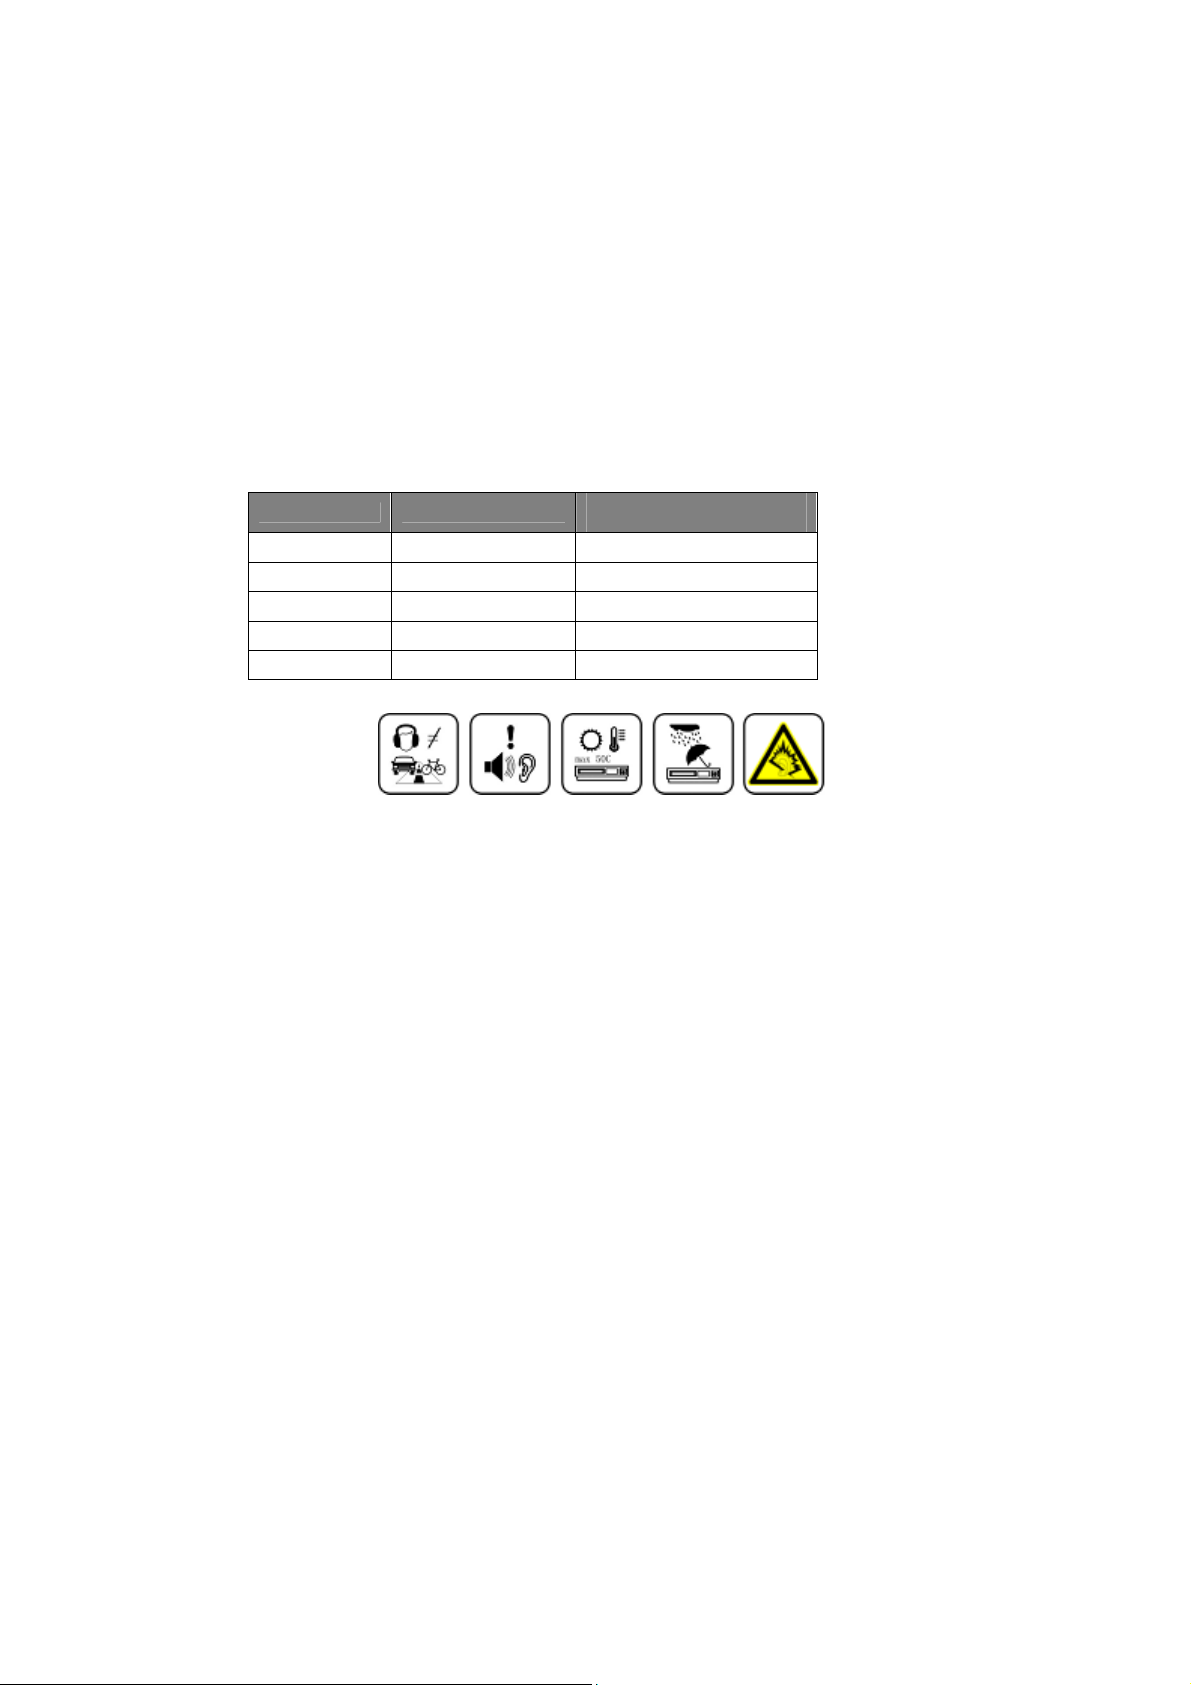
Precautions
1. Never use the player during driving or operating other vehicles to avoid traffic accident, which also be written in the law in some districts. Even
in walking especially crossing the street.
2. Please also do not listen in extremely high volume to avoid any dangerous. Wherever with potential risks, please stop using the player for
safety purpose.
3. Please insert the earphone prior to turn on the player, which can not only avoid damaging the earphone but keep the player in good condition.
4. Keep the player clean and never store the player close to the heat source or dirty, humid or rainy places and avoid direct sunlight.
5. If the surface is dirty, please clean with soft cloth wet with clean water or soft abluent and never clean the case with alcohol or diluents.
6. Never use the player in extremely dry environment to avoid static.
7. Never disconnect the player from PC abruptly during downloading, uploading and formatting to avoid program failure.
8. In order to provide the best access performance, it will be unable to format in FAT-32 in PC if your mp3 flash memory capacity is 128MB.
9. Attention: Because of the different memory calculating method and the player software (firmware) is stored in the device flash memory and, it
will cause the difference between flash memory marked capacity and real capacity. The real flash memory capacity is lesser than the marked
memory capacity of this device is normal. Due to different firmware size, it will have the different free flash memory capacity. Please refer the
table as below for more details.
Marked capacity Real capacity range
128MB 122MB~128MB 73MB~127MB
256MB 244MB~256MB 191MB~255MB
512MB 488MB~512MB 428MB~511MB
1GB 953MB~1000MB 879MB~999MB
2GB 1907MB~2000MB 1804MB~1999MB
Free capacity range after
stored firmware
Product Features
- Support formats MP3 WMA WAV
This player supports playback of music files which type is MP3, WMA or WAV..
- Voice recording function
A built-in microphone inside the player enables easy voice recording.
- FM Tuner
This player provides a high-performance FM Tuner that allows users to perform automatic channel search, set “favorite” channels and record
“favorite” programs.
- Built-in 128*64 double color OLED screen
There is a build-in 128*64 double color OLED screen.
- Supports multilingual display
This player supports mutiple languages user interface.
- Eye-catching design of the case
The player is really an eye-catching design with touch buttons.
- High Playback quality
Sound quality is higher than 90dB SNR.
- Plug and play portable storage
Allows data transfer to and from a PC with USB 1.1 / 2.0 full-speed interface. The player is also a portable storage device that supports Mass
Storage Class without the need to install additional driver, except for Win98SE.
- Easy and quick battery charging
The player’s battery can be charged via USB port from a computer or an USB interface adapter. It can be fully charged in 4 hours approximately and
80% charged in 2 hours.
2
Page 3
System Requirement
System requirement of this player:
1. Microsoft
2. Pentium 200MHz CPU or higher level CPU
3. USB port
4. Enough hard disk free space
5. CD-ROM drive
®
Windows 98SE/2000/Me/XP
Basic Operation
Connecting to a PC
We make no representation for the errors, omissions or updates of this document. We also make
no representation for the data or music files lost of the player.
Microsoft Windows Media and Windows are trademarks of Microsoft Corporation.
Trademarks of other products mentioned in this user's manual are owned by their respective
companies or organizations.
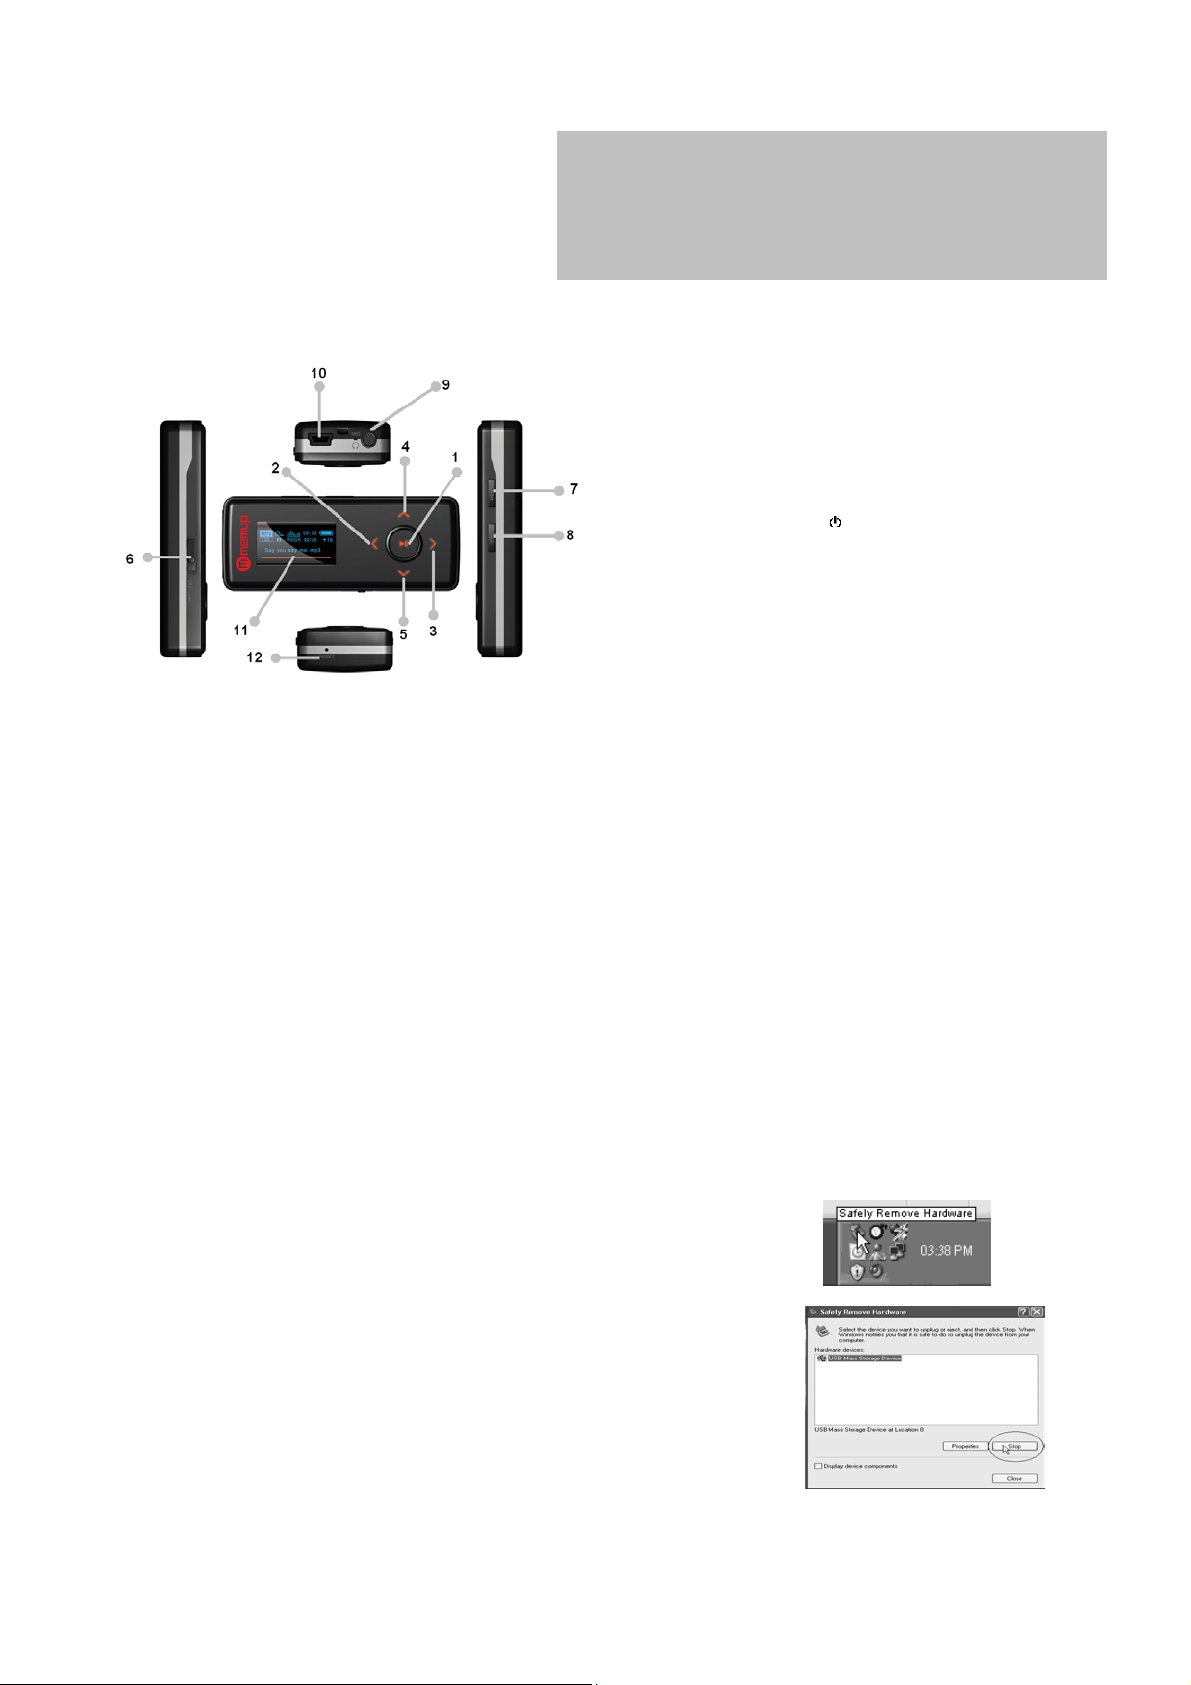
(1) Play/Pause Button
(2) Rewind Button
(3) Forward Button
(4) Volume Up Button
(5) Volume Down Button
(6) Hold Key
(7) Power/Menu Button (
(8) REC Button
(9) Earphone Jack
(10) USB Port
(11) Display Area
(12) Reset
/M)
Install Device Driver for Windows 98SE
1. Execute setup.exe in driver CD and complete the driver installation.
2. Reboot the PC.
3. Connect the MP3 player to the USB port of PC
Operation Procedure
To upgrade firmware or copy music to the player, please first to power the player off and connect the player to the PC by using a USB cable.
After connecting to a PC, the system will create a removable drive in “My Computer” and from which the data stored on the player becomes
accessible. “Ready” will be shown on the player if successfully connected. Note that please do not use USB hub or USB extended line when connection.
The files stored on the player can be managed through Windows File Explorer or “My Computer” to copy favorite music files or data to the player; or
deleting files stored in the player.
After file access is completed, please follow the steps below to remove the player to prevent file damages.
Removing Hardware
Use the left button on the mouse to double-click on the icon for removing hardware that is located on the
lower right corner of the screen. Please refer to the right picture:
When the following screen appears, click “Stop” button to remove the hardware safely. The USB cable
can then be removed from the player, please refer to the right picture:
3
Page 4

Battery Charging
Be sure to charge when first time to use the player. This product adopts build-in rechargeable Li-Ion battery.
Connect this player to a PC. Please refer to “Connecting to a PC” on previous section for instructions.
The READY display will be shown on the player as the right picture. The battery indicator on the right top of the display shows the battery level.
When the battery is charging, the icon will be changing from an empty battery to a full one to indicate the process.
Æ
The right icon will replace the charging one when the battery is full.
Although it contains a hardware protection circuit, please do not charge the battery for more than 12 hours at a time.
During charging, it’s normal that the player will have a little heat. The battery should be charged and discharged for several times to optimize power
performance.
Note: The mp3 player only accepts the standard USB 2.0 output voltage and current to charge the built-in Li-Ion battery: 5-Volt voltage and less than
500mA current. If the charging voltage and current are out of the compass, it will damage the battery and the mp3 player. It will be no warranty in this
case. Please make sure the output voltage and current of the USB port on your PC or USB adapter before charging this player.
Copy Music Files to the Player
If the connection is successful, a removable drive icon will appear in “My Computer”.
First, find out your favorite MP3 or WMA music files in “My Computer”.
Second, use the mouse to select those music files and click those files with the right button of the
mouse to select “Copy”.
Third, find MEMUP Removable Drive in “My Computer” and enter it, then right click on the mouse to
paste those files to the Removable Drive.
After the file copy is completed, remove the player safely from the PC.
Start-up/down Procedure
To power on the player, press the Menu/Power button while the player is off.
Press and hold the Power/Menu Button to power off the player while the player is on to ensure the settings are saved. (The setting will only be saved if the
player is power off properly by the user or time up regarding to timer setting).
Main Menu
When pressing Power/Menu button, the main menu will be shown on the LCD display. To select the main function by touching Rewind button or Forward
button then touch Play/Pause button to confirm the selection. Pressing Power/Menu button will leave main menu and back to the main functions. The
main menu is as below:
(1) Music
(2) FM radio
(3) Recordings
(4) Folder navigation
(5) Settings
(6) Delete
(7) Memory/FW
(8) Exit
4
Page 5

Music
LCD Display
Playback status
Vol ume
File type
Play mode
EQ
A-B playback indicator
Key lock
Battery
Current track no. /total track no.
Elapse time/Total duration
ID3 tag
Operation procedure
1. Select “Music”
Music function is a default function when power on the player. You also can open the music function by select the Music in the main menu.
2. Play and Pause
Music playback stops first when power on or switching to Music playback function from other function.
While the music is stop or paused, touch Play/Pause button to play the music .Press the Play/Pause button to pause the music while the music is playing.
3. Go to previous
Touch the Previous(<) button to replay the current track .If the current track has been played less than five seconds ,touch the Previous button will skip to
the previous track in the current play list , if the current track is the first track in the play list it will skip to the last tract in the play list .
4. Go to next
Touch the Forward(>) button to skip to the next track , if the current track is the final track it will wrap around to the first track in the current play list .
5. Fast rewind
Touch and hold Rewind button will cause the time code to seek backward. If the start of the track is reached ,seeking will skip to the end of the previous
track .If the start of the first track in the play list is reached, seeking will skip to the end of last track in the play list .
6. Fast forward
Touch and hold Forward button will cause the time code to seek forward within the current track. If the end of the track is reached, seeking will skip to the
start of the next track .If the end of the last track in the play list is reached ,seeking will skip to the start of first track in the play list .
7. Adjust EQ Mode
Press Rec button to adjust EQ Mode when the music paused or stopped. You can also touch Power/Menu button to switch to main menu and then select
Settings function and enter to its submenu, then select EQ.
EQ Mode Selection: Normal Î RockÎ Jazz Î Classic Î PopÎ Bass Î Treble
8. Multiple Play Modes
Touch Power/Menu button to switch to main menu. Select Settings function and enter to the submenu, then select Play Mode.
Music: Normal / Repeat One / Repeat All / Shuffle / Shuffle and Repeat / Preview
Voice: Normal / Repeat One / Repeat All
9. Set AB Mode
Pressing REC button while in the music playback function means select the starting point A, pressing REC button again to select the ending point B. Press
REC button again to stop the playback of AB section.
10. Back to Main Menu
Press Power/Menu button will leave music function and open Main Menu.
5
Page 6

FM Radio
LCD Display
Vol ume
Station
memory
Manual
scan
Operation Procedure
1. Select “FM Radio”
Select FM Radio in main menu to listen to the FM radio programs. The device will search for frequencies automatically when first time entering or no saved
stations.
2. Switch FM Radio Function
Touch Play/Pause button to switch between the Station memory Mode and Manual scan Mode.
3. Switch radio station
Touch Rewind button or Forward button to switch between the saved radio stations under Station memory Mode.
4. Fine-tune the frequency
Touch Rewind button or Forward button to fine-tune the frequency backward or forward by 0.1MHz under Manual scan Mode.
It will quickly adjust the frequency backward or forward by touch and hold the Previous or Forward button in the Manual Scan Mode.
5. Back to Main Menu
Press Power/Menu button to open FM Submenu and select “Exit” will leave FM radio function, back to the main menu.
Battery
FM frequency
Slider of FM
frequency
FM Submenu
Press Power/Menu button to enter FM submenu under FM radio function.
1. FM Radio
Touch Play/Pause button to back to FM Radio function.
2. Save station
Touch Play/Pause button will open the window of save station as the picture below. Touch Play/Pause button again to
save the current station. The player will automatically save the current frequency to the current station number. You can
also touch Rewind or Forward button to select the station number you want to save.
Press Power/Menu button to back to Station memory Mode if you do not want to save any station.
3. Delete station
Touch Play/Pause/Power button will open the window of delete station as the picture below. Touch Play/Pause button
again to delete the current station.
Press Menu/Power button to back to Station memory Mode if you do not want to delete any station.
4. Auto scan
Select Auto scan and confirm it, the player will search for frequencies automatically. The player will search for the
20(maximum, it can be less than 20) strongest signal channels and memorize it. The player will return to FM Radio
function after scanning for the station.
5. Exit
Confirm this selection will turn the player back to the main menu.
6
Page 7

FM Record
LCD Display
Vol ume
Status
Recording icon
Battery
Elapse time / Total
Current track
Operation Procedure
1. Open “FM Record”
During FM listening, press and hold REC button to start FM Recording. When the recording icon is flashing, the recording begins.
2. Pause Recording
Touch the Play/Pause button to pause recording and touch it again to resume recording at the same recorded file.
3. Stop Recording
Press REC button or press Power/Menu button to stop recording and the player will remain in FM Radio function. If wish to listen to the recorded FM
program, you have to switch to the Recordings function and select the recorded file F###.WAV.
4. Recorded Files
The recorded file is defined automatically as F###.WAV in FM directory of the player, ### is a figure composed of three numbers starting with 001 for the
first file and 002 for the second one. The format of recorded file is WAV (ADPCM).
Cautions
During recording, the display will show “Device Full!” if the flash memory is full. The recording will be stopped and the recorded file will be automatically
saved. No further recording and file saving are possible.
During recording, the display will show “Low Battery!” warning to warn the user the battery is low. The recording will be stopped and the voice file will be
automatically saved. No further recording and file saving are possible unless the battery is been charged.
Since the recording function consumes more battery power, therefore, if the battery is low, no further recording is possible, even though other functions
may still be played.
Recordings
LCD Display
Play mode
Vol ume
File type
Playback status
Current track
A-B playback indicator
Key lock
Battery
Current track no.
EQ
Elapse time/Total duration
Operation Procedure
Select “Recordings” Function
Select Recordings in main menu to enter Recordings playback function and touch Play/Pause button to start playing. Please refer to the Music function for
the voice files playback and operation. Please note that there is no shuffle and preview play mode in the Recordings playback function.
Function of the Recordings
1. Play recorded files from FM Record.
2. Play recorded files from Mic. Record.
3. Support recorded files in WAV (ADPCM) format that stored in Recordings directory of the player.
7
Page 8

MIC. Record
LCD Display
Recording icon Current track
Vol ume
Status
Battery
Elapse time / Total
duration
Operation Procedure
1. Select “MIC. Record” function
Press REC button to start voice recording from the microphone from whatever function except FM Radio function. When the recording icon is flashing, the
recording begins.
2. Pause Recording
Touch the Play/Pause button to pause recording and touch it again to resume recording.
3. Stop Recording
Touch Power/Menu button or Press REC button to stop recording and the player turn to the Recordings function. Touch Play/Pause button to play the
recorded file V###.WAV.
4. Recorded Files
The recorded file is defined automatically as V###.WAV in Recordings directory of the player, ### is a figure composed of three numbers starting with
001 for the first file and 002 for the second one. The format of recorded file is WAV (ADPCM).
5. Sampling rate
Sampling rate of recorded file can be set under the Settings function. Select Record settings under Settings submenu. The higher the sampling rate, the
better recording quality will gain but will produce larger recorded file size. The lower the sampling rate, the more common quality will gain with longer
recording duration and smaller recorded file size.
Cautions
During recording, the display will show “Device Full!” if the flash memory is full. The recording will be stopped and the recorded file will be automatically saved.
No further recording and file saving are possible.
During recording, the display will show “Low Battery!” warning to warn the user the battery is low. The recording will be stopped and the voice file will be
automatically saved. No further recording and file saving are possible unless the battery is been charged.
Since the recording function consumes more battery power, therefore, if the battery is low, no further recording is possible, even though other functions
may still be played.
Folder Navigation
Open the Folder Navigation
Select Folder navigation in main menu and confirm it. The folder will contain all recordings files if you switched from Recordings function, otherwise the
folder will contain all music files.
Select the folder or file
Touch Rewind or Forward button to select the option. If a track is selected, the player will be switched to music playback function (or Recordings function)
and play the selected track.
Open/Close folder
Touch Play/Pause button will cause the folder opened. The user selects the tracks of the opened folder by touch Play/Pause button or press
Menu/Power button to close the folder and for exit.
Progress bar
Folder
Track
8
Page 9

Settings
System setup allows users to customize their settings.
Attention: The options may vary upon the firmware version.
Operation Procedure
Touch Rewind button or Forward button in the main menu to select
Settings menu and touch Play/Pause button to enter Settings
menu. Touch the previous or forward button to select the submenu
and touch Play/Pause button to confirm the selection or press
Power/Menu button to exit.
Setup
Item
Equalizer Normal, Rock, Jazz, Classical, Pop, Bass, Treble
Play Mode
Contrast The brightness of the display
Display time 5 seconds, 10 seconds, Always on(50%) , Always on(100%)
Shut down 2min, 10min ,30 min, Disable
Record
settings
Language Multiple Languages
Load default Load default settings
Exit Back to main menu
Description
Normal, Repeat one, Repeat all,
Shuffle, Shuffle repeat, Preview
8/11/16/22kHz
Delete
Touch Rewind button or Forward button in the main menu to select Delete functions and touch Play/Pause button to confirm the selection. You will enter
Delete submenu, which includes only delete all. Press Power/Menu button will back to main menu.
Delete All
Touch Rewind button or Forward button to select yes or not to delete all files in the player and touch Play/Pause button to confirm the selection. All files in
the player will be deleted if you confirm yes.
Note
You can also delete one file in the Folder navigation function. Touch Rewind button or Forward button in the main menu to select Folder function and touch
Play/Pause button to confirm the selection. Touch Rewind button or Forward button to select file which you want to delete and press REC button to enter
the submenu of delete one. Touch Rewind button or Forward button to select yes or not to delete the file in the player and touch Play/Pause button to
confirm the selection. The file in the player will be deleted if you confirm yes.
Memory/FW
Display firmware version and total/free flash memory space.
Select Memory/FW in main menu and touch Play/Pause button to confirm it.
Exit
Exit and return to the function (Music or Voice) from where you entered to main menu.
Trouble Shooting
If you have problems in operating your player, please check the trouble shooting guide below before sending it to service.
Problem
If there is no picture displayed after the player is connected to PC and can not serve as a storage device or can not be powered on after the battery is fully
charged, please refer to the following steps to update the software in the player.
Check Items
1. Download the most updated software from the website or copy it from the attached CD (if any) and execute the setup.exe in the folder to complete the
installation.
2. Press and hold Power/Menu button of the player for five seconds and plug in the USB cable.
3. Execute the updated software installed by step (1) to start firmware download program and release the Power/Menu button.
4. If the software upgrade program can not detect the player, press and hold the Power/Menu button and do not release it. Keep the USB connection with
the PC and use a tack or pin to press the RESET at the side of the player. Check the firmware update program can delete out the player or not. If the
program still can not delete the player, unplug the USB cable and repeat step (2) and (3) until the player is detected and the software upgrade is
completed.
5. The upgrade of software may format the player, so please copy the music or files in the player to PC first.
Problem
If you find there is weak signals for FM channels.
Check Items
Remove or turn off interference sources from the player. Interference sources may include a PC and other electronic devices.
Adjust the angle of earphone cord and the player, for the earphone cord is the antenna of the player.
9
Page 10

Problem
No sound from the earphone
Check Items
Check if the earphone is completely inserted into the jack.
Check if the music file formats are supported by the player.
Specification
MP3 bit rate 32~320Kbps Music format MP3, WMA
Sampling rate
Record format WAV (ADPCM) Dynamic current
Recording duration
(8KHz, 32kbps)
Signal to noise
ratio
Dynamic
scope
Distortion <0.05% Screen
Output power 5mW*2 Battery
Storage condition
Working
environment
8/11/16/22kHz
(optional)
512MB: 36 hours
1GB: 72 hours
2GB: 144hours
>90db
>80db (1KHZ)
Humidity <90%,
normal temperature
Humidity <85%,
-10~40 Celsius
Frequency
response
Power off current <500uA
Dimension 75*28.5*13.5
Weight < 40g
Playback duration <10 hours
USB port
20Hz~20KHz
<70mA (play mp3
music & backlight
off)
128*64double
double color OLED
Rechargeable Li-Ion
battery
USB 1.1 / 2.0 Full
Speed
Capacity □512MB □ 1GB □2GB □4GB
Caution: All rights reserved. The products mentioned in this user manual are provided for identification purposes only and may be a brand name or
trademark registered by their respective owners. This peripheral has been designed for both personal and professional use.
This equipment may cause electromagnetic disturbances in residential areas. If this occurs, it is the responsibility of the user to take the appropriate
measures and assume the responsibility and cost. The device must not be used close to or in conjunction with a critical system.
MEMUP shall not be liable for any loss of data or damages caused by the use of a MEMUP device. We reserve the right to make changes in accordance
with technological developments.
10
 Loading...