

Page 1
User manual
www.memup.com
Page 2

1
COMMENTS
Download the latest user manual from the website www.memup.com if you notice that the instructions differ from
those in the present manual.
Do not turn off the player while formatting or downloading data.
Do not expose the device to serious impact or let it fall from a height.
Do not use the player at extremely high or low temperatures, or in a dusty or humid environment. Do not expose it to direct
sunlight.
Regularly create backups of your data to avoid accidental loss.
Avoid using the player within a powerful magnetic field.
Keep the device away from water or any other liquid. If water or another liquid enters the device, immediately turn it off and
clean it.
To avoid corrosion, do not use chemical solutions to clean the device. Clean it with a dry cloth.
Do not try to disassemble, repair or modify the product. This will void the warranty.
Memup reserves the right to improve the product or to modify its specifications or design without further notice.
Before using the product, please read the present manual and keep the instructions for future reference.
Introduction
Congratulations on your purchase of a M28THD! The high degree of integration reduces the weight and size of the device and
makes it handier to use. Its large screen with TFT technology displays information with clarity and precision while the USB 2.0
interface facilitates the transmission of data to and from your computer. The MP4 player contains a lithium-polymer battery that
can be recharged via the USB port on your computer. The built-in microphone can be used to record voice messages and listen
to them directly on the device or on your computer.
Before using the product, please read this manual and keep the instructions for further reference.
Page 3
2
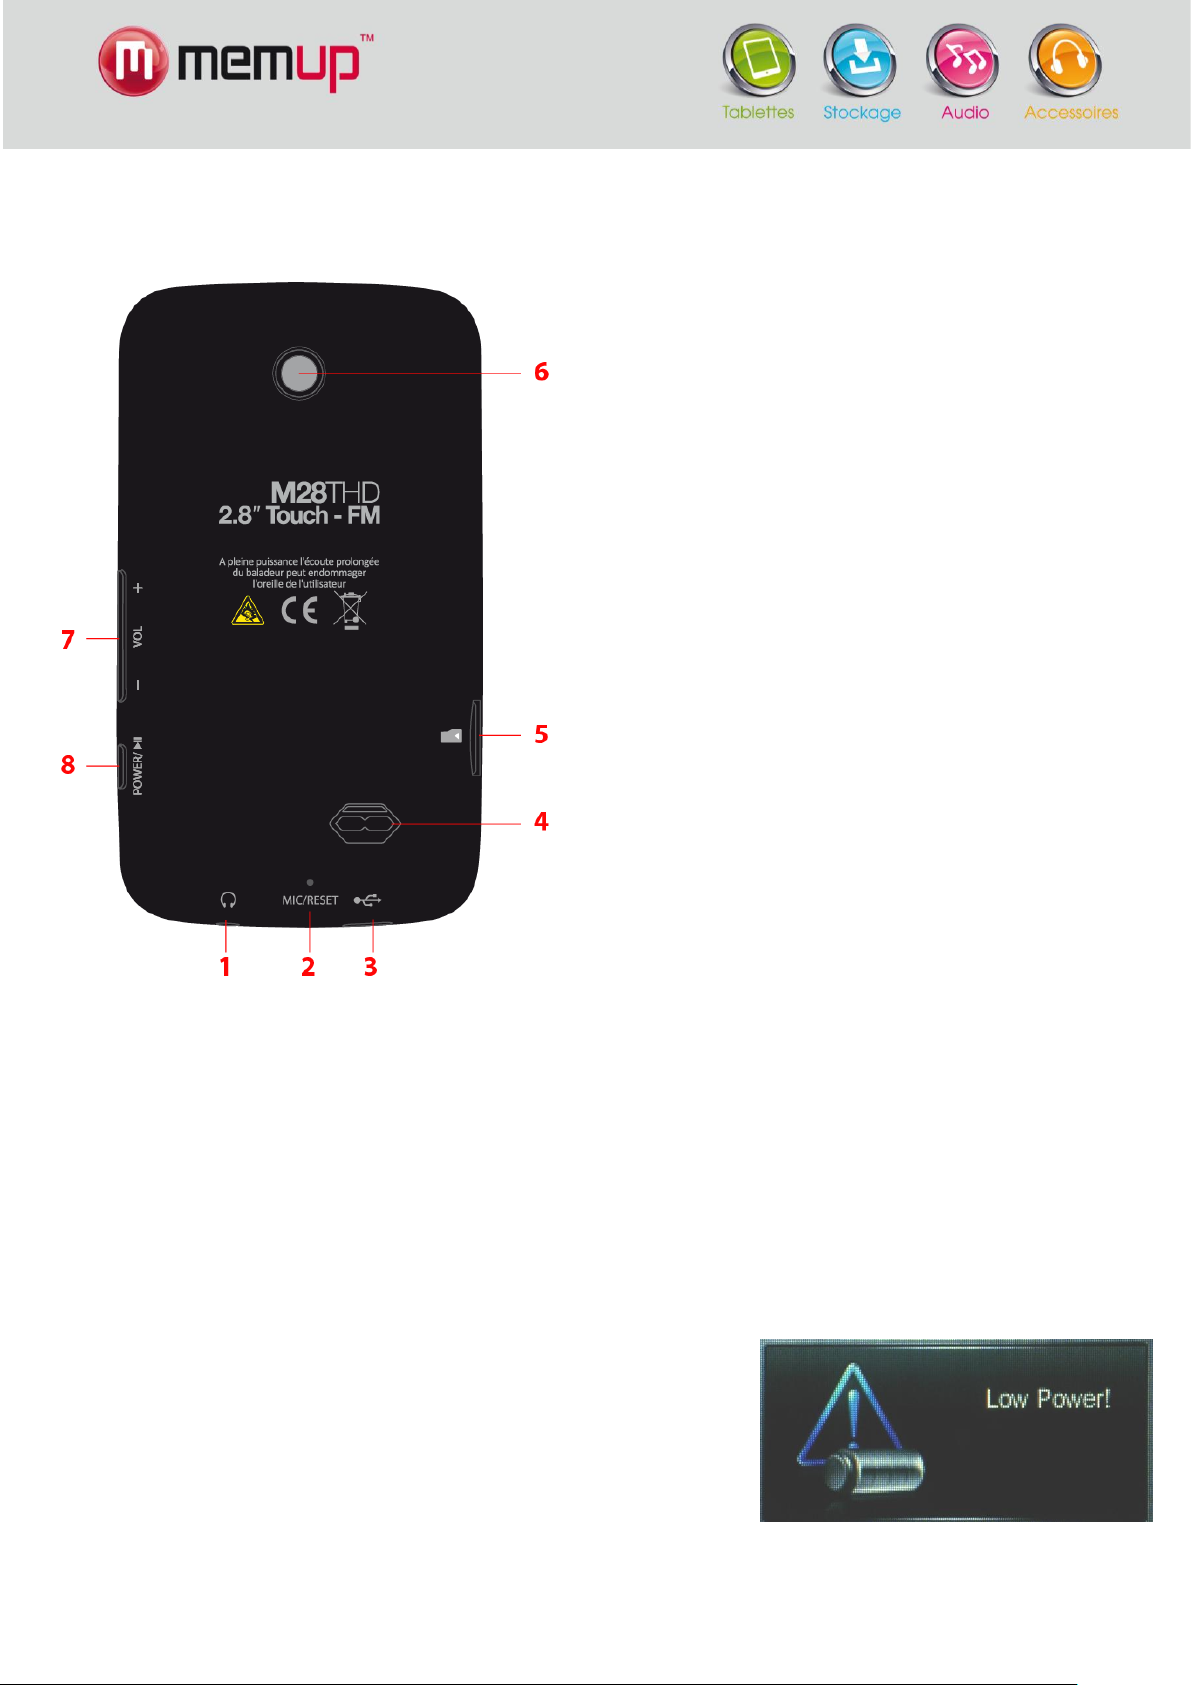
Description
1. Headset jack
2. Microphone / Reset button
3. USB slot
4. Speaker
5. MicroSD card slot
6. Camera / Video recorder / Webcam
7. Volume control
8. Power on / Power off / Play
Below you will find a description of the product.
Use
Power on/off
Power on:
Hold the POWER button down until the animated picture starts up on the screen.
Power off:
Hold the POWER down until the device is switched off.
The player can be turned off automatically after a standby period that you can define in the Settings menu.
Recharging the player
The player can be recharged by plugging the provided USB cable into your PC.
An icon will show up on the right while charging. First turn on your PC, then plug
the player into the PC using a USB cable. 3 or 4 hours are usually enough to
recharge the player entirely. (The first time you use it, we recommend that you
let your player recharge for about 8 hours.)
Page 4
3
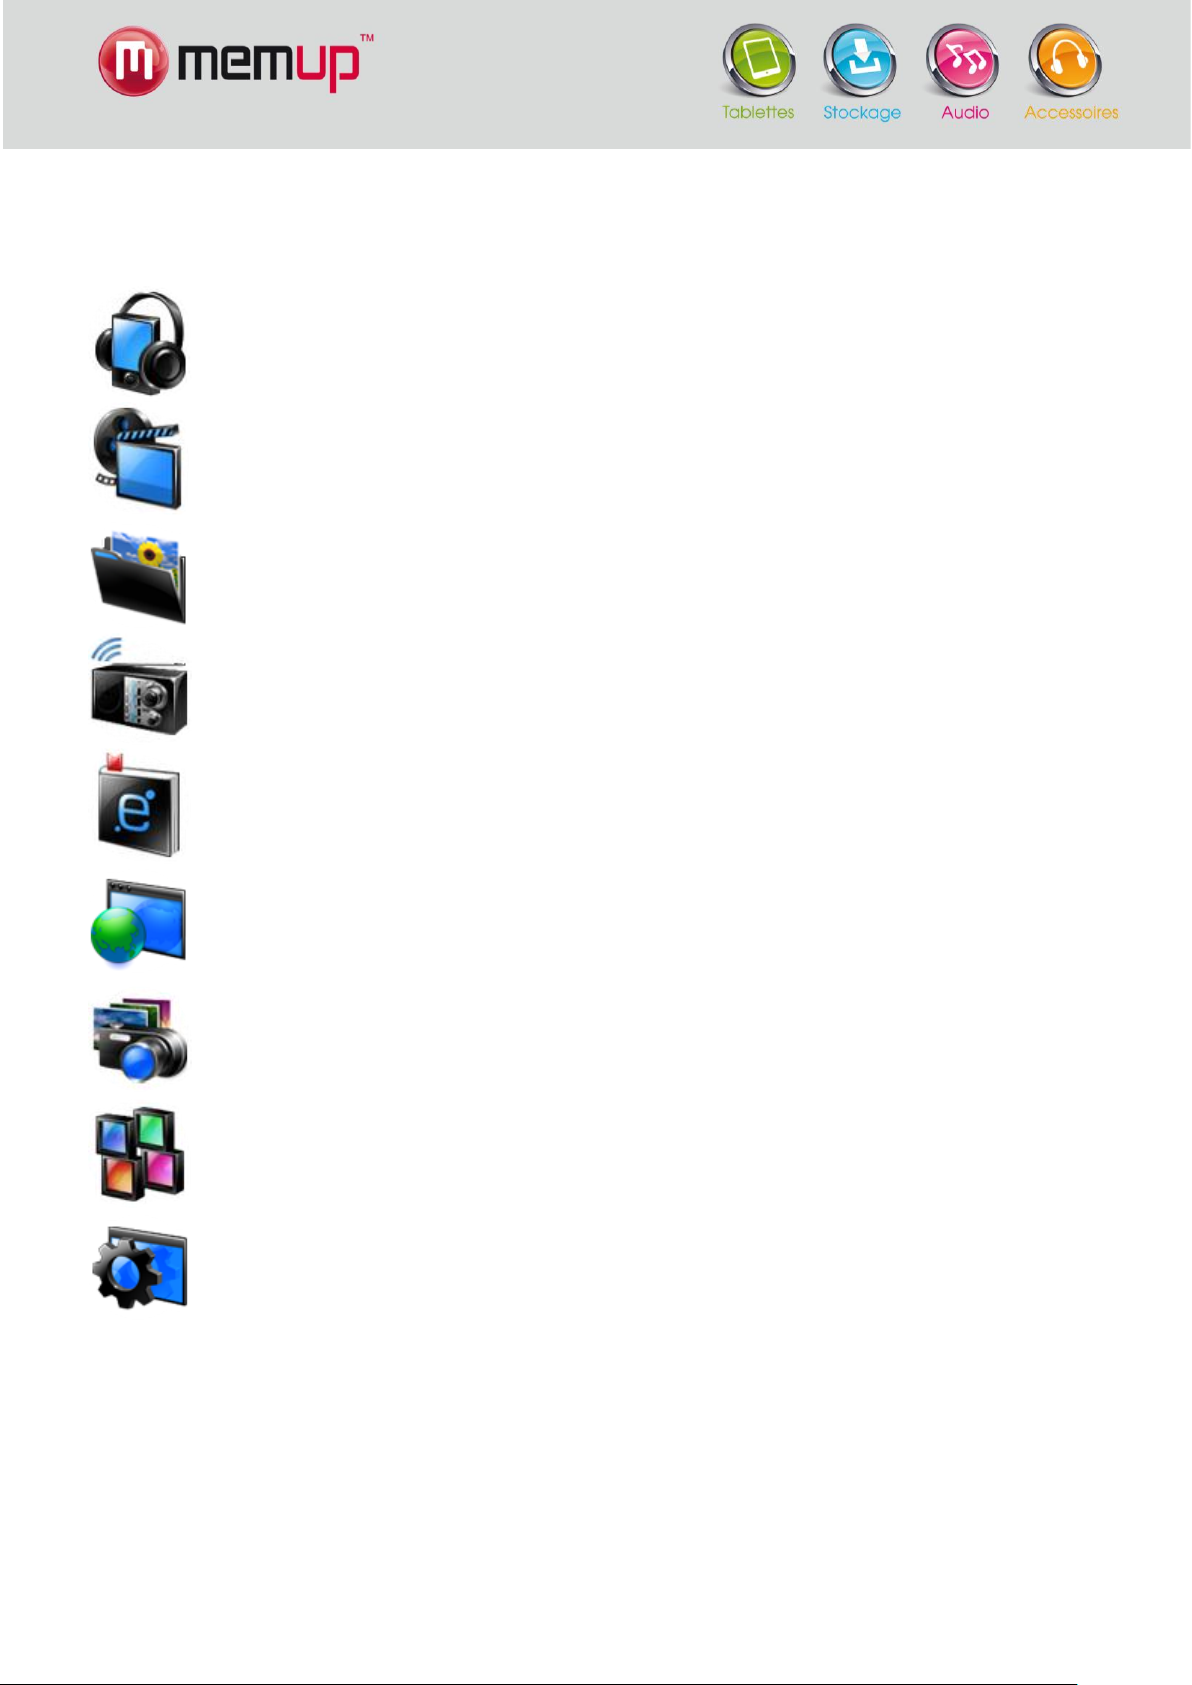
Main menu
Music:
Select this option to listen to songs.
Video:
Select this option to watch videos.
Photo:
Select this option to browse through and look at photos.
Radio:
Select this option to listen to the radio.
E-book:
Select this option to read texts (in .txt format).
Browser:
Select this option to browse through content folders in the internal memory
or flash drive of your player.
Camera/Video camera/
Webcam:
Select this option to take photos, make videos or use the player as a
webcam connected to a PC.
Applications:
Select this option to use the stopwatch, calendar or calculator, or to record
voice messages using the built-in microphone.
Settings:
Select this option to change the system configuration.
When the player is turned on, you will see the main menu displayed with 9 sub-menus from which you can select different
functions and options. Select the icon you want, then click on it to confirm your choice. Available options:
Important:
To start up a function, open a file or set your player, press once on the button to select the option you want, then press
on it again to confirm.
Do not press too hard on the screen to avoid disrupting the touch functionality.
If you find that the touch screen is not sensitive enough, you can adjust its calibration in the Settings menu.
If the device does not react or function, turn it off and on again, or press the reset button on the back of the player.
Page 5
4
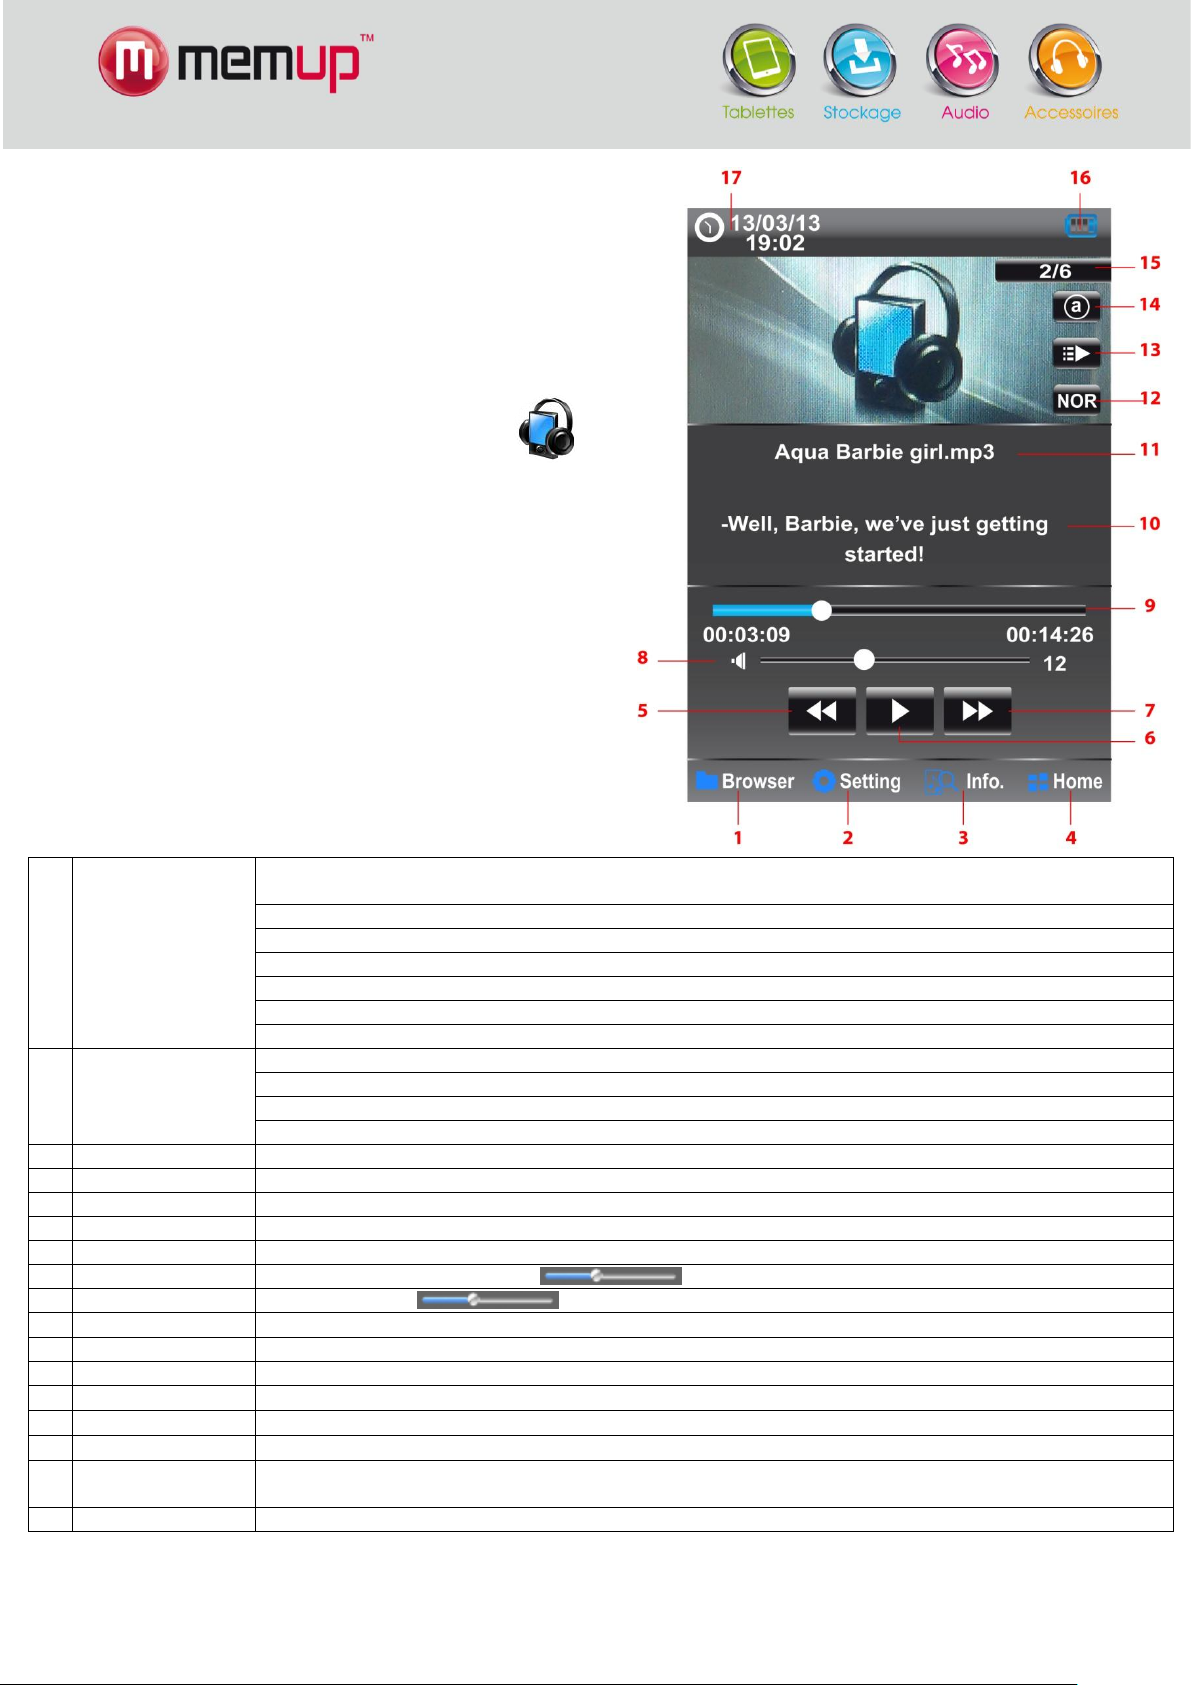
Music
1
Browser:
Use the browser to browse through your music library and choose the music file you want to listen to.
Then press on an audio file to start playing.
Local folder: internal memory directory
Card folder: flash drive directory
All titles: all audio files
ID3 list: all ID3 files
Play lists: 5 play lists
Tag list: all tagged files
2
Settings:
SRS: Change the tonality of the music (WOW, WOWHD or Personal)
Equalisers: Personalise your equaliser by manually adjusting the equaliser effects.
Add to my play list: add an audio file to one of the 5 play lists. Press to confirm, then select a play list.
Tag a title. You can then find it again in Brower > Tag list
3
Info:
Information about the music file: Title, Artist, Album, Genre, Year, Byte, bit/s, DRM
4
Home:
Go back to the main menu on the home screen.
5
Play / Pause
Play the file or put it on pause
6
Fast forward
Play the previous file
7
Fast rewind
Play the next file
8
Volume
While playing, slide the cursor to adjust the volume.
9
Progress bar
Move the cursor to play another section.
10
Lyrics display
Simultaneously displays the lyrics of a song (cf. below)
11
File name
The selected file name is displayed
12
Equaliser mode
Displays the Equaliser mode selected in Settings
13
Play mode
Displays the play mode: regular or random
14
Repeat
Displays repeat mode: regular, repeat the title once, repeat all titles once, etc.
15
Number of titles
Display the title currently playing with reference to all available titles
16
Battery power
level
Shows the time that is left on the battery
17
Date and Time
Displays date and time (Settings in Home>Settings>Date & Time)
Use the Music mode to listen to music (MP3, WMA, WAV, FLAC,
APE).
To activate this mode:
Switch on the player: the Home menu will show up.
Select the function you want by pressing once on then
press again on the Music icon to confirm.
Functions of keys on the music player interface
Page 6

5
Simultaneous display of the lyrics of a song
1
Fast rewind
To play the next file
2
Progress bar
Move the cursor to play a different section.
3
Fast forward
To play the previous file
4
Home
Return to the main menu on the home screen.
5
Volume
While playing, slide the cursor to adjust the volume
6
Play / Pause
To play a file or put it on pause
7
Add a Tag
Your video has been tagged. You can find it again in Browser > Tag list (cf. point 8)
8
Browser
Local folder: internal memory directory
Card folder: flash drive directory
Tag list: all tagged files (directory of defined video tags)
The player synchronises the lyrics files in .LRC format.
How to use lyrics files:
Make sure that each lyrics file has the same name as the matching audio file.
For example:
Audio file: My heart will go on.mp3
Lyrics file: My heart will go on.lrc
Select the.mp3 file and press Play.
Video
Use the Video mode to play videos (3GP, AVI, FLV, RM / RMVB, WMV). To activate this mode, do the following:
Turn on the player: the main menu will be displayed.
Select the function you want by pressing once on then confirm your selection by pressing a second time on the icon.
Browse through your video library using the file browser. Press on the video file you want to watch, then press on it again to
confirm.
Functions of keys on video player interface
NOTE: while playing, the browser and menu bars are hidden. Touch the screen to see the icons.
Page 7

6
1
Slideshow / Manual
Activate or deactivate the automatic slideshow photo display function
2
Browser
Local folder: internal memory directory
Card folder: flash drive directory
3
Slideshow intervals
Select the laps of time between photos in the slideshow: 1 to 5 seconds.
4
Fast rewind
Go to the next file
5
Fast forward
Go to the previous file
6
Home
Go back to the main menu on the home screen.
Photo
Use the Photo mode to display photos (JPEG, GIF, BMP, PNG, TIF). Activate this mode in the following way:
Switch on the MP3 player: the main menu will show up.
Select the function you want by pressing once on then confirm your choice by pressing again on the Photo icon.
Browse through your photo library using the file browser. Select then press on the image file you want to see.
Key functions on photo display interface
NOTE: while playing, the browser and menu bars are hidden. Touch the screen to see the icons.
Page 8

7
FM radio
1
Dictaphone:
Radio recording: record radio programmes. The recorded file will be saved in Save.
2
Settings:
Select a reception area: Asia, Japan, Europe, USA
3
Home:
Return to the main menu on the home screen.
4
Fast return
Search for a station by reducing the frequency.
5
Play / Pause
Start listening or put the radio on pause
6
Fast forward
Search for a station by increasing the frequency
7
Volume
While playing, slide the cursor to adjust the volume
8
Radio frequency band
Indicates the radio frequency. Use fast forward or back to move the cursor and tune the
frequency.
9
Reception area
Indicates the reception area selected in Settings: Asia, Japan, Europe, USA
10
Radio frequency
Indicates the frequency of the selected radio station
11
Delete station
Delete a preset station
12
Preset station
Preset a station: 20 stations can be preset
13
Automatic search
Automatically searches for station frequencies
14
Manual search
Search manually for station frequencies. Use fast forward/back buttons to set the frequency.
15
List of stations
Displays the list of preset stations. Select then confirm.
Use the Radio mode to listen to radio stations. Activate this mode in the following way:
Switch on the player: the main menu will be displayed.
Select the function you want by clicking once on then confirm your choice by clicking again on the icon.
Key functions on the Radio interface
Page 9

8
E-book: read .txt files
1
Browser
Local folder: internal memory directory
Card folder: flash drive directory
2
Previous
Go to the previous page
3
Next
Go to the next page
4
Home
Return to the main menu on the home screen.
5
Text being read
Displays the page that is currently being read.
6
Go to
Go to another part of the text.
7
Tag manager
(Bookmarks)
Manage tagged passages in the text (Bookmarks). To save a tag or choose one that has been
saved.
8
Page
Shows the page that is being read with relation to the total number of pages in the text.
9
Automatic scrolling
speed
Set the speed at which pages must scroll (10, 15, 20, 25 seconds).
10
Page reading mode
Choose between turning pages manually (by using the Prev./Next buttons) or have them scroll
automatically (by adjusting the page scrolling speed).
Use the E-book mode to read text files. To activate this mode:
Switch on the player: the main menu will be displayed.
Select the function you want by clicking once on then click again on the E-book icon to confirm.
Browse through your library by using the file browser. Select then click on the .txt file that you want to read.
Key functions of the text-file reader interface
Page 10

9
Camera / Video camera / Webcam
1
Browser
Displays the image directory
2
Settings
Special effects: White balance (Indoors, Outdoors, Automatic), Brightness (from -3 to 3),
Exposure mode (Auto, Indoors, Outdoors), Special effect (Deactivate, Black-and-white, Sepia,
Negative)
Backup location: Internal memory or memory card
Shutter sound: Deactivate, Sound 1, Sound 2 or Sound 3
Date stamping: Deactivate, Date, or Date & Time
3
Image resolution
Choose photo resolution: 320x240, 1280x960, 1024x768, 640x480
4
Shutter
Press to take a photo. A backup will be saved in the image directory.
5
Home
Return to the main menu on the home screen.
6
Self-timer
Set the self-timer between 5 and 20s or deactivate.
7
8 Video mode
Switch to video-recording mode.
Use the Camera mode to take photos. To activate this mode:
Switch on the player: the main menu will show up.
Select the function you want by clicking once on then click again on the
icon to confirm.
Select your mode (Photo shot, Video recording, Webcam) then click on it again to
confirm.
Key functions on photo shot interface
Page 11

10
Key functions on video recording interface
1
Browser
Displays video directory
2
Settings
Brightness: adjust brightness (from -3 to +3)
Backup location: Internal memory or Card memory
3
Image resolution
Set the photo resolution: 224x174, 176x144 or 320x240px
4
Shutter
Press to start video recording. It will be saved automatically in the video directory.
5
Home
Return to the main menu on the home screen.
6
Special effect
Select the effect you want to apply to the video: Deactivate, Black-and-white, Sepia, Negative
7
Exposure mode
Select: Auto, Indoors, Outdoors
8
Photo mode
Switch to photo mode.
Browser: file browser
Use the Browser mode to browse through folders on your player or manage all
supported files (play or delete).
To activate this mode:
Switch on the player: the main menu will show up.
Select the function you want by clicking once on then click again on the
icon to confirm.
1. Browse through folders and select supported files to start playing.
2. You can select or delete files by using the menu at the bottom of the
screen.
3. Click on Return to go back to the main menu.
Page 12

11
Applications
1
Browser
Displays video directory
2
Settings
Recording format: WAV or MP3
Recording quality: Low, Medium, High
Recording volume: +1, +2 or +3
3
Home
Return to the main menu on the home screen.
4
Record/Pause/Stop
Start recording, put on pause, or stop
5
Recording backup
Make a backup of the recording. The audio file will be stored in the Browser
directory.
6
Recording progress bar
Indicates recording time.
7
Recording quality
Indicates the sound quality of the recording, selected in Settings.
8
Audio file name
Shows the name of the file that is being recorded.
Use this menu to access the following functions: Dictaphone, Calendar, Stopwatch, Calculator and Notes
Switch on the player: the main menu will show up.
Select the function you want by clicking once on then click again on the icon to confirm.
Dictaphone – Voice-mail recorder
Use the Dictaphone mode to record voice messages by means of the built-in microphone.
In the Applications menu, select the Dictaphone function by clicking once on the icon, then click on it again to confirm.
Key functions on the Dictaphone interface
Page 13

12
Calendar
Use the Calendar mode to check your calendar.
In the Applications menu, select the Calendar function by clicking once on the icon, then click on it again to confirm.
Use the arrows to select the month and year and display the period you want.
Stopwatch
Use the Stopwatch mode to time an activity.
In the Applications menu, select the Stopwatch function by clicking once on the icon, then click
on it again to confirm.
Click on Start to start the stopwatch. When timing, you can click on Next to save different laps.
Up to 5 intermediary laps can be saved.
To time more laps, delete the previous laps by clicking on Delete all.
Calculator
In the Applications menu, select the Calculator function by clicking once on the icon, then click on it again to confirm.
Notes
In the Applications menu, select the Notes function by clicking once on the icon, then click on it again to confirm.
Page 14

13
Settings
Use the Settings mode to change system settings.
To activate this mode:
Switch on the player: the main menu will show up.
Select the function you want by clicking once on then click on it again to confirm.
Key functions on the settings interface
Player information
This screen shows basic information on the player:
Name of player
Firmware version
Total memory space
Space available
Total card space
Remaining card space
Number of music files
Number of image files
Number of video files
Number of text files
Date and time
Time format: Activate or deactivate 24h mode.
Set the time: In order to display the date and time you want, use the arrows to select the year, month, day, hour and
minutes.
Language
Select a language from the list. The player supports the following languages: English, French, German, Italian, Dutch,
Portuguese and Spanish.
Screen – Display
Standby time: Use the arrows to set standby time between 5 seconds and 30 minutes. The player will lock if no
operation takes place within the selected time. If the standby time is 0 seconds, the player will not go on standby and
will not lock automatically. Move the arrow downwards to unlock the player.
Brightness: Use the arrows to select one of 5 degrees of brightness for your LCD screen.
Calibration
Click twice in the centre of the “+” to calibrate the touch screen.
Automatic shut-off
Use the arrows to set the shut-off timer between 10 and 120 minutes. The player will shut off once the set time is over. This
setting is erased once the player is turned off. If the shut-off timer is set on Deactivate, the player will not be turned off.
Reset:
Restore the default settings (Factory settings) of your player.
MAJ Firmware (Update)
Update your player using firmware
Other settings
Format the device: You can choose whether to format either the internal memory or the flash-card memory.
Choose USB mode: You can choose between a USB or a Multimedia device.
 Loading...