

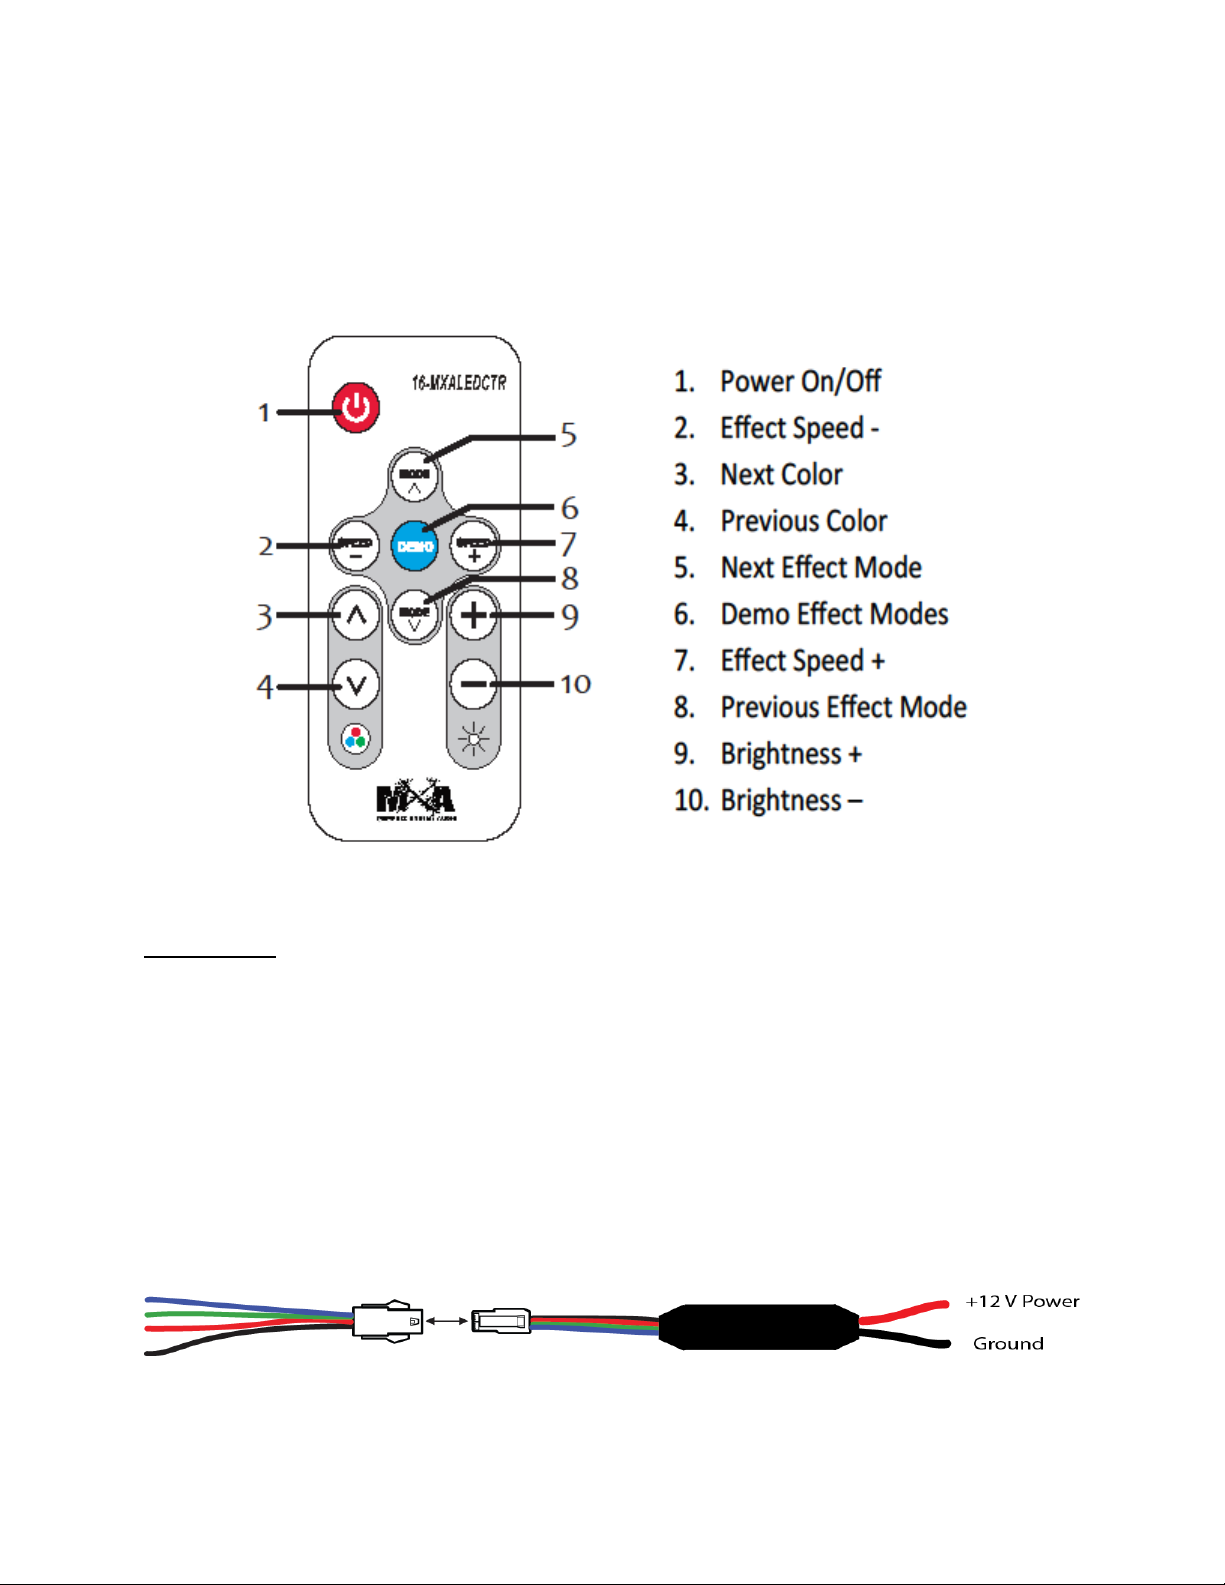
16-MXALEDCTR
Installation: Connect + 12V Power to the red wire from a fused source. Installation of a switch
between the 16-MXALEDCTR and +12V power source can prevent battery drain when not in use. If
using the Remote Turn On lead from a Head Unit, make sure to use a relay to prevent damage to the
Head Unit. Connect Ground to chassis ground. Use supplied pig tail harness from the 16-MXALEDCTR to
extend wiring were needed to supplied pig tail harness of 16-MXASP2 and 16-MXASB1 LED Rings.
Installation of 16-MXALEDCTR inside metal enclosures will interfere with the Remotes connectivity.
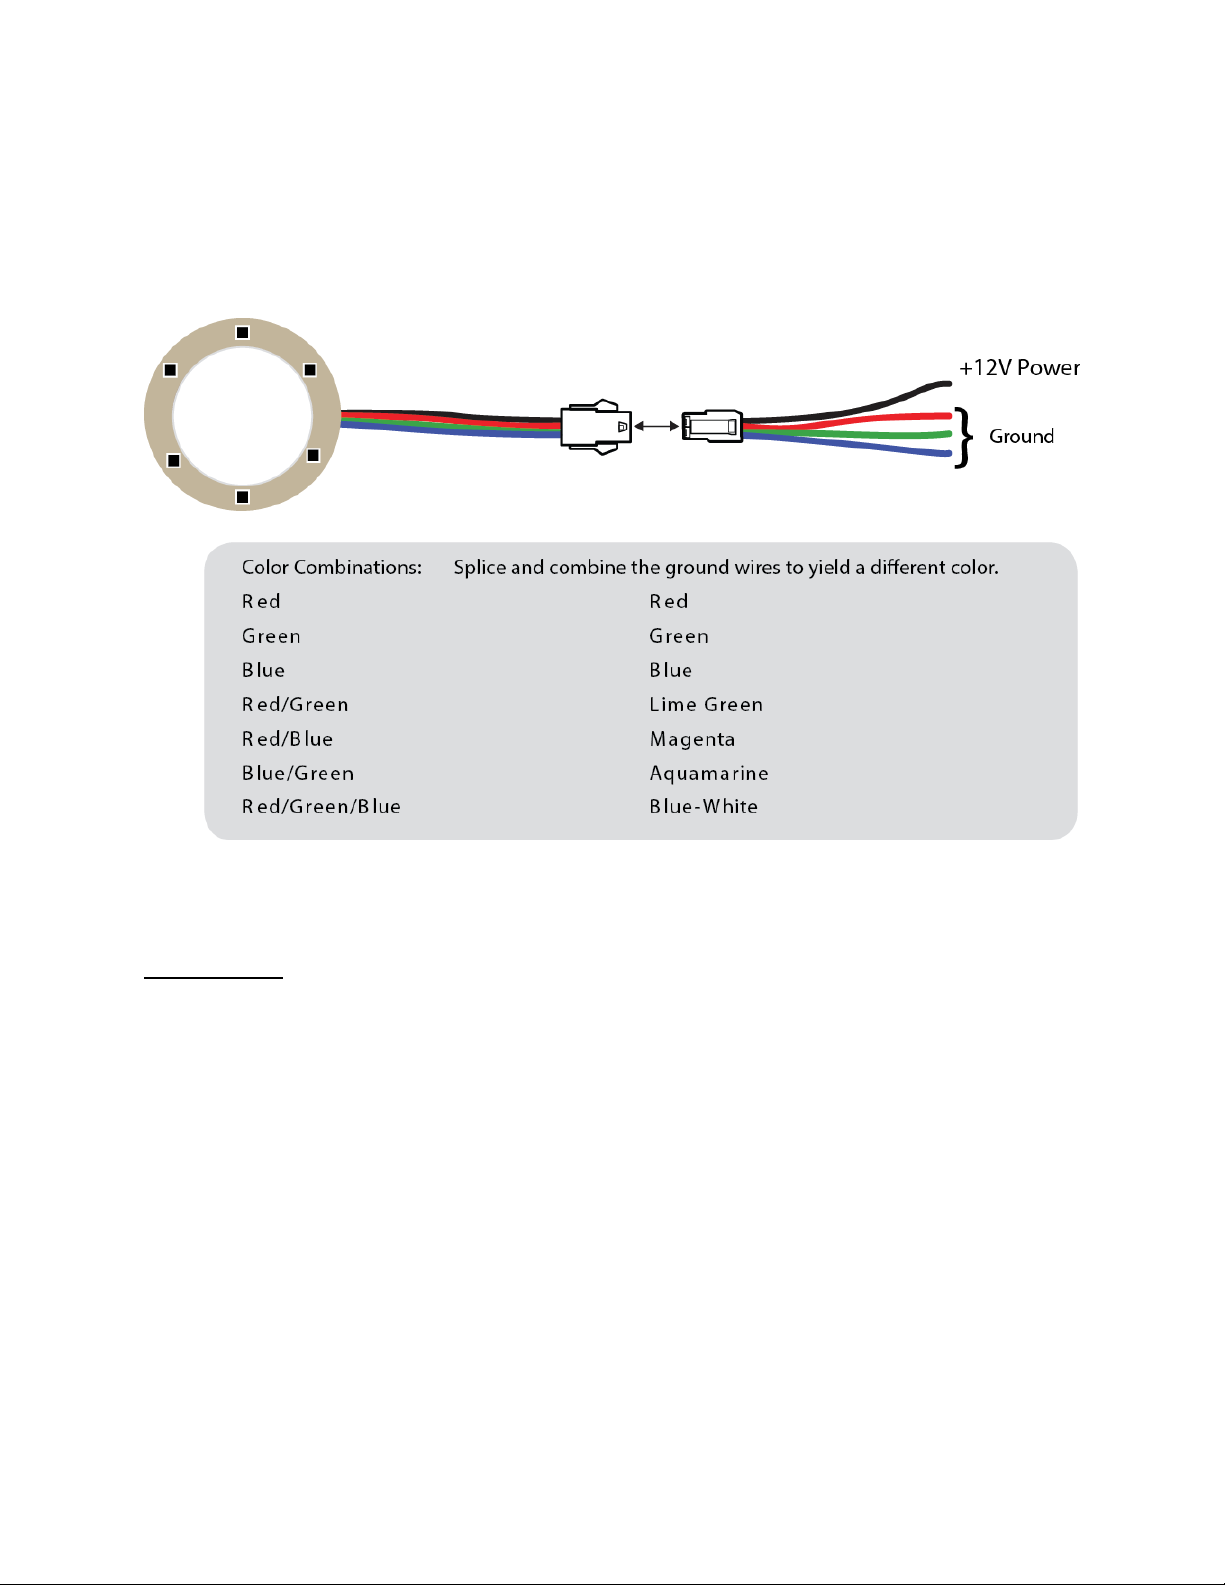
16-MXALEDSP2 and 16-MXALEDSB1
Installation: Attach LED ring to the back of the Speaker or Subwoofer grill with supplied double
sided tape. Run wires down the lower right spoke of the grill/s. Cyanoacrylate glue may be used to
secure wires to back of the grill. Cut a notch on the lower right side of speaker basket, if not already
notched. Make sure that wiring is protected and not pinched during installation. The 16-MXALEDSP2
and 16-MXALEDSB1 can be controlled by the 16-MXALEDCTR or wired directly for single color use. To
use the 16-MXALEDCTR, Connect supplied pigtail harness to the 16-MXALEDCTR’s supplied pigtail
harness. If not using the 16-MXALEDCTR, make sure to connect the Black wire of the supplied pigtail
harness to a switched + 12V fused source and use the chart above to determine the color of wire/s to
connect chassis ground to for the appropriate LED color desired.
 Loading...