

Page 1
SoftwareGUIDE
Guide du logiciel Guía de Software Guia de software
DVD recorder
MULTI FORMAT
Supports Windows®2000/XP/Vista
32023220_SG 050207.qxp:32023292_QIG_LO.qxp 8/3/07 11:48 AM Page 1
Page 2

Table of Contents
1. INTRODUCTION 4
1.1. Congratulations
2. INCLUDED SOFTWARE 4
2.1. Nero StartSmart 3 Essentials
2.2. Nero Express 7 Essentials
2.3. Nero Vision 4 Essentials
2.4. InCD 5 Essentials
2.5. Nero BackItUp 2 Essentials
2.6. Nero ShowTime 3 Essentials
2.7. Nero Cover-Designer 2 Essentials
2.8. Nero Recode 2 Essentials
2.9. Nero MediaHome Essentials
2.10. LightScribe Functionality
2.11. Nero ToolKit
2.12. InCD Reader
2.13. DVD-Video Plug-in
2.14. HE-AAC Plug-in
2.15. Installing the Windows 98SE USB Drivers (For External Drive Hardware Only)
3. SOFTWARE INSTALLATION 8
4. UNINSTALLING THE SOFTWARE 9
5. UNDERSTANDING THE SOFTWARE 10
A. The Command Center
B. User Interface and Navigation
C. Navigation in Nero StartSmart
D. Nero ProductSetup
E. Thirty-Day Trial Functionality
6. BASIC SOFTWARE FUNCTIONS - BURNING CDS AND DVDS 13
a. Make a Data Disc
b. Make an Audio CD
c. Copy a CD
d. Make a DVD Video Disc
e. Creating LightScribe labels
f. Updates & Upgrades
g. FAQs
Version Français 22
Versión en Español 40
Portugese de Versão 65
32023220_SG 050207.qxp:32023292_QIG_LO.qxp 8/3/07 11:48 AM Page 2
Page 3

5
English
2.3. Nero Vision Express 4 Essentials
WithNero Vision Express 4 Essentials, you can record videos and edit or burn
existing video files. You can also use Nero Vision Express 4Essentials to create convenientslideshows and even useyourown music asa soundtrack for them.
2.4. InCD 5 Essentials
InCD5 Essentials is a packet-writing program that formats rewritable discs allowing you
to copy files ontothe disc by simply Dragging and thenDropping the files you have chosen on to your new DVD Recorder drivein Microsoft Windows Explorer or save themto a
discquickly andeasily using NeroExpress 7 Essentials.
2.5. Nero BackItUp 2 Essentials
Nero BackItUp 2 Essentials is a convenient, easy-to-operate program for backing
up and restoring data. It allows you to archive your back-ups on either CD or DVD
discs and even Memorex USB TravelDrives.
2.6. Nero ShowTime 3
NeroShowTime 3allows you to playback nearlyall digitalrecordings (e.g., movies, home
videos, TV programs, home videos, VCDs, SVCDs,etc...) with excellent picture and sound
quality. Nero ShowTime 3 also enables you toplayback audiotracks. It supports most
current formats,including MP3, WAV, AAC, etc.
2.7. Nero Cover-Designer 2 Essentials
Nero Cover-Designer Essentials is a user-friendly program for creating individual
covers and labels.
2.8. Nero Recode 2 Essentials
Nero Recode 2 Essentials allows you to make a DVD video from many short DVD
videos or from a Larger DVD video that you need to fit on a 4.7GB disc. This also works
great for converting your videos to iPod, PSP, and other portable video players.
2.9. Nero MediaHome Essentials
Nero MediaHome Essentials allows you to stream videos, music and images to all your
UPnP (Universal Plug and Play) enabled devices and to Nero ShowTime 3 Essentials.
2.10. LightScribe Functionality
The combination of this new Memorex DVD recorder and the Nero Cover-Designer software allows you to inscribe LightScribe discs with your own photos and text without
having to print and apply a paper label that could peel off if applied incorrectly.
2. INCLUDED SOFTWARE
Your Memorex DVD Recorder kit includes a CD-ROM disc that installs the powerful,
Memorex Nero 7 Essentials™ software Suite that allows you to create and copy digital
audio, data, photo, and video programs on both CD's and DVD's. The package includes:
Note: Be sure to click onthe Read me 1st button to view any important last minute
information thatwillhelp you ensure the best experiencewith your new Memorex DVD
Recorder.
2.1. Nero StartSmart 3 Essentials
NeroStartSmart3 Essentials is the command center ofthe Nero 7 productfamily and
makes it easier tofind, identify, and use thecomprehensive software programs. Once you
havelaunched Nero StartSmart 3 Essentials, all you have to do is select the desired task
and the corresponding software starts automatically.
2.2. Nero Express 7 Essentials
NeroExpress 7 Essentials providesa simple, uncluttered interface to powerfulrecording
programs on both CD and DVD discs.
1. INTRODUCTION
1.1. Congratulations!
Thank you for purchasing a Memorex DVD recorder.
Please follow this Software Guide to begin enjoying the benefits of your new DVD
Recorder. We suggest keeping this guide in a safe place for future reference.
4
32023220_SG 050207.qxp:32023292_QIG_LO.qxp 8/3/07 11:48 AM Page 4
Page 4
7
English
6
2.15. Installing the Windows 98SE USB 2.0 Drivers
(For External Drive Hardware Only):
Important: Memorex does not supportthisproduct with Windows 98SE or WindowsMe.
However, we have provided drivers that will allowthe Hardware portion ofyour product to
workin Windows 98SE. Windows Me does not require our driversin order forthe drive to
work. The Nero softwareprovided with this product does Not support Windows 98SE or
Windows Me.
Note: Do not connect your External Drive toyourcomputer before installing the Windows
98SEUSB 2.0 Drivers.
Follow these steps to install the USB drivers for your External drive onlyif you are using
the Windows 98SE operating system:
1. Turn your computer on.
2. Once your computer has finished loading the Operating System and any programs
thatlaunch whenyou start up, Insert your Memorex Softwareand Driver CD from
yournew MemorexExternal DVD recorder kit.
Note: If the program starts automatically, just click onthe Exit button toclosethe program
and then select your existinginternal CD/DVD drive containing the Memorex CD in
Windows Explorer. Double click on the“Memorex USB 2.0 DriverInstaller AT2V1.32.exe”
program in the "Win98SE USB2 Drivers" directory.
Oncethe programhas launched, follow the on-screen directions to install your drivers
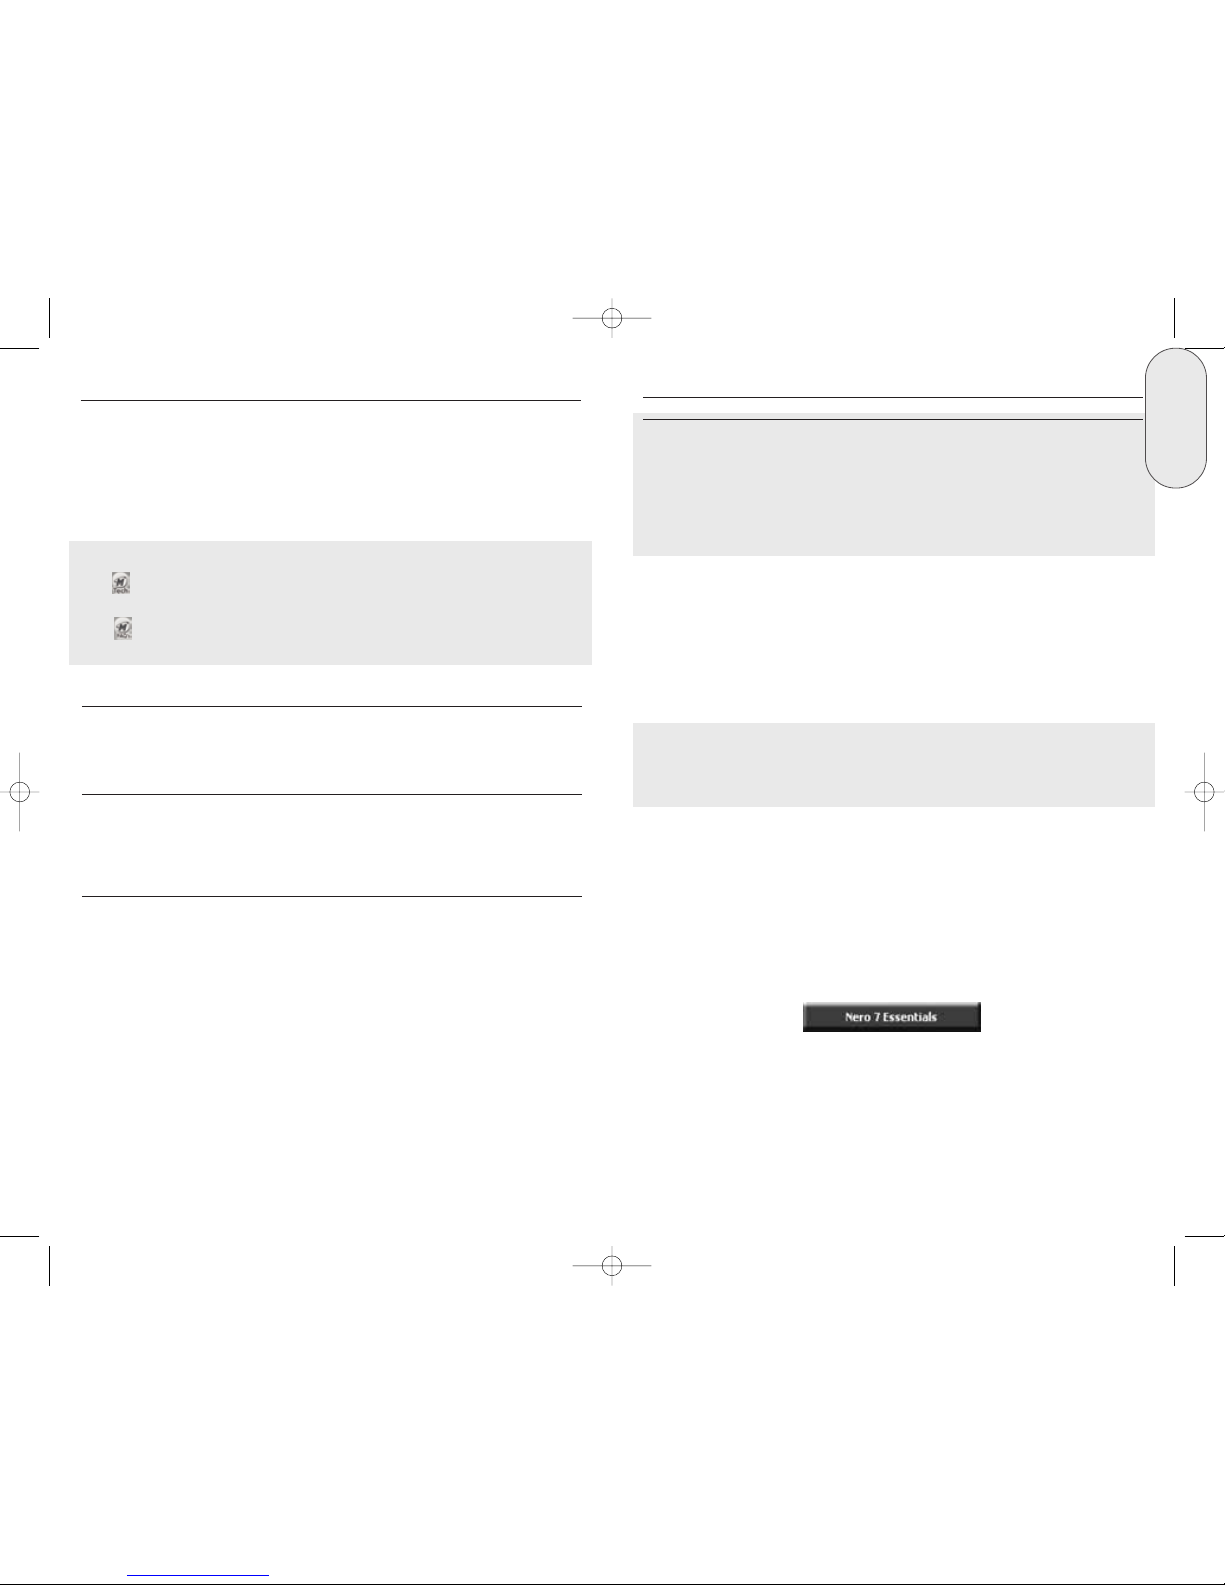
3. You will need toinstall theSoftware Suite once your new drive has beeninstalled
and detected by your computer. It is recommended that you leavethe software disc
in your internal CD/DVDdrive. Thenusing Windows Exploreragain, double click on
the “setup.exe” program in the main directory andthat you choose to click on the
Install Nero 7 Essentials button (Shown below) in the main installer screen. This will
launch the installation of the mostcommonly used components of the Powerful
Memorex SoftwareSuite.
4. Follow the on-screen directions to install the MemorexSoftware Suite. Further
details about theMemorex SoftwareSuite and Installationspecifics can be found
under the 3. Software Installation section.
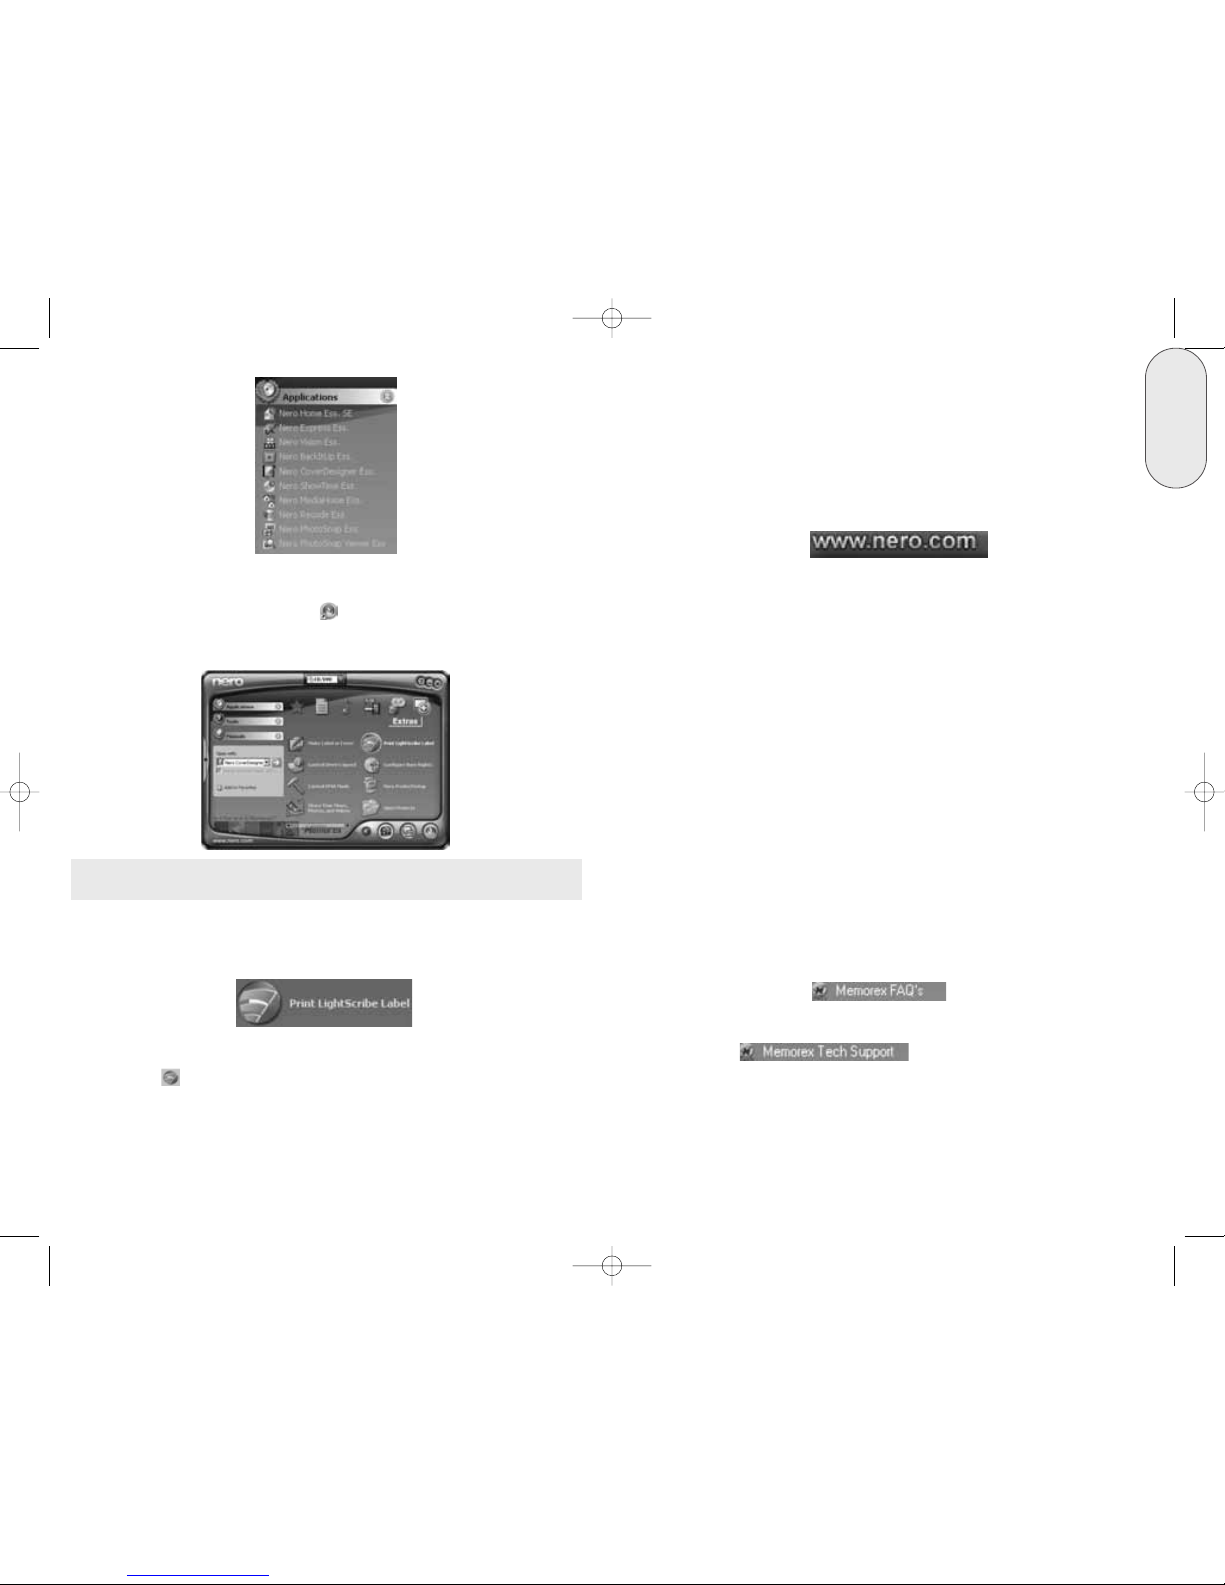
Note: The Nero Toolkit window has two special links to the Memorex website.
Link to the Memorex Tech Support form page. You can request assistance with
an issue you may be experiencing.
Link to the Memorex FAQ's page. You will gain immediate access to Frequently
Asked Questions.
2.12. InCD Reader
InCDEasyWrite Readeris a programthatallows you to readdiscswritten inMRW
("Mount Rainier ReWritable") format on systemsthat do not support MRW.
2.13. DVD-Video Plug-in
In conjunction with theNero Vision Express 4 Essentials program, the DVD-Video Plug-in
allows the encoding ofvideofiles in DVD/SVCDformat. You can then play back thevideos
on nearly any DVD player*.
2.14. HE-AAC Plug-in
The HE-AAC Plug-in allows you to encode audio files in MP4 format and also to decode
theminto other formats. High EfficiencyAdvanced Audio Coding (HE-AAC) is the very latest audio compression technology; its main feature is its revolutionary high- speed compression and its incomparable soundquality.
For detailed info on how to use the above applications, please refer to the Manuals
sectionof the Nero StartSmart 3 Essentials menu.
* Some DVD players are not able to play back certain disc formats. Please consult
the manufacturer to find out which formats your DVD player supports.
2.11. Nero ToolKit
Includes the following:
1) Nero CD-DVD Speed tests the speed of theavailableCD/DVD drives.
2) Nero DriveSpeed allows you to set the read speed of discs in orderto noticeably
reduce noise level or tooptimize the spinup or spin down times of your drives.
3) Nero InfoTool provides you with information about themostimportant features
of installed drives, inserted discs, installedsoftware, and more.
32023220_SG 050207.qxp:32023292_QIG_LO.qxp 8/3/07 11:48 AM Page 6
Page 5

9
English
8
Note: You can find various Free items under theExtras folder on your softwareinstall disc.
You can access theseFreeitemsby clicking on the"Extras" button shown below in the
software installer screen orby browsingthe software install disc under the Extrasfolder in
the main directory. Besureto view the "ReadMe First.txt" and any webpage info sheets
about the Free items before using them.
8. Restart your PC so that all the new settings take effect.
4. UNINSTALLING THE SOFTWARE
To uninstall Nero 7 Essentials orindividual components, proceed as follows:
Note: To uninstall the software under Windows 2000,XP orVista you must have
administrator rights.
1. Insert the Memorex Nero 7 Essentials CD into theCD/DVD drive.
2. If the Setup program launches automatically, an installation menu will appear, in which
you can Click on the Exitbutton to close the Software Installationwizard.
3. Browse tothe main directoryof your Memorex Software CD.
Note: If the program does not start automatically, Browse to the main directory of your
Memorex SoftwareCD.
4. Open the Tools directory.
5. Double click on the General-Clean Tool application file.
6. Individually select the Software components that you wish to remove by clicking
the box next to the application name.
3. SOFTWARE INSTALLATION
The Memorex recording software is quick and easyto install using the followingsteps:
Important Note:It isrecommended thatyou remove any other CD/DVD Recording
software suites (such as software byRoxio) in order toavoid any possible incompatibilitiesor conflicts between similar software engines ordrivers.
If you choose to keep your existing software installed and would prefer to use itinstead of
the Memorex software, please realize that your existing software may not fully support the
fullfunctionality ofthe Memorexdrive.
Note: To install thesoftware under Windows 2000,XP orVistayou must have administrator rights.
1. Close allWindows programs and close any anti-virussoftware which may be running.
2. Make surethe MemorexNero 7 Essentials software installationCD is in yourinternal
CD/DVD drive.
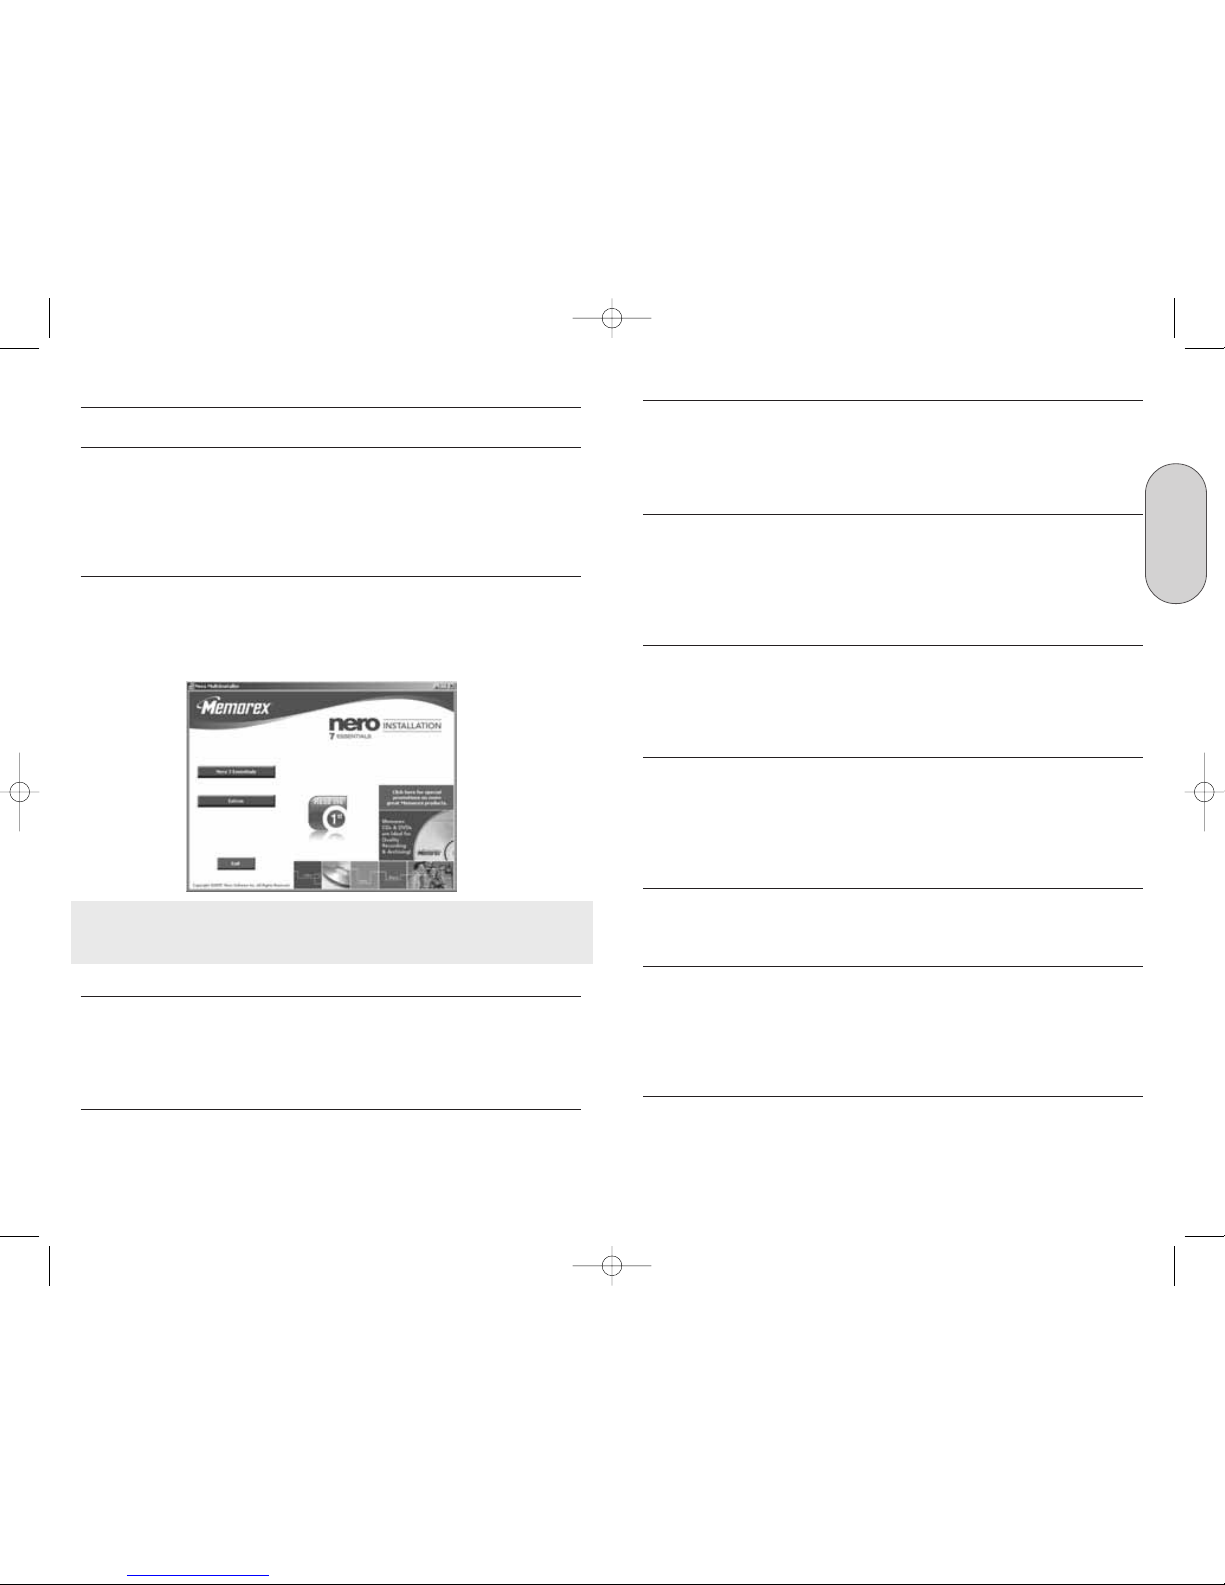
3. Aninstallation menu appears from which you can choose to install usingthe one button
install, InstallNero7 Essentials which will launch the installationof the most commonly
usedcomponentsof the Enhanced MemorexSoftware Suite and speed up thesoftware
installation.
It isrecommended thatyou choose to click on the Install Memorex Software Suite button
(Shown below) in the main installer screen. Thiswill launchthe installationof the most
commonly used components of the Enhanced Memorex Software Suite and speed up the
software installation.
Note: If the program does not start automatically, select the CD/DVD drive containing
the Memorex CD in Windows Explorer. Double click on the "setup.exe" program in the
maindirectory.
4. In the welcome window you again see the choices of programs you may want to install.
Click on NEXT to continue with the installation.
5. Carefully read through the license agreement.If you agreeto the terms of thelicense
agreement, clickon "Iaccept all terms of the preceding License Agreement." If you do
not accept the licenseterms, you cannotinstall theNero7 Essentials software. Click on
NEXTto continue.
6. After theautomatic installationof each selection, you can either restart your computer,
select another programinstallation, orexit the installation wizard.
7. To close the installation menu,click on EXIT. If you decide to installmore components
at a later date, click onthe appropriate buttonand carry outthe installationwiththe aid
of the wizard.
32023220_SG 050207.qxp:32023292_QIG_LO.qxp 8/3/07 11:48 AM Page 8
Page 6
11
English
10
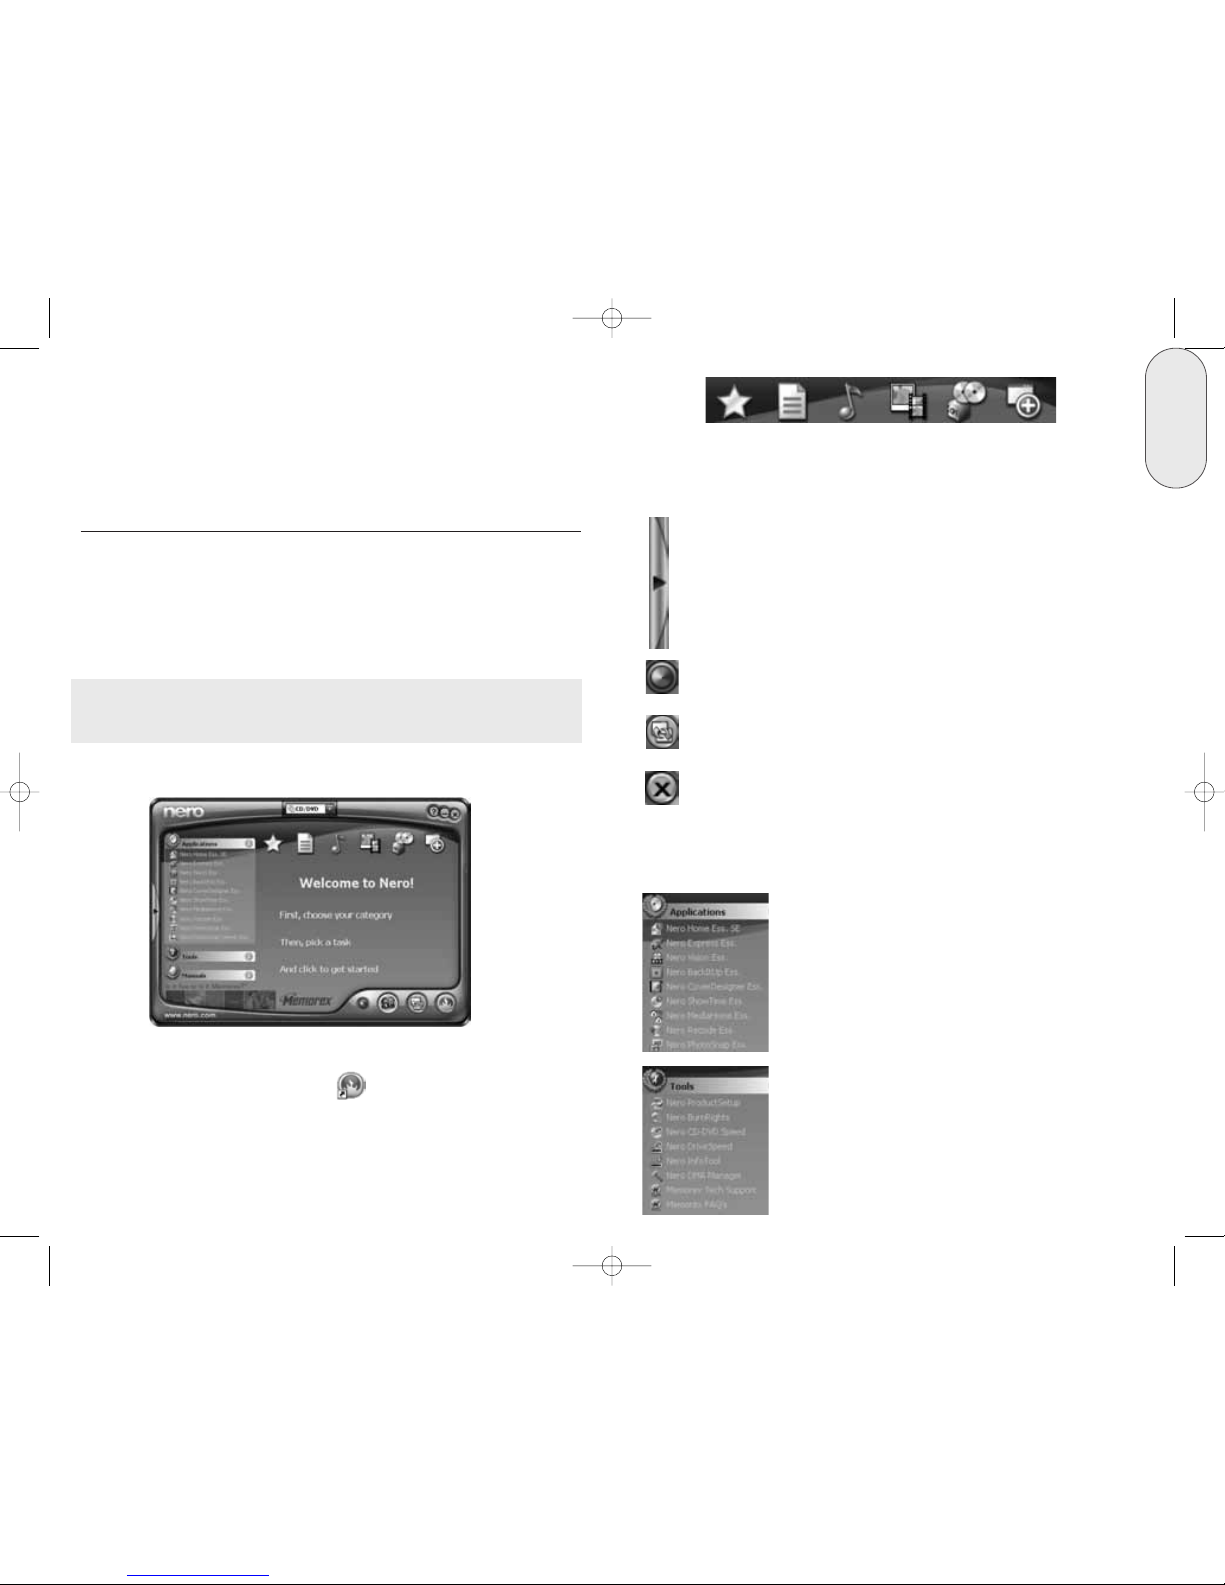
This area shows all installed applications in the Nero 7
product family. Click once on the desired application to
access it.
This area shows all installed applications in the Nero Toolkit.
Click once on the desired application to access it.
In addition to the areas and elements that are available in standard view, the Nero
StartSmart 3 Essential bar also gives you the option of accessing the desired program
directly.
For each task, you also have the option of deciding for yourself which application is to
be used to open it. If you hover the mouse over the desired task, the OPEN WITH option
appears in the Nero StartSmart bar. You can then select the desired program in the pulldown menu.
Clicking on this button minimizes the Nero StartSmart window from
the Full view to the Standard view.
Clicking on this button allows you to change the colors of your
Nero StartSmart interface for a customized look if you prefer.
Clicking on this buttonopens up theconfiguration window. Hereyou
can set which program inthe Nero 7 family is started forwhich tasks.
Clicking on this buttonin the upperright corner of Nero StartSmart
willclosethe program.
A. The Command Center
The program Nero StartSmart 3Essentialsis the command center for the Nero 7
Essentials product family and makesit easier to use the comprehensive software programs. Once you have started Nero StartSmart 3 Essentials, all you have to do is select
the desired category (e.g., Audio), then choosea task (e.g., MakeAudio CD) and the relevantsoftware starts automatically.
B. User Interfaceand Navigation
7. Follow the on-screen instructions, close all open applications and reboot your
computer once the de-installation has successfully completed.
As well, you may use your Operating Systems Add-Remove Programs utility to
uninstall the following listing.
• Nero 7 Essentials
5. UNDERSTANDING THE SOFTWARE
Note: The tasks shown in Nero StartSmart 3 Essentials depend upon the version and
the installed programs of Nero 7 Essentials and therefore can deviate from the
description within the documentation!
Nero StartSmart consists of the following areas and elements. To Launch Nero
StartSmart, click on the Nero StartSmart Icon on your Desktop or Quick Launch
Toolbar.
32023220_SG 050207.qxp:32023292_QIG_LO.qxp 8/3/07 11:48 AM Page 10
Page 7
13
English
12
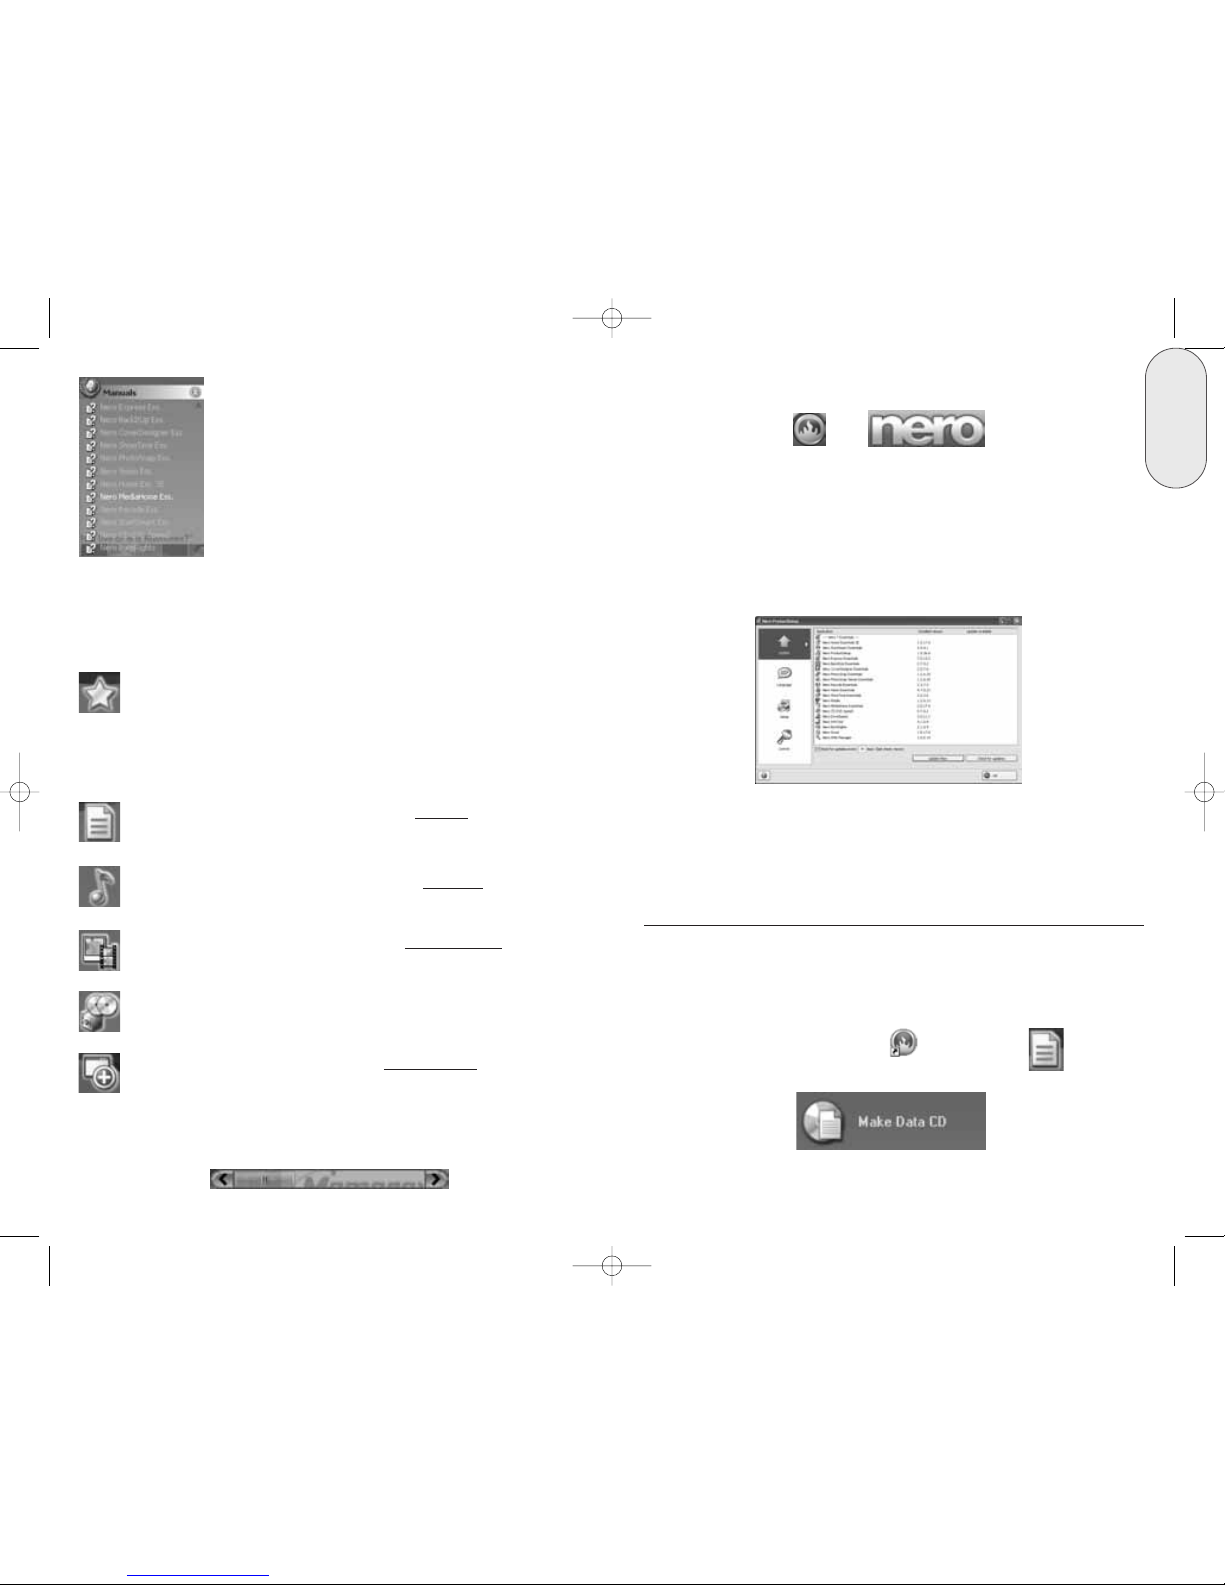
D. Nero ProductSetup
These buttons open the Nero ProductSetup. The Nero ProductSetup area allows you
to look for updates, change the language, modify or remove the Nero 7 Essentials
software suite and enter license codes for other features.
The first column contains the version number of the installed software, while the
other column shows the currently available version numbers. As a result you are
always able to keep your programs up to date. To update your software, connect to
the internet then click on the button to the right of the new version listing and download the latest version then run the downloaded application from your computer.
6. BASIC SOFTWARE FUNCTIONS
A. Burning a CD/DVD
This section only deals with the basic default settings. For more details, please refer
to the Help guides under the Nero StartSmart Manuals.
a. Make a Data Disc
1. Click on the Nero StartSmart Icon ; select the "Data" category
and click on "Make Data CD."
This area shows all of the HTML based Manuals that are
available for this software suite. Click once on the desired
manual to access it. More manuals and documentation may
be available in the main directory of the install disc and in
the Ahead folder in your Program Files directory.
Please note the Slide Bar at the bottom of some of the above areas. You will see
other available options if you use the slide bar in the areas that have one
This category contains your favorite or preferred tasks. The Favorites area
contains the most common tasks. To add entries from the other areas of
Nero StartSmart 3 Essentials, select a task icon by right clicking on it and
choosing the command "Add to Favorites" from the context menu. To
remove a task from the Favorites, right click on the relevant task and then
choose the command "Remove from Favorites.”
This category contains the possible tasks for a data disc.
C. Navigation in Nero StartSmart 3 Essentials
If you hover the mouse over the individual category icons, the possible tasks in that
category are displayed. The tasks displayed depend on the selected mode, CD/DVD,
CD or DVD.
This category contains the possible tasks for an audio disc.
This category contains the possible tasks for Photo and Video
discs.
This contains the tasks involving copying and the tasks relating to backing
up.
This section contains the additional tasks relating to discs
.
E: Thirty-Day TrialFunctionality
This software suite has some special features that you will be allowed access to for
thirty days. This Thirty-Day Trial period will start the first time you attempt to use
each feature.
32023220_SG 050207.qxp:32023292_QIG_LO.qxp 8/3/07 11:48 AM Page 12
Page 8
15
English
14
8. “Burn process completed successfully at...”, Click on the "OK" button and
then on the "Next" button to advance to the selection window.
9. Select the desired option, the "More" button or close Nero Express 7
Essentials by clicking on the button.
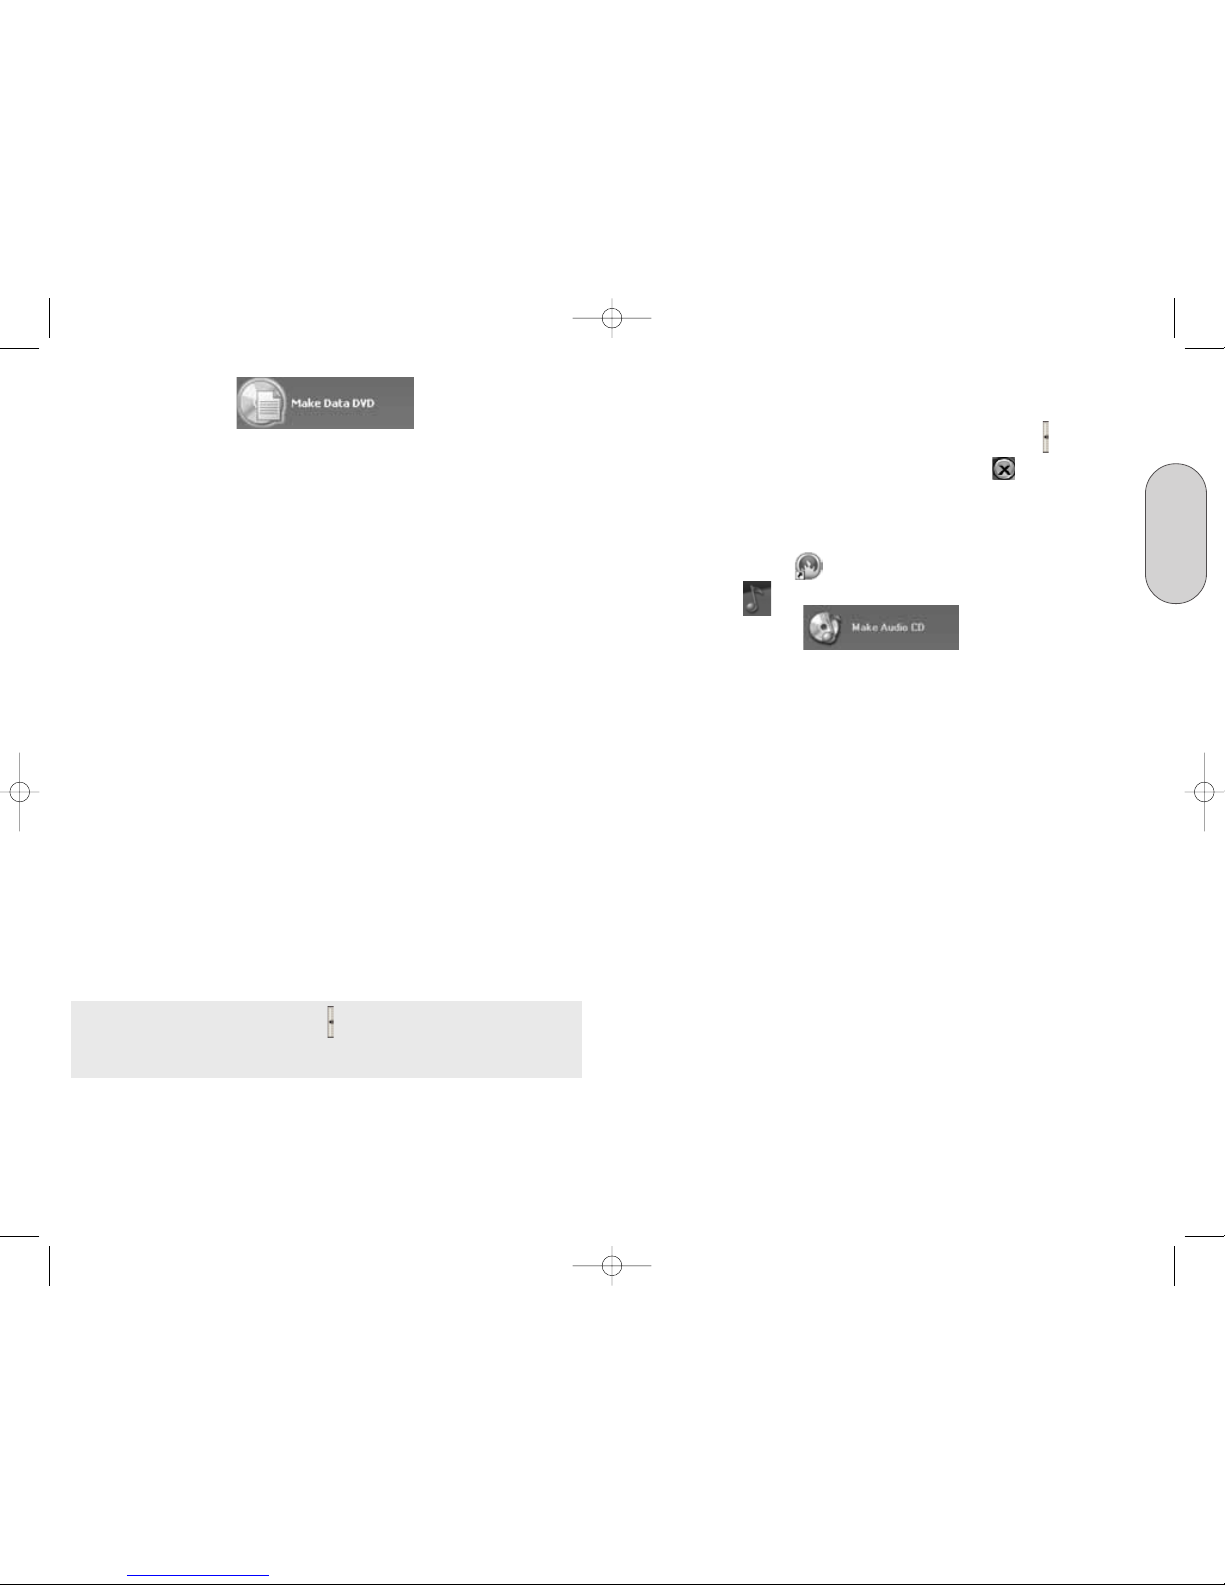
b. Make an Audio CD
An audio CD contains music files that can be played back in nearly any CD or DVD
player.
1. Start Nero StartSmart Icon ; select the "Audio" category and
click on "Make Audio CD."
2. In the window, click on the "Add" button to open the window for selecting files.
3. Select the desired files and click on the "Add" button to transfer them to the
compilation.
4. Once you have finished adding files, click on the "Close" button to close
the window and return to the Nero Express 7 Essentials screen.
5. All the files you have added appear in the compilation window. Click on the
"Next" button to advance to the burning window.
6. Before burning the disc, make the final settings:
Current Recorder: Select the Memorex DVD recorder from the list of connected
recorders.
Title (CD TEXT): If the recorder supports the writing of CD TEXT, you can enter
the title of the CD here. The title may not be longer than 64 characters.
Artist (CD TEXT): If the recorder supports the writing of CD TEXT, you can enter
the artist's name for the CD here. The name may not be longer than 64
characters.
Number of copies: Select the number of copies to be burned.
Verify data on disc after burning: if this checkbox is selected, the program
verifies that the burned data on the disc is identical to the original content once
the disc is recorded. This guarantees that the burned content will function as
desired, but this step adds time to the full recording process.
Note: Clicking onthe "More" button on the leftsideexpands theburning window and
offers additional setting options such asselection of the Write method,Writing speed and
Simulation of theburning process.
7. Click on the "Burn" button to start burning the disc.
To make a Data DVD, follow the same steps, but click on “Make Data DVD” instead.
These buttons can also be found in the Favorites area. For the best compatibility with
Data DVD's, do not use the multisession option. Due to specification limitations, the
multiple sessions of Data DVD discs are not generally able to be read in Windows
98SE, Me or 2000 in most cases.
Nero Express 7 Essentials starts automatically and the compilation window to Add
your data opens.
2. In the window, click on the "Add" button to open the window for selecting files.
3. Select the desired files and click on the "Add" button to transfer them to the
compilation.
4. Once you have finished adding files, click on the "Close" button to close the
window and return to the Nero Express 7 Essentials screen.
5. All the files you have added appear in the compilation window. Click on the
"Next" button to advance to the burning window.
6. Before burning the disc, make the final settings:
Current Recorder: Select the Memorex DVD recorder from the list of
connected recorders.
Disc name: Give the disc a title if you like.
Number of copies: Select the number of copies to be burned.
Verify data on disc after burning: if this checkbox is selected, the program
verifies that the burned data on the disc is identical to the original data once
the disc is recorded. This guarantees that the burned data will function as
desired, but this step adds time to the full recording process.
Allow files to be added later (multisession disc): If this checkbox is selected,
a multi-session disc is created, allowing you to add further sessions later. If
the checkbox is not selected, the disc is finalized and no more burning is
possible.
Note: Clicking onthe "More" button on the leftsideexpands theburning window and
offers additional setting options such asselection of the Write method,Writing speed and
Simulation of theburning process.
7. Click on the "Burn" button to start burning the disc.
The burning process starts and you will see information about the current status.
32023220_SG 050207.qxp:32023292_QIG_LO.qxp 8/3/07 11:48 AM Page 14
Page 9
17
English
16
5. Once you have made all your settings, click on the "Copy" button to start
burning the disc.
The burning process starts and you will see information about the current status.
Once the burning process is complete, you can print or save a log of the burning
process.
6. Click on the "OK" button and then on the "Next" button to advance to the
selection window.
7. Select the desired option or close Nero Express 7 Essentials.
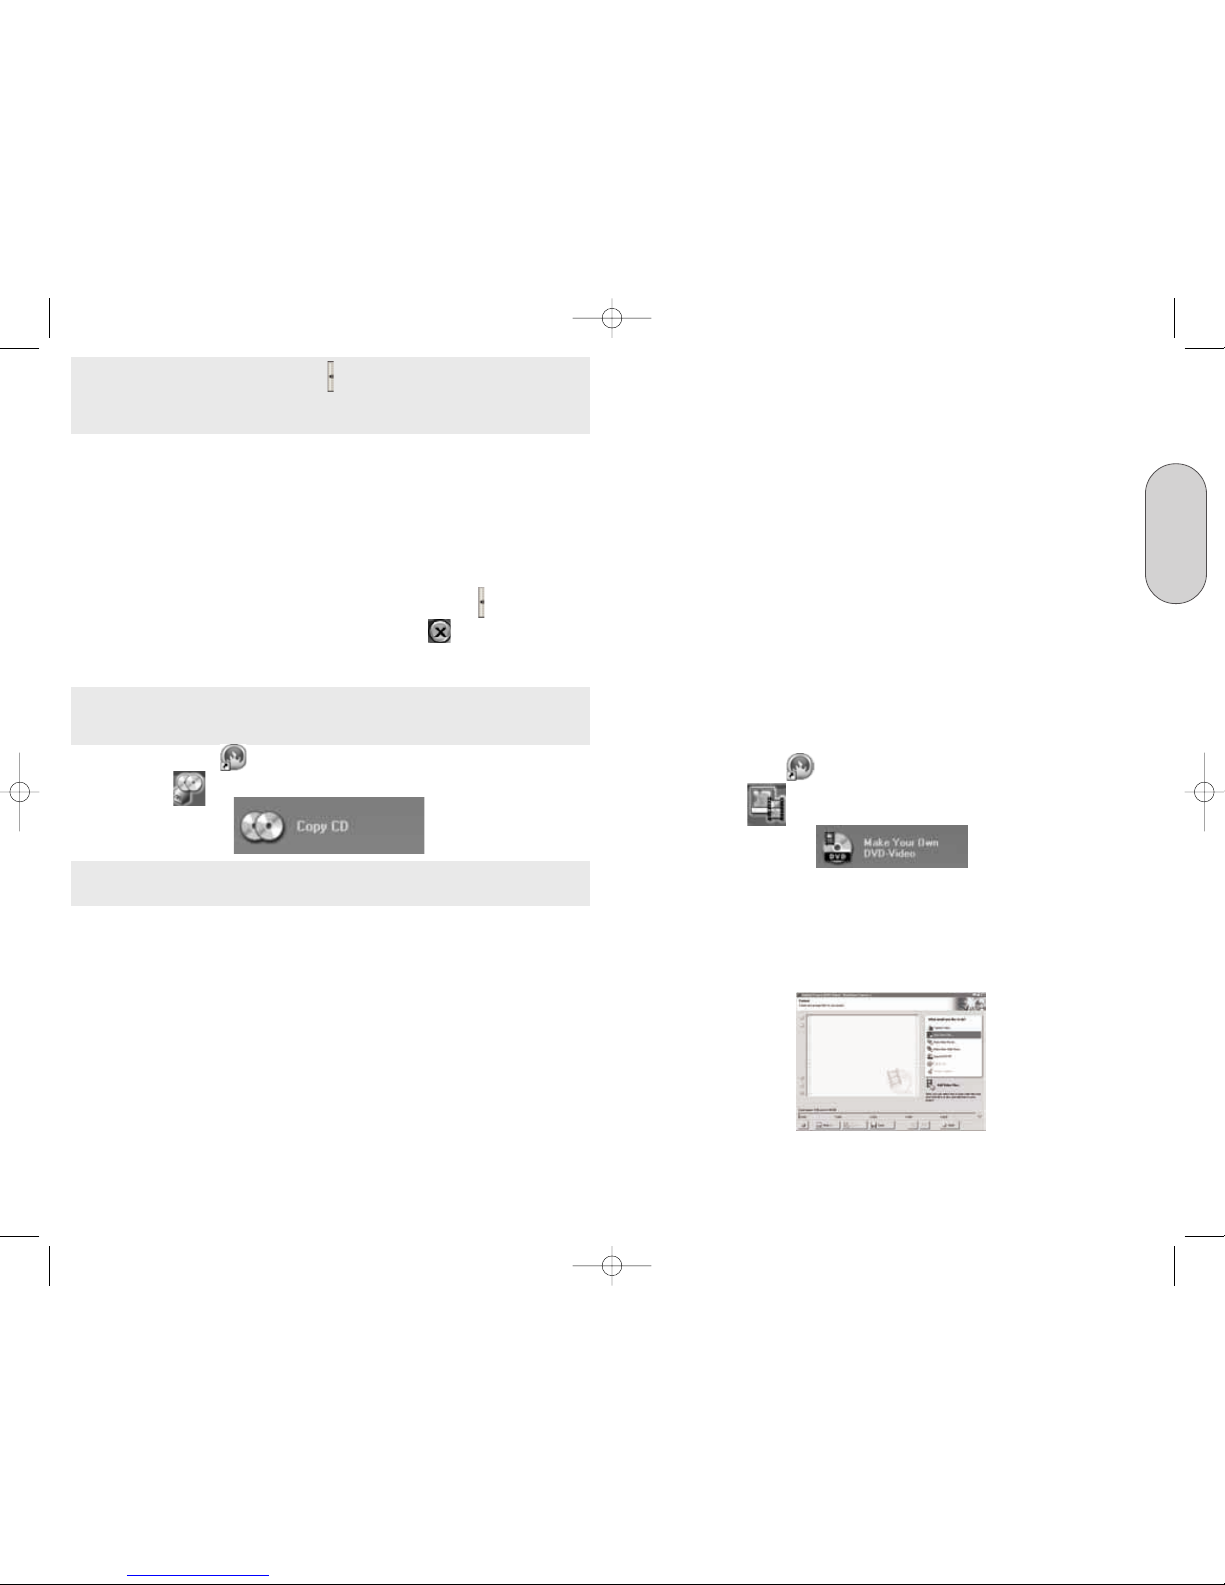
d. Make a DVD VideoDisc
A video disc contains video files that you can burn in a variety of formats (VCD /
SVCD or DVD-Video) that you can record on your Memorex DVD drive. This
Software Guide describes the creation of a DVD video disc. The procedure for a VCD
or SVCD is essentially the same.
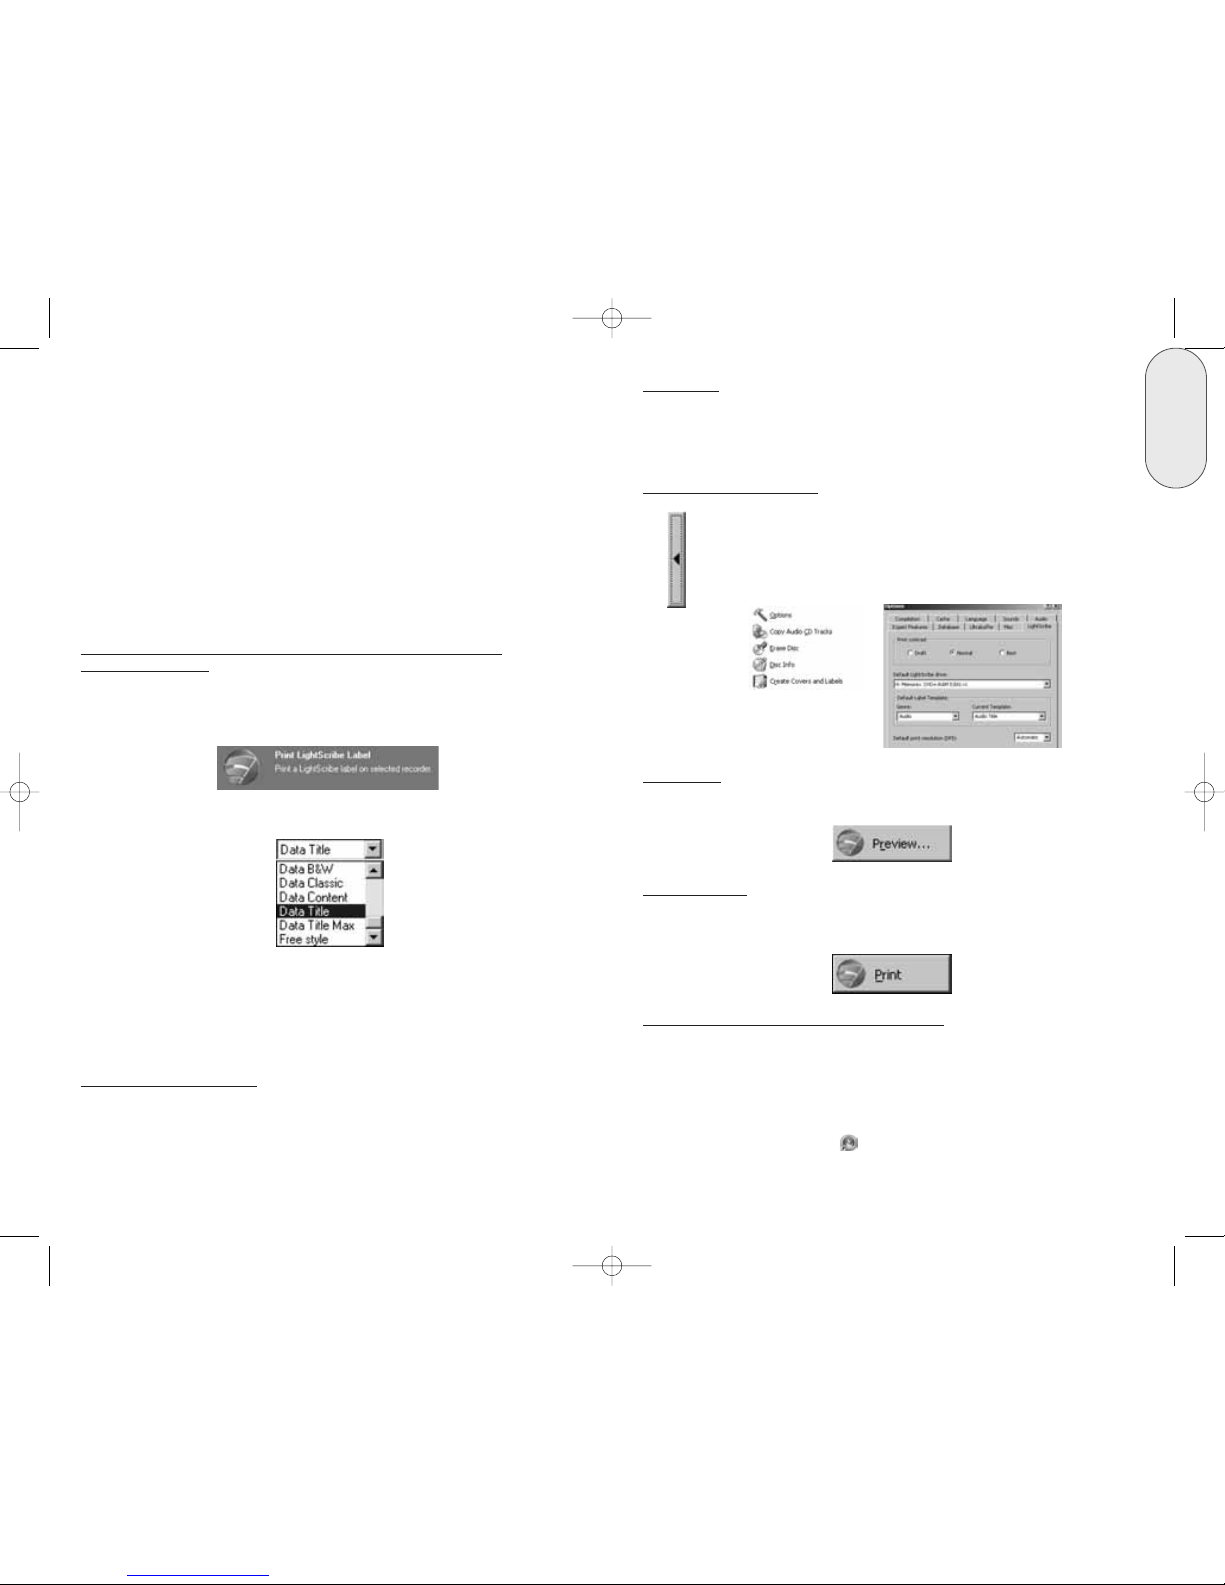
1. Start Nero StartSmart Icon ; select the "Photo and Video" category
and click on "Make your own DVD-Video."
This button can also be found in the Favorites area.
NeroVision 4 Essentials starts automatically and the selection window for video discs
opens.
2. Click on "Add Video Files" to open the window for selecting the files.
3. Select the desired files and click on the "Open" button to transfer them to the
compilation.
4. Repeat steps 2 and 3 to add more video files.
The burning process starts and you will see information about the current status.
8. “Burn process completed successfully at...”, Click on the "OK" button and
then on the "Next" button to advance to the selection window.
9. Select the desired option, the "More" button or close Nero Express 7
Essentials by clicking on the button.
c. Copy a CD
Important Note:Unless you own the copyright or have the permission ofthe copyright
holder, the unauthorized copying of discs represents a violation of national or international
lawsand may result in serious penalties.
1. Start Nero StartSmart Icon ; select the "Copyand Backup" category
and click on "CopyDisc."
Note: The Nero softwarewill generally not copy CD or DVD discs with Copy protection on
them.
NeroExpress 7 Essentials starts automatically and the selectionwindow for the drives and
the final burningsettings opens up.
2. Select the drive containing the disc to be copied asthe sourcedrive.
3. Select the Memorex DVD recorder as your destination drive.
4. In the "Quick Copy" section, you can determinehow the disc is to be copied.
• If the “Quick Copy” option is selected, the copy is made directly, i.e., fromdrive to drive.
Thismethod is quick but is susceptible toerrors.
• If the Quick Copyoption is not selected,a temporary imagefilefor the original disc is
first recorded toyourhard drive,and the image fileis then burned from the temporary
image file. This methodtakes longer due to the extra step of Imaging to theharddrive. As
well, the size of the image file will require additionalharddisk spaceand corresponds to
the quantity of data to be copied fromthe disc.
Writing Speed: Select the burn speed.
Number of copies:Select the number of copies to be copied.
32023220_SG 050207.qxp:32023292_QIG_LO.qxp 8/3/07 11:48 AM Page 16
Page 10
19
English
18
Note: With the Left Mouse button, click onthe video thumbnail of your choice while
holding the button down, you may dragthe selected thumbnailaround yourproject work
areato avoid keyor special areas(like peoples faces or various items) of your custom
background picture if you have chosen one.
8. You can use the on-screen remote control to move around the menu, e.g., to
view the videos as they will appear once the DVD-Video disc has been made.
Click on "Preview Menu Animation" button to see how the animated buttons or
Motion menu background will look if you chose those options or Click the
"Next" button to proceed to the next window.
Before burning the disc, make the final settings then click Burn to continue.
Burn to: Select the Memorex DVD recorder from the list of connected recorders.
Write to Hard Disk Folder: If you do not want to burn the project (yet) but you
want to save it to the hard disk instead, click on this button to open up a window
where you can select the location you to which you can save it.
Volume Name: Change the name of the disc if you wish to do so.
Recording Settings: Depending on the selected destination recorder, you can
adjust the recording settings, e.g., to select the burn speed or set the Book Type
to DVD-ROM for better player compatibility.
To Improve DVD Playback Compatibility: Various older generation DVD drives
and Home DVD players, particularly older players, do not recognize DVD+R, +RW
or +R DL recorded discs and may not read or play them.
It is possible to get these devices to recognize and play these discs by changing the
type code setting of the disc from a DVD+R, +RW or +R DL disc to a “DVD-ROM”
disc so that the drives and players treat them just as regular DVDs. The Memorex
version of Nero software provides an option of changing the disc media type code,
known as the Booktype Bitsetting.
The Nero software and your drive are set to the “Automatic” setting by default. In
order to improve the DVD playback and overall compatibility, choose the “DVDROM” setting.
Places to make the change: Open the Nero Toolkit menu and select Nero CD-DVD
Speed, the “Bitsetting” option appears under the “Extra” menu. Nero Express has
this option under the "Options" button on the “Final Burn Settings” screen.
NeroVision Express has the option under the "Recording Settings" button on the
“Burn Options” screen.
For more details on this subject, please click on the Memorex FAQs button in the
StartSmart menu under the Nero Toolkit area to visit our online FAQs area.
Note: Clicking on the "More" button expands the burning window and offers additional setting options, such as selection of the coding quality and the aspect ratio of the
video.
5. All selected files appear in the compilation window. Click on the "Next" button
to create the menu.
6. Select your Menu by choosing one of the available templates on the right then
click on the "Edit Menu" button to adjust the template for your needs.
7. Make the desired changes to the DVD menu by highlighting the individual
menu items with the mouse and selecting the desired option. Click on the
"Next" button to go back to the Select Menu window.
Click on the "Next" button to proceed to the Preview window.
32023220_SG 050207.qxp:32023292_QIG_LO.qxp 8/3/07 11:48 AM Page 18
Page 11
21
English
20
The burning process starts and you will see information about the current status.
9. Once the burning process is complete, a corresponding message appears.
Click on the "Yes" button to save the log file or "No" to close the window. A log
file can be useful for Technical Support if there were any problems with your
disc or the burning process.
10. Select the desired option or close NeroVision 4 Essentials.
e. Creating LightScribe labels
LightScribe Direct Disc Labeling is an exciting disc labeling technology that enables
you to burn silkscreen-quality labels directly on your LightScribe CDs and DVDs providing easy to create professional quality no-hassle labels. You can burn your data,
music or video onto a LightScribe CD or DVD, then simply flip the disc over, put it
back into the drive, and burn your newly created label design directly onto the disc.
Printing labels with Nero StartSmart and Nero Express Essentials Label
Templates and Modes
Launch Nero Express Essentials then select the Print LightScribe Label category
then click on the Print LightScribe Label option in the right hand side of the
window
Select a template or mode from the "Label templates" drop down menu at the right
hand side of the "Disc Label" window.
LightScribe provides three different label modes to choose from depending on how
much information and creative expression you want each disc label to have. Draft
mode is the fastest and the mode you would use for text only and, Normal mode is
an average of great for text and graphics. Best mode is the best quality you can get
and is the mode you would use for high quality photos and will take the longest time
to use.
Inserting a Background Image
To insert a background image to fit the round shape of the disc label, right-click in
the center area of the "Disc label" window and select "Background Properties".
Editing Titles
To edit the title on the label, double click on the title.
A "Properties" window will appear giving you options to change the settings and
style of the title of the label.
LightScribe Label Preferences
To adjust some of the settings of the label and how it should be burned,
click the "Preferences" button on the left hand side of the "Disc label"
window. Then click on "Options" and then on the "LightScribe" tab of the
options window.
Print Preview
Click on the button "Preview" to view what your label will look like when it´s printed.
Printing the Label
When you are finished editing your label, you can click the "Print" button at the
bottom of the window to continue printing your label.
Printing a label with Nero CoverDesigner Essentials
It is also possible to create and print a LightScribe label with Nero CoverDesigner
Essentials. The creation and printing steps are similar to the steps for Nero
Express Essentials. The only difference is that you can start directly from the Nero
CoverDesigner Essentials application.
You can start creating and printing your LightScribe label by launching the Nero
StartSmart Essentials application then by clicking on the “Nero
CoverDesigner Ess.” link in the Applications area shown below.
32023220_SG 050207.qxp:32023292_QIG_LO.qxp 8/3/07 11:48 AM Page 20
Page 12
22 23
English
f. Updates & Upgrade
At www.nero.com you will find free updates and new upgrades for purchase. These
can improve your performance, eliminate errors, and integrate new functions. You
can retrieve these via your Nero ProductSetup or visit the Nero website from time to
time. We recommend that you maintain your software with the most current updates
to optimize its performance. You can also click on the Memorex FAQs button in the
StartSmart Toolkit (or visit www.memorex.com and click “Support”) to browse the
Memorex website for any special updates or available downloads.
g. FAQs
1. Where can I find step by step directions for using Nero Express 7 Essentials,
NeroVision 4 Essentials, and Nero BackItUp 2 Essentials?
– In addition to this Guide, the Nero StartSmart bar has a Manuals section with
html versions of the Nero manuals containing detailed instructions for using the
Nero software.
2. One of my encoders has expired! What should I do?
– For licensing reasons, Memorex and Nero are only permitted to integrate
demonstration versions into Nero 7 Essentials for some formats. This gives you
the chance to test out the encoder functions for a limited time or amount of uses.
To activate the demo version, you must purchase the corresponding encoder
plug-in. You can do this at http://www.nero.com in the online shop.
3. Why do I not have a Help file?
– If for some reason you do not have access to any Help files, please download
the latest update and the language package to enable you to access the help files
again. You can download them from: http://www.nero.com/us/downloads.html.
4. Where can I get assistance with technical problems?
For all technical problems, we recommend using the Nero help system by clicking
on the Nero "Online Help" link in the StartSmart Manuals menu or by clicking on
the "Memorex FAQ's" link in the StartSmart Toolkit menu.
If you cannot find an answer to your problem at either of the locations above, you
can contact Memorex Technical Support by clicking on the "Memorex Tech
Support" link in the StartSmart Toolkit menu or
through e-mail at techsupport@memorex.com.
If all of the above electronic assistance is not resolving your issue, please call us
Toll Free at (877) Is it live [474-8548].
Technicians are available M-F 9-6 p.m. P.S.T.
You can also begin creating a LightScribe label with Nero CoverDesigner Essentials
by starting with Nero StartSmart. First open the Nero StartSmart Essentials application by double clicking on the Nero icon on your desktop. Click on "Extras" on
the task area of the Nero StartSmart Essentials screen. The "Print LightScribe Label"
icon will appear in the far right hand task area.
Important: The "Print LightScribe Label" icon will only appear if you have a
LightScribe capable drive installed.
Click on the 'Print LightScribe Label" icon and then the "New Document" window will
appear in Nero CoverDesigner Essentials. Select the "LightScribe" icon, select the
type of label and the click “OK” to begin creating your label.
When you are finished creating and editing your label, click the "Print LightScribe
Label" button on the Standard toolbar at the top of Nero CoverDesigner
Essentials. Choose your Print contrast(Quality), click "Preview" to view your label
before you print or just click "Print" to begin printing your label. The printing process
here is the same as in Nero Express.
32023220_SG 050207.qxp:32023292_QIG_LO.qxp 8/3/07 11:48 AM Page 22
Page 13
Français
2524
2.3. Nero Vision Express 4 Essentials
Avec Nero VisionExpress 4 Essentials, vous pouvez enregistrer et modifier des vidéos ou
graver des fichiers vidéo existants. Vous pouvez aussi utiliser Nero VisionExpress 4 pour
créer des diaporamas pratiques et même utiliservotrepropre musique comme trame
sonore.
2.4. InCD 5 Essentials
InCD5 Essentials est un logiciel d’écriture en mode paquetqui formateles disques réinscriptibles, ce qui vous permet de copier des fichiers sur disque simplement enfaisant
glisser les fichiers voulus sur votre nouveau graveur de DVDdansMicrosoft Windows
Explorer ou encore, de les sauvegarder rapidement et facilement sur disque en utilisant
NeroExpress 7 Essentials.
2.5. Nero BackItUp 2 Essentials
Nero BackItUp 2 Essentials est un programme pratique, convivial et puissant qui
sert à sauvegarder et à restaurer les données. Il vous permet de sauvegarder vos
fichiers d’archives sur CD, DVD et même sur les lecteurs USB TravelDrives de
Memorex.
2.6. Nero ShowTime 3
NeroShowTime 3vous permetde lire presque tous lesenregistrementsnumériques(tels
que films, vidéos domestiques, émissions télévisées, CD vidéo, SVCD, etc.) avec une
excellente qualité d’image et de son. De plus, ilpermet égalementde faire l’écoutede
trames sonores. Il prend en charge laplupart des formats courants, notamment MP3,
WAV,AAC,etc.
2.7. Nero Cover-Designer 2 Essentials
Nero Cover-Designer Essentials est un programme convivial qui sert à créer des étiquettes et des couvertures.
2.8. Nero Recode 2 Essentials
Nero Recode 2 Essentials vous permet de réaliser une vidéo DVD à partir soit de
plusieurs vidéos DVD de courte durée, soit d’une même vidéo DVD plus longue et
ensuite, de la graver sur un disque de 4,7 Go. Ce programme permet également de convertir vos vidéos en un format compatible avec iPod, PSP et autres lecteurs vidéo portatifs.
2.9. Nero MediaHome Essentials
Nero MediaHome permet de transmettre en continu des vidéos, de la musique et des
images vers tous vos périphériques UpnP (Universal Plug and Play) et Nero ShowTime
3 Essentials.
2. LOGICIEL INCLUS:
Votre trousse du graveur DVD de Memorex comprend un disque CD-ROM qui installe
un logiciel puissant, complet et personnalisé Memorex Nero 7 Essentials, offrant un
accès facile et simple à presque tous les formats d’enregistrementpopulaires sur CD et
DVD et disponibles présentement. Ce logiciel vous permet de créer et de copier des programmesaudio, de données, de photo et de vidéo numériques sur disques CD et DVD.
Remarque : Assurez-vous de cliquersur le bouton « Read me 1st » (Lisez-moi d’abord)
pourafficher des conseils de dernière minute qui vousaideront à tirerle maximum de
votre nouveau graveur de DVD Memorex.
2.1. Nero StartSmart 3 Essentials
NeroStartSmart3 Essentials est le centre de commande des produits Nero7 quivous
permet de trouver, d’identifier et d’utiliser plus facilement la gamme complètede produits
logiciels. Une fois quevous avez lancé Nero StartSmart 3 Essentials, ilne vous reste plus
qu’àsélectionner la tâche voulue;le logiciel approprié démarrera automatiquement.
2.2. Nero Express 7 Essentials
NeroExpress 7 Essentials offre uneinterface simple et conviviale pour les programmes
d’enregistrement puissantssur CDet DVD.
1. INTRODUCTION
1.1. Félicitations!
Merci d’avoir acheté un graveur DVD Memorex. Le respect de ce Guide du logiciel
permet de tirer avantage du nouveau graveur DVD.
Nous suggérons de le conserver dans un endroit sûr pour consultation ultérieure.
32023220_SG 050207.qxp:32023292_QIG_LO.qxp 8/3/07 11:48 AM Page 24
Page 14

2.16. Installation des pilotes USB 2.0 pour Windows 98 SE
(Pour disque dur externe seulement):
Important: Memorex n’assurepas lefonctionnement de ce produitsous Windows 98SE
ou Windows Me. Cependant, nous avons inclus des pilotes quivous permettrontd’utiliser
votre équipementavecWindows 98SE. Nospilotes ne sont pas nécessaires pourle fonctionnement sous Windows Me. Le logiciel Nero fourni avec ce produitne fonctionne pas
sousWindows 98SE ou Windows Me.
Remarque: Ne connectez pas votre lecteurexterne à votre ordinateur avant d’installer les
pilotes USB 2.0 pour Windows 98SE.
Suivez ces étapes pourinstaller les pilotes USB de votre lecteur externe seulement si vous
utilisez le système d’exploitationWindows 98SE :
1. Mettez votre ordinateur en marche.
2. Une fois quevotre ordinateura fini de charger le système d’exploitation et tout autre
programme se lançant au démarrage,insérez votre logicielMemorex et le CD de
votre trousse d’enregistrement DVDexterne de Memorex.
Remarque: Si le programme démarre automatiquement, cliquez simplement sur lebouton
« Exit » (Quitter)pourle fermer, puis sélectionnez votre lecteur deCD/DVD interne contenant le CD Memorex dans l’Explorateur Windows. Double-cliquez sur le programme «
Memorex USB 2.0 Driver Installer AT2V1.32.exe » dans le répertoire « Win98SE USB2
Drivers ».
Une fois le programme lancé, suivez les instructionsà l’écran pour installer les pilotes.
3. Vousdevrez installerla suite logicielle unefois que votre ordinateur aura détecté et
installé les nouveaux pilotes. Nousvousrecommandons de laisser le disque
contenant le logicieldans votre lecteur de CD/DVD. Àpartir de l’Explorateur
Windows, double-cliquez sur le programme « setup.exe» dans le répertoire
principal, puis cliquez sur le bouton « Install Nero 7 Essentials » (illustré
ci-dessous) à l’écran principal du programme d’installation. L’installation des
composants les plus courants de la puissante suite logicielle Memorex
commencera.
4. Suivez les directions à l’écran pour installer la suite logicielleMemorex. Vous
trouverez de plus amples détails à proposde la suitelogicielleMemorex etdes
spécifications d’installation à lasection 3.Installation du logiciel.
Français
2726
Remarque: La fenêtre Nero Toolkit possède des liens spéciaux avec le site Web de
Memorex.
Lien avec la page du formulaire Memorex Tech Support (Assistance technique
Memorex). Vous pouvez demander de l’aide au sujet d’une question qui vous concerne.
Lien avec la page Memorex FAQ (Foire aux questions Memorex). Vous aurez
immédiatement accès à la Foire aux questions.
2.12. InCD Reader
InCDEasyWrite Readerest un programme qui permet de lire des disques écrits enformat
MRW ("Mount Rainier ReWritable" (Format réinscriptible Mount Rainier)) sur des systèmes qui ne prennent pas en charge leformat MRW.
2.13. DVD-Video Plug-in
Utilisé de pair avec leprogramme Nero Vision Express4 Essentials, le programme d’application complémentaireDVD-Video permetde coder lesfichiers vidéo enformat
DVD/SVCD et ensuite, deles lire surpratiquement n’importe quel lecteur de DVD*.
2.14. HE-AAC Plug-in
La fonctionnalité HE-AAC permet d’encoder les fichiers audio en format MP4 et aussi de
les décoder dans d’autres formats. Le codage avancé à haute efficacité (High Efficiency
Advanced Audio Coding (HE-AAC)) estla toute dernièretechnologie de compression
audio; sa caractéristique principale estsa compression haute vitesse révolutionnaire et la
qualité incomparable du son.
Pour de plus amples renseignements sur l’utilisation des applications ci-dessus,
reportez-vous à la section des manuels au menu Nero StartSmart 3 Essentials.
* Certains lecteurs DVD ne peuvent lire certains formats de disque. Veuillez consulter le
fabricant pour découvrir les formats quisont pris en charge par votrelecteur DVD.
2.10. Fonctionnalité LightScribe
La combinaison dece nouveau graveur de DVD Memorex etdu logiciel Nero CoverDesigner vous permet degraver vos propres textes et photos sur desdisques LightScribe
sansavoirà imprimeret à apposerune étiquette papier qui risqueraitde sedécoller sielle
était mal appliquée.
2.11. Nero ToolKit
Inclut le suivant:
1) Nero CD-DVD Speed vérifie la vitesse deslecteurs CD/DVD disponibles.
2) Nero DriveSpeed permet de configurer lavitesse de lecture des disquesde manière
à réduire les parasitesou d’optimiser les temps d’accélération ou de décélération
des lecteurs.
3) Nero InfoTool offer del’information sur les caractéristiques les plus importantes des
lecteurs installés, des disques insérés,du logicielinstallé et beaucoup plus encore.
32023220_SG 050207.qxp:32023292_QIG_LO.qxp 8/3/07 11:48 AM Page 26
Page 15

Français
2928
Remarque: Le répertoire « Extras » sur le disque d’installation contient plusieurséléments
gratuits. Vouspouvez y accéder soit en cliquant sur le bouton « Extras» à l’écran d’installation, soit en parcourant ledisque d’installation, dansle dossier «Extras » du répertoire
principal. Prenez soinde lire attentivement le document « ReadMeFirst.txt »et toute autre
paged’information concernant leséléments gratuits avant de les utiliser
8. Redémarrez l’ordinateur de manière que tous les nouveauxparamètresentrent en
vigueur.
4. Désinstallation du logiciel
Pourdésinstaller le logiciel sousWindows 2000, XP ou Vista, vous devezavoir des droits
d’administrateur :
Remarque: Pour désinstaller le logicielsous Windows 2000 ou Windows XP, vous devez
posséder des droits d’administrateur.
1. Insérezle CDdu logicielMemorex Nero 7 Essentials dans le lecteur CD/DVD.
2. Si le programme de configurationdémarre automatiquement, un menu d’installation
s’affiche dans lequelvous pouvezcliquer surle bouton Exit (Quitter) pourquitter
l’assistant d’installationdu logiciel.
3. Parcourez le répertoireprincipal du CD delogiciels Memorex.
Remarque: Si le programme ne débute pas automatiquement, parcourez lerépertoire
principal du CD de logiciels Memorex.
4. Ouvrez le répertoire Tools (Outils).
5. Cliquezdeuxfois sur le fichier d’application General-CleanTool (Outil denettoyage
général).
6. Sélectionnezindividuellement les composants logiciels que vous souhaitez supprimer
en cliquant sur lacasesituée prèsdu nom de l’applicationou cliquez simplement sur la
casesituée prèsde Clean All(Nettoyertout)poursupprimer tous les programmesNero
installés sur l’ordinateur.
3. Installation du logiciel
Le logiciel d’enregistrement Memorex estfacile et rapide àinstaller en utilisantles étapes
suivantes :
Noteimportante: Il est recommandéd’enlever toutesuite de logiciels (comme le logiciel
de Roxio) pour éviter tout conflit ouincompatibilitépossible entre des logicielsou des
pilotes similaires. Sivous choisissezde conserverle logiciel existent installé et préférezl’utiliser au lieu du logiciel Memorex, notez que le logiciel existant peut ne pas prendre en
charge la pleine fonctionnalité du graveur Memorex.
Remarque: Pour installer le logiciel sous Windows 2000, XPou Vista, vous devez avoir
les droits d’administrateur.
1. Quitteztousles programmes Windows et tout logiciel antivirus quipeut être enactivité.
2. Assurez-vousque le CD d’installation Memorex
NNeerroo 77 EEsssseennttiiaallss
se
trouve dans votre
lecteur de CD/DVD.
3. Lorsque le menu d’installation s’affiche, vous pouvez cliquer sur le bouton Install
NNeerroo
77 EEsssseennttiiaallss
pour
lancer le processus d’installation des composants les plus courants
de la suite logicielle évoluée Memorex.
Il est recommandé de choisir le bouton Install Memorex Software Suite (illustré cidessous) dans l’écran principal d’installation. Cela lance l’installation des composants les
plus utilisés de la puissante suite du logiciel Memorex et accélère l’installation du logiciel.
Remarque: Si le programme ne débute pas automatiquement, sélectionnez le lecteur
CD/DVD qui abrite le CD Memorex dans Windows Explorer. Cliquez deux fois sur le programme « setup.exe » dans le répertoire principal.
4. Dans la fenêtre d'accueil vous verrez les choix de programmes que vous pouvez vouloir
installer. Cliquez sur NEXT (Suivant) pour poursuivre l’installation.
5. Veuillez lire le contrat de licence. Si vous acceptez les conditions énoncées, cliquez sur
« I accept all terms of the preceding License Agreement » (J’accepte toutes les
conditions du contrat de licence précité). Si vous refusez, vous ne pourrez pas installer
le logiciel Nero 7 Essentials. Cliquez sur « NEXT » (Suivant) pour continuer.
6. Après l’installation automatique de chaque sélection, vous pouvez sélectionner l’installation d’un autre programme ou quitter l’assistant d’installation.
7. Pour quitter le menu d’installation, cliquez sur EXIT (Quitter). Si vous décidez d’installer
plus de composants à une date ultérieure, cliquez sur le bouton approprié et effectuez
l’installation à l’aide de l’assistant.
32023220_SG 050207.qxp:32023292_QIG_LO.qxp 8/3/07 11:48 AM Page 28
Page 16

Français
3130
Cette zone affiche toutes les applications installées dans la
gamme de produits Nero 7. Cliquez une fois sur l'application
voulue pour y accéder.
Cette zone affiche toutes les applications installées dans le
Nero Toolkit. Cliquez une fois sur l’application à laquelle
vous voulez avoir accès.
Outre les zones et éléments disponibles en affichage standard, la barre Nero StartSmart
3 Essentials permet aussi d'avoir accès directement au programme voulu.
Pour chaque tâche, vous avez aussi l’option de décider vous-même de l’application à
utiliser pour l’ouvrir. Si vous déplacez la souris au-dessus de la tâche voulue, l’option
OPEN WITH (Ouvrir à l’aide de) s’affiche sur la barre Nero StartSmart. Vous pouvez
alors sélectionner le programme voulu dans le menu déroulant.
En cliquant sur ce bouton, cela minimise la fenêtre Nero StartSmart
d’un plein affichage à un affichage standard.
Permet de modifier, en cliquant sur ce bouton, les couleurs de
l’interface Nero StartSmart pour obtenir la présentation personnalisée voulue.
Cliquez sur ce bouton pour ouvrir la fenêtre de configuration. Vous
pourrez alors définir le programme à utiliser dans Nero 7 pour exécuter les tâches voulues.
Quitter le programme en cliquant sur ce bouton dans le coin droit
supérieur de Nero StartSmart.
A. Le poste de commande
Le programme Nero StartSmart 3 Essentials est le centre de commande des produits Nero
7 qui vous permet d'utiliser plus facilement la gamme complète de produits logiciels. Une
fois que vous avez lancé Nero StartSmart 3 Essentials, il ne vous reste plus qu'à sélectionner la catégorie voulue (p. ex. Audio) et à choisir la tâche à exécuter (p. ex. Make Audio
CD (Enregistrer un CD audio)). Le logiciel approprié démarrera automatiquement.
B. Interface utilisateur et navigation
7. Suivez les instructions à l’écran, quittez toutes les applications ouvertes et faites
redémarrer l’ordinateur une fois que la désinstallation est bien terminée. Vous
pouvez également avoir recours à l’utilitaire « Ajouter/Supprimer des programmes»
de votre système d’exploitation pour désinstaller le composant suivant :
• Nero 7 Essentials
5. Pour comprendre le logiciel
Remarque: Les tâches illustrées dans Nero StartSmart 3 Essentials dépendent de la
version et des programmes Nero 7 Essentials installés; elles peuvent donc être différentes de celles décrites dans la documentation.
Nero StartSmart se compose des secteurs et éléments qui suivent. Pour lancer Nero
StartSmart, cliquez sur l’icône Nero StartSmart sur le bureau ou sur la barre
d’outils d’exécution rapide.
32023220_SG 050207.qxp:32023292_QIG_LO.qxp 8/3/07 11:48 AM Page 30
Page 17

Français
3332
D. Nero ProductCenter
Ces boutons servent à afficher l’écran Nero ProductSetup à partir duquel vous pourrez vérifier les mises à jour, modifier vos préférences linguistiques, modifier ou supprimer la suite logicielle Nero 7 Essentials et entrer les codes de licence pour
d’autres fonctions.
La première colonne comporte le numéro de la version du logiciel installé tandis que
l’autre colonne affiche les numéros de versions disponibles actuellement. Ainsi, vous
êtes toujours en mesure de garder vos programmes à jour. Pour mettre à niveau
votre logiciel, connectez-vous à Internet puis cliquez sur le bouton à droite du listage
de la nouvelle version. Téléchargez la dernière version et ensuite exécutez l’application téléchargée sur l’ordinateur.
E: Essai de fonctionnalité pendant 30 jours
Ce logiciel comprend quelques fonctions spéciales auxquelles vous aurez accès pendant trente jours. La période d’essai commencera dès la première fois où vous
essaierez d’utiliser chaque fonction.
Pour créer un DVD de données, suivez les mêmes étapes, mais cliquez à la place sur « Make data DVD
» (Créer un DVD de données). Ces boutons se trouvent également dans la zone des favoris. Pour une
compatibilité optimale avec les DVD de données, n'utilisez pas l'option multisession. En raison de limites
techniques, les sessions multiples de DVD de données sont généralement impossibles à réaliser dans
Windows 98SE, Me ou 2000.
FONCTIONS DE BASE DU LOGICIEL
A. Enregistrement d’un CD/DVD
Cette section contient uniquement les paramètres de base par défaut. Pour de plus
amples renseignements, veuillez consulter les guides d'aide dans la section des
manuels Nero StartSmart.
a. Création d’un disque de données
1. Cliquez sur l’icône Nero StartSmart; sélectionnez la catégorie « Data »
(Données) et cliquez sur « Make Data CD » (Créer un CD de données).
Cette zone affiche tous les manuels HTML disponibles pour
cette suite de logiciels. Cliquez une fois sur le manuel
auquel vous voulez avoir accès. Cette zone possède aussi un
bouton Online Help (Aide en ligne) qui, une fois cliqué, vous
amène à la page Web Nero Help.
Veuillez noter la présence de la barre de curseur au bas de certaines des zones susmentionnées. Vous verrez d’autres options disponibles si vous utilisez la barre de
curseur dans les zones qui en possèdent une.
Cette catégorie comporte vos tâches préférées. La zone Favorites
(Préférés) comporte les tâches les plus usuelles. Pour ajouter des entrées
d’autres zones de Nero StartSmart3 Essentials, sélectionnez une icône de
tâche en cliquant dessus du bouton droit et en choisissant la commande «
Add to Favorites » (Ajouter aux préférés) du menu contextuel. Pour supprimer une tâche des Favorites, cliquez du bouton droit sur la tâche pertinente et puis choisissez la commande « Remove from favorites »
(Supprimer des préférés).
Comporte les tâches possibles pour un disque de données.
C. Navigation dans Nero StartSmart
Si vous déplacez la souris au-dessus des icônes de catégorie individuelle, les tâches
possibles de cette catégorie s’affichent. Les tâches affichées dépendent du mode
sélectionné, soit CD/DVD, CD ou DVD.
Comporte les tâches possibles pour un disque audio.
Comporte les tâches possibles pour des disques Photo et Vidéo.
Comporte les tâches pertinentes à la copie ainsi que les tâches liées à la
sauvegarde.
Comporte des tâches additionnelles pertinentes aux disques.
32023220_SG 050207.qxp:32023292_QIG_LO.qxp 8/3/07 11:48 AM Page 32
Page 18
Français
3534
b. Création d’un CD audio
Un CD audio contient des fichiers de musique qui peuvent être lus sur presque tous
les lecteurs de CD ou de DVD.
1. Cliquez sur l’icône Nero StartSmart; sélectionnez la catégorie
« Audio » et cliquez sur « Make Audio CD » (Créer un CD audio).
Ce bouton se trouve aussi dans la zone Favorites (Préférés). Nero Express 6 démarre
automatiquement et la fenêtre de compilation pour les disques audio s’ouvre.
2. Dans la fenêtre, cliquez sur le bouton « Add » (Ajouter) pour ouvrir la fenêtre
de sélection de fichiers.
3. Sélectionnez les fichiers voulus et cliquez sur le bouton « Add » (Ajouter) pour
les transférer vers la compilation.
4. Une fois que vous avez fini d'ajouter des fichiers, cliquez sur le bouton « Close »
(Fermer) pour fermer la fenêtre et revenir à l'écran Nero Express 7 Essentials
5. Tous les fichiers que vous avez ajoutés apparaissent dans la fenêtre de compilation.
Cliquez sur le bouton « Next » (Suivant) pour passer à la fenêtre de gravure.
6. Avant de graver le disque, définissez les paramètres finals :
Current Recorder (Graveur actuel) : Sélectionnez le graveur de DVD Memorex
dans la liste des graveurs connectés.
Title (CD TEXT) (Titre (texte de CD) : Si le graveur permet l'écriture de texte CD,
vous pouvez entrer le titre du CD ici. Le texte ne doit pas contenir plus de 64
caractères
Artist (CD TEXT) (Artiste (texte de CD) : Si le graveur permet l'écriture de texte
CD, vous pouvez entrer le nom de l'artiste ici. Le nom ne doit pas contenir plus de
64 caractères.
Number of copies (Nombre de copies): Sélectionnez le nombre de copies à
enregistrer.
Verify data on disc after burning (Vérifier les données sur disque une fois la
gravure terminée) : Si cette case est cochée, le programme vérifie que les
données gravées sur le disque sont identiques aux données d'origine. Cette étape
garantit que les données gravées fonctionneront tel que prévu, mais elle rend le
processus de gravure plus long.
8. « Burn process completed successfully at... » (Le processus de gravure s'est
terminé correctement à..). Cliquez sur le bouton OK, puis sur « Next »
(Suivant) pour passer à la fenêtre de sélection
9. Sélectionnez l'option voulue, cliquez sur le bouton « More » (Plus) ou
fermez Nero Express 7 Essentials en cliquant sur ce bouton.
Nero Express 7 Essentials démarre automatiquement et la fenêtre de compilation «
Add your data » (Ajouter les données) s'ouvre.
2. Dans la fenêtre, cliquez sur le bouton « Add » (Ajouter) pour ouvrir la fenêtre
de sélection de fichiers.
3. Sélectionnez les fichiers voulus et cliquez sur le bouton « Add » (Ajouter) pour
les transférer vers la compilation.
4. Une fois que vous avez fini d'ajouter des fichiers, cliquez sur le bouton « Close »
(Fermer) pour fermer la fenêtre et revenir à l'écran Nero Express 7 Essentials.
5. Tous les fichiers que vous avez ajoutés apparaissent dans la fenêtre de
compilation. Cliquez sur le bouton « Next » (Suivant) pour passer à la fenêtre
de gravure.
6. Avant de graver le disque, définissez les paramètres finals :
Current Recorder (Graveur actuel) : Sélectionnez le graveur de DVD Memorex
dans la liste des graveurs connectés.
Disc name (Nom du disque): Au besoin, donnez un nom au disque.
Number of copies (Nombre de copies): Sélectionnez le nombre de copies à
enregistrer.
Verify data on disc after burning (Vérifier les données sur disque une fois la
gravure terminée) : Si cette case est cochée, le programme vérifie que les
données gravées sur le disque sont identiques aux données d'origine. Cette étape
garantit que les données gravées fonctionneront tel que prévu, mais elle rend le
processus de gravure plus long.
Allow files to be added later (multisession disc) (Permettre l'ajout ultérieur de
fichiers - disque multisession) : Si cette case est cochée, le système crée un
disque multisession, ce qui vous permettra d'ajouter d'autres données plus tard.
Si elle n'est pas cochée, le disque sera fermé et aucune autre donnée ne pourra
être ajoutée.
Remarque: Cliquez sur le bouton « More » (Plus) pour agrandir la fenêtre de gravure
et afficher d'autres options telles que sélection de mode d'écriture, vitesse d'écriture et
simulation du processus de gravure
7. Cliquez sur le bouton « Burn » (Graver) pour commencer la gravure. Le
processus d'enregistrement débute et les renseignements concernant l'état
actuel du processus s'affichent.
Le processus d’enregistrement débute et l'information sur l'état actuel du
processus s’affiche.
32023220_SG 050207.qxp:32023292_QIG_LO.qxp 8/3/07 11:48 AM Page 34
Page 19
Français
3736
Writing Speed (Vitesse d’écriture): Sélectionnez la vitesse d’enregistrement.
Number of copies (Nombre de copies): Sélectionnez le nombre de copies à
enregistrer.
5. Une fois que vous avez configure tous les paramètres, cliquez sur le bouton
« Burn » (Enregistrer) pour commencer l’enregistrement du disque.
Le processus d’enregistrement débute et l'information sur l'état actuel du processus
s’affiche.
Une fois que l’enregistrement est terminé, vous pouvez imprimer ou sauvegarder un
sommaire du processus d’enregistrement.
6. Cliquez sur le bouton « OK » et puis sur le bouton « Next » (Suivant) pour
passer à la fenêtre de sélection.
7. Sélectionnez l’option voulue ou quittez Nero Express 7 Essentials.
d. Création d’un disque DVD vidéo
Un disque vidéo contient des fichiers vidéos que vous pouvez enregistrer sous divers
formats (VCD /SVCD ou DVD-Vidéo) que vous pouvez enregistrer sur votre graveur
DVD Memorex. Le Guide du logiciel décrit la création d’un disque DVD vidéo. Dans le
cas d’un disque VCD ou SVCD, la procédure est la même.
1. Cliquez sur l’icône Nero StartSmart; sélectionnez la catégorie « Photo
and Video » (Photo et vidéo) et cliquez sur « Make your own DVDVideo »
(Créer son propre DVD vidéo).
Ce bouton se trouve aussi dans la zone Favorites (Préférés).
NeroVision Express 3 démarre automatiquement et la fenêtre de sélection pour les
disques vidéo s’ouvre.
2. Cliquez sur « Add Video Files » (Ajouter fichiers vidéo) pour ouvrir la fenêtre
afin de sélectionner les fichiers.
3. Sélectionnez les fichiers voulus et cliquez sur le bouton « Open » (Ouvrir) pour
les transférer vers la compilation.
4. Répétez les étapes 2 et 3 pour ajouter d’autres fichiers vidéo.
Remarque: Cliquez sur le bouton « More » (Plus) pour agrandir la fenêtre de gravure
et afficher d'autres options telles que sélection de mode d'écriture, vitesse d'écriture et
simulation du processus de gravure
7. Cliquez sur le bouton « Burn » (Graver) pour commencer la gravure. Le
processus d'enregistrement débute et les renseignements concernant l'état
actuel du processus s'affichent.
Le processus d’enregistrement débute et l'information sur l'état actuel du
processus s’affiche.
8. « Burn process completed successfully at... » (Le processus de gravure s'est
terminé correctement à..). Cliquez sur le bouton OK, puis sur « Next »
(Suivant) pour passer à la fenêtre de sélection
9. Sélectionnez l'option voulue, cliquez sur le bouton « More » (Plus) ou
fermez Nero Express 7 Essentials en cliquant sur ce bouton.
c. Copie d’un CD
Note importante:À moins d’être propriétaire des droits d’auteur ou d’avoir l’autorisation
de l’auteur, la copie non autorisée de disques représente une infraction aux lois nationales
et internationales et peut amener des sanctions graves.
1. Cliquez sur l’icône Nero StartSmart; sélectionnez la catégorie « Copy and
Backup » (Copier et sauvegarder) et cliquez sur « Copy Disc » (Copier disque).
Remarque: Le logiciel Nero ne copiera pas de disques DVD possédant une protection
contre la copie.
Nero Express 6 démarre automatiquement et la fenêtre de sélection pour les lecteurs ainsi
que les paramètres d’enregistrement finaux s’ouvre.
2. Sélectionnez le lecteur ayant le disque à copier comme lecteur source.
3. Sélectionnez le graveur DVD Memorex comme lecteur de destination.
4. Dans la section « Quick Copy » (Copie rapide), vous pouvez déterminer la manière
dont le disque sera copié.
• Si l’option « Quick Copy » (Copie rapide) est sélectionnée, la copie est effectuée
directement, par ex. de lecteur à lecteur. Cette méthode est rapide mais susceptible de
générer des erreurs.
• Si l’option « Quick Copy » (Copie rapide) n’est pas sélectionnée, un fichier image
temporaire du disque d’origine est enregistré sur le disque dur et le fichier image est
ensuite enregistré à partir du fichier image temporaire. Cette méthode prend plus de
temps. La taille du fichier image et, par conséquent, l’espace nécessaire sur le disque
dur correspondent à la quantité de données à copier à partir du disque d'origine.
32023220_SG 050207.qxp:32023292_QIG_LO.qxp 8/3/07 11:48 AM Page 36
Page 20

Français
3938
Cliquez sur le bouton « Next » (Suivant) pour passer à la fenêtre « Preview »
(Aperçu).
Remarque: À l’aide du bouton gauche de la souris, cliquez sur la vignette vidéo de
votre choix. Tout en maintenant appuyé le bouton, vous pouvez faire glisser la
vignette sélectionnée autour de votre aire de travail du projet pour éviter une touche
ou des zones spéciales (comme des visages ou divers éléments) de votre image personnalisée en arrière-plan, si vous en avez choisie une.
8. Vous pouvez utiliser la télécommande à l’écran pour vous déplacer dans le
menu, par ex. pour afficher des films tels qu’ils s’afficheront une fois que le
disque DVD-Vidéo sera terminé. Cliquez sur le bouton « Preview Menu
Animation » (Animation du menu d’aperçu).
Avant de graver le disque, établissez les paramètres finaux puis cliquez sur « Burn »
(Enregistrer) pour continuer.
Burn to (Enregistrer vers): Sélectionnez le graveur DVD Memorex de la liste des
graveurs raccordés.
Write to Hard Disk Folder (Dossier d’écriture sur disque dur): Si vous ne voulez
pas graver ce projet (tout de suite) mais que vous souhaitez à la place le sauvegarder sur disque dur, cliquez sur ce bouton pour ouvrir une fenêtre où vous
pouvez sélectionner une endroit où le sauvegarder.
Volume Name (Nom du volume): Modifiez le nom du disque si vous le souhaitez.
Recording Settings (Paramètres d’enregistrement): Selon le graveur de
destination sélectionné, vous pouvez régler les paramètres d’enregistrement, par
ex. sélectionner la vitesse d’enregistrement ou le type de livre à enregistrer sur
DVD-ROM pour obtenir une meilleure compatibilité du lecteur.
Il est possible que ces appareils puissant reconnaître et lire ces disques en modifiant
le réglage du code de type du disque d'un disque DVD+R, +RW ou +R DL à un
disque « DVD-ROM » de manière que les lecteurs les traitent comme des disques
DVD réguliers. La version Memorex du logiciel Nero offre une option visant à modifier le code de type du média disque, connu sous le nom de « Booktype Bitsetting ».
Le logiciel Nero et votre lecteur sont configures au réglage « Automatic »
(Automatique) par défaut. Pour améliorer la lecture et la compatibilité globale du
DVD, choisissez le paramètre « DVD-ROM ».
Effectuez les modifications aux endroits suivants : Ouvrez le menu Nero Toolkit et
sélectionnez Nero CD-DVD Speed, l’option « Bitsetting » s’affiche sous le menu «
Extra ». Nero Express possède cette option sous le bouton « Options » à l’écran «
Final Burn Settings » (Paramètres finaux d’enregistrement). NeroVision Express possède cette option sous le bouton « Recording Settings » (Paramètres d’enregistrement) à l’écran « Burn Options » (Options d’enregistrement).
Pour obtenir plus de détails sur ce sujet, veuillez cliquer sur le bouton « Memorex
FAQ!s » (Foire aux questions Memorex) dans le menu StartSmart sous la zone Nero
Toolkit pour visiter la zone de la foire aux questions en ligne.
5. Tous les fichiers sélectionnés s’affichent dans la fenêtre de compilation.
Cliquez sur le bouton « Next » (Suivant) pour créer le menu.
6. Sélectionnez le Menu en choisissant l’un des modèles disponibles à droite et
puis cliquez sur le bouton « Edit Menu » (Modifier le menu) pour ajuster le
modèle en fonction de vos besoins.
7. Effectuez les modifications voulues au menu DVD en mettant en surbrillance à
l’aide de la souris les éléments individuels du menu et en sélectionnant
l’option voulue. Cliquez sur le bouton « Next » (Suivant) pour revenir à la
fenêtre « Select Menu » (Sélectionner le menu).
32023220_SG 050207.qxp:32023292_QIG_LO.qxp 8/3/07 11:48 AM Page 38
Page 21

Français
4140
Remarque: En cliquant sur le bouton « More » (Plus), cela agrandit la fenêtre d’enregistrement et offre des options de réglage supplémentaires comme la sélection de
la qualité du codage et le format d’image de la vidéo.
La gravure commence et l'état actuel du processus s’affiche.
9. Une fois la gravure terminée, un message s’affiche. Cliquez sur « Yes » (Oui)
pour sauvegarder le fichier-journal ou sur « No » (Non) pour fermer la fenêtre.
Le fichier-journal sera utile au groupe de soutien technique si des problèmes
ont surgi en rapport avec le disque ou le processus de gravure.
10. Sélectionnez l’option voulue ou fermez NeroVision 4 Essentials.
e. Création d’étiquettes LightScribe
LightScribe est une technologie emballante qui vous permet de graver facilement des
étiquettes de type sérigraphique directement sur vos CD et DVD tout en leur donnant
un aspect professionnel. Gravez vos fichiers de données, de musique ou vidéo sur
un CD ou DVD LightScribe, retournez-le, puis remettez-le dans le lecteur et gravez
votre nouvelle étiquette directement sur le disque.
Impression d’étiquettes à l’aide de Nero StartSmart et des modes et modèles d’éti
-
quettes Nero Express Essentials
Lancez l’application Nero Express Essentials, sélectionnez la catégorie « Print
LightScribe Label », puis cliquez sur l’option « Print LightScribe Label » dans la partie de droite de la fenêtre.
Sélectionnez un mode ou un modèle au menu déroulant « Label templates » dans la
partie de droite de la fenêtre « Disc Label ».
LightScribe offre un choix de trois modes d’étiquettes différents, selon la quantité
d’information et l’expression créatrice que vous voulez conférer à chaque étiquette.
Le mode « Draft » (Brouillon) est le mode le plus rapide que vous utiliserez pour
graver du texte seulement alors que le mode « Normal » convient aux étiquettes contenant un mélange de texte et de graphiques. Le mode « Best » (Meilleur), qui est le
processus le plus long, est celui que vous utiliserez pour graver des images de qualité supérieure.
Insertion d’une image d’arrière-plan
Pour insérer une image d’arrière-plan qui épousera la forme ronde de l’étiquette du
disque, cliquez avec le bouton droit de la souris sur le centre de la fenêtre « Disc
label » (Étiquette de disque), puis sélectionnez « Background Properties »
(Propriétés d’arrière-plan).
Modification de titres
Pour modifier le titre de l’étiquette, double-cliquez sur le titre. La fenêtre « Properties
» (Propriétés) qui s’ouvre vous permet de modifier les paramètres et le style du titre
de l’étiquette.
Préférences – étiquettes LightScribe
Pour modifier certains paramètres de l’étiquette et les options de gravure,
cliquez sur « Preferences » (Préférences) dans la partie gauche de la fenêtre «
Disc label » (Étiquette de disque). Ensuite, cliquez sur « Options », puis sur
l’onglet LightScribe dans la fenêtre d'options.
Aperçu avant impression
Pour voir à quoi ressemblera votre étiquette une fois imprimée, cliquez sur «
Preview » (Aperçu).
Impression de l’étiquette
Lorsque vous êtes satisfait de votre étiquette, vous pouvez cliquer sur le bouton «
Print » (Imprimer) au bas de la fenêtre pour l’imprimer.
Impression d’une étiquette avec Nero CoverDesigner Essentials
Vous pouvez également créer et imprimer une étiquette LightScribe avec Nero
CoverDesigner Essentials. La marche à suivre ressemble à celle de Nero Express
Essentials, à la différence que vous pouvez commencer le processus directement à
partir de l’application Nero CoverDesigner Essentials.
32023220_SG 050207.qxp:32023292_QIG_LO.qxp 8/3/07 11:48 AM Page 40
Page 22

Français
4342
éliminer les erreurs et intégrer de nouvelles fonctions. Vous pouvez récupérer ces logiciels
par le biais du Nero ProductCenter ou visitez de temps à autre le site Web de Nero. Nous
vous recommandons de maintenir à jour votre logiciel à l’aide des mises à jour les plus
courantes afin d’optimiser la performance. Vous pouvez aussi cliquer sur le bouton «
Memorex FAQ » (Foire aux questions Memorex) dans le « StartSmart Toolkit » (ou visiter
le site www.memorex.com et cliquer sur « Support » (Assistance) pour parcourir le site
Web de Memorex afin d’y découvrir des mises à jour spéciales ou les téléchargements qui
sont disponibles.
g. Foire aux questions
1. Où puis-je trouver des instructions détaillées concernant l'utilisation de Nero
Express 7 Essentials, NeroVision 4 Essentials et Nero BackItUp 2 Essentials ?
- Outre le présent Guide, la barre Nero StartSmart comprend une section de
manuels Nero présentés en version HTML où vous pourrez obtenir des renseigne
ments détaillés sur l'utilisation du logiciel Nero.
2. Un de mes codeurs est expiré ! Que dois-je faire?
- Pour des raisons de licence, Memorex et Nero ont seulement le droit d'intégrer
les versions de démonstration dans Nero 7 Essentials pour certains formats. Vous
pouvez ainsi tester les fonctions de codage pendant une période limitée ou un
certain nombre de fois. Pour activer la version de démonstration, vous devez
acheter le programme d'application complémentaire correspondant pour codeur.
Pour ce faire, rendez-vous à la boutique en ligne à l'adresse http://www.nero.com.
3. Pourquoi n’ai-je pas de fichier d’Aide?
- Si, pour un motif quelconque, vous n'avez pas accès aux fichiers d'Aide, veuillez
télécharger la dernière mise à jour et le logiciel de langue pour vous permettre de
nouveau l’accès aux fichiers d’Aide. Vous pouvez les télécharger de l’adresse
suivante : http://www.nero.com/us/downloads.html
4. Où puis-je trouver de l’aide lors de problèmes techniques?
- Pour tous les problèmes techniques, nous vous recommandons d’utiliser le
système d’aide de Nero en cliquant sur le lien « Online Help » (Aide en ligne) de Nero
dans le menu des manuels StartSmart ou en cliquant sur le lien « Memorex FAQ’s »
(Foire aux questions Memorex) dans le menu du « StartSmart
Toolkit ».
Si vous ne pouvez trouver réponse à votre problème à l’un ou l’autre des endroits
susmentionnés, vous pouvez contacter l’assistance technique de Memorex en cliquant
sur le lien « Memorex Tech Support » (Assistance
technique Memorex) dans le menu « StartSmart Toolkit » ou par courriel à
techsupport@memorex.com.
Si l’assistance technique ci-dessus ne résout pas la question, veuillez nous
appeler sans frais au (877) Is it live [474-8548]. Les techniciens sont à votre
disposition, du lundi au vendredi, de 9 h à 18 h, HNP.
Vous pouvez commencer à créer et à imprimer votre étiquette LightScribe en lançant
l’application Nero StartSmart Essentials , puis en cliquant sur le lien « Nero
CoverDesigner Ess. » dans la zone d’applications illustrée ci-dessous.
Vous pouvez aussi créer une étiquette LightScribe avec Nero CoverDesigner Essentials en
commençant par Nero StartSmart. Lancez d’abord l’application Nero StartSmart Essentials
en double-cliquant sur l’icône Nero sur votre bureau. Ensuite, cliquez sur « Extras »
dans la zone des tâches à l’écran Nero StartSmart Essentials. L’icône « Impression d’étiquette LightScribe » apparaît dans la zone à l’extrême droite.
Important : L’icône « Impression d’étiquette LightScribe » apparaîtra seulement si
vous avez un lecteur avec fonctionnalité LightScribe installée.
Cliquez sur l’icône « Impression d’étiquette LightScribe »; la fenêtre « New
Document » (Nouveau document) s’ouvrira dans Nero CoverDesigner Essentials.
Sélectionnez l’icône « LightScribe », puis le type d’étiquette, et cliquez sur « OK »
pour commencer à créer votre étiquette.
Lorsque vous êtes satisfait du résultat, cliquez sur le bouton « Print LightScribe
Label » (Imprimer étiquette LightScribe) sur la barre d’outils standard dans le haut
de la fenêtre Nero CoverDesigner Essentials. Choisissez la qualité d’impression
voulue, cliquez sur « Preview » (Aperçu) pour visionner votre étiquette avant de l’imprimer ou cliquez sur « Print » pour lancer l’impression. Le processus d’impression
est le même que dans Nero Express.
f. Mises à jour et mises à niveau
Vous trouverez des mises à jour gratuites et de nouvelles mises à niveau qui peuvent être
achetées à l’adresse www.nero.com. Ces logiciels peuvent améliorer votre performance,
32023220_SG 050207.qxp:32023292_QIG_LO.qxp 8/3/07 11:48 AM Page 42
Page 23

Español
4544
crear presentaciones de diapositivas convenientes e incluso usar su propia música como
banda sonora para ellas.
2.4. InCD 5 Essentials
InCD 5 Essentials es un programa de escritura de paquete que formatea discos reescribibles
permitiéndole copiar archivos en el disco simplemente Arrastrando (Dragging) y Soltando
(Dropping) los archivos que haya elegido en su nueva unidad grabadora DVD en el
Explorador de Microsoft Windows o sálvelos en un disco con rapidez y facilidad usando
Nero Express 7 Essentials.
2.5. Nero BackItUp 2 Essentials
Nero BackItUp 2 Essentials es un programa conveniente, poderoso y fácil de
operar para respaldar y restaurar datos. Le permite archivar sus respaldos ya sea
en discos de CD o DVD y también en Memorex USB TravelDrives.
2.6. Nero ShowTime 3
Nero ShowTime 3 le permite reproducir casi todas las grabaciones digitales (esto es,
películas, videos caseros, programas de TV, discos VCD, SVCD, etc.) con excelente calidad
de imagen y sonido. Nero ShowTime 3 le permite también reproducir pistas de audio.
Soporta la mayoría de los formatos actuales, incluyendo MP3, WAV, AAC, etc.
2.7. Nero Cover-Designer 2 Essentials
Nero Cover-Designer Essentials es un programa fácil de usar para crear y diseñar
portadas y etiquetas individuales.
2.8. Nero Recode 2 Essentials
Nero Recode 2 Essentials le permite elaborar un video en DVD de varios videos cortos
en DVD o de un video en DVD más grande, que necesite ajustar en un disco de 4.7 GB.
Esto también funciona muy bien para convertir sus videos a iPod, PSP y a otros reproductores de video portátiles.
2.9. Nero MediaHome Essentials
Nero MediaHome Essentials le permite transmitir videos, música e imágenes a todos
sus dispositivos habilitados UpnP (Universal Plug and Play) y a Nero ShowTime 3.
2.10. Funcionalidad de LightScribe
La combinación de esta nueva grabadora de Memorex DVD y el software Nero CoverDesigner le permite grabar discos LightScribe con sus propias fotos y texto, sin tener que
imprimir y aplicar una etiqueta de papel que podría despegarse si se aplica incorrectamente.
2. SOFTWARE INCLUIDO:
Su grabadora de DVD Memorex incluye un disco CD-ROM que instala el poderoso
programa Memorex Nero 7 Essentials™ software Suite que le permite crear y copiar
programas digitales de audio, datos, fotos y video, tanto en discos CD, como en discos
DVD. El paquete incluye:
Nota: Asegúrese de pulsar en el primer botón de "Read me" para ver cualquier información importante de último minuto, para ayudar a asegurar la mejor experiencia
con su nueva grabadora Memorex DVD.
2.1. Nero StartSmart 3 Essentials
Nero StartSmart 3 Essentials es el centro de comando de la familia de producción Nero 7
y hace más fácil encontrar, identificar y usar los programas de software completos. Una
vez que haya lanzado Nero StartSmart 3 Essentials, todo lo que usted tiene que hacer es
seleccionar la tarea deseada y el software correspondiente inicia en forma automática.
2.2. Nero Express 7 Essentials
Nero Express 7 Essentials proporciona una interfaz despejada sencilla para los programas
de grabación poderosos en discos, tanto de CD como de DVD.
2.3. NeroVision Express 4 Essentials
Con Nero Vision Express 4 Essentials, usted puede grabar videos y editar o quemar
archivos de video existentes. Asimismo puede usar Nero Vision Express 4 Essentials para
1. INTRODUCCIÓN
1.1. Felicitaciones!
Gracias por comprar una grabadora de DVD Memorex.
Por favor siga esta Guía de Software para comenzar a disfrutar los beneficios de
su nueva grabadora de DVD. Sugerimos que guarde esta guía en un lugar seguro
para su consulta futura.
32023220_SG 050207.qxp:32023292_QIG_LO.qxp 8/3/07 11:48 AM Page 44
Page 24

2.15. Instalación de los controladores para Windows 98SE USB 2.0
(Únicamente para unidades externas):
Importante: Memorex no soporta este producto con Windows 98SE ó Windows Me. No
obstante, hemos proporcionado controladores que le permitirán a la parte del hardware de
su producto trabajar en Windows 98SE. Windows Me no requiere de nuestros controladores para que trabaje la unidad. El software Nero proporcionado con este producto no
soporta a Windows 98SE ó Windows Me.
Nota: No conecte la unidad externa a su computadora antes de instalar los controladores
para Windows 98SE USB 2.0.
Siga estos pasos para instalar los controladores USB para su unidad externa únicamente
si es usuario del sistema operativo Windows 98SE:
1. Encienda su computadora.
2. Una vez que su computadora haya terminado de cargar el sistema operativo, así
como otros programas que se ejecutan durante el inicio, inserte el Software
Memorex y el CD del Controlador de su nuevo equipo externo de grabación de
DVDs Memorex.
Nota: Si el programa inicia automáticamente, simplemente pulse en el botón de Exit
(Salida) para cerrar el programa y después seleccione su unidad interna de CD/DVD que
contenga Memorex CD en Windows Explorer. Pulse dos veces en el programa “Memorex
USB 2.0 Driver Installer AT2V1.32.exe”, en el directorio "Win98SE USB2 Drivers".
Una vez que el programa haya sido lanzado, siga las instrucciones que aparecen en la
pantalla para instalar sus unidades.
3. Necesitará instalar el Software Suite (Juego de software) una vez que su unidad
nueva haya sido instalada y detectada por su computadora. Se recomienda que deje
el disco de software en su unidad de CD/DVD interna. Después, usando una vez
más Windows Explorer, pulse dos veces en el programa “setup.exe” en el directorio
principal y en aquel que escogió para pulsar el botón Install Nero 7 Essentials
(mostrado abajo) en la pantalla del instalador principal. Esto lanzará la instalación de
los componentes más comúnmente usados en el juego de software Powerful
Memorex Software Suite.
4. Siga las instrucciones que aparecen en la pantalla para instalar el Paquete de
Software Memorex. Puede encontrar más detalles sobre el Paquete de Software
Memorex y la instalación bajo el 3. Sección de Instalación de Software.
Español
4746
Nota: La ventana de Nero Toolkit tiene dos vínculos especiales con el sitio web de
Memorex.
Vínculo hacia la página “Memorex Tech Support” (Soporte Técnico de
Memorex). Usted puede solicitar asistencia con alguna situación que pueda estar
experimentando.
Vínculo hacia la página “Memorex FAQ's” (Preguntas Frecuentes de
Memorex).Tendrá acceso inmediato a las Preguntas Frecuentes.
2.12. InCD Reader
InCD EasyWrite Reader es un programa que le permite leer discos escritos en formato
MRW ("Mount Rainier ReWritable") en sistemas que no soportan MRW.
2.13. DVD-Video Plug-in
En conjunto con el programa Nero Vision Express 4 Essentials, el módulo de video DVD
permite la codificación de archivos de video en formato DVD/SVCD. Entonces puede
reproducir los videos en casi cualquier reproductor de DVD*.
2.14. HE-AAC Plug-in
El módulo HE-AAC le permite codificar archivos de audio en formato MP4 y también decodificarlos en otros formatos. La “High Efficiency Advanced Audio Coding [Codificación de
Audio Avanzado de Alta Eficiencia (HE-AAC)] es la tecnología de compresión de audio más
moderna; su característica principal es su compresión de alta velocidad revolucionaria y su
calidad de sonido incomparable.
Para mayor información sobre cómo utilizar las aplicaciones anteriores, por favor consulte la sección de manuales en el menú de Nero StartSmart 3 Essentials.
* Algunos reproductores de DVD no tienen la capacidad de reproducir ciertos formatos de
disco. Por favor consulte al fabricante para saber qué formatos soporta su reproductor de
DVD.
2.11. Nero ToolKit
Incluye lo Siguiente:
1) Nero CD-DVD Speed prueba la velocidad de las unidades de CD/DVD disponibles.
2) Nero DriveSpeed le permite establecer la velocidad de lectura de los discos con el
fin de reducir en forma notable el nivel de ruido o de optimizar las revoluciones de
sus unidades.
3) Nero InfoTool le proporciona información sobre las características más importantes
de las unidades instaladas, los discos insertados, el software instalado y mucho
más.
32023220_SG 050207.qxp:32023292_QIG_LO.qxp 8/3/07 11:48 AM Page 46
Page 25

Español
4948
Nota: Puede encontrar varios artículos gratuitos dentro de la carpeta de Extras, en su
disco de instalación de software. Puede tener acceso a estos artículos gratuitos al pulsar
en el botón de "Extras" que se muestra abajo, en la pantalla del instalador del software o al
navegar dentro del disco de instalación del software dentro de la carpeta de Extras, en el
directorio principal. Asegúrese de ver "ReadMe First.txt" y toda la información de páginas
web acerca de los artículos gratuitos, antes de usarlos.
8. Reinicie su PC para que todas las nuevas configuraciones comiencen a funcionar.
4. Desinstale el software
Para desinstalar Nero 7 Essentials o sus componentes individuales, haga lo siguiente:
Nota: Para desinstalar el software dentro de Windows 2000, XP o Vista, debe tener dere-
chos de administrador.
1. Inserte el CD de Memorex Nero 7 Essemtials en la unidad de CD/DVD.
2. Si el programa de configuración se inicia en forma automática, aparecerá un menú de
instalación, en el que usted podrá pulsar en el botón de "Exit" (Salir) para cerrar el
asistente de instalación del software.
3. Entre al directorio principal de su CD del software de Memorex.
Nota: Si el programa no se inicia en forma automática, entre al directorio principal del CD
de software Memorex.
4. Abra el directorio de "Tools"(Herramientas).
5. Pulse dos veces en el archivo de aplicación "General-Clean Tool" (Herramienta de
limpieza general).
6. Seleccione en forma individual los componentes del software que desea eliminar
pulsando en el cuadro al lado del nombre de la aplicación o sólo pulse en el cuadro al
lado de "Clean All" (Limpiar todo) con el fin de eliminar todos los programas de Nero
instalados en su computadora.
3. Instalación del software
El software de grabación Memorex es rápido y fácil de instalar aplicando los siguientes
pasos:
Nota importante:Se recomienda que elimine cualquier otra suite de software de
grabación de CD/DVD (como el software de Roxio) con el fin de evitar cualquier posible
incompatibilidad o conflicto entre motores o controladores de software similares. Si opta
por conservar su software existente instalado y prefiere usarlo en lugar del software de
Memorex, por favor tome en cuenta que su software existente quizá no soporte la funcionalidad completa de la unidad de Memorex.
Nota: Para instalar el software dentro de Windows 2000, XP o Vista, debe tener derechos
de administrador.
1. Cierre todos los programas de Windows y cierre cualquier software antivirus que esté
corriendo.
2. Asegúrese de que el CD de instalación del software Memorex
NNeerroo 77 EEsssseennttiiaallss
est
á
en la unidad interna de CD/DVD.
3. Aparece un menú de instalación, del cual usted puede escoger para instalar usando el
botón para instalar Install
NNeerroo 77 EEsssseennttiiaallss
, e
l cual lanzará la instalación de los
componentes más comúnmente usados del juego de software Enhanced Memorex
Software Suite y acelerará la instalación del software.
Note: Si el programa no se inicia en forma automática, seleccione la unidad de CD/DVD
que contenga el CD de Memorex en el Explorador de Windows. Pulse dos veces en el programa "setup.exe" en el directorio principal.
4. En la ventana de bienvenida verá las opciones de los programas que usted desee
instalar. Pulse en "NEXT" (Siguiente) para continuar con la instalación.
5. Lea con cuidado el acuerdo de licencia. Si usted está de acuerdo con los términos del
acuerdo de licencia, pulse en "I accept all terms of the preceding License Agreement".
(Acepto todos los términos del Acuerdo de Licencia precedente). Si no acepta los
términos de la licencia, usted no podrá instalar el software Nero 7 Essentials. Pulse en
"NEXT" (Siguiente) para continuar.
6. Después de la instalación automática de cada selección, usted podrá elegir otra
instalación de programa o salir del asistente de instalación.
7. Para cerrar el menú de instalación, pulse en "EXIT" (Salir). Si usted decide instalar más
componentes más adelante, pulse en el botón apropiado y lleve a cabo la instalación
con la ayuda del asistente.
Se recomienda elegir el botón de instalación de la Suite del Software Memorex
(mostrado abajo) en la pantalla del instalador principal. Esto lanzará la instalación de
los componentes más comúnmente utilizados de la poderosa Suite del Software de
Memorex y acelerará la instalación del software.
32023220_SG 050207.qxp:32023292_QIG_LO.qxp 8/3/07 11:48 AM Page 48
Page 26

Español
5150
Esta área muestra todas las aplicaciones instaladas en la
familia de productos de Nero 7. Haga clic una vez en la aplicación deseada para entrar a ella.
Esta área muestra todas las aplicaciones instaladas en Nero
Toolkit. Pulse una vez en la aplicación deseada para entrar a
ella.
Además de las áreas y los elementos que están disponibles en la vista estándar, la barra
de Nero StartSmart 3 Essential también le da la opción de tener acceso al programa
deseado en forma directa.
Para cada tarea, usted también tiene la opción de decidir qué aplicación se va a utilizar
para abrirla. Si pasa el cursor del ratón sobre la tarea deseada, aparece la opción de
"OPEN WITH" (Abrir con) en la barra de Nero StartSmart. Entonces puede seleccionar el
programa deseado en el menú desplegable.
Al pulsar en este botón se minimiza la ventana de Nero StartSmart
de la vista completa a la vista estándar.
Pulsar en este botón le permite cambiar los colores de la interfaz
de su Nero StartSmart para tener una apariencia personalizada si
así lo prefiere.
Al hacer clic en este botón se abre la ventana de configuración. Aquí
puede determinar qué programa de la familia Nero 7 se inicia, para
cuáles tareas.
Al pulsar en este botón de la esquina superior derecha de Nero
StartSmart se cerrará el programa.
A. El Centro de Comandos
El programa Nero StartSmart 3 Essentials es el centro de comandos de la familia de productos Nero 7 Essentials y facilita usar los programas de software completos. Una vez
que ha iniciado Nero StartSmart 3 Essentials, lo único que tiene que hacer es seleccionar
la categoría deseada (por ejemplo, Audio), después elija una tarea [por ejemplo, "Make
Audio CD" (Hacer CD de Audio)] y el software correspondiente se inicia en forma
automática.
B. Interfaz del usuario y navegación
7. Siga las instrucciones en pantalla, cierre todas las aplicaciones abiertas y reinicie
su computadora una vez que la desinstalación se haya completado con éxito.
Asimismo, usted puede usar su utilidad para Agregar/Quitar programas de su
sistema operativo para desinstalar lo siguientee:
• Nero 7 Essentials
5. Comprensión del software
Nota: Las tareas que se muestran en Nero StartSmart 3 Essentials dependen de la
versión y de los programas instalados de Nero 7 Essentials y por lo tanto ¡pueden
diferir de la descripción dentro de la documentación!
Nero StartSmart consiste en las siguientes áreas y elementos. Para lanzar Nero
StartSmart, pulse en el icono de Nero StartSmart en su escritorio o en la barra
de tareas de inicio rápido.
32023220_SG 050207.qxp:32023292_QIG_LO.qxp 8/3/07 11:48 AM Page 50
Page 27

Español
5352
D. Nero ProductCenter
Estos botones abren Nero ProductSetup. El área de Nero ProductSetup le permite
buscar actualizaciones, cambiar el idioma, modificar o quitar el juego de software de
Nero 7 Essentials y anotar los códigos de licencia para otras características.
La primera columna contiene el número de versión del software instalado, mientras
que la otra columna muestra los números de versión actualmente disponibles. Como
resultado usted siempre podrá mantener sus programas actualizados. Para actualizar
su software, conéctese a Internet y después pulse en el botón de la derecha de la
lista de nuevas versiones y descargue la versión más reciente, en seguida corra la
aplicación que descargó en su computadora.
E: Prueba de funcionalidad por treinta días
Este conjunto de software tiene algunas funciones especiales a las que se le permitirán accesar por treinta días. Este periodo de prueba de treinta días se iniciará la
primera vez que usted intente usar cada función.
6. FUNCIONES BÁSICAS DEL SOFTWARE
A. Cómo quemar un CD/DVD
Esta sección sólo trata las configuraciones básicas predeterminadas. Para más
detalles, favor de consultar las guías de Ayuda de los manuales de Nero StartSmart..
a. Cómo crear un disco de datos
1. Pulse en el icono de Nero StartSmart; seleccione la categoría de
"Data" (Datos) y pulse en "Make Data CD" (Hacer CD de datos).
Para hacer un DVD de datos, siga los mismos pasos, pero esta vez pulse en "Make
Data DVD" (Hacer DVD de Datos). Estos botones también se pueden encontrar en el
área de "Favorites" (Favoritos). Para la mejor compatibilidad con los discos DVD de
datos, no use la opción de sesión múltiple. Debido a las limitaciones de especificación, las sesiones múltiples de DVD de datos, generalmente no se pueden leer en
Windows 98SE, Me ó 2000, en la mayoría de los casos.
Esta área muestra todos los manuales basados en HTML que
se encuentran disponibles para esta suite de software. Pulse
una vez en el manual deseado para entrar a él.
Esta área también tiene un botón de Ayuda en Línea que
cuando se pulsa en él, le llevará a Nero. Página web de
ayuda.
Por favor note la barra de deslizamiento en la parte inferior de algunas de las áreas
de arriba. Usted verá otras opciones disponibles si usa la barra de deslizamiento en
las áreas que tienen opciones.
Esta categoría contiene sus tareas favoritas o preferidas. El área de "Favorites"
(Favoritos) contiene las tareas más comunes. Para agregar entradas desde
otras áreas de Nero StartSmart3 Essentials, seleccione un icono de tarea pul-
sando con el botón derecho del ratón sobre él y eligiendo el comando "Add to
Favorites" (Agregar a Favoritos) del menú de contexto. Para eliminar una tarea
de Favoritos, pulse con el botón derecho del ratón sobre la tarea deseada y
después elija el comando "Remove from Favorites" (Eliminar de favoritos).
Contiene tareas posibles para un disco de datos.
C. Navegación en Nero StartSmart
Si pasa el cursor del ratón sobre los iconos de categoría individual, se despliegan las
tareas posibles en esa categoría. Las tareas que se despliegan dependen del modo
seleccionado, CD/DVD, CD o DVD.
Contiene tareas posibles para un disco de audio.
Contiene tareas posibles para un disco de fotografía y video
.
Contiene tareas que implican copiar y tareas relacionadas con respaldos.
Contiene tareas adicionales relacionadas con discos
.
32023220_SG 050207.qxp:32023292_QIG_LO.qxp 8/3/07 11:48 AM Page 52
Page 28
2. En la ventana, haga clic en el botón "Add" (Agregar) para abrir la ventana de
selección de archivos.
3. Seleccione los archivos deseados y haga clic en el botón "Add" (Agregar) para
transferirlos a la compilación.
4. Una vez que haya terminado de agregar los archivos, pulse en el botón "Close"
(Cerrar) para cerrar la ventana y regresar a la pantalla de Nero Express 7
Essentials.
5. Todos los archivos que ha agregado aparecen en la ventana de compilación.
Pulse en el botón "Next" (Siguiente) para avanzar a la ventana para quemar.
6. Antes de quemar el disco, realice las configuraciones finales:
Current Recorder (Grabadora actual): Seleccione la grabadora de DVD Memorex
de la lista de grabadoras conectadas.
Title (CD TEXT) [Título (TEXTO DE CD)]: Si la grabadora soporta la escritura de
CD TEXT, usted puede ingresar aquí el título del CD. El título no puede ser más
largo de 64 caracteres.
Artist (CD TEXT) [Artista (TEXTO DE CD)]: Si la grabadora soporta la escritura de
CD TEXT, usted puede ingresar aquí el nombre del artista para el CD. El nombre
no puede ser más largo de 64 caracteres.
Number of copies (Número de copias):Seleccione el número de copias a quemar.
Verificar los datos en el disco después de quemar: si se selecciona este cuadro,
el programa verifica que los datos quemados en el disco sean idénticos a los
datos originales una vez que el disco sea grabado. Esto garantiza que los datos
quemados funcionarán como se desea, aunque este paso agrega tiempo al proce
so de grabación completo.
Nota: Al hacer clic en el botón "More" (Más) en el lado izquierdo, se expande la ventana
de quemado y ofrece opciones de configuración adicionales , tales como la selección del
método de Escritura, velocidad de escritura y simulación del proceso de quemado.
7. Pulse en el botón "Burn" (Quemar) para comenzar a quemar el disco.
Español
5554
9. Seleccione la opción deseada, el botón "More" (Más) o cierre Nero Express
7 Essentials al hacer clic en el botón .
b. Cómo crear un CD de audio
Un CD de audio contiene archivos de música que se puede reproducir en casi
cualquier reproductor de CD o DVD.
1. Inicie el icono de Nero StartSmart; seleccione la categoría de
"Audio" y pulse en "Make Audio CD" (Hacer CD de audio).
Nero Express 7 Essentials se inicia en forma automática y se abre la ventana de
compilación "Add your data" (Agregar sus datos).
2. En la ventana, pulse en el botón "Add" (Agregar) para abrir la ventana de
selección de archivos.
3. Seleccione los archivos deseados y pulse en el botón "Add" (Agregar) para
transferirlos a la compilación.
4. Una vez que haya terminado de agregar los archivos, pulse en el botón "Close"
(Cerrar) para cerrar la ventana y regresar a la pantalla de Nero Express 7
Essentials.
5. Todos los archivos que ha agregado aparecen en la ventana de compilación.
Pulse en el botón "Next" (Siguiente) para avanzar a la ventana para quemar.
6. Antes de quemar el disco, realice las configuraciones finales:
Current Recorder (Grabadora actual): Seleccione la grabadora de DVD Memorex
de la lista de grabadoras conectados.
Disc name (Nombre del disco): Déle un nombre al disco si lo desea.
Writing Speed (Velocidad de escritura): Seleccione la velocidad de quemado.
Number of copies (Número de copias): Seleccione el número de copias a quemar.
Verificar los datos en el disco después de quemar: si se selecciona este cuadro,
el programa verifica que los datos quemados en el disco sean idénticos a los
datos originales una vez que el disco sea grabado. Esto garantiza que los datos
quemados funcionarán como se desea, aunque este paso agrega tiempo al proce
so de grabación completo.
Permitir que los archivos se agreguen después (Disco de sesión múltiple): Si
se selecciona este cuadro, se creará un disco de sesión múltiple, lo que le permite
agregar otras sesiones más tarde. Si no se selecciona el cuadro, el disco se
finaliza y no será posible volver a quemar nada en él.
Nota: Al hacer clic en el botón "More" (Más) en el lado izquierdo, se expande la ventana
de quemado y ofrece opciones de configuración adicionales , tales como la selección del
método de Escritura, velocidad de escritura y simulación del proceso de quemado.
7. Pulse en el botón "Burn" (Quemar) para comenzar a quemar el disco.
El proceso de quemado comienza y usted verá la información sobre el estatus
actual.
8. “Burn process completed successfully at...”, (El proceso de quemado se
completó satisfactoriamente en...). Haga clic en el botón "OK" y después en el
botón "Next" (Siguiente) para avanzar a la ventana de selección.
32023220_SG 050207.qxp:32023292_QIG_LO.qxp 8/3/07 11:48 AM Page 54
Page 29

Español
5756
5. Una vez que haya determinado todas sus configuraciones, haga clic en el
botón "Copy" (Copiar) para comenzar a quemar el disco.
El proceso de quemado comienza y usted verá la información sobre el estado actual.
Una vez que el proceso de quemado esté completo, usted puede imprimir o guardarr
un registro del proceso de quemado.
6. Pulse en el botón "OK" y después en el botón "Next" (Siguiente) para avanzar a
la ventana de selección.
7. Seleccione la opción deseada o cierre Nero Express 7 Essentials.
d. Cómo crear un Disco de Video DVD
Un disco de video contiene archivos de video que usted puede quemar en una variedad de formatos (VCD /SVCD o DVD-Video) que puede grabar en su unidad de
DVD Memorex.
Esta Guía de Software describe la creación de un disco de video DVD. El procedimiento para un VCD o SVCD es, en esencia, el mismo.
1. Inicie el icono de Nero StartSmart; seleccione la categoría de "Photo and
Video" (Fotografía y video) y pulse en "Make your own DVDVideo"
(Hacer su propio DVDVideo).
Este botón también se puede encontrar en el área de "Favorites" (Favoritos).
NeroVision Express 3 inicia en forma automática y abre la ventana de selección para
discos de video.
2. Pulse en "Add Video Files" (Agregar Archivos de Video) para abrir la ventana
para seleccionar los archivos.
3. Seleccione los archivos deseados y pulse en el botón "Open" (Abrir) para
transferirlos a la compilación.
4. Repita los pasos 2 y 3 para agregar más archivos de video.
El proceso de quemado comienza y usted verá la información sobre el estatus
actual.
8. “Burn process completed successfully at...”, (El proceso de quemado se
completó satisfactoriamente en...). Haga clic en el botón "OK" y después en el
botón "Next" (Siguiente) para avanzar a la ventana de selección.
9. Seleccione la opción deseada, el botón "More" (Más) o cierre Nero Express
7 Essentials al hacer clic en el botón .
c. Copiado de un CD
Nota Importante: A menos que usted tenga los derechos reservados o cuente con el
permiso del propietario de los derechos reservados, el copiado no autorizado de discos representa una violación de las leyes nacionales o internacionales y puede dar
como resultado penalizaciones serias.
1. Inicie el icono de Nero StartSmart; seleccione la categoría "Copy and
Backup" (Copiar y respaldar) y pulse en "Copy Disc" (Copiar disco).
Nota: El software de Nero generalmente no copiará discos CD o DVD con protección de
copia en ellos.
Nero Express 6 se inicia en forma automática y se abre la ventana de selección para las
unidades las configuraciones finales de quemado.
2. Seleccione la unidad que contiene el disco a copiar como la unidad fuente.
3. Seleccione la grabadora de DVD Memorex como su unidad de destino.
4. En la sección "Quick Copy" (Copia rápida), usted podrá determinar cómo se va a
copiar el disco.
• Si se selecciona la opción "Quick Copy" (Copia rápida), la copia se hace en forma directa,
por ejemplo, de disco a disco. Este método es rápido pero es susceptible a errores.
• Si no se selecciona la opción "Quick Copy" (Copia rápida), primero se graba un archivo
de imagen temporal para el disco original en el disco duro, y después se quema el archivo
de imagen desde el archivo de imagen temporal. Este método es más largo debido al paso
adicional de crear una imágen en el disco duro. Igualmente, el tamaño del archivo
requerirá espacio adicional en el disco duro, el cual corresponde a la cantidad de datos
copiados del disco.
Writing Speed (Velocidad de escritura):Seleccione la velocidad de quemado.
Number of copies (Número de copias):Seleccione el número de copias a copiar.
32023220_SG 050207.qxp:32023292_QIG_LO.qxp 8/3/07 11:48 AM Page 56
Page 30

Español
5958
Pulse en el botón "Next" (Siguiente) para proceder a la ventana de "Preview" (Vista previa).
Nota: Con el botón izquierdo del ratón, pulse en el recuadro de video de su elección
mientras sostiene el botón presionado, usted podrá arrastrar el recuadro seleccionado alrededor del área de trabajo su proyecto para evitar áreas clave o especiales
(como rostros de personas y varios puntos) de la fotografía de fondo personalizada
si es que ha elegido una.
8. Usted puede utilizar el control remoto en pantalla para moverse por el menú;
por ejemplo, para ver los videos conforme aparezcan una vez que el disco
DVD-Video se ha hecho. Pulse en el botón "Preview Menu Animation" (Vista
previa de animación de menú) para ver cómo se verán los botones animados o
el fondo del menú Movimiento si elige esas opciones o pulse en el botón "Next"
(Siguiente) para proceder a la próxima ventana.
Antes de quemar el disco, determine las configuraciones finales y después pulse en
"Burn" (Quemar) para continuar.
Burn to (Quemar a): Seleccione la grabadora de DVD Memorex de la lista de
grabadoras conectados.
Write to Hard Disk Folder (Escribir a una carpeta de disco duro): Si no desea
quemar el proyecto (todavía) pero desea salvarlo mejor en el disco duro, pulse en
este botón para abrir una ventana en donde puede seleccionar la ubicación en la
que puede salvarlo.
Volume Name (Nombre de Volumen): Cambie el nombre del disco si desea hacerlo.
Recording Settings (Configuraciones de grabación): Dependiendo de la grabadora
de destino seleccionada, usted puede ajustar las configuraciones de grabación;
por ejemplo, seleccionar la velocidad de quemado o establecer el tipo de libro
para el DVD-ROM con el fin de obtener una mejor compatibilidad de reproducción.
Cómo mejorar la reproducción del DVD
Compatibilidad: Varias unidades de DVD de generaciones anteriores y algunos
reproductores de DVD caseros, en particular los antiguos, no reconocen los dis
cos grabados DVD+R, +RW o +R DL y puede que no los lean o reproduzcan.
Es posible obtener estos dispositivos para reconocer y reproducir estos discos al cambiar
la configuración del código tipo del disco de un disco DVD+R, +RW o +R DL a un disco
"DVD-ROM" de manera que las unidades y los reproductores los reconozcan como un
DVD regular. La versión de Memorex del software de Nero proporciona una opción para
cambiar el código tipo del medio de disco conocido como "Booktype Bitsetting".
El software de Nero y su unidad están configurados en "Automatic" (Automático)
desde la fábrica. Con el fin de mejorar la reproducción de los DVD y la compatibilidad general, elija la configuración "DVD-ROM".
5. Todos los archivos seleccionados aparecen en la ventana de compilación.
Pulse en el botón "Next" (Siguiente) para crear el menú.
6. Seleccione su Menú al elegir una de las plantillas disponibles a la derecha y
después pulse en el botón "Edit Menu" (Editar Menú) para ajustar la plantilla a
sus necesidades.
7. Realice los cambios deseados en el menú de DVD al resaltar los puntos del
menú individual con el cursor y seleccionar la opción deseada. Pulse en el
botón "Next" (Siguiente) para regresar a la ventana de Seleccionar Menú.
32023220_SG 050207.qxp:32023292_QIG_LO.qxp 8/3/07 11:48 AM Page 58
Page 31

Español
6160
Lugares para hacer el cambio: Abra el menú de "Nero Toolkit" y seleccione la velocidad de Nero CD-DVD, y aparecerá la opción de "Bitsetting" bajo el menú de "Extra".
Nero Express tiene esta opción bajo el botón de "Options" (Opciones) en la pantalla
de "Final Burn Settings" (Configuraciones de Quemado Final). NeroVision Express
tiene la opción bajo el botón de "Recording Settings" (Configuraciones de Grabación)
en la pantalla de "Burn Options"(Opciones de Quemado).
Para mayores detalles sobre este tema, por favor pulse en el botón de "Memorex
FAQs" (Preguntas Frecuentes de Memorex) en el menú de StartSmart bajo el área de
Nero Toolkit para que visite nuestra área de Preguntas Frecuentes en línea.
Nota: Al pulsar en el botón "More" (Más) se expande la ventana de quemado y ofrece
opciones adicionales de configuración tales como la selección de la calidad de codificado y el cociente de aspecto del video.
El proceso de quemado comienza y usted verá la información sobre el estatus actual.
9. Una vez que el proceso de quemado esté completo, aparecerá el mensaje cor
respondiente. Pulse el botón "Yes" (Sí) para guardar el archivo de registro o
"No" para cerrar la ventana. Un archivo de registro puede ser útil para el Apoyo
Técnico si hay algún problema con su disco o con el proceso de quemado.
10. Seleccione la opción deseada o cierre NeroVision 4 Essentials.
e. Creación de etiquetas LightScribe
LightScribe Direct Disc Labeling es una interesante tecnología para rotular discos
que le permite copiar etiquetas de calidad serigráfica directamente en sus discos
LightScribe CD y DVD, lo cual le da etiquetas de calidad profesional fáciles de hacer.
Puede copiar sus datos, música o video en un disco LightScribe CD o DVD, después,
simplemente voltee el disco, póngalo de vuelta en la unidad y copie su nuevo diseño
de etiqueta directamente en el disco.
Impresión de etiquetas con Plantillas y Modalidades de Etiquetas de Nero StartSmart
y Nero Express Essentials
Inicie Nero Express 7 Essentials, después seleccione la categoría Print LightScribe
Label, después pulse la opción de Print LightScribe Label en el lado derecho de la
ventana.
Seleccione una plantilla o modalidad del menú desplegable "Label templates"
(Plantillas de etiquetas) en el lado derecho de la ventana "Disc Label" (Etiquetar
disco).
LightScribe le ofrece a escoger tres modalidades diferentes de etiquetas, dependiendo de cuánta información y expresión creativa desee en cada etiqueta que tenga. La
modalidad Draft (preliminar) es la más rápida y es la modalidad que usaría para
texto solamente, y la modalidad Normal es un promedio bueno para texto y gráficos.
La modalidad Best (Mejor) es la mejor calidad que pueda tener y es la que usaría
para fotos de alta calidad y tomará más tiempo para usar.
Inserción de una imagen en el fondo
Para insertar una imagen en el fondo que se ajuste a la forma redonda de la etiqueta
del disco, pulse el botón derecho en el área central de la ventana de "Disc label" y
seleccione "Background Properties" (Propiedades del fondo).
Edición de títulos
Para editar el título de la etiqueta, pulse dos veces en el título. Una ventana de
"Properties" (Propiedades) aparecerá, dándole opciones para cambiar las configuraciones y estilo del título en la etiqueta.
Preferencias de etiquetas de LightScribe
Para ajustar algunas de las configuraciones de la etiqueta y cómo debe ser
copiada, pulse el botón de "Preferences" (Preferencias) en el lado izquierdo de
la ventana "Disc label" (Etiqueta del disco). Después pulse el botón de
"Options” (Opciones) y luego en la ceja "LightScribe" de la ventana de
opciones.
Vista previa de la impresión
Pulse en el botón “Preview" (Vista previa) para ver cómo se va a lucir su etiqueta
cuando esté impresa.
Impresión de la etiqueta
Cuando haya terminado la edición de su etiqueta, puede pulsar el botón "Print"
(Imprimir) en la parte inferior de la ventana para continuar la impresión de su etiqueta.
32023220_SG 050207.qxp:32023292_QIG_LO.qxp 8/3/07 11:48 AM Page 60
Page 32

Español
6362
Cuando haya terminado la creación y edición de su etiqueta, pulse el botón "Print
LightScribe Label" en la barra de herramientas estándar en la parte de arriba de
Nero CoverDesigner Essentials. Escoja su contraste de impresión (Quality), pulse
"Preview" (Vista previa) para ver su etiqueta antes de imprimirla o simplemente pulse
"Print" (Imprimir) para comenzar la impresión de su etiqueta. El proceso de impresión aquí, es el mismo de que Nero Express.
f. Actualizaciones y nuevas versiones
En el sitio www.nero.com encontrará actualizaciones gratuitas y nuevas versiones para
compra. Esto puede mejorar su desempeño, eliminar errores e integrar funciones nuevas.
Usted puede obtenerlas a través de su Nero ProductCenter o visitar el sitio web de Nero
de vez en cuando. Le recomendamos que mantenga su software con las actualizaciones
más recientes para optimizar su desempeño. También puede pulsar en el botón de
"Memorex FAQ" (Preguntas Frecuentes de Memorex) del "StartSmart Toolkit" [o visite el
sitio www.memorex.com y pulse en "Support" (Soporte") para navegar por el sitio web de
Memorex en busca de cualquier actualización especial o descargas disponibles.
g. Preguntas frecuentes
1. ¿Dónde puedo encontrar instrucciones paso por paso, para usar Nero Express 7
Essentials, NeroVision 4 Essentials y Nero BackItUp 2 Essentials?
- Además de esta guía, la barra Nero StartSmart tiene una sección de Manuales
con versiones en formato html de los manuales de Nero, que contienen
instrucciones detalladas para usarse con el software de Nero.
2. ¡Uno de mis codificadores ha expirado! ¿Qué debo hacer?
- Por razones de licencia, Memorex y Nero sólo tienen permitido integrar versiones de
demostración en Nero 7 Essentials para algunos formatos. Esto le da la oportunidad de
probar las funciones del codificador durante un tiempo o usos limitados. Para activar la
versión de demostración, usted debe adquirir el módulo del codificador correspondiente. Usted puede hacerlo en el sitio http://www.nero.com en la tienda en línea.
3. ¿Por qué no tengo un archivo de Ayuda?
- Si por alguna razón usted no tiene acceso a ningún archivo de Ayuda, por favor
descargue la actualización más reciente y el paquete de idiomas para permitirle de
nuevo el acceso a los archivos de ayuda. Los puede descargar desde el sitio:
http://www.nero.com/us/downloads.html
Impresión de una etiqueta con Nero CoverDesigner Essentials
También es posible crear e imprimir una etiqueta LightScribe con Nero
CoverDesigner Essentials. Los pasos para la creación e impresión son similares a los
pasos para Nero Express Essentials. La única diferencia es que usted puede iniciar
directamente de la aplicación Nero CoverDesigner Essentials.
Puede empezar la creación e impresión de su etiqueta LightScribe al lanzar la aplicación Nero StartSmart Essentials , después pulsar en el enlace “Nero
CoverDesigner Ess.”, en el área de aplicaciones mostrada abajo.
También puede comenzar la creación de una etiqueta LightScribe con Nero
CoverDesigner Essentials al iniciar con Nero StartSmart. Primero abra la aplicación Nero
StartSmart Essentials al pulsar dos veces en el icono de Nero de su escritorio. Pulse
en "Extras" en el área de tareas de la pantalla de Nero StartSmart Essentials. El icono
"Print LightScribe Label" aparecerá en la parte derecha extrema del área de tareas.
Importante: El icono "Print LightScribe Label" aparecerá solamente si tiene una
unidad capaz instalada de LightScribe.
Haga clic en el icono "Print LightScribe Label" y luego aparecerá la ventana "New
Document" (Nuevo documento) en Nero CoverDesigner Essentials. Seleccione el
icono "LightScribe", seleccione luego el tipo de etiqueta y pulse “OK” para iniciar la
creación de su etiqueta.
32023220_SG 050207.qxp:32023292_QIG_LO.qxp 8/3/07 11:48 AM Page 62
Page 33

64
Português
4. ¿Dónde puedo obtener asistencia con problemas técnicos?
- Para todos los problemas técnicos, le recomendamos usar el sistema de ayuda
de Nero al pulsar en el vínculo "Online Help" (Ayuda en línea) de Nero en el menú
de los manuales de StartSmart o al pulsar en el vínculo de "Memorex FAQ's"
(Preguntas Frecuentes de Memorex) en el menú de
"StartSmart Toolkit".
Si no puede encontrar una respuesta para su problema en ninguna de las dos
ubicaciones de arriba, usted podrá contactar a soporte técnico de Memorex al
pulsar en el vínculo de "Memorex Tech Support"
(Soporte Técnico de Memorex)
en el menú de "StartSmart Toolkit" o por correo electrónico a la dirección
techsupport@memorex.com.
Si toda la asistencia electrónica anterior no le resuelve su problema, por favor llámenos al número gratuito (877) Is it live [474-8548]. Los técnicos están disponibles
de L-V de 9-6 p.m. Hora del Pacífico
2. SOFTWARE INCLUSO
O kit do gravador de DVD Memorex inclui um disco CD-ROM para instalar o potente
conjunto de software Nero 7 Essentials ™, o qual permite criar e copiar áudio digital,
dados, fotografias e programas de vídeo em CD e DVD. O pacote inclui:
Observação: não se esqueça de clicar no primeiro botão do Read Me para visualizar
quaisquer informações importantes de último minuto, para ajudar a garantir a melhor
experiência com seu novo gravador de DVD Memorex.
2.1. Nero StartSmart 3 Essentials
Nero StartSmart 3 Essentials é o centro de comandos da família de produtos Nero 7 e
facilita localizar, identificar e usar os abrangentes programas de software. Depois de inicializado o Nero StartSmart 3 Essentials, basta selecionar a tarefa desejada e o software
correspondente inicia automaticamente.
2.2. Nero Express 7 Essentials
Nero Express 7 Essentials oferece uma interface simples e descomplicada com programas
de gravação potentes em discos CD e DVD.
1. INTRODUÇÃO
1.1. Parabéns!
Obrigado por adquirir o gravador de DVD Memorex.
Observe este Guia de Software para começar a desfrutar dos benefícios de seu
novo gravador de DVD. Sugerimos manter este guia em um local seguro para
futuras consultas.
32023220_SG 050207.qxp:32023292_QIG_LO.qxp 8/3/07 11:48 AM Page 64
Page 34

Português
6766
2.3. Nero Vision Express 4 Essentials
Com o Nero Vision Express 4 Essentials, pode-se gravar vídeos e editar ou gravar
arquivos de vídeos existentes. Ele pode ser usado também para criar shows de
slides e até mesmo usar sua própria música como trilha sonora para eles.
2.4. InCD 5 Essentials
InCD Essentials é um programa de gravação de pacotes que formata discos regraváveis,
permitindo copiar arquivos no disco simplesmente arrastando e soltando os arquivos
selecionados do novo gravador de DVD no Microsoft Windows Explorer ou salvá-los com
rapidez e facilidade em um disco usando Nero Express Essentials.
2.5. Nero BackItUp 2 Essentials
Nero BackItUp 2 Essentials é um programa conveniente e de fácil operação para
se fazer o backup e restaurar dados. Ele permite arquivar seus backups em discos
CD ou DVD, e até mesmo nos TravelDrives USB da Memorex.
2.6. Nero ShowTime 3
Nero ShowTime 3 permite reproduzir praticamente todas as gravações digitais (p.ex.,
filmes, vídeos de produção caseira, programas de TV, VCDs, SVCDs, etc.) com excelente
qualidade de som e imagem. Nero ShowTime 3 permite também reproduzir faixas de
áudio. É compatível com a maioria dos formatos atuais, incluindo MP3, WAV, AAC, etc.
2.7. Nero Cover-Designer 2 Essentials
Nero Cover-Designer Essentials é um programa de fácil utilização para criar capas e
etiquetas individuais.
2.8. Nero Recode 2 Essentials
Nero Recode 2 Essentials permite fazer um vídeo DVD a partir de diversos vídeos de
curta duração ou de um vídeo de maior duração que precise colocar em um disco de
4,7 GB. Isso também funciona muito bem na conversão de vídeos para iPod, PSP e
outros players de vídeo portáteis.
2.9. Nero MediaHome Essentials
Nero MediaHome Essentials permite transmitir vídeos, músicas e imagens para todos
os dispositivos ativados pelo UPnP (Plug and Play Universal) e para o Nero ShowTime
3 Essentials.
2.10. Funcionalidade LightScribe
A combinação deste novo gravador de DVD Memorex e o software Nero Cover-Designer
permite rotular os discos LightScribe com suas próprias fotografias e texto, sem a
necessidade de imprimir e aplicar uma etiqueta de papel que poderia se descolar, no
caso de aplicada incorretamente.
Observação: a janela do Nero Toolkit possui dois links especiais para o website da
Memorex.
Link para a página de Suporte Técnico da Memorex (Memorex Tech Support).
Você poderá solicitar auxílio para problemas que estejam ocorrendo.
Link para a página de Perguntas Mais Freqüentes (FAQ). Você terá acesso ime
diato a essas perguntas.
2.12. InCD Reader
InCD EasyWrite Reader é um programa que permite ler discos gravados no formato
MRW ("Mount Rainier ReWritable"), em sistemas que não são compatíveis com esse
formato.
2.13. DVD-Video Plug-in
Juntamente com o programa Nero Vision Express 4, o DVD-Video Plug-in permite a codificação de arquivos de vídeo no formato DVD/SVCD. Dessa forma, será possível reproduzir vídeos em praticamente qualquer DVD player*.
2.14. HE-AAC Plug-in
HE-AAC Plug-in permite codificar arquivos de áudio no formato MP4 e decodificá-los em
outros formatos. A Codificação Avançada de Áudio de Alta Eficiência (HE-ACC - High
Efficiency Advanced Audio Coding) é a tecnologia de compressão de áudio mais moderna;
suas principais características são a compressão revolucionária de alta velocidade e a
incomparável qualidade do som.
Para obter informações detalhadas sobre o uso das aplicações acima, consulte a
seção de Manuais do menu Nero StartSmart 3 Essentials.
* Alguns DVD players não reproduzem certos formatos de disco. Consulte o
fabricante para descobrir os formatos compatíveis com seu DVD player.
2.11. Nero ToolKit
Inclui o seguinte:
1) Nero CD-DVD Speed testa a velocidade das unidades de CD/DVD disponíveis.
2) Nero DriveSpeed permite ajustar a velocidade de leitura dos discos para reduzir o
nível de ruído de maneira significativa ou otimizar o tempo de aceleração e
desaceleração das unidades.
3) Nero InfoTool oferece informações sobre as características mais importantes das
unidades instaladas, discos inseridos, software instalado e muito mais.
32023220_SG 050207.qxp:32023292_QIG_LO.qxp 8/3/07 11:48 AM Page 66
Page 35

Português
6968
2.15. Instalação dos drivers USB 2.0 para Windows 98SE
(somente para unidades externas):
Importante: este produto da Memorex não é compatível com Windows 98SE ou Windows
Me. Entretanto, oferecemos os drivers que permitirão ao hardware de seu produto a funcionar no Windows 98SE. Windows Me não requer nossos drivers para que a unidade
funcione. O software Nero fornecido com este produto não é compatível com Windows
98SE nem Windows Me.
Observação: não conecte sua unidade externa ao computador antes de instalar os drivers
USB 2.0 para o Windows 98SE.
Siga as etapas abaixo para instalar os drivers USB na unidade externa somente se o seu
computador estiver rodando o sistema operacional Windows 98SE:
1. Ligue o computador.
2. Depois que o computador acabar de carregar o sistema operacional e todos os
programas que são ativados com a inicialização, insira o software Memorex e o CD
de drivers do novo kit de gravador para DVD externo da Memorex.
Observação: se o programa iniciar automaticamente, basta clicar no botão Exit (Sair) para
fechar o programa e após selecionar a unidade interna do CD/DVD existente contendo o
CD da Memorex no Windows Explorer. Clique duas vezes no programa “Memorex USB
2.0 Driver Installer AT2V1.32.exe”, no diretório "Win98SE USB2 Drivers".
Depois de inicializado o programa, siga as orientações na tela para instalar seus drivers.
3. Será necessário instalar o conjunto de software depois que a unidade for instalada
e detectada pelo computador. Recomenda-se deixar o disco de software na unidade
interna de CD/DVD. A seguir, usando novamente o Windows Explorer, clique duas
vezes no programa “setup.exe” no diretório principal e clique no botão Install Nero
7 Essentials (indicado abaixo) na tela do instalador principal. Isso inicializará a
instalação dos componentes mais comumente usados do potente conjunto de
software Memorex.
4. Siga as orientações na tela para instalar o conjunto de software Memorex. Maiores
detalhes sobre o conjunto de software Memorex e instalação podem ser
encontrados na seção
33.. ““IInnssttaallaaççããoo ddoo SSooffttwwaarree””
.
3. INSTALAÇÃO DO SOFTWARE
Usando as etapas a seguir, o software de gravação da Memorex é rápido e fácil de se
instalar:
Nota Importante:Recomenda-se remover quaisquer outros conjuntos de software de
gravação de CD/DVD (como o software da Roxio), a fim de evitar possíveis incompatibilidades ou conflitos entre drivers ou mecanismos do software.
Se optar por manter seu software existente instalado e prefirir usá-lo em vez do software
Memorex, saiba que o software existente pode não ser totalmente compatível com a funcionalidade completa da unidade Memorex.
Observação: Para instalar o software nos sistemas operacionais Windows 2000, XP ou
Vista, você deve ter direitos de administrador.
1. Feche todos os programas do Windows e qualquer software antivírus que possa estar
executando
2. Certifique-se de que o CD de instalação do software
MMeemmoorreexx NNeerroo 77 EEsssseennttiiaallss
encon
tre-se na unidade interna de CD/DVD.
3. Aparece um menu a partir do qual é possível selecionar a instalação usando um botão,
Install Nero 7 Essentials, o qual iniciará a instalação dos componentes comumente
usados do conjunto aprimorado de software Memorex e acelerará a instalação do
software
Recomenda-se optar por clicar no botão de instalação do conjunto de software Memorex
(mostrado abaixo) na tela do instalador principal. Isso inicializará a instalação dos componentes mais comumente usados do conjunto aprimorado de software Memorex e acelerará a instalação do software.
Observação: se o programa não iniciar automaticamente, selecione a unidade de CD/DVD
que contenha o CD da Memorex no Windows Explorer. Clique duas vezes no programa
“setup.exe” no diretório principal.
4. Na janela de boas-vindas, você verá novamente as opções de programas que talvez
deseje instalar. Clique em NEXT (AVANÇAR) para continuar com a instalação.
5. Leia cuidadosamente o acordo de licença. Se concordar com seus termos, clique em "I
accept all terms of the preceding License Agreement” (Aceito todos os termos do
Acordo de Licença acima). Se não aceitar os termos da licença, você não poderá
instalar o software Nero 7 Essentials. Clique em NEXT (AVANÇAR) para continuar.
6. Após a instalação automática de cada seleção, você pode reinicializar o computador,
selecionar a instalação de outro programa ou sair do assistente de instalação.
7. Clique em EXIT (SAIR) para fechar o menu de instalação. Caso decida instalar outros
componentes posteriormente, clique no botão apropriado e conduza a instalação com
o auxílio do assistente.
32023220_SG 050207.qxp:32023292_QIG_LO.qxp 8/3/07 11:48 AM Page 68
Page 36

Português
7170
Observação: você poderá encontrar diversos itens gratuitos na pasta Extras do disco de
instalação do software. Esses itens podem ser acessados clicando-se no botão "Extras"
mostrado abaixo na tela do instalador de software, ou navegando pelo disco de instalação
do software, na pasta Extras no diretório principal. Certifique-se de ler o "ReadMe First.txt"
e todas as páginas de informações da web sobre os itens gratuitos antes de usá-los.
8. Reinicialize o PC para que todas as novas configurações entrem em vigor.
4. DESINSTALAÇÃO DO SOFTWARE
Para desinstalar o Nero 7 Essentialsou componentes individuais, proceda da seguinte
maneira:
Observação: Para desinstalar o software nos sistemas operacionais Windows 2000, XP
ou Vista, você deve ter direitos de administrador.
1. Insira o CD Nero 7 Essentials da Memorexna unidade de CD/DVD.
2. Se o programa de configuração iniciar automaticamente aparecerá um menu de
instalação no qual se pode clicar no botão Exit (Sair) para fechar o assistente de
instalação do software.
3. Proceda até o diretório principal do CD de software Memorex.
Observação: Se o programa não iniciar automaticamente, proceda até o diretório principal
do CD de software Memorex.
4. Abra o diretório Tools (Ferramentas).
5. Clique duas vezes no arquivo de aplicação General-CleanTool (Ferramenta de
limpeza geral).
6. Selecione individualmente os componentes do software que queira remover
clicando na caixa ao lado do nome da aplicação.
A. O centro de comandos
Nero StartSmart 3 Essentials é o centro de comandos da família de produtos do Nero 7
Essentials e facilita o uso dos abrangentes programas de software. Após iniciar o Nero
StartSmart 3 Essentials, basta selecionar a categoria desejada (por exemplo, áudio), a
tarefa (como fazer CD de áudio) e o software correspondente inicia automaticamente.
B. Interface de usuário e navegação
7. Siga as instruções na tela, feche todas as aplicações abertas e reinicialize o
computador depois da conclusão bem-sucedida da desinstalação.
Pode-se usar também os programas de Adicionar-Remover dos sistemas
operacionais para desinstalar a lista abaixo:
• Nero 7 Essentials
5. COMPREENSÃO DO SOFTWARE
Observação: As tarefas indicadas no Nero StartSmart 3 Essentials variam de acordo
com a versão e programas instalados no Nero 7 Essentials e, portanto, podem ser
diferentes da descrição dentro da documentação!
Nero StartSmart é composto pelas áreas e elementos seguintes. Para acionar o Nero
StartSmart clique no ícone Nero StartSmart no desktop ou na barra de ferra-
mentas de inicialização rápida.
32023220_SG 050207.qxp:32023292_QIG_LO.qxp 8/3/07 11:48 AM Page 70
Page 37

Português
7372
Esta área mostra todas as aplicações instaladas na família de
produtos Nero 7. Clique uma vez na aplicação desejada para
acessá-la.
Esta área mostra todas as aplicações instaladas no Nero
Toolkit. Clique uma vez na aplicação desejada para acessá-la.
Além das áreas e elementos disponíveis na visualização padrão, a barra do Nero
StartSmart 3 Essential oferece a opção de acessar diretamente o programa desejado.
Para cada tarefa, você terá também a opção de decidir qual aplicação deve ser usada
para abri-la. Se você movimentar o cursor do mouse sobre a tarefa desejada, a opção
OPEN WITH (ABRIR COM) aparece na barra do Nero StartSmart. Pode-se então selecionar o programa desejado no menu suspenso.
Clicar neste botão minimiza a janela do StartSmart da visualização
completa para a visualização padrão.
Clicar neste botão permite mudar as cores de interface do Nero
StartSmart para uma aparência personalizada de sua preferência.
Clicar neste botão abre a janela de configuração. Aqui é possível definir
qual o programa da família do Nero 7 será inicializado para determinadas tarefas.
Clicar neste botão no canto superior direito do Nero StartSmart
fechará o programa.
Esta área mostra todos os Manuais baseados em HTML
disponíveis para este conjunto de software. Clique uma vez
no manual desejado para acessá-lo. Pode haver outros manuais e documentos disponíveis no diretório principal do
disco de instalação e na pasta Ahead no diretório de arquivos do programa.
Observe que algumas das áreas acima incluem uma barra deslizante na parte
inferior. Essa barra oferece opções adicionais.
Esta categoria contém suas tarefas favoritas ou preferidas. A área “Favorites”
(Favoritos) contém as tarefas mais comuns. Para adicionar entradas de outras
áreas do Nero StartSmart 3 Essentials, selecione um ícone de tarefa clicando
com o botão direito do mouse sobre o mesmo e selecionando o comando “Add
to Favorites” (Adicionar aos favoritos) do menu de contexto. Para remover uma
tarefa de Favoritos, clique com o botão direito do mouse na tarefa em questão e
após selecione o comando “Remove from Favorites” (Remover dos Favoritos).
Esta categoria contém as possíveis tarefas para um disco de dados.
C. Navegação no Nero StartSmart 3 Essentials
Quando se movimenta o cursor do mouse sobre os ícones de uma categoria individual,
são exibidas as tarefas da categoria. As tarefas exibidas dependem do modo selecionado, CD/DVD, CD ou DVD.
Esta categoria contém as possíveis tarefas para um disco de áudio.
Esta categoria contém as possíveis tarefas para um disco de fotografias e
vídeos.
Contém as tarefas envolvendo cópias e backup.
Esta seção contém tarefas adicionais relacionadas aos discos.
32023220_SG 050207.qxp:32023292_QIG_LO.qxp 8/3/07 11:48 AM Page 72
Page 38

Português
7574
D. Nero ProductSetup
Estes botões abrem o Nero ProductSetup. A área do Nero ProductSetup permite a
busca de atualizações, mudar o idioma, modificar ou remover o conjunto de software Nero 7 Essentials e introduzir códigos de licença para outros recursos.
A primeira coluna contém o número da versão do software instalado e as demais
colunas mostram os números das versões atualmente disponíveis. Dessa forma,
você poderá manter seus programas sempre atualizados. Para atualizar o software,
conecte-se à Internet após isto clique no botão à direita da nova versão e faça o
download da versão mais recente. Em seguida, rode a aplicação que foi baixada no
computador.
6. FUNÇÕES BÁSICAS DO SOFTWARE
A. Gravação de um CD/DVD
Esta seção trata somente das configurações básicas padrão. Para obter maiores
detalhes, consulte os guias de Ajuda dos Manuais do Nero StartSmart.
a. Criar um disco de dados
1. Clique no ícone do Nero StartSmart; selecione a categoria "Data" (Dados)
e clique em "Make Data CD” (Criar CD de dados).
E: Funcionalidade experimental por 30 dias
Este conjunto de software inclui alguns recursos especiais que podem ser acessados
por 30 dias. O início deste período experimental de 30 dias se dá na primeira vez
que você tentar usar cada recurso.
Para criar um DVD de dados, siga as mesmas etapas, porém clique em “Make Data
DVD” (Criar DVD de dados). Esses botões podem ser também encontrados na área
Favoritos. Para obter a melhor compatibilidade com DVDs de dados, não use a
opção de multi-sessões. Devido a limitações de especificação, na maioria dos casos,
as multi-sessões de discos DVD de dados geralmente não podem ser lidas nos sistemas operacionais Windows 98SE, Me ou 2000.
Nero Express 7 Essentials inicia automaticamente e a janela de compilação abre
para você adicionar seus dados..
2. Na janela, clique no botão “Add” (Adicionar) para abrir a janela de seleção de
arquivos.
3. Selecione os arquivos desejados e clique no botão “Add” (Adicionar) para
transferir os mesmos à compilação.
4. Após acabar de adicionar os arquivos, clique no botão “Close” (Fechar) para
fechar a janela e retornar à tela do Nero Express 7 Essentials. .
5. Todos os arquivos que foram adicionados aparecem na janela de compilação.
Clique no botão “Next” (Avançar) para passar à janela de gravação.
6. Antes de gravar o disco, faça os ajustes finais:
Current Recorder(Gravador atual): selecione o gravador de DVD Memorex da
lista de gravadores conectados.
Disc name (Nome do disco): se desejar, dê um nome ao disco.
Number of copies (Número de cópias): Number of copies (Número de cópias).
Verify data on disc after burning (Verificar dados no disco após a gravação):
se esta caixa de verificação estiver selecionada, o programa verifica se os
dados gravados no disco são idênticos aos dados originais, após a gravação
do disco. Isso garante que os dados gravados funcionarão conforme deseja
dos. Entretanto, esta etapa aumenta o tempo total do processo de gravação.
Allow files to be added later (multisession disc) (Permitir adição de arquiv
os posteriormente – disco multi-sessão): Se esta caixa de verificação estiver
selecionada, um disco multi-sessão é criado, permitindo que se adicionem
outras sessões posteriormente. Se a caixa de verificação não for selecionada,
o disco é finalizado e não será possível fazer nenhuma gravação adicional.
Observação: clicar no botão “More” (Mais) no lado esquerdo expande a janela de
gravação e oferece outras opções de configuração, como a seleção do método, velocidade e simulação do processo de gravação
7. Clique no botão “Burn” (Gravar) para iniciar a gravação do disco.
O processo de gravação inicia e você verá as informações sobre o status atual.
32023220_SG 050207.qxp:32023292_QIG_LO.qxp 8/3/07 11:48 AM Page 74
Page 39

Português
7776
8. “Burn process completed successfully at...” (Processo de gravação con
cluído com êxito em...). Clique no botão "OK" e no botão “Next” (Avançar)
para passar à janela de seleção.
9. Selecione a opção desejada, o botão "More" (Mais) ou feche o Nero
Express 7 Essentials clicando no botão .
b. Criar um CD de áudio
O CD de áudio contém arquivos de músicas que podem ser reproduzidos em praticamente qualquer CD ou DVD player.
1. Inicie o ícone do Nero StartSmart ; selecione a categoria "Audio" (Áudio)
e clique em "Make Audio CD” (Criar um CD de áudio).
2. Na janela, clique no botão “Add” (Adicionar) para abrir a janela de seleção de
arquivos.
3. Selecione os arquivos desejados e clique no botão “Add” (Adicionar) para
transferir os mesmos à compilação.
4. Após acabar de adicionar os arquivos, clique no botão “Close” (Fechar) para
fechar a janela e retornar à tela do Nero Express 7 Essentials.
5. Todos os arquivos que foram adicionados aparecem na janela de compilação.
Clique no botão “Next” (Avançar) para passar à janela de gravação.
6. Antes de gravar o disco, faça os ajustes finais:
Current Recorder (Gravador atual): selecione o gravador de DVD Memorex da
lista de gravadores conectados.
Title (CD TEXT) [Título (Texto no CD)]: se o gravador suportar a gravação de
TEXTO no CD, pode-se introduzir aqui o título do CD. O título não poderá incluir
mais de 64 caracteres.
Artist (CD TEXT) [Artista (Texto no CD)]: se o gravador suportar a gravação de
TEXTO no CD, pode-se introduzir aqui o nome do artista para o CD. O nome não
pode incluir mais de 64 caracteres.
Number of copies (Número de cópias): selecione o número de cópias a serem
gravadas.
Verify data on disc after burning (Verificar dados no disco após a gravação): se
esta caixa de verificação estiver selecionada, o programa verifica se os dados
gravados no disco são idênticos ao conteúdo original, após a gravação do disco.
Isso garante que o conteúdo gravado funcionará como desejado. Entretanto, esta
etapa aumenta o tempo total do processo de gravação.
Observação: clicar no botão “More” (Mais) no lado esquerdo expande a janela de
gravação e oferece outras opções de configuração, como a seleção do método, velocidade
e simulação do processo de gravação.
7. Clique no botão “Burn” (Gravar) para iniciar a gravação do disco.
O processo de gravação inicia e você verá as informações sobre o status atual.
8. “Burn process completed successfully at...” (Processo de gravação concluído
com êxito em...). Clique no botão "OK" e no botão “Next” (Avançar) para
passar à janela de seleção.
9. Selecione a opção desejada, o botão "More" (Mais) ou feche o Nero Express
7 Essentials clicando no botão .
c. Cópia de um CD
Nota Importante:Exceto se você possuir direitos autorais ou tiver a permissão do titular
desses direitos, a cópia não autorizada dos discos representa uma violação das leis
nacionais ou internacionais e podem resultar em graves penalidades.
1. Inicie o ícone do Nero StartSmart ; selecione a categoria "Copy and Backup"
(Copiar e fazer backup) e clique em "Copy Disc” (Copiar disco).
Observação: Em geral, o software Nero não copiará discos CD ou DVD que contenham
proteção contra a reprodução.
O Nero Express 7 Essentials inicia automaticamente e abre a janela de seleção das
unidades e configurações finais de gravação.
2. Selecione a unidade que contém o disco a ser copiado como unidade fonte.
3. Selecione o gravador de DVD Memorex como unidade de destino.
4. Na seção “Quick Copy” (Cópia rápida), pode-se estabelecer como o disco deve ser
copiado.
• Se for selecionada a opção “Quick Copy”, a cópia será feita diretamente, ou seja, de
unidade para unidade. Este método é rápido, mas suscetível a erros.
• Se a opção Quick não estiver selecionada, um arquivo de imagem temporário para o
disco original é inicialmente gravado na unidade rígida e depois o arquivo de imagem é
gravado desse arquivo temporário. Esse método é mais demorado devido à etapa extra de
gravação da imagem no disco rígido. Além disso, o tamanho do arquivo de imagem exigirá espaço adicional no disco rígido, correspondente à quantidade de dados a ser copiada
do disco.
Writing Speed (Velocidade de gravação):selecione a velocidade de gravação.
32023220_SG 050207.qxp:32023292_QIG_LO.qxp 8/3/07 11:48 AM Page 76
Page 40

Português
7978
Number of copies (Número de cópias):selecione o número de cópias a serem feitas.
5. Depois de feitas todas as configurações, clique no botão “Copy” (Copiar) para
iniciar a gravação do disco.
O processo de gravação inicia e você verá as informações sobre o status atual.
Depois de concluído o processo de gravação, pode-se imprimir ou salvar um
registro desse processo.
6. Clique no botão "OK" e no botão “Next” (Avançar) para passar à janela de
seleção.
7. Selecione a opção desejada ou feche o Nero Express 7 Essentials.
d. Criar um disco de vídeo DVD
Um disco de vídeo contém arquivos de vídeo que podem ser gravados em uma variedade de formatos (VCD / SVCD ou DVD-Vídeo) e que podem ser gravados na
unidade de DVD Memorex. Este Guia de Software descreve a criação de um disco de
vídeo DVD. O procedimento para VCD ou SVCD é essencialmente o mesmo.
1. Inicie o ícone do Nero StartSmart ; selecione a categoria "Photo e Video”
(Fotografias e vídeos) e clique em “Make your own DVD-Video” (Criar seu
próprio DVD-Vídeo).
Este botão pode ser encontrado também na área Favoritos.
NeroVision 4 Essentials inicia automaticamente e abre a janela de seleção para
discos de vídeo.
2. Clique em “Add Video Files” (Adicionar arquivos de vídeo) para abrir a janela
para a seleção de arquivos.
3. Selecione os arquivos desejados e clique no botão “Open” (Abrir) para
transferir os mesmos à compilação.
4. Repita as etapas 2 e 3 para adicionar outros arquivos de vídeo.
5. Todos os arquivos selecionados aparecem na janela de compilação. Clique no
botão “Next” (Avançar) para criar o menu.
6. Selecione seu Menu escolhendo um dos modelos disponíveis à direita e clique
no botão “Edit Menu” (Editar Menu) para ajustar o modelo de acordo com
suas necessidades
7. Faça as mudanças desejadas no menu de DVD destacando itens individuais do
menu com o mouse e selecionando a opção desejada. Clique no botão “Next”
(Avançar) para retornar à janela Select Menu (Menu de seleção).
Clique no botão “Next” (Avançar) para passar à janela Preview (Visualizar).
32023220_SG 050207.qxp:32023292_QIG_LO.qxp 8/3/07 11:48 AM Page 78
Page 41
Para obter maiores detalhes sobre este assunto, clique no botão Memorex FAQs
(Perguntas mais freqüentes da Memorex) no menu StartSmart abaixo da área de
Nero Toolkit e visitar a área das perguntas mais freqüentes online.
Observação: clicar no botão “More” (Mais) expande a janela de gravação e oferece
outras opções de configuração, como a seleção da qualidade de codificação e a taxa
de aspecto do vídeo.
O processo de gravação inicia e você verá as informações sobre o status atual.
9. Depois de concluído o processo de gravação, aparecerá uma mensagem correspondente. Clique no botão “Yes” (Sim) para salvar o arquivo de registro ou
em “No” (Não) para fechar a janela. O arquivo de registro pode ser útil para o
departamento de Suporte Técnico, caso tenham ocorrido problemas com o
disco ou durante o processo de gravação.
10. Selecione a opção desejada ou feche o NeroVision 4 Essentials.
e. Criação de etiquetas LightScribe
A rotulagem direta sobre disco LightScribe é uma tecnologia interessante, que permite gravar etiquetas com qualidade serigráfica diretamente sobre CDs e DVDs
LightScribe, proporcionando etiquetas de qualidade profissional, fáceis de fazer e
sem causar aborrecimentos. Pode-se gravar dados, músicas ou vídeos no CD ou
DVD LightScribe e após simplesmente virar o disco, colocá-lo de volta na unidade e
gravar a etiqueta elaborada diretamente sobre o disco.
Impressão de etiquetas com Nero StarSmart e modos e modelos de etiquetas
Nero Express Essentials
Inicie o Nero Express Essential, selecione a categoria “Print LightScribe Label" e
clique na opção “Print LightScribe Label” no lado direito da janela.
Selecione um modelo ou modo no menu suspenso “Label templates” (modelos
de etiquetas), no lado direito da janela “Disc Label” (Rotular disco)..
LighScribe oferece a seleção de três modos diferentes, dependendo da quantidade
de informações e expressão criativa que se pretenda colocar na etiqueta do disco. O
modo Draft (Rascunho) é o mais rápido e adequado para etiquetas contendo apenas
texto, o modo Normal é de velocidade média e ótimo para etiquetas contento texto e
gráficos. O modo Best (Melhor) oferece a melhor qualidade que se pode obter; é
recomendado para fotografias de alta qualidade. Esse modo é o mais demorado de
todos.
Português
8180
Observação: Com o botão esquerdo do mouse, clique na imagem reduzida de vídeo de
sua preferência. Mantendo o botão pressionado, pode-se arrastar a imagem selecionada
pela área de trabalho do projeto, a fim de se evitar as áreas principais ou especiais (como
rostos de pessoas ou itens diversos) da imagem de fundo personalizada, caso você tenha
selecionado uma.
8. Pode-se usar o controle remoto na tela para movimentar-se pelo menu, por
exemplo, para visualizar vídeos à medida que aparecem depois que o disco de
DVD-vídeo tiver sido feito. Clique no botão “Preview Menu Animation”
(Visualizar animação do menu) para ver como seria a aparência dos botões
animados ou do fundo do menu Motion (movimento) se você selecionasse
estas opções, ou clique no botão “Next” (Avançar) para passar à janela
seguinte.
Antes de gravar o disco, faça os ajustes finais e então clique em Burn (Gravar) para
continuar.
Burn to (Gravar em): selecione o gravador de DVD Memorex da lista de
gravadores conectados.
Write to Hard Disk Folder (Gravar em uma pasta do disco rígido): caso (ainda)
não queira gravar o projeto, mas deseje salvá-lo no disco rígido, clique neste
botão para abrir uma janela na qual se pode selecionar o lugar em que o projeto
pode ser salvo
Volume Name (Nome do volume): mude o nome do disco, se assim desejar.
Recording Settings (Configurações de gravação): Dependendo do gravador de
destino selecionado, pode-se ajustar as configurações da gravação, como
selecionar a velocidade da gravação ou definir o campo “Book Type” em
DVD-ROM, para melhor compatibilidade do player
Como melhorar a compatibilidade de reprodução do DVD: Muitas unidades de
DVD e DVD players domiciliares mais antigas não reconhecem os discos
gravados DVD+R, +RW ou + R DL e talvez não consigam ler ou reproduzi-los
É possível fazer com que esses dispositivos reconheçam e reproduzam tais discos
mudando a configuração do código de DVD+R, +RW ou + R DL para um disco
“DVD-ROM”. Assim, as unidades e players tratarão tais discos como DVDs normais.
A versão da Memorex do software Nero oferece uma opção para mudar o código do
tipo de mídia do disco, conhecida como “Booktype Bitsetting".
O software Nero e sua unidade são configurados em “Automático” por padrão. Para
melhorar a reprodução de compatibilidade geral do DVD, selecione a configuração
“DVD-ROM”.
Efetue as seguintes mudanças: Abra o menu Nero Toolkit e selecione Nero CD-DVD
Speed (Velocidade de CD-DVD Nero). A opção "Bitsetting" aparece no menu "Extra".
Nero Express possui esta opção abaixo do botão “Options” (Opções) na tela “Final
Burn Settings" (Configurações finais de gravação). NeroVision Express apresenta
esta opção abaixo do botão “Recording Options” (Opções de gravação) na tela “Burn
Options" (Opções de gravação).
32023220_SG 050207.qxp:32023292_QIG_LO.qxp 8/3/07 11:48 AM Page 80
Page 42

Português
8382
Inserção de uma imagem de fundo
Para inserir uma imagem de fundo que se ajuste ao formato redondo da etiqueta do
disco, clique na área central da janela “Disc Label” (Etiqueta de disco) e selecione
“Background Properties” (Propriedades da imagem de fundo).
Edição de títulos
Para editar o título da etiqueta, clique duas vezes sobre o título.
A janela “Properties” (Propriedades) aparecerá, oferecendo opções para mudar as
configurações e o estilo do título da etiqueta.
Preferências das etiquetas LightScribe
Para ajustar determinadas configurações da etiqueta e como ela deve ser
gravada, clique no botão "Preferences" (Preferências) do lado esquerdo da
janela "Disc Label" (Etiqueta do disco). A seguir, clique em “Options”
(Opções) e na guia “LightScribe” da janela de opções..
Visualização da impressão
Clique no botão “Preview" (Visualizar) para ver como será a aparência da etiqueta
quando impressa.
Impressão da etiqueta
Depois de concluir a edição da etiqueta, pode-se clicar no botão “Print” (Imprimir)
na parte inferior da janela para continuar com sua impressão.
Impressão de uma etiqueta com Nero CoverDesigner Essentials
É possível também criar e imprimir uma etiqueta LightScribe com o Nero
CoverDesigner Essential. As etapas de criação e impressão são similares às do Nero
Express Essentials. A única diferença é que se pode iniciar diretamente da aplicação
Nero CoverDesigner Essentials.
Pode-se também começar criando uma etiqueta LightScribe com o Nero
CoverDesigner Essentials iniciando pelo Nero StartSmart. Primeiro, abra a aplicação
Nero StartSmart Essentials com um clique duplo no ícone Nero , encontrado em
seu desktop. Clique em “Extras” na área de tarefas da tela Nero StartSmart
Essentials. O ícone "Print LightScribe Label" (Imprimir etiqueta LightScribe) aparecerá na extrema direita da área de tarefas.
Importante: o ícone "Print LightScribe Label" aparecerá somente se houver uma
unidade instalada compatível com LightScribe.
Clique no ícone “Print LightScribe Label” e então a janela “New Document” (Novo
documento) aparecerá no Nero CoverDesigner Essentials. Selecione o ícone
“LightScribe”, o tipo de etiqueta e clique em “OK” para começar a criar sua etiqueta.
Após concluir a criação e edição da etiqueta, clique no botão "Print LightScribe
Label" na barra de ferramentas padrão na parte superior do Nero CoverDesigner
Essentials. Selecione o contraste de impressão (Qualidade), clique em “Preview”
(Visualizar) para visualizar a etiqueta antes de imprimir ou simplesmente clique em
“Print” (Imprimir) para iniciar a impressão da etiqueta. O processo de impressão é o
mesmo do Nero Express.
Pode-se iniciar a criação e impressão da etiqueta LightScribe inicializando a aplicação Nero StartSmart Essentials e após clicando no link “Nero CoverDesigner
Ess. ” na área de aplicações indicada abaixo.
32023220_SG 050207.qxp:32023292_QIG_LO.qxp 8/3/07 11:48 AM Page 82
Page 43
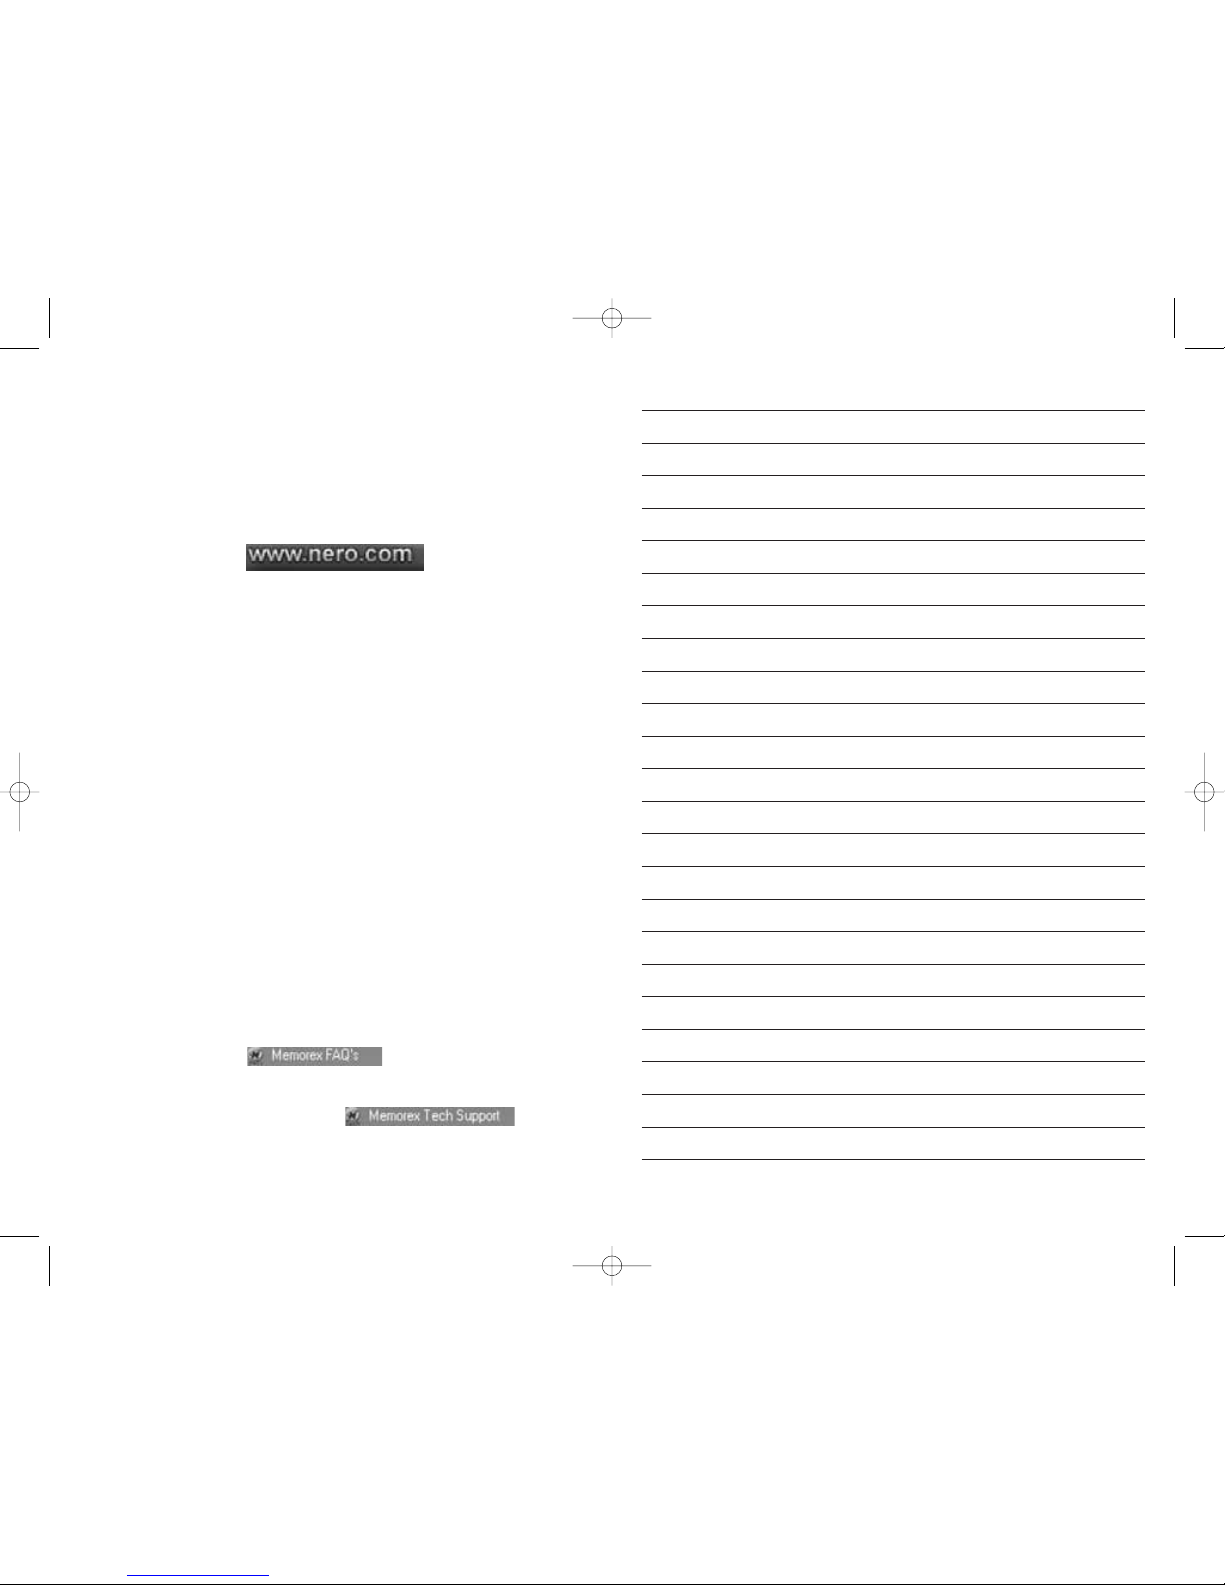
8584
f. Atualizações e novas versões
Você pode encontrar atualizações gratuitas e novas versões para o seu produto em
www.nero.com. Isso pode melhorar o desempenho, eliminar erros e integrar novas
funções. Essas informações podem ser obtidas pelo Nero ProductSetup ou visitando-se regularmente o website do Nero. Recomendamos manter o software com as
atualizações mais recentes para otimizar seu desempenho. Pode-se também clicar
no botão FAQs (Perguntas mais freqüentes) da Memorex no StartSmart Toolkit (ou
visitar www.memorex.com e clicar em “Support”) para navegar o website da
Memorex e tentar encontrar atualizações especiais ou downloads disponíveis.
g. Perguntas mais freqüentes (FAQs)
1. Onde posso encontrar orientações detalhadas sobre como usar Nero Express 7
Essentials, NeroVision 4 Essentials e Nero BackItUp 2 Essentials?
– Além deste guia, a barra do Nero StartSmart possui a seção de Manuais com
versões em HTML dos manuais do Nero, contendo instruções detalhadas para o
uso de seu software.
2. Um dos meus codificadores expirou! Que devo fazer?
– Por razões de licença, a Memorex e Nero podem apenas integrar versões de
demonstração no Nero 7 Essentials para determinados formatos. Isso oferece a
oportunidade de testar as funções do encoder por tempo limitado ou quantidades
limitadas de uso. Para acionar a versão de demonstração, é necessário comprar a
conexão do encoder correspondente. Isso pode ser feito na loja online, no
endereço http://www.nero.com.
3. Por que não tenho um arquivo de ajuda?
– Se, por algum motivo, você não tiver acesso a nenhum dos arquivos de ajuda,
faça o download da mais recente atualização e pacote de idiomas para poder
acessar novamente os arquivos de ajuda. O download pode ser feito em:
http://www.nero.com/us/downloads.html..
4. Onde posso obter auxílio com problemas técnicos?
Para todos os problemas técnicos, recomendamos usar o sistema de ajuda do
Nero clicando seu link “Online Help” (Ajuda online) no menu StartSmart Manuals
ou clicando no link "Memorex FAQ's" (Perguntas mais freqüentes da Memorex) no
menu StartSmart Toolkit.
Caso não consiga encontrar uma resposta para o seu problema em nenhum dos
locais mencionados acima, entre em contato com o Suporte Técnico da Memorex
clicando no link "Memorex Tech Support" no menu
StartSmart Toolkit ou enviando um e-mail para techsupport@memorex.com.
Se nenhuma das opções de auxílio eletrônico acima solucionar o seu problema,
ligue gratuitamente para (877) Is it live [474-8548]. Os técnicos se encontram
disponíveis de segundas a sextas, entre 9 e 18 horas, horário do Pacífico.
32023220_SG 050207.qxp:32023292_QIG_LO.qxp 8/3/07 11:48 AM Page 84
Page 44
32023220_SG 050207.qxp:32023292_QIG_LO.qxp 8/3/07 11:48 AM Page 86
Page 45
copy.
share.
®
Is it live or is it Memorex?
®
SoftwareGUIDE
Guide du logiciel Guía de Software Guia de software
DVD recorder
MULTI FORMAT
©2007 Memorex Products, Inc. • Cerritos, CA 90703 • www.memorex.com
5395 9586
32023220_SG 050207.qxp:32023292_QIG_LO.qxp 8/3/07 11:48 AM Page 88
 Loading...