

Page 1
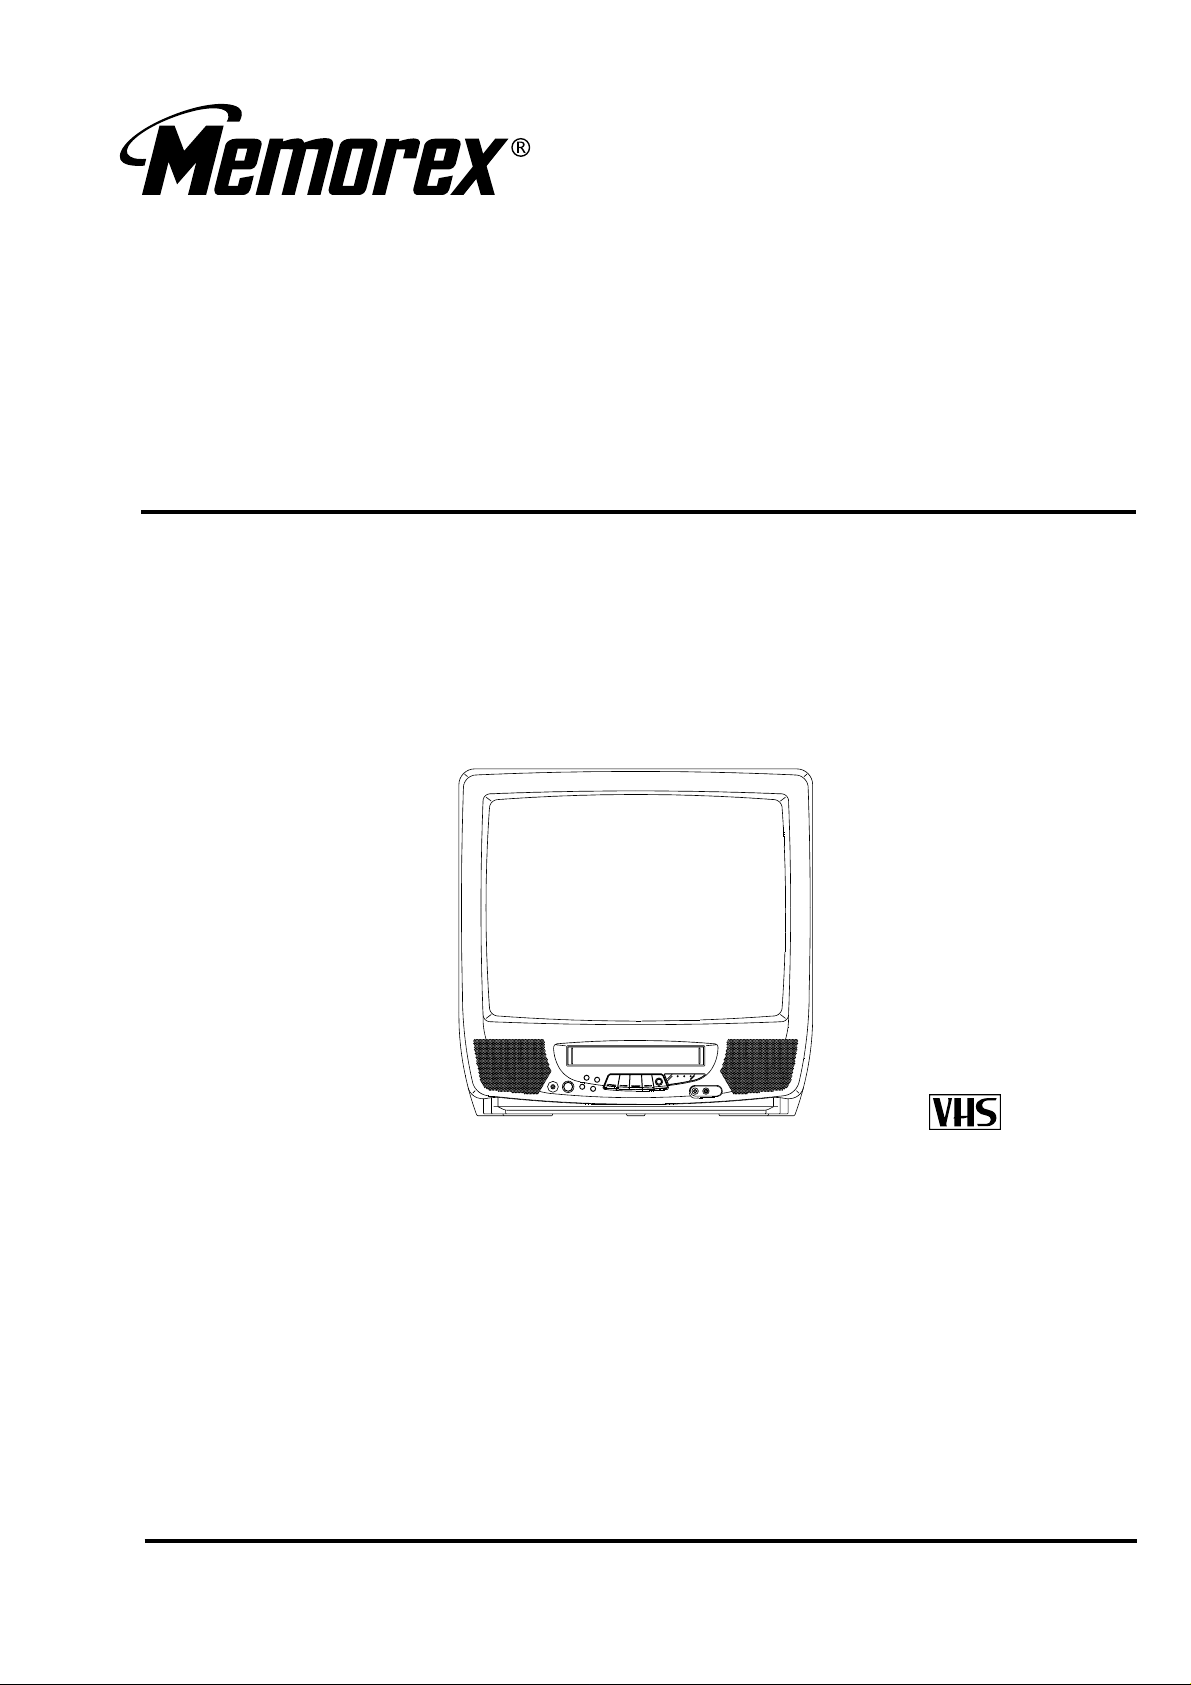
MVT2195B
SERVICE MANUAL
COLOR TELEVISION/VIDEO CASSETTE RECORDER
ORIGINAL
MFR’S VERSION A
Design and specifications are subject to change without notice.
Page 2
MVT2195B
SER VICE MANUAL
COLOR TELEVISION/VIDEO CASSETTE RECORDER
MFR’S VERSION C
MFR’S VERSION
A
C
Please file this revision with the original version.
REVISION 1
M2003
EP14BD
F20EL82
IC1001
OEC7043A
OEC7043B
Page 3
Ch
ange of
MICRO MOTOR
(
)
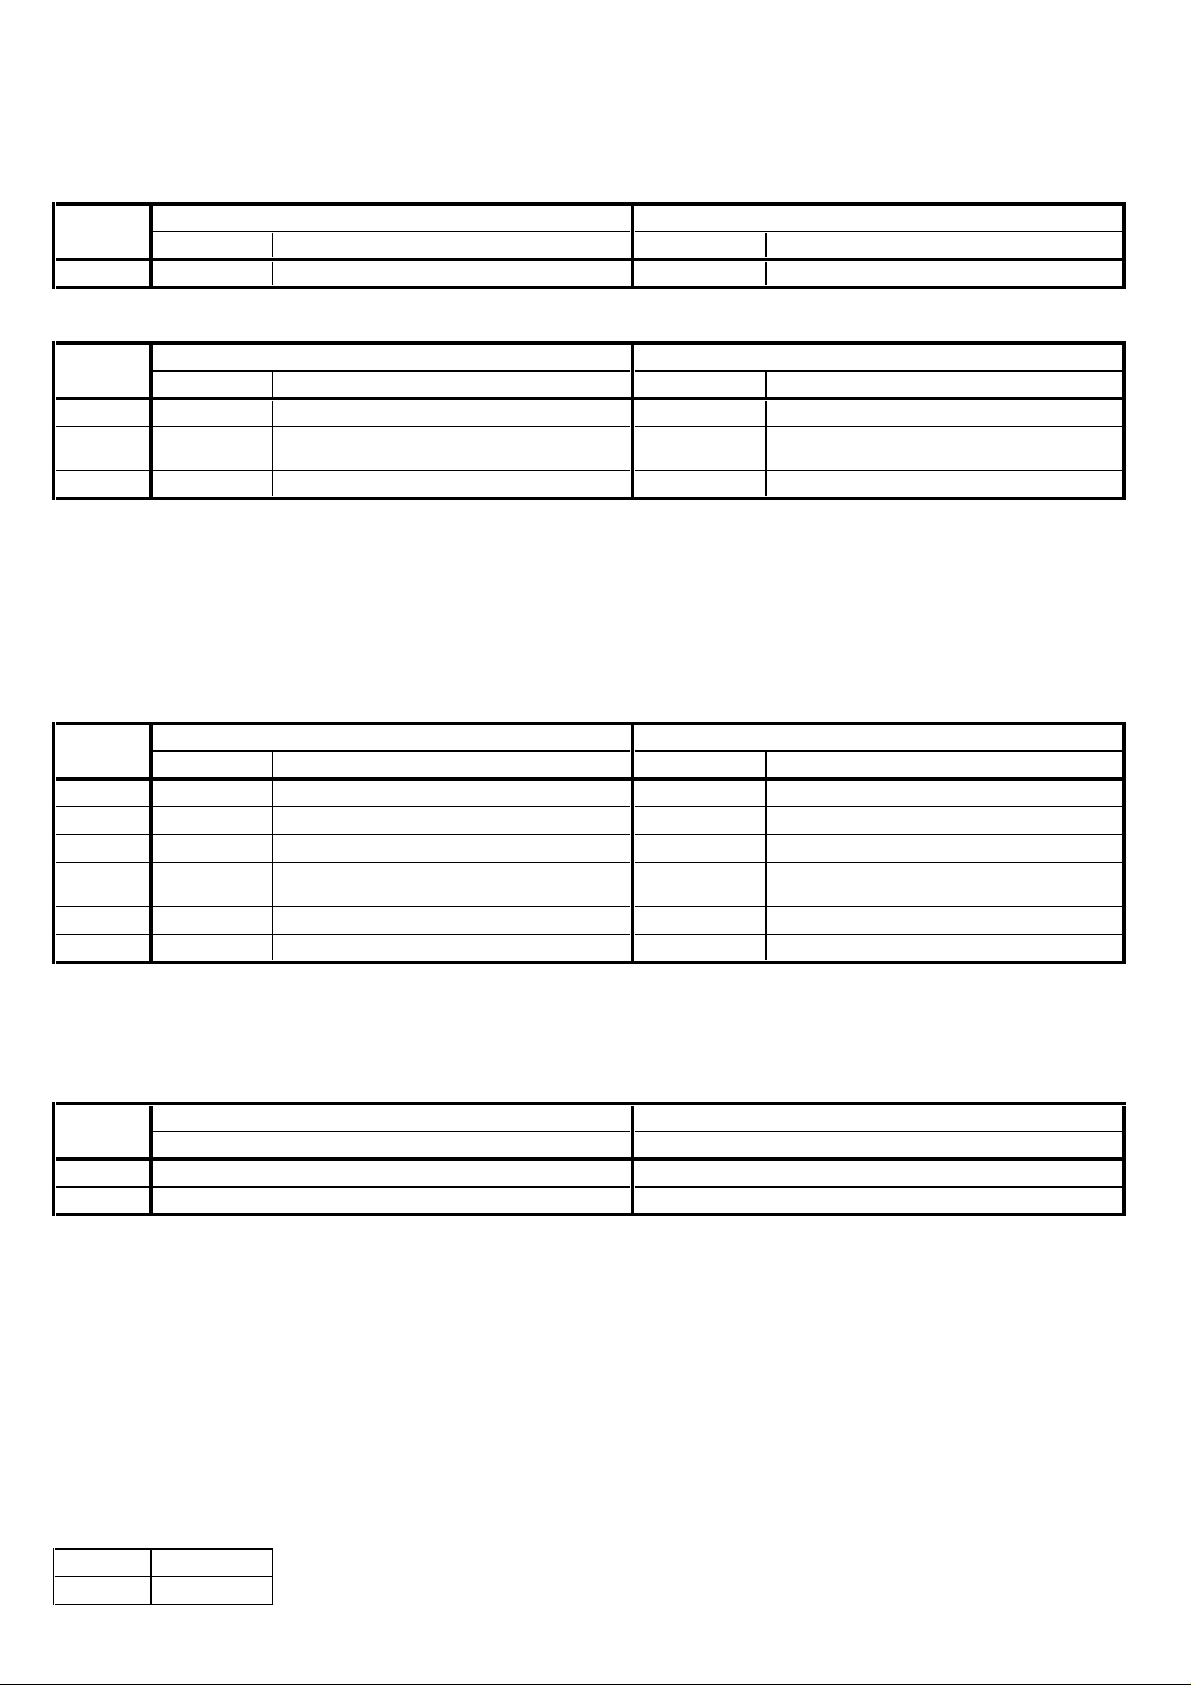
DIFFERENCES
MFR'S VERSION A MFR'S VERSION C
REF. NO.
M2003 1589V11007 MICRO MOTOR EP14BD 1589311005 MICRO MOTOR F20EL82
PART NO. DESCRIPTION PART NO. DESCRIPTION
MFR'S VERSION A MFR'S VERSION C
REF. NO.
CD1002 122F051702 CORD, JUMPER 2F051702 122F071701 CORD, JUMPER 2F071701
CP1005 069J750029
PCB010 A546A5A01A SYSCON PCB ASS'Y VMX180B A546A5A01B SYSCON PCB ASS'Y VMX180C
MAIN PCB's are not interchangeable.
PART NO. DESCRIPTION PART NO. DESCRIPTION
CONNECTOR PCB SIDE
IMSA-9604S-05Z14
069J770029
CONNECTOR PCB SIDE
IMSA-9604S-07Z14
Change of IC1001
DIFFERENCES
MFR'S VERSION A MFR'S VERSION C
REF. NO.
IC1001 I56F57043A IC OEC7043A I56F57043B IC OEC7043B
R677 R903N8103J RC 10K OHM 1/8W DEL
R685 R002T4182J RC 1.8K OHM 1/4W DEL
Q612 T8YJ2412K0
C692 CHGTF0415Z CC 0.1UF 50V F DEL
PCB010 A546A5A01A SYSCON PCB ASS'Y VMX180B A546A5A01B SYSCON PCB ASS'Y VMX180C
PART NO. DESCRIPTION PART NO. DESCRIPTION
TRANSISTOR, SILICON
2SC2412KT146
R,S
DEL
NOTE FOR THE REPLACING OF MEMORY IC
MFR'S VERSION A MFR'S VERSION C
ADDRESS
04 83 C3
0C 19 00
DATA DATA
SPEC.NO. M546-A5A
O/R NO. W085005
Page 4
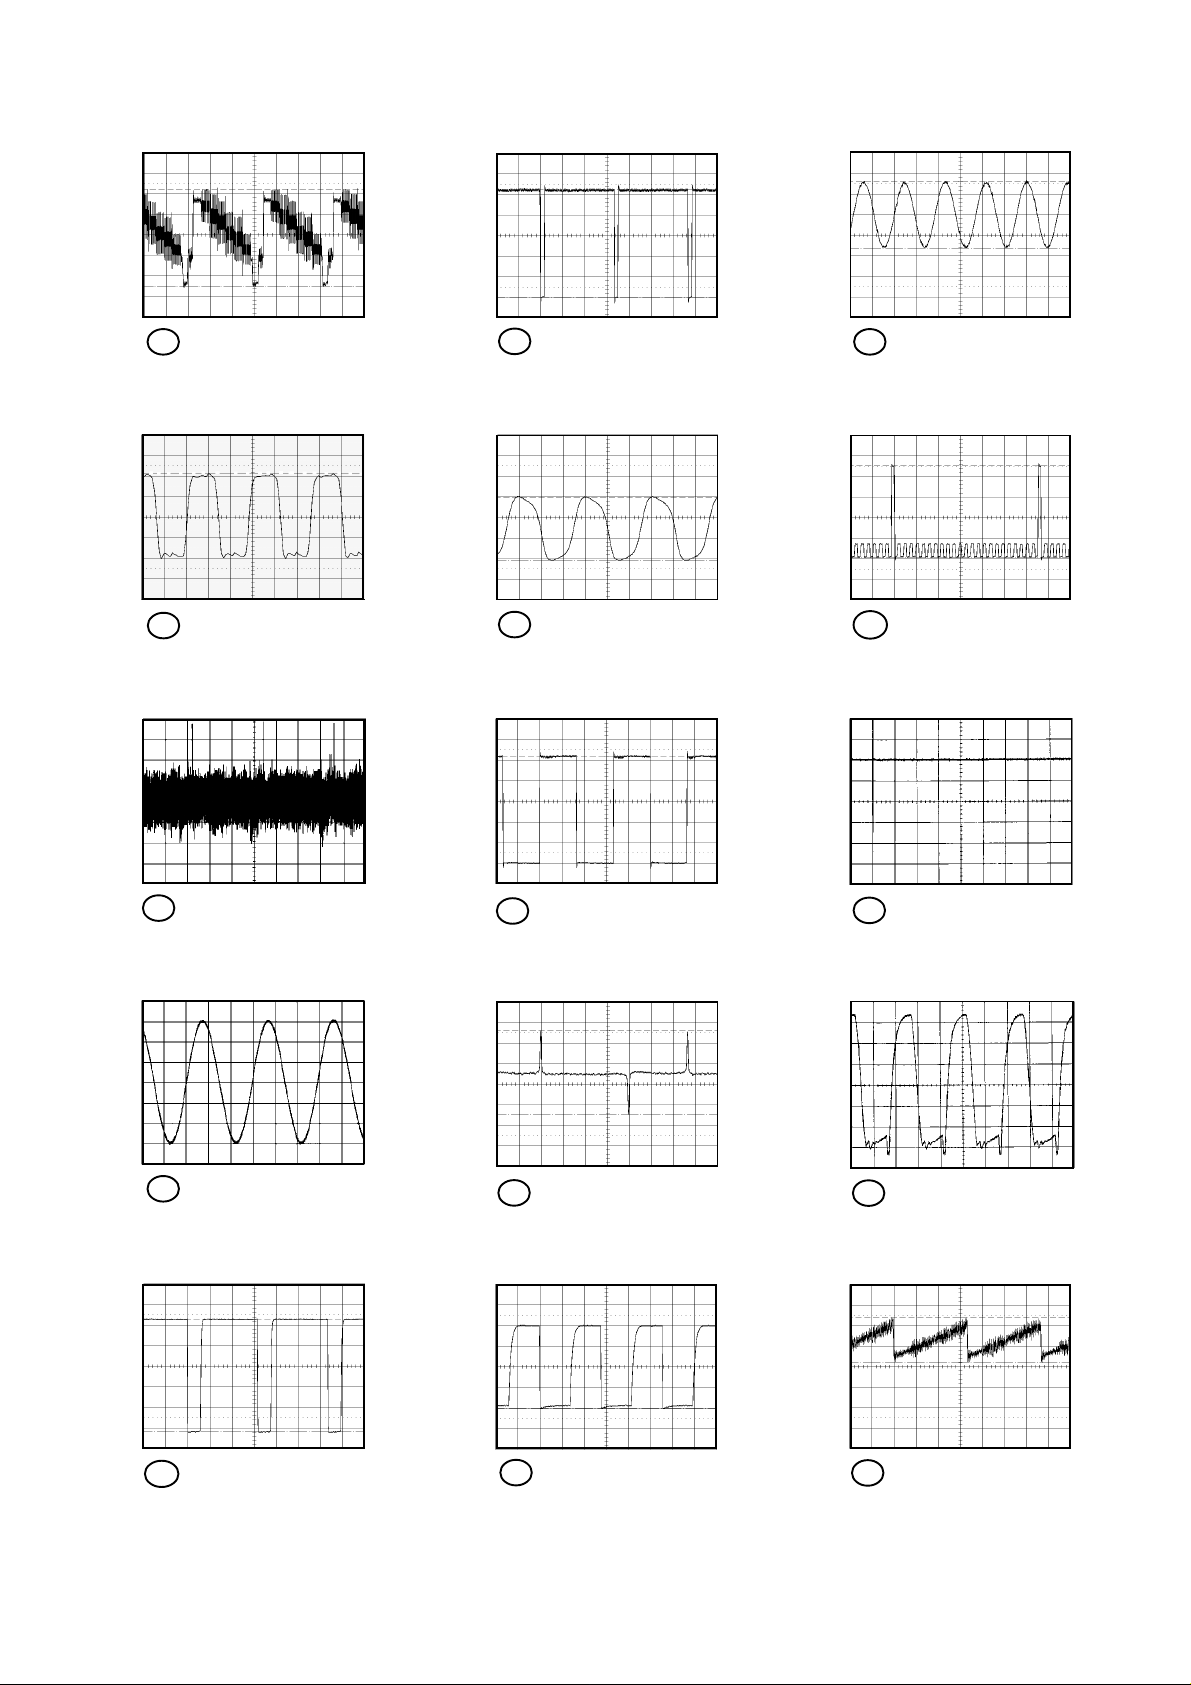
Y/C/AUDIO/HEAD AMP
WAVEFORMS
1PB
0.5V 20µs/div
2 POWER ON
100mV 0.1µs/div
3 PB
10mV 20us/div
6 POWER ON
0.5V 10ms/div
7 POWER ON
1.0V 10µs/div
8 PB
1.0V 10ms/div
11 PB
0.5V 0.5ms/div
12 PB
1.0V 5ms/div
POWER
13 5.0V 20ms/div
4 REC
10.0V 5us/div
MICON
5 POWER ON
1.0V 20µs/div
9 PB
1.0V 5ms/div
14 500mV 5µs/div
DEFLECTION
10 PB
1.0V 0.5ms/div
The following waveforms were measured at the point of the corresponding
NOTE:
balloon number in the schematic diagram.
H-1
15 0.5V 5ms/div
Page 5
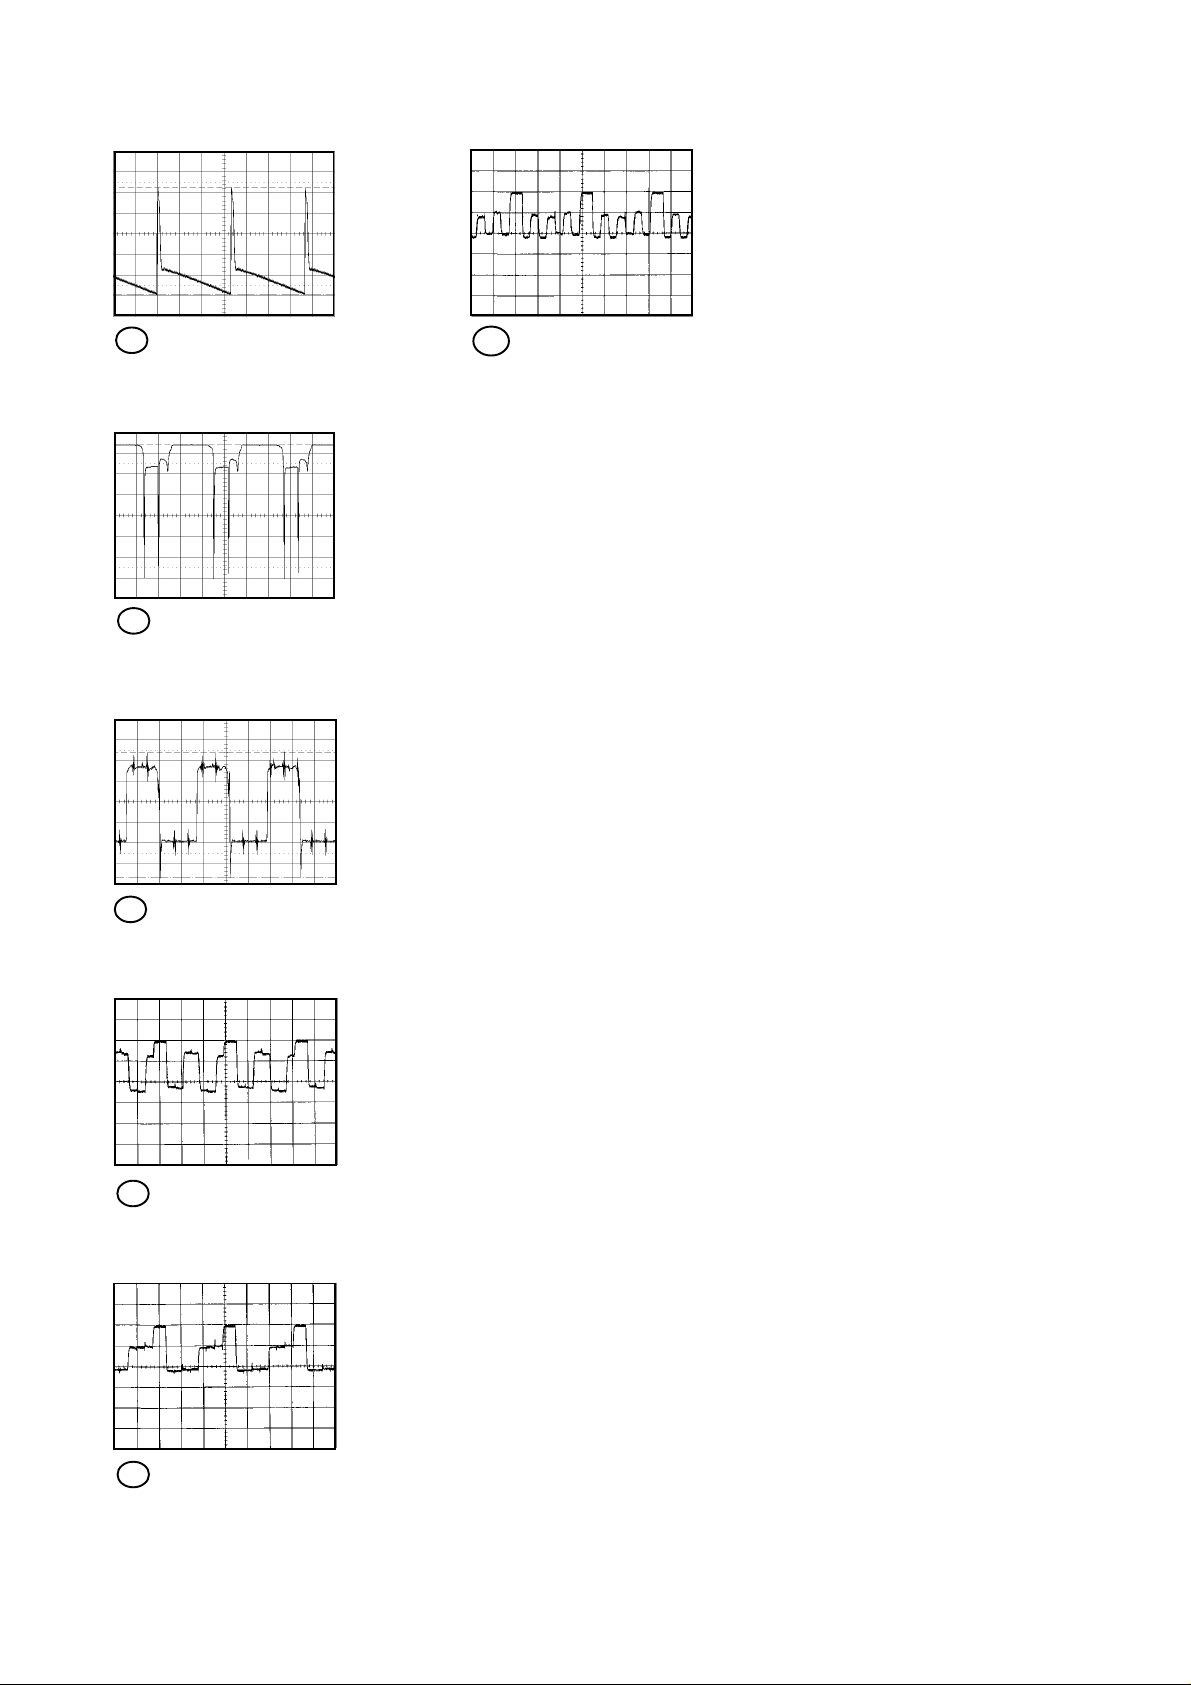
WAVEFORMS
16 10.0V 5ms/div
17 2.0V 20µs/div
18 200mV 20µs/div
21 50.0V 20µs/div
CRT
19 50.0V 20µs/div
20 50.0V 20µs/div
The following waveforms were measured at the point of the corresponding
NOTE:
balloon number in the schematic diagram.
H-2
Page 6
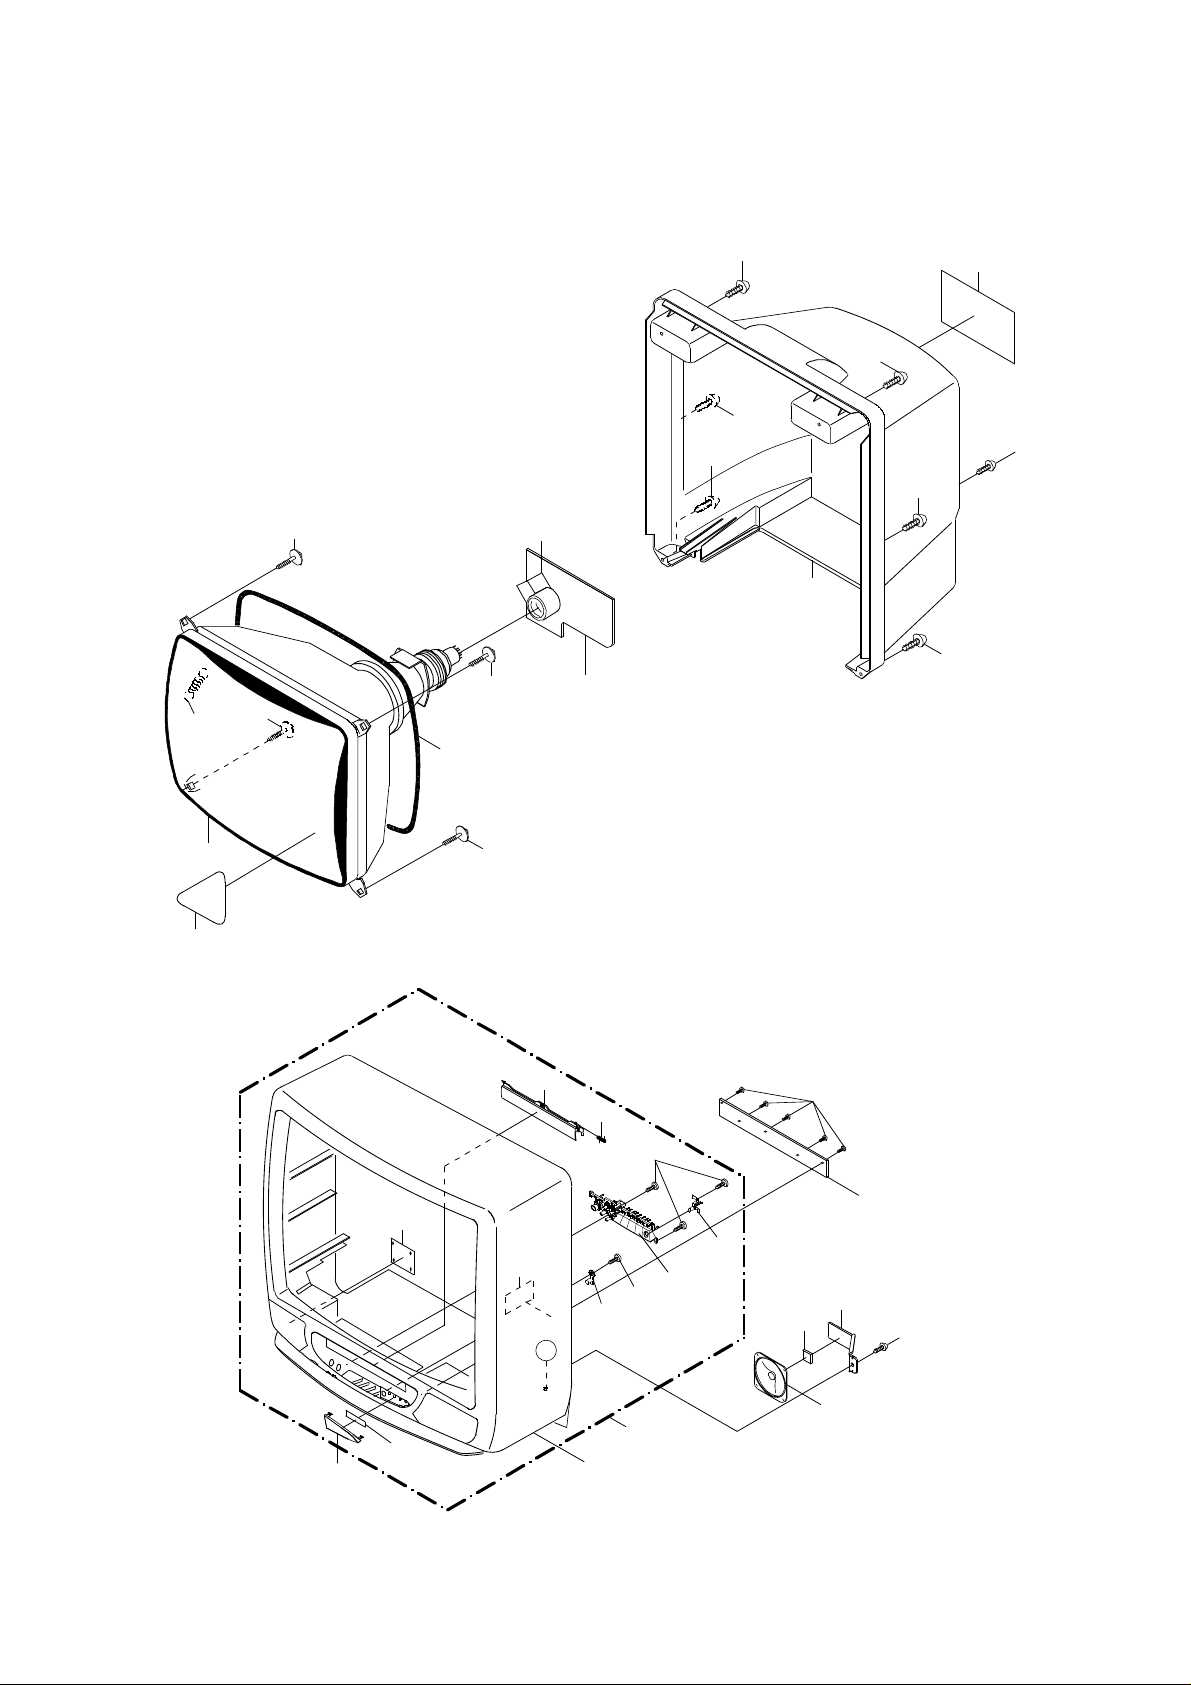
MECHANICAL EXPLODED VIEW
114
203
203
L503
203
J801
PCB110
(CRT PCB)
209
209
209
124
209
210
209
123
209
V801
133
103
113
109
203
110
104
A
102
108
105
202
101
201
106
107
201
PCB030
(OPERATION PCB)
111
112
SP351
201
I-1
Page 7
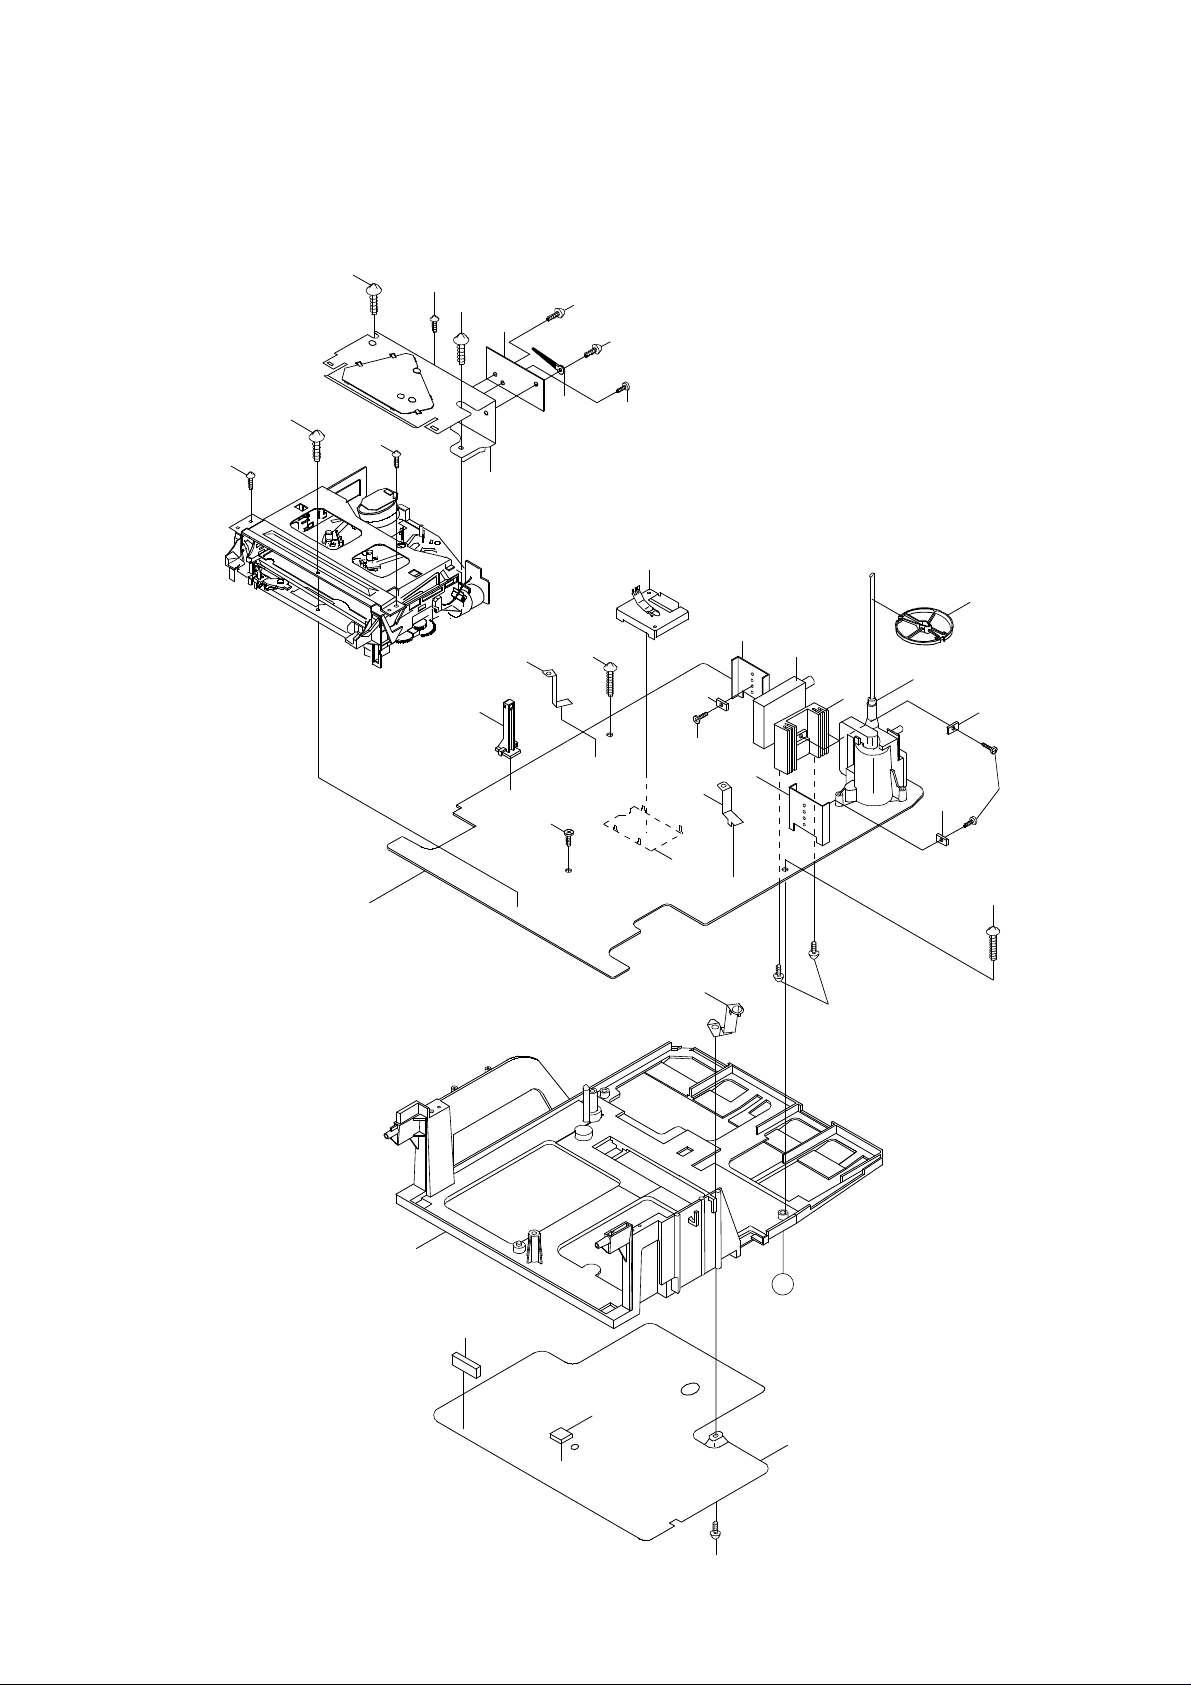
MECHANICAL EXPLODED VIEW
202
208
208
202
202
208
125
132
122
120
206
118
212
207
212
213
121
117
204
120
115
115
TU601
116
FB401
117
131
117
204
PCB010
(SYSCON PCB)
119
130
207
126
205
A
129
128
127
I-2
211
Page 8
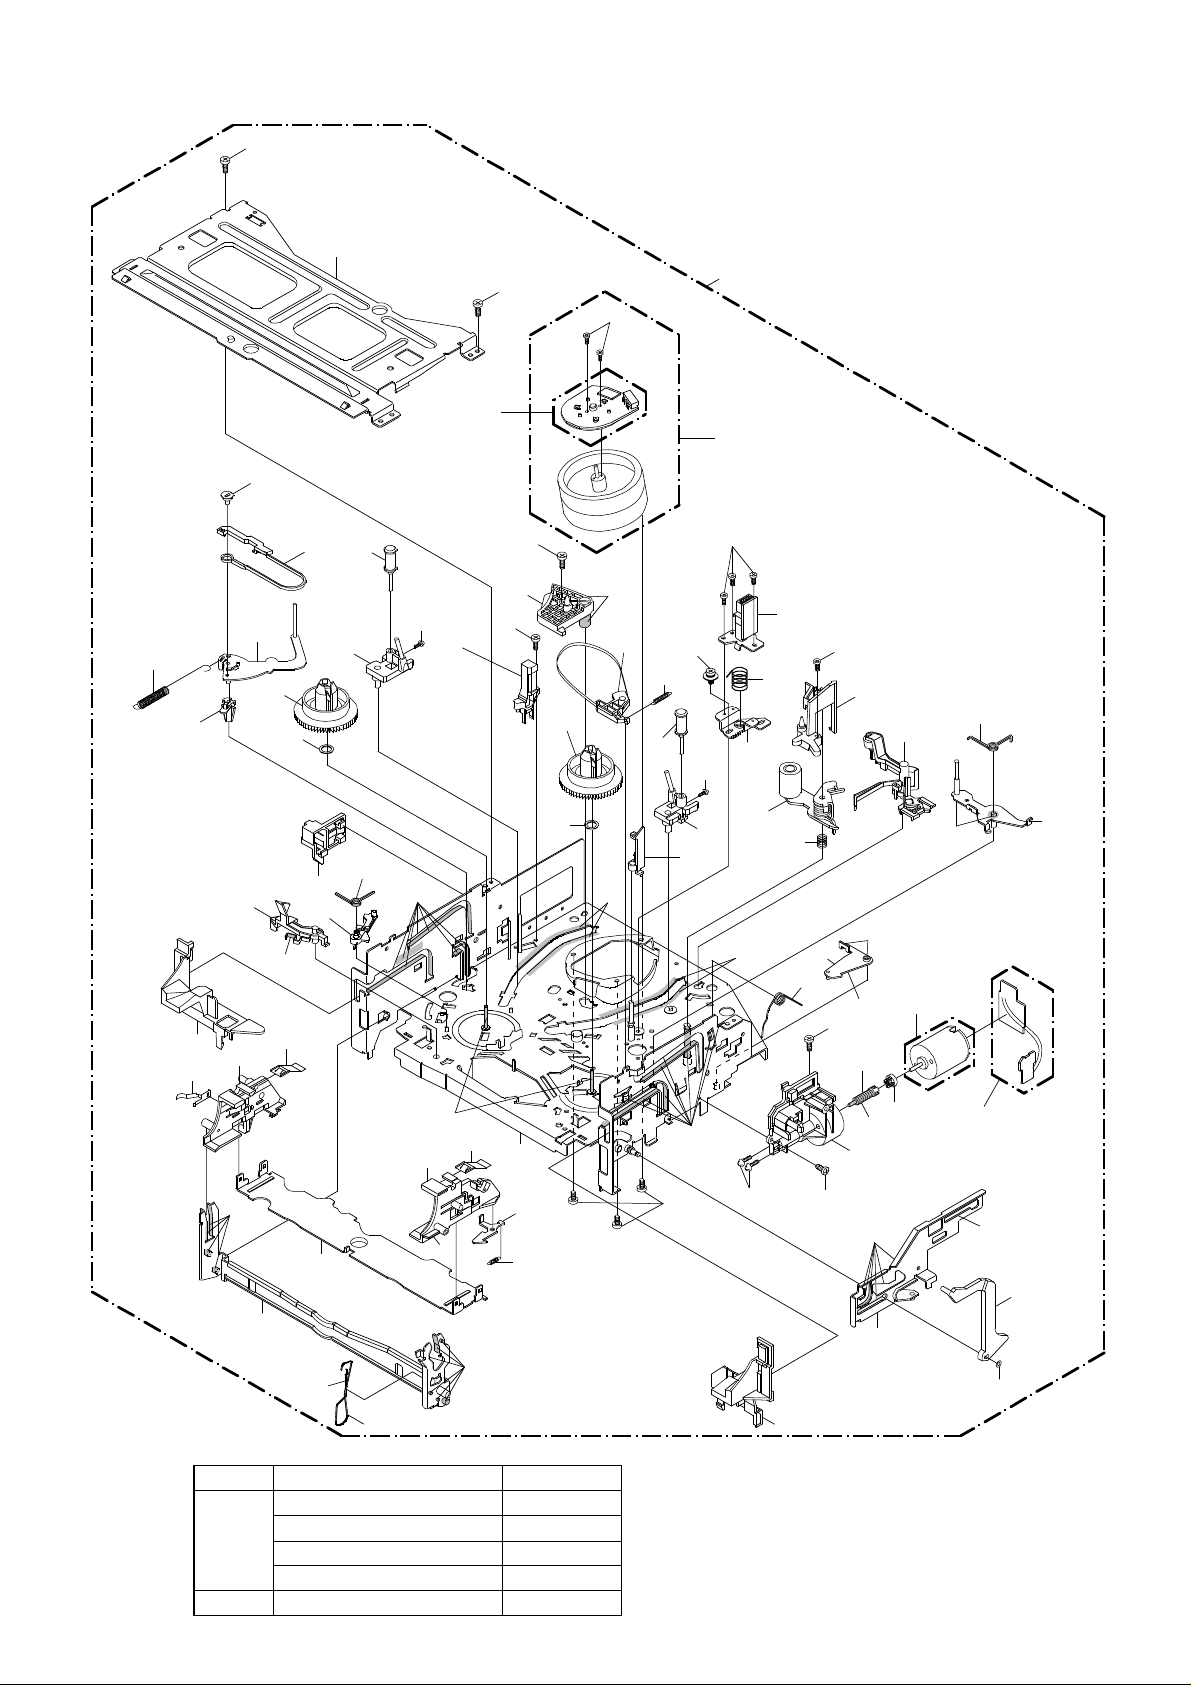
503
335
CHASSIS EXPLODED VIEW (TOP VIEW)
367
503
510
M2003
300
UN4001
349
336
359
368
357
318
303
328
512
AA
366
319
361
309
314
355
313
508
AD
358
H5002
BA
366
502
306
505
334
310
512
AB
AA
321
348
313
506
508
315
338
AD
507
304
AB
317
H5001
305
369
353
501
320
502
356
AA
329
330
AA
AA
301
364
347
AA
M101
PCB550
(DECK PCB ASS'Y)
316
AD
323
CLASS
GREASE
OIL
365
363
AD
AD
AD
352
PART NO.
G-555G
G-488M
FL-721 AC
MG-33 AD
FL OIL No. 6115 BA
351
MARK
AA
AB
I-3
515
509
502
AD
324
360
NOTE:
Applying positions AA, AB, AC, AD and BA for
the grease or oil are displayed for this section.
Check if the correct grease or oil is applied for
each position.
AD
362
511
Page 9
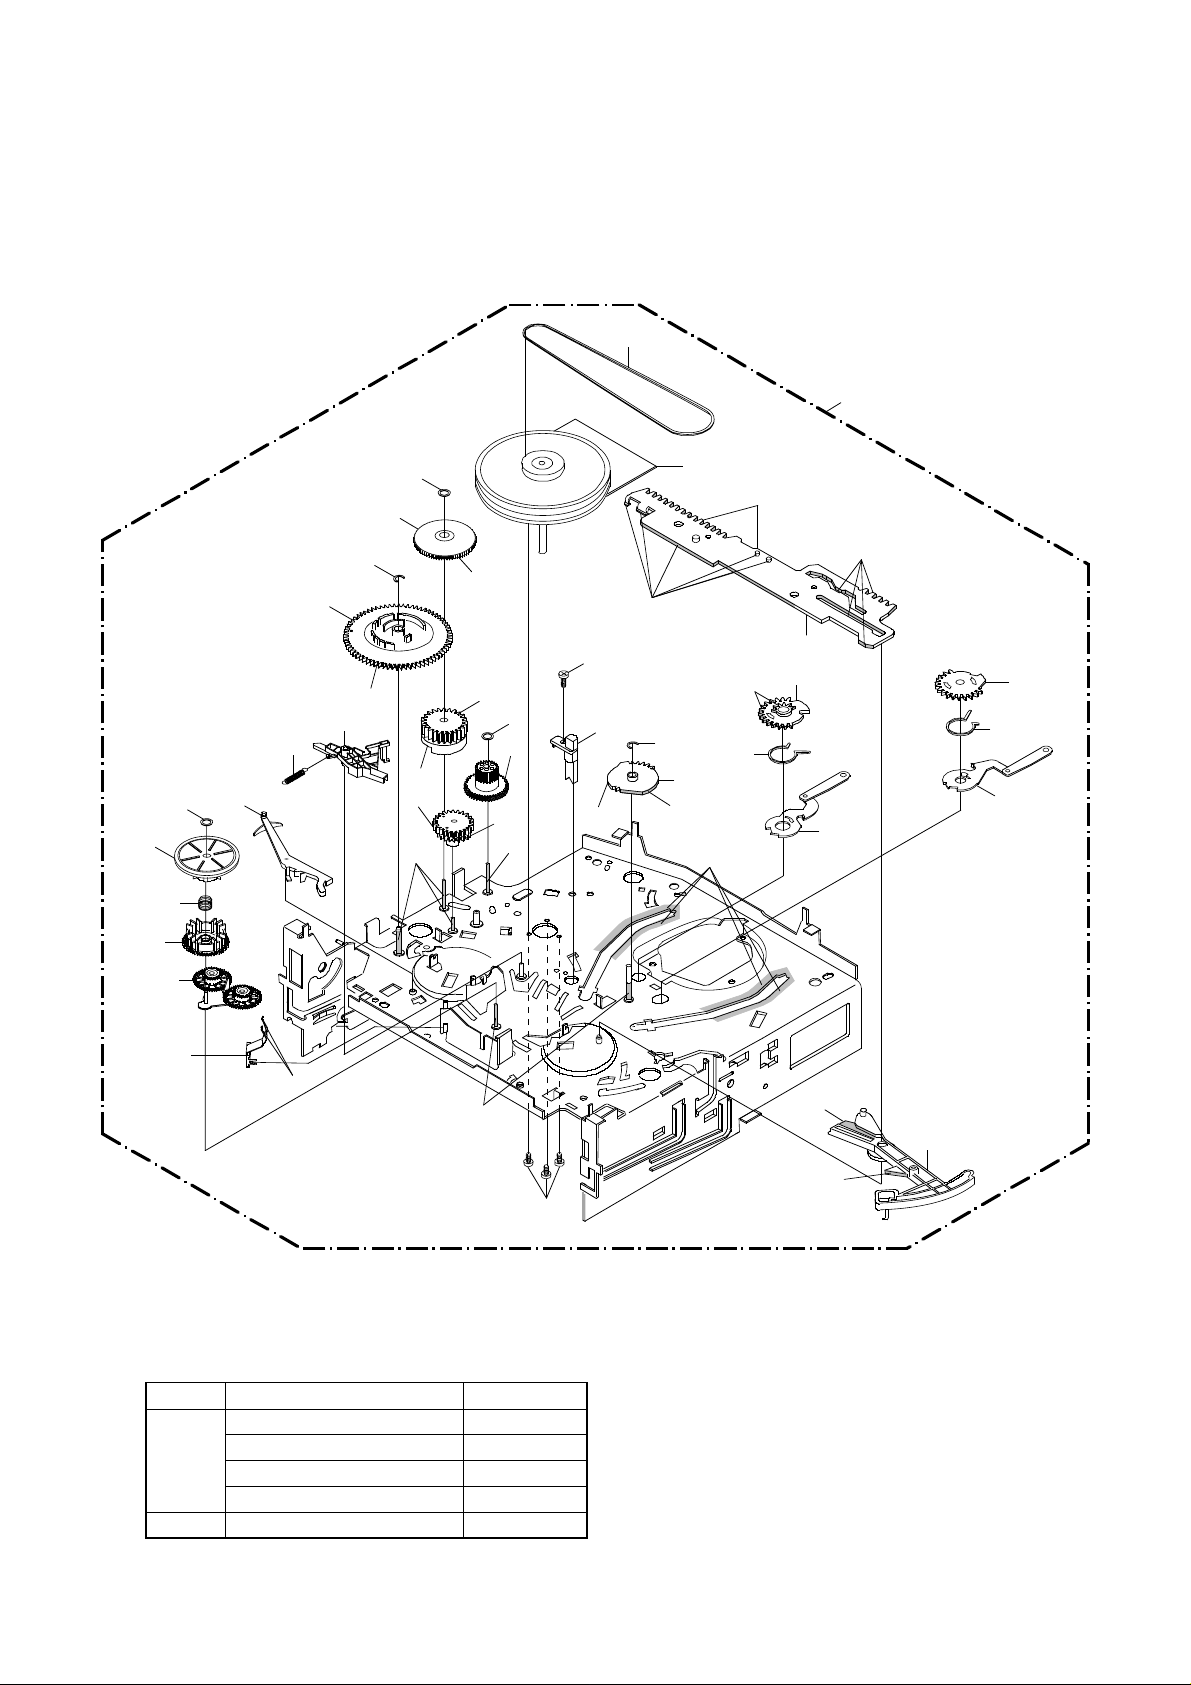
CHASSIS EXPLODED VIEW (BOTTOM VIEW)
302
300
307
327
308
354
513
326
350
341
322
514
AA
340
511
AA
342
AD
AA
343
511
339
AA
AD
503
345
AA
AA
514
AC
M2001
331
AB
346
AA
AA
344
333
AA
332
346
311
312
325
AD
CLASS
GREASE G-555G
OIL
PART NO.
G-488M
FL-721 AC
MG-33
FL OIL No. 6115 BA
AD
MARK
AA
AB
AD
504
I-4
AA
AA
NOTE:
Applying positions AA, AB, AC, AD and BA for
the grease or oil are displayed for this section.
Check if the correct grease or oil is applied for
each position.
337
Page 10
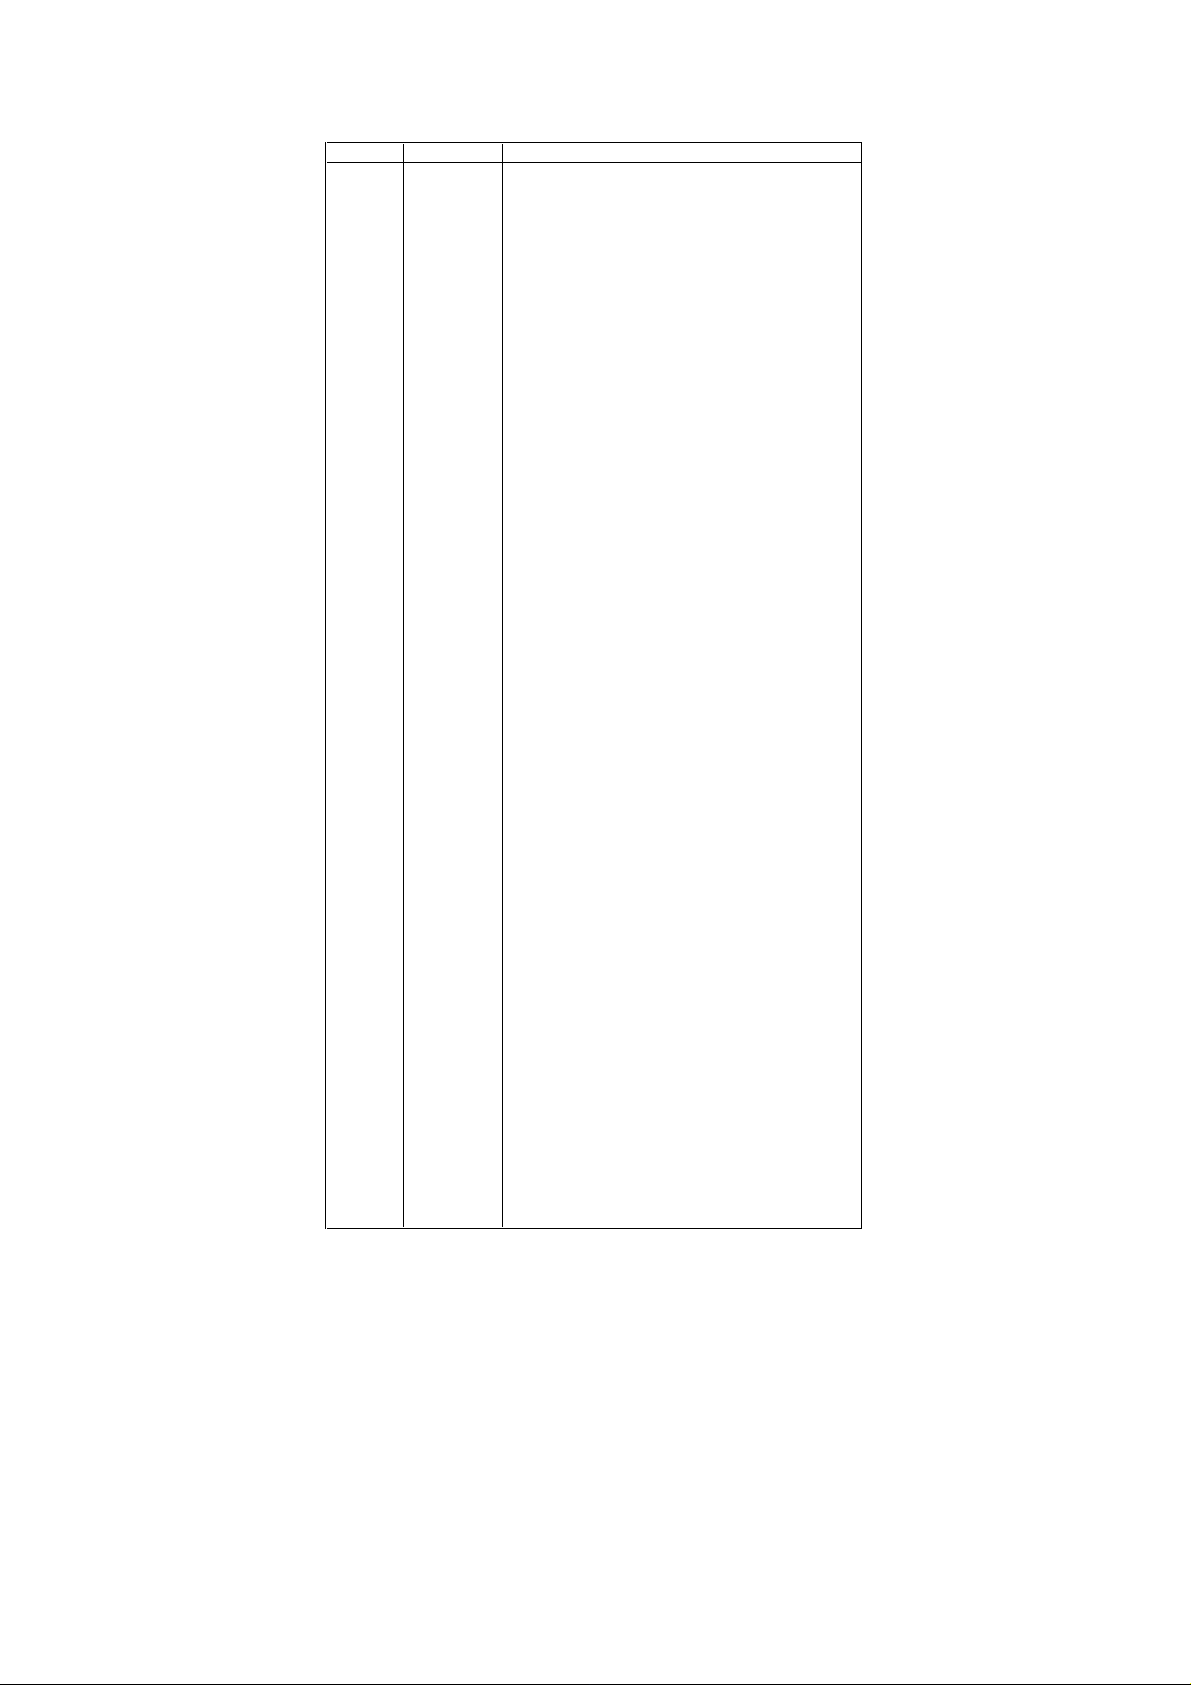
MECHANICAL REPLACEMENT PARTS LIST
REF. NO. PART NO. DESCRIPTION
101 A546A5A720 CABINET,FRONT ASS'Y
102 701WPJA839 CABINET,FRONT
103 711WPA0114 PLATE,FRONT
104 712WPJ0621 FLAP
105 713WPA0075 GUIDE,REMOCON
106 735WPJ0114 BUTTON,FRAME
107 735WPA0402 BUTTON,REC
108 743WKA0032 SPRING,FLAP
109 7230006830 SHEET,LED
110 7260000323 SHEET,CRT SERVICEMAN
111 753WSA0123 PLATE,SPEAKER
112 800WFA0005 CUSHION 10x15
113 800WQ00048 FELT,SHEET 75x75
114 741WUA0019 SPRING,EARTH
115 --- HEAT SINK
116 --- HEAT SINK
117 --- METAL SPACER
118 8995034000 CORD CLIP UL CO.
119 761WPA0196 HOLDER,DECK
120 753WSA0118 PLATE,EARTH-SYSCON
121 752WSA0192 SHIELD,CASE HEAD AMP ASS'Y
122 752WSA0198 PLATE,DECK SHIELD
123 702WPA0671 CABINET,BACK
124 722A08A058 SHEET,RATING
125 85OP700036 HOLDER,EOT SENSOR
126 753WSA0120 PLATE,BOTTOM-EARTH
127 752WSAA028 SHIELD,BOTTOM
128 800WFA0038 CUSHION 10x10xT2
129 800WFA0037 CUSHION 15x5xT6
130 753WSA0130 SHIELD,COVER HEAD AMP
131 899HV3T000 HOLDER,ANODE WIRE
132 752WSA0206 PLATE,SI-STEEL-2
133 723000A825 FILM,DECORATION
201 8110630A04 SCREW,TAP TITE (P) BRAZIER 3x10
202 8110630804 SCREW,TAP TITE (P) BRAZIER 3x8
203 8121F50B84 SCREW,TAPPING (B0) GW20 5x28
204 810A130804 SCREW/WASHER (A) M3x8
205 8109630802 SCREW,TAP TITE (B) BRAZIER 3x8
206 8110330804 SCREW,TAP TITE (P) FLAT 3x8
207 8117540B04 SCREW,TAPPING (B0) TRUSS 4x20
208 8117140A24 SCREW,TAPPING (B0) PAN 4x12
209 8117540A64 SCREW,TAPPING (B0) TRUSS 4x16
210 8117540804 SCREW,TAPPING (B0) TRUSS 4x8
211 8110630604 SCREW,TAP TITE (P) BRAZIER 3x6
212 8107630604 SCREW,TAP TITE (S) BRAZIER 3x6
213 8107226604 SCREW,TAP TITE (S) BIND 2.6x6
--- JB5K0200 POLYBAG
--- J5126217 REGISTRATION CARD
--- J545A201 INSTRUCTION BOOK
--- 793WCDA715 GIFT BOX
--- 791WHA0025 LAMIFILM BAG
--- 792WHAA025 PACKAGE,TOP
--- 792WHAA026 PACKAGE,BOTTOM
J1-1
Page 11
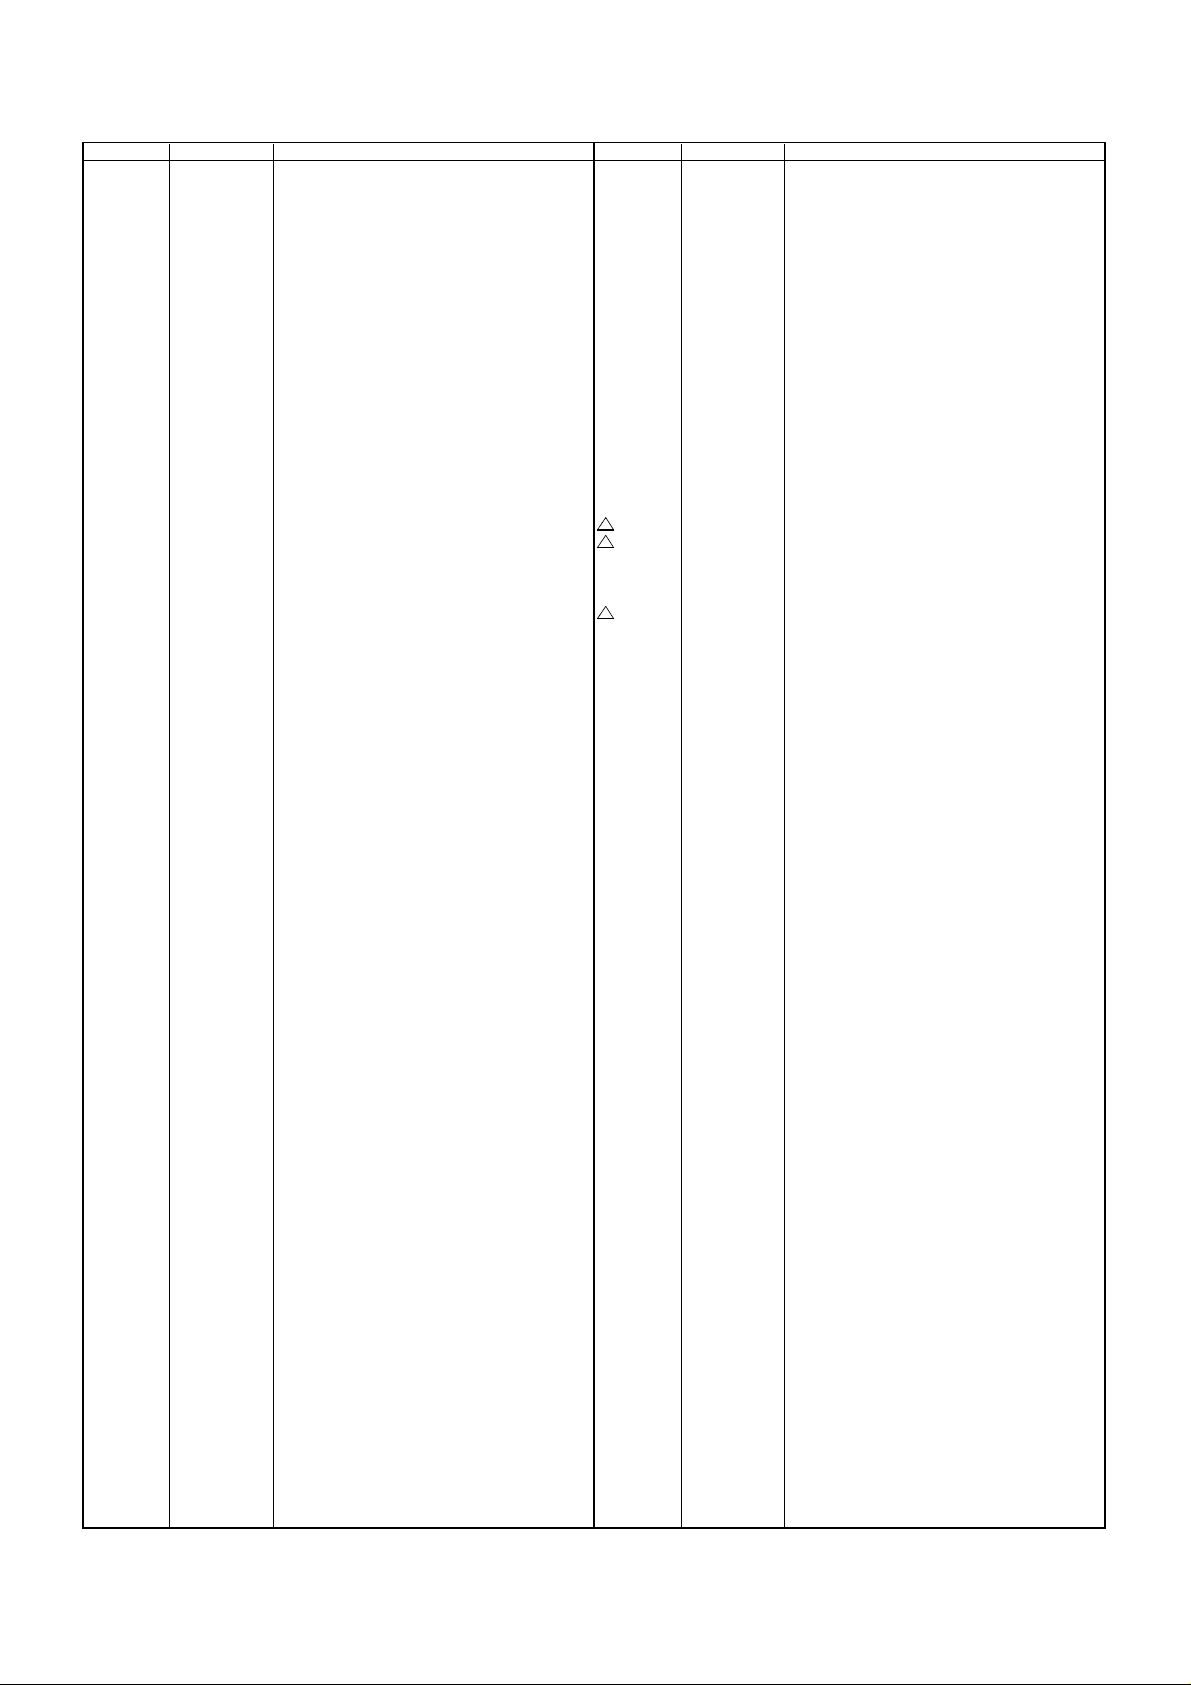
CHASSIS REPLACEMENT PARTS LIST
REF. NO. PART NO. DESCRIPTION REF. NO. PART NO. DESCRIPTION
300 A545A0A420A DECK ASSY A545A0A420A 501 8107126A04 SCREW,TAP TITE(S) PAN 2.6x10
301 85OA500022 AHC ASS'Y 503 8107226604 SCREW,TAP TITE(S) BIND 2.6x6
302 85OP200290 BELT,CAPSTAN (S) 504 8109126604 SCREW,TAP TITE(B) PAN 2.6x6
303 85OP900710 LEVER,REC 505 810A126804 SCREW/WASHER(A) M2.6x8
304 85OP500083 BASE,AC HEAD 506 810B126404 SCREW/WASHER(B) M2.6x4
305 85OP800324 SPRING,AC HEAD 507 8102120604 SCREW,PAN M2x6
306 85OA000367 MAIN CHASSIS ASS'Y (S-Z) 508 8102120304 SCREW,PAN M2x3
307 85OA200082 CLUTCH ASS'Y(S2) 509 8102130304 SCREW,PAN M3.0x3.0
308 85OA200080 ARM,IDLER ASS'Y (S)
309 85OP600556 ARM,SS BRAKE (S) 510 810A123504 SEMS A M2.3x5.0
310 85OP200292 REEL,T (S) 512 82Q2647C5N POLYSLIDER WASHER 2.6x4.7xT0.25
311 85OA300061 LOADING ARM S ASS'Y 513 82P184505N POLYSLIDER WASHER(CUT) 1.8x4.5xT0.5
312 85OA300062 LOADING ARM T ASS'Y 514 83ETW30000 E-RING 3.0
313 85OA400209 GUIDE ROLLER ASS'Y 515 810A126504 SCREW/WASHER(A) M2.6x5
314 85OA400188 BASE,INCL S ASS'Y
315 85OA400196 BASE,INCL T(S) ASS'Y CP101 069R740018 CONNECTOR PCB SIDE 52044-0445
316 85OA400199 P5-3 ARM ASS'Y(S) H5001 1523D91034 HEAD (AUDIO CONTROL) HVMXA1072A
317 85OA400205 PINCH ROLLER BLOCK H5002 1543D02013 HEAD (FULL ERASE) HVFHP0032A
318 85OA400175 TENSION ARM ASS'Y ! M101 1596P78001 MOTOR (LOADING) MXN13FB11H
319 85OA400184 TENSION BAND ASS'Y (S) ! M2001 1510398030 CAPSTAN DD UNIT F2QSB02
320 85OA400178 PINCH ROLLER LEVER ASS'Y PCB550 A4C831B550 DECK PCB ASS'Y VE8851
321 85OA600188 BRAKE T ASS'Y (S) Q101 0000700320 TRANSISTOR,PHOTO RPT-38PB113
322 85OA600191 CAP BRAKE ASS'Y(S) ! UN4001 A545A0A500 CYLINDER UNIT ASSY A545A0A500
323 85OA900213 LINK ASS'Y
324 85OA900216 LINK LEVER ASS'Y
325 85OP200284 LEVER,CLUTCH (S)
326 85OP200285 ACTUATOR,CLUTCH
327 85OP200298 GEAR,COUPLING(S2)
328 85OP200291 REEL,S (S)
329 85OP600541 WORM
502 8107226804 SCREW,TAP TITE(S) BIND 2.6x8
511 82P266005N POLYSLIDER WASHER(CUT) 2.6x6.0xT0.5
M2003 1589V11007 MICRO MOTOR EP14BD
330 85OP600563 BRACKET,MOTOR
331 85OP300178 GEAR,MAIN LOADING
332 85OP300179 GEAR,LOADING S
333 85OP300180 GEAR,LOADING T
334 85OP300186 HOLDER,LOADING GEAR
335 85OP400472 ADJUST,TENSION
336 85OP400492 HOLDER,TENSION
337 85OP400490 LEVER,TENSION
338 85OP400475 COVER,P4
339 85OP600543 GEAR,JOINT
340 85OP600544 GEAR,MIDDLE
341 85OP600554 CAM,MAIN (S)
342 85OP600546 CAM,P5
343 85OP600565 CAM,PINCH ROLLER
344 85OP600561 ROD,MAIN(S)
345 85OP700035 REFLECTOR,LED
346 85OP800318 SPRING,LOADING GEAR
347 85OP800334 SPRING,P5 (S)
348 85OP800335 SPRING,BRAKE T (S)
349 85OP800322 SPRING,TENSION
350 85OP800336 SPRING,CAP BRAKE (S)
351 85OP800342 SPRING,LOCKER (S)
352 85OP800326 SPRING,LINK
353 85OP800328 SPRING,DAMPER
354 85OP800330 SPRING,RING
355 85OP800337 SPRING,SS BRAKE (S)
356 85OP900680 OPENER,CASS
357 85OP900704 CASS SIDE L
358 85OP900684 CASS SIDE R
359 85OP900709 TAPE GUIDE L (P,R)
360 85OP900686 TAPE GUIDE R
361 85OP900714 COVER,SENSOR L3
362 85OP900688 LEVER,FLAP
363 85OP900690 CASS HOLDER
364 85OP600540 DRIVER,WORM
365 85OP900713 LOCKER,R2
366 85OP900694 SPRING,PACK
367 85OP900695 BRACKET,TOP
368 85OP900696 SPRING,CASS EARTH
369 85OP800341 SPRING,P/R ARM
J2-1
Page 12
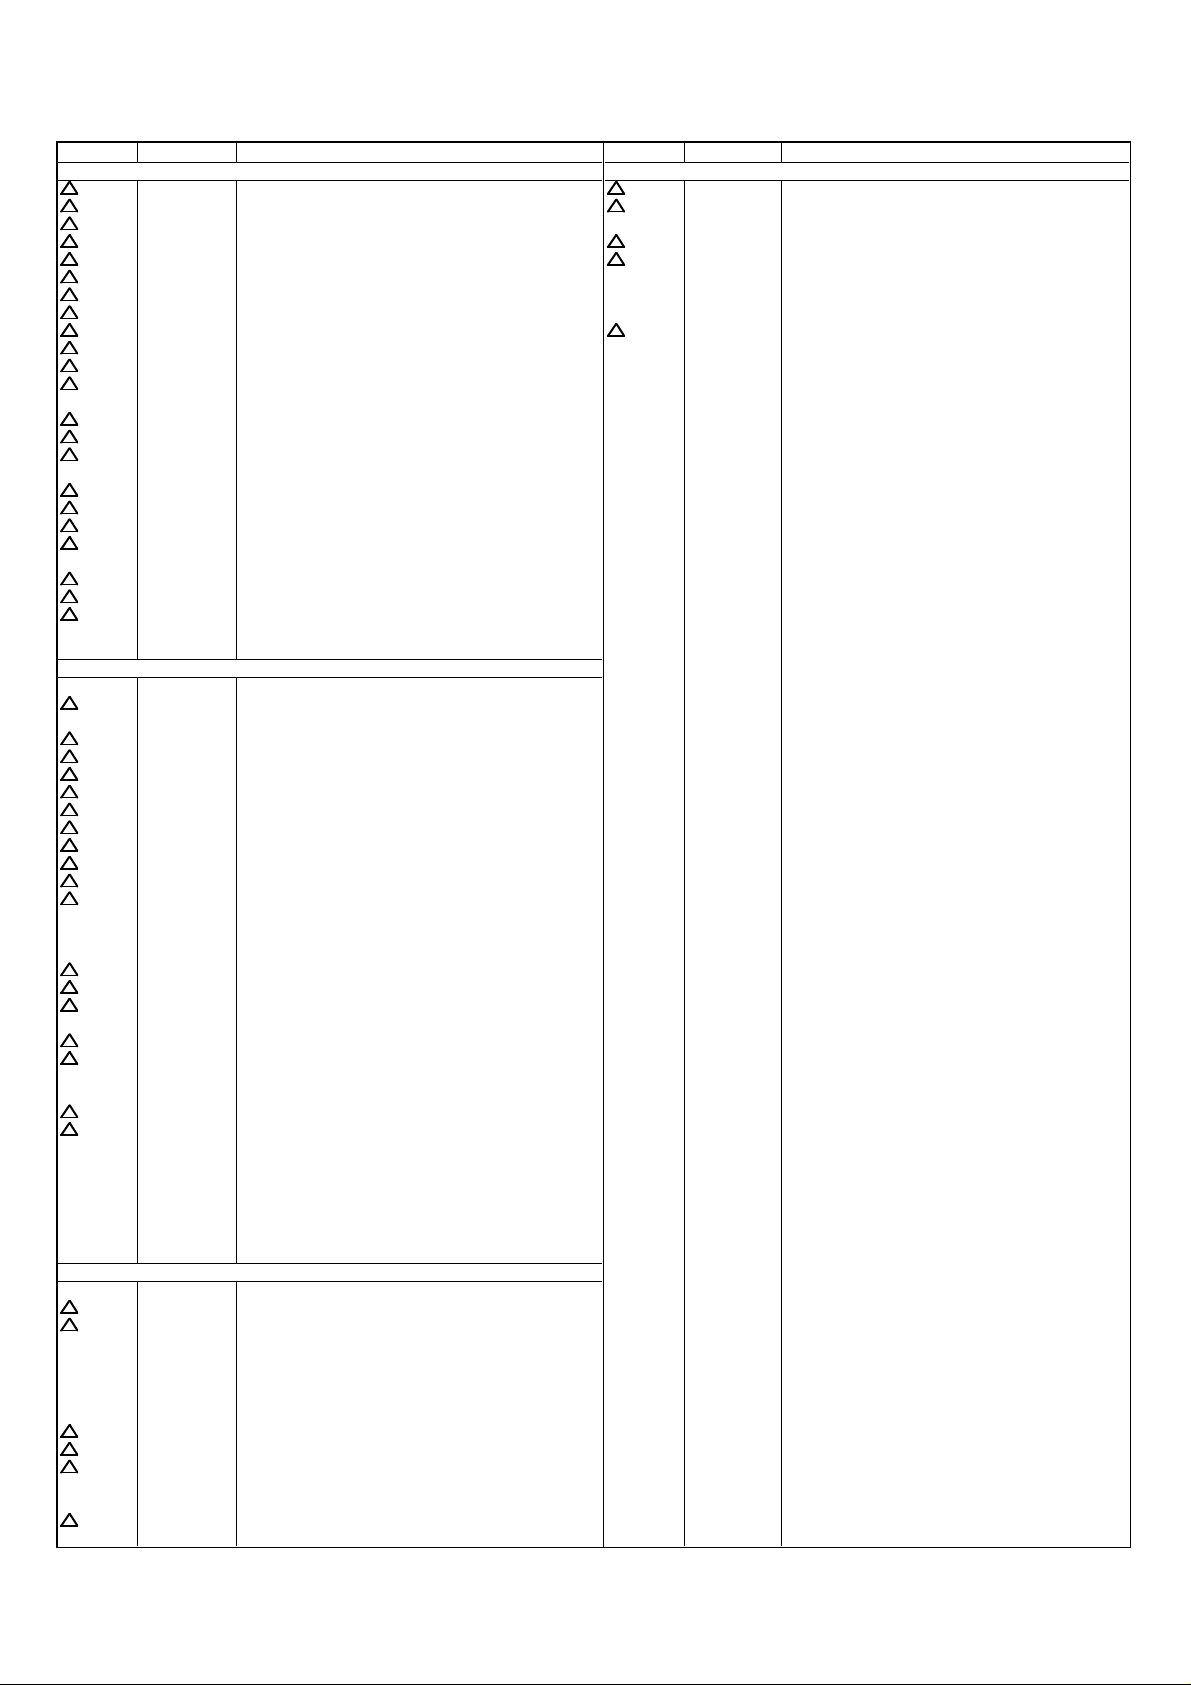
ELECTRICAL REPLACEMENT PARTS LIST
REF. NO.PART NO. DESCRIPTION REF. NO.PART NO. DESCRIPTION
RESISTORS DIODES
! R415 R426T22R2F R, METAL 2.2 OHM 1/2W ! D507 D28015DF60 DIODE, SILICON 15DF6
! R420 R801R7822F RC 8.2K OHM 1/10W ! D509 D28T21DQN9 DIODE, SCHOTTKY 21DQ09N-TA2B1
! R422 R3X10A4R7J R, METAL 4.7 OHM 2W D510 D2BTRU2AM0 DIODE, SILICON RU2AM V1
! R439 R801R7223F RC 22K OHM 1/10W ! D512 D28T21DQN9 DIODE, SCHOTTKY 21DQ09N-TA2B1
! R440 R801R7513J RC 51K OHM 1/10W ! D515 D97U03001B DIODE, ZENER MTZJ30B T-77
! R441 R801R7563J RC 56K OHM 1/10W D516 D1VT001330 DIODE, SILICON 1SS133T-77
! R442 R801R7153F RC 15K OHM 1/10W D517 D28TELS2N2 DIODE, RECTIFIER 10ELS2N-TA1B2
! R443 R801R7682J RC 6.8K OHM 1/10W D518 D1VT001330 DIODE, SILICON 1SS133T-77
! R444 R801R7223F RC 22K OHM 1/10W ! D519 D28T21DQN9 DIODE, SCHOTTKY 21DQ09N-TA2B1
! R447 R65582680J R, FUSE 68 OHM 1/2W D521 D1VT001330 DIODE, SILICON 1SS133T-77
! R449 R655U4680J R, FUSE 68 OHM 1/4W D523 D1VT001330 DIODE, SILICON 1SS133T-77
! R450 R6558A2R7J R, FUSE 2.7 OHM 2W D528 D97U05R61B DIODE, ZENER MTZJ5.6B T-77
R500 R0G3K2275K RC 2.7M OHM 1/2W D529 D1VT001330 DIODE, SILICON 1SS133T-77
! R501 R5Y2CE2R2J R, CEMENT 2.2 OHM 7W D601 D1VT001330 DIODE, SILICON 1SS133T-77
! R510 R002T2124J RC 120K OHM 1/2W D602 D97U08R21B DIODE, ZENER MTZJ8.2B T-77
! R512 R3X181273J R, METAL OXIDE 27K OHM 1W D604 D1VT001330 DIODE, SILICON 1SS133T-77
R515 R002T4103J RC 10K OHM 1/4W D605 D2WT11ES10 DIODE, SILICON 11ES1-EIC
! R529 R4X5T4272F R, METAL 2.7K OHM 1/4W D606 D1VT001330 DIODE, SILICON 1SS133T-77
! R542 R33681R18J R, METAL 0.18OHM 1W D607 D1VT001330 DIODE, SILICON 1SS133T-77
! R543 R635U4681J R, FUSE 680 OHM 1/4W D608 D23U1003A3 DIODE, SCHOTTKY SB10-03A3
! R632 R3X18A221J R, METAL OXIDE 220 OHM 2W D609 D97U06R81B DIODE, ZENER MTZJ6.8B T-77 or
R686 R00202102J RC 1K OHM 1/2W D94TA6RB12 DIODE, ZENER HZ6B2L TD or
! R802 R3K18A153J R, METAL 15K OHM 2W D94TA7RA12 DIODE, ZENER HZ7A2L TD or
! R805 R3K18A153J R, METAL 15K OHM 2W D94TA7RB11 DIODE, ZENER HZ7B1L TD or
! R810 R3K18A153J R, METAL 15K OHM 2W D94TA7RC12 DIODE, ZENER HZ7C2L TD
R1005 R615J12R7J R, FUSE 2.7 OHM 1W D610 D97U06R81B DIODE, ZENER MTZJ6.8B T-77 or
R4070 R00104106J RC 10M OHM 1/4W D94TA6RB12 DIODE, ZENER HZ6B2L TD or
C354 E02LF1222M CE 2200 UF 10V D94TA7RB11 DIODE, ZENER HZ7B1L TD or
! C407 E02L03102M CE 1000 UF 25V D94TA7RC12 DIODE, ZENER HZ7C2L TD
C423 P411F3474J CMPP 0.47 UF 250V ECWF D611 D97U06R81B DIODE, ZENER MTZJ6.8B T-77 or
! C424 P414F9682H CMPP 0.0068UF 1.6KV ECWH D94TA6RB12 DIODE, ZENER HZ6B2L TD or
! C425 C01BBP7B3K CC 0.0012UF 2KV BP D94TA7RA12 DIODE, ZENER HZ7A2L TD or
! C433 E5EZT5470M CE 47 UF 50V D94TA7RB11 DIODE, ZENER HZ7B1L TD or
! C502 C13HB07H3K CC 0.0022UF 2KV B D94TA7RC12 DIODE, ZENER HZ7C2L TD
! C503 C13HB07H3K CC 0.0022UF 2KV B D612 D1VT001330 DIODE, SILICON 1SS133T-77
! C506 P2122B104M CMP 0.1 UF 250V ECQUL D613 D1VT001330 DIODE, SILICON 1SS133T-77
! C507 E51CGC471M CE 470 UF 200V D614 D1VT001330 DIODE, SILICON 1SS133T-77
! C510 E5EZT4101M CE 100 UF 35V D615 D97U06R81B DIODE, ZENER MTZJ6.8B T-77 or
! C511 E02LT3471M CE 470 UF 25V D94TA6RB12 DIODE, ZENER HZ6B2L TD or
! C513 P2122B104M CMP 0.1 UF 250V ECQUL D94TA7RA12 DIODE, ZENER HZ7A2L TD or
C514 C01BBP7K3K CC 0.0027UF 2KV BP D94TA7RB11 DIODE, ZENER HZ7B1L TD or
C517 C01BBP7W2K CC 820 PF 2KV BP or D94TA7RC12 DIODE, ZENER HZ7C2L TD
C0300R7W2K CC 820 PF 2KV R D616 D97U06R81B DIODE, ZENER MTZJ6.8B T-77 or
! C520 E02LT2471M CE 470 UF 16V D94TA6RB12 DIODE, ZENER HZ6B2L TD or
! C521 E53VFB221M CE 220 UF 160V D94TA7RA12 DIODE, ZENER HZ7A2L TD or
! C523 E5EZT4471M CE 470 UF 35V D94TA7RB11 DIODE, ZENER HZ7B1L TD or
C524 E5EZT3102M CE 1000 UF 25V D94TA7RC12 DIODE, ZENER HZ7C2L TD
! C529 C034E0JH3M CC 0.0022UF 125V MX D617 D97U06R81B DIODE, ZENER MTZJ6.8B T-77 or
! C530 C034F0JL3M CC 0.0033UF 125V MX D94TA6RB12 DIODE, ZENER HZ6B2L TD or
C560 C01BBP7H3K CC 0.0022UF 2KV BP or D94TA7RA12 DIODE, ZENER HZ7A2L TD or
C0300R7H3K CC 0.0022UF 2KV R D94TA7RB11 DIODE, ZENER HZ7B1L TD or
! C659 E50HU2470M CE 47UF 16V D94TA7RC12 DIODE, ZENER HZ7C2L TD
! C660 CS0RB0315K CC 0.1UF 25V D618 D1VT001330 DIODE, SILICON 1SS133T-77
C687 P6M9T0104J CMPL 0.1 UF 50V TF D619 D1VT001330 DIODE, SILICON 1SS133T-77
C801 C13HB07H3K CC 0.0022UF 2KV B D620 D1VT001330 DIODE, SILICON 1SS133T-77
C819 C13HB07H3K CC 0.0022UF 2KV B D621 D1VT001330 DIODE, SILICON 1SS133T-77
C1001 E02LU3101M CE 100 UF 25V D791 002132Q040 LED SLZ-936C-11-S-T1
C1064 E0EL02471M CE 470 UF 16V D792 002132Q040 LED SLZ-936C-11-S-T1
C4014 P1S300473J CP 0.047 UF 50V D793 002132Q040 LED SLZ-936C-11-S-T1
C4026 E50HU0101M CE 100 UF 6.3V D1001 D2WT011E10 DIODE, SILICON 11E1-EIC
D401 D2WT011E10 DIODE, SILICON 11E1-EIC D1003 0010600060 LED SID1050CM
! D408 D94TA27011 DIODE, ZENER HZ27-1L TD D1004 D92T1120B0 DIODE, ZENER RD12FB-T7
! D409 D94TA11B13 DIODE, ZENER HZ11B3L TD D1005 D2WT011E10 DIODE, SILICON 11E1-EIC
D410 D97U06R81B DIODE, ZENER MTZJ6.8B T-77 or D1007 D97U06R81B DIODE, ZENER MTZJ6.8B T-77 or
D94TA6RB12 DIODE, ZENER HZ6B2L TD or D94TA6RB12 DIODE, ZENER HZ6B2L TD or
D94TA7RA12 DIODE, ZENER HZ7A2L TD or D94TA7RA12 DIODE, ZENER HZ7A2L TD or
D94TA7RB11 DIODE, ZENER HZ7B1L TD or D94TA7RB11 DIODE, ZENER HZ7B1L TD or
D94TA7RC12 DIODE, ZENER HZ7C2L TD D94TA7RC12 DIODE, ZENER HZ7C2L TD
! D412 D2LTPG06J0 DIODE, SILICON RMPG06J-G3 D1008 D97U06R81B DIODE, ZENER MTZJ6.8B T-77 or
! D413 D2LTPG06J0 DIODE, SILICON RMPG06J-G3 D94TA6RB12 DIODE, ZENER HZ6B2L TD or
! D501 D4LZBL06L0 DIODE, SILICON GBL06L-6177 D94TA7RA12 DIODE, ZENER HZ7A2L TD or
D502 D1VT001330 DIODE, SILICON 1SS133T-77 D94TA7RB11 DIODE, ZENER HZ7B1L TD or
D503 D23U1003A3 DIODE, SCHOTTKY SB10-03A3 D94TA7RC12 DIODE, ZENER HZ7C2L TD
! D505 D28T21DQN9 DIODE, SCHOTTKY 21DQ09N-TA2B1 D1013 D28TQS04N0 DIODE, SCHOTTKY 11EQS04N-TA1B2
D506 D2LTPG06J0 DIODE, SILICON RMPG06J-G3 D1014 D97U05R11B DIODE, ZENER MTZJ5.1B T-77 or
CAPACITORS
DIODES
D94TA7RA12 DIODE, ZENER HZ7A2L TD or
D1002 D1VT001330 DIODE, SILICON 1SS133T-77
J3-1
Page 13
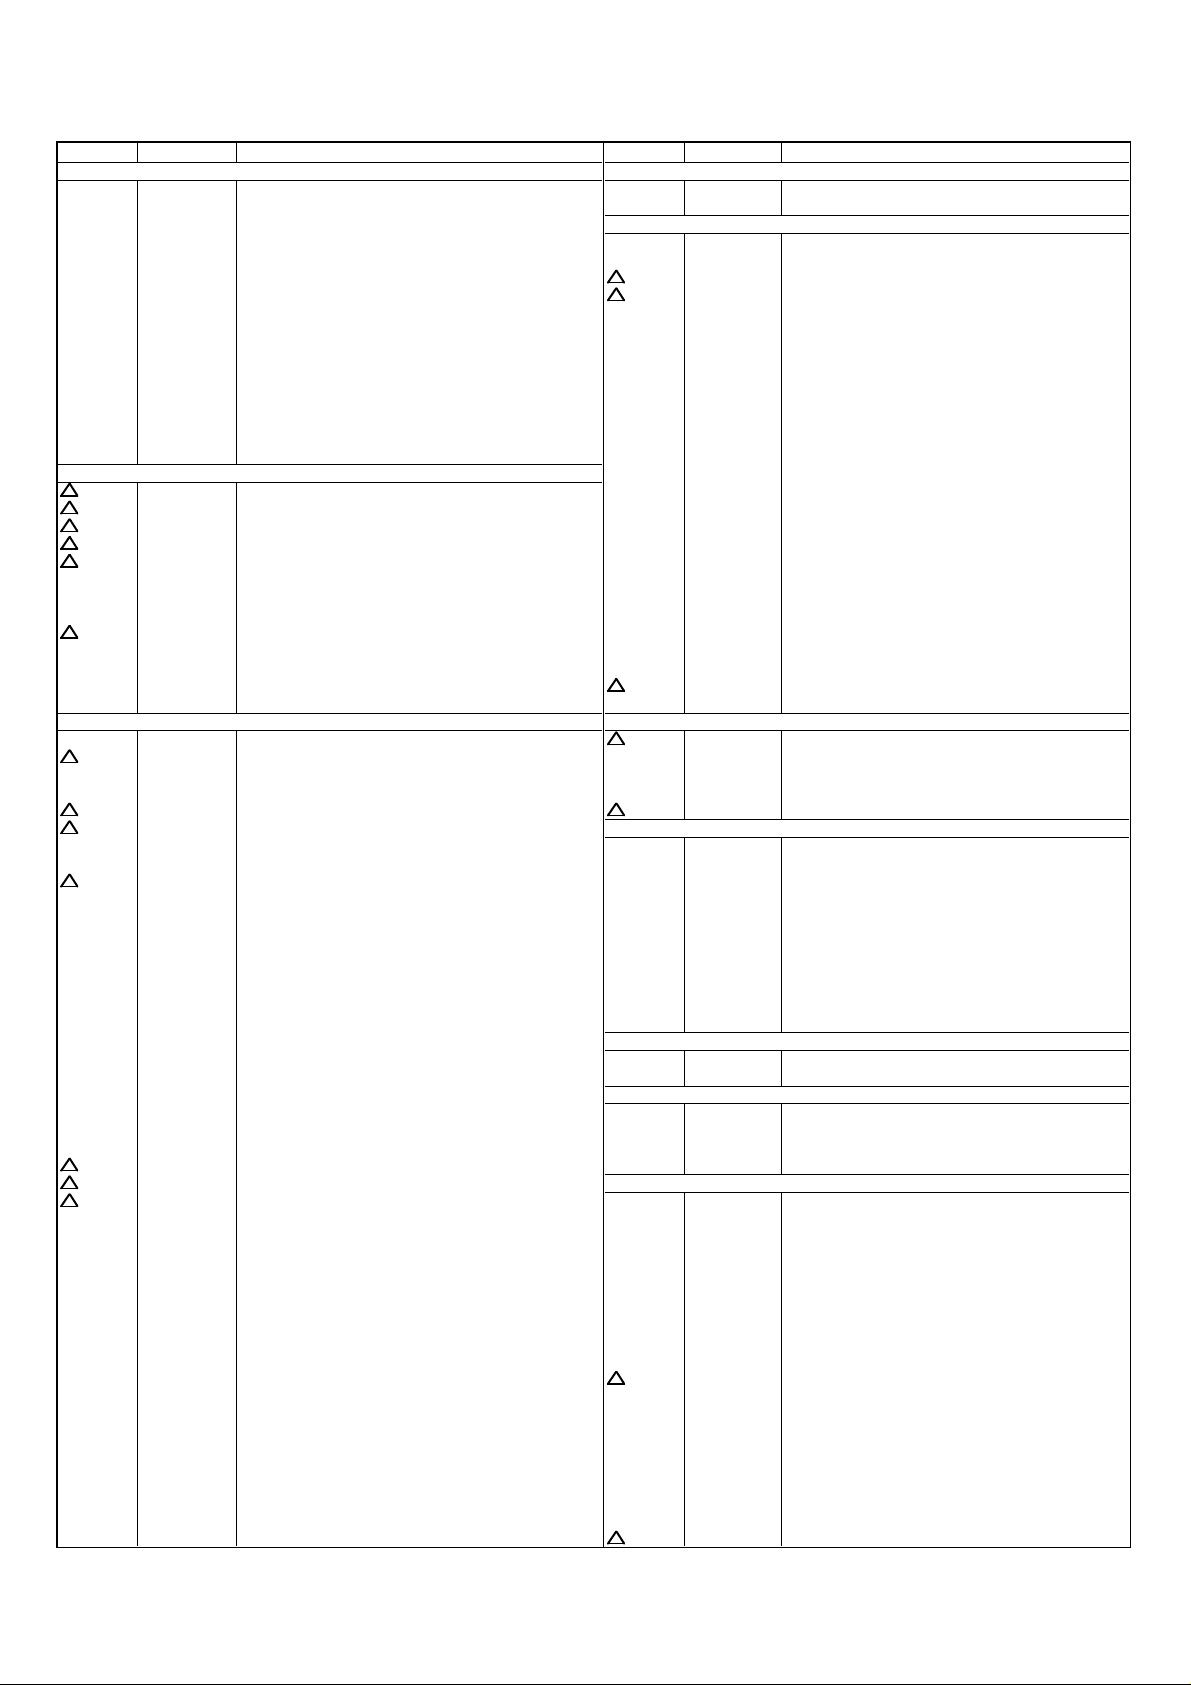
ELECTRICAL REPLACEMENT PARTS LIST
E
REF. NO.PART NO. DESCRIPTION REF. NO.PART NO. DESCRIPTION
RESISTORS TRANSISTORS
D4005 D97U06R81B DIODE, ZENER MTZJ6.8B T-77 or Q4011 TNYJD05001 COMPOUND TRANSISTOR DTC144EKAT146
D4006 D97U06R81B DIODE, ZENER MTZJ6.8B T-77 or ! L502 029X000088 COIL, LINE FILTER SS24V-150
D4202 D23U1003A3 DIODE, SCHOTTKY SB10-03A3 L607 021LA6120K COIL 12 UH
D4207 D97U06R81B DIODE, ZENER MTZJ6.8B T-77 or L610 021673560K COIL 56 UH or
! IC351 I01DP75110 IC AN7511 L4002 02167F101J COIL 100 UH
! IC401 I03TD80400 IC LA78040 L4003 021673101J COIL 100 UH
! IC501 I1KA97805A IC KIA7805API L4004 0326230038 COIL, TRAP 2623003
! IC502 I2BT066230 IC STR-G6623 L4005 02167F470J COIL 47 UH
! IC506 0002500450 PHOTO COUPLER TLP621(GR) L4007 021LA6101J COIL 100 UH
IC601 I06FC12030 IC M61203BFP L4008 02167F101J COIL 100 UH
IC1001 I56F57043A IC OEC7043A L4009 02167F101J COIL 100 UH
IC1002 I9UJ0T600H IC PST600H L4010 02167F101J COIL 100 UH
! IC1003 I07SQ955AN IC BA6955AN or L4011 021LA6220J COIL 22 UH
IC1099 A546A5A015 IC S-24C02BDP-11 T401 03305Y002S TRANS, HORIZONTAL DRIVE 305Y002
IC4001 I03F31077B IC LA71077BM-MPB or ! T501 048129015S TRANSFORMER, SWITCHING 8129015S
D94TA6RB12 DIODE, ZENER HZ6B2L TD or Q4204 TNYJB05001 COMPOUND TRANSISTOR DTC114EKAT146
D94TA7RA12 DIODE, ZENER HZ7A2L TD or
D94TA7RB11 DIODE, ZENER HZ7B1L TD or L005 02A6A8A0A1 CORE, FERRITE HF57T18.5x10x10
D94TA7RC12 DIODE, ZENER HZ7C2L TD L401 021679472K COIL 4.7 MH
D94TA6RB12 DIODE, ZENER HZ6B2L TD or ! L503 028R200026 COIL, DEGAUSS 8R20026
D94TA7RA12 DIODE, ZENER HZ7A2L TD or L601 021LA61R0M COIL 1 UH
D94TA7RB11 DIODE, ZENER HZ7B1L TD or L603 021673101K COIL 100 UH
D94TA7RC12 DIODE, ZENER HZ7C2L TD L605 021LA61R0M COIL 1 UH
D94TA6RB12 DIODE, ZENER HZ6B2L TD or 021B73560K COIL 56 UH
D94TA7RA12 DIODE, ZENER HZ7A2L TD or L612 021LA66R8K COIL 6.8 UH
D94TA7RB11 DIODE, ZENER HZ7B1L TD or L801 021673101J COIL 100 UH
D94TA7RC12 DIODE, ZENER HZ7C2L TD L1001 021LA62R2K COIL 2.2 UH
I07SQ69550 IC BA6955N L4012 021LA6680J COIL 68 UH
I03F31067M IC LA71067M-MPB T4001 031626007S COIL, BIAS OSC 1626007
ICS
L4001 02167F101J COIL 100 UH
COILS &TRANSFORMERS
TRANSISTORS JACKS
Q401 TNYJA05001 COMPOUND TRANSISTOR DTC143EKAT146 ! J351 0602131012 JACK, RCA 3.5 HSJ2630-010070 or
! Q402 TB3T008920 TRANSISTOR, SILICON 2SB892(S,T)-AE 060G131014 RCA, JACK HTJ-035-28A
Q403 TNYJJ05001 COMPOUND TRANSISTOR DTC114TKAT146 J701 0602101020 JACK, RCA JPJ3811-01-430 or
Q404 TPYJD05001 COMPOUND TRANSISTOR DTA144EKAT146 060Q401870 RCA, JACK AV2-24-5
! Q405 TC3T022710 TRANSISTOR, SILICON 2SC2271(D,E)-AE ! J801 066C130015 SOCKET, CATHODE RAY TUB
! Q406 TD30026270 TRANSISTOR, SILICON 2SD2627LS-CBC11
Q501 TD3T008630 TRANSISTOR, SILICON 2SD863(E,F)-AE or SW751 0504201T31 SWITCH, TACT SKHVBED010
! Q504 TC5T018154 TRANSISTOR, SILICON 2SC1815Y(TPE2) SW792 0504201T31 SWITCH, TACT SKHVBED010
Q506 TNYJJ05001 COMPOUND TRANSISTOR DTC114TKAT146 SW793 0504201T31 SWITCH, TACT SKHVBED010
Q507 TC5T018154 TRANSISTOR, SILICON 2SC1815Y(TPE2) SW794 0504201T31 SWITCH, TACT SKHVBED010
Q513 TNYJB05001 COMPOUND TRANSISTOR DTC114EKAT146 SW795 0504201T31 SWITCH, TACT SKHVBED010
Q602 TC5T021204 TRANSISTOR, SILICON 2SC2120Y(TPE2) SW796 0504201T31 SWITCH, TACT SKHVBED010
Q603 TC5T021204 TRANSISTOR, SILICON 2SC2120Y(TPE2) SW797 0504201T31 SWITCH, TACT SKHVBED010
Q604 TDWT00400E TRANSISTOR, SILICON 2SD400E or SW798 0504201T31 SWITCH, TACT SKHVBED010
Q605 TDWT00400E TRANSISTOR, SILICON 2SD400E or SW1001 0508221001 SWITCH (LEAF) SPVF130100
Q606 TD3T008630 TRANSISTOR, SILICON 2SD863(E,F)-AE or VR502 V1263L2BTC VOLUME, SEMI FIXED RH063MCN2R or
Q608 T6YJ1037K0 TRANSISTOR, SILICON 2SA1037AKT146R,S
Q609 TNYJB05001 COMPOUND TRANSISTOR DTC114EKAT146 PCB010 A546A5A01A PCB ASS'Y VMX180B
Q611 TNYJB05001 COMPOUND TRANSISTOR DTC114EKAT146 PCB030 A545B0A03A PCB ASS'Y TEXA28A
Q612 T8YJ2412K0 TRANSISTOR, SILICON 2SC2412KT146 R,S PCB110 A546A3A11A PCB ASS'Y TCX312B
! Q804 TC3F042170 TRANSISTOR, SILICON 2SC4217(D,E)-RAC PCB550 A4C831B550 SEE CHASSIS REPLACEMENT PARTS LIST
! Q805 TC3F042170 TRANSISTOR, SILICON 2SC4217(D,E)-RAC
! Q806 TC3F042170 TRANSISTOR, SILICON 2SC4217(D,E)-RAC B402 024AT03655 CORE, BEADS BL01RN1-A63T6
Q1001 0002M00570 PHOTO COUPLER SG-260 B403 024AT03655 CORE, BEADS BL01RN1-A63T6
Q1002 T8YJ2412K0 TRANSISTOR, SILICON 2SC2412KT146 R,S B405 024AT03655 CORE, BEADS BL01RN1-A63T6
Q1003 0002G00550 PHOTO COUPLER GP1S94L B502 024AT03482 CORE, BEADS BL02RN2-R62T4
Q1004 TNYJC05001 COMPOUND TRANSISTOR DTC124EKAT146 B503 024AT03655 CORE, BEADS BL01RN1-A63T6
Q1005 0002M00570 PHOTO COUPLER SG-260 B505 024AT03482 CORE, BEADS BL02RN2-R62T4
Q1007 TNYTB05001 COMPOUND TRANSISTOR DTC114EKT147 B602 024DT03581 CORE, BEADS LFP3A-M3R2TA
Q1008 TNYJB05001 COMPOUND TRANSISTOR DTC114EKAT146 B4201 024DT03581 CORE, BEADS LFP3A-M3R2TA
Q1009 0002G00550 PHOTO COUPLER GP1S94L CD351 06CH27090A CORD, CONNECTOR CH27090A
Q1013 0000100380 PHOTO TRANSISTOR PNA2604M010R CD352 06CH12435A CORD, CONNECTOR CH12435A
Q1023 T8YJ2412K0 TRANSISTOR, SILICON 2SC2412KT146 R,S ! CD501 120R614909 CORD, AC 0R614909 or
Q1024 TNYJA05001 COMPOUND TRANSISTOR DTC143EKAT146 1207614909 CORD, AC 07614909
Q4001 TC3T033310 TRANSISTOR, SILICON 2SC3331(S,T,U)-A CD757 06CH2A019A CORD, CONNECTOR CH2A019A
Q4002 TC3T033310 TRANSISTOR, SILICON 2SC3331(S,T,U)-A CD801 068M82025A CORD, CONNECTOR 8M82025A
Q4003 TPYTC03001 COMPOUND TRANSISTOR DTA124ESTP CF601 1022T45R72 FILTER, SAW SAF45MFY220ZR
Q4005 TA3T013180 TRANSISTOR, SILICON 2SA1318(S,T)-AA CF603 1011T4R504 FILTER, CERAMIC EFCT4R5YS5A
Q4006 TD3T007340 TRANSISTOR, SILICON 2SD734(E,F)-AA CF604 1011T4R517 FILTER, CERAMIC EFCT4R5MW5
Q4007 T6YJ1037K0 TRANSISTOR, SILICON 2SA1037AKT146R,S CP351 069E260129 CONNECTOR PCB SIDE 8283_0612_00_000
Q4008 T8YJ2412K0 TRANSISTOR, SILICON 2SC2412KT146 R,S CP353 0694270139 CONNECTOR PCB SIDE 173979-7
Q4009 T6YA1037K0 TRANSISTOR, SILICON 2SA1037KT147 ! CP401 069X450029 CONNECTOR PCB SIDE B05B-DVS
TD3T012070 TRANSISTOR, SILICON 2SD1207(S,T)-AE SW791 0504201T31 SWITCH, TACT SKHVBED010
TD3T012070 TRANSISTOR, SILICON 2SD1207(S,T)-AE SW799 0504201T31 SWITCH, TACT SKHVBED010
TD3T012070 TRANSISTOR, SILICON 2SD1207(S,T)-AE
TD3T012070 TRANSISTOR, SILICON 2SD1207(S,T)-AE V1163L2BTC VOLUME, SEMI FIXED EVNCYAA03BY2
P.C.BOARD ASSEMBLIES
SWITCHES
VARIABLE RESISTORS
MISCELLANEOUS
CVT3275-5102
J3-2
Page 14
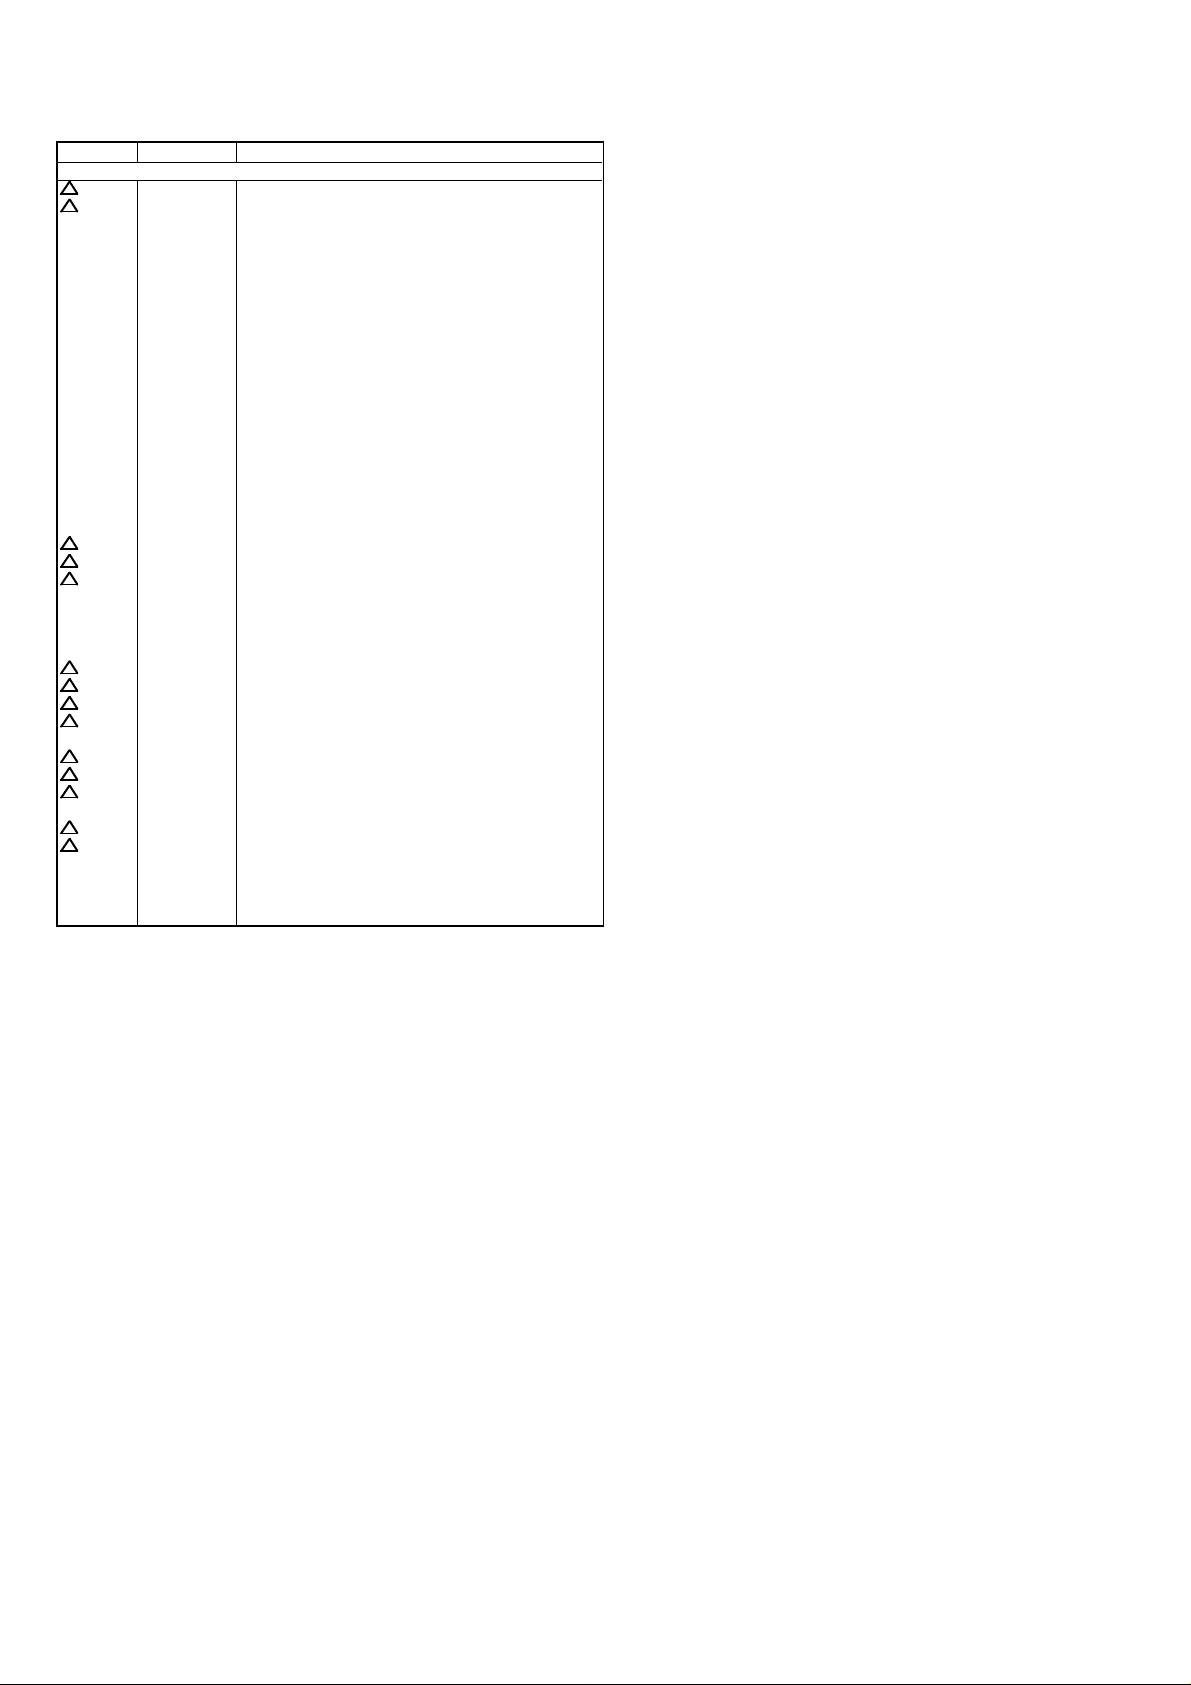
ELECTRICAL REPLACEMENT PARTS LIST
.
.
REF. NO.PART NO. DESCRIPTION
MISCELLANEOUS
! CP501 0697320039 CORD, UX CONNECTOR THL-P03P-B1
! CP502 069W420029 CONNECTOR PCB SIDE TV-50P-02-A1
CP757 06942A0139 CONNECTOR PCB SIDE 1-173979-0
CP801 069W320018 CONNECTOR PCB SIDE TS-80P-02-V1
CD1001 122L040904 CORD, JUMPER 2L040904
CD1002 122F051702 CORD, JUMPER 2F051702
CD4001 122L061501 CORD, JUMPER 2L061501
CP1003 0694240139 CONNECTOR PCB SIDE 173979-4
CP1004 0697280590 CONNECTOR PCB SIDE TMC-J08P-B1
CP1005 069J750029 CONNECTOR PCB SIDE IMSA-9604S-05Z14
CP1006 069J740029 CONNECTOR PCB SIDE IMSA-9604S-04Z14
CP4001 0697240600 CONNECTOR PCB SIDE TOC-C04X-B1
CP4002 069J760029 CONNECTOR PCB SIDE IMSA-9604S-06Z14
CP4003 0697120320 CONNECTOR PCB SIDE TMC-T02X-E1
CP851A 067R010019 WIRE HOLDER 51048-1000
CP851B 067R010019 WIRE HOLDER 51048-1000
CUS011 800WF00004 CUSHION-A
CUS012 800WF00019 CUSHION-C
EL001 124116281A EYE LET XRY16X28BD
EL002 124120301A EYE LET XRY20X30BD
! F501 081PA05003 FUSE 233005-MB000
! F502 080PA2R501 FUSE 23302.5-MB000
! FB401 043219010F TRANSFORMER, FLYBACK 3219010F
FH501 06710T0006 HOLDER, FUSE EYF-52BC
FH502 06710T0006 HOLDER, FUSE EYF-52BC
FH503 06710T0006 HOLDER, FUSE EYF-52BC
FH504 06710T0006 HOLDER, FUSE EYF-52BC
! ICP501 083PC05003 MICRO FUSE 251005RT
! ICP502 083PC05003 MICRO FUSE 251005RT
! ICP503 083PC05002 MICRO FUSE 251005
! ICP505 083PC04003 MICRO FUSE 251004RT
OS753 077Q000017 REMOTE RECEIVER PIC-28143TH5
! RY501 0560Q20114 RELAY SDT-S-112LMR
! SP351 070W133014 SPEAKER P-300S-2
! TH501 DF20A3R0Q0 DEGAUSS, ELEMENT PTH451A3R0Q11
TM101 07660CG010 TRANSMITTER SBJU20003A
! TU601 0145K00050 TUNER, UHF-VHF TECC1040PG31A
! V801 098Q200481 CRT W/DY A48AGY13X77
X602 100CT3R505 CRYSTAL HC-49/C 3.579545MHz
X1001 100CT01207 CRYSTAL HC-49/U-S 12MHz
X1002 100DA32R01 CRYSTAL DT-26 32.768KHz
X4001 100CF3R512 CRYSTAL HC-49/U 3.579545MHz
RESISTOR
RC................... CARBON RESISTOR
CAPACITORS
CC................... CERAMIC CAPACITOR
CE................... ALUMI ELECTROLYTIC CAPACITOR
CP................... POLYESTER CAPACITOR
CPP.................. POLYPROPYLENE CAPACITOR
CPL.................. PLASTIC CAPACITOR
CMP.................
CMPL...............
CMPP............... METAL POLYPROPYLENE CAPACITOR
METAL POLYESTER CAPACITOR
METAL PLASTIC CAPACITOR
J3-3
Page 15

SPEC.NO.
O/R NO.
M546-A5A
W045012
Page 16
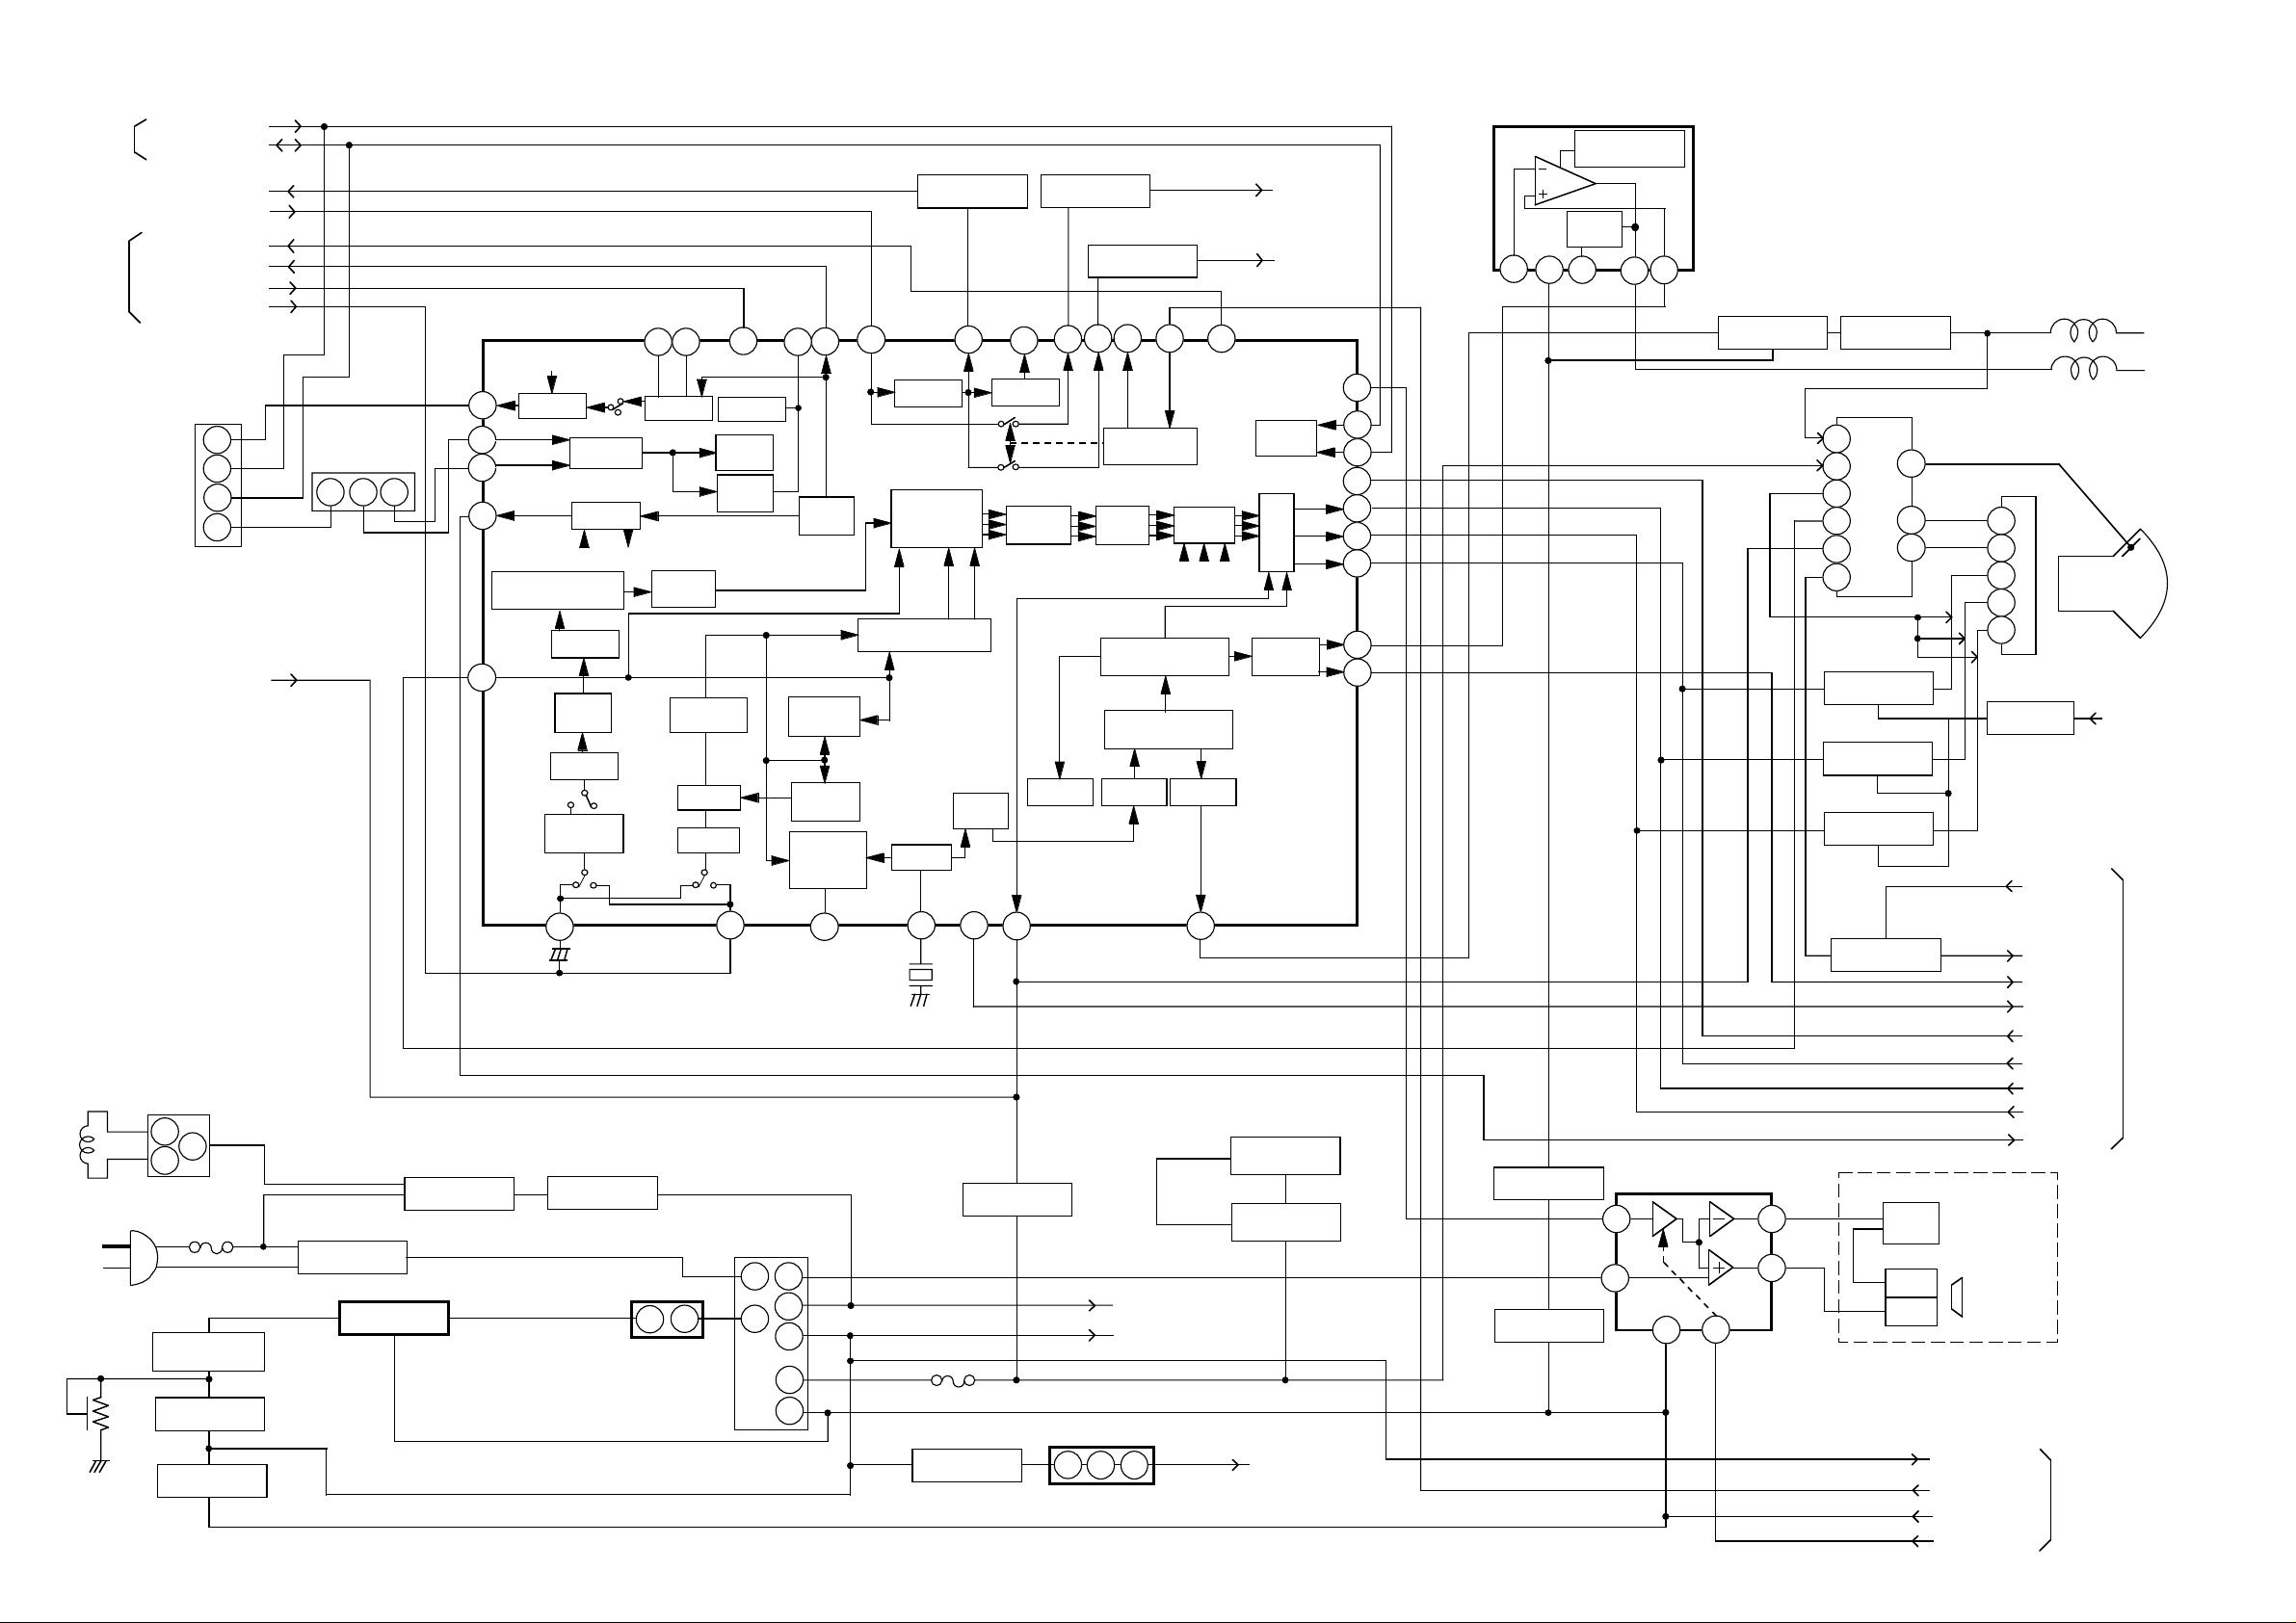
TV BLOCK DIAGRAM
MICON/
OPERATION/
DECK
Y/C/AUDIO/
HEAD AMP/
IN/OUT
Y/C/AUDIO/
HEAD AMP/
IN/OUT
SCL
SDA
AT + 5V
AT + 25V
TU_AUDIO
TU_VIDEO
Y/C_AUDIO
CHROMA_VIDEO
TU601
1
4
5
11
H. SYNC
SAW FILTER
CF601
154
CHROMA IC
IC601 M61203BFP
DELAY ADJ
RF AGC
62
1
64
60
BLACK STRETCH
31
VIF AMP
DEFEAT
GAMMA
CLAMP
VIDEO
TONE
DELAY
CHROMA
TRAP
AFT
NC NC
63 48
IF AGC
AFT OUT
VIDEO
MUTE
VIDEO
APC
DET
CHROMA
BPF
ACC
HPF
52
VCO
DET
57
56
LOCK
DET
KILLER
DET
ACC
DET
CHROMA
APC
DET
Q602, Q603
REG.
55
5.7Vreg
CONTRAST
DEMODULATOR
VCXO
41
RGB
MATRIX
VCO
ADJ
NC
42
RESET
P-ON-ON
BRIGHT
Q606
33
AFC 1
REG.
Q604, Q605
REG.
39 46
POWER ON
CONTROL
DRIVE
AMP
VERTICAL
COUNT DOWN
HORIZONTAL
COUNT DOWN
H VCO AFC 2
13
CLAMP
26
RGB
CUT OFF
53
P. CON + 8V
AT + 5V
BUS
I/F
HV
BLK
V.RAMP
50
10
27
14
15
16
17
29
THERMAL
PROTECTION
AMP
PUMP
UP
VCC
1
5
3
2
5
V. OUTPUT IC
IC401
LA78040
7
Q405
H-DRIVE
Q406
H. OUTPUT
FB401
1
COL
2
+B
6
E180
7
ABL
9
AFC
10
HEA
E180V
Q804
BLUE AMP
Q806
RED AMP
Q805
GREEN AMP
HV
DY
J801
F
S
F
7
11
8
6
Q608
CUT OFF
X_RAY-TEST
V801
CRT
P. CON + 8V
L503
DEGAUSS COIL
AC IN
VR502
+B ADJ
E-1
TH501
DEGAUSS ELEMENT
3
2
1
F501
Q507
FEED BACK
SW
Q506
5V SW
Q513
5V SW
D501
RECTIFIER
IC506 TLP621(GR)
FEED BACK
RY501
RELAY
Q504
RELAY DRIVE
POWER REG. IC
IC502
STR-G6623
34
3536
32
12
6
NC
X602
3.579545MHz
Q612
SYNC SW
T501
8
16
1
AT + 12V
UNREG + 8V
3
2
1
5
14
3
13
11
9
F502
Q501
POWER SW
5V REG IC
IC501 KIA7805PI
7
Q609
POWER ON
SW
Q611
POWER
FAIL SW
P. CON + 5V
Q402
Q401
DRIVER
SW
SOUND AMP IC
IC351 AN7511
2
5
1
Q403, Q404
SW
J351
6
8
4
HEAD
JACK
CD352
SP+
SP–
POWER FAIL
VCR_POWER-H
TV_POWER-H
TV_A_MUTE
SP351
SPEAKER
X_RAY
VD
HD
OSD_BLK
OSD_B
OSD_R
OSD_G
AFT_M
MICON/
OPERATION/
DECK
MICON/
OPERATION/
DECK
E-2
Page 17
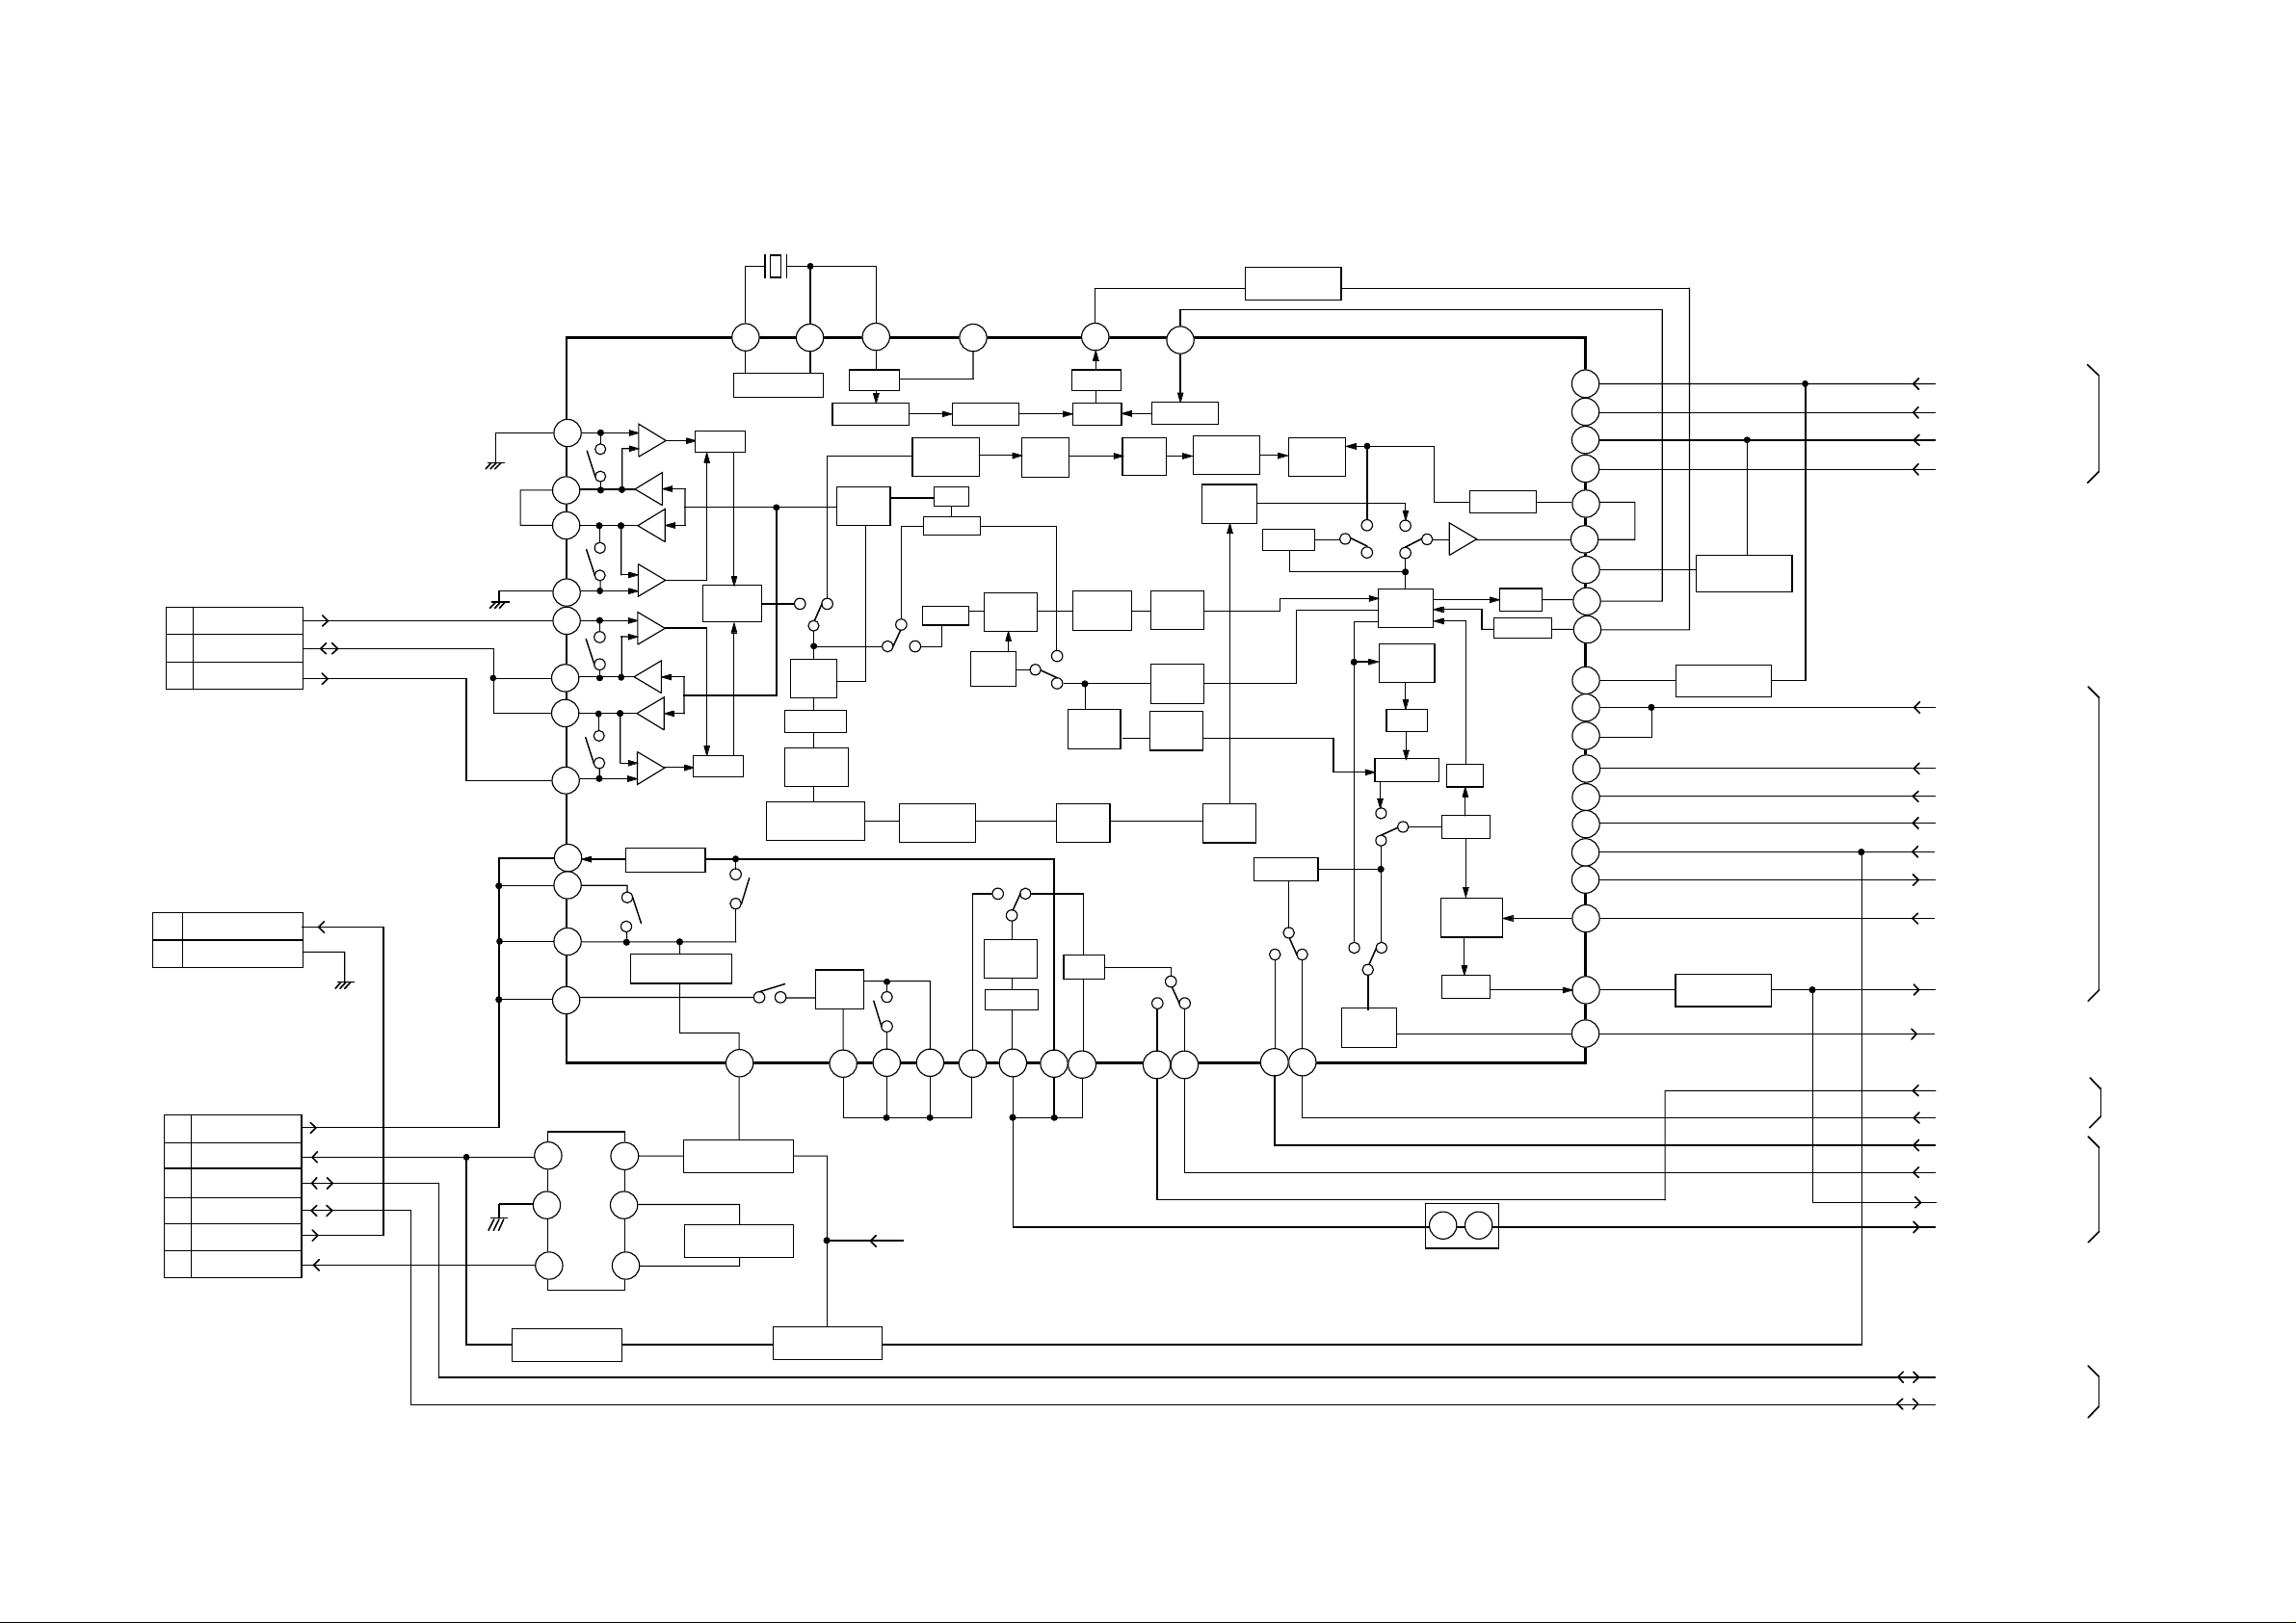
Y/C/AUDIO/CCD/HEAD
AMP IC
IC4001
LA71067M-MPB
Y/C/AUDIO/HEAD AMP/IN/OUT BLOCK DIAGRAM
X4001
3.579545MHz
62
61
51
NC
53
49
Q4009
BUFFER
47
CYL
FE HEAD
HEAD AUDIO
CONTROL
CP4001
SP-CH2 (L)
2
SP_COM
3
4
SP-CH1 (R)
CP4003
FE HEAD (HOT)
1
FE HEAD (GND)
2
CP4002
AUDIO PB
6
AUDIO REC
5
4
CTL+
CTL-
3
21AE HEAD(-)
AE HEAD(+)
85
84
83
82
88
89
90
91
6
4
T4001
5
6
4
VX01
L
H.SW
H
H
H.AMP
SW
L
H
H.SW
L
7
5
REC AMP
AUTO BIAS
2
3
1
Q4005
BIAS CTL
Q4006
BIAS OSC
P
DELAY
PB
FM-EQ
PB
PHASE-EQ
PB.EE
99
PULL
TIMMING
AGC
AMP
R
R
FM
AGC
EQ
AMP
2
3 80 76
DRIVER
REC
FM-EQ
KIL
C-LPF
GCA
P
DOUBLE
LIM
1
100
P. CON + 5V
B-UP
AMP
ACC
AMP
LINE
AMP
MUTE
96
FM
MOD
98
R
OUT
CCD
Main
CONV
P
KIL
B.D.
FM
DEM
ALC
97
WC
DC
CLAMP
3.58M
BPF2
3.58M
BPF1
PB
AMP
NL
EMPHA
V/I
CONV
SUB
LPF
Y-LPF
V-AGC
42
DETAL
ENH
38
P
R
P
SYNC
SEP
P
R
YNR/
COMB
N.L.
DEEM
NC1
Y/C MIX
P
R
R
1/2
FBC
Chara
INS.
6dB
2 3
L4004
CLAMP
VCA
CLAMP
Y/C R/P
AUDIO R/P
C ROT
RF SW IN
AUDIO
MUTE
H.A R/P
ENV DET
59
55
30
19
28
12
11
93
25
74
46
44
36
16
17
14
13
31
35
34
Q4011
Q4008
EP SW.
Q4007
BUFFER
TRICK PB
SW
SP/LP/EP-H
INPUT_SEL
TRICK_PB-H/EE-H
DOC_XO_CTL
REC/EE/PB
C. ROTARY
H. SW
VCR_A_MUTE
V. REC_ST-H
ENV. DET
DUMMY_V. SYNC
SD_VIDEO
H. SYNC
FRONT_AUDIO
FRONT_VIDEO
TU_VIDEO
TU_AUDIO
CHROMA_VIDEO
Y/C_AUDIO
MICON/
OPERATION/
DECK
MICON/
OPERATION/
DECK
TV
MICON/
OPERATION/
DECK
TV
E-3
Q4001, Q4002
AUDIO PB SW
Q4003
SW
CTL+
CTL-
MICON/
OPERATION/
DECK
E-4
Page 18
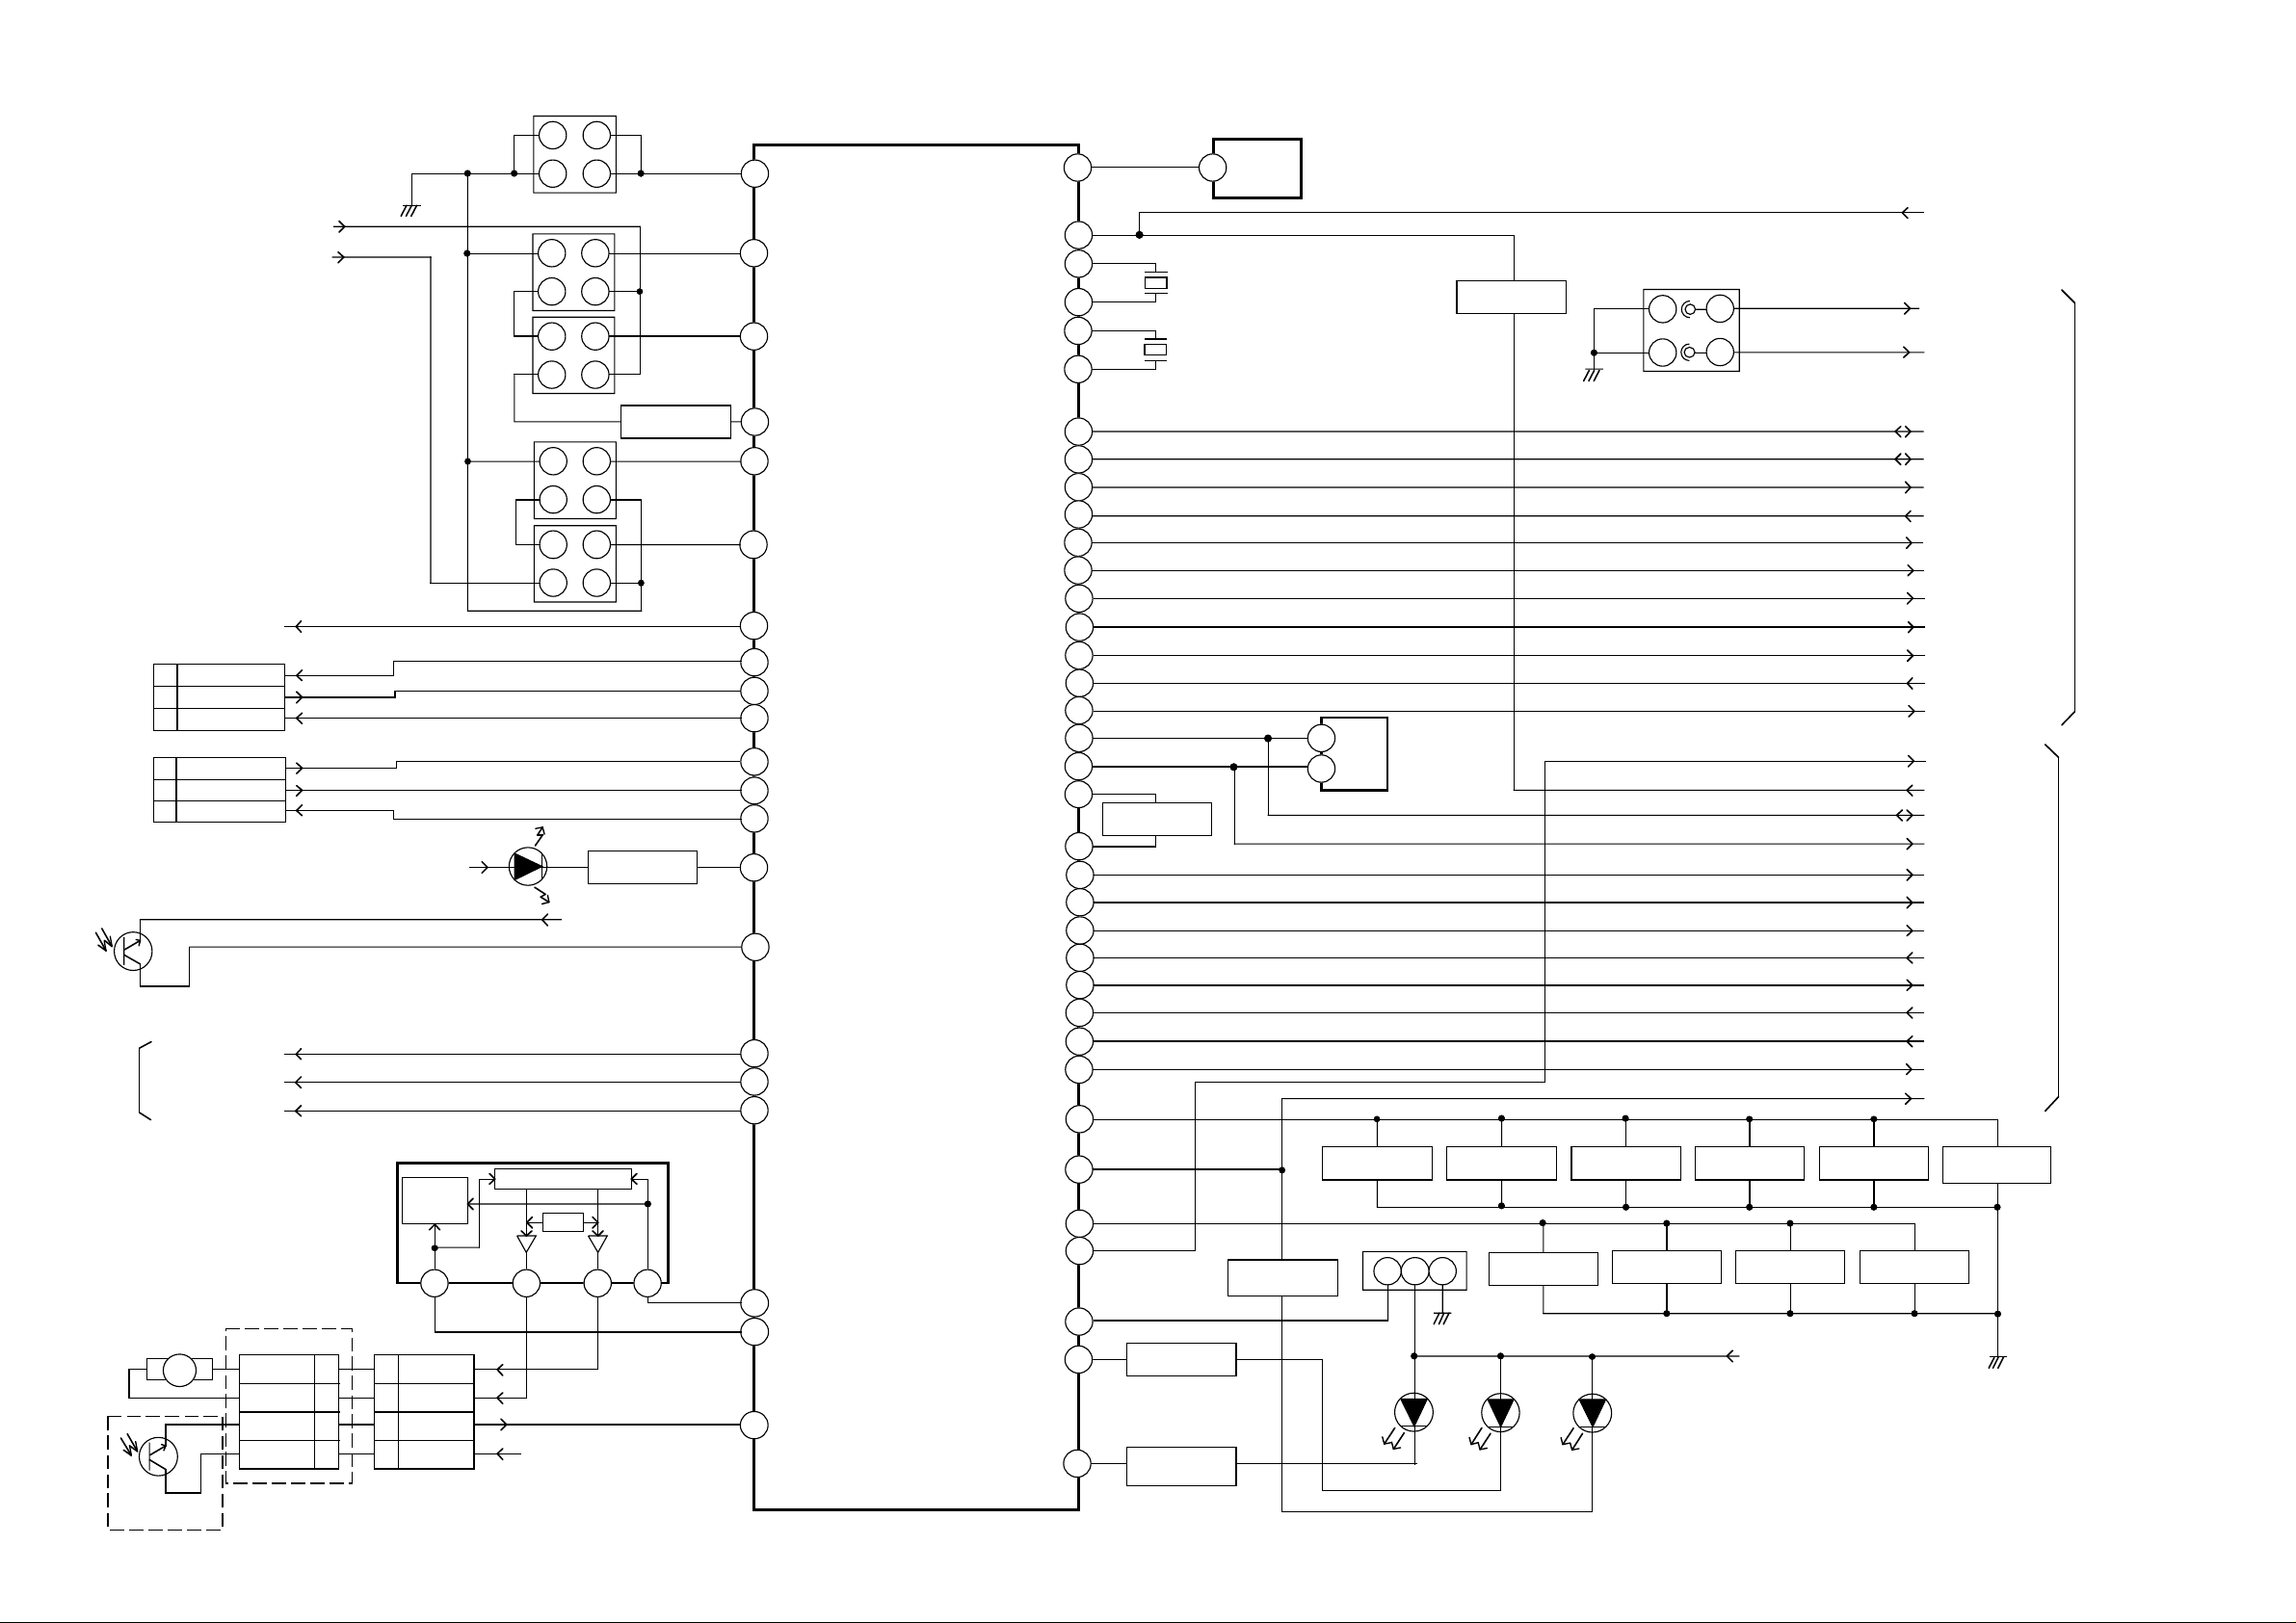
MICON/OPERATION/DECK BLOCK DIAGRAM
TV
CAPSTAN
DD UNIT
MICRO
MOTOR
Y/C/AUDIO/
HEAD AMP/
IN/OUT
LOADING
MOTOR
E-5
VCR_POWER_H
CP1004
4 CTL
6
FG
CAP/M/F/R
7
CP1005
CYL PG
1
3 CYL FG
5
CYL DRIVE
EOT SENSOR
Q1013
C. ROTARY
DUMMY_V. SYNC
INPUT_SEL
M101
LM
BOT SENSOR
Q101
AT + 5V
P. CON + 5V
CP101
LDM+
LDM-
BOT
VCC 1
4
3
2
SW1001
D1003
P. CON + 5V
LOADING MOTOR DRIVER IC
IC1003 BA6955AN
POWER
CP1006
4
3
2
SAVE
2
LDM+
LDMBOT
VCC1
CONTROL LOGIC
5
P. CON + 5V
23
1
4
14
2
3
14
3
2
2
3
4
1
2
3
4
1
Q1024
LED DRIVER
P. CON + 5V
STD
7
MS_SEN A
Q1009
MS_SEN B
Q1003
Q1002
SENSOR SW
REEL SENSOR
Q1005
REEL SENSOR
Q1001
4
TIMER SYSCON MICON IC
IC1001 OEC7043A
TAB SW
50
1
MSSEN-A
MSSEN-B
2
SENS LED
23
REEL-T
80
REEL-S
79
VCR-POWER
27
CAP-PWM
76
CAP-FG
87
CAP-FWD
11
DRUM-PG
90
89
DRUM-FG
DRUM-PWM
77
CENTER LED
68
3
EOT
15
COLOR ROTARY
13 DUMMY-V. SYNC
33
INPUT_SEL
20
LDM-RVS
21
LDM-FWD
4
BOT
POWER_FAIL_L
X-OUT (12MHz)
X-IN (12MHz)
XC-OUT (32KHz)
XC-IN (32MHz)
V-REC-ST-H
CVIN
REC-H/EE-M/PB-L
SP/LP/EP-H
TRICK_PB-H
ENV_DET
VCR_A_MUTE
IIC-DATA1
IIC-CLK1
CTL AMP-OUT
FF/REW-L
AFT (MONI)
OSD OUT1
V-SYNC
H/C-SYNC
KEY A
TV-POWER
KEY B
X_RAY_TEST
REMOCON-IN
REC LED
T-REC LED
34RESET-L
85
39
38
36
35
95CTL+
94CTL66
56
18VIDEO-H.SW
61
67DOC/XO-CTL
83
69
6
81
72
71
97
FF/REW_SW
73
R
64
G
63
62
B
7
60
59
58
82TV_A_MUTE
9
28
10
41
14
30
29
32.768KHz
Q1004
Q1007
REC LED SW
Q1008
T-REC
LED SW
3
X1001
12MHz
X1002
OUT
Q4204
TV POWER
SYSTEM RESET IC
IC1002
PST600H
SDA
5
SCL
6
POWER
ON/OFF
SW
REC/OTR
D793
EEP ROM IC
IC1099
S-24C02BDP-11
OS753
Q1023
X_RAY_SW
REC/OTR STOP/EJECT PLAY
321
T-REC
D791
CH DOWN
AUDIO L
VIDEO
J701
3
1
CH UP VOL. UP VOL. DOWN
POWER/PLAY
D792
2
4
AT + 5.6V
POWER FAIL
FRONT_VIDEO
FRONT_AUDIO
CTL+
CTLV. REC_ST_H
SD_VIDEO
H. SW
REC/EE/PB
DOC_XO_CTL
SP/LP/EP-H
TRICK_PB-H/EE-H
ENV_DET
VCR_A_MUTE
X_RAY_TEST
X_RAY
SDA
SCL
OSD_R
OSD_G
OSD_B
AFT_M
OSD_BLK
VD
HD
TV_A_MUTE
TV_POWER-H
FF/CUE REW/REV
TV
Y/C/AUDIO/
HEAD AMP/
IN/OUT
TV
E-6
Page 19
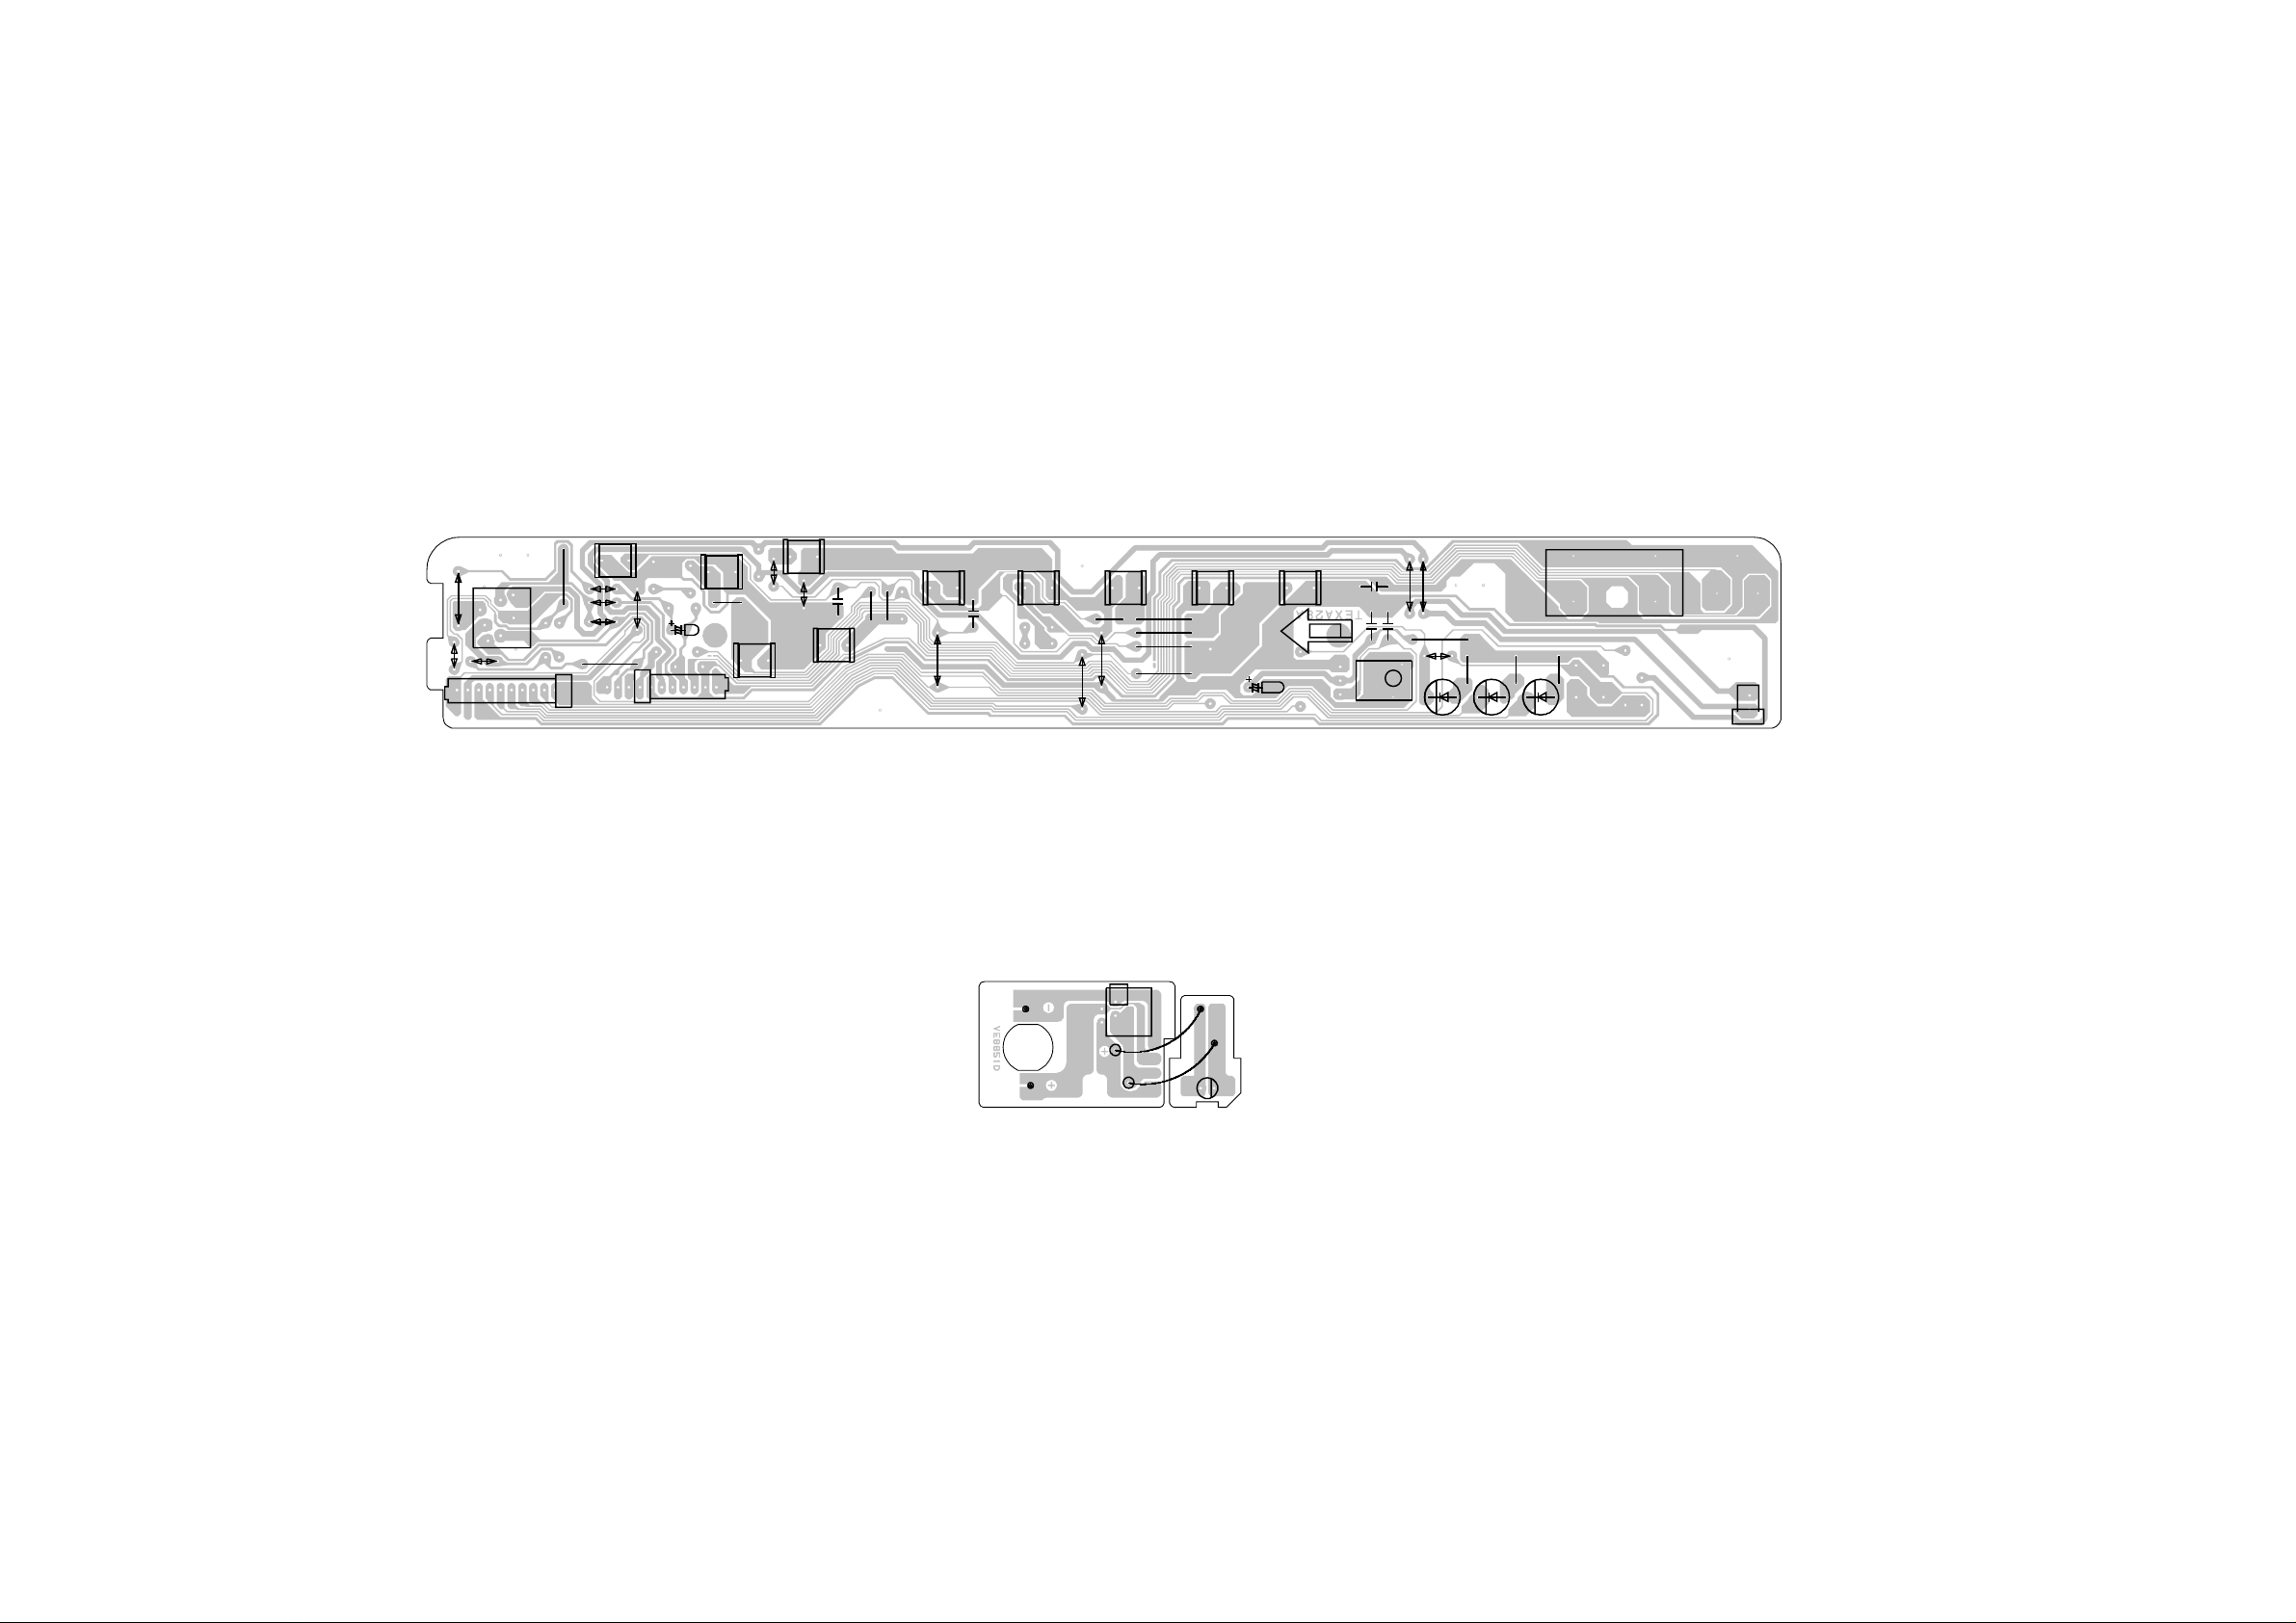
PRINTED CIRCUIT BOARDS
OPERATION
SOLDER SIDE
W812
W814
W815
J351
CD757
R351
W003
W805
W811
R350_1
W009
SW751
C382
CD351_1
SW797
R777
SW796
W006
W007
SW799
SW798
C781
R776
R775
SW791
W008
SW794
C779
DECK
SOLDER SIDE
S101
S102
W002
S104
SW792
R772
W001
CP101
S103
R778
SW793
R773
R774
R771
S105
S106
Q101
C755_1
SW795
C752
C701
OS753
W005
C751
W004
R766
W802
D792
R761
D793
R793
J701_1
R754
CD352
D791
F-1
F-2
Page 20
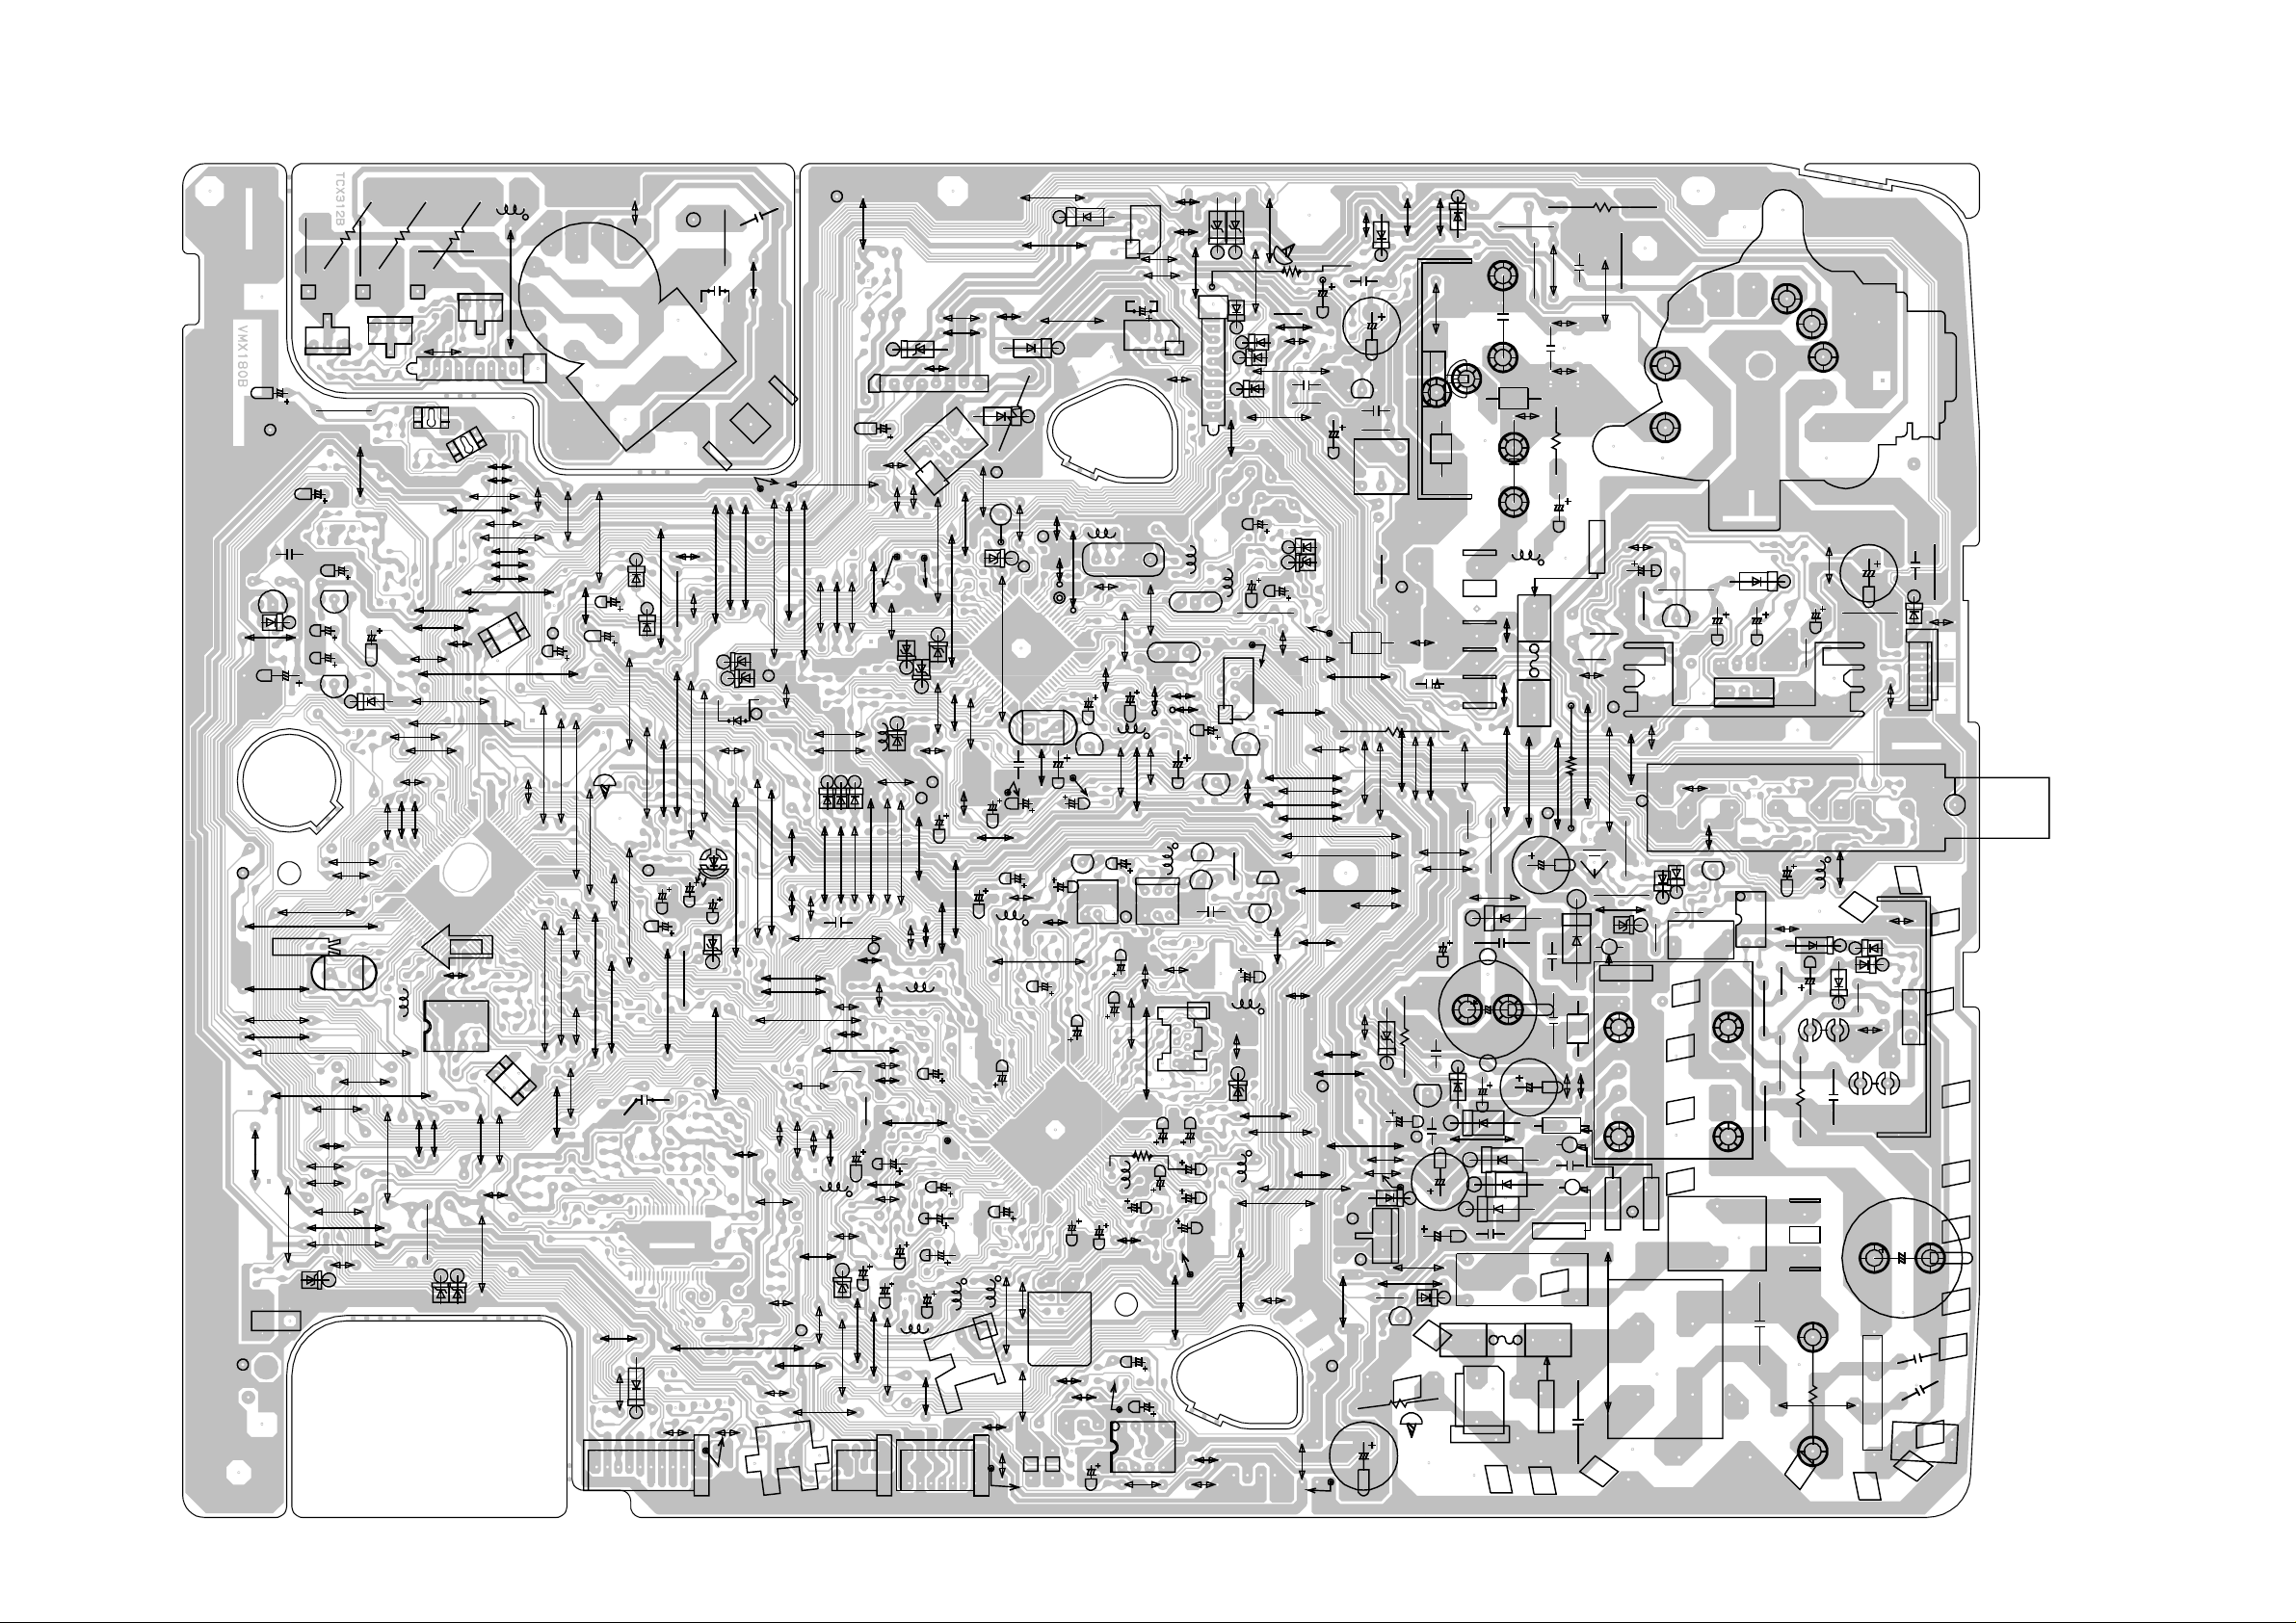
PRINTED CIRCUIT BOARDS
SYSCON/CRT (INSERTED PARTS)
SOLDER SIDE
F-3
D1002
TP1001
C1032
IC1002
W056
C1003_1
W014
W053
W145
D4207
SW1001
C1051
TP802
C1021
W260
R808
Q805_1
C643
C642
Q602
W329
W224
W060
W055
R805
R1079
C1058_1
W182
W181
X1001
W095
W012
W013
W208
W147
W146
TP801
Q603
D608
W207
W261
R807
Q804_1
W810
C679
W037
W074
R802
W156
TP803
Q1003
W190
W191
W038
W057
W327
W188
W193
L1001
W076
D1008
W131
Q1009
W225
W228
W093
W149
R685
R810
R820
CP851B
W054
W189
W017
IC1099
Q806_1
W227
D1007
W001
W353
W186
W187
Q1001
W151
W153
W154
L801
W226
W048
W047
W049
Q1005
W152
W132
W881
W185
W018
C662
W283
W282
W328
W246
W183
W865
W051
W022
W244
W245
C665
W271
W243
C645
W270
W233
W184
W158
W119
D606
W249
W248
W130
J801
D604
W269
W125
C1015
C4014_1
D4202
CP757_2
W223
W046
C1016
W052
W143
S801
W859
R650
D609
W222
C1020
W336
D611
W123
C1018
R1016
C819_1
CP801
S105Y
W124
W091
W850
D1003
W065
W162
S802Y
R801
W217
D1014
W063
W163
C801
W128
W218
W023
D605
Q
W020
W015
W100
W324
W822
1013
W349
W019
W082
W086
W083
W061
W029
W829
W347
W316
W242
D620
W087
W073
W016
W078
D4005
W101
W204
W068
C4075
W205
L4009
W323
W317
W352
W351
D621
W089
W310
W849
R4006
W326
W045
C1001
W069
W070
W350
W088
W821
W167
R4052
C4008
C4071
W278
CP1003
S801X
W092
L612
D619
W009
W315
W325
D1004
W042
W043
W313
W232
W815
W011
C4057
W077
W340
C4062
W322
W050
W220
D615
W231
W254
C4007
L4011
W321
S802X
D617
W312
L4007
W896
C4045
IC1003
D616
W874
W311
C4043
C4061
C4059
C4060
W319
CP353_1
W264
D610
W302
W230
W253
W041
W216
W044
P
C
W827
C655
W195
S801Y
L4008
004
1
W039
W120
C4035
CP4003
W105
W194
W304
D607
W072
S103Y
C659
L4002
W280
C4024
C4058
W814
D1013
W121
C664
L4005
W803
D1001
B602
C646
W032
C4034
W028
W308
TP1002
S108Y
R1005
W265
X602
W360
C4022
W161
W813
W122
C652_1
C4010
W251
W033
C4070
X4001
W160
D1005
W206
W303
W267
C648
Q4005
C4017
W159
TP4001
W359
C649
Q606
S106Y
L4004
C4039
C356
C1064
L605
W848
C4011
W067
W024
L610
W307
C4004
C4016
R4070
L4012
S107X
CP1006
CF601
C641_2
W213
W010
C4030
W309
C355
C351
IC351
W126
W166
W118
CP1005_1
W025
W306
L4003
W305
W252
C4021
C4033
W142
W164
W212
L601
W268
CF604
CF603
W031
W071
C678_1
T4001
W287
CP4001_1
C4023
C4031
C4037
W275
W165
CP851A
C644
Q605
Q4006
Q4002
C4015
C4026
S103X
W127
W855
D409
L607
S107Y
CP4002
W885
C624
Q604
Q4001
L4001
L4010
W027
D408
D614
D618
D613
C610
R4015
Q4003
C4001X1002
W826
D4006
W003
W215
W335
D601
D602
R607
W059
W295
W262
W301
D612
R456
W878
C632
W300
R686
R678
W344
W080
W299
S108X
W332
W331
W293
W357
W343
W168
W144
W201
W203
W200
W294
W284
C417
C418_2
S105X
W296
C433_2
W176
W175
W342
W111
W178
W285
50
R
T401
W171
W108
W286
S106X
D503
W846
0
C354
W847
C430_1
Q405
B405
W234
W196
C508
W133
R449
D515
R515
R632
W872
Q504
D412
C438
R460
R512
W197
HS402
C431
W857
W198
Q501
C519
IC501
W880
W333
C413
W139
C528
W214
C601
C520
W816
Q406
B402
CP401
W138
W236
W177
D510
D517
W113
C511
D516
FH502 FH501F501
CP501
D413
W358
R513
C521
C522
C424
W856
C516
C423
R554
B403
W837
W831
W297
C517
C524_2
D519
R454
W890
L401
R453
C425
W109
C523
C505
ICP502
D512
D509
D505
RY501
W811
W892
W893
F502FH504
FH503
W136
C560
ICP503_1
ICP505
4A125V
5A125V
C506
R447
C422_1
W860
R422
W805
C518
R450_2
C432
2.5A125V
R417
R419
W875
W808
VR502
D507
B503
W817
R490
W112
W106
C403
R553
R529
W104
D528
ICP501
5A125V
5A125V
W355
R410
W897
5A125V
W107
D529
R532
L502
R421
Q402
HS401_1
R533
W871
D523
C530
FB401
W169
Q507
C408
IC401
IC506
D401
C406_1
C612_1
R502 R504
R503
T501_1
TH501
C513
W117
CP502
R411_1
TU601
C510
R510
R542
W102
C405
L603
D502
W807
D506
B502
C514_1
R501
C407
W354
R415_1
R543
W291
B505
W137
W861
D518
IC502
D501
C420
D410
CP351_1
D521
C507
C503
W116
B4201
HS502
C502
C529
R423
F-4
Page 21
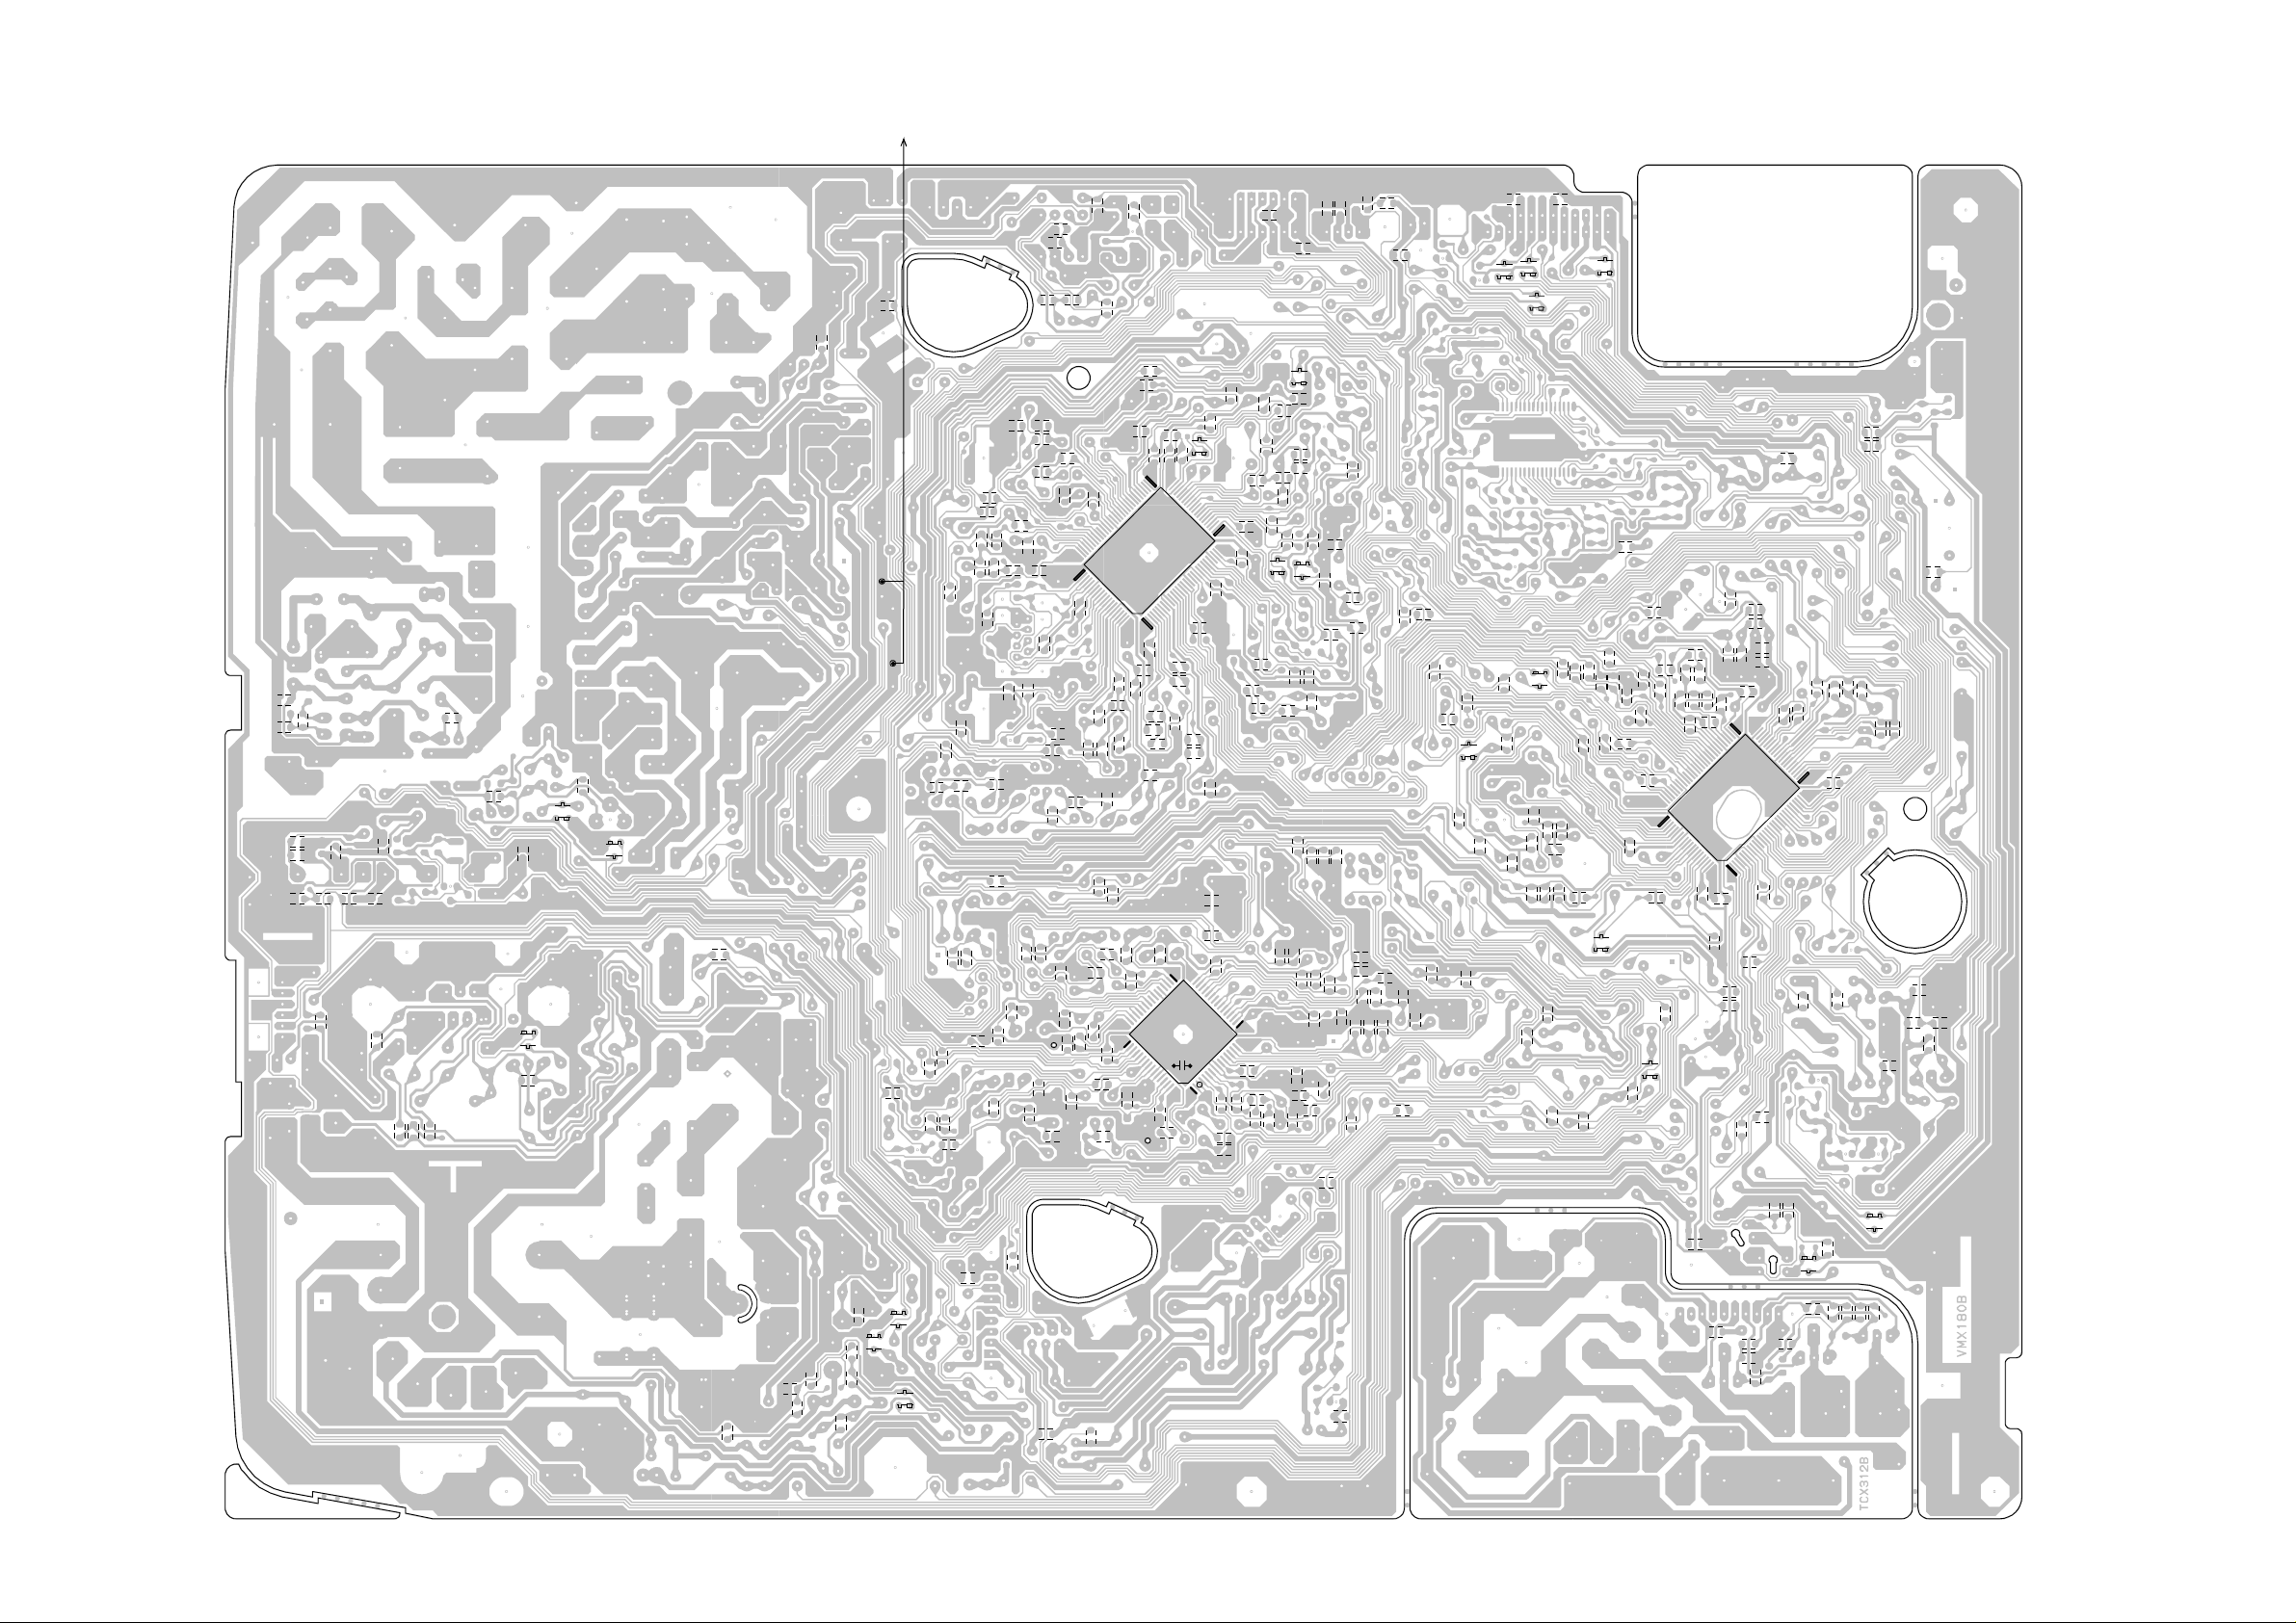
PRINTED CIRCUIT BOARDS
SYSCON/CRT (CHIP MOUNTED PARTS)
TO SHIELD COVER H/AMP
SOLDER SIDE
C512
C515
C609
R605
R506
C607
R602C604 R603 C605
C613
C509
C554
R684
Q506
W904
Q513
R523
S008_1
S008
C617
R4002
R4031
R4001
R4003
R4033
W864
R4061
R4028
R4019
C4051
C4074
R505
C4028
C4072
C4065
C4066
R4026
C4078
W801
C4036
R4046
R4044
R4029
W889
C4009
R352
C301
C4046
R4009
C631
C353
C4032
R4010
C4005
C4084
81
C4003
R4007
R353
R357
C4029
R4072
R4012
C4002
C4006
R654
R4013R4008
R610
R359
C4083
R4014
C4044
IC4001
1
R4020
C4018
R4025
R4023
R4011
C4055
51
R4022
C4020
C4050
R4034
C4025
C4048
R4027
C4027
R4032
Q4009
C4073
R4036
31
C660
R4050
R4047
C4038
C4079
R4063
C692_1
R4051
C4047
R4049
C4204
R4045
R4060
R4065
R4062
R4056
Q4008
C4049
Q4011
C4080
R4057
C4053
C4052
C4054
R4201
R4039
Q4007
C4041
R638
C4076
R4078
R4024
R4064
R4048
C661
R4005
W836
R646
C4077
R4016
C4082
C690
R4055
C1005
R1011
R4053
R4067
R4068
C1044
R1077
Q1023
R1064
R1028
Q1007
R1075
Q1008
C1045
R1039
C1072
Q612
Q1024
C1028
C1063
R1012
C1033C1024
R1029
C1065
C1019
R1021
R1017
R1009
R1013
R1007
C1029
Q4204
R1035
C1009
C1043
C1004
C1010
R1042
R1038
R1002
C1023
R1020
C1013
C1022
C1062
C1037
R1053
R1036
81
C1041
R1034
C1038
C1071
R1033
C1035
C1031
C1025
C1034
1
W895
R1006
C1061
R1032
R1031
51
IC1001
R1045
R1044
C1030
R1004
C1060
C1042
C1039
C1046
31
C1047
R1040
C1068
C1026
C1040
R1046
R1047
C1048
C1049
R1018
C1050
W838
R401
R414
R416
R413
Q401
R402
R683
R441_1
R439
R443
R440_2
R442_1 R444
R420_1
C416
Q611
W876
Q609
Q404
C623
R609
R601
C669
C627
R628
W886
W894
R611
W888
R622
W887
R636
C672
C616
C527
C674
C618
R667
C693
R625
R608
R615
R633
C640
R688
C636
C691_1
R621
C1002
C625
R644
C650
49
C687_1
C626
C634
C654
C622
33
IC601
1
R629
R647
C677
C637
17
R655
R630
R626
R677
R656
C639
C673
R631
R676
R657
R624
C688
C647
R648
C653
C1066
R643
R687
R1003
C630
R652
R649
R659
R635
C684
R660
C658
R641
R658
R634
C668
C666
R642
C657
R639
R640
R614
Q1004
C621
Q608
R651
R1008
R1087
C805
C1027
R1024
R1019
C1074
R1001
R1010
R816
C811
R813
R1083
R811
R1050
Q1002
R812
R663
R662
R1066
C810
Q403
R814
C809_1
C667
R815
C1014
R1049
C1017
R1051
F-5
F-6
Page 22
ABC D E F GH
Y/C/AUDIO/HEAD AMP SCHEMATIC DIAGRAM
8
TU_AUDIO
R4028
H
L
H
L
L
R4029 2.2M
226.3V KA
H.AMP
H
H.AMP
120
P.CON+5V
27K
R4031
L4010
6.8K
100uH 0305
1006.3V KA
C4026
C4072 0.1 B
R4070
10M 1/4W
ENV
TP4001
JWF-50K-1
6P CH
C4084
3
1F
C4065
1K
68uH
L4012
R4033
NC
NC
A-Vcc
Vref
2.3V
ALC
SW
HA TEST
REC
AMP
R4034
C4027
+
820
0.0015 B
4.725V KA
NOMAL
FM
AGC
DELAY
PB
FM-EQ
PB
PHASE-EQ
8
RP
CTL
AMP
9
AGC
AMP
SW
P
R
LINE
AMP
Vref
PB
/EE
REC:
EP/LP
PB:EP
4
5
C4025
0.0015 B
R4032 27K
1016V KA
C4024
FRONT_AUDIO
TRICK_PB-H/EE-H
TRICK PB SWITCH
Q4011
DTC144EKA
1.1
7
6
5
4
3
FROM POWER
GND
P.CON+5V
TO SHIELD COVER HEAD AMP
S008
S008_1
FROM/TO CYL
CP4001_1
TOC-C04X-B1
4
SP-CH1 (R)
SP_COM
3
2
SP-CH2 (L)
1
FROM/TO HEAD AUDIO CONTROL
CP4002
IMSA-9604S-06Z14
AUDIO PB
6
AUDIO REC
5
CTL+
4
CTL-
3
AE HEAD(-)
2
AE HEAD(+)
1
W826
C4046
0.01 B
C4051
0.01 B
100uH 0305
15.6KHZ TRAP
L4004
2623003
P.CON+5V
R4001 820
V.REC_ST_H
0
0.7
0
0
0.7
0
L4001
R4002
10K
R4003
10K
1234
6
5.2
SW
0
Q4003
DTA124ES
5.3
P.CON+5V
ENV_DET FRONT_VIDEO
COMP CHROMA_VIDEO
Y/C_AUDIO H.SYNC
CTL+
CTL-
AUDIO
PB SW
Q4001
2SC3331
AUDIO
PB SW
Q4002
2SC3331
C4078
C4001
NC
0.1 B
476.3V KA
W864
C4003
C4074
4
0.1 F
470P CH
6
5
C4011
150V KA
R4009 2.7K
C4002
0.01 B
R4008
12K
COIL,BIAS OSC
T4001
1626007
1
2
34
R4007
2
TO FULL ERASE HEAD
CP4003
TMC-T02X-E1
2
FE HEAD(GND)
1
FE HEAD(HOT)
C4015
0.022100V TF
C4004
0
Y/C/AUDIO/CCD/HEAD AMP IC
IC4001
LA71067M-MPB
C4009 0.1 F
R4012
22K
680
22K
R4072
R4013
10K
C4010
R4011
0.01 B
0.015 B
5.2
0
L4003
R4010
BIAS OSC
Q4006
2SD734
22K
5.2
100uH
3.3K
0.4
BIAS CTL
2SA1318
C4005
476.3V KA
C4006
Q4005
0
C4016
476.3V KA
3.4
R4015
L4011
C4083
R4061
4.725V KA
0
2.2 1/4W
22uH
33P CH
680
1.8
1.8
1.8
1.8
5.1
1.8
1.8
1.8
1.8
1.0
4.6
2.8
0.3
5.1
2.4
33K
R4026
4.7K
R4019
336.3V KA
C4021
D4006
MTZJ6.8B
1F
C4023
C4066
NC
2.4 2.4 2.4 0 2.4 5.0 2.3 2.3 2.8 2.3 1.5 2.0 0 0
80
0
818283848586878889
H.A GND
CH4
REC EP
OUT
CH3
0
H.A GND
H.A VCC
CH2
REC SP
OUT
90919293949596979899
CH1
0
REC AGC
FILT
ENV DET
COMP OUT
0
0
C4017
C4018
MUTEA.GND
ALC-LEVEL
AUTO
BIAS
PB/EE
EQ
AMP
100
110
150V KA
R4020
10K
6.8K
R4022
6.8K
R4023
R4025
330K
C4020
0.0027 B
0.01 B
C4022
R4027
1
THE DC VOLTAGE AT EACH PART WAS
NOTE:
MEASURED WITH THE DIGITAL TESTER
DURING PLAYBACK
NOTE:THIS SCHEMATIC DIAGRAM IS THE LATEST AT THE TIME
OF PRINTING AND SUBJECT TO CHANGE WITHOUT NOTICE
(SYSCON PCB)
C4070
C4044
150V KA
ALWAYS
5V
REC
AFC
C.SYNC
RP
680K
C4041
390P CH
INPUT_SEL
476.3V KA
C4045
0.1 F
R4050 680K
NC
2.5
VDDC-VCC
4Fsc
TIMMING
DRIVER
AUTO-BIAS
CCD
CLAMP
FBC
INS.
R4045 680K
PB-C
SYNC
SEP
6DB
L4007
100uH
R4048
W821
PB-Y
DEEN
NC1
Y/C
MIX
4.7K
N.L.
R
C4043
R4049
P
VIDEO OUT
22P CH
YNR/COMB
1/2
Chara
CAUTION: DIGITAL TRANSISTOR
476.3V KA
PULL
VCA
P
R
150V KA
R4051
C4047
1K
SP/LP/EP-H
L4002
100uH 0305
0.1 B
C4033
R4044
BEFORE
AFTER
R
SUB
LPF
FM
DEM
LIM
R/P
C4075
330P B
C4079
C4036
0.022 B
ACC
DET
ACC
AMP
2.250V KA
8.2K
150V KA
C4037
680
R4046
R4014
1.8K
2
X4001
3.579545MHz
320FHVX01
VCO
REC
BGA
APC
BGA
P
3.58M
BPF1
P
R
V/I
CONV
DETAIL
ENH
NL
EMPHA
CLAMP
R
TESTRP
Y-Vcc Y-GND
150V KA
C4034
R4047
1006.3V KA
C4038
C4035
47uH
L4005
DOC_XO_CTL
P.CON+5V
C4039
SLD
PR
PB
APC
RP
NC
R4064
10K
0.1 F
0305
Y-LPF
L4008
100uH 0305
R4053
6.8K
C4028
0.22 B
C4029
0.056 B
1.4
C-GND
KIL
DET
KIL
KIL
KIL
PB
B.D.
AMP
P
R
GCA
Main
4.21M
CONV
BPF
3.58M
Sub
BPF2
CONV
REC
FM-EQ
S-EQ
FM-EQ
SQPB
VHS
IN
C ROT
RF SW
AUDIO
MUTE
R/P
H.A
11 12 13 14 15 16 17 18 192 20 21 22 23 24 25 26 27 28 293 30
R4068
47K
R4067
V.REC_ST_H
VCR_A_MUTE
C_ROTARY
H.SW
0.1 B
C4080
C4032
0.022 B
2.250V KA
C4031
1016V KA
C4030
NC
4.0 2.3 2.2 3.0 4.1 3.4 4.9 3.4 5.0 5.0 5.0 4.2 2.3 0.1
REG
P
R
C-LPF
BGA
B-UP
AMP
BALANCER
NOMAL
FM
MOD
WC
R-EQ
DOUBLE
DC
TEST
IN
R/P
AUDIO
Y/C
HA SW
47K
R4036
47K
REC/EE/PB
CLOCK
OUT
CLAMP
132
V-AGC
4.81.02.102.83.42.00.21.05.01.604.9000.80.80.8005.0NC5.01.52.42.402.42.42.42.4
C4048 0.01 B
515253545556575859660616263646566676869770717273747576777879
VCP
SYNC
DET
AFC
AGC
TC2
27K
C4049
OUT
IN
W836
C4050
220P CH
0
50
2.2
0
VSS VSS
2.7
2.5
3.0
3.2
2.8
2.8
4.9
2.8
40 41 42 43 44 45 46 47 48 49
NC
3.5
2.5
1.5
1.0
3.0
4.3
4.4
NC
0
4.6
31 32 33 34 35 36 37 38 39
180P CH
TRICK_PB-H/EE-H
S103YS103X
C4055
0.1 F
C4073
47P CH
2.2
C4058
226.3V KA
C4060
4.750V KA
C4007
C4052
0.01 B
R4057 2.2K
C4053 0.01 B
C4057 4716V KA
R4055 8.2K
R4078 100
C4054
0.047 B
R4024 10K
W849
SP/LP/EP-H
W896
2.2K
R4065
2.6
BUFFER
Q4009
2SA1037K
0
R4039
C4059
150V KA
4.725V KA
W815
1
2.0
BUFFER
2SA1037AK
33K
Q4007
R4060
220K
C4061 150V KA
R4063 3.3M
R4056 1M
C4062 150V KA
C4071
150V KA
R4052
33 1/4W
R4006
R4016
33 1/4W
100
2.6
0
C4008
EP SW.
Q4008
2SC2412K
4.2 5.0
4.8
CAUTION: DIGITAL TRANSISTOR
R4062
220K
D4005
MTZJ6.8B
C4082
0.047 B
L4009
100uH
0305
C4076
C4077
1006.3V KA
0.1 B
0.1 B
TU_VIDEO
DUMMY_V.SYNC
P.CON+5V
Y/C_VIDEO
SD_VIDEO
FROM/TO IN/OUT
FRONT_AUDIO
FRONT_VIDEO
Y/C_AUDIO
Y/C_VIDEO
FROM/TO MICON
SP/LP/EP-H
TRICK_PB-H/EE-H
V.REC_ST_H
C_ROTARY
VCR_A_MUTE
REC/EE/PB
DUMMY_V.SYNC
CTLCTL+
DOC_XO_CTL
INPUT_SEL
COMP
ENV_DET
H.SW
SD_VIDEO
FROM/TO CHROMA/IF
TU_VIDEO
TU_AUDIO
CHROMA_VIDEO
Y/C_AUDIO
H.SYNC
PLAYBACK LUMINANCE SIGNAL
PLAYBACK VIDEO SIGNAL
AUDIO SIGNAL(REC)
AUDIO SIGNAL(PB)
TUNER VIDEO SIGNAL
PCB010
VMX180
8
7
6
5
4
3
2
1
ABC D E F GH
G-2G-1
Page 23
8
7
6
5
FROM/TO DECK
CP1006
IMSA-9604S-04Z14
1
2
3
4
4
FROM/TO MICRO MOTOR
CP1005_1
IMSA-9604S-05Z14
5
4
3
3
2
1
2
FROM/TO CAPSTAN DD UNIT
CP1004
TMC-J08P-B1
1
2
3
4
5
6
7
1
8
ABC D E F GH
MICON SCHEMATIC DIAGRAM
(SYSCON PCB)
SDA
SCL
C1044
220P CH
C1045
220P CH
150P CH
R1044
3.3K
00
JUST CLOCK
AFT(MONI)
D1007
AFT_M
REEL_S
C1060
150P CH
220
220
R1038
R1042
4.9 0 4.8 4.8 4.9
IIC-CLK1
FF/REW-L
AFT(REC)
MTZJ6.8B
IIC-DATA2
IIC-DATA1
KEY B
CAP-FWD
KEY A
11 12 13 14 15 16 17 18 192 20 21 22 23 24 25 26 27 28 293 30
9
D1008
MTZJ6.8B
C1039
KEY_A
KEY_B
C1074
0.1 B
REEL_T
4.7K
R1046
47K
R1019
1.2 0
1
00.9
REEL SENS
Q1005
SG-260
CENTLED
V.REC_ST_H
DOC_XO_CTL
TRICK_PB-H/EE-H
R1053
TRICK PB-H
CAP-LIMIT
0.1 B
DUMMY_V.SYNC
4.7K
R1047
2
34
CENTER LED
DUMMY-V.SYNC
0
CAP FULL
V-REC-ST-H
YC DOC/XO CTL
HEAD.AMP.SW
COLOR ROTARY
REMOCON-IN
NC
REMOCON_IN
1006.3V KA
C1058_1
SYSTEM RESET IC
IC1002 PST600H
GND OUTIN
123
D1002
1SS133
2.2
MMTV
C1051
CRITICAL FOR SAFETY,USE ONES
DESCRIBED IN PARTS LIST ONLY
OSD_R
OSD_G
R1021 10
R1007 10
220
C1009 220PCH
R
ENV-CMP-IN
TP1002
JWF-50K-1
COMP
5.25.1 0
C1017
OSD_B
R1035 10
C1010 220PCH
G
B
HI-FI-H.SW
VIDEO-H.SW
8
H.SW
0.1 B
C1071
100P CH
OSD_BLK
REC/EE/PB
C1004
100P CH
R1036 4.7K
C1037 390PCH
C1023 220PCH
V-SYNC
OSD OUT1
REC-H/EE-M/PB-L
50 TAB SW
49 OSD-VSS
48 CM_ADV_AUDIO/AV2
33 INPUT_SELC
32 RENT_H
31 ON-TIMER LED
DEGAUSS_H
LDM-FWD
LDM-RVS
LDM_R
LDM_F
H/C-SYNC
SENS LED
NC
SEN_LED
RESET
R1049
ARESINCE THESE PARTS MARKED BYCAUTION:
0.1 F
C1035
200P CH
C1031
0.001 B
0
NUA
SP-H
4.7K
C1041
0.1 B
C1034
CVIN
IIC-OFF
5.2
IIC_OFF
NC
R1001
R1051
C1021
SERVICE
NC
1K
R1031
HLF
VHOLD
OSD-VCC
CM_ADV_VIDEO/AV1
TUNER_CONTROL
X-RAY_TEST
X-OUT(12MHz)
X-IN(12MHz)
XC_OUT(32KHz)
XC_IN(32KHz)
EXT-MUTE
VCR-POWER
TV-POWER
3.3K
5.6K
10006.3V YK
C1003_1
3316V KA
R1032
10K
TP1001
5
6
R1033
1K
NC
5.25.22.11.62.34.24.905.10002.502.62.52.51.8
515253545556575859660616263646566676869770717273747576777879880
SD-IN(MONI)
NUB
OSC-OUT2
OSC-IN2
CLKSEL
VSS
VCC
RESET-L
T-REC LED
T-REC_LED
C1014
SERVICE
REC LED
REC_LED
0.1 F
C1038
NC
NC
NC
NC
NC
820P CH
L1001
2.2uH
R1040
33K
7
X1001
12MHz
C1049 22P CH
X1002
32.768KHz
C1050 20P CH
0.1 B
C1068
2.5
2.6
5678
SDA
SCL
EEP ROM IC
VSS
A2
IC1099 S-24C02BDP-11
50
5.2
0
0
0
0
2.6
2.5
5.2
0
0
40 41 42 43 44 45 46 47 48 49
0
2.6
2.1
5.2
1.3
1.5
5.2
0
0
31 32 33 34 35 36 37 38 39
0
R.SIGNAL
G.SIGNAL
B.SIGNAL
PLAYBACK VIDEO SIGNAL
TUNER VIDEO SIGNAL
DEFLECTION SIGNAL
CAPSTAN AFC SIGNAL
CYLINDER AFC SIGNAL
CYLINDER APC SIGNAL
DANGEREUSES AN POINT DE VUE SECURITE
N’UTILISER QUE CELLS DECRITES
DANS LA NOMENCLATURE DES PIECES
C1046 20P CH
C1047 18P CH
C1040 18P CH
C1048 18P CH
RESET
INPUT_SEL
C1030
0.1 B
5.20
VCC
TEST
A1
A0
1234
0000
ETANTLES PIECES REPAREES PAR UNATTENTION:
C1062
0.1 B
1M
R1034
C1026
0.1 B
C1042
0.1 B
TV_POWER_H
VCR_POWER_H
R1004
1K
C1043
0.1 B
CAUTION: DIGITAL TRANSISTOR
FROM/TO Y/C/AUDIO/HEAD AMP
H.SW
DOC_XO_CTL
REC/EE/PB
SP/LP/EP-H
TRICK_PB-H/EE-H
SD_VIDEO
ENV_DET
VCR_A_MUTE
CTL+
CTLC_ROTARY
DUMMY_V.SYNC
V.REC_ST_H
COMP
INPUT_SEL
FROM/TO CHROMA/IF
HD
VD
AFT_M
SCL
SDA
OSD_R
OSD_G
OSD_B
OSD_BLK
AT+5V_BACKUP
AT+5V
VCR_POWER_H
TV_POWER_H
FROM/TO IN/OUT
IIC_OFF
TV_POWER_H
REC_LED
T-REC_LED
KEY_A
KEY_B
REMOCON_IN
SCL
SDA
TO SOUND AMP
TV_POWER_H
TV_A_MUTE
FROM/TO DEFLECTION
X_RAY
X-RAY_TEST
TV_POWER_H
PCB010
VMX180
VCC
BOT
LDMLDM+
CYL DRIVE
CYL GND
CYL FG
CYL +B
CYL PG
GND
MOTOR_GND
I LIMIT
CTL
VCO
FG
CAP/M/F/R
VCC(5V)
FROM/TO POWER
DEGAUSS_H
GND
POWER_FAIL
P.CON+5V
AT+12V
MOTOR_GND
TV_POWER_H
LOADING MOTOR DRIVER IC
IC1003 BA6955AN
CONTROL LOGIC
POWER
SAVE
12345678
012.1 00 10.8 0 10.9 12.1
LDM_F
PNA2604M010R
LED DRIVER
Q1024
DTC143EKA
D1004
RD12FB
LM-
LDM_R
EOT SENSOR
Q1013
0.1
5.0
R1016
270 1/4W
5.1
R1005
2.7 1W
EOT
R1011
0
0
R1010
3.3K
STD
2.2K
D1003
BOT
R1003
SID1050CM
D1013
11EQS04N
CYL_DRIVE
C1066
0.1 B
D1005
11E1-EIC
LM+
D1001
11E1-EIC
C1002
0.001 Y
82K
R1018
SW1001
SPVF130100
C1064
47016V YK
CYL_FG
CYL_PG
CAP_CTL
CAP_FG
CAP_F/R
10025V YK
C1001
CENTLED
4.7K
4
1
23
LMLM+
C1005
0.001 Y
C1063
X_RAY
VCR_A_MUTE TAB_SW
TV_A_MUTE
SP/LP/EP-H
CAP_FG
CYL_FG
CYL_PG X-RAY_TEST
CTLCTL+
FF/REW_SW
DTC124EKA
TAB_SW
C_ROTARY
0.1 F
W814
THE DC VOLTAGE AT EACH PART WAS
NOTE:
MEASURED WITH THE DIGITAL TESTER
DURING PLAYBACK
H.SW
CAP_F/R
Q1004
C1025
R1064
5.1
0.1 B
1K
W859
R1012
0
0
C1072
10K
R1008
12
C1022
0.1 B
1F
1K
CAP_CTL
CYL_DRIVE
4.7K
R1028
5.9
0.2
X_RAY_SW
Q1023
2SC2412K
0
4.7K
R1075
R1077
1K
C1013 0.0039 B
C1019
0.001 CH
C1027
0.0039 B
9
W895
R1024
1K
1.3
SENSOR SW
Q1002
2SC2412K
MS_SEN B
Q1003
GP1S94L
NOTE:THIS SCHEMATIC DIAGRAM IS THE LATEST AT THE TIME
D1014
MTZJ5.1B
R1039 18K
11
10
C1015 4710V KA
C1016 2216V KA
C1018 4.750V KA
R1009 560
R1013 560
C1020
1016V KA
TIMER SYSCON MICON IC
IC1001
OEC7043A
SEN_LED
KA
2206.3V
1K
R1066
C1032
R1079
22 1/4W
5.1
1.2 5.2
23
1
4
1.4
0.8
56K
R1083
OF PRINTING AND SUBJECT TO CHANGE WITHOUT NOTICE
REEL_T
0.1 F
C1065
R1029
4.7K
W810
818283848586878889
0
REEL-T
5.1
5.1
NC
5.1
POWER_FAIL_L
5.9
CFG AMP-OUT
2.6
CAP-FG
2.5
AMP-VSS
0
DRUM-FG
2.0
DRUM-PG
90919293949596979899
0.6
AMP-VREFOUT
2.5
AMP-VREFIN
2.5
C
0.2
CTL-
0
CTL+
2.5
AMP C
2.6
CTL AMP-OUT
2.5
5.1
5.2
MSSEN-A
100
0
110
1.4 1.4 0 0 2.4 2.2 5.2 5.2 0 2.2 0 0 5.2 2.3 2.6 2.6NC00000 0.15.25.200
MS_SEN-A
MS_SEN-B
MS_SEN A
Q1009
GP1S94L
5.20.8
23
1
4
1.4
0.5
100
R1087
R1050
REEL_S
C1028
R1017 33K
NC
0.90.9
REEL-S
E/V_MASK/PLAY_LED
MSSEN-B
EOT
4
MS_SEN-B
EOT
BOT
MS_SEN-A
56K
0.1 B
C1061
C1029
0.01 B
R1020 22K
3.3K
R1045
NC NC
CAP-PWM
AGC(REC)
DRUM-PWM
81 VCR_A_MUTE
82 TV_A_MUTE
83 SP/LP/EP-H
84 CA/MA_SEL
98 AMP-VCC
99 ANALOG VCC
100 DEW
HI-FI-ENV
BOT
VIDEO-ENV
5
00
ENV_DET
120
R1002
47K
R1006
1.22.4
2
1
34
00.9
REEL SENS
Q1001
SG-260
ABC D E F GH
8
7
6
5
4
3
2
1
G-4G-3
Page 24
ABC D E F GH
8
123
IIC_OFF
SDA
12345
SCL
GND
R4005
1.5K
TEST POINT
C4014_1
CP1003
173979-4
0.047 M
6
7
CP351_1
TEST POINT
8283_0612_00_000
B.OUT
INT-MONI
P.CON+5V
Y/C_AUDIO
4
GND
Y/C_VIDEO
1102345678
CP757_2
1-173979-0
KEY_B
(CD757)
FROM/TO OPERATION
NC
REC_LED
T-REC_LED
KEY_A
6
5
FROM/TO MICON
IIC_OFF
IN/OUT SCHEMATIC DIAGRAM
(SYSCON PCB)
9
GND
AT+5V
POWER_ON_L
REMOCON_IN
NC
D4202
SB10-03A3
1234567
CP353_1
173979-7
GND
(CD351)
SP_OUT
FROM/TO OPERATION
SOUND_OUT
SOUND_GND
FRONT_AUDIO_IN
GND
FRONT_VIDEO_IN
FROM/TO SOUND AMP
SOUND_GND
SOUND+
SP_OUT
FROM CHROMA/IF
AT+5V
INT-MONI
B.OUT
8
7
6
5
SDA
SCL
T-REC_LED
REC_LED
4
KEY_B
KEY_A
REMOCON_IN
TV_POWER_H
3
FROM/TO Y/C/AUDIO/HEAD AMP
Y/C_AUDIO
Y/C_VIDEO
FRONT_AUDIO
FRONT_VIDEO
W822
0
3.6
REC LED SW
0
Q1007
DTC114EK
3.6
0
T-REC LED SW
DTC114EKA
0
Q1008
C1024
TV POWER SW
DTC114EKA
0.1 B
0.1 B
C1033
D4207
MTZJ6.8B
2
Q4204
0
4.5
0
C4204
470P CH
W889
W881
S108X S108Y
B4201
BL02RN1-R62
R4201
75
FROM POWER
GND
P.CON+5V
4
3
2
B.SIGNAL
PLAYBACK VIDEO SIGNAL
TUNER VIDEO SIGNAL
AUDIO SIGNAL(REC)
CAUTION: DIGITAL TRANSISTOR
AUDIO SIGNAL(PB)
THE DC VOLTAGE AT EACH PART WAS
1
NOTE:
MEASURED WITH THE DIGITAL TESTER
DURING PLAYBACK
NOTE:THIS SCHEMATIC DIAGRAM IS THE LATEST AT THE TIME
OF PRINTING AND SUBJECT TO CHANGE WITHOUT NOTICE
PCB010
VMX180
1
ABC D E F GH
G-6G-5
Page 25
ABC D E F GH
CHROMA/IF SCHEMATIC DIAGRAM
8
7
6
5
4
3
2
1
FROM/TO MICON
AT+5V
AT+5V_BACKUP
VD
OSD_R
OSD_G
OSD_B
OSD_BLK
SDA
SCL
AFT_M
VCR_POWER_H
HD
TV_POWER_H
1213
1.8
1
AGC
2
NC
2.5
3
2.5
4
SCL
2.5
5
SDA
6
NC
4.9
7
+5V
8
NC
29.3
9
+30V
10
NC
TU601 TECC1040PG32A
0
11
IF
1415
FROM/TO POWER
AT+30V
GND
UNREG+8V
AT+25V
P.CON+8V
W871
R.SIGNAL
G.SIGNAL
B.SIGNAL
DEFLECTION SIGNAL
AUDIO SIGNAL(REC)
AUDIO SIGNAL(PB)
PLAYBACK VIDEO SIGNAL
TUNER VIDEO SIGNAL
C601
R602
C604
150V KA
220
100P CH
R684
R603
C605
75
220
C609
C610
0.1 B
C607
0.1 B
100P CH
CAUTION: DIGITAL TRANSISTOR
(SYSCON PCB)
22035V YK
C678_1
2216V KA
R633
C649
TV/Y IN
VIDEO CHROMA Vcc
V RAMP FEEDBACK
POWER ON CONT
D609 MTZJ6.8B
R658 2.2K
R634
R.OUT
VCR_POWER_H
11.0 8.2
L610
56uH
8.2K
150V KA
3.2
CHROMA APC FILTER
V PULSE OUT
SPOT KILLER
V RAMP CAP
STRAT UP Vcc
R OUT
R659 2.2K
100
R635
R632
220 2W
REG.
Q603
2SC2120Y
REG.
Q604
2SD400E
5.0 8.3
5.6
100
R663
100
R628
2216V KA
2216V KA
C644
47010V YK
NCNC
Y SW OUT
5.7V REG OUT(FOR CPU)
DEF
R656 1K
1K
R657
S802X
S801X
S801Y
R630
C692_1
0.1 B
H.SYNC
SDA
REG.
Q605
2SD400E
5.08.3
R629
5.6
100
C640
0.1 B
C646
D607
1SS133
5.6 0 0 3.2
5v REG
VIDEO/CHROMA GND
34 EXT C in
33 8.7V REG OUT
32 X’TAL
31 ACL/ABCL
17 V OUT
16 B OUT
AFC FILTER
H.PLUSE OUT
SDA
150V KA
C645
C647
0.01 B
R631
6.8K
R687 680K
100
5.5
C642
64 VIF IN
1 VIF IN
SCL
5
100
SCL
R662
10K
R625
6
R626 10K
W829
H.PLUSE
4.8 8.3
D608
5.5
SB10-03A3
100
2216V KA
C643
C679
MCU RESET
INTELLIGENT MONI
H OUT
FBP IN
789
R677 10K
H_OUT
AT+5V
REG.
4.8 8.0
Q602
2SC2120Y
W876
C667
TU_VIDEO
L607
12uH
180
R622
CF603
10K
C625
1F
1F
C691_1
0.1 B
C627 0.47 B
C677
220P CH
C626
0.1 B
C622
0.1 B
SAW FILTER
CF601
SAF45MFY220ZR
1uH
L605
R621
EFCT4R5YS5A
W888
W848
C632
150V KA
C634
0.01 B
CHROMA IC
M61203BFP
2.2K
C687_1
NOTE:THIS SCHEMATIC DIAGRAM IS THE LATEST AT THE TIME
OF PRINTING AND SUBJECT TO CHANGE WITHOUT NOTICE
L603
100uH
C612_1
47010V YK
C613
2.250V KA
0.1 B
27K
R605
INT-MONI
AUDIO_OUT
Y/C_AUDIO VD
TU_AUDIO
D601 1SS133
R607 1K 1/2W
R609 680
C618
AFT_M
R601
2.2K
R667
1.5K
L601
1uH
THE DC VOLTAGE AT EACH PART WAS
NOTE:
MEASURED WITH THE DIGITAL TESTER
DURING PLAYBACK
W887
C617 0.01 B
W801
R611 10K
C623 0.0033 B
D602 MTZJ8.2B
C624
100P CH
0.01 B
R614 100K
12345
C616
0.01 B
C669
0.1 B
R608
C631
4716V KA
C621
OUTOUTGININ
0.01 B
CF604
EFCT4R5MW5
470
C636
R615
2.3
49
2.4
50515253545556575859
2.3
AUDIO BYPASS
3.0
EXT AUDIO IN
2.0
FM DIRECT OUT
3.2
VIF VCO F/B
9.0
VREG Vcc
3.0
VIF APC FILTER
2.2
VIF VIDEO OUT
0
VIF GND
0
2.4
AFT OUT
6061626364
2.9
QIF IN
2.3
RF AGC OUT
2.7
IF AGC FILTER
1.5
1 10111213141516
IC601
C637
100P CH
0.1 TF
YK
47010V
C641_2
1.8K
0.01 B
R688
2.0 2.0 8.2 8.2 8.2 4.0 4.8 5.5
Hi Vcc
46 SW REG CONT
47 LIMITER IN
48 IF AGC
49 QIF OUT
50 AUDIO OUT
H VCO F/B
VIF Vcc
2
3
C639
0.01 B
2K
R624
B602
BL02RN1-R62
R655
REG.
Q606
8.8
2SD863
W894
C693
220P B
4725V KA
100
R644
C652_1
C654
C672 0.01 B
C650
0.015 B
2.0
8.8
333435363738394404142434445464748
3.3
3.0
0
R IN
30 31 32
4.7
0
G OUT
FAST BLK
fsc OUT
D610 MTZJ6.8B
G.OUT
0.1
7.3
NC
4.9
4.9
4.8
2.0
0
B IN
20 21 22 23 24 25 26 27 28 29
8.0
8.0
3.7
17 18 19
G OUT
3.04.0 4.8 2.84.03.33.02.6 0 00.43.22.55.05.01.5
D611
R636 100
R660 2.2K
100
B.OUT
CRITICAL FOR SAFETY,USE ONES
DESCRIBED IN PARTS LIST ONLY
D615
MTZJ6.8B
C653
MTZJ6.8B
C657
R610
18PCH
X602
C673
3.579545MHz
C659
0.01 B
0.01 B
1M
4716V
C655
W865
C648
0.150V KA
L612
220P B
KA
FROM/TO Y/C/AUDIO/HEAD AMP
CHROMA_VIDEO
R686
1K 1/2W
D618
1SS133
5.0
TU_VIDEO
TU_AUDIO
Y/C_AUDIO
H.SYNC
TO IN/OUT
INT-MONI
B.OUT
AT+5V
FROM/TO SOUND AMP
S107Y
AUDIO_OUT
FROM/TO DEFLECTION
GND
V_OUT
ACL
V_FEEDBACK
180V
HEATER
H_GND
H_OUT
H.PLUSE
F_P.CON+15V
CP851A
51048-1000
NC
NC
R678
0
8.0
0
TO CRT
GND
10
CUT OFF
9
G.OUT
8
B.OUT
7
R.OUT
6
NC
5
HEATER
4
H_GND
3
NC
2
180V
1
4.7K 1/4W
POWER FAIL SWITCH
Q611
DTC114EKA
PCB010
VMX180
FROM POWER
AT+12V
POWER_FAIL
100
R654
C674
6.8uH
R676
C660
W874
4716V KA
0.1 B
R639
R640
120P CH
1K
1.5K
180
R638
15K
W827
D617 MTZJ6.8B
D616 MTZJ6.8B
C684 0.022 B
D604
1SS133
ARESINCE THESE PARTS MARKED BYCAUTION:
0.1 B
D606
1SS133
R646
22K
R642
10K
0.22 B
0.082 B
W850
C666
S802Y
R650
470 1/4W
C662
S106YS106XS105YS105X
C661
0.01 B
C665
R643
47K
C658
C688
C664 1 MMTS
R641 18K
R649 2.2K
04.5
0
R685
1016V KA
1016V KA
R648
2.2K
D605
11ES1-EIC
R647
2.2K
C690 330P CH
OSD_BLK
R652
4.7K
C630
100P CH
C668 0.001 CH
V_OUT
D619 1SS133
D620
D621 1SS133
SYNC SW
Q612
2SC2412K
1.8K
CUT OFF
Q608
2SA1037AK
0.4
R651
100
DANGEREUSES AN POINT DE VUE SECURITE
N’UTILISER QUE CELLS DECRITES
DANS LA NOMENCLATURE DES PIECES
1SS133
W872
OSD_R
OSD_G
OSD_B
HD
W878
W886
CUT_OFF
G.OUT
B.OUT
R.OUT
HEATER
H_GND
180V
1.0
0
TV_POWER_H
W885
1SS133
D613 1SS133
D612 1SS133
D614
0.8
R683
100
POWER ON SWITCH
Q609
DTC114EKA
ETANTLES PIECES REPAREES PAR UNATTENTION:
0
8
7
6
5
4
3
S001X
2
1
G-7
ABC D E F GH
G-8
Page 26
ABC D E F GH
8
7
FROM/TO IN/OUT
SP_OUT
SOUND+
SOUND_GND
(S802)
6
5
FROM MICON
TV_A_MUTE
TV_POWER_H
FROM CHROMA/IF
AUDIO_OUT
SOUND AMP SCHEMATIC DIAGRAM
(SYSCON PCB)
W855
5678
08.2 3.5 3.4
8
7
6
5
-+
SOUND AMP IC
IC351 AN7511
R359
4.7K
R353
47K
0.0047
68K
2.250V KA
C351
220010V YK
C354
4
FROM POWER
SOUND+B
GND
SOUND_GND
TO CHROMA/IF
3
S107X
W803
C353
0.1 B
C355
1016V KA
R357
5.6K
R352
2
0
C301
1234
3.95.1 0.3
4
B
1016V KA
C356
3
2
AUDIO SIGNAL(REC)
PCB010
VMX180
THE DC VOLTAGE AT EACH PART WAS
NOTE:
1
MEASURED WITH THE DIGITAL TESTER
DURING PLAYBACK
NOTE:THIS SCHEMATIC DIAGRAM IS THE LATEST AT THE TIME
OF PRINTING AND SUBJECT TO CHANGE WITHOUT NOTICE
CRITICAL FOR SAFETY,USE ONES
DESCRIBED IN PARTS LIST ONLY
ARESINCE THESE PARTS MARKED BYCAUTION:
DANGEREUSES AN POINT DE VUE SECURITE
N’UTILISER QUE CELLS DECRITES
DANS LA NOMENCLATURE DES PIECES
ETANTLES PIECES REPAREES PAR UNATTENTION:
1
ABC D E F GH
G-10G-9
Page 27
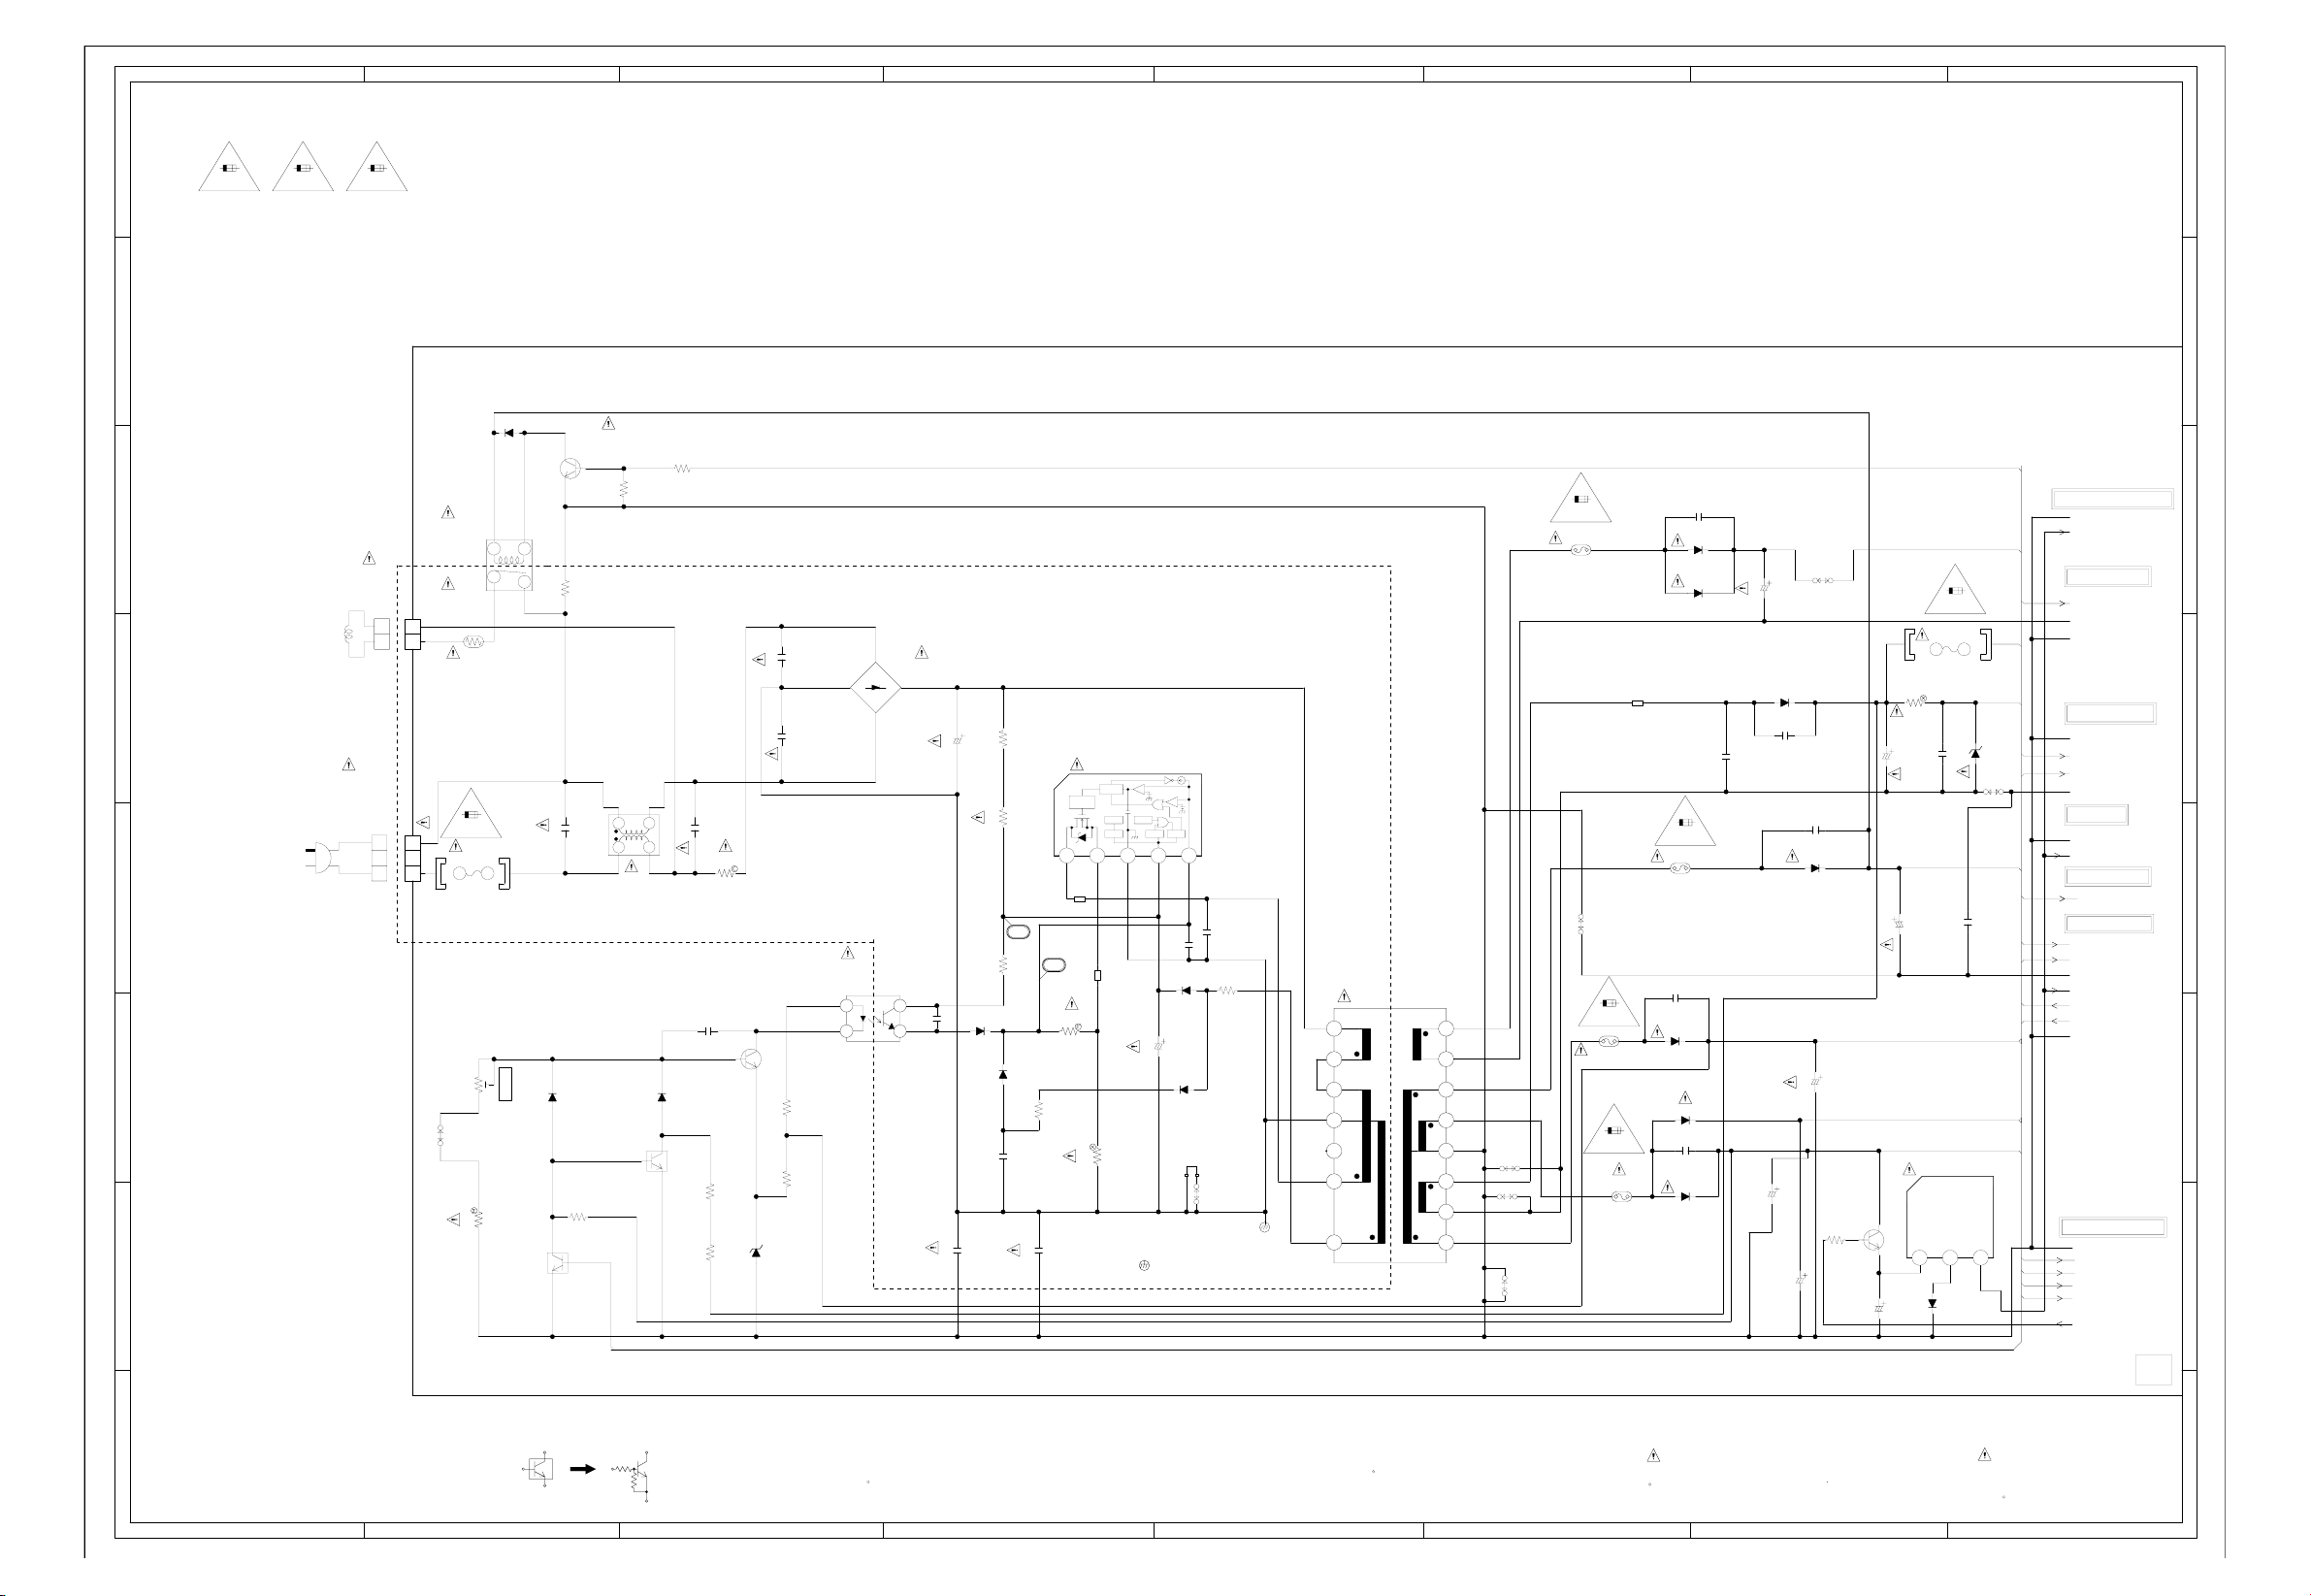
ABC D E F GH
8
5A 125V
CAUTION:
FOR CONTINUED PROTECTION AGAINST FIRE HAZARD,
REPLACE ONLY WITH THE SAME TYPE FUSE
(F501,ICP501,ICP502,ICP503),2.5A 250V(F502),
AND 4A 125V(ICP505).
ATTENTION: POUR UNE PROTECTION CONTINUE LES RISQUES D’INCEIE
N’UTILISER QUE DES FUSIBLE DE MEME TYPE
(F501,ICP501,ICP502,ICP503),2.5A 250V(F502),
ET 4A 125V(ICP505).
CAUTION: ICP501,ICP502,ICP503,AND ICP505 ARE MANUFACTURED BY
LITTELFUSE INC.,TYPE 251.
2.5A 250V
7
6
DEGAUSS
8R200026
5
AC120V_60Hz
CD501
0R614909
WIDE
BLADE
WHITE
4
BLACK
3
2
4A 125V
COIL
L503
5A 125V
21
21
5A 125V
SDT-S-112LMR
TV-50P-02-A1
1
2
CP501
12
EYF-52BC
RY501
CP502
TH501
PTH451A3R0Q11
THL-P03P-B1
5A 125V
F501
5A125V
233005-MB000
FH502
W904
R529
D516
1SS133
3
FH501
EYF-52BC
+-1%
2.7K 1/4W
SWITCHING
DTC114EKA
+B ADJ
Q513
12
4
VR502
POWER SCHEMATIC DIAGRAM
(SYSCON PCB)
8
7
RELAY DRIVE
Q504
2SC1815Y
0.1
0.7
0
R500
+-10%
2.7M 1/2W
C506
0.1250V ECQUL
SS24V-15045
330
D523
1SS133
5V SWITCHING
DTC114TKA
R513
390 1/4W
0
5V
5.2
0
TV_POWER_H
10K
R523
34
12
L502
D529
0
Q506
R515
10K 1/4W
1SS133
6.8
0
0.1250V ECQUL
C513
2.2 7W
C554
0.0022 B
FEED BACK
SWITCHING
Q507
2SC1815Y
R553
R554
R501
6.0
39K 1/2W
22K 1/2W
D528
15.7
5.4
C503
C502
R533
R532
MTZJ5.6B
0.00222KV B
0.00222KV B
18K 1/4W
12K 1/4W
FEED BACK
IC506
TLP621(GR)
7.3
6.3
DEGAUSS_H
TO Y/C/AUDIO/HEAD AMP
GND
P.CON+5V
TO SOUND AMP
SOUND+B
SOUND_GND
GND
TO DEFLECTION
GND
+B
AT+25V
H_GND
TO IN/OUT
GND
P.CON+5V
TO CHROMA/IF
AT+12V
FROM/TO MICON
AT+12V
POWER_FAIL
MOTOR_GND
P.CON+5V
DEGAUSS_H
TV_POWER_H
GND
FROM/TO CHROMA/IF
GND
AT+30V
POWER_FAIL
AT+25V
UNREG+8V
P.CON+8V
PCB010
VMX180
6
5
4
3
2
21DQ09N
21DQ09N
5A 125V
ICP502
251005RT
5A125V
C505
470P500V B
D507
15DF6
D517
10ELS2N
C519
470P500V B
D519
21DQ09N
C516
D505
D509
470P500V B
C560
SOUND+B
W846
47016V YK
C520
D510
RU2AM
C517
820P2KV BP
0.00222KV BP
C518
470P500V B
D512
21DQ09N
47035V MHE
C523
POWER SW
Q501
100025V MHE
C524_2
2SD863
R505
8.0
100
33010V YK
C522 150V KA
C508
23302.5-MB000
FH503
EYF-52BC
R512
27K 1W
C521
220160V PR
47025V YK
C511
IC501 KIA7805API
8.2
7.2
123
D503
2.5A 250V
F502
2.5A250V
C528
5V REG IC
7.2
SB10-03A3
FH504
EYF-52BC
D515
0.022 F
AT+12V
C527
POWER_FAIL
UNREG+8V
OUTGNDIN
0.2 5.1
+B
AT+30V
MTZJ30B
W875
0.1 B
AT+25V
4A 125V
ICP505
251004RT
4A125V
D501
2
GBL06L-6177
1
4
3
R504
C507
470200V UP
120K 1/2W
R510
120K 1/2W
B505
BL02RN2-R62T4
13
R503
D502
1SS133
0.0022125V MX
D518
C515
3.3K 1/4W
1SS133
0.001 B
10.1
1
1.7
2
34
C509
0.01 B
C529
POWER REG. IC
IC502 STR-G6623
O.S.C
DRIVE
REG.
T.S.D
START
12345
206.0
14
B502
BL02RN2-R62T4
R543
680 1/4W
R506
2.2K
R542
0.18 1W
C530
0.0033125V MX
-+
O.V.P LATCH
C510
IS THE LIVE CONNECTIONCAUTION:
-+
2.515.800
C514_1
C512
0.001 B
D506
RMPG06J
10035V MHE
D521
1SS133
HS502
763WSA0004
R502
22 1/2W
W861
0.00272KV BP
T501_1 8129015S
GND1
165
DC IN
8
153
7
NC
153
NC
6
0
GND
5
0
NC
4
NC
110
3
COL
0
ADJ
1
135V
8.5
SB
16
0
SG
15
11.3
12V
14
8.2
5V
13
0
LG
12
W856
124.5
11
0
W805
10
HG
25.0
25V
9
W880
W817
5A 125V
ICP501
251005RT
5A125V
5A 125V
ICP503_1
251005RT
5A125V
B503
BL01RN1-A63
1
G-11
CAUTION: DIGITAL TRANSISTOR
THE DC VOLTAGE AT EACH PART WAS
NOTE:
MEASURED WITH THE DIGITAL TESTER
DURING PLAYBACK
NOTE:THIS SCHEMATIC DIAGRAM IS THE LATEST AT THE TIME
OF PRINTING AND SUBJECT TO CHANGE WITHOUT NOTICE
CRITICAL FOR SAFETY,USE ONES
DESCRIBED IN PARTS LIST ONLY
ARESINCE THESE PARTS MARKED BYCAUTION:
DANGEREUSES AN POINT DE VUE SECURITE
N’UTILISER QUE CELLS DECRITES
DANS LA NOMENCLATURE DES PIECES
ETANTLES PIECES REPAREES PAR UNATTENTION:
1
ABC D E F GH
G-12
Page 28
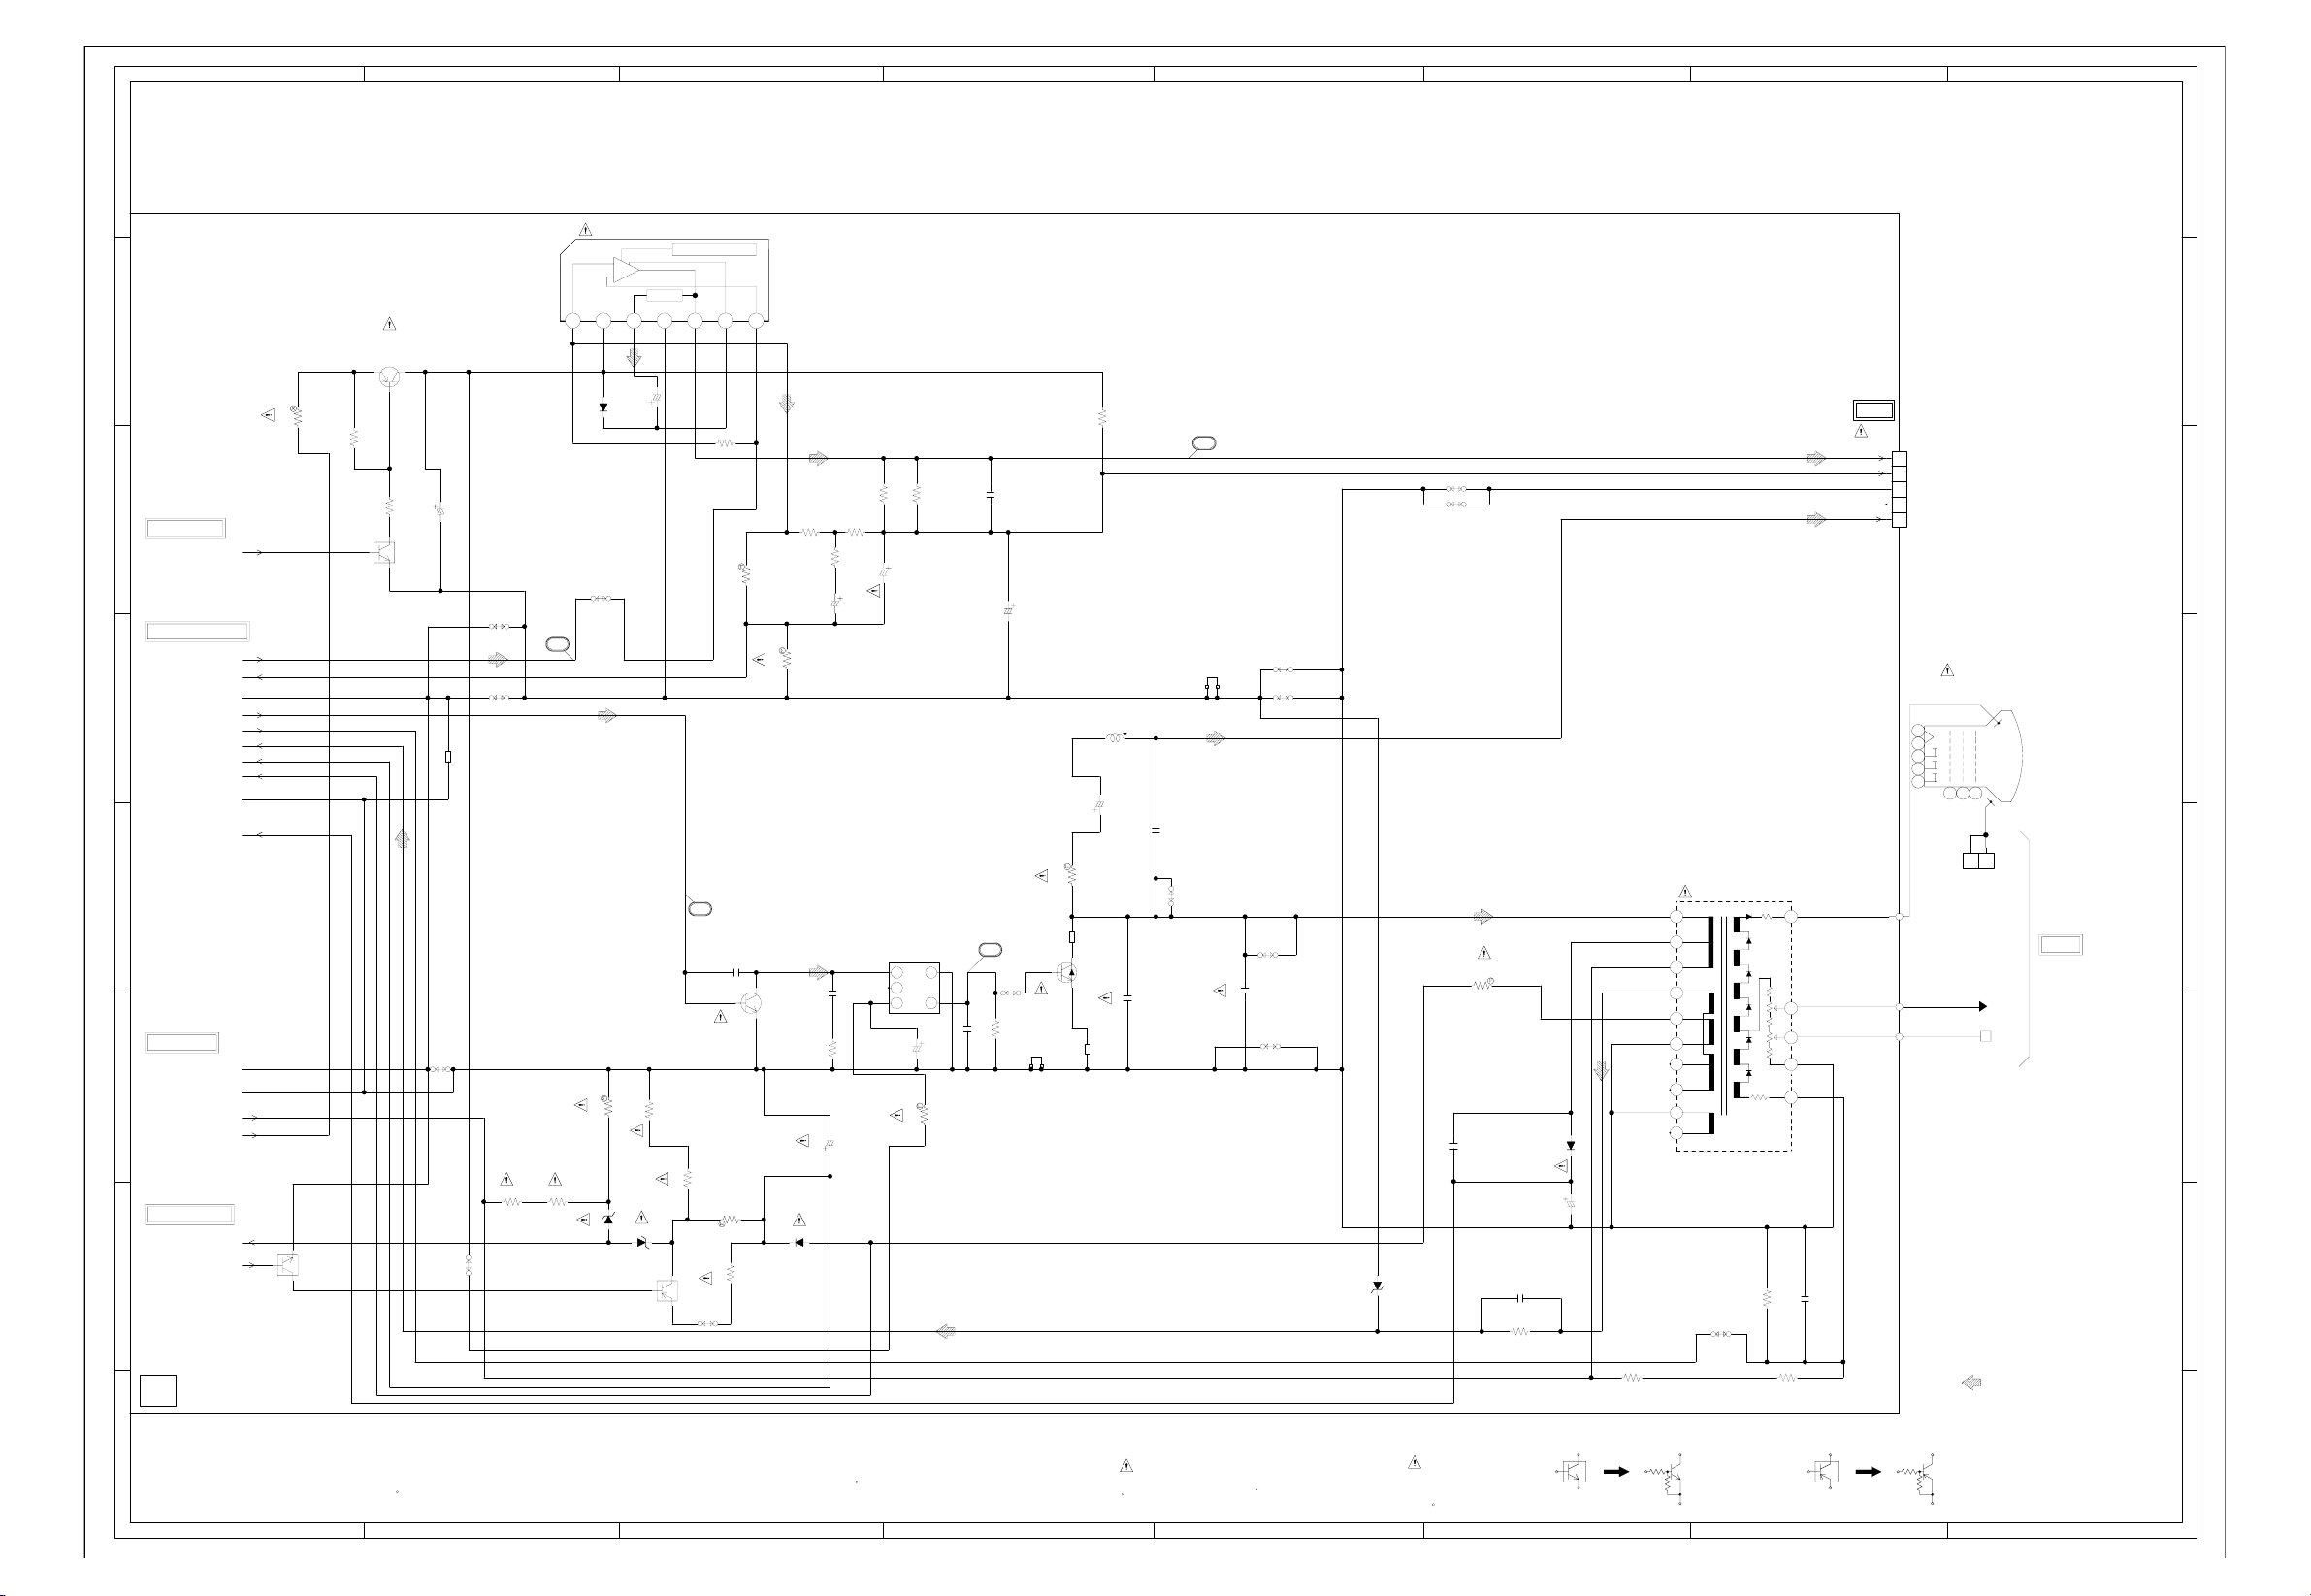
ABC D E F GH
8
7
6
5
4
3
2
PCB010
VMX180
FROM MICON
TV_POWER_H
FROM/TO CHROMA/IF
V_OUT
V_FEEDBACK
H_OUT
H.PLUSE
F_P.CON+15V
HEATER
H_GND
FROM POWER
H_GND
AT+25V
FROM/TO MICON
X_RAY
X-RAY_TEST
GND
ACL
180V
GND
+B
SWITCHING
DTC114TKA
Q403
DEFLECTION SCHEMATIC DIAGRAM
(SYSCON PCB)
V.OUTPUT IC
IC401 LA78040
+
Vcc GND
1234567
DRIVER
Q402
2SB892
26.026.0
25.0
R422
4.7 2W
47K
R402
R410
4.8
SWITCHING
Q401
DTC143EKA
0
4.9
0
2250V MHE
C408
2.7K 1/2W
0.1
0.1
W897
W808
B405
BL01RN1-A63
W813
R441_1
56K
W831
3.6 25.9 2.0 0 12.5 26.3 3.7
D401
11E1-EIC
W838
15
R439
R440_2
51K
D408
SWITCHING
DTA144EKA
AMP
22K +-1%
HZ27-1L
HZ11B3L
Q404
D409
THERMAL PROTECTION
PUMP UP
C406_1
6.8K
R443
10.8
0
0
10035V MHE
R444
18
H-DRIVE
2SC2271
+-1%
22K
W847
R401
470
R411_1
C416
22P CH
0.5
Q405
R442_1
15K +-1%
R420_1
+-1%
8.2K
33K +-1%
31.0
0
R415_1
D412
RMPG06J
R413
3.3K
2.2 1/2W
+-1%
R456
R414
C405
C417
4.7K 1/2W
C433_2
R416
4750V MHE
82K
18K
150V KA
560P500V B
31.0
0.2
22.3
R417
C407
NC
R419
330 1/2W
560 1/2W
100025V YK
T401
305Y002
0
34
2
1
6
1.3
2250V
MHE
C418_2
R449
68 1/4W
C438
680P500V B
C413
17
R460
TF
0.1100V
1050V YK
C403
W816
H.OUTPUT
2SD2627LSCBC11
100 1/4W
HS402
763WSA0004
Q406
1.3
R447
B403
BL01RN1-A63
262.0
0
R421
820 1/2W
L401
4.7mH 0909
1250V MHE
C422_1
68 1/2W
B402
BL01RN1-A63
C424
C423
0.00681.6KV ECWH
0.47250V ECWF
W890
16
HS401_1
763WSA0004
C425
W893
0.00122KV BP
W892
W860
W807
D410
MTZJ6.8B
W857
W837
C430_1
R450_2
2.7 2W
0.001500V B
C420
220P500V B
R423
10K 1/4W
D413
C431
RMPG06J
10250V YK
120K 1/4W
R453
262.0
136.0
135.0
22.3
8.1
NC
NC
1.5
NC
FB401 3219010F
COL
1
E180
6
B+
2
AFC
0
9
HEA
TER
10
GND
8
0
E12
4
E27
3
GND
8
E8
5
W811
GND
ABL
R490
47K 1/4W
68K 1/4W
R454
TO DY
CP401
B05B-DVS
5
4
3
2
NC
1
V801
A48AGY13X77
9
10
R
8
G
6
B
11
HV
F
S
0
11
0.7
7
0.47100V TF
C432
FOCUS
SCREEN
175
2
CD801
8M82025A
1
TO CRT
DEFLECTION SIGNAL
8
7
6
5
4
3
2
1
THE DC VOLTAGE AT EACH PART WAS
NOTE:
MEASURED WITH THE DIGITAL TESTER
DURING PLAYBACK
NOTE:THIS SCHEMATIC DIAGRAM IS THE LATEST AT THE TIME
OF PRINTING AND SUBJECT TO CHANGE WITHOUT NOTICE
CRITICAL FOR SAFETY,USE ONES
DESCRIBED IN PARTS LIST ONLY
ARESINCE THESE PARTS MARKED BYCAUTION:
DANGEREUSES AN POINT DE VUE SECURITE
N’UTILISER QUE CELLS DECRITES
DANS LA NOMENCLATURE DES PIECES
ETANTLES PIECES REPAREES PAR UNATTENTION:
CAUTION: DIGITAL TRANSISTOR
CAUTION: DIGITAL TRANSISTOR
1
ABC D E F GH
G-14G-13
Page 29
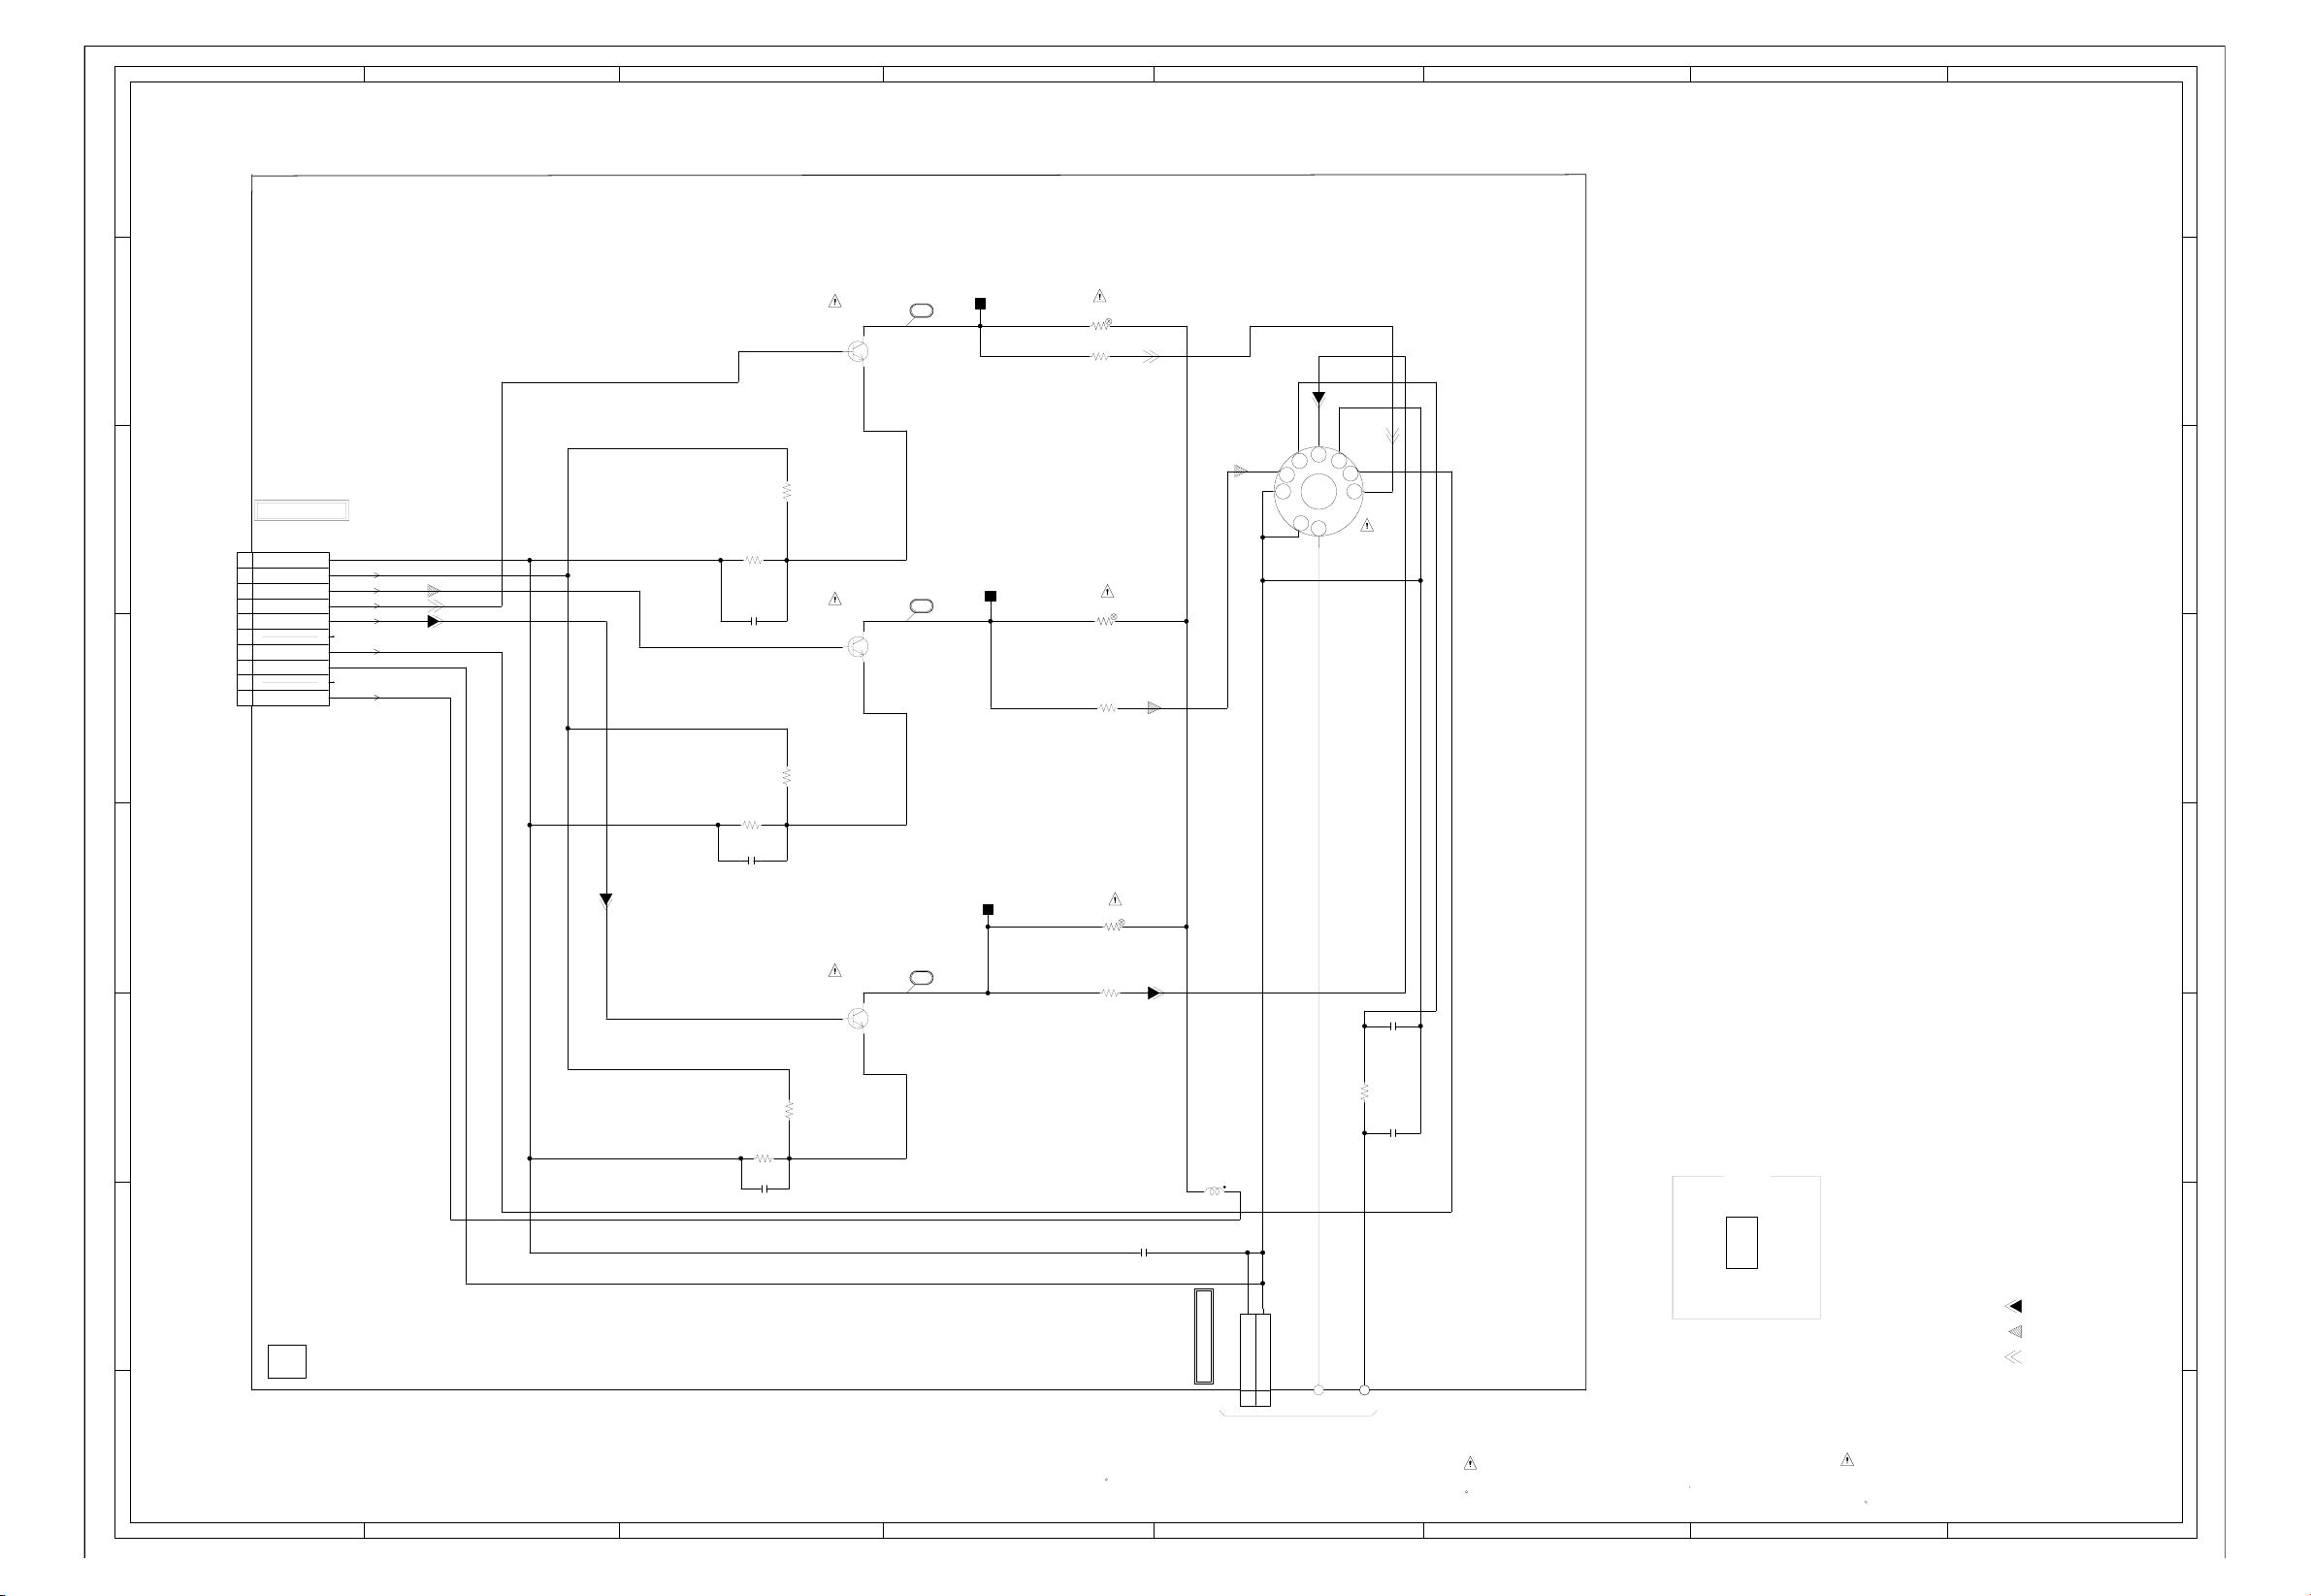
ABC D E F GH
CRT SCHEMATIC DIAGRAM
8
TP801
BLUE AMP
R814
2SC4217
390
GREEN AMP
Q804_1
2.8
Q805_1
2SC4217
2.9
7
10
9
8
7
6
5
4
3
2
1
CP851B
51048-1000
FROM CHROMA/IF
(CP851A)
GND
CUT_OFF
G.OUT
B.OUT
R.OUT
HEATER
H_GND
180V
GND
CUT_OFF
G.OUT
B.OUT
R.OUT
NC
HEATER
H_GND
NC
180V
R811
4.7K
C809_1
820P CH
6
S001Y
5
19
132.5
2.5
TP802
20
132.1
2.5
(SYSCON PCB)
R802
15K 2W
R807
2.7K 1/4W
R805
15K 2W
R808
2.7K 1/4W
132.5
8
7
132.9
789
1
F
0
0
10
132.8
11
J801
CVT3275-5102
6
104.1
6
0
5
0
5
390
R815
R812
4.7K
C810
560P B
4
RED AMP
Q806_1
2SC4217
2.8
21
132.3
2.5
TP803
R810
15K 2W
R820
2.7K 1/4W
C819_1
0.00222KV B
3
R801
390
R816
R813
4.7K
C811
560P B
C805
2
100P CH
L801
100uH
H_GND
H_GND
FOCUS
1M 1/4W
SCREEN
C801
0.00222KV B
ACCESSORY
TM101
HG-23A04
R.SIGNAL
4
3
2
G.SIGNAL
PCB110
TCX312
GND
FROM DEFLECTION
CP801
TS-80P-02-V1
2
GND
1
B.SIGNAL
S801
1
THE DC VOLTAGE AT EACH PART WAS MEASURED
NOTE:
WITH THE DIGITAL TESTER WHEN THE COLOR BROADCAST
WAS RECEIVED IN GOOD CONDITION AND PICTURE IS NORMAL.
NOTE:THIS SCHEMATIC DIAGRAM IS THE LATEST AT THE TIME
OF PRINTING AND SUBJECT TO CHANGE WITHOUT NOTICE
CRITICAL FOR SAFETY,USE ONES
DESCRIBED IN PARTS LIST ONLY
ARESINCE THESE PARTS MARKED BYCAUTION:
DANGEREUSES AN POINT DE VUE SECURITE
N’UTILISER QUE CELLS DECRITES
DANS LA NOMENCLATURE DES PIECES
ETANTLES PIECES REPAREES PAR UNATTENTION:
1
ABC D E F GH
G-16G-15
Page 30
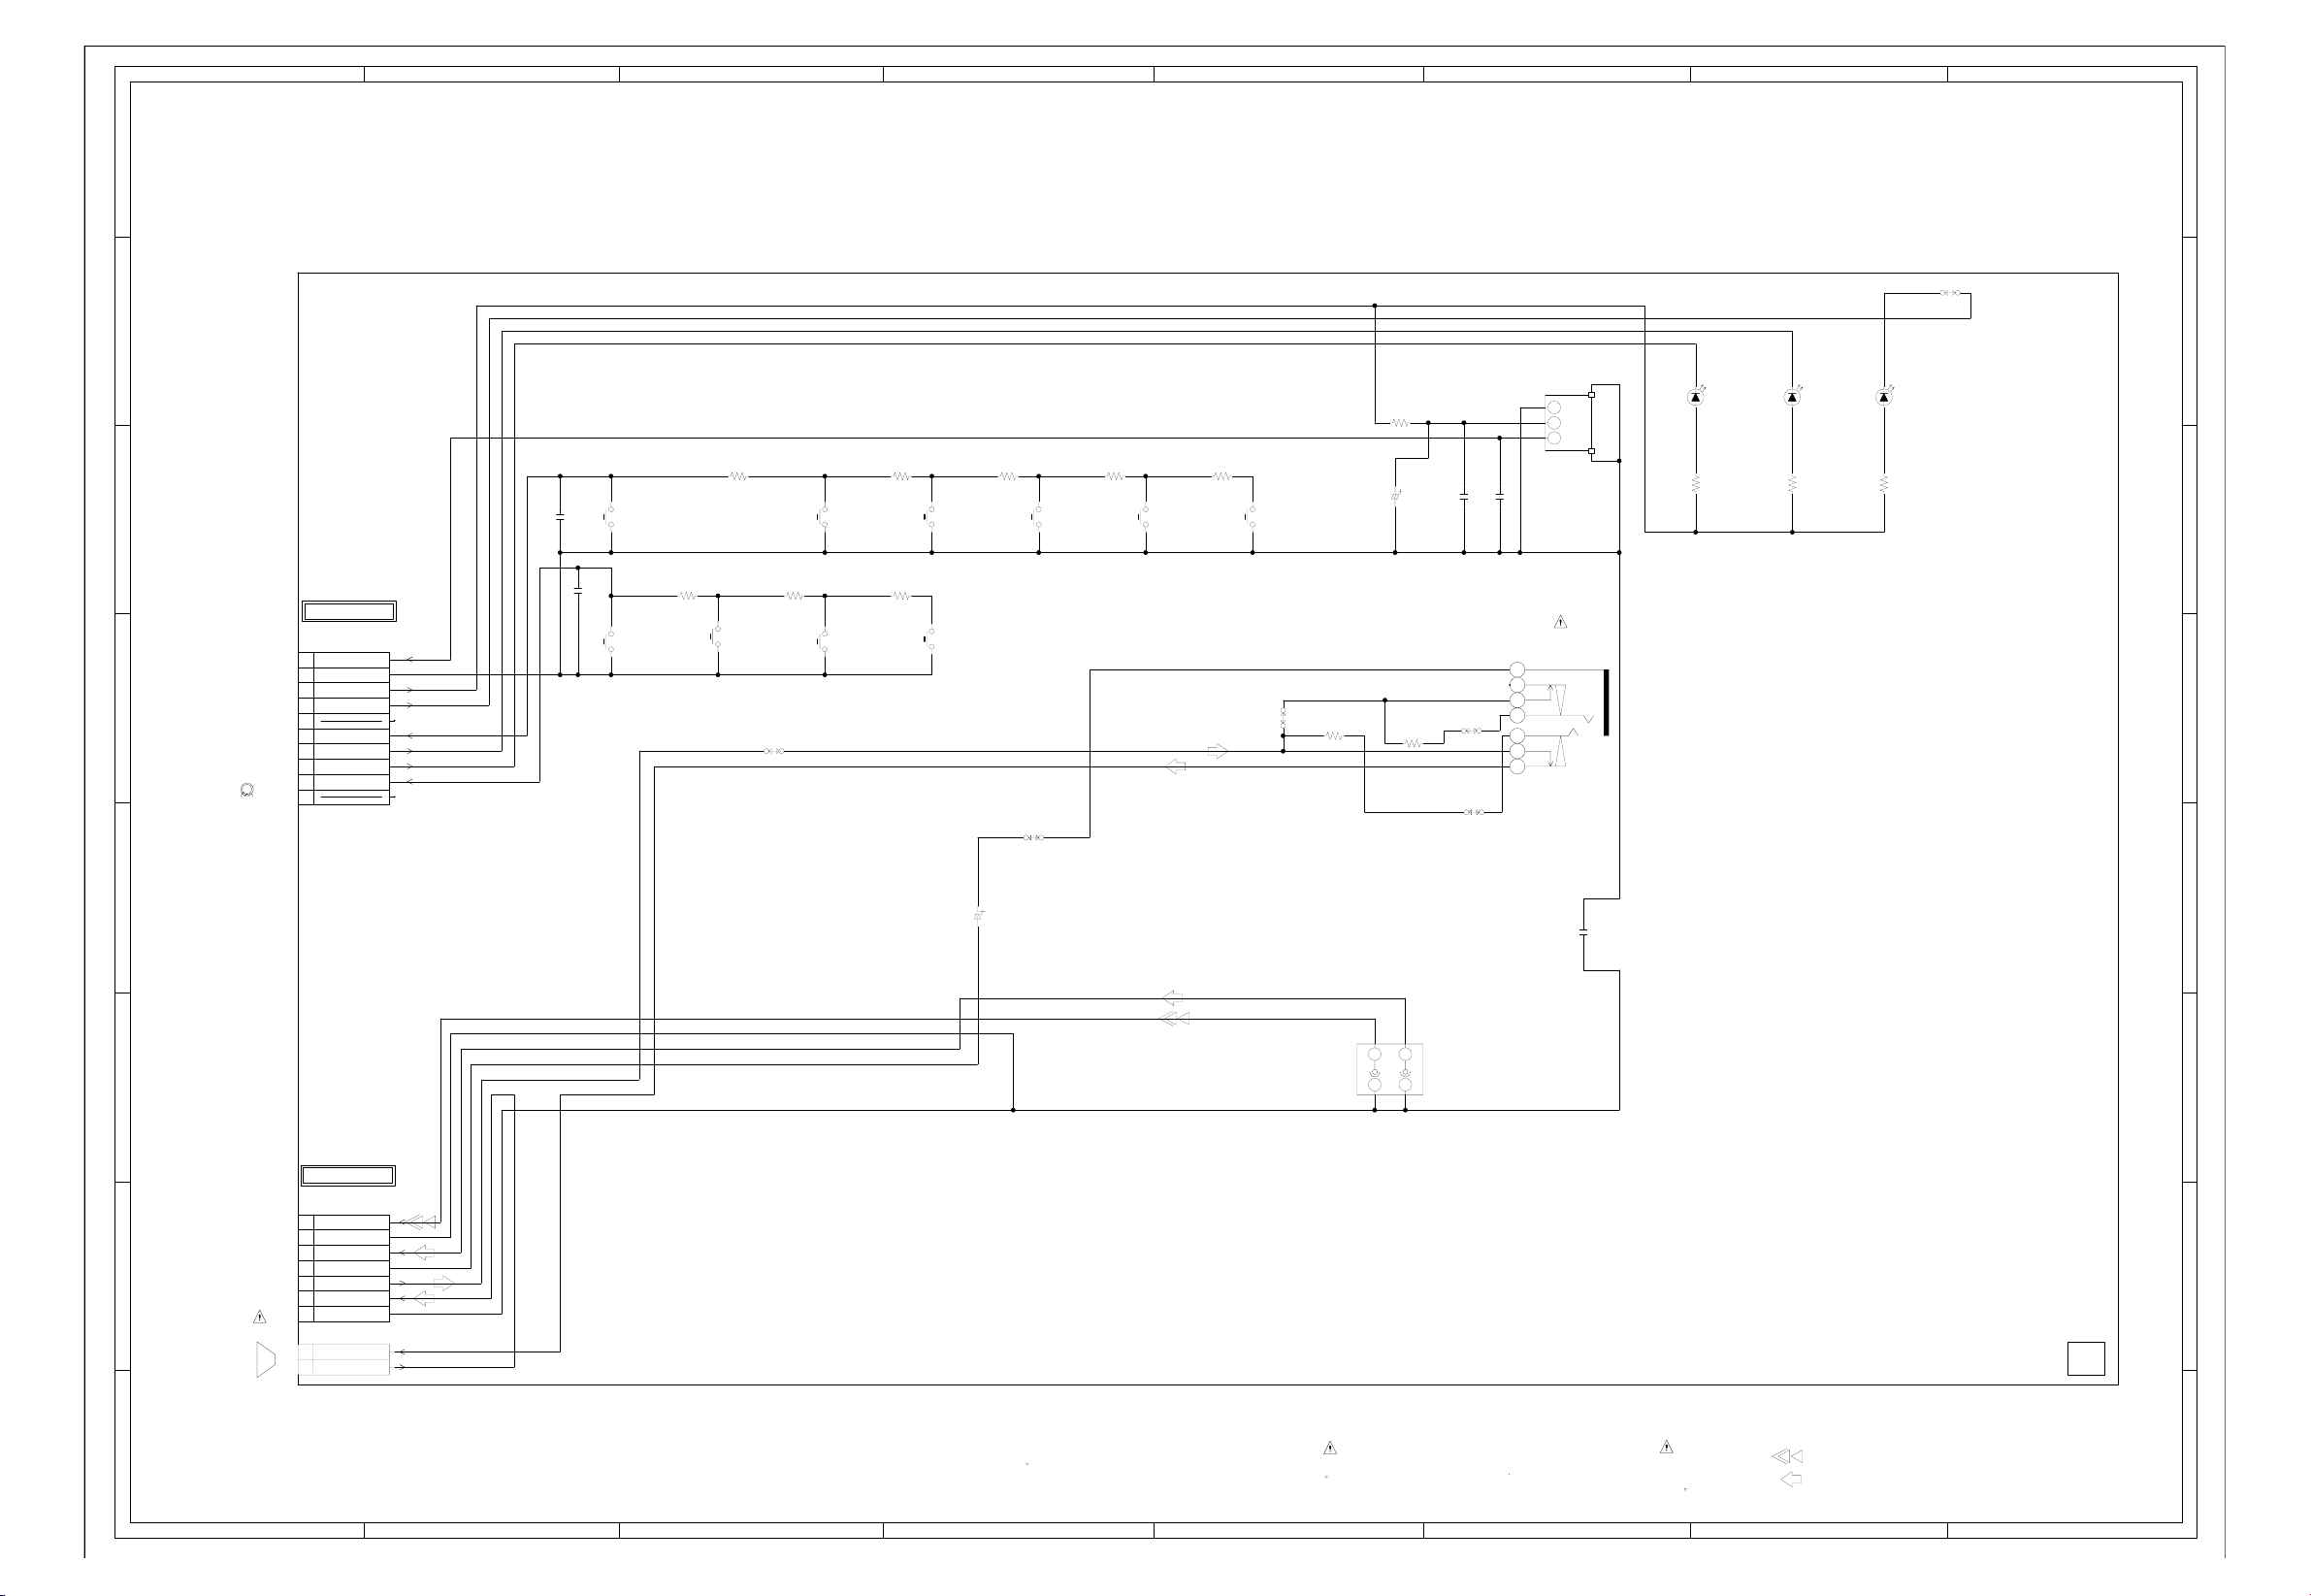
ABC D E F GH
8
(OPERATION PCB)
W802
7
OS753
PIC-28143TH5
0
GND
100P B
1
NC
5
4
3
2
6
7
3
5.0
B+
2
5.0
Vout
1
HEADPHONE_JACK
J351
HSJ2630-010070
R766
10 1/4W
R778
820
6
FROM/TO IN/OUT
CD757
(CP757)
CH2A019A
REMOCON_IN
10
9
GND
8
5
L005
HF57T18.5*10*10
7
6
5
4
3
2
1
AT+5V
POWER_ON_L
KEY_A
T-REC_LED
REC_LED
KEY_B
NC
NC
C781
0.001 B
POWER ON/OFF
C779
0.001 B
CH DOWN
SW751
SW799
SKHVBED010
SKHVBED010
R775
820
CH UP
SW798
SKHVBED010
W805
R776
1K
SW795
REC/OTR
SW796
VOL UP
SKHVBED010
SKHVBED010
R771
1K
R777
1.5K
SW791
STOP/EJECT
SW797
VOL DOWN
SKHVBED010
SKHVBED010
R772
1.5K
PLAY
SW792
W812
SKHVBED010
R773
2.7K
SW793
FF/CUE
SKHVBED010
R774
5.6K
SW794
REW/REV
SKHVBED010
W811
R351
22 1/4W
C755_1
R350_1
22 1/4W
2206.3V KA
C752
W815
W814
C751
0.1 F
D793
REC/OTR
R793
SLZ-936C-11-S-T1
270
T-REC
D791
R754
270
POWER/PLAY
SLZ-936C-11-S-T1
D792
R761
SLZ-936C-11-S-T1
270
8
7
6
5
OPERATION SCHEMATIC DIAGRAM
4
10016V KA
C382
HEH
4
3
FROM/TO IN/OUT
(CD353)
CD351_1
CH27090A
FRONT_VIDEO_IN
7
6
GND
FRONT_AUDIO_IN
5
SOUND_GND
SP351
8 OHM
4
3
2
1
CD352
CH12435A
1
2
SOUND_OUT
SP_OUT
GND
SP +
SP -
THE DC VOLTAGE AT EACH PART WAS MEASURED
NOTE:
WITH THE DIGITAL TESTER WHEN THE COLOR BROADCAST
WAS RECEIVED IN GOOD CONDITION AND PICTURE IS NORMAL.
NOTE:THIS SCHEMATIC DIAGRAM IS THE LATEST AT THE TIME
OF PRINTING AND SUBJECT TO CHANGE WITHOUT NOTICE
CRITICAL FOR SAFETY,USE ONES
DESCRIBED IN PARTS LIST ONLY
2
SPEAKER
810-47-171
1
E
VIDEO
FRONT AV JACK
JPJ3811-01-430
ARESINCE THESE PARTS MARKED BYCAUTION:
123
J701_1
AUDIO L
DANGEREUSES AN POINT DE VUE SECURITE
N’UTILISER QUE CELLS DECRITES
DANS LA NOMENCLATURE DES PIECES
C701
0.022 F
PCB030
TEXA28
ETANTLES PIECES REPAREES PAR UNATTENTION:
PLAYBACK VIDEO SIGNAL
AUDIO SIGNAL(REC)
4
3
2
1
ABC D E F GH
G-18G-17
Page 31
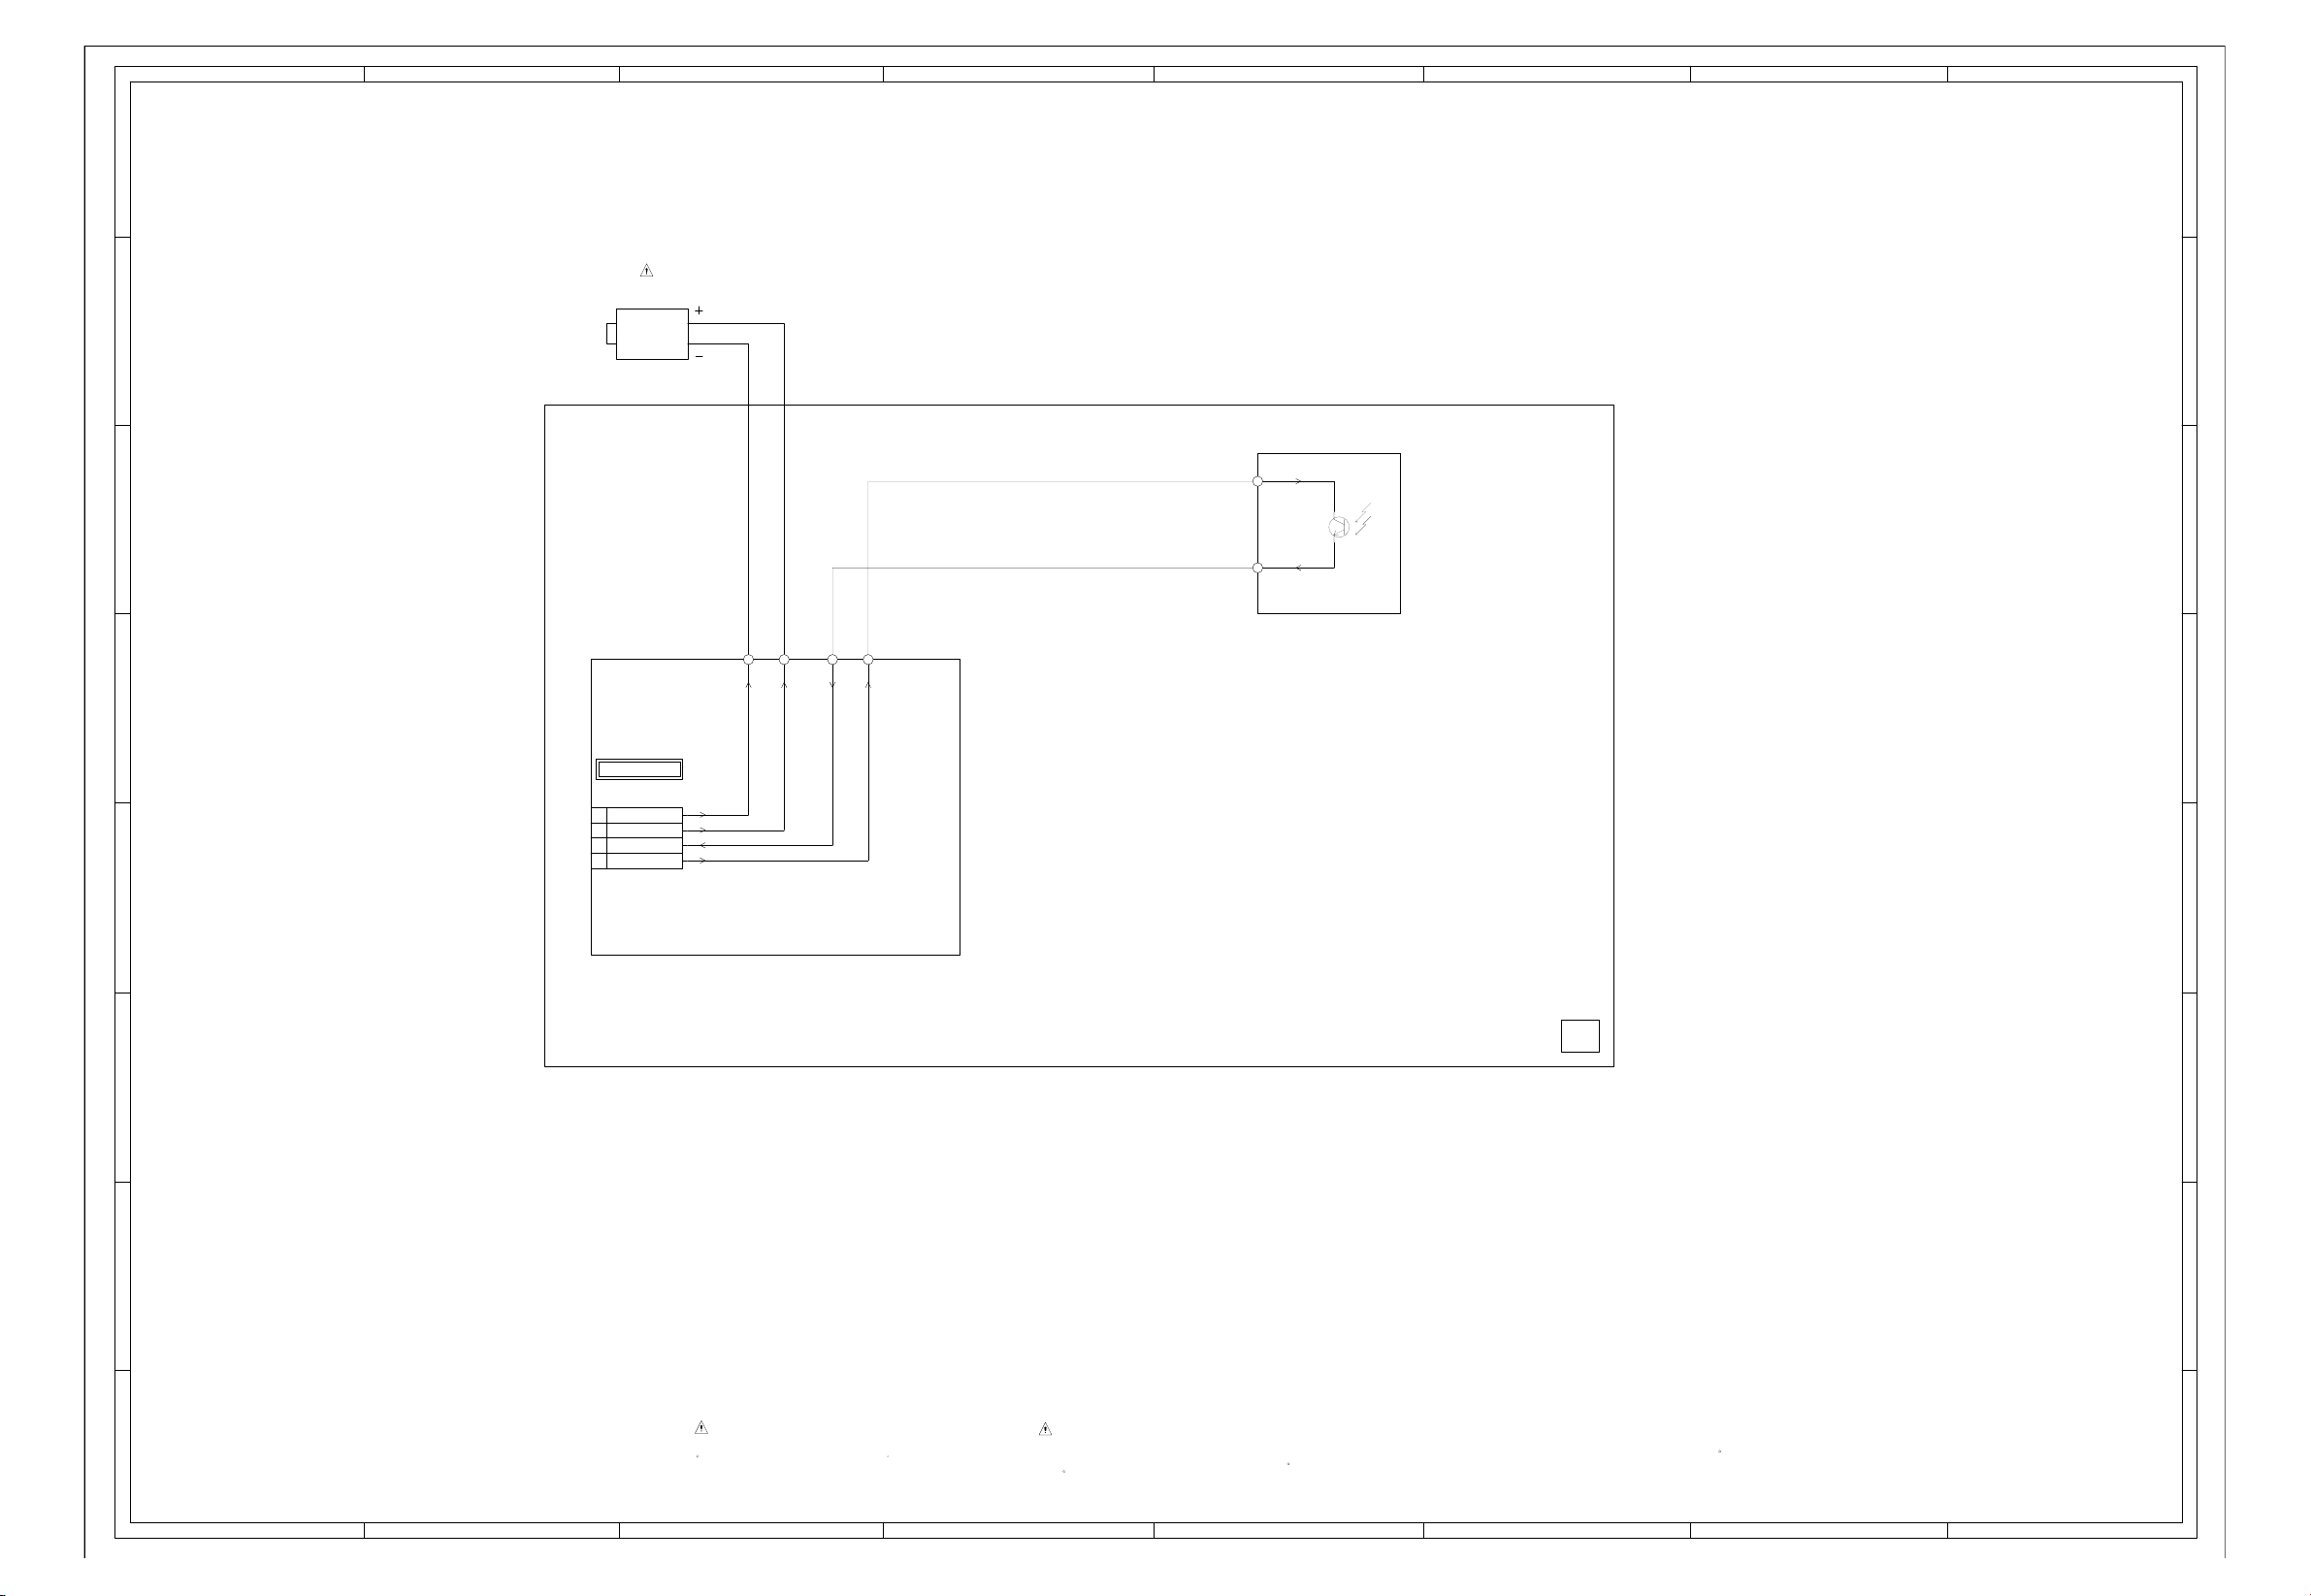
ABC D E F GH
8
LOADING MOTOR
M101
(DECK PCB)
7
S105
S106
5.1
0
BOT SENSOR
Q101
RPT-38PB113
6
S103 S104S101 S102
8
7
6
DECK SCHEMATIC DIAGRAM
5
FROM/TO MICON
CP101
52044-0445
LDM+
4
LDM-
3
2
BOT
1
VCC
4
PCB550
VE8851
3
5
4
3
2
1
G-19
2
CRITICAL FOR SAFETY,USE ONES
DESCRIBED IN PARTS LIST ONLY
ARESINCE THESE PARTS MARKED BYCAUTION:
DANGEREUSES AN POINT DE VUE SECURITE
N’UTILISER QUE CELLS DECRITES
DANS LA NOMENCLATURE DES PIECES
ETANTLES PIECES REPAREES PAR UNATTENTION:
THE DC VOLTAGE AT EACH PART WAS
NOTE:
MEASURED WITH THE DIGITAL TESTER
DURING PLAYBACK
NOTE:THIS SCHEMATIC DIAGRAM IS THE LATEST AT THE TIME
OF PRINTING AND SUBJECT TO CHANGE WITHOUT NOTICE
1
ABC D E F GH
G-20
Page 32
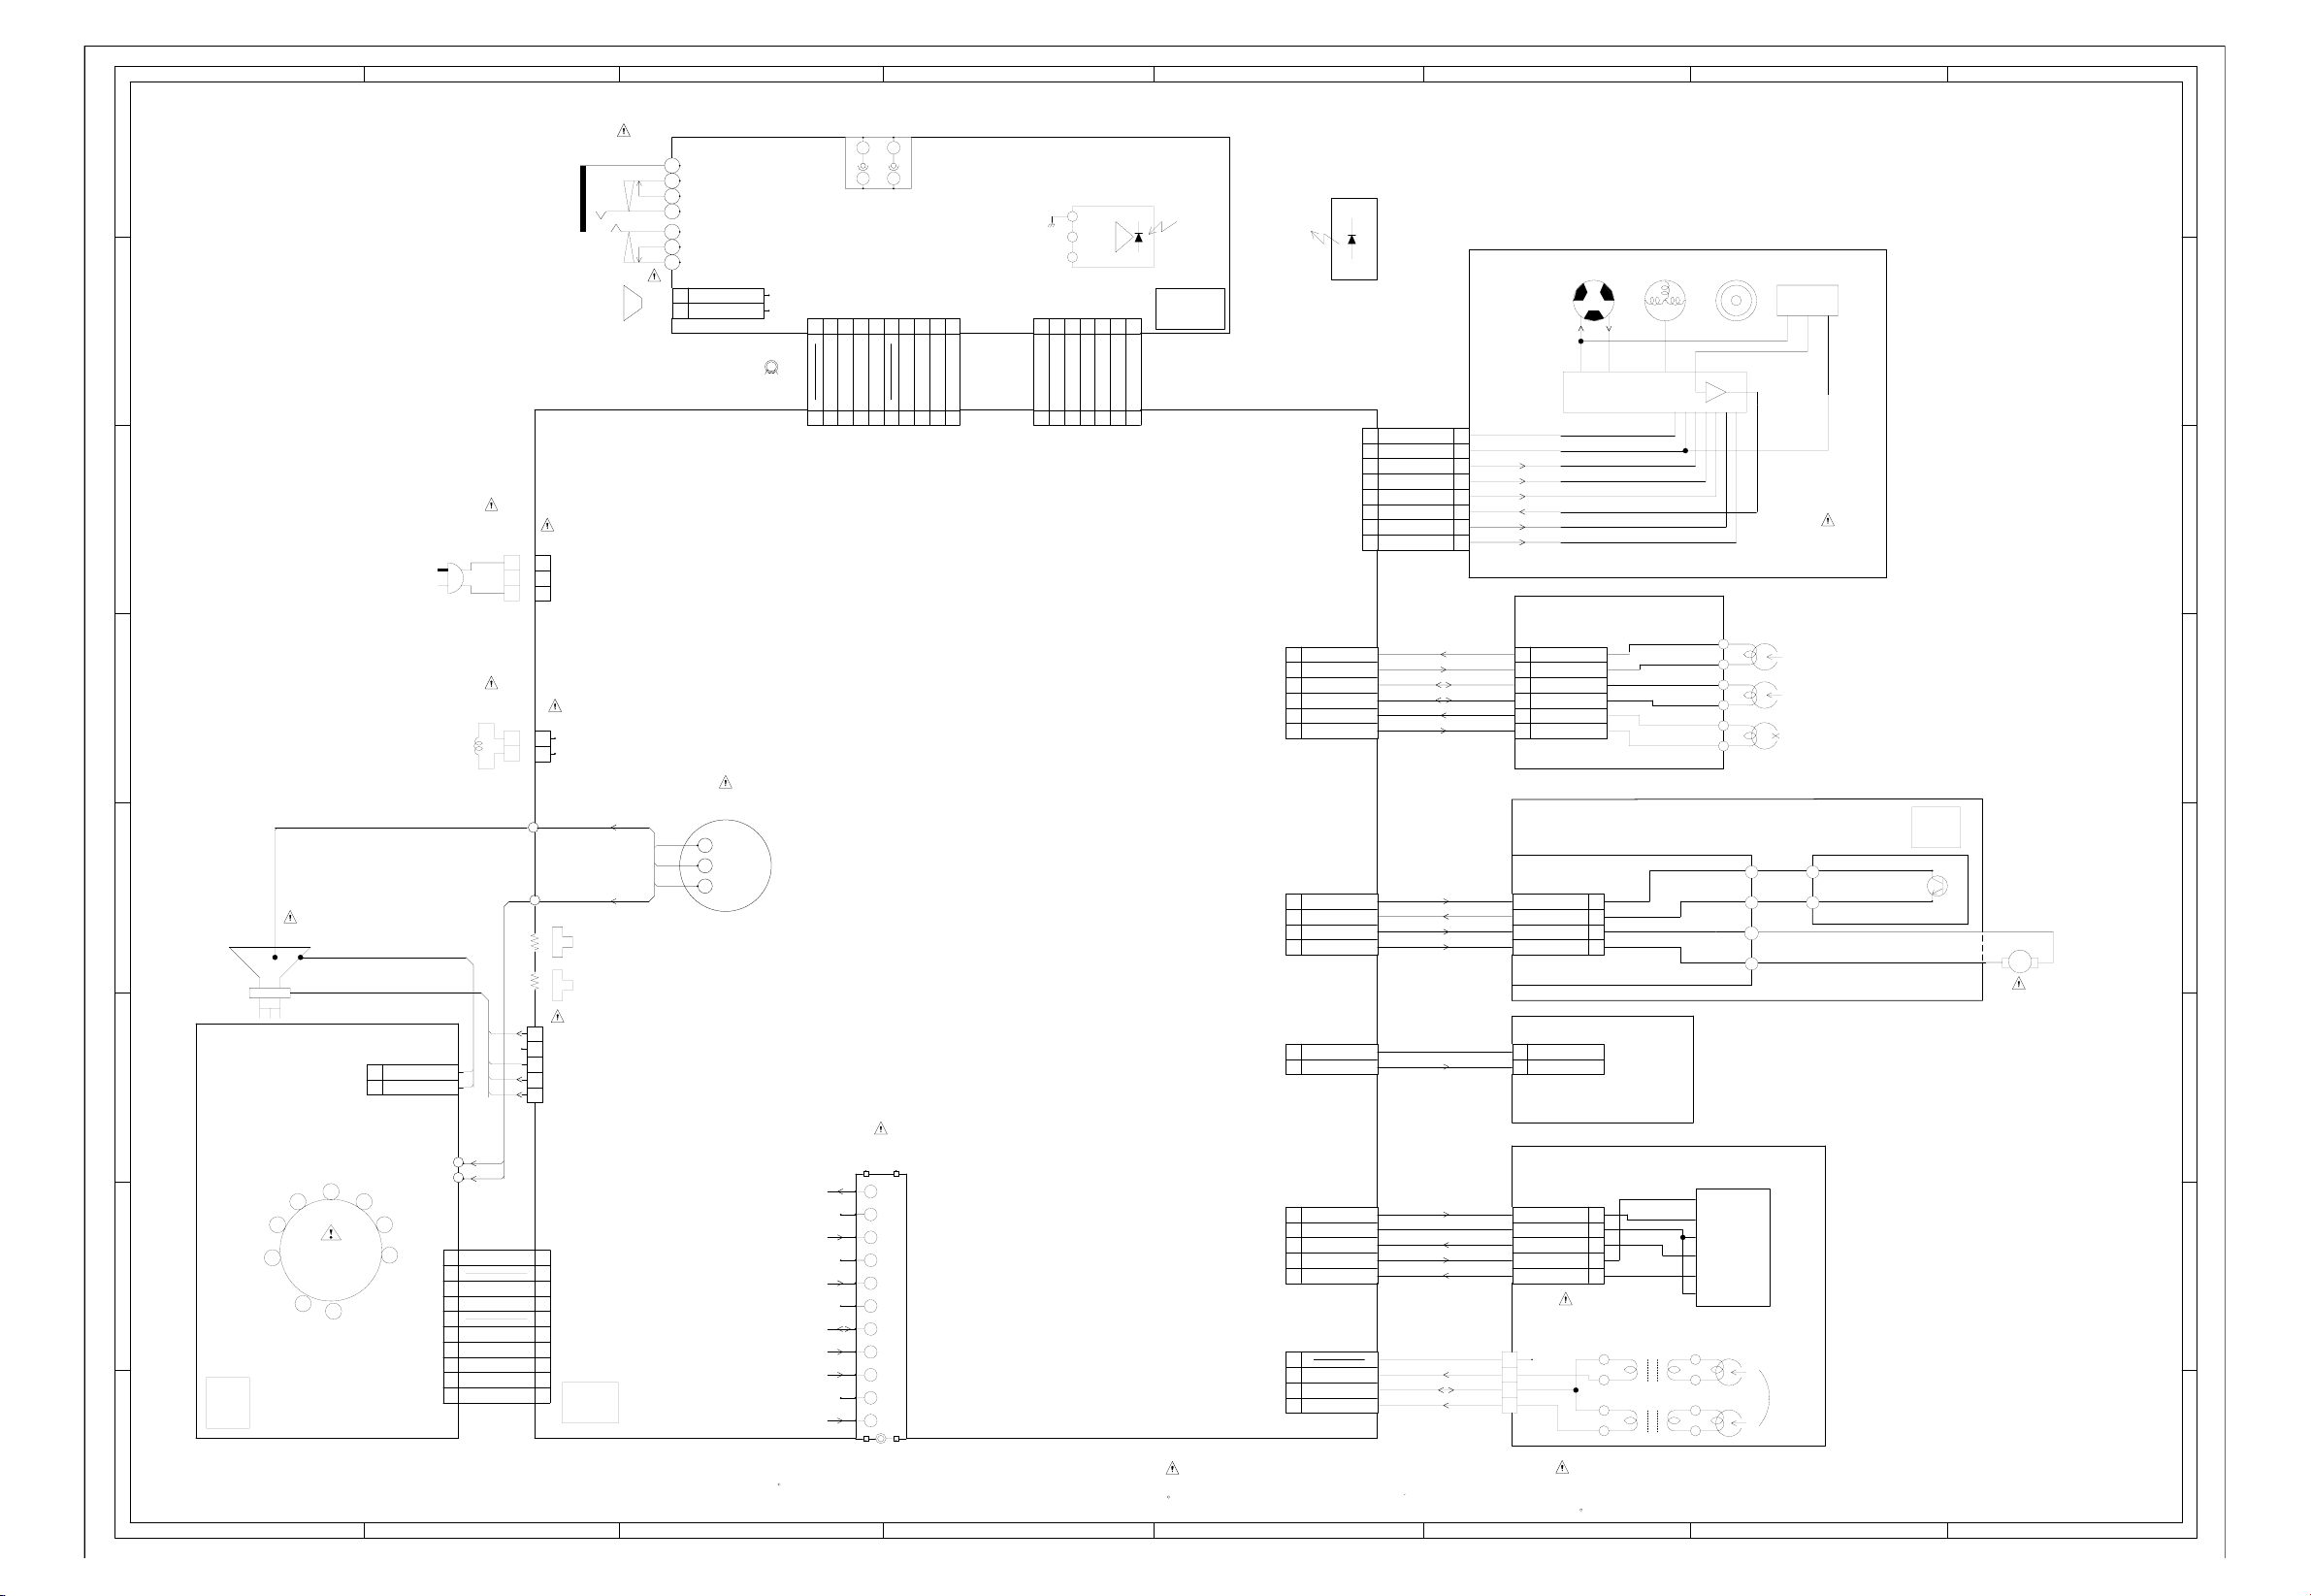
ABC D E F GH
INTERCONNECTION DIAGRAM
8
7
HEADPHONE JACK
J351
SPEAKER
SP351
8 OHM
1
5
4
3
2
6
7
CD352
1
2
SP +
SP -
1
HEH
4
123
E
FRONT AV JACK
J701
8
COMMAND TRANSMITTER
OS753
3
GND
2
B+
1
Vout
9
8765432
10
OPERATION PCB
7654321
FROM
TM101
PCB030
TEXA28
TO
OS753
TM101
SENSOR
MAINHALL
ROTOR
MAGNETCOIL
MR
FG SENSOR
O
VCC
G
7
L005
1
CP757 CD757
6
5
BLADE
WIDE
AC120V_60Hz
CD501
WHITE
BLACK
DEGAUSS COIL
L503
CP501
21
21
CP502
21
2
1
FBT
FB401
KEY_B
REC_LED
T-REC_LED
KEY_A
POWER_ON_L
8765432
9
REMOCON_IN
10
GND
AT+5V
4
V801
CRT
H.V
3
ANODE
DY
CD801
CP801
1
GND
2
GND
FOCUS SCREEN
CP401
1
NC
2
3
4
5
CP353 CD351
GND
SP_OUT
SOUND_OUT
GND
SOUND_GND
FRONT_AUDIO_IN
FRONT_VIDEO_IN
7654321
CP4002
6
5
4
3
2
1
CP1006
1
2
3
4
CP4003
2
1
CP1004
AUDIO PB
AUDIO REC
CTL+
CTLAE HEAD(-)
AE HEAD(+)
VCC
BOT
LDMLDM+
FE HEAD (GND)
FE HEAD (HOT)
1
2
3
4
5
6
7
8
GND
MOTOR_GND
I LIMIT
CTL
VCO
FG
CAP/M/F/R
VCC(5V)
CD4001
FFC
CD1001
FFC
1
2
3
4
5
6
7
8
HALL
VCC
AUDIO PB
6
AUDIO REC
5
CTL+
4
CTL-
3
AE HEAD(-)
2
AE HEAD(+)
1
CP101
VCC
BOT
LDMLDM+
2
FE HEAD (GND)
1 FE HEAD (HOT)
OUT
HALL
SWITCH
IN
LOGIC
HEAD AUDIO CONTROL ASS’Y
H5001
1
2
3
4
FULL ERASE HEAD ASS’Y
H5002
CAPSTAN DD UNIT ASS’Y
DECK MECHA ASS’Y
M2001
AUDIO
CONTROL
AE
RED
WHITE
BOT SENSOR
Q101
DECK PCB
PCB550
VE8851
LM
LOADING MOTOR
M101
6
5
4
3
TUNER PACK
FOCUS
SCREEN
6
CRT SOCKET
J801
F
7
8
9
5
4
PCB110
TCX312
3
1
2
CRT PCB
S801
CP851ACP851B
180V
H.GND
HEATER
R.OUT
B.OUT
G.OUT
GND
1
2
3
4
5
6
7
8
9
10
SYSCON PCB
PCB010
VMX180
1
2
3
4
5
6
7
8
CUT_OFF
9
10
1
OF PRINTING AND SUBJECT TO CHANGE WITHOUT NOTICE
THE TIMETHIS INTERCONNECTION DIAGRAM IS THE LATEST ATNOTE:
TU601
14 15
11
IF
10
NC
+30V
9
8
NC
+5V
7
6
NC
SDA
5
SCL
4
3
2
NC
AGC
1
12 13
CRITICAL FOR SAFETY,USE ONES
DESCRIBED IN PARTS LIST ONLY
ARESINCE THESE PARTS MARKED BYCAUTION:
CP1005
5
4
3
2
1
CP4001
1
2
3
4
CYL DRIVE
CYL GND
CYL FG
CYL +B
CYL PG
SP-CH2 (L)
SP_COM
SP-CH1 (R)
CD1002
FFC
DANGEREUSES AN POINT DE VUE SECURITE
N’UTILISER QUE CELLS DECRITES
DANS LA NOMENCLATURE DES PIECES
CYL DRIVE
CYL GND
CYL FG
CYL +B
CYL PG
CYLINDER UNIT ASS’Y
UN4001
1
NC
2
3
4
ETANTLES PIECES REPAREES PAR UNATTENTION:
5
4
3
2
1
MICRO MOTOR
M2003
VCC
DRIVE CONTROL
GND
FG
PG
FG.PG GND
CH2
CH1
2
HEAD
1
ABC D E F GH
G-22G-21
Page 33
SERVICING NOTICES ON CHECKING
As for the places which need special attentions,
they are indicated with the labels or seals on the
cabinet, chassis and parts. Make sure to keep the
indications and notices in the operation manual.
2. AVOID AN ELECTRIC SHOCK
There is a high voltage part inside. Avoid an
electric shock while the electric current is
flowing.
3. USE THE DESIGNATED PARTS
The parts in this equipment have the specific
characters of incombustibility and withstand
voltage for safety. Therefore, the part which is
replaced should be used the part which has
the same character.
Especially as to the important parts for safety
which is indicated in the circuit diagram or the
table of parts as a mark, the designated
parts must be used.
4. PUT PARTS AND WIRES IN THE
ORIGINAL POSITION AFTER
ASSEMBLING OR WIRING
There are parts which use the insulation
material such as a tube or tape for safety, or
which are assembled in the condition that
these do not contact with the printed board.
The inside wiring is designed not to get closer
to the pyrogenic parts and high voltage parts.
Therefore, put these parts in the original
positions.
5. TAKE CARE TO DEAL WITH THE
CATHODE-RAY TUBE
In the condition that an explosion-proof cathoderay tube is set in this equipment, safety is
secured against implosion. However, when
removing it or serving from backward, it is
dangerous to give a shock. Take enough care to
deal with it.
6. AVOID AN X-RAY1. KEEP THE NOTICES
Safety is secured against an X-ray by considering about the cathode-ray tube and the high
voltage peripheral circuit, etc.
Therefore, when repairing the high voltage peripheral circuit, use the designated parts and
make sure not modify the circuit.
Repairing except indicates causes rising of high
voltage, and it emits an X-ray from the cathoderay tube.
PERFORM A SAFETY CHECK AFTER
7.
SERVICING
Confirm that the screws, parts and wiring which
were removed in order to service are put in the
original positions, or whether there are the
portions which are deteriorated around the
serviced places serviced or not. Check the
insulation between the antenna terminal or
external metal and the AC cord plug blades.
And be sure the safety of that.
(INSULATION CHECK PROCEDURE)
1.
Unplug the plug from the AC outlet.
2.
Remove the antenna terminal on TV and turn
on the TV.
3.
Insulation resistance between the cord plug
terminals and the eternal exposure metal
[Note 2] should be more than 1M ohm by
using the 500V insulation resistance meter
[Note 1] .
4.
If the insulation resistance is less than 1M
ohm, the inspection repair should be
required.
[Note 1]
If you have not the 500V insulation
resistance meter, use a Tester.
[Note 2]
External exposure metal: Antenna terminal
Earphone Jack
HOW TO ORDER PARTS
Please include the following informations when you order parts. (Particularly the VERSION LETTER.)
1. MODEL NUMBER and VERSION LETTER
The MODEL NUMBER can be found on the back of each product and the VERSION LETTER can be
found at the end of the SERIAL NUMBER.
2. PART NO. and DESCRIPTION
You can find it in your SERVICE MANUAL.
A1-1
Page 34

CONTENTS
SERVICING NOTICES ON CHECKING.....................................................................................
HOW TO ORDER PARTS ..........................................................................................................
CONTENTS .................................................................................................................................
GENERAL SPECIFICATIONS....................................................................................................
DISASSEMBLY INSTRUCTIONS
1. REMOVAL OF MECHANICAL PARTS AND P. C. BOARDS............................................
2. REMOVAL OF DECK PARTS............................................................................................
3. REMOVAL OF ANODE CAP..............................................................................................
KEY TO ABBREVIATIONS ........................................................................................................
SERVICE MODE LIST ................................................................................................................
PREVENTIVE CHECKS AND SERVICE INTERVALS..............................................................
NOTE FOR THE REPLACING OF MEMORY IC .......................................................................
SERVICING FIXTURES AND TOOLS .......................................................................................
PREPARATION FOR SERVICING.............................................................................................
MECHANICAL ADJUSTMENTS ................................................................................................
ELECTRICAL ADJUSTMENTS..................................................................................................
BLOCK DIAGRAMS
TV ............................................................................................................................................
Y/C/AUDIO/HEAD AMP/IN/OUT .............................................................................................
MICON/OPERATION/DECK ...................................................................................
PRINTED CIRCUIT BOARDS
OPERATION/DECK.................................................................................................................
SYSCON/CRT .........................................................................................................................
SCHEMATIC DIAGRAMS
Y/C/AUDIO/HEAD AMP ..........................................................................................................
MICON .....................................................................................................................................
IN/OUT .....................................................................................................................................
CHROMA/IF.............................................................................................................................
SOUND AMP ...........................................................................................................................
POWER ...................................................................................................................................
DEFLECTION ..........................................................................................................................
CRT..........................................................................................................................................
OPERATION............................................................................................................................
DECK .......................................................................................................................................
INTERCONNECTION DIAGRAM ...........................................................................................
WAVEFORMS .............................................................................................................................
MECHANICAL EXPLODED VIEWS...........................................................................................
CHASSIS EXPLODED VIEWS ...................................................................................................
MECHANICAL REPLACEMENT PARTS LIST .........................................................................
CHASSIS REPLACEMENT PARTS LIST..................................................................................
ELECTRICAL REPLACEMENT PARTS LIST...........................................................................
A1-1
A1-1
A2-1
A3-1~A3-6
B1-1, B1-2
B2-1~B2-5
B3-1
C1-1, C1-2
C2-1
C3-1, C3-2
C4-1
C5-1
C5-1
D1-1~D1-4
D2-1~D2-5
E-1, E-2
E-3, E-4
E-5, E-6
F-1, F-2
F-3~F-6
G-1, G-2
G-3, G-4
G-5, G-6
G-7, G-8
G-9, G-10
G-11, G-12
G-13, G-14
G-15, G-16
G-17, G-18
G-19, G-20
G-21, G-22
H-1, H-2
I-1, I-2
I-3, I-4
J1-1
J2-1
J3-1~J3-3
A2-1
Page 35
GENERAL SPECIFICATIONS
G-1.Outline of the Product
19 inch(480.0mmV):Measured diagonally
Color CRT 90 degree deflection
3 -Speed 1/2" Video Cassette Recorder
VHS Recorder/Player
VHS-C Player
G-2.VCR Format
VHS Standard NTSC PAL SECAM PAL-M PAL-N
VHS Hi-Fi Audio System
G-3.Video Recording System :Rotary, slant azimuth two head helical scan system
Luminance Component :FM recording
Chrominance Component :Low frequency converted direct recording
G-4.Broadcasting System US System M
G-5.Color System NTSC PAL SECAM or Monochrome signa l
G-6.NTSC Playback(PAL 60Hz) Yes No
G-7.MESECAM Yes No
G-8.Cassette Tape
VHS type video cassette tape Width 12.65mm (1/2 Inch)
VHS-C type video cassette tape Width 12.65mm (1/2 Inch)
G-9.Tape Speed
NTSC or PAL-M PAL or SECAM
SP 33.35 mm/sec S P 23.39 mm/sec
LP 16.67 mm/sec LP 11.69 mm/sec
SLP 11.12 mm/sec
G-10.Recording/Playback Time
NTSC or PAL-M
at S P Mode Max. 210 min. (with T-210 cassette)
at LP Mode Max. 420 min. (with T-210 cassette)
at SL P Mode Max. 630 min. (with T-210 cassette)
PAL or SECAM
at S P Mode Max. 300 min. (with E-300 cassette)
at LP Mode Max. 600 min. (with E-300 cassette)
G-11.Use Deck
OVD-5 OVD-6 OVD-6S OVD-6S(Vertical)
G-12.Rewind/Fast Forward Time(Approx.)
FF:1'48" / Rew:1'48" (with T-120 cassette) (with E-180 cassette)
G-13.Search Speed
SP 3 and 5 Times
LP 7 and 9 Times
SLP 9 and 15 Times
G-14.Slow Speed
SP Times
LP Times
SLP Times
G-15.Frame Advance
SP Times
LP Times
SLP Times
G-16.Antenna Input Impedance
VHF/UHF 75 ohm unbalanced
A3- 1
Page 36
GENERAL SPECIFICATIONS
G-17.Tuner and Receiving channel 1Tuner System 2Tuner System
Tuner : Contactless Electric tuner
Oscar(W/O HYPER) Oscar(W/ HYPER) France CATV) Others
Cha nne l Cove ra ge
2 ~ 69 , 4A , A-5 ~ A-1 , A ~ I , J ~ W , W+1~ W+84
Tuning System
Frequency syn. Voltage syn. Others
G-18.Preset Channel: -- channels
G-19.Intermediate Frequency
Picture(FP) 45.75 MHz MHz MHz
Sound (FS) 41.25 MHz MHz MHz
FP-FS 4.50 MHz MHz MHz
G-20.Stereo/Dual TV Sound
Yes( NICAM GERMAN USA JAPAN) No
G-21.Video Signal
Input Level 1 Vp-p / 75 ohm
Output Level -- Vp-p / -- ohm
S/N Ratio 50 dB (Weighted)
Horizontal Resolution at SP Mode 220 Lines
G-22.Audio Signal
Input Level
Line -- dB / -- Kohm
RCA - 8 dB / 50 Kohm
Output Level
Line -- dB / -- Kohm
RCA -- dB / -- Kohm
(0dB=0.775 V rms.)
S/N Ratio at SP Mode 38 dB
Harmonic Distortion : 1.5 % (1KHz)
Frequency Response : at SP Mode 100 Hz ~ 10 kHz
at LP Mode 100 Hz ~ 6 kHz
at SLP Mode 100 Hz ~ 4 kHz
Hi-Fi Audio Signal NONE
Depth Multiplex Recording Rotary, Slant Azimuth Two Head
System Helical Scan System
Dynamic Range : More than -- dB
Wow And Flutter : Less than -- % Wrms
Channel Separation : More than -- dB
Harmonic Distortion : Less than -- %
G-23.Heads
Video 2 Rotary Heads
FM Audio Rotary Heads
Audio / Control 1 Stationary Head ( Mono Stereo(L,R) )
Erase 1 Full Track Erase
G-24.Motor: 3 Motors
Tape/Cassette Loading
Cylinder (Direct Drive)
Capstan (Direct Drive)
G-25.Power Source
120 V AC 50Hz AC 60Hz
EXT DC Jack -- V
A3- 2
Page 37
GENERAL SPECIFICATIONS
G-26.Power Consumption: 86 W at AC 120 V 60 Hz
-- W at DC --- V(at TV and VCR ON)
Stand by: 5 W at AC 120 V 60 Hz
Per Year: -- kWh / Year
G-27.Dimensions(Approx.)
489 mm(W) 462.5 mm(D) 479.5 mm(H)
G-28.Weight(Approx.) Net : 22.0 Kg ( 48.7 lbs)
Gross: 25.0 Kg ( 55.3 lbs)
G-29.Cabinet Material
Cabinet Front: PS 94HB DECABROM
ABS 94V2 NON-DECA
94V0
Cabinet Rear: PS 94HB DECABROM
ABS 94V2 NON-DECA
94V0
G-30.Cassette Loading System: Front Cassette Loading System
Top Loading System
G-31.Tape Counter: Linear Time Tape Counter
G-32.Protector: Power Fuse Dew Sensor
G-33.Regulation
Safety
UL CSA SAA SI CE SEV
BS NF NEMKO FEMKO DEMKO IEC65
SEMKO NZ HOMOLO SABS CNS SISIR
NOM AS3159 DENTORI UNE GOST NONE
Radiation
FCC DOC FTZ PTT CE SEV
SABA SI NF NZ HOMOLO UNE
CNS CISPR13 DENTORI AS/NZS NONE
X- Radiation
DHHS HWC PTB DENTORI NONE
G-34.Temperature
Operation 5 ˚C ~ 40 ˚C
Storage -20 ˚C ~ 60 ˚C
G-35.Operating Humidity Less than 80 %RH
G-36.Clockand Timer
Calendar: 1990/1/1~2081/12/31
Built-in 1 Month 8 Events Programmable Timer
One Touch Recording : Max Time 5 Hours
Sleep Timer Yes Max 120 Min.( 10 Min. Step) No
On/Off Timer Yes 1 Programs No
Wake Up Timer Yes Programs No
G-37.Timer back up Time
More than 1/12 Minutes (at P ower Off Mode)
A3- 3
Page 38
G-38.Terminals
VHF/UHF Ante nna Input Din Type F-Type France Type
Front Vide o Input ( R CA ø8.3)
Front Audio Input ( R CA ø8.3)
Re a r Vide o Input ( R C A ø8.3)
Re a r Audio Input ( R C A ø8.3)
Re a r Vide o Output ( R CA ø8.3)
Re a r Audio Output ( RC A ø8.3)
21 Pin DC Jack 12V (Center +)
AC Inlet Ext. Speaker
Diversity Ear Phone
Head Phone
G-39.Indicator
Power Stand By Rec/Otr T-Rec Tape In
(Red) ( ) (Red) (Red)( )
On Timer OTPB
( ) ( )
G-40.On Screen Display
Menu Timer Rec S e t
G-CODE(or SHOWVIEW or PLUSCODE)No. Entry
Clock/Date CH/AV
Tape Counter Tape Speed
Sleep Time Tape In
Control Level ( Vol, Bright, Cont, Color, Tint, Sharpness)
Control Level ( Vol, Bright, Cont, Color, Sharpness)
Play/Stop/FF/Rew/Rec/OTR/T-Rec/Pause/Eject(Symbol Mark)
Auto Tracking/Manual Tracking Caption/Text 1/2
Index Repeat
Add/Delete Stereo/SAP
Muting
G-41.OSD Language
Eng Ger Fre Spa Ita Por Jan
OSD Language Setting
Eng Ger Fre Spa Ita Por Jan
GENERAL SPECIFICATIONS
Ch Set Up TV/CATV Auto Ch Memory
Add/Delete Guide Ch Se t
TV Set Up V-Chip S et On/Off Timer
Picture Audio
Sap On/Off
Auto Repeat On/Off
System Set Up Clock Set( Calendar 12H 24H)
Language Auto Clock On/Off
Standard Time Daylight Saving Time
Not Applicable
G-42.Speaker
Position Front Side Bottom
Size 3 inches
Imp. 8 ohm x 1 pcs
Output Max 1.5 W
10% 1.0 W (Typical)
G-43.EXT Speaker : Yes -- W Imp -- ohm No
A3- 4
Page 39
GENERAL SPECIFICATIONS
G-44.Carton
Master Carton: Need No Need
Content: ---- Set
Material: ---- / ---- Corrugated Carton
Dimensions: ---- mm(W) ---- mm(D) ---- mm(H)
Description of Original Yes No
Gift Box : Material Double/Brown Corrugated Carton ( with Photo Label)
Double/White Corrugated Carton ( with Photo Label)
Double Full Color Carton W/Photo
Dimensions: 559 mm(W) 538 mm(D) 555 mm(H)
Design: As Per Buyer 's
Description of Origin: Yes No
Drop Test Natural Dropping At 1 Corner / 3 Edges / 6 Surfaces
Height 25cm 31cm 46cm 62cm 80cm
Container Stuffing: 352 Sets / 40' container
G-45.Accessories
Channel Film Dew Caution Sheet
Owner's Manual( W /Gurantee Card) [English/Spanish]
AC Plug Adapter
Remote Control Unit Quick Set-up Sheet
Rod Antenna ( One Pole Two Pole/ F-Type DIN Type France Type)
Loop Antenna( F-Type DIN Type France Type)
U/V Mixer Battery (UM- 4 x 2 )
DC Car Cord ( Center+) AC Cord
Guarantee Card AV Cord (2Pin-1Pin)
Warning Sheet Registration Card(W/Guarantee Card)
Circuit Diagram PTB Sheet
Antenna Change Plug 300 ohm to 75 ohm Antenna Plug
Service Facility List Euro Warranty Information Sheet
Important Safeguard
G-46.Other Features
Auto Head Cleaning Index Search
Auto Tracking Auto Clock
VIDEO PLUS+(SHOWVIEW,G-CODE) Auto Shut Off
HQ (VHS Standard High Quality)
Auto Power On, Auto Play, Auto Rewind, Auto Eject
Forward / Reverse Picture Search SQPB
One Touch Playback CATV
Auto CH Memory Just Clock Function
Rental Mode Closed Caption
TV Monitor CM Skip(30secX6Times)
V-chip( USA Canada) CM Advance
Energy Star Dirty Head Warning
G-47.Switch Front Power(Tact) Channel Up Volume Up
Play Channel Down Volume Down
Pause/Still F.FWD/Cue Rew/Rev
System Select Eject/Stop Rec/OTR
One Touch Playback Main Power SW
Rear Color On/Off (SECAM only) Degauss
Main Power SW AC/DC
G-48.Magnetic Field
BV : +0.45G BV : +0.35G BV : +0.25G
BH : 0.18G BH : 0.30G B H : 0.30G
BV : -0.15G BV : -0.25G BV : -0.50G
BH : 0.15G BH : 0.15G BH : 0.30G
A3- 5
Page 40
GENERAL SPECIFICATIONS
G-49.Remote Control Unit: RC-CG
Glow in Dark Remocon Yes No
Power Source: D.C 3 V Battery UM - 4 x 2
Control Key: Total 41 Key
0 Ch Up Power
1 Ch Down Eject
2 Volume Up Play
3 Volume Down Stop
4 Input Select F.FWD
5 Audio Select Rew
6 TV/VCR Timer Re c
7 Pause/Still REC/OTR
8 Slow Auto Tracking
9 Slow Speed Up Tracking Up/Set +
Menu Slow Speed Down Tracking Down/Set Set Up Skip Search Counter Reset
Set Down Speed Clock/Counter
Enter TV Monitor Zero Return
Cancel Index One Touch Playback
Call Program TV/Caption/Text
Muting Video Plus Caption On/Off
Sleep Timer Program/Video Plus Caption 1/2
Quick View
A3- 6
Page 41
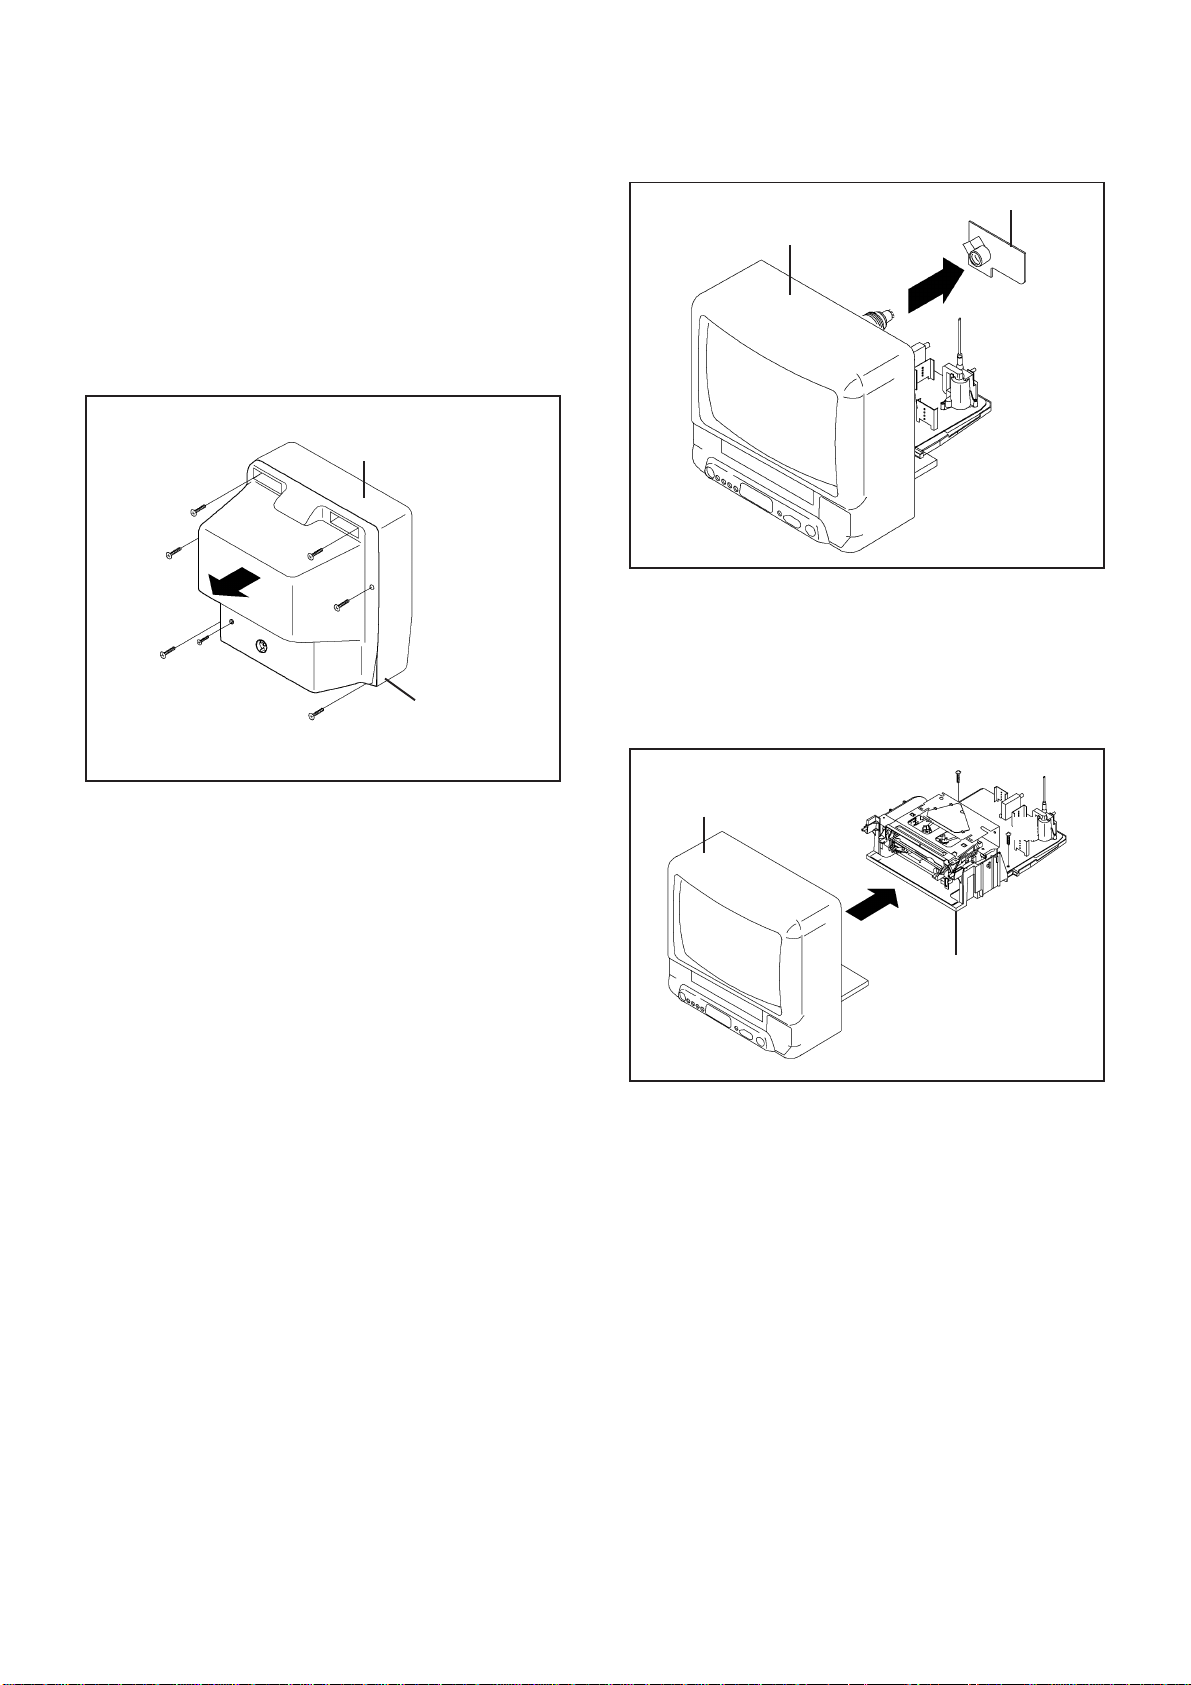
DISASSEMBLY INSTRUCTIONS
1. REMOVAL OF MECHANICAL PARTS
AND P.C. BOARDS
1-1: BACK CABINET (Refer to Fig. 1-1)
1.
Remove the 6 screws 1.
2.
Remove the screw 2 which are used for holding the Back
Cabinet.
3.
Remove the AC cord from the AC cord hook 3.
4.
Remove the Back Cabinet in the direction of arrow.
Front Cabinet
1
1
12
1
1
3
1
Back Cabinet
Fig. 1-1
Front Cabinet
1-3: VCR BLOCK (Refer to Fig. 1-3)
Remove the 2 screws 1.
1.
Disconnect the following connectors:
2.
(CP757, CP353, CP401 and CP502).
Unlock the support 2.
3.
Remove the VCR Block in the direction of arrow.
4.
1
CRT PCB
Fig. 1-2
1-2: CRT PCB (Refer to Fig. 1-2)
CAUTION: BEFORE REMOVING THE ANODE CAP,
DISCHARGE ELECTRICITY BECAUSE IT
CONTAINS HIGH VOLTAGE.
BEFORE ATTEMPTING TO REMOVE OR
REPAIR ANY PCB, UNPLUG THE POWER
CORD FROM THE AC SOURCE.
1.
Remove the Anode Cap.
(Refer to REMOVAL OF ANODE CAP)
2.
Disconnect the following connector: (CP801).
3.
Remove the CRT PCB in the direction of arrow.
Front Cabinet
VCR Block
1
2
UP TO
RELEASE
Fig. 1-3
B1-1
Page 42
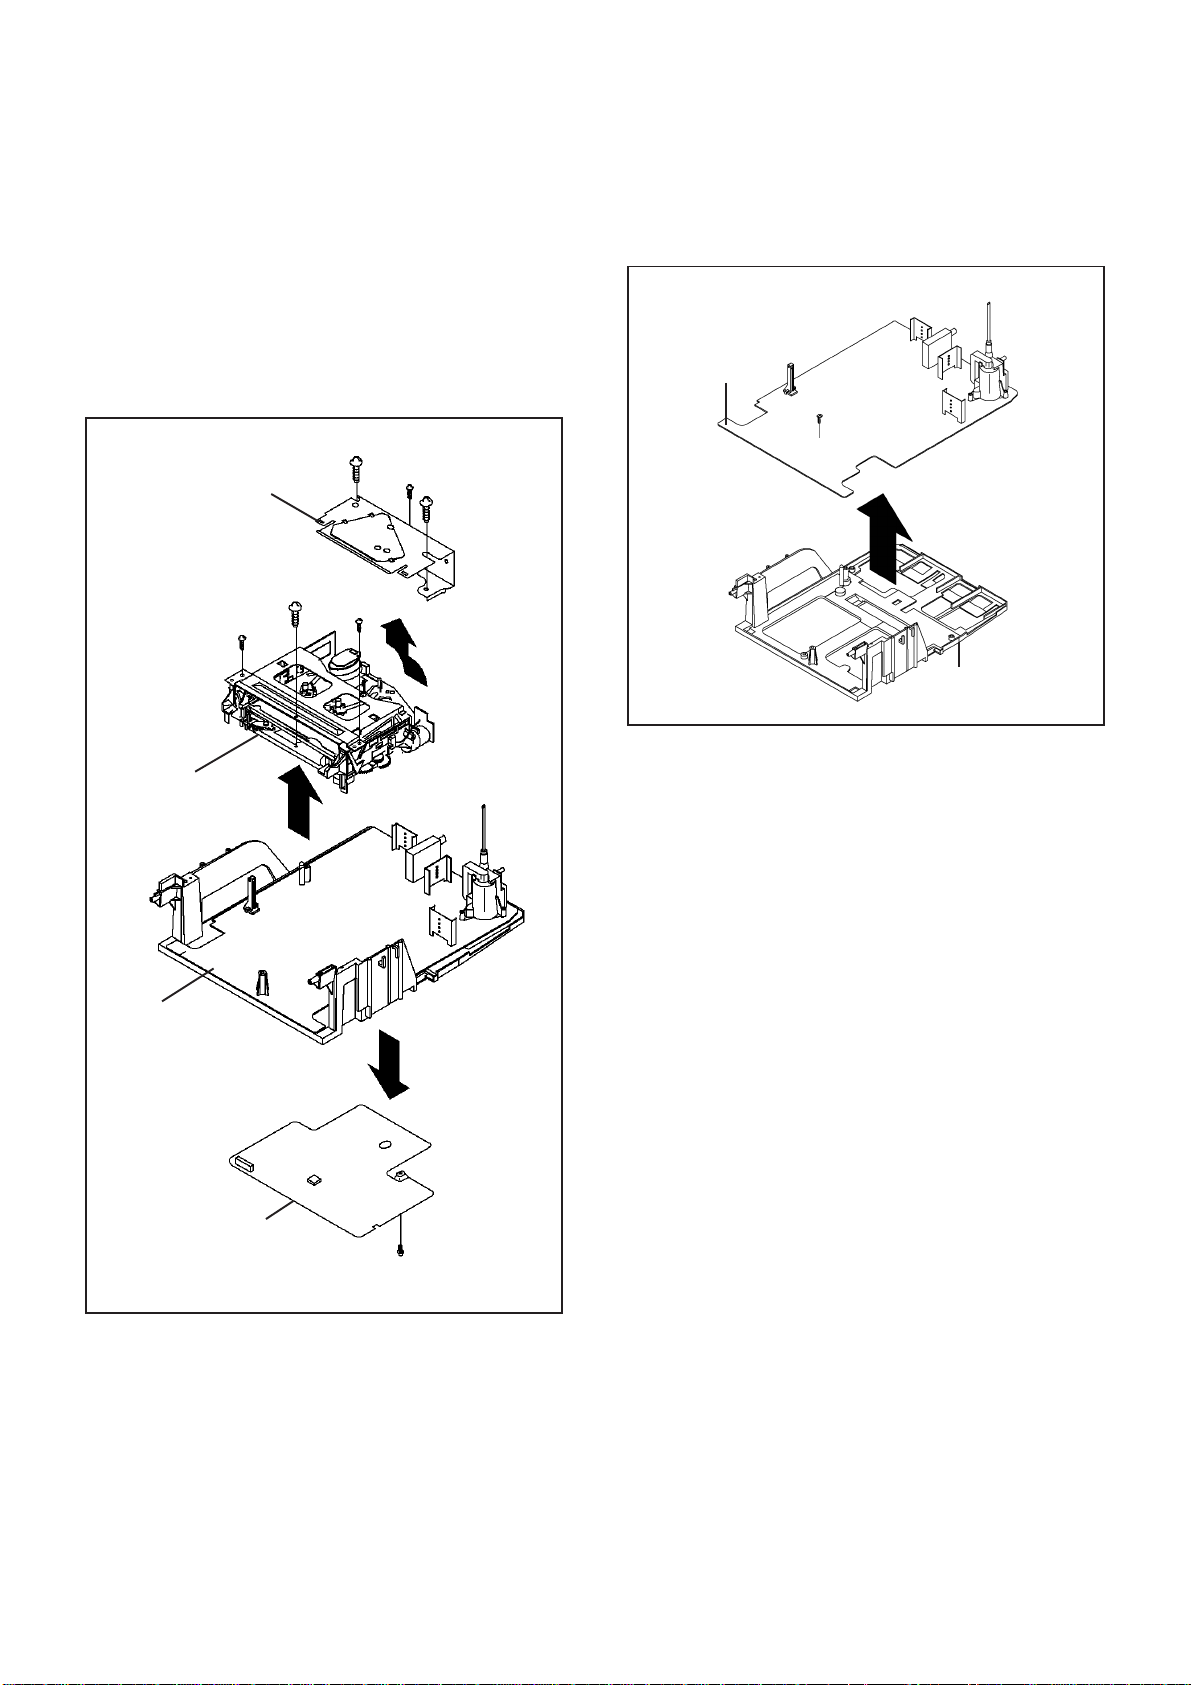
DISASSEMBLY INSTRUCTIONS
1-4:
DECK SHIELD PLATE, DECK CHASSIS AND
BOTTOM SHIELD (Refer to Fig. 1-4)
1.
Remove the 3 screws 1.
2.
Remove the 3 screws 2.
3.
Remove the Deck Shield Plate in the direction of arrow (A).
4.
Disconnect the following connectors: (CP1004, CP1005,
CP1006, CP4001, CP4002 and CP4003).
5.
Remove the Deck Chassis in the direction of arrow (B).
6.
Remove the screw 3.
7.
Remove the Bottom Shield in the direction of arrow (C).
2
Deck Shield Plate
2
1
1
2
1
(A)
1-5: SYSCON PCB (Refer to Fig. 1-5)
1.2.Remove the screw 1.
Remove the Syscon PCB in the direction of arrow.
Syscon PCB
1
Deck Holder
Fig. 1-5
Deck Chassis
Syscon PCB
(B)
(C)
Bottom Shield
3
Fig. 1-4
B1-2
Page 43
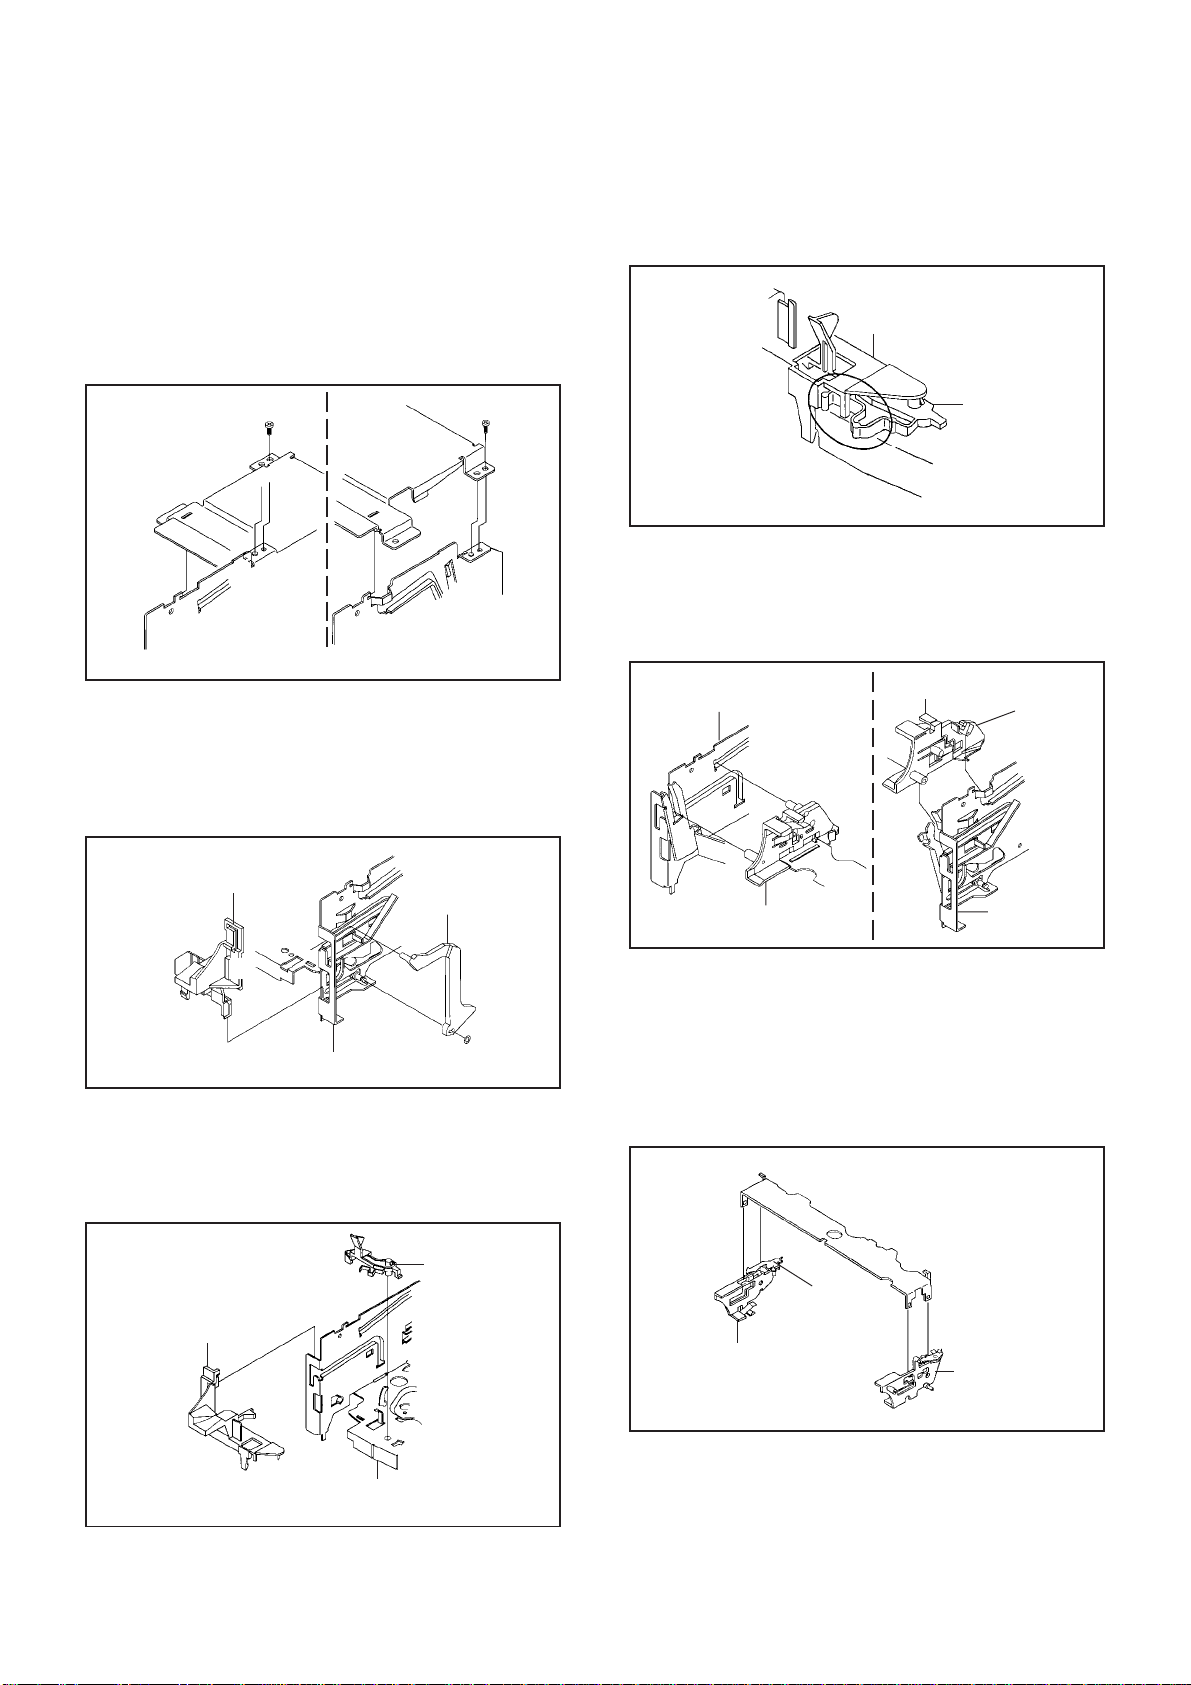
DISASSEMBLY INSTRUCTIONS
2. REMOVAL OF DECK PARTS
2-1: TOP BRACKET (Refer to Fig. 2-1)
Remove the 2 screws 1.
1.
Slide the 2 supports 2 and remove the Top Bracket.
2.
NOTE
When you install the Top Bracket, install the screw (1)
first, then install the screw (2).
(2)
1
Top Bracket
2
Main Chassis
• Screw Torque: 5 ± 0.5kgf•cm
Top Bracket
2
Main Chassis
2-2: FLAP LEVER/TAPE GUIDE R (Refer to Fig. 2-2)
Move the Cassette Holder Ass'y to the back side.
1.
Remove the Polyslider Washer 1.
2.
Remove the Flap Lever.
3.
Unlock the 3 supports 2 and remove the Tape Guide R.
4.
(1)
1
Fig. 2-1
NOTE
When you install the Tape Guide L, install as shown in the
circle of Fig. 2-3-B. (Refer to Fig. 2-3-B)
Tape Guide L
REC Lever
• The REC Lever is not installed on the Video Cassette Player.
Fig. 2-3-B
2-4: CASSETTE HOLDER ASS'Y (Refer to Fig. 2-4)
Move the Cassette Holder Ass'y to the front side.
1.
Push the Locker R to remove the Cassette Side R.
2.
Remove the Cassette Side L.
3.
Main Chassis
Cassette Side R
Locker R
Tape Guide R
Flap Lever
2
2
2
Main Chassis
1
Fig. 2-2
2-3: TAPE GUIDE L (Refer to Fig. 2-3-A)
Move the Cassette Holder Ass'y to the back side.
1.
Unlock the 2 supports 1 and remove the Tape Guide L.
2.
Remove the REC Lever. (Recorder only)
3.
REC Lever
Tape Guide L
1
Cassette Side L
Main Chassis
Fig. 2-4
2-5: CASSETTE SIDE L/R (Refer to Fig. 2-5)
Unlock the 4 supports 1 and then remove the Cassette
1.
Side L/R.
NOTE
When you install the Cassette Side R, be sure to move the
Locker R after installing.
1
1
Locker R
Cassette Side R
1
1
Cassette Side L
Fig. 2-5
1
Main Chassis
• The REC Lever is not installed on the Video Cassette Player.
Fig. 2-3-A
B2-1
Page 44
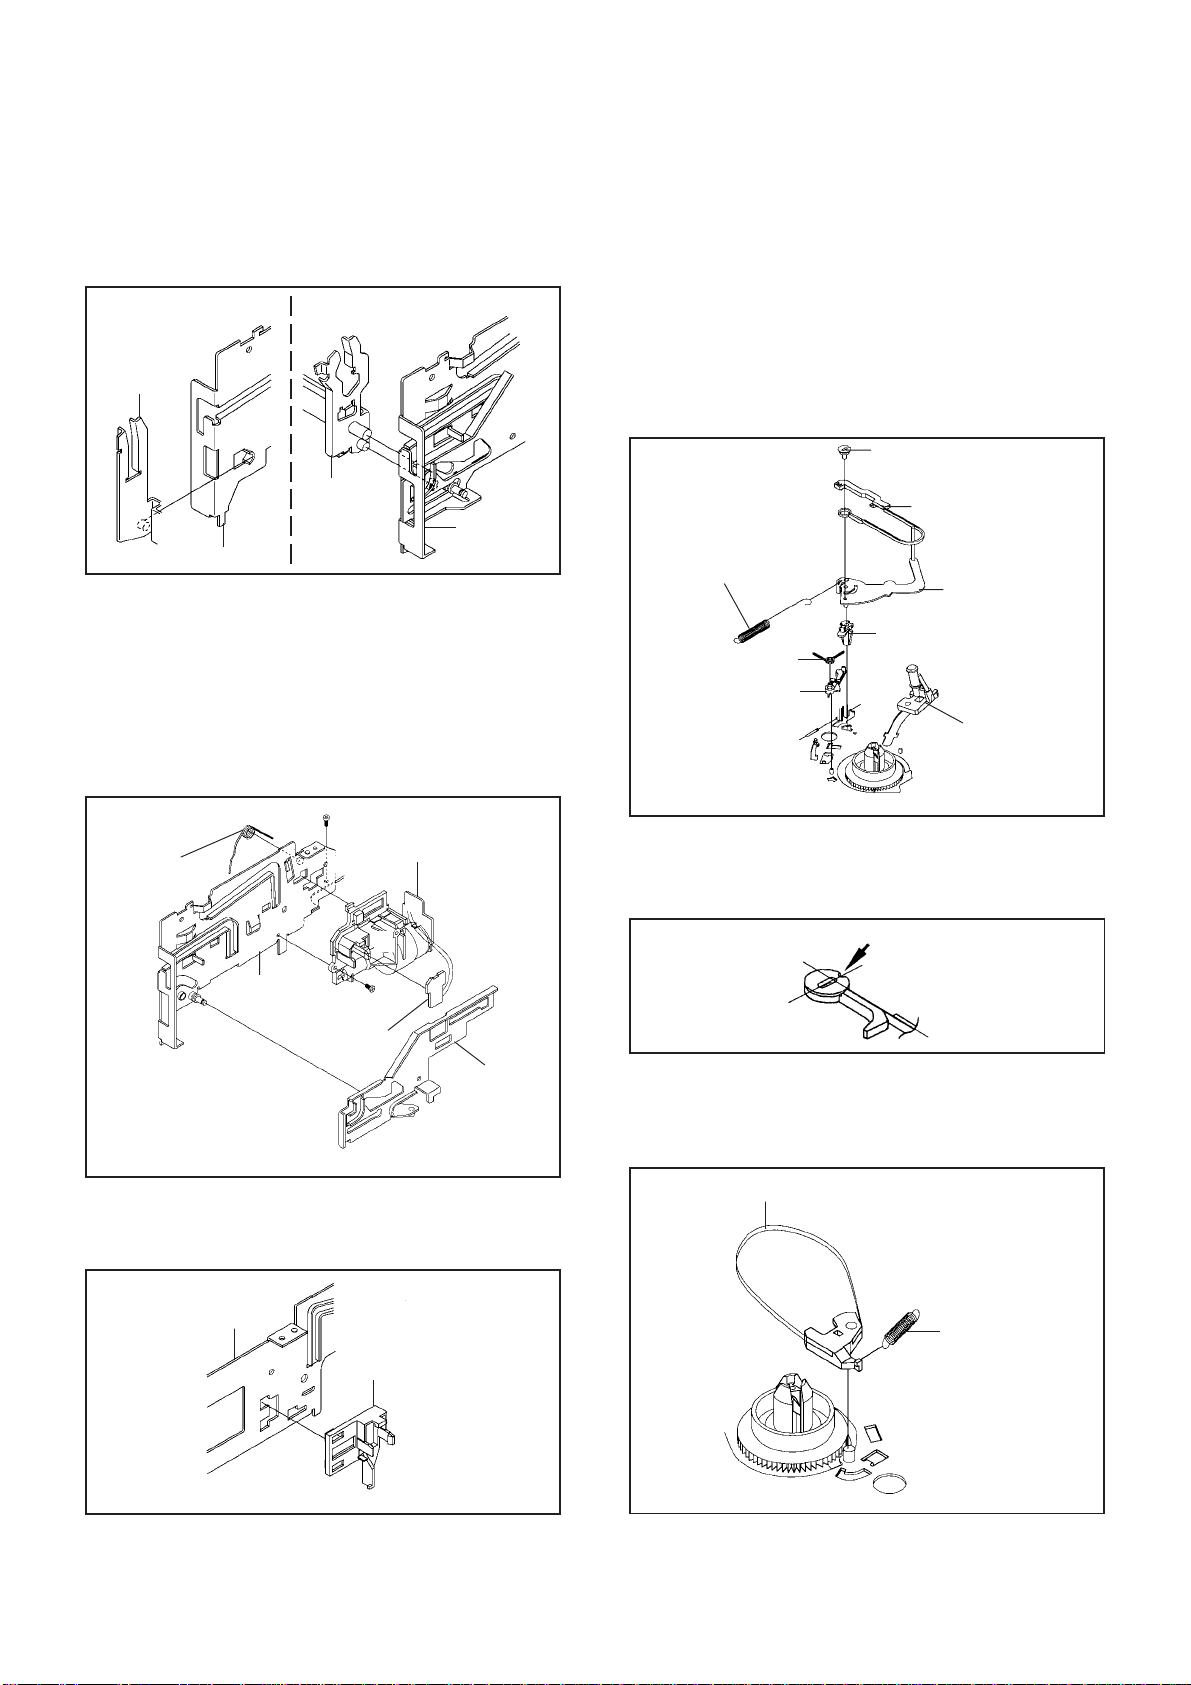
DISASSEMBLY INSTRUCTIONS
2-6: LINK ASS'Y (Refer to Fig. 2-6)
Set the Link Ass'y to the Eject position.
1.
Remove the (A) side of the Link Ass'y first, then remove
2.
the (B) side.
Link Ass'y
(A)
Main Chassis
(B)
Link Ass'y
Main Chassis
Fig. 2-6
2-7: LOADING MOTOR ASS'Y (Refer to Fig. 2-7)
Remove the Link Lever.
1.
Remove the Dumper Spring.
2.
Remove the 2 screws 1.
3.
Unlock the support 2 and remove the Loading Motor
4.
Ass'y.
Unlock the 2 supports 3 and remove the Deck PCB
5.
(BOT).
1
Dumper Spring
Loading Motor Ass'y
2
2-9: TENSION ASS'Y (Refer to Fig. 2-9-A)
Move the Inclined S Ass'y to the back side.
1.
Remove the Tension Spring.
2.
Unlock the support 1 and remove the Tension Arm
3.
Ass'y.
Remove the Tension Adjust.
4.
Unlock the 2 supports 2 and remove the Tension Band
5.
Ass'y.
Unlock the support 3 and remove the Tension Holder.
6.
Remove the SS Brake Spring.
7.
Remove the SS Arm Brake.
8.
Tension Adjust
2
Tension Spring
SS Brake Spring
SS Arm Brake
2
1
3
Tension Band Ass'y
Tension Arm Ass'y
Tension Holder
Inclined S Ass'y
Fig. 2-9-A
NOTE
When you install the Tension Adjust, install as shown in
Fig. 2-9-B. (Refer to Fig. 2-9-B)
3
Main Chassis
• Screw Torque: 5 ± 0.5kgf•cm
1
Deck PCB
(BOT)
2-8: SENSOR COVER L3 (Refer to Fig. 2-8)
Unlock the support 1 and remove the Sensor Cover L3.1.
Main Chassis
Sensor Cover L3
1
Link Lever
Fig. 2-7
Fig. 2-8
Adjust the direction of the Marker to inside.
2-10: T BRAKE ASS'Y (Refer to Fig. 2-10)
Remove the T Brake Spring.
1.
Remove the T Brake Ass'y.
2.
T Brake Ass'y
T Brake Spring
Fig. 2-9-B
Fig. 2-10
B2-2
Page 45
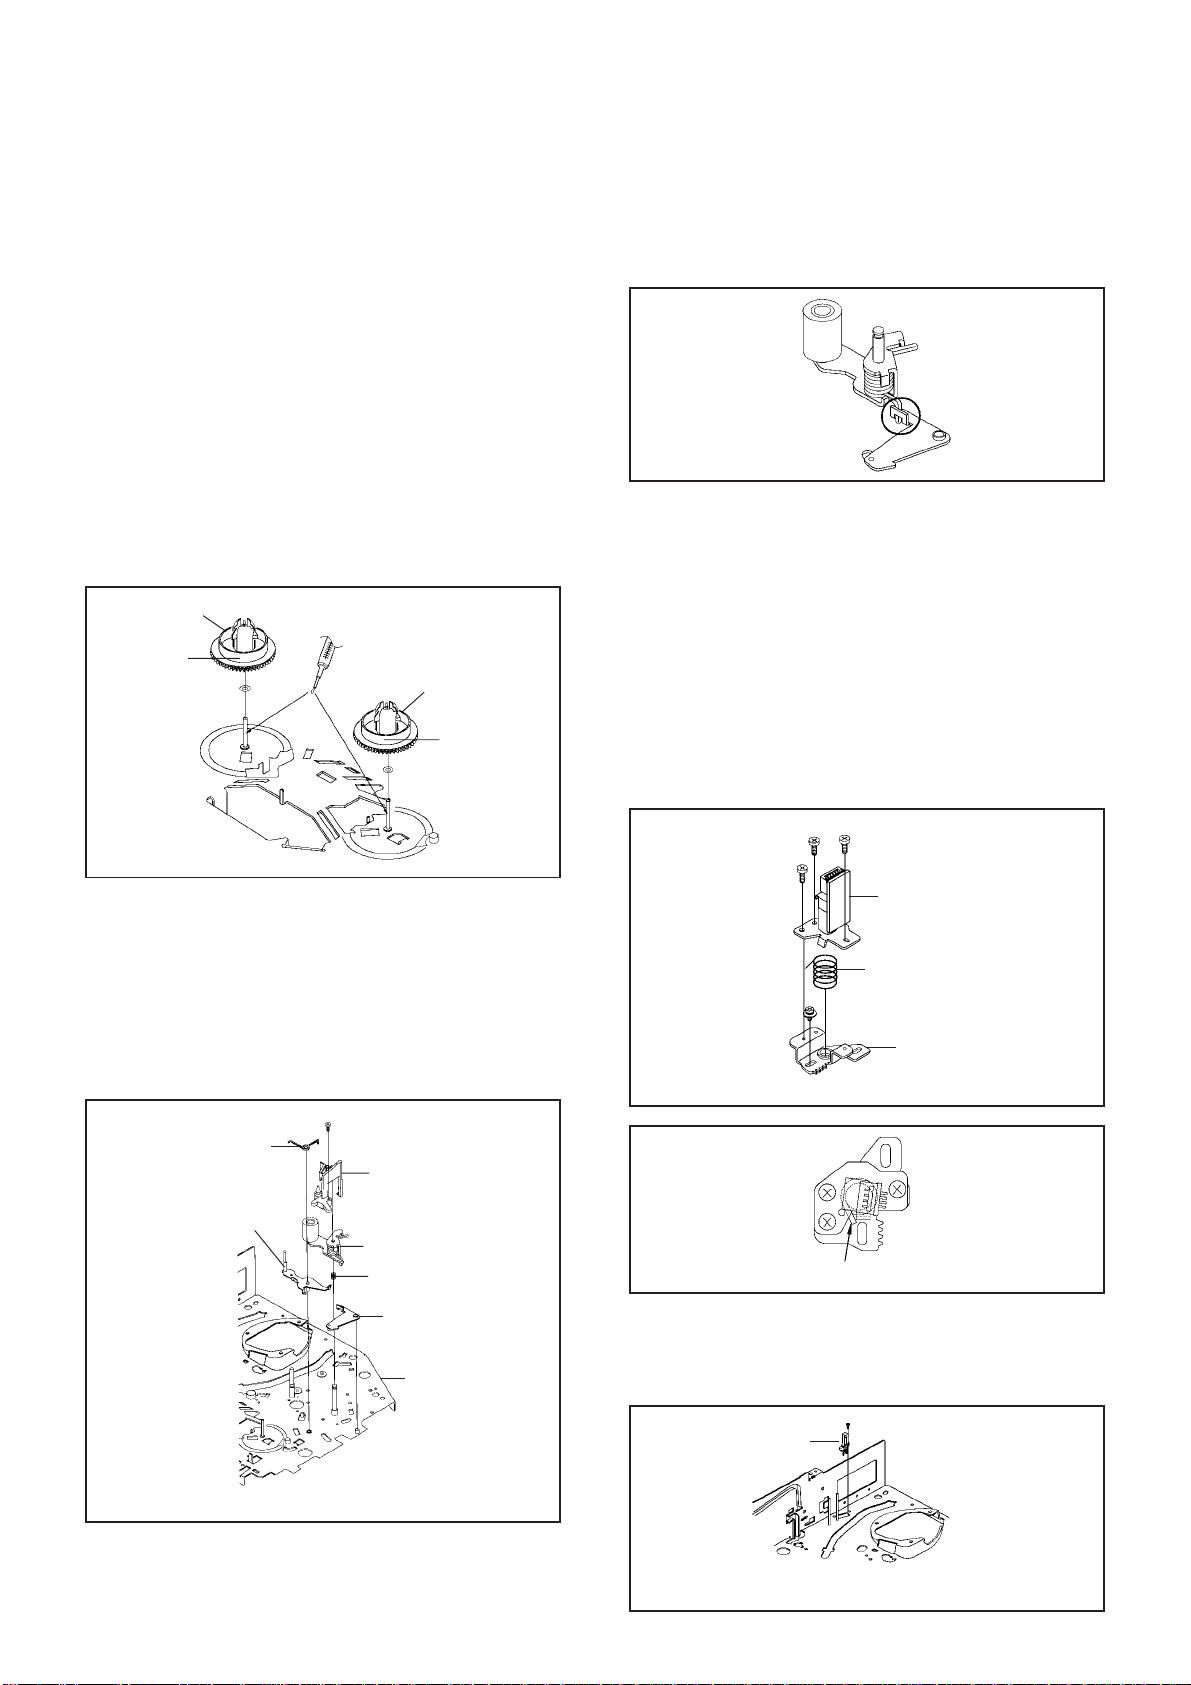
DISASSEMBLY INSTRUCTIONS
2-11: S REEL/T REEL (Refer to Fig. 2-11)
Remove the S Reel and T Reel.
1.
Remove the 2 Polyslider Washers 1.
2.
NOTE
Take care not to damage the gears of the S Reel and T
1.
Reel.
The Polyslider Washer may be remained on the back of
2.
the reel.
Take care not to damage the shaft.
3.
Do not touch the section "A" of S Reel and T Reel. (Use
4.
gloves.) (Refer to Fig. 2-11) Do not adhere the stains
on it.
When you install the reel, clean the shaft and oil it (FL
5.
OIL #6115). (If you do not oil, noise may be heard in FF/
REW mode.)
After installing the reel, adjust the height of the reel.
6.
(Refer to MECHANICAL ADJUSTMENT)
S Reel
(A)
1
T Reel
(A)
1
NOTE
Do not touch the Pinch Roller. (Use gloves.)
1.
When you install the Pinch Roller Block, install as shown
2.
in the circle of Fig. 2-12-B. (Refer to Fig. 2-12-B)
Fig. 2-12-B
2-13: A/C HEAD (Refer to Fig. 2-13-A)
Remove the screw 1.
1.
Remove the A/C Head Base.
2.
Remove the 3 screws 2.
3.
Remove the A/C Head and A/C Head Spring.
4.
NOTE
Do not touch the A/C Head. (Use gloves.)
1.
When you install the A/C Head Spring, install as shown
2.
in Fig. 2-13-B. (Refer to Fig. 2-13-B)
When you install the A/C Head, tighten the screw (1)
3.
first, then tighten the screw (2), finally tighten the screw
(3).
2-12: PINCH ROLLER BLOCK/P5-3 ARM ASS'Y
(Refer to Fig. 2-12-A)
Remove the P5 Spring.
1.
Remove the screw 1.
2.
Unlock the 2 supports 2 and remove the Cassette
3.
Opener.
Remove the Pinch Roller Block, Pinch Roller Arm
4.
Spring, Pinch Roller Lever Ass'y and P5-3 Arm Ass'y.
P5 Spring
P5-3 Arm Ass'y
1
2
Cassette Opener
2
Pinch Roller Block
Pinch Roller Arm Spring
Pinch Roller Lever Ass'y
Main Chassis
Fig. 2-11
(3)
(1)
2
2
(2)
1
• Screw Torque: 4 ± 0.5kgf•cm (Screw 1)
2
Spring Position
A/C Head
A/C Head Spring
A/C Head Base
Fig. 2-13-A
Fig. 2-13-B
2-14: FE HEAD (RECORDER ONLY) (Refer to Fig. 2-14)
Remove the screw 1.
1.
Remove the FE Head.
2.
• Screw Torque: 5 ± 0.5kgf•cm
Fig. 2-12-A
B2-3
FE Head
• The FE Head is not installed on the Video Cassette Player.
• Screw Torque: 4 ± 0.5kgf•cm
1
Fig. 2-14
Page 46
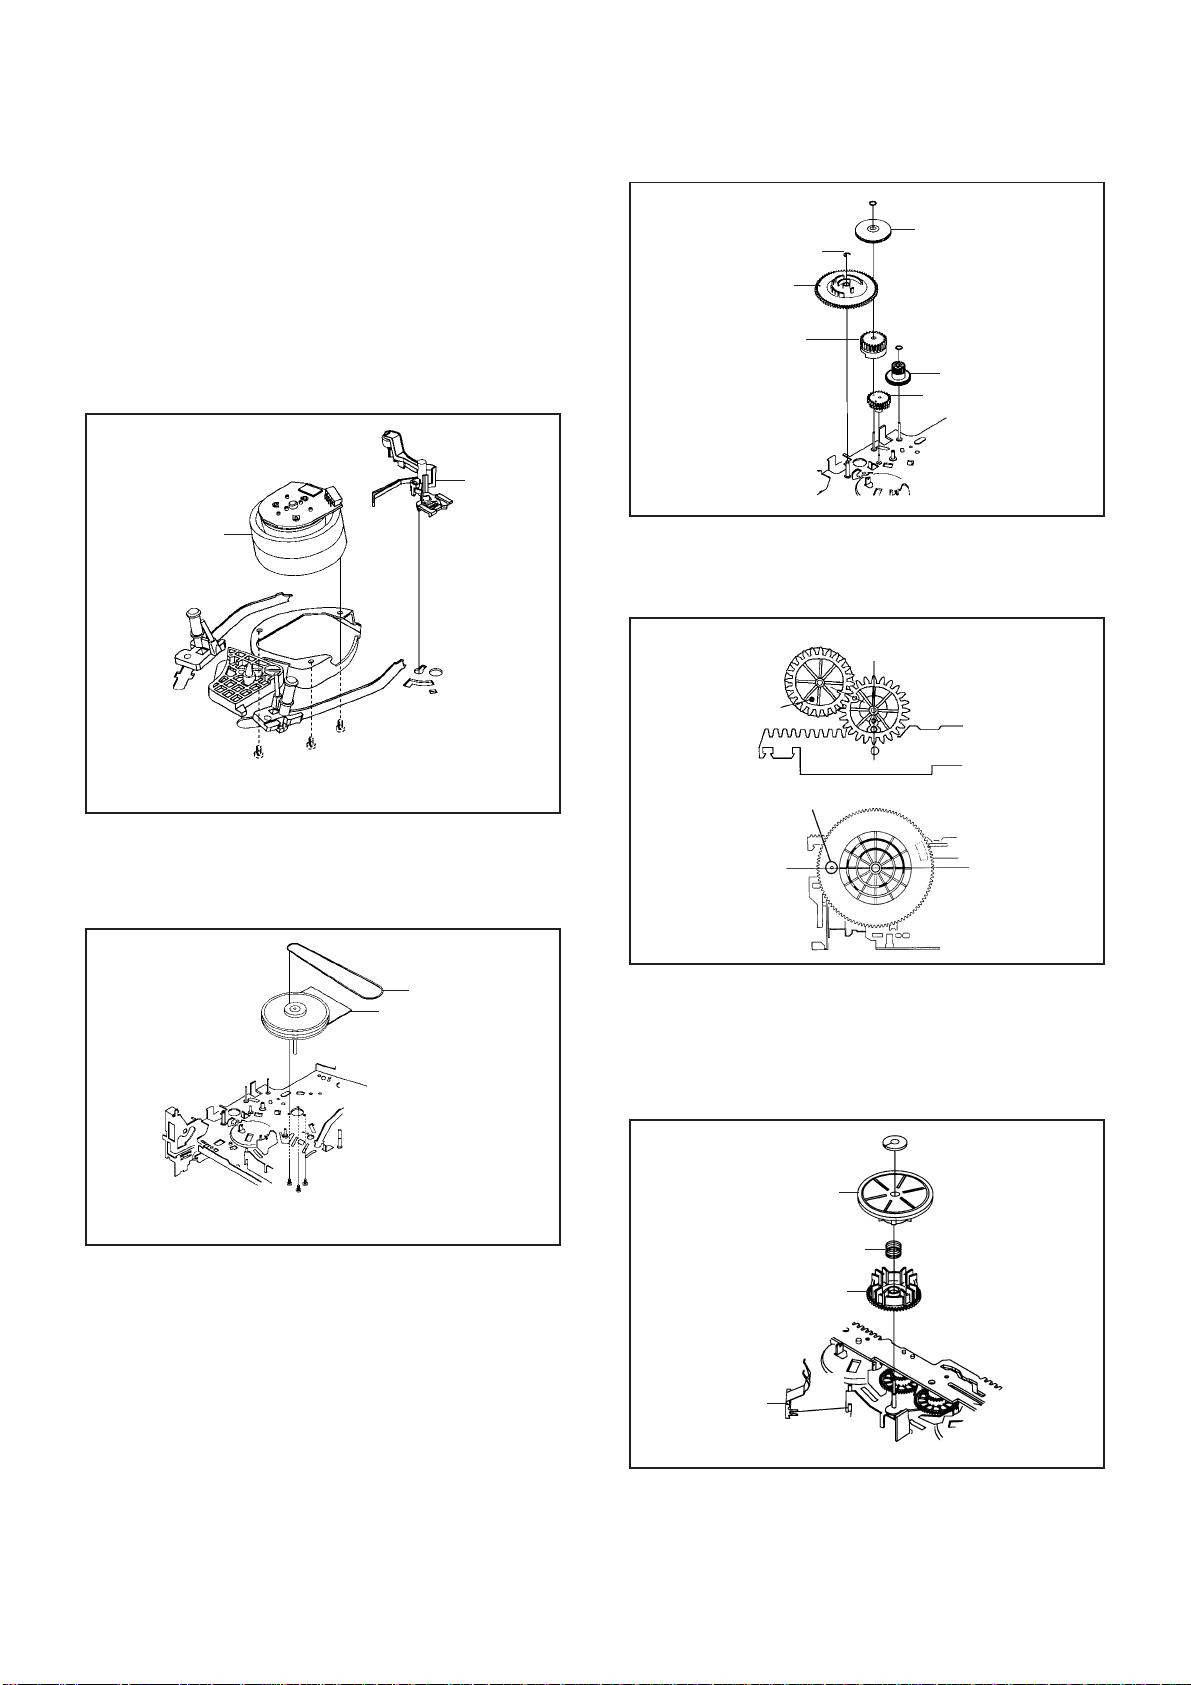
DISASSEMBLY INSTRUCTIONS
2-15: AHC ASS'Y/CYLINDER UNIT ASS'Y
(Refer to Fig. 2-15)
Unlock the support 1 and remove the AHC Ass'y.
1.
Remove the 3 screws 2.
2.
Remove the Cylinder Unit Ass'y.
3.
NOTE
When you install the Cylinder Unit Ass'y, tighten the
screws from (1) to (3) in order while pulling the Ass'y
toward the left front direction.
AHC Ass'y
Cylinder Unit Ass'y
2
(2)
• Screw Torque: 3 ± 0.5kgf•cm
(1)
2
2
(3)
1
Fig. 2-15
2-16: CAPSTAN DD UNIT (Refer to Fig. 2-16)
Remove the Capstan Belt.
1.
Remove the 3 screws 1.
2.
Remove the Capstan DD Unit.
3.
1
Middle Gear
E-Ring
Main Cam
Pinch Roller Cam
2
Joint Gear
P5 Cam
Fig. 2-17-A
NOTE
When you install the Pinch Roller Cam, P5 Cam and Main
Cam, align each marker. (Refer to Fig. 2-17-B)
Pinch Roller Cam
Check the hole of Main
Chassis can be seen.
Marker
Main Cam
P5 Cam
Capstan Belt
Capstan DD Unit
1
1
1
• Screw Torque: 5 ± 0.5kgf•cm
Fig. 2-16
2-17: MIDDLE GEAR/MAIN CAM (Refer to Fig. 2-17-A)
Remove the Polyslider Washer 1, then remove the
1.
Middle Gear.
Remove the E-Ring, then remove the Main Cam, P5
2.
Cam and Pinch Roller Cam.
Remove the Polyslider Washer 2, then remove the
3.
Joint Gear.
Fig. 2-17-B
2-18: CLUTCH ASS'Y (Refer to Fig. 2-18)
Remove the Polyslider Washer 1.
1.
Remove the Clutch Ass'y, Ring Spring and Coupling
2.
Gear.
Unlock the 2 supports 2 and remove the Clutch Lever.
3.
1
Clutch Ass'y
Ring Spring
Coupling Gear
Clutch Lever
2
2
Fig. 2-18
B2-4
Page 47
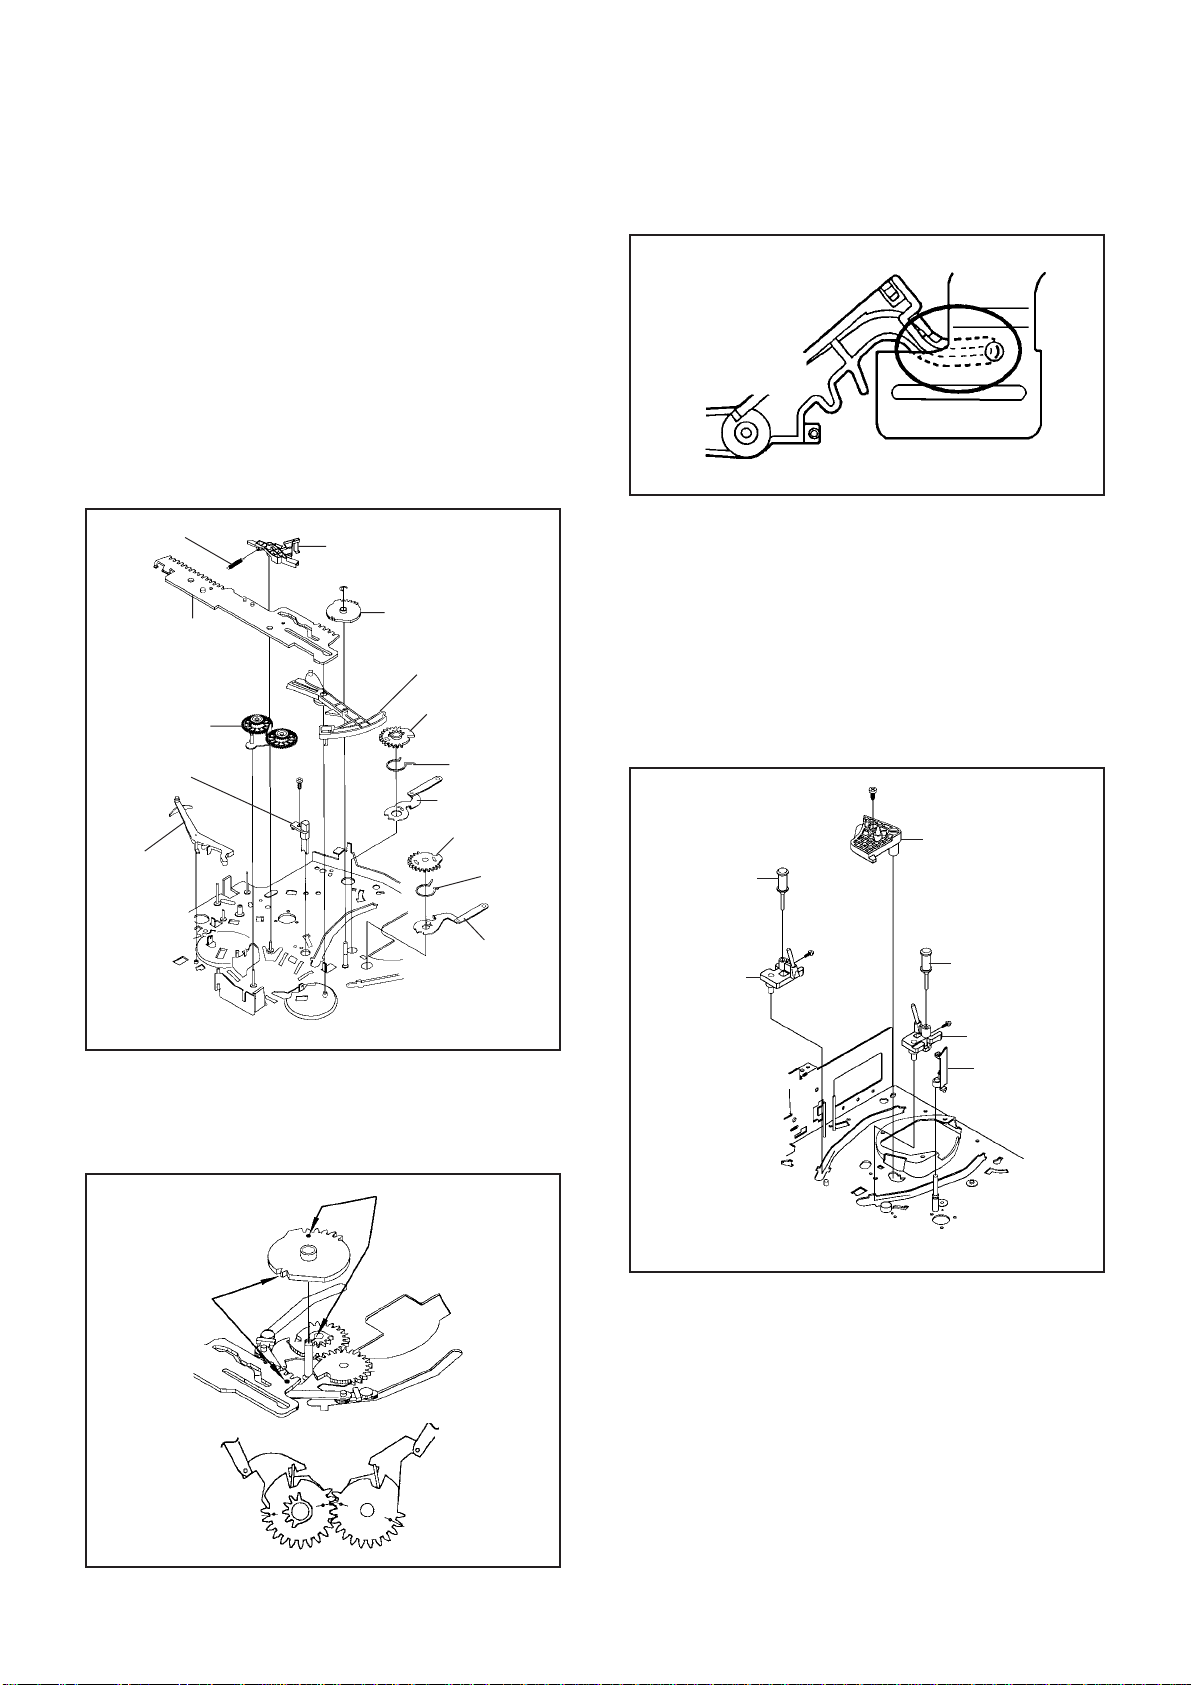
DISASSEMBLY INSTRUCTIONS
2-19: LOADING GEAR S/T ASS'Y (Refer to Fig. 2-19-A)
Remove the E-Ring 1 and remove the Main Loading
1.
Gear.
Remove the Capstan Brake Spring.
2.
Slide the Main Rod and remove the Capstan Brake
3.
Ass'y.
Remove the Main Rod, Tension Lever, Clutch Actuator,
4.
Idler Arm Ass'y.
Remove the screw 2.
5.
Remove the LED Reflecter.
6.
Remove the Loading Arm S Ass'y and Loading Arm T
7.
Ass'y.
8.
Remove the Loading Gear S and Loading Gear T.
9.
Remove the Loading Gear Spring.
Capstan Brake Spring
Main Rod
Idler Arm Ass'y
LED Reflecter
Clutch Actuator
Capstan Brake Ass'y
2
1
Main Loading Gear
Tension Lever
Loading Gear T
Loading Gear
Spring
Loading Arm T Ass'y
Loading Gear S
Loading Gear
Spring
2. When you install the Clutch Actuator, install as shown in
the circle of Fig. 2-19-C. (Refer to Fig. 2-19-C)
Clutch Actuator
Fig. 2-19-C
2-20: INCLINED S/T ASS'Y (Refer to Fig. 2-20)
Unlock the support 1 and remove the P4 Cover.
1.
Remove the screw 2.
2.
Unlock the support 3 and remove the Loading Gear
3.
Holder.
Remove the Inclined S.
4.
Remove the Inclined T.
5.
Remove the 2 screws 4, then remove the Guide Roller.
6.
NOTE
Do not touch the roller of Guide Roller.
2
Loading Gear Holder
Guide Roller
3
Loading Arm S Ass'y
• Screw Torque: 5 ± 0.5kgf•cm
Fig. 2-19-A
NOTES
1. When you install the Loading Arm S Ass'y, Loading Arm
T Ass'y and Main Loading Gear, align each marker.
(Refer to Fig. 2-19-B)
Marker
Main Loading Gear
Marker
Loading Arm T Ass'y
Loading Arm S Ass'y
4
Inclined S
• Screw Torque: 5 ± 0.2kgf•cm (Screw 2)
• Screw Torque: 0.7 ± 0.2kgf•cm (Screw 4)
Guide Roller
4
Inclined T
P4 Cover
1
Fig. 2-20
Fig. 2-19-B
B2-5
Page 48
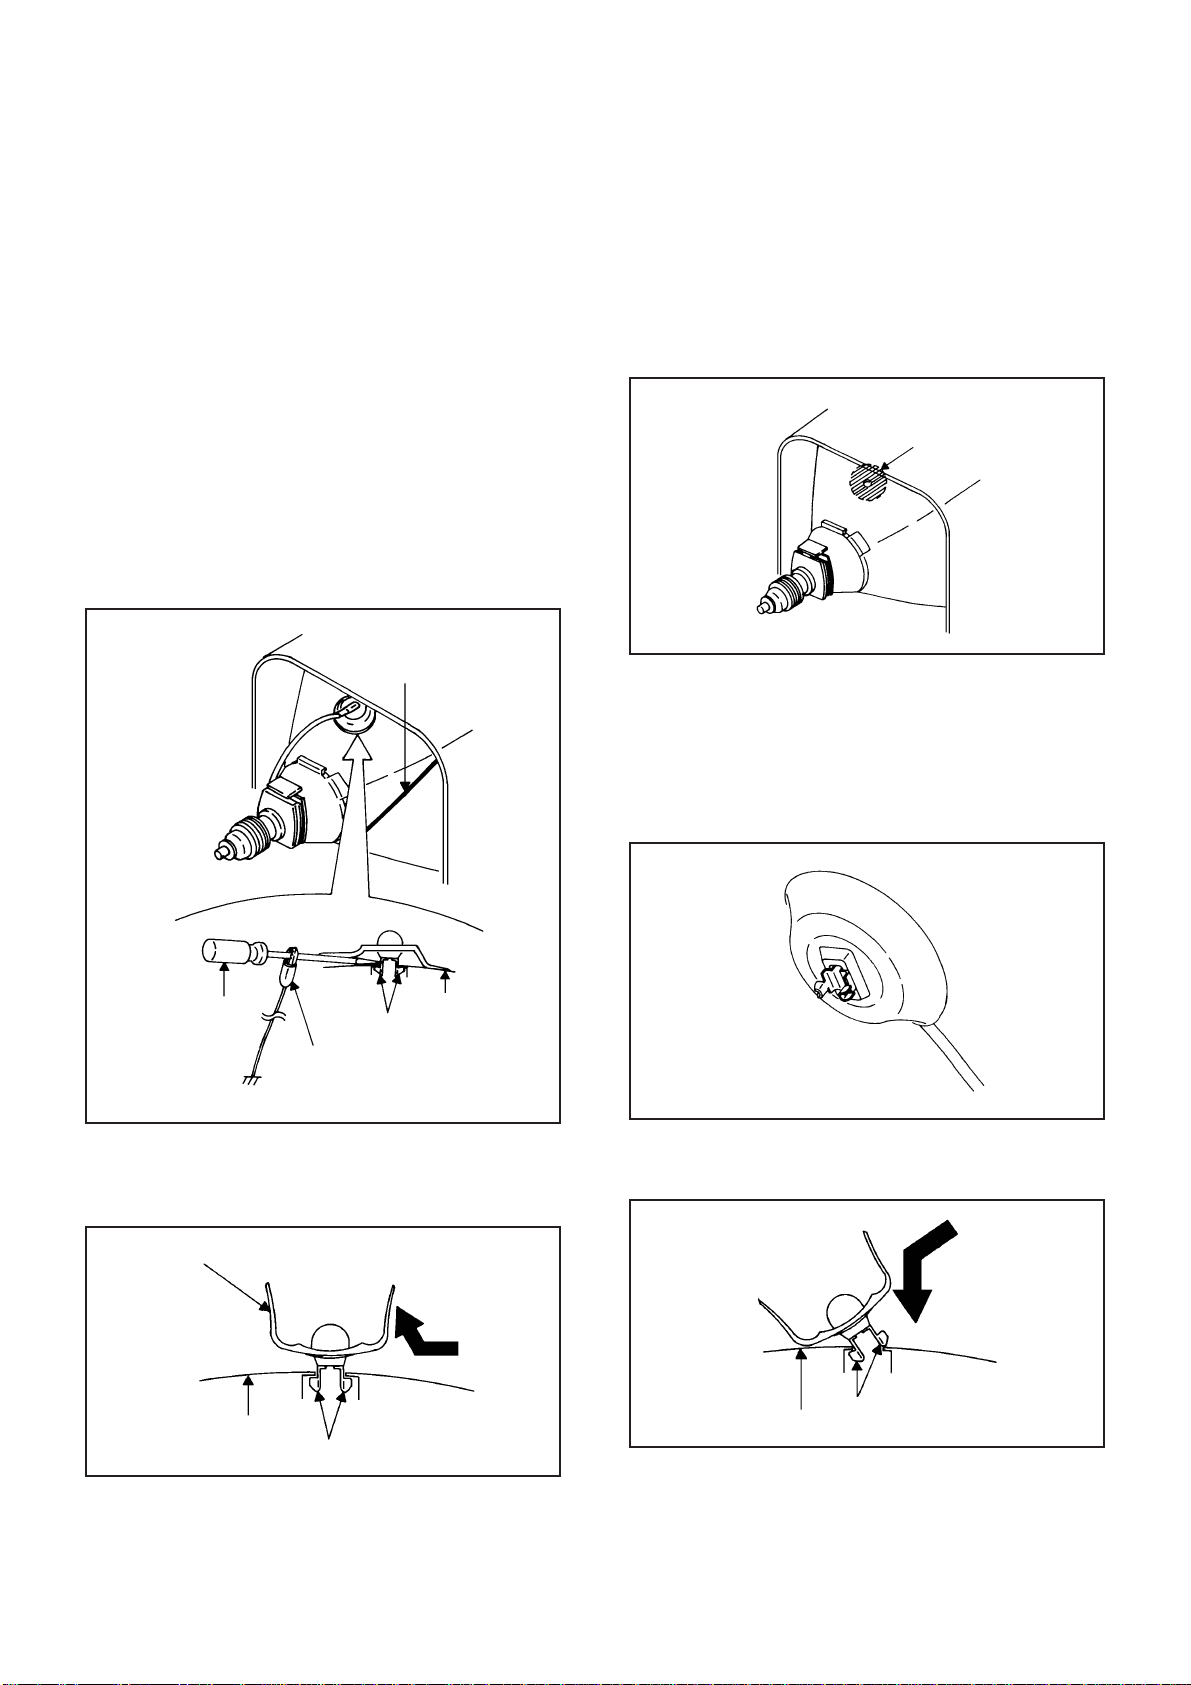
DISASSEMBLY INSTRUCTIONS
3. REMOVAL OF ANODE CAP
Read the following NOTED items before starting work.
After turning the power off there might still be a potential
*
voltage that is very dangerous. When removing the
Anode Cap, make sure to discharge the Anode Cap's
potential voltage.
Do not use pliers to loosen or tighten the Anode Cap
*
terminal, this may cause the spring to be damaged.
REMOVAL
1. Follow the steps as follows to discharge the Anode Cap.
(Refer to Fig. 3-1.)
Connect one end of an Alligator Clip to the metal part of
a flat-blade screwdriver and the other end to ground.
While holding the plastic part of the insulated Screwdriver,
touch the support of the Anode with the tip of the
Screwdriver.
A cracking noise will be heard as the voltage is discharged.
GND on the CRT
3. After one side is removed, pull in the opposite direction to
remove the other.
NOTE
Take care not to damage the Rubber Cap.
INSTALLATION
1. Clean the spot where the cap was located with a small
amount of alcohol. (Refer to Fig. 3-3.)
Location of Anode Cap
Fig. 3-3
NOTE
Confirm that there is no dirt, dust, etc. at the spot where
the cap was located.
2.3.Arrange the wire of the Anode Cap and make sure the
wire is not twisted.
Turn over the Rubber Cap. (Refer to Fig. 3-4.)
Screwdriver
Alligator Clip
GND on the CRT
Flip up the sides of the Rubber Cap in the direction of the
2.
arrow and remove one side of the support.
(Refer to Fig. 3-2.)
Rubber Cap
CRT
Support
Support
CRT
Fig. 3-1
Fig. 3-2
Fig. 3-4
4. Insert one end of the Anode Support into the anode button,
then the other as shown in Fig. 3-5.
Support
CRT
5.6.Confirm that the Support is securely connected.
Put on the Rubber Cap without moving any parts.
Fig. 3-5
B3-1
Page 49

A
A/C
ACC
AE
AFC
AFT
AFT DET
AGC
AMP
ANT
A.PB
APC
ASS'Y
AT
AUTO
A/V
B
BGP
BOT
BPF
BRAKE SOL
BUFF
B/W
C
C
CASE
CAP
CARR
CH
CLK
CLOCK (SY-SE)
COMB
CONV
CPM
CTL
CYL
CYL-M
CYL SENS
D
DATA (SY-CE)
dB
DC
DD Unit
DEMOD
DET
DEV
E
E
EF
EMPH
ENC
ENV
EOT
EQ
EXT
F
F
FBC
FE
FF
FG
FL SW
FM
FSC
FWD
G
GEN
GND
H
H.P.F
KEY TO ABBREVIATIONS
:
Audio/Control
:
Automatic Color Control
:
Audio Erase
:
Automatic Frequency Control
:
Automatic Fine Tuning
:
Automatic Fine Tuning Detect
:
Automatic Gain Control
:
Amplifier
:
Antenna
:
Audio Playback
:
Automatic Phase Control
:
Assembly
:
All Time
:
Automatic
:
Audio/Video
:
Burst Gate Pulse
:
Beginning of Tape
:
Bandpass Filter
:
Brake Solenoid
:
Buffer
:
Black and White
:
Capacitance, Collector
:
Cassette
:
Capstan
:
Carrier
:
Channel
:
Clock
:
Clock (Syscon to Servo)
:
Combination, Comb Filter
:
Converter
:
Capstan Motor
:
Control
:
Cylinder
:
Cylinder-Motor
:
Cylinder-Sensor
:
Data (Syscon to Servo)
:
Decibel
:
Direct Current
:
Direct Drive Motor Unit
:
Demodulator
:
Detector
:
Deviation
:
Emitter
:
Emitter Follower
:
Emphasis
:
Encoder
:
Envelope
:
End of Tape
:
Equalizer
:
External
:
Fuse
:
Feed Back Clamp
:
Full Erase
:
Fast Forward, Flipflop
:
Frequency Generator
:
Front Loading Switch
:
Frequency Modulation
:
Frequency Sub Carrier
:
Forward
:
Generator
:
Ground
:
High Pass Filter
H.SW
Hz
I
IC
IF
IND
INV
K
KIL
L
L
LED
LIMIT AMP
LM, LDM
LP
L.P.F
LUMI.
M
M
MAX
MINI
MIX
MM
MOD
MPX
MS SW
N
NC
NR
O
OSC
OPE
P
PB
PB CTL
PB-C
PB-Y
PCB
P. CON
PD
PG
P-P
R
R
REC
REC-C
REC-Y
REEL BRK
REEL S
REF
REG
REW
REV, RVS
RF
RMC
RY
S
S. CLK
S. COM
S. DATA
SEG
SEL
SENS
SER
SI
SIF
SO
SOL
SP
STB
SW
:
Head Switch
:
Hertz
:
Integrated Circuit
:
Intermediate Frequency
:
Indicator
:
Inverter
:
Killer
:
Left
:
Light Emitting Diode
:
Limiter Amplifier
:
Loading Motor
:
Long Play
:
Low Pass Filter
:
Luminance
:
Motor
:
Maximum
:
Minimum
:
Mixer, mixing
:
Monostable Multivibrator
:
Modulator, Modulation
:
Multiplexer, Multiplex
:
Mecha State Switch
:
Non Connection
:
Noise Reduction
:
Oscillator
:
Operation
:
Playback
:
Playback Control
:
Playback-Chrominance
:
Playback-Luminance
:
Printed Circuit Board
:
Power Control
:
Phase Detector
:
Pulse Generator
:
Peak-to Peak
:
Right
:
Recording
:
Recording-Chrominance
:
Recording-Luminance
:
Reel Brake
:
Reel Sensor
:
Reference
:
Regulated, Regulator
:
Rewind
:
Reverse
:
Radio Frequency
:
Remote Control
:
Relay
:
Serial Clock
:
Sensor Common
:
Serial Data
:
Segment
:
Select, Selector
:
Sensor
:
Search Mode
:
Serial Input
:
Sound Intermediate Frequency
:
Serial Output
:
Solenoid
:
Standard Play
:
Serial Strobe
:
Switch
C1-1
Page 50

S
SYNC
SYNC SEP
T
TR
TRAC
TRICK PB
TP
U
UNREG
V
V
VCO
VIF
VP
V.PB
VR
V.REC
VSF
VSR
VSS
V-SYNC
VT
X
X'TAL
Y
Y/C
KEY TO ABBREVIATIONS
:
Synchronization
:
Sync Separator, Separation
:
Transistor
:
Tracking
:
Trick Playback
:
Test Point
:
Unregulated
:
Volt
:
Voltage Controlled Oscillator
:
Video Intermediate Frequency
:
Vertical Pulse, Voltage Display
:
Video Playback
:
Variable Resistor
:
Video Recording
:
Visual Search Fast Forward
:
Visual Search Rewind
:
Voltage Super Source
:
Vertical-Synchronization
:
Voltage Tuning
:
Crystal
:
Luminance/Chrominance
C1-2
Page 51
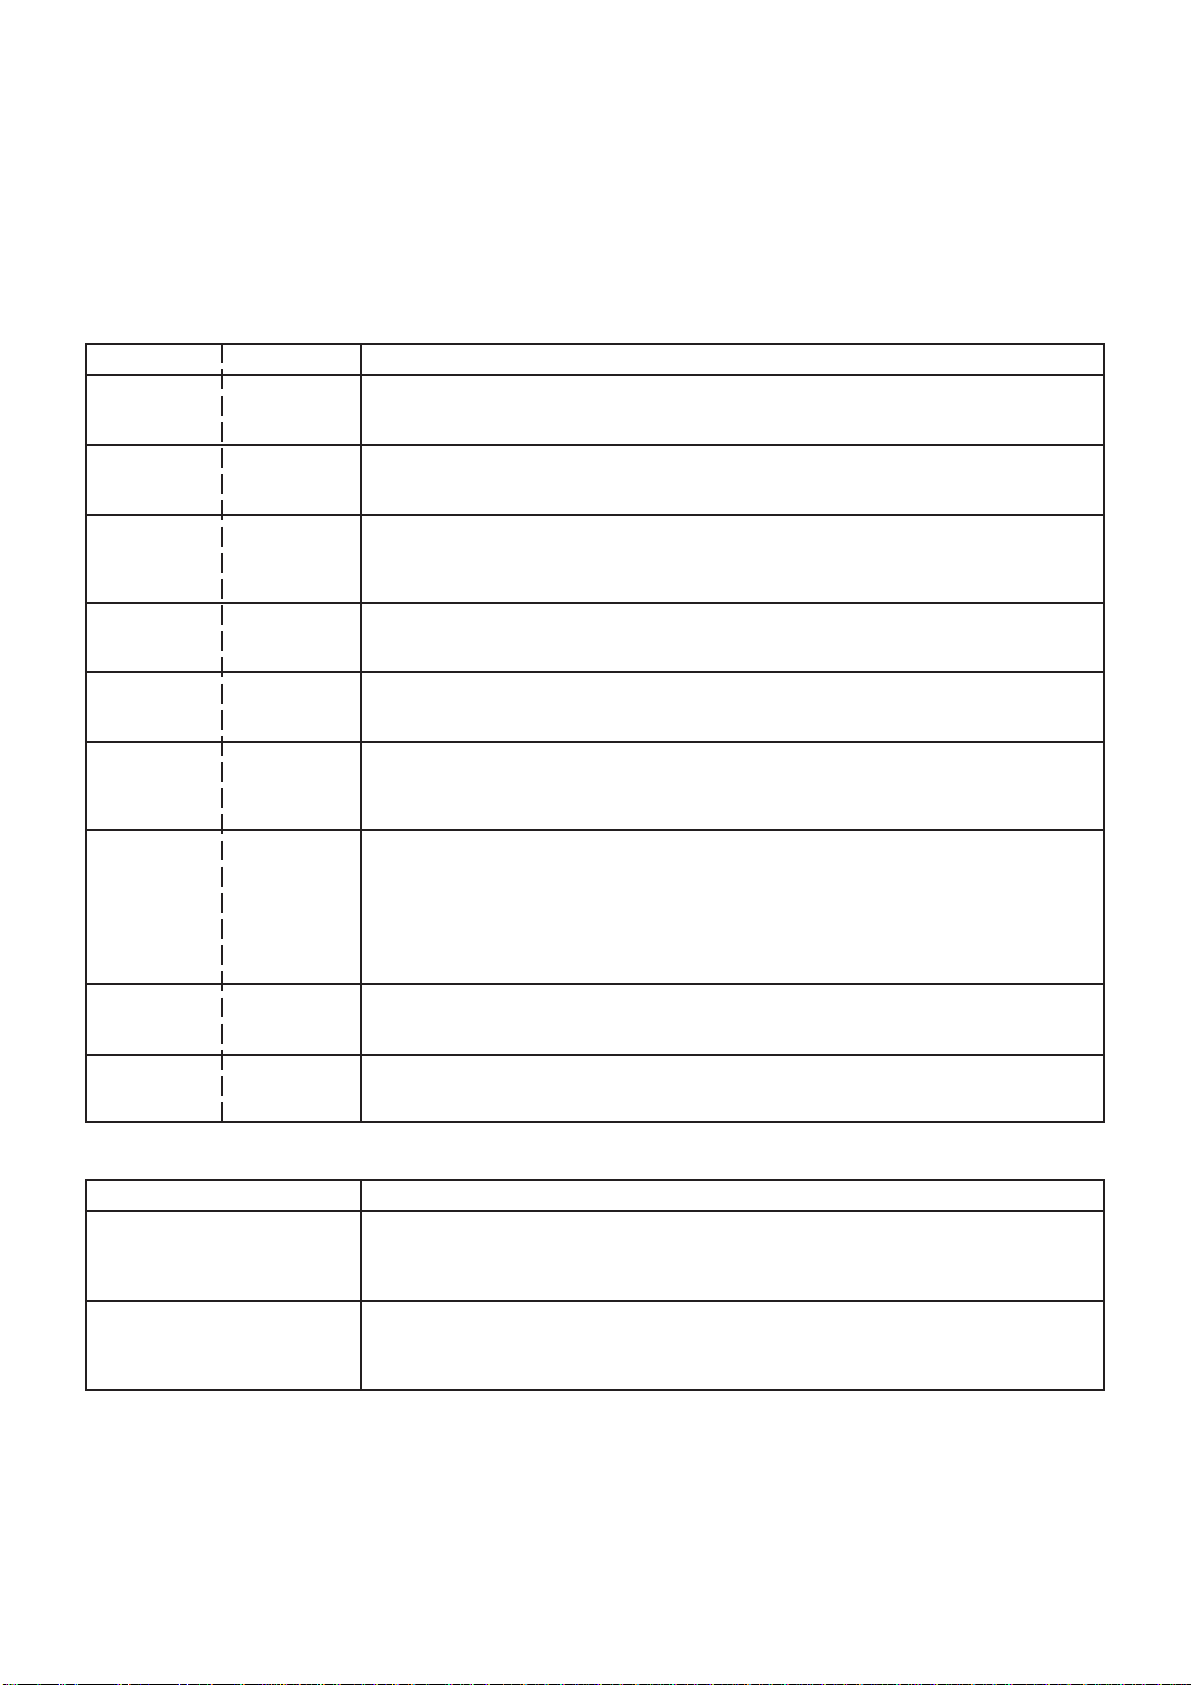
SERVICE MODE LIST
This unit provided with the following SERVICE MODES so you can repair, examine and adjust easily.
To enter SERVICE MODE, unplug AC cord till lost actual clock time. Then press and hold Vol (-) button of main unit and
remocon key simultaneously.
The both pressing of set key and remote control key will not be possible if clock has been set. To reset clock, either unplug
AC cord and allow at least 5 seconds before Power On.
Set Key Remocon Key Operations
VOL. (-) MIN
VOL. (-) MIN 1
VOL. (-) MIN
VOL. (-) MIN
VOL. (-) MIN 4
VOL. (-) MIN
VOL. (-) MIN
0
2
3
5
6
Releasing of V-CHIP PASSWORD.
Initialization of the factory.
NOTE: Do not use this for the normal servicing.
Horizontal position adjustment of OSD.
NOTE: Also can be adjusted by using the Adjustment MENU.
Refer to the "ELECTRICAL ADJUSTMENT" (OSD HORIZONTAL).
Adjust the PG SHIFTER automatically.
Refer to the "ELECTRICAL ADJUSTMENT" (PG SHIFTER).
Adjust the PG SHIFTER manually.
Refer to the "ELECTRICAL ADJUSTMENT" (PG SHIFTER).
Adjusting of the Tracking to the center position.
NOTE: Also can be adjusted by pressing the ATR button for more than 2 seconds
during PLAY.
POWER ON total hours and PLAY/REC total hours are displayed on the screen.
Refer to the "PREVENTIVE CHECKS AND SERVICE INTERVALS" (CONFIRMATION
OF USING HOURS).
Can be checked of the INITIAL DATA of MEMORY IC.
Refer to the "NOTE FOR THE REPLACING OF MEMORY IC".
VOL. (-) MIN 8
VOL. (-) MIN 9
Method Operations
Press the ATR button on the
remote control for more than
2 seconds during PLAY.
Make the short circuit between
the test point of SERVICE and
the GND.
Writing of EEPROM initial data.
NOTE: Do not use this for the normal servicing.
Display of the Adjustment MENU on the screen.
Refer to the "ELECTRICAL ADJUSTMENT" (On-Screen Display Adjustment).
Adjusting of the Tracking to the center position.
Refer to the "MECHANICAL ADJUSTMENT" (GUIDE ROLLER) and "ELECTRICAL
ADJUSTMENT" (PG SHIFTER).
The EOT/BOT/Reel sensor do not work at this moment.
Refer to the "PREPARATION FOR SERVICING"
C2-1
Page 52
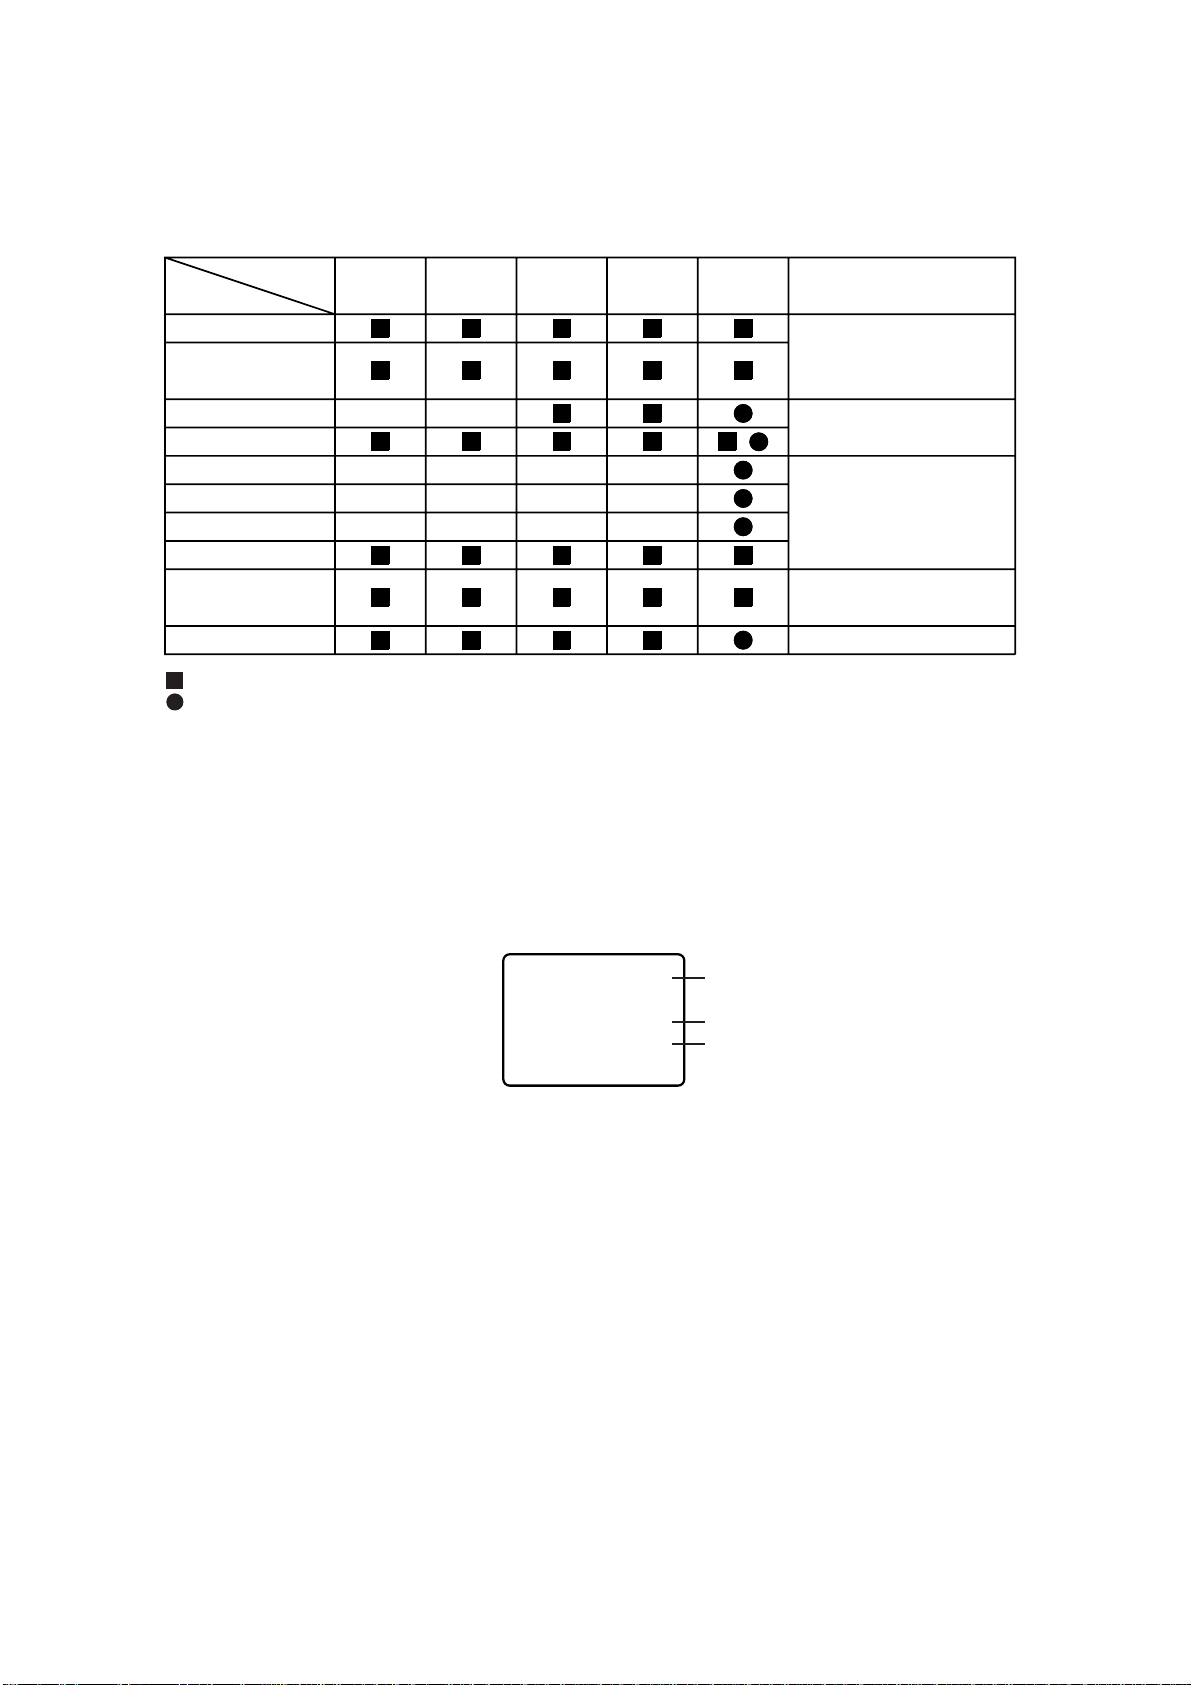
PREVENTIVE CHECKS AND SERVICE INTERVALS
The following standard table depends on environmental conditions and usage. Unless maintenance is properly
carried out, the following service intervals may be quite shortened as harmful effects may be had on other parts.
Also, long term storage or misuse may cause transformation and aging of rubber parts.
Time
Parts Name
Audio Control Head
Full Erase Head
(Recorder only)
Capstan Belt
Pinch Roller
Capstan DD Unit
Loading Motor
Tension Band
Capstan Shaft
Tape Running
Guide Post
Cylinder Unit
: Clean
: Replace
500
hours
1,000
hours
1,500
hours
2,000
hours
3,000
hours
Notes
Clean those parts in
contact with the tape.
Clean the rubber, and parts
which the rubber touches.
Replace when rolling
becomes abnormal.
Clean the Head
CONFIRMATION OF USING HOURS
POWER ON total hours and PLAY/REC total hours can be checked on the screen.
Total hours are displayed in 16 system of notation.
NOTE: The confirmation of using hours will not be possible if clock has been set. To reset clock, either unplug
AC cord and allow at least 5 seconds before Power On.
1.
Set the VOLUME to minimum.
2.
While holding down VOLUME button on front cabinet, press key 6 on remote control simultaneously.
3.
After the confirmation of using hours, turn off the power.
INIT 00 83
POWER ON
PLAY/REC
(16 x 16 x 16 x thousands digit value) + (16 x 16 x hundreds digit value) + (16 x tens digit value) + (ones digit value)
0010
0003
Initial setting content of MEMORY IC.
POWER ON total hours.
PLAY/REC total hours.
C3-1
Page 53
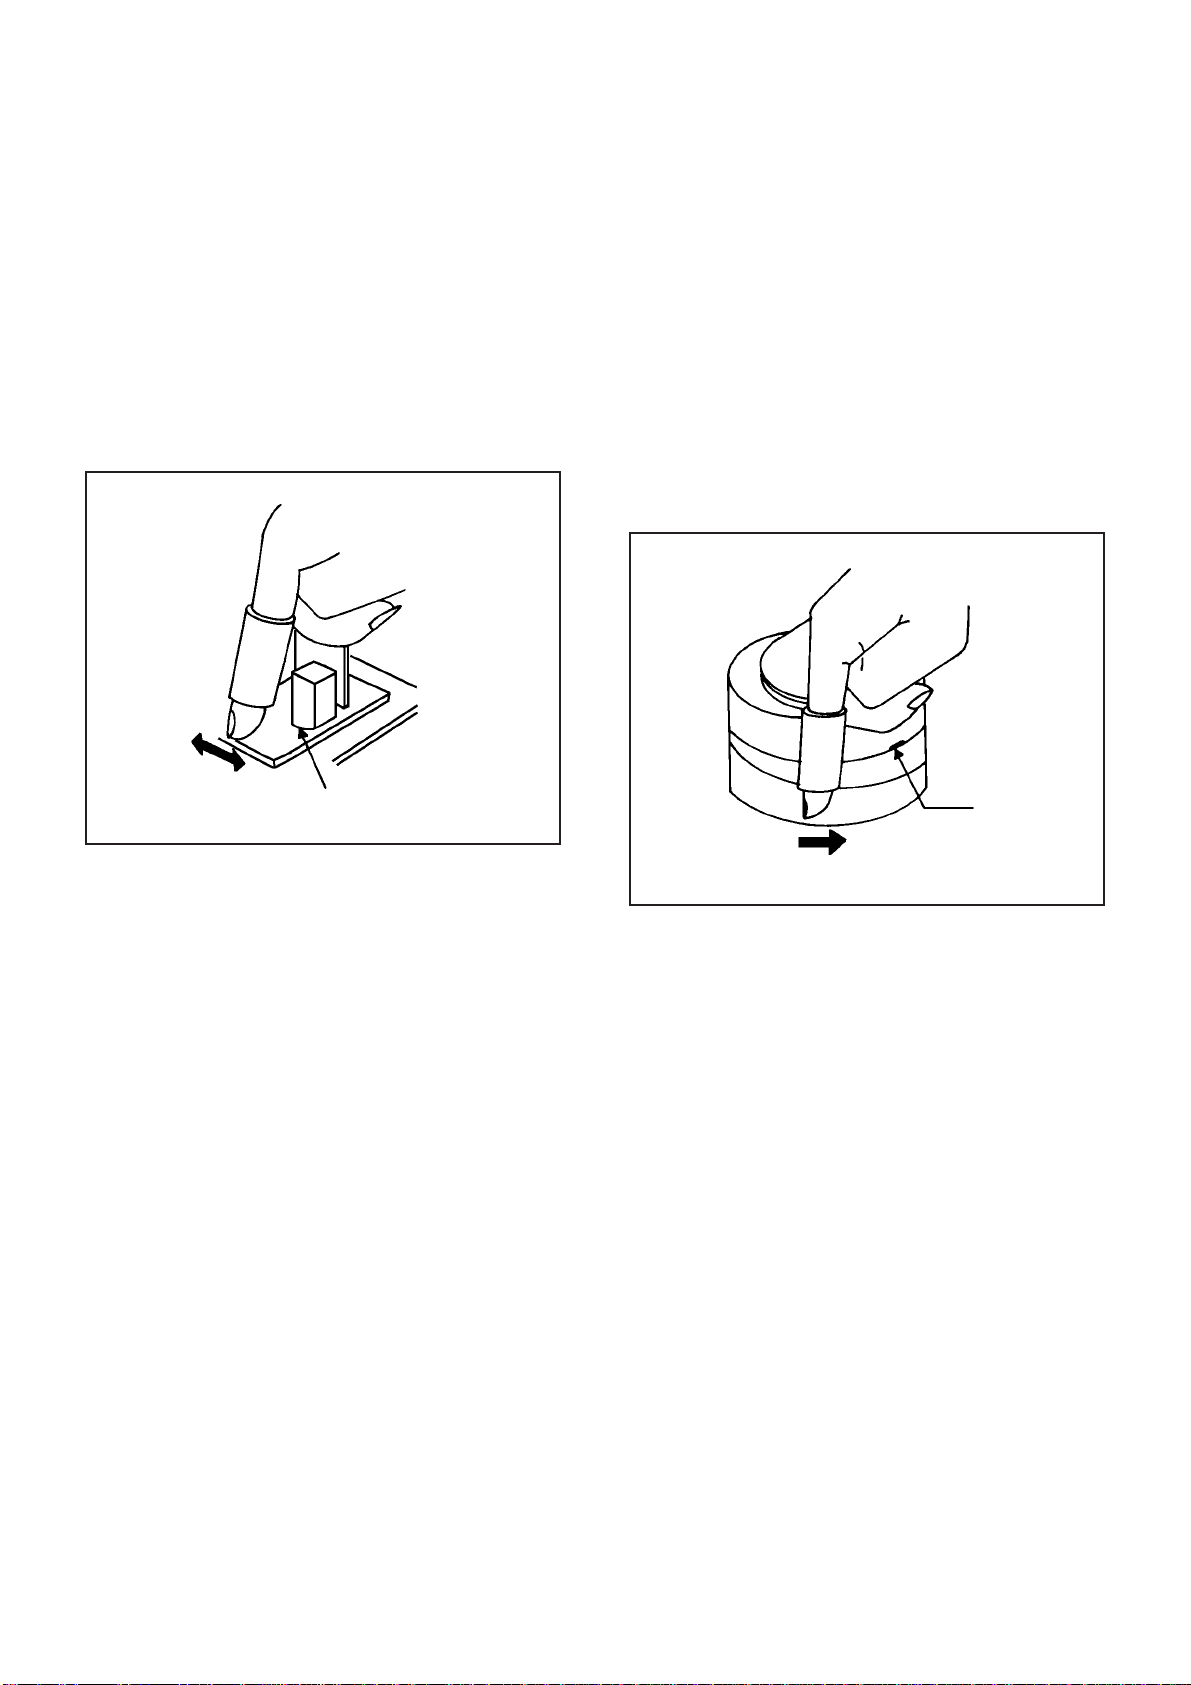
PREVENTIVE CHECKS AND SERVICE INTERVALS
CLEANING
NOTE
After cleaning the heads with isopropyl alcohol, do not
run a tape until the heads dry completely. If the heads
are not completely dry and alcohol gets on the tape,
damage may occur.
1. AUDIO CONTROL HEAD
Wrap a piece of chamois around your finger. Dip it in
isopropyl alcohol and clean the audio control head by
wiping it horizontally. Clean the full erase head in the
same manner. (Refer to the figure below.)
2. TAPE RUNNING SYSTEM
When cleaning the tape transport system, use the
gauze moistened with isopropyl alcohol.
3. CYLINDER
Wrap a piece of chamois around your finger. Dip it in
isopropyl alcohol. Hold it to the cylinder head softly.
Turn the cylinder head counterclockwise to clean it (in
the direction of the arrow). (Refer to the figure below.)
NOTE
Do not exert force against the cylinder head. Do not move
the chamois upward or downward on the head.
Use the chamois one by one.
Audio Control Head
Cylinder Head
C3-2
Page 54
NOTE FOR THE REPLACING OF MEMORY IC
If a service repair is undertaken where it has been required to change the MEMORY IC, the following steps should be taken to
ensure correct data settings while making reference to TABLE 1.
NOTE: Initial Data setting will not be possible if clock has been set. To reset clock, either unplug AC cord and allow
at least 5 seconds before Power On.
ADDRESS DATA83ADDRESS DATA ADDRESS DATA ADDRESS DATA
00
01
02
03
04
05 14 0C 19 13 53 1A A9 21 00 28 01
06
08
1B
C0
63
34
07 89
08
09
0A
0B
0D
3B
75
10
97
00
0E
0F
10 8C
11
12
14 00
00
00
68
5C
15
16
17
18
19
1B
00
00
05
05
00
0F
ADDRESS
1C
1D
1E
1F
20
22
DATA ADDRESS DATA
04
39
8D
00
00
00
23
24
25
26
27
29
Table 1
Enter DATA SET mode by setting VOLUME to minimum.
1.
While holding down VOLUME button on front cabinet, press key 6 on remote control simultaneously.
2.
ADDRESS and DATA should appear as FIG 1.
ADDRESS DATA
INIT 00 83
POWER ON
PLAY/REC
3.
ADDRESS is now selected and should "blink". Using the SET + or - keys on the remote, step through the ADDRESS until
required ADDRESS to be changed is reached.
4.
Press ENTER to select DATA. When DATA is selected, it will "blink".
5.
Again, step through the DATA using SET + or - until required DATA value has been selected.
6.
Pressing ENTER will take you back to ADDRESS for further selection if necessary.
7.
Repeat steps 3 to 6 until all data has been checked.
8.
When satisfied correct DATA has been entered, turn POWER off (return to STANDBY MODE) to finish DATA input.
The unit will now have the correct DATA for the new MEMORY IC.
0010
0003
Fig. 1
00
00
00
00
00
00
C4-1
Page 55
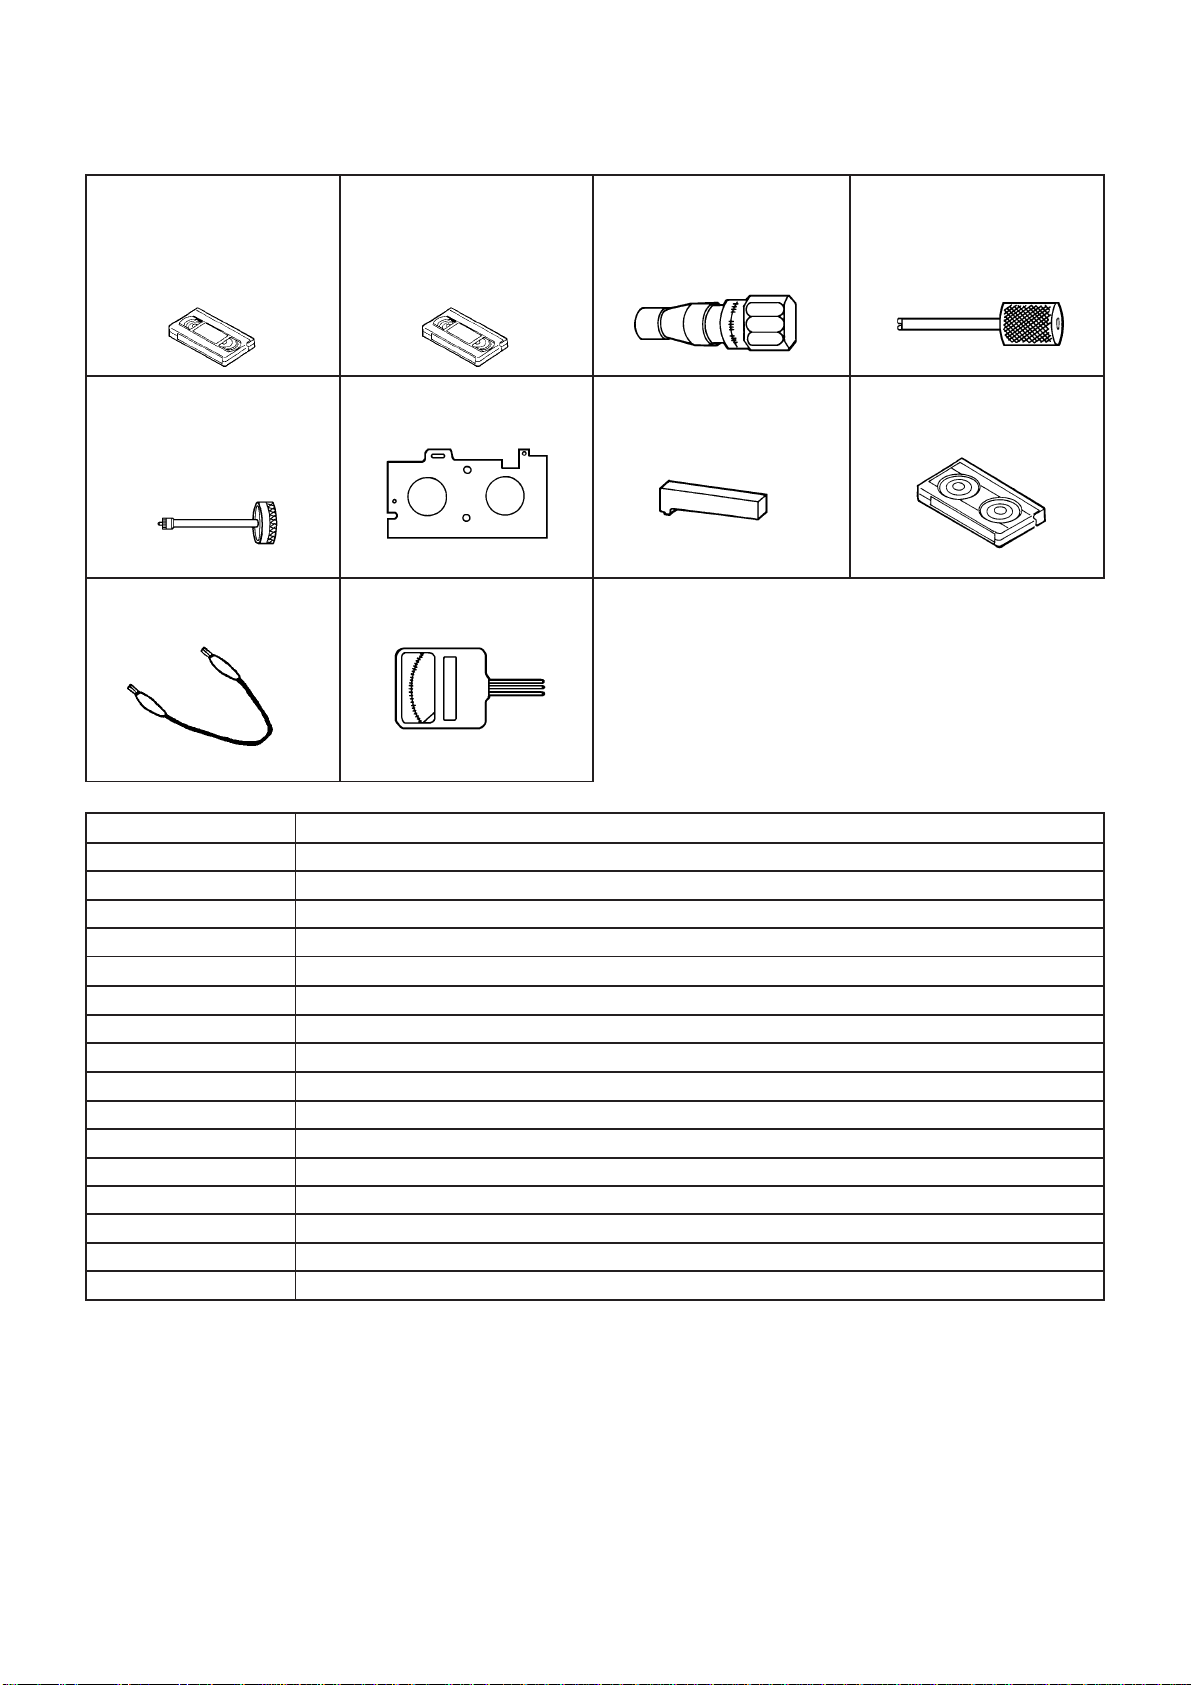
SERVICING FIXTURES AND TOOLS
(For 2 heads model)
VHS Alignment Tape
JG001
JG001A
JG001Q
JG001T
(VN S-LI6 )
2
2
(VN S-CO1 )
2
(VN S-LI6 H)
(VN S-X6 )
2
Screwdriver
JG154 Cable
(For 4 heads model)
3
3
3
3
VHS Alignment Tape
JG001B
JG001I
JG001P
JG001S
1
(VN S-LI6 )
(VN S-CO1 )
1
1
(VN S-LI6 H)
1
(VN S-X6 )
3
3
3
3
JG002B
JG002E
JG002F
JG024AJG022 Master PlaneJG153 X Value Adjustment
Adapter
Dial Torque Gauge
(10~90gf•cm)
(60~600gf•cm)
Reel Disk Height
Adjustment Jig
JG005 Post Adjustment
Screwdriver
Part No. SV-TG0-030-000
(small)
JG100A Torque Tape
(VHT-063)
Tentelometer
Part No. Remarks
JG001
JG001A
Monoscope, 6KHz (For 2 heads model)
Color Bar, 1KHz (For 2 heads model)
JG001Q Hi-Fi Audio (For 2 heads Hi-Fi model)
JG001T X Value Adjustment (For 2 heads model)
JG001B
JG001I
JG001P
Monoscope, 6KHz (For 4 heads model)
Color Bar, 1KHz (For 4 heads model)
Hi-Fi Audio (For 4 heads Hi-Fi model)
JG001S X Value Adjustment (For 4 heads model)
JG002B VSR Torque, Brake Torque (S Reel/T Reel Ass'y)
JG002E Brake Torque (T Reel Ass'y)
JG002F
JG005
JG153
JG022/JG024A
VSR Torque, Brake Torque (S Reel)
Guide Roller Adjustment
X Value Adjustment
Reel Disk Height Adjustment
JG100A Playback Torque, Back Tension Torque During Playback
Used to connect the test point of SERVICE and GROUNDJG154
PREPARATION FOR SERVICING
How to use the Servicing Fixture
1.
Unplug the connector CP757 and CP353, then remove the TV/VCR Block from the set.
2.
Remove the Operation PCB from the set, then connect it with the Syscon PCB.
If necessary, connect CP353. (Front A/V Jack Input Terminal)
3.
Short circuit between TP1001 and Ground with the cable JG154.
(Refer to MAJOR COMPONENTS LOCATION GUIDE)
4.
The EOT, BOT and Reel Sensor do not work at this moment.
At that time, the STOP/EJECT button is available to insert and eject the Cassette Tape.
C5-1
Page 56
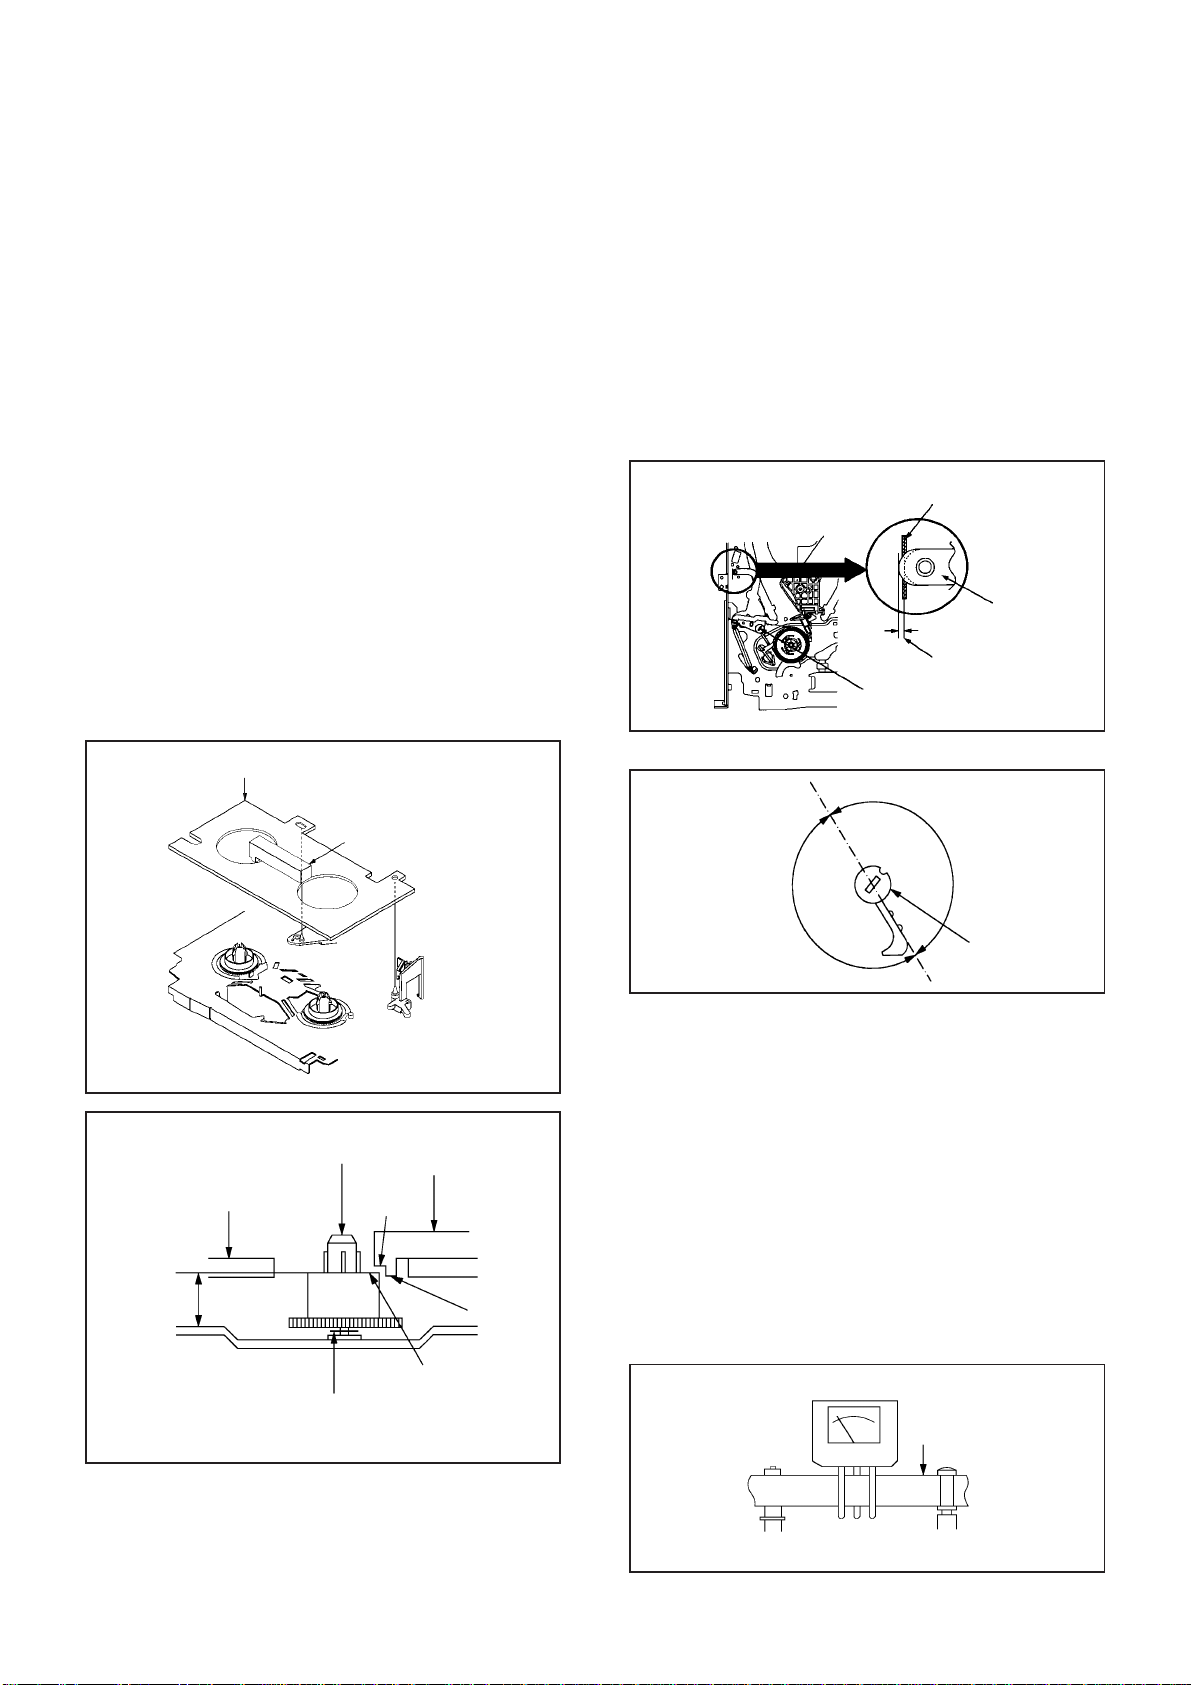
MECHANICAL ADJUSTMENTS
1. CONFIRMATION AND ADJUSTMENT
Read the following NOTES before starting work.
••Place an object which weighs between 450g~500g on
the Cassette Tape to keep it steady when you want to
make the tape run without the Cassette Holder. (Do not
place an object which weighs over 500g.)
When you activate the deck without the Cassette
Holder, short circuit between TP1001 and GND. (Refer
to ELECTRICAL ADJUSTMENT PARTS LOCATION
GUIDE) In this condition the BOT/EOT/Reel Sensor will
not function.
CONFIRMATION AND ADJUSTMENT OF REEL
1-1:
DISK HEIGHT
1.
Turn on the power and set to the STOP mode.
2.
Set the master plane (JG022) and reel disk height
adjustment jig (JG024A) on the mechanism framework,
taking care not to scratch the drum, as shown in Fig. 1-
1-A.
3.
Confirm that "A" of the reel disk is lower than "B" of the
reel disk height adjustment jig (JG024A) , and is higher
than "C". If it is not enough height, adjust to 10(+0.2, -0)
mm with the height adjustment washer.
4.
Adjust the other reel in the same way.
Master Plane (JG022)
1-2: CONFIRMATION AND ADJUSTMENT OF TENSION
POST POSITION
1.
Set to the PLAY mode.
2.
Adjust the Tension Adjust until the edge of the Tension
Arm is positioning within 0.5mm range from the
standard line center of Main Chassis.
After this adjustment, confirm that the cut position is
located in "A" area as shown in Fig. 1-2-B. If it is
located in "B" area, adjust again.
3.
While turning the S Reel clockwise, confirm that the
edge of the Tension Arm is located in the position
described above.
Standard line of Main Chassis
Tension Arm
0.5mm (Adjusting range)
Standard line center of Main Chassis
Tension Adjust
Fig. 1-2-A
Master Plane (JG022)
10(+0.2, -0)mm
Reel Disk Height Adjustment Jig
(JG024A)
Reel Disk
Height Adjustment
Washer
2.6x4.7xT0.13
2.6X4.7xT0.25
Reel Disk Height
Adjustment Jig
(JG024A)
(B)
(A)
Fig. 1-1-A
(C)
Fig. 1-1-B
(A)
Cut Position
(B)
Tension Adjust
Fig. 1-2-B
1-3: CONFIRMATION OF PLAYBACK TORQUE AND
BACK TENSION TORQUE DURING PLAYBACK
Load a video tape (T-120) recorded in standard speed
1.
mode. Set the unit to the PLAY mode.
Install the tentelometer as shown in Fig. 1-3. Confirm that
2.
the meter indicates 20 ± 2gf in the beginning of playback.
• USING A CASSETTE TYPE TORQUE TAPE (JG100A)
1.
After confirmation and adjustment of Tension Post
position (Refer to item 1-2), load the cassette type
torque tape (JG100A) and set to the PLAY mode.
2.
Confirm that the right meter of the torque tape indicates
60~110gf•cm during playback in SP mode.
3.
Confirm that the left meter of the torque tape indicates
25~40gf•cm during playback in SP mode.
Tentelometer
Video Tape
D1-1
P1 Post
Guide Roller
Fig. 1-3
Page 57
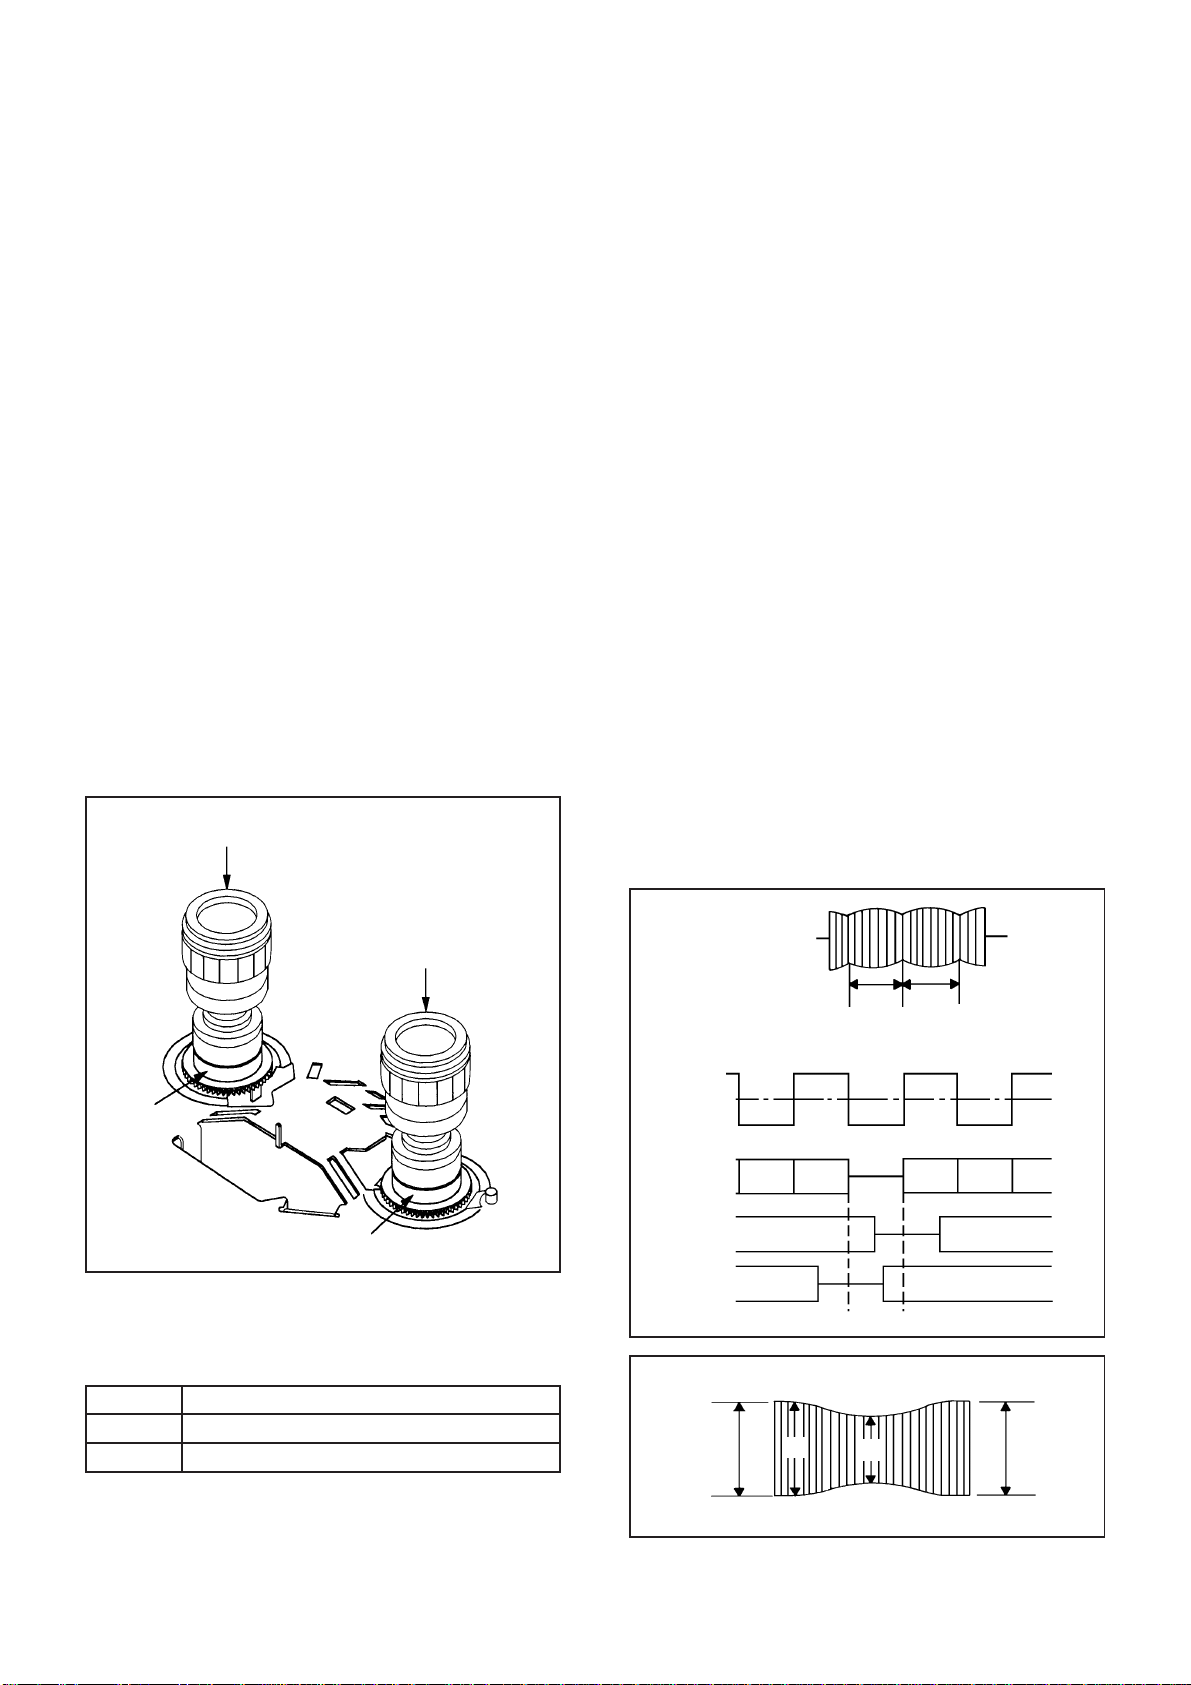
MECHANICAL ADJUSTMENTS
1-4: CONFIRMATION OF VSR TORQUE
Operate within 4~5 seconds after the reel disk begins to
1.
turn.
Install the Torque Gauge (JG002F) and Adapter (JG002B)
2.
on the S Reel. Set to the Rewind mode. (Refer to Fig.1-4)
Then, confirm that it indicates 120~180gf•cm.
3.
NOTE
Install the Torque Gauge on the reel disk firmly. Press the
REW button to turn the reel disk.
1-5: CONFIRMATION OF REEL BRAKE TORQUE
(S Reel Brake) (Refer to Fig. 1-4)
Set to the STOP mode.
1.
Move the Idler Ass'y from the S Reel.
2.
Install the Torque Gauge (JG002F) and Adapter
3.
(JG002B) on the S Reel. Turn the Torque Gauge
(JG002F) clockwise.
Then, confirm that it indicates 60~100gf•cm.
4.
(T Reel Brake) (Refer to Fig. 1-4)
Set to the STOP mode.
1.
Move the Idler Ass'y from the T Reel.
2.
Install the Torque Gauge (JG002E) and Adapter
3.
(JG002B) on the T reel. Turn the Torque Gauge
(JG002E) counterclockwise.
Then, confirm that it indicates 45~70gf•cm.
4.
Torque Gauge/Adapter
(JG002F/JG002B)
2. CONFIRMATION AND ADJUSTMENT
OF TAPE RUNNING MECHANISM
Tape Running Mechanism is adjusted precisely at the
factory. Adjustment is not necessary as usual. When you
replace the parts of the tape running mechanism because
of long term usage or failure, the confirmation and
adjustment are necessary.
2-1: GUIDE ROLLER
Playback the VHS Alignment Tape (JG001 or JG001B).
1.
(Refer to SERVICING FIXTURE AND TOOLS)
Connect CH-1 of the oscilloscope to TP4001 (Envelope)
2.
and CH-2 to TP1002 (SW Pulse).
Press and hold the Tracking-Auto button on the remote
3.
control more than 2 seconds to set tracking to center.
Trigger with SW Pulse and observe the envelope. (Refer
4.
to Fig. 2-1-A)
When observing the envelope, adjust the Adjusting
5.
Driver (JG005) slightly until the envelope will be flat.
Even if you press the Tracking Button, adjust so that
flatness is not moved so much.
Adjust so that the A : B ratio is better than 3 : 2 as shown
6.
in Fig. 2-1-B, even if you press the Tracking Button to
move the envelope (The envelope waveform will begin to
decrease when you press the Tracking Button).
Adjust the PG shifter during playback.
7.
(Refer to the ELECTRICAL ADJUSTMENTS)
NOTE
After adjustment, confirm and adjust A/C head.
(Refer to item 2-2)
Torque Gauge/Adapter
(JG002E/JG002B)
S Reel
T Reel
Fig. 1-4
NOTE
If the torque is out of the range, replace the following
parts.
Check item
1-4
1-5
Replacement Part
Idler Ass'y/Clutch Ass'y
T Brake Spring/Tension Spring
Envelope
CH-3
Audio
Max
CH-1
Envelope
(TP4001)
CH-1
CH-2
Track
Track
CH-2
SW Pulse (TP1002)
(1)
(2)
Entrance Exit
A
B
Fig. 2-1-A
Max
D1-2
A : B = 3 : 2
Fig. 2-1-B
Page 58
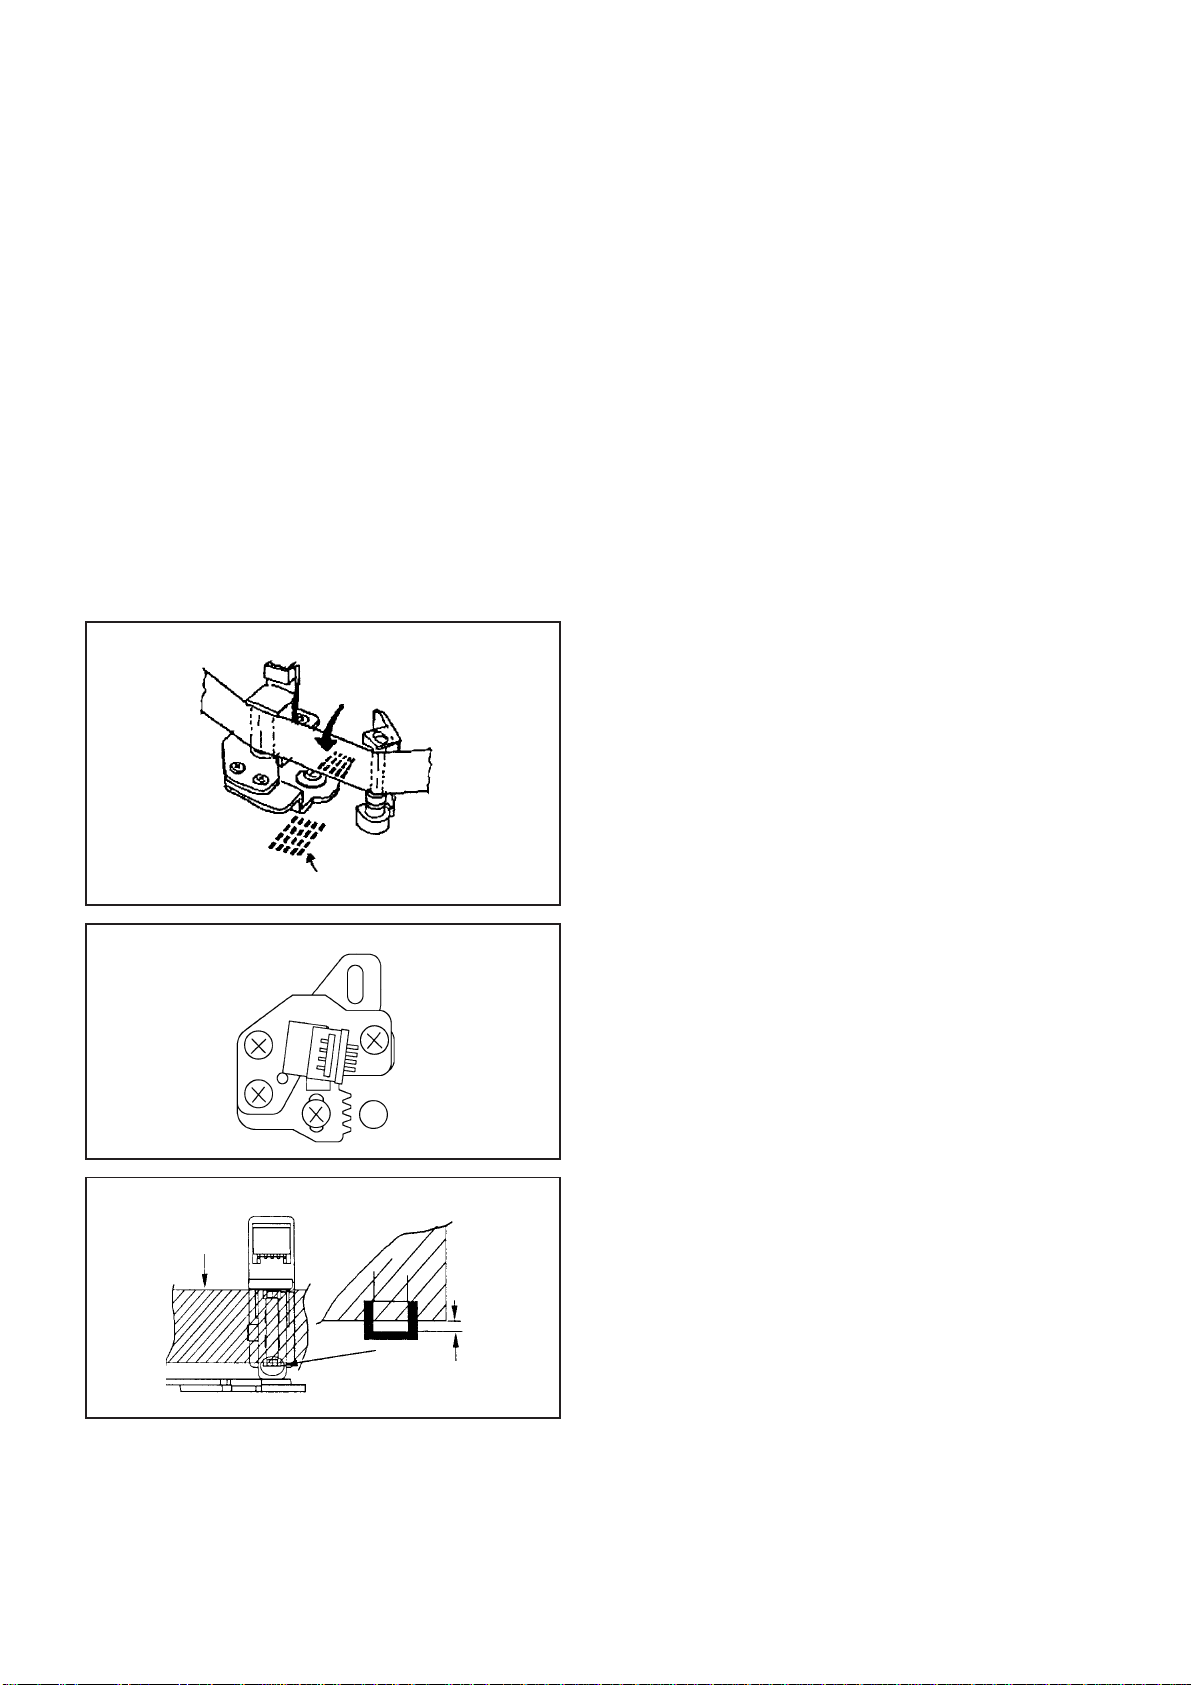
MECHANICAL ADJUSTMENTS
CONFIRMATION AND ADJUSTMENT OF AUDIO/
CONTROL HEAD
When the Tape Running Mechanism does not work well,
adjust the following items.
1.
Playback the VHS Alignment Tape (JG001 or JG001B).
(Refer to SERVICING FIXTURE AND TOOLS)
2.
Confirm that the reflected picture of stamp mark is
appeared on the tape prior to P4 Post as shown in Fig.
2-2-A.
a)
When the reflected picture is distorted, turn the screw
1 clockwise until the distortion is disappeared.
b)
When the reflected picture is not distorted, turn the
screw 1 counterclockwise until little distortion is
appeared, then adjust the a).
3.
Turn the screw 2 to set the audio level to maximum.
4.
Confirm that the bottom of the Audio/ Control Head and
the bottom of the tape is shown in Fig. 2-2-C.
c)
When the height is not correct, turn the screw 3 to
adjust the height. Then, adjust the 1~3 again.
Audio/Control Head
Reflected picture of
Stamp Mark
P4 Post
Audio/Control Head
3
Stamp Mark
1
Fig. 2-2-A
2-3:2-2:
TAPE RUNNING ADJUSTMENT
(X VALUE ADJUSTMENT)
Confirm and adjust the height of the Reel Disk.
1.
(Refer to item 1-1)
Confirm and adjust the position of the Tension Post.
2.
(Refer to item 1-2)
Adjust the Guide Roller. (Refer to item 2-1)
3.
Confirm and adjust the Audio/Control Head.
4.
(Refer to item 2-2)
Connect CH-1 of the oscilloscope to TP4001, CH-2 to
5.
TP1002 and CH-3 to HOT side of Audio Out Jack.
Playback the VHS Alignment Tape (JG001S or JG001T).
6.
(Refer to SERVICING FIXTURE AND TOOLS)
Press and hold the Tracking-Auto button on the remote
7.
control more than 2 seconds to set tracking to center.
Set the X Value adjustment driver (JG153) to the 4 of
8.
Fig. 2-2-B. Adjust X value so that the envelope waveform
output becomes maximum. Check if the relation between
Audio and Envelope waveform becomes (1) or (2) of Fig.
2-1-A.
2-4: CONFIRM HI-FI AUDIO (Hi-Fi model only)
Connect CH-1 of the oscilloscope to TP4001, CH-2 to
1.
TP1002 and CH-3 to the Hi-Fi Audio Out Jack.
Playback the VHS Alignment Tape (JG001P or JG001Q).
2.
(Refer to SERVICING FIXTURE AND TOOLS)
Press and hold the Tracking-Auto button on the remote
3.
control more than 2 seconds to set tracking to center.
Press the Tracking Up button and count number of steps
4.
which the audio output is changed from Hi-Fi (10KHz) to
MONO (6KHz).
Press the Tracking Down button and count number of
5.
steps which the audio output is changed from Hi-Fi
(10KHz) to MONO (6KHz).
Confirm that the difference between these counted steps
6.
number in the above items are within 2 steps. If the
difference are more than 3 steps, do Tape Running
Adjustment again. (Refer to item 2-3)
2
Audio/Control Head
Tape
4
Fig. 2-2-B
0.25±0.05mm
Fig. 2-2-C
D1-3
Page 59
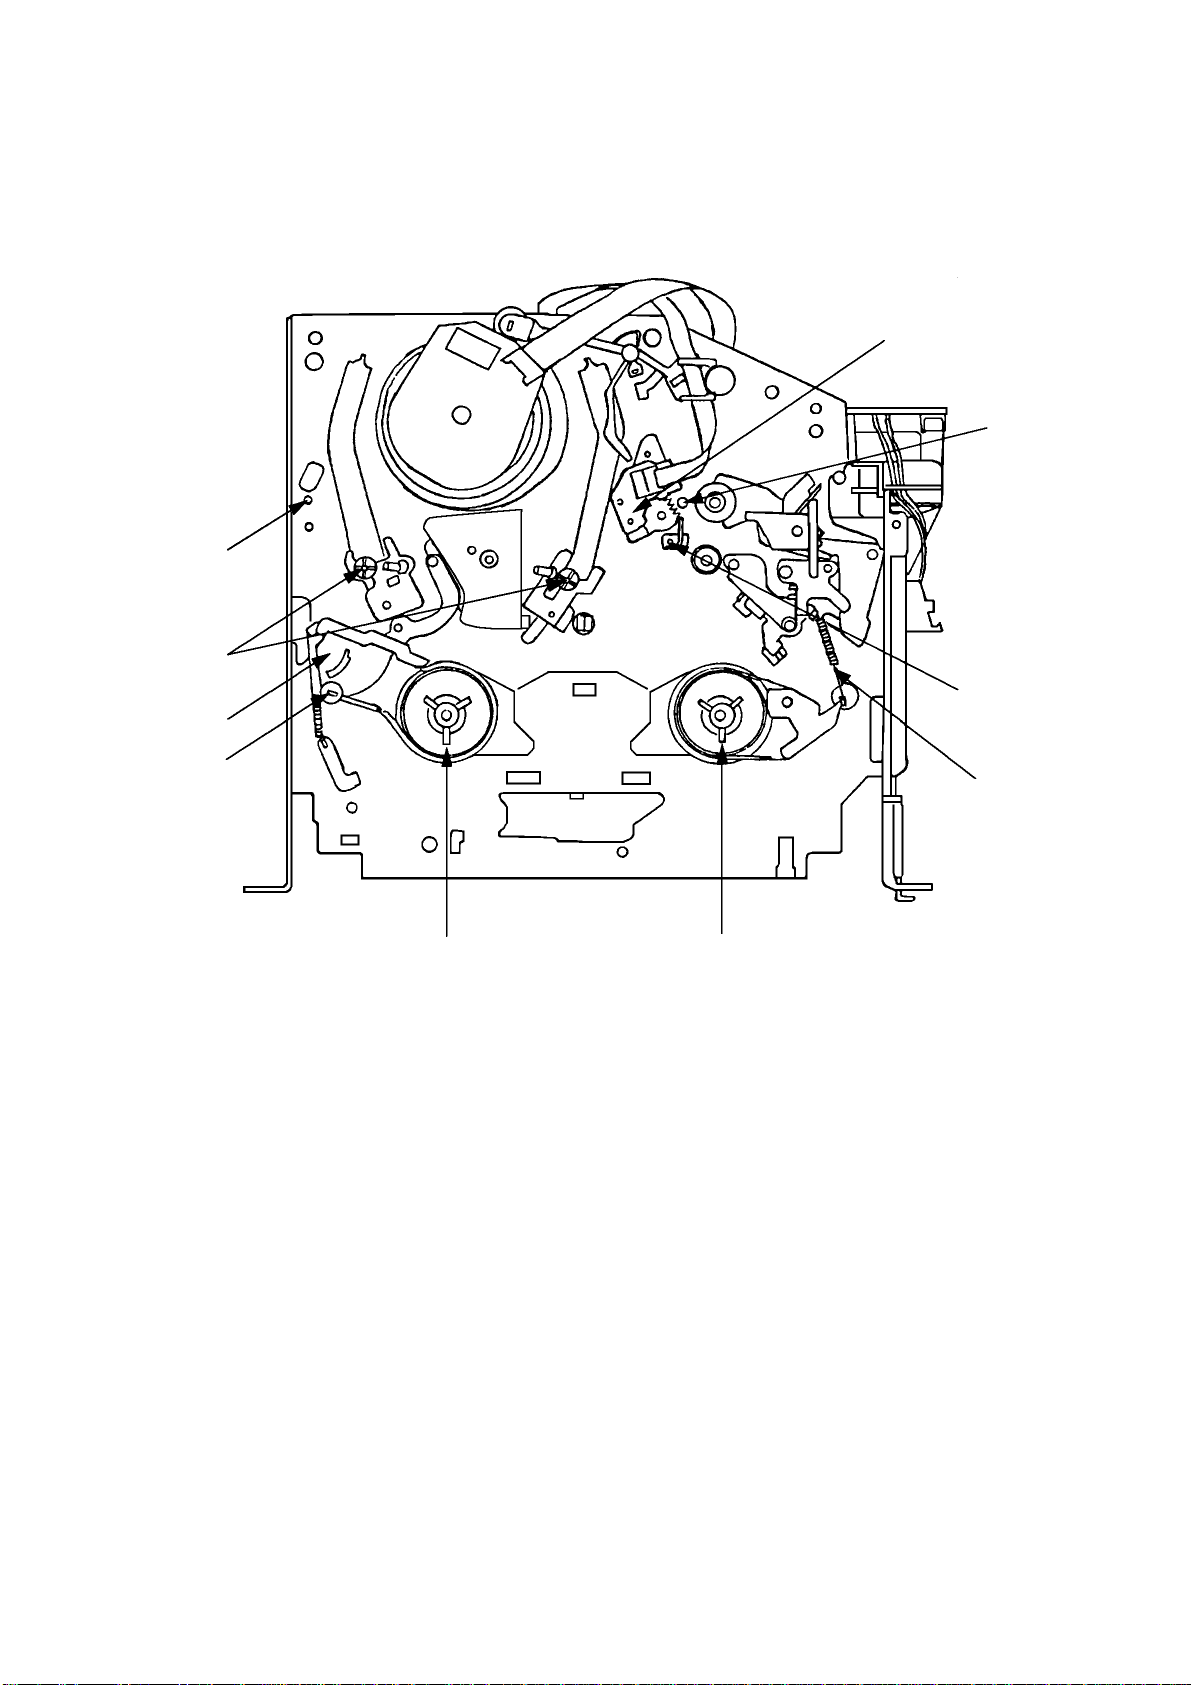
MECHANICAL ADJUSTMENTS
3. MECHANISM ADJUSTMENT PARTS LOCATION GUIDE
4
3
2
5
6
7
1
10
1. Tension Adjust
2. Tension Arm
3. Guide Roller
4. P1 Post
5. Audio/Control Head
6.
X value adjustment driver hole
7.
P4 Post
8.
T Brake Spring
9.
T Reel
10.
S Reel
9
8
D1-4
Page 60
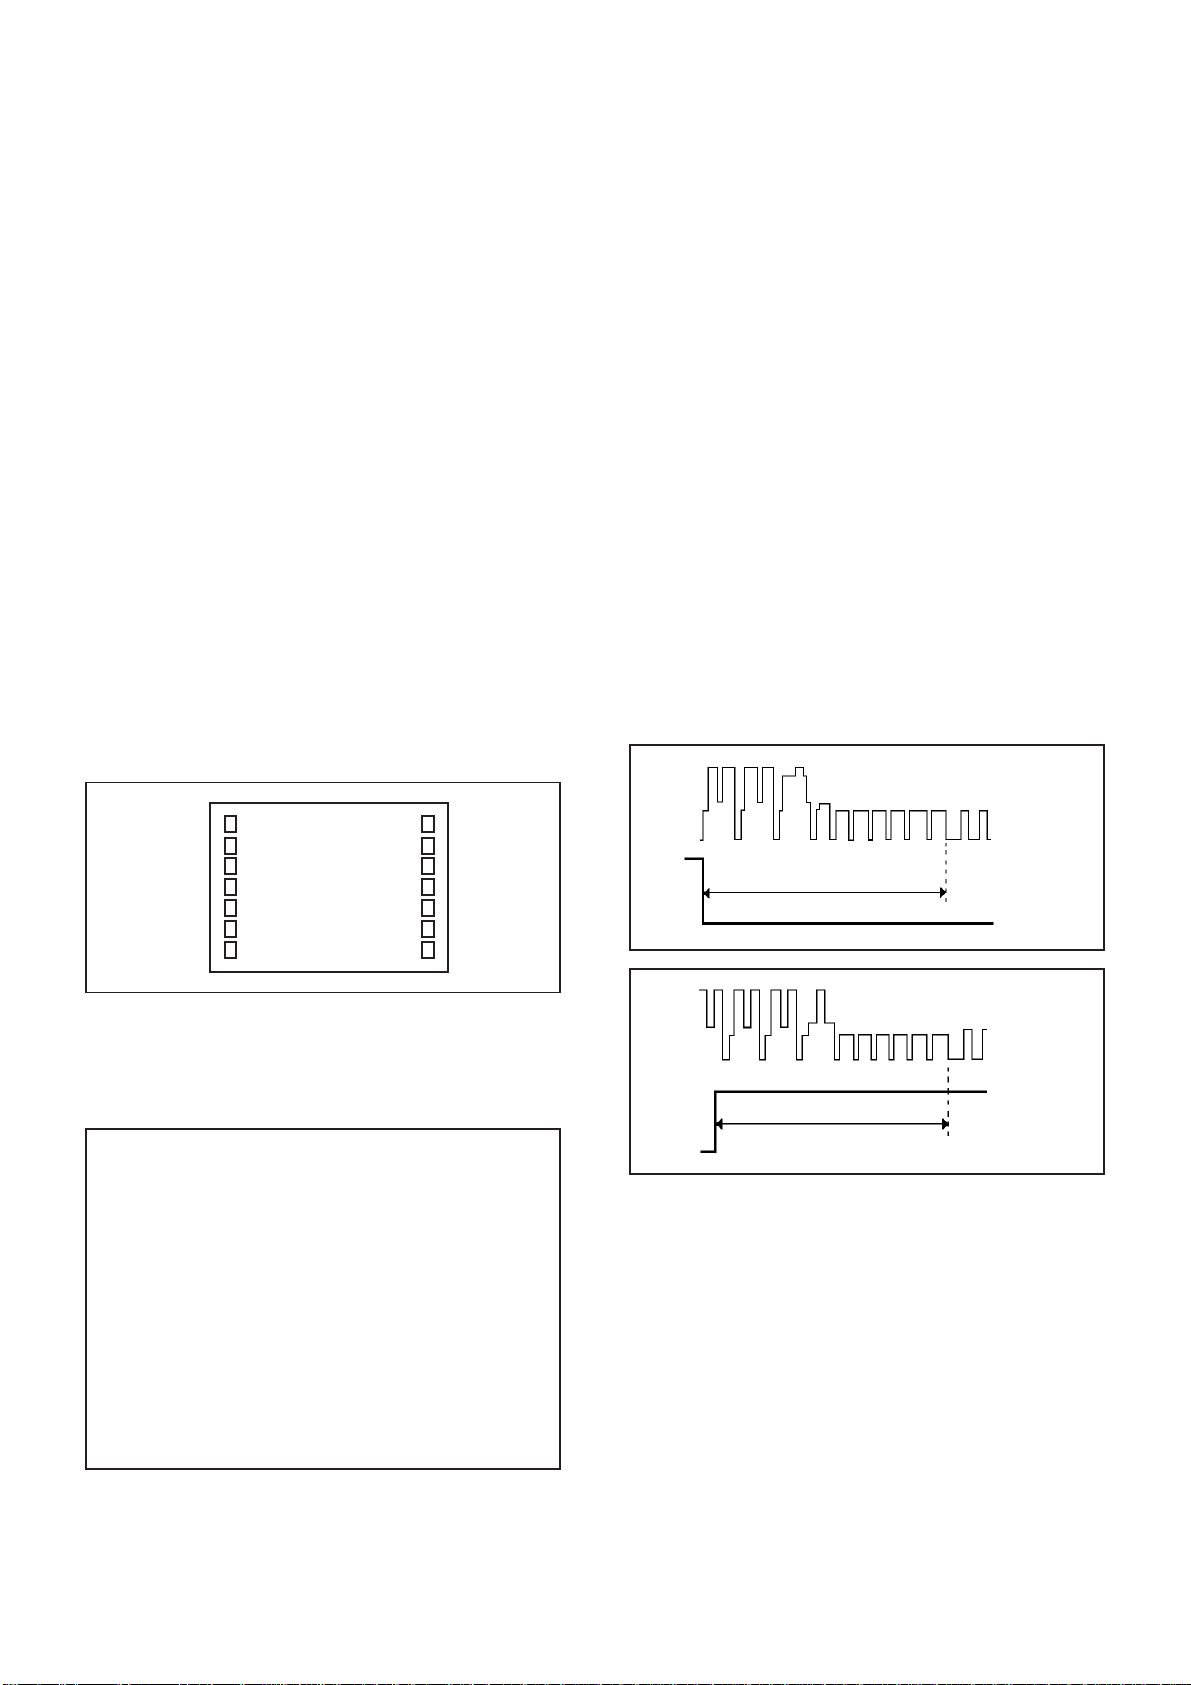
ELECTRICAL ADJUSTMENTS
1. BEFORE MAKING ELECTRICAL
ADJUSTMENTS
Read and perform these adjustments when repairing the
circuits or replacing electrical parts or PCB assemblies.
CAUTION
•
Use an isolation transformer when performing any
service on this chassis.
•
Before removing the anode cap, discharge electricity
because it contains high voltage.
•
When removing a PCB or related component, after
unfastening or changing a wire, be sure to put the wire
back in its original position.
Inferior silicon grease can damage IC's and transistors.
•
When replacing IC's and transistors, use only specified
silicon grease (YG6260M).
Remove all old silicon before applying new silicon.
On-Screen Display Adjustment
Unplug the AC plug for more than 5 seconds to set the
1.
clock to the non-setting state. Then, set the volume
level to minimum.
Press the VOL. DOWN button on the set and the
2.
Channel button (9) on the remote control simultaneously
to appear the adjustment mode on the screen as shown
in Fig. 1-1.
2. BASIC ADJUSTMENTS
(VCR SECTION)
2-1: PG SHIFTER
1.
Connect CH-1 on the oscilloscope to TP1002 and CH-2
to pin 4 of CP1003.
2.
Playback the alignment tape. (JG001A)
3.
Press and hold the Tracking-Auto button on the remote
control more than 2 seconds to set tracking to center.
4.
Press the VOL. DOWN button on the set and the
channel button (3) on the remote control simultaneously
until the indicator REC disappears. If the indicator REC
disappears, adjustment is completed.
(If the above adjustments doesn't work well:)
5.
Press the VOL. DOWN button on the set and the
channel button (3) on the remote control simultaneously
until the indicator REC disappears.
6.
When the REC indicator is blinking, press both VOL.
DOWN button on the set and the channel button (4) on
the remote control simultaneously and adjust the
Tracking +/- button until the arising to the down of Head
Switching Pulse becomes 6.5 ± 0.5H.
(Refer to Fig. 2-1-A, B)
7.
Press the Tracking Auto button.
TV
00 OSD 15
Use the Channel UP/DOWN button or Channel button
3.
(0-9) on the remote control to select the options shown
in Fig. 1-2.
Press the MENU button on the remote control to end
4.
the adjustments.
FUNCTION
NO.
00
01
02
03
04
05
06
07
08
09
10
11
12
OSD H
CUT OFF
RF AGC
VIF VCO
H VCO
H PHASE
V SIZE
V SHIFT
R DRIVE
B DRIVE
R BIAS
G BIAS
B BIAS
FUNCTION
NO.
BRIGHTNESS
13
CONTRAST
14
COLOR
15
TINT
16
SHARPNESS
17
FM LEVEL
18
LEVEL
19
SEPARATION 1
20
SEPARATION 2
21
TEST MONO
22
TEST STEREO
23
X-RAY TEST
24
Fig. 1-1
Fig. 1-2
CH-2
6.5H
CH-1
Fig. 2-1-A
CH-2
CH-1
6.5H
Fig. 2-1-B
2-2: VCO FREERUN
1.
Place the set with Aging Test for more than 10 minutes.
2.
Receive the VHF HIGH.
3.
Disconnect the Antenna while receiving the VHF HIGH
and set to the Noise screen.
4.
Once turn off the Power and turn on the Power again.
5.
Approxi. 3 seconds later, input the Antenna again.
6.
Connect the digital voltmeter between the pin 5 of
CP351 and the pin 1 (GND) of CP351.
7.
Activate the adjustment mode display of Fig. 1-1 and
press the channel button (03) on the remote control to
select "VIF VCO".
8.
Press the VOL. UP/DOWN button on the remote control
until the digital voltmeter is 2.5 ± 0.5V.
D2-1
Page 61

ELECTRICAL ADJUSTMENTS
2-3: RF AGC
1.
Receive a 70dB monoscope pattern.
2.
Connect the digital voltmeter between the pin 5 of
CP351 and the pin 1 (GND) of CP351.
3.
Activate the adjustment mode display of Fig. 1-1 and
press the channel button (02) on the remote control to
select "RF AGC".
4.
Press the VOL. UP/DOWN button on the remote control
until the digital voltmeter is 2.4 ± 0.05V.
(TV SECTION)
2-4: CONSTANT VOLTAGE
1.
Connect the digital voltmeter to the FUSE HOLDER of
FH503.
2.
Set condition is AV MODE without signal.
3.
Adjust the VR502 until the digital voltmeter is 135 ± 0.5V.
2-5: CUT OFF
1.
Adjust the unit to the following settings.
R BIAS=64, G BIAS=64, B BIAS=64,
BRIGHTNESS=128, CONTRAST=64
2.
Place the set with Aging Test for more than 15 minutes.
3.
Set condition is AV MODE without signal.
4.
Activate the adjustment mode display of Fig. 1-1 and
press the channel button (01) on the remote control to
select "CUT OFF".
5.
Adjust the Screen Volume until a dim raster is obtained.
2-6: FOCUS
1.
Receive the monoscope pattern.
2.
Turn the Focus Volume fully counterclockwise once.
3.
Adjust the Focus Volume until picture is distinct.
2-7: WHITE BALANCE
NOTE: Adjust after performing CUT OFF adjustment.
1.
Place the set with Aging Test for more than 15 minutes.
2.
Receive the color bar pattern.
3.
Using the remote control, set the brightness and contrast
to normal position.
4.
Activate the adjustment mode display of Fig. 1-1 and
press the channel button (10) on the remote control to
select "R.BIAS".
5.
Using the VOL. UP/DOWN button on the remote control,
adjust the R.BIAS.
6.
Press the CH. UP/DOWN button on the remote control to
select the "R.DRIVE", "B.DRIVE", "G.BIAS" or "B.BIAS".
7.
Using the VOL. UP/DOWN button on the remote control,
adjust the R.DRIVE, B.DRIVE, G.BIAS or B.BIAS.
8.
Perform the above adjustments 6 and 7 until the white
color is looked like a white.
2-8: HORIZONTAL PHASE
1.
Receive the center cross signal from the Pattern
Generator.
2.
Activate the adjustment mode display of Fig. 1-1 and
press the channel button (05) on the remote control to
select "H PHASE".
3.
Press the VOL. UP/DOWN button on the remote
control until the vertical line becomes fit to the notch of
the shadow mask.
2-9: VERTICAL SHIFT
1.
Receive the center cross signal from the Pattern
Generator.
2.
Activate the adjustment mode display of Fig. 1-1 and
press the channel button (07) on the remote control to
select "V SHIFT".
3.
Press the VOL. UP/DOWN button on the remote
control until the horizontal line becomes fit to the notch
of the shadow mask.
2-10: VERTICAL SIZE
1.
Receive the cross hatch signal from the Pattern
Generator.
2.
Activate the adjustment mode display of Fig. 1-1 and
press the channel button (06) on the remote control to
select "V SIZE".
3.
Press the VOL. UP/DOWN button on the remote
control until the rectangle on the center of the screen
becomes square.
4.
Receive a broadcast and check if the picture is normal.
2-11: SUB BRIGHTNESS
1.
Receive the black pattern*. (RF Input)
2.
Activate the adjustment mode display of Fig. 1-1 and
press the channel button (13) on the remote control to
select "BRIGHTNESS".
3.
Press the VOL. UP/DOWN button on the remote
control until the screen begin to shine.
4.
Receive the black pattern*. (Audio Video Input)
5.
Press the INPUT SELECT button on the remote control
to set to the AV mode. Then perform the above
adjustments 2~3.
*The Black Pattern means the whole black raster signal.
Select the "RASTER" of the pattern generator, set to
the OFF position for each R, G and B.
2-12: SUB CONTRAST
1.
Activate the adjustment mode display of Fig. 1-1 and
press the channel button (14) on the remote control to
select "CONTRAST".
2.
Press the VOL. UP/DOWN button on the remote
control until the contrast step No. becomes "100"
3.
Press the INPUT SELECT button on the remote control
to set to the AV mode. Then perform the above
adjustments 1~2.
D2-2
Page 62
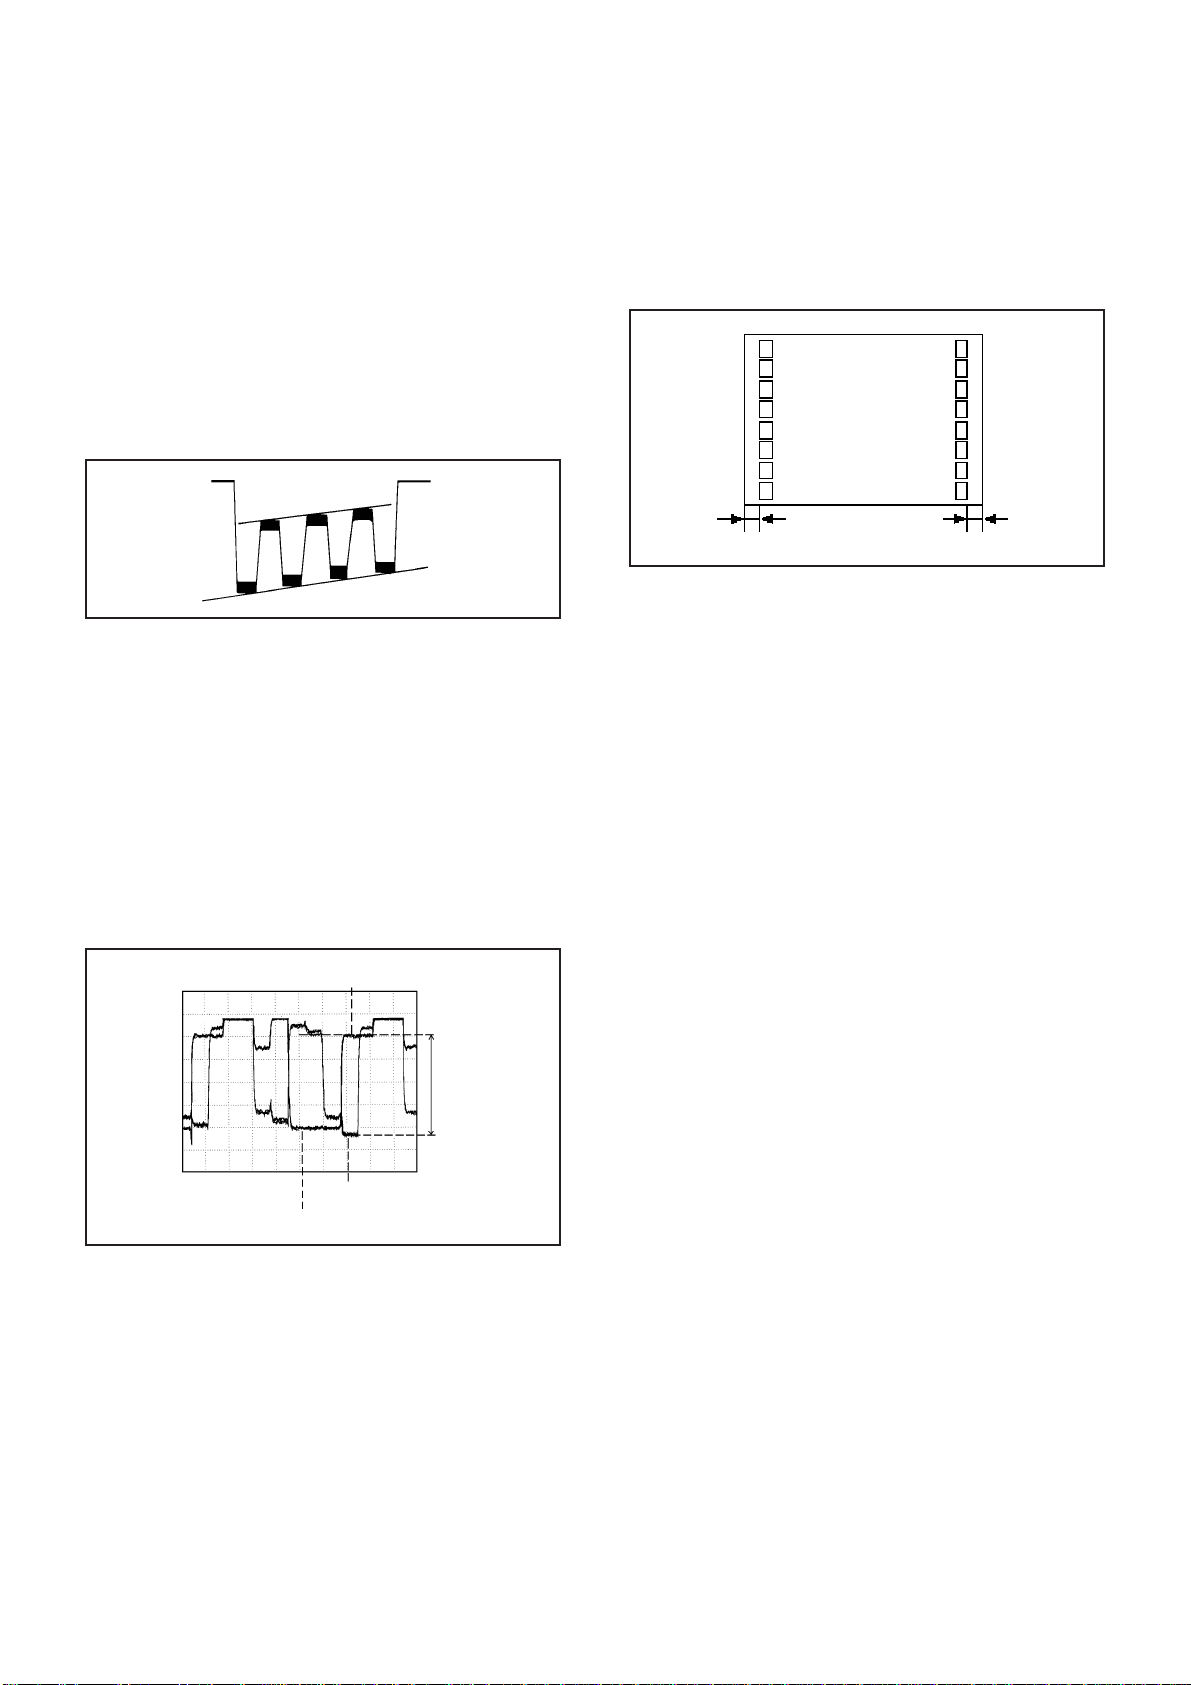
ELECTRICAL ADJUSTMENTS
2-13: SUB TINT
1.
Receive the color bar pattern. (RF Input)
2.
Connect the synchro scope to TP803.
3.
Activate the adjustment mode display of Fig. 1-1 and
press the channel button (16) on the remote control to
select "TINT".
4.
Press the VOL. UP/DOWN button on the remote control
until the waveform becomes as shown in Fig. 2-2.
5.
Receive the color bar pattern. (Audio Video Input)
6.
Press the INPUT SELECT button on the remote control
to set to the AV mode. Then perform the above
adjustments 2~4.
Fig. 2-2
2-14: SUB COLOR
1.
Receive the color bar pattern. (RF Input)
2.
Connect the synchro scope to TP801.
3.
Activate the adjustment mode display of Fig. 1-1 and
press the channel button (15) on the remote control to
select "COLOR".
4.
Press the VOL. UP/DOWN button on the remote control
until the red color level is adjusted to 110% of the white
level. (Refer to Fig. 2-3)
5.
Receive the color bar pattern. (Audio Video Input)
6.
Press the INPUT SELECT button on the remote control
to set to the AV mode. Then perform the above
adjustments 2~4.
2-15: OSD HORIZONTAL
1.2.Activate the adjustment mode display of Fig. 1-1.
Press the VOL. UP/DOWN button on the remote
control until the difference of A and B becomes
minimum. (Refer to Fig. 2-4)
TV
00 OSD 15
A
B
Fig. 2-4
White 0%
Red Level
White 100%
0%
110%
Fig. 2-3
D2-3
Page 63
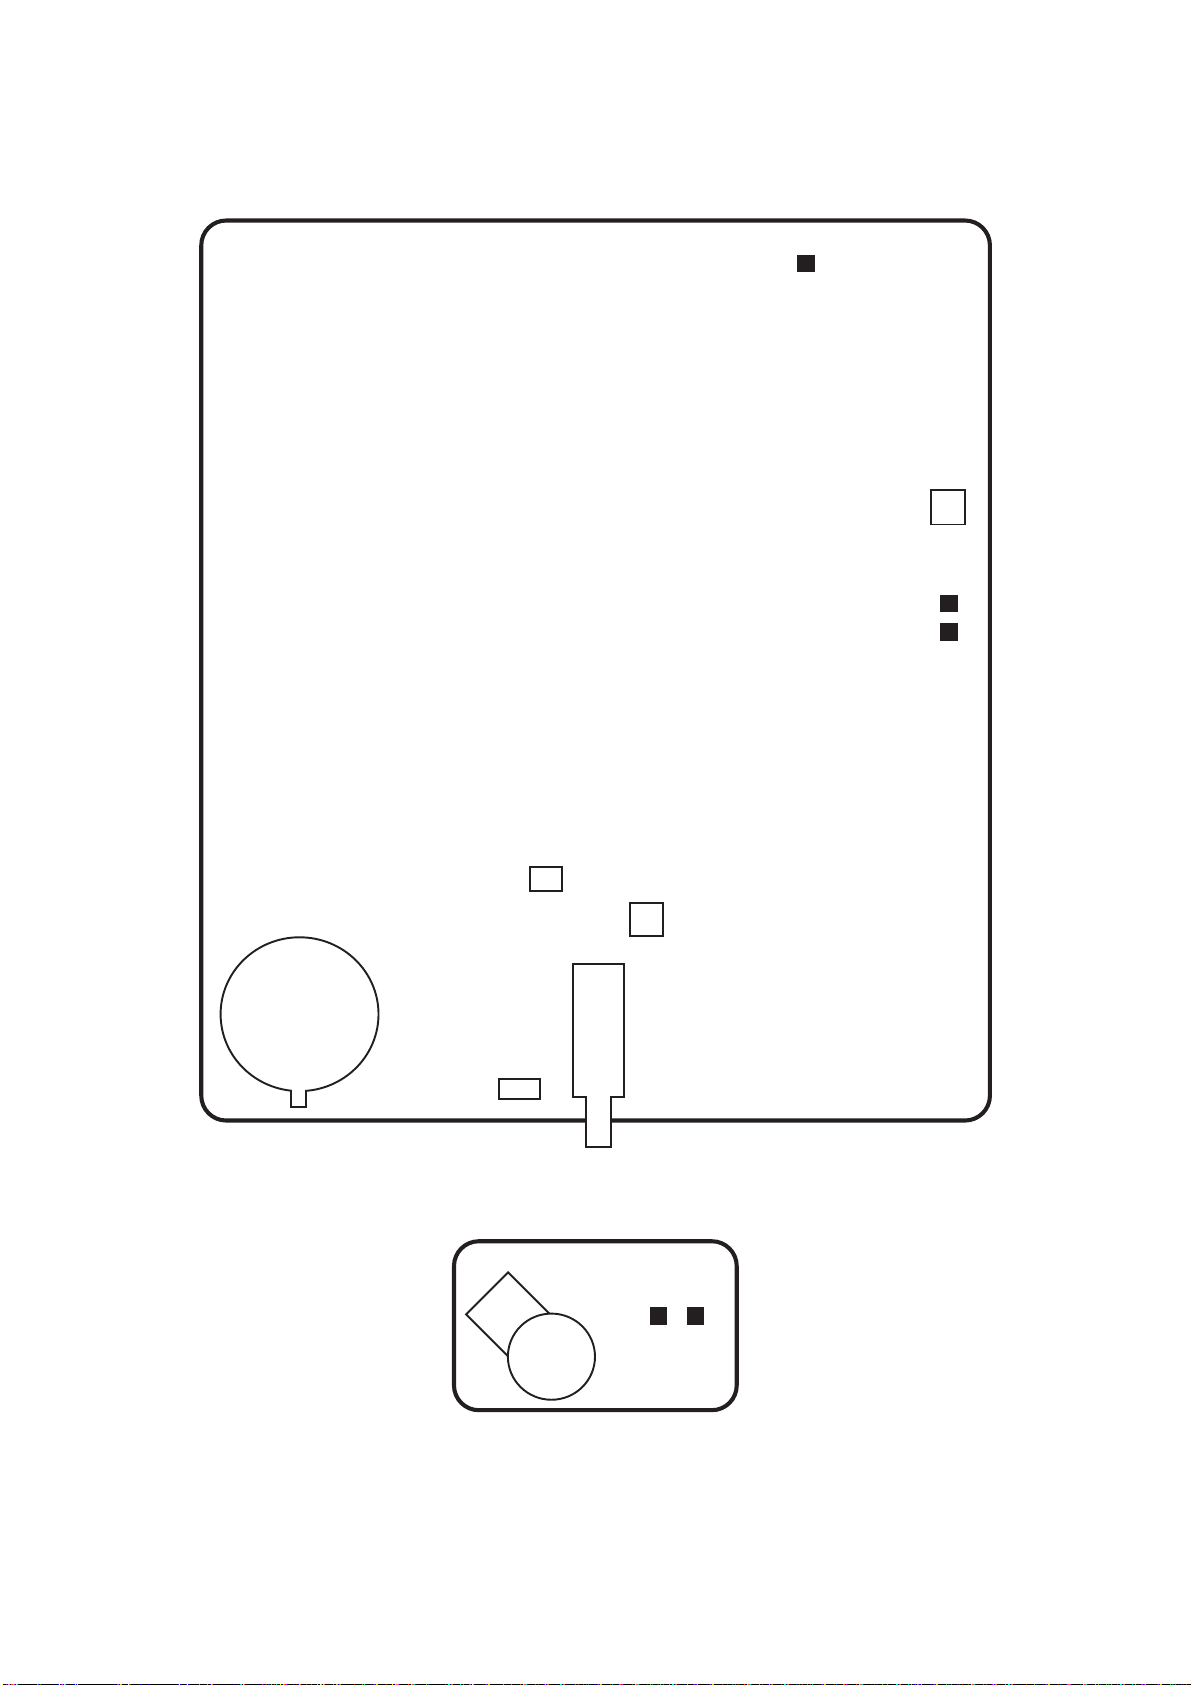
ELECTRICAL ADJUSTMENTS
3. ELECTRICAL ADJUSTMENT PARTS LOCATION GUIDE
TP1001
CP1003
TP1002
TP4001
FB401
FOCUS VOLUME
SCREEN VOLUME
FH503
VR502
TU001
CP351
SYSCON
TP801
TP803
J801
CRT
D2-4
Page 64
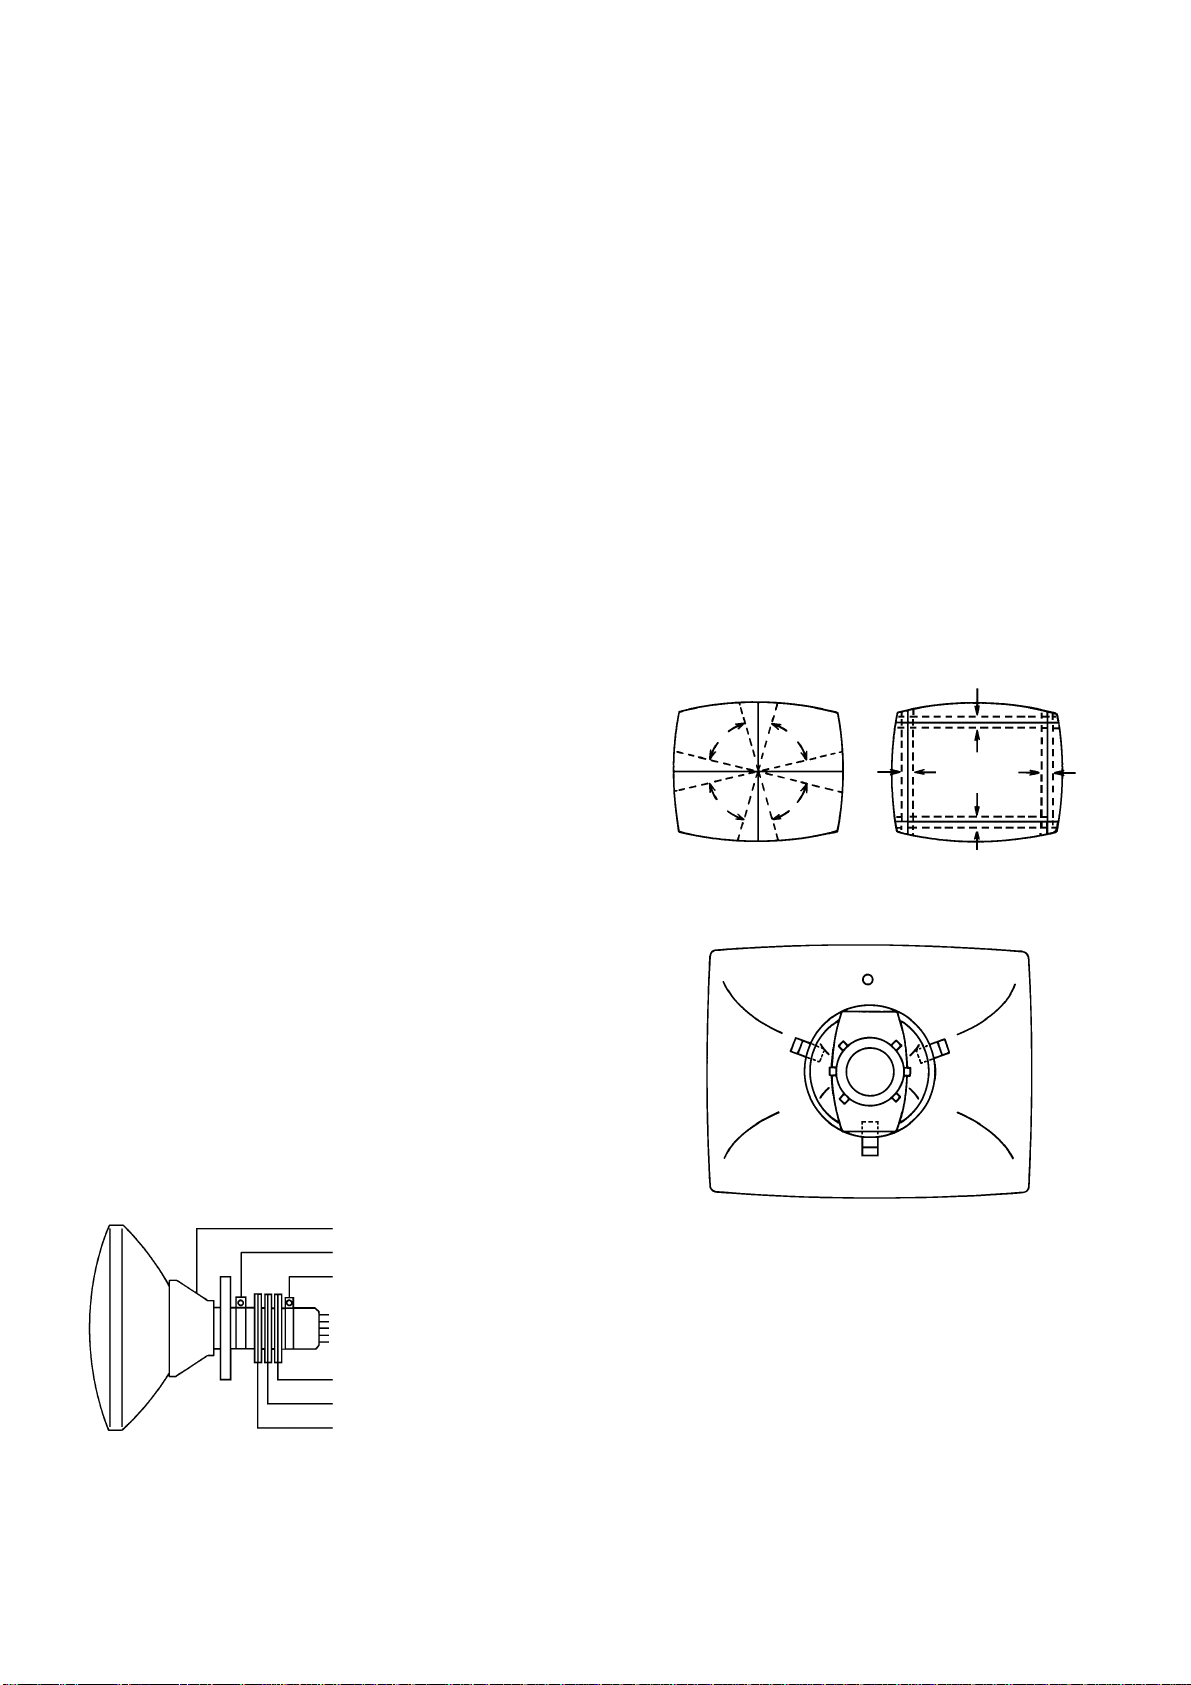
ELECTRICAL ADJUSTMENTS
4.PURITY AND CONVERGENCE
ADJUSTMENTS
NOTE
1.
Turn the unit on and let it warm up for at least 30
minutes before performing the following adjustments.
2.
Place the CRT surface facing east or west to reduce the
terrestrial magnetism.
3.
Turn ON the unit and demagnetize with a Degauss Coil.
4-1: STATIC CONVERGENCE (ROUGH ADJUSTMENT)
1.
Tighten the screw for the magnet. Refer to the adjusted
CRT for the position. (Refer to Fig. 4-1)
If the deflection yoke and magnet are in one body,
untighten the screw for the body.
2.
Receive the green raster pattern from the color bar
generator.
3.
Slide the deflection yoke until it touches the funnel side
of the CRT.
4.
Adjust center of screen to green, with red and blue on
the sides, using the pair of purity magnets.
5.
Switch the color bar generator from the green raster
pattern to the crosshatch pattern.
6.
Combine red and blue of the 3 color crosshatch pattern
on the center of the screen by adjusting the pair of 4
pole magnets.
7.
Combine red/blue (magenta) and green by adjusting the
pair of 6 pole magnets.
8.
Adjust the crosshatch pattern to change to white by
repeating steps 6 and 7.
4-2: PURITY
NOTE
Adjust after performing adjustments in section 4-1.
1.
Receive the green raster pattern from color bar
generator.
2.
Adjust the pair of purity magnets to center the color on
the screen.
Adjust the pair of purity magnets so the color at the
ends are equally wide.
3.
Move the deflection yoke backward (to neck side)
slowly, and stop it at the position when the whole screen
is green.
4.
Confirm red and blue colors.
5.
Adjust the slant of the deflection yoke while watching
the screen, then tighten the fixing screw.
DEFLECTION YOKE
DEFLECTION YOKE SCREW
MAGNET SCREW
4-3: STATIC CONVERGENCE
NOTE
Adjust after performing adjustments in section 4-2.
1.
Receive the crosshatch pattern from the color bar
generator.
2.
Combine red and blue of the 3 color crosshatch pattern
on the center of the screen by adjusting the pair of 4
pole magnets.
3.
Combine red/blue (magenta) and green by adjusting the
pair of 6 pole magnets.
4-4: DYNAMIC CONVERGENCE
NOTE
Adjust after performing adjustments in section 4-3.
1.2.Adjust the differences around the screen by moving the
deflection yoke upward/downward and right/left.
(Refer to Fig. 4-2-a)
Insert three wedges between the deflection yoke and
CRT funnel to fix the deflection yoke.
(Refer to Fig. 4-2-b)
R G B
R
G
B
UPWARD/DOWNWARD SLANT RIGHT/LEFT SLANT
WEDGE
WEDGE POSITION
R
G
B
Fig. 4-2-a
WEDGE
WEDGE
Fig. 4-2-b
R G B
6 POLE MAGNETS
4 POLE MAGNETS
PURITY MAGNETS
Fig. 4-1
D2-5
 Loading...