

Page 1
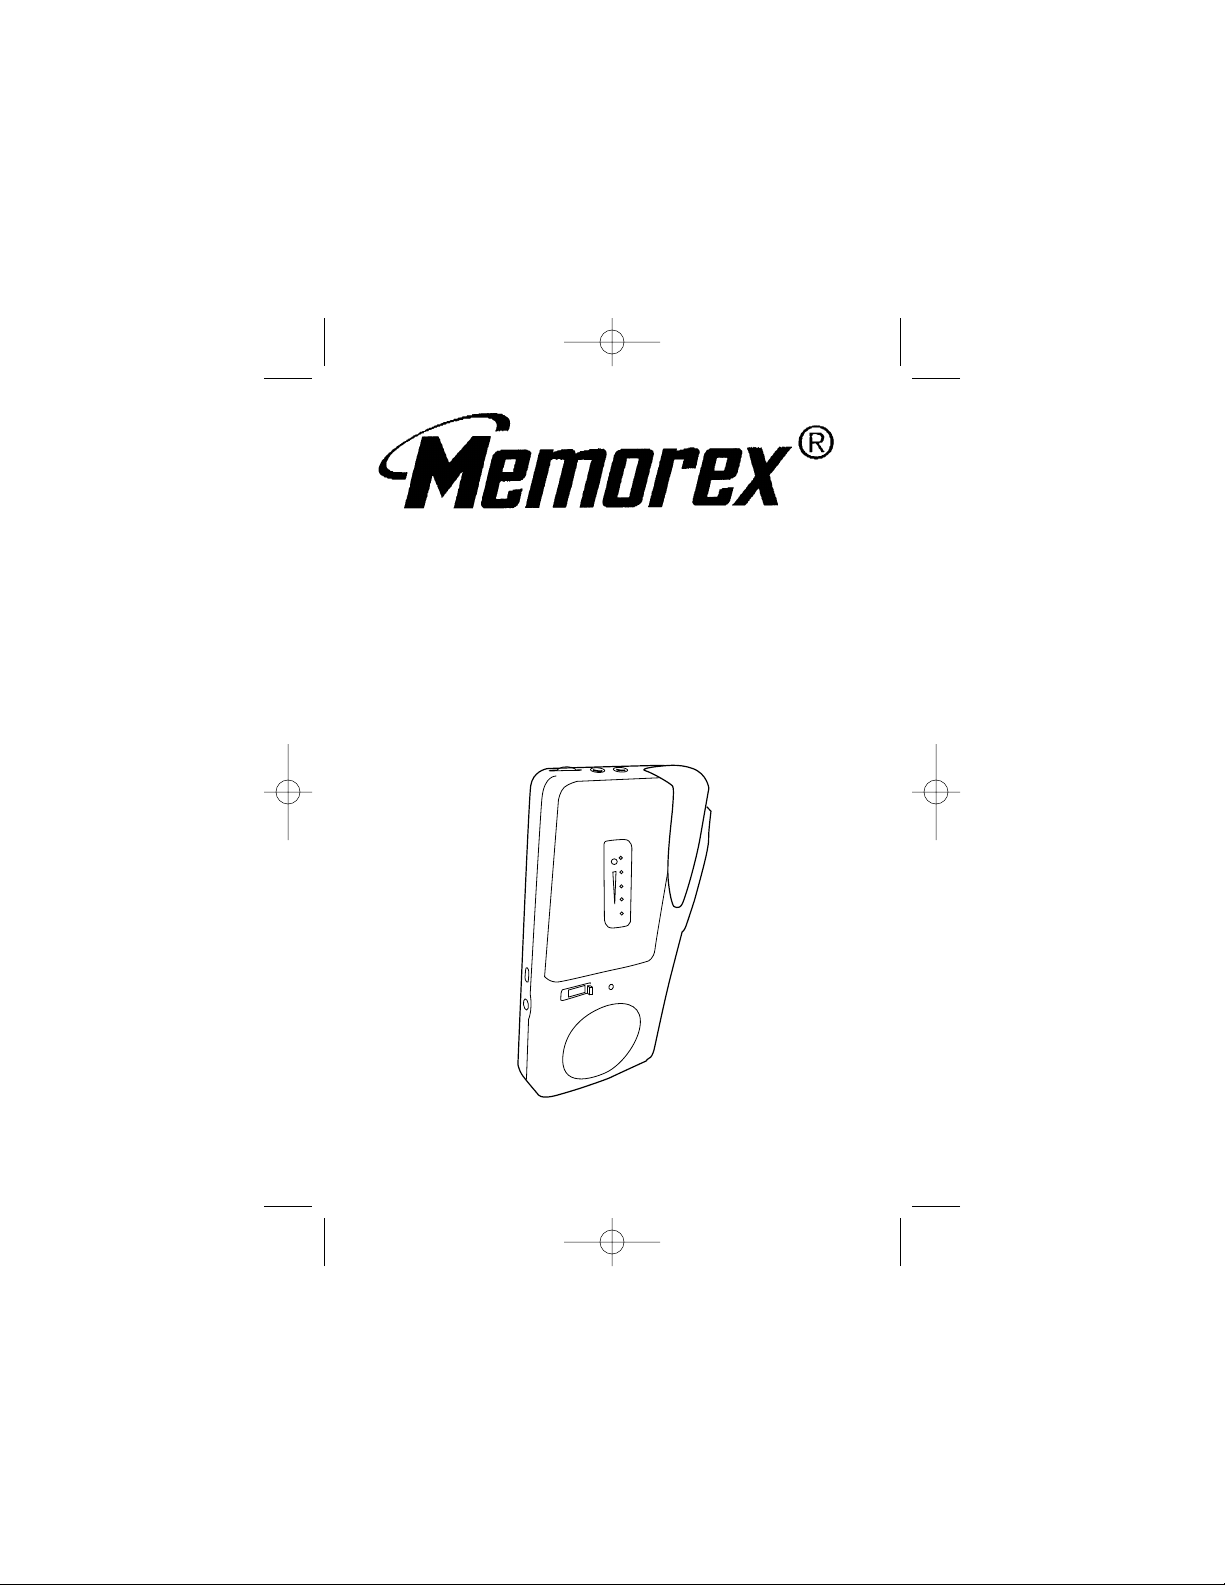
MODEL: MB2186A
BEFORE OPERATING THIS PRODUCT,
PLEASE READ THESE INSTRUCTIONS COMPLETELY.
MICRO CASSETTE RECORDER
OPERATING INSTRUCTIONS
MB2186A O/M.QXD 11/26/02 3:07 PM Page 13
Page 2
1
SAFETY PRECAUTIONS
CAUTION: TO REDUCE THE RISK OF ELECTRIC SHOCK,
DO NOT REMOVE COVER (OR BACK). NO USERSERVICEABLE PARTS INSIDE. REFER SERVICING TO
QUALIFIED SERVICE PERSONNEL.
CAUTION
RISK OF ELECTRIC SHOCK
DO NOT OPEN
DANGEROUS VOLTAGE
The lightning flash with arrowhead symbol, within an
equilateral triangle is intended to alert the user to the
presence of uninsulated dangerous voltage within the
product’s enclosure that may be of sufficient magnitude
to constitute a risk of electric shock to persons.
ATTENTION
The exclamation point within an equilateral triangle is
intended to alert the user to the presence of important
operating and maintenance (servicing) instructions in
the literature accompanying the appliance.
IMPORTANT:
PLEASE KEEP ALL PACKAGING MATERIAL FOR AT LEAST
90 DAYS IN CASE YOU NEED TO RETURN THIS PRODUCT
TO YOUR PLACE OF PURCHASE OR MEMOREX.
Before using, fill out and mail the registration card. This will
make sure a permanent record is made with the date of
purchase in case service is needed.
SURGE PROTECTORS:
It is recommended to use a surge protector for AC connection.
Lightning and power surges ARE NOT covered under warranty for
this product.
MB2186A O/M.QXD 11/26/02 3:07 PM Page 1
Page 3
2
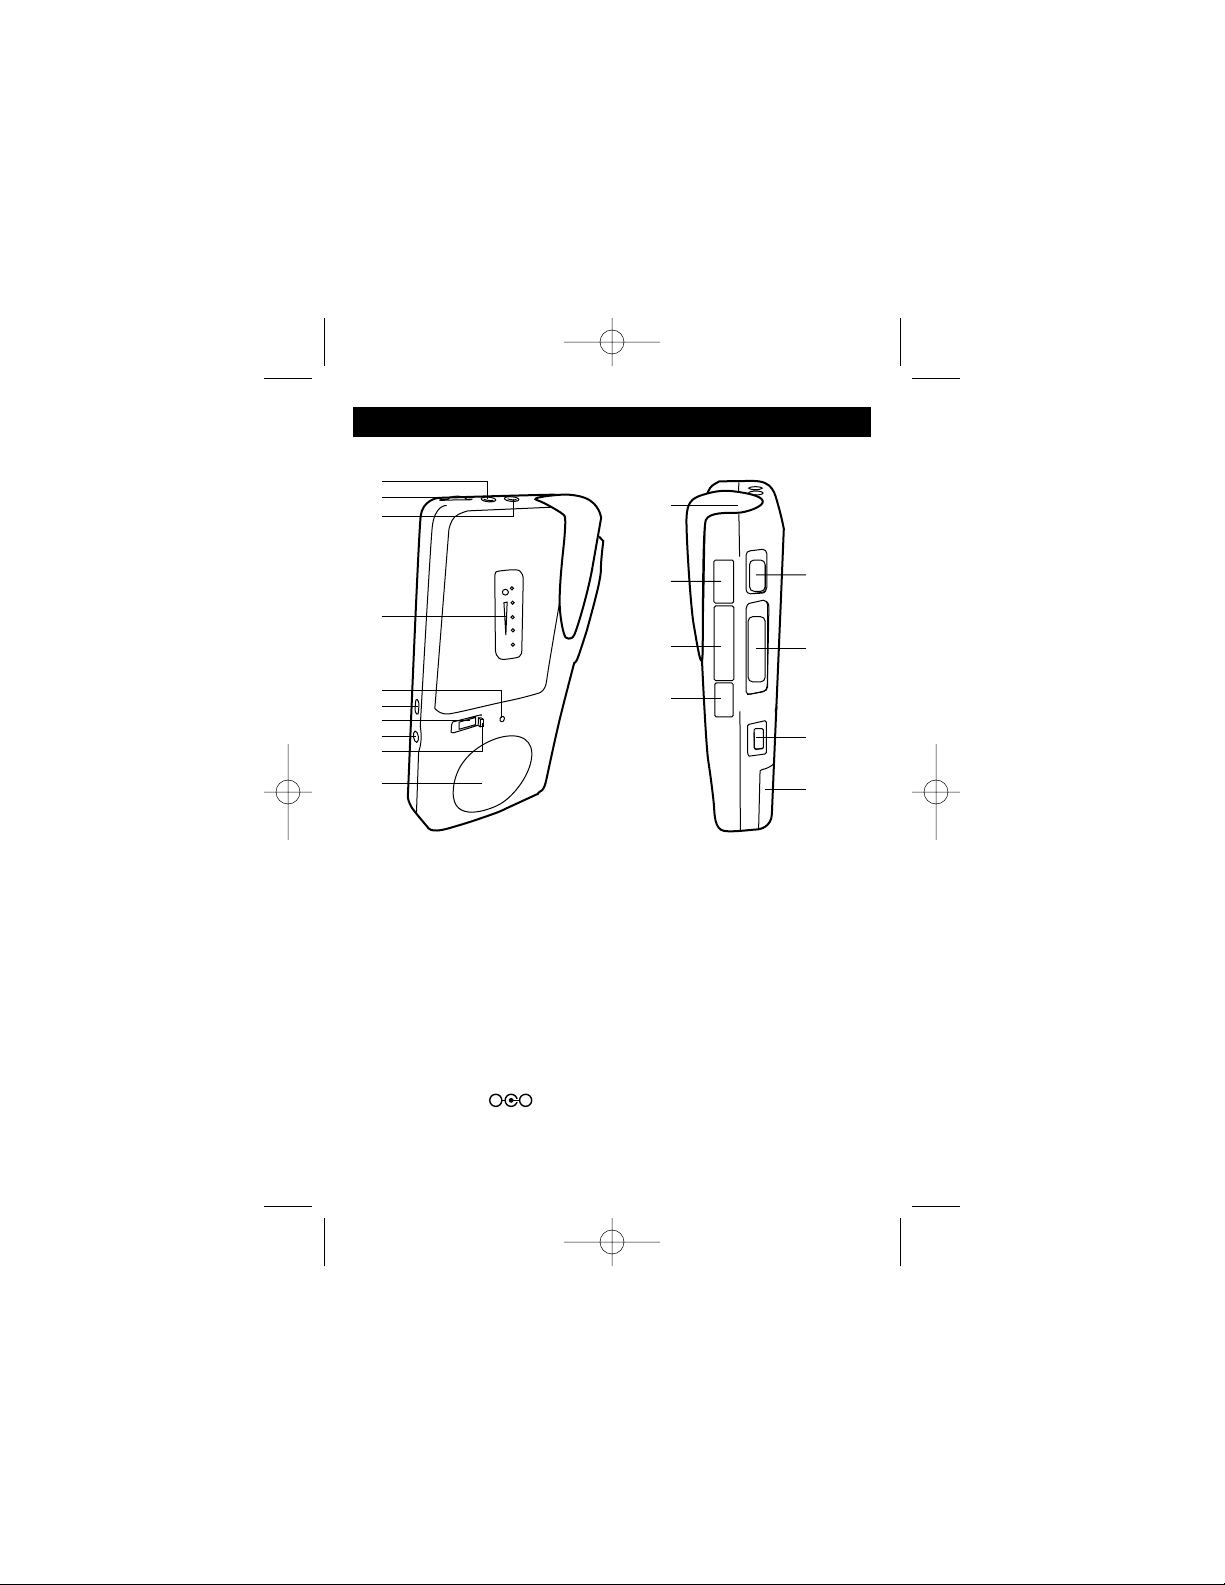
LOCATION OF CONTROLS
1. EAR (Earphone) Jack
2. VOLUME/VAC Mic
Sensitivity Control
3. MIC (Microphone) Jack
4. Microcassette
Compartment
5. REC/BATT Indicator
6. VAC (Voice Activation)
ON/OFF Switch
7. Tape Counter
8. DC 3V Jack
9. Tape Counter Reset
Button
10. Speaker
11. Built-in Microphone
12. Record Button
13. Play Button
14. Stop/Eject Button
15. PAUSE ON/OFF Switch
16. REW (REV)/F.F Switch
Button
17. TAPE SPEED (2.4/1.2)
Switch
18. Battery Compartment
FRONT REAR
MB2186A O/M.QXD 11/26/02 3:07 PM Page 2
1
2
3
11
4
5
6
7
8
9
10
12
13
14
+
-
15
16
17
18
Page 4
3
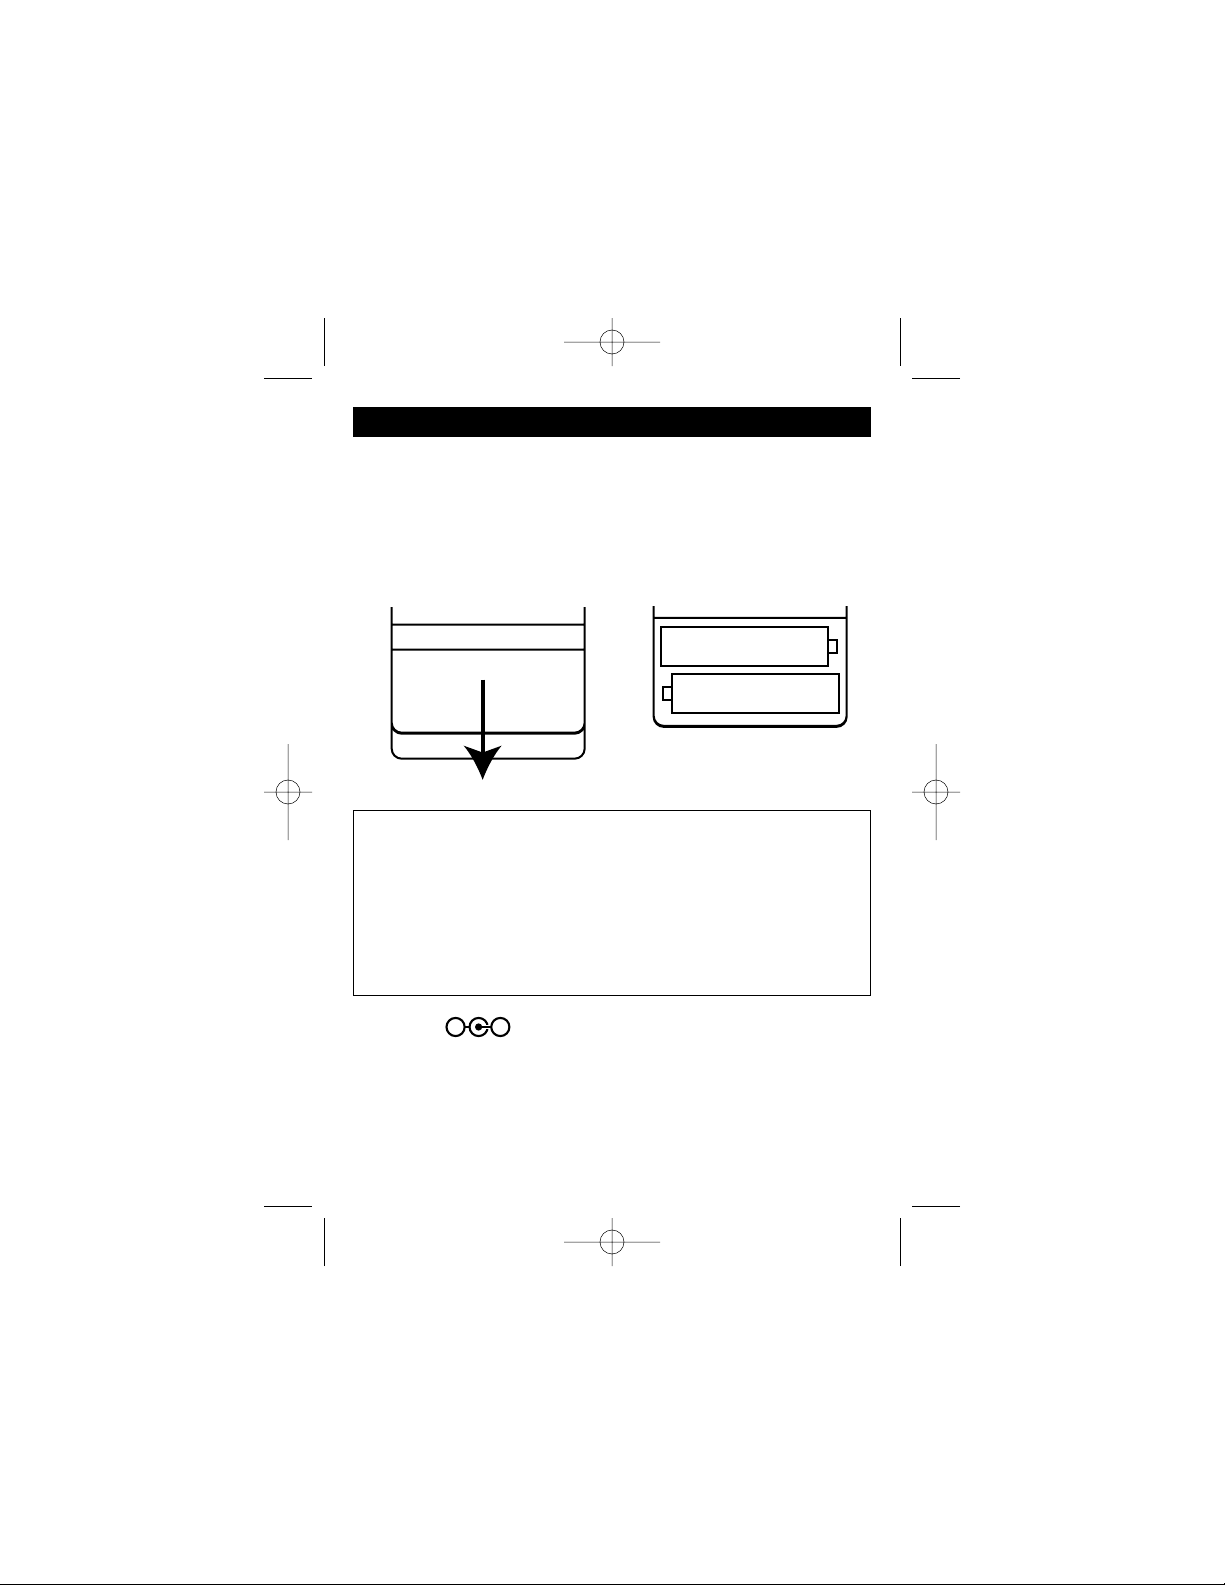
POWER SOURCES
BATTERY INSTALLATION
Open the battery compartment and insert two (2) "AA" size
batteries (not included) following the polarity diagram. Put the
battery compartment cover back into place.
NOTE: The REC/BATT indicator will brightly light during
recording when batteries are fresh. When they are weak, it will
light dim.
BATTERY PRECAUTIONS
Follow these precautions when using batteries in this device:
1. Use only the size and type of batteries specified.
2. Be sure to follow the correct polarity when installing the batteries as indicated in the
battery compartment. Reversed batteries may cause damage to the device.
3. Do not mix different types of batteries together (e.g. Alkaline and Carbon-zinc) or
old batteries with fresh ones.
4. If the device is not to be used for a long period of time, remove the batteries to prevent
damage or injury from possible battery leakage.
5. Do not try to recharge batteries not intended to be recharged; they can overheat and
rupture. (Follow battery manufacturer’s directions.)
DC JACK
To use this unit with an external AC adapter (not included)
having 3V and a negative center pin, insert the AC adapter’s
plug into the DC 3V jack on the unit. The batteries will be
disconnected when the AC adapter is connected.
MB2186A O/M.QXD 11/26/02 3:07 PM Page 3
+
-
+
—
+
—
Page 5

4
Press the Stop/Eject button and
insert a microcassette tape with
the side to be played facing you
and the exposed tape facing the
right. Close the Cassette
Compartment.
1
Slide the TAPE SPEED switch to
the tape speed used when
recorded.
2
TO PLAY A PRERECORDED MICROCASSETTE TAPE
Set the VOLUME/VAC Mic
Sensitivity control to minimum.
3
Press the Play button ❶ to start
playback and adjust the
VOLUME/VAC Mic Sensitivity
control ❷ as desired. To stop the
tape before it reaches the end,
press the Stop/Eject button ❸.
4
OPERATION
EARPHONE JACK
For private listening, connect an earphone (not included) to this jack.
The speaker is automatically disconnected when the earphone plug is
inserted in the jack.
MB2186A O/M.QXD 11/26/02 3:07 PM Page 4
2
1
3
Page 6

5
To rapidly rewind a microcassette
tape in the Stop mode, slide the
REW (REV)/F.F switch ❶ to the
REW (REV) position. Press the
Stop/Eject button ❷ when you
reached the desired position.
1
To rapidly review a microcassette
tape, press the Play button ❶ and
then slide and hold the REW
(REV)/F.F switch ❷ to the REW
(REV) position. You will then hear
the microcassette play at fast
speed. Release the switch to
resume normal playback.
2
TO FAST REWIND/REVIEW A MICROCASSETTE TAPE
To rapidly forward a microcassette tape in the Stop mode,
slide the REW (REV)/F.F switch
❶ to the F.F position. Press the
Stop/Eject button ❷ when you
reached the desired position.
1
To rapidly cue a microcassette
tape, press the Play button ❶ and
then slide and hold the REW
(REV)/F.F switch ❷ to the F.F
position. You will then hear the
microcassette play at fast speed.
Release the switch to resume
normal playback.
2
TO FAST FORWARD/CUE A MICROCASSETTE TAPE
OPERATION
MB2186A O/M.QXD 11/26/02 3:07 PM Page 5
2
2
1
1
1
1
2
2
Page 7

6
To pause Recording, Playback,
Rewind or Fast Forward, slide the
PAUSE switch to the ON position.
1
To resume, slide back to the OFF
position.
2
TO PAUSE A CASSETTE TAPE
This unit can pause the microcassette while Recording, Playback,
Rewind or Fast Forward
TAPE SPEED SWITCH
Set the one of the following positions:
2.4: NORMAL SPEED: Compatible with most single-speed
microcassette recorders. This setting has the best sound quality.
1.2: LONGER RECORDING: This will allow double recording time, but
the sound quality will be less.
The tape counter is helpful in locating particular portions of the tape.
The tape counter will count up or
down when playing, recording,
fast forwarding or rewinding a
microcassette tape.
1
To reset the counter, press the
Tape Counter Reset button; the
counter will reset to “000”
2
TAPE COUNTER
OPERATION
MB2186A O/M.QXD 11/26/02 3:07 PM Page 6
Page 8

7
Press the Stop/Eject button and
insert a microcassette tape with
the side to be played facing you
and the exposed tape facing the
right (and the Erase Prevention
Tab intact, see note below).
Close the Cassette Compartment.
1
Slide the TAPE SPEED switch to
the desired tape speed.
2
NORMAL RECORDING
For constant recording, slide the
VAC ON/OFF switch ❶ to the
OFF position and press the
Record button ❷ (the Play button
will automatically depress) and
the REC/BATT indicator will light.
3
Speak into the built-in microphone
or insert a microphone into the
MIC jack and speak into it in a
normal tone of voice.
4
OPERATION
This unit is capable of recording only when sound is heard. To use this
feature, see the next page. For normal recording, follow steps below.
IMPORTANT NOTE: If you cannot press the Record button,
then there is either no tape inserted, or the erase prevention tab
has been removed. See page 9 for details.
MB2186A O/M.QXD 11/26/02 3:07 PM Page 7
1
2
Page 9

8
Press the Stop/Eject button and
insert a microcassette tape with
the side to be played facing you
and the exposed tape facing the
right. Close the Cassette
Compartment.
1
For Voice Activated Recording,
slide the VAC ON/OFF switch ❶
to the ON position and press the
Record button ❷ (the PLAY
button will automatically depress).
2
VOICE ACTIVATED (VAS) RECORDING
Speak into the built-in microphone or insert a microphone into
the MIC jack and speak into it in a
normal tone of voice. Adjust the
VOLUME/VAC Mic Sensitivity
control until your voice activates
the recorder (REC/BATT indicator
will light).
3
NOTES:
• The first few sounds activate
the recorder and may not be
recorded.
• A variation in voice level during
recording will not stop the unit,
2 seconds of silence is
required to stop the recording.
• For constant recording, see
previous page.
• When recording, the VOLUME/
VAC Mic Sensitivity control
adjusts the microphone
sensitivity. At 10, a soft sound
will activate the recorder. At 0,
a louder sound is required.
OPERATION
Voice activated recording will allow dictation only when you
speak. When the unit detects a pause of a few seconds, it will
temporarily stop recording until it detects sound again.
MB2186A O/M.QXD 11/26/02 3:07 PM Page 8
1
2
Page 10

9
CARE AND MAINTENANCE
SAFEGUARD AGAINST ACCIDENTAL ERASURE
When a new recording is
made, any program material
previously recorded is
automatically erased and only
the new recording remains.
To safeguard valuable
recordings from being erased
accidentally, the cassette and
the deck are equipped with a
special device.
On the cassette there is an
erase prevention tab on each side. To prevent accidental erasing, break
out these tabs with a screwdriver. If only one side of the tape is to be
protected, break out the tab on the left side with the side desired facing
you.
To record on a tape in which the tab has been broken, place a piece of
adhesive tape over that area.
NOTE: When a tab is broken out, the record button cannot be depressed.
CASSETTE TAPE RECOMMENDATIONS
Standard tape lengths have 15 (C-30), 30 (C-60) and 45 (C-90) minutes
of recording time on each side. Longer length tapes of 60 (C-120)
minutes of recording time on each side are not recommended. Use only
high quality tapes. If a problem develops, check the unit first with
another cassette to determine if the problem is with the cassette, and
not with the unit.
If there is any slack in the tape in the
cassette, it should be removed before
inserting the cassette. Place a pencil in
one of the hubs and rotate toward the
outside of the cassette until all slack is
taken up.
MB2186A O/M.QXD 11/26/02 3:07 PM Page 9
Page 11

10
CARE AND MAINTENANCE (CONTINUED)
CASSETTE TAPE USAGE
Use only high quality tapes. If there
is any slack in the tape, remove it
before inserting the cassette. To do
so, place a pencil in one of the hubs
and rotate it until the slack is taken
up.
Clean the tape head, capstan and
pinch roller using a cotton swab
slightly moistened with alcohol.
Avoid scratching the head surface. To clean the unit housing,
use a soft cloth slightly dampened with water and wipe dry.
CAUTION: Never use chemicals such as benzene or paint
thinner for cleaning, otherwise the case may be deformed or
discolored.
Traffic Safety
• Do not use while operating a motorized vehicle. It may create
a traffic hazard and is illegal in many areas.
• Even if your earphone is an open air type designed to let you
hear outside sounds, do not turn the volume up so high that
you cannot hear what is around you.
• Use extreme caution or temporarily discontinue use in
potentially hazardous situations.
MB2186A O/M.QXD 11/26/02 3:07 PM Page 10
Page 12

SPECIFICATIONS
Tape Speed. . . . . . . . . . . . . . . . . . . . . 2.4cm/sec or 1.2cm/sec
Frequency Response. . . . . . . . . . . . . . . . . . . . . . . 250-4500Hz
Speaker. . . . . . . . . . . . . . . . . . . . . . . . . . . . . . . 40mm (4 Ohm)
Power Source. . . . . . 3V, “AA” size x 2 batteries (Not Included)
Dimensions . . . . . . . . . . . . . . . . . . . . . . . . . . 126 x 68 x 26mm
Weight . . . . . . . . . . . . . . . . . . . . . . . . . 160g (without batteries)
Specifications are subject to change without notice.
11
FOR ADDITIONAL SET-UP OR OPERATING
ASSISTANCE, PLEASE VISIT OUR WEBSITE AT
WWW.MEMCORPINC.COM OR CONTACT
CUSTOMER SERVICE AT
1-800-919-3647
PLEASE KEEP ALL PACKAGING MATERIAL FOR
AT LEAST 90 DAYS IN CASE YOU NEED TO
RETURN THIS PRODUCT TO YOUR PLACE OF
PURCHASE OR MEMOREX.
FOR PARTS AND ACCESSORIES, CONTACT
FOX INT’L AT 1-800-321-6993.
MB2186A O/M.QXD 11/26/02 3:07 PM Page 11
Page 13

Memcorp, Inc.
Weston, FL
Printed in Hong Kong
Visit our website at www.memcorpinc.com
MB2186A O/M.QXD 11/26/02 3:07 PM Page 12
 Loading...