

Page 1
USER MANUAL
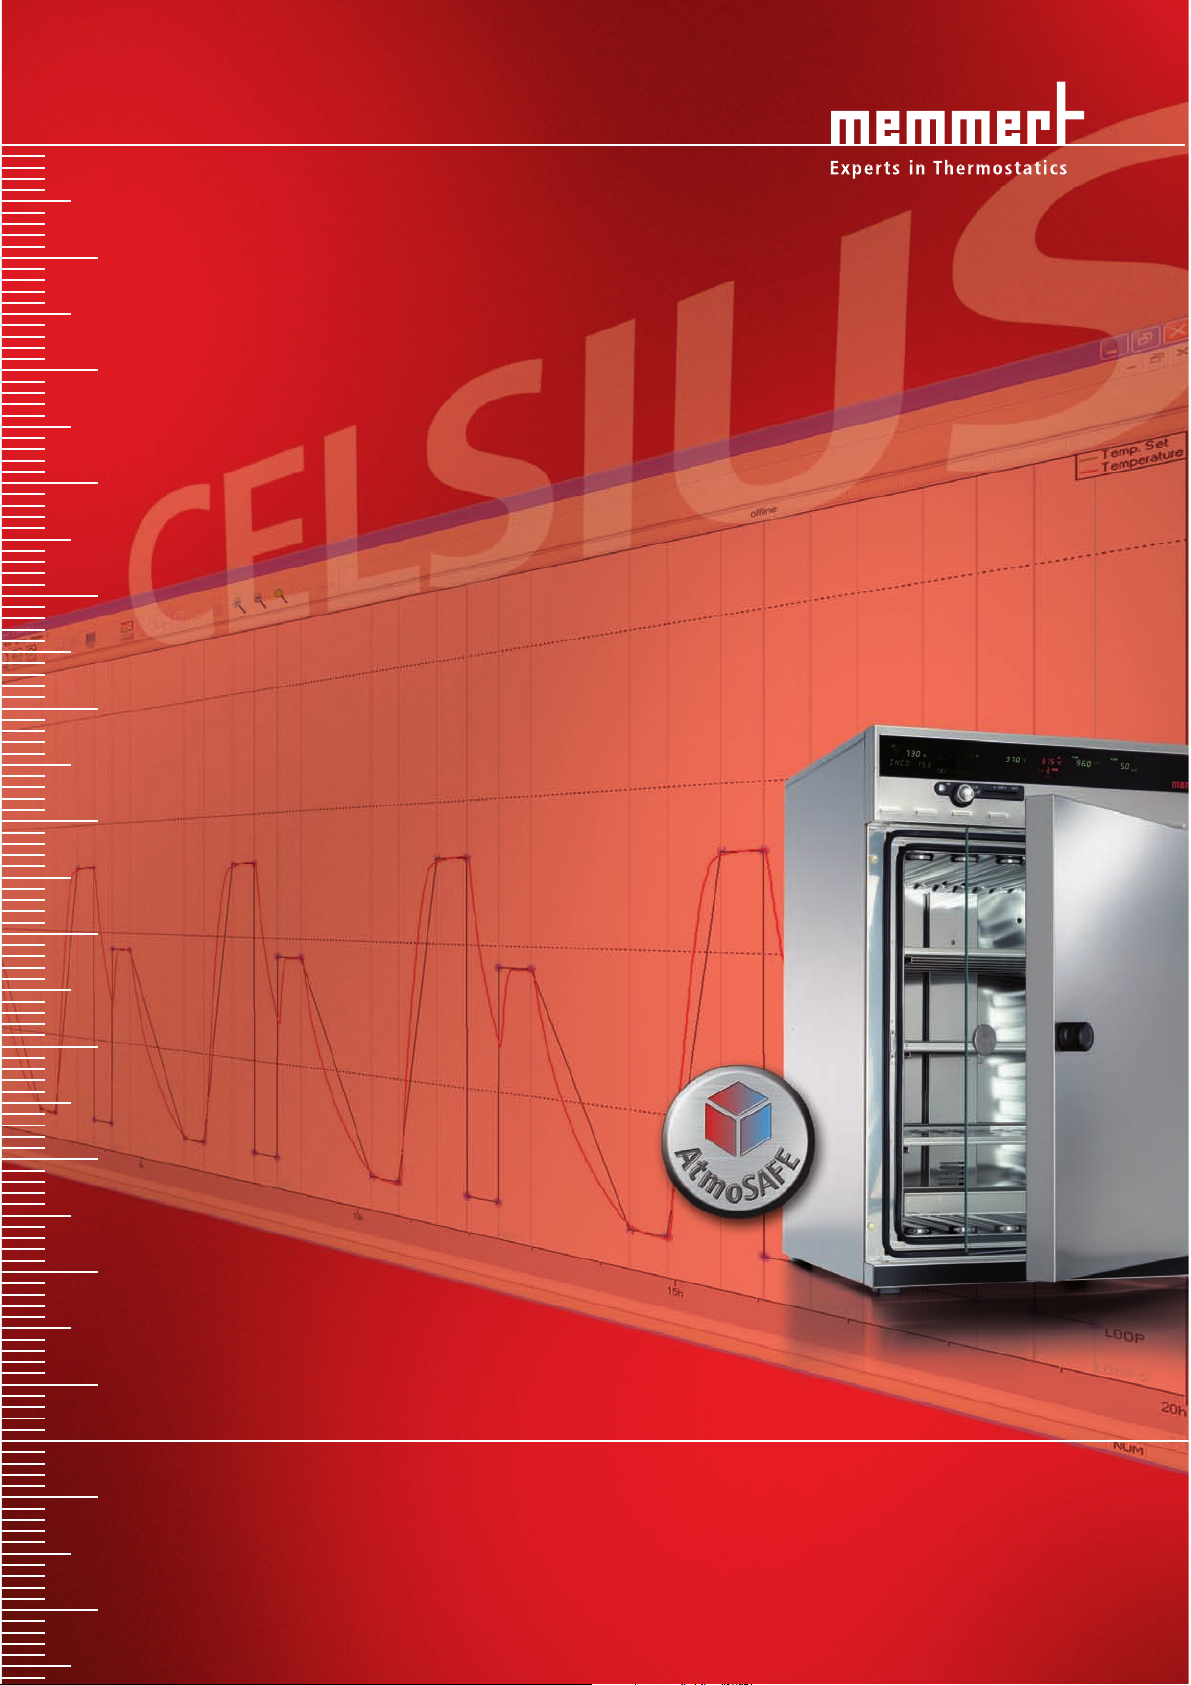
CELSIUS 10.0
Control software for MEMMERT appliances
Page 2

Manufacturer and customer service
MEMMERT GmbH + Co. KG
PO Box 17 20
91107 Schwabach, Germany
Äußere Rittersbacherstr. 38
91126 Schwabach
Germany
Phone: +49 (0) 09122 / 925-0
Fax: +49 (0) 09122 / 14585
Email: sales@memmert.com
Internet: www.memmert.com
Customer service:
Phone: +49 (0) 09122/925-128
and: +49 (0) 09122/925-126
Email: service@memmert.com
© 2010 Memmert GmbH + Co. KG
Edition 10/2010
Subject to modifications
Page 3

CELSIUS 10.0
About this manual
Intended use and target group
This user manual describes the installation and use of the MEMMERT control software CELSIUS 10.0. It is intended for use by trained personnel of the operating company, who have the
task of programming/operating MEMMERT ovens.
If you intend to work with the software, please read this manual carefully before starting.
Familiarise yourself with the programme and run several tests before actually controlling an
oven. Incorrect use could result in damage to the oven and/or to the chamber load.
If there is something you do not understand, or certain information is missing, ask your superior or get in touch with the manufacturer. Do not do anything without authorisation.
Explanation of terms
Below, we shall explain a number of terms that are used repeatedly in this manual.
Term Meaning
Tempering
profile/ramp
Protocol Recording of the actual physical values/combinations
Controller internal control of an oven
a time sequence of physical values/combinations
(temperature and – depending on oven type – humidity, vacuum, CO
perform
(temperature and – depending on oven type – humidity, vacuum, CO
during the execution of a tempering profile (measuring values)
and O2), that the oven should
2
and O2), that the oven should create
2
Description
on/from page
27
38
Other documents that you must read:
Please also read the user manual for the respective oven to be operated with the software
and familiarise yourself with it.
Storage and forwarding
This manual should always be kept in a place where those working with the software have
access to it. It is the responsibility of the operator to ensure that persons who work with or
will work with the software are informed as to the whereabouts of this user manual. We recommend that it is always stored in a protected location close to the computer on which the
software is installed. Make sure that the manual is not damaged by heat or damp.
An electronic version of this manual in PDF format can be run from the software via the
help function (see page 19 ).
3
Page 4

CELSIUS 10.0
Content
1. Introduction 6
1.1 Description ........................................................................................................................... 6
1.2 System Requirements .......................................................................................................... 6
1.3 Supported MEMMERT ovens and parameters .................................................................... 7
2. Installing CELSIUS and device drivers 8
3. Programme description 11
3.1 Starting CELSIUS ................................................................................................................11
3.2 Programme interface ......................................................................................................... 12
3.2.1 Language......................................................................................................................... 13
3.2.2 Menu bar .........................................................................................................................13
3.2.3 Toolbar 19
4. Connect ovens and external devices 21
4.1 Connect ovens with a USB interface to a computer with an
USB interface ..................................................................................................................... 21
4.2 Connect ovens with an RS-232 interface ..........................................................................22
4.3 Connect ovens with an Ethernet interface to a network (LAN) ....................................... 22
4.3.1 Setting the IP address of the oven with XTADMIN ......................................................... 23
4.3.2 Setting the IP address in CELSIUS ................................................................................... 24
4.4 Connecting an external card reader .................................................................................. 24
5. Logging on ovens 25
5.1 Logging on online and offline ...........................................................................................25
5.2 Logging on an oven ..........................................................................................................25
6. Working with CELSIUS 27
6.1 Tempering profiles ............................................................................................................. 27
6.1.1 Creating a new tempering profile ..................................................................................27
6.1.2 Graphical and tabular view ............................................................................................. 27
6.1.3 Device status line ............................................................................................................. 28
6.1.4 Working in the graphical view ........................................................................................ 29
6.1.5 Working in the tabular view ........................................................................................... 34
6.1.6 Executing a tempering profile ........................................................................................35
6.1.7 Saving and loading tempering profiles ..........................................................................36
6.1.8 Printing a tempering profile ............................................................................................ 37
6.2 Protocol .............................................................................................................................38
6.2.1 Types of Protocols ...........................................................................................................38
6.2.2 Recording the actual progression ................................................................................... 38
6.2.3 Saving and loading protocol data (*.pro) ...................................................................... 39
6.2.4 Loading protocol data from the internal MEMoryCard of the oven ..............................39
6.2.5 Loading protocol data (*.bin) from the ring protocol memory of the oven..................39
6.2.6 Export log data in tabular form (Report) ........................................................................ 41
6.3 Ending work with CELSIUS ............................................................................................... 43
4
Page 5

CELSIUS 10.0
7. Settings and Options 43
7.1 Working directories ........................................................................................................... 43
7.2 Auto-Update Ring Protocol ...............................................................................................43
7.3 Backup Folder .................................................................................................................... 43
7.4 Saving Settings ................................................................................................................. 44
7.5 Logging off ovens .............................................................................................................. 44
7.6 Working with
7.7 GLP Data ............................................................................................................................ 45
7.8 Programme language ........................................................................................................ 46
7.9 Connection details .............................................................................................................46
7.9.1 Pin assignment RS-232 and RS-485 ................................................................................46
7.9.2 Interface cable for RS-232 in accordance with DIN 12900 part 1 .................................. 46
7.10 Deinstalling CELSIUS ......................................................................................................... 47
MEMoryCard ..............................................................................................45
8. Index 48
5
Page 6

CELSIUS 10.0
1. Introduction
1.1 Description
CELSIUS is a computer programme for the programming, control and logging of MEMMERT
ovens with an RS-232, or alternatively RS-485, USB or Ethernet interface.
With CELSIUS, you can
► Create, change and save tempering profiles on your computer in graphical or tabular
form.
► Control one or more MEMMERT ovens via one or more serial interfaces and log the current
values. up to eight ovens can be controlled via RS-232 or USB, and if RS-485 or Ethernet
interfaces are used (not for ovens of the E class), you can control up to 16 ovens simultaneously;
► if your oven is equipped accordingly, you can use the functions of the MEMoryCard XL,
i. e. to store a tempering profile on a MEMoryCard XL, as well as load tempering profiles
and protocols from a MEMoryCard XL, display this on the monitor and save it to a different data medium (hard drive, USB stick);
► read out, manage and document the internal ring protocol memory (1024 kB) of the
MEMMERT ovens;
► print out tempering profiles and accompanying protocol data (depending on the oven
type, temperature, humidity, vacuum, CO
contacts, see page 7 ) including GLP data, graphically or numerically.
, O2, fan speed, air flap position and switch
2
1.2 System Requirements
Category Minimum system reqirements
Processor Pentium 1 GHz
Main memory 1 GB
Available free space on hard
drive
CD-ROM drive yes
Graphics VGA graphics and colour monitor
Interfaces
Operating system Windows XP, Vista, 7
1 GB
an unused RS-232 or USB interface, if several ovens are being
operated, one interface for each oven
6
Page 7
1.3 Supported MEMMERT ovens and parameters
Oven type Parameters
CELSIUS 10.0
Tempera-
Incubators
INE, BE
INP, BP
IFE
IFP
Universal ovens
UE
ULE
UNE
UNP
UP
UFE
UFP
ULP
ture
Humidity Vacuum CO
O2Fan speed Servo air flap
2
––––– –
––– –
––––
––––
–
––––– –
––––
–
––––– –
–––––
––––– –
––––
––––
––––
–
CO2 incubator
INCO
2
2
+
INCO
Oxigene
*
*
–
–
Cooled incubators
ICP (Min:
-12º)
ICP (Min:
0º)
IPP
––––
––––– –
––––– –
Vacuum drying ovens
VO
–
Constant climate and humidity chambers
HCP
HPP
–––– –
–––– –
Climatic test chambers
CTC
TTC
––––
–––
*
* *
–– –
––
–
–– – –
–
–
Storage chambers
IPS
* Parameter is logged by CELSIUS, but cannot be set with CELSIUS.
––––– –
7
Page 8
CELSIUS 10.0
2. Installing CELSIUS and device drivers
Caution:
Always first install CELSIUS before you connect an oven to your computer.
You must have administrator rights to be able to install CELSIUS.
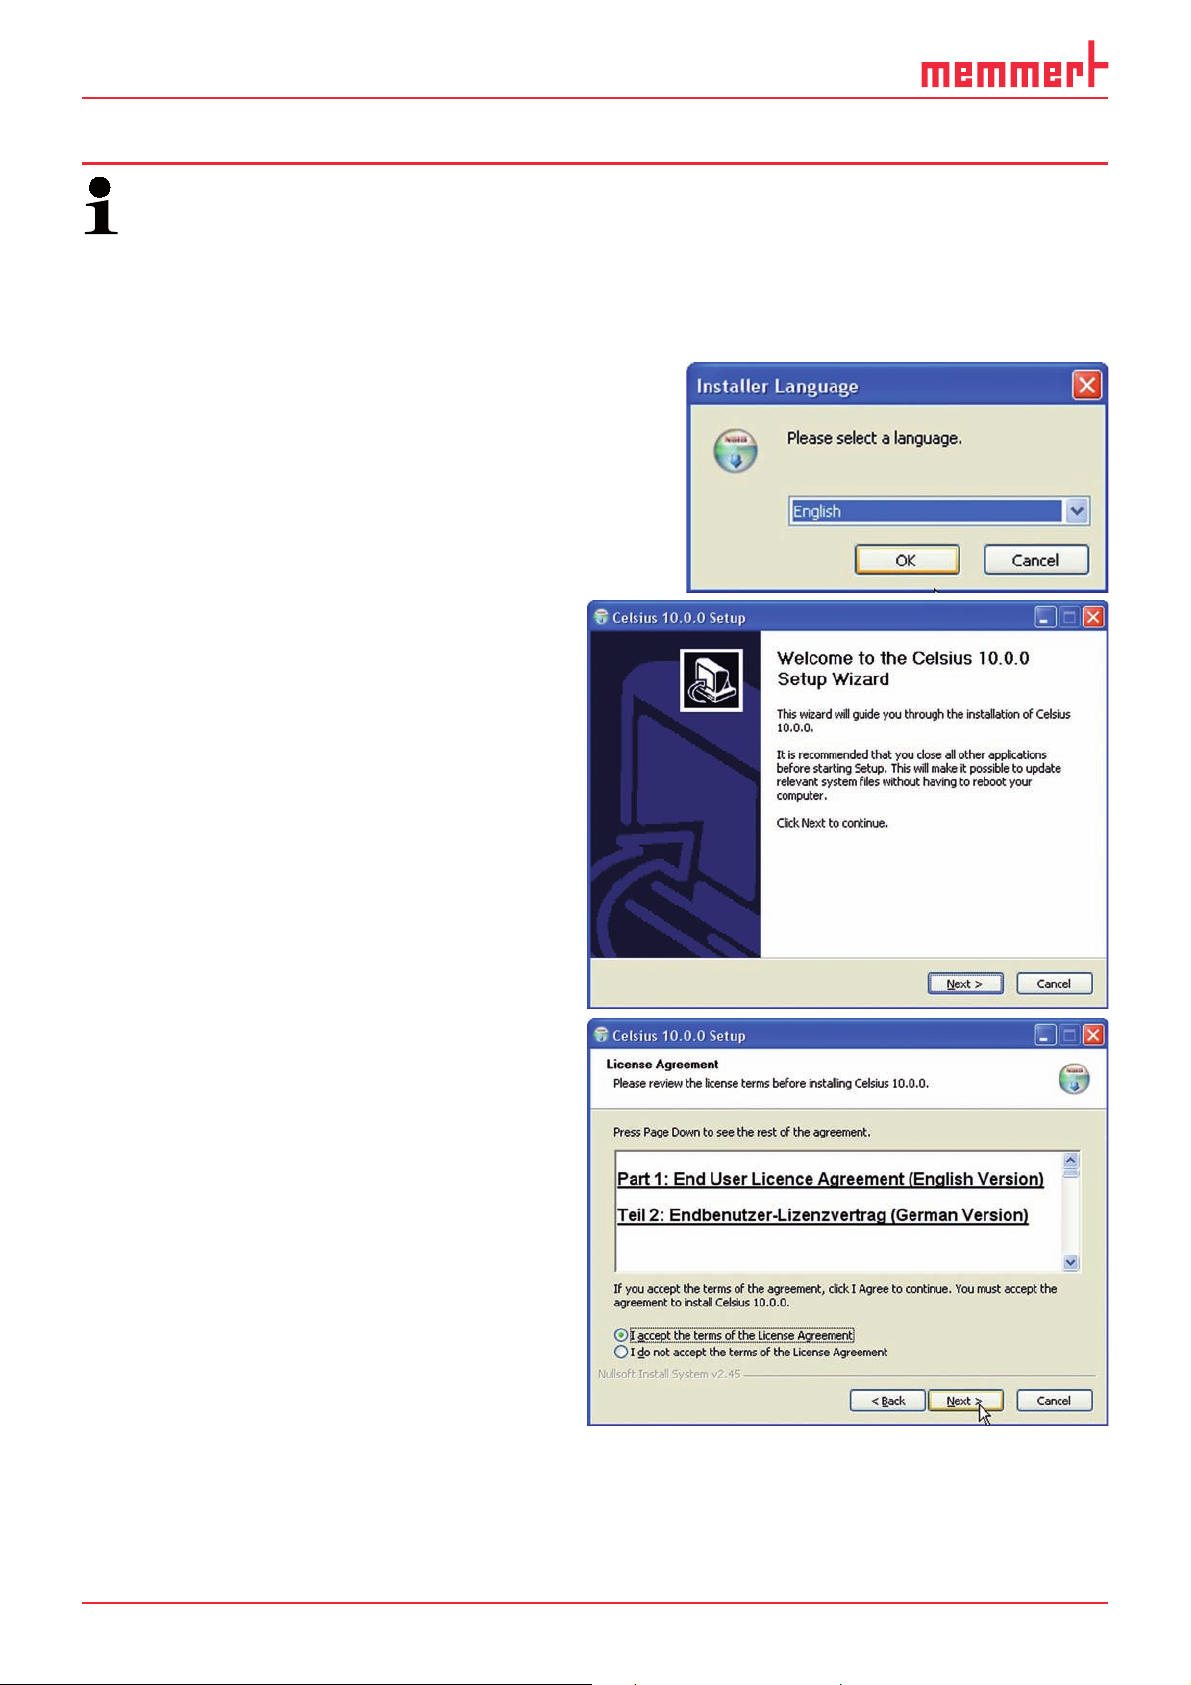
Insert the installation CD into the CD drive. The installation procedure should now start automatically.
If this is not the case, double-click on the file Setup.exe on the CD.
1. You are first requested to select the language
for the installation. Select the desired language
and confirm with OK.
2. The installation wizard takes you
throught the installation procedure.
Click on "Next" to continue.
3. You are shown the License conditions for
the use of the software in German and
English. You must accept the license
conditions before you can continue with
the installation. If you reject the license
agreement, the installation procedure is
terminated; but it can be restarted at any
time. Click on "I accept the terms of the
License Agreement" if you agree with the
terms of the license, and then click on
"Next".
8
Page 9
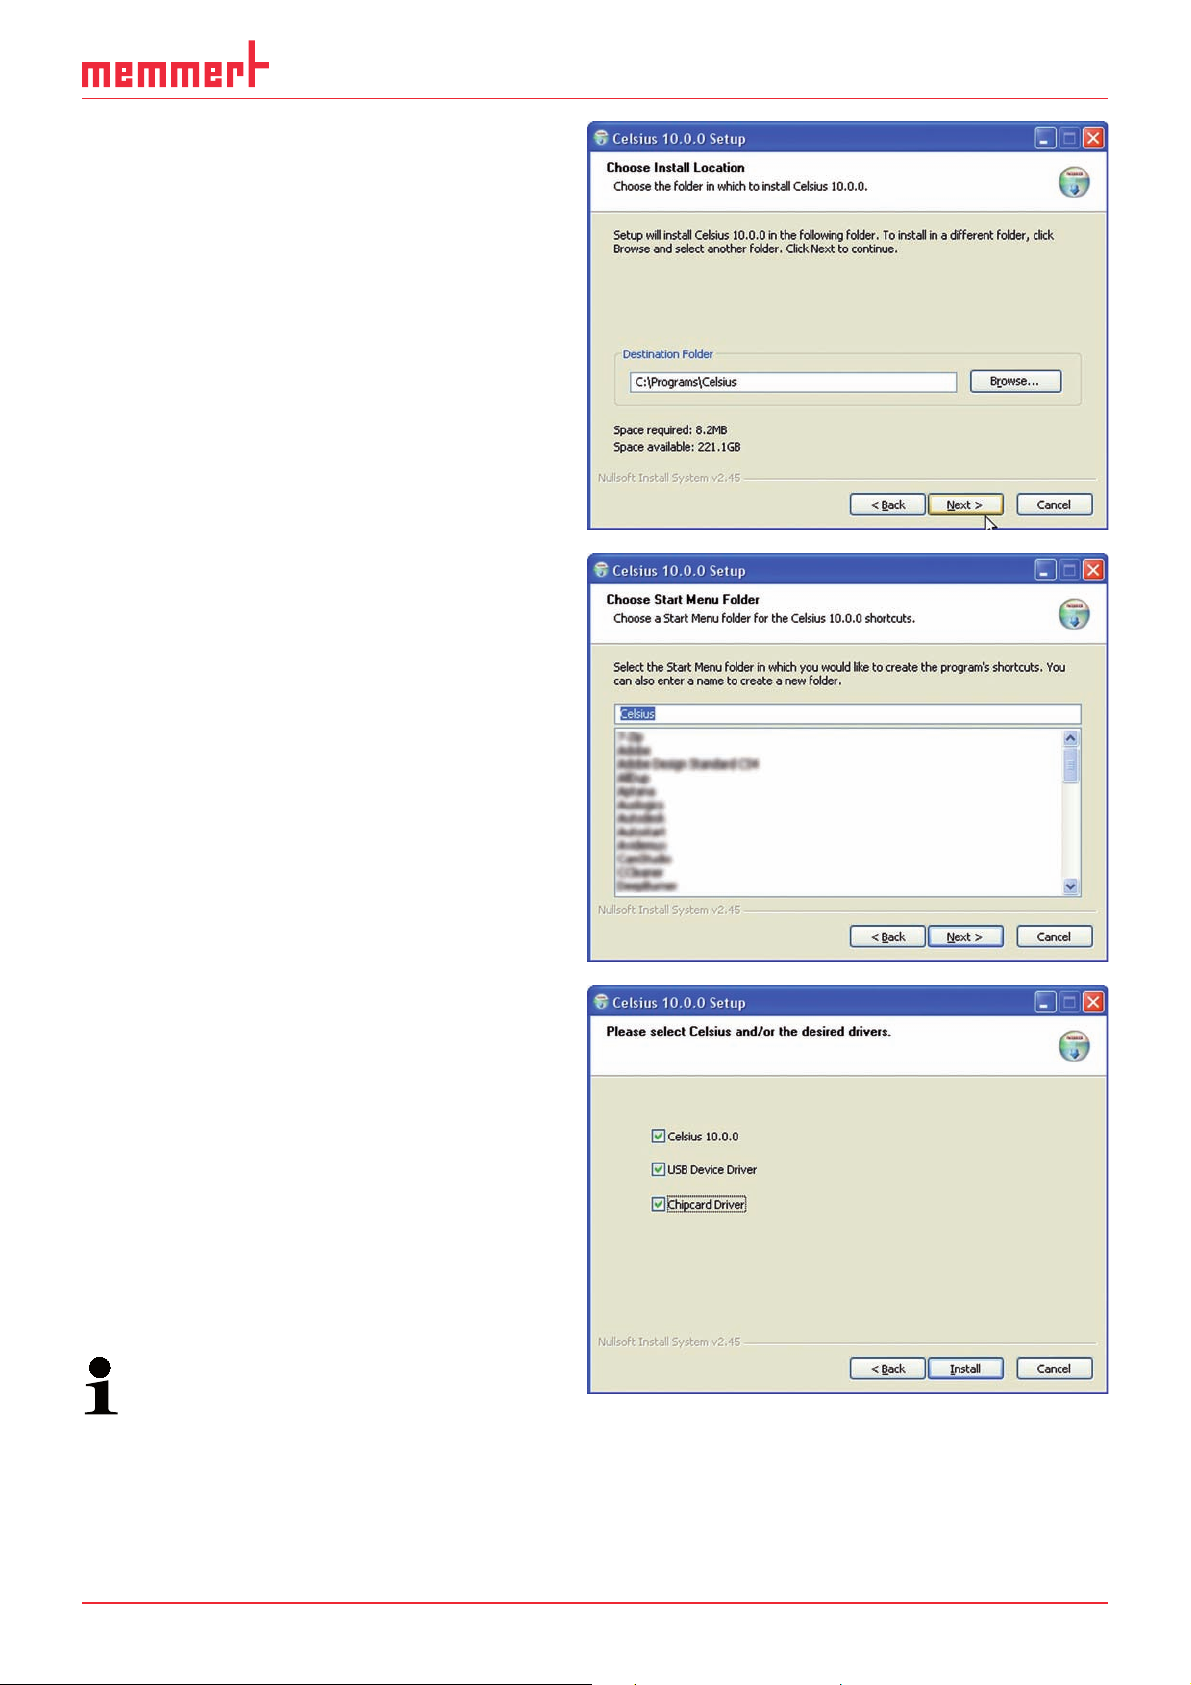
4. Then you must choose the target
directory where the programme files will
be installed. With "Browse", you can
change the preset path/folder.
Click on "Next" to continue.
5. Choose a Start Menu folder for the
programme shortcuts. The default
setting is "CELSIUS". You can choose a
different directory from the list or enter
the name of a folder that should be
newly created.
CELSIUS 10.0
6. In the next window, select the
programme components/drivers that
should be installed:
► Select "CELSIUS 10.0.0" if you only
want to install the programme itself.
► Also select " USB Device Driver" if you
want to connect ovens via the USB
interface.
► In addition, you should select
" Chipcard Driver" if you want to use
a MEMoryCard XL in an external card
reader device (see page 24 ).
You can also install USB and chip card
drivers later on. To do this, restart the
installation and, in the top window,
select the components to be installed
additionally.
9
Page 10

CELSIUS 10.0
7. You now have the option of registering
with GLP data (GLP = good laboratory
practice) (name and company). You may
also skip this step and enter GLP data at
a later date (see page 45 ).
8. Click on "Install". Each of the installation
routines for the selected components are
now run one after another. In the same
way, carry out steps 2 to 4. Click on
"Next" each time to continue the
installation or finally to complete it.
9. Click on "Finish" to complete the
installation. CELSIUS 10.0.0 and the
selected drivers are now installed on your
PC/laptop and can be used.
10
Page 11
3. Programme description
3.1 Starting CELSIUS
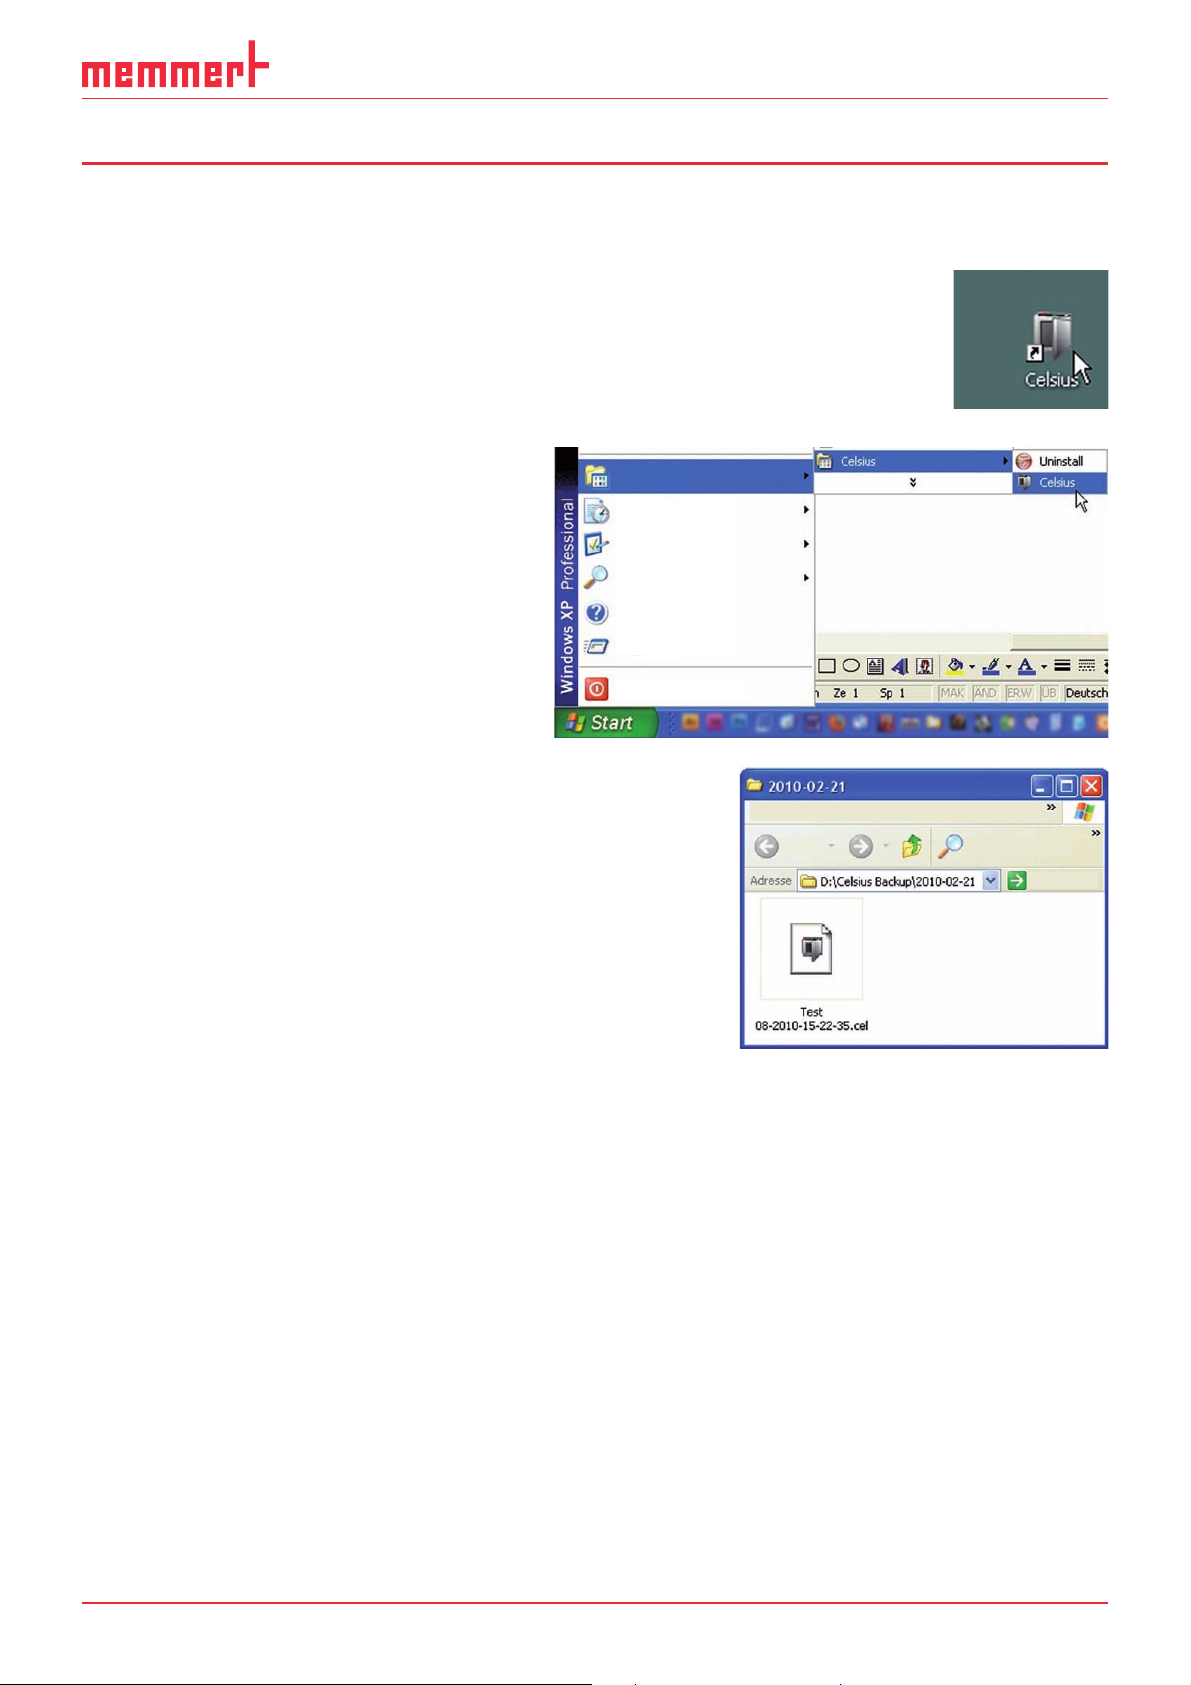
CELSIUS can be started in three ways:
► by double-clicking on the shortcut created on
the desktop:
CELSIUS 10.0
► by going to the Start menu:
Programs
Documents
Settings
Search
Help and Support
Run
Shut down
► by double-clicking on a profile file generated by
CELSIUS (*. cel) or log file (*. pro) (see also pages 36
and 39 ):
File Edit View Favorites Extras
Back
Search
11
Page 12
CELSIUS 10.0
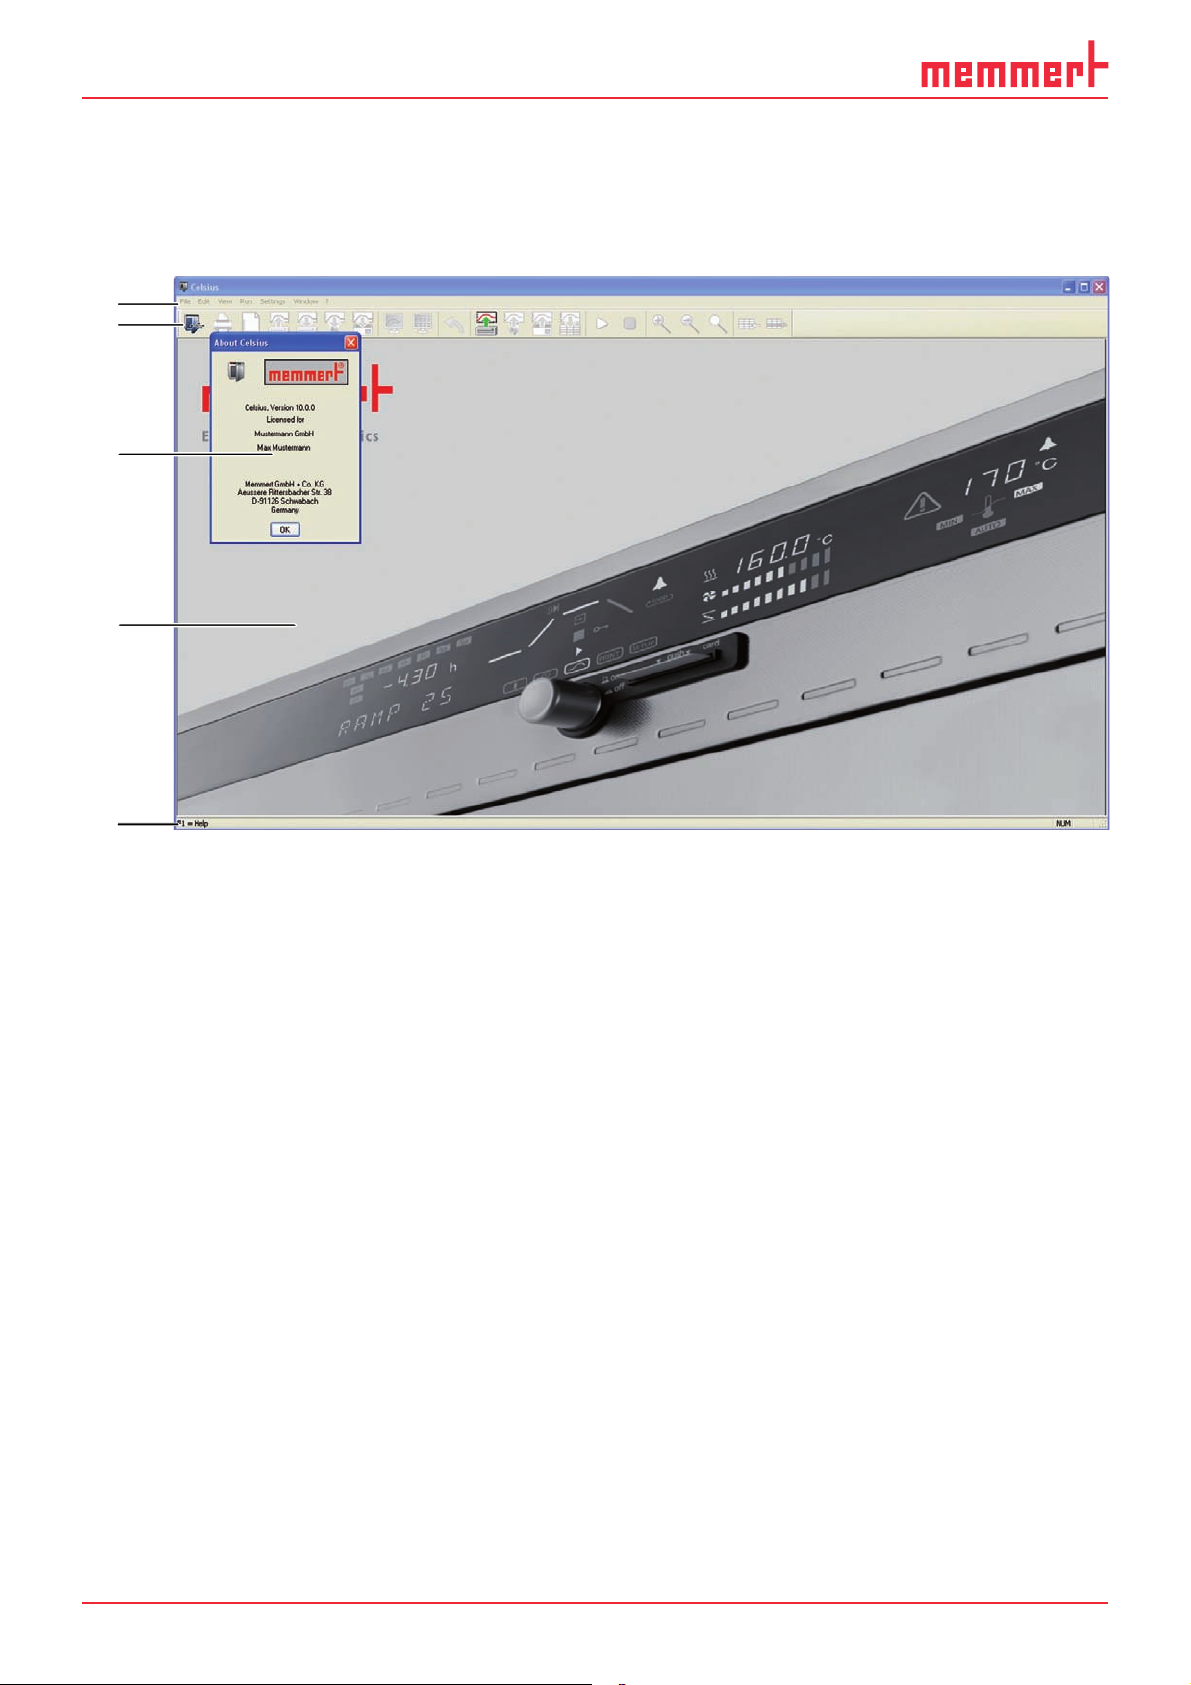
3.2 Programme interface
Once the programme has started, the start screen appears. Confirm the infobox (3) with
license information by clicking on "OK".
The main programme window of CELSIUS is divided into the following areas:
1
2
3
4
5
1 Menu bar: The various processing options are given here (description from page 13 ).
2 Toolbar: This contains buttons to quickly access the main functions
(for an explanation, see page 19 ).
3 Information box
4 Main window: When functions have been run, you can create and edit tempering profiles
here (in graphical or tabular form, see page 27 and display logs (see page 38 ).
5 Status line: A help text for the function currently chosen is displayed here, along with vari-
ous information on the current PC configuration.
12
Page 13

CELSIUS 10.0
3.2.1 Language
Programme interface and menus can be displayed in five languages (German, English, Spanish, French and Italian). If you want to use a different language than the one currently set, you
can change the language via the menu bar:
Preset language Can be changed via ...
German Einstellungen→Sprache
English Settings
Spanish Ajustes→Lenguaje
French Réglages→Langue
Italian Impostazioni→Lingua
Confirm the language selection with OK and restart CELSIUS for the change to take effect.
→Language
3.2.2 Menu bar
All programme functions can be run from the menu bar. The most important programme
functions can also be run quickly via the icons of the tool bar (see page 19 ). The individual
functions and how they are run are described below.
As long as no oven is logged in, only general programme parameters can be changed and
log files loaded. Functions currently not available are greyed out and cannot be clicked on.
13
Page 14
CELSIUS 10.0
"File" menu
Menu item Submenu
items
New Profi le –
Load Tempering
Profi le ►
From File
From Device
From Internal
MemoryCard
From External
MemoryCard
(USB/RS 232)
Quick
call via
Description See
page
Creates a new tempering profile.
A possible existing profile will be
deleted. Deleting a profile that
has not yet been saved must be
confirmed.
Loads a tempering profile from a
file
Loads a tempering profile from the
oven
loads a tempering profile from the
MEMoryCard in the oven
Loads a tempering profile from the
MEMoryCard in the external card
reader The card reader must be
logged in beforehand via the menu
item Settings→ Options (see page ).
27
36
36
36
36
Save T empering
Profi le ►
Load Protocol
Data ►
To File
To Device
To Internal
MemoryCard
To External
MemoryCard
(USB/RS 232)
From File
From File
( Ring Protocol
Memory *.bin)
Saves the current tempering profile
to a file
Saves the current tempering profile
to the internal memory of the oven
Saves a tempering profile on the
MEMoryCard in the oven if no
external card reader is connected
Saves a tempering profile on the
MEMoryCard in the external card
reader, if connected
Opens an existing log file (*.pro)
Opens an existing log file (*.bin)
which has been transferred from
the ring protocol memory of the
oven
36
36
36
36
39
39
14
Page 15
CELSIUS 10.0
Menu item Submenu
items
From Device
( Ring Protocol
Memory)
From Internal
MemoryCard
From External
MemoryCard
Save Protocol
Data ►
To File (*.pro)
Report
Quick
call via
Description See
page
Loads the log files from the internal
ring protocol memory of the oven
Loads log files from the
MEMoryCard in the oven
Loads log files from the
MEMoryCard in the external card
reader
If no log file was specified when
a tempering profile was started,
the log file can be generated with
this after the sequence has been
completed.
Print log data as a spreadsheet or
save as Excel® format (.xls)
39
39
39
39
41
Print Profi le
Multipage
Printout
Preset GLP Data
Show GLP Data
The tempering profile in the active
window is printed. Depending on
the display type currently selected
on the screen, the printout is as
a graphic (including possible log
values) or as a table (without log
values). The exact screen contents
are printed here. The printout is
prefixed with a GLP header if this
option has been enabled.
The printout is done as in Print
tempering profile, but the entire
tempering profile is printed out –
on several pages, if necessary. The
time axis is selected according to
the current screen display.
If a tempering profile is to be
printed with GLP data, it must be
specified here first.
Display of GLP data entered
37
37
45
45
Tr ansmit GLP
Data to Device
1 Test-11-03-10
2 Test-10-03-10
Sends the GLP data to the controller of the oven. The GLP data
appear in the GLP header on each
printed page.
Most recently saved tempering
profiles
45
15
Page 16
CELSIUS 10.0
Menu item Submenu
items
Exit
Menu "Edit"
Menu item Quick
call via
Quick
call via
Description See
Description See
page
Ends CELSIUS. If the function " Save
Settings on Exit" is activated (see
page ), the assignment of the
interfaces to the ovens and their
configurations are saved for the
next programme start. Other basic
settings are always saved when the
programme is terminated. If some
ovens are still active or if tempering
profiles have not yet been saved
a prompt appears for security
reasons.
page
Insert Line
Delete Line
Undo
Wr ap-Up Profi le
Adds a new line to the table. The current ramp is
divided.
Deletes the current line in the table 35
Undoes the last action
Allows a tempering profile to be edited after a programme sequence. The values logged for this oven so
far are deleted and the tempering profile can now be
edited.
35
16
Page 17

Menu "View"
CELSIUS 10.0
Menu item Quick
call via
Graphics
Table
Zoom In
Z oom Out
Zoom all
Description See
page
Displays the opened tempering profile in
graphical form
Displays the opened tempering profile in
tabular form
Zooms into the time range displayed in the
graphical view at fixed steps. The smallest
display range is one hour.
Zooms out of the time range displayed in the
graphical view. The largest time unit is 10 000
h.
Displays the standard time range in the graphical view so that all data are displayed
29
34
Menu "Run"
Menu item Quick
call via
Start
Stop
Pause
Continue
Description See
page
Starts the tempering profile displayed in the
current window
Ends the sequence of a started tempering profile prematurely. Continuation not possible.
Interrupts the sequence of a started tempering
profile
Continues an interrupted sequence
35
17
Page 18

CELSIUS 10.0
Menu " Settings"
Menu item Quick
access
via
Log-on Device
Log-off Device
Log-off all Devices
Save Settings
Save Settings on
Exit
Description See
page
Logs on a new oven 25
Logs off the oven in the current window. If the
oven is still active or if the tempering profile has
not yet been saved, you are prompted for confirmation.
Logs off all ovens
Saves the current assignment of interfaces to
ovens, and their configurations. All other basic
settings of this menu are saved automatically
when the programme ends
When this function is enabled, the allocation of
interfaces to ovens and their configurations is
automatically saved when the programme ends.
The next time the programme starts, CELSIUS
tries to log on the ovens exactly as before. If an
oven that was previously logged on online is no
longer available, it is not logged on again.
44
44
Options
Language
Show Color Leg-
ends
Auto-Update Ring
Protocol
Backup Folder
Open Celsius W orking Directory
Open Common
Celsius Directory
Toolbar
This assigns default settings to the GLP data and
enables the GLP header and log to be activated.
If an external card reader is used, the relevant
interface is specified here.
Setting the desired language
Switches the colour legend in the log window on
and off
Updates the transmitted ring memory of the oven
at regular intervals
Selecting a directory in which backup copies are
saved automatically
Opens the working directory in which tempering
profiles and logs are saved, in Windows Explorer
Opens the directory in which tempering profiles
and logs are saved for all users, in Windows
Explorer
Switching toolbar on and off
45 , 27
13
38
43
43
43
43
19
18
Page 19
"Window" menu
Menu item Description
CELSIUS 10.0
Cascade
Tile
Arrange I cons
1, 2 ...
Arranges windows in overlapping form
Arranges windows next to each other
Re-arranges iconified windows
Moves to the corresponding device window
Menu "?"
Menu item Description
User Manual
Info about Celsius
Opens this manual in PDF format
Information on the programme version and registration
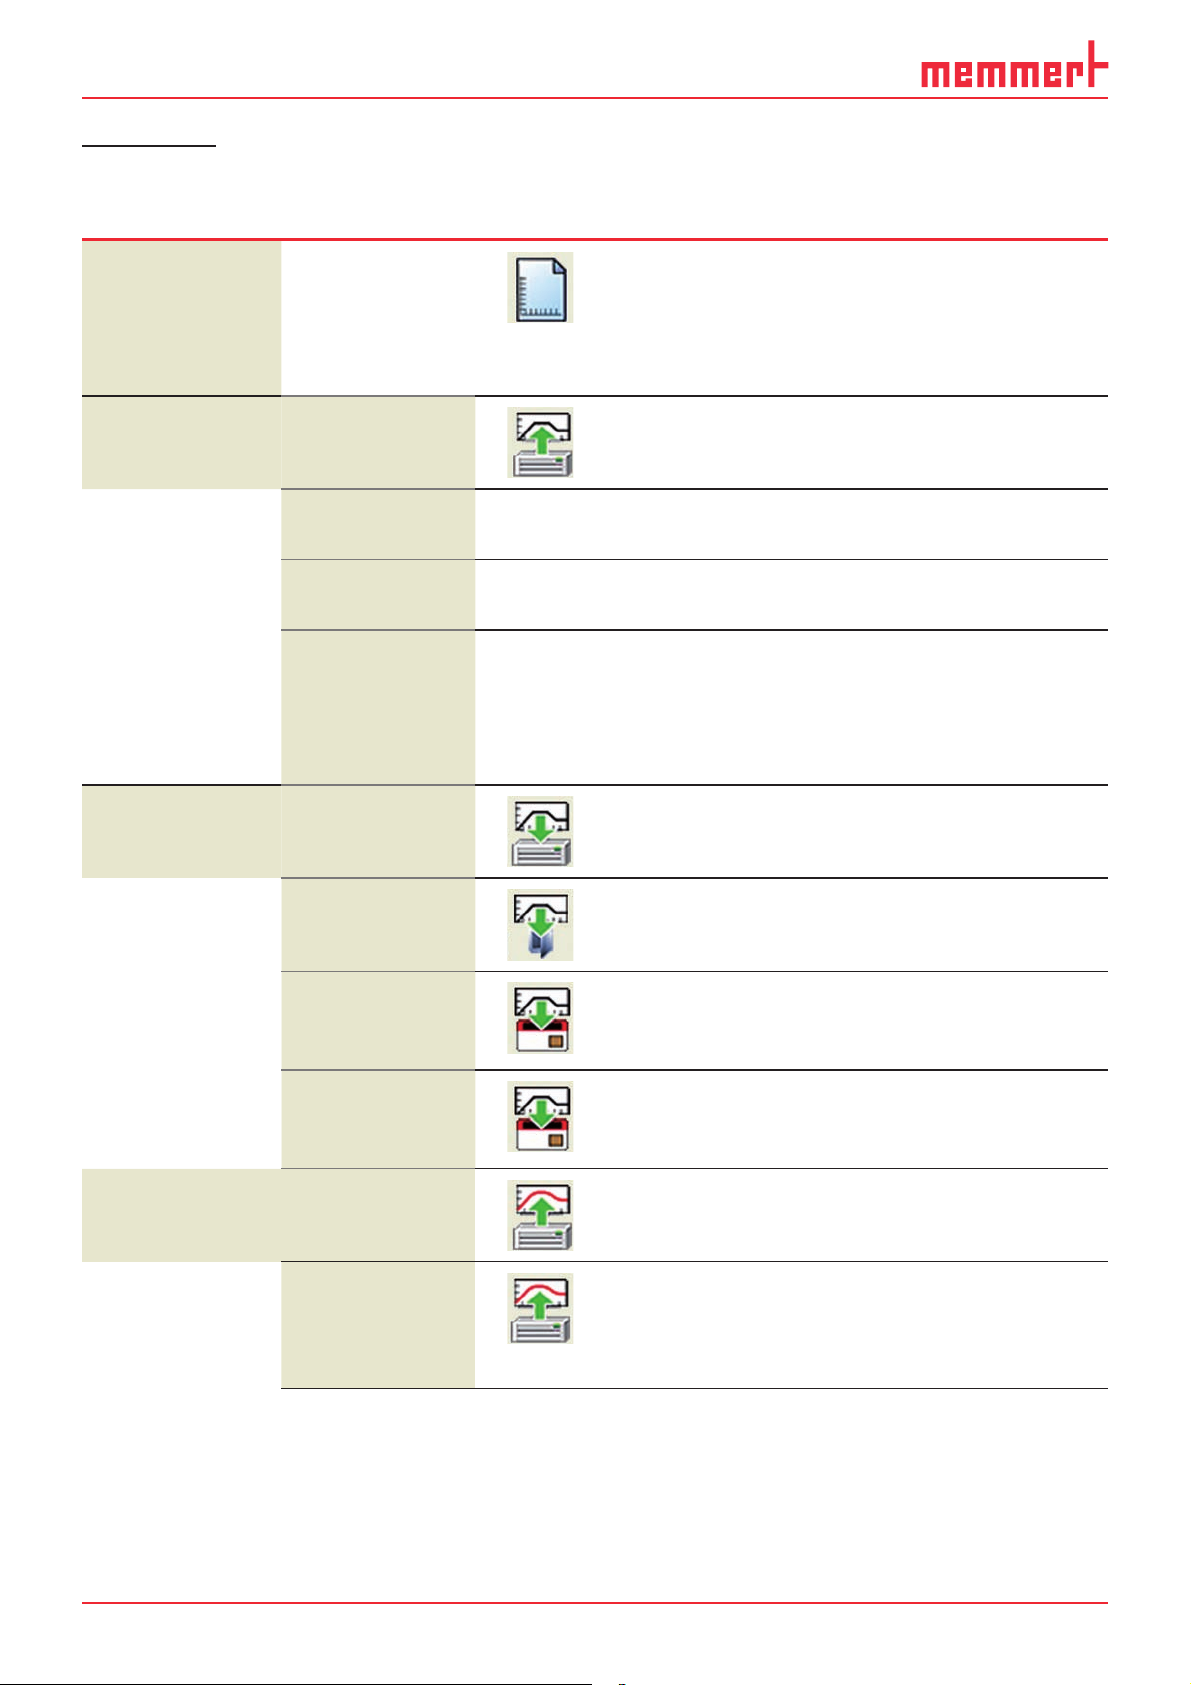
3.2.3 Toolbar
Via the toolbar, you have quick access to the most important and most frequently used programme functions. Functions currently not available are greyed out and cannot be clicked on.
The toolbar can be switched on and off via the " Settings" menu.
1 2 3 4 5 6 7 8 9 10 11 12 13 14 15 16 17 18 19 20 21
Item Function Description See
page
1 Log-on Device Logs on a new oven 25
2 Print Profile The tempering profile in the active window is
printed. Depending on the display type currently selected on the screen, the printout is as
a graphic (including possible measured values)
or as a table (without measured values). The
exact screen contents are printed here. The
printout is prefixed with a GLP header if this
option has been enabled.
3 New Profile Creates a new tempering profile. A possible
existing tempering profile will be deleted.
Deleting a tempering profile that has not yet
been saved must be confirmed.
4 Load Tempering Profile Loads a tempering profile from a file 35
37
27
19
Page 20

CELSIUS 10.0
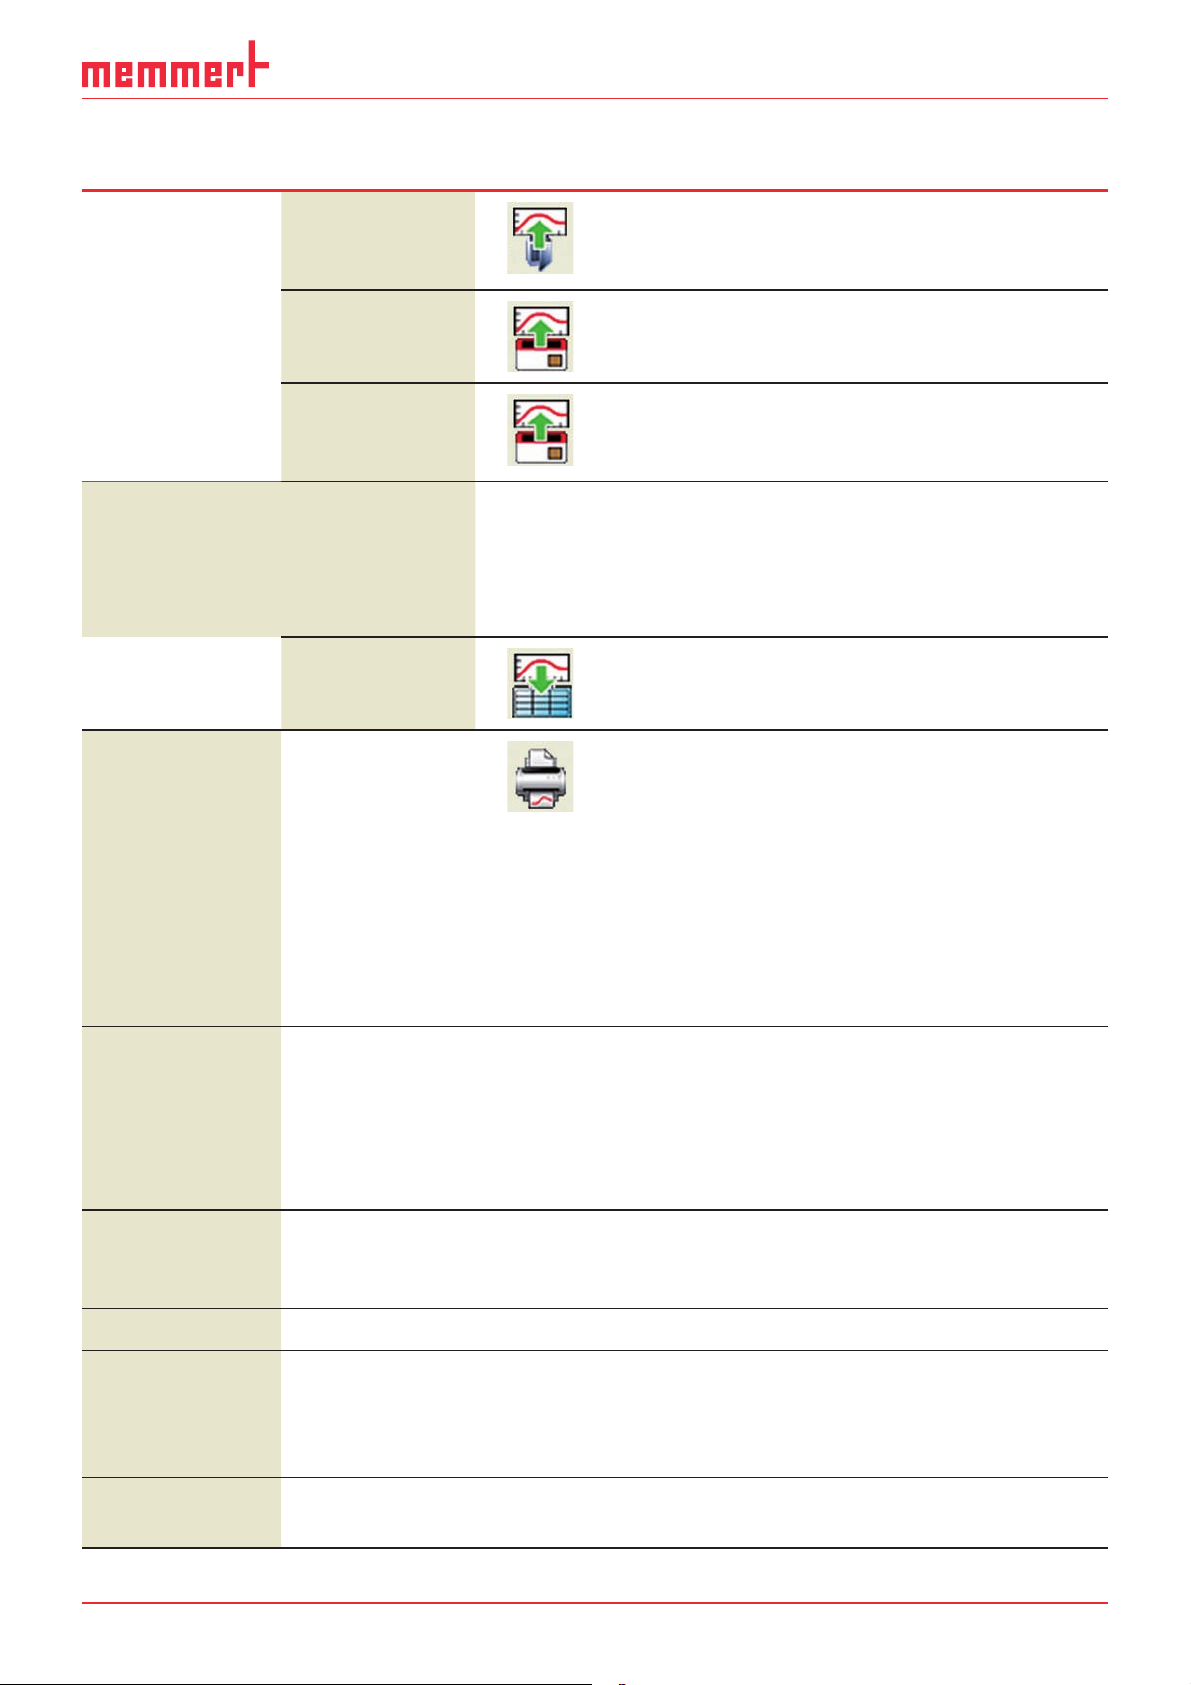
Item Function Description See
page
5 Save tempering profile
to file
6 Save tempering profile
to oven
7 Save tempering profile
to MEMoryCard
8 Graphical View Displays the opened tempering profile in
9 Tabular View Displays the opened tempering profile in
10 Undo Undoes last action
11 Load the log data from
file
12 Load the log data from
oven
13 Load the log from the
MEMoryCard
Saves the current tempering profile to a file 35
Saves the current tempering profile to the
internal memory of the oven
Saves a tempering profile on the MEMoryCard
in the oven or in an external card reader, if
connected
graphical form
tabular form
Opens an existing log file (*.pro) 39
Loads the log files from the internal ring protocol memory of the oven
Loads log files from the MEMoryCard in the
external card reader
35
35
29
34
39
39
14 Report Print log data as a spreadsheet or save as
Excel® format (.xls)
15 start profile Starts the tempering profile displayed in the
current window
16 Stop Ends the sequence of a started tempering pro-
file prematurely. Continuation not possible.
17 Zoom In Zooms into the time range displayed in the
graphical view at fixed steps. The smallest
display range is one hour.
18 Zoom out Zooms out of the time range displayed in the
graphical view. The largest time unit is 10 000
h.
19 Zoom all Displays the standard time range so that all
data are displayed
20 insert cell Adds a new line to the table. The current ramp
is divided (only available in tabular view).
21 Delete Line Deletes the current line in the table (only avail-
able in tabular view).
41
35
35
35
20
Page 21

CELSIUS 10.0
4. Connect ovens and external devices
Always install the software and necessary drivers (e.g. USB) first before connecting an oven
to the computer.
When connecting an oven, read the information and notes concerning this in the
oven's user manual.
To control an oven from the PC and – if it is equipped accordingly – to be able to access the
integrated card reader, the oven must be connected to the PC and switched on. It must be in
the "I" operating mode. In addition, the address with which you want to access the oven from
the CELSIUS software must be set (see also page 25 and the user manual for the oven).
Connecting wires to the ovens with the RS-232 or USB interface (alternatively via RS-485 or
Ethernet, for the P class only) is described in the user manual.
The correct installation and configuration of the PC interfaces is in general dependent on the
type and manufacturer, which is why we refer you to the appropriate system documentation.
4.1 Connect ovens with a USB interface to a computer with an
USB interface
For every oven with a USB interface that is to be connected to the computer, one USB interface must be available on the computer.
Connect the USB connections of the oven and computer with a standard USB cable (maximum 5 m) and log on the oven in CELSIUS as described on page 25 .
P
P
21
Page 22

CELSIUS 10.0
4.2 Connect ovens with an RS-232 interface
To connect an oven with an RS-232 interface, a
twisted RS-232 connection cable in accordance
with DIN 12900 part 1 is required (see also page
48 ). If the computer has no nine-pin RS-232
interface, then a USB–RS-232 adapter is additionally required (available in specialist shops, see
figure on the right).
Connect the RS-232 connection of the oven to the
RS-232 or USB connection of the computer and log
on the oven in CELSIUS as described on page 25 .
4.3 Connect ovens with an Ethernet interface to a network ( LAN)
For identification purposes, each oven that is to be connected to a network ( LAN) should have
its own unique IP or DNS address (e.g. firmxyz.dyndns.org). Schematic example:
Each oven is delivered by default with the IP address 192.168.100.100. The programme
"XTADMIN", which can be found on the CELSIUS CD-ROM, can be used to change the IP address of the oven.
22
Page 23

CELSIUS 10.0
4.3.1 Setting the IP address of the oven with XTADMIN
1. Connect the oven whose IP address you want to change with a standard network cable to
a free network socket and switch it on.
2. Install and run the programme XTADMIN on the installation CD. The main programme
window of XTADMIN appears.
3. Click on "SET IP" (1), a new "XTIP" window opens
4. In the window column to the left, click on the plus sign next to the name of the oven ("XTNANO") whose IP address you want to change and highlight the lowest entry ("XT-NANO
xxx", the name may deviate from this) (2). In the XTIP window, the preset IP address and
the name of the oven must now appear (3).
5. Enter the IP address which you want to assign to the oven (4). Make a note of the IP address.
6. Click on "Set IP" (5) in the XTIP window. The oven is now assigned the IP address entered.
7. Close XTADMIN.
XT-NANO
192.168.100.100
XT-NANO xxx
1
2
5
192.168.100.100
3
XT-NANO-xxx
4
Now the IP address of the oven needs to be set in CELSIUS (see next page).
23
Page 24

CELSIUS 10.0
4.3.2 Setting the IP address in CELSIUS
8. Start CELSIUS and in the " Settings" menu, select
the item " Options". Click on " LAN".
9. Enter the IP address or DNS of the oven set in
XTADMIN and confirm this with "OK":
10. Close the window "Global Options" by clicking on
"OK".
You can now log on the oven in CELSIUS, as described
from page 25 .
4.4 Connecting an external card reader
If you want to connect an external card reader (can be
acquired separately as an accessory) to your computer
so that you can store data on a MEMoryCard , the card
reader must first be logged on.
1. Connect the card reader to a USB or COM interface
of the computer.
2. In the " Settings" menu, click on the menu item
" Options".
3. Select the interface to which you have connected
the card reader (USB or COM) and close the options and settings windows with "OK". The card
reader can now be used.
If you click on "Format MEMoryCard", the card is
re-formatted. All data stored on it is then deleted.
24
Page 25

CELSIUS 10.0
5. Logging on ovens
5.1 Logging on online and offline
When logging an oven on, read the information and notes concerning this in the
oven's user manual.
In order to create and edit a tempering profile, an oven must always be logged on. There are
basically two ways of doing this:
► Logging on online:
An oven can be logged on that is switched on and connected to an interface of the PC.
Only for an online log-on can the oven be controlled from the PC or the programme be
saved on a MEMoryCard (XL) located in the PC.
► Logging on offline:
As an alternative to logging on online, a virtual oven can also be logged on, which does
not have to be currently connected to the PC. This so-called offline operation is useful, for
example, when
• the tempering profile is created initially on a notebook computer that is to be con-
nected to the oven to control it at a later time;
• a new tempering profile is to be created while the oven is controlled from the same PC
with a different tempering profile;
• the tempering profile is created on the PC and is to be stored afterwards on a
MEMoryCard (XL) using an external card reader.
5.2 Logging on an oven
1. In the " Settings" menu, select the menu item
" Log-on Device" or click in the toolbar on the
icon.
The dialog box " Log-on Device" appears:
2. Each oven by default is given a device address.
What device address is preset can be found out in
the setup menu for the oven (see accompanying
user manual). The device address can also be
changed there. Every oven that is or is going to be
connected must have its own distinctive device
address. No ovens may have an identical device
address.
You can adjust the preset or altered device address
of the oven (e.g. "4") in the dialog box " Log-on
Device" in the drop-down menu "Device No.".
25
Page 26

CELSIUS 10.0
3. Select the interface (offline, COM1 or USB) (if you
select " LAN", "USB" or " COM", make sure that the
oven is in operating mode "I"):
► "offline", if the oven is (not yet) connected
(see above)
LAN1
► COM: The oven logged on is connected to the
serial RS-232 interface (optionally RS-485. Up
to 16 ovens can be connected and controlled
via USB ports. In the selection of the interface for logging on the oven, " COM 1...16" is
displayed.
► USB: The oven logged on is connected to the USB port. Up to 16 ovens can be con-
nected and controlled via USB ports. When connecting via a USB port, "USB 1...16" is
displayed automatically.
► LAN: The oven logged on is connected to a LAN (Ethernet) interface. Up to 16 ovens
can be connected and controlled via LAN interfaces (for configuration, see page 22 ). In
the selection of the interface for logging on the oven, " LAN 1...16" is displayed.
If an interface was specified and CELSIUS cannot find an oven at this interface, this setting
is switched automatically to offline. CELSIUS automatically determines the configuration of
ovens connected online.
For ovens logged on offline, the desired device
configuration must be specified in another dialog. The
configuration dialog appears automatically if an oven
was logged on offline.
Select from the list the oven type that you want to
simulate or to which you want to transfer a tempering profile, and confirm this with "OK". With optional
extras (e.g. additional switching contacts), these must
be activated manually for them to be used later on.
Depending on what oven type you set, different,
oven-specific setting options (e.g. flap or fan) will be
available later when you are creating a tempering
profile (see pages 29 and 34 ).
If an oven has been logged on for the first time, a graphics window
is automatically generated so that a new tempering profile can be
created. The window can be opened or minimised with a double
click.
If there is more than 30 minutes difference between the oven and computer times, a
warning is displayed when the oven is logged on. In this case, you should set the oven to
the time displayed by the computer (see user manual for the oven).
26
Page 27

CELSIUS 10.0
6. Working with CELSIUS
6.1 Tempering profiles
6.1.1 Creating a new tempering profile
A new, empty tempering profile can be created in three ways:
► in the graphics window that is automatically started when a new oven has been logged
on (see above)
► via "File"→"New Profile"
► by clicking on in the toolbar
6.1.2 Graphical and tabular view
Tempering profiles can be created and edited in graphical (see page 29 ) and tabular form (see
page 34 ).
You can switch between the two views at at any time:
► with the icons ( graphical view) and ( tabular view) in the toolbar
► via "View"→"Graphics" or "View"→"Table"
Example of graphical and tabular presentation of the same tempering profile:
Time
hh:mm
Period
hh:mm
Vacuum
mBar
Type
What setting options are available depends on what oven type is used for a tempering profile.
The setting options for individual oven types are listed from page 7 .
With "Edit"→"Undo" or
, the last performed entry / change can be revoked.
27
Page 28

CELSIUS 10.0
6.1.3 Device status line
The device status line is visible at the top of the graphical and tabular views while a tempering
profile is being created or run. It shows the following information:
Controller active
COM3 IST: 24.1 °C 40.1 °C 0:02h
12345
1 Controller status, e.g.:
► Edit Profile The tempering profile can currently be edited.
► starts at ...: Time at which the controller starts
► Controller active: The controller is currently controlled by the PC. At the
temperature curve, nothing can be changed.
► Controller passive: The programme sequence was interrupted by a pause in the Run
menu.
► STOP: The programme, and thus the controller, was stopped.
To edit the tempering profile, the menu item "Wrap-Up
Profile" in the "Edit" menu must be selected.
► ERROR <Text>: The controller has reported an error state.
The corresponding error text is displayed.
2 COM interface of oven or "offline"
3 Actual temperature value
4 Physical properties of the oven at the mouse position while a tempering profile is being
run (e. g. temperature, humidity, vacuum) or the temperature at the mouse cursor position
while the temperature profile is being entered
5 Current runtime or the time coordinates at the mouse cursor position while the tempera-
ture profile is being entered
The device status line can be switched on and off in the Settings menu.
28
Page 29
CELSIUS 10.0
6.1.4 Working in the graphical view
The graphical view of a tempering profile can be displayed
► with the icon in the toolbar
► via "View"→"Graphics" in the menu bar
The graphics window is divided into horizontal segments, depending on the oven type. In the
top segment (1), a tempering profile can be created, and the temperature is logged when a
tempering profile is executed. In the lower segment (2), other oven-specific parameters (e.g.
humidity, vacuum) can be programmed and logged. What these are specifically can be seen in
the table on page 7 .
Depending on the oven type, additional oven-specific functions are available at the bottom of the graphics window, such as for adjusting the flaps, controlling the fan speed or for
programming the switching contacts (3). They can be enabled and disabled via mouse click or
adjusted via drop-down menus. These functions are shown in the tabular view as additional
table columns (see page 34 ).
File Edit View Run Settings Window ?
1
2
3
In the graphics window, the mouse cursor is displayed as a
cross. With this you can, in the coordinates system portrayed,
define and connect various points of the combination of time
and temperature or time and air pressure (in the example
VO).
To create a new segment, click on where you want the end
point to be. It is automatically connected to the end point
of the previous segment in the form of a line. The current
data of the mouse position are shown at the top right in the
status line (see page 28 ).
29
Page 30

CELSIUS 10.0
If you move the mouse cursor over predefined coordinates
(links between two segments), it turns into a cross with four
arrows. If you hold the mouse button down, you can then
move the respective point on the x and/or y axis.
If a coordinate is created in a prohibited area or you want to
move it to such an area, the mouse cursor turns into a
no-entry sign. The coordinate jumps automatically back to its
previous position when you let go.
Changes to the graphical view are automatically updated
when you switch to the tabular view, and vice versa.
Ramp close statements
Each segment (ramp) of a tempering profile must
end with a close statement and be linked to the next
segment. These positions are represented by the blue
dots.
To run the selection dialog, move the
mouse cursor to one of the blue ramp end points and
loop count
press the right mouse button. The following ramp
close statements are available:
delete
► normal: Resets the end point definition back to the standard value. At the
end of the ramp segment the oven continues straightaway with
the next ramp segment. If this is the final ramp segment, the
tempering profile is stopped and the connected oven is reset to
its default configuration.
30
Page 31

CELSIUS 10.0
► spwt() (= Setpoint wait). The oven waits for the end of the ramp seg-
ment until the required setpoint has approximately been reached.
Only then is the next segment processed. This command cannot
be applied for the final ramp segment of a tempering profile.
Which setpoint is involved depends on the oven, and can be
seen from the expression in brackets: spwt(t) = Temperature,
spwt(h) = Humidity, spwt(p) = Pressure etc.
Temperature for incubators (Ixx, INCO 2, IPP, ICP) and HCP humidity chambers:
If this function is enabled, the next ramp only begins when the
setpoint temperature has been reached with a tolerance of
± 0.5° C.
Temperature for universal ovens, sterilisers and vacuum ovens:
If this function is enabled, the next ramp only begins when the
setpoint temperature has been reached with a tolerance of
± 2.0° C.
Vacuum for VO vacuum ovens:
If this function is enabled, the next ramp only begins when the
setpoint vacuum has been reached with a tolerance of ± 3 mbar.
For VO vacuum ovens, the SPWT function can be enabled separately for temperature and vacuum.
Humidity for HCP humidity chambers:
If this function is enabled, the next ramp only begins when
the setpoint humidity has been reached with a tolerance of
± 2 % rh. For HCP humidity chambers, the SPWT function can be
enabled separately for temperature and humidity.
► loop:
The tempering profile is repeated endlessly from the beginning,
until the user ends the tempering profile. This command can only
be applied for the final ramp segment of a tempering profile.
► LOOP(n) The tempering profile is repeated from the beginning n-times
(n: 1 ... 99):
31
Page 32

CELSIUS 10.0
► HOLD At the end of the tempering profile, the parameters of the last
ramp segment are retained until the user ends the tempering
profile. This command can only be applied for the final ramp segment of a tempering profile.
► Delete Deletes the respective ramp segment. If a subsequent ramp seg-
ment exists, the end point of this is connected by a ramp to the
end point of the previous segment.
If no ramp close statement is specified, the command "normal" (see above) is automatically
applied.
Zooming
You can zoom in and out of the display in the various graphics windows. There are different
ways of doing this:
► via the tool and menu bar:
extends the time range (menu bar: View→ Zoom in)
squashes the time range (menu bar: View→ Zoom out)
displays the time range so that all data are displayed
(menu bar: View→Zoom all)
► Move the mouse cursor over the time axis. The
mouse cursor turns into a magnifying glass. You can now
• expand the time axis at the position of the magnify-
ing glass by clicking the left mouse button
• compress the time axis at the position of the magnify-
ing glass by clicking the right mouse button
► Move the mouse cursor over the vertical axis in the
temperature, humidity, pressure, CO
mouse cursor turns into a magnifying glass. You can now
or O2 windows. The
2
• expand the respective axis at the position of the mag-
nifying glass by clicking the left mouse button
• compress the respective axis at the position of the
magnifying glass by clicking the right mouse button
32
Page 33

CELSIUS 10.0
► If the mouse cursor is shown as a magnifying glass: Holding the left mouse button down,
select the area into which you want to zoom. Let go of the mouse button. The selected
area is now shown in a full window:
33
Page 34

CELSIUS 10.0
6.1.5 Working in the tabular view
The tabular view of a tempering profile can be displayed
► with the icon in the toolbar
► via "View"→"Table" in the menu bar
In the table window, the tempering profile is shown as a table. The individual adjustment
options are displayed in columns. What columns are displayed depends on the oven and how
it is configured. Time, duration and temperature can be entered or modified via the keyboard.
Inadmissible entries are simply ignored, with no messages. Settings that are only available in
certain predefined values (in the example below, type, flap and fan), can be specified via dropdown menus.
In contrast to the graphical view, protocol values are not shown in the table window.
Edit Profile
Time
hh:mm
2134567
Period
hh:mm
FlapType
Fan
89
Tabular View (example)
1 Ramp segment No. ...
2 Beginning of ramp segment after programme start
3 Duration of the ramp segment
4 Temperature in the ramp segment
5 Ramp close statement (see page 30 )
6 Flap position
7 Fan speed
8 Position of switching contact a
9 Position of switching contact b
In addition to the ramp segments entered, the table always shows an empty line (in the example: line 8). A further ramp segment can be added here.
34
Page 35

CELSIUS 10.0
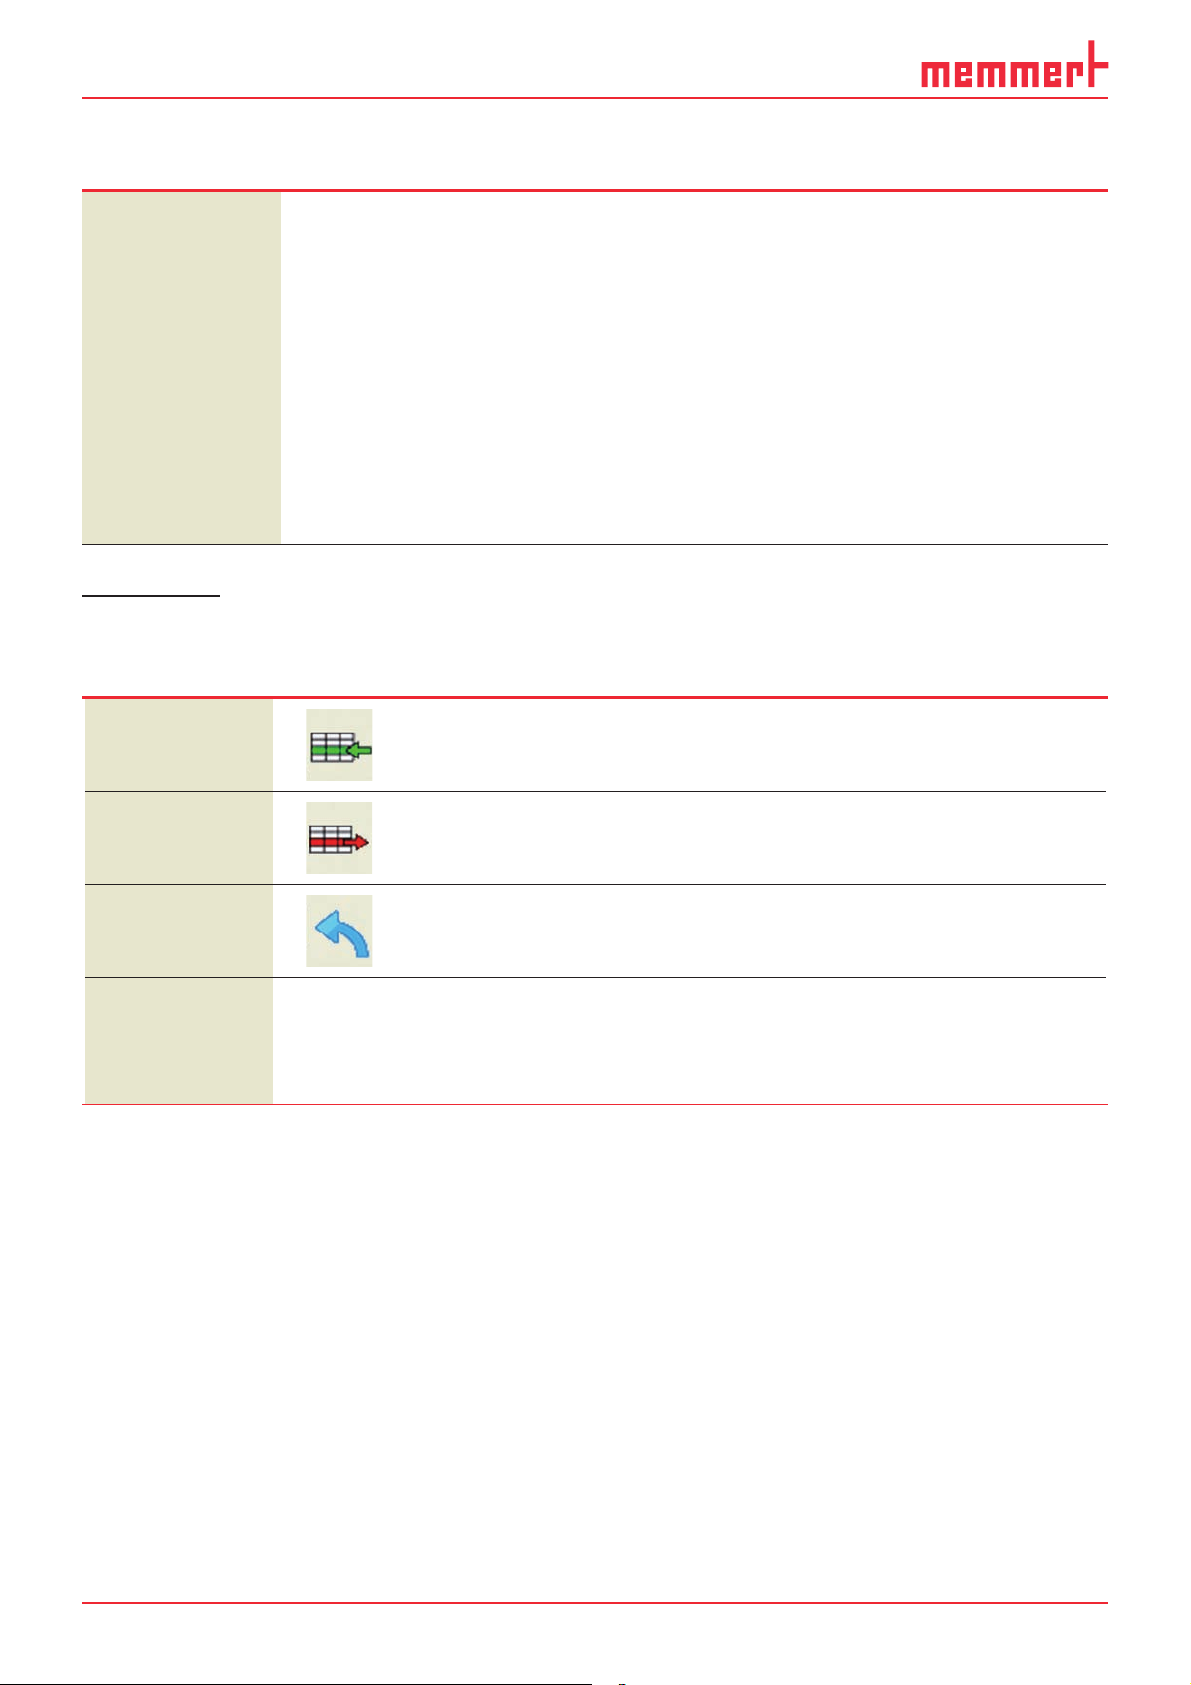
Inserting and deleting lines
If the table window is active, the commands for deleting and inserting lines are additionally
available in the view menu and toolbar:
► Insert a line at the position marked
► Delete selected line
If the last ramp segment is deleted, the ramp close statement is automatically transferred
to the line above.
6.1.6 Executing a tempering profile
Before a tempering profile is started, disable the screen saver and the energy-saving mode
of your computer, as these could interfere with the programme sequence.
For a tempering profile to be started,
► it must have previously been saved (see page 36 )
► the relevant oven must be connected and logged on to the computer and be in operating
mode "I". If this is not the case, an error message will be displayed. In this case, you should
check that the oven is switched on, connected and logged in to CELSIUS.
Every tempering profile can only be run on the oven type for which it was created. The same
applies for saving to a MEMory Card (XL).
A tempering profile can be started
► via the button in the toolbar
► via "Run"→"Start" in the menu bar
35
Page 36

CELSIUS 10.0
When a tempering profile is started, the start dialog appears automatically with the following
setting options:
12 345 67 8910
1 Log and print GLP data (automatically enabed if GLP data were preset, see page 9 )
2 Select the storage location of the log file if " Create Log File" was clicked
3 Click on this if a log file is to be generated
4 GLP description of the procedure
5 GLP value company
6 Starting time; the default is "today" and the current time; both values can be changed. The
tempering profile then starts at the set time.
7 GLP value tested by
8 If "Protocol only" is clicked, no setpoint values are sent to the oven and only the actual val-
ues are logged. The setpoint values must be set on the oven. The "Protocol only" operating
mode is possible both in the main switch position "I" and in the "clock" position of the oven.
9 Starting time
10 GLP value sample ID
6.1.7 Saving and loading tempering profiles
A tempering protocol can be saved
► To File ( or "File"→" Save Tempering Profile"→"To File"). In the window that opens, you
can specify the file name and the storage location. In the preset directory there is a folder
each for tempering profiles and for protocols.
With "File"→"Load Tempering Profile"→"From File" or
profile files (*.cel) and edit them.
you can open saved tempering
► In the oven ( or "File"→" Save Tempering Profile"→"To Device"). The tempering pro-
file is saved in the ring protocol memory of the oven. It can be opened and edited with
"File"→"Load Tempering Profile"→"From Device".
36
Page 37

CELSIUS 10.0
► To Internal MemoryCard ( or "File"→"Save Tempering
Profile"→"To Internal MemoryCard "). With this command,
the tempering profile on the MEMoryCard can be stored
in the controller of the oven. In this case, the
MEMoryCard must be compatible with the oven model.
You may enter a name for the tempering profile saved on
the card (max. 8 characters, no spaces) or use the name
suggested.
If you enable "Write Protection", you ensure that the tempering profile on the MEMoryCard
cannot be altered by the controller of the oven. This write protection has no effect on
CELSIUS writing data to the MEMoryCard. The default setting for write protection is ON.
Only one tempering profile can be written on a MEMoryCard XL. The MEMoryCard XL can
be overwritten at any time, however.
► To External MemoryCard ("File"→" Save Tempering Profile"→"To External MemoryCard ( USB/
RS 232)". This allows you to save a tempering profile of up to 40 ramps on a card in a connected and logged on card reader (see page 45 ).
With "File"→"Load Tempering Profile"→"From Internal MemoryCard "/"... external" you can open
tempering profiles stored internally or externally on the MEMoryCard.
6.1.8 Printing a tempering profile
In order to print a tempering profile,
click on
or select "File→ Print
Profile".
The Windows print dialog appears.
The default setting is the standard
printer set for Windows. You may
select a different printer that is connected.
The print command prints out the
content of the active window. The
time range displayed on the screen is
printed, with or without GLP header
data.
If the graphics window is active on
the screen, the current tempering
profile and the protocol are printed
in the graphic mode. If the tempering profile is displayed on screen in tabular form, it will be
printed out in tabular form.
Print
Printer
Location
Comment
Print Range
All
Pages
Selection
Cancel
Printing is only possible if the tempering profile is not currently being run in the oven.
Multipage Printout
For the print option "File→ Multipage Printout", the printout is done as in " Print Profile", but the
entire tempering profile is printed out – on several pages, if necessary. The time axis is selected
according to the current screen display.
37
Page 38

CELSIUS 10.0
6.2 Protocol
A protocol is the recording of the actual physical values that prevail in the oven while a
tempering profile is running (e.g. temperature, humidity, air pressure and CO
allows a comparison to be made between the desired (set) and the actual values.
6.2.1 Types of Protocols
Protocol values can be generated and recorded in three ways:
► in the internal ring protocol memory of the oven. Each oven automatically records all
actual values of up to several months. If the memory is full, the oldest entries are overwritten. These protocol data can be read out with CELSIUS, transferred to the PC, saved in
*.bin file format or be further processed (see page 39 ).
► When a tempering profile is run via CELSIUS, the protocol data (actual values) are dis-
played as continuous curves in the graphic window and can be saved (file format *. pro)
(see next section).
► Protocol values can be stored on the MEMoryCard in the oven.
6.2.2 Recording the actual progression
When a tempering profile is run, the actual values of the oven are displayed in the graphical
view as colour curves (1) which follow the tempering profile (2). Each colour represents a different value (e.g. temperature, humidity), explained in a colour legend at the top right of the
window:
content). This
2
Tem p. Set
Temperature
2
1
The display of the colour legend can be switched on and off in the in the menu via
"Settings"→"Show Color Legends".
38
Page 39

CELSIUS 10.0
6.2.3 Saving and loading protocol data (*. pro)
If the option " Create Log File" is enabled when a tempering profile is run (see page 35 ), the
protocol values are saved to the protocol file (*. pro) selected. You may also write the actual
value curve with the corresponding tempering profile later on to a protocol file if the protocol
option is not enabled in the start dialog of the temperature programme.
The protocol can only be saved
later for as long as it is displayed
in the graphics window.
To create a file for the protocol displayed, select "File"→" Save Protocol
Data"→"To File (*. pro)". In the window appearing, you can select the
protocol file (button "File") and GLP
data that are to be recorded. This
option is automatically enabed if GLP
data have been set (see page 9 ).
Protocol data saved in this way can
be re-opened with "File"→" Load Pro-
tocol Data"→"From File" or
6.2.4 Loading protocol data from the internal MEMoryCard of the oven
If the oven is equipped with a MEMoryCard, protocol data are stored on it. They can be read
in with CELSIUS via "File"→" Load Protocol Data"→"From Internal MemoryCard" or
.
6.2.5 Loading protocol data (*.bin) from the ring protocol memory of the oven
The oven saves all values measured over a long period automatically in its internal ring
protocol memory. These measured values can be read in with CELSIUS ("File"→" Load Protocol
Data"→"From Device ( Ring Protocol Memory)" or
When they are first read out, the entire ring protocol memory is read out and saved as a file in
the format *.bin. This file is write-protected. The preset directory for ring protocol files varies
according to the operating system. This can be displayed via "Settings"→"Open Common Cel-
sius Directory". The ring protocol data are located in the subdirectory of this, "FlashProtocols".
Reading out the protocol memory for the first time may take some time (up to 15 minutes), depending on the device runtime.
).
39
Page 40

CELSIUS 10.0
After data have been read in, a
selection dialog appears. Here you
can select the period of time for
which you would like to display a
protocol. The protocol is read from
the bin file that was previously
transferred by the oven, and which is
displayed in the entry field "Ring
Protocol File".
If the protocol data for the selected period of time need more
main memory than is made available by the computer, a warning
appears. In this case, you should
make the period of time shorter.
With "Browse", you can open protocol files of other ovens that have already been transferred
in the format *. . No oven needs to be logged on for this. You can also run this function via
"File"→" Load Protocol Data"→"From File ( Ring Protocol Memory *. bin)"
Adding comments to the ring protocol
You can add comments later on to the ring protocol file. The comment is displayed as text in
the protocol window for the corresponding point in time:
Start Test #4
Position the mouse cursor in the graphic window at the point at which you would like to add
a comment (max. 30 characters). Press the right mouse button. In the window that opens,
you can enter the comment and save it with OK.
An added comment can also be changed later. To do this, right click on the comment. It is
recommended that you select the highest zoom level so that you can select exactly the same
point in time.
40
Page 41

CELSIUS 10.0
6.2.6 Export log data in tabular form (Report)
With the report function, it is possible to print log data in tabular form or save them as Excel®
format (.xls) for processing in a spreadsheet programme and graphically enhance them, for
example. This way, ring protocol data can be processed, as well as log data resulting from running a temperature-control profile (see Chapter “ Types of Protocols ” on page 38 ). The report
function is available if a log or ring protocol is displayed in the window, and this window is
active.
You can run the report function
► via the tool panel
► via “File” → “Save protocol data” → “Report”
41
Page 42

CELSIUS 10.0
A dialog window appears in which you can specify what is to be included in the report:
1
2
3
4
5
6
7
Report options and presentation as spreadsheet
1 Period presented in protocol window (can be changed by zooming [see page 32] and/or the
horizontal scroll bar)
2 Period to be included in the report
3 Interval of individual datasets, recordings are taken at one-minute intervals. To reduce the
amount of datasets, a larger interval (e.g. 5 minutes) may be chosen.
4 GLP data (see page 44) are also included if selected.
5 If selected, a short statistic (minimum, maximum and average value of displayed data) is
generated at the end of the report for the setting “Print Report”.
6 Selection whether the report is to be printed or saved as a file in the .xls format.
7 Selection of the columns to be included in the report. The left window shows the available
device dependent columns, the right window shows the columns that will appear in the
report. With > or <, columns can be added or removed, with >> or <<, all columns are
included or removed.
42
Page 43

6.3 Ending work with CELSIUS
You can end work with CELSIUS
► via "File"→"Exit"
► by closing the programme window
► with the key combination Alt + F4
CELSIUS 10.0
If an oven is stilll logged on or an opened tempering profile has not
been saved, a warning will appear:
If you confirm the prompt with Yes, open tempering profiles will be closed and not saved.
If you want to cancel this, click No. Save open tempering profiles (see page 36 ) and log off
ovens that are currently logged on (see page 45 ).
If the option " Save Settings on Exit" (see page 44 ) is enabled, the assignment of the inter-
faces to the ovens and their configurations are saved automatically if the programme is
ended via "File"→"Exit".
Yes No
7. Settings and Options
7.1 Working directories
Tempering profile and protocol files are saved in a predetermined directory if no other path is
specified when they are saved (see pages 36 and 39 ). With " Settings"→"Open Celsius Working
Directory" you can open this directory in Explorer.
For shared CELSIUS files, there is also a preset directory avaiable to all users. This can be run
in Explorer with " Settings"→"Open Common Celsius Directory". Ring protocol files (*.bin) are
stored in the subdirectory "FlashProtocols".
7.2 Auto-Update Ring Protocol
Via the menu item "Settings"→"Auto-Update Ring Protocol", CELSIUS can reload all online ring
protocols at specified intervals, so that any data that has arrived in the meantime is immediately displayed. This function should only be enabled if there is little activity in CELSIUS or in
the operating system in general, since it could overload system resources. If the data are not
constantly required, for example to observe an experiment, this function should be disabled.
7.3 Backup Folder
If you want verification of all changes
to the temperature profiles and
protocol files, it is possible to create
backup copies with time and date
stamp when any change is made
and store these in a separate,
write-protected backup folder. The
backup function can be enabled via
" Settings"→ "Backup Folder".
If the checkmark "Use backup folder" is set, an existing directory can be entered, or an existing
backup directory can be selected via the button.
Backup folder can be located locally on the same computer as CELSIUS or on a network drive
with write permission.
43
Page 44

CELSIUS 10.0
Only existing folders or network drives may be selected. No new folders may be created.
Backup copies in the backup folder can be read, but not deleted or overwritten. If backup
files are to be deleted, the "Read only" property of the directory must be changed.
A copy of the following file types is saved automatically in the backup folder:
► *.cel: CELSIUS tempering profiles
► *. pro: CELSIUS protocol files
► *. bin: Protocol files of the internal controller ring protocol memory
For each day when data is saved, a separate folder with
the appropriate date is created. All the backup copies for
one day are located in this folder. The current time is
added to the file name each time. In this way, it is
possible to save several backup copies under the same
file name on the same day.
File Edit View Favorites Extras
Back
Search
Example:
The tempering profile file "Test 08-2010.cel" is
backed up on 21 February 2010 at 15:22:35 in
the folder
D:\CELSIUS Backup\2010-02-21 as
"Test 08-2010-15-22-35.cel":
File Edit View Favorites Extras
Back
Search
7.4 Saving Settings
„ Settings→ Save Settings" saves the current
assignment of interfaces to ovens and their configurations. All other basic settings of this menu
are saved automatically when the programme
ends.
If you enable " Save Settings on Exit" and close CELSIUS via "File"→ "Exit", the assignment of the
interfaces to the ovens and their configurations are saved automatically when the programme
ends. The next time the programme starts, CELSIUS tries to log on the ovens exactly as before.
If an oven that was previously logged on online is no longer available, it is not logged on
again.
7.5 Logging off ovens
With " Settings→Log-off Device" you can log off the oven that is shown in the current window.
If the oven is still active or if the tempering profile has not yet been saved, you are prompted
for confirmation. "Log-off all Devices" - logs off all devices.
44
Page 45

CELSIUS 10.0
7.6 Working with MEMoryCard
MEMMERT ovens with P fittings are equipped
with an integrated card reader for MEMoryCard
XL (32 kB). On each MEMoryCard, a tempering
profile with up to 40 ramps can be stored. This
tempering profile is then processed by the oven
on its own, i.e. without a PC connection. During
the profile sequence, the MEMoryCard saves the
actual data that are accumulated in electronic
form. For vacuum ovens or humidity chambers,
the vacuum or humidity actual values are saved
on the MEMoryCard . These protocol data can be
read out later on from the PC with the help of CELSIUS. The MEMoryCard is therefore a
transportable and interchangeable storage medium for tempering profiles and protocols.
More information on the MEMoryCard can be found in the user manual for the oven.
7.7 GLP Data
CELSIUS supports archiving and the printout of GLP
data (GLP = " good laboratory practice"). Global data
that is always to be used (e.g. company name and
Tested by), can be specified via " Settings→ Options":
This data can be modified and/or oven-specific details
can be added to it:
► when running a tempering profile in the start
dialog (see page 35 )
► if you create a protocol file (see page 39 )
► at any time via "File→Preset GLP
Data"
Only digits and capital letters are
permitted in the field "Sample ID".
With "File→Show GLP Data" you can
have the currently stored GLP data
displayed.
45
Page 46

CELSIUS 10.0
7.8 Programme language
The programme and the menus can be displayed in five different languages. How you can
change the languages is described on page 13 .
7.9 Connection details
7.9.1 Pin assignment RS-232 and RS-485
Pin assignment RS-
232
1 – not occupied –
2 RxD
Received data –
Pin assignment
RS-485
5
9
3 TxD Send data B Send and receive data
4 – not occupied –
5 GND Signal ground –
6 – not occupied –
7 – not occupied –
8 – not occupied A Send and receive data
9 – not occupied –
7.9.2 Interface cable for RS-232 in accordance with DIN 12900 part 1
1
3
1
2
3
4
6
7
8
2
RxD 2
TxD 3
GND 5
2 RxD
3 TxD
5 GND
8 Pin contacts (male)
9 Screening
10 Spring contacts (female)
► Use screened interface cables
► Connect screening at one end to the plug casing
A standard-compliant connecting cable can be purchased from the company MEMMERT
under the name V6. The protocol description of the interface (according to NAMUR) can be
requested from MEMMERT customer service.
46
Page 47

7.10 Deinstalling CELSIUS
You must have administrator rights to be able to deinstall CELSIUS.
CELSIUS 10.0
If you want to remove CELSIUS from
your computer, you can run the
deinstallation routine via
Start→Programs→CELSIUS→
Uninstall:
Programs
Documents
Settings
Search
Help and Support
Run
Shut down
47
Page 48

CELSIUS 10.0
8. Index
*.bin file 14, 40, 44
*.cel file 44
*.pro file 11, 14, 15, 20, 38,
39, 44
A
Additional functions 29
Address 21, 22, 23, 24
All deviceslog off 18
Arrange icons 19
B
Backup directory 18, 43, 44
Bin file 40
C
Card reader 10, 24
Cel 11
Chipcard driver 10
Close statement 30
COM 24, 26, 28
Comments 40
Configuration dialog 26
Connect 8, 10, 21, 22, 24
Continuation 17
Controller status 28
Coordinates 30
Create tempering profile 27
Customer service 2
D
Deinstalling CELSIUS 47
Delete 14, 19, 35
Delete line 16, 20, 35
Determining GLP data 15
Device status line 28
E
“Edit” menu 16
End 16
Ethernet interface 6, 22
Excel® format 41
“Execute” menu 17
Executing a tempering pro-
file 35
Export to spreadsheet 20
External card reader 24
F
Fan speed 34
“File” menu 14
Flap position 34
G
GLP Data 6, 9, 15, 18, 36,
39, 45
Good laboratory practice 9,
45
Graphical View 20, 27, 29
Graphics window 27, 29,
37, 39
H
HOLD 32
I
Information about CELSIUS
19
Information box 12
Insert cell 20
Inserting and deleting lines
35
Inserting comments 40
Insert line 16
Installation assistant 8
Installation procedure 8
Install device driver 8
Interface cable 46
IP address 22, 23, 24
L
LAN 22, 24, 26
Language 13
Last profile 15
License terms 8
Load protocol data 14, 39,
40
Load protocol data from
file 20
Load protocol from
MEMoryCard 20
Load protocol from oven 20
Load tempering profile 14,
19
Logging off ovens 44
Logging on offline 25
Logging on online 25
Logging on online and of-
fline 25
Logging on ovens 25
Loop 31
M
Main memory 6, 40
Main programme window
12
Manufacturer 2
MEMoryCard 6, 10, 14, 15,
20, 24, 25, 37, 39, 45
Menu bar 12
Menu “?”(Help) 19
Mouse cursor 29, 30, 32
Multiple page graphics print-
ing 15, 37
N
Network 22
New Profile 14, 19
O
Open CELSIUS work direc-
tory 18
Options 14, 18, 24, 43, 44,
45
P
Pause 17
PDF format 3
Pin assignment 46
Print dialog 37
Printing 15, 37
Printing a tempering profile
37
Print profile 15, 19, 37
Profile file 11
Profilepostprocessing 16
Programme description 11
Programme interface 12
Programme language 46
Programme shortcuts 9
Protocol 18, 20, 38, 39, 40
Protocol file 11, 14, 15, 20,
36, 39, 40, 45
Protocol files 40, 43, 44
48
Page 49

CELSIUS 10.0
R
Ramp close statement 30
Ramp segment 29, 34
report function 41
Ring protocol memory 14,
15, 36, 39, 40
RS-232 interface 22, 26
S
Save protocol data 15, 39
Save settings 18, 44
Save settings when ending
18
Save tempering profile 14,
36, 37
Save tempering profile to
file 20
Save tempering profile to
MEMoryCard 20
Save tempering profile to
oven 20
Saving and loading protocol
data 39
Saving and loading temper-
ing profiles 36
Send GLP data to device 15
Setpoint wait 31
Settings 13, 14, 16, 18, 19,
24, 25, 28, 34, 43, 44,
45
“Settings” menu 18
Setting the IP address 23
Shared CELSIUS directory 18
Show GLP data 15
spreadsheet 41
Spwt 31
Standard printer 37
Start 17
Start dialog 36, 39, 45
Starting CELSIUS 11
Start menu 11
Start menu folder 9
Start profile 20
Start screen 12
Start time 36
Status line 12
Stop 17, 20
Storage location 36
Supported MEMMERT ovens
7
Switch off device 18
Switch on device 18, 19, 25
T
Table columns 29
Table window 28, 34, 35
Tabular view 20, 27, 34
Target directory 9
Toolbar 12, 19
U
Undo 16, 20
USB device driver 10
USB interface 6, 21, 26
USB–RS-232 adapter 22
V
“View” menu 17, 19
W
Working directories 43
Working with MEMoryCard
45
X
XTADMIN 22, 23, 24
Z
Zoom in 17
Zoom In 20, 32
Zooming 32
Zoom out 20, 32
Zoom Out 17
49
Page 50

Page 51

Page 52

Memmert GmbH + Co KG | PO Box 1720 | D-91107 Schwabach, Germany | Tel. +49 (0) 9122-925-0 | Fax +49 (0) 9122-145-85 | Email: service@memmert.com | www.memmert.com
26.10.2010
CELSIUS 10.0 englisch
D23498
 Loading...