

Page 1

- 1 -
User Manual
Model : T96 WiFi Action Camera
Made by: Melife Technology Co., Ltd
Version: Melife-V1.0
Melife Technology Co., Ltd
Page 2
- 2 -
1. Key Features
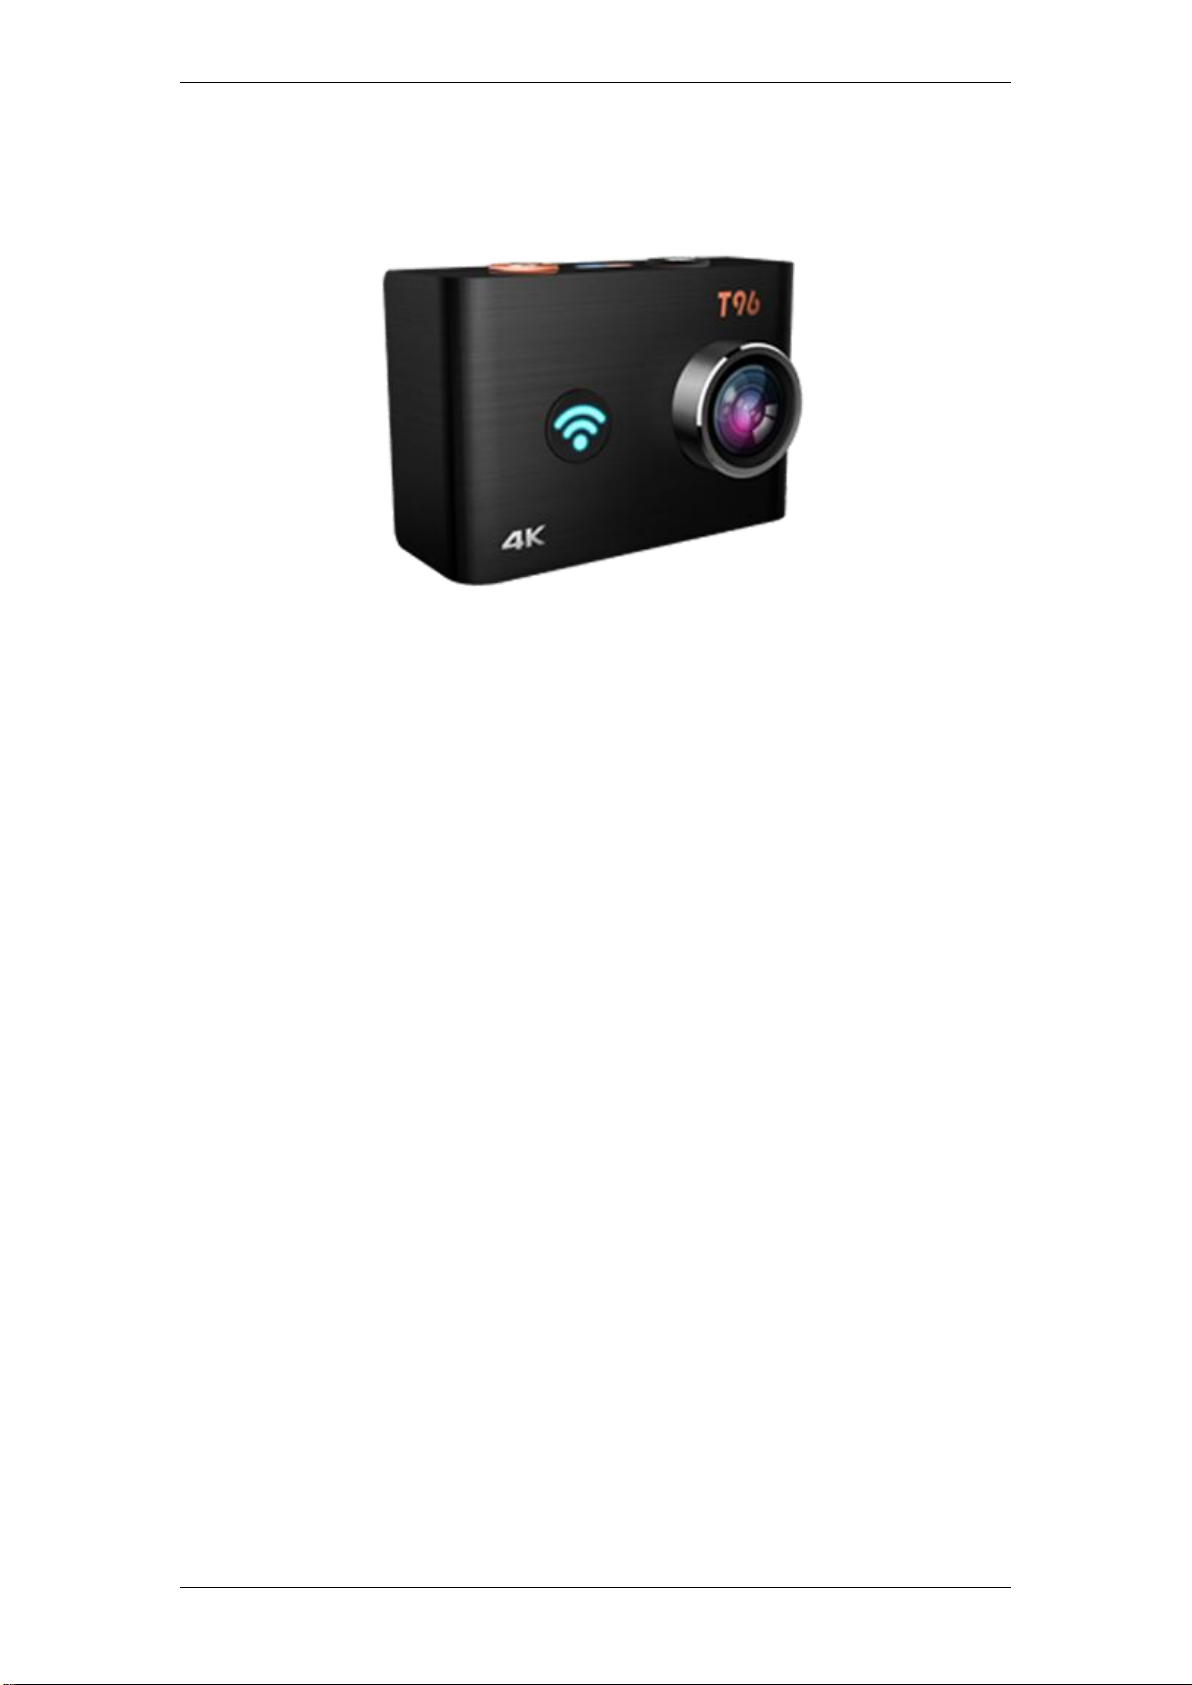
Video resolution: 4K@24fps, 2.7K@30fps, 1080p@96fps, 1080p@60fps,
1080p@30fps, 720p@120fps, 720@60fps.
Image resolution: 12.4MP
Support WiFi connection, range up to 15 meters
Support 2.4G Wireless remote control
Bundle with waterproof case can support underwater 30m
2” TFT LCD screen
3.7V/1000mAh Detachable Lithium-ion battery
Melife Technology Co., Ltd
Page 3
- 3 -
2. Accessories in Standard Package
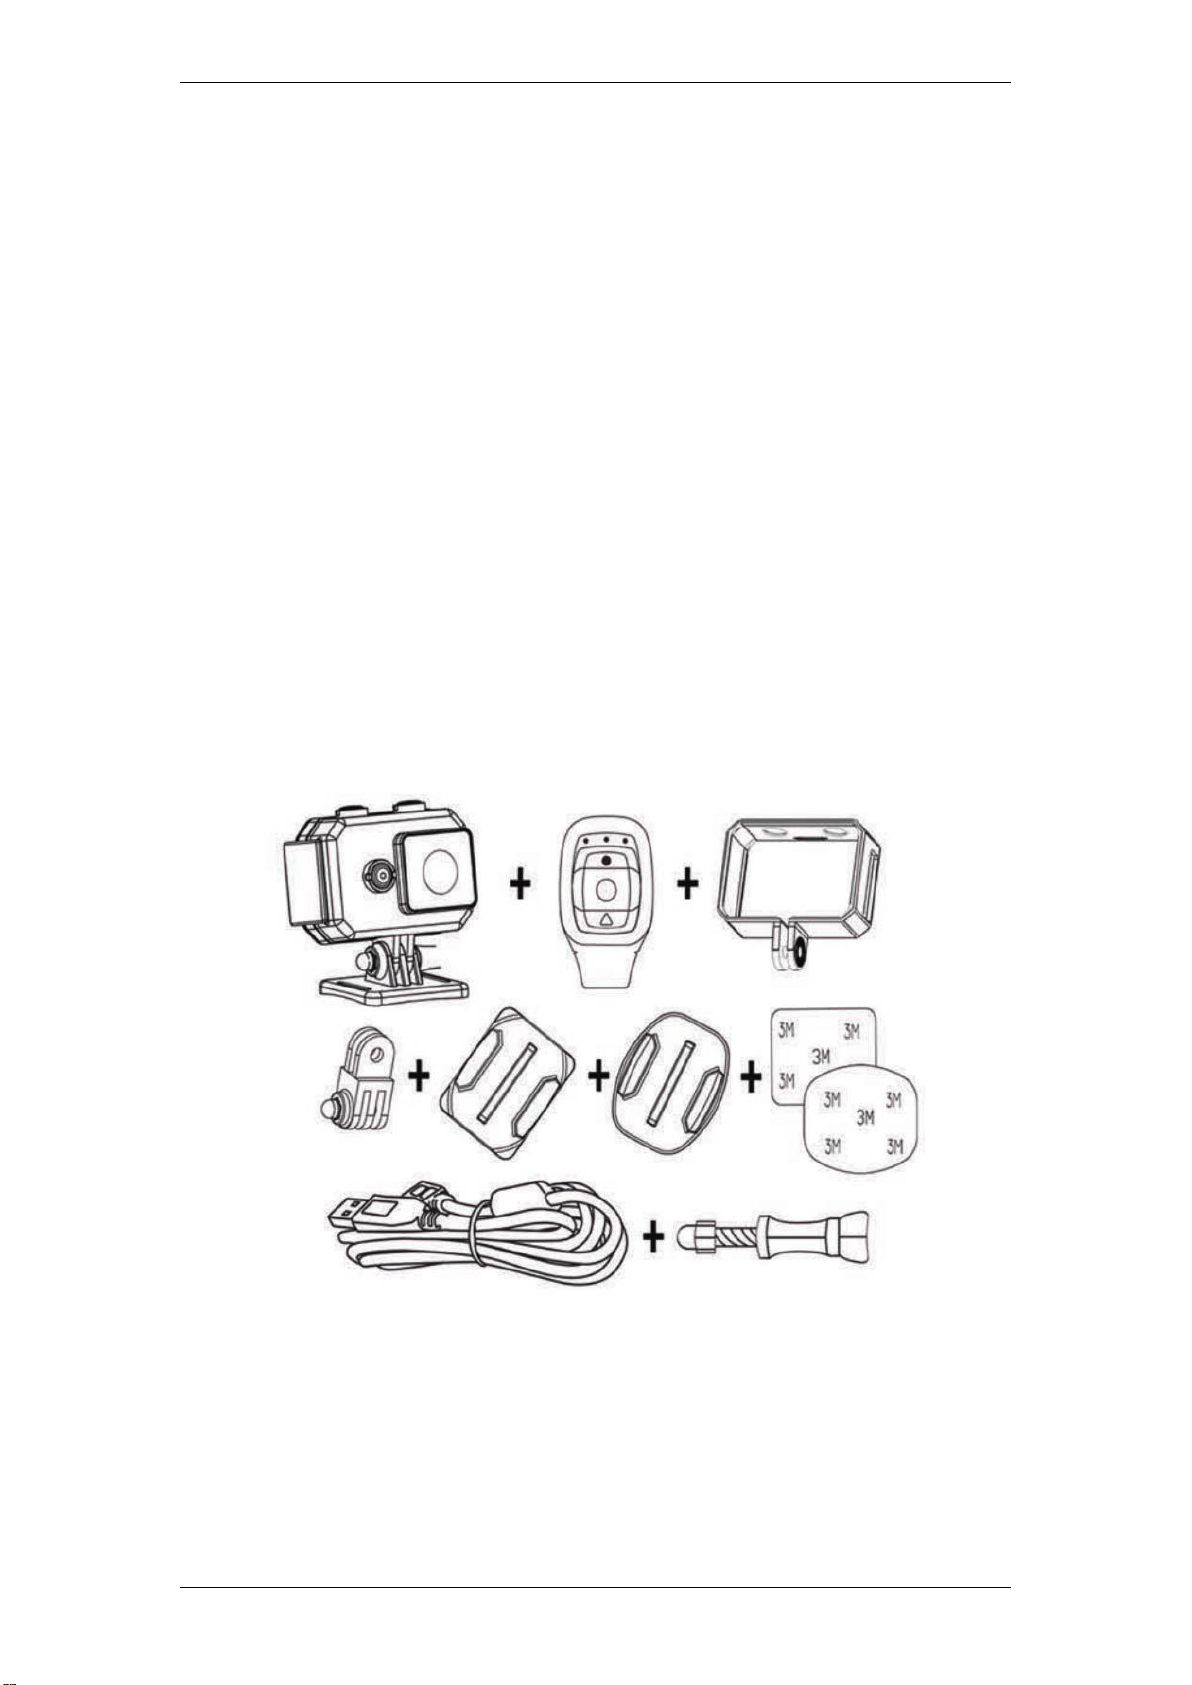
Camera x 1 3M adhesive for curved mount x 1
Remote control x 1 3M adhesive for curved mount x 1
Waterproof case x 1 Quick release mount x 1
Portable case x 1 USB Cable x 1
Curved mount x 1 Knuckle x 1
Flat mount x 1 Lock bolt x2
Melife Technology Co., Ltd
Page 4
Melife Technology Co., Ltd
- 4 -
3. Camera Diagram
Page 5

- 5 -
4. Using your camera
4.1 Power On & Power Off the Camera
Turn on
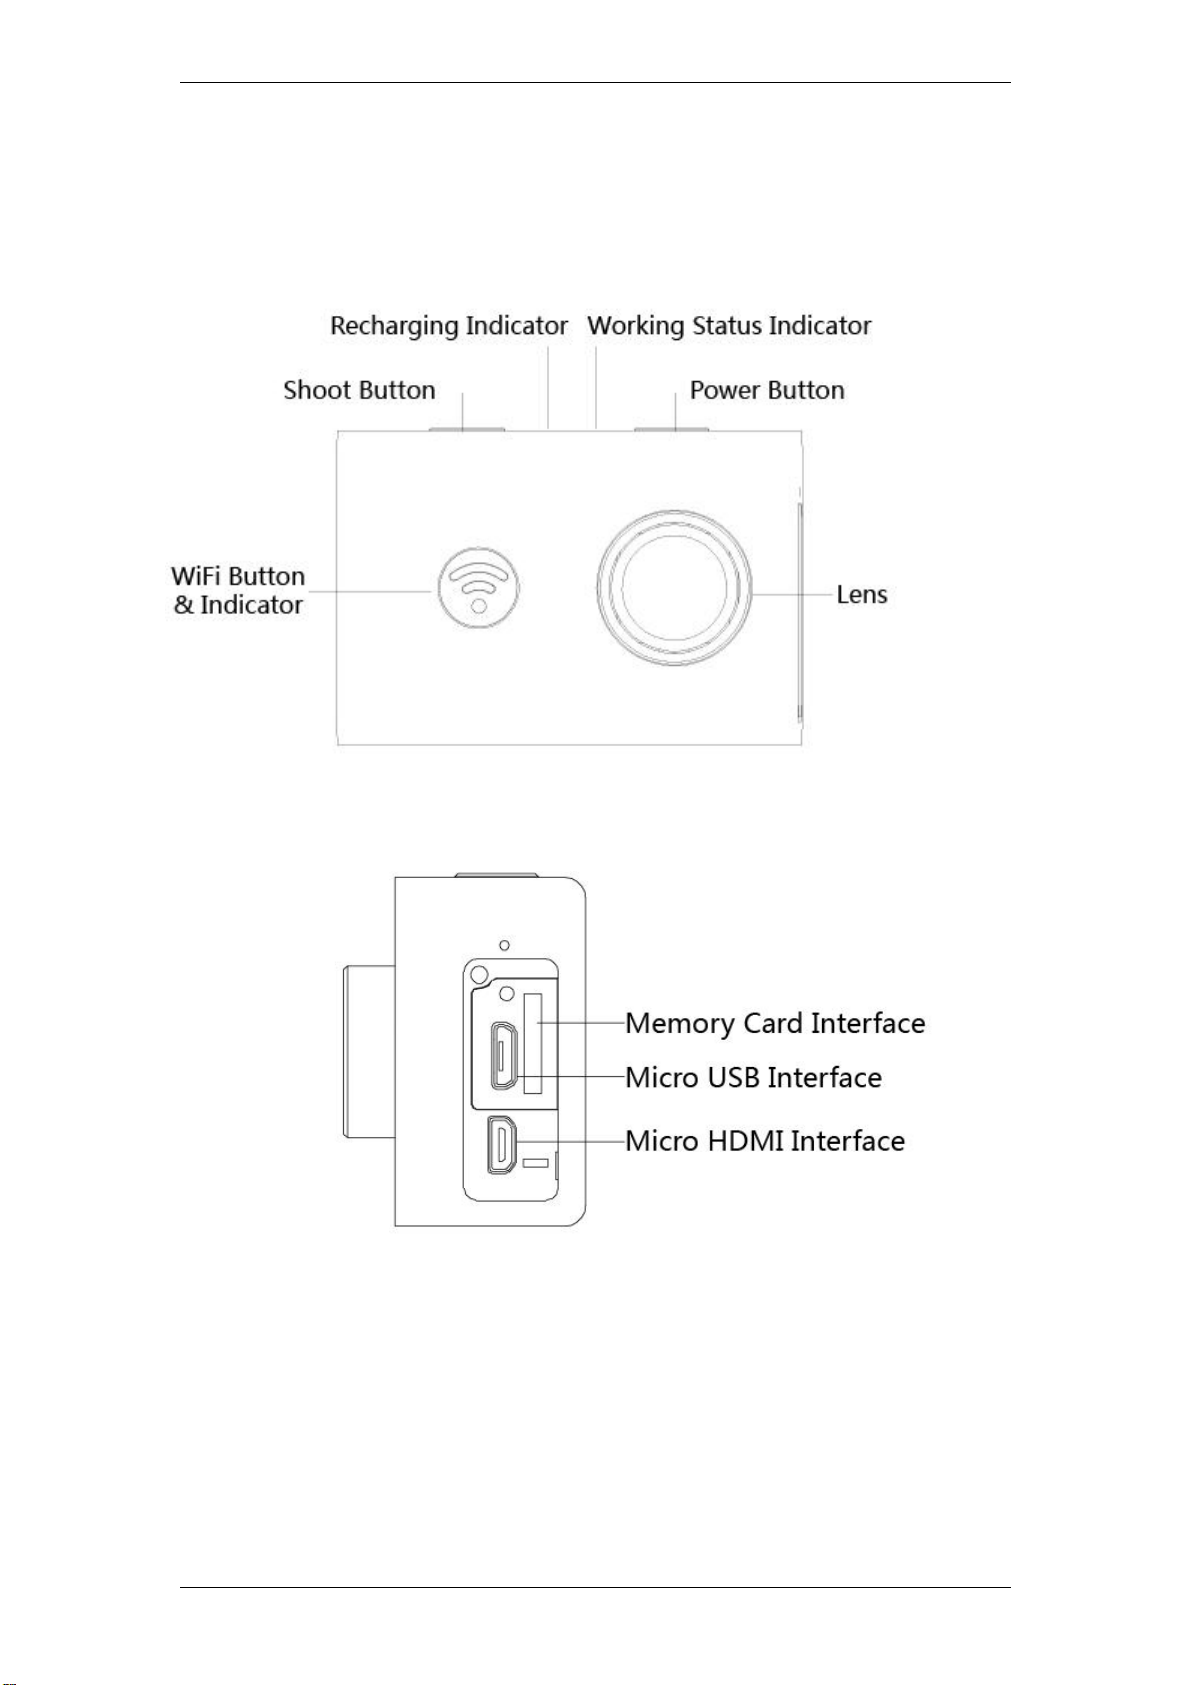
Press and hold the “POWER” button for 2 seconds, the Working Status
Indicator on the top will turn blue. The camera goes to the video capture mode
by default.
Turn off
Press and hold the “POWER” button for 2 seconds.
4.2 Insert a Memory Card
Pull off the Cap from the right side of the camera, and insert a Micro SD card
into the slot.
NOTE:
1. We suggest using CLASS 10 (High speed) Micro SD card for smooth
shooting purpose. Lower CLASS of Micro SD Card may cause video
blur.
2. There is only one correct direction to insert the Micro SD card into the
slot.. Do not force the card into the card slot, as it may damage both the
camera and the Micro SD card.
3. A new Micro SD card should be formatted before using.
Melife Technology Co., Ltd
Page 6

- 6 -
4.3 Recharge the battery
Before using the T96 for the first time, please fully charge the battery first.
Procedure:
1. Connect T96 with chargers or devices by Micro USB cable (provided).
2. Recharging Indicator will turns red during recharging.
3. A completely flat battery will take about 3.5 hours to be fully charged. The
battery icon at the right bottom is full when the battery is fully charged.
4. Some functions, such as WiFi function, is not allowed to use if battery level
is low,
4.4 Insert camera in waterproof case
1. Ensure the case is dry and clean.
2. Insert T96, ensuring the lens fits neatly in the lens cavity.
3. Close the security latch.
4. The T96 can be mounted using the accessories provided.
4.5 Shoot Video
Press "SHOOT" button once to start recording; press again to stop.
4.6 Shoot a Single Picture
Press "SHOOT" button once to shoot a single picture.
Press and hold "SHOOT" button to switch from Video mode to Picture mode.
Melife Technology Co., Ltd
Page 7
- 7 -
5. Setup your camera
5.1 Video Mode
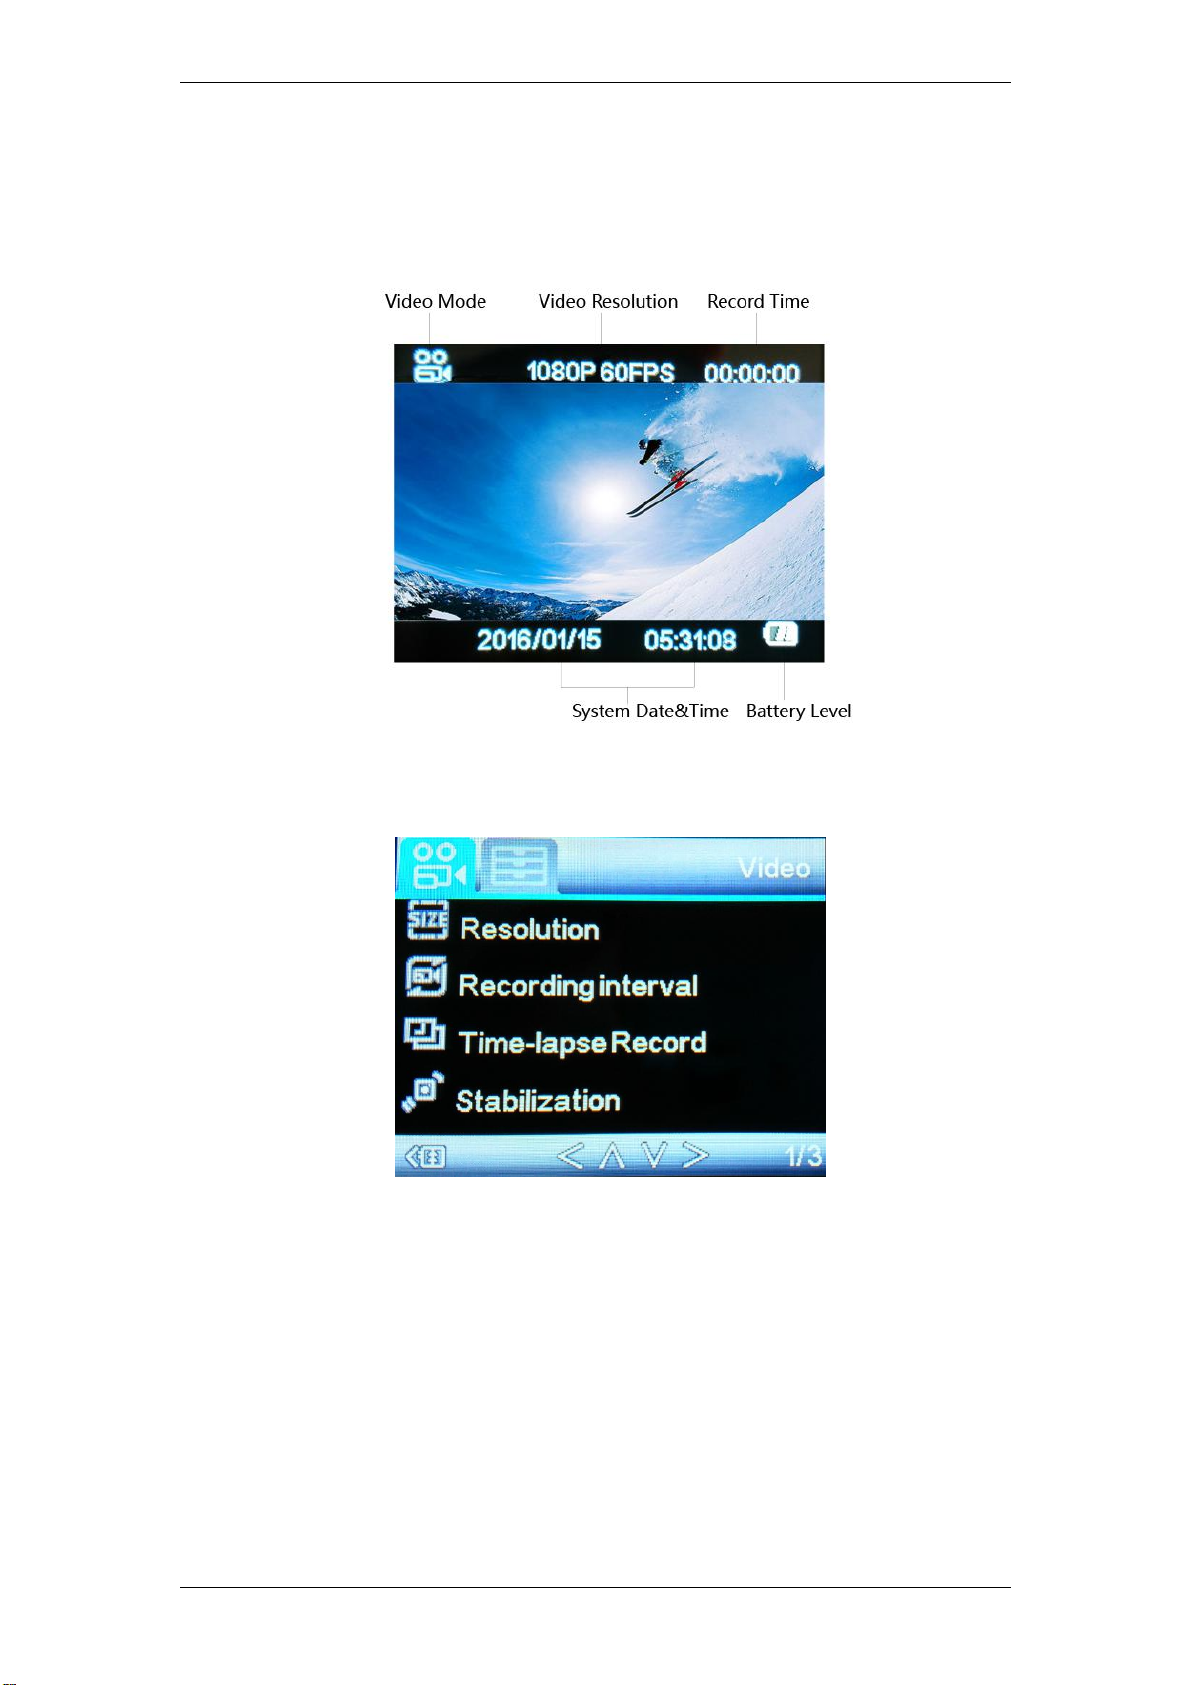
Press "POWER" button once to go into Video mode setting.
Resolution
UHD P24, QHD P30, FHD P60, FHD P30, HD P120, HD P60 are for your
choose.
Melife Technology Co., Ltd
Page 8

- 8 -
Recording Interval
The video will be separated into difference files by the Time Length.
Off: the video will be separated into different files by every 12mins if 4K
selected; by every 25mins if 1080p/720p / VGA selected.
3 Minutes: the video will be separated into difference files by every 3 minutes.
5 Minutes: the video will be separated into difference files by every 5 minutes.
10 Minutes: the video will be separated into difference files by every 10
minutes.
For example, if you select "5 Minutes", after recording 20 minutes, the video
will be separated into 4 Video Clips (5 Minutes each Clip).
Time-lapse Record
This feature allows you to set the intervals at which a frame is captured. You
can set the time intervals as Off, 1Second, 5Seconds, 10Seconds, 30Seconds,
1 Minute, 5 Minutes, 10 Minutes.
Stabilization
Open this function will start built-in Gyroscope to make the video shooting
more steadily, less shaking.
Melife Technology Co., Ltd
Page 9
- 9 -
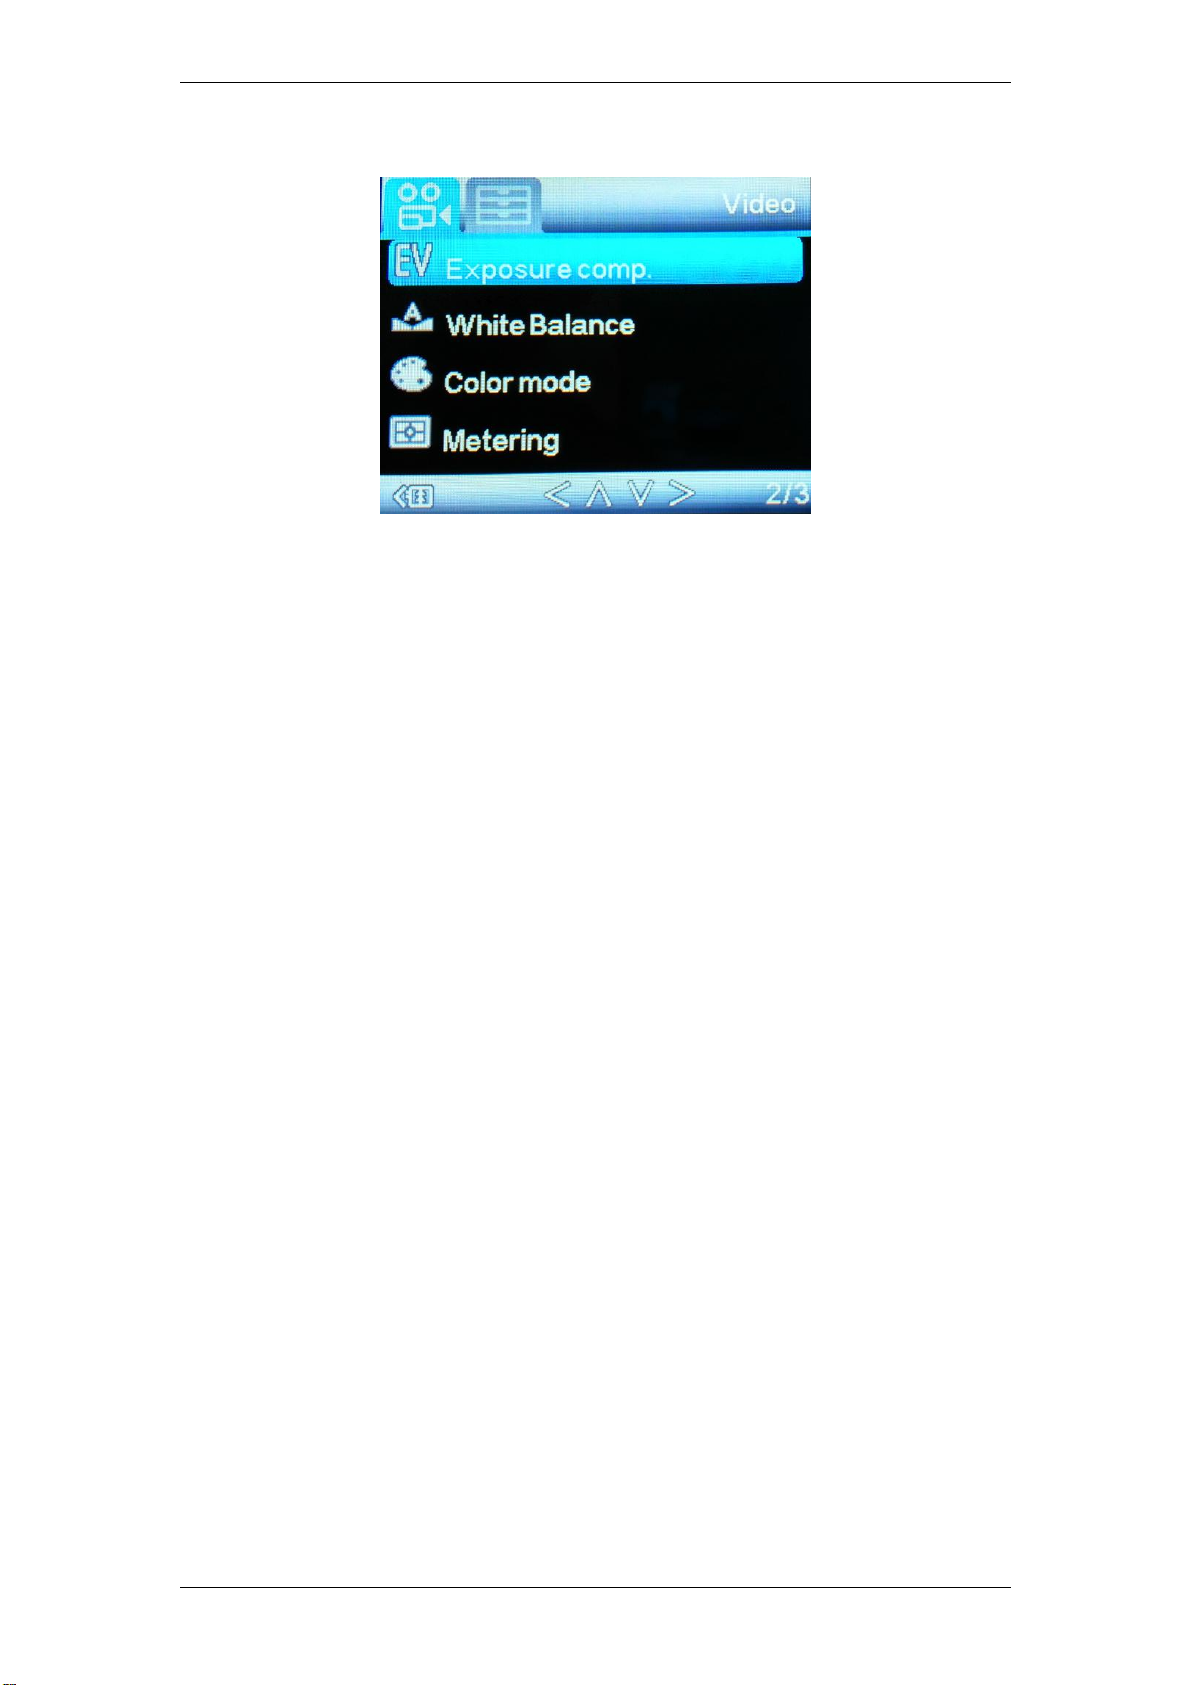
Exposure
This function allow users to choose exposure parameter from options including
+2/3, +1/3, +0.0, -1/3, -2/3, -1.0, -4/3, -5/3, -2.0.
White balance
Users can adjust it when the lighting condition changed, Auto, Daylight, Cloudy,
Tungsten, Fluorescent.
Default mode is Auto.
Color Mode
Users can choose different color mode from options including Normal,
Black&White, Sepia, Dive Mode
Metering
Users can choose Average, Center, Spot
Melife Technology Co., Ltd
Page 10
- 10 -
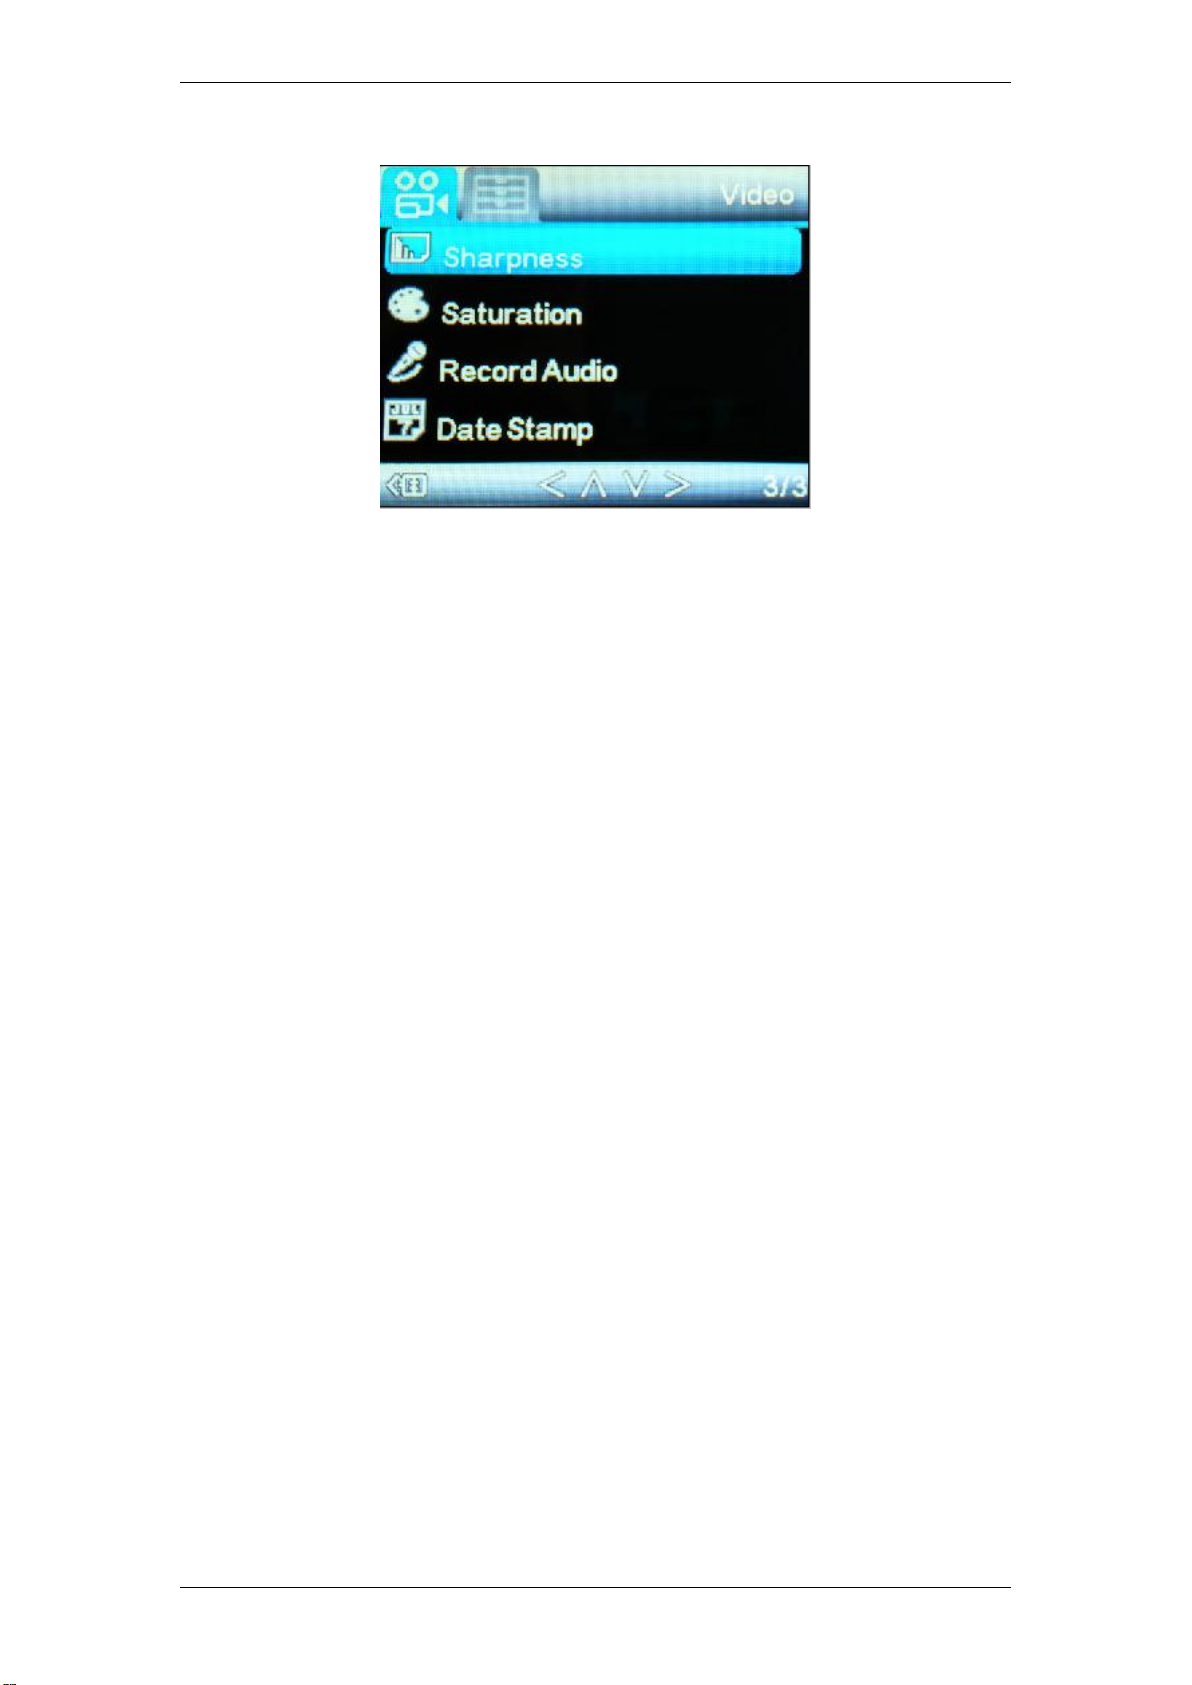
Sharpness
Users can setup sharpness to Strong, Standard, Low.
Saturation
Users can setup saturation to High, Standard, Low
Record Audio
Off:Shoot video without sound.
On: Shoot video with sound.
Date Stamp
You can display the time and date on video or not.
Off: not display date on videos
Date: display date on videos
5.2 General Setting
Press and hold “SHOOT” button to switch from Video mode setting to general
setting.
Melife Technology Co., Ltd
Page 11
- 11 -
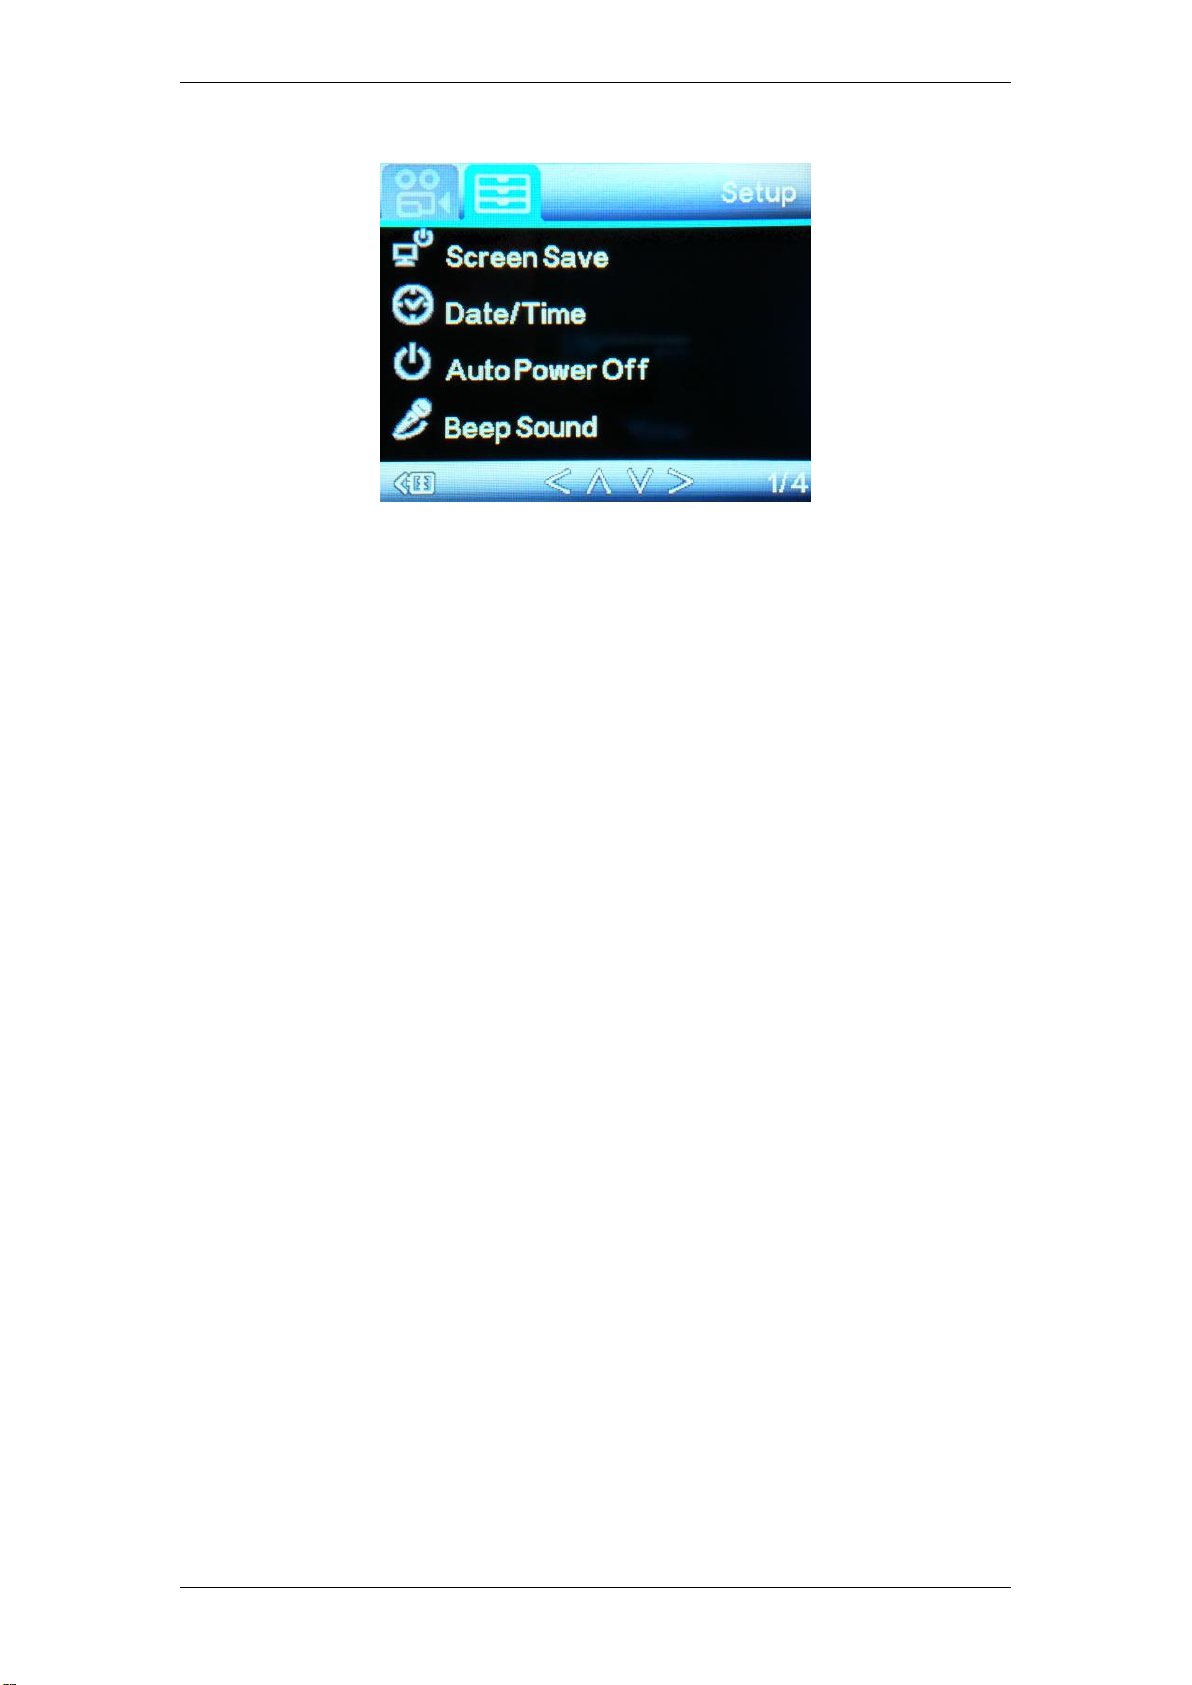
Screen Save
Off: The screen will be always on;
1 Minute: The screen will be off after 1min;
3 Minutes: The screen will be off after 3mins;
5 Minutes: The screen will be off after 5mins;
Date / Time
The date appears as YY/DD/MM. You can set it by yourself.
Auto Power Off
Off: The camera will be always on;
3 Minutes: The camera will be off after 3mins;
5 Minutes: The camera will be off after 5mins;
10 Minutes: The camera will be off after 10mins;
Beep Sound
Off: Turn the key tone off.
On: Turn the key tone on.
Melife Technology Co., Ltd
Page 12
- 12 -
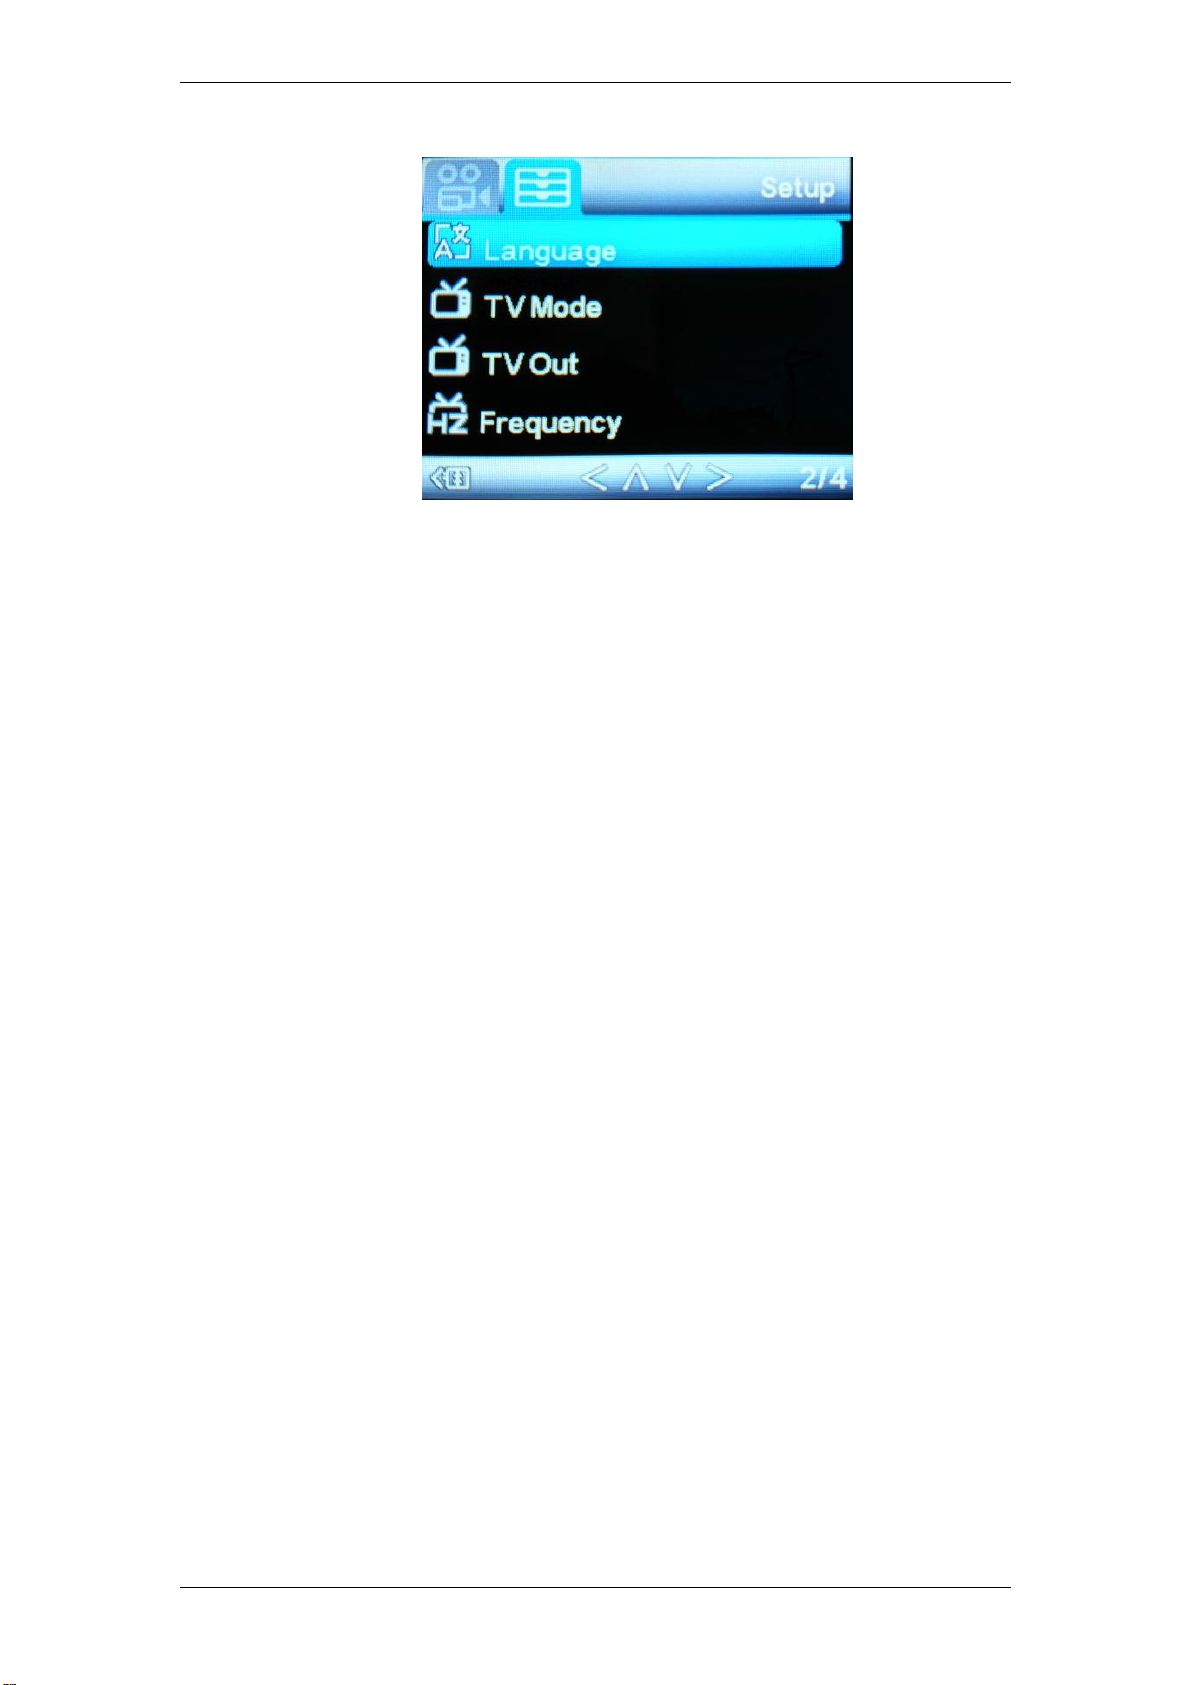
Language
Select your language from English, France, Spanish, Portugal, Germany, Italy,
Simplify Chinese, Traditional Chinese, Russian, Japanese options.
TV Mode
Select the NTSC or PAL to suit your TV system.
TV Out
Users can choose OFF or ON.
Frequency
Select correct light frequency to avoid strobing, options including 50Hz or
60Hz.
Melife Technology Co., Ltd
Page 13
- 13 -
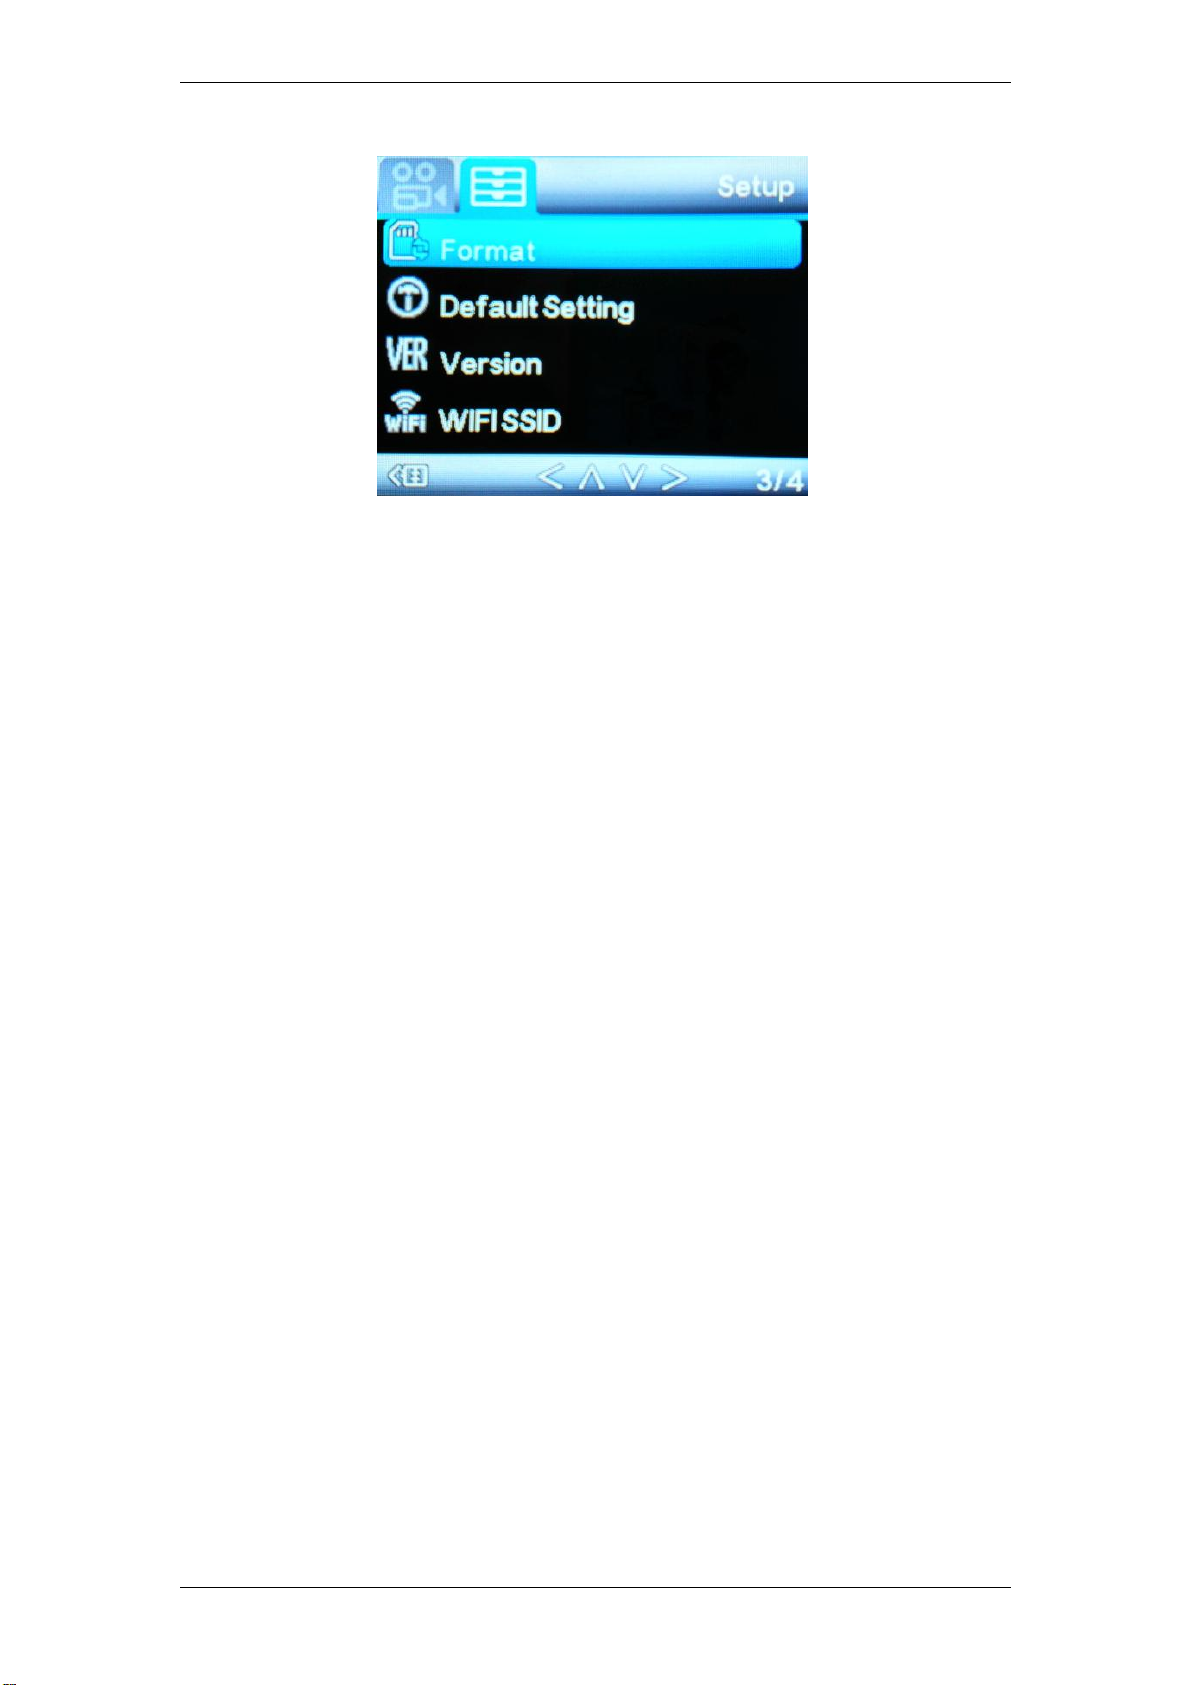
Format
This operation will delete all data in camera, please double check and confirm
whether you need continue.
Default Setting
This operation will return all the menu setting into factory defaults.
Version
You can check your camera OSD software version here.
WIFI SSID
Set up your new WiFi name.
Note: Use the WiFi button to navigate, use SHOOT button to confirm. The
name is showed as “WIFI_ T96_XXXXXX”, you can change the WIFI SSID
which is displayed with cycle letters or numbers, such as “A-Z” “a – z” “1 -0”.
Melife Technology Co., Ltd
Page 14
- 14 -
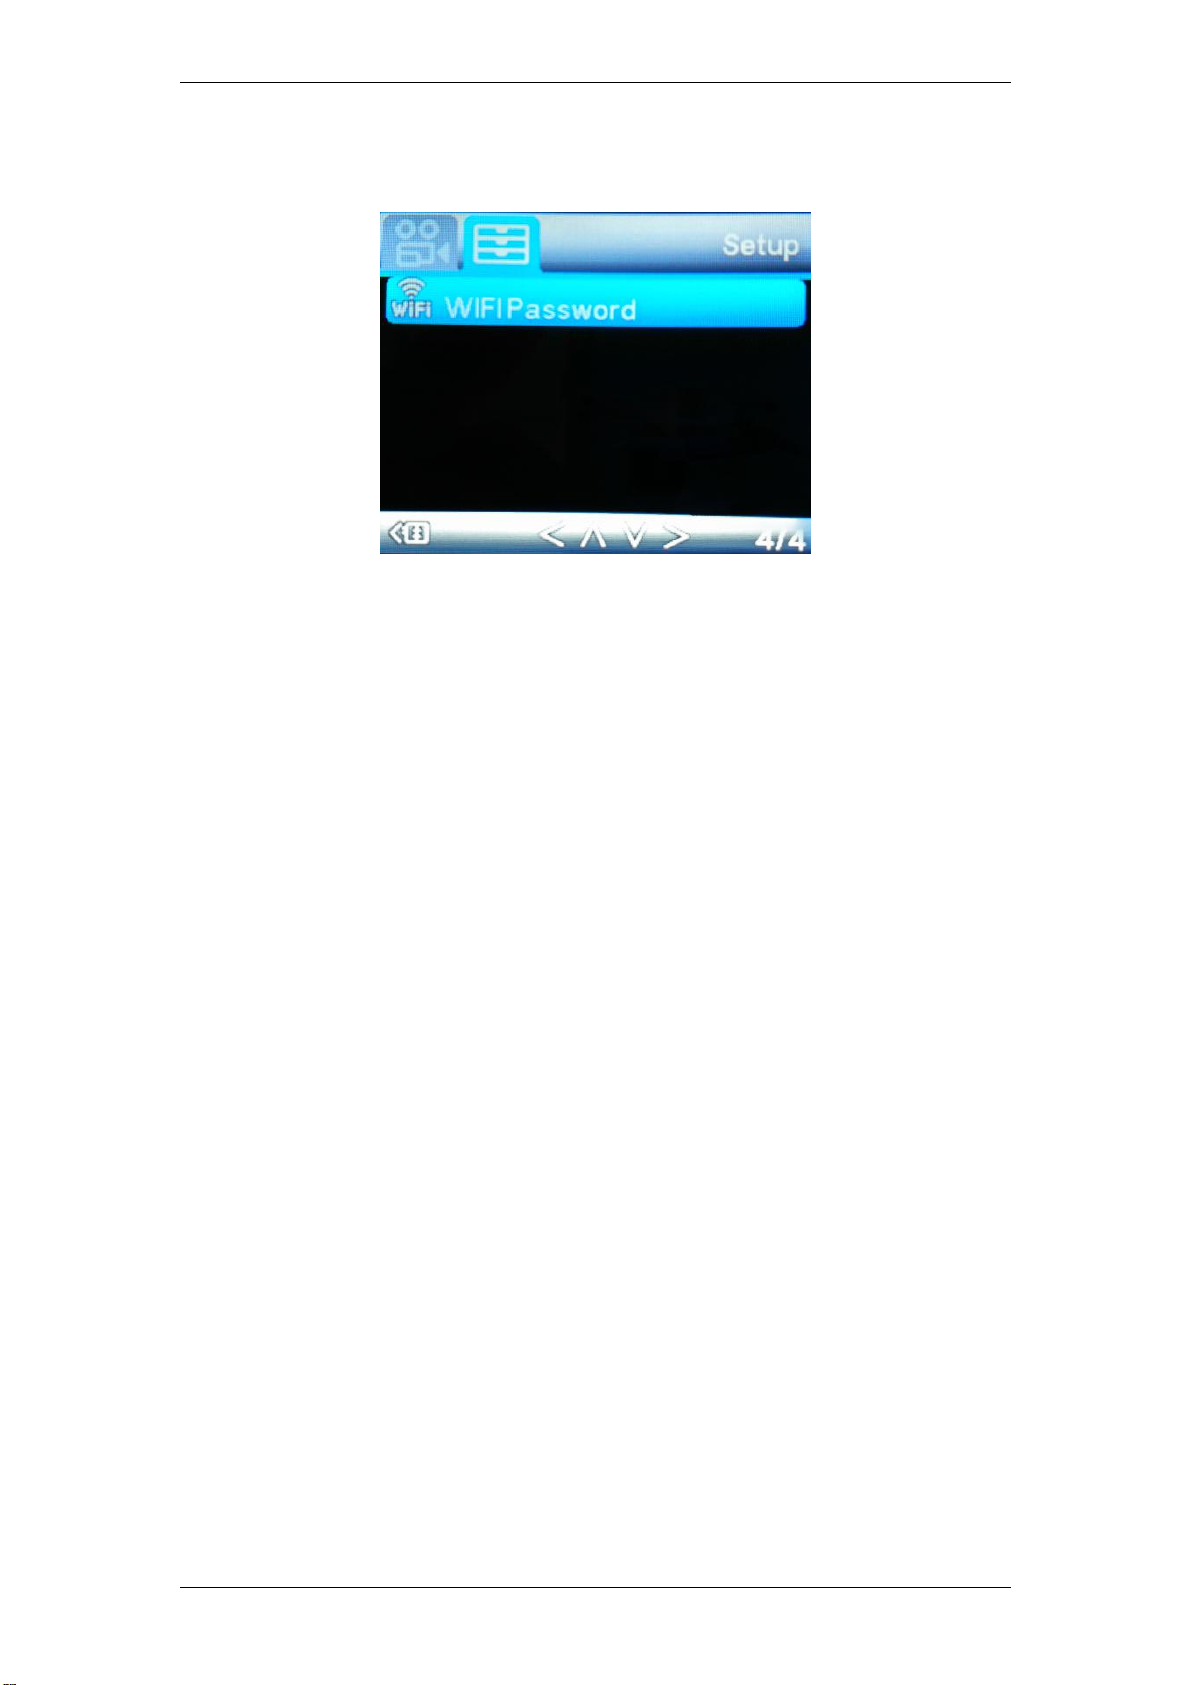
WIFI Password
Set up your new WiFi Password
The factory default WiFi Password is 12345678.
You can change the WIFI password which is displayed with cycle letters or
numbers, such as “A-Z” “a – z” “1 -0”.
Use the WiFi button to navigate, use SHOOT button to confirm.
Melife Technology Co., Ltd
Page 15
- 15 -
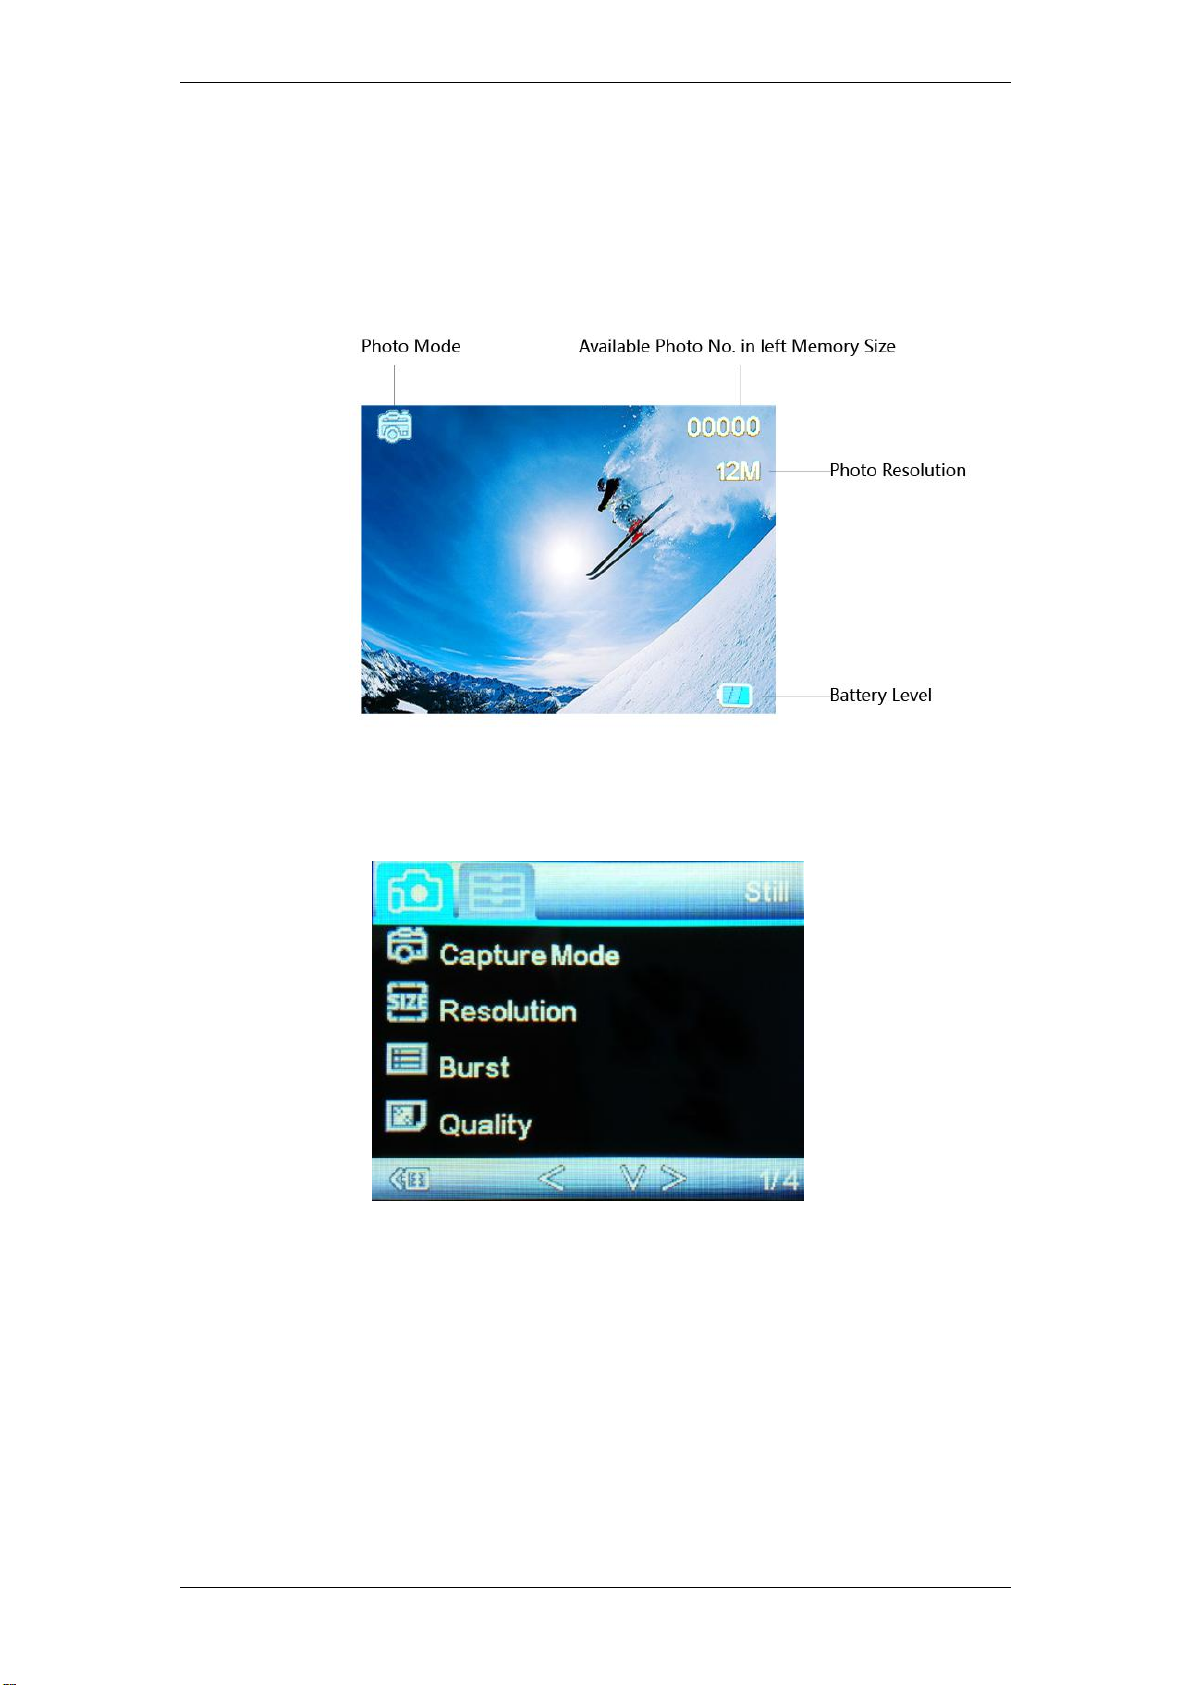
5.3 Picture Mode
Press “Shoot Button” 2s when default video mode to switch to Photo Mode.
Capture Mode
Single: Shoot a single picture;
2S Timer: Shoot a single picture every 2 seconds;
5S Timer: Shoot a single picture every 5 seconds;
10S Timer: Shoot a single picture every 10 seconds;
Melife Technology Co., Ltd
Page 16

- 16 -
Resolution
12M 4032 x 3024
10M 3648 x 2736
8M 3264 x 2448
5M 2592 x 1944
3M 2048 x 1536
2MHD 1920 x 1080
VGA 640 x 480
1.3M 1280 x 960
Burst
If on, the camera will continuously shoot pictures automatically.
If off, normal picture shooting, press “SHOOT” button once to shoot a single
picture.
Quality
To set the image quality from Fine, Normal, Economy.
Melife Technology Co., Ltd
Page 17
- 17 -
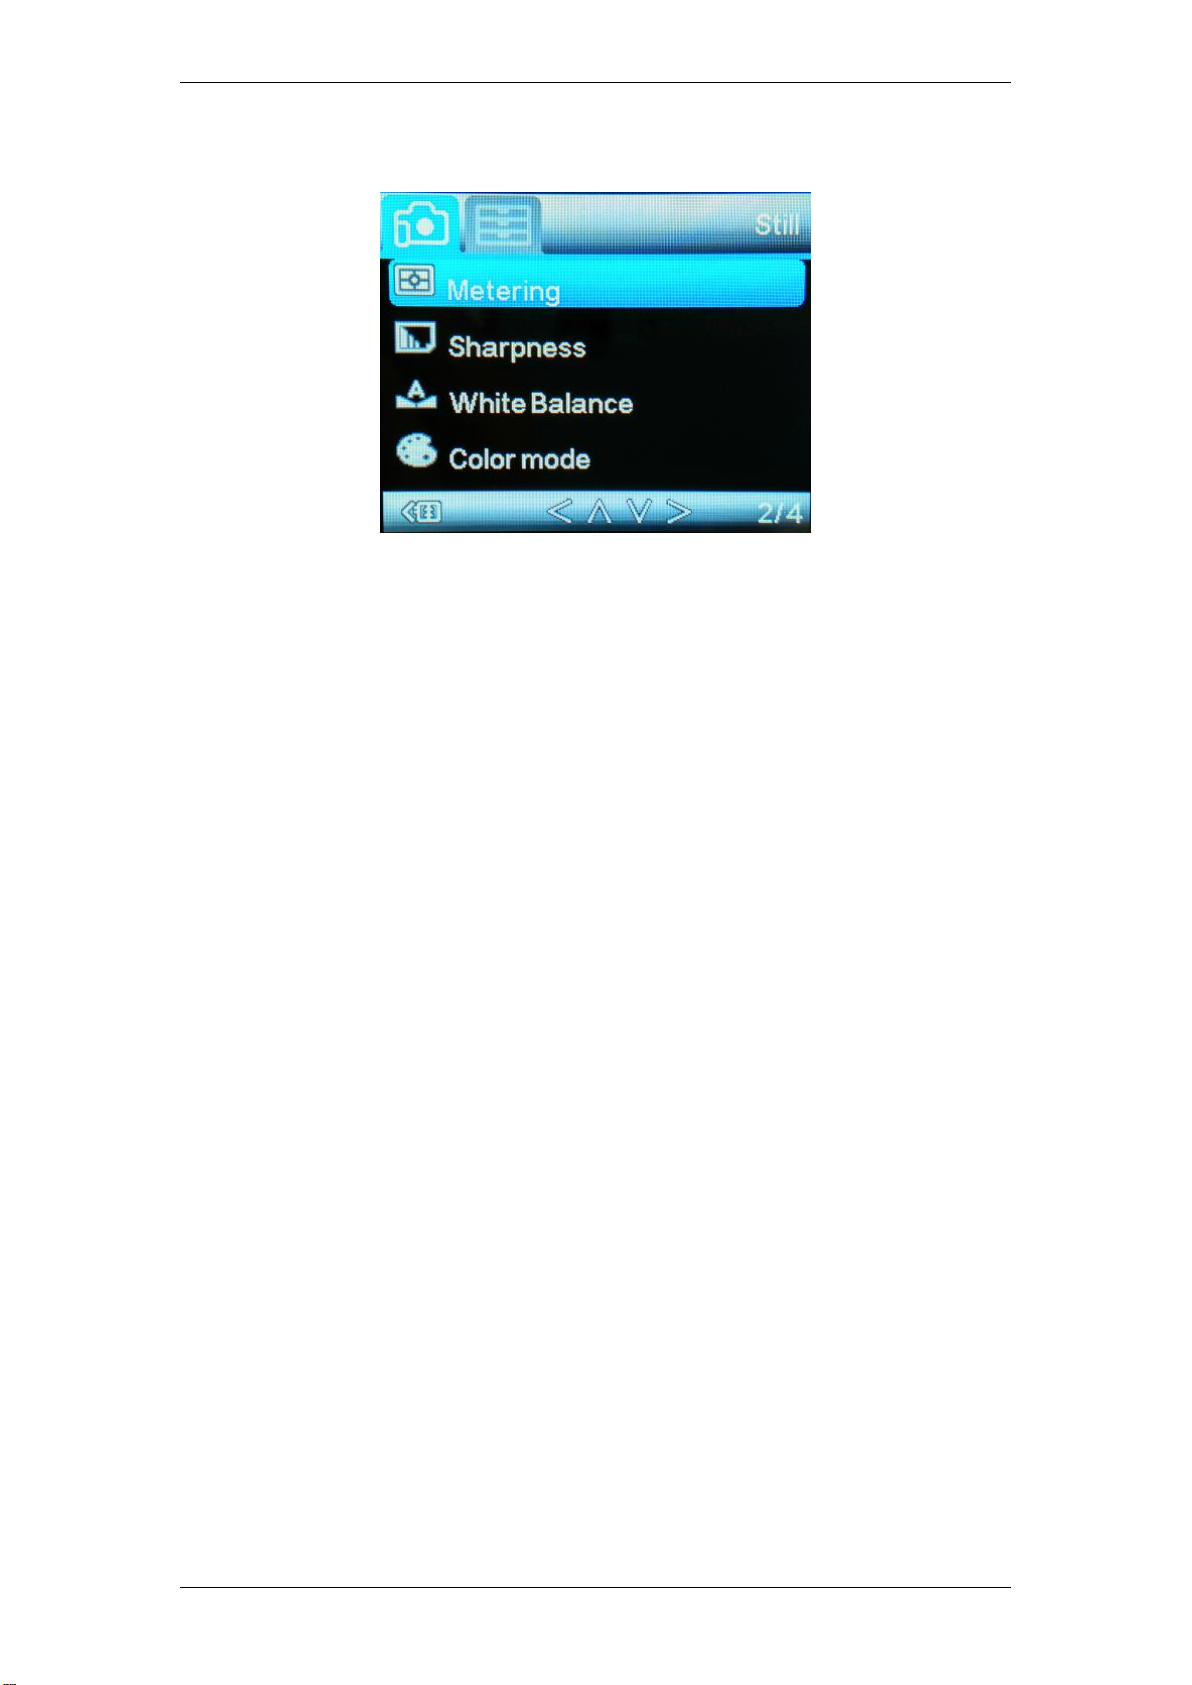
Metering
Metering mode refers to the way in which a camera determines the exposure.
Users can choose different options from Average, Center, Spot.
Sharpness
To set the image sharpness to Strong, Standard, Low..
White Balance
You can adjust it when the lighting condition changed, Auto, Daylight, Cloudy,
Tungsten, Fluorescent.
Default mode is Auto.
Color Mode
Setup different color mode from Normal, Black&White, Sepia, Dive mode.
Melife Technology Co., Ltd
Page 18
- 18 -
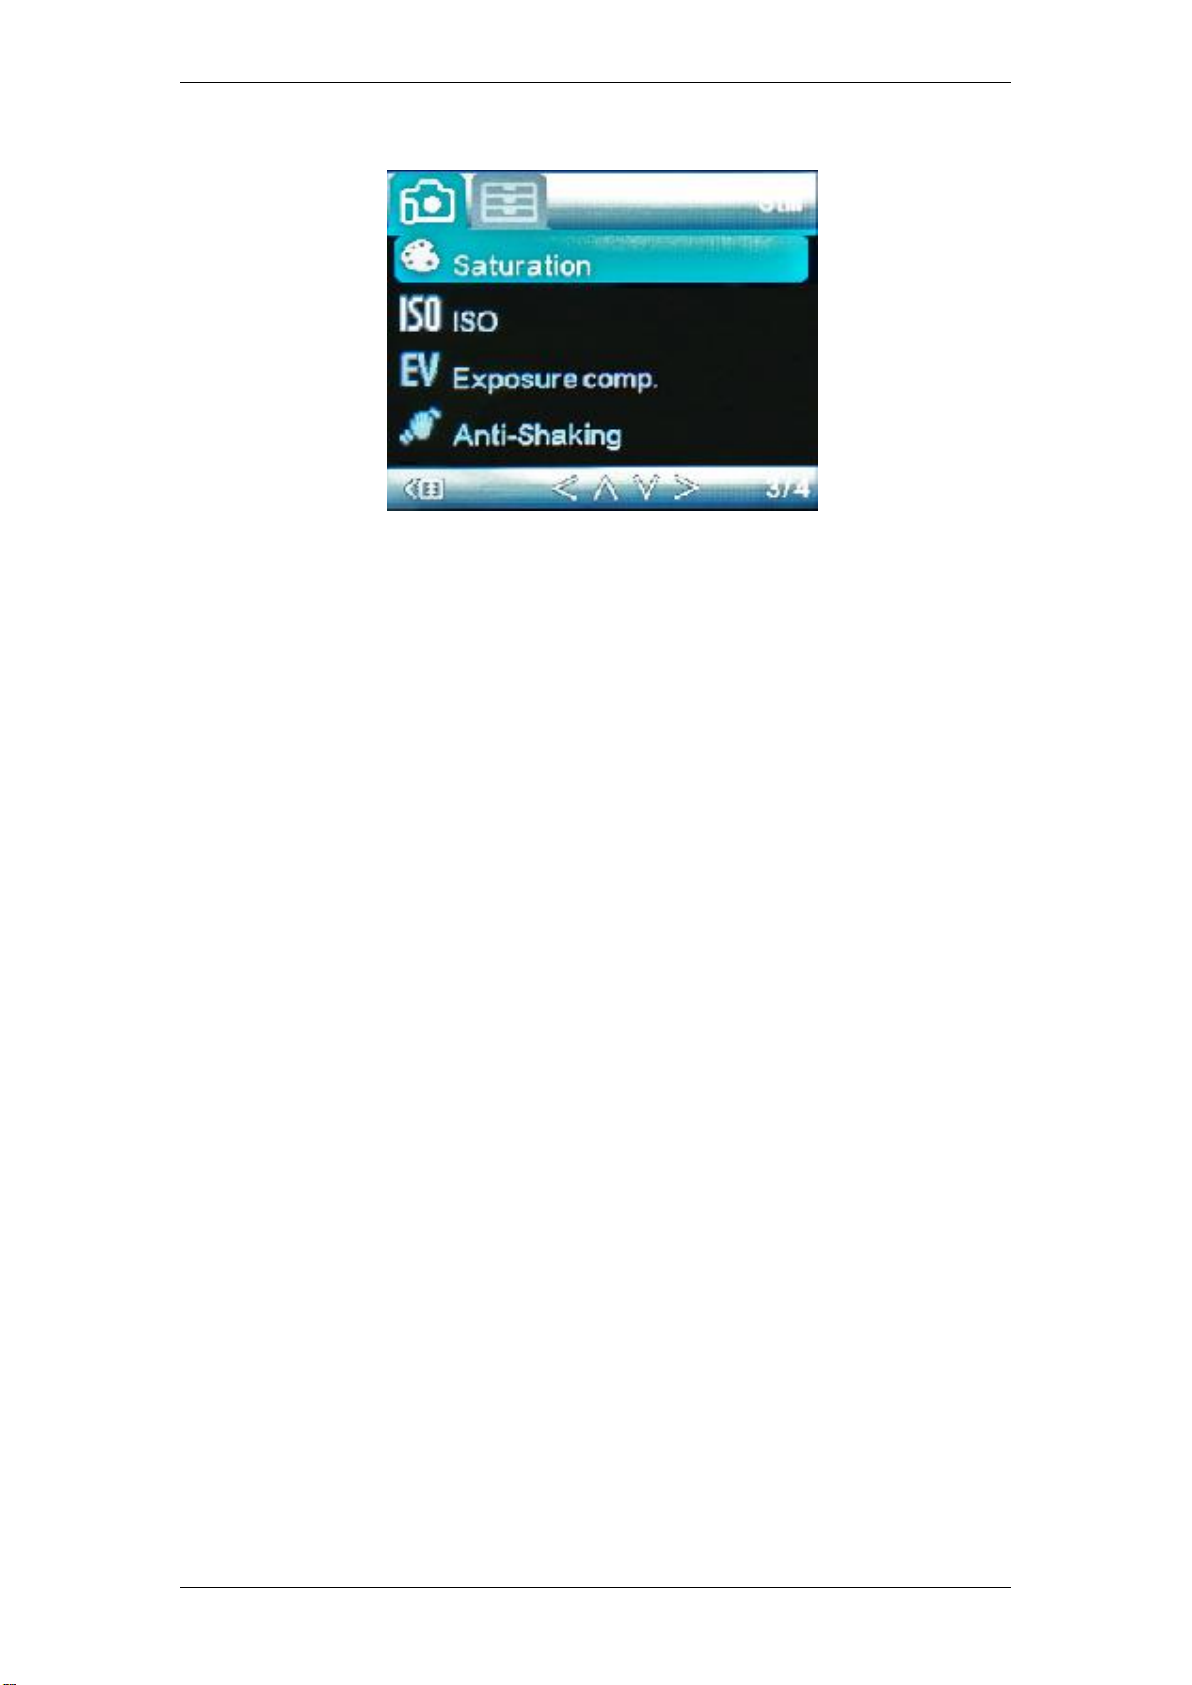
Saturation
Users can setup saturation to High, Standard, Low
ISO
This is the measurement of how sensitive a digital camera’s sensor is to light,
options including Auto, 100, 200, 400,
Exposure
This allows user to set the light exposure value, +2/3, +1/3, +0.0, -1/3, /2/3,
-1.0, -4/3, -5/3, -2.0.
Stabilization
Open this function will start built-in Gyroscope to make the video shooting
more steadily, less shaking.
Melife Technology Co., Ltd
Page 19
- 19 -
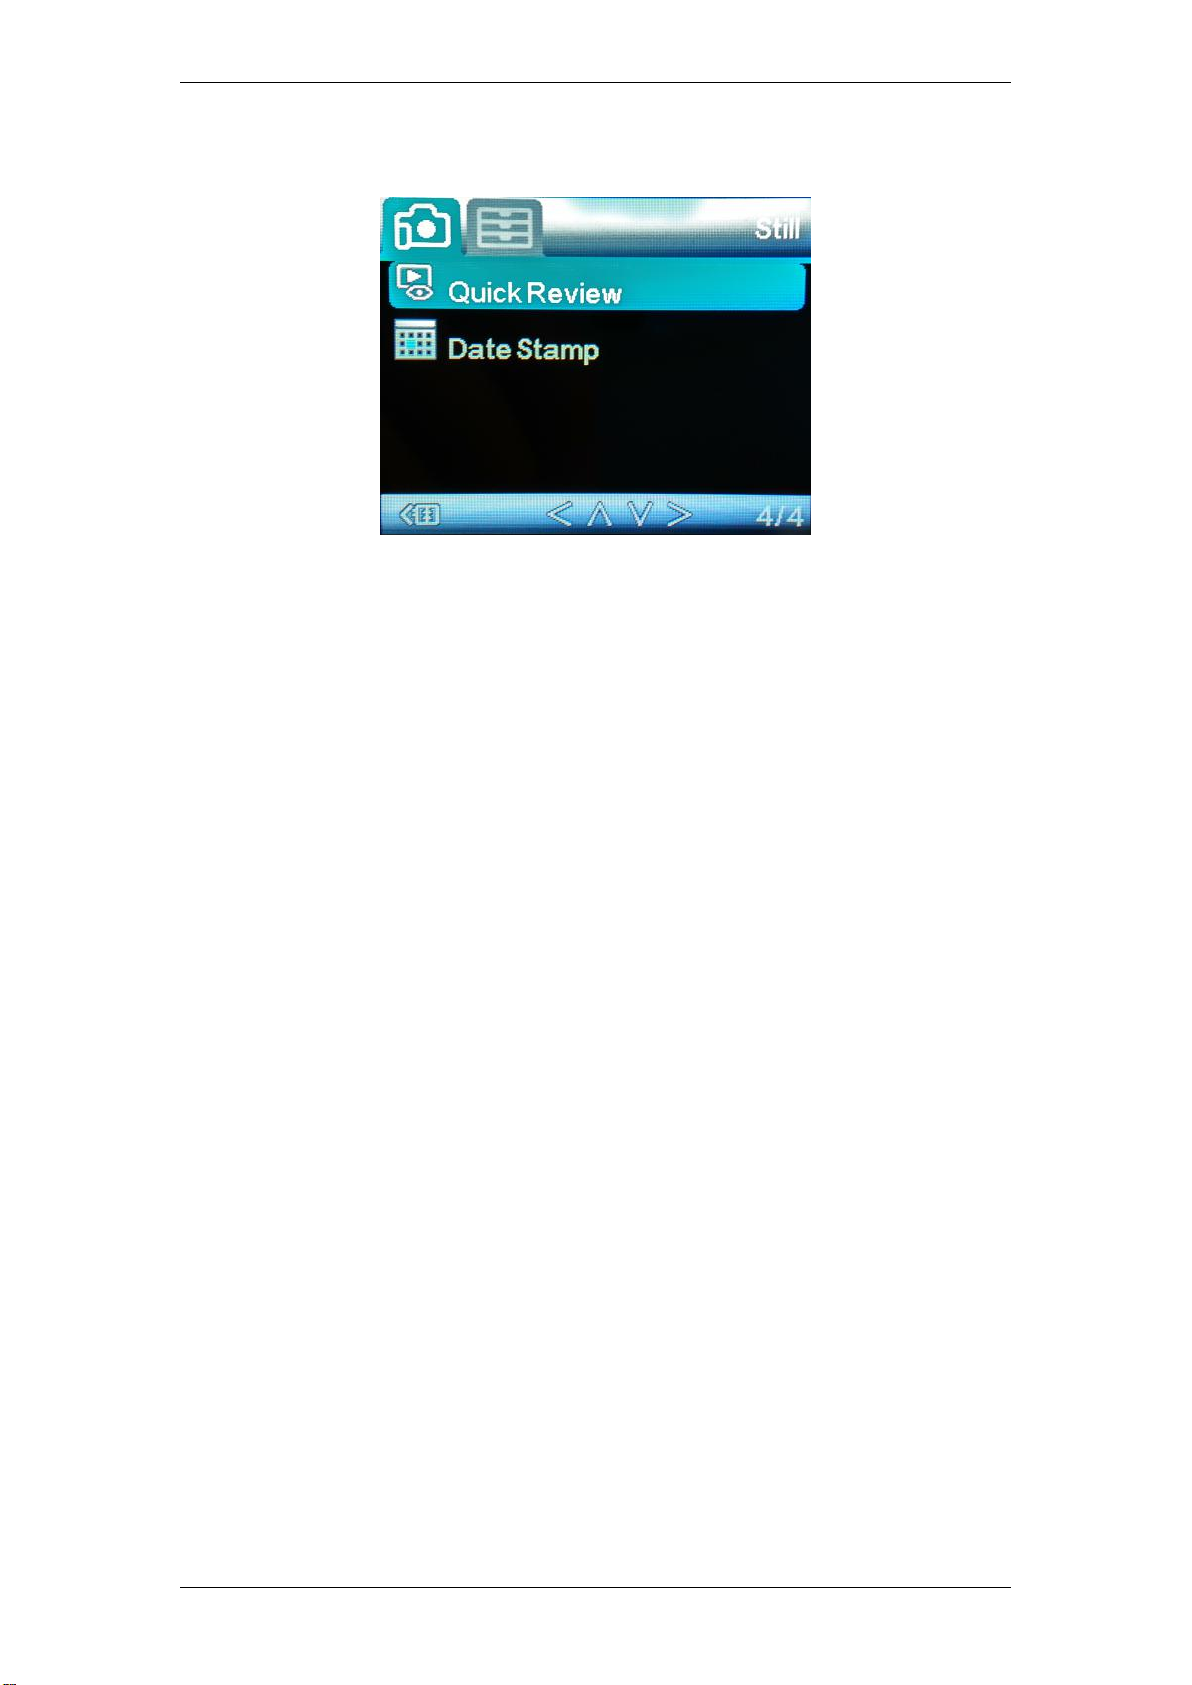
Quick Review
Check the photos quickly, 3 options including Off, 2 Seconds,5 Seconds.
Date Stamp
You can display the time and date on pictures or not;
Off: not display date & time on pictures;
Date: display date on pictures
Date/Time: display date & time on pictures.
Melife Technology Co., Ltd
Page 20
- 20 -
5.4 Remote Control
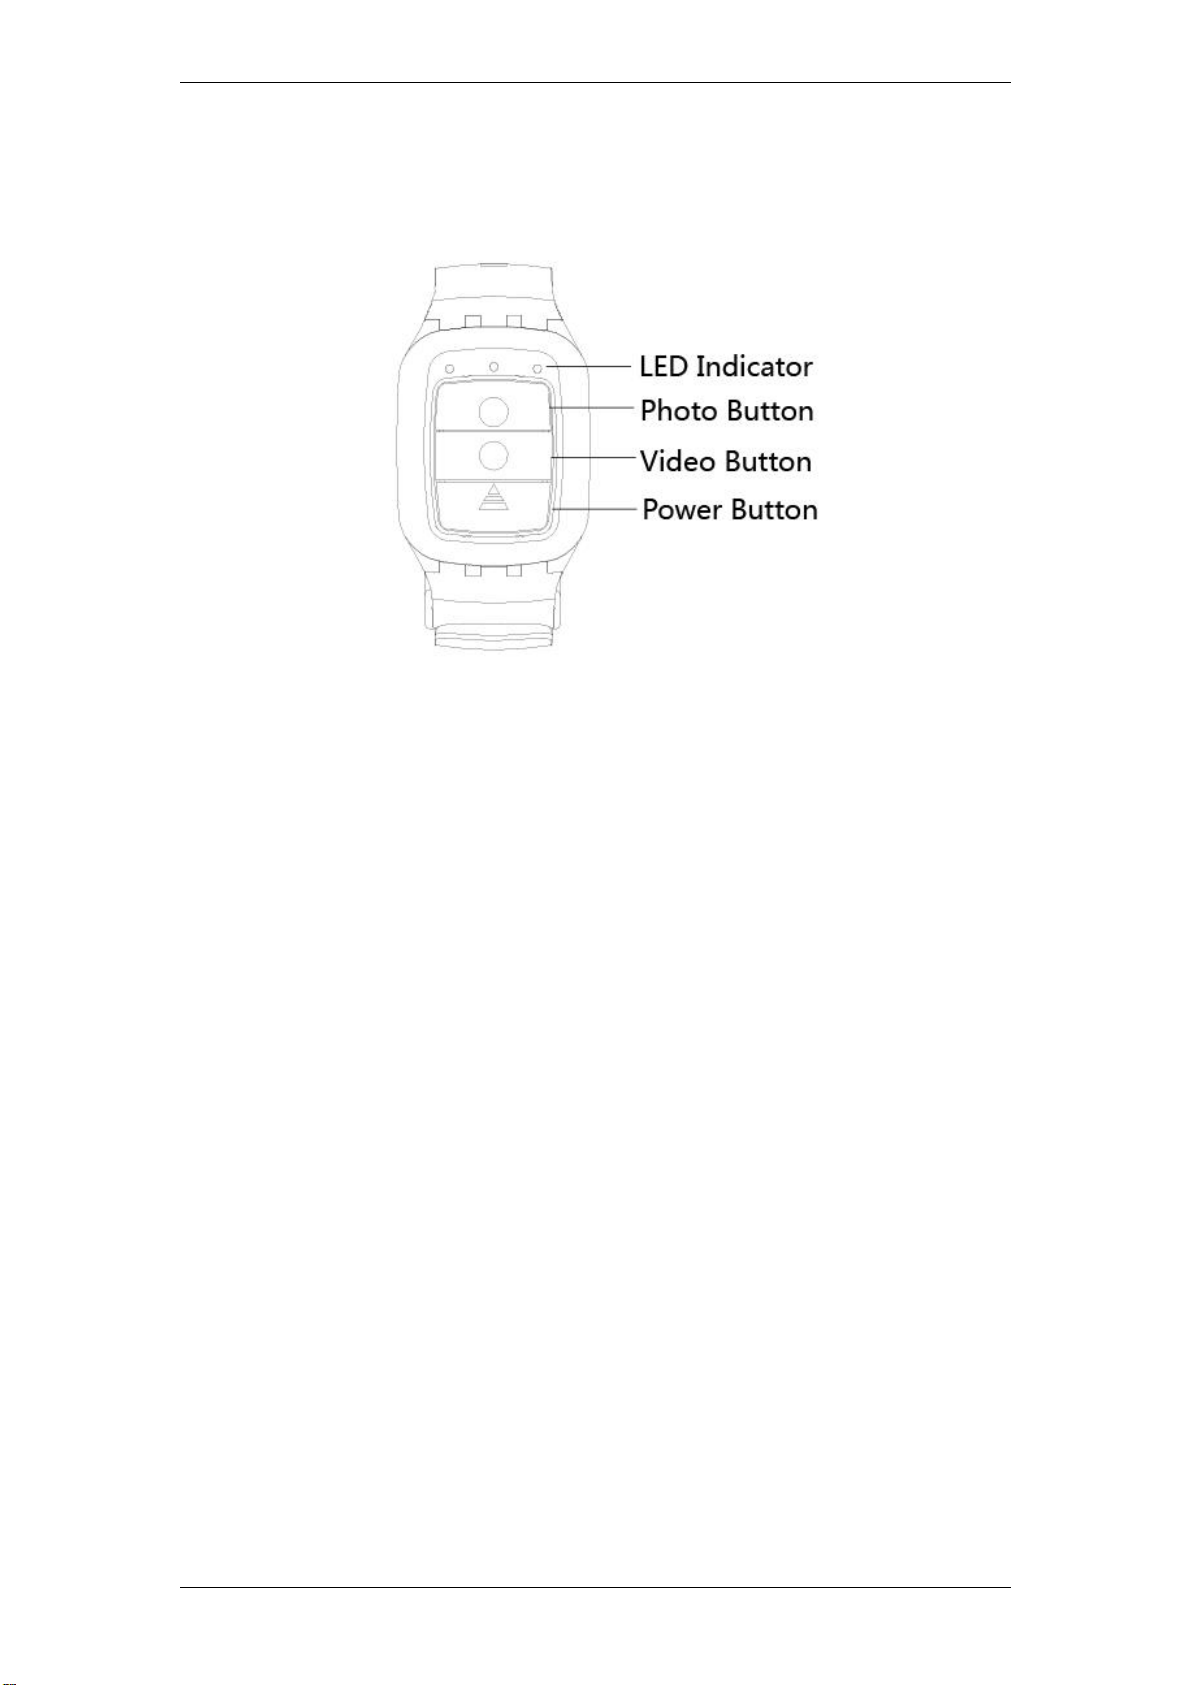
LED Indicator Function:
Left LED: When WiFi connected, light flash with blue;
Middle LED: When coding finished, light turns blue;
When battery charging, light turns red;
During charging while camera is on,light turns purple;
Right LED: Light flashes with green when recording;
Light flash once with green for each capture.
Photo Button: Press once to take a single picture.
Video Button: Press once to start recording a video,press again to stop.
Power Button: Press and hold for 4 seconds to turn off the camera.
Melife Technology Co., Ltd
Page 21

- 21 -
Coding your camera and remote control
1.Make sure your camera and remote control are full of power.
2. Press and hold the "Photo" & "Video"buttons of the remote at the same time,
and turn camera on.
3. When the camera enters into the real live interface,release the "Picture" &
"Video" buttons of remote.
4. When the middle indicator lights up blue, the coding is finished.
Note:
You only need to coding once, afterwards the camera will recognize
automatically.
WiFi function & remote controller can not be used simultaneously.
5.5 PC Camera (Web cam)
The camera can be used as a PC camera (web cam)
a. Connect camera and PC via a USB cable provided.
b. The camera will turn on automatically, and shows two options, “ Mass
Storage” & “ PC Camera”, then choose PC Camera.
Use the WiFi button to navigate, use SHOOT button to confirm.
Melife Technology Co., Ltd
Page 22

- 22 -
6. APP Download
6.1 Android Users
Android users can download Apps by searching “T96 DV” in Google Play
Store.
6.2 Apple Users
Apple users can download Apps by searching “T96 DV” in Apple App Store.
7. Data Transfer
7.1 Connect with TV
You can playback captured videos and pictures on TV via a Micro HDMI cable.
a. Connect the camera to TV via a Micro HDMI cable.
b. Power the camera on.
c. The displayed images on the TV are all the same with the camera screen.
You can operate same as the camera also.
d. Press and hold “POWER” button for 2 seconds to turn off the camera.
7.2 Transfer files to PC
You can transfer captured videos and pictures to PC.
a. Connect your camera and PC via a USB cable (Provided).
b. The camera will turn on automatically, and shows two options, “ Mass
Storage” & “ PC Camera”, then choose “Mass Storage”.
c. Select the files you want to transfer to your computer.
Use the “WiFi” button to navigate, use “SHOOT” button to confirm.
Melife Technology Co., Ltd
Page 23

- 23 -
7.3 Reset the Camera
No any extra “Reset” button of this camera.
When the camera does not work properly or is jammed, you might pull out of
the battery, so that you can restart the camera for properly shooting.
Cautions
Do not drop the camera.
Do not place heavy objects on the camera.
Keep the camera away from water and liquids (unless used in the waterproof
case). This may cause the camera to malfunction.
Recharge the battery via the USB cable.
The camera should not be in heat over 55℃.
Do not use the camera when it is low power.
Do not use the camera while it is in charging.
Do not attempt to open the case of the camera or modify it in any way. If the
camera has been opened, the warranty will be void. Maintenance and repairs
can only be performed by Melife.
Melife Technology Co., Ltd
 Loading...