

Page 1
File: rt03.doc - 1 - Rev. 1, May 4, 2005
Meitav-tec Ltd (Contel group)
Tel: +972 (3) 962 6462 Fax: +972 (3) 962 6620
www.meitavtec.com - [email protected]
RT03 - Hand Held Remote Control
Operating manual
Please read this manual carefully before use.
Index
General 1
On/Off 2
Fan Speeds 3
Modes 4
Temperature Set-Points 5
Real Time Clock and Day 6
Timer 7
Batteries Replacement 8
1. General
This is an Infra red Remote Control Unit, which means it must be pointed at the
thermostat (or extra receiver) to operate.
Every time you change a parameter in the Remote Control, you must send it to
the thermostat by pressing the "ON/SEND".
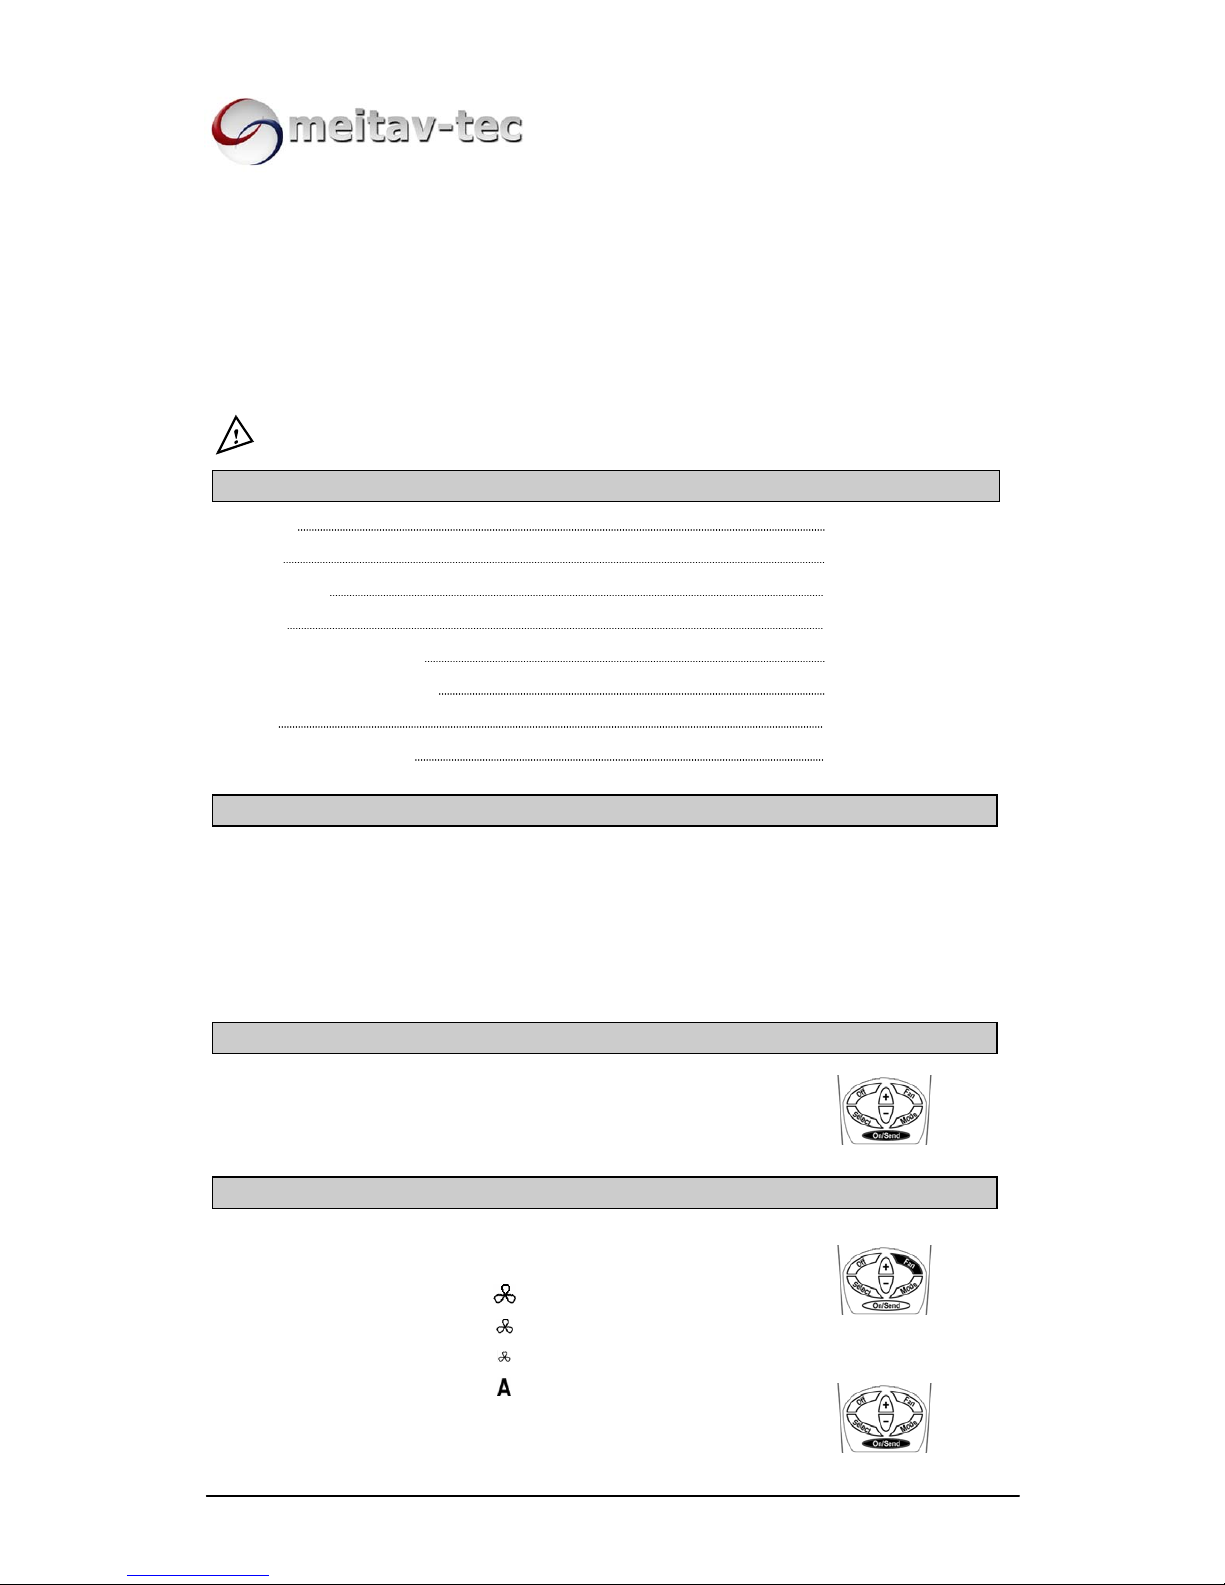
2. On/Off
• Press the ON/SEND button to activate the air conditioner / fan
coil unit and/or updating information.
3. Fan Speeds
• Press the FAN button to switch between fan speeds:
High Speed
Medium Speed
Low Speed
Auto Speed
• Press the ON/SEND button to send information to thermostat.
Page 2
File: rt03.doc - 2 - Rev. 1, May 4, 2005
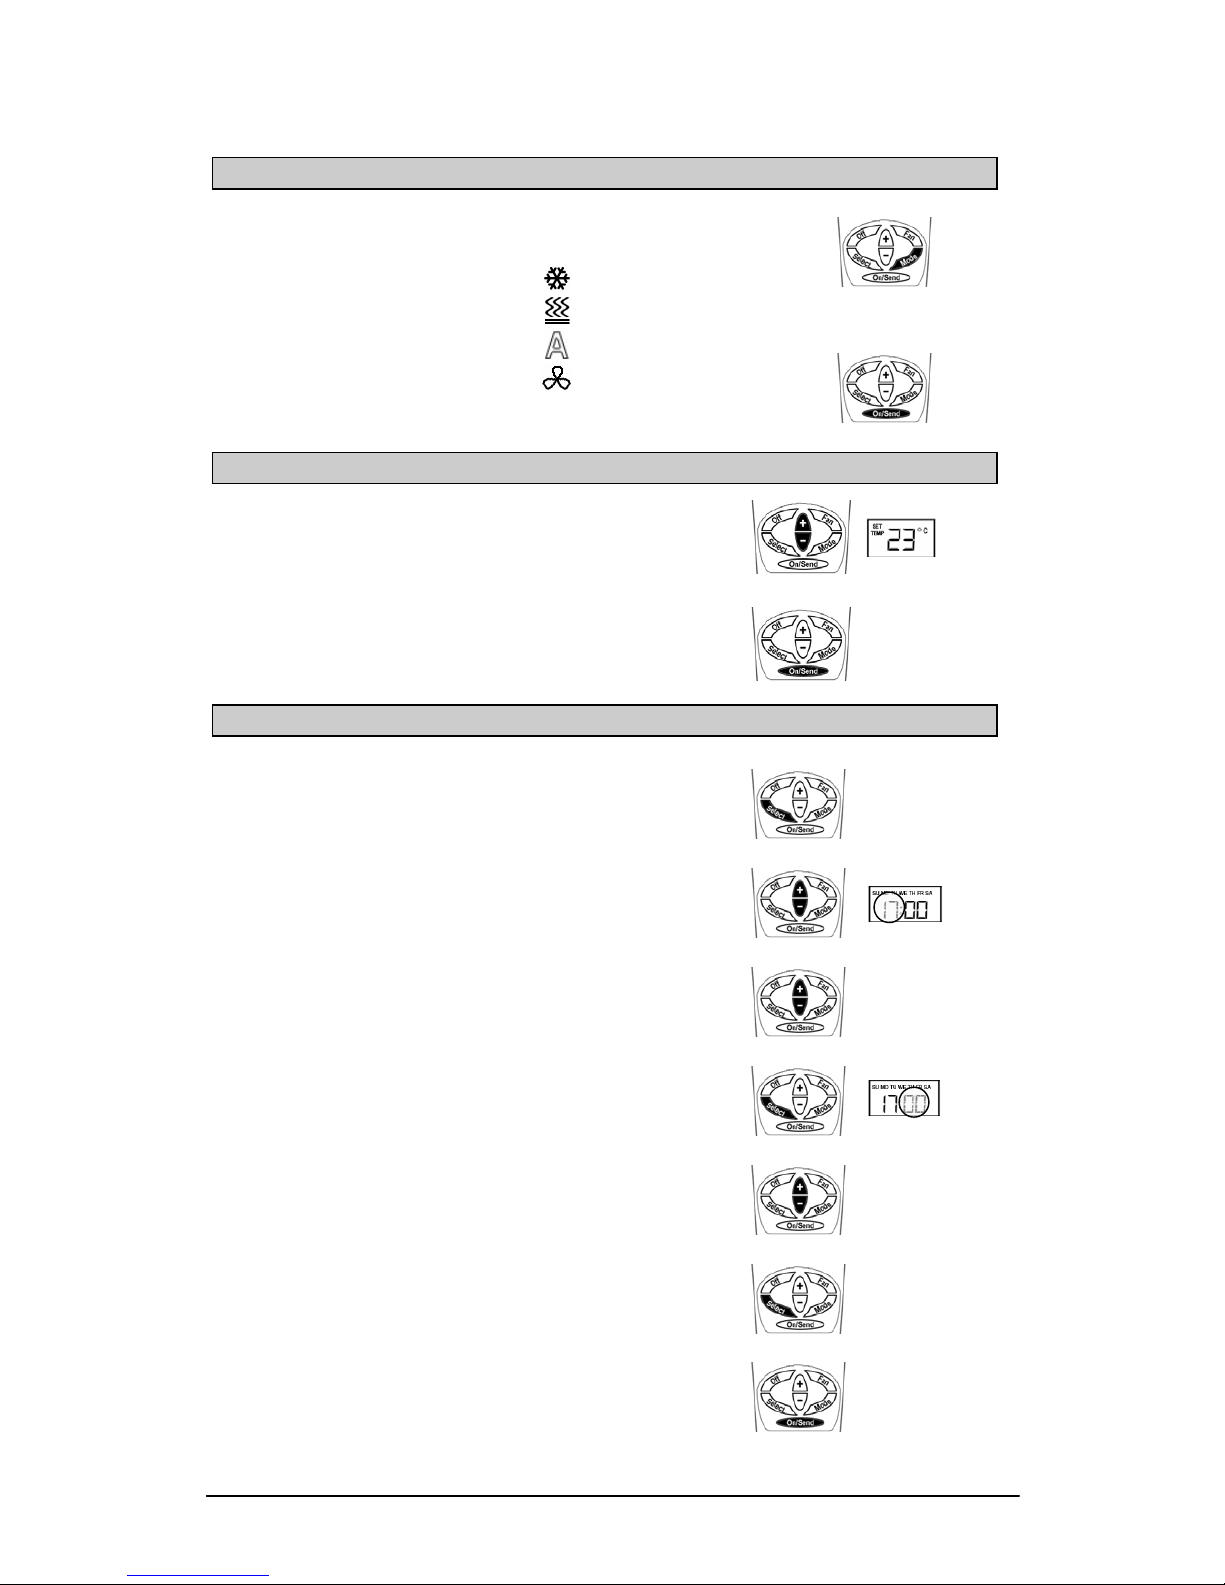
4. Modes
• Press the MODE button to switch between:
Cool
Heat
Auto change-over
Fan only
• Press the ON/SEND button to send information to thermostat.
5. Temperature Set-Point
• Adjust the desired temperature using the (+) or (-) buttons.
• Press ON/SEND button to send information to thermostat.
6. Real Time Clock and Day
• Press the SELECT button - CLOCK SET will flash.
• Press the (+) or (-) buttons - the hours will flash.
• Adjust the hours using the (+) or (-) buttons.
• Press the SELECT again - minutes will flash.
• Adjust the minutes using the (+) or (-) buttons.
• Press the SELECT again to return to normal display
mode.
• Press the ON/SEND button to send information to the
thermostat.
Page 3
File: rt03.doc - 3 - Rev. 1, May 4, 2005
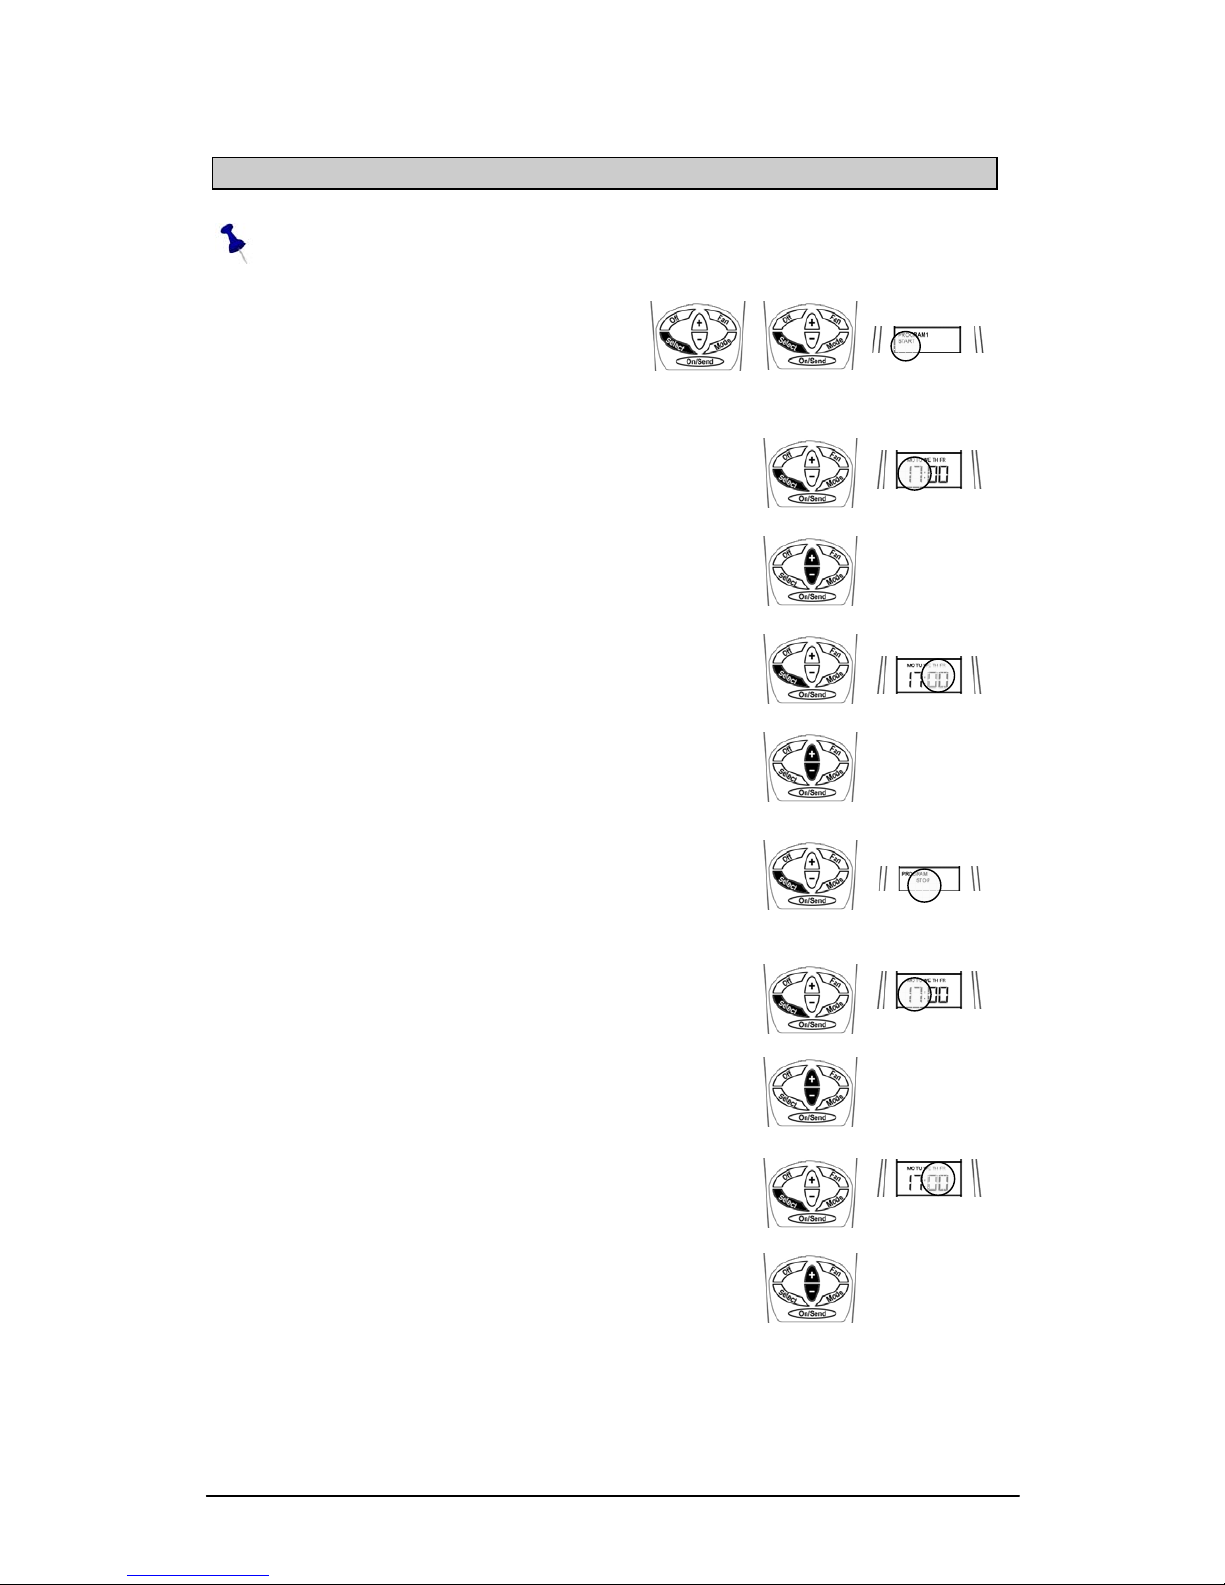
7. Timer
IMPORTANT: If no button is pressed for 10 seconds the display will return
to normal display mode.
Start Time:
• Press the SELECT button twice -
PROGRAM & START (flashing)
will appear on display.
• Press the SELECT button - the hours will flash.
• Adjust the hours using the (+) or (-) buttons.
• Press the SELECT button - the minutes will flash.
• Adjust the minutes using the (+) or (-) buttons.
Stop Time:
• Press the SELECT button - PROGRAM & STOP
(flashing) will appear on display.
• Press the SELECT button - the hours will flash.
• Adjust the hours using the (+) or (-) buttons.
• Press the SELECT button - the minutes will flash.
• Adjust the minutes using the (+) or (-) buttons.
Page 4
File: rt03.doc - 4 - Rev. 1, May 4, 2005
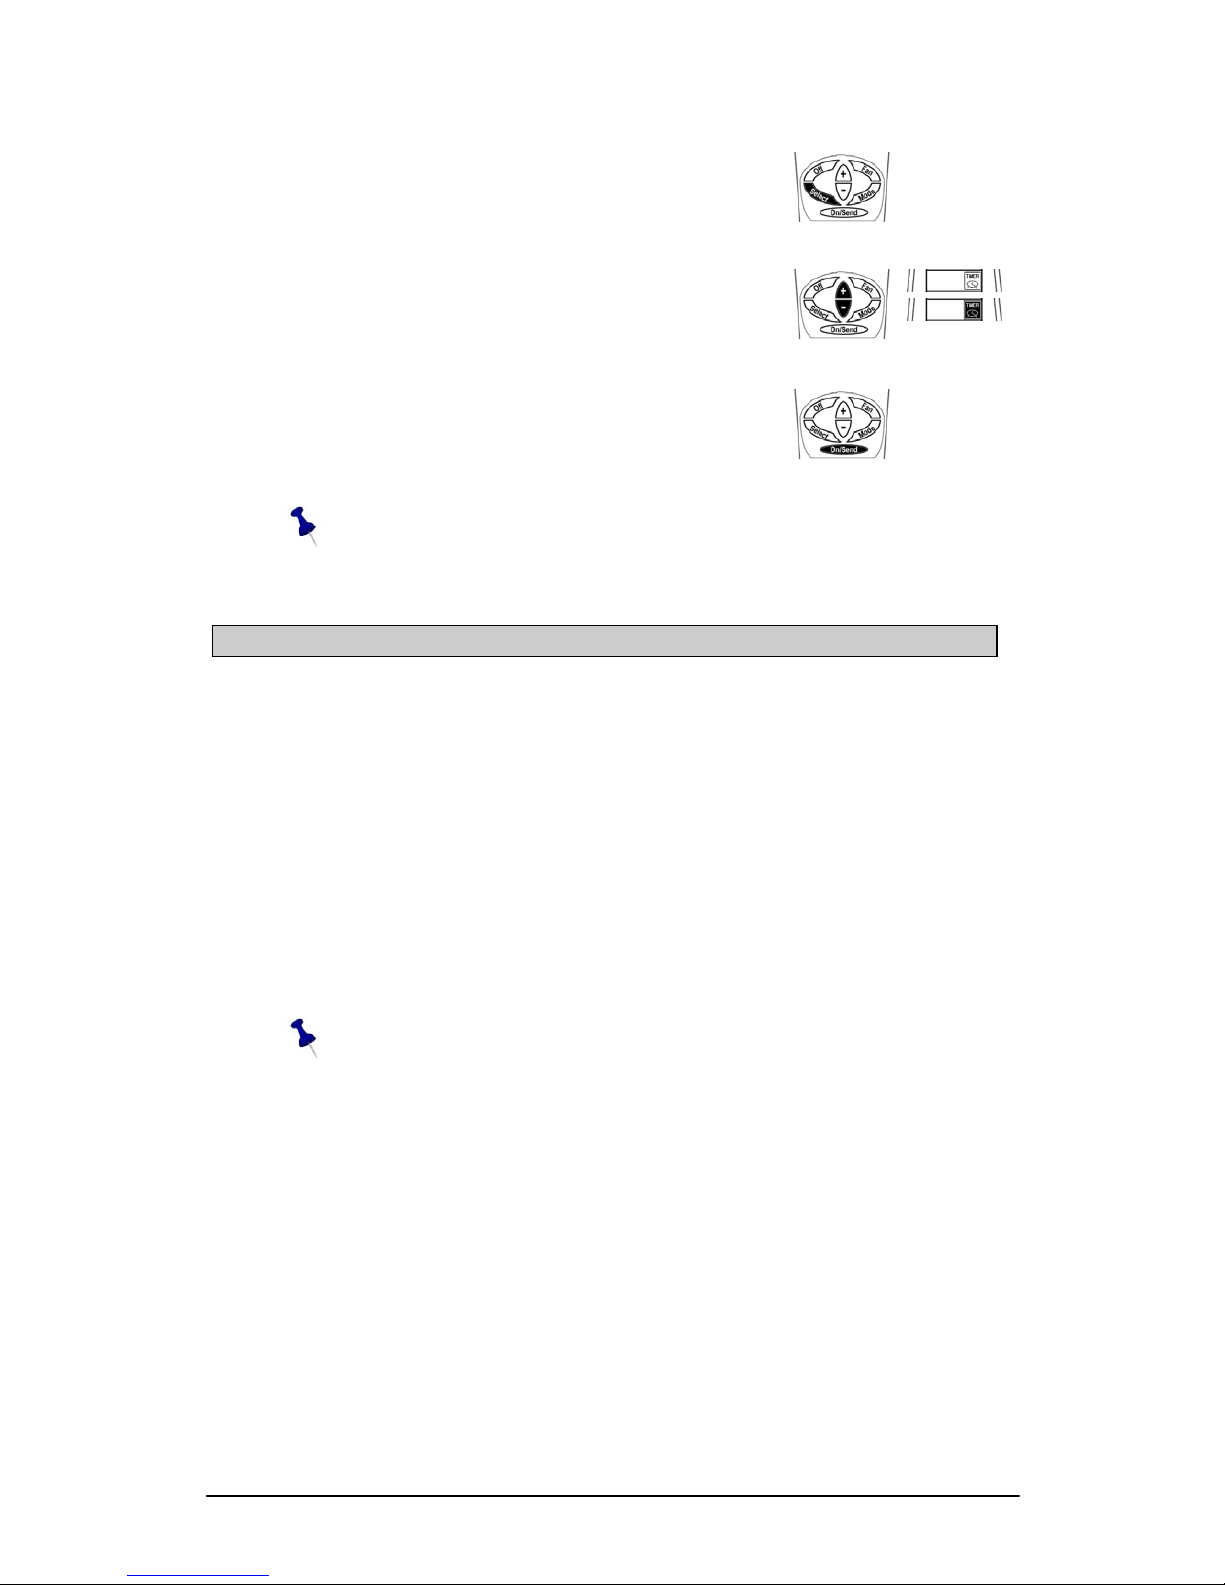
• Press the SELECT button - the TIMER will blink
• Select TIMER ON (black icon) or OFF
(white icon) using the (+) or (-) buttons.
• Press the ON/SEND button to send the
information to the thermostat.
Important: when the Timer is active, and there is power failure to the thermostat,
the display will show “ON” flashing.
8. Batteries Replacement
When the batteries are low, the display of the remote control will dim.
If the batteries will not be replaced the display will turn off completely.
Batteries replacement:
Pull the batteries cover down to reveal the batteries.
Remove the old batteries.
Wait for 10 minutes before installing the new batteries.
Install two new AAA batteries – Pay attention to the polarity.
Return the batteries cover to place.
Important: The remote control will not operate unless at least 10 min utes pass
between removing the old batteries and installing the new ones.
 Loading...