

Page 1
über den Windows Update-Service. Für Windows 7 müssen Sie den Geräte-Manager öffnen und
mit einem Rechts-Klick auf das „PocketScope II“ DS60M10 das Treiber-Update auswählen.
2. Laden Sie den aktuellen Treiber von:
http://www.meilhaus.org/downloadserver/easyusb.htm
Entpacken Sie die Dateien auf Ihre Festplatte.
Schließen Sie das „PocketScope II“ DS60M10 mit dem mitgelieferten USB-Kabel an Ihren PC an.
Wenn das Wizzard-Fenster „Neue Hardware gefunden“ erscheint, wählen Sie die Option der
Treiber-Installation von einem Ordner und wählen Sie den Ordner, in den Sie die Dateien zuvor
entpackt haben.
Windows Applikations Installation
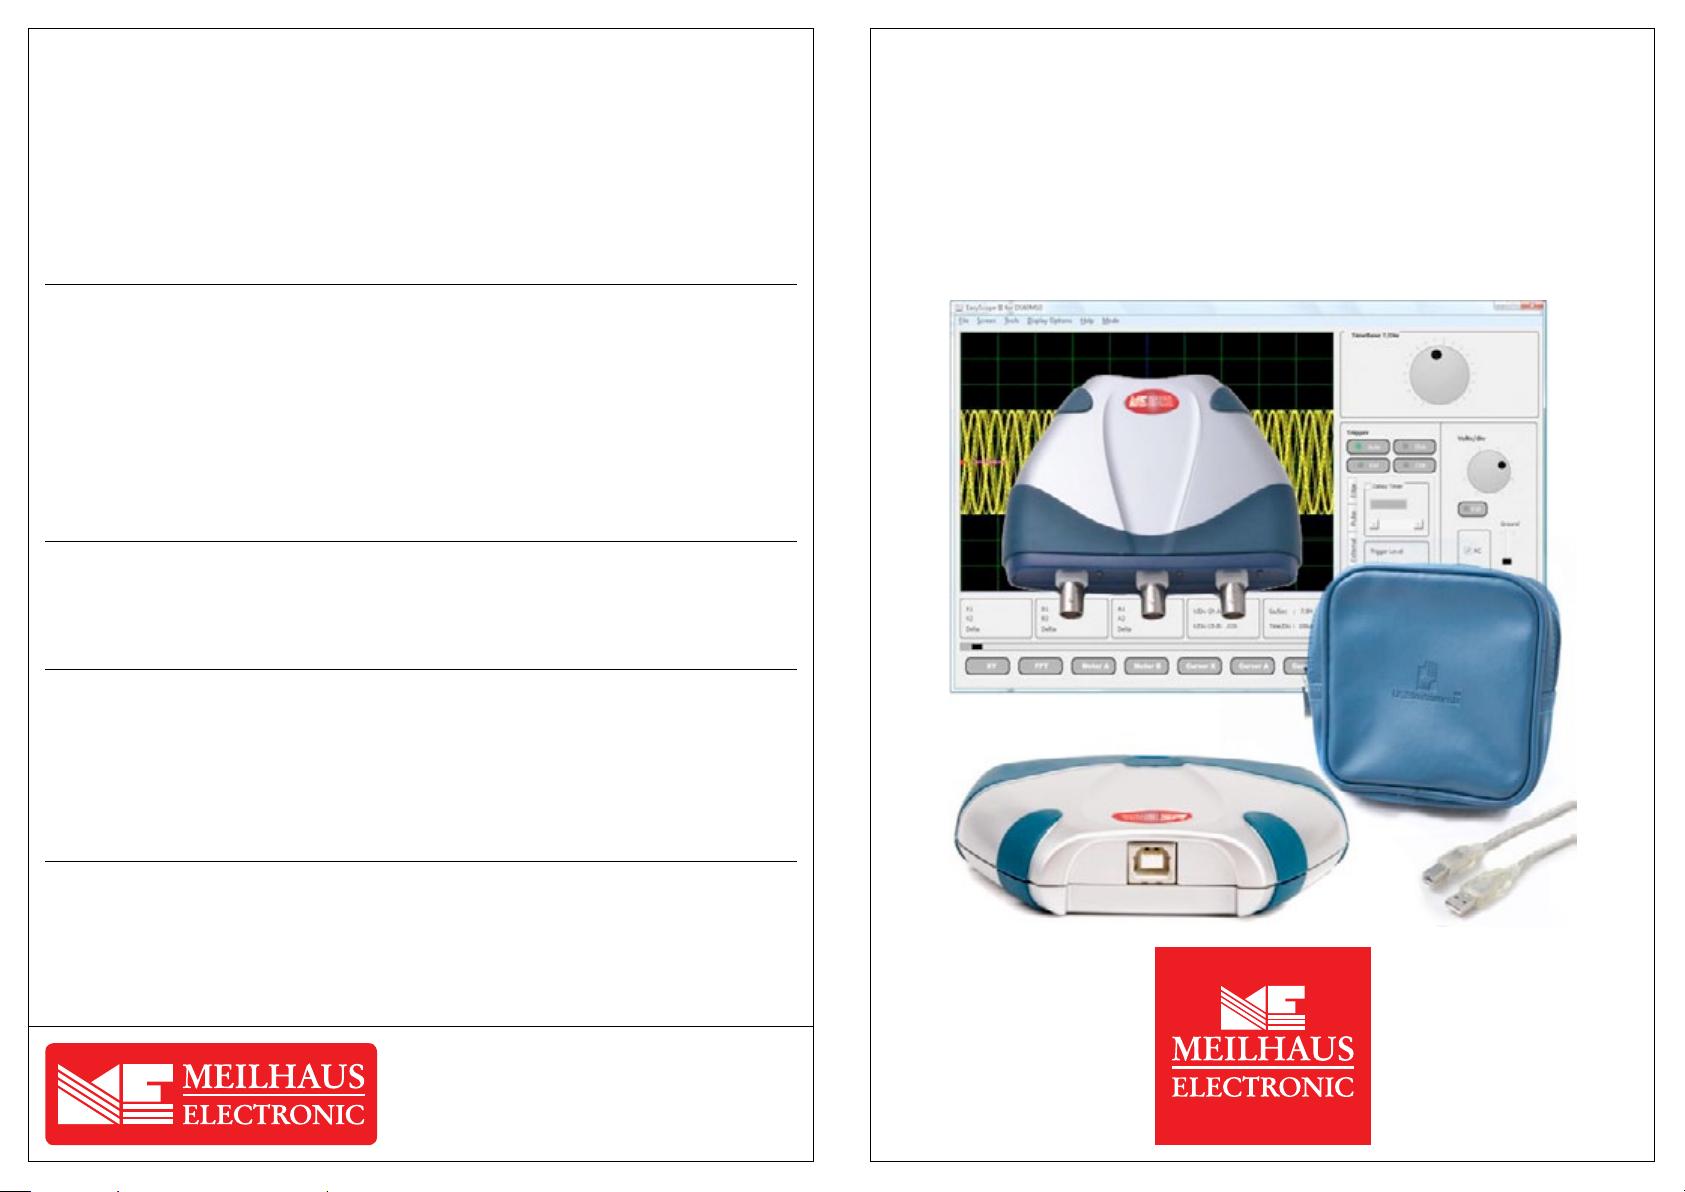
Das „PocketScope II“ DS60M10 arbeitet mit der EasyScope III Software, die sowohl die Oszilloskop- als auch die Datenlogger-Funktion unterstützt.
EasyScope III kann heruntergeladen werden von:
http://www.meilhaus.org/downloadserver/easyusb.htm
Entpacken Sie die Dateien in ein Verzeichnis Ihrer Wahl auf Ihrer Festplatte.
Starten Sie die Installation durch Doppelklick auf die Datei EasyScopeIIIsetup.exe und befolgen Sie
die Installationsanweisungen am Bildschirm.
Die EasyScope III Applikation kann dann vom START-Menü ›› Alle Programme ausgewählt und
gestartet werden. Es wird zudem eine Verknüpfung/Shortcut auf dem Desktop erzeugt.
Alle Funktionen des Instruments sind in EasyScope III zugänglich.
Installation des MAC OS X Treibers und Applikation
Konsultieren Sie das „PocketScope II“ DS60M10 User’s Manual für eine Installations-Anleitung
des MAC OS X Treibers und der EasyScope III Applikationssoftware. Das User’s Manual kann
heruntergeladen werden unter:
http://www.meilhaus.org/downloadserver/easyusb.htm
Multifunktions-Instrument
„PocketScope II“ DS60M10
Gebrauchsanleitung, Installation, Inbetriebnahme
ACHTUNG: Messung hoher Spannungen
Das „PocketScope II“ DS60M10 ist für maximale Eingangswerte bis ±50 VDC (35 V
spezifiziert; dies gilt auch mit einem x10 Tastkopf. Das direkte Messen höherer Spannungen kann das Gerät beschädigen und führt zum Erlöschen der Gewährleistung. Das Gerät
ist nicht galvanisch isoliert. Die Masse der internen Schaltungen des Gerätes sind über
USB direkt mit der Masse des Host-PC verbunden. Zur Messung hoher Spannungen wie
z. B. Netzspannung verwenden Sie bitte einen differentiellen Hochspannungs-Tastkopf zu
Ihrem eigenen Schutz und dem Schutz Ihrer Geräte.
Fehlersuche
Sollte es zu einer elektrostatischen Entladung (ESD) über die Masseleitung des Oszilloskopes
kommen, kann das „PocketScope II“ DS60M10 eventuell sperren und erfordert dann einen
Neustart des Host-PC. In der Praxis wird dies selten vorkommen und sollte den reibungslosen
Betrieb des Gerätes nicht beeinträchtigen. Sollten Sie dennoch Probleme mit dem Gerät haben,
kontaktieren Sie bitte unser Support-Team unter:
support@meilhaus.com
Meilhaus Electronic GmbH
Am Sonnenlicht 2
82239 Alling
ü www.meilhaus.com
www.MEsstechnik24.de
^ sales@meilhaus.com
support@meilhaus.com
& ++49 - (0)8141 - 5271-0
eff
AC)
1.0D, 12/2013
Page 2
Wichtige Sicherheits-Informationen,
!
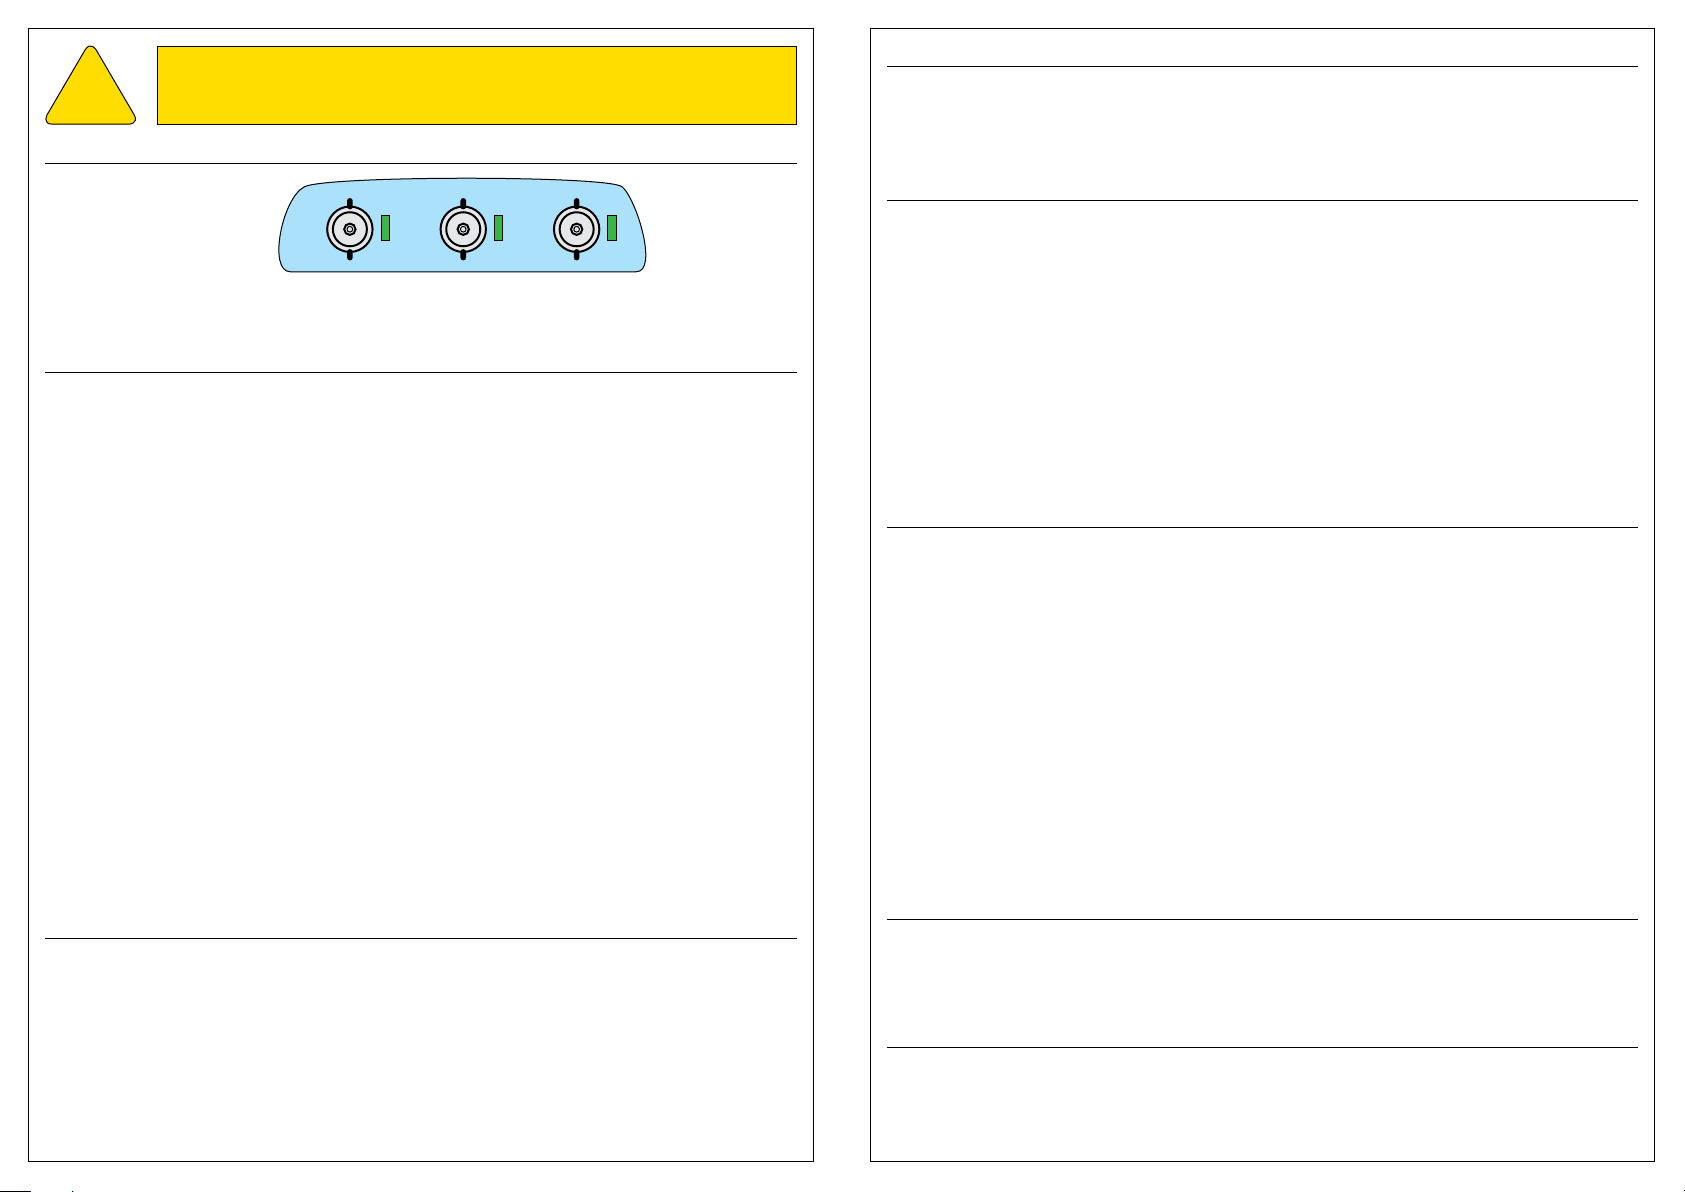
„PocketScope II“ DS60M10 Front-Panel-Anschlüsse
Bevor Sie das „PocketScope II“ DS60M10 anschließen, beachten Sie bitte folgendes:
1. Das „PocketScope II“ DS60M10 bietet KEINE galvanische (optische) Isolation zwischen sich
selbst und dem Host-PC. Die Masse (GND) jedes BNC-Anschlusses (außen) ist mit der Masse
des Host-PCs über die GND-Leitung und die Schirmung des USB-Kabels verbunden.
Die Leitungen handelsüblicher Scope-Tastköpfe haben eine direkte Verbindung zwischen dem
Tastkopf GND-Clip und BNC-GND und sind somit effektiv über den Host-PC geerdet. Dies kann
auch für Laptop/Notebooks gelten, bei denen ein anderer I/O-Anschluss mit anderen Geräten
verbunden ist, die geerdet sind (zum Beispiel die USB-Verbindung zu einem Drucker).
In diesem Fall kann der Anschluss der GND-Leitung des Tastkopfes an eine Spannungsquelle
bewirken, dass Überlaststrom über die GND-Schaltung des „PocketScope II“ DS60M10 und den
Host-PC fließt, wodurch die interne Schutzsicherung des „PocketScope II“ DS60M10 durchbrennen oder im schlimmsten Fall der Host-PC oder der Prüfling beschädigt werden kann. Um dies
zu verhindern achten Sie bitte darauf, dass der GND-Clip eines angeschlossenen Tastkopfes nur mit Signalen verbunden wird, die potentialfrei (floating) sind oder GND-Potential
haben. Im Zweifelsfall prüfen Sie bitte mit einem Voltmeter/Multimeter, ob eine Spannungsdiffe-
renz zwischen GND des Scopes und GND der zu testenden Schaltung besteht, bevor Sie irgend
eine Verbindung zwischen Scope und Prüfling herstellen.
2. Bitte beachten Sie die maximale Eingangsspannung an den Eingängen des „PocketScope II“
DS60M10:
Kanal A, Kanal B ±50 VDC (35 VAC
Out/Ext Trig In ±5 V
3. Schließen Sie keine externen Signale an den Anschluss Trigger-Eingang/Kompensations-Ausgang
an, wenn der Trigger-Eingang nicht aktiv ist (d. h. schließen Sie kein externes Signal an, wenn die
grüne LED neben dem „Trigger In“/„Compensation Out“ Anschluss aus ist).
Einführung
Vielen Dank für den Kauf des „PocketScope II“ DS60M10 Multifunktions-Instruments.
Diese Gebrauchsanleitung enthält die Spezifikationen des Gerätes und beschreibt die
Installation der „PocketScope II“ DS60M10 Treiber- und Applikations-Software.
Das „PocketScope II“ DS60M10 kombiniert die Funktionalität eines Oszilloskopes, Daten-
loggers, Spektrum-Analysators, Voltmeters und Frequenzmeters in einem einzigen
Instrument.
Die EasyScope III Software (Oszilloskop und Datenlogging) für Windows und MAC OS X kann hier
kostenfrei heruntergeladen werden:
http://www.meilhaus.org/downloadserver/easyusb.htm
bitte unbedingt zuerst lesen!
CHA/Eingang
Kanal A
CHB/Eingang
)
eff
Kanal B
Trigger-Eingang/
Kompen sations-Ausgang
Lieferumfang
Bitte prüfen Sie Ihre Lieferung auf Vollständigkeit: • 1x „PocketScope II“ DS60M10 Modul.
• 1x Tasche.
• 1x USB-Kabel.
• Diese Kurzanleitung.
Eigenschaften/Spezifikationen
• Kombi-Gerät aus Oszilloskop, Daten logger, Spektrum-Analysator, Frequenzmeter, Voltmeter.
• 10/8 bit Datastreaming simultan auf beiden Kanälen.
• Sampling Rate: Oszilloskop: 60 MSamples/s max. auf beiden Kanälen, simultan.
Datenlogger: Bis zu 1 KSamples/s.
• Max. Eingangsspannung ±50 VDC (35 VAC
• AC/DC-Kopplung.
• Flanken-, Min.-/Max.-, Pulsbreiten- und Delay-Trigger-Betriebsarten.
• Analog-Bandbreite 5 MHz.
• Unterstützt x1 und x10 Tastköpfe.
• USB-versorgt (500 mA) - kein externes Netzteil erforderlich.
• Tasche im Lieferumfang.
• Attraktives, grif figes Gehäuse.
• Größe (mm) 116 (B) x 30 (H) x 100 (T). 0,41 kg (ohne Kabel).
).
eff
EasyScope III Software-Funktionen
Oszilloskop: • 2 Oszilloskop-Kanäle.
• Zeitbasis 100 ns/Div…200 ms/Div.
• Y-Skalierung 25 mV/Div…5 V/Div.
• X- und Y-Mess-Cursor.
• FFT Spektrum-Analysator Display für beide Kanäle.
• Anzeige für Minimum, Maximum, Mittelwert, echten Effektivwert Spannung
und Frequenz.
• Auto-Set-Funktion.
• Datensicherung als CSV- oder BMP-Datei.
• Dritte BNC-Buchse wählbar als Trigger-Eingang oder Tastkopf-Kompen-
sations-Ausgang (2,5 V Rechteck mit 1 kHz).
Datenlogger: • 2 Datenlogger-Kanäle.
• Sampling-Rate bis 1 ms (1000 S/s).
• Eingangsbereich 0,1 V…20 V.
• Datensicherung als CSV- oder BMP-Datei.
• Import von gespeicherten CSV-Dateien.
So beginnen Sie
Zum Betrieb des „PocketScope II“ DS60M10 ist die Installation des Gerätetreibers auf Ihrem PC
erforderlich. Der Treiber muss vor der EasyScope III Software installiert werden. Das „PocketScope II“ DS60M10 benötigt bis zu 500 mA vom USB-Port. Es wird empfohlen, das „PocketScope II“ DS60M10 direkt an einen USB-Port des PC anzuschließen, nicht über ein USB-Hub.
Windows Treiber Installation
Die Installation des Treibers kann auf zwei Arten erfolgen:
1. Die aktuellen „PocketScope II“ DS60M10 Geräte-Treiber sind über den Microsoft Windows Update-Service verfügbar. Schließen Sie das „PocketScope II“ DS60M10 einfach über USB an Ihren
PC an. Wenn das Wizzard-Fenster „Neue Hardware gefunden“ erscheint, erlauben Sie die Suche
Page 3

For Windows 7, the user will need to open Device Manager, right-click on the “PocketScope II“
DS60M10 and select update drivers.
2. Download the latest device drivers available:
http://www.meilhaus.org/downloadserver/easyusb.htm
Extract the files to a convenient location on your local drive.
Connect the supplied USB cable to the “PocketScope II“ DS60M10 and the other end of the
cable to a spare USB port on the PC.
The Windows “Found New Hardware Wizard” will appear. Select the choice to install the drivers
from a specific location and then browse to the folder created in the previous step where you
unzipped the files.
Windows Application Installation
The “PocketScope II“ DS60M10 uses the EasyScope III application which includes both Oscilloscope and Data Logger functions.
EasyScope III can be downloaded from:
http://www.meilhaus.org/downloadserver/easyusb.htm
Extract the files to a convenient location on your local drive.
Start the installation by double clicking on the EasyScopeIIIsetup.exe file and follow the on-screen
prompts to install the application.
The EasyScope III application can then be accessed from the START ›› All programs list of applications. A shortcut to the application is also created on the desktop.
All instrument functions are accessed through EasyScope III.
MAC OS X Driver and Application Installation
Refer to the “PocketScope II“ DS60M10 user’s manual for instructions on how to install the
MAC OS X driver and EasyScope III application software. The User’s Manual is downloadable
from:
http://www.meilhaus.org/downloadserver/easyusb.htm
Multi-Function Instrument
“PocketScope II“ DS60M10
Quick Start Guide, Installation
CAUTION: Measuring High Voltages
The “PocketScope II“ DS60M10 is rated at ±50 V DC maximum input (35 VACRMS) even
with a x10 oscilloscope lead attached. Measuring higher voltages than this directly may
damage the instrument and invalidate the warranty. The instrument is not galvanically
isolated. The ground of the internal circuitry connects directly to the ground of the host PC
via the USB connection. To measure high voltages such as mains supplies, use a high voltage differential probe for your personal safety and to pre-vent damage to the instrument.
Troubleshooting
If a static/ESD discharge occurs down the earth lead of the oscilloscope, the unit may lock up
and require the host pc to be re-started to resume operation. In practice, this is an unusual
condition and should not affect normal operation. We anticipate you will receive many years of
satisfactory service out of your purchase, however, should you experience any problems we will
do our best to rectify them. Should you experience problems please contact support via email:
support@meilhaus.com
Meilhaus Electronic GmbH
Am Sonnenlicht 2
82239 Alling/Germany
ü www.meilhaus.com
www.MEsurement24.com
^ sales@meilhaus.com
support@meilhaus.com
& ++49 - (0)8141 - 5271-0
1.0E, 12/2013
Page 4

Important Information.
!
“PocketScope II“ DS60M10 Front Panel Connections
Please note the following points before connecting the “PocketScope II DS60M10 to
the circuit to be measured:
1. Like many PC-based instruments, the “PocketScope II“ DS60M10 does NOT provide galvanic (optical) isolation between itself and the host PC. The GND (outer) connection on each of the BNC
connectors is connected to the GND of the host PC via the USB GND wire and cable shield.
Normal scope probe leads have a direct connection between the probe GND clip and the BNC
GND connection and so are effectively earthed via the host PC. This can also apply to notebook
PCs where some other IO connector is wired to other equipment that is earthed (for example a
USB connection to a printer).
In such a situation, connecting the GND lead of the scope probe to a voltage source can cause
excess current to flow down the GND circuit of the “PocketScope II“ DS60M10 and host PC
which may blow the internal protection fuse of the “PocketScope II“ DS60M10 or in a serious
case may damage the host PC or circuit under test. To avoid this, please take care that the
GND clip of any attached scope probes are only attached to signals that are floating or at
GND potential. If in doubt, check if a voltage differential exists between the GND of the scope
and the GND of the equipment being tested using a multi-meter set to measure volts, before
making any connections between the scope and the equipment.
2. Please observe that the maximum input voltages to the “PocketScope II“ DS60M10 inputs are
as follows:
Ch A, Ch B ±50 VDC (35 VAC
Out/Ext Trig In ±5 V
3. Do not connect any external signal to the “trigger in“/“compensation out“ connector when the
Trigger input is not active (i. e. do not connect an external signal when the green LED next to the
“trigger in“/“compensation out“ connector is off).
Getting Started Guide
Congratulations on your purchase of the “PocketScope II“ DS60M10 multi-function instrument.
This guide contains the specifications and installation procedure for the “PocketScope II“
DS60M10 drivers and application software.
The “PocketScope II“ DS60M10 combines the functions of oscilloscope, data logger, spectrum
analyzer, volt meter, and frequency meter into a single instrument.
“PocketScope II“ DS60M10 EasyScope III (oscilloscope and data logging) software for Windows
and MAC OS X can be downloaded royalty-free from:
http://www.meilhaus.org/downloadserver/easyusb.htm
Please read before use!
CHA/input
channel A
RMS
CHB/input
channel B
)
Trigger input/
compen sation output
What’s In the Box?
Please check that the box contains the • 1x “PocketScope II“ DS60M10 instrument
following items: • 1x instrument carrying sof t case
• 1x USB cable
• This quick start guide
Hardware Features
•
Combined oscilloscope, data logger, spectrum analyzer, frequency meter, voltage meter functions.
• 10/8 bit data streaming simultaneously on both channels.
• Sampling rate: Oscilloscope: 60 MSamples/s maximum on both channels, simultaneous.
Data logger: Up to 1 KSamples/s.
• Maximum input voltage ±50 VDC (35 VAC
• AC/DC coupling.
• Edge, min/max, pulse width and delayed trigger modes.
• Analog Bandwidth - 5MHz.
• Support for x1 and x10 probes.
• Self powered USB interface (500 mA) - no external power supply required.
• Instrument carrying soft case included.
• Attractive enclosure with rubberized mouldings.
• Dimensions (mm) 116 (W) x 30 (H) 100 (D). Weight: 0.41 kg (excluding cable).
RMS
).
EasyScope III Software Features
Oscilloscope • 2 oscilloscope channels.
• Time base – 100 ns/div…200 ms/div.
• Y-scale 25 mV/div…5 V/div.
• On Screen X and Y measurement cursors.
• FFT spectrum analyzer display on both channels.
• Meter displays - min., max., mean, true RMS voltage and frequency.
• Auto-set function.
• Save captured data as CSV or BMP files.
• Third channel selectable as trigger input or probe compensation output
(2.5 V square wave at 1 kHz).
Data logger • 2 data logging channels.
• Sampling rate up to 1 ms (1000 Samples/s).
• Input saturation ranges from 0.1 V…20 V.
• Save captured data as CSV or BMP files.
• Import from previously saved CSV files.
Getting Started
The “PocketScope II“ DS60M10 requires device drivers to be installed on your PC to enable
communication with the instrument. Drivers should be installed prior to installing the EasyScope
III application. The “PocketScope II“ DS60M10 requires up to 500mA from the USB port. It is
recommended to connect the “PocketScope II“ DS60M10 directly to a USB port on the PC and
not through a USB hub.
Windows Driver Installation
Driver installation can be completed in one of two ways:
1. The latest “PocketScope II“ DS60M10 device drivers are available through the Microsoft
Windows Update service. Simply plug in the “PocketScope II“ DS60M10. When the ”Found
New Hardware“ Wizard appears, allow it to find the drivers from the Windows Update service.
 Loading...