

Meiji Techno ML9000 Instruction Manual

JAPAN
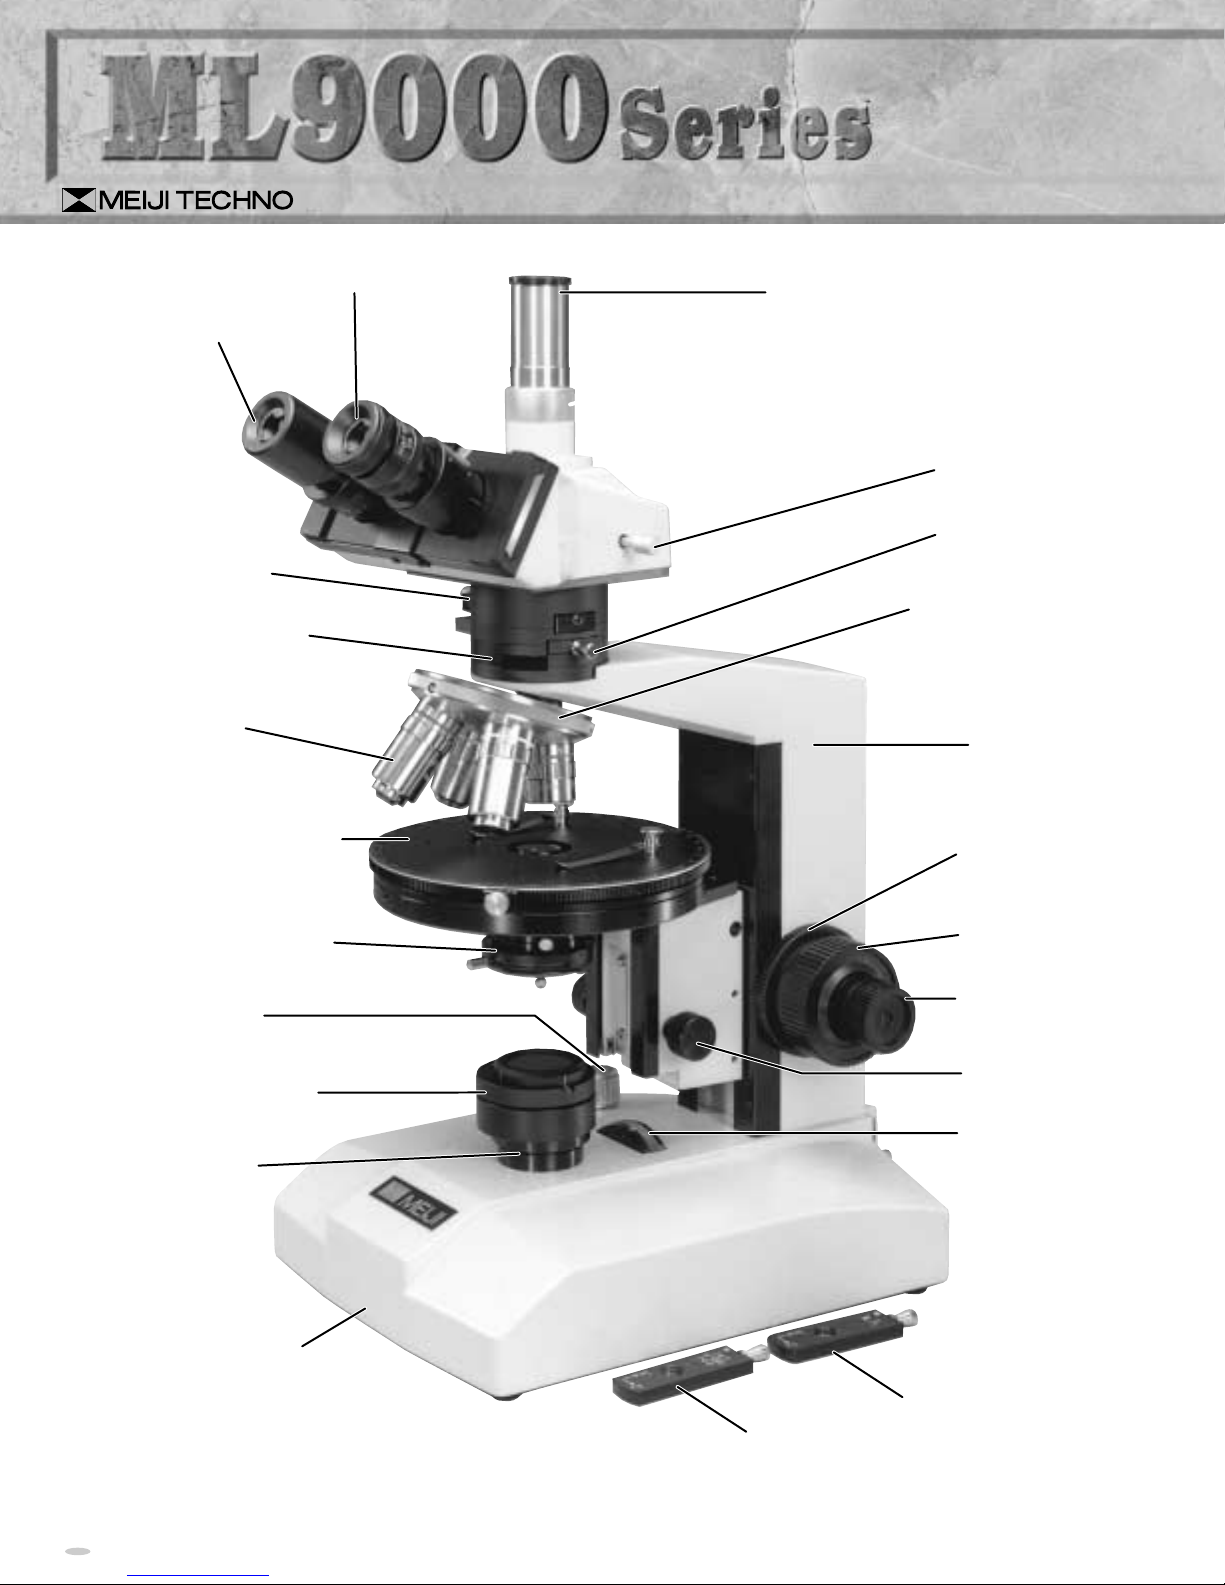
First Order Red
Compensating Plate
1/4 Wave-Length
Test Plate
Field Iris
Adjustment Ring
Substage Focus
Control
Fine Focus Knob
Coarse Focus
Knob
Tension Control
Knob
Microscope Limb
Ball-bearing
Objective Nosepiece
with Objective Mounts
Analyzer Slider
Beam-splitter Lever
MODEL 9300: Trinocular Body
MODEL 9200: Binocular Body
MODEL 9100: Monocular Body
Rotatable 360゚/30゚ Inclination
Photo Tube
Microscope Base
with Built-in
Transformer
Koehler Type
Illuminator
with 6V 30W
Halogen Lamp
Rotatable Swing-out
Polarizer
Light Intensity
Control Knob
Substage Condenser
Achromatic N.A.1.25
Rotatable Stage
with Clamp, Reading
to 1゚ Rotation
Strain Free
Objectives
Compensator Slot
Bertrand
Lens/Aperture
10X Eyepiece,
High-eyepoint,
Widefield
Focusing Cross-line
Eyepiece, 10X
MODEL ML9300
[TRINOCULAR MODEL]
1 10
UNPACKING, ASSEMBLY, PREPARATION FOR USE
UNPACKING
All MEIJI TECHNO microscopes are usually supplied in an expanded polystyrene, 2-part case and this
should be used for storage, possible transport in the future, etc. If your order includes a wooden
storage cabinet, release the fixing screws holding the limb and base from the cabinet and withdraw.
Unpack the microscope and its parts carefully. Do not throw away any boxes or packing materials until
the contents of the shipping container have been checked against your order and the packing list sent.
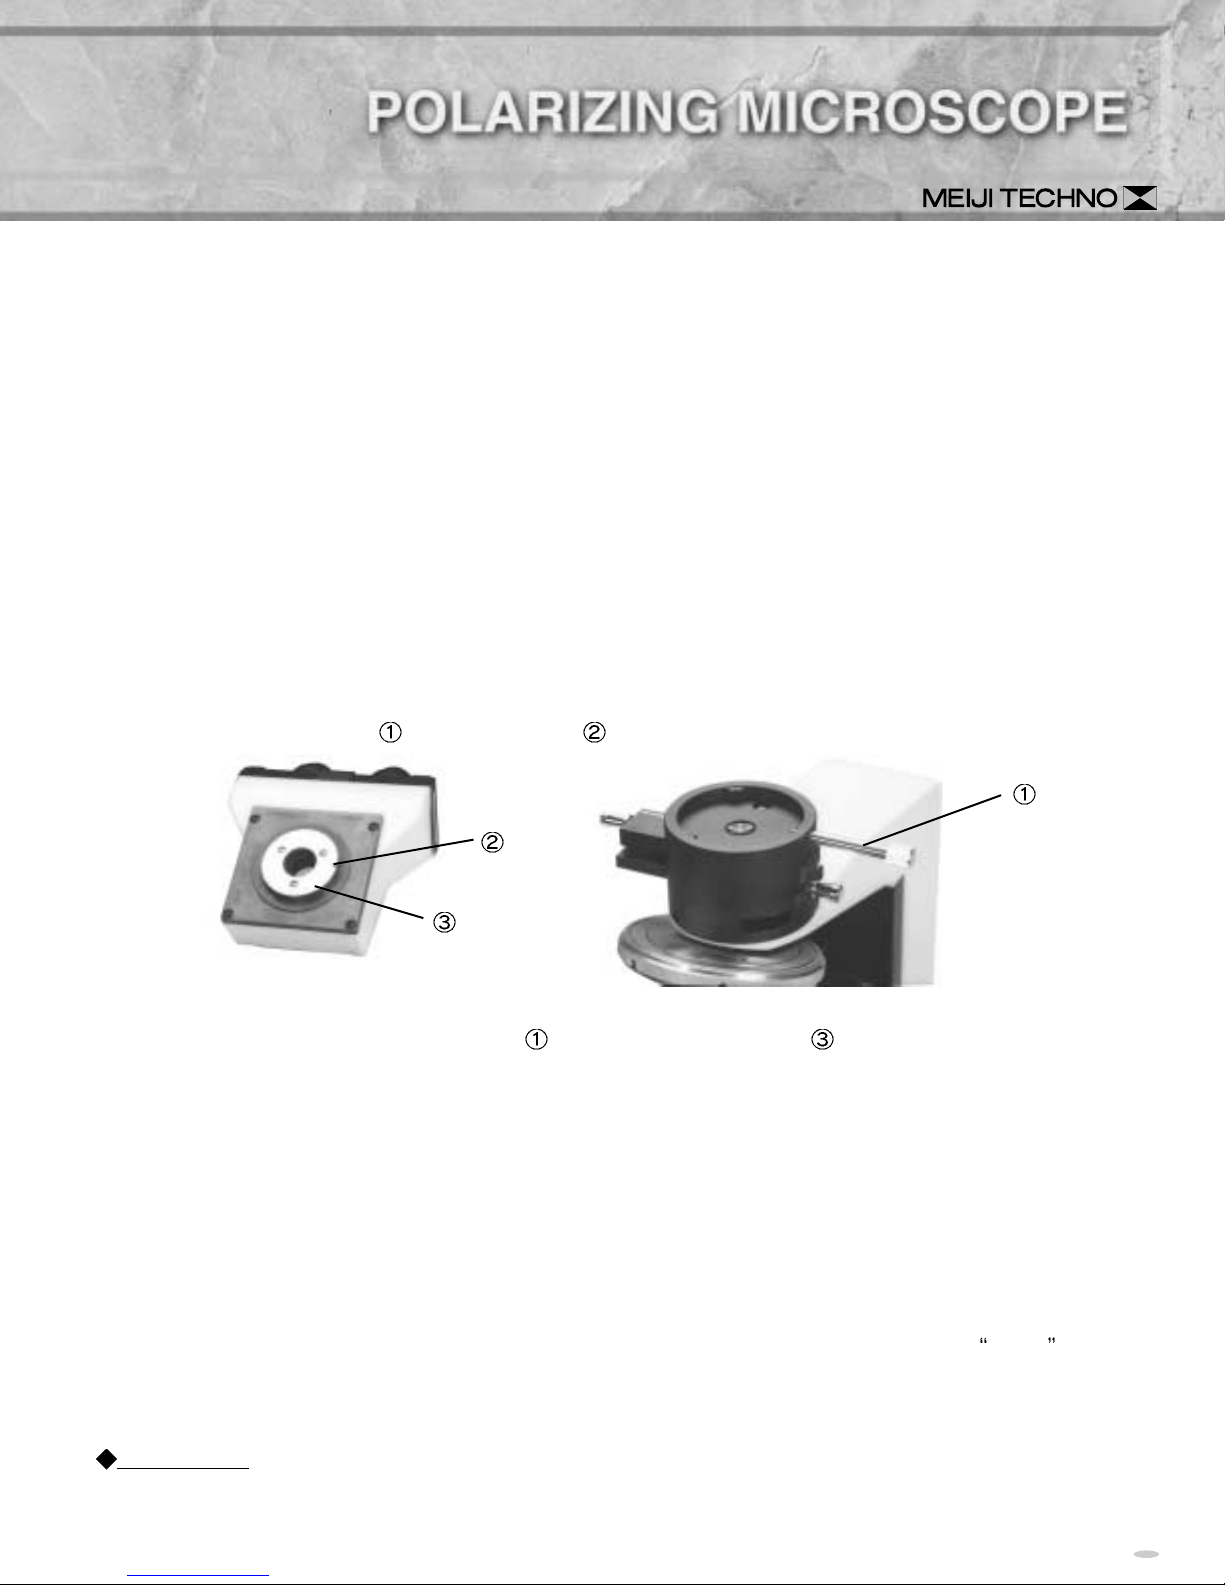
ASSEMBLY
The binocular or trinocular body which is stored separately should now be mounted on the limb and
clamped, when it is squared with the base.
It is important that the body be oriented correctly on the microscope limb. Make sure, therefore, that
the point of the Clamp screw
gets fit to the Slot milled on the bottom face of the body.
Clamp
screw
Slot
Cone fitting
[Adverse side of body]
To mount the body, loosen the Clamp screw and insert the Cone fitting of the body into the recess
in the top of the limb and clamp it by the clamp screw.
Place the microscope and parts on a sturdy table or desk which gives firm and stable support. This
should be located where the atmosphere is as clean as possible, avoiding the places where there is
excessive dust, moisture, heat or fumes.
When in place insert eyepieces in the eyetubes of the binocular body and mount the objectives on the
centering objective nosepiece, starting with the lowest magnification, but positioning the 10X in the fixed
(not centerable) opening. Then position the others to the right in order of increasing magnification.
A focusable cross-line eyepiece should be used in the slotted eyetube. Make sure that it is
into the slot in the eyetube, as its orientation is important and should not change. The cross-line should
be sharply focused by turning the focusing ring.
IMPORTANT! Before plugging the illuminator into any electric outlet, make sure that transformers
and illumination bases supplied to you are suitable to the current available. (See voltage indication at
the bottom of limb.)
Keyed

OPERATING INSTRUCTIONS
OPTICAL SET-UP AND ILLUMINATION
(1) Turn on the illuminator. Place the specimen slide you wish to examine on the microscope stage and
rotate the 10X objective into position for focus.
(2) Move the substage condenser up to its top position, using the Rack and pinion focusing control
Check to make sure that both the Field iris
Rack and pinion
focusing control
for substage
condenser
Switch and
intensity control
knob
(3) Focus down on your specimen slide until detail can be seen. Adjust the brightness of the in-base
light source, using the Intensity control knob
and the Aperture iris are fully open.
Aperture iris
control lever
Field iris control
, left-hand back on the base.
.
BINOCULAR ADJUSTMENT
COMMENT: Using a binocular body is much more efficient and less tiring than monocular bodies, but it
must be adjusted correctly. When it is perfectly adjusted the images coming from the two eyepieces are
fused into one better image in eyes of the observer.
3 8
Fused
 Loading...