

Page 1

T10
/
T11
Page 2
T10
T11
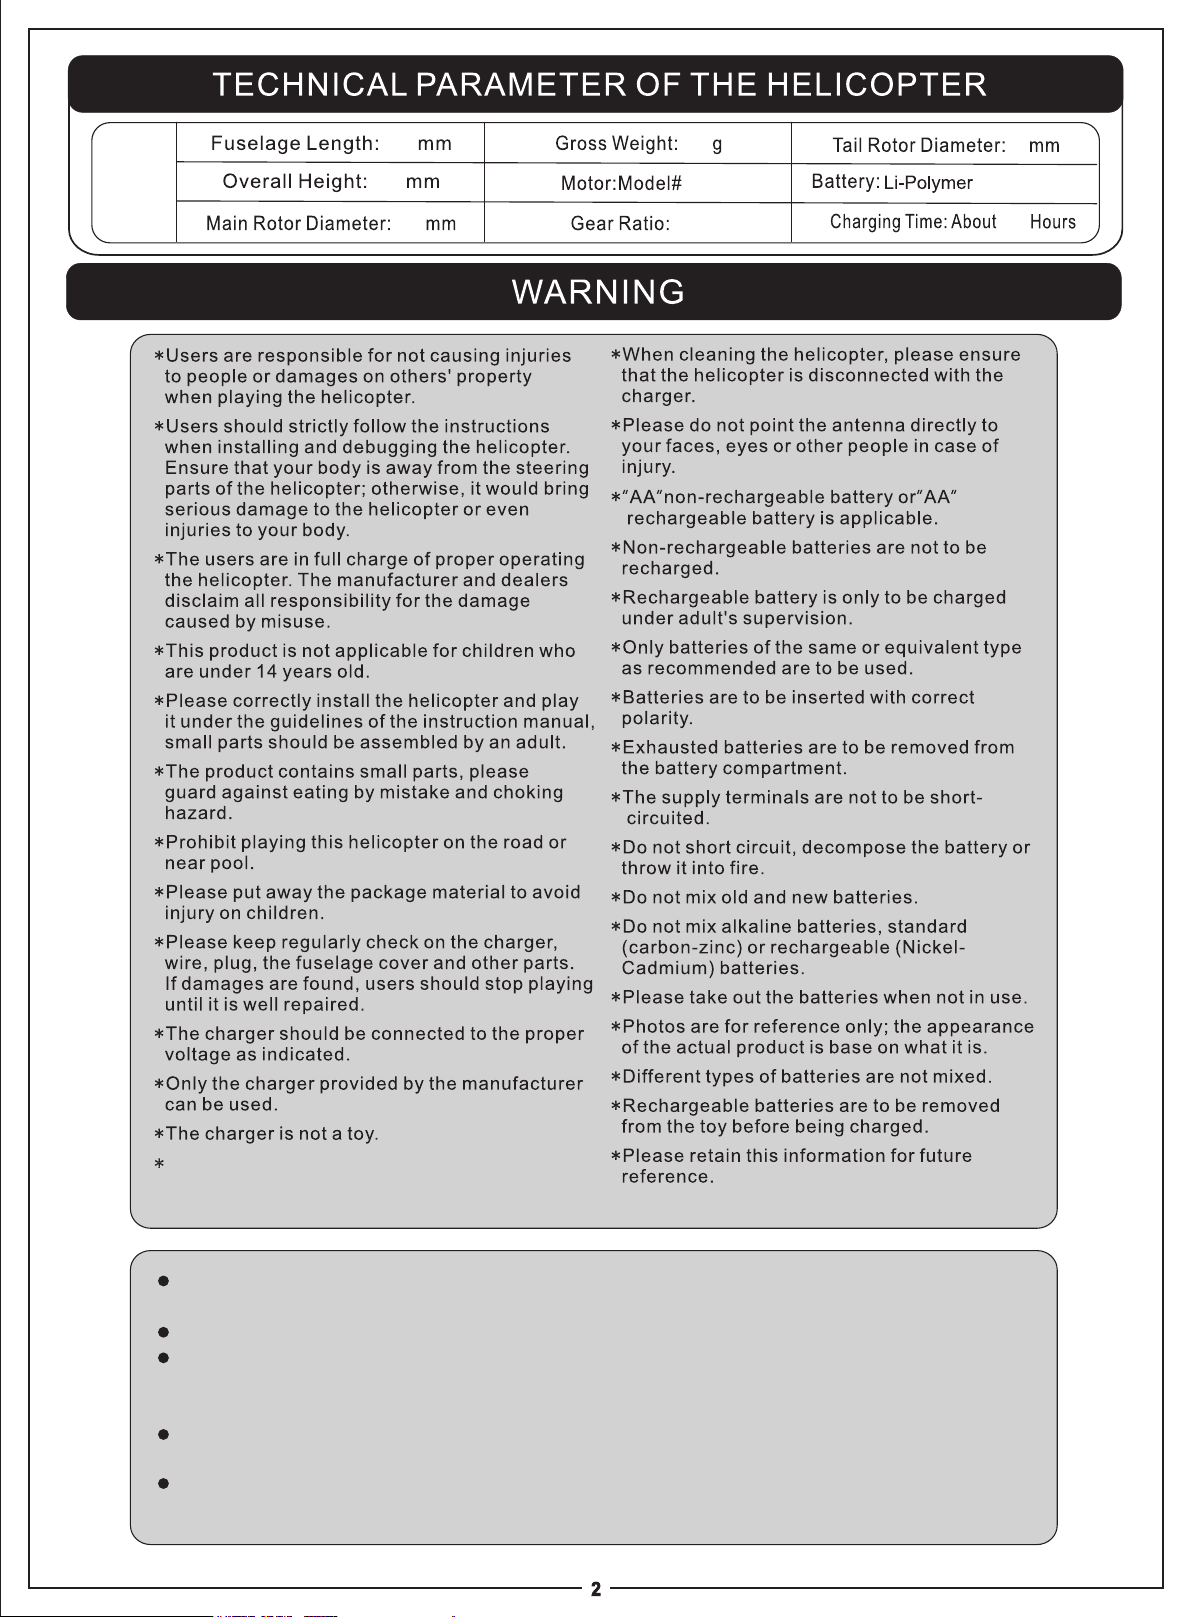
500
235
490
438
180
14:1
90
7.4V1100mAh
2.5
The wire that fixed on the landing gear is the receiver
of the helicopter, disassembling this wire may be
dangerous or causes accident.
When the controller/helicopter is underpowered, the control distance would be shortened due
to this effect.
If the helicopter is underpowered, it would result in difficulty of taking off or lower flight altitude.
If the helicopter is damaged or become deformed, please repair it intime. If it is seriously
damaged (e. g. the rotor of the helicopter is ruptured), user should stop playing; otherwise, it
may get the user injured.
If you do not play the helicopter for a long time, please take out the batteries from the controller
to avoid battery leakage which would damage the product.
Please do not have the helicopter fell from high altitude or crashed. It would make the helicopter
broken of greatly reduce the service life of the helicopter.
Page 3
Light indicator
Power socket
Battery charging plug
ONOFF
Battery connecting plug
split charging device
all-in-one charging device
To meet the different demands from different customers worldwide, two different charging devices have been designed for charging.
One is split charging device (1 piece charger +1 piece charge controller), the other one is all-in-one charging device (one charger
only)The product is included with either of the two charging devices. User should check the package to confirm which charging
device is included before reading the charging method.
Page 4

How to charge the helicopter by split charging device (Pic 3 & 4)
� Turn off the helicopter; unplug the battery cable from the helicopter.
� Insert the plug of the battery cable into the quadrate port of the charge controller (matching the plug to the port)
Insert the plug of the charger cable into the circular port of the charge controller, then, connect the plug of the charger
to AC power outlet to start charging.
Once charging is proceeding, the red power light of the charge controller is on. When charging is finished, both the red
light and green light of the charge controller are on.
Full charge takes about 3 hours.
How to charge the helicopter by all-in-one charging device (Pic 5)
� Turn off the helicopter.
� Unplug the battery cable from the helicopter, then, insert the plug of the battery cable into the port of the charger (matching
the plug to the port) to start charging.
� Once charging is proceeding, red light is on. When charging is finished, the red light will turn into green light.
Full charge takes about 2.5 hours.
Turn the power switch of the
helicopter to "OFF" position .
Pic.3
ONOFF
Pic.4
ONOFF
ONOFF
Pic.5
Page 5

ON
OFF
ONOFF
ONOFF
ONOFF
ONOFF
ONOFF
Page 6

ONOFF
ONOFF
the trimmer
Page 7

PREPARATION FOR FLIGHT
Must set the remote controller to the “OFF” position before operating step 1
1. Turn on the helicopter by inserting the battery plug into the battery socket, the helicopter light will keep quickly
blinking for about 3 seconds while the helicopter is checking the middle point of the gyro. Then, the light of the
helicopter will blink slowly, indicating that the helicopter is ready to connect with the remote controller.
2. Turn on the remote controller, the power indicator light of the remote controller will blink slowly, slowly push up
the throttle control stick to the top and then push it down to the bottom.Then, remote controller sends out
connectional signal and the indicator light keep quickly blinking during the signal connection process.Once
signal connection is done,the light of the helicopter and the power indicator light of the remote controller will
stay "ON" without blinking,meaning that the helicopter is ready for flight.
3. Push up the throttle stick and the helicopter takes off.
 Loading...