

Meijer Durathon Instructions Manual
TM
Iron
English ...................... 2
Français .................. 15
Español .................. 31
Meijer.com

7. The iron must be used and rested on a stable surface.
8. When placing the iron on its stand, ensure that the surface
on which the stand is placed is stable.
9. Close supervision is required for any appliance used by or near
children. Do not leave the iron unattended while the iron is
connected or on an ironing board.
10. Burns can occur from touching hot metal parts, hot water, or
steam. Use caution when you turn a steam iron upside down—
there might be hot water in the reservoir.
11. To avoid a circuit overload, do not operate an iron on the same
circuit with another high-wattage appliance.
12. If an extension cord is absolutely necessary, a cord with an
ampere rating equal to or greater than the maximum rating of
the iron shall be used. A cord rated for less amperage can result
in a risk of fire or electric shock due to overheating. Care shall be
taken to arrange the cord so that it cannot be pulled or be tripped
over.
Meijer.com
3
• Do not use vertical steam in the direction of people or pets.
• During first use of the iron, it may appear to smoke. This will
stop and does not indicate a defect or hazard.
• Many irons spit or sputter during the first few uses with tap
water. This happens as the steam chamber becomes conditioned.
This will stop after a few uses.
• To clean steam vents before first use, prepare iron for steam
ironing and then iron over an old cloth for a few minutes while
letting the iron steam. Press the Steam Burst button several times
to clean the vents. Then follow the self-cleaning instructions on
page 12.
Meijer.com
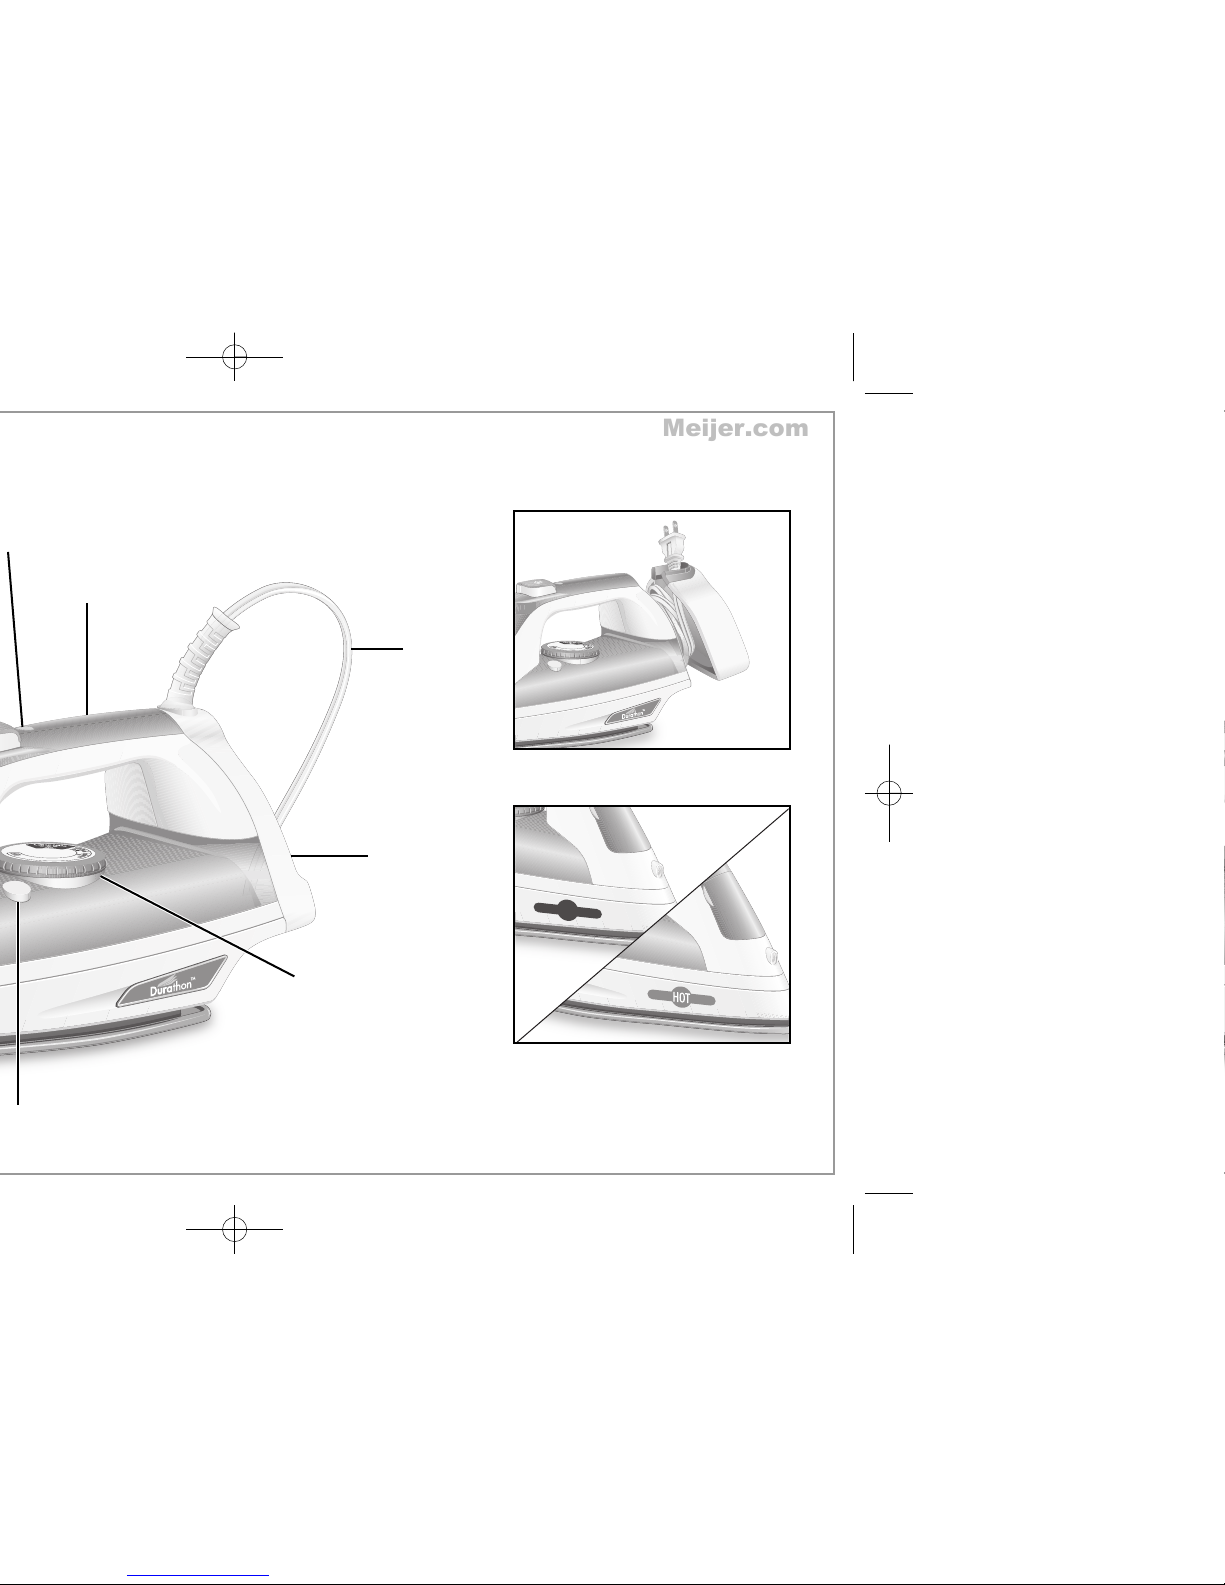
Heel Rest
Cord
Temperature Control
Dial
Optional Features
(on select models)
Cord Wrap
Hot Dot Indicator
(refer to page 9 for more information)
Soft Touch Grip
Meijer.com
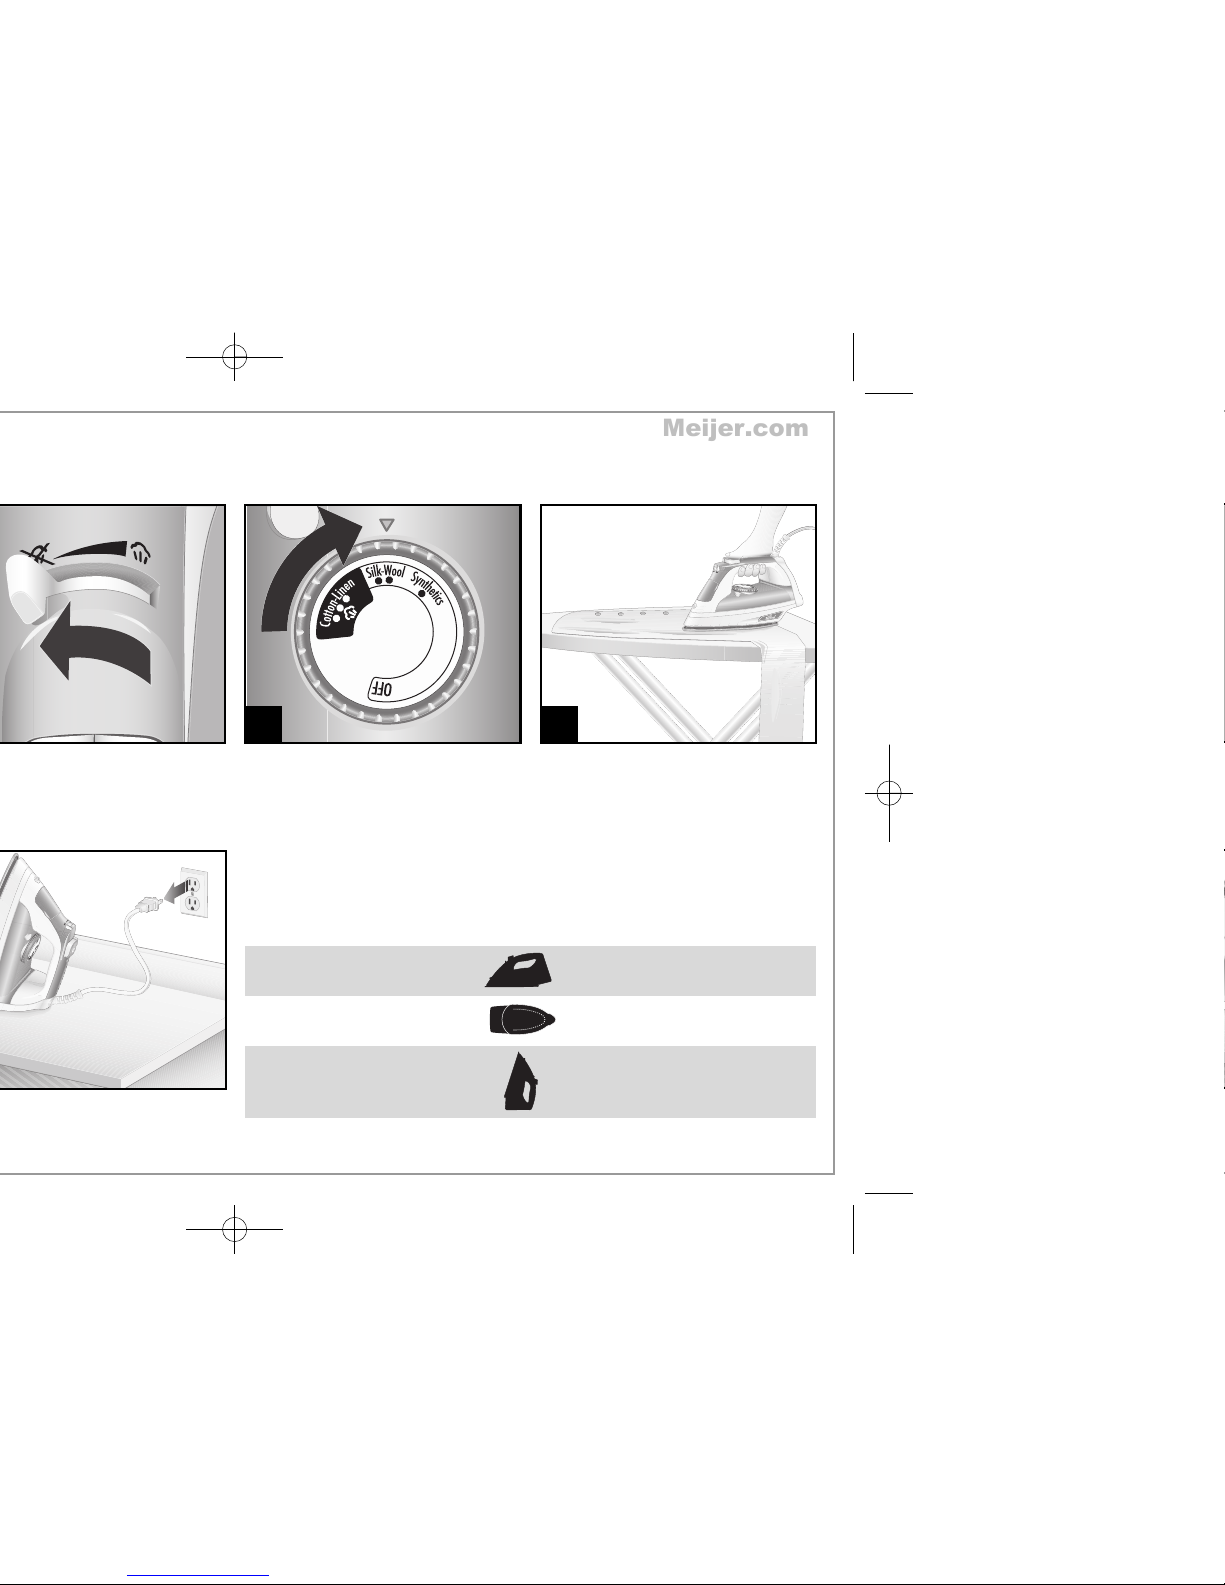
Turn Temperature Control Dial
to desired temperature. Allow 2
minutes for iron to reach desired
temperature.
IRON POSITION
Resting on soleplate
Resting on either side
Resting on heel
POSITION SENSING/AUTO SHUTOFF
The iron will turn off automatically when left in the following positions.
The Auto Shutoff time varies based on the iron’s position.
MOTIONLESS TIME
30 seconds
30 seconds
15 minutes
NOTE: Moving the iron will reset the Auto Shutoff sensor.
5
Meijer.com
 Loading...