

MegaTech R/C Real World Helicopter, R/C HELICOPTER Instruction Manual

Entire contents © Megatech 2008 Rev. 200809121600
Flight Manual
This manual is for the Real
World Helicopter Series. Your
exact model may vary from the
one pictured, but all functions
will be the same.
R/C HELICOPTER
www.megatech.com

2
If you have questions about operating or assembling your new Megatech product...
Please Call Megatech First!
DO NOT RETURN THIS PRODUCT TO THE STORE
Call our Service Department at:
(201) 662-8500
or email support@megatech.com
10am - 5pm EST Monday through Friday (except holidays)
Technical assistance is also available on the web at www.megatech.com
READ ENTIRE MANUAL FIRST BEFORE ATTEMPTING TO FLY
IMPORTANT NOTE: The warranty covers manufacturer’s defects only and does NOT cover
damage caused by operator error. Spare parts, baeries, and accessories are available.
TABLE OF CONTENTS
Safety Precautions ........................................................................ 3
Package Contents ......................................................................... 4
The Radio System ......................................................................... 4
Installing The Batteries ............................................................... 5
Charging Your Helicopter .......................................................... 6
Pre-Flight Checks ........................................................................... 7
Flight School ...................................................................................8
Repairing Your Helicopter ....................................................... 10
Parts List ......................................................................................... 10
Troubleshooting ......................................................................... 11
Warranty ........................................................................................ 13
FCC Emissions Information ......................................................14

3
Important! Before you begin, please read all safety precautions and warnings.
Failure to comply with any of the following could lead to bodily harm or
injury. The Megatech helicopter is not intended for use by those under 8 years
of age without proper adult supervision.
SAFETY PRECAUTIONS
TRANSMITTER SAFETY
• Since your helicopter is controlled by an optical link it is very important to always use fresh alkaline
batteries in the transmitter. When the red LED light becomes dark, flashes or does not glow on the
transmitter, immediately install fresh batteries. Failure to do so could result in the loss of control
and (most likely) a crash.
• Never mix old and new batteries. Do not mix Alkaline, standard Carbon-Zinc or rechargeable
(Nickel-Cadmium, Nickel-Metal Hydride or Lithium).
• Always remove batteries from the transmitter when you have nished ying for the day. Do not
store batteries inside the transmitter.
SAFETY GUIDELINES
• Extreme care must be taken in handling the helicopter. Do not crush, step or sit on your helicopter.
• Although the rotor and tail blades on the helicopter are very small and exible they should still be treated
with respect and caution! Use care when operating your helicopter. Keep your hands, ngers and any
article of clothing away from the spinning rotor and tail blades.
• Always y your helicopter in a wide-open room. Make sure that the ight area is free from obstructions.
Your helicopter is extremely lightweight and obstacles can damage the helicopter or cause it to crash.
• Do not y around people who are unaware that you are ying a helicopter, and never y over peoples
heads. Keep spectators behind you when flying.
• Do not attempt to disassemble any of the helicopter’s components or allow them to get wet or electrical
damage may occur. If the helicopter ever comes in contact with any moisture, dry it carefully and allow it
to stand overnight before attempting to use it again.
• Never use solvents or liquid cleaners to clean the helicopter, doing so may damage the unit or it’s
electronics. Only use a dry, soft cloth for cleaning the helicopter.
• Your helicopter is intended for indoor ight ONLY as it ies slowly and is capable of turning within the
connes of an average sized living or dining room.
• Your helicopter is extremely lightweight and breezes from fans, air conditioning or even a person walking
by can affect its performance.
• You must point your controller at the helicopter at all times to maintain accurate control.
• Natural daylight (not light bulb/indoor lighting) can aect the range and controllability of the helicopter.
• Keep the helicopter away from heat or re. Never leave the helicopter or transmitter in direct sunlight for
any length of time
RECHARGEABLE BATTERY WARNINGS AND PRECAUTIONS
• The Lithium Polymer battery is factory installed into your helicopter and provides superior
performance, but has specic charging requirements dierent than that of other battery types such as
NiCad, NiMH and other rechargeable batteries. Improper handling of Lithium Polymer batteries could
result in the battery drastically overheating, so please follow all warnings and instructions.
• ALLOW INTERNAL FLIGHT PACK TO COOL FOR 10 MINUTES AFTER EACH FLIGHT BEFORE ATTEMPTING
TO RECHARGE.
• Never leave the helicopter plugged into the charger when it is not in use. Damage to the on-board
battery can occur.
• See charging safety under the charging section on page 6 for additional warnings.
4
PACKAGE CONTENTS
Before getting started you will need:
• 6 “AA” 1.5V Alkaline batteries
(sold separately)
First make sure the contents of your
package are complete:
A. Helicopter micro helicopter
B. Transmitter with integrated
peak charger
C. Spare tail rotor blade (1)
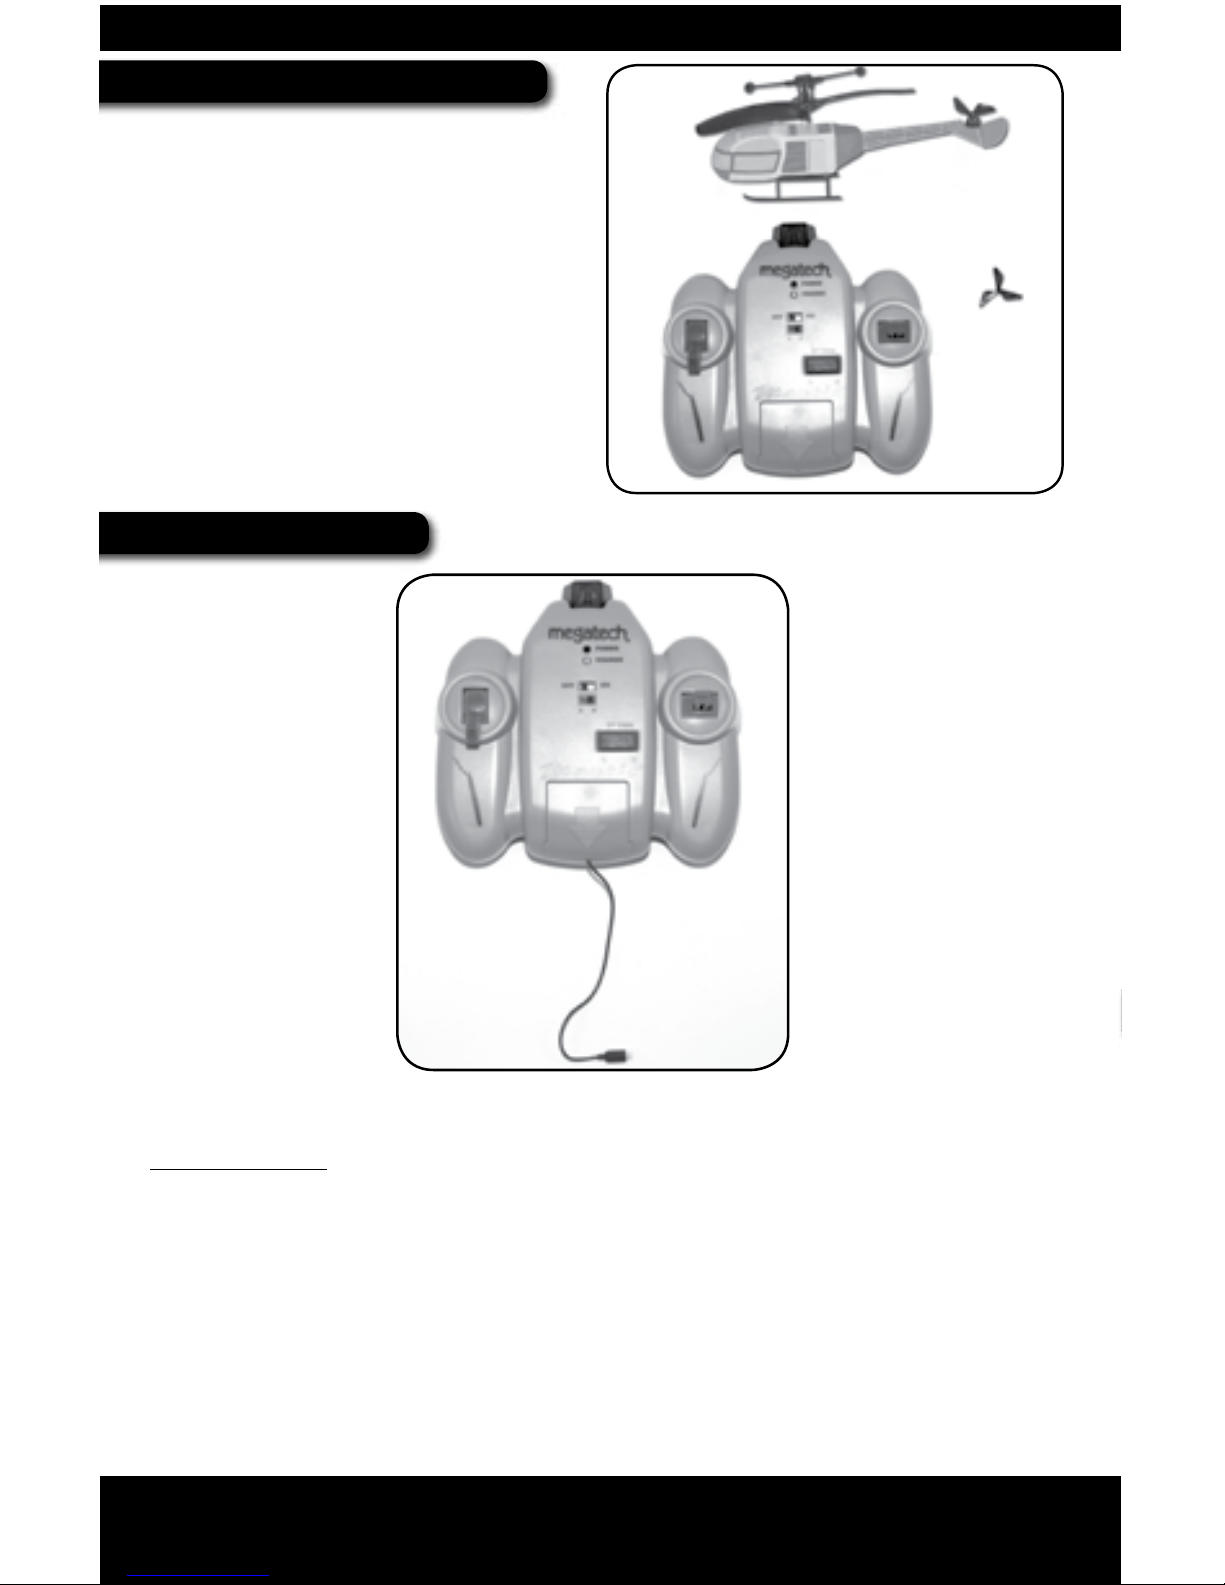
RADIO SYSTEM
A 2-channel transmitter featuring Spectra-Link Optical control guides the helicopter.
THE CONTROLS
A. Throttle Control Stick - When it is all the way in the “down” (or pulled back)
position, the motor is off. For safety, make sure the throttle control stick is in the
“down” position before switching on the helicopter so the rotor blades do not
unexpectedly start up.
The rotor blade speed increases as the throttle control stick is moved up (or
forward). The helicopter gains altitude as power is increased, and descends as
power is decreased.
Full power is reached when the throttle control stick is positioned all the way
forward.
A.
B.
C.
A.
B.
C.
D.
E.
F.
G.
5
B. Tail Rotor Control Stick - Will spin the helicopter clockwise or counter clockwise
depending on the control input. Note: You can only use the tail rotor control stick
when throttle input is given.
C. Tail Rotor Trim Button - This adjusts for straight and stable flight when the tail
rotor control stick is in the neutral position.
D. Charging Cord - Located inside a compartment at the base of the transmitter and
used when charging the helicopter.
E. Channel Switch - This switch is marked with the letters A and B to indicate the
channel that the helicopter is operating on. You must always make sure that the
channel switch is set to the correct channel or the helicopter will not operate
properly. Please see the helicopter or box for indication of the proper channel.
F. Power & Charge LEDs - The bottom most LED illuminates green when the
transmitter is in the charging mode. When the top most LED illuminates red, the
transmitter power is ON and you have adequate power to control your helicopter.
If the red LED light becomes dark, flashes or does not glow on the transmitter, the
transmitter batteries are low and must be replaced. Never attempt to y when the
red LED light is dim, flashing or does not glow! This will result in loss of control and
a possible crash. Contact our service center at 201-662-8500 if you think there may
be a problem with your radio system.
G. Power Switch - Turns your controller on and off.
IMPORTANT NOTE: The transmitter has an auto shutoff feature. If the transmitter
power is left ON for 10 minutes without any control input or charger output,
the transmitter will turn off. This is to prevent the transmitter batteries from
discharging if the transmitter was left ON in error. You will need to flip the power
switch OFF and ON to reset the transmitter.
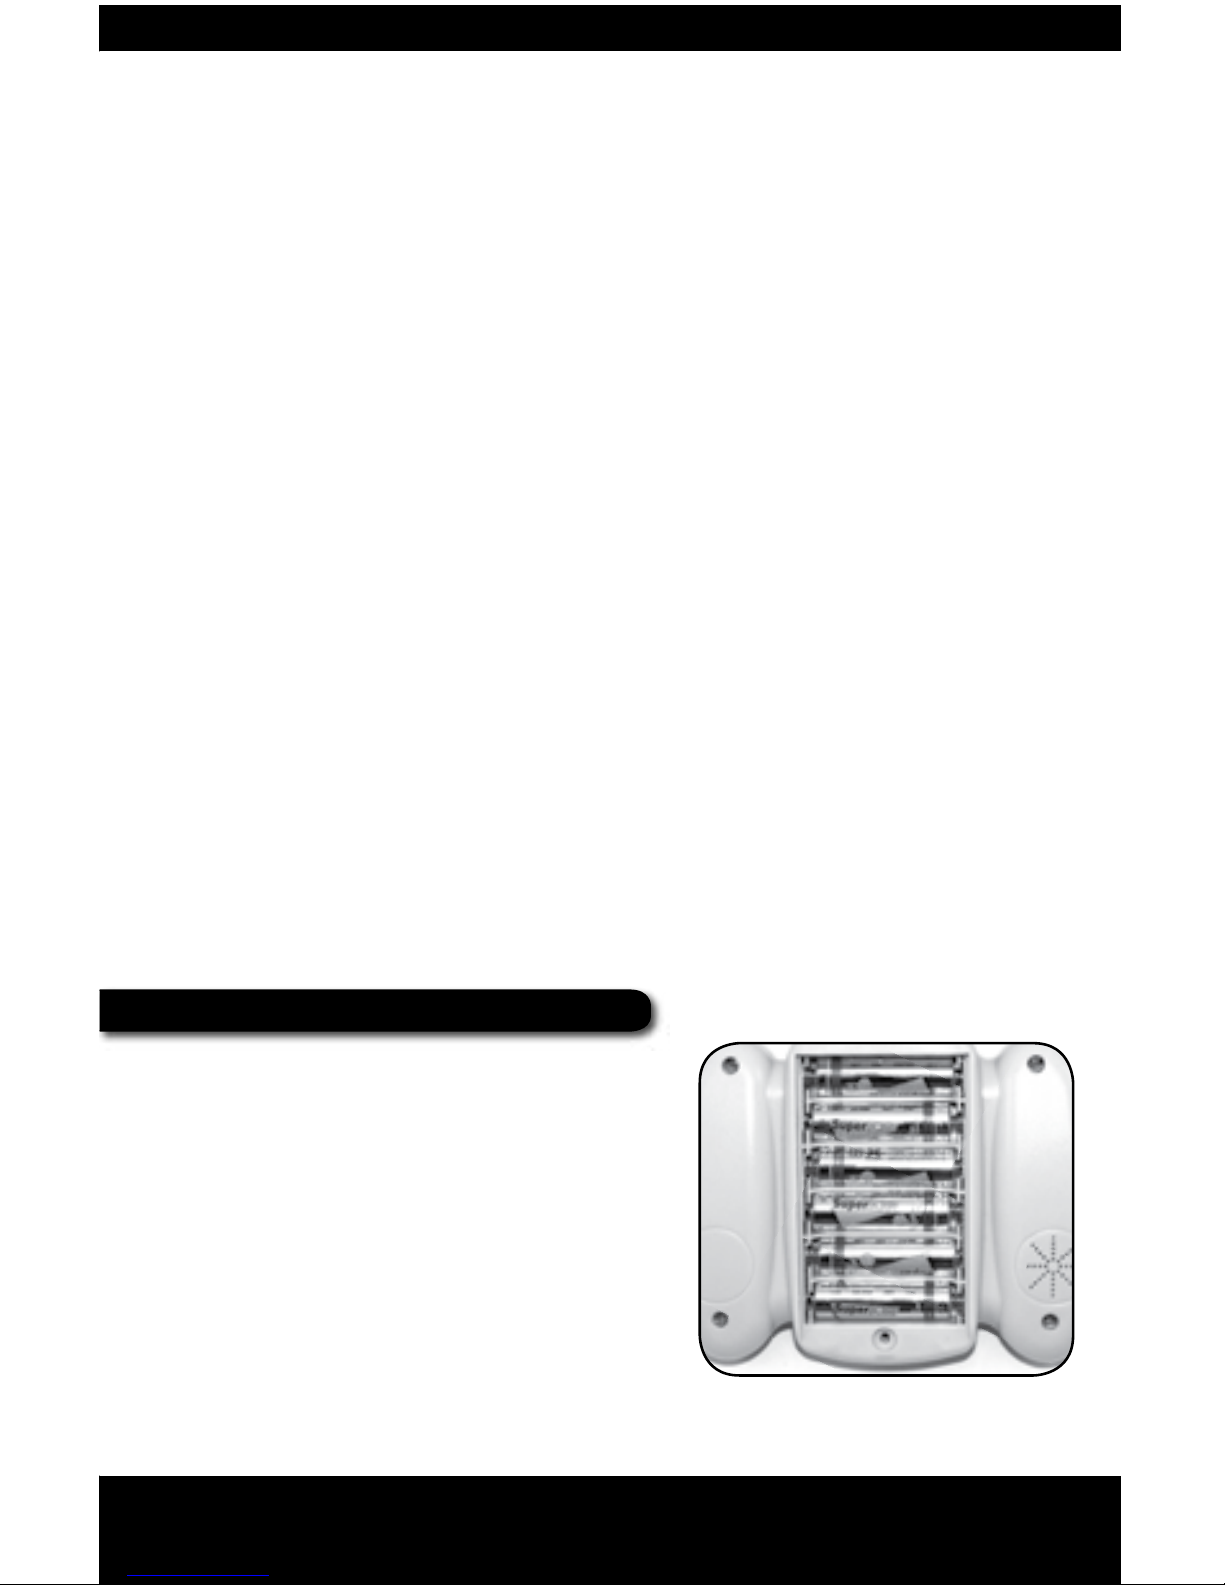
INSTALLING THE BATTERIES
Transmitter requires 6 “AA” 1.5V alkaline batteries
(sold separately)
1) Be sure that both the transmitter and helicopter
power switches are in the “OFF” position.
2) Using a Philips Head screwdriver, unscrew the
battery hatch hold-down screw, and remove the
hatch.
3) Install 6 fresh “AA” 1.5V alkaline batteries in the
transmitter, paying close attention to the
polarity symbols. (+ & -)
IMPORTANT! If the transmitter batteries are not installed according to proper
polarity, the transmitter will not function and electrical damage may occur.
 Loading...