

Entire contents © Megatech 2002
www.megatech.com
MTC 8112 - Capitol Flyer
MTC 8113 - Skyliner
MTC 8114 - Airstike
Instruction Manual
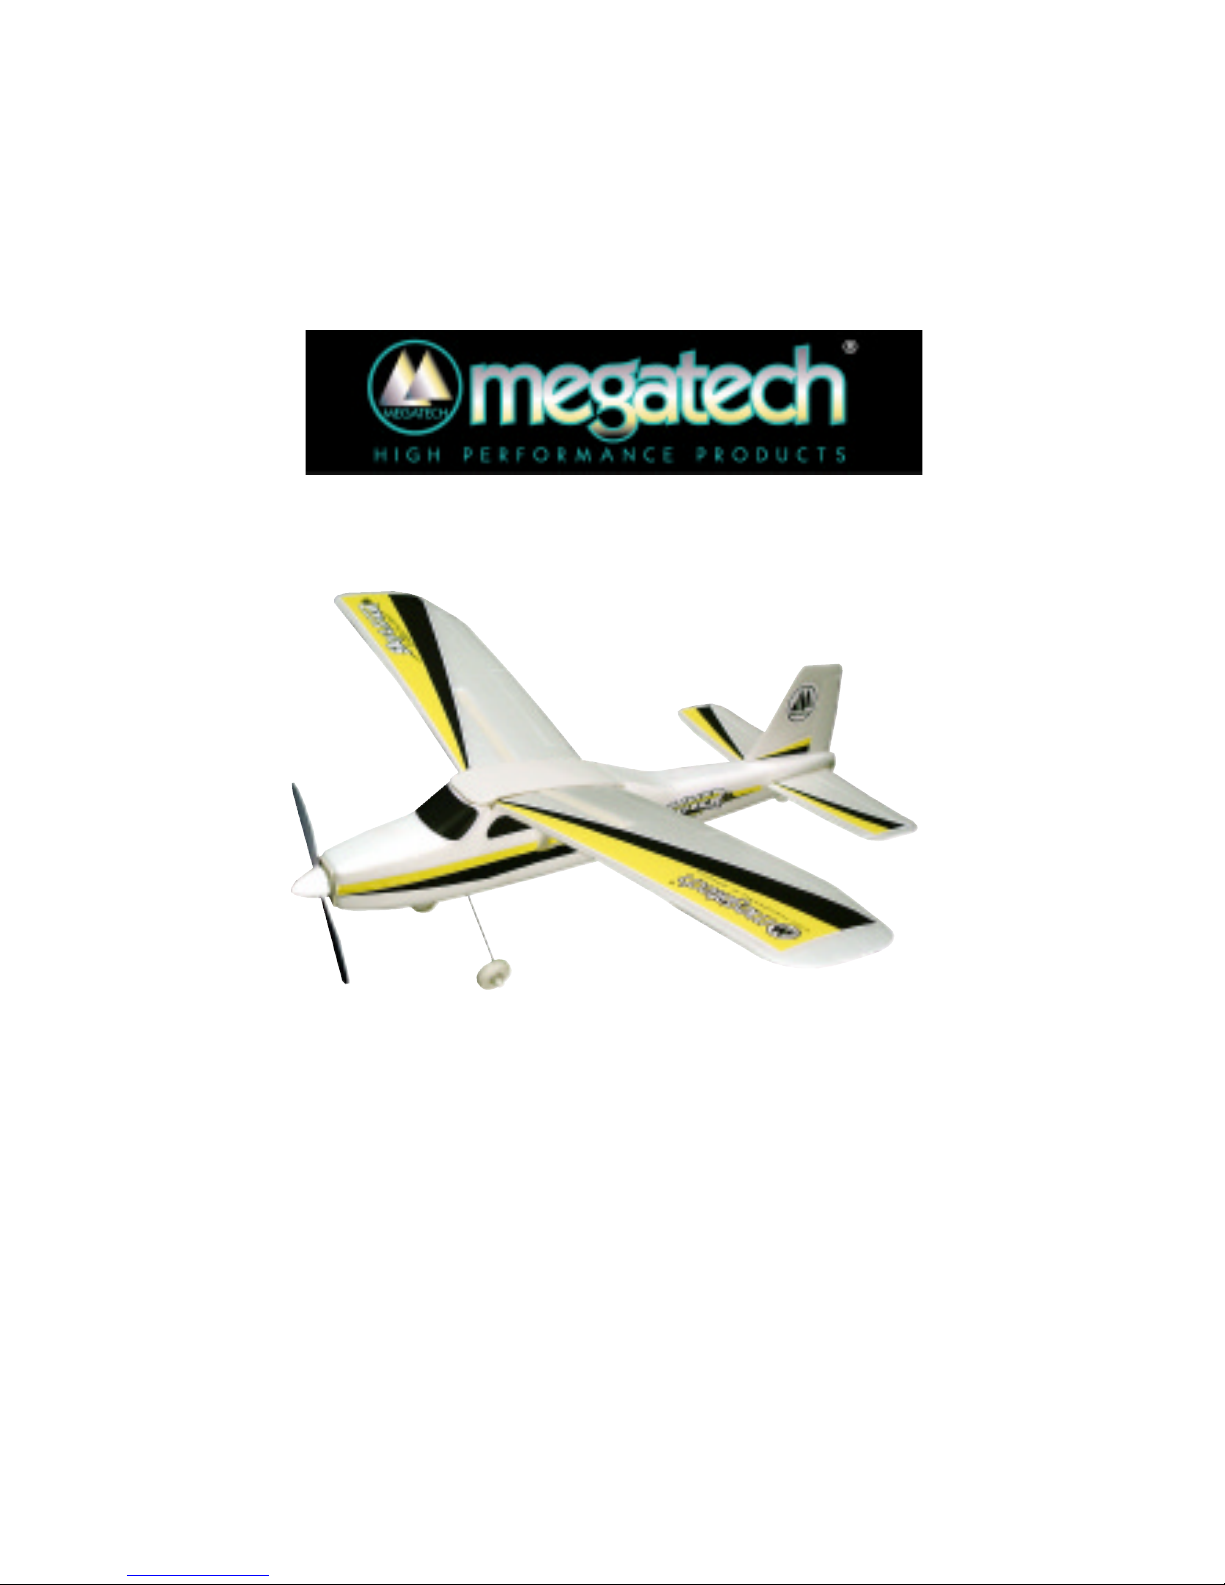
Learn the basics of Aerodynamics with Megatech’s Fun
Flight Series Free Flight Airplanes! This Rechargeable
Electric powered Cessna style airplane is perfect for
introducing kids into the exciting world of aviation. The unique
break-away wing design allows the free ight to be own
again and again even after a crash landing!
General Safety
1 Always y in an open area far from streets, power lines or
trees.
1 Do not y in winds over 5MPH
1 Have all spectators stand clear when launching
and ying the airplane
Battery Safety
The free-ight’s on-board battery is made of the latest
technology in Nickel-cadmium batteries. Special safety
precautions MUST be observed to prevent injury to yourself
or damage to the battery pack.
1 NEVER charge the battery pack for longer than 2
minutes
1 DO NOT allow smoking, sparks or an open ame near the
while charging.
1 ALWAYS charge the battery in a well ventilated area
1 DO NOT incinerate or alter the battery, doing so may
result in the battery bursting and releasing toxic
materials.
1 If battery pack gets very hot or makes a popping sound
or leaks a liquid during the charging process---STOP
CHARGING IMMEDIATELY, the pack has overheated
and will be damaged by further use.
Propeller Safety
The free ight has a high-speed performance propeller and
adult supervision is required during use.
1 Do not alter your propeller, discard worn or damaged
propellers.
1 Keep ngers, face and all loose objects away from
spinning propeller
1 Only use propellers approved for use with this free ight
airplane
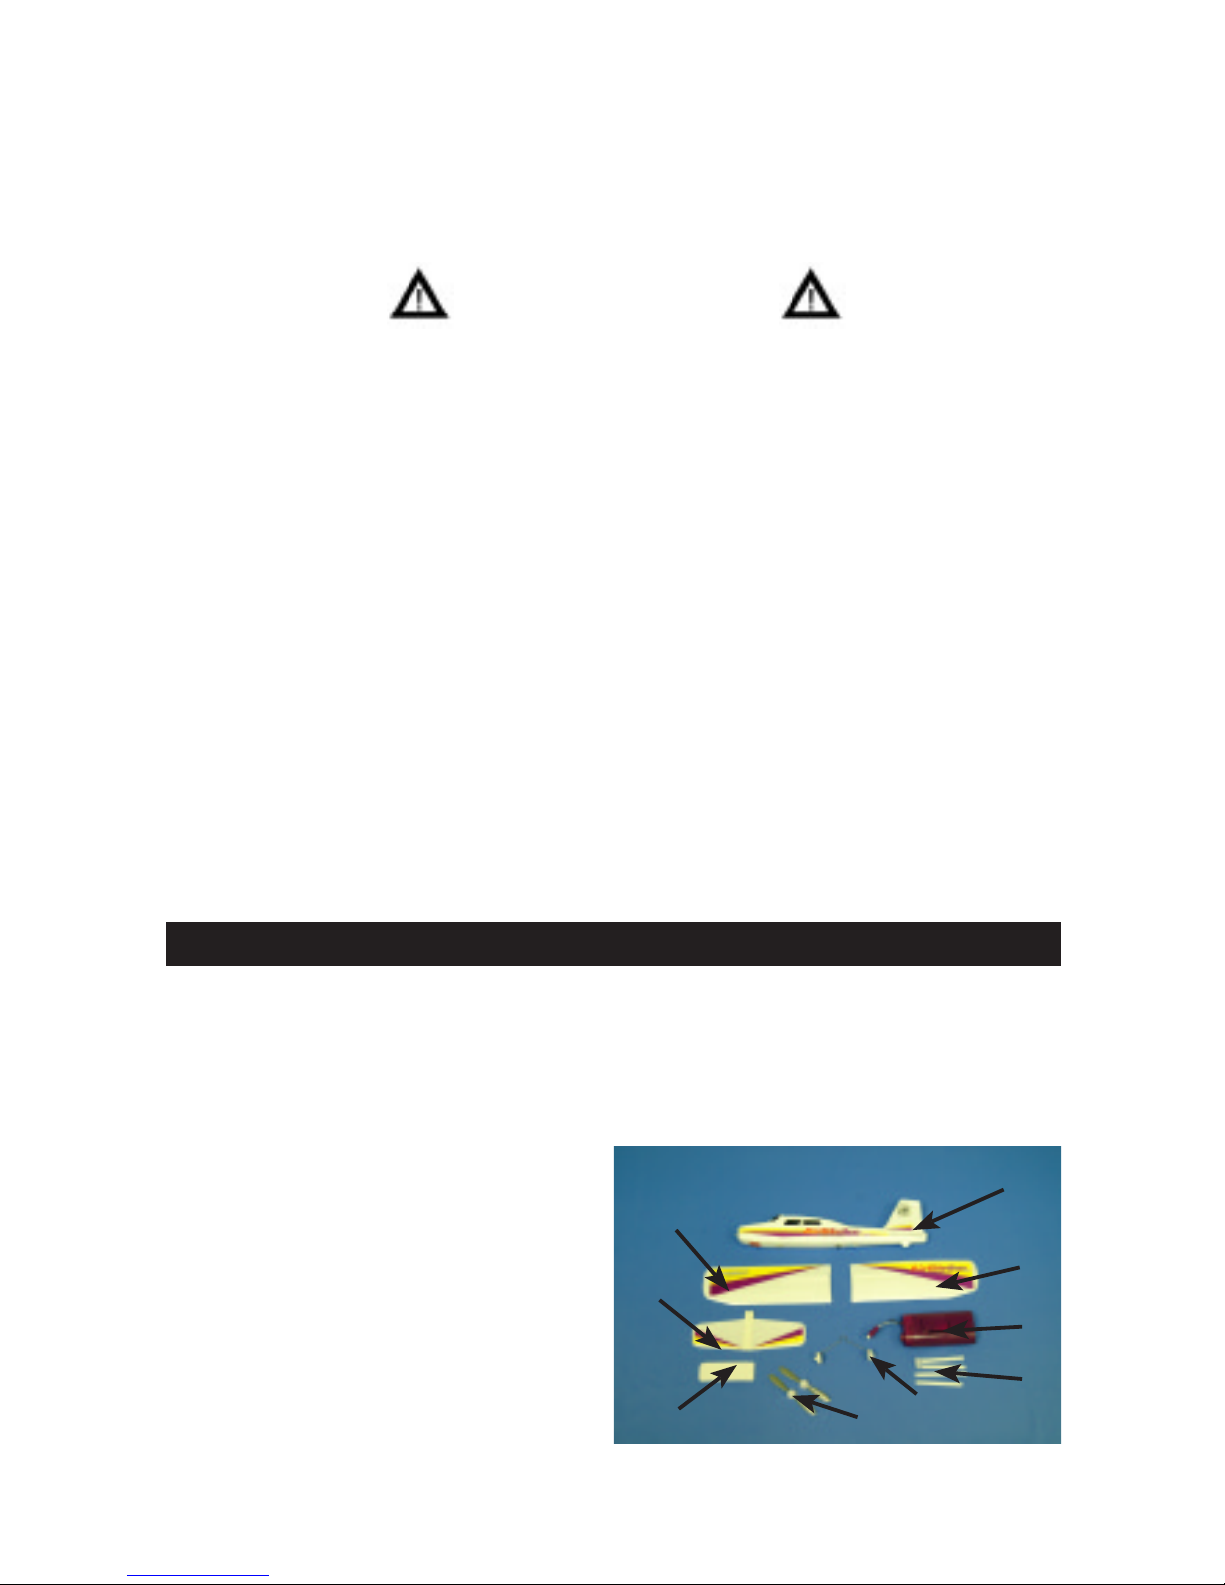
1. Getting Acquainted with your Free Flight
Before you begin, make sure the contents are complete:
1.Airplane Fuselage
2.Main Wing & Tail Wing set
3.Charger
4.Propellers (2)
5.Wing Supports
6.Landing Gear
7.Wing Brace
1
2
2
7
4
6
5
3
2
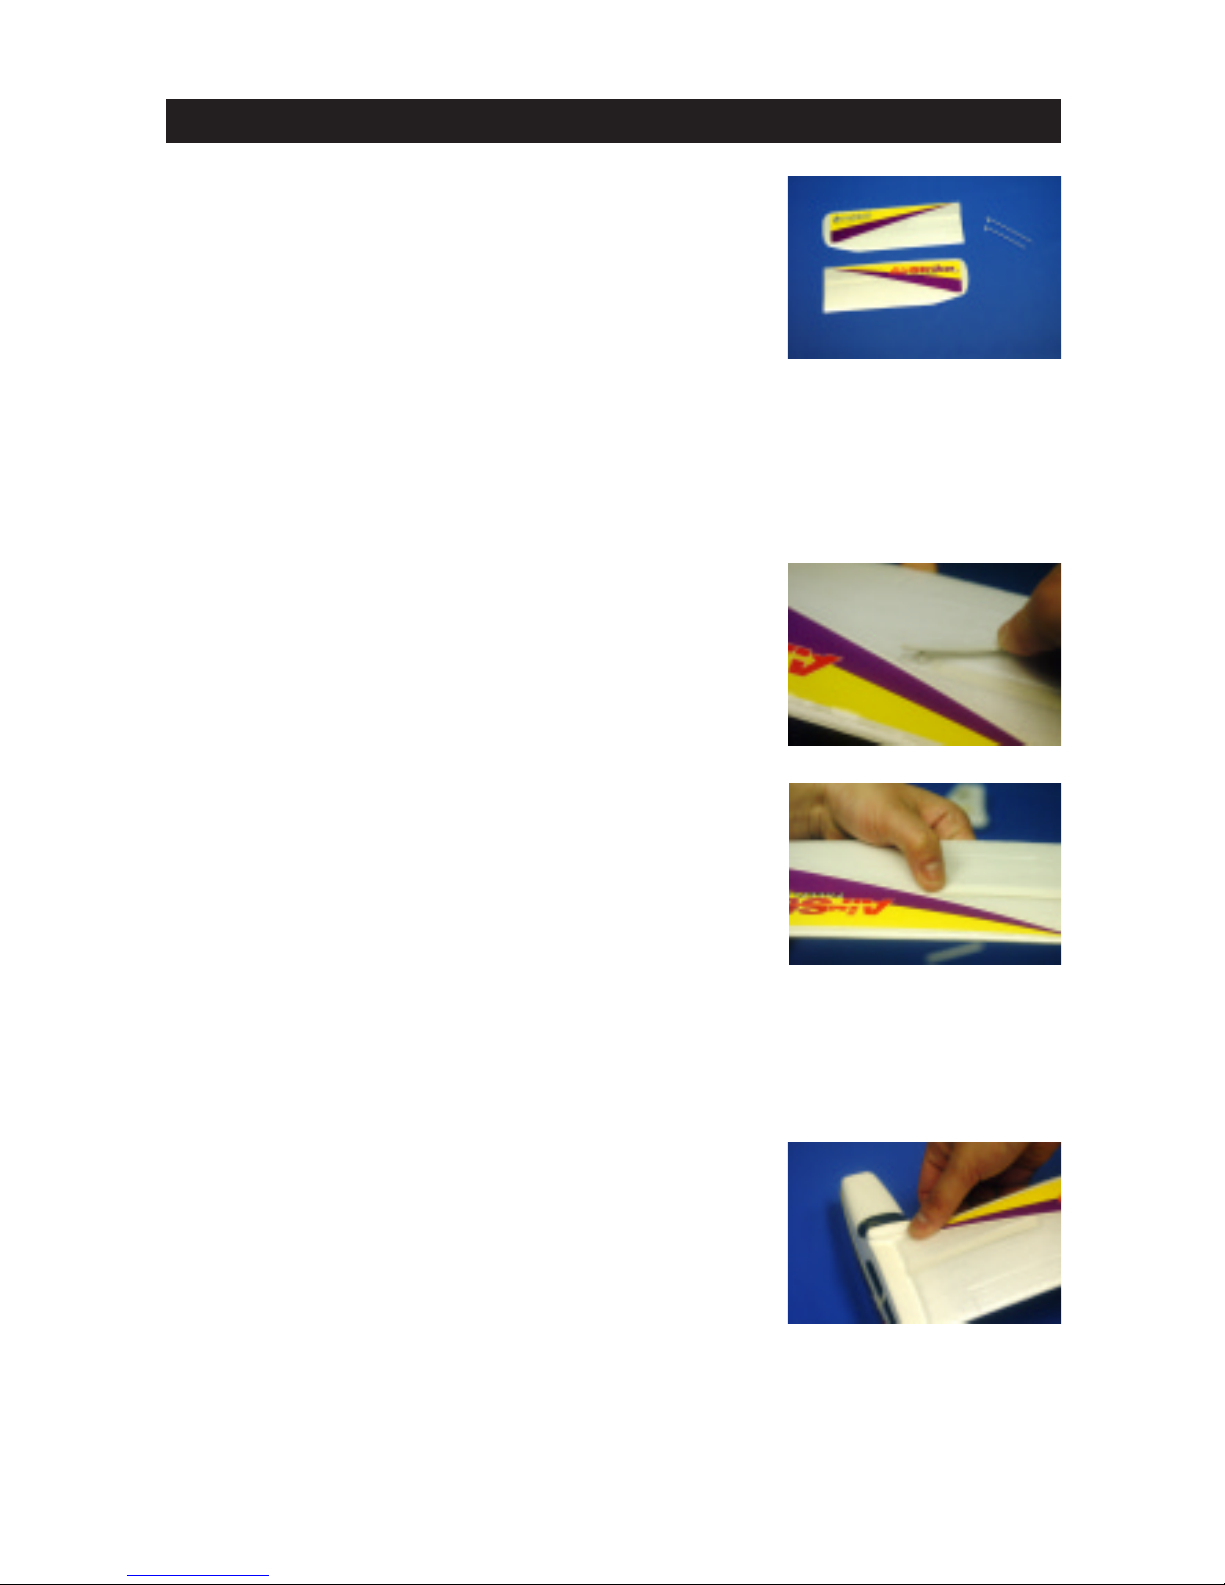
2. Attaching the Main Wing & Wing Supports
1 First lay the 2 halves of the main wing
next to each other with the double
sided tape facing up
1 Find the 2 at wing supports
(non-bent)
1 Remove the protective paper from the
double sided tape on both pieces of
the main wing
1 Push peg through indented circle as
shown and align the wing support
with the tape as shown (peg should
push through to under side of the
main wing)
1 Remove protective paper from double
sided tape on top of the fuselage
1 Center main wing pieces as
shown, making sure the pegs are
facing downwards and the decals are
positioned towards the front of the
plane.

1 Remove protective covering from
double sided tape on the wing support
holders on the side of the fuselage
1 Locate the 2 bent wing supports.
Push peg on main wing through
the hole in the bent wing support
and Twist wing support so peg locks
into place and align with wing support
holder as shown
1 Do the same thing for both sides of the airplane
1 Locate wing brace and remove
protective paper from the
double sided tape
1 Center wing brace over main wing
and align with the curved portion
towards the front of the plane.

3.Attaching Tail Wing
1 Locate Tail wing and Remove protective covering from
double sided tape
1 With double sided tape facing
downward, insert tail piece with the
extra tape hanging towards the back.
1 Slide completely into the slot as
shown and squeeze the tail piece
closed
4.Attaching the Propeller & Landing Gear
1 Twist Propeller onto shaft until
approximately 1/32” cleareance
between propeller and fuselage
1 Locate landing gear and squeeze the
wheels together as you insert into the
bottom of the fuselage

5. Charging the Airplane
1 You will need 4 “C” alkaline batteries for the charger. Note:
Always use fresh alkaline batteries. DO NOT mix old and
new batteries to assure optimum performance.
1 Flip top of charger open and insert batteries paying
careful attention to the “+” and “-” polarity pictured on the
side of the charger case
1 Make sure the switch on the bottom of
your plane is in the “off” position.
Connect the charger to the charger
adapter on the bottom of the plane.
1 Push red button for up to 2 minutes.
DO NOT overcharge the battery. Motor
performance will improve after about
5 motor runs
1 When charging is complete, remove charger from the
airplane

6. Flying
1 Once plane has been charged,
proceed to the center of your
ying area. Note: Flying area should be
approximately the size of a soccer
eld.
1 Turn the motor switch “on” and launch
your airplane into the wind. Toss the
plane into the wind, ensuring
the plane is level with the horizon.
If the planeis tilted upwards
or downward, your launch may not
be successful
1 Use extreme caution to keep away
from spinning propeller. Children
under 10 years of age should
accompanied by an adult.
7. Taking off from the ground
After a few hand launch ights you may want to try to take
off from the ground. Charge your plane for a full 2 minutes.
Choose a at, smooth surface and place your plane facing
into the wind. Switch the plane “on” and let it go on its own. It
will begin to climb after about 30 feet.
wind
wrong
wrong
correct

8.Tips
1 If the plane crashes, the wing should break away. If this
occurs, simply slide it back into position before your
next ight
1 Clear packing tape can be used to repair a cracked
or broken wing
1 Spare parts are available
9.Specications
Wingspan: 17.75”
Length: 13.75”
Operation Time: 2 minutes
Charge Time: 2 minutes
Required: 4 “C” alkaline batteries

Warranty Information
Megatech International guarantees the parts included in this kit to be
free from defects that exist at the time of purchase for a period of 90
days from date of purchase. If any component of this product fails to
function properly due to defects in materials or manufacturing process
during this 90 day period, the Manufacturers obligations are limited and
manufacturer can choose to either repair the defective part or replace it.
This warranty does not cover any damage caused by use, misuse,
alteration, accident, or neglect, nor does it cover normal wear and tear
of the product. This warranty is void if the part/product in question has
been altered or modied or repaired by anyone other than Megatech
International or an authorized agent.
Under no circumstances will Megatech International or any of its
representatives be held liable for injury to persons or property damage
resulting from assembly or use of the product. Megatech is not liable
if any outside radio frequencies interfere with the product’s frequency
causing loss of control. Megatech International will not be held liable for
any personal injury or property damage resulting from an out-of-control
model caused by use or misuse of the product.
Megatech International expressly excludes any and all express
warranties not specically stated here and all implied warranties of
merchantability and tness for a particular purpose. There are no
warranties which extend beyond the description of the warranties
contained herein.
Contact Megatech International before returning any part/product that is
defective according to the limitations listed above. Please be sure to pack
the returned item(s) carefully and insure it as this warranty does not cover
loss or damage during transit
Megatech International
8300 Tonnelle Avenue
North Bergen NJ 07047
(201) 662-2800


 Loading...